

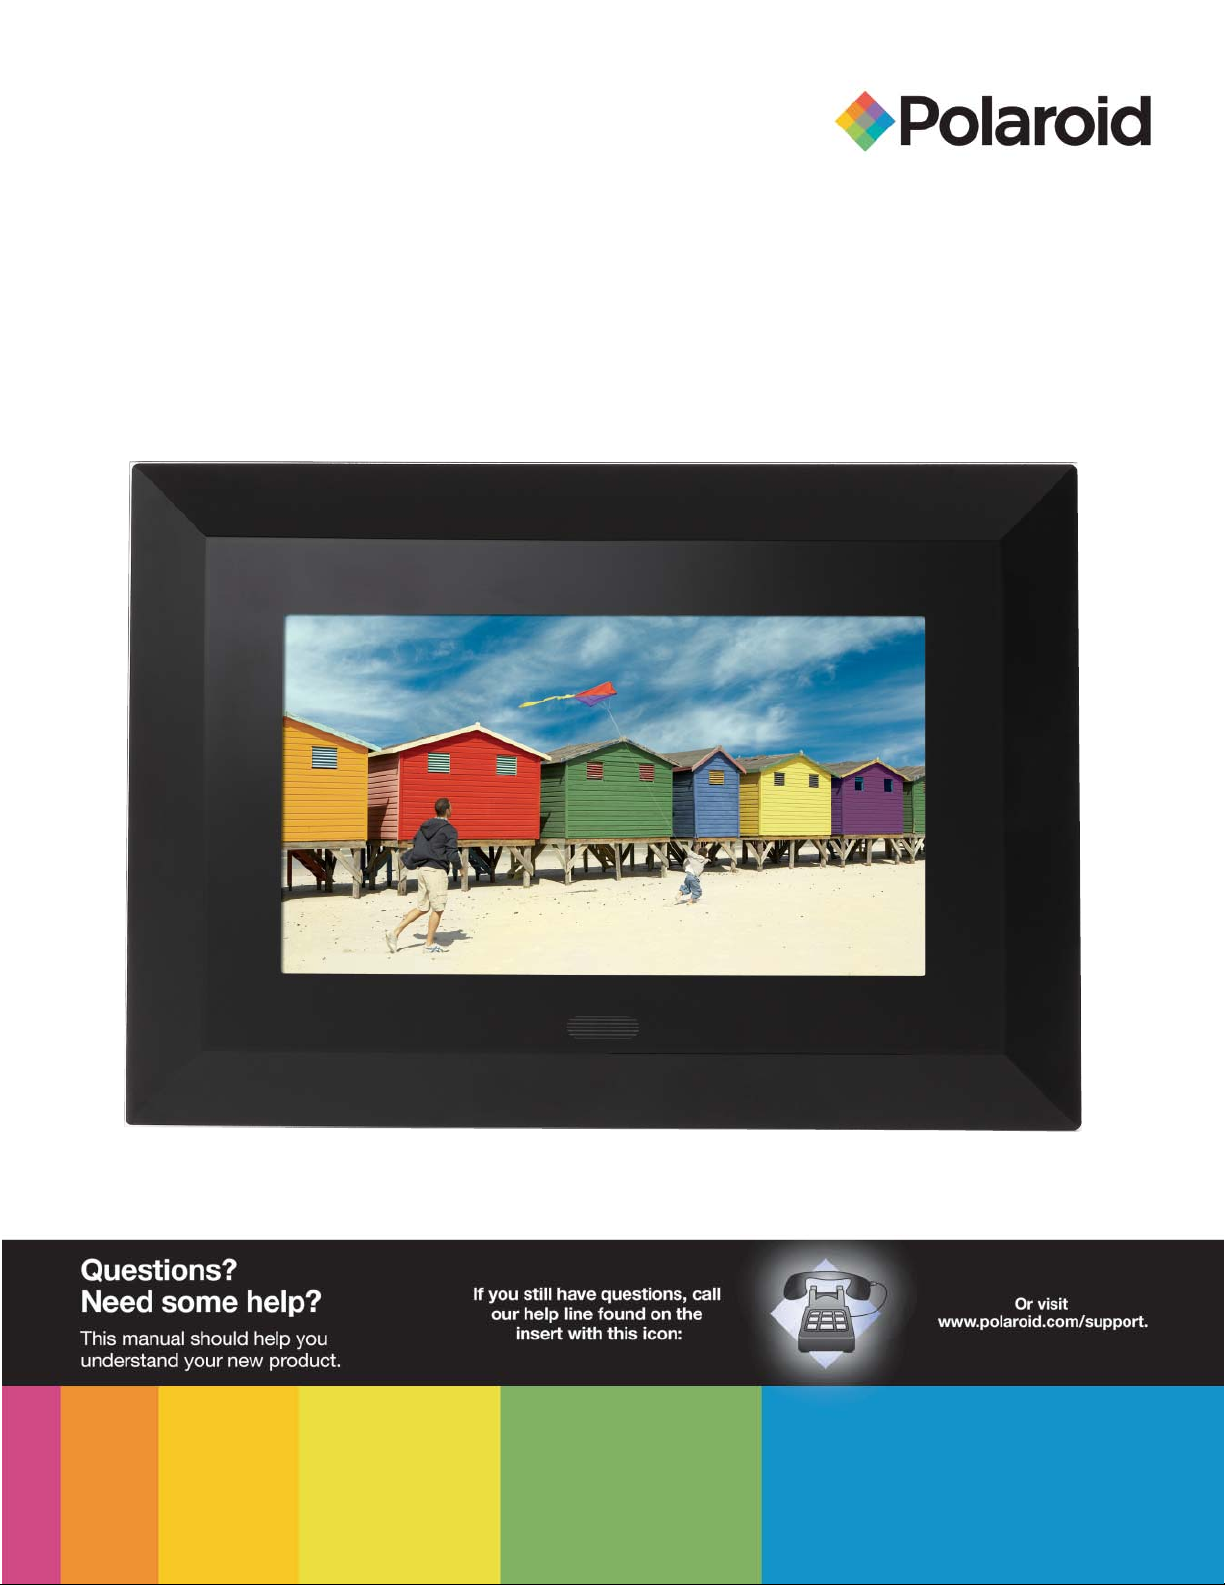
Digital Photo Frame
User’s Manual
20080514
Controls and Basic Instructions
Set Up and Navigation
CONGRATULATIONS on your purchase of a Polaroid digital photo frame. Please read carefully
and follow all instructions in the manual and those marked on the product before fi rst use. Failing
to follow these warnings could result in personal injury or damage to the device. Also, remember to
keep this User’s Manual in a convenient location for future reference.
Important: Save the original box and all packing material for future shipping needs.
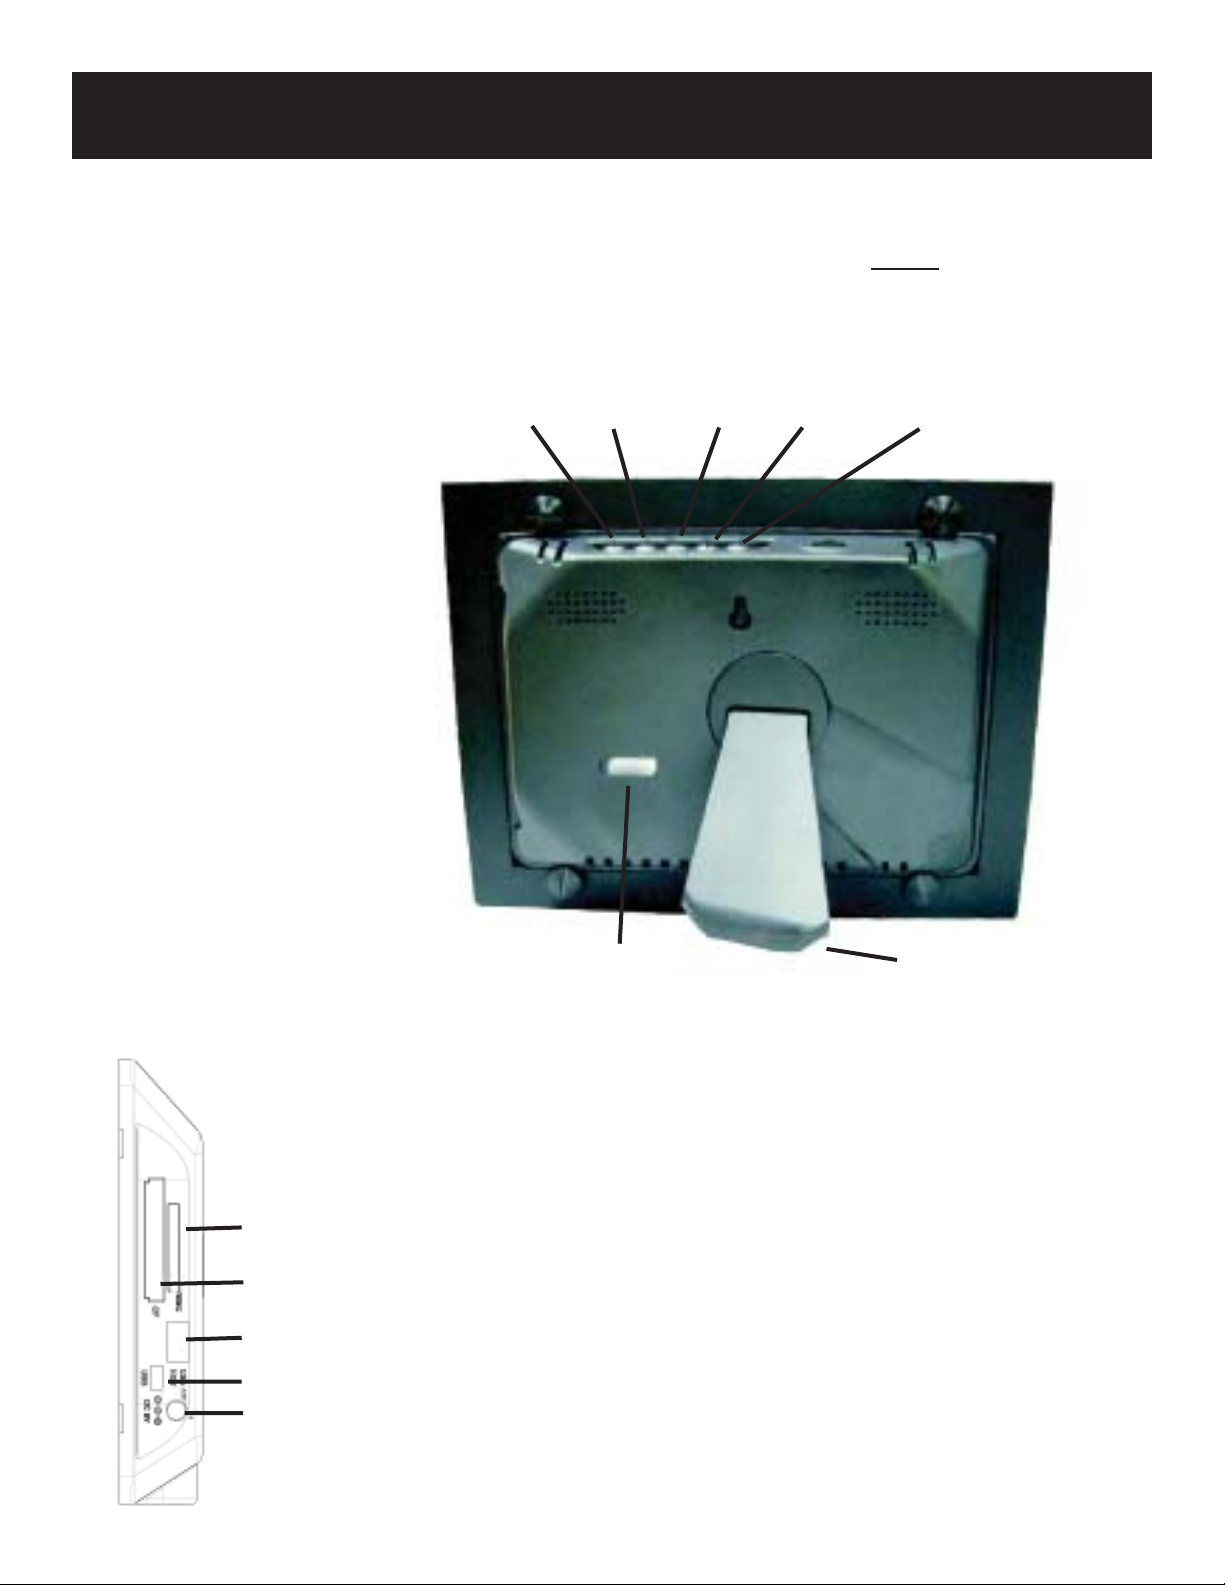
Controls
Menu Next
Power
Play/PauseExit Previous
Adjustable Base
Inserting a Memory Card
SD, MMC, MS, MS Duo card
CF card
USB port
Mini USB port
AC power input
1. Find the slot that fi ts your memory card.
2. Insert the card in the correct slot.
3. To remove the card, simply push it in slightly
until it springs back out. Remove.
Note: Do not remove any memory card from its slot while
pictures are playing. Doing so could damage the frame or
memory card. Always turn the power off before removing the
memory card.
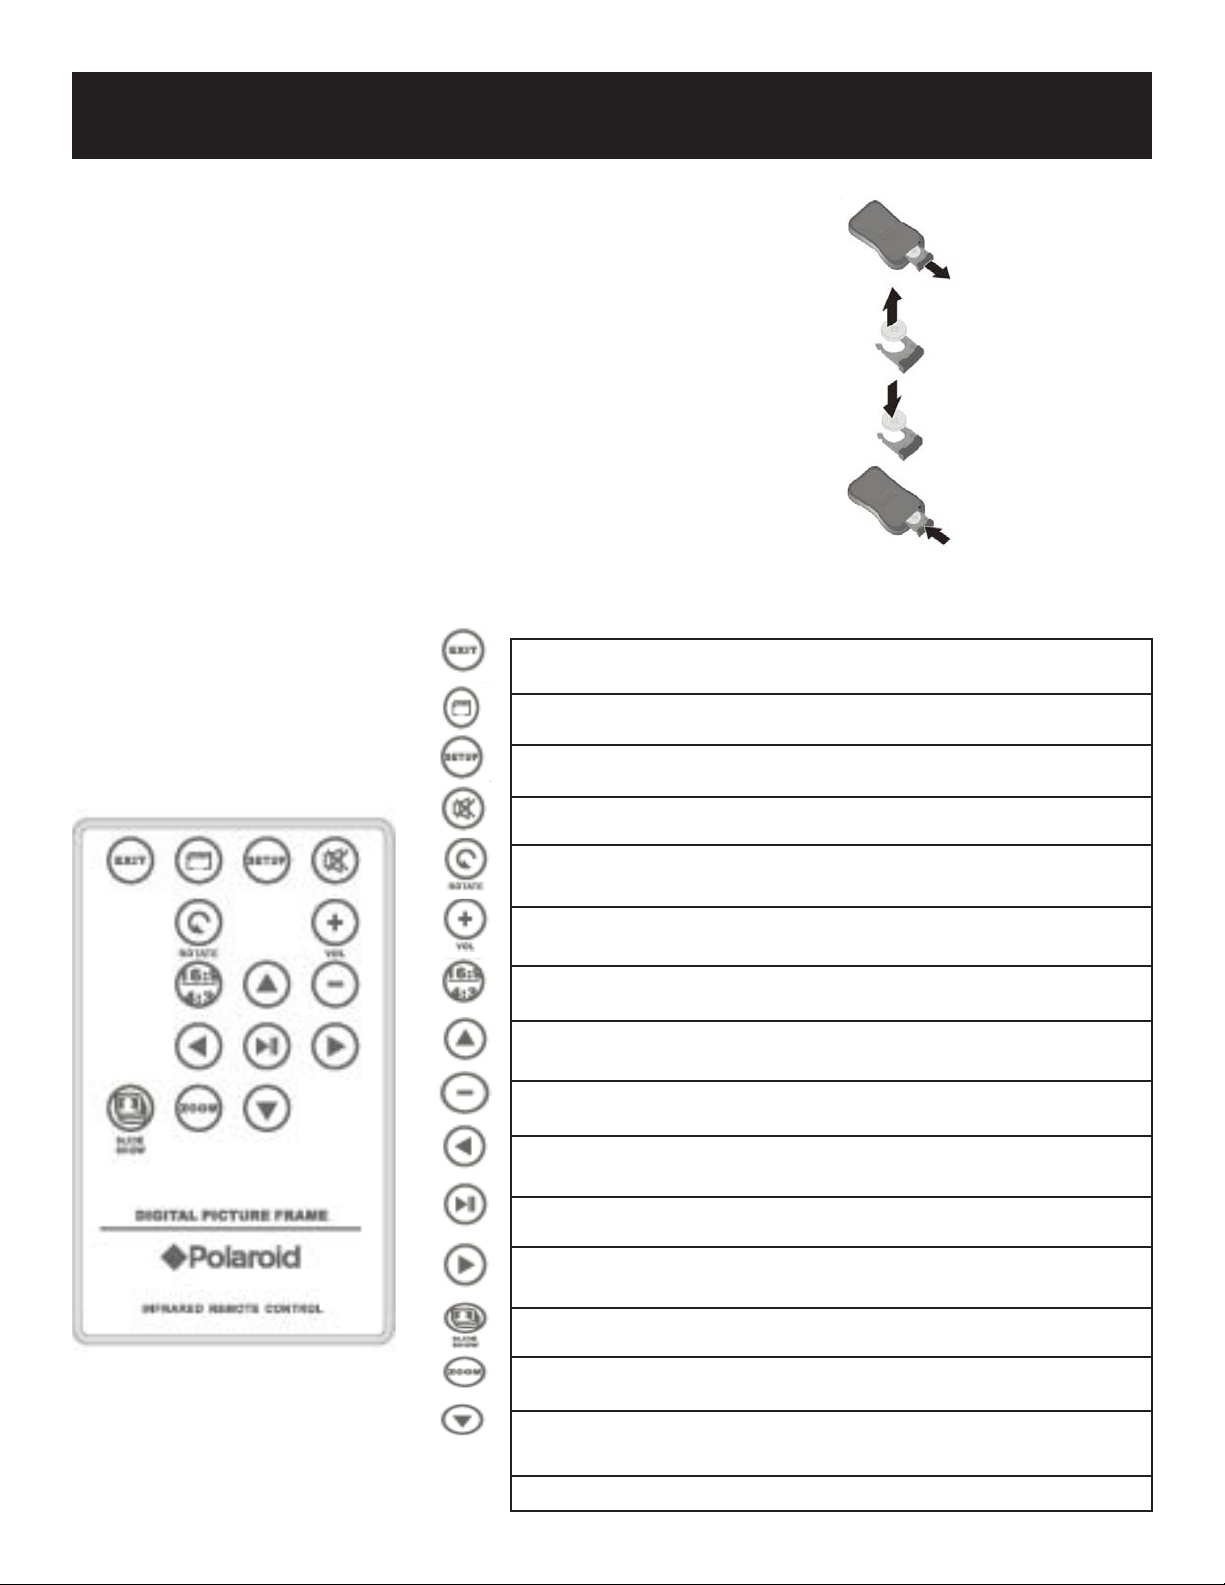
Battery Instructions and Remote Control
Replacing the Remote Control Battery
1. Remove the battery compartment by pulling the cover in the direction
of the arrow.
2. Remove old battery and dispose of correctly.
3. Insert new battery taking note of correct polarity (+/-).
4. Replace cover.
Caution:
1.Only use a 3V CR2025 battery.
2.Dispose of used batteries according to local ordinance regulations.
3.Remove the battery when not using the Flash Player for prolonged periods.
Buttons on the Remote Control
EXIT Press to exit a photo slide show or video/music fi les
CARD SELECT button Press to choose a different memory card
SETUP button Press to open menu for changing settings
MUTE Press to mute the audio
ROTATE Press to rotate photos 90 degrees clockwise on screen*
VOLUME + Press to increase volume
ASPECT RATIO Press to toggle from 4:3 to 16:9*
UP Press to move up when selecting fi les
VOLUME - Press to decrease volume
LEFT Press to move left when selecting fi les
ENTER/PLAY/PAUSE Press to confi rm selections, play, or pause
RIGHT Press to move right when selecting fi les
SLIDESHOW Press to start a photo slideshow
ZOOM Press to zoom up to 4x
DOWN Press to move down when selecting fi les
*Non-functional in slideshow mode

Set Up and NavigationControls and Basic Instructions
On-screen Menu Sub-Menus Description
Language Select the language of your choice: English, Italian, German, French,
Spanish, Portuguese, Dutch, Polish, Czech, Russian, Swedish, Finnish,
Greek, Turkish, Arabic
Display image size Original Shows your images as full frame or original size
Optimal
Slideshow transition Normal Each picture in a slide show will be shown one after another. Choose a
Random
Fade
Curtain
Open-door
Cross-comb
Slideshow speed Fast 5 seconds
transition to be used between those images
Normal
Slow
Slideshow music On Add music to your slideshow
Off
Slideshow shuffl e On Display photos in random order
Off
Video repeat Repeat single Allows you to repeat video
Repeat all
No repeat
Music repeat Repeate single Allows you to repeat songs
Repeat all
No repeat
Power Saving 2 hours Automatically turns the photo frame off after a selected period of time
4 hours
8 hours
No power saving
Factory default Cancel Resets all your settings back to the factory default
OK
Version number Factory software version
15 seconds
30 seconds
Changing the Language
1. Press the “SETUP” button to enter the setup mode
2. Press “UP” or “DOWN” to select the setup function
and press “ENTER”.
3. Press “UP” or “DOWN” to select “LANGUAGE” and press “ENTER”.
4. Select your language and press “ENTER”.

Setting Up the Photo Frame
Powering up the Digital Photo Frame
1. Plug the appropriate end of the AC adapter into a power outlet and the other end into the Digital photo frame.
2. After you’ve stored content on a memory card (not included), insert the card into the proper slot (see page 2).
3. Turn the power switch to “ON”. Once the unit has been turned on, the unit will enter the source mode automatically.
Using a Memory Card
1. Insert your memory card into one of the open ports
(see page 2).
2. If there are any photos on the memory card, a slide
show will automatically begin in approximately
30 seconds.
3. It is recommended that you turn off your USB
device and the Digital photo frame before
connecting the USB device.
NOTE: DO NOT TAKE THE MEMORY CARD OUT
OF THE SLOT WHILE THE PICTURES ARE STILL
PLAYING OR WHEN THE POWER IS STILL ON. THIS
COULD DAMAGE THE FRAME OR THE MEMORY
CARD. ALWAYS TURN THE POWER OFF BEFORE
REMOVING THE MEMORY CARD.
FOR
PLACEMENT
ONLY
Selecting a Mode
1. Press “LEFT” or “RIGHT” to choose a mode.
2. Select photo, music, or video, then press “ENTER”
to show available fi les.
3. Select “FILE” mode, then press “ENTER” to view all
availabe fi les on your memory card or USB device.
4. Select “TIME” mode, then press “ENTER” to view
the calendar and clock.
5. Select “SETUP” mode, then press “ENTER” to
setup slideshows, change languages, etc.
Setup Mode
1. Press the “SETUP” button to enter the setup mode
2. Press “UP” or “DOWN” to select the setup function
and press “ENTER”.
3. Press “UP” or “DOWN” to select your choice and
press “ENTER”.

Navigating in the Digital Photo Frame
Connecting a USB Device to the Digital Photo Frame
1. The Digital photo frame has a built-in mini-USB port. If you would like to connect the USB device (such as a USB
fl ash drive) to the Digital photo frame with a full-siz
included cable has a male mi
2. It is recommended that you turn off your USB device and the Digital photo frame before connecting the USB device.
NOTE: DO NOT TAKE THE MEMORY CARD OUT OF THE SLOT WHILE THE PICTURES ARE STILL PLAYING OR
WHEN THE POWER IS STILL ON. THIS COULD DAMAGE THE FRAME OR THE MEMORY CARD. ALWAYS TURN
THE POWER OFF BEFORE REMOVING THE MEMORY CARD.
ni-size USB port and a female full-size USB port.
Connecting a USB fl ash drive to your Photo Frame
1. Your Digital photo frame will recognize a USB fl ash drive the same way it sees your fl ash memory cards.
e port, please use the included USB Connection Cable. This
Multi-Photo Preview Mode:
1. Press “UP”, “DOWN”, “LEFT”, or “RIGHT” to select a photo and press “ENTER”.
2. Press “RIGHT” to go to the next picture. Press “LEFT” to go back to the previous picture.
3. When viewing a picture, press “ZOOM” to enlarge.
4. While in zoom mode, use the “UP”, “DOWN”, “LEFT”, and “RIGHT” buttons to move the picture.
5. While in full screen mode, press the “ROTATE” button to rotate the picture.
6. While in full screen mode, press the “SETUP” button to enter the setup menu.
7. While in photo mode, press the “ENTER” button to start a slide show. Press “ENTER” again to pause.
8. While in photo mode, press the “16:9/4/3” button to select your aspect ratio

Navigating in the Digital Photo Frame
Viewing Music or Video Files
1. Press “UP” or “DOWN” to select a music or video fi le.
2. Press “ENTER” to play the selected fi le.
3. Press “ENTER” to pause, once again to resume.
4. Press “EXIT” to pause when.
5. Press “+” or “-” to adjust the volume.
6. While music or video is playing, press “UP” to play prevous fi le, press “DOWN” to play the fi le.
File Browser
1. Press “UP” or “DOWN” to select fi les or a directory.
2. Press “ENTER” to play the selected fi le.
3. Press “ENTER” or “RIGHT” button to enter a sub-directory.
4. Press “EXIT” or “LEFT” to return to a previous menu.
5. Press “RIGHT” or “LEFT” to mark a fi le.
6. Press “SETUP” to show the “COPY” or “DELETE” operation menu.
Calendar Mode
1. Press “UP” or “DOWN” to change the month.
2. Press “SETUP” to show the setup menu.
3. While in the setup menu, select “SET CLOCK”. Press “RIGHT” to set the correct time. Use the “RIGHT”
and “LEFT” arrows to move from the “DATE” and “TIME”.
4. While in the setup menu, select “SET ALARM”. Press “RIGHT” to set the correct time. Use the “RIGHT” and
“LEFT” arrows to move from the “DATE”, “TIME”, “ALARM SOUND” and “ALARM OCCURENCE”.
5. While in the setup menu, select “SLIDESHOW PHOTO” to turn on/off slide show in calendar mode.

Working with a PC
Connecting to your PC
1. Plug in the Digital photo frame.
2. Connect the small end of the USB cable to the USB port on the side of the Digital photo frame.
3. Connect the larger end of the USB cable to an open USB port on your PC.
4. Open “My Computer” on your desktop.
5. All fl ash cards currently in the Digital Photo Frame, as well as the frame’s built-in memory, will be listed as
“Removable Disk” on your PC.
6. Double-click the desired drive (memory card) to display the fi les on that drive.
7. Click and drag to copy photo, video, or music fi les to and from the card and your PC. Most photos are stored in
the Windows “My Pictures” folder on your PC, unless you’ve moved them somewhere else.
NOTE: If your PC is connected to a LAN (Local Area Network), or if you have multiple drive letters already assigned to
peripheral devices, you will need to manage your drive settings in Windows to free up the four drive letters immediately
following your CD-ROM drive so the Digital photo frame can correctly asign them to memory card slots.
Disconnecting to your PC
NOTE: Never simply unplug the Digital photo frame from your PC as it can seriously damage the memory in your
digital photo frame and/or your PC. You must “SAFELY REMOVE HARDWARE”.
1. Open “My Computer” on your desktop.
2. Select the Digital photo Frame drive by right clicking on its icon.
3. Select “Eject” to disconnect the Digital photo Frame from your PC.
4. You should receive a message stating it is safe to disconnect the Digital photo frame from your PC.
Once you receive that message, disconnect the USB cord from your Digital photo Frame to your PC.

Frequently Asked Questions
Q: Why are display times faster with some pictures than
others?
A. While higher resolution images are clearer than low resolution images, they are larger fi les and tend to load slower than
smaller fi les.
Q: I set up my Digital Photo Frame but it won’t turn on. Why?
A: Make sure the AC adapter is securely connected to the Digital photo frame, and the power switch is set to “ON”
Q: I have a fl ash card in the Digital Photo Frame but I can’t
view any of my photos. Why?
A: First make sure your memory card is one of the recognized formats and that the fi les on the card are JPEG images
fi les. Second, turn the Digital photo frame off and make sure your fl ash card is inserted all the way into the card slot and
is facing the correct direction. Third, turn the frame on. After a couple of seconds, you should see your fi rst photos. Press
“EXIT” to open the card selection screen and select the card you wish to view. Then select “PHOTOS”. You should see
thumbnails of all the photos on the card.
NOTE: Some digital cameras save images in formats other than JPEG. Refer to your camera’s manual if your photos are
not JPEG fi les.
Q: Can I insert multiple fl ash cards at the same time?
A. Yes. Simply turn on the unit before inserting any cars. The card selection screen lets you choose between all available
fl ash cards.
Q: Does the Digital Photo Frame support all JPEG and Motion
JPEG fi les?
A. No, it supports JPEG and Motion fi les taken from a digital camera. The Digital photo frame may not read all images or
video fi les downloaded from the Internet or from other software graphic applications.

Specsifi cations and Recycling
Set Up and Navigation
Unit 8” Digital Photo Frame
Resolution 800 x 480
Contrast Ratio 500:1
Card Type SD, MMC, CF, MS, MS Duo, MS
Pro, MS Pro Duo
Input Mini USB
Questions? Need some help?
Call our help line found on the insert with this icon:
Or visit www.polaroid.com.
WEEE:
This product contains electrical or electronic materials. The presence of these materials may, if not disposed of properly,
have potential adverse effects on the environment and human health. Presence of this label on the product means it
should not be disposed of as unsorted waste and must be collected separately. As a consumer, you are responsible for
ensuring that this product is disposed of properly. To fi nd out how to properly dispose of this product, please go to
www.polaroid.com and click on “Company“ or call the customer service number for your country listed in the
instruction manual.
“Polaroid” and “Polaroid and Pixel” are trademarks of Polaroid Corporation.
For service, support and warranty information, visit www.polaroid.com.
 Loading...