

Page 1

www.polaroid-digital.com
�
Portable Digital Picture Viewer
User Guide
Page 2

2
Polaroid izonePHOTO™ Portable Digital Picture Viewer User Guide
www.polaroid-digital.com
3
Polaroid izonePHOTO™ Portable Digital Picture Viewer User Guide
www.polaroid-digital.com
Product Overview
1. LCD Screen
2. Left/Previous Button
3. Down/Stop/Zoom Out Button
4. Rotation Button
5. Power Button
6. Menu Button
7. OK/Play/Pause Button
8. Up/Zoom In Button
9. Right/Next Button
10. Power On LED
Front View
11. Battery Door
12. SD Card Slot
13. Hand Strap Holder
14. AV OUT Jack
15. USB Port
Back View
Page 3
3
Polaroid izonePHOTO™ Portable Digital Picture Viewer User Guide
www.polaroid-digital.com
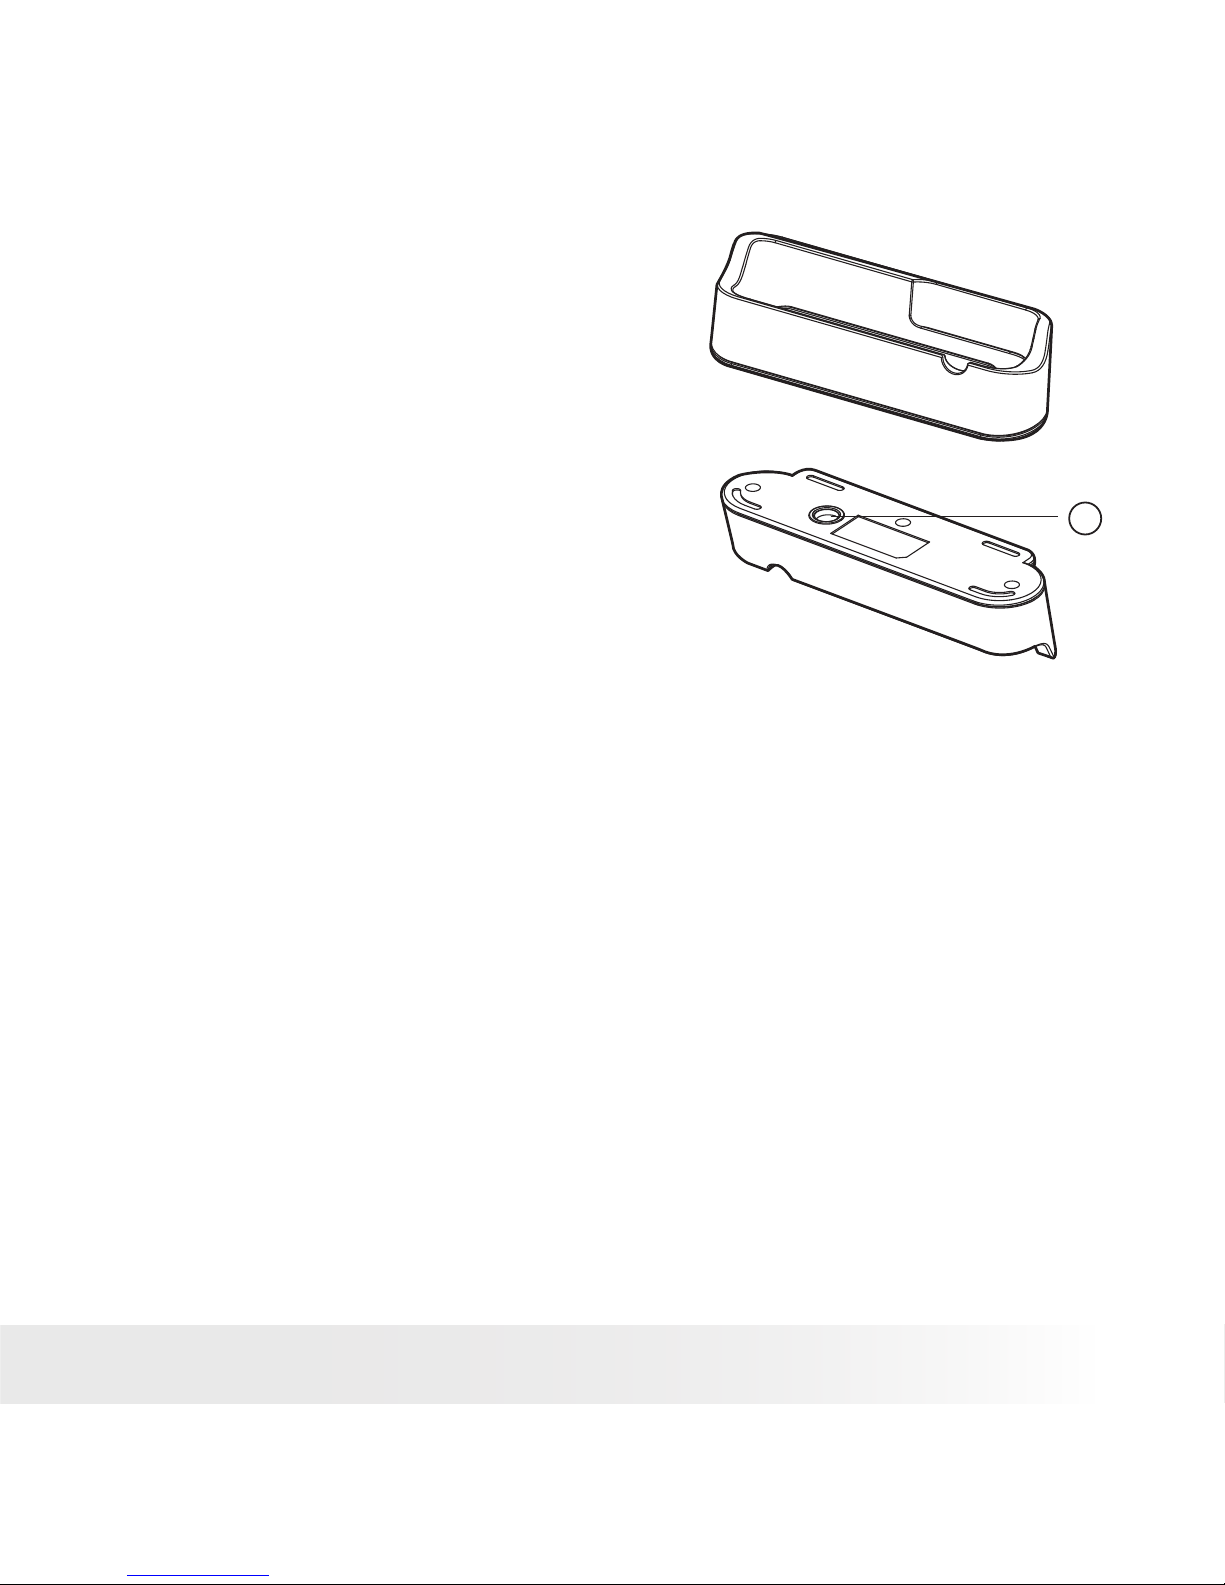
16. Tripod Mount
Stand
Page 4

4
Polaroid izonePHOTO™ Portable Digital Picture Viewer User Guide
www.polaroid-digital.com
5
Polaroid izonePHOTO™ Portable Digital Picture Viewer User Guide
www.polaroid-digital.com
Table of Contents
1 Getting Started ..........................................................................6
• Picture Viewer Package Contents ...........................................7
• Attaching the Hand Strap........... ...........................................8
• Using the Stand....................... .............................................8
• Installing the Batteries...........................................................9
• Turning the Picture Viewer On and Off......................... ...........9
• Checking the Battery Level.......................................... ........10
• Picture Viewer Modes.................................................. ........10
• How to Navigate Menus........................................ ...............11
2 SETUP Mode............................................................................ 12
• Formatting the Internal Memory or a Memory Card... ........ .....13
• Turning Beep Sound On/Off......................................... ........ 14
• Auto Power Save Setting........................................ ........ .....15
• Setting Display Language.....................................................16
• Resetting to Default Settings................................ ........ .......17
• Picture Viewer Default Settings............................................ 18
3 Transferring Pictures/Video Clips from Computer to izonePHOTO™...19
• Before You Transfer Files...................................... ........ .......19
• Connecting izone PHOTO™ to Computer ................................20
• Transferring Pictures and Video Clips ...................................21
• Convert Image, Video and Audio Format via ArcSoft®
MediaConverter™ (PC Only) .................................................23
4 Viewing/Managing Pictures .......................................................29
• Picture Menu ......................................................................30
• Viewing Pictures in Thumbnail and Full Screen ......................31
• View Pictures and Video Clips on a TV..................................32
• Rotating the Currently Displayed Picture ...............................34
• Zoom Feature .....................................................................35
• Running a Slide Show..........................................................36
• Protecting and Unprotecting Picture(s)..................................37
• Deleting Picture(s) ..............................................................38
• Adding the Photo Effect ......................................................39
Page 5

5
Polaroid izonePHOTO™ Portable Digital Picture Viewer User Guide
www.polaroid-digital.com
5 Playing/Managing Video Clips....................................................40
• Video Menu........................................................................41
• Playing a Video Clip ............................................................42
• Deleting Video Clip(s)..........................................................43
• Protecting/Unprotecting Video Clip(s) ...................................44
• Setting Repeat On/Off.........................................................45
6 Print Settings ...........................................................................46
• About PictBridge.................................................................46
• DPOF (Digital Print Order Format).........................................50
7 Using the SD (Secure Digital) Card.............................................53
• Using the SD Card...............................................................53
8 Installing the Software onto a Computer.....................................56
• Installing the Software ........................................................56
• Software Included with Your Picture Viewer ..........................58
• Computer System Requirements...........................................60
9 Troubleshooting Problems ......................................................... 61
10 Getting Help...........................................................................65
• Polaroid-digital Online Services ............................................65
• Customer Support...............................................................65
• ArcSoft Software Help ........................................................65
11 Appendix ...............................................................................66
• Technical Specications ......................................................66
•
Uninstalling the izonePHOTO™ Driver (For PC users only)
................67
• Using Your Batteries............................................................67
• Tips, Your Safety & Maintenance..........................................68
• Regulatory Information ........................................................68
Page 6

6
Polaroid izonePHOTO™ Portable Digital Picture Viewer User Guide
www.polaroid-digital.com
7
Polaroid izonePHOTO™ Portable Digital Picture Viewer User Guide
www.polaroid-digital.com
1 Getting Started
The izone PHOTO™ is the rst portable digital picture viewer in Polaroid
brand. Its credit-card size, compact and protective carrying case makes
it a fashion accessory and it’s simple to take your memories with you.
• Easily viewing, storing and printing pictures you have taken
with a digital camera
• Share and relieve your most treasured memories quickly and
easily on its 2.4-inch TFT screen
• Viewing JPEG images of up to 6 megapixels.
• Magnify pictures 4X for a close-up view
• Display pictures on an external monitor, such as TV
• Rotating and adding a photo effect to pictures
• Bundled with AcrSoft® MediaConverter, quickly and
effortlessly converting photo and video les into formats
optimized for use on your portable device
NOTE:
• The izonePHOTO™ may support the images in standard Huffman table
JPEG format and video clips in AVI and asf formats. Use ArcSoft®
MediaConverter™ or a third-party software to convert the image to JPEG
format or the video clip to asf format if the izonePHOTO™ cannot play it.
• The izonePHOTO™ can only read images and video clips stored in the “100
MEDIA” folder. The picture viewer will not read images and video les in any
other folder.
Page 7

7
Polaroid izonePHOTO™ Portable Digital Picture Viewer User Guide
www.polaroid-digital.com
• Picture Viewer Package Contents
Registration Card
Abt. Digital Ca mera
Waltersweierweg 5
77652 Offenburg
Germany
First Class
Postage
Required
Post Ofce will
not deliver
without proper
postage
Carrying Caseizone photo
USB Cable
Hand StrapQuick Start Guide
The CD-ROM includes
Polaroid izonePHOTO™ driver ( PC)
izone™ PhotoBase (PC & Mac)
ArcSoft® PhotoPrinter™ (PC & Mac)
ArcSoft® MediaConverter™ (PC)
Adobe® Acrobat® Reader (PC & Mac)
User Guide (in PDF format)
3xAAA-size
Batteries
AV Cable Stand
IZONE PHOTO
Quick Start Guide
Guide de Démarrage rapide
Guida Rapida
Guía Rápida de Inicio
Guia de Início Rápido
ML 0403
Part no.: OM837657 R1
Printed in China
Schnellanleitung
Page 8

8
Polaroid izonePHOTO™ Portable Digital Picture Viewer User Guide
www.polaroid-digital.com
9
Polaroid izonePHOTO™ Portable Digital Picture Viewer User Guide
www.polaroid-digital.com
• Attaching the Hand Strap
• Using the Stand
Page 9

9
Polaroid izonePHOTO™ Portable Digital Picture Viewer User Guide
www.polaroid-digital.com
• Installing the Batteries
Three AAA-size batteries are supplied with the product. For a detailed
guideline on battery usage, please see “Using Your Batteries” on page 67.
IMPORTANT NOTE:
For best performance and prolonged battery life, we recommend the use of
AAA lithium or rechargeable NiMH.
• Turning the Picture Viewer On and Off
To turn on the picture viewer, fully press
and hold the
button till the LCD screen
is activated. Pressing and holding the
button again and the picture viewer will
power off the picture viewer.
Page 10
10
Polaroid izonePHOTO™ Portable Digital Picture Viewer User Guide
www.polaroid-digital.com
11
Polaroid izonePHOTO™ Portable Digital Picture Viewer User Guide
www.polaroid-digital.com
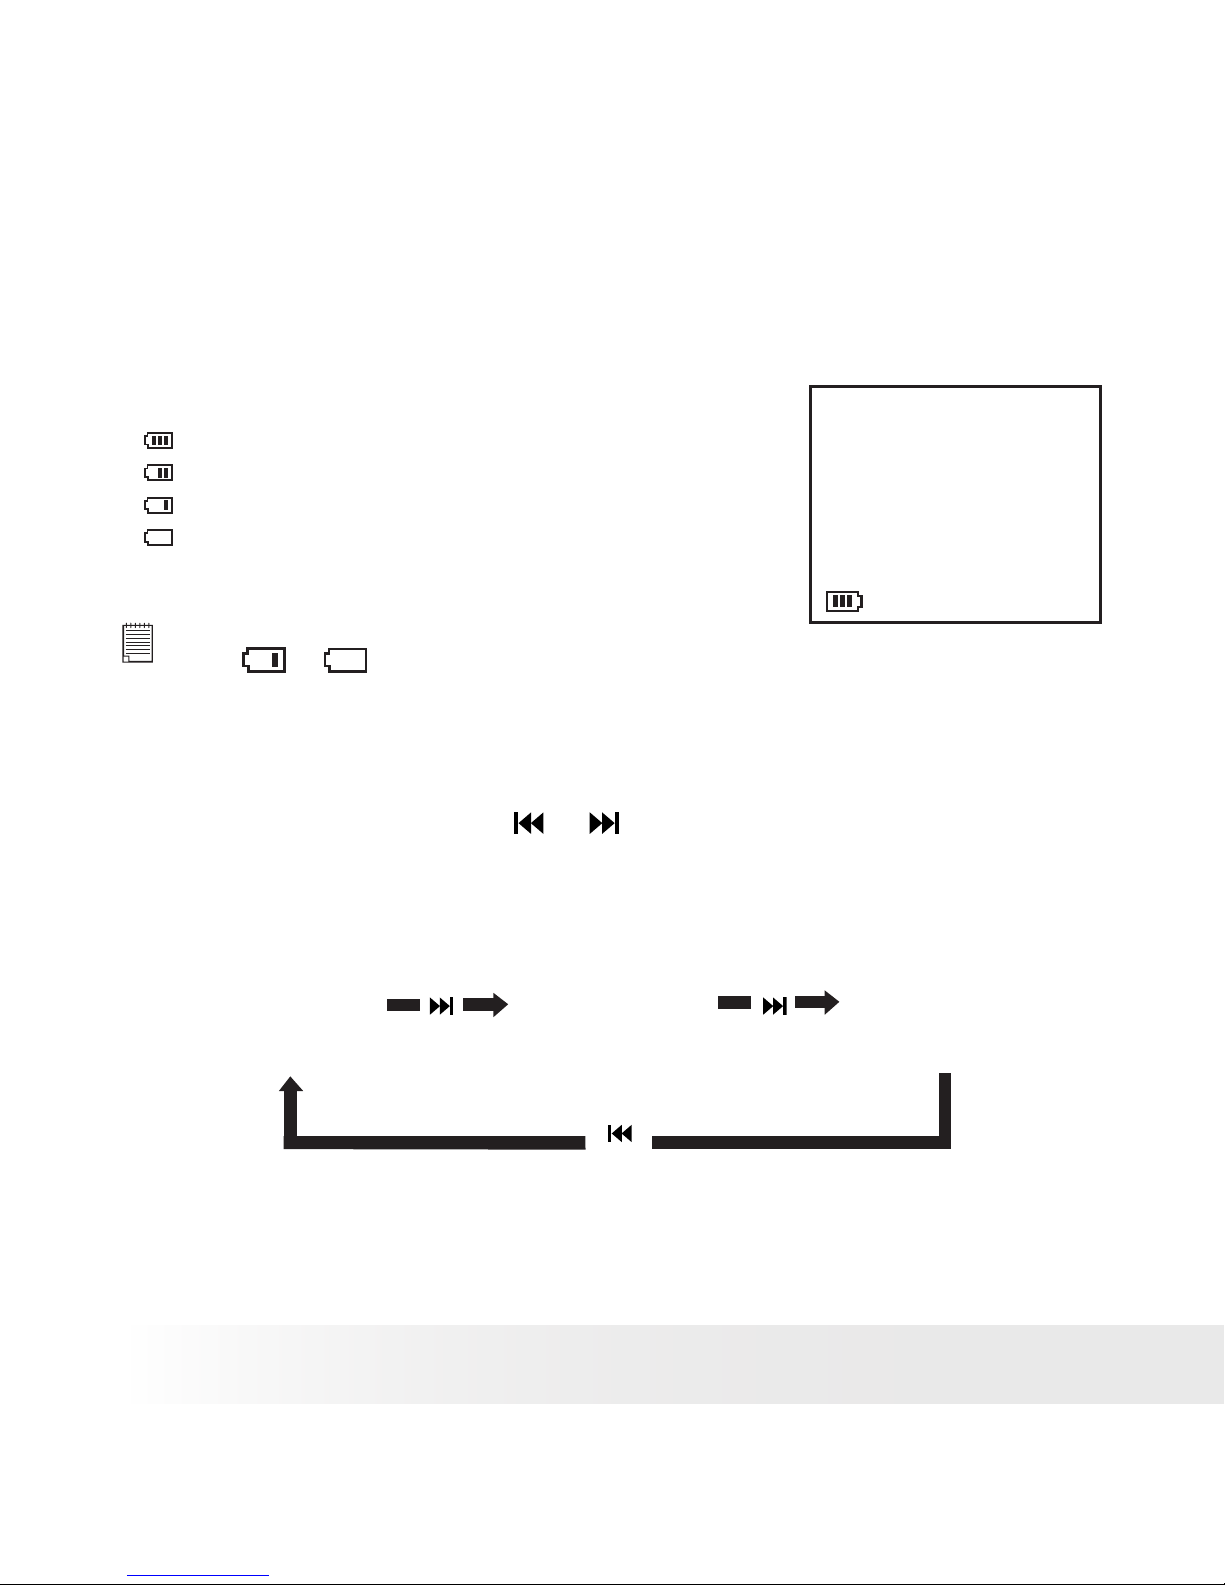
• Checking the Battery Level
Check the battery power level before viewing pictures and video clips.
1. Turn the picture viewer on.
2. Check the battery level status that appears on the picture viewer LCD
screen.
Battery power is full.
Battery power is adequate.
Battery power is low.
Battery power is exhausted.
NOTE:
If the
or
battery indicator appears on the LCD screen, please recharge
or replace the batteries.
• Picture Viewer Modes
The picture viewer has three working modes, PICTURES, VIDEOS and
SETUP modes. Pressing the or button switches among them.
press
press
press
PICTURES VIDEOS SETUP
Page 11
11
Polaroid izonePHOTO™ Portable Digital Picture Viewer User Guide
www.polaroid-digital.com
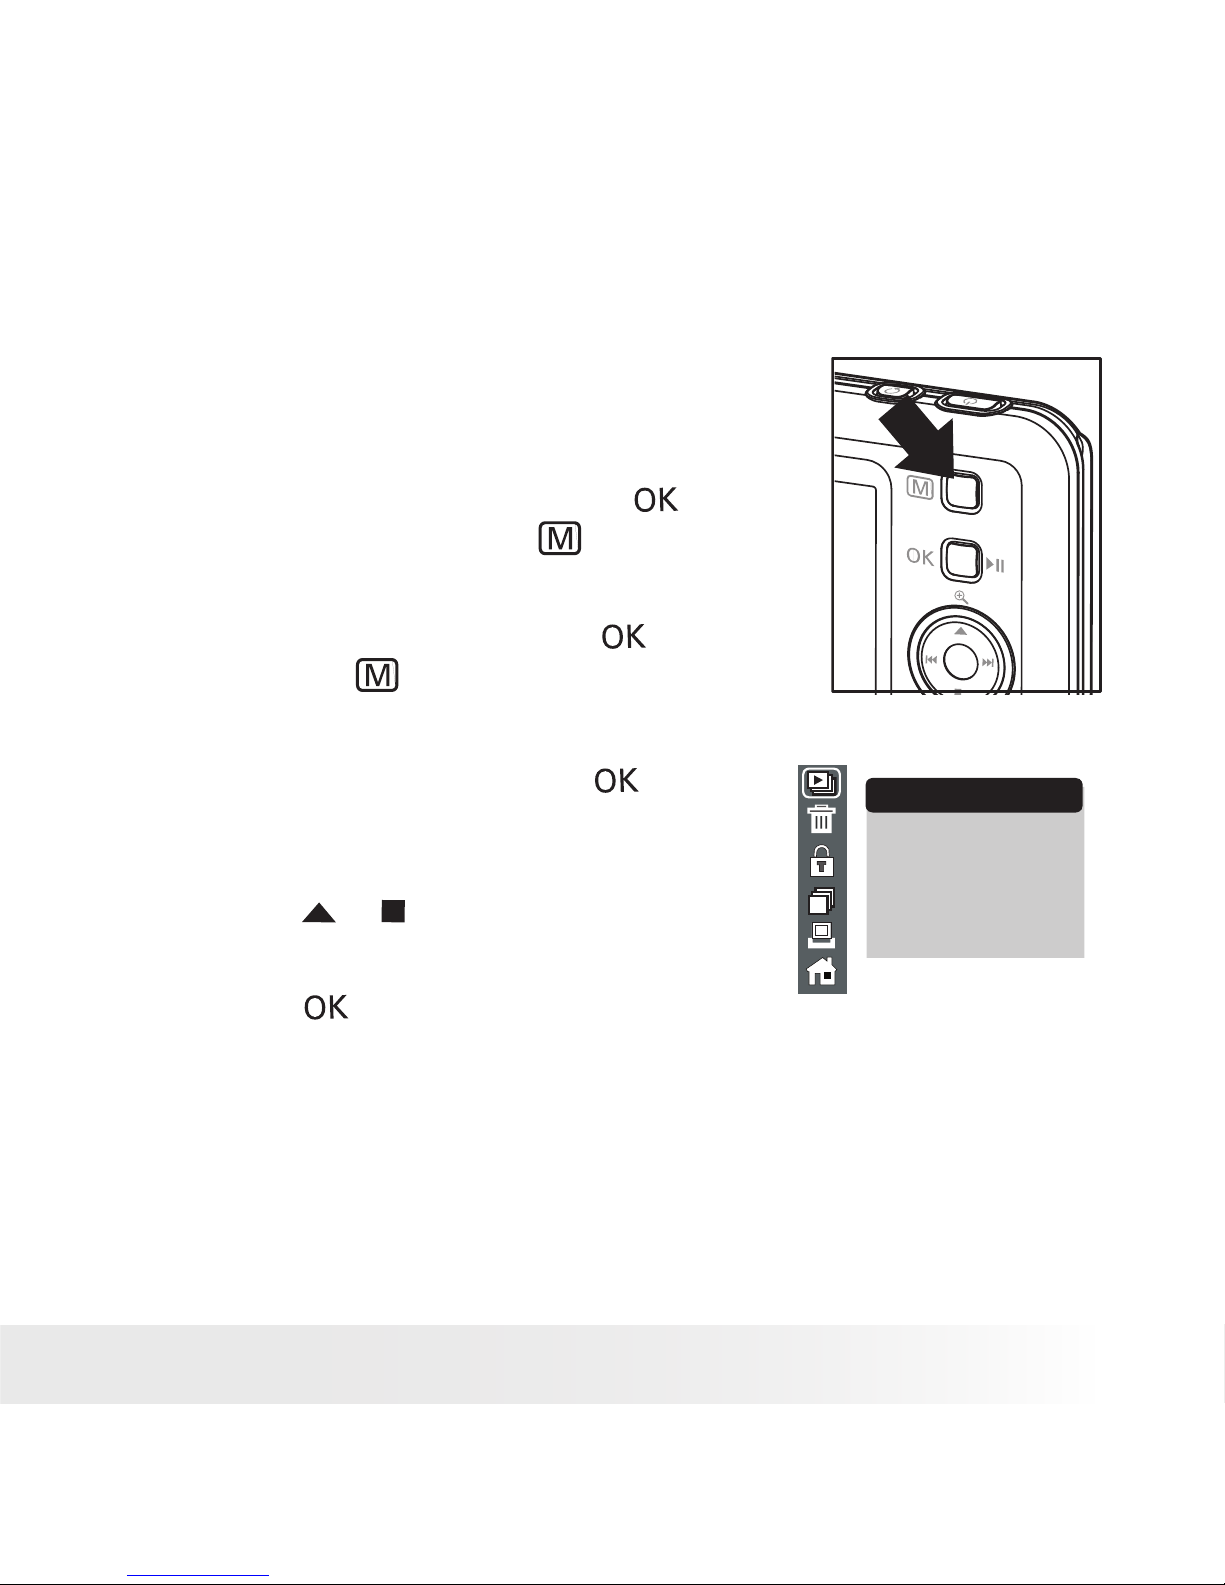
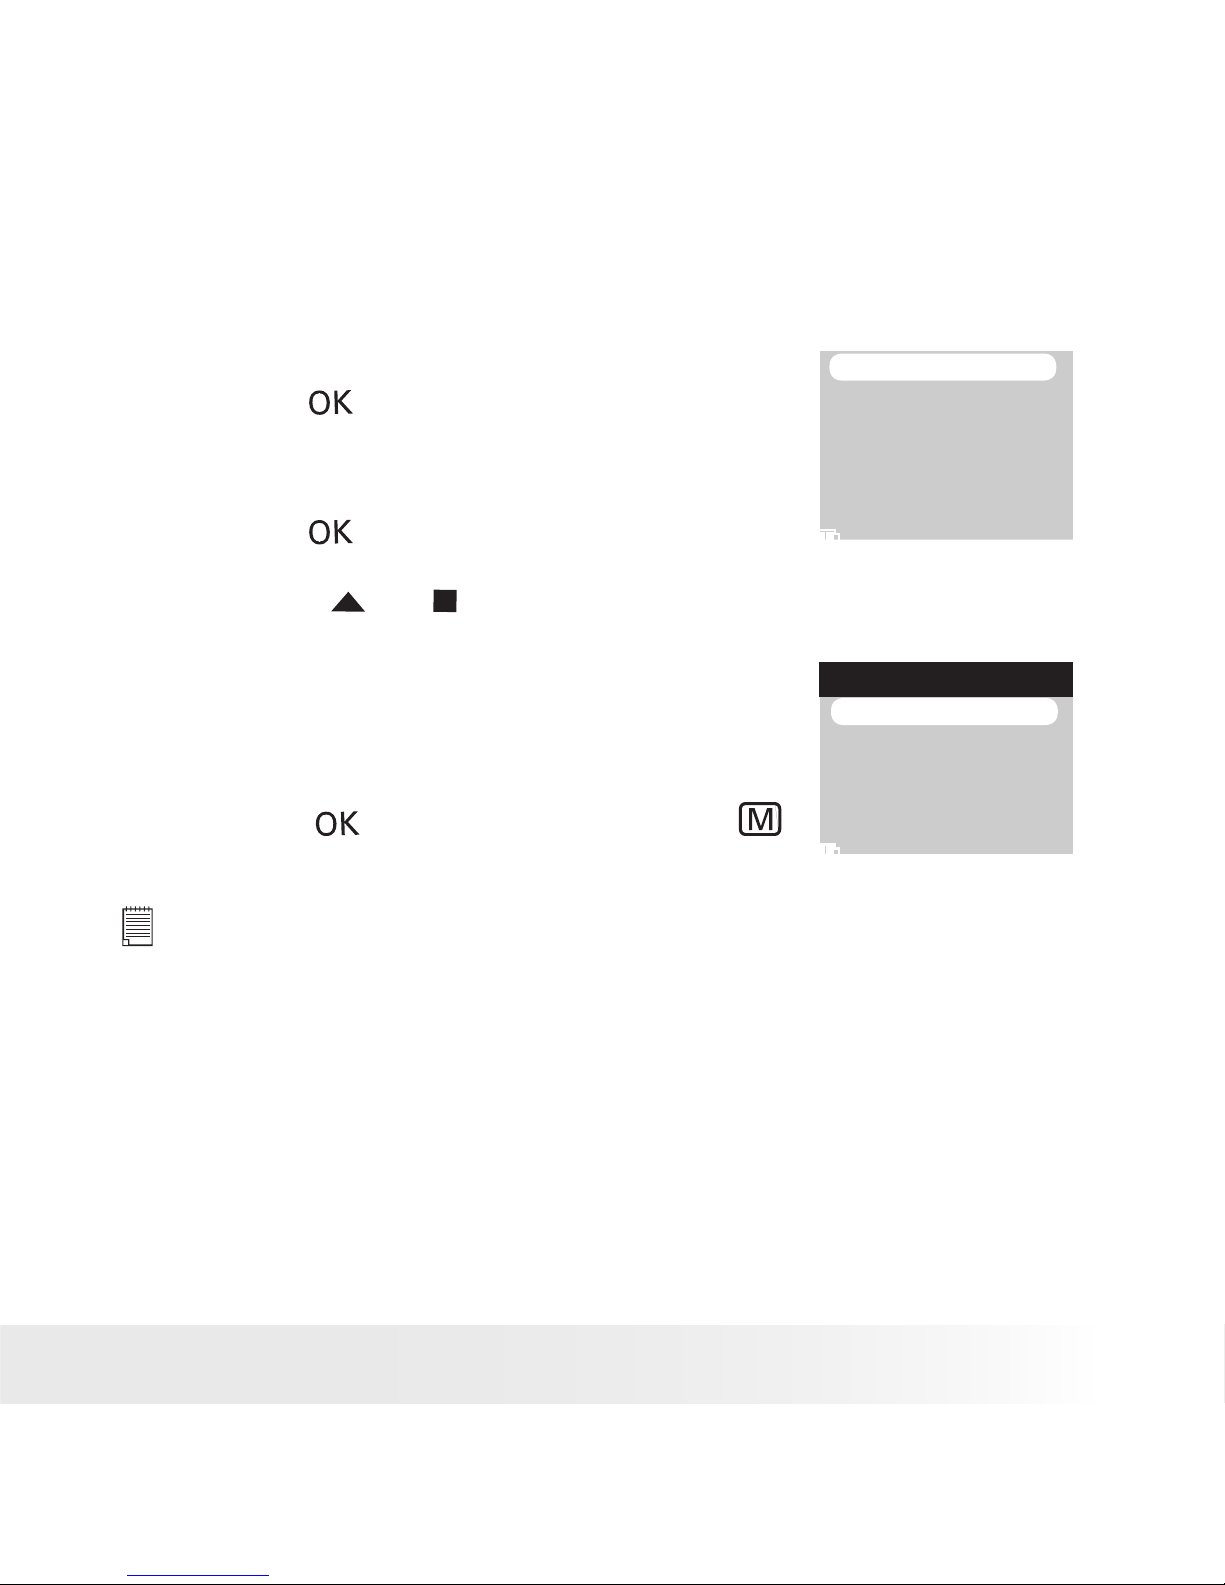
• How to Navigate Menus
The PICTURES and VIDEOS mode
menus are used to select playback
settings. The SETUP menu allows you to
adjust the settings of the picture viewer,
for instance, beep sound, auto power
off, etc.
1. In the PICTURES mode, press the
button twice and then the button to
access the menu bar.
In the VIDEOS mode, press the button
and then the button to access the
menu bar.
In the SETUP mode, press the button
to access the menu list.
PLAY
INTERVAL:1 SEC
INTERVAL:3 SEC
INTERVAL:5 SEC
SLIDE SHOW
2. Press the or button to select the
desired setting.
3. Press the button to conrm.
Page 12
12
Polaroid izonePHOTO™ Portable Digital Picture Viewer User Guide
www.polaroid-digital.com
13
Polaroid izonePHOTO™ Portable Digital Picture Viewer User Guide
www.polaroid-digital.com
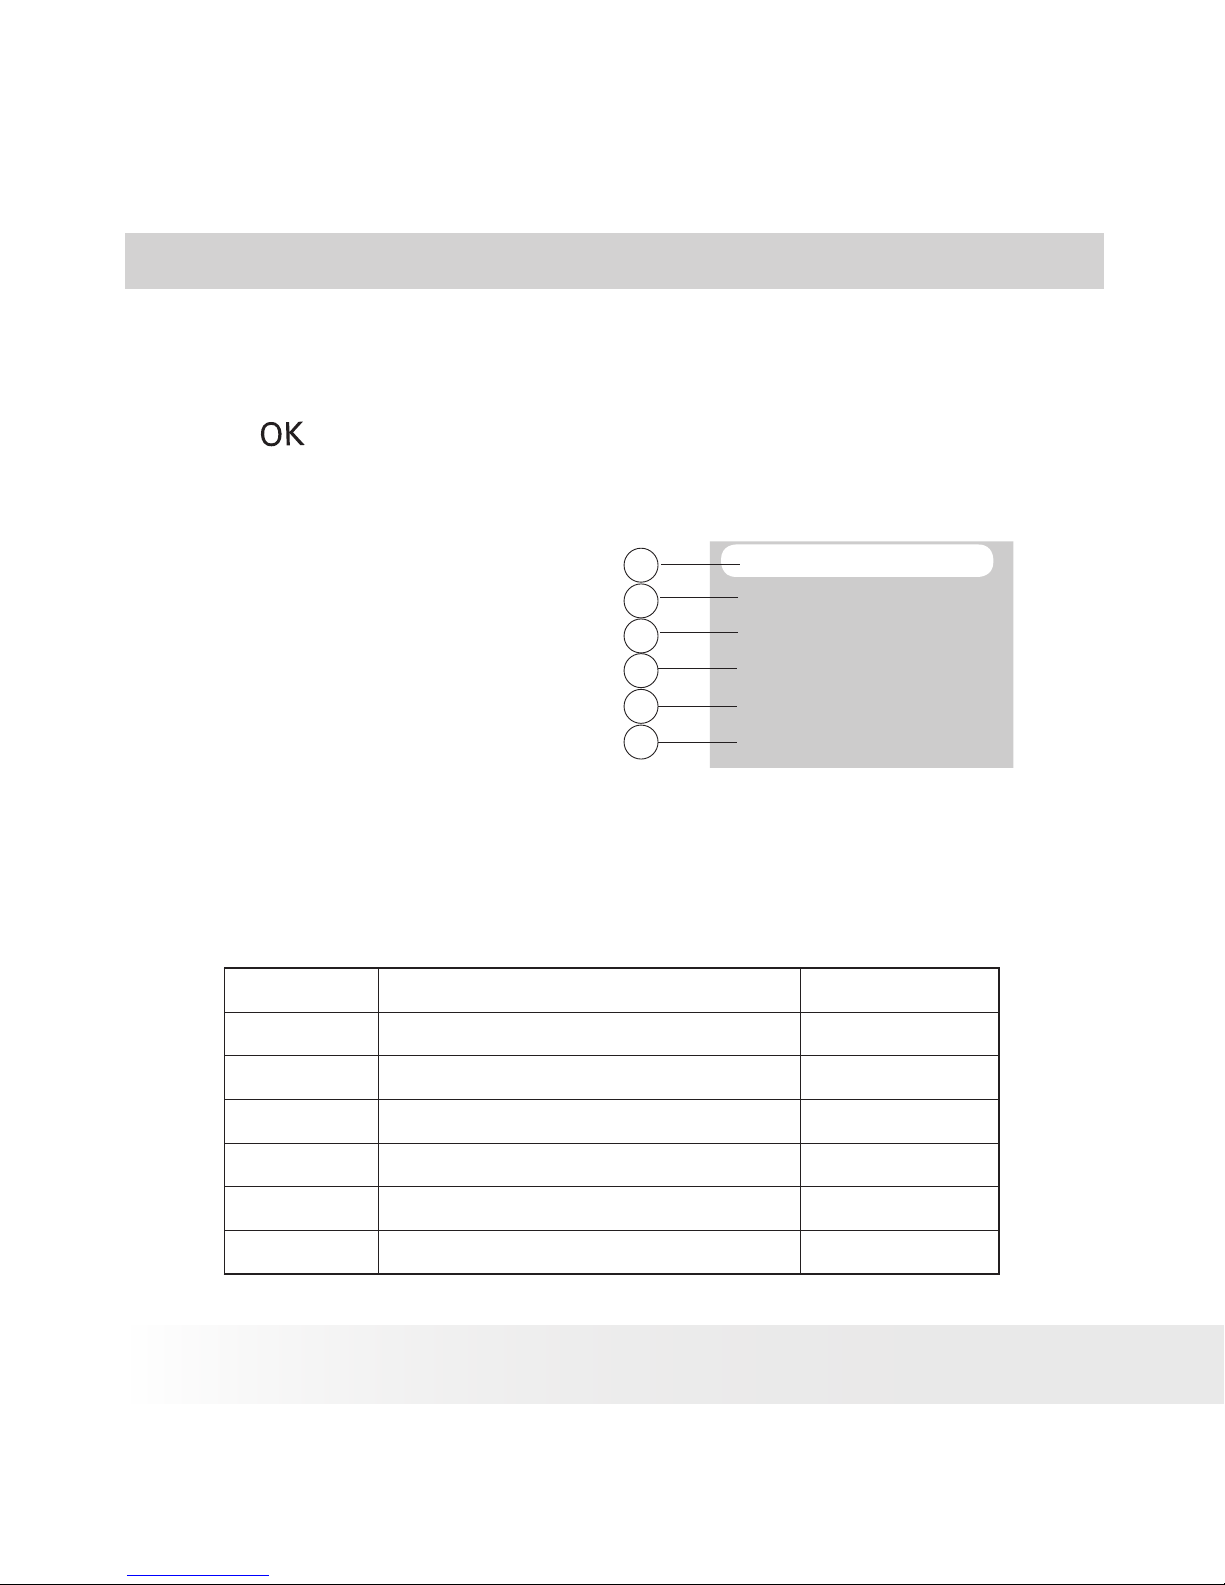
2 SETUP Mode
This mode allows you to adjust the picture viewers’ settings, such as
beep sound, auto power off.
Press the button to access the setup menu.
FORMAT
BEEP SOUND
AUTO POWER OFF
LANGUAGE
TV OUT
DEFAULT SETTING
1
2
3
4
5
6
SETUP
No. Description Ref. Page
1 Format 13
2 Beep Sound 14
3 Auto Power Off 15
4 Language 16
5 TV Out 32
6 Default Setting 17
Page 13
13
Polaroid izonePHOTO™ Portable Digital Picture Viewer User Guide
www.polaroid-digital.com
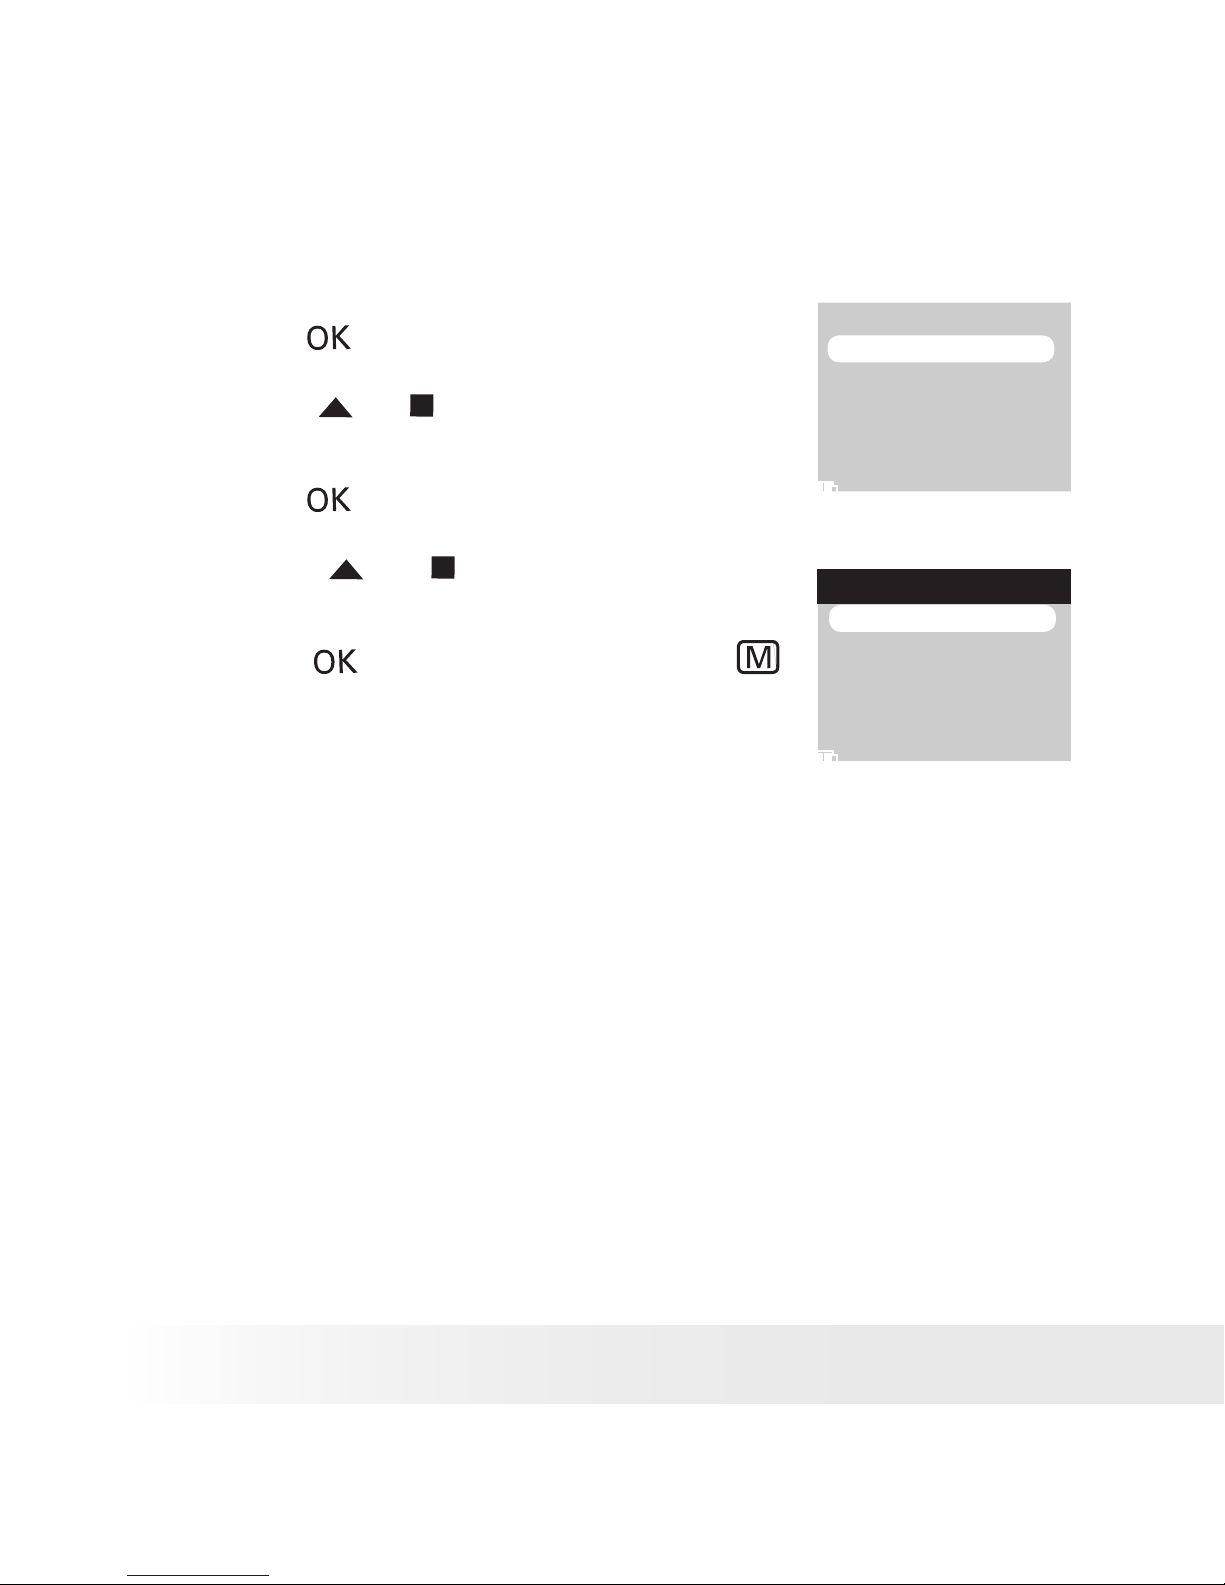
• Formatting the Internal Memory or a Memory Card
Formatting the internal or external memory deletes all data stored in it.
1. Set the picture viewer to SETUP mode.
2. Press the button.
3. “FORMAT” is the current selection.
FORMAT
BEEP SOUND
AUTO POWER OFF
LANGUAGE
TV OUT
DEFAULT SETTING
4. Press the button.
5. Press the or button to select the
desired setting.
Choose “NAND FLASH” to format the
internal memory, or “CARD” to format the
memory card.
6. Press the button to conrm, or the
button to exit.
FORMAT
NAND FLASH
CARD
NOTE:
• Data deleted by a format operation cannot be recovered. Make sure you
do not have any useful data currently stored in the internal memory or the
memory card before you format it.
• Formatting destroys all the pictures and video clips, even those that are protected.
• SD cards formatted in another picture viewer, computer or other devices
may not work properly. It is recommended to format SD cards with your
izonePHOTO™ picture viewer.
Page 14
14
Polaroid izonePHOTO™ Portable Digital Picture Viewer User Guide
www.polaroid-digital.com
15
Polaroid izonePHOTO™ Portable Digital Picture Viewer User Guide
www.polaroid-digital.com
• Turning Beep Sound On/Off
1. Set the picture viewer to SETUP mode.
2. Press the button.
FORMAT
BEEP SOUND
AUTO POWER OFF
LANGUAGE
TV OUT
DEFAULT SETTING
3. Press the or button to select “BEEP
SOUND”.
4. Press the button.
5. Press the or button to select the
desired setting.
BEEP SOUND
ON
OFF
6. Press the button to conrm, or the
button to exit.
Page 15
15
Polaroid izonePHOTO™ Portable Digital Picture Viewer User Guide
www.polaroid-digital.com
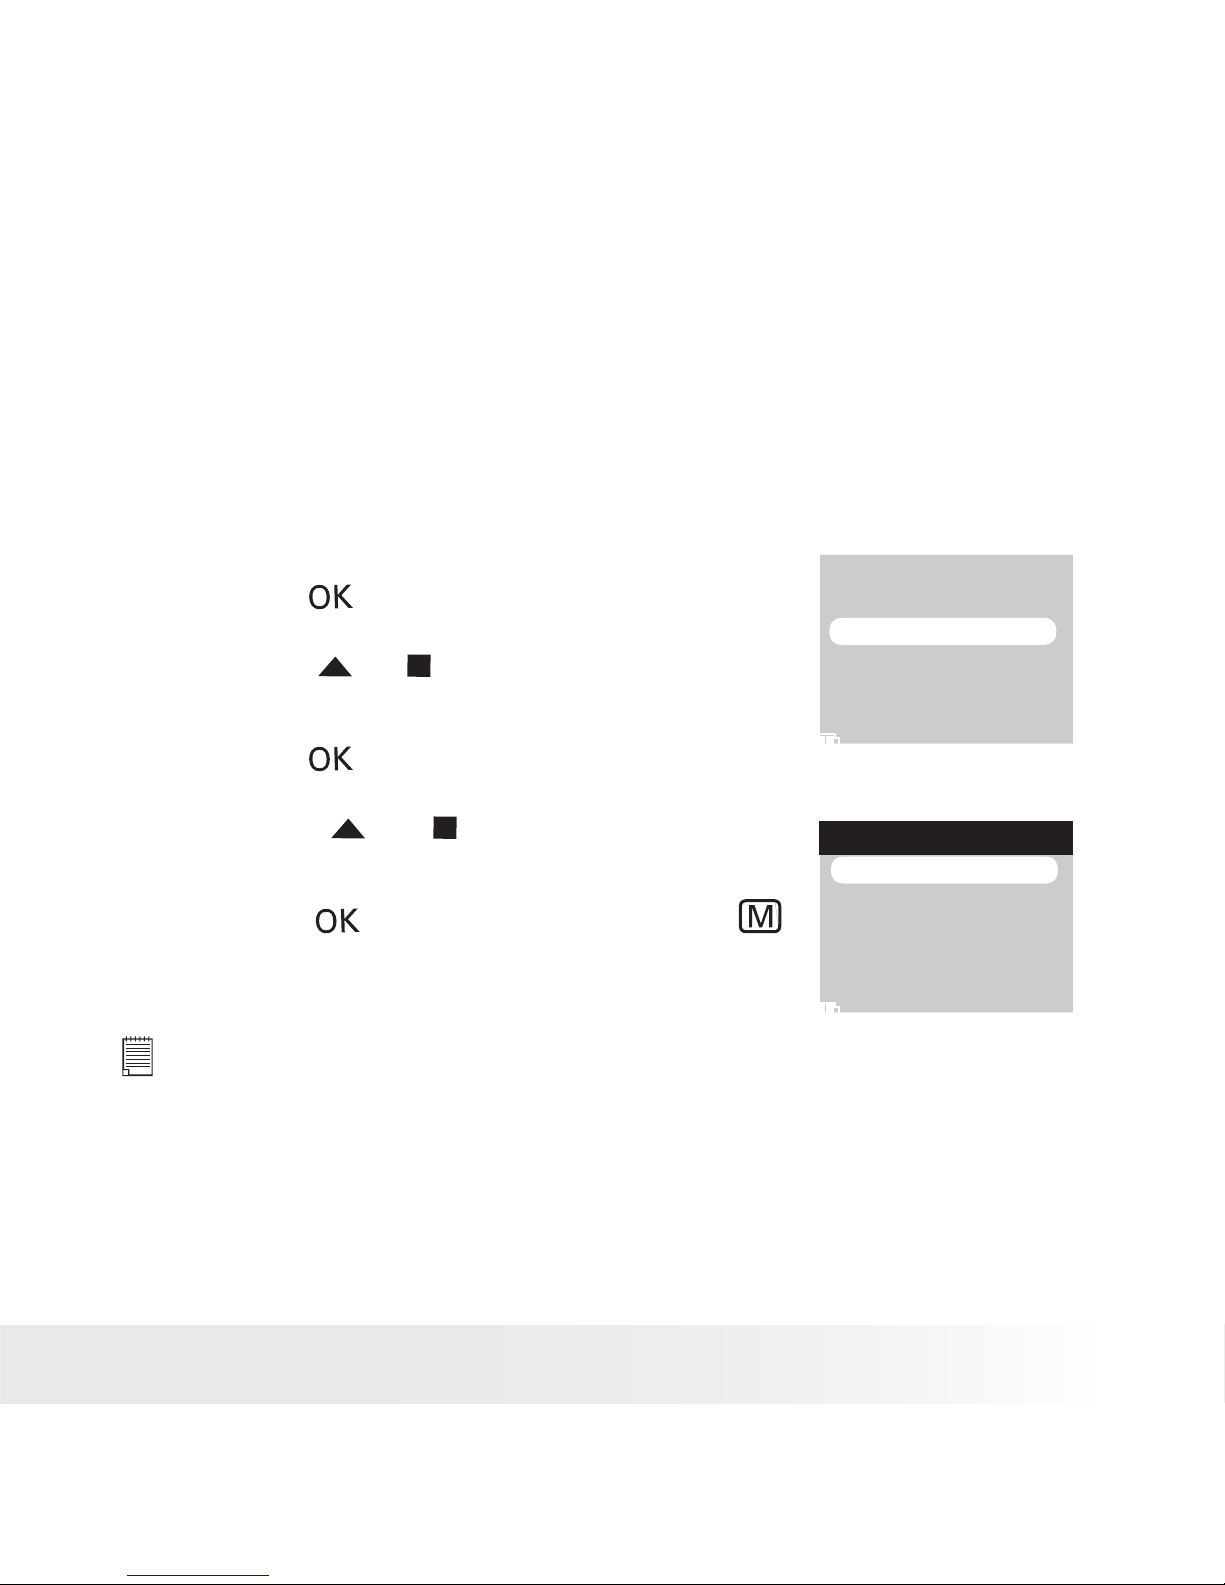
• Auto Power Save Setting
The picture viewer performs the following power save operation to
conserve battery power.
OFF The power save feature is not activated.
1/3/5 MIN The picture viewer is designed to switch off
automatically to save battery life after the specied
period of inactivity.
You can change the power save setting according to the following steps.
1. Set the picture viewer to SETUP mode.
2. Press the button.
FORMAT
BEEP SOUND
AUTO POWER OFF
LANGUAGE
TV OUT
DEFAULT SETTING
3. Press the or button to select “AUTO
POWER OFF”.
4. Press the button.
AUTO POWER OFF
OFF
1 MIN
3 MIN
5 MIN
5. Press the or button to select the
desired setting.
6. Press the button to conrm, or the
button to exit.
NOTE:
Auto power off is automatically disabled under any one of the following
conditions.
- While playing a video clip.
- While a slide show is undergoing.
- While the picture viewer’s USB port is connected to a computer or other
external devices, or while the picture viewer is being controlled by an external
device.
Page 16

16
Polaroid izonePHOTO™ Portable Digital Picture Viewer User Guide
www.polaroid-digital.com
17
Polaroid izonePHOTO™ Portable Digital Picture Viewer User Guide
www.polaroid-digital.com
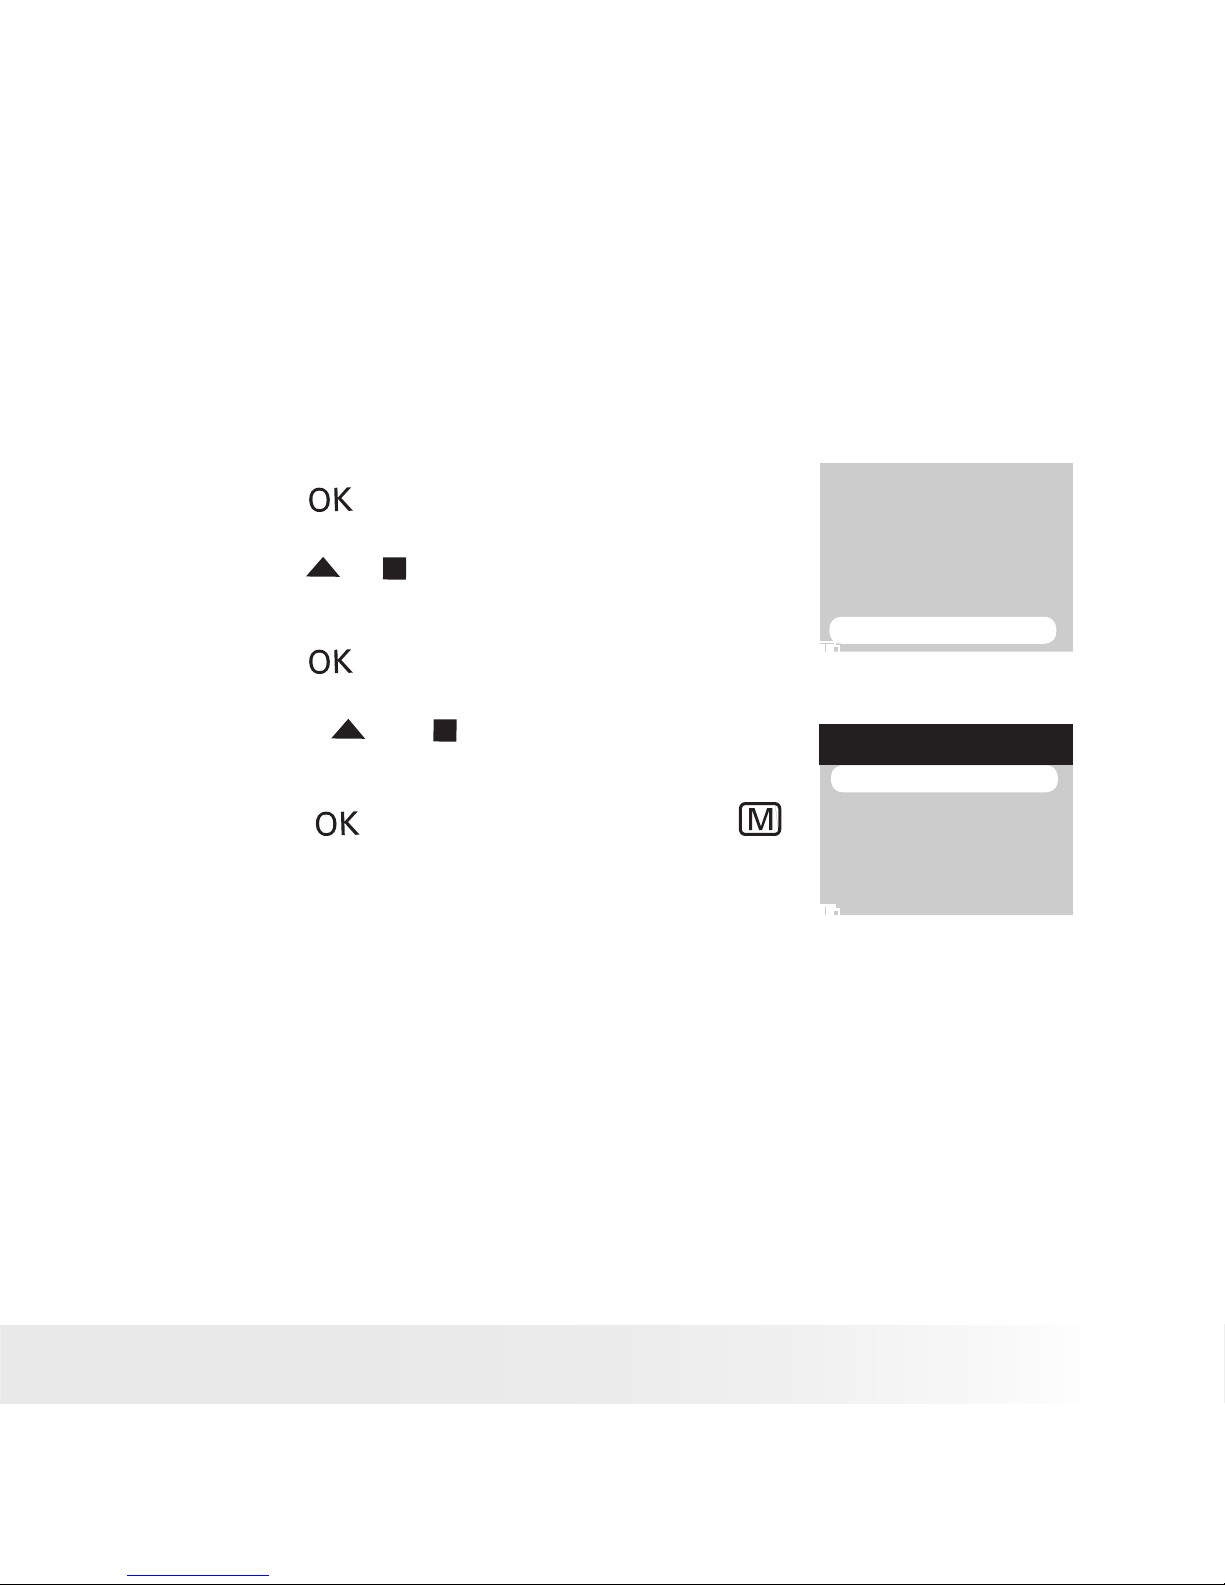
• Setting Display Language
Under this setting, you can select the language you prefer for the LCD
screen.
1. Set the picture viewer to SETUP mode.
2. Press the button.
FORMAT
BEEP SOUND
AUTO POWER OFF
LANGUAGE
TV OUT
DEFAULT SETTING
3. Press the or button to select “LANGUAGE”.
4. Press the button.
5. Press the or button to select the desired
setting.
LANGUAGE
ENGLISH
GERMAN
FRENCH
ITALIAN
6. Press the button to conrm, or the
button to exit.
Page 17
17
Polaroid izonePHOTO™ Portable Digital Picture Viewer User Guide
www.polaroid-digital.com
• Resetting to Default Settings
You can easily change all the settings you made back to the default
settings by the following steps.
Please refer to “Picture Viewer Default Settings” on page 18 for more
details.
1. Set the picture viewer to SETUP mode.
2. Press the button.
FORMAT
BEEP SOUND
AUTO POWER OFF
LANGUAGE
TV OUT
DEFAULT SETTING
3. Press the or button to select “DEFAULT
SETTING”.
4. Press the button.
DEFAULT SETTING
YES
NO
5. Press the or button to select the
desired setting.
6. Press the button to conrm, or the
button to exit.
Page 18
18
Polaroid izonePHOTO™ Portable Digital Picture Viewer User Guide
www.polaroid-digital.com
19
Polaroid izonePHOTO™ Portable Digital Picture Viewer User Guide
www.polaroid-digital.com
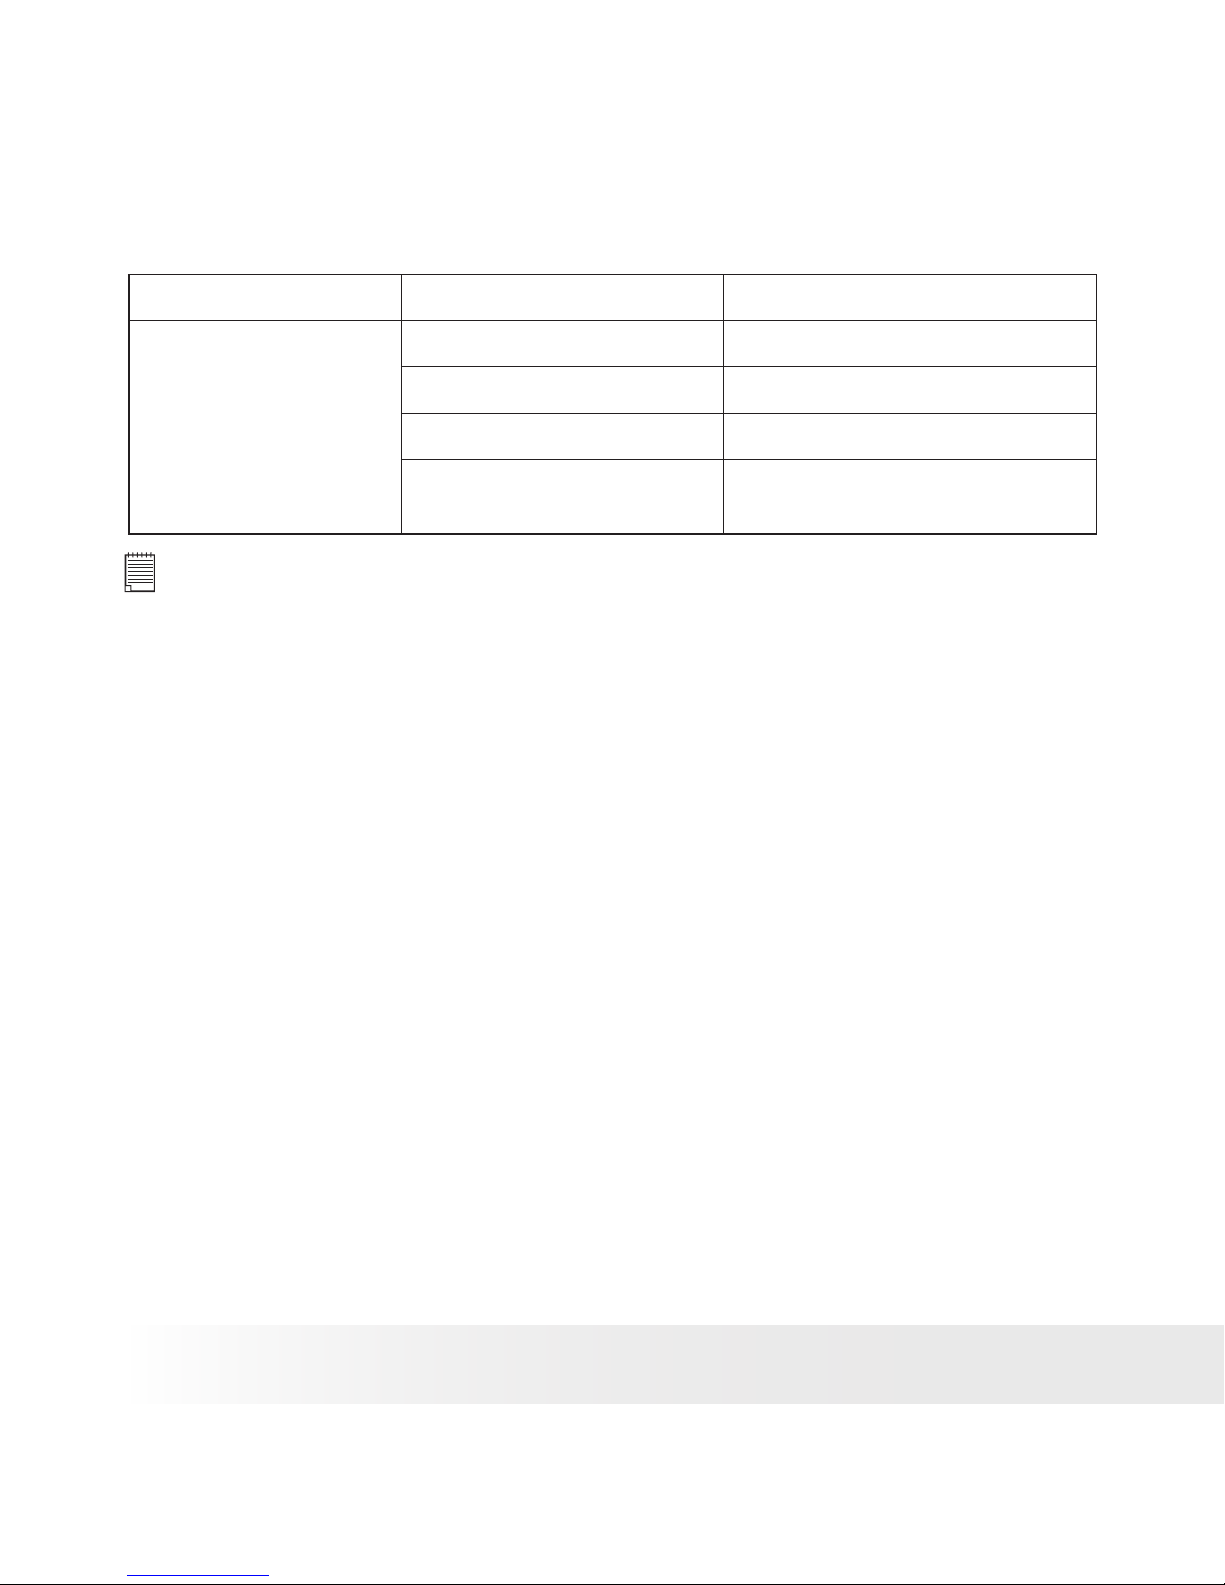
• Picture Viewer Default Settings
Picture viewer Mode Description Default
Setup Mode Beep On
Auto Power Off 1 minute
Language English
TV out NTSC for USA; PAL for
Europe
NOTE:
The default language for the LCD screen may vary with different countries
and regions.
Page 19

19
Polaroid izonePHOTO™ Portable Digital Picture Viewer User Guide
www.polaroid-digital.com
3 Transferring Pictures/Video Clips from Computer to
izone PHOTO™
IMPORTANT!
• The izonePHOTO™ may support the images in standard Huffman table
JPEG format and video clips in AVI and asf formats. Use ArcSoft®
MediaConverter™ or a third-party software to convert the image to
JPEG format or the video clip to asf format if the izonePHOTO™ cannot
play it.
• The izonePHOTO™ can only read images and video clips stored in the
“100 MEDIA” folder. The picture viewer will not read images and video
les in any other folder.
• Before You Transfer Files
IMPORTANT!
Before you connect your izone PHOTO™ to the computer, make sure that you
have installed the software from the enclosed CD. Please refer to “8 Installing
the Software onto a Computer”.
Page 20

20
Polaroid izonePHOTO™ Portable Digital Picture Viewer User Guide
www.polaroid-digital.com
21
Polaroid izonePHOTO™ Portable Digital Picture Viewer User Guide
www.polaroid-digital.com
For Windows® and Macintosh Users:
PC
Mac
• Connecting izone PHOTO™ to Computer
USB Series A plug connects to your PC USB Series Mini B plug connects to your
izonePHOTO™
1. Turn on your izone PHOTO™.
2. Plug Series A of the USB cable into the marked socket on your
computer.
3. Plug Series Mini B of the USB cable into the port on your izone
PHOTO™.
4. An interface “Found new hardware” appears on the computer
desktop.
5. A removable disk drive will be installed onto your computer
automatically.
Page 21

21
Polaroid izonePHOTO™ Portable Digital Picture Viewer User Guide
www.polaroid-digital.com
• Transferring Pictures and Video Clips
For Windows® Users:
PC
NOTE:
You can transfer pictures and video clips in any mode.
1. Double click on “My Computer” on your PC desktop and your will
see a “Removable Disk” drive.
2. Double click “Removable Disk” -> double click “DCIM” -> double
click “100 MEDIA”.
3. Choose the pictures and video clips stored in your computer and drag
them to the “100 MEDIA” folder.
Page 22

22
Polaroid izonePHOTO™ Portable Digital Picture Viewer User Guide
www.polaroid-digital.com
23
Polaroid izonePHOTO™ Portable Digital Picture Viewer User Guide
www.polaroid-digital.com
For Macintosh Users:
Mac
NOTE:
For Mac user, directly plug-in the picture viewer and no need to install the
driver.
1. Turn on the picture viewer.
2. Connect the picture viewer to a computer via the USB cable. The
systems will automatically recognize the mass storage drive. (System
will automatically create a Mass Storage named “Unlabeled”)
NOTE:
This Drive name will vary from different version of Mac OS system.
3. Double click the folder “Unlabeled” to enter sub-folder “DCIM”.
4. Double click “Unlabeled” -> double click “DCIM” -> double click
“100 MEDIA”.
5. Choose the pictures and video clips stored in your computer and drag
them to the “100 MEDIA” folder.
NOTE:
• The izonePHOTO™ may support the images in standard Huffman table JPEG
format and video clips in AVI and asf formats. Use a third-party software
to convert the image to JPEG format or the video clip to asf format if the
izonePHOTO™ cannot play it.
• The izonePHOTO™ can only read images and video clips stored in the “100
MEDIA” folder. The picture viewer will not read images and video les in any
other folder.
Page 23

23
Polaroid izonePHOTO™ Portable Digital Picture Viewer User Guide
www.polaroid-digital.com
• Convert Image, Video and Audio Format via ArcSoft®
MediaConverter™ (PC Only)
IMPORTANT!
To play the video clip in the izonePHOTO™, it is necessary to convert to asf format.
1. Click “Start” -> Choose “Programs” -> Choose “ArcSoft
MediaConverter” -> Choose “Media Converter”
2. The “ArcSoft MediaConverter™” interface appears on the computer
screen.
3. Click “Select Media”.
Page 24

24
Polaroid izonePHOTO™ Portable Digital Picture Viewer User Guide
www.polaroid-digital.com
25
Polaroid izonePHOTO™ Portable Digital Picture Viewer User Guide
www.polaroid-digital.com
4. Choose a source le and its le type.
5. Click “Open”.
Page 25

25
Polaroid izonePHOTO™ Portable Digital Picture Viewer User Guide
www.polaroid-digital.com
6. Click “Select Destination” and choose a destination folder.
Page 26

26
Polaroid izonePHOTO™ Portable Digital Picture Viewer User Guide
www.polaroid-digital.com
27
Polaroid izonePHOTO™ Portable Digital Picture Viewer User Guide
www.polaroid-digital.com
7. Click “Settings”.
Page 27

27
Polaroid izonePHOTO™ Portable Digital Picture Viewer User Guide
www.polaroid-digital.com
8. Select “Photo”, “Audio” or “Video” based on the source le type.
9. Select the customized conversion settings for the target le type.
10. Click “Save”.
Page 28

28
Polaroid izonePHOTO™ Portable Digital Picture Viewer User Guide
www.polaroid-digital.com
29
Polaroid izonePHOTO™ Portable Digital Picture Viewer User Guide
www.polaroid-digital.com
11. Click “Convert” to start the conversion.
12. A message prompts when the conversion is nished. Click “OK”.
13. Connect the izonePHOTO to the computer.
14. Go to the destination folder and drag the converted le to the
removable disk.
Page 29

29
Polaroid izonePHOTO™ Portable Digital Picture Viewer User Guide
www.polaroid-digital.com
4 Viewing/Managing Pictures
PICTURES mode allows you to view pictures in full screen, thumbnail
and slide show. You can also rotate, protect, print, delete them, and
change their photo effect.
PICTURES
Page 30

30
Polaroid izonePHOTO™ Portable Digital Picture Viewer User Guide
www.polaroid-digital.com
31
Polaroid izonePHOTO™ Portable Digital Picture Viewer User Guide
www.polaroid-digital.com
• Picture Menu
1. Press the button.
2. Press the button.
3. Press the button to access the picture menu.
PLAY
INTERVAL:1 SEC
INTERVAL:3 SEC
INTERVAL:5 SEC
SLIDE SHOW
1
2
3
4
5
6
No. Description Ref. Page
1 Slide Show 36
2 Deletion 37
3 Protectiong/Remove Protection 37
4 Photo Effect 39
5 Printing Setting 46
6 Home ---
NOTE:
Select and press the button. The picture viewer returns to the
PICTURES screen.
Page 31

31
Polaroid izonePHOTO™ Portable Digital Picture Viewer User Guide
www.polaroid-digital.com
• Viewing Pictures in Thumbnail and Full Screen
1. Set the picture viewer to PICTURES mode.
2. Press the button.
3. Press the or button to select the
desired settings.
4. Press the button.
Pictures stored in the current memory is
shown in thumbnail.
5. Press the , , or button to select a
picture.
Pic7
Pic6
M
6. Press the button to view it in full screen.
M
PICTURES
ALL PICTURES
HOME
Page 32

32
Polaroid izonePHOTO™ Portable Digital Picture Viewer User Guide
www.polaroid-digital.com
33
Polaroid izonePHOTO™ Portable Digital Picture Viewer User Guide
www.polaroid-digital.com
• View Pictures and Video Clips on a TV
Setting the Video Output System
The video output signal (NTSC or PAL) can be switched to accommodate
different signal systems. For example, NTSC for USA, Canada, Taiwan,
Japan, etc. and PAL for Europe, Asia (excluding Taiwan), and so on.
1. Set the picture viewer to SETUP mode.
2. Press the button.
FORMAT
BEEP SOUND
AUTO POWER OFF
LANGUAGE
TV OUT
DEFAULT SETTING
3. Press the or button to select “TV
OUT”.
4. Press the button.
5. Press the or button to select the
desired setting.
TV OUT
PAL
TV NTSC
OFF
6. Press the button.
Page 33

33
Polaroid izonePHOTO™ Portable Digital Picture Viewer User Guide
www.polaroid-digital.com
The TV screen performs as the LCD screen and the LCD screen is
powered off after a proper connection between the picture viewer and
a TV.
1. Connect the picture viewer to a TV via the AV cable (supplied) as
illustrated.
2. View the pictures and video clips stored in the picture viewer on the
TV. Procedures are the same as those on page 31.
To Audio In Jack To Video In Jack
White Plug Yellow Plug
NOTE:
The video output signal varies with different shipment destination.
Page 34

34
Polaroid izonePHOTO™ Portable Digital Picture Viewer User Guide
www.polaroid-digital.com
35
Polaroid izonePHOTO™ Portable Digital Picture Viewer User Guide
www.polaroid-digital.com
• Rotating the Currently Displayed Picture
The currently displayed JPEG picture can be rotated for a better review
angle on the LCD screen.
1. Set the picture viewer to PICTURE mode.
2. Select a picture.
M
3. Pressing the button each time rotates
the picture 90 degree counter-clockwise.
M
Page 35

35
Polaroid izonePHOTO™ Portable Digital Picture Viewer User Guide
www.polaroid-digital.com
• Zoom Feature
Your picture viewer is designed with 4X digital zoom. This feature lets
you zoom in on the central area of a photo.
1. Set the picture viewer to PICTURES mode.
2. Select a picture.
3. Press the button to zoom in and the button to return to the
original zoom status.
The zoom factor is shown on the LCD screen.
ok
4. Pressing the button switches to the orientation mode.
5. Press the , , or button to move around the picture.
6. Pressing the button returns to the zoom mode.
Page 36

36
Polaroid izonePHOTO™ Portable Digital Picture Viewer User Guide
www.polaroid-digital.com
37
Polaroid izonePHOTO™ Portable Digital Picture Viewer User Guide
www.polaroid-digital.com
• Running a Slide Show
The slide show function enables you to view all pictures stored in the
current memory one by one on the LCD screen.
1. Access the picture menu.
PLAY
INTERVAL:1 SEC
INTERVAL:3 SEC
INTERVAL:5 SEC
SLIDE SHOW
2. (SLIDE SHOW) is the current selection.
3. Press the button.
4. Press the or button to select the slide
show duration.
5. Press the button to start a slide show.
6. Pressing the button again will returns to
the “SLIDE SHOW” menu.
PLAY
INTERVAL:1 SEC
INTERVAL:3 SEC
INTERVAL:5 SEC
SLIDE SHOW
7. Press the button to exit, or the
button to start playing a slide show.
Page 37

37
Polaroid izonePHOTO™ Portable Digital Picture Viewer User Guide
www.polaroid-digital.com
• Protecting and Unprotecting Picture(s)
1. Access the picture menu.
2. Press the or button to select
(LOCK).
LOCK THIS
UNLOCK THIS
LOCK ALL
UNLOCK ALL
LOCK
3. Press the button.
4. Press the or button to select the desired
setting.
5. Press the button.
LOCK THIS Protect the currently displayed picture.
UNLOCK THIS Remove protection from the currently displayed picture.
LOCK ALL Protect all pictures in the current memory.
UNLOCK LOCK Remove protection from all of the pictures.
An
icon appears on the LCD screen, indicating the picture is under
protection.
NOTE:
Press the or button to select the picture that you want to protect or
remove protection before the above operation.
Page 38

38
Polaroid izonePHOTO™ Portable Digital Picture Viewer User Guide
www.polaroid-digital.com
39
Polaroid izonePHOTO™ Portable Digital Picture Viewer User Guide
www.polaroid-digital.com
• Deleting Picture(s)
1. Access the picture menu.
2. Press the or button to select
(ERASE).
THIS IMAGE
ALL IMAGES
ERASE
3. Press the button.
4. Press the or button to select the desired
setting.
5. Press the button.
THIS IMAGE Delete the currently displayed picture.
ALL IMAGES Delete all images stored in the current memory.
NOTE:
• To delete one picture, use the or button to select the one you want to
delete before the above operation.
• Protected le can not be deleted. Remove protection before deleting.
• All deleted pictures can not be recovered.
Page 39

39
Polaroid izonePHOTO™ Portable Digital Picture Viewer User Guide
www.polaroid-digital.com
• Adding the Photo Effect
You can add or change a special color tone and ambiance of a picture
in this setting.
1. Access the picture menu.
2. Press the or button to select
(PHOTO EFFECT).
3. Press the button.
BLACK & WHITE
EMBOSS
NEGATIVE
COLD
PAINT
PHOTO EFFECT
4. Press the or button to select the
desired setting.
5. Press the button.
A message prompts the user to save the
effect-added picture as a new le.
YES
NO
SAVE THIS IMAGE?
6. Press the or button to select the
desired setting.
7. Press the button.
BLACK & WHITE Changing into a black-and-white picture.
EMBOSS Creating embossing of the image against the background
image or color
NEGATIVE Like the image on a lm that makes the white areas of original
black and black areas white.
COLD Adding a cool color tone to the image.
PAINT Adding a painting effect to the image.
Page 40

40
Polaroid izonePHOTO™ Portable Digital Picture Viewer User Guide
www.polaroid-digital.com
41
Polaroid izonePHOTO™ Portable Digital Picture Viewer User Guide
www.polaroid-digital.com
5 Playing/Managing Video Clips
VIDEOS mode allows you to view video clips.
VIDEOS
Page 41

41
Polaroid izonePHOTO™ Portable Digital Picture Viewer User Guide
www.polaroid-digital.com
• Video Menu
1. Set the picture viewer to VIDEOS mode.
2. Press the button.
3. Press the button to access the video menu.
ERASE
THIS FILE
ALL FILES
1
2
3
4
No. Description Ref. Page
1 Deletion 43
2 Protection/Remove protection 44
3 Repeat On/Off 45
4 Home ---
NOTE:
Select and press the button. The picture viewer returns to the
VIDEOS screen.
Page 42

42
Polaroid izonePHOTO™ Portable Digital Picture Viewer User Guide
www.polaroid-digital.com
43
Polaroid izonePHOTO™ Portable Digital Picture Viewer User Guide
www.polaroid-digital.com
• Playing a Video Clip
1. Set the picture viewer to VIDEOS
mode.
2. Press the button.
Video3
M
Video4
Video5
Video6
3. Press the , , or button to
select a video clip.
4. Press the button to start playing
the video clip. Press it again to pause.
5. Press the button to stop.
M
Press the button to select the previous
video clip and the button to select the
next one.
Page 43

43
Polaroid izonePHOTO™ Portable Digital Picture Viewer User Guide
www.polaroid-digital.com
• Deleting Video Clip(s)
1. Access the video menu.
2. Press the or button to select
(ERASE).
3. Press the button.
Video3
Video4
Video5
Video6
THIS FILE
ALL FILES
ERASE
4. Press the or button to select the
desired setting.
5. Press the button.
THIS FILE Delete the selected video clip.
ALL FILES Delete all video clips in the current memory.
Page 44

44
Polaroid izonePHOTO™ Portable Digital Picture Viewer User Guide
www.polaroid-digital.com
45
Polaroid izonePHOTO™ Portable Digital Picture Viewer User Guide
www.polaroid-digital.com
• Protecting/Unprotecting Video Clip(s)
1. Access the video menu.
2. Press the or button to select
(LOCK).
3. Press the button.
LOCK
LOCK THIS
UNLOCK THIS
LOCK ALL
UNLOCK ALL
4. Press the or button to select the
desired setting.
5. Press the button.
LOCK THIS Protect the selected video clip.
UNLOCK THIS Remove protection from the selected video clip.
LOCK ALL Protect all video clips stored in the current memory.
UNLOCK ALL Remove protection from all of the locked video clips.
An
icon appears on the LCD screen, indicating the video clip is
under protection.
NOTE:
Press the or button to select the video clip that you want to protect or
remove protection before the above operation.
Page 45

45
Polaroid izonePHOTO™ Portable Digital Picture Viewer User Guide
www.polaroid-digital.com
• Setting Repeat On/Off
The picture viewer repeatedly plays the selected video clip after
activating the repeat feature.
1. Access the video menu.
2. Press the or button to select
(REPEAT).
3. Press the button.
REPEAT
ON
OFF
4. Press the or button to select the
desired setting.
5. Press the button.
Page 46

46
Polaroid izonePHOTO™ Portable Digital Picture Viewer User Guide
www.polaroid-digital.com
47
Polaroid izonePHOTO™ Portable Digital Picture Viewer User Guide
www.polaroid-digital.com
6 Print Settings
• About PictBridge
PictBridge is a new industry standard that allows you to print images
directly from a PictBridge enable digital camera, picture viewer or other
device to a PictBridge compatible printer without using a photo editing
software or a computer.
Printing Procedures
1. Preparing the picture viewer and the printer.
Picture Viewer Be sure battery level is full before printing.
Printer Refer to the user guide that comes with your printer and make
preparations (paper, ink cassette, cartridge, etc.) as required.
Turn on the picture viewer and the printer.
NOTE:
If battery level is low or exhausted, recharge or replace your batteries.
2. Selecting PictBridge mode
Set the picture viewer to PICTURE mode and select the PictBridge
mode. Refer to page 47 for details.
3. Connecting the picture viewer to the printer
Refer to "Picture Viewer/Printer Connection" on page 48 for details.
4. Select print settings.
Use the picture viewer's function and navigation buttons to select the
print settings. Refer to page 49 for details.
5. Printing
Press the button to start printing. Refer to page 49 for details.
Page 47

47
Polaroid izonePHOTO™ Portable Digital Picture Viewer User Guide
www.polaroid-digital.com
Cancelling Printing
Press the button to cancel printing the
print job. The printer will stop printing and
eject the paper.
PROGRESS 001/002
PRINTED 001
CANCEL
Printing Errors
If for some reason an error occurs during or
before printing, select “CANCEL” and then
press the button.
NOTE:
• Please refer to the printer’s user guide for
the solutions. Printing may resume once the
problem is solved.
PROGRESS 001/003
PRINTED 002
ERROR
CANCEL
• Printing operation may still fail with some errors
even. In that case, select “CANCEL” and press
the button.
PICTBRIDGE
DPOF
PRINT SETTING
Selecting PictBridge Mode
1. Set the picture viewer to PICTURES
mode.
2. Access the picture menu.
3. Press the or button to select
(PRINT SETTING).
4. Press the button.
5. “PICTBRIDGE” is the current selection.
6. Press the button.
NOTE:
To print a single image, select the image before
enabling PictBridge mode.
PLEASE CONNECT TO DEVICE
Page 48

48
Polaroid izonePHOTO™ Portable Digital Picture Viewer User Guide
www.polaroid-digital.com
49
Polaroid izonePHOTO™ Portable Digital Picture Viewer User Guide
www.polaroid-digital.com
Picture Viewer/Printer Connection
Connecting with the USB Cable.
To Printer
1. Plug Series A of the USB cable into the marked socket on your
printer. Location of USB socket will vary from printer to printer.
2. Plug Series Mini B of the USB cable into the port on your picture
viewer.
DEVICE IS
CONNECTED
NOTE:
• “
DEVICE IS CONNECTED” displays on the
LCD screen, indicating a proper connection to
the printer.
• Do not connect the USB cable to the picture
viewer until PictBridge is enable and when
prompted by the “PLEASE CONNECT TO
DEVICE” screen. If you already have connected
the cable to the picture viewer, do not plug into
printer until prompt to do so. Not following this
sequence will result in connection failure.
• When “PLEASE CONNECT TO DEVICE” is displayed for about ten
seconds, it will skip to the PictBridge print setting screen even if there is
no connection between picture viewer and printer.
Page 49

49
Polaroid izonePHOTO™ Portable Digital Picture Viewer User Guide
www.polaroid-digital.com
Selecting Print Settings
1. Press the or button to select the
desired setting.
PICTBRIDGE
THIS IMAGE
ALL IMAGES
The following options are available.
THIS IMAGE Pring the selected image.
ALL IMAGES Print all images in the current memory.
2. Press the button.
PICTBRIDGE
PRINT 01 COPIES
3. Press the or button to select the
number of copies from 1 to 99.
Printing
1. Press the button to start printing.
Page 50

50
Polaroid izonePHOTO™ Portable Digital Picture Viewer User Guide
www.polaroid-digital.com
51
Polaroid izonePHOTO™ Portable Digital Picture Viewer User Guide
www.polaroid-digital.com
• DPOF (Digital Print Order Format)
”DPOF” stands for “Digital Print Order Format”, which is a format for
recording on a memory card or other medium which captured images
and how many copies should be printed. Then you can print on a DPOFcompatible printer or at a professional print service from the memory
card in accordance with the le name and number of copies settings
recorded on the card.
With this picture viewer, you should always select images by viewing
them on the LCD screen. Do not specify images by le name without
viewing the le contents.
1. Insert an SD card into the picture
viewer.
2. Turn on the picture viewer.
3. Access the picture menu.
4. Press the or button to select
(PRINT SETTING).
5. Press the button.
6. Press the button to select “DPOF”.
7. Press the button.
PICTBRIDGE
DPOF
PRINT SETTING
Page 51

51
Polaroid izonePHOTO™ Portable Digital Picture Viewer User Guide
www.polaroid-digital.com
8. Press the or button to select the
desired setting.
9. Press the button.
DPOF
THIS IMAGE
ALL IMAGES
THIS IMAGE The selected picture in a memory card will be printed up
to 99 copies.
ALL IMAGES All pictures in a memory card will be printed up to 99
copies for each picture.
10. Press the or button to select the
number of copies.
11. Press the button.
12. Repeat the above steps and select
another image you want to print and
its number of copies.
DPOF
PRINT 01 COPIES
Page 52

52
Polaroid izonePHOTO™ Portable Digital Picture Viewer User Guide
www.polaroid-digital.com
53
Polaroid izonePHOTO™ Portable Digital Picture Viewer User Guide
www.polaroid-digital.com
13. Remove the memory card out of the picture viewer and insert it
into the printer’s card slot (as illustrated). Location of the card slot
may vary from printer to printer model.
14. Press the Print button on the printer to start printing.
Gently push the SD card inwards
and release it for the SD card to
eject from the SD card slot.
Page 53

53
Polaroid izonePHOTO™ Portable Digital Picture Viewer User Guide
www.polaroid-digital.com
7 Using the SD (Secure Digital) Card
• Using the SD Card
Your picture viewer comes with built-in ash memory for storing
pictures and video clips. You can expand the memory using a
commercially available SD card (up to 1GB). The picture viewer senses
whether a memory card is inserted, and the memory card has a higher
priority over the internal memory.
Memory Card Precautions
1. Use only an SD memory card with this picture viewer.
2. Electrostatic charge, electrical noise, and other phenomena can
cause data corruption or even loss. Always make sure that you
always back up important data on other media (MO disc, computer
hard drive, etc.).
3. If a memory card starts to behave abnormally, you can restore
normal operation by reformatting it.
4. We recommend that you format a memory card before using it for
the rst time after purchasing it, or whenever the card you are using
seems to be the cause of abnormal pictures. Remember to format a
memory card if it was used in another media player or other devices.
Refer to “Formatting the Internal Memory or a Memroy Card” on
page13 for details.
Page 54

54
Polaroid izonePHOTO™ Portable Digital Picture Viewer User Guide
www.polaroid-digital.com
55
Polaroid izonePHOTO™ Portable Digital Picture Viewer User Guide
www.polaroid-digital.com
IMPORTANT!
• Make sure you turn off the picture viewer before inserting or removing a
memory card.
• Be sure to orient the card correctly when inserting it. Never try to force a
memory card into the slot when you feel resistance.
• SD memory cards have a write protection switch that you can use to
protect les from accidental deletion. However, you must remove the write
protection whenever you want to store new les, format it, or delete its
les.
• Files contained in the SD card recorded by other picture viewers may
conict with the izonePHOTO™ picture viewer, and valuable data in your
existing SD card may be distorted or lost when the card is inserted in the
izonePHOTO™ picture viewer. We strongly recommend the user to use
a NEW or formatted SD card for the izonePHOTO™ picture viewer. The
manufacturer is not liable for losing or corrupting any valuable data or les in
your SD card due to your improper operation.
• As tests prove, the izonePHOTO™ works best with popular brands of
memory cards such as SanDisk, Panasonic, Lexar and TOSHIBA. Consider
using these cards for best performance.
Inserting the SD Card
Turn off the picture viewer. Insert the
SD card and ensure the card is inserted
correctly as illustrated.
Removing the SD Card
To remove the SD card, turn off your
picture viewer and gently push the SD
card inwards. And then release it for the
SD card to eject from the SD card slot.
Page 55

55
Polaroid izonePHOTO™ Portable Digital Picture Viewer User Guide
www.polaroid-digital.com
IMPORTANT!
• Never insert any other object into the picture viewer’s SD card slot. Doing
so creates the risk of damage to the picture viewer and card.
• Should water or any foreign objects ever get into the card slot,
immediately turn off the picture viewer, remove the batteries and contact
your dealer or nearest service provider.
• Never remove a card from the picture viewer while the picture viewer is
powered on. Doing so can cause the recording operation to fail, and even
damage the memory card.
Page 56

56
Polaroid izonePHOTO™ Portable Digital Picture Viewer User Guide
www.polaroid-digital.com
57
Polaroid izonePHOTO™ Portable Digital Picture Viewer User Guide
www.polaroid-digital.com
8 Installing the Software onto a Computer
• Installing the Software
For Windows® Users:
PC
IMPORTANT!
• Please backup all the necessary data before any driver and software installation.
• The CD-ROM is tested and recommended to use under English Windows OS.
• Please restart the computer after installing the software.
IMPORTANT! (For Windows® 98SE)
Windows® 98SE needs to install the izonePHOTO™ driver for Mass Storage
function. After the installation, please restart the Windows before connecting
the picture viewer to the PC.
IMPORTANT! (For Windows® Me, 2000, XP)
Directly plug-in the picture viewer to transfer and view the pictures. No need
to install the driver.
IMPORTANT!
To view pictures and video clips on the picture viewer, it is necessary to
install ArcSoft MediaConverter from the CD supplied. You can use the
ArcSoft® MediaConverter™ or a third-party software to convert the video
clips to asf format.
Page 57

57
Polaroid izonePHOTO™ Portable Digital Picture Viewer User Guide
www.polaroid-digital.com
1. Before you begin, close all other software
applications opened on your computer.
2. Insert the CD supplied into the computer
CD-ROM Drive.
3. The CD User Interface Screen will
automatically launch.
4. With the mouse, click on each software
interface button in turn and follow the
on-screen instructions.
Open & Close
NOTE:
If the setup screen does not appear after loading
the CD, then you can manually start it by double
clicking the “My Computer” icon on your desktop,
then double clicking the icon for the CD-ROM
drive. When the CD-ROM window opens, double
click the “INSTALL-E.EXE” icon.
For Macintosh Users:
Mac
1. Before you begin, close all other software applications opened on
your computer.
2. Insert the CD supplied into the computer CD-ROM Drive.
3. Double click the CD-ROM icon “Polaroid”.
4. Install the software included.
Page 58

58
Polaroid izonePHOTO™ Portable Digital Picture Viewer User Guide
www.polaroid-digital.com
59
Polaroid izonePHOTO™ Portable Digital Picture Viewer User Guide
www.polaroid-digital.com
• Software Included with Your Picture Viewer
izonePHOTO™ Driver Plug & Play removable disk
Easy to use, just plug the picture viewer to a computer and use it as a
removable disk. Use the izone PhotoBase to edit and print the Pictures.
izone PhotoBase software - the intelligent software that makes nding
your pictures easy!
izone PhotoBase helps you to organize and present multimedia les.
You can quickly and easily create Slide Shows, Web Albums and Video
Postcards. Meanwhile, you can effectively print contact sheets for
quick image referencing. The unique “album” structure of the program
makes le access convenient. On top of that, you can acquire les from
various sources, including digital cameras, scanners, video devices, and
removable media.
After you plug-in the picture viewer, the izone PhotoBase software
automatically checks to see if you have taken new photos that need to
be transferred to your computer. If there are new images, you will be
prompted if you want izone PhotoBase to download all the images in the
picture viewer to your computer automatically.
With the izone PhotoBase software, you can quickly sort all the photos
on your computer either by the date or by image/folder name. Once
you have located your images, you can make your simple edits, print or
share in no time at all!
Page 59

59
Polaroid izonePHOTO™ Portable Digital Picture Viewer User Guide
www.polaroid-digital.com
ArcSoft PhotoPrinter Picture Editing Software
A quick, easy way to get great-looking photo prints at home. In just
a couple of clicks you can turn your favorite digital snapshots into
gorgeous color photos ready for framing, scrapbooking, or sending to
family and friends.
ArcSoft MediaConverter File Conversion Application
A powerful all-in-one multimedia le application which transcodes and
optimizes les on a PC for transfer and playback on portable media
players. It quickly and effortlessly allows users to take their favorite
videos, photos, and audio tracks with them wherever they go after
converting them into other preferred le formats
Adobe® Acrobat® Reader .PDF File Reading Software
Adobe® Acrobat® Reader lets you view and print Adobe Portable
Document format (PDF) les on all major computer platforms, as well
as ll in and submit Adobe PDF forms online.
Page 60

60
Polaroid izonePHOTO™ Portable Digital Picture Viewer User Guide
www.polaroid-digital.com
61
Polaroid izonePHOTO™ Portable Digital Picture Viewer User Guide
www.polaroid-digital.com
• Computer System Requirements
For acceptable picture transferring and editing performance, we
recommend the following minimum requirements;
For Windows® Users
PC
• Compatible with Microsoft® Windows® 98SE, Me, 2000 or XP
• Pentium® III 450MHz or equivalent processor
• 128MB RAM (512MB recommended)
• USB Port
• DirectX 9.0 or higher
• 500MB free disk space
• Color monitor with high color (16-bit) graphic capability or higher
• CD-ROM drive
• Standard mouse and keyboard
• Stereo speakers
For Macintosh Users
Mac
• PowerPC® Processor
• Mac™ OS Version 9.2~X
• USB Port
• 96MB RAM (128MB recommended)
• 400MB Free disk space
• Color monitor with high color (16-bit) graphic capability or higher
• CD-ROM drive
• Standard mouse and keyboard
• Stereo speakers
Page 61

61
Polaroid izonePHOTO™ Portable Digital Picture Viewer User Guide
www.polaroid-digital.com
9 Troubleshooting Problems
The troubleshooting guide is designed to help you. If problems
continue, please contact customer support. Details are provided under
“Getting Help”.
Symptom Problem Solution
I receive an error
message when I am
installing the Polaroid
izonePHOTO™ driver.
Polaroid izonePHOTO™
driver” does not load.
Shut down all other applications
and attempt to reinstall the driver.
Check to see if the USB controller in
your BIOS is activated. Please refer
to the Polaroid website on how to
activate the USB controller in your
computer’s BIOS.
I cannot transfer imags
to my picture viewer
Connection failure Check all cable connection are secured.
I cannot run
the Polaroid
izonePHOTO™ driver”.
Conict with another
driver or capture device.
If you have another picture viewer
driver installed on your computer,
remove it and it’s driver completely
from your system to avoid
conicting with your izonePHOTO™.
My CD Installation
wizard does not work.
The auto installation
le is switched off
or the CD-ROM is
disconnected.
Go to the computer desktop.
Right click on “My Computer”.
Click “Properties”. Select “Device
Manager”. Double click on “CDROM”, double click on “CD-R
(normally the manufacturer’s name.
Click on “Settings”. Ensure both
“Auto insert notication” and the
“disconnect” are ticked. If you
change the settings the computer
will ask you to restart your PC.
Click “Yes”.
Page 62

62
Polaroid izonePHOTO™ Portable Digital Picture Viewer User Guide
www.polaroid-digital.com
63
Polaroid izonePHOTO™ Portable Digital Picture Viewer User Guide
www.polaroid-digital.com
Symptom Problem Solution
My izonePHOTO™
picture viewer hanged
and all buttons do not
work.
Your picture viewer
may be affected by the
electrostatic discharge.
Remove and re-install the batteries.
Turn on the picture viewer again.
I cannot activate my
picture viewer by
pressing the Power
button.
Batteries are exhausted. Replace with new batteries.
The picture viewer
suddenly powers off.
Auto power off function
is activated.
Or
Batteries are exhausted.
Turn on the picture viewer.
Or
Replace with new batteries.
My memory card is
not recognized by the
picture viewer when
it is inserted into the
card slot.
Some brands of
memory cards may
not have their physical
dimensions meeting the
international standard.
As a consequence,
these cards will not
be recognized by your
picture viewer.
Try another brand of memory card
with your picture viewer. If problem
still exist, please visit
http://www.polaroid-digital.com for
customer service.
I cannot erase
pictures or video
clips.
All the pictures and
video clips are under
protection.
Remove protection from the
pictures and video clips.
Page 63

63
Polaroid izonePHOTO™ Portable Digital Picture Viewer User Guide
www.polaroid-digital.com
Symptom Problem Solution
The picture viewer
is detected by the
Windows and works
properly. But a
drive letter of the
Removable disk is
not created.
The removable disk
crashes with the
network drives.
Disconnect the crashed network
drive and reserve this drive letter
for the picture viewer.
There is no
response from
the picture viewer
while pressing any
buttons.
The LCD screen is
frozen or the picture
viewer is hanged.
Remove and re-install the batteries.
Turn on the picture viewer.
An error message
appears on the LCD
screen before or
during printing.
Printer may not support
some advanced print
features.
Or
Some fault occurs with
the printer.
Or
Print settings can be
congured for images
only.
Select “DEFAULT” for a particular
print setting or visit
http://www.polaroid-digital.com for
the solutions.
Or
Please refer to the printer’s user
guide for the solutions.
Or
Make it sure that there is no video
clips or other le format in the
current memory before printing.
Page 64

64
Polaroid izonePHOTO™ Portable Digital Picture Viewer User Guide
www.polaroid-digital.com
65
Polaroid izonePHOTO™ Portable Digital Picture Viewer User Guide
www.polaroid-digital.com
Symptom Problem Solution
izonePHOTO™
cannot play images
or video clips.
The image or video
format is not supported
by the izonePHOTO™.
or
The image or video le
is corrupted.
Use ArcSoft® MediaConverter™ or
a third-party software to convert
the image to JPEG format or the
video clip to asf format.
or
Copy the image or video clip to the
izonePHOTO™ again.
Please also refer to the help les & User Guides that accompany the
enclosed applications. For further information and support, please visit
our website: http://www.polaroid-digital.com
Page 65

65
Polaroid izonePHOTO™ Portable Digital Picture Viewer User Guide
www.polaroid-digital.com
10 Getting Help
• Polaroid-digital Online Services
Website: http://www.polaroid-digital.com
• Customer Support
Questions? Need Help? Call us at 1-877-388-3779 (USA),
001-866-722-0866 (Mexico), 1-888-235-0808 (Canada).
Monday thru Friday, 10 am-7 pm EST and Sat 10 am-4 pm
EST Or visit us at http://www.polaroid-digital.com
• ArcSoft Software Help
For United States For Latin America
ArcSoft HQ Support Center E-mail:latinsupport@arcsoftsupport.com
(Fremont, CA 94538)
Tel.: 1-510-979-5599
Fax: 1-510-440 -7978
E-mail: support@arcsoftsupport.com
Web: http://www.arcsoft.com/en/support/
For Europe For China
ArcSoft Europe Support Center ArcSoft China Support Center
(Ireland) (Hangzhou)
Tel.: +353-(0) 61-702087 Tel.: +86-571-88210575
Fax: +353-(0) 61-702001 E-mail: support@arcsoft.com.cn
E-mail: eurosupport@arcsoft.com Web: http://www.arcsoft.com.cn/new/support
For Japan For Taiwan
ArcSoft Japan Support Center (Tokyo) ArcSoft Taiwan Support Center (Taiwan)
Tel.: +81-3-5795-1392 Tel.: +886-(0) 2-2506-9355
Fax: +81-3-5795-1397 Fax: +886-(0) 2-2506-8922
E-mail: support@arcsoft.jp E-mail: support@arcsoft.com.tw
Web: http://www.arcsoft.jp Web: www.arcsoft.com.tw
Visit http://www.arcsoft.com for technical support and frequently
asked questions (FAQ’s).
“Polaroid” and “Polaroid and Pixel” are trademarks of Polaroid Corporation, Waltham, MA, USA.
Page 66

66
Polaroid izonePHOTO™ Portable Digital Picture Viewer User Guide
www.polaroid-digital.com
67
Polaroid izonePHOTO™ Portable Digital Picture Viewer User Guide
www.polaroid-digital.com
11 Appendix
• Technical Specications
LCD Screen • Size: 2.4” TFT color panel
• Resolution: 480 x 240 pixels
Viewing Time • Picture Only: 1 hr
• Video Clip Only: 1 hr
Storage • Internal Memory: 32MB Nand Flash (27MB for
data storage)
• External Memory
- supports SD card up to 1GB (not included)
File Format
Support
• Picture: JPEG
• Video Clip: AVI & ASF
Power Supply 3 x AAA batteries (included)
Connectivity • With computer via USB cable (included)
• With TV via AV cable (included)
Dimension • Size: (W) 90 mm x (D) 16 mm x (H) 58 mm
• Weight: Approximately 68g (excluding the
batteries and memory card)
Operating
System
• For Windows® Users: Microsoft® Windows®
98SE, Me, 2000 or XP
• For Macintosh Users: Mac OS 9.2~X
Page 67

67
Polaroid izonePHOTO™ Portable Digital Picture Viewer User Guide
www.polaroid-digital.com
• Uninstalling the izonePHOTO™ Driver (For PC users only)
1. Unplug the izonePHOTO™ from the PC.
2. Go to Start -> Setting -> Control Panel.
3. Double click Add or Remove Programs.
4. In Add or Remove Programs, select “Polaroid izonePHOTO” and click
the Change/Remove button.
5. Restart the computer after uninstall.
• Using Your Batteries
IMPORTANT NOTE:
For best performance and prolonged battery life, we recommend the use of
AAA lithium or rechargeable NiMH.
WARNING!
• Batteries should be replaced by an adult.
• Do not mix different types of batteries (or new and used batteries).
• Use recommended or equivalent type of batteries only.
• Insert the batteries in the correct polarity.
• Remove exhausted batteries from the picture viewer immediately.
• Do not short the supply terminals.
• Do not dispose the batteries in re.
• Remove batteries from the picture viewer when not in use.
These instructions should be retained for future reference.
Page 68

68
Polaroid izonePHOTO™ Portable Digital Picture Viewer User Guide
www.polaroid-digital.com
69
Polaroid izonePHOTO™ Portable Digital Picture Viewer User Guide
www.polaroid-digital.com
• Tips, Your Safety & Maintenance
Your picture viewer should only be operated within the following
environmental conditions;
• 32 - 104º Fahrenheit; 0 - 40º Celsius
• 20% - 85% relative humidity, non condensing
Battery life or image quality may be affected outside these conditions.
Picture Viewer Cautions
• NEVER immerse any part of the picture viewer or its accessories into
any uid or liquid.
• ALWAYS disconnect the picture viewer from your PC or TV before
cleaning it.
• ALWAYS remove dust or stains with a soft cloth dampened with
water or neutral detergent.
• NEVER place hot items on the surface of the picture viewer.
• NEVER attempt to open or disassemble picture viewer as this will
affect any warranty claim.
• Regulatory Information
FCC Notice
This device complies with Part 15 of FCC Rules. Operation is subject
to the following two conditions: (1) This device may not cause harmful
interference, and (2) This device must accept any interference received,
including interference that may cause undesired operation.
Warning: Changes or modications to this unit not expressly approved
by the party responsible for compliance could void the user’s authority
to operate the equipment.
Page 69

69
Polaroid izonePHOTO™ Portable Digital Picture Viewer User Guide
www.polaroid-digital.com
NOTE: This equipment has been tested and found to comply with the
limits for Class B digital device, pursuant to Part 15 of the FCC Rules.
These limits are designed to provide reasonable protection against
harmful interference in a residential installation. This equipment
generates, uses and can radiate radio frequency energy and, if not
installed and used in accordance with the instructions, may cause
harmful interference to radio communications.
However, there is no guarantee that interference will not occur in a
particular installation. If this equipment does cause harmful interference
to radio or television reception, which can be determined by turning
the equipment off and on, the user is encouraged to try to correct the
interference by one or more of the following measures:
• Reorient or relocate the receiving antenna.
• Increase the separation between the equipment and receiver.
• Connect the equipment into an outlet on a circuit different from that
to which the receiver is needed.
• Consult the dealer or an experienced radio/TV technician for help.
Shielded cable must be used with this unit to ensure compliance with
the Class B FCC limits.
Under the environment with electrostatic discharge, the product may
malfunction and require user to reset the product.
Page 70

US 1105
Part No.: OM3377US003
 Loading...