

Page 1

Contents
Polaroid. Add a little color to your life.
Since 1937, America has turned to Polaroid for their photography needs. Today , families look to Polaroid
for consumer electronics that define the digital age: plasma and LCD TVs, portable and standard DVD
players, digital cameras. And while our selection has changed, you’ll still receive the same friendly , helpful
service that made Polaroid an American icon.
Congratulations on your new Polaroid TV purchase. To ensure your new TV provides you with years of
enjoyment, please read this guide carefully .
Safety 2
Overview 4
Using the Remote control 5
Basic operation 6
External connection 7
General Description 8
Menu operation instruction 8
Menu Basic operation 8
Using the PICTURE menu 8
Using the SOUND menu 8
Using the TIMER menu 9
Using the FUNCTION menu 9
Using the TUNING menu 9
Using the P ARENTAL CONTROL 10
Troubleshooting (VHF / UHF reception) 14
Troubleshooting 15
Specifications & Accessories 13
1
Page 2
Safety
CACA
UTIONUTION
CA
UTION
CACA
UTIONUTION
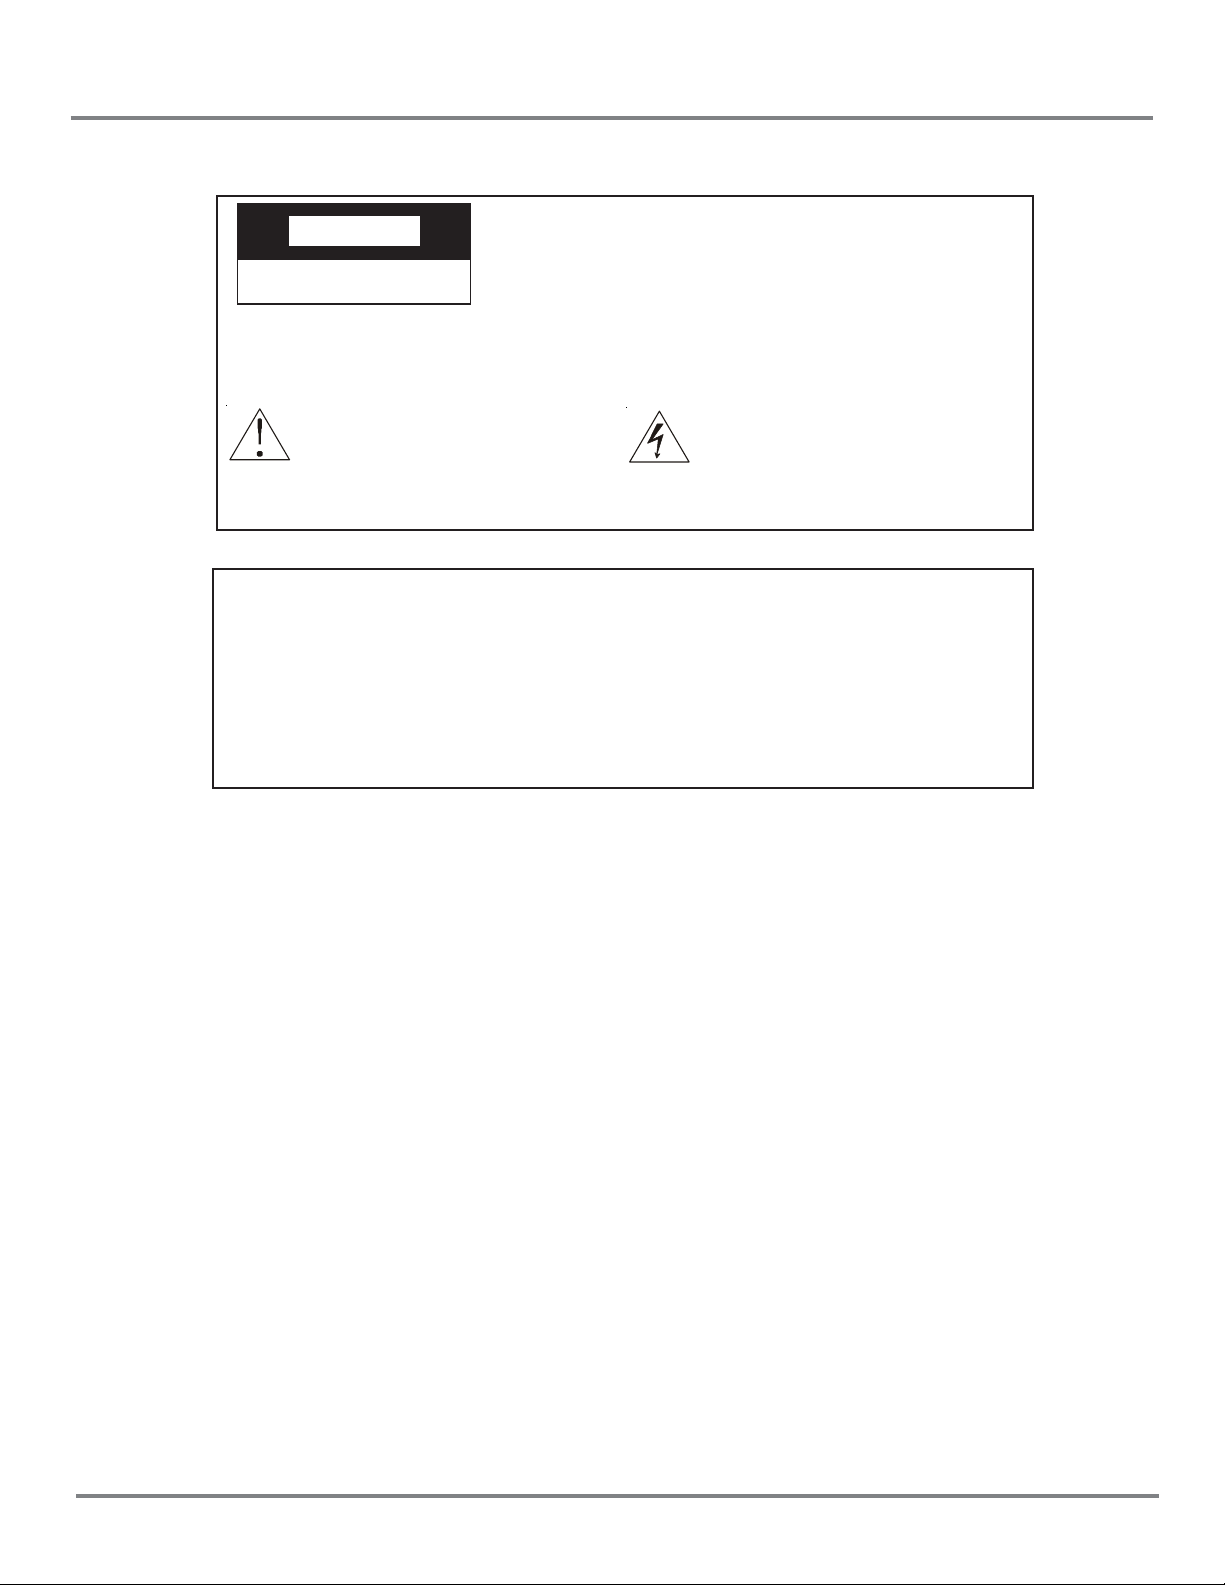
RISK OF ELECTRIC SHOCK
DO NOT OPEN
This symbol indicates that this product incorporates double insulation between hazardous AC
voltage and user accessible parts. When servicing use only identical replacement parts.
Caution: T o reduce the risk of electric shock, do not remove cover (or back). No
user serviceable parts inside. Refer servicing to qualified service personnel.
This symbol indicates important
instructions accompanying the
product.
This symbol indicates “dangerous voltage” inside the product
that presents a risk of electric
shock or personal injury .
WARNING
T o reduce the risk of fire or electric shock, do not expose this product to rain or
moisture.
The apparatus must not be exposed to dripping or splashing. Objects filled
with liquids, such vases or drinking glasses, must never be placed on the apparatus.
IMPORT ANT SAFETY INSTRUCTIONS
1. Read all the safety and operating instructions before the apparatus is operated.
2. Retain the safety and operating instructions for future reference.
3. Adhere to all warnings on the television and in the operating instructions.
4. Follow all operating and use instructions.
5. Do not use this apparatus near water .
6. Clean only with dry cloth.
7. Do not block any ventilation openings. Install in accordance with the manufacturer’s instructions.
8. Do not install near any heat sources such as radiators, heat registers, stoves, or other apparatus (including amplifiers) that produce heat.
9. Do not defeat the safety purpose of the polarized or grounding-type plug. A polarized plug has two
blades with one wider than the other. A grounding type plug has two blades and a third grounding prong.
The wide blade or the third prong is provided for your safety . If the provided plug does not fit into your
outlet, consult an electrician for replacement of the obsolete outlet.
10.Protect the power cord from being walked on or pinched particularly at plugs, convenience receptacles,
and the point where they exit from the apparatus.
1 1.Only use attachments/accessories specified by the manufacturer .
2
Page 3
Safety
12.Use only with the cart, stand, tripod, bracket, or table specified by the manufacturer, or sold with the app aratus. When a cart is used, use caution when moving the
cart/apparatus combination to avoid injury from tip-over .
13.Unplug this apparatus during lightning storms or when unused for long periods of
time.
14.Refer all servicing to qualified service personnel.
Servicing is required when the apparatus has been damaged in any way , such as power-supply cord or
plug is damaged, liquid has been spilled or objects have fallen into the apparatus, the apparatus has
been exposed to rain or moisture, does not operate normally , or has been dropped.
15.If an outside antenna or cable system is connected to the product, be sure the antenna or cable system
is grounded so as to provide some protection against voltage surges and built-up static charges. Section 810 of the National Electrical Code, ANSI/NFPA No. 70-1984 (Section 54 of Canadian Electrical
Code, Part 1) provides information with respect to proper grounding of the mast and supporting structure, grounding of the lead-in wire to an antenna-discharge unit, size of grounding conductors, location of
antenna-discharge unit, connection to grounding electrode. See following example.
ANTEN NA
LEAD IN
WIRE
ELECTRIC
SERVICE
EQUIPMENT
NEC-NA T IO NAL ELECTRICALCODE
ANTENNA
DISCHARG E UNINT
(NEC S E CTION 810-21)
GROUNDING COND UCTORS
(NEC S E CT ION 810-21)
GROUND CLAMPS
POWER SERVICE GROUNDING
ELECTRO DE SYSTEM
(NEC ART 250 PART H)
3
Page 4

Page 5
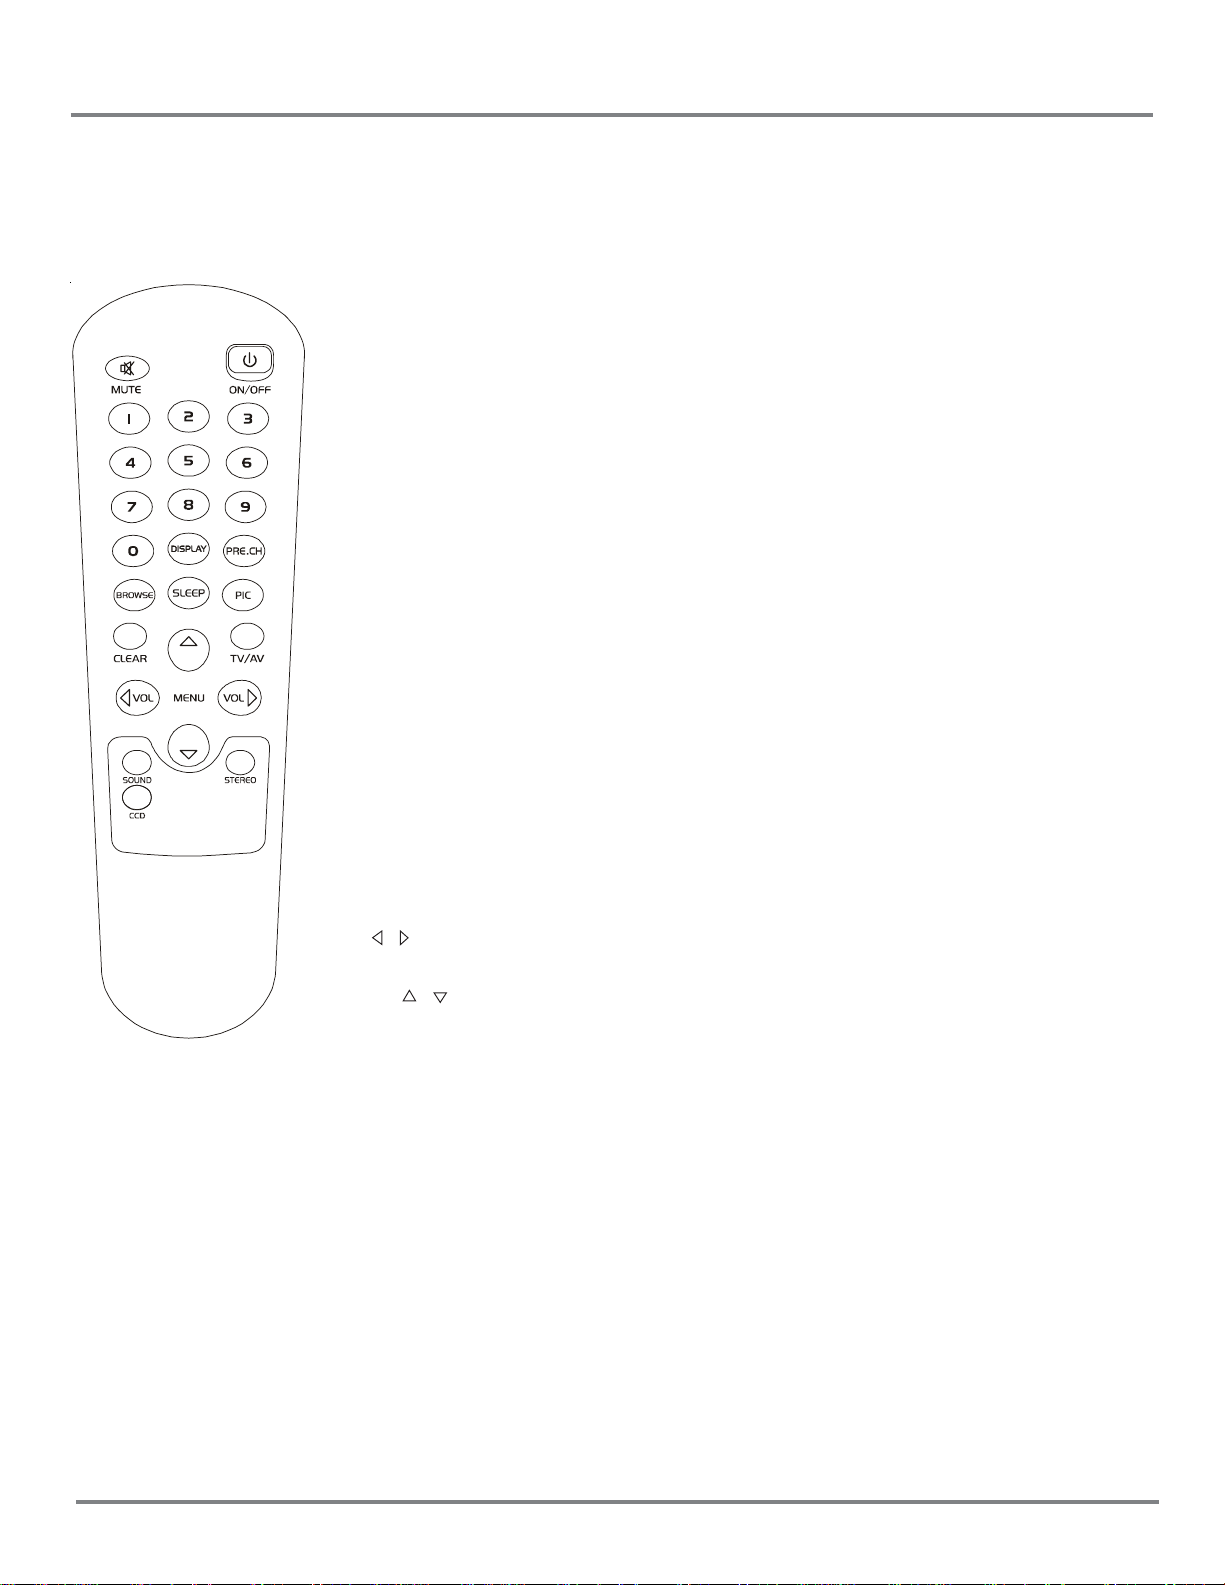
Using the Remote Control
CHAN
CHAN
The Buttons On the Remote control
Mute button Lowers the volume to its minimum level. Press again to
restore volume.
ON/OFF Turns the television on and off.
0-9 (Digit buttons) Enter channel numbers and time settings directly through
KK-Y261N
DISPLAY Displays channel information.
PRE.CH Returns you to the previous channel. If you are in the menu
BROWSE Uses the browse feature. Press the button twice to begin
SLEEP Sets the sleep timer .
PIC Step s through picture presets USER, SOFT , NORMAL, and
CLEAR Removes any menu or display from the screen and returns
TV/AV T oggles the television between available A V inputs and RF
MENU Displays the television’s Main menu.
VOL(
/ )buttons Decreases or increases the television's volume or moves
CHAN ( / ) buttonsScans up or down through the current channel list. Press
SOUND Selects from four present audio settings (USER, SPEECH,
STEREO No function on this model.
CCD Turns on or turns off the closed caption.
Loading batteries: Remove the lid of the battery compartment,insert 2 size AAA batteries with the
polarities as indicated inside the compartment, then replace the lid.
Note:
1. New batteries will last about 1 year under normal use.
2. If you do not intend to use the remote control for a long period of time, remove the batteries to avoid
damage due to leakage.
the remote control.
T o enter a two-digit channel, press the two digits. T o enter a
three-digit channel, press and hold the first digit for two seconds until two dashes appear to the right of the number , then
add the second two. Example: to tune a channel 123, press
and hold 1 for two seconds, press 2, then press 3.
system, this button takes you to the previous menu screen.
scanning channels. Press the button again to stop scanning
at the current channel.
BRIGHT.
you to television viewing. If you are using a menu with num-
ber inputs, press CLEAR to erase the last number entered.
input.
through the on-screen menu system.
once to change the channel up or down; press and hold to
continue changing channels, or move through the on-screen
menu system.
THEA TER, and MUSIC)
5
Page 6

Basic Operation
Connecting the television to power
Insert the power plug into a 120V AC electrical outlet. Unplug the power cord when the television will not be
used for a long period of time.
T urning the television on and off
Turn on the power by using the POWER button on the television or on the remote control.
Using standby mode
If the television is in a non-signal state (is not receiving a television signal) for 15 minutes, the television will
enter standby mode. To turn the television back on, press the POWER button on the television or remote
control.
Changing channels
Change channels by using the CHAN / button on the television or on the remote control. When ANTENNA is set to AIR, access the channel by pressing two digits on the remote control. When ANTENNA is
set as CABLE, use three digits on the remote control to select the channel. To select channels above 100,
press and hold the “1” number for two seconds. The OSD shows 1--, then input the other two digits.
Turning the volume up or down
Adjust the sound by using the VOL / button on the television or on the remote control.
6
Page 7

External connection
This unit can be simultaneously connected to a VCR, DVD player, video camera and other audio-video
equipment .
For monophonic audio devices, connect the audio using the AUDIO L jack.
1. Under A V1, A V2 mode, connect the external equipment to the back panel of this television as shown in
the following figure:
YELLOW(VIDEO)
WHITE(AUDIO)
RED(AUDIO)
2. Under AV3 mode, connect the external equipment to the side panel of this unit as the following figure
shows:
Video input
Audio input (L MONO)
Audio input (R)
7
Page 8

General description
CHAN
CHAN
Menu operation instruction
Menu basic operation
1. T o enter a menu, press the menu button on the television or on the remote control,
then use the VOL
control) to select the icon.
2. Press CHAN / button on the television or on the remote control to select the mode
you want to change.
3. Use the VOL / button on the television or on the remote control to change the
setting.
4. Press the MENU button on the television or on the remote control to return the previous menu. Y ou can press the CLEAR button on the remote control to exit the menu
operaton directly .
Using the PICTURE menu
The PICTURE menu allows you to make an adjustment to your picture settings. It also
allows you to customize the picture mode based on the type of program you are viewing.
/ button on front of the television (or the / button on the remote
KK-Y261N
CONTRAST Adjust the difference between the light and dark areas of the picture.
BRIGHTNESS Adjust left or right to darken or brighten the picture.
COLOR Adjust left or right to decrease or increase color intensity or saturation.
SHARPNESS Adjust left or right to soften or sharpen the picture detail.
TINT Adjust the balance between the red and green levels.
COLOR TEMP Provide three automatic color adjustments: Cold for a more blue palette of picture
color; Normal; Warm for a more red palette of picture color .
Using the SOUND menu
The SOUND menu allows you to make adjustments to your sound settings.
SOUND
BASS 50
TREBLE 50
BALANCE 0
SURROUND OFF
BASS Adjust left or right to decrease or increase low pitched sound.
TREBLE Adjust left or right to decrease or increase high pitched sound.
BALANCE Adjust left or right to emphasize left or right speaker balances.
SURROUND Turn on or off the surround sound ef fect.
8
Page 9

Using the TIMER menu
The TIMER menu allows you to set the sleep timer .
General description
TIMER
SLEEP TIMER 0
SLEEP TIMER: Lets you set the time you want the television to turn itself off after a given time, press the
VOL / button to setup the timer.
Using the FUNCTION menu
The FUNCTION menu provides several options for setting up your television.
FUNCTION
LANGUAGE
BACKGROU N D
BLACK STRETCH
NOISE REDUCE
CLOSE CAPTION
LANGUAGE Select from the available languages to display the menus. (Y ou can select from En-
glish, French, or Sp anish.)
BACKGROUND Turn on or of f the background function when no signal is received.
Note: The BACKGROUND function isn’t available in RF input.
BLACK STRETCH Turn on or of f black stretch function.
NOISE REDUCE T urn on or off the noise reduce function.
CLOSE CAPTION Select from eight closed captioned modes, including four text modes.
ENGLISH
ON
ON
OFF
CC1
Using the TUNING menu
The T uning menu offers operations for tuning and channel edit.
TUNING
SOURCE
CHANNEL
CHANNEL NAME
DELETE CH
FINE TUNE
AUTO SEARCH
SOURCE Select from AIR or CABLE. Select AIR to use an outdoor antenna or rabbit ears. Select
CABLE to receive your broadcast from a cable television provider.
CHANNEL Use the VOL / button on the television or on the remote control to scroll up and down
through the channels available using your outdoor antenna or rabbit ears. Y ou can also
enter the channel number directly using the number buttons.
AIR
8
< >
YES
9
Page 10

General description
CHANNEL NAME Allows you to name a channel. The channels you can name are only from 2 to 1 1 in AIR.
Y ou can use the VOL
character label for each channel.
DELETE CH Select YES to skip the selected channel when pressing the CH up and down buttons.
Select NO to include the selected channel when pressing the CH up and down buttons.
FINE TUNE Allows you to fine tune a channel that is not appearing on your screen correctly.
AUTO SEARCH Select it to start channel search and store automatically .
Using the PARENTAL CONTROL menu
The P ARENT AL CONTROL menu allows you to program your television so that children cannot see certain
programs, channels, or use the front panel control.
/ button on the television or on the remote control to enter a five-
PASSWORD
PASSWORD
PASSWORD Use the password to enter the P ARENT AL CONTROL menu. The initial password is “1234”.
when you use this menu the first time, you should change the password to keep children
from using this menu. If you forget the password, input the default password 5898 to enter
this submenu and reset the password.
How to use the PARENTAL CONTROL menu
When you enter the password, the P ARENT AL GUIDE menu displays on the screen asshown in the figure
below:
PARENTAL GUIDE
PARENTAL GUIDE
CHILD LOCK
CHANGE PASSWORD
P ARENT AL GUIDE Select “OFF” to ignore the Parental Guide. Select “ON” to activate it as shown in the
figure below:
PA RE NTAL GUIDE
PA RE NTAL GUIDE
TV RATING
MPAA RATING
CHILD LOCK
CHANGE PASSWORD
OFF
OFF
ON
OFF
10
Page 11

TV RATING Displays the TV Rating submenu(see the figure below).
General description
TV RATING
RATING
TV-Y
TV-Y7
TV-G
TV-PG
TV-14
TV-MA
FV D L S V
>U
UU
U
UUUUU
UUUUU
UUUU
Tip: Unblock (U), block(B),”>”(selection indicator)
The TV ratings and content themes you can block are listed in the following two tables:
T able 1 T able 2
Content Themes
Sexually explicit dialogue
Adult language
Sexual situations
Violence
Fantasy Violence
All Children
TV-Y
TV-Y7
TV-G
TV-PG
TV-14
TV-MA
Hierarchy of Age-Based Ratings
All Children
Directed to Children 7 years and older
Genera l Audi enc e
Parental Guidance Sugges ted
Parents Strongly Cautioned
Mature Audience Only
D
L
S
V
FV
TV-Y
Blocking(or unblocking)TV Ratings
Y ou can automatically block(or unblock) all program ratings above(or below) to a specified TV rating level.
T o block(or unblock) programs with higher(or lower) ratings:
1. Press the CHAN / button on the television or on the remote control to highlight the lowest(or highest)
level rating that you want to block(or unblock).
2. Press the VOL / button on the television or on the remote control to toggle between U and B. The level
rating and all higher (or lower) ratings automatically change to B(or U).
3. Press the MENU button on the television or on the remote control to return to the previous menu.
Blocking(or Unblocking) Specific Content Themes
You can block(or unblock) programs based on their content(see table 2). When you block(or unblock) a
content theme for a particular rating, you automatically block(or unblock)that content themes for higher(or
lower)rated programs as well.
1.Press the CHAN / button on the television or on the remote control until the lowest(or highest) level of
content you want to block(or unblock) is highlighted. Then the prompt “>” will move there.
2.Press the VOL / button on the television or on the remote control to change content status to B(or U).
All higher(or lower) ratings’ content theme will automatically change to B(or U).
3.Press the MENU button on the television or on the remote control to return to the previous menu.
11
Page 12

General description
M PA A RATING Displays the Movie Ratings submenu(as the figure below shown).
MPAA RATING
G B
PG
PG-13
R
NC-17
X
The movie ratings you can block are listed in the following table:
Hierarchy of MPA A RATINGS
G
PG
PG-13
All Children
Directed to old Children
General Audience
B
B
B
B
B
R
NC-17
X
Parental Guidance Suggested
No one under17 admitted
No one under 17 admitted
Blocking(or Unblocking) MPAA RATING
When you block(or unblock) a movie rating, the system automatically blocks(or unblocks) all other movies
with higher(or lower) ratings.
1. Press the CHAN / button on the television or on the remote control to highlight the lowest(or highest)
rating that you want to block(or unblock).
2. Press the VOL / button on the television or on the remote control to change it to B(or U). All higher(or
lower) ratings will automatically change to B(or U).
3. Press MENU button on the television or on the remote control to return to the previous menu.
NOTE: The screen displays a background and the sound is muted if the television show you are trying to
watch is over the preset limit. T o watch these programs, reset the rating level.
CHILD LOCK Selecting “ON” lets you block the television’s front panel and all programs. In addi-
tion, the sound is muted. The CHILD LOCK will take effect when the television
turns on next time.
CHANGE PASSWORD Allows you to change the password of the PARENTAL CONTROL menu. When
you select it, the following figure displays on the screen:
12
Page 13

General description
NEW PASSWORD Enter a new password. Y ou can use number buttons to input a new password.
CONFIRM Enter the same number to confirm the new password.
CHANGE PASSWORD
NEW PASSWORD ---CONFIR M ----
13
Page 14

Troubleshooting (VHF / UHF reception)
The most common types of television interference are as follows:
SNOWY PICTURE
Snowy picture is usually due to weak signal. Adjust antenna or inst all an antenna amplifier.
DOUBLE IMAGE OR GHOSTS
Double images are usually caused by reflections from tall buildings. Adjust the direction of the antenna or
raise it.
RADIO WAVE INTERFERENCE
Wavy patterns are moving on the screen, which are usually caused by nearby radio transmitters or shortwave receiving equipment.
HIGH TEMPERATURE ELECTROTHERMAL INTERFERENCE
Diagonal or herringbone patterns appear on the screen or part of picture is missing. This is probably caused
by high temperature electrothermal equipment in a nearby hospital.
NOTE:If one of these symptoms appears on the screen when the cable from a cable provider is connected,
this may be due to the local cable company broadcast.
14
Page 15

Troubleshooting
Most problems you encounter with your television can be corrected by consulting the Troubleshooting list
that follows.
If the trouble still persists, contact the service center .
Troubleshooting
Problems Check
No picture or sound. Check if the power supply is plugged in.
Check if the power button is in the "on” position.
Picture is OK, no sound. Check if the volume control is set t o the minimum or mute position.
Check if the power button is in the "on" position.
Check if the batteri es are exhausted or not connected well.
Remote control doesn't work
No television signal.
No external vid eo si gnal.
Picture lacks color or picture
too dark.
All channels lose col or
intermittently.
Make sure that there is no strong light striking the sensor wi ndow of the
remotecontrol unit.
Check there are no obstacles before the sensor window of remote
control unit.
Check if the TV/AV button is set to TV.
Check if the anten na is connected correctly.
Check if the TV/AV button is set to AV.
Check if the color, bright, and con trast controls are correctly adj usted.
Check if the antenna is broken.
Check if the antenna is di sconnected.
Check if the antenna is dam aged.
Poor reception, loss of color
with certain channels.
Diagonal stri pes appear on
picture.
Picture has "snow" .
Ghost images appear.
Check if the channe l s are c orrectly tuned (see "Fine tuning" ) .
The receiver may be affected by interference fr om a nearby radio
broadcasting tr ansmitter or by another televis i on receiver.
Check if the antenna is broken.
Check if the antenna is di sconnected.
Check if the antenna is dam aged.
Check if the anten na di rection has been changed by a storm or strong wi nd,
Ghost images are caus ed by signals which have been reflected by a hill or
large building. The direction of the antenna should be chosen for minimized
ghost images.
15
Page 16

Specifications
"Polaroid" and “Polaroid and Pixel” are trademarks of Polaroid Corporation, Waltham, MA, USA.
For service, support and warranty information, visit www.polaroid.com or in the US call
1-866-289-5168, in Canada call 1-866-301-7922 and in Mexico call 01-800-400-2443.
TTX-141
65
2 X 1W
Supplied accessories.
1. User’s Manual
2. Remote control
3. 2 AAA size batteries
For service, support and warranty information, visit www.polaroid.com
call 1-866-289-5168 and in Canada call 1-866-301-7922.
27
14.82”(W) X 15.02”(H) X 14.35”(D)
24.2 lbs
“Polaroid” is a registered trademark of Polaroid Corporation of Waltham, MA USA and li-
censed for use on the TDX-141 to Petters Consumer Brands, LLC.
16
Page 17

17
Page 18

Page 19

14” Color Television TTX-141
 Loading...