

Page 1
P-500ir
ImageViewing Software
www.polaroid.com
1 Introduction
2 Things You Should Know
7 Installing the Software
9 Getting and Viewing Images
From the P-500ir printer (p.9)
From the PDA (p.11)
From the EyeModule2 (p.11)
13 Selecting Images
14 Printing Photos
From the P-500ir (p.14)
From the
17 Editing Images
20 Managing Images
Saving P-500ir images to a PDA (p.20)
Saving EyeModule2 images (p.20)
Backing up images (p.21)
Beaming to other handhelds (p.21)
Deleting images (p.22)
Locking and Unlocking images (p.22)
Creating a Slide Show (p.23)
25 Menu Options
27 Display Messages
31 Customer Support
Disclaimer and
Limitation of Liability (p.31)
EyeModule2
(p.16)
Introduction
Back Next
Polaroid’s P-500ir image viewing software is an application you can install on
your infrared-enabled PalmTM OSR handheld personal digital assistant (PDA).
The
Polaroid P-500ir Digital Photo Printer
has an infrared port you can use to
connect with your PDA. The printer and PDA interact to create a fast and
easy way to view, edit, store and print digital photos.
You can download the FREE software from
This guide is a companion to the
Guide
. We
strongly recommend that you read this User’s Guide before using
the application
, and carefully review the
Polaroid P-500ir Digital Photo Printer User’s
http://www.Polaroid.com
Polaroid Disclaimer and Limitation
of Liability.
This guide includes everything you need to know to use the image viewing
software with your PDA starting with
Things You Should Know
and software
installation instructions to get you started. Use the navigation menu to the left to
get to the section you need, or use the
Back
and
Next
buttons to move through
the instructions in sequence. You can also print out all or part of this guide.
1 of 1
page
1
Page 2
P-500ir
ImageViewing Software
www.polaroid.com
1 Introduction
2 Things You Should Know
7 Installing the Software
9 Getting and Viewing Images
From the P-500ir printer (p.9)
From the PDA (p.11)
From the EyeModule2 (p.11)
13 Selecting Images
14 Printing Photos
From the P-500ir (p.14)
From the
17 Editing Images
20 Managing Images
Saving P-500ir images to a PDA (p.20)
Saving EyeModule2 images (p.20)
Backing up images (p.21)
Beaming to other handhelds (p.21)
Deleting images (p.22)
Locking and Unlocking images (p.22)
Creating a Slide Show (p.23)
25 Menu Options
27 Display Messages
31 Customer Support
Disclaimer and
Limitation of Liability (p.31)
EyeModule2
(p.16)
Things You Should Know
•
About the software. Before you install the software, we recommend that
Back Next
you make sure that your handheld device meets the minimum system
requirements necessary for installing it, and that you back up all of your
information prior to installation. You bear the entire risk of use or
performance of the software and documentation.
•
About online Help.
The P-500ir image viewing application provides Tips
and explanatory information whenever you tap the ‘i’ icon at the top of a
dialogue box.
•
About smart card adapters
. Smart card adapters accept memory cards up
to 32MB. We recommend using 2 to 32MB memory cards in your
camera so the P-500ir can successfully send images to your PDA.
•
About PDA-based images. Palm compatible images stored in your PDA
device are intended for viewing only and display in full-screen view.
•
About printer battery power. To conserve power, the printer shuts down
after prolonged inactivity. You may want to manually shut down the
printer to conserve power while editing photos on your PDA, then
reactivate the printer when you are ready to print. When the printer
power level is low the P-500ir may refuse print and connect requests.
1 of 5
page
2
Page 3
P-500ir
P- 5 0 0ir
ImageViewing Software
Image Viewing Software
www.polaroid.com
www.polaroid.com
1 Introduction
2 Things You Should Know
7 Installing the Software
9 Getting and Viewing Images
From the P-500ir printer (p.9)
From the PDA (p.11)
From the EyeModule2 (p.11)
13 Selecting Images
14 Printing Photos
From the P-500ir (p.14)
From the
17 Editing Images
20 Managing Images
Saving P-500ir images to a PDA (p.20)
Saving EyeModule2 images (p.20)
Backing up images (p.21)
Beaming to other handhelds (p.21)
Deleting images (p.22)
Locking and Unlocking images (p.22)
Creating a Slide Show (p.23)
25 Menu Options
27 Display Messages
31 Customer Support
Disclaimer and
Limitation of Liability (p.31)
EyeModule2
(p.16)
Things You Should Know
•
About Zoom. Double-tapping an image when viewing thumbnails will
Back Next
zoom the image to full-screen view. You can save or print images from
Zoom mode. Tapping
•
About eyemodule2.
Cancel
eye
returns you to thumbnail view.
module
TM
2
is a HandspringTM SpringboardTM
module digital camera that allows you to take photos using your Visor
PDA. Once you save these photos you can transfer them to the Polaroid
imaging software or print them using the P-500ir printer.
•
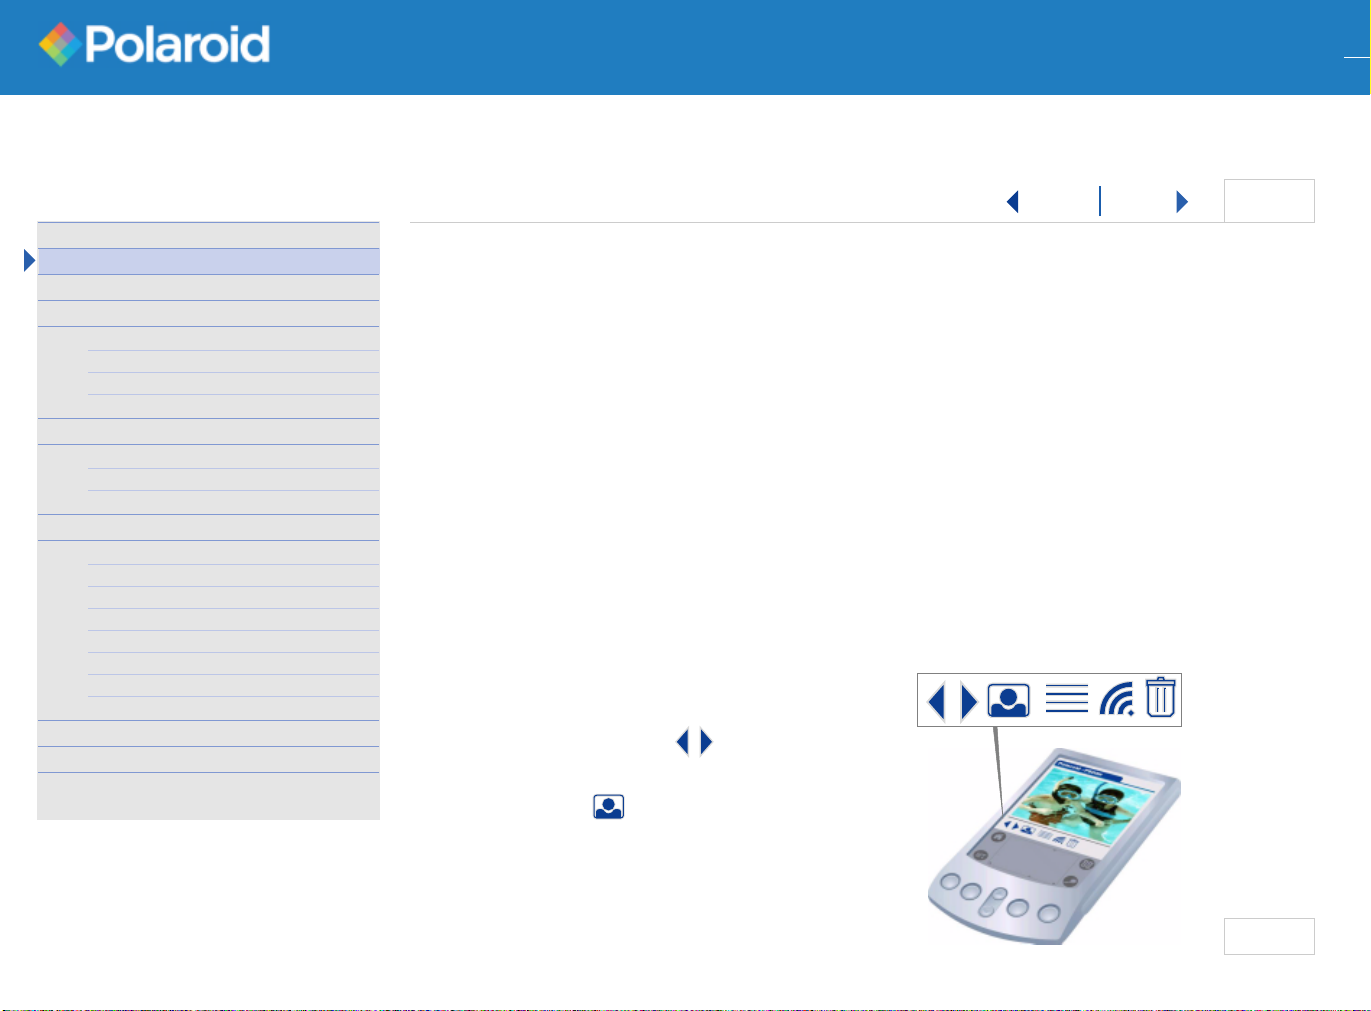
About the control bars and display.
Once you open the application the
control bars below the display screen provide access to image viewing tasks.
The icons that appear correspond to
stored in your PDA),
printer), or
Edit Photo mode
Get Image mode
. Tapping other handheld controls will exit the
View-only mode
(viewing images
(interacting with the P-500ir
image viewing application.
View-only Mode (full-screen view, does
not require P-500ir interaction)
•
Navigation arrows
— Move to previous
or next image.
•
Get image
— Retrieves saved images from
PDA. Also brings you to starting point from
anywhere within the application.
2 of 5
TM
page
3
Page 4
P-500ir
P- 5 0 0ir
ImageViewing Software
Image Viewing Software
www.polaroid.com
www.polaroid.com
1 Introduction
2 Things You Should Know
7 Installing the Software
9 Getting and Viewing Images
From the P-500ir printer (p.9)
From the PDA (p.11)
From the EyeModule2 (p.11)
13 Selecting Images
14 Printing Photos
From the P-500ir (p.14)
From the
17 Editing Images
20 Managing Images
Saving P-500ir images to a PDA (p.20)
Saving EyeModule2 images (p.20)
Backing up images (p.21)
Beaming to other handhelds (p.21)
Deleting images (p.22)
Locking and Unlocking images (p.22)
Creating a Slide Show (p.23)
25 Menu Options
27 Display Messages
31 Customer Support
Disclaimer and
Limitation of Liability (p.31)
EyeModule2
(p.16)
Things You Should Know
•
Go To file list
— Brings you to an image file list allowing a jump to
a specific image.
•
Beam
— Allows you to exchange PDA stored images between
infrared-enabled Palm OS handhelds.
•
Delete
•
Image Name
— Removes images from your PDA.
— Shows the file name of the displaying image.
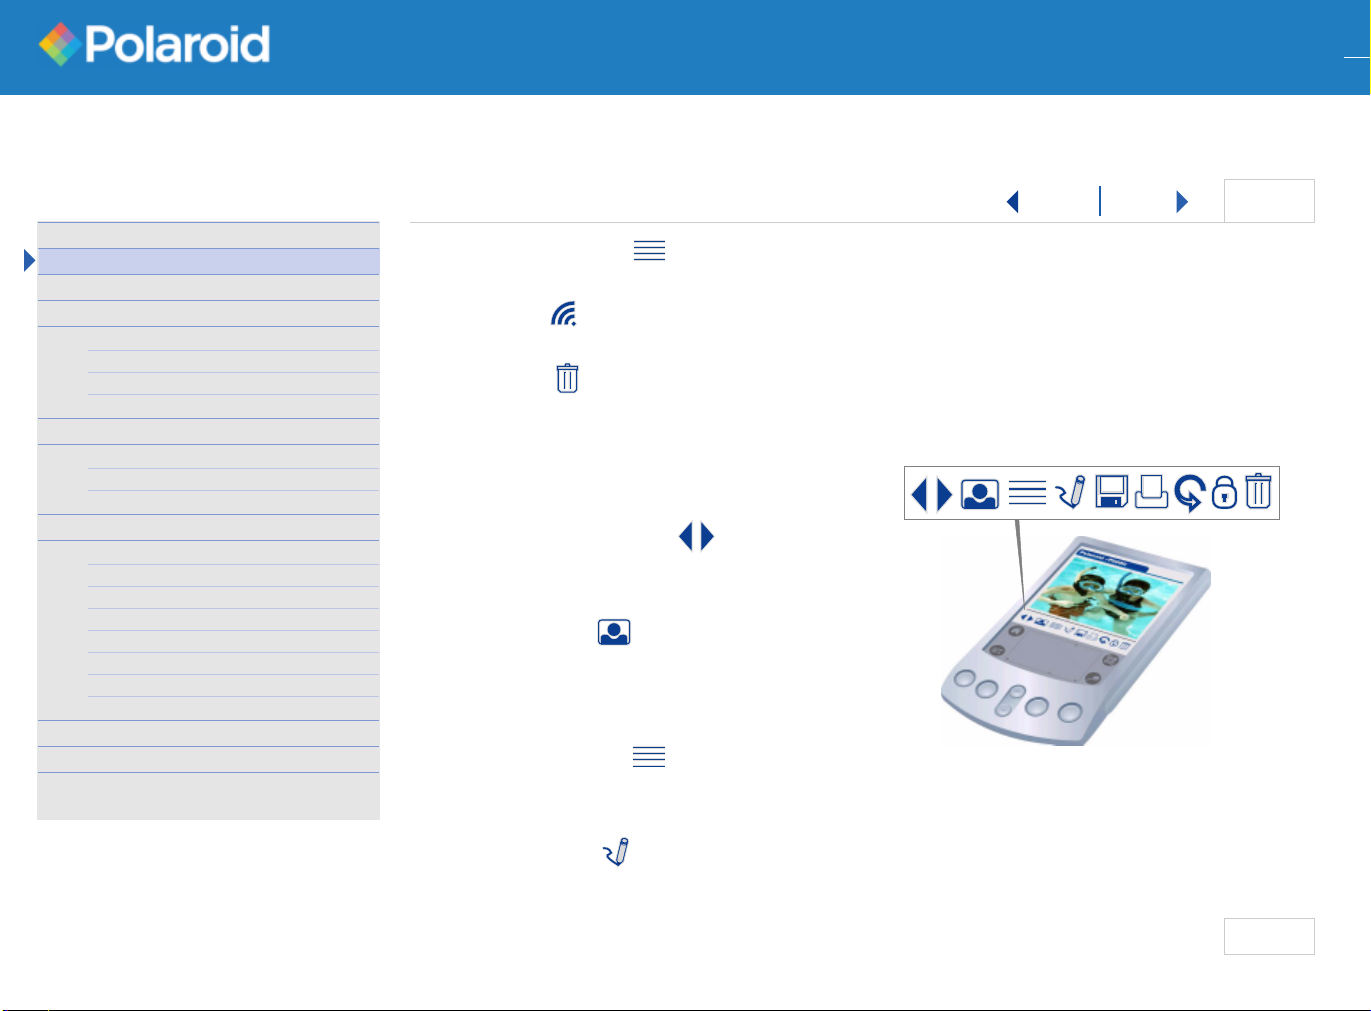
Get Image Mode (full-screen or thumbnail
views, requires P-500ir interaction)
•
Navigation arrows
— Displays previous
or next 1, 4, or 9 images. Also deselects
previous selections.
•
Get Image
— Retrieves images from your
P-500ir printer or eyemodule2 digital camera.
Also brings you to starting point from
anywhere within the application.
•
Go To file list
— Brings you to an image
file list allowing a jump to a specific image or
range of images.
Back Next
3 of 5
•
Edit photo
— Activates the Edit Photo
screen and editing tools (Pick color, Annotate, Crop, Erase).
page
4
Page 5
P-500ir
P- 5 0 0ir
ImageViewing Software
Image Viewing Software
www.polaroid.com
www.polaroid.com
1 Introduction
2 Things You Should Know
7 Installing the Software
9 Getting and Viewing Images
From the P-500ir printer (p.9)
From the PDA (p.11)
From the EyeModule2 (p.11)
13 Selecting Images
14 Printing Photos
From the P-500ir (p.14)
From the
17 Editing Images
20 Managing Images
Saving P-500ir images to a PDA (p.20)
Saving EyeModule2 images (p.20)
Backing up images (p.21)
Beaming to other handhelds (p.21)
Deleting images (p.22)
Locking and Unlocking images (p.22)
Creating a Slide Show (p.23)
25 Menu Options
27 Display Messages
31 Customer Support
Disclaimer and
Limitation of Liability (p.31)
EyeModule2
(p.16)
Things You Should Know
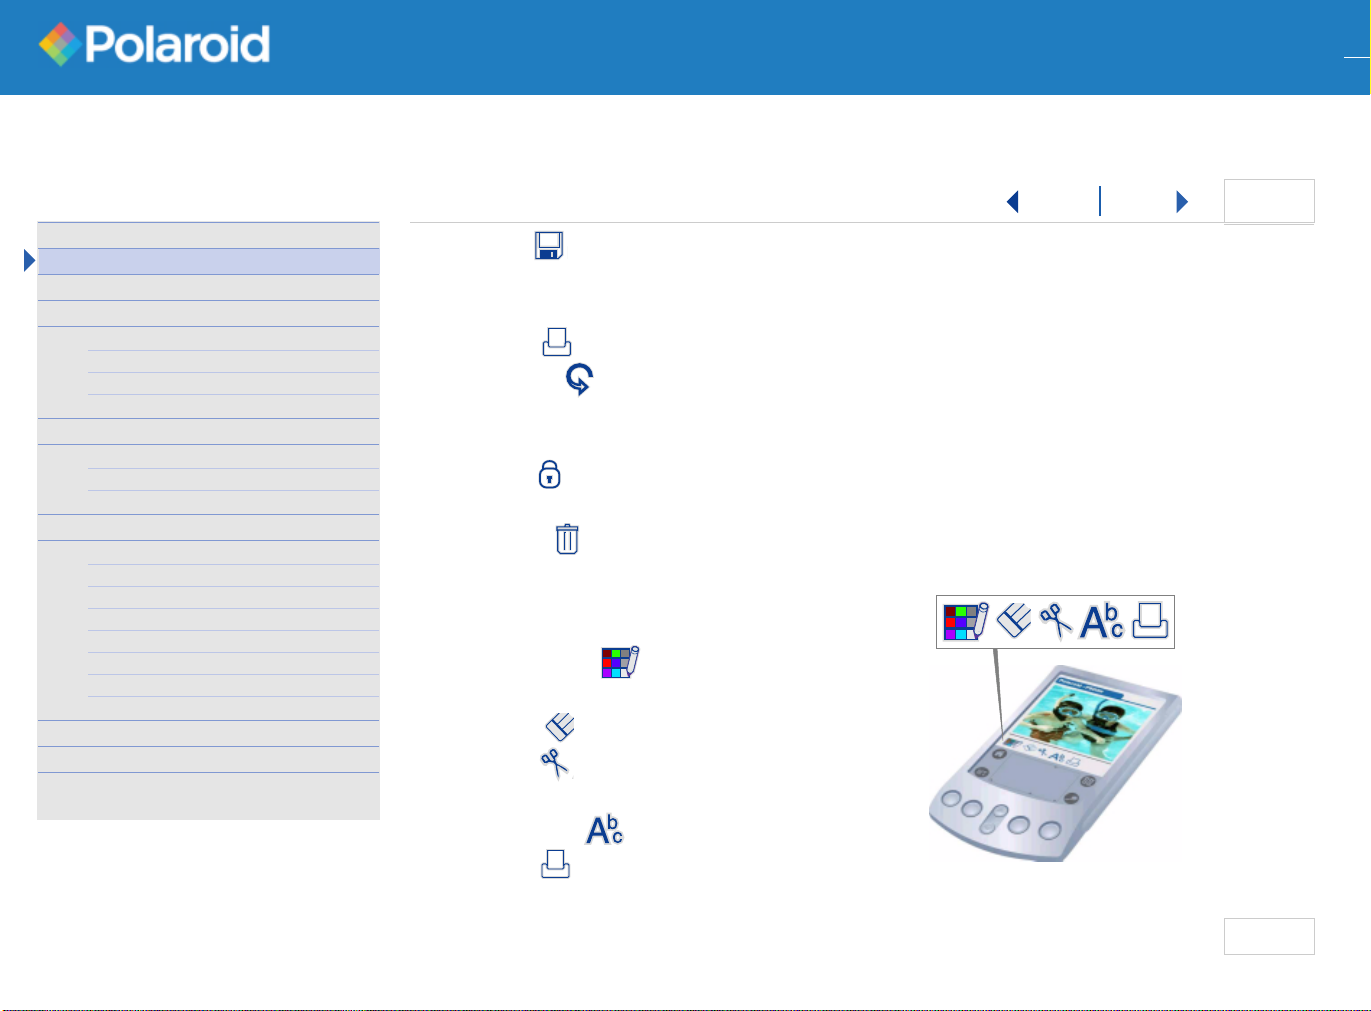
•
Save
— Copies selected images to your PDA as PalmOS compatible
Back Next
view-only images. Note: All images are saved in color, even when using a
black and white PDA.
•
Print
— Activates the print queue options.
•
Refresh
— Allows you to continue with your task if a connection has
been broken, (for example: changing memory cards, replacing film packs,
restoring connection to IR ports, refreshing image information).
•
Lock
— Activates lock/unlock options. Lock prevents an image from
being deleted or tags an image for printing with the P-500ir.
•
Delete
— Removes images from your memory card.
Edit Photo Mode (full-screen view, requires
P-500ir interaction)
•
Pick Color
— Opens Pick Color palette
to choose your freehand or annotation color.
•
Erase
— Allows you to undo your edit.
•
Crop
— Allows you to select an area of an
image to keep and expand for printing.
•
Annotate
— Activates text box option.
4 of 5
•
Print
— Activates the print queue options.
page
5
Page 6
P-500ir
P- 5 0 0ir
ImageViewing Software
Image Viewing Software
www.polaroid.com
www.polaroid.com
1 Introduction
2 Things You Should Know
7 Installing the Software
9 Getting and Viewing Images
From the P-500ir printer (p.9)
From the PDA (p.11)
From the EyeModule2 (p.11)
13 Selecting Images
14 Printing Photos
From the P-500ir (p.14)
From the
17 Editing Images
20 Managing Images
Saving P-500ir images to a PDA (p.20)
Saving EyeModule2 images (p.20)
Backing up images (p.21)
Beaming to other handhelds (p.21)
Deleting images (p.22)
Locking and Unlocking images (p.22)
Creating a Slide Show (p.23)
25 Menu Options
27 Display Messages
31 Customer Support
Disclaimer and
Limitation of Liability (p.31)
EyeModule2
(p.16)
Things You Should Know
Back Next
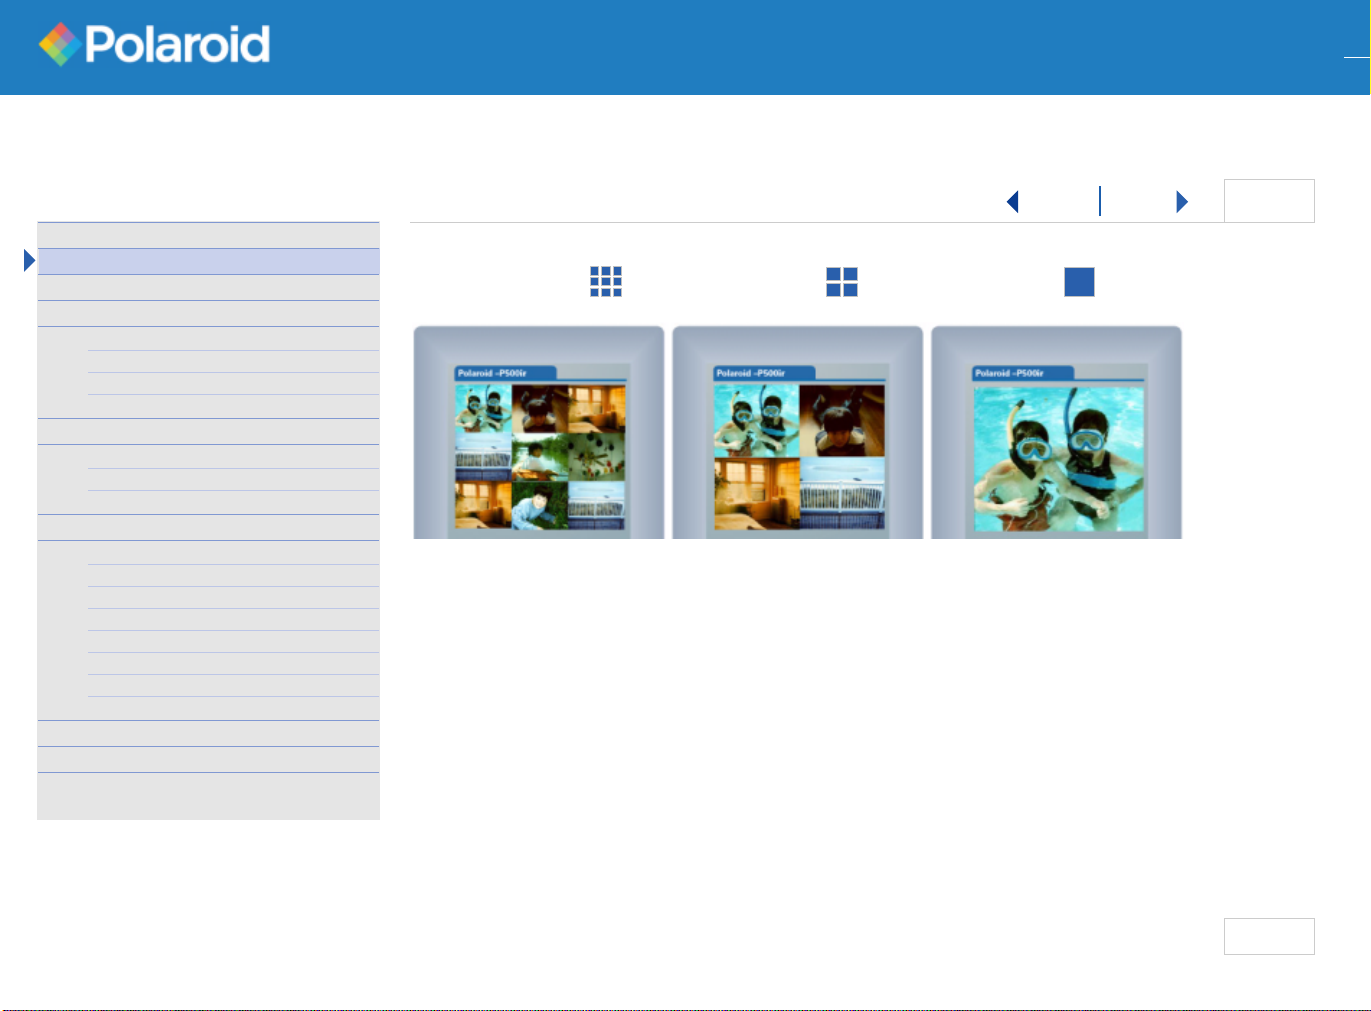
Display options
• 9 thumbnails • 4 thumbnails • Full-screen
•
About Polaroid.com.
The Polaroid web site is an interactive site providing
updated information and help using either the image viewing software or
your
P-500ir
at
www.Polaroid.com
.
5 of 5
page
6
Page 7
P-500ir
ImageViewing Software
www.polaroid.com
1 Introduction
2 Things You Should Know
7 Installing the Software
9 Getting and Viewing Images
From the P-500ir printer (p.9)
From the PDA (p.11)
From the EyeModule2 (p.11)
13 Selecting Images
14 Printing Photos
From the P-500ir (p.14)
From the EyeModule2 (p.16)
17 Editing Images
20 Managing Images
Saving P-500ir images to a PDA (p.20)
Saving EyeModule2 images (p.20)
Backing up images (p.21)
Beaming to other handhelds (p.21)
Deleting images (p.22)
Locking and Unlocking images (p.22)
Creating a Slide Show (p.23)
25 Menu Options
27 Display Messages
31 Customer Support
Disclaimer and
Limitation of Liability (p.31)
Installing the Software
Back Next
Polaroid P-500ir image viewing software
You can download the
Palm Desktop software then acquire the application when you perform a
®
HotSync
operation.
To download and install the software
1 Go to http://www.Polaroid.com
2 Select Customer Support.
3 Select Download Software to get the application and User’s Guide onto
your computer.
4 Follow your handheld’s add-on application instructions to install the
software into your handheld applications folder.
5 Perform a HotSync operation.
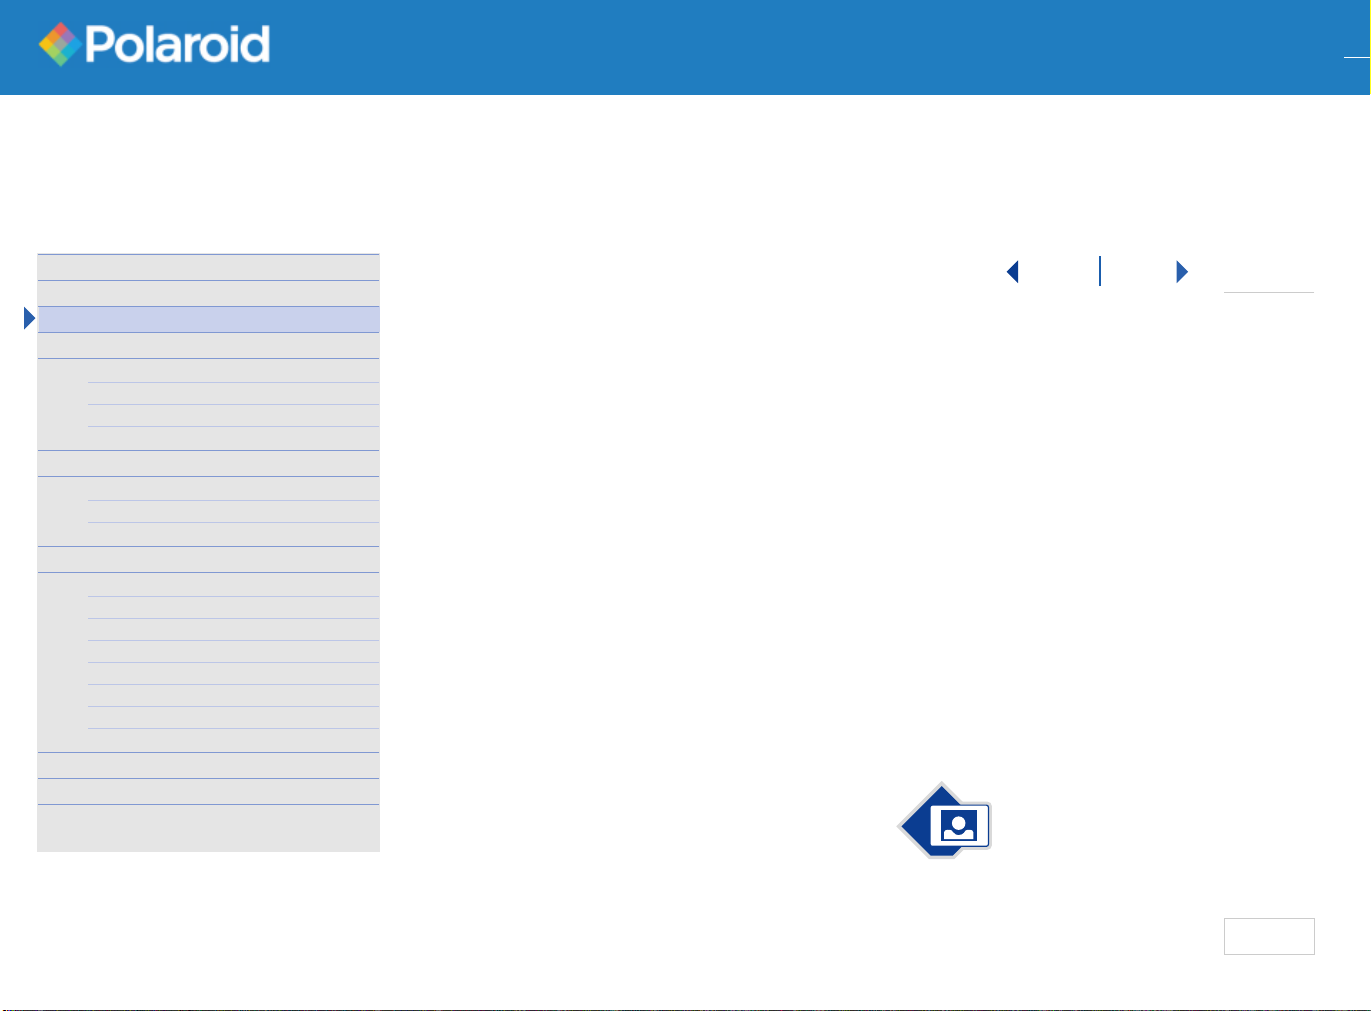
A Polaroid image viewing application icon
appears on your handheld device as well as
a new Polaroid application category.
Polaroid P-500ir image viewing software into your
1 of 2
Tap the icon to open the application.
page
7
Page 8
P-500ir
P- 5 0 0 ir Image Viewing Software www.polaroid.com
ImageViewing Software
www.polaroid.com
1 Introduction
2 Things You Should Know
7 Installing the Software
9 Getting and Viewing Images
From the P-500ir printer (p.9)
From the PDA (p.11)
From the EyeModule2 (p.11)
13 Selecting Images
14 Printing Photos
From the P-500ir (p.14)
From the EyeModule2 (p.16)
17 Editing Images
20 Managing Images
Saving P-500ir images to a PDA (p.20)
Saving EyeModule2 images (p.20)
Backing up images (p.21)
Beaming to other handhelds (p.21)
Deleting images (p.22)
Locking and Unlocking images (p.22)
Creating a Slide Show (p.23)
25 Menu Options
27 Display Messages
31 Customer Support
Disclaimer and
Limitation of Liability (p.31)
Installing the Software
To navigate use the left and right arrows as shown.
Back Next
2 of 2
page
8
Page 9
P-500ir
1–2 ft.
1-2 ft
ImageViewing Software
www.polaroid.com
1 Introduction
2 Things You Should Know
7 Installing the Software
9 Getting and Viewing Images
From the P-500ir printer (p.9)
From the PDA (p.11)
From the EyeModule2 (p.11)
13 Selecting Images
14 Printing Photos
From the P-500ir (p.14)
From the EyeModule2 (p.16)
17 Editing Images
20 Managing Images
Saving P-500ir images to a PDA (p.20)
Saving EyeModule2 images (p.20)
Backing up images (p.21)
Beaming to other handhelds (p.21)
Deleting images (p.22)
Locking and Unlocking images (p.22)
Creating a Slide Show (p.23)
25 Menu Options
27 Display Messages
31 Customer Support
Disclaimer and
Limitation of Liability (p.31)
Getting and Viewing Images
Back Next
The application operates in two modes: View-only and Get Image. In Viewonly mode you get images already stored in your PDA. Images display one at
a time. In Get Image mode you get images from either a memory card
inserted in the P-500ir printer, or an eyemodule2 digital camera. Images
display full-screen, or as 4 or 9-image thumbnails.
Note: If your PDA displays text and images in black and white, your photos will
print in color if you captured your images in color.
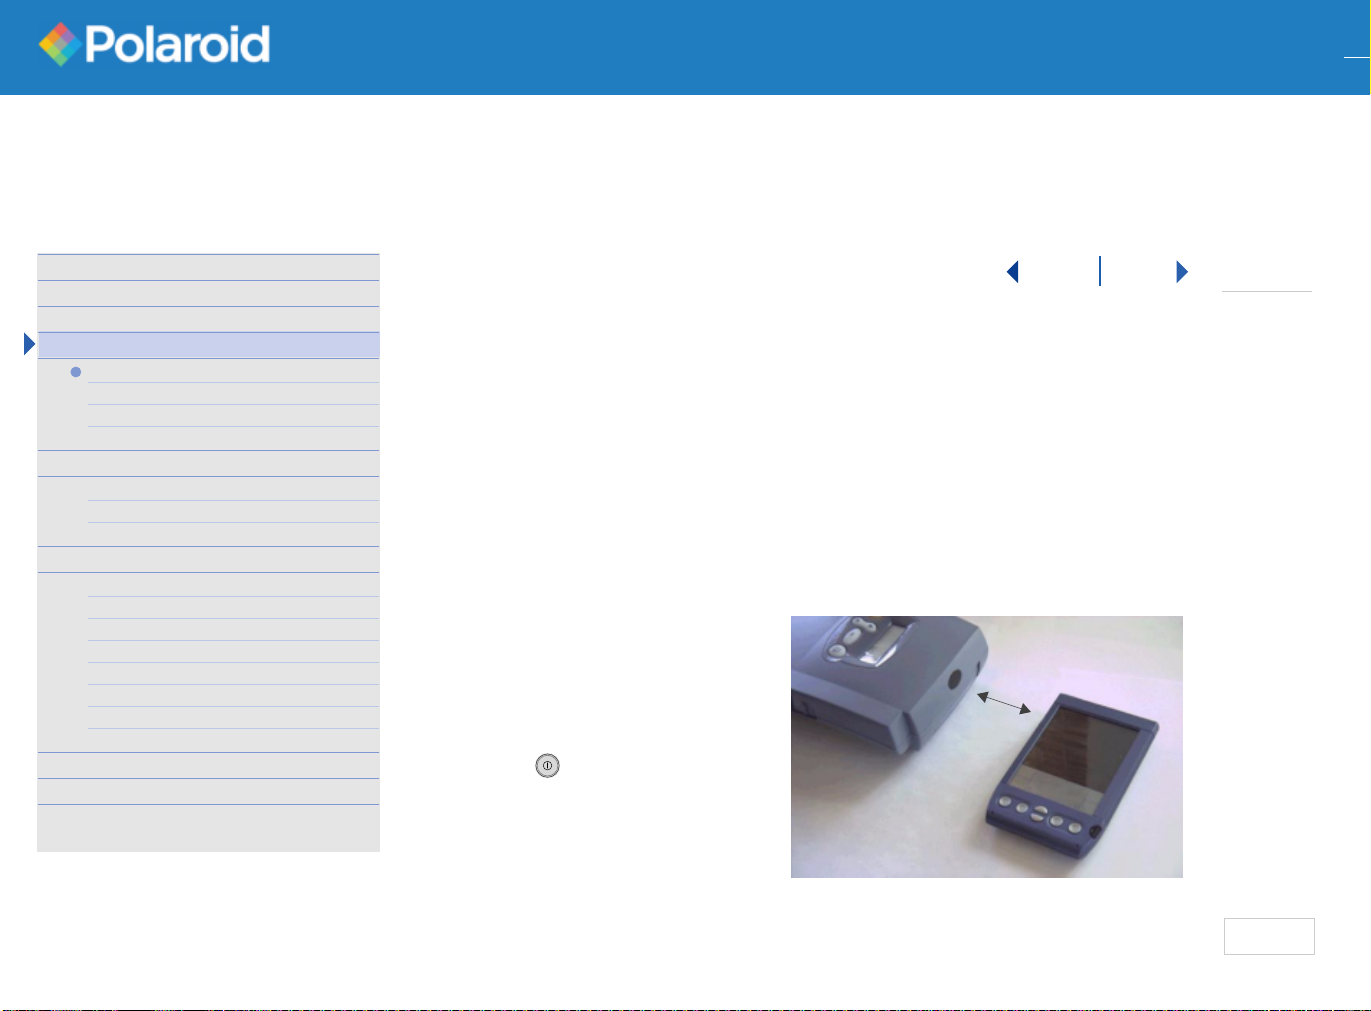
Getting Images from the P-500ir printer
1 Align the P-500ir infrared port
within 1–2 feet of the PDA
infrared port.
2 Turn on the P-500ir. Press
and hold .
1 of 4
page 9
Page 10
P-500ir
P- 5 0 0 ir Image Viewing Software www.polaroid.com
ImageViewing Software
www.polaroid.com
1 Introduction
2 Things You Should Know
7 Installing the Software
9 Getting and Viewing Images
From the P-500ir printer (p.9)
From the PDA (p.11)
From the EyeModule2 (p.11)
13 Selecting Images
14 Printing Photos
From the P-500ir (p.14)
From the EyeModule2 (p.16)
17 Editing Images
20 Managing Images
Saving P-500ir images to a PDA (p.20)
Saving EyeModule2 images (p.20)
Backing up images (p.21)
Beaming to other handhelds (p.21)
Deleting images (p.22)
Locking and Unlocking images (p.22)
Creating a Slide Show (p.23)
25 Menu Options
27 Display Messages
31 Customer Support
Disclaimer and
Limitation of Liability (p.31)
Getting and Viewing Images
Back Next
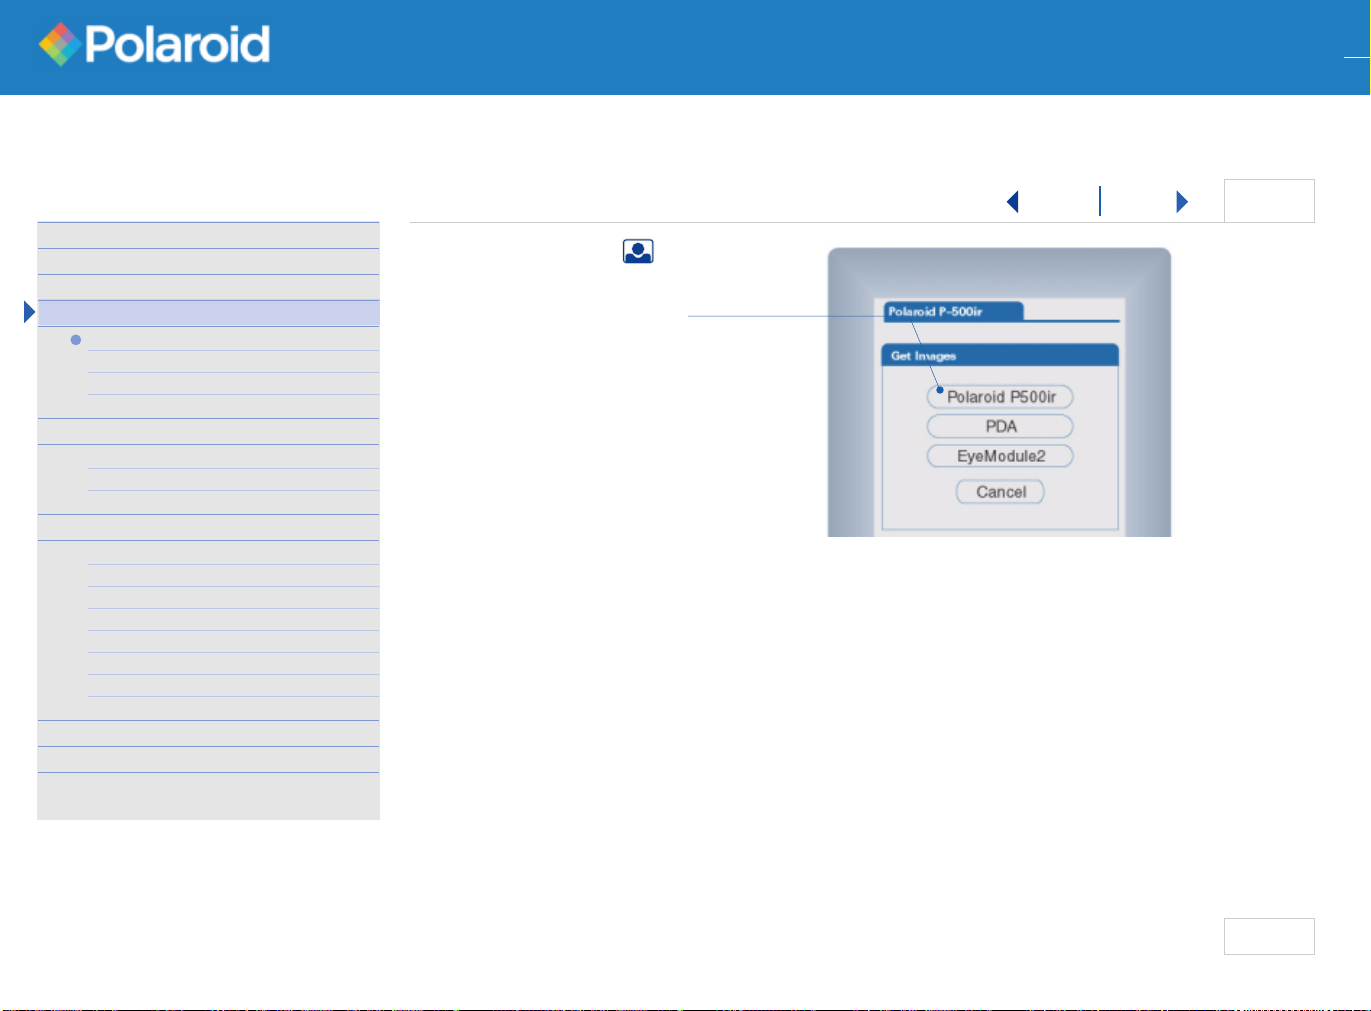
3 Tap the get image icon. A menu
screen appears.
4 Select Polaroid P-500ir.
You can select your viewing preference
each time you retrieve images from a
memory card in the P-500ir. The
default setting is full-screen view.
5 Select view preference and tap OK.
The connection status displays as
your PDA connects with the printer and lets you know how many images
are found on the memory card. After several seconds an image displays.
If an error message appears, make sure the P-500ir is on and that the infrared
ports are aligned and within range, then try again.
6 To preview the next image or group of images, tap an arrow on the control bar.
Note: Every time you tap a navigation arrow to view another group of images,
your PDA reconnects with the printer and converts them for viewing.
Images are not stored in your PDA until you save them.
2 of 4
page
10
Page 11

P-500ir
P- 5 0 0 ir Image Viewing Software www.polaroid.com
ImageViewing Software
www.polaroid.com
1 Introduction
2 Things You Should Know
7 Installing the Software
9 Getting and Viewing Images
From the P-500ir printer (p.9)
From the PDA (p.11)
From the EyeModule2 (p.11)
13 Selecting Images
14 Printing Photos
From the P-500ir (p.14)
From the EyeModule2 (p.16)
17 Editing Images
20 Managing Images
Saving P-500ir images to a PDA (p.20)
Saving EyeModule2 images (p.20)
Backing up images (p.21)
Beaming to other handhelds (p.21)
Deleting images (p.22)
Locking and Unlocking images (p.22)
Creating a Slide Show (p.23)
25 Menu Options
27 Display Messages
31 Customer Support
Disclaimer and
Limitation of Liability (p.31)
Getting and Viewing Images
Back Next
Getting Images from the PDA
1 Tap the Get Image icon. A menu
screen appears.
2 Select PDA.
Images most recently viewed in your
PDA will display. These can include
images saved from previous P-500ir sessions. If no images have been saved to
your PDA, tap the Get Image icon to
retrieve images from the P-500ir or the
eyemodule2 digital camera.
Getting Images from the EyeModule2
1 Insert eyemodule2 into your expansion slot so that it snaps into place.
2 Capture an image. You can name an image file while the properties are
highlighted so that you can easily scan the eyemodule2 image list later.
3 Save the image.
3 of 4
page 11
Page 12

P-500ir
P- 5 0 0 ir Image Viewing Software www.polaroid.com
ImageViewing Software
www.polaroid.com
1 Introduction
2 Things You Should Know
7 Installing the Software
9 Getting and Viewing Images
From the P-500ir printer (p.9)
From the PDA (p.11)
From the EyeModule2 (p.11)
13 Selecting Images
14 Printing Photos
From the P-500ir (p.14)
From the EyeModule2 (p.16)
17 Editing Images
20 Managing Images
Saving P-500ir images to a PDA (p.20)
Saving EyeModule2 images (p.20)
Backing up images (p.21)
Beaming to other handhelds (p.21)
Deleting images (p.22)
Locking and Unlocking images (p.22)
Creating a Slide Show (p.23)
25 Menu Options
27 Display Messages
31 Customer Support
Disclaimer and
Limitation of Liability (p.31)
Getting and Viewing Images
Back Next
4 Open the Polaroid P-500ir image viewing application and tap the Get
Image icon. A menu screen appears.
5 Select EyeModule2.
6 Scroll through the image list that appears and highlight the image file
you want.
7 Tap Xfer to transfer and save the photo to the Polaroid P-500ir application,
then tap Cancel to view.
4 of 4
page
12
Page 13

P-500ir
ImageViewing Software
www.polaroid.com
1 Introduction
2 Things You Should Know
7 Installing the Software
9 Getting and Viewing Images
From the P-500ir printer (p.9)
From the PDA (p.11)
From the EyeModule2 (p.11)
13 Selecting Images
14 Printing Photos
From the P-500ir (p.14)
From the EyeModule2 (p.16)
17 Editing Images
20 Managing Images
Saving P-500ir images to a PDA (p.20)
Saving EyeModule2 images (p.20)
Backing up images (p.21)
Beaming to other handhelds (p.21)
Deleting images (p.22)
Locking and Unlocking images (p.22)
Creating a Slide Show (p.23)
25 Menu Options
27 Display Messages
31 Customer Support
Disclaimer and
Limitation of Liability (p.31)
Selecting Images
Back Next
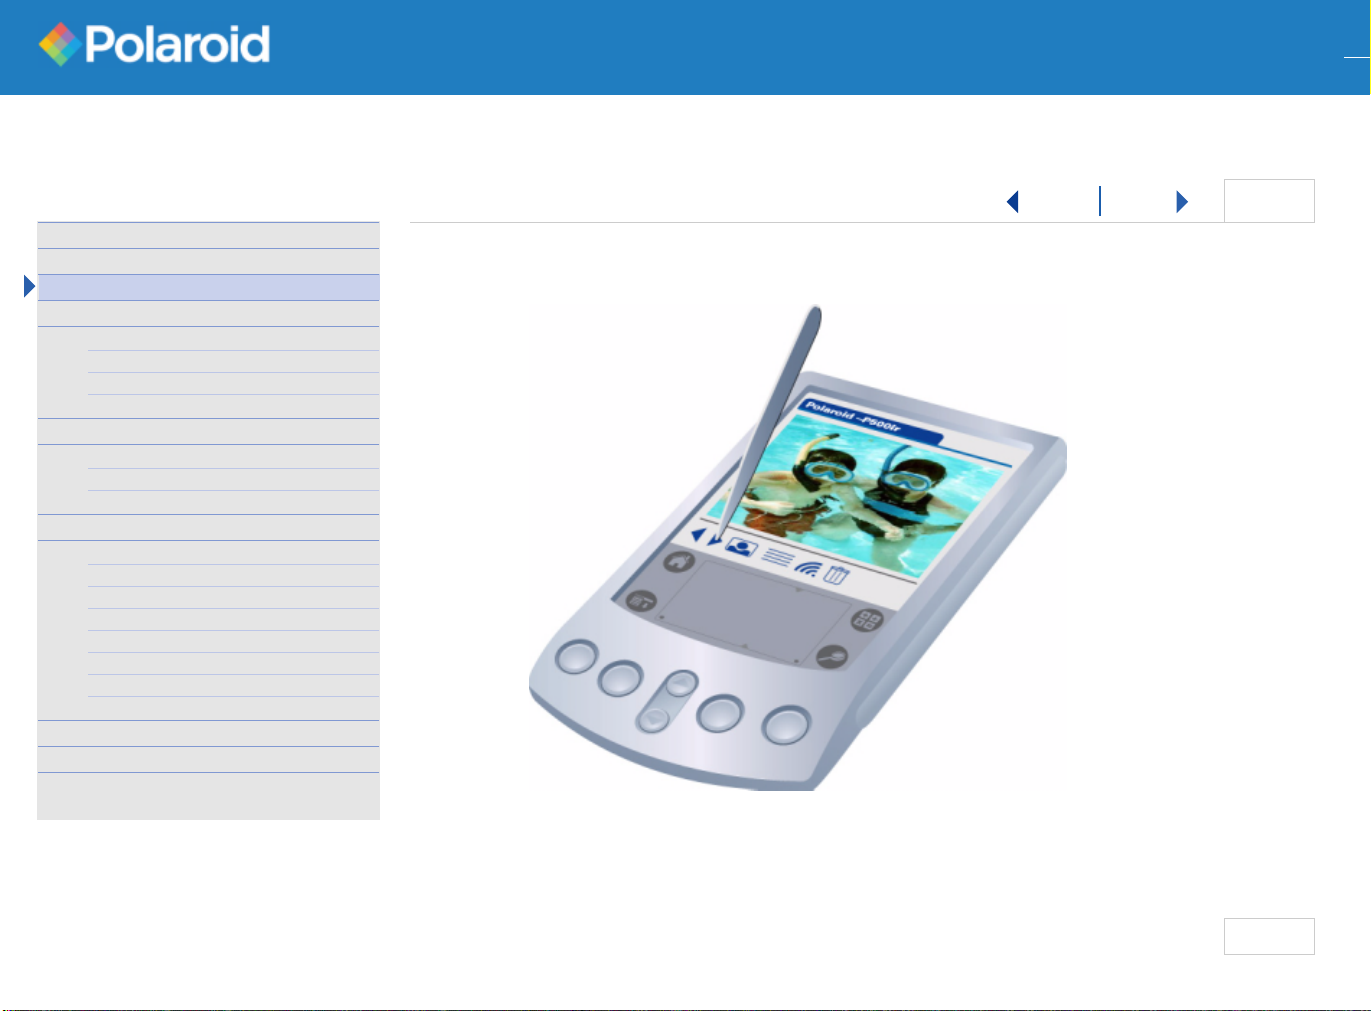
In Get Image mode, once you retrieve images for viewing on your handheld,
you may select the ones you want to edit, print or save to your PDA. When
viewing full-screen images, you are viewing the selected image.
1 When viewing thumbnails, tap once on the image. A yellow border indicates
the selected image. To deselect, tap the image again.
Tap twice to Zoom to full-screen view. You can then Save or Print the
selected image.
Note: You can select multiple images to Print, Save, Lock or Delete. To Edit
images you must select a single image then tap the Edit Photo icon to
go into the Edit Photo screen.
2 Tap the control bar icon to initiate the activity you want.
Note: Navigating to other screens clears selected images in the current screen.
1 of 1
page 13
Page 14

P-500ir
ImageViewing Software
www.polaroid.com
1 Introduction
2 Things You Should Know
7 Installing the Software
9 Getting and Viewing Images
From the P-500ir printer (p.9)
From the PDA (p.11)
From the EyeModule2 (p.11)
13 Selecting Images
14 Printing Photos
From the P-500ir (p.14)
From the EyeModule2 (p.16)
17 Editing Images
20 Managing Images
Saving P-500ir images to a PDA (p.20)
Saving EyeModule2 images (p.20)
Backing up images (p.21)
Beaming to other handhelds (p.21)
Deleting images (p.22)
Locking and Unlocking images (p.22)
Creating a Slide Show (p.23)
25 Menu Options
27 Display Messages
31 Customer Support
Disclaimer and
Limitation of Liability (p.31)
Printing Photos
Back Next
You can print photos from digital film or EyeModule2 image files. When
printing from digital film you can add several images to the P-500ir print
queue or print right away.
From the P-500ir:
1 Align the P-500ir infrared port within 1-2 feet of the PDA infrared port.
2 Turn on the P-500ir. Press and hold .
Note: If there are Locked or DPOF images on your memory card, the image
viewing application ignores this information once you activate infrared.
3 Tap the get image icon.
4 Select Polaroid P-500ir.
5 Select view preference and tap OK. The PDA and printer takes a momemt
to connect and transfer information.
6 Navigate to the image you want to print.
1 of 3
page 14
Page 15

P-500ir
P- 5 0 0 ir Image Viewing Software www.polaroid.com
ImageViewing Software
www.polaroid.com
1 Introduction
2 Things You Should Know
7 Installing the Software
9 Getting and Viewing Images
From the P-500ir printer (p.9)
From the PDA (p.11)
From the EyeModule2 (p.11)
13 Selecting Images
14 Printing Photos
From the P-500ir (p.14)
From the EyeModule2 (p.16)
17 Editing Images
20 Managing Images
Saving P-500ir images to a PDA (p.20)
Saving EyeModule2 images (p.20)
Backing up images (p.21)
Beaming to other handhelds (p.21)
Deleting images (p.22)
Locking and Unlocking images (p.22)
Creating a Slide Show (p.23)
25 Menu Options
27 Display Messages
31 Customer Support
Disclaimer and
Limitation of Liability (p.31)
Printing Photos
Back Next
7 Tap the image to select it. A yellow border indicates the selected image(s).
Note: If you are viewing 4 or 9 thumbnails you can select several images
before printing or adding them to the print queue. If you move on to the
next group of thumbnails the previously selected images will clear.
8 Tap the print icon on the PDA. An options screen appears:
Print / Queue
Image(s) selected to print 1
Enter number of copies 1
PrintQueue
Cancel
The number of copies selected applies to all images. The default is 1.
Continue until you select all the images you want to print.
9 Tap Queue to add selections to the print queue, or Print to begin printing.
2 of 3
page 15
Page 16

P-500ir
P- 5 0 0 ir Image Viewing Software www.polaroid.com
ImageViewing Software
www.polaroid.com
1 Introduction
2 Things You Should Know
7 Installing the Software
9 Getting and Viewing Images
From the P-500ir printer (p.9)
From the PDA (p.11)
From the EyeModule2 (p.11)
13 Selecting Images
14 Printing Photos
From the P-500ir (p.14)
From the EyeModule2 (p.16)
17 Editing Images
20 Managing Images
Saving P-500ir images to a PDA (p.20)
Saving EyeModule2 images (p.20)
Backing up images (p.21)
Beaming to other handhelds (p.21)
Deleting images (p.22)
Locking and Unlocking images (p.22)
Creating a Slide Show (p.23)
25 Menu Options
27 Display Messages
31 Customer Support
Disclaimer and
Limitation of Liability (p.31)
Printing Photos
Back Next
Note: If you exit to use another application the printer continues printing. If
you return and attempt to print more images before completing the
previous process, the printer will be busy. You may retry once all the
photos sent to the previous queue print.
From the EyeModule2:
1 Align the P-500ir infrared port within 1-2 feet of the PDA infrared port.
2 Turn on the P-500ir. Press and hold .
Note: If there are Locked or DPOF images on your memory card, the image
viewing application ignores this information once you activate infrared.
3 Tap the get image icon.
4 Select EyeModule2.
5 Select the image you want to print from the list, then tap Print. An option
screen appears.
6 If you want to change the default setting (1), enter the number of copies.
7 If you want to save the image to your memory card, tap the check box
3 of 3
8 Tap Print.
page
16
Page 17

P-500ir
ImageViewing Software
www.polaroid.com
1 Introduction
2 Things You Should Know
7 Installing the Software
9 Getting and Viewing Images
From the P-500ir printer (p.9)
From the PDA (p.11)
From the EyeModule2 (p.11)
13 Selecting Images
14 Printing Photos
From the P-500ir (p.14)
From the EyeModule2 (p.16)
17 Editing Images
20 Managing Images
Saving P-500ir images to a PDA (p.20)
Saving EyeModule2 images (p.20)
Backing up images (p.21)
Beaming to other handhelds (p.21)
Deleting images (p.22)
Locking and Unlocking images (p.22)
Creating a Slide Show (p.23)
25 Menu Options
27 Display Messages
31 Customer Support
Disclaimer and
Limitation of Liability (p.31)
Editing Images
Back Next
You can edit images on your memory card before you print them and permanently annotate important information directly onto your photo. Edits are
for printing only - you cannot save these changes.
1 Align P-500ir infrared port within 1-2 feet of the PDA infrared port.
2 Turn on the P-500ir. Press and hold .
3 Tap the get image icon.
4 Tap P-500ir.
5 Select view preference and tap OK.
6 Navigate to the image you want to edit.
7 Tap the image to select it (if in thumbnail view).
8 Tap the edit icon. The editing screen appears with a new tool bar.
•Tap to open the Pick Color palette.
•Tap to clear edits at any time.
•Tap to use the cropping tool.
1 of 3
•Tap to use the annotation tool.
•Tap to print.
•Tap Exit to leave Edit Photo.
page 17
Page 18

P-500ir
P- 5 0 0 ir Image Viewing Software www.polaroid.com
ImageViewing Software
www.polaroid.com
1 Introduction
2 Things You Should Know
7 Installing the Software
9 Getting and Viewing Images
From the P-500ir printer (p.9)
From the PDA (p.11)
From the EyeModule2 (p.11)
13 Selecting Images
14 Printing Photos
From the P-500ir (p.14)
From the EyeModule2 (p.16)
17 Editing Images
20 Managing Images
Saving P-500ir images to a PDA (p.20)
Saving EyeModule2 images (p.20)
Backing up images (p.21)
Beaming to other handhelds (p.21)
Deleting images (p.22)
Locking and Unlocking images (p.22)
Creating a Slide Show (p.23)
25 Menu Options
27 Display Messages
31 Customer Support
Disclaimer and
Limitation of Liability (p.31)
Editing Images
Back Next
To pick a color and write freehand on an image
You can write on your photo in several colors before printing by returning to
the Pick Color palette.
1 Tap the icon and pick a color from the palette, then tap OK.
2 Write directly on the image with your stylus.
3 Tap the print icon.
To crop an image
You can print an enlarged area of an image to get a closer view of your photo.
1 Tap the cropping tool .
2 Choose Large or Small crop box.
3 Place the stylus on the image and hold it down until the crop box appears.
Slowly guide the crop box over the area you want to keep in your photo.
Do not lift the stylus off of the panel until you finish.
4 Tap the print icon.
2 of 3
page
18
Page 19

P-500ir
P- 5 0 0 ir Image Viewing Software www.polaroid.com
ImageViewing Software
www.polaroid.com
1 Introduction
2 Things You Should Know
7 Installing the Software
9 Getting and Viewing Images
From the P-500ir printer (p.9)
From the PDA (p.11)
From the EyeModule2 (p.11)
13 Selecting Images
14 Printing Photos
From the P-500ir (p.14)
From the EyeModule2 (p.16)
17 Editing Images
20 Managing Images
Saving P-500ir images to a PDA (p.20)
Saving EyeModule2 images (p.20)
Backing up images (p.21)
Beaming to other handhelds (p.21)
Deleting images (p.22)
Locking and Unlocking images (p.22)
Creating a Slide Show (p.23)
25 Menu Options
27 Display Messages
31 Customer Support
Disclaimer and
Limitation of Liability (p.31)
Editing Images
Back Next
To annotate an image
You can add text to record information such as date and time or
captions directly onto your photo.
1 Pick the color from the palette, then tap OK.
2 Tap the annotate icon.
3 Tap the text string line to activate the area. Use your PDA graffiti area or
keyboard to enter text then tap Done.
Note: There is a 20 character limit for each line.
4 Place the stylus on the image and hold it down until the text box appears.
Guide the box to where you want to place the text and lift the stylus when
you are done.
Repeat steps 2 - 4 as often as you want before printing.
5 Tap the print icon.
3 of 3
page 19
Page 20

P-500ir
ImageViewing Software
www.polaroid.com
1 Introduction
2 Things You Should Know
7 Installing the Software
9 Getting and Viewing Images
From the P-500ir printer (p.9)
From the PDA (p.11)
From the EyeModule2 (p.11)
13 Selecting Images
14 Printing Photos
From the P-500ir (p.14)
From the EyeModule2 (p.16)
17 Editing Images
20 Managing Images
Saving P-500ir images to a PDA (p.20)
Saving EyeModule2 images (p.20)
Backing up images (p.21)
Beaming to other handhelds (p.21)
Deleting images (p.22)
Locking and Unlocking images (p.22)
Creating a Slide Show (p.23)
25 Menu Options
27 Display Messages
31 Customer Support
Disclaimer and
Limitation of Liability (p.31)
Managing Images
Back Next
There are several ways to manage your images using the Polaroid P-500ir
image viewing application.
Saving P-500ir images to a PDA
1 Navigate to the image you want to save.
2 Select the image.
3 Tap the save icon. When you go into View-only mode the saved image
displays.
Saving EyeModule2 images
1 Navigate to the image you want to save.
2 Select the image.
3 Tap Xfer to transfer and save the photo to the image viewing application,
then tap Cancel to view.
4 Tap Print to open the print option screen and tap the check box to save the
JPEG image to your memory card.
1 of 5
page 20
Page 21

P-500ir
P- 5 0 0 ir Image Viewing Software www.polaroid.com
ImageViewing Software
www.polaroid.com
1 Introduction
2 Things You Should Know
7 Installing the Software
9 Getting and Viewing Images
From the P-500ir printer (p.9)
From the PDA (p.11)
From the EyeModule2 (p.11)
13 Selecting Images
14 Printing Photos
From the P-500ir (p.14)
From the EyeModule2 (p.16)
17 Editing Images
20 Managing Images
Saving P-500ir images to a PDA (p.20)
Saving EyeModule2 images (p.20)
Backing up images (p.21)
Beaming to other handhelds (p.21)
Deleting images (p.22)
Locking and Unlocking images (p.22)
Creating a Slide Show (p.23)
25 Menu Options
27 Display Messages
31 Customer Support
Disclaimer and
Limitation of Liability (p.31)
Managing Images
Back Next
Backing up images
View-only Palm compatible images are automatically backed up to your
computer during HotSync operation.
Beaming to other handhelds
You can beam saved images between infrared-enabled Palm OS handhelds.
You must load the application onto the receiving device before sending
images.
To beam the Polaroid image viewing application
1 Align the infrared port on your PDA with the infrared port on the
receiving handheld.
2 Tap Polaroid P-500ir at the top of the display to open the drop-down
Options menu.
3 Tap Beam Application.
Note: If you are currently running the Polaroid image viewing application
and want to receive an updated version from another PDA, you need
to exit to another application before beaming to your handheld.
2 of 5
page 21
Page 22

P-500ir
P- 5 0 0 ir Image Viewing Software www.polaroid.com
ImageViewing Software
www.polaroid.com
1 Introduction
2 Things You Should Know
7 Installing the Software
9 Getting and Viewing Images
From the P-500ir printer (p.9)
From the PDA (p.11)
From the EyeModule2 (p.11)
13 Selecting Images
14 Printing Photos
From the P-500ir (p.14)
From the EyeModule2 (p.16)
17 Editing Images
20 Managing Images
Saving P-500ir images to a PDA (p.20)
Saving EyeModule2 images (p.20)
Backing up images (p.21)
Beaming to other handhelds (p.21)
Deleting images (p.22)
Locking and Unlocking images (p.22)
Creating a Slide Show (p.23)
25 Menu Options
27 Display Messages
31 Customer Support
Disclaimer and
Limitation of Liability (p.31)
Managing Images
Back Next
To beam images
1 Tap the get image icon.
2 Tap PDA.
3 Navigate to the saved image you want to beam.
4 Align the infrared port on your PDA with the infrared port on the
receiving device.
5 Tap the beam icon.
Deleting images
You can delete images on your memory card or from your PDA.
1 Navigate to the image you want to delete.
2 Tap the delete icon. A message appears asking you to confirm.
3 Tap Yes to delete. Tap No to cancel.
Locking and Unlocking images
Managing images using your camera LCD depletes battery power. You can
use your PDA to lock images on your memory card to prevent them from
being deleted, or to tag them for printing with your P-500ir. You can also
unlock images.
3 of 5
page
22
Page 23

P-500ir
P- 5 0 0 ir Image Viewing Software www.polaroid.com
ImageViewing Software
www.polaroid.com
1 Introduction
2 Things You Should Know
7 Installing the Software
9 Getting and Viewing Images
From the P-500ir printer (p.9)
From the PDA (p.11)
From the EyeModule2 (p.11)
13 Selecting Images
14 Printing Photos
From the P-500ir (p.14)
From the EyeModule2 (p.16)
17 Editing Images
20 Managing Images
Saving P-500ir images to a PDA (p.20)
Saving EyeModule2 images (p.20)
Backing up images (p.21)
Beaming to other handhelds (p.21)
Deleting images (p.22)
Locking and Unlocking images (p.22)
Creating a Slide Show (p.23)
25 Menu Options
27 Display Messages
31 Customer Support
Disclaimer and
Limitation of Liability (p.31)
Managing Images
Back Next
1 Align the P-500ir infrared port within 1-2 feet of the PDA infrared port.
2 Turn on the P-500ir. Press and hold .
3 Tap the get image icon.
4 Select P-500ir.
5 Select view preference and tap OK.
6 Navigate to the image you want to lock.
7 Tap the image to select.
8 Tap the lock icon. An image lock/unlock option window appears.
9 Tap Lock to apply lock. Tap Unlock to remove lock. Tap Cancel to leave
this option.
Creating a Slide Show
In View-only mode you can create a slide show to continuously display
selected images.
1 Navigate through your images and tap the check box at the top of the
display screen to select images for your slide show. A check mark will
appear in the box.
4 of 5
page 23
Page 24

P-500ir
P- 5 0 0 ir Image Viewing Software www.polaroid.com
ImageViewing Software
www.polaroid.com
1 Introduction
2 Things You Should Know
7 Installing the Software
9 Getting and Viewing Images
From the P-500ir printer (p.9)
From the PDA (p.11)
From the EyeModule2 (p.11)
13 Selecting Images
14 Printing Photos
From the P-500ir (p.14)
From the EyeModule2 (p.16)
17 Editing Images
20 Managing Images
Saving P-500ir images to a PDA (p.20)
Saving EyeModule2 images (p.20)
Backing up images (p.21)
Beaming to other handhelds (p.21)
Deleting images (p.22)
Locking and Unlocking images (p.22)
Creating a Slide Show (p.23)
25 Menu Options
27 Display Messages
31 Customer Support
Disclaimer and
Limitation of Liability (p.31)
Managing Images
Back Next
2 Tap Polaroid P-500ir at the top of the display to open the drop-down
Options menu.
3 Tap Slide Show to activate.
4 Tap [ + ] to increase the display time by seconds.
5 Tap [ - ] to decrease the display time by seconds.
6 Tap Cancel to stop.
5 of 5
page
24
Page 25

P-500ir
ImageViewing Software
www.polaroid.com
1 Introduction
2 Things You Should Know
7 Installing the Software
9 Getting and Viewing Images
From the P-500ir printer (p.9)
From the PDA (p.11)
From the EyeModule2 (p.11)
13 Selecting Images
14 Printing Photos
From the P-500ir (p.14)
From the EyeModule2 (p.16)
17 Editing Images
20 Managing Images
Saving P-500ir images to a PDA (p.20)
Saving EyeModule2 images (p.20)
Backing up images (p.21)
Beaming to other handhelds (p.21)
Deleting images (p.22)
Locking and Unlocking images (p.22)
Creating a Slide Show (p.23)
25 Menu Options
27 Display Messages
31 Customer Support
Disclaimer and
Limitation of Liability (p.31)
Menu Options
Back Next
You can select menu options and get Help from the image viewing menu at
the top of the display screen. Tap Polaroid P-500ir at the top of the display to
open the drop-down Options or Help menu.
1 of 2
page 25
Page 26

P-500ir
P- 5 0 0 ir Image Viewing Software www.polaroid.com
ImageViewing Software
www.polaroid.com
1 Introduction
2 Things You Should Know
7 Installing the Software
9 Getting and Viewing Images
From the P-500ir printer (p.9)
From the PDA (p.11)
From the EyeModule2 (p.11)
13 Selecting Images
14 Printing Photos
From the P-500ir (p.14)
From the EyeModule2 (p.16)
17 Editing Images
20 Managing Images
Saving P-500ir images to a PDA (p.20)
Saving EyeModule2 images (p.20)
Backing up images (p.21)
Beaming to other handhelds (p.21)
Deleting images (p.22)
Locking and Unlocking images (p.22)
Creating a Slide Show (p.23)
25 Menu Options
27 Display Messages
31 Customer Support
Disclaimer and
Limitation of Liability (p.31)
Menu Options
Back Next
Option / Help Shortcut Description
Image properties P Displays the current image file settings. Permits
you to rename the image file.
Beam Application S Beam Polaroid P-500ir image viewing software to
an infrared-enabled Palm OS handheld
Beam Image B Beam a single image to an infrared-enabled Palm
OS handheld
Beam Album A Beam all images to an infrared-enabled Palm OS
handheld
Slide Show Z In View-only mode, activate the Slide Show
feature.
About Provides useful information about the Polaroid
image viewing application and support.
2 of 2
page
26
Page 27

P-500ir
ImageViewing Software
www.polaroid.com
1 Introduction
2 Things You Should Know
7 Installing the Software
9 Getting and Viewing Images
From the P-500ir printer (p.9)
From the PDA (p.11)
From the EyeModule2 (p.11)
13 Selecting Images
14 Printing Photos
From the P-500ir (p.14)
From the EyeModule2 (p.16)
17 Editing Images
20 Managing Images
Saving P-500ir images to a PDA (p.20)
Saving EyeModule2 images (p.20)
Backing up images (p.21)
Beaming to other handhelds (p.21)
Deleting images (p.22)
Locking and Unlocking images (p.22)
Creating a Slide Show (p.23)
25 Menu Options
27 Display Messages
31 Customer Support
Disclaimer and
Limitation of Liability (p.31)
Display Messages
Message Explanation Resolution
Connecting to
Printer....
Your PDA receives
information from the
memory card in the
printer when you
initiate infrared
interaction.
Receiving... Your PDA converts
images from your
memory card to a PDAviewable format. This
takes several seconds.
## images on card Polaroid image viewing
software reads the image
files on your memory
card and tells you how
many it finds.
Wait. If printer does not
respond, ensure that
infrared ports are
aligned and within
range.
Wait. A progress bar
indicates status.
Tap the navigation
arrows to view
additional images.
Back Next
1 of 4
page 27
Page 28

P-500ir
P- 5 0 0 ir Image Viewing Software www.polaroid.com
ImageViewing Software
www.polaroid.com
1 Introduction
2 Things You Should Know
7 Installing the Software
9 Getting and Viewing Images
From the P-500ir printer (p.9)
From the PDA (p.11)
From the EyeModule2 (p.11)
13 Selecting Images
14 Printing Photos
From the P-500ir (p.14)
From the EyeModule2 (p.16)
17 Editing Images
20 Managing Images
Saving P-500ir images to a PDA (p.20)
Saving EyeModule2 images (p.20)
Backing up images (p.21)
Beaming to other handhelds (p.21)
Deleting images (p.22)
Locking and Unlocking images (p.22)
Creating a Slide Show (p.23)
25 Menu Options
27 Display Messages
31 Customer Support
Disclaimer and
Limitation of Liability (p.31)
Display Messages
Waiting for Printer
response...
Some connections take
longer than others. This
message also remains for
an extended period of
time if the printer has
shut down.
No image(s) selected A yellow box appears
around a selected
image.
P-500ir didn’t
recognize the last
command
The printer accepts one
command at a time. A
selection may have been
made too quickly.
Queue successful Images selected to print
are ready and will start
printing momentarily.
Printing started Appears when the Print
command activates.
Back Next
Wait.
Note: Receiving images
in thumbnail view takes
longer than full-screen.
Turn on P-500ir,
Refresh and try again.
Select image so that
yellow box appears.
Tap OK to continue
and try again.
Wait. If images were
sent to the print queue,
tap the Print icon to
print now.
Wait
. Photo prints in
several seconds.
2 of 4
page
28
Page 29

P-500ir
P- 5 0 0 ir Image Viewing Software www.polaroid.com
ImageViewing Software
www.polaroid.com
1 Introduction
2 Things You Should Know
7 Installing the Software
9 Getting and Viewing Images
From the P-500ir printer (p.9)
From the PDA (p.11)
From the EyeModule2 (p.11)
13 Selecting Images
14 Printing Photos
From the P-500ir (p.14)
From the EyeModule2 (p.16)
17 Editing Images
20 Managing Images
Saving P-500ir images to a PDA (p.20)
Saving EyeModule2 images (p.20)
Backing up images (p.21)
Beaming to other handhelds (p.21)
Deleting images (p.22)
Locking and Unlocking images (p.22)
Creating a Slide Show (p.23)
25 Menu Options
27 Display Messages
31 Customer Support
Disclaimer and
Limitation of Liability (p.31)
Display Messages
No device found Printer needs to be on
when getting images.
Infrared ports need to
be aligned and within
range
No images found on
card
Card may contain
unreadable or
incompatible image
files.
No card found The card may not be
inserted properly.
Could not bind the IR
Technical problem. Press OK to continue.
stack
Back Next
Turn on the
P-500ir.
Align infrared ports
within range.
Check card in your
camera or on your PC.
The P-500ir reads
JPEG images on
CompactFlash Type 1
& II or SmartMedia 232MB removable
memory cards.
Check that the card is
properly and firmly
inserted into the
memory card slot.
3 of 4
Error in transport layer Technical problem. Press OK to continue.
page 29
Page 30

P-500ir
P- 5 0 0 ir Image Viewing Software www.polaroid.com
ImageViewing Software
www.polaroid.com
1 Introduction
2 Things You Should Know
7 Installing the Software
9 Getting and Viewing Images
From the P-500ir printer (p.9)
From the PDA (p.11)
From the EyeModule2 (p.11)
13 Selecting Images
14 Printing Photos
From the P-500ir (p.14)
From the EyeModule2 (p.16)
17 Editing Images
20 Managing Images
Saving P-500ir images to a PDA (p.20)
Saving EyeModule2 images (p.20)
Backing up images (p.21)
Beaming to other handhelds (p.21)
Deleting images (p.22)
Locking and Unlocking images (p.22)
Creating a Slide Show (p.23)
25 Menu Options
27 Display Messages
31 Customer Support
Disclaimer and
Limitation of Liability (p.31)
Display Messages
Fatal Exception ->
Technical problem. Turn off your PDA,
Reset
No JPEG images found
on digital film
Memory card is empty
or image files may have
been removed.
App Write: Error
Technical problem. Tap OK to continue.
writing data
P-500ir is BUSY The printing process is
active.
Your batteries are low.
Place the handheld in a
HotSync cradle to
You may not be able to
complete all tasks with
limited power.
recharge.
Back Next
turn it back on and try
again. If problem
persists contact Polaroid
Customer Support.
Check card in your
camera or on your
computer.
Wait. When the printer
finishes printing you
may continue.
Tap OK. Recharge or
replace your batteries.
4 of 4
page
30
Page 31

P-500ir
ImageViewing Software
www.polaroid.com
1 Introduction
2 Things You Should Know
7 Installing the Software
9 Getting and Viewing Images
From the P-500ir printer (p.9)
From the PDA (p.11)
From the EyeModule2 (p.11)
13 Selecting Images
14 Printing Photos
From the P-500ir (p.14)
From the EyeModule2 (p.16)
17 Editing Images
20 Managing Images
Saving P-500ir images to a PDA (p.20)
Saving EyeModule2 images (p.20)
Backing up images (p.21)
Beaming to other handhelds (p.21)
Deleting images (p.22)
Locking and Unlocking images (p.22)
Creating a Slide Show (p.23)
25 Menu Options
27 Display Messages
31 Customer Support
Disclaimer and
Limitation of Liability (p.31)
Customer Support
Back Next
You can call Polaroid within the U.S.A., 7 days a week, 8 A.M. to 8 P. M . EST.
Please identify the Polaroid product and serial number.
We offer a variety of Customer Support Services. Contact us for details and
applicable fees.
www.Polaroid.com
U.S.A.: 1.800.897.0356
Disclaimer and Limitation of Liability
•
No Warranty. Polaroid Corporation provides this software that is
compatible with most infrared-enabled Palm OS handheld devices
AS IS.
POLAROID MAKES NO WARRANTIES WITH RESPECT TO THE
SOFTWARE, EITHER EXPRESS OR IMPLIED, INCLUDING BUT
NOT LIMITED TO IMPLIED WARRANTIES OF MERCHANTABILITY
AND FITNESS FOR A PARTICULAR PURPOSE
. Polaroid Corporation
is not liable for any damages of any kind whatsoever, arising out of the use
of or inability to use the software or documentation, even if Polaroid has
been advised of the possibility of such damages.
1 of 2
page 31
Page 32

P-500ir
P- 5 0 0 ir Image Viewing Software www.polaroid.com
ImageViewing Software
www.polaroid.com
1 Introduction
2 Things You Should Know
7 Installing the Software
9 Getting and Viewing Images
From the P-500ir printer (p.9)
From the PDA (p.11)
From the EyeModule2 (p.11)
13 Selecting Images
14 Printing Photos
From the P-500ir (p.14)
From the EyeModule2 (p.16)
17 Editing Images
20 Managing Images
Saving P-500ir images to a PDA (p.20)
Saving EyeModule2 images (p.20)
Backing up images (p.21)
Beaming to other handhelds (p.21)
Deleting images (p.22)
Locking and Unlocking images (p.22)
Creating a Slide Show (p.23)
25 Menu Options
27 Display Messages
31 Customer Support
Disclaimer and
Limitation of Liability (p.31)
Customer Support
Back Next
• Limitation of Liability. IN NO EVENT SHALL POLAROID OR ITS
SUPPLIERS BE LIABLE FOR ANY CONSEQUENTIAL OR
INCIDENTAL DAMAGES (INCLUDING, WITHOUT LIMITATION,
DAMAGES FOR LOSS OF BUSINESS PROFITS, BUSINESS
INTERRUPTION, LOSS OF BUSINESS INFORMATION, OR
OTHER PECUNIARY LOSS)‚ARISING OUT OF THE USE OR
INABILITY TO USE THIS POLAROID PRODUCT, EVEN IF
POLAROID HAS BEEN ADVISED OF THE POSSIBILITY OF SUCH
DAMAGES
. Some states and countries do not allow the exclusion or
limitation of liability for consequential or incidental damages, so above
limitations may not apply to you.
2 of 2
©2001Polaroid Corporation, Cambridge, MA 02139, U.S.A., owner of the trademark “Polaroid” and “Polaroid 500”. All other product names may be the property
of their respective owners. All rights reserved.
Printed in the U.S.A. PU-21674M-0
page
32
 Loading...