

Polaroid ID CARD MAKER EXPERT, ID CARD MAKER ENHANCED, ID CARD MAKER ELITE User Manual

ID Card Maker Enhanced, Expert, and Elite Online User Document ation
This file contains information about Polaroid ID Card Maker
identification software version 6.0 or higher. Some information
included here may not apply to your environment.
Please choose a title below to view the document, or click on the
titles to the left of this page.
Operator’s Guide for ID Card Maker Version 6
Administrator’s Guide for ID Card Maker Version 6
Polaroid PCID Printer and Magnetic Stripe Plug-ins
Legal Notices
Conventions Used in the Online User Documentation
Comments? Suggestions?
ID Card Maker Enhanced, Expert, and Elite Version 6 User Documentation

Legal Notices
The design and information contained in these materials is
protected by US and international copyright law.
U.S. Patent No. 6,632,250.
Names and logos in sample projects are fictitious. Any similarity to
actual names, trademarks, or trade names is coincidental.
Polaroid and Polaroid & Pixel are trademarks of Polaroid
Corporation.
Adobe and Acrobat are registered trademarks and Type Manager
is a trademark of Adobe Systems Incorporated. Microsoft and
Windows are registered trademarks of Microsoft Corporation.
Pentium is a registered trademark of Intel Corporation.
All other product names are trademarks of their respective
owners.
Portions of this product were created using LEADTOOLS © 19912005 LEAD Technologies, Inc. ALL RIGHTS RESERVED. Portions
of this product are licensed under US patent 5,327,254 and foreign
counterparts.
Portions of the bar code technology of this product are copyrighted
by StrandWare, Inc.
Elite Edition Only:
ID Card Maker Enhanced, Expert, and Elite Version 6 User Documentation
Binary PDF417 barcode technology provided in this product is
copyrighted by TAL Technologies, Inc.

Conventions Used in the Online User Documentation
Notes remind or inform you of something you should know
before proceeding.
Names of menus, dialog box options, and buttons appear in bold
type.
File names also appear in bold type, and the variable part of the file
name is in bold italics (for example, project name.iwx indicates
that you supply the project name while iwx remains constant).
Names of keyboard keys appear in large and small capital letters
(for example,
ENTER).
Information you enter appears in regular italic type (for example,
you may be instructed to type Admin to log in to an ID Card Maker
application).
Parts of dialog box names that change depending on a name you
supplied appear in brackets [ ].
Elite Edition Only:
Features that are available only in ID Card Maker Elite Edition
applications are identified by this phrase in the left margin.
Blue text indicates a jump (link) to the referenced topic for online
reading.
ID Card Maker Enhanced, Expert, and Elite Version 6 User Documentation

Comments? Suggestions?
Please send comments, suggestions, or corrections to:
ID Card Maker Information Development
Polaroid Commercial ID Systems
4650 Executive Blvd.
Ft. Wayne, IN 46808
ID Card Maker Enhanced, Expert, and Elite Version 6 User Documentation

Operator’s Guide for
ID Card Maker Version 6

Contents
About the Operator’s Guide _________________________________________________ iv
Chapter 1: System Overview _________________________________________ 1
Introducing the ID Card Maker “Project” _____________________________________ 1
Getting Started____________ ___ _______________________________________________ 2
Log In to an ID Card Maker Application __________________________________ 3
Changing Your User Password____________________________________________ 4
Using the Welcome Dialog Box___________________________________________ 5
Using ID Card Maker Applications ________________________________________ 5
Opening a Project __________________________________________________________ 7
Chapter 2: Using the ID Card Maker Process Application ______________ 9
Using an ID Card Maker Project ______________________________________________ 9
Entering Information in Text Fields________________________________________ 10
Entering Information in Date Fields_______________________________________ 12
Selecting Information in List Fields________________________________________ 13
Using Photo Fields _____ _________________________________________________ 14
Photo from File______________________________________________________ 15
TWAIN______________________________________________________________ 16
TWAIN (Fast)________________________________________________________ 17
Video for Windows__________________________________________________ 18
Video for Windows (Fast) ____________________________________________ 19
Optional Cameras _________________________________________________ 19
Selecting a Different Photo Source __________________________________ 19
Cropping and Adjusting Photos______________________________________ 20
Exporting Images __________________________________________________ _ 23
Importing Images ____________ _______________________________________ 23
Adjusting Photo Backdrop Removal Parameters ____ _______ ___ ____ ____ 24
Using Signature Fields ___________________________________________________ 28
Signature from File __________________________________________________ 29
Optional Capture Devices __________________________________________ 29
Using Check Box Fields__________________________________________________ 30
Using Binary Fields ______________________________________________________ 31
Data from File ______________________________________________________ 32
Mandatory Fields_______________________________________________________ 33
Read-only Fields________________________________________________________ 33
ii ID Card Maker Enhanced, Expert, and Elite User Documen tation

Contents
Previewing Cards ________________________________________________ _______ 33
Printing Cards ___________________________________________________________ 34
Using a Project that is Connected to a Database _____________________________ 37
Changing Information in a Database_____________________________________ 38
Entering a New Database Record________________________________________ 40
Deleting a Database Record ____________________________________________ 41
Using a Project that is Connected to a Directory Service ______________________ 42
Changing Information in a Directory Service ______ ___ ____ ___ ____ ___ ____ ___ 43
Creating a New Directory Service Entry___________________________________ 45
Chapter 3: Using the ID Card Maker Reports Application ______________ 47
Reports Procedure Overview ________________________ ________________________ 47
Selecting a Report __ ____________________________________________________ 48
Selecting Records _______________________________________________________ 48
Printing Reports _________________________________________________________ 48
Chapter 4: Searching the Database__________________________________ 51
Performing a Quick Search __________________________________________________ 52
Refining the Quick Search ______________________________ _________________ 53
Viewing Search Results __________________________________________________ 54
Navigating Search Results _______________________________________________ 56
Clearing a Record Set ___________________________________________________ 57
Running a Stored Advanced Search _________________________________________ 57
Creating an Advanced Search ______________________________________________ 58
Index_______________________________________________________________ 59
ID Card Maker Version 6 Operator’s Guide iii

About the Operator’s Guide
This document, part of the online User Documentation, guides users of
the Process and Reports applications through the tasks they perform.
Other sources of information about ID Card Maker applications are:
• The CD insert tells how to install ID Card Maker software.
• The online help system tells you how to perform ID Card Maker
tasks. You can access the online help system from the Help menu
in each ID Card Maker application or by pressing the F1 key.
• The Administrator’s Guide, also part of the online User
Documentation, explains why you might want to use the various
features available in the ID Card Maker applications. It also
suggests the order in which tasks should be performed.
iv ID Card Maker Enhanced, Expert, and Elite User Document ation

Chapter 1: System Overview
Polaroid ID Card Maker includes four applications:
ID Card Maker Project lets a System Administrator create projects
that meet your organization’s specific needs for card designs, report
designs, data entry, and database access.
ID Card Maker Process lets you use the projects you create in the
Project application to gather information, access your database, and
print identification cards.
ID Card Maker Reports lets you generate and print image-rich reports
from your database.
ID Card Maker Administrator contains tools to manage user
accounts, monitor security, and configure your ID Card Maker
software.
Introducing the ID Card Maker “Project”
An ID Card Maker project is similar to a folder or directory on a
computer: it is the container that holds information about an
identification implementation.
A project contains a Production Form and one or more card designs.
Optionally, your project can contain one or more report designs and
one or more stored searches.
ID Card Maker Version 6 Operator’s Guide 1

System Overview
Enhanced Edition:
Enhanced Edition projects can contain only one card design.
By using field connections, information entered in a Production Form
can be saved in a database, printed on a card, used in a report, or all of
the above. The Production Form can also be used to query an existing
database so that you can add or change information in the database or
print cards and reports using information in the database.
Getting Started
The rest of this chapter explains the steps you take to begin using your
ID Card Maker identification software.
2 ID Card Maker Enhanced, Expert, and Elite User Documentation
System Overview
Log In to an ID Card Maker Application
To begin using ID Card Maker software, on the taskbar, click Start,
and then click Programs, Polaroid, ID Card Maker, and then ID Card
Maker Process or ID Card Maker Reports.
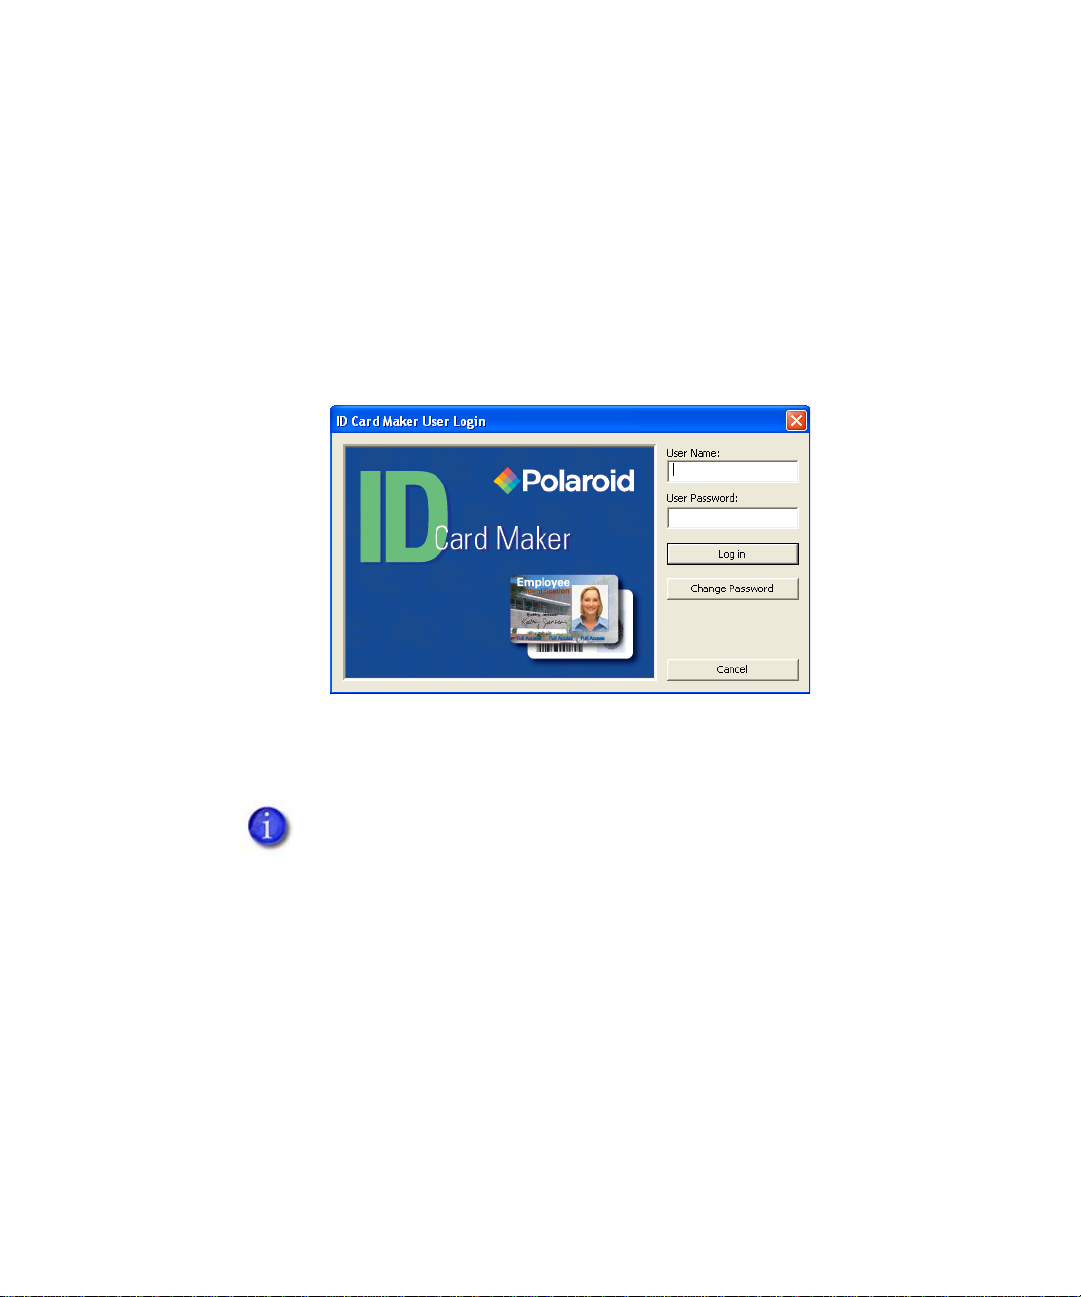
In the User Login dialog box, type the User Name and User Password
given to you by your System Administrator, and then click the Log in
button.
When you are logged in to an ID Card Maker application, you do not
need to supply your user name and password again to start another ID
Card Maker application.
Your System Administrator may have configured your
computer to require logging in again if you have not used the
Process application after a certain period of time. If that
happens, you will see a dialog box similar to the following.
ID Card Maker Version 6 Operator’s Guide 3

System Overview
Changing Your User Password
Each time you log in to an ID Card Maker application you have the
opportunity to change your user password. To change your password,
click the Change Password button any time before completing the
login.
Passwords can be 1 to 32 characters long and can include any
character you can type from the keyboard.
Elite Edition:
Your System Administrator may have configured additional password
requirements.
4 ID Card Maker Enhanced, Expert, and Elite User Documentation
System Overview
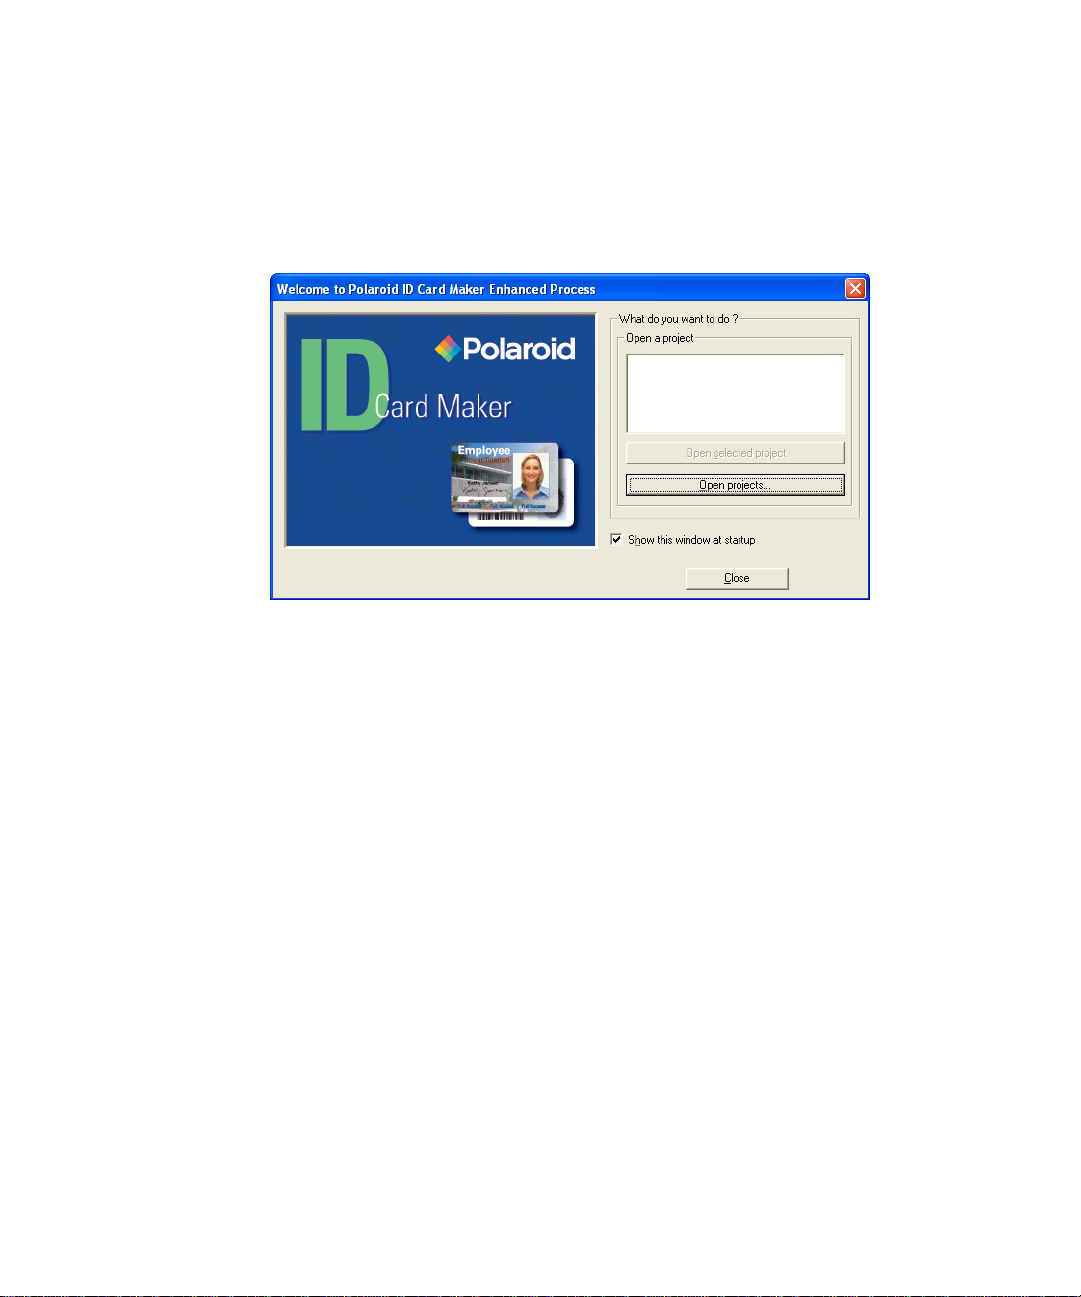
Using the Welcome Dialog Box
After you have changed your password or entered it and clicked Log
in, the Welcome dialog box appears.
From this dialog box you can open an existing project. If the project
you want to open is not listed, click More projects to display the Open
Project dialog box, which lists all ID Card Maker projects available to
you.
You can also choose not to have the Welcome dialog box display by
clearing the check mark next to Show this window at startup. If you
hide the Welcome dialog box and later want to show it again, from the
menu bar, select View and then Show Welcome on startup.
Using ID Card Maker Applications
ID Card Maker applications let you perform most actions several
ways: by selecting menu commands with the mouse, or with the
keyboard, or by clicking a toolbar button, or by clicking the right
mouse button and selecting from the pop-up menu. Key commands or
shortcuts for actions common to many applications—such as print and
ID Card Maker Version 6 Operator’s Guide 5

System Overview
save—follow Microsoft Office conventions; you do not have to relearn
your favorite shortcuts.
Most ID Card Maker applications have several toolbars, and you can
display or hide toolbars to match the way you prefer to work. When
you rest the mouse pointer on a toolbar button, the name and function
of the button appears.
A status bar at the bottom of the window provides additional
information about the application
. As with toolbars, you can choose to
view or hide the status bar.
Menu bar
Toolbars
Status bar
6 ID Card Maker Enhanced, Expert, and Elite User Documentation

System Overview
Opening a Project
To open a project, from the menu bar select File and then Open
Project (either with the mouse or with the keyboard).
The Open Project dialog box opens. Select a project from the list of
projects that are available to you and then click the Open button.
ID Card Maker Version 6 Operator’s Guide 7

System Overview
8 ID Card Maker Enhanced, Expert, and Elite User Documentation

Chapter 2: Using the ID Card Maker Process Application
This chapter uses the sample projects that came with your ID Card
Maker software to explain your tasks. The projects you will use will be
created to meet your specific needs, but they will probably follow the
same general principles.
This chapter gives you background information about using the ID
Card Maker Process application. While you are using the software you
can get step-by-step instructions on the task you are doing by pressing
the F1 key or by selecting Help Topics from the Help menu.
Using an ID Card Maker Project
How your project opens depends on what privileges you have. If you
are allowed to enter new records, the pointer will be in the field that
the designer of the project designated as the starting field. (This is
usually the field in the upper left corner of the window.) If your
project is connected to a database, the New button on the toolbar will
be “pushed in” and there will be a check mark next to the New
command on the Record menu.
You can start entering information immediately. Most fields will have
a prompt that indicates the kind of information you are to enter in the
field. You can move between fields by tabbing or by clicking with the
mouse.
ID Card Maker Version 6 Operator’s Guide 9

Using the ID Card Maker Process Application
The following sections discuss how to enter information into each type
of field you may find in your project.
If you need to start over with the record and your project is
connected to a database, from the menu bar select Record and
then Refresh. All fields will return to the way they were when
you selected the record from the database.
Entering Information in Text Fields
Text fields
10 ID Card Maker Enhanced, Expert, and Elite User Document ation

Using the ID Card Maker Process Application
Most fields will be text fields. There will be a maximum number of
characters you can enter in a text field. If a text field stops accepting
characters, it may be that you have reached the maximum field length.
If you enter more characters than the text field entry box can display,
the text might scroll. You can see all the text using the H
arrow, and right arrow keys. You can also ask the project designer to
make the text field wide enough to display all the text.
Some text fields may appear with characters already entered for you.
For example, an identification number might appear with hyphens
separating groups of digits. These fields have a “mask” applied to
them to make your job easier. As you type data into these fields, the
pointer will skip over the characters that are already there. Some other
ways masked text fields might behave are:
• Converting characters. For example, lowercase characters you type
might automatically be changed into uppercase characters.
• Requiring that you enter something in a field. If you try to print a
card or save a record without entering a value in such a text field,
you will see the message, “Mandatory character not present.”
When you click OK to clear the message, the pointer will appear in
the field you need to complete.
OME, END, left
• Requiring a certain kind of character. If you type a letter into a
phone number field that is masked to accept only numeric
characters, the letter will not be accepted and the computer bell
will sound.
Other text fields may be completely filled in for you. Sometimes such
text is supplied as a convenience to you but you can change it. Other
times the field is read-only and you cannot change the contents.
Normally, read-only fields are indicated by gray text or some other
visual cue.
ID Card Maker Version 6 Operator’s Guide 11

Using the ID Card Maker Process Application
Entering Information in Date Fields
Date field
Date fields have separator characters (often slashes or hyphens) in
them. You must enter numbers for the day, month, and year in the
order that was specified when your project was created. If the prompt
for the date field does not tell you whether to enter the month first or
second and you enter it in the wrong position, an error message will
appear when you try to print a card or save the record. You can easily
change the order.
Some date fields also require that you enter a time. The time part of the
date field will appear to the right of the date. You must enter numbers
12 ID Card Maker Enhanced, Expert, and Elite User Document ation

Using the ID Card Maker Process Application
for the hour, minute, and second part of the time. If your project uses
the 12-hour time format, you will also need to enter AM or PM.
If you make a mistake while entering a date, move the pointer
to the right of the incorrect character, press the B
key, and then type the correct number.
Selecting Information in List Fields
ACKSPACE
List fields
List fields have an arrow at the right side of the field. Instead of typing
information in them, you make a selection from the items in the list. To
ID Card Maker Version 6 Operator’s Guide 13

Using the ID Card Maker Process Application
see all the choices, click and hold on the arrow. See the online help
topic “Select an item in a list field” for ways to use the keyboard to
make list field selections.
Using Photo Fields
What happens when you enter a photo field depends on how your
project was set up, whether your system has a camera, and, if so, what
kind of camera it is. The most common behavior is for a photo capture
to begin as soon as you enter the photo field. If no dialog box opens,
14 ID Card Maker Enhanced, Expert, and Elite User Document ation
Photo field

Using the ID Card Maker Process Application
you must start the capture operation. From the menu bar, select
Capture and then Capture.
The dialog box for the default photo source opens. If an “Unable to
capture photo . . .” message appears, you must select a source for the
photo. From the menu bar, select Capture and then Select Capture
Source. See the online help topic “Select a photo source” for step-bystep instructions.
If you need to select a source, check with your System
Administrator. They may have forgotten to assign a source.
The following paragraphs show the dialog boxes that open for the
photo sources that are available on all ID Card Maker computers.
Photo from File
If the photo source selected is Photo from File, the Open dialog box
opens. You use standard Windows navigation techniques to find the
drive, folder, and file that contains the photograph that should be
used. Your supervisor or ID Card Maker System Administrator will
supply you with the file location and file naming scheme to use. When
you select a file, a “thumbnail” of the file displays so you can verify
that you have the correct file.
ID Card Maker Version 6 Operator’s Guide 15

Using the ID Card Maker Process Application
When you have found the file you want, click Open. The Photo Crop
and Adjust dialog box opens, where you can center the subject or crop
out (eliminate) unnecessary background. See Cropping and Adjusting
Photos on page 20.
TWAIN
If the photo source selected is TWAIN, the TWAIN Interface dialog
box opens. (The TWAIN standard specifies how an application, such
as ID Card Maker Process, can activate a scanner, digital camera, or
other image-capturing device.)
16 ID Card Maker Enhanced, Expert, and Elite User Document ation

Using the ID Card Maker Process Application
When you click the Select Source button, the Select Source dialog box
opens. It lists all the TWAIN devices installed on your computer.
Select the device you want to use and click the Select button. The
Select Source dialog box closes. In the TWAIN Interface dialog box,
click the Acquire Photo button. The software application that is
associated with the device you selected opens.
Because there are many different TWAIN devices made by many
different manufacturers, this document cannot supply explicit
instructions for using your TWAIN device. See the documentation that
came with your device, or ask your supervisor or ID Card Maker
System Administrator for step-by-step instructions.
TWAIN (Fast)
If the photo source selected is TWAIN (Fast), the last TWAIN device
used is automatically selected. See the documentation that came with
your device or ask your System Administrator for step-by-step
instructions.
ID Card Maker Version 6 Operator’s Guide 17

Using the ID Card Maker Process Application
Video for Windows
If the photo source selected is Video for Windows, the Video for
Windows Interface dialog box opens.
When you click the Select Source button, the Select Source dialog box
opens. It lists all the Video for Windows devices installed on your
computer.
Select the device you want to use and click the OK button. The Select
Source dialog box closes.
If the Source list shows a Video for Windows source (possibly
designated VFW) and a Windows Driver Model (WDM)
source for your camera, selecting the Windows Driver Model
entry usually gives better results.
In the Video for Windows Interface dialog box, click the Acquire
Photo button. The Video for Windows Camera dialog box opens.
18 ID Card Maker Enhanced, Expert, and Elite User Document ation

Using the ID Card Maker Process Application
When your subject is ready, click Take Photo. The camera captures the
image and the label on the button changes to Retry. If the photo is
unacceptable (for example, if the subject’s eyes are closed), click Retry.
If the photo is acceptable, click OK. The Photo Crop and Adjust dialog
box opens. See Cropping and Adjusting Photos
Video for Windows (Fast)
If the photo source selected is Video for Windows (Fast), the Video for
Windows Camera dialog box opens immediately. You do not have to
select a source.
on page 20.
Optional Cameras
In addition to the photo sources already described, your ID Card
Maker system may include an optional capture device, such as a
Polaroid ID Card Maker Image Capture product. These optional
devices have special software that makes them especially easy to use
with your ID Card Maker system. Optional cameras are explained in
their own online documents, which you access through the Windows
Start menu.
Selecting a Different Photo Source
If you have the necessary privilege, you can use a photo source other
than the one specified when your project was created. See the online
help topic “Select a photo source” for step-by-step instructions.
ID Card Maker Version 6 Operator’s Guide 19

Using the ID Card Maker Process Application
Cropping and Adjusting Photos
If your ID Card Maker project allows you to crop photos, the Photo
Crop and Adjust dialog box will open as soon as you have selected
your photo. Your photo will appear in the image area with four
squares, called sizing handles, around the outside.
To zoom in on the subject (eliminate unnecessary background), click
and drag any sizing handle, then release the mouse button. The crop
box proportions, set by the project designer, remain constant.
After you have zoomed in, your subject may no longer be centered in
the crop box. To adjust the position of the crop box, move the mouse
until the pointer is inside the crop box. The pointer changes to a four-
20 ID Card Maker Enhanced, Expert, and Elite User Document ation

Using the ID Card Maker Process Application
way arrow. Click and drag the crop box to the position you want, then
release the mouse button.
When the photo is as you want it, click the OK button. The Photo Crop
and Adjust dialog box closes, and the photo appears in the photo field.
Most of the time, cropping and adjusting is all you need to do to a
photo. But the Photo Crop and Adjust dialog box also offers the
following advanced capabilities.
Rotating Photos
Some previously taken photos may have an orientation different from
the one you need. You can compensate for this by rotating the photo as
necessary. Each time you click the Rotate button, the photo rotates
one-quarter turn clockwise.
Any cropping or adjusting you did is lost when you rotate a
photo. If you need to rotate the photo, do that first, then crop
and adjust.
Selecting an Exposure
If the subject of the photo has a very light or very dark complexion,
you can improve the quality of the photo to some degree by clicking
the Photo Selection button.
ID Card Maker Version 6 Operator’s Guide 21

Using the ID Card Maker Process Application
An array of nine different brightnesses appears, with the original
exposure in the center. Select a photo by clicking it with the mouse or
by using the arrow keys to move the selection box.To adjust the
contrast of the photo, select the More button. You can also select from
nine choices for saturation. At any time you can start over or select OK
or press E
NTER to accept the currently-selected photo. Your selection
appears in the image area of the Photo Crop and Adjust dialog box.
Remember, the final quality of the image is also affected by the
printer you are using to print your ID cards. Changing
lighting and camera settings should always be the first steps
you take to improve the photo. This selection option will not
make up for poor data.
22 ID Card Maker Enhanced, Expert, and Elite User Document ation
 Loading...