

Page 1

ID Card Maker Entry Online User Documentation
This file contains information about Polaroid ID Card Maker
identification software version 6.0 or higher. Some information
included here may not apply to your environment.
Please choose a title below to view the document, or click on the
titles to the left of this page.
Operator’s Guide for ID Card Maker Version 6
Administrator’s Guide for ID Card Maker Version 6
Polaroid PCID Printer and Magnetic Stripe Plug-ins
Legal Notices
Conventions Used in the Online User Documentation
Comments? Suggestions?
ID Card Maker Entry Version 6 User Documentation
Page 2

Legal Notices
The design and information contained in these materials is
protected by US and international copyright law.
U.S. Patent No. 6,632,250.
Names and logos in sample projects are fictitious. Any similarity to
actual names, trademarks, or trade names is coincidental.
Polaroid and Polaroid & Pixel are trademarks of Polaroid
Corporation.
Adobe and Acrobat are registered trademarks and Type Manager
is a trademark of Adobe Systems Incorporated. Microsoft and
Windows are registered trademarks of Microsoft Corporation.
Pentium is a registered trademark of Intel Corporation.
All other product names are trademarks of their respective
owners.
Portions of this product were created using LEADTOOLS © 19912005 LEAD Technologies, Inc. ALL RIGHTS RESERVED. Portions
of this product are licensed under US patent 5,327,254 and foreign
counterparts.
Portions of the bar code technology of this product are copyrighted
by StrandWare, Inc.
ID Card Maker Entry Version 6 User Documentation
Page 3

Conventions Used in the Online User Documentation
Notes remind or inform you of something you should know
before proceeding.
Names of menus, dialog box options, and buttons appear in bold
type.
File names also appear in bold type, and the variable part of the file
name is in bold italics (for example, project name.iwx indicates
that you supply the project name while iwx remains constant).
Names of keyboard keys appear in large and small capital letters
(for example,
ENTER).
Information you enter appears in regular italic type (for example,
you may be instructed to type Admin to log in to an ID Card Maker
application).
Parts of dialog box names that change depending on a name you
supplied appear in brackets [ ].
Blue text indicates a jump (link) to the referenced topic for online
reading.
ID Card Maker Entry Version 6 User Documentation
Page 4

Comments? Suggestions?
Please send comments, suggestions, or corrections to:
ID Card Maker Information Development
Polaroid Commercial ID Systems
4650 Executive Blvd.
Ft. Wayne, IN 46808
ID Card Maker Entry Version 6 User Documentation
Page 5

Operator’s Guide for
ID Card Maker Version 6
Page 6

Contents
About the Operator’s Guide _________________________________________________ iv
Chapter 1: System Overview _________________________________________ 1
Introducing the ID Card Maker “Project” _____________________________________ 1
Getting Started_____________________________________________________ _________ 2
Start an ID Card Maker Application_______________________________________ 2
Using the Welcome Dialog Box___________________________________________ 3
Using ID Card Maker Applications ________________________________________ 3
Opening a Project __________________________________________________________ 5
Chapter 2: Using the ID Card Maker Process Application ______________ 7
Using an ID Card Maker Project ______________________________________________ 7
Entering Information in Text Fields_________________________________________ 8
Using Photo Fields _______________________________________________________ 9
Photo from File______________________________________________________ 10
TWAIN__________________________________________________________ ____ 10
TWAIN (Fast)________________________________________________________ 11
Video for Windows__________________________________________________ 12
Video for Windows (Fast) ____________________________________________ 13
Optional Cameras __________________________________________________ 13
Selecting a Different Photo Source __________________________________ 13
Cropping and Adjusting Photos______________________________________ 14
Rotating Photos _________________________________________________ 15
Selecting an Exposure ___________________________________________ 15
Starting Over____________________________________________________ 17
Previewing Cards_____________ __________________________________________ 17
Printing Cards __________________________________________________________ 18
Using the Project Database _________________________________________________ 20
Changing Information in a Database____________________________________ 20
Entering a New Database Record_______________________________________ 21
Deleting a Database Record____________________________________________ 22
ii ID Card Maker Entry Version 6 User Documentation
Page 7

Chapter 3: Searching the Database _________________________________ 23
Performing a Search _______________________________________________________ 23
Refining the Search____________________________ ___ ____ ___ ____ ___ ____ ____ 24
Navigating Search Results_______________________________________________ 25
Index ______________________________________________________________ 27
ID Card Maker Entry Ver sion 6 Operator’s Guide iii
Page 8

About the Operator’s Guide
This document, part of the online User Documentation, guides users of
the Process application through the tasks they perform.
Other sources of information about ID Card Maker applications are:
• The CD insert tells how to install ID Card Maker software.
• The online help system tells you how to perform ID Card Maker
tasks. You can access the online help system from the Help menu
in each ID Card Maker application or by pressing the F1 key.
• The Administrator’s Guide, also part of the online User
Documentation, explains why you might want to use the various
features available in the ID Card Maker applications. It also
suggests the order in which tasks should be performed.
iv ID Card Maker Entry Version 6 User Documentation
Page 9

Chapter 1: System Overview
Polaroid ID Card Maker Entry Edition includes three applications:
ID Card Maker Designer lets a System Administrator create projects
that meet your organization’s specific needs for card designs, data
entry, and database access.
ID Card Maker Production lets you use the projects you create in the
Designer application to gather information, access your database, and
print identification cards.
ID Card Maker Administrator contains tools to configure your ID
Card Maker software.
Introducing the ID Card Maker “Project”
An ID Card Maker project is similar to a folder or directory on a
computer: it is the container that holds information about an
identification implementation.
A project contains a Production Form, a card design, and a database.
By using field connections, information entered in a Production Form
can be saved in a database, printed on a card, or both. The Production
Form can also be used to query an existing database so that you can
add or change information in the database or print cards using
information in the database.
ID Card Maker Entry Version 6 Operator’s Guide 1
Page 10

System Overview
Getting Started
The rest of this chapter explains the steps you take to begin using your
ID Card Maker identification software.
Start an ID Card Maker Application
To begin using ID Card Maker software, on the taskbar, click Start,
and then click Programs, Polaroid, ID Card Maker, and then ID Card
Maker Entry Process.
2 ID Card Maker Entry Version 6 User Documentation
Page 11
System Overview
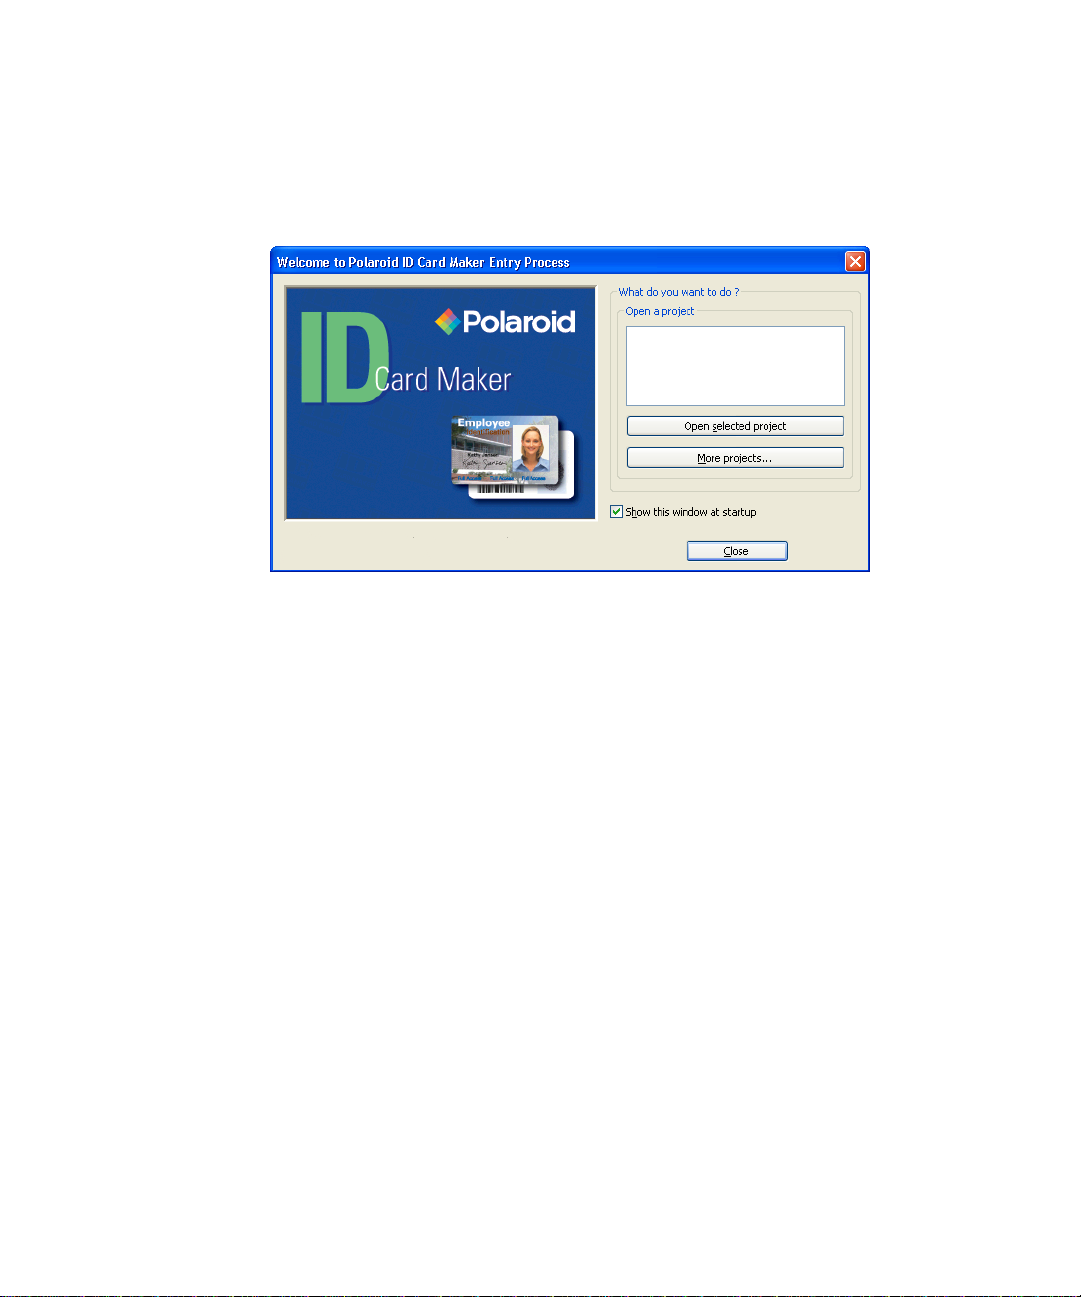
Using the Welcome Dialog Box
The Welcome dialog box appears.
From this dialog box you can open an existing project. If the project
you want to open is not listed, click More projects to display the Open
Project dialog box, which lists all ID Card Maker projects available to
you.
You can also choose not to have the Welcome dialog box display by
clearing the check mark next to Show this window at startup. If you
hide the Welcome dialog box and later want to show it again, from the
menu bar, select View and then Show Welcome on startup.
Using ID Card Maker Applications
ID Card Maker applications let you perform most actions several
ways: by selecting menu commands with the mouse, or with the
keyboard, or by clicking a toolbar button, or by clicking the right
mouse button and selecting from the pop-up menu. Key commands or
shortcuts for actions common to many applications—such as print and
save—follow Microsoft Office conventions; you do not have to relearn
your favorite shortcuts.
ID Card Maker Entry Version 6 Operator’s Guide 3
Page 12
System Overview
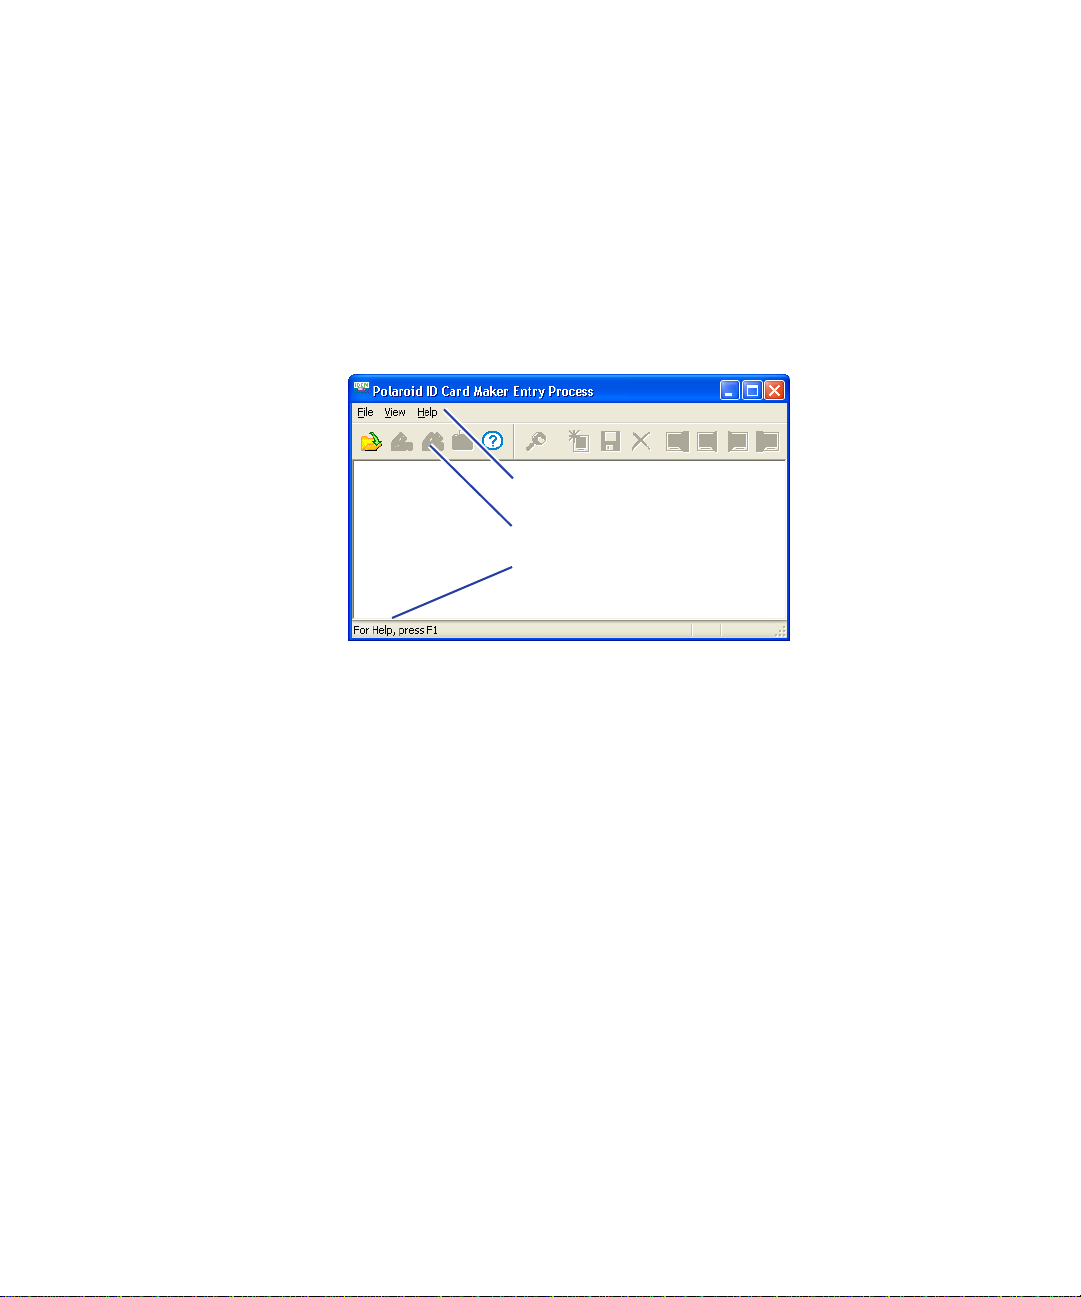
Most ID Card Maker applications have several toolbars, and you can
display or hide toolbars to match the way you prefer to work. When
you rest the mouse pointer on a toolbar button, the name and function
of the button appears.
A status bar at the bottom of the window provides additional
information about the application
. As with toolbars, you can choose to
view or hide the status bar.
Menu Bar
Toolbar
Statu s B a r
4 ID Card Maker Entry Version 6 User Documentation
Page 13
System Overview
Opening a Project
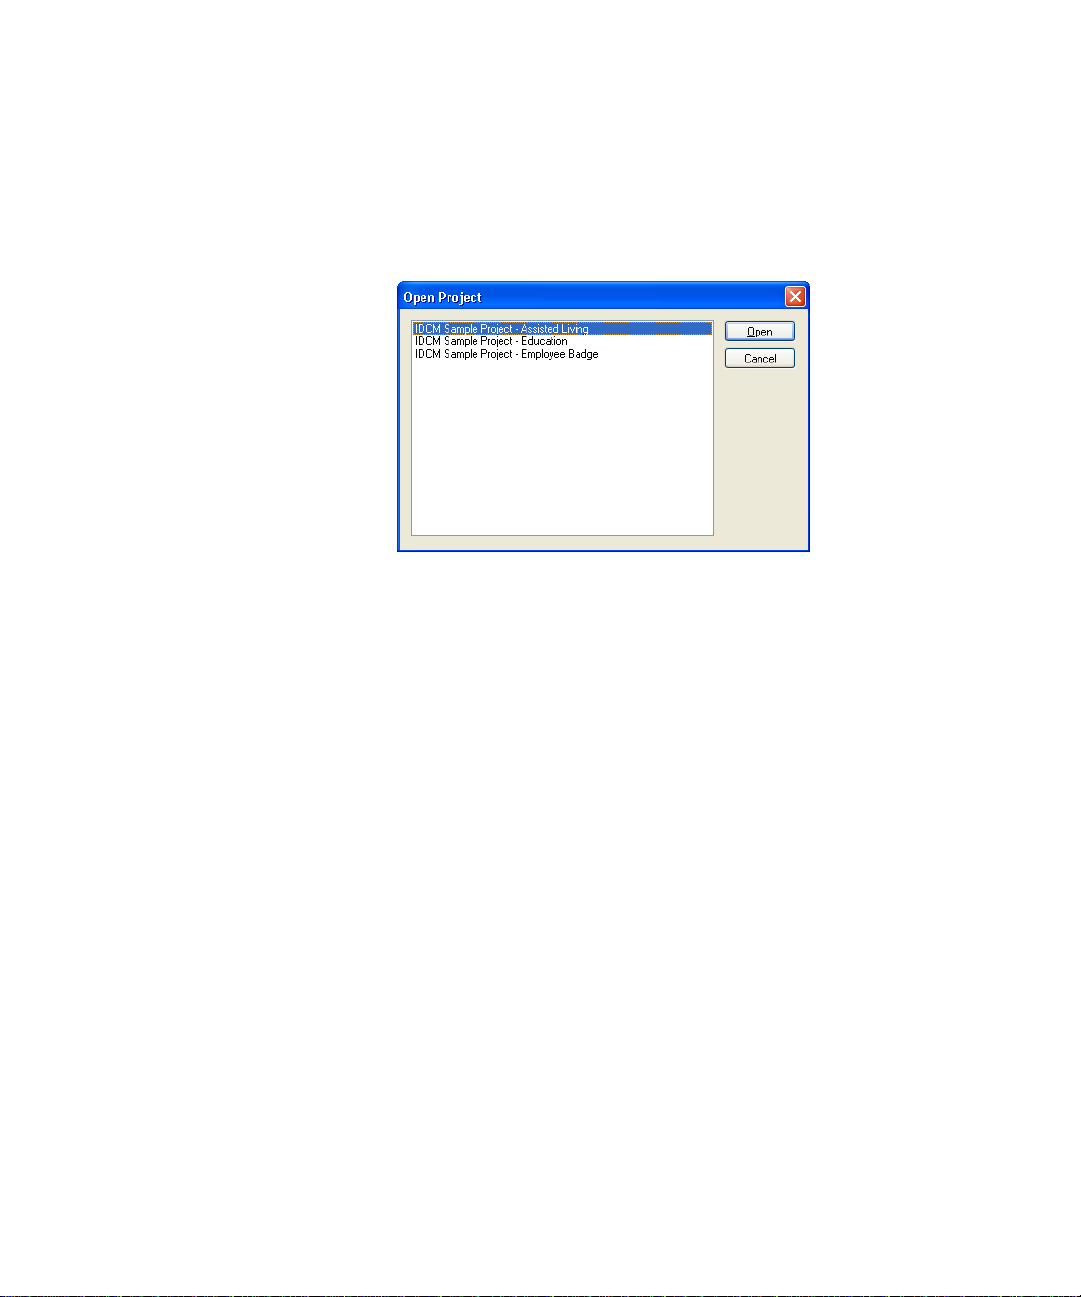
To open a project, from the menu bar select File and then Open
Project (either with the mouse or with the keyboard).
*** IDCM Entry screenshot goes here
The Open Project dialog box opens. Select a project from the list of
projects that are available to you and then click the Open button.
ID Card Maker Entry Version 6 Operator’s Guide 5
Page 14

System Overview
6 ID Card Maker Entry Version 6 User Documentation
Page 15

Chapter 2: Using the ID Card Maker Process Application
This chapter uses the sample projects that came with your ID Card
Maker software to explain your tasks. The projects you will use will be
created to meet your specific needs, but they will probably follow the
same general principles.
This chapter gives you background information about using the ID
Card Maker Process application. While you are using the software you
can get step-by-step instructions on the task you are doing by pressing
the F1 key or by selecting Help Topics from the Help menu.
Using an ID Card Maker Project
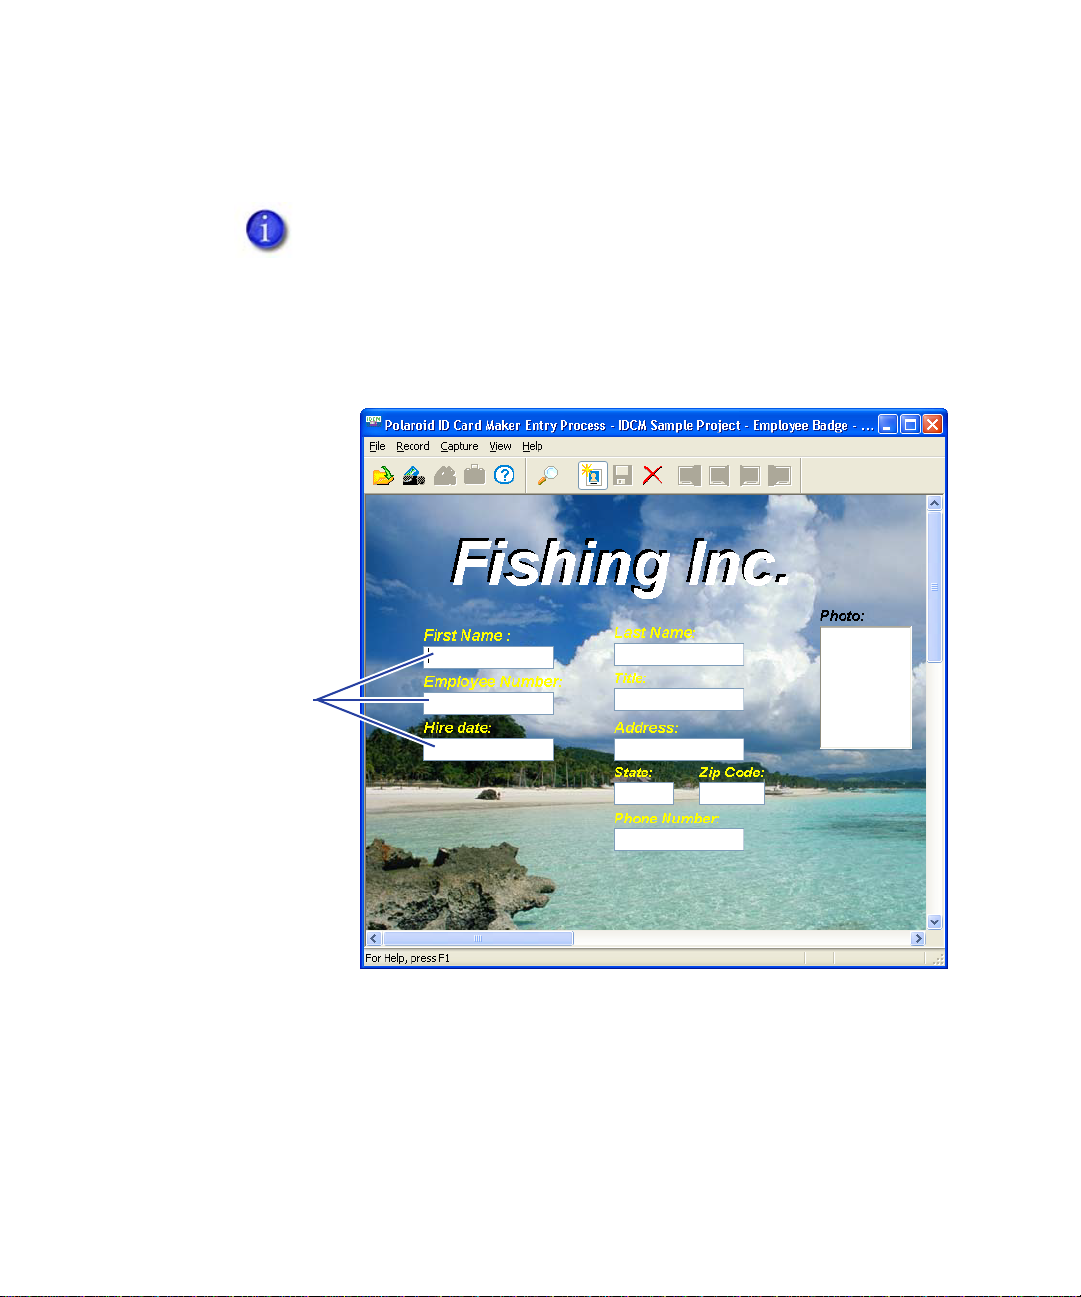
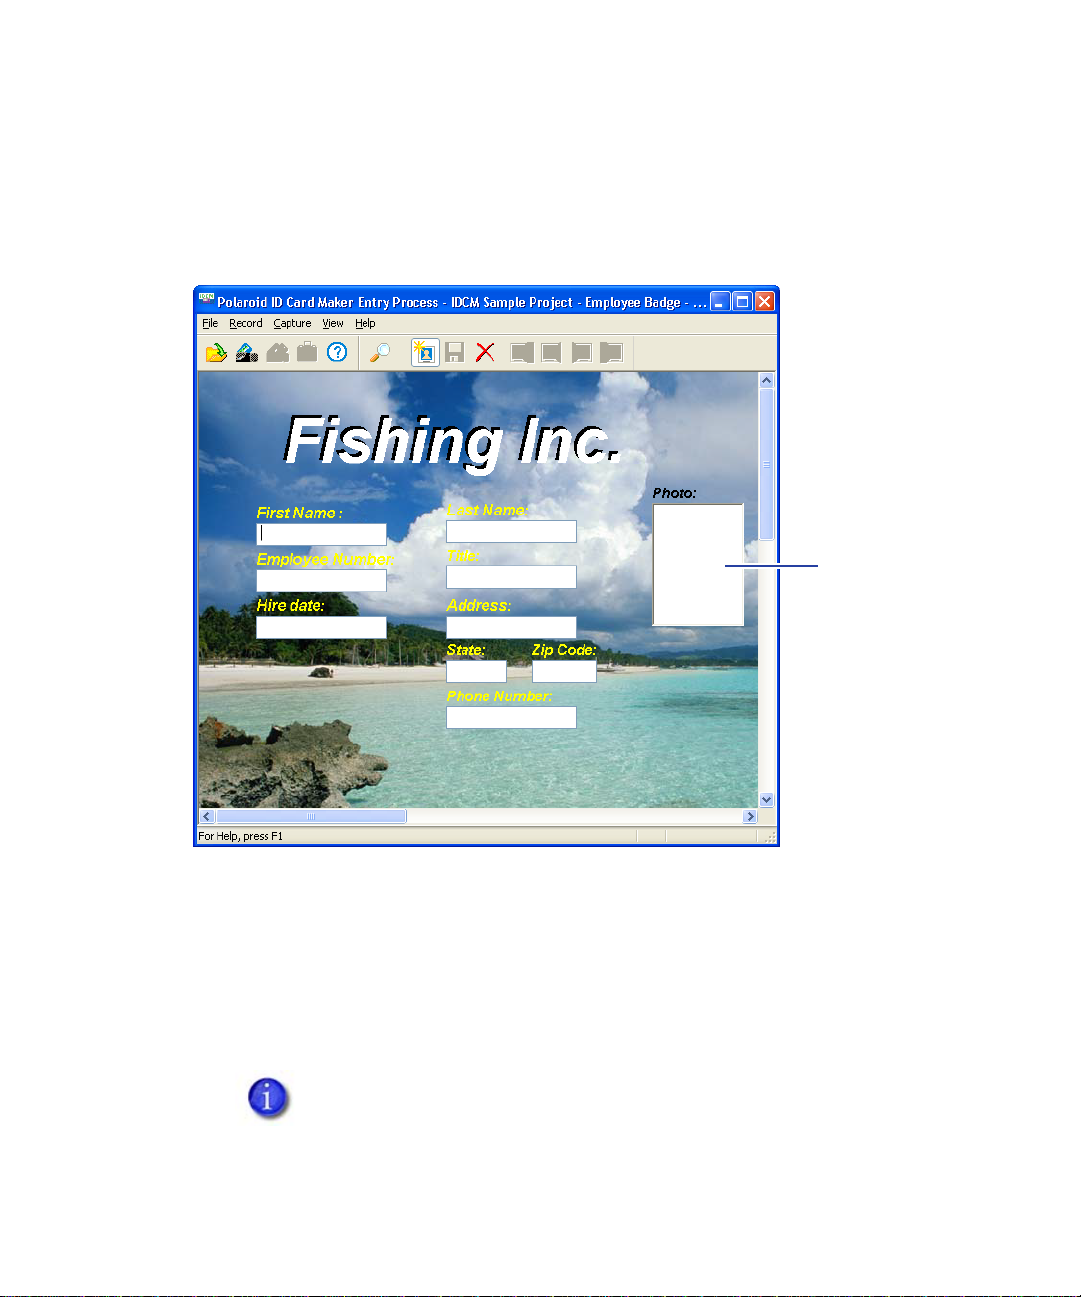
When your project opens, the pointer will be in the field that the
designer of the project designated as the starting field. (This is usually
the field in the upper left corner of the window.) The New button on
the toolbar will be “pushed in” and there will be a check mark next to
the New command on the Record menu.
You can start entering information immediately. Most fields will have
a prompt that indicates the kind of information you are to enter in the
field. You can move between fields by tabbing or by clicking with the
mouse.
ID Card Maker Entry Version 6 Operator’s Guide 7
Page 16
Using the ID Card Maker Process Application
The following sections discuss how to enter information into each type
of field you may find in your project.
If you need to start over with the record, from the menu bar
select Record and then Refresh. All fields will return to the
way they were when you selected the record from the
database.
Entering Information in Text Fields
Text fields
Most fields will be text fields. There will be a maximum number of
characters you can enter in a text field. If a text field stops accepting
characters, it may be that you have reached the maximum field length.
If you enter more characters than the text field entry box can display,
the text might scroll. You can see all the text using the H
8 ID Card Maker Entry Version 6 User Documentation
OME, END, left
Page 17
Using the ID Card Maker Process Application
arrow, and right arrow keys. You can also ask the project designer to
make the text field wide enough to display all the text.
Using Photo Fields
Photo field
Whenyou enter a photo field, a photo capture begins.
The dialog box for the default photo source opens. If an “Unable to
capture photo . . .” message appears, you must select a source for the
photo. From the menu bar, select Capture and then Select Capture
Source. See the online help topic “Select a photo source” for step-bystep instructions.
If you need to select a source, check with your System
Administrator. They may have forgotten to assign a source.
ID Card Maker Entry Version 6 Operator’s Guide 9
Page 18
Using the ID Card Maker Process Application
The following paragraphs show the dialog boxes that open for the
photo sources that are available on all ID Card Maker computers.
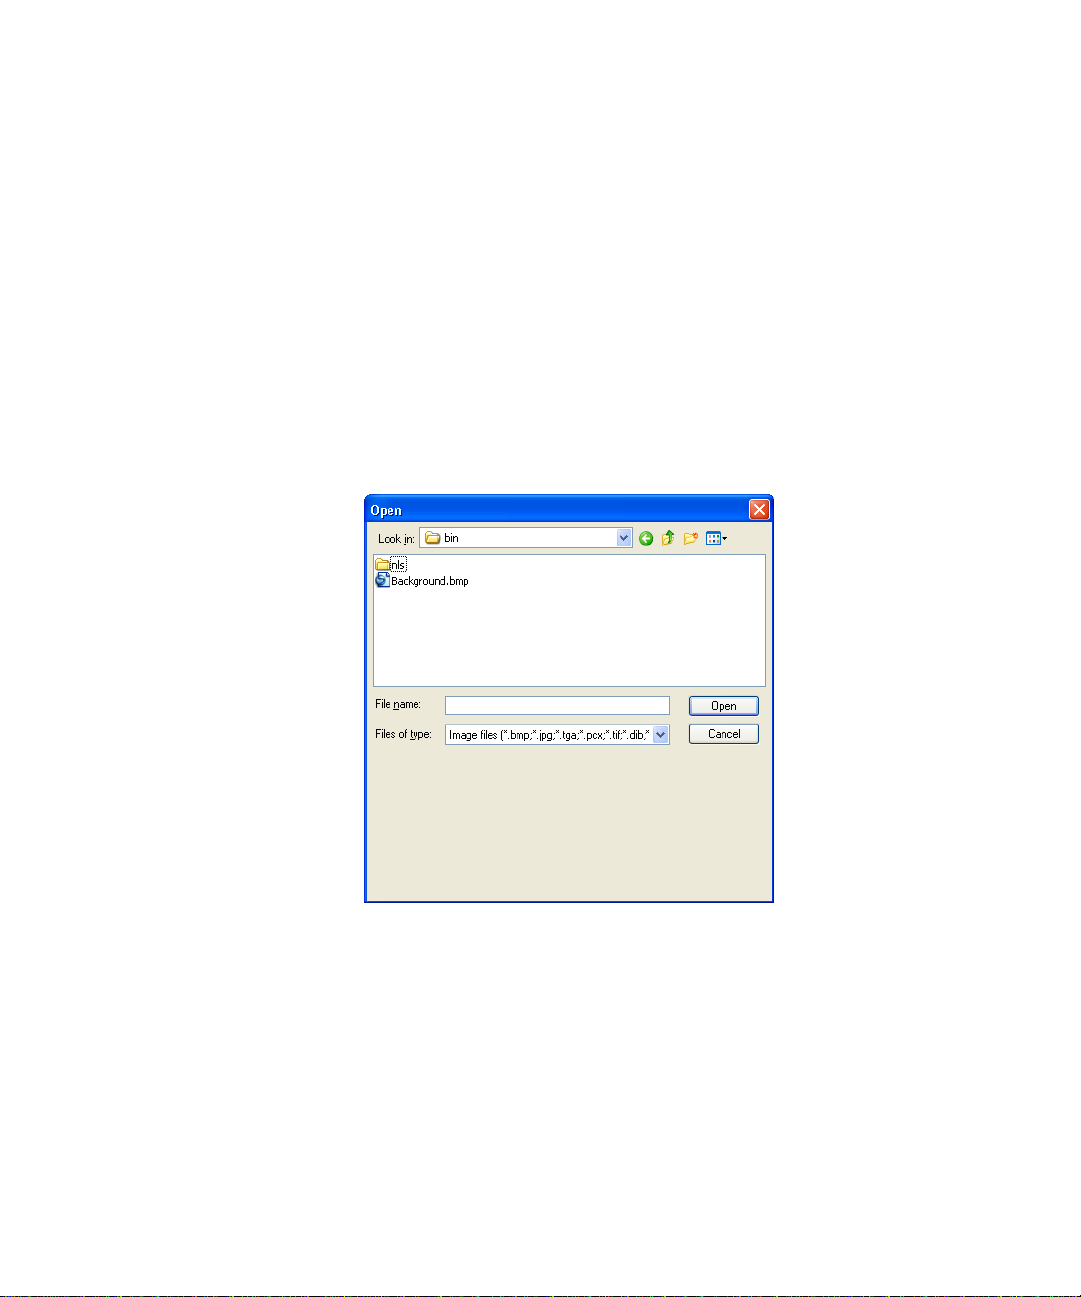
Photo from File
If the photo source selected is Photo from File, the Open dialog box
opens. You use standard Windows navigation techniques to find the
drive, folder, and file that contains the photograph that should be
used. Your supervisor or ID Card Maker System Administrator will
supply you with the file location and file naming scheme to use. When
you select a file, a “thumbnail” of the file displays so you can verify
that you have the correct file.
When you have found the file you want, click Open.
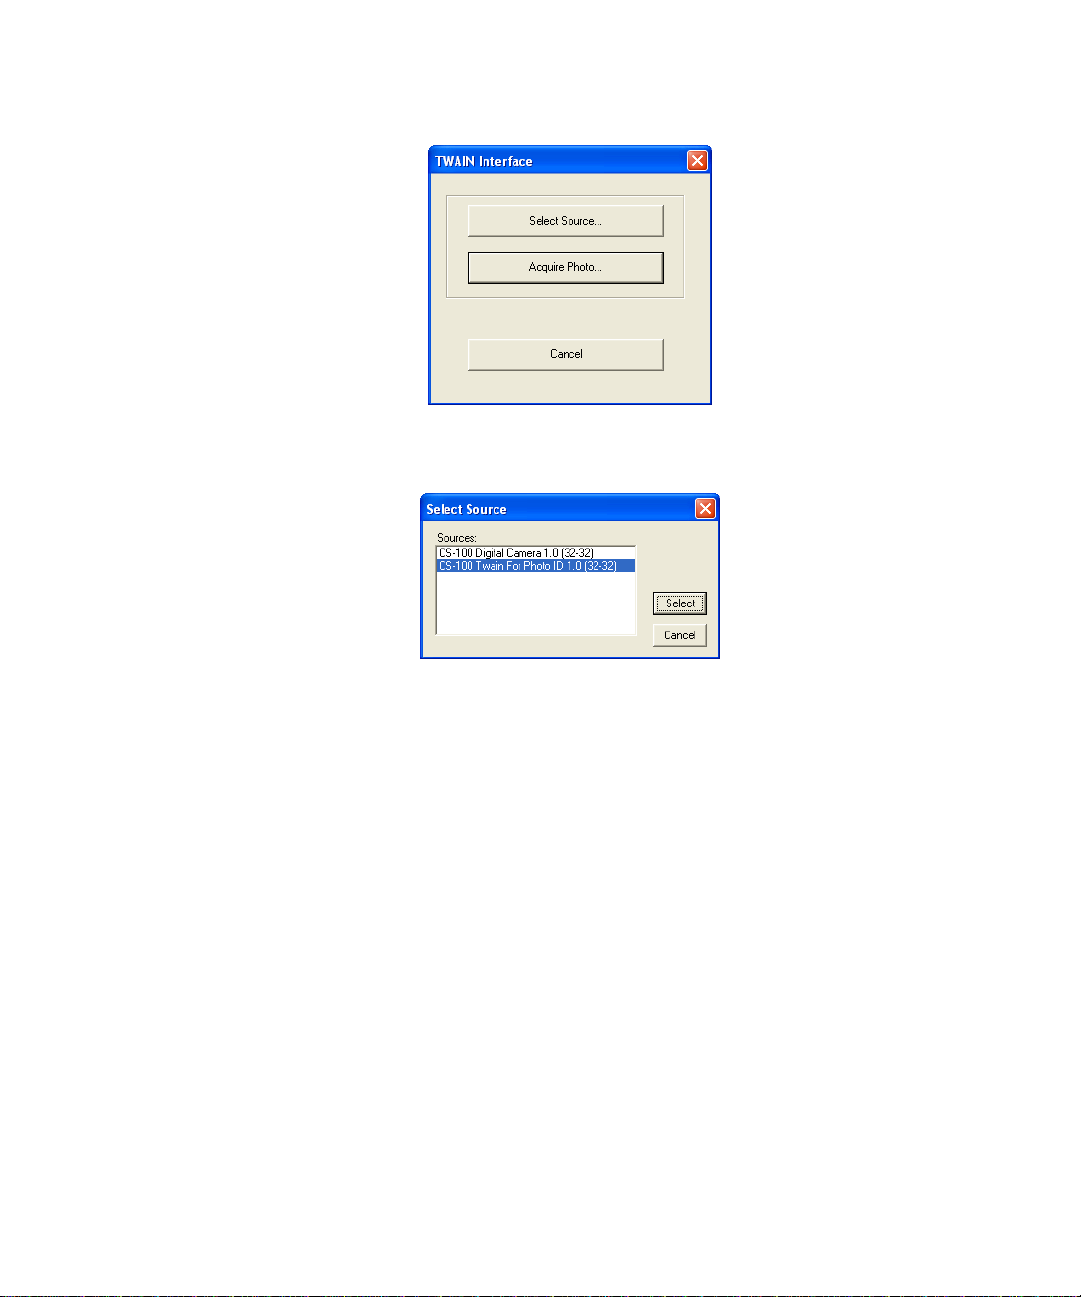
TWAIN
If the photo source selected is TWAIN, the TWAIN Interface dialog
box opens. (The TWAIN standard specifies how an application, such
as ID Card Maker Process, can activate a scanner, digital camera, or
other image-capturing device.)
10 ID Card Maker Entry Version 6 User Documentation
Page 19
Using the ID Card Maker Process Application
When you click the Select Source button, the Select Source dialog box
opens. It lists all the TWAIN devices installed on your computer.
Select the device you want to use and click the Select button. The
Select Source dialog box closes. In the TWAIN Interface dialog box,
click the Acquire Photo button. The software application that is
associated with the device you selected opens.
Because there are many different TWAIN devices made by many
different manufacturers, this document cannot supply explicit
instructions for using your TWAIN device. See the documentation that
came with your device, or ask your supervisor or ID Card Maker
System Administrator for step-by-step instructions.
TWAIN (Fast)
If the photo source selected is TWAIN (Fast), the last TWAIN device
used is automatically selected. See the documentation that came with
your device or ask your System Administrator for step-by-step
instructions.
ID Card Maker Entry Version 6 Operator’s Guide 11
Page 20
Using the ID Card Maker Process Application
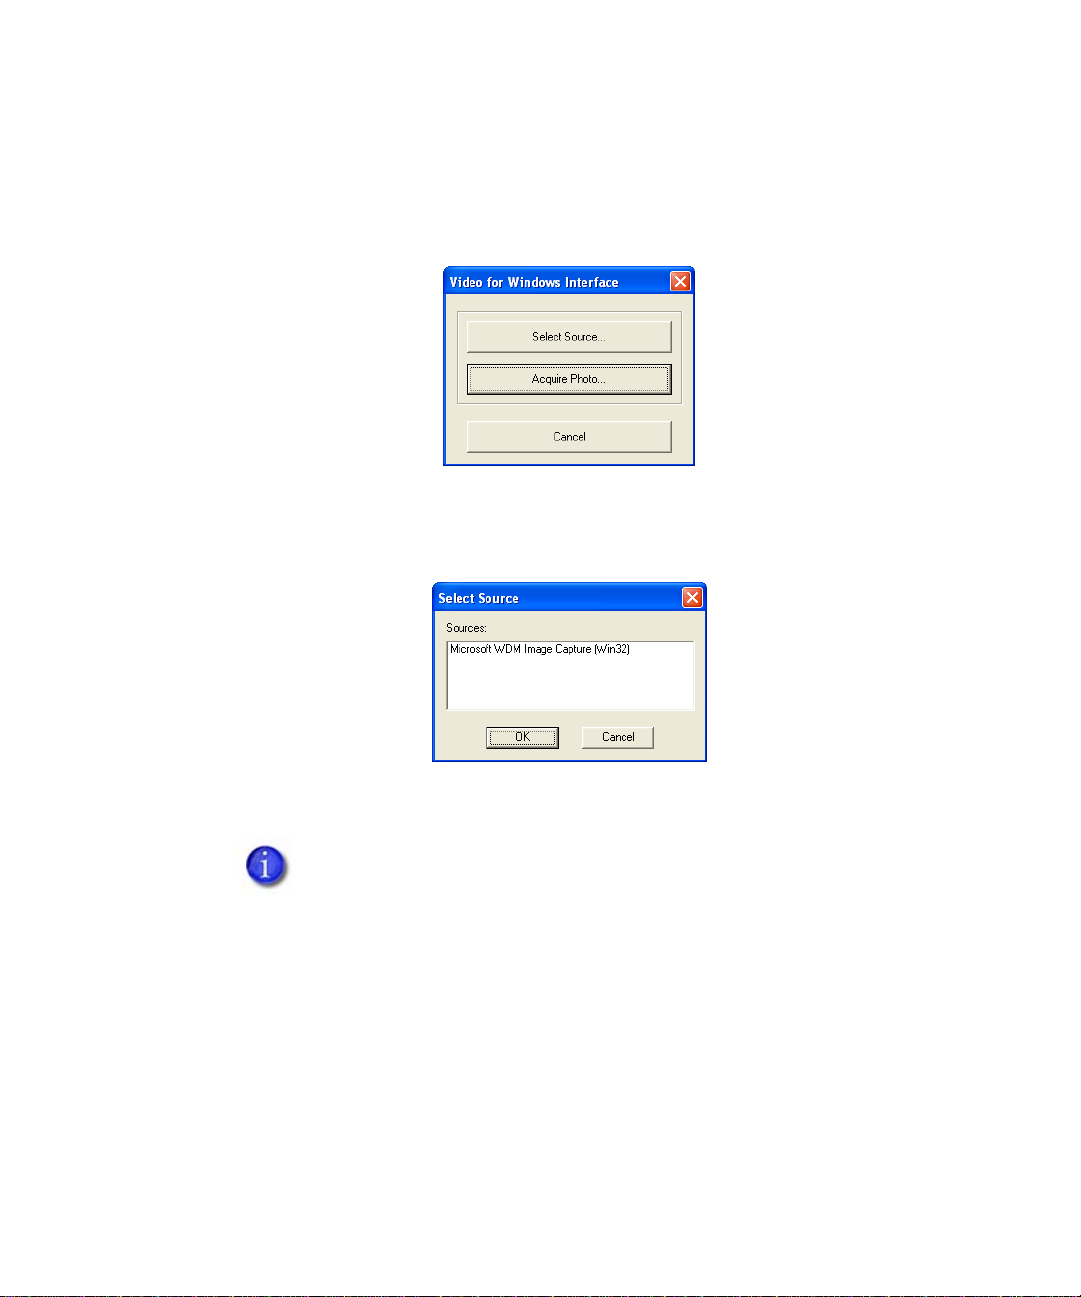
Video for Windows
If the photo source selected is Video for Windows, the Video for
Windows Interface dialog box opens.
When you click the Select Source button, the Select Source dialog box
opens. It lists all the Video for Windows devices installed on your
computer.
Select the device you want to use and click the OK button. The Select
Source dialog box closes.
If the Source list shows a Video for Windows source (possibly
designated VFW) and a Windows Driver Model (WDM)
source for your camera, selecting the Windows Driver Model
entry usually gives better results.
In the Video for Windows Interface dialog box, click the Acquire
Photo button. The Video for Windows Camera dialog box opens.
12 ID Card Maker Entry Version 6 User Documentation
Page 21

Using the ID Card Maker Process Application
When your subject is ready, click Take Photo. The camera captures the
image and the label on the button changes to Retry. If the photo is
unacceptable (for example, if the subject’s eyes are closed), click Retry.
If the photo is acceptable, click OK. The Photo Crop and Adjust dialog
box opens. See Cropping and Adjusting Photos
Video for Windows (Fast)
If the photo source selected is Video for Windows (Fast), the Video for
Windows Camera dialog box opens immediately. You do not have to
select a source.
on page 14.
Optional Cameras
In addition to the photo sources already described, your ID Card
Maker system may include an optional capture device, such as a
Polaroid ID Card Maker Image Capture product. These optional
devices have special software that makes them especially easy to use
with your ID Card Maker system. Optional cameras are explained in
their own online documents, which you access through the Windows
Start menu.
Selecting a Different Photo Source
You can use a photo source other than the one specified when your
project was created. See the online help topic “Select a photo source”
for step-by-step instructions.
ID Card Maker Entry Version 6 Operator’s Guide 13
Page 22
Using the ID Card Maker Process Application
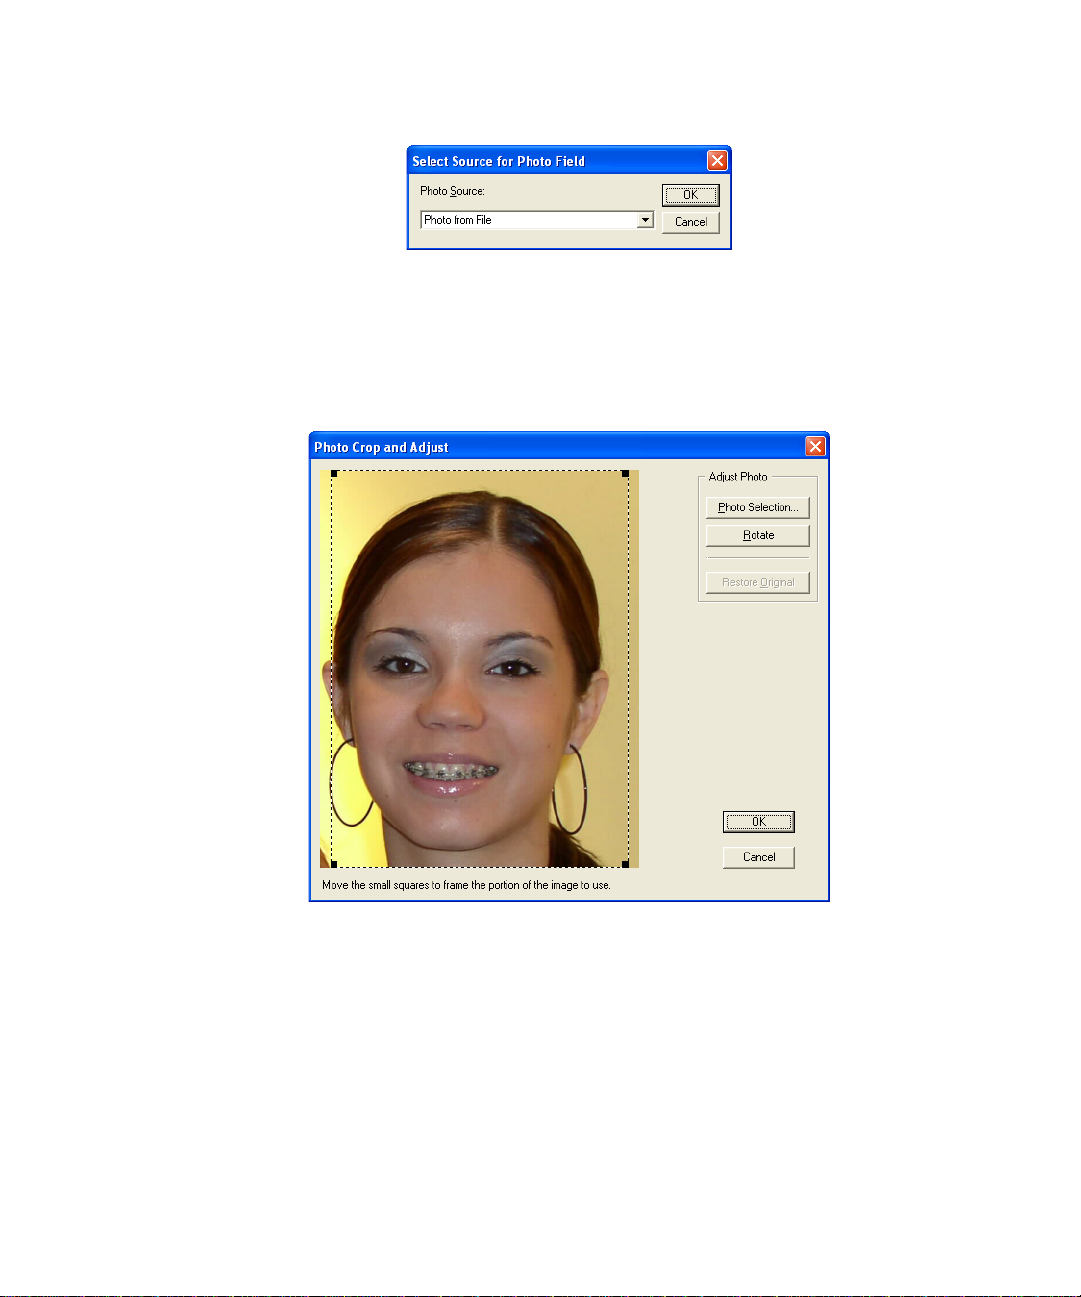
Cropping and Adjusting Photos
The Photo Crop and Adjust dialog box will open as soon as you have
selected your photo. Your photo will appear in the image area with
four squares, called sizing handles, around the outside.
To zoom in on the subject (eliminate unnecessary background), click
and drag any sizing handle, then release the mouse button. The crop
box proportions, set by the project designer, remain constant.
After you have zoomed in, your subject may no longer be centered in
the crop box. To adjust the position of the crop box, move the mouse
until the pointer is inside the crop box. The pointer changes to a four-
14 ID Card Maker Entry Version 6 User Documentation
Page 23

Using the ID Card Maker Process Application
way arrow. Click and drag the crop box to the position you want, then
release the mouse button.
When the photo is as you want it, click the OK button. The Photo Crop
and Adjust dialog box closes, and the photo appears in the photo field.
Most of the time, cropping and adjusting is all you need to do to a
photo. But the Photo Crop and Adjust dialog box also offers the
following advanced capabilities.
Rotating Photos
Some previously taken photos may have an orientation different from
the one you need. You can compensate for this by rotating the photo as
necessary. Each time you click the Rotate button, the photo rotates
one-quarter turn clockwise.
Any cropping or adjusting you did is lost when you rotate a
photo. If you need to rotate the photo, do that first, then crop
and adjust.
Selecting an Exposure
If the subject of the photo has a very light or very dark complexion,
you can improve the quality of the photo to some degree by clicking
the Photo Selection button.
ID Card Maker Entry Version 6 Operator’s Guide 15
Page 24

Using the ID Card Maker Process Application
An array of nine different brightnesses appears, with the original
exposure in the center. Select a photo by clicking it with the mouse or
by using the arrow keys to move the selection box.To adjust the
contrast of the photo, select the More button. You can also select from
nine choices for saturation. At any time you can start over or select OK
or press E
NTER to accept the currently-selected photo. Your selection
appears in the image area of the Photo Crop and Adjust dialog box.
Remember, the final quality of the image is also affected by the
printer you are using to print your ID cards. Changing
lighting and camera settings should always be the first steps
you take to improve the photo. This selection option will not
make up for poor data.
16 ID Card Maker Entry Version 6 User Documentation
Page 25
Using the ID Card Maker Process Application
Starting Over
You can undo all your changes (cropping, exposure selection, rotation)
by clicking the Restore Original button.
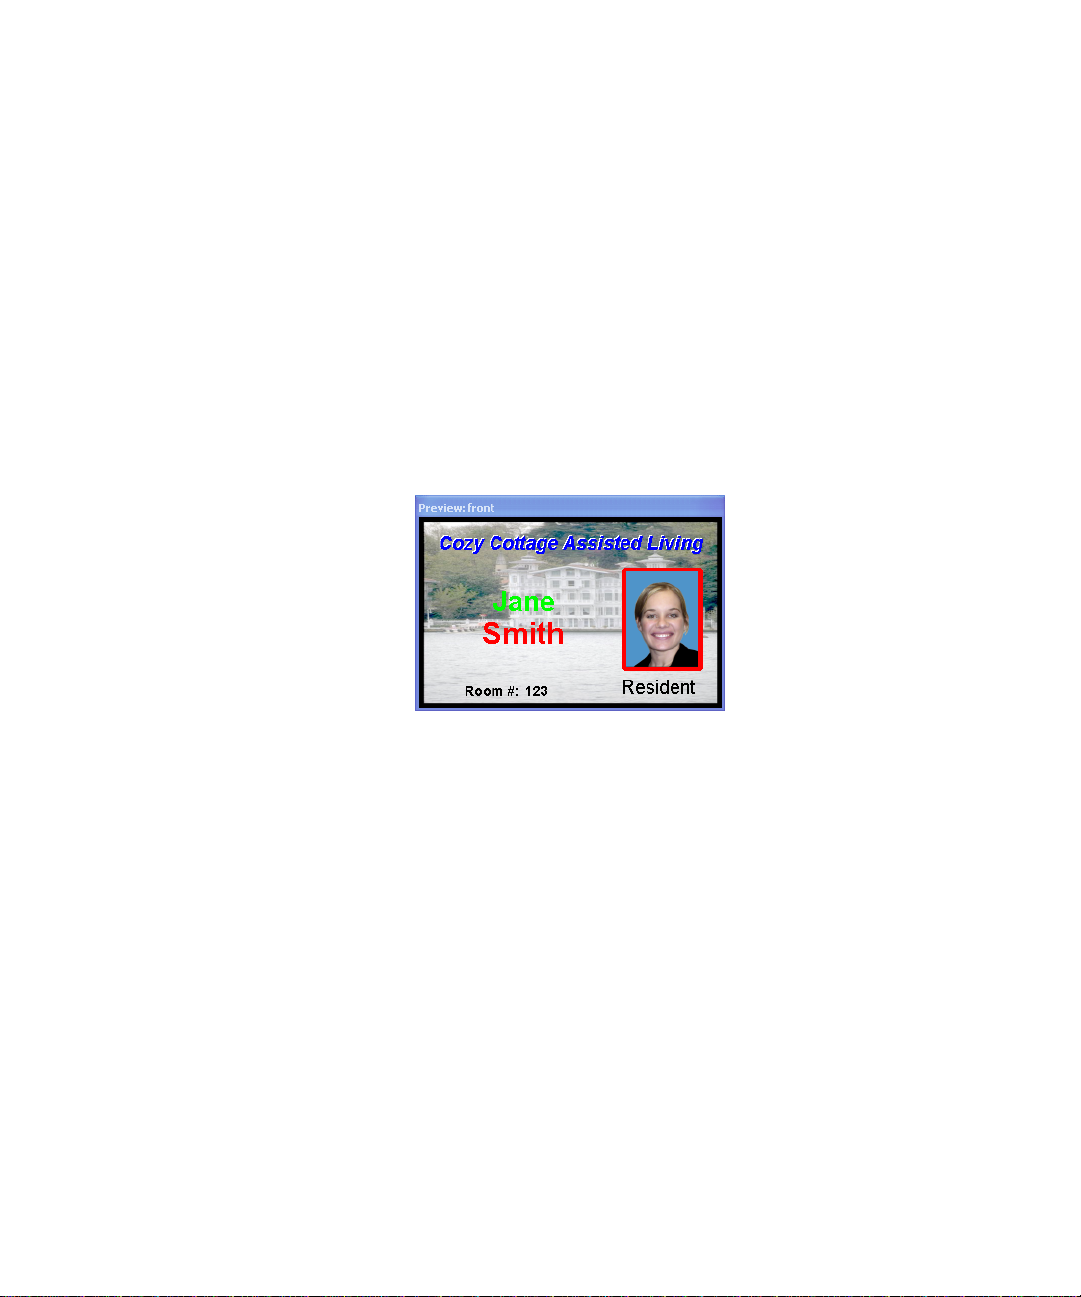
Previewing Cards
To see a preview of the card that will be printed, from the menu bar
select View and then Card preview – front or Card preview – back. A
Card Preview opens. (You can see previews of both sides of the card
by selecting both card preview menu commands.)
You can move the Card Preview to a different location by clicking on
its title bar and dragging it to the new location. You can change the
size of the Card Preview by moving the mouse to an edge of the Card
Preview until the pointer turns into a two-way arrow, then clicking
and dragging the edge of the Card Preview until it is the size you
want.
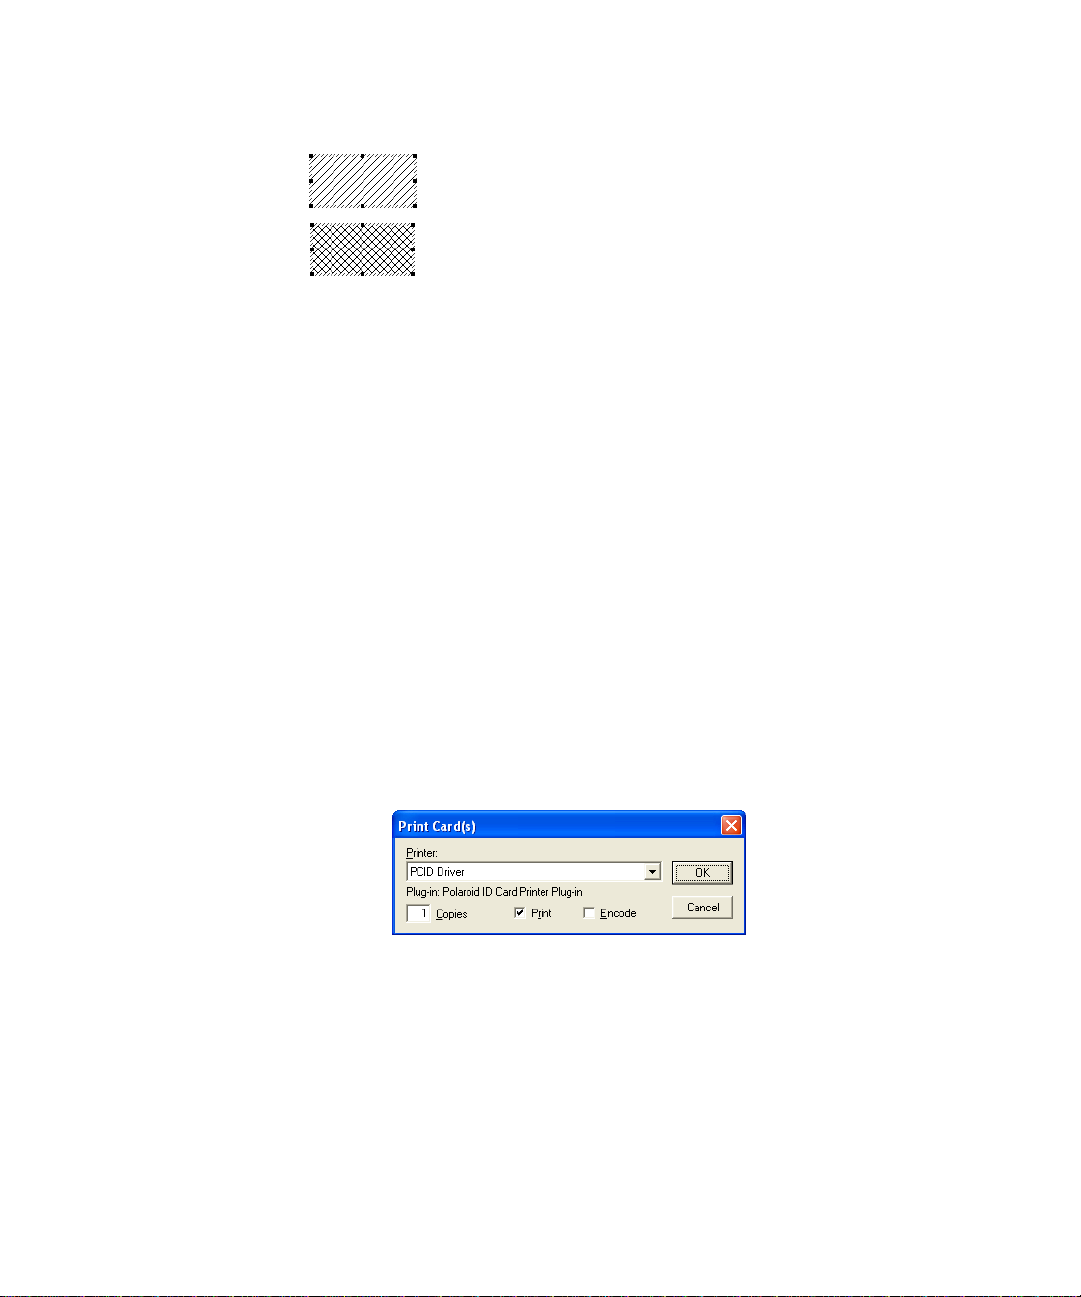
If your card design includes a bar code and if you enter too much data,
the bar code in the Preview will change to diagonal lines. If you enter
the wrong kind of data in the Production Form field associated with
the bar code (for example, a letter if the bar code type only accepts
numbers), the bar code in the Preview will change to a crosshatch
pattern. Cards with too much or unsupported bar code data will not
print.
ID Card Maker Entry Version 6 Operator’s Guide 17
Page 26
Using the ID Card Maker Process Application
Too much bar code data
Unsupported bar code data
Printing Cards
You can print each card as you gather the information or you can
collect information on a group of cardholders (saving it in the project
database) and then print the cards in a batch.
Card printing works the same whether you print cards singly or in
batches:
1. Gather the cardholder information or select the record(s) to print.
2. To print a single card, from the menu bar select File and then Print
Card or click the Print button on the toolbar.
To print cards for all the records you selected, from the
menu bar select File and then Print All or click the Print all
button on the toolbar.
The Print Card(s) dialog box opens.
3. If necessary, select your card printer from the list.
4. If you want to print more than one copy of the card(s), enter the
number of copies you want.
5. If your printer has a magnetic stripe encoder, you can choose to
print the card, encode the card, or both by selecting the appropriate
check boxes.
18 ID Card Maker Entry Version 6 User Documentation
Page 27
Using the ID Card Maker Process Application
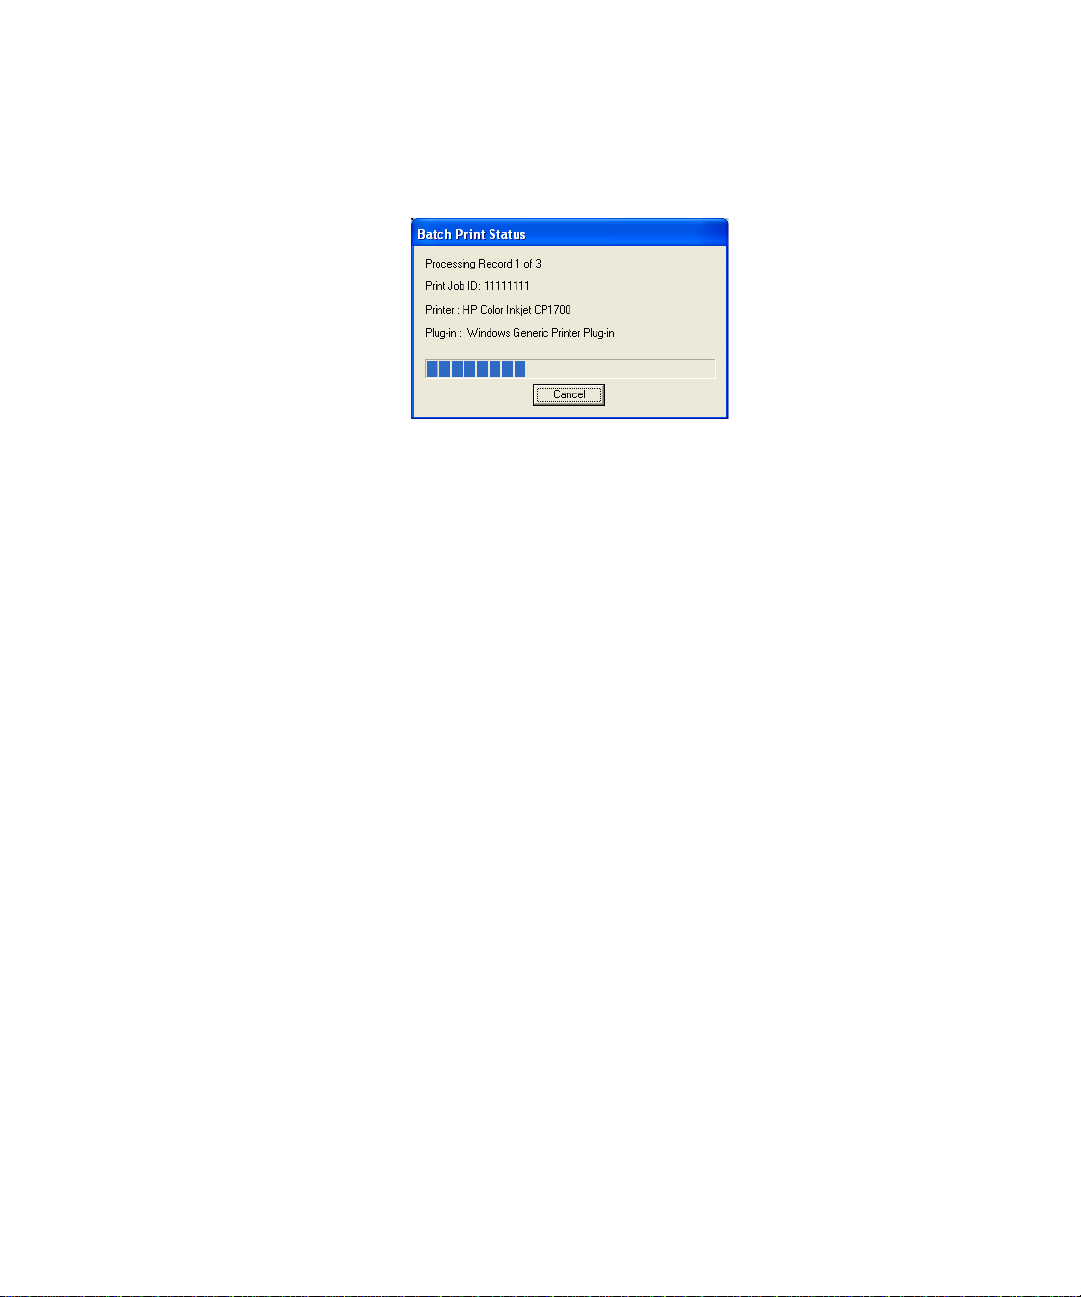
6. Click OK. If you chose to print cards for multiple records, the
Batch Print Status dialog box opens.
Clicking the Cancel button stops processing cards.
However, cards that have already been processed will still
be sent to the printer and cards that have been sent cannot
be retrieved.
ID Card Maker Entry Version 6 Operator’s Guide 19
Page 28
Using the ID Card Maker Process Application
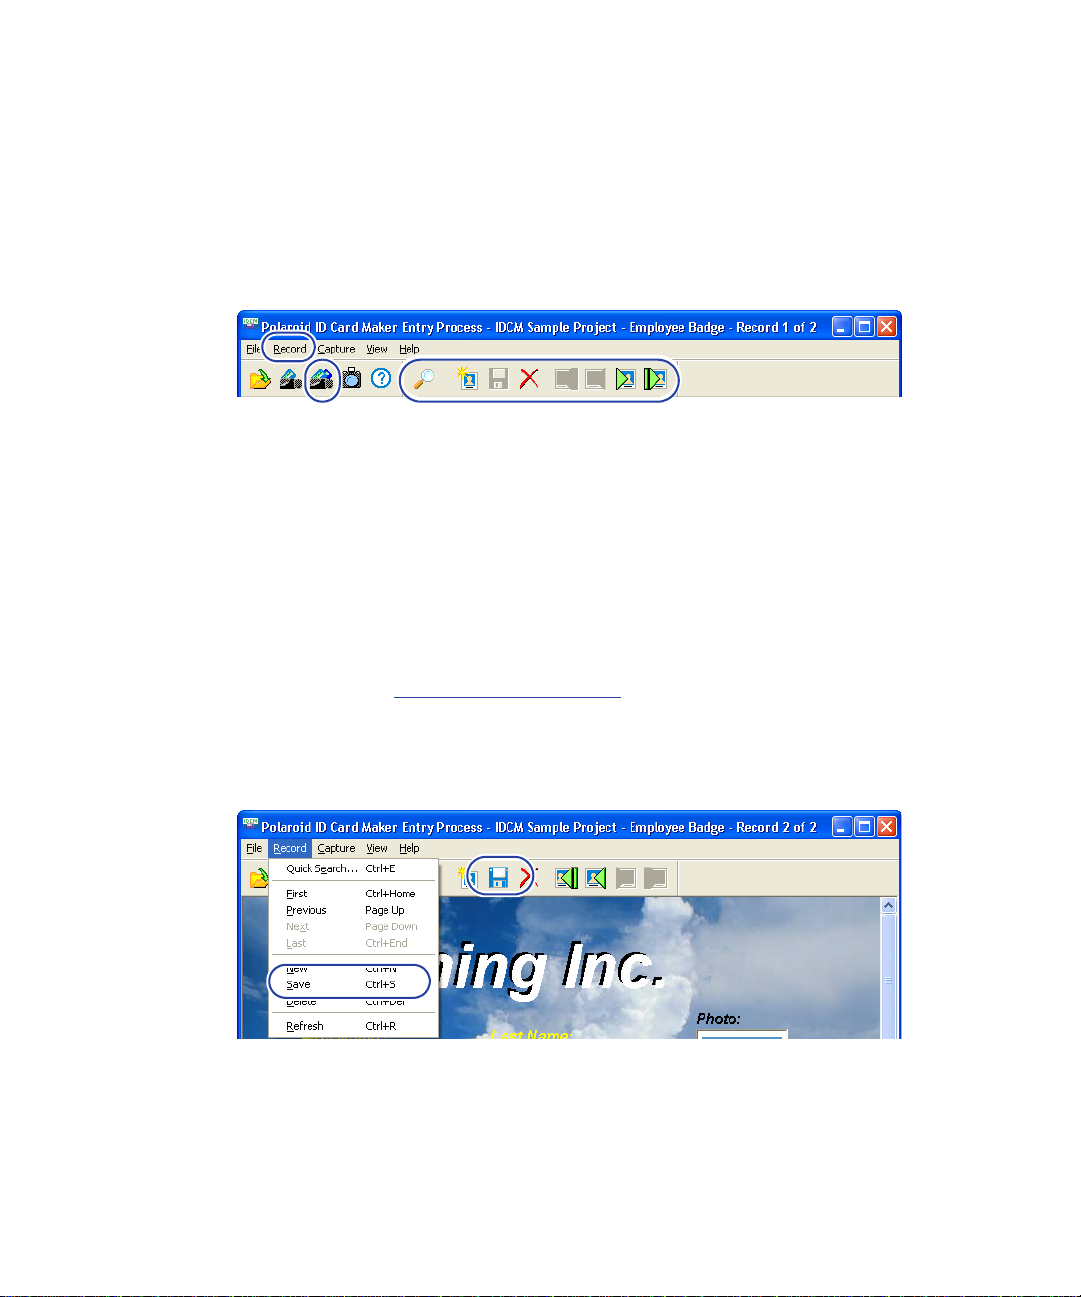
Using the Project Database
Your ID Card Maker project is connected to its own database. To help
you use the database, your menu bar has a Record menu and your
toolbar includes eight database-specific buttons.
Database-specific buttons
Databases store information in tables. Each row of the table is called a
record, and that is why the new menu on the menu bar is named
Record—it deals with database records. Each column of the table is
known as a field. A column contains a category of information, such as
a name, a telephone number, or a photograph of the person described
in the record. The information you enter in fields in the ID Card Maker
Production Form can be stored in and retrieved from columns in a
database table. Searching the database to retrieve information is
explained in Searching the Database
on page 23.
Changing Information in a Database
20 ID Card Maker Entry Version 6 User Documentation
Page 29
Using the ID Card Maker Process Application
To change information in a database:
1. Locate the record you need to change. See Searching the Database
on page 23, or go to the online help topic “Find a record with
Quick Search”.
2. Click in or tab to the field that needs to be changed and correct the
information.
If you need to reverse all the changes you made to the record,
from the menu bar, select Record and then Refresh. The
information returns to the way the record is stored in the
database.
3. When all changes have been made, from the menu bar, select
Record and then Save (or click the button on the toolbar that looks
like a diskette). The changed information is saved in the database.
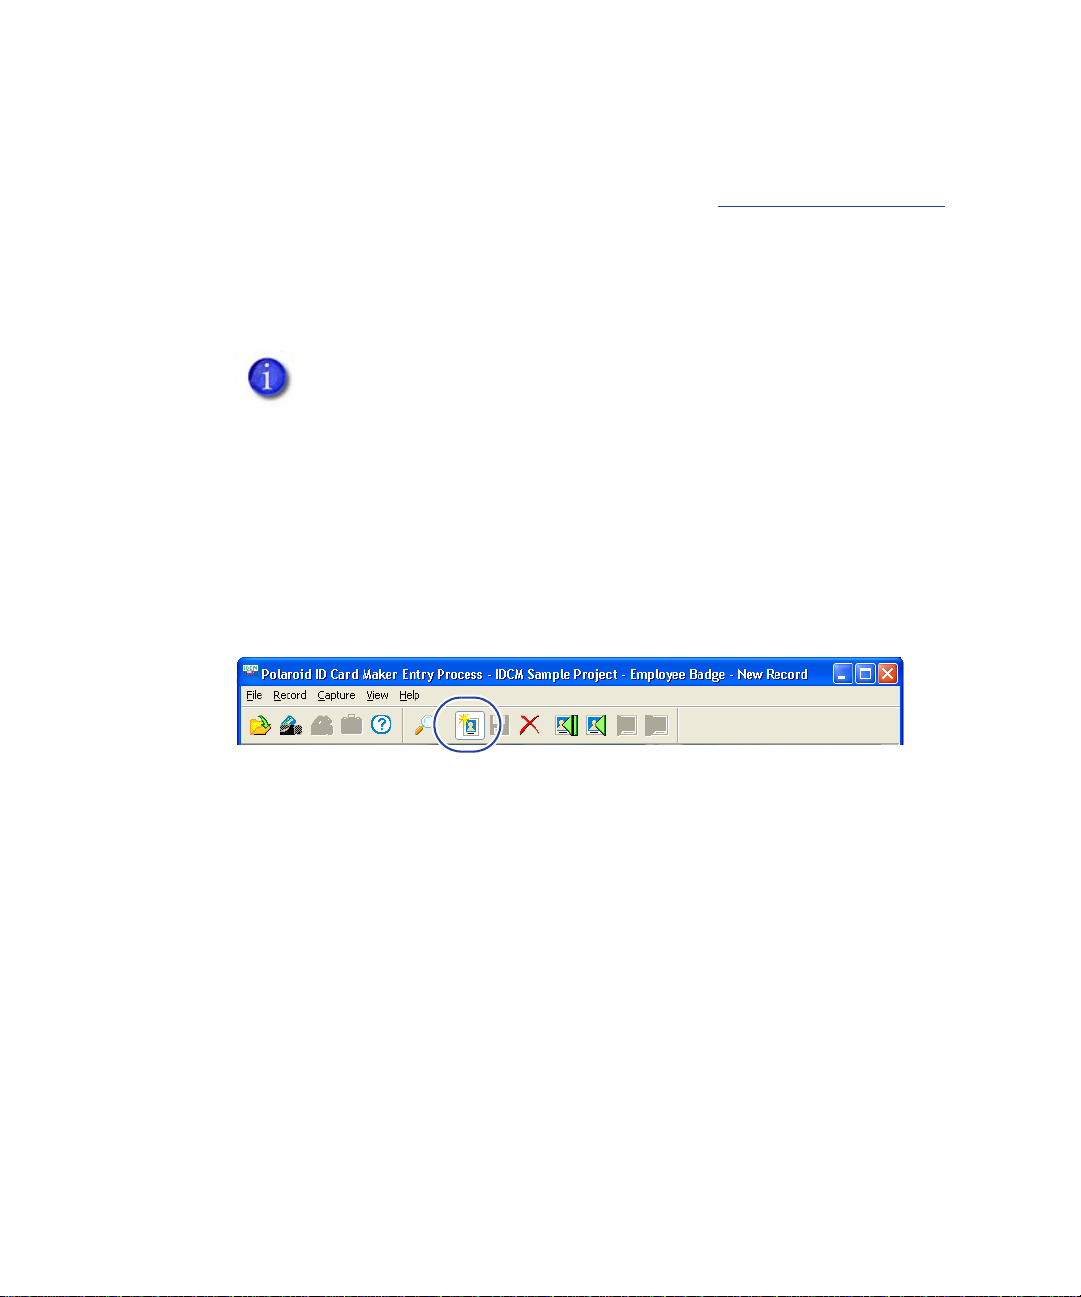
Entering a New Database Record
To add a new record to a database:
1. From the menu bar, select Record and then New (or click the
button on the toolbar that has a yellow starburst). All fields are
cleared.
2. Enter data into the fields. See the online help topics “Enter data
into a text field” and related topics, as well as “Take a photo” for
step-by-step instructions.
3. When all information has been entered, from the menu bar, select
Record and then Save (or click the button on the toolbar that looks
like a diskette). The new record is saved in the database.
ID Card Maker Entry Version 6 Operator’s Guide 21
Page 30
Using the ID Card Maker Process Application
An ID Card Maker project can be set up so that a record is
automatically saved to the database each time a card is
printed. Ask your ID Card Maker System Administrator if
your project has been set up this way. If so, you do not have to
remember to save each record.
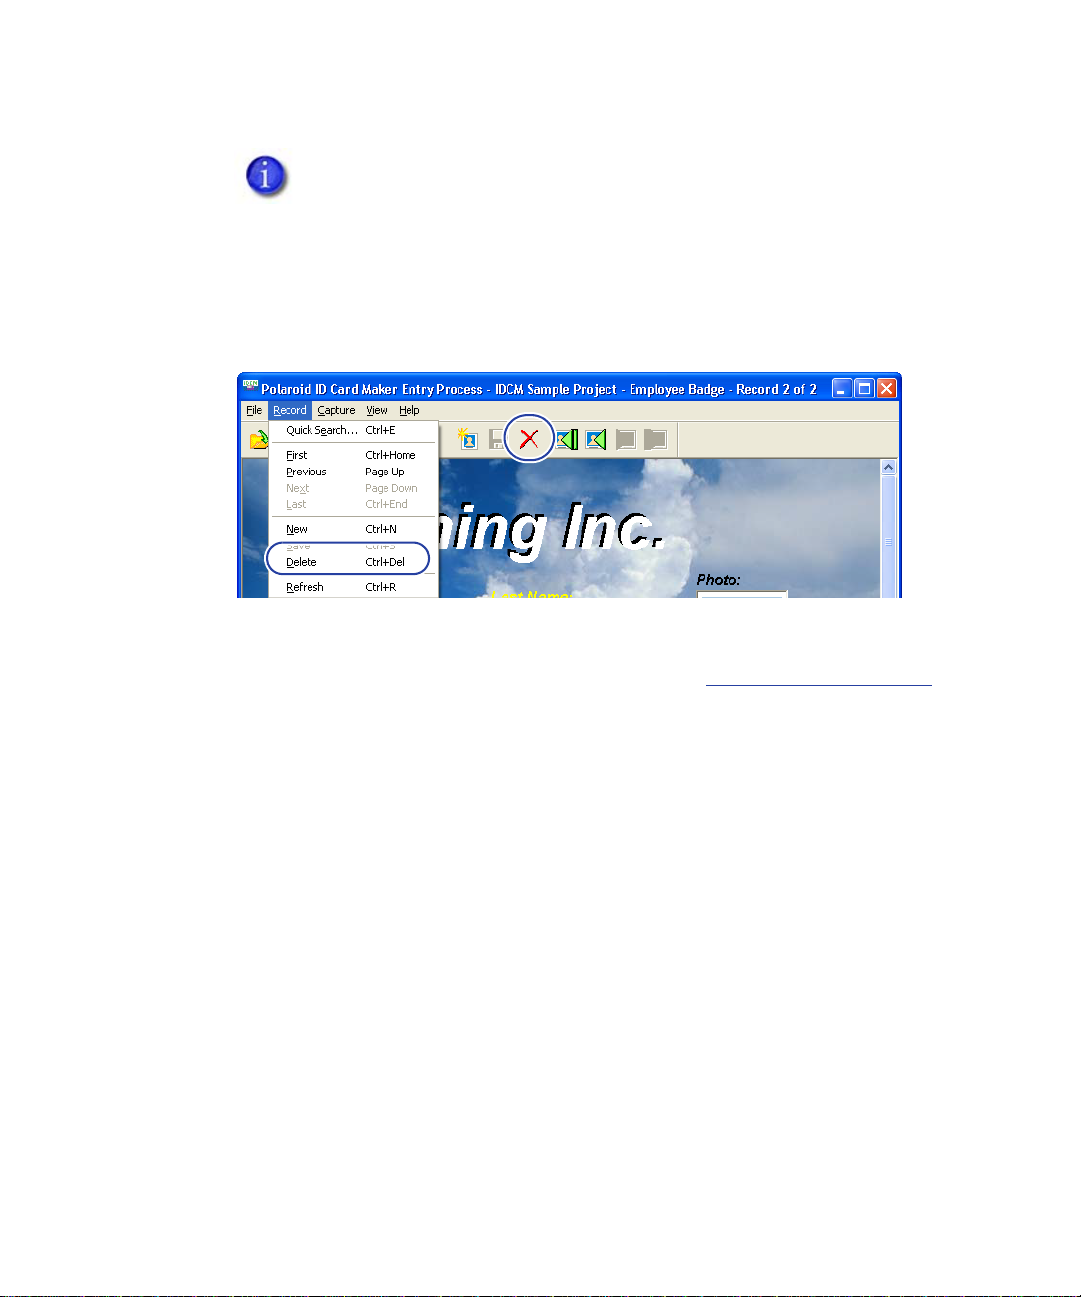
Deleting a Database Record
To delete a record from a database:
1. Locate the record you need to delete (see Searching the Database
on page 23, or go to the online help topic “Find a record”).
2. From the menu bar, select Record and then Delete (or click the
button on the toolbar that has an X). A confirmation message
appears.
3. Click Yes to delete the record. The record is deleted from the
database.
To delete multiple records, repeat the procedure above.
22 ID Card Maker Entry Version 6 User Documentation
Page 31

Chapter 3: Searching the Database
Each ID Card Maker Entry Edition project is connected to a database.
You get information out of a database by searching it.
Performing a Search
To perform a simple or one-time search of the database, click the
button on the toolbar that has a magnifying glass on it (the Quick
Search button), or from the menu bar, select Record and then Quick
Search. The Quick Search dialog box opens.
The Quick Search dialog box contains a field for each text field in your
Production Form.
You will never see a photo field in a Quick Search dialog box
because you cannot enter search criteria for photos.
The kind and amount of information you enter in the Quick Search
dialog box determines how many records the database system finds
for you. If you click the Search button without entering anything in
any of the fields, the database system shows you all the records in the
ID Card Maker Entry Version 6 Operator’s Guide 23
Page 32

Searching the Database
database. For example, if a database for a project has 15 records,
clicking the Search button without making any entries in the dialog
box results in 15 records.
Refining the Search
You can reduce the number of records displayed by entering more
specific information in one or more search fields and by using
wildcard characters.
This search uses the % (percent) wildcard character. It stands for any
number of characters after the S. You can also use the _ (underscore)
wildcard character to substitute for a single character. For example,
entering Jo_n would find John and Joan but not Johann.
If you enter data into more than one search field, the database
system looks for records that match all fields.
24 ID Card Maker Entry Version 6 User Documentation
Page 33

Searching the Database
Navigating Search Results
When a database search finds multiple records, the title bar of the ID
Card Maker Process application window changes to describe which
record is currently visible and the total number of records that met the
specifications of the search. Also, the Next and Last buttons on the
toolbar become available for use (as well as the Next and Last
commands on the Record menu). If you click the Next button, the title
bar changes to “Record 2 of ...” and the First and Previous buttons on
the toolbar (as well as the First and Previous commands on the Record
menu) also become available for use. You can also use the P
and P
AGE UP keys to move through records.
ID Card Maker Entry Version 6 Operator’s Guide 25
AGE DOWN
Page 34

Searching the Database
26 ID Card Maker Entry Version 6 User Documentation
Page 35

Index
Symbols
% wildcard character 24
_ wildcard character 24
A
Administrator application
definition 1
B
bar code field
errors 17
C
camera 13
card
previewing 17
cards
printing 18
D
database 20
deleting a record 22
searching 23
wildcard characters 24
database, using
searching
for all records 23
viewing records 25
O
opening a project 5
P
photo
adjusting 14
capturing with TWAIN device 10
cropping 14
rotating 15
selecting 15
source, selecting in Process
application 13
photo field
using in Process application 9
photo from file 10
pop-up menu 3
previewing cards 17
printing cards 18
Process application
definition 1
using 7
Process window
moving around in 7
project
definition 1
opening 5
using in Process application 7
Project application definition 1
K
keyboard shortcuts 3
ID Card Maker Entry Version 6 Operator’s Guide 27
R
right-click menu 3
searching database 23
Page 36

Index
T
text field
entering information in Process
application 8
toolbars 4
TWAIN
device, using in Process application 10
interface standard 10
V
Video for Windows
device, using in Process application 12
W
Welcome dialog box 3
wildcard characters 24
wildcard characters in database
searches 24
28 ID Card Maker Entry Version 6 User Documentation
Page 37

Administrator’s Guide for
ID Card Maker Version 6
Page 38

Contents
About the Administrator’s Guide _____________________________________________ v
Chapter 1: System Overview _________________________________________ 1
Introducing the ID Card Maker Project _______________________________________ 1
Getting Started_____________________________________________________ _________ 2
Using the Welcome Dialog Box___________________________________________ 3
Using ID Card Maker Applications ________________________________________ 4
Working with Fields ______________________________________________________ 5
Inserting Fields _______________________________________________________ 5
Selecting Fields ______________________________________________________ 6
Changing Field Properties _______________________________________ ___ __ 7
Fonts ________________________________________________________________ 9
Cutting, Copying, and Pasting Fields _________________________________ 11
Arranging Fields_____________________________________________________ 12
Developing a Project ___________________________________________________ 12
Create the ID Card Maker Project ___________________________________ 13
Create the Card Design_____________________________________________ 13
Create the Production Form_________________________________________ 13
Configure the Database ____________________________________________ 13
Tie It All Together____________________________________________________ 14
Try It Out ___________________________________________________ ________ 14
Implement Card Production_________________________________________ 14
Chapter 2: Plan and Create a Card Design___________________________ 15
What Is a Card Design?_____________________________________________________ 15
Card Window __________________________________________________________ 15
Orientation_____________________________________________________________ 16
Size ____________________________________________________________________ 17
Background____________________________________________________________ 17
Topcoat _______________________________________________________________ 18
Types of Card Fields_________________ _______________________________________ 18
Text Field_________________ ____ ___ ____ ___ ____ ___ ___ ____ ___ ____ ___ ____ ____ 18
Photo Field_____________________________________________________________ 19
Bar Code Field _________________________________________________________ 20
Magnetic Stripe Field ___________________________________________________ 22
ii ID Card Maker Entry Version 6 User Documentation
Page 39

Static Text Field_________________________________________________________ 23
Static Graphic Field_____________________________________________________ 23
Printing Sample Cards __________________________________________________ 24
Printing Cards in the Process Application_________________________________ 24
Chapter 3: Plan and Create a Production Form_______________________ 25
What Is a Production Form? _________________________________________________ 25
Production Form Window ________ ____ ___ _______ ___ ____ ___ ____ ___ ____ ___ _ 25
Background____________________________________________________________ 26
Size ____________________________________________________________________ 27
Types of Production Form Fields ____________________ _________________________ 27
Text Field_________________ ____ ___ ____ ___ ____ ___ ___ ____ ___ ____ ___ ____ ____ 27
Photo Field_____________________________________________________________ 28
Static Text Field_________________________________________________________ 30
Changing the Tab Order of Fields _______________________________________ 31
Adding Fields to the Production Form from a Card Design ________________ 31
Chapter 4: Using Databases with ID Card Maker Projects _____________ 33
Database Access __________________________________________________________ 33
Controlling Database Activities _____________________________________________ 33
Adding Fields to a Database _______________________________________________ 34
Chapter 5: Connecting Fields _______________________________________ 37
What Is the Field Connector? _______________________________________________ 37
Field Connector Window ___________________________________________________ 38
Data Source Area ______________________________________________________ 39
Production Form Area ___________________________________ ____ _______ ___ _ 39
Card Area _____________________________________________________________ 39
Connect and Disconnect Buttons _______________________________________ 40
Restrictions on Connections to Database Columns ___________________________ 40
Restrictions on Connections to Card Design Fields____________________________ 41
Chapter 6: Working with Capture Options____________________________ 43
Photo from File _____________________________________________________________ 45
TWAIN Interface____________________________________________________________ 47
Video for Windows Interface ________________________________________________ 48
Optional Capture Devices _______________ ___ ________________________________ 49
Configuring Optional Capture Devices __________________________________ 49
ID Card Maker Entry Version 6 Administrator’s Guide iii
Page 40

Chapter 7: Working with Printer Options______________________________ 53
Introducing Printer Plug-ins _________________________________________________ 53
Specifying Plug-ins _________________________________________________________ 54
Printing Graphics with the Card Printer’s K-panel _____________________________ 54
Field Properties Print Options ____________________________________________ 54
Override Field-level Settings _____________________________________________ 54
Index ______________________________________________________________ 57
iv ID Card Maker Entry Version 6 User Documentation
Page 41

About the Administrator’s Guide
This Administrator’s Guide, part of the online User Documentation,
explains why you might want to use the various features available in
the ID Card Maker applications. It also suggests the order in which
tasks should be performed.
Other sources of information about ID Card Maker applications are:
• The CD insert tells how to install ID Card Maker software.
• The online help system tells you how to perform ID Card Maker
tasks. You can access the online help system from the Help menu
in each ID Card Maker application or by pressing the F1 key.
• The Operator’s Guide, also part of the online User Documentation,
guides users of the Process application through the tasks they
perform.
• The online User Documentation also contains a document about
the Polaroid ID Card Printer printer plug-in available for use with
ID Card Maker software.
ID Card Maker Entry Version 6 Administrator’s Guide v
Page 42

vi ID Card Maker Entry Version 6 User Documentation
Page 43

Chapter 1: System Overview
Polaroid ID Card Maker includes three applications:
• ID Card Maker Project lets you create projects that meet your
organization’s specific needs for card designs and data entry.
• ID Card Maker Process lets a Process application operator use the
projects you create in the Project application to gather information,
access your database, and print identification cards.
• ID Card Maker Administrator contains tools to configure your ID
Card Maker software and associated devices.
Introducing the ID Card Maker Project
An ID Card Maker project is similar to a folder or directory on a
computer: it is the container that holds information about an
identification implementation. In fact, when you create an ID Card
Maker project, the software creates a folder on your hard drive with
the name you give the project. And, just as you can have many folders
on your computer, you can have many ID Card Maker projects.
A project contains a Production Form, a card design, and a database.
By using field connections, information entered in a Production Form
can be saved in a database, printed on a card, or both. The Production
Form can also be used to query an existing database so that you can
ID Card Maker Entry Version 6 Administrator’s Guide 1
Page 44

System Overview
add or change information in the database or print cards using
information in the database.
Getting Started
The rest of this chapter explains the steps you take to begin using your
ID Card Maker identification software.
To begin using ID Card Maker software, on the taskbar, click Start,
and then click Programs, Polaroid, ID Card Maker, and then ID Card
Maker Entry Project.
2 ID Card Maker Entry Version 6 User Documentation
Page 45

System Overview
Using the Welcome Dialog Box
After you have started the application, the Welcome dialog box
appears.
From this dialog box you can start a new project (see Create the ID
Card Maker Project on page 13) or open an existing project. If the
project you want to open is not listed, click More projects to display
the Open Project dialog box, which lists all active ID Card Maker
projects.
You can also choose not to have the Welcome dialog box display by
clearing the check mark next to Show this window at startup. If you
hide the Welcome dialog box and later want to show it again, from the
application menu bar, select View and then Show Welcome on
startup. The selection you make applies only to the Windows user
name you used to log in and only to the current application. Other ID
Card Maker applications have separate settings for showing the
Welcome window.
ID Card Maker Entry Version 6 Administrator’s Guide 3
Page 46

System Overview
Using ID Card Maker Applications
ID Card Maker applications let you perform most actions several
ways: by selecting menu commands with the mouse, or with the
keyboard, or by clicking a toolbar button, or by clicking the right
mouse button and selecting from the pop-up menu. Key commands or
shortcuts for actions common to many applications—such as print and
save—follow Microsoft Office conventions; you do not have to relearn
your favorite shortcuts.
Most ID Card Maker applications have several toolbars, and you can
display or hide toolbars to match the way you prefer to work. When
you rest the mouse pointer on a toolbar button, the name and function
of the button appears.
A status bar at the bottom of the window provides additional
information about the application
view or hide the status bar.
. As with toolbars, you can choose to
4 ID Card Maker Entry Version 6 User Documentation
Page 47

System Overview
Status bar
These fields show sample data.
Working with Fields
Every element on a Production Form or card design is considered a
field.
Inserting Fields
To insert a field, from the menu bar, select Insert and then the type of
field you want to add to your Production Form or card.
ID Card Maker Entry Version 6 Administrator’s Guide 5
Page 48

System Overview
The types of fields you can insert depend on whether the Production
Form or card design is active. Some field types, such as a magnetic
stripe field, apply only to a card design.
Selecting Fields
Text fields have six
sizing handles.
Graphics fields have
eight sizing handles.
When a field is inserted, it is automatically selected, meaning that you
can make changes to it. A field that is selected has a border of diagonal
lines and six or eight squares (called sizing handles) around the
border, depending on the type of field. In addition, when a single field
is selected, the status bar reports the field name, field type, component
name, and component type (card, Production Form, etc.).
6 ID Card Maker Entry Version 6 User Documentation
Page 49

System Overview
To select a field that was previously inserted, position your mouse
pointer over the field you want to select and click.
You can also select two or more fields at a time. Position your mouse
pointer over one of the fields you want to select and click. Hold down
the S
HIFT or CTRL key while clicking on the additional fields.
When multiple fields are selected, you can move them as a group,
align them, space them apart an equal amount, or make them the same
size.
Changing Field Properties
Many field types have common characteristics, or properties. You can
change a field’s properties in the Edit Field Properties dialog box. To
access the Edit Field Properties dialog box, with the field selected,
from the menu bar select Edit and then Field Properties.
An easy way to access a field’s properties is to double-click on
it.
The Edit Field Properties dialog box changes depending on the type of
field you have selected. The illustration above shows the Edit Field
Properties dialog box for a text field on a Production Form. Chapters 2
ID Card Maker Entry Version 6 Administrator’s Guide 7
Page 50

System Overview
(for card design fields) and 3 (for Production Form fields) describe the
properties of each field in detail.
Most fields have the following properties.
Name
Every field has a name. The Project application names fields as you
insert them, but you can change the system-supplied name (Text Field
1, for example) to a more descriptive name (such as FirstName).
Giving fields descriptive names will help you when you are using the
field connector to associate Production Form fields with card fields
and database table columns.
Using the View menu, you can choose to have the fields in your
Production Form and card design show either field names or sample
data (which you provide) as you work in the ID Card Maker Project
application. When you use the Field Connector (described in chapter 5,
Connecting Fields) field names are always shown for easier
identification of fields.
Sample Data
Variable fields that can contain characters let you supply sample data
for use when viewing the project in Sample Data view or printing a
sample card. You type information that might appear in the field.
Photo fields use a sample photo.
Alignment/Rotation
Most fields have an alignment property. The choices available depend
on whether the field contains characters or graphical information. In
addition, many fields can be rotated in 90-degree increments.
8 ID Card Maker Entry Version 6 User Documentation
Page 51

System Overview
Position/Size
All fields have position and size properties. You can change these
properties by typing new values in the Edit Field Properties dialog box
or by using the mouse to drag the field to a new position or drag a
sizing handle until the field is the size you want. You can also change
the height of graphic-oriented fields by dragging a sizing handle.
Graphic-oriented fields include photos and static graphics. See the ID
Card Maker Project online help topic “Size a field proportionately” for
information on avoiding distortion of graphics.
To change the height of a text-oriented field, change the size of the
font. Text-oriented fields are text and static text fields.
See the online help topics “Move a field” and “Change a field’s size”
for step-by-step instructions. See C
on page 11 for more information.
Fonts
utting, Copying, and Pasting Fields
You can select from many fonts for the text and static text fields on
your cards and Production Forms. ID Card Maker Project uses Arial,
an OpenType font that is supplied with Windows operating systems,
as the default font. OpenType fonts are preceded by an “O” in fonts
lists.
Because the OpenType format is an extension of TrueType,
characteristics of TrueType fonts also apply to OpenType
fonts.
Because TrueType fonts always produce the same results no matter
what printer the card is printed on, it is strongly recommended that
you use only these fonts in your card designs. The results of using
non-TrueType fonts with more than one card printer are
unpredictable. In addition, TrueType fonts can always be rotated.
If the printer you will use to print cards has printer fonts installed and
you want to use them, you must select Display Printer Fonts and a
ID Card Maker Entry Version 6 Administrator’s Guide 9
Page 52

System Overview
printer for the project on the Printer Fonts tab of the Edit Project
Properties dialog box. See the online help topic “Use printer fonts” for
step-by-step instructions. Printer fonts appear in the fonts list for card
fields preceded by a printer icon. They never appear in the fonts list for
Production Form fields.
You can use Type 1 fonts if you also have Adobe® Type Manager™
software installed on your ID Card Maker computer.
You can specify that the font size of a text field on a card design should
automatically shrink to accommodate a large amount of text. The font
size shrinks to a minimum of 6 points. If at 6-point type the text still
does not fit, characters are dropped from the end.
Text Field Colors
You can select both a foreground and background color for your text
fields. The foreground color refers to the color of the text in the field.
If you select pure black for the foreground color of a card text or static
text field, the field will be printed with the black panel (K-panel) of the
printer ribbon if the card printer is using a ribbon with a black panel.
The black panel produces a truer black and sharper characters than
printing using a combination of the cyan, magenta, and yellow panels.
You can either specify that the background be transparent (the default)
or that it be a solid color.
10 ID Card Maker Entry Version 6 User Documentation
Page 53

System Overview
Printers do not print white. If you define the field to print in white text,
the printer will “knock out” the characters, allowing the surface of the
card or paper (usually white) to show through.
Cutting, Copying, and Pasting Fields
You can use standard Windows operations to delete a selected field
from your Production Form or card design, or copy and paste a
selected field on your Production Form or card design.
You can copy and paste fields within a project component but
you cannot paste fields between the Production Form and a
card. You can, however, create Production Form fields from
card fields. See the online help topic “Add fields to a
Production Form from a card design”.
When you cut a field, it is placed on the clipboard. It stays on
the clipboard until it is replaced by a different field or you
close the project.
Save time by copying and pasting formatted fields rather than always
inserting a new, default field. For example, in the sample card above
the “Grade” field was created and formatted.
Then it was copied and
pasted for the “Home Room” field and the Field Name and Display
Text were changed on the General tab of the Edit Field Properties
[Static Text] dialog box.
The designer did not have to change the font
characteristics for the copied field.
ID Card Maker Entry Version 6 Administrator’s Guide 11
Page 54

System Overview
Arranging Fields
When you insert a field, the Project application places it near the upper
left corner of the Production Form or card design. To move a selected
field, place the mouse pointer over the field. The pointer changes to a
four-way arrow. Hold down the left mouse button while you move the
field to its new location and then release the mouse button.
As mentioned, you can select multiple fields and then move or align
them. For example, to make your Production Form look consistent,
select all the fields in the first row and then (using the Format or right
mouse click menu) align the fields using the Bottom selection. Repeat
with each row. Then select the left-most field in each row, and align
them using the Left selection. See the ID Card Maker Project online
help topic “Align fields” for additional options.
If fields overlap, you may need to arrange them by using the stacking
order. To understand the stacking order, imagine that each field you
place on the Production Form or card design is on a separate sheet of
clear plastic. The first field you place is on a plastic sheet next to the
object’s background; the second field is on a sheet in front of the first
sheet, and so on. When you select a field, you can bring that field all
the way to the front of the stacking order, bring it one position toward
the front, send it all the way to the back of the stacking order, or send it
one position toward the back. Commands to change the stacking order
of fields are available on the Format menu of the menu bar.
Developing a Project
An ID Card Maker project involves a Production Form, a card design,
and connections from the Production Form to the card design and
database. It does not matter which part of the project you start with.
This document describes card designs first because many people find
it easiest to think about a card—something you can hold in your hand.
12 ID Card Maker Entry Version 6 User Documentation
Page 55

System Overview
Furthermore, ID Card Maker applications support an iterative design
process. You can start with a card design, move to the Production
Form, use the field connector to associate Production Form fields with
card fields and database table columns, and then go back and refine
your card design or make changes to the Production Form.
Create the ID Card Maker Project
You create a new project in the ID Card Maker Project application. You
can either create a project from scratch or start with a project you
already have.
To create a new project from scratch, either select Create a new project
on the Welcome dialog box when you start the Project application or
select File and then New Project from the Project menu bar. See the
online help topic “Create a new project” for step-by-step instructions.
Create the Card Design
See chapter 2, Plan and Create a Card Design for complete
information.
Create the Production Form
See chapter 3, Plan and Create a Production Form for complete
information.
Configure the Database
Chapter 4: Using Databases with ID Card Maker Projects explains
working with the project’s database.
ID Card Maker Entry Version 6 Administrator’s Guide 13
Page 56

System Overview
Tie It All Together
Chapter 5: Connecting Fields explains what you need to do to retrieve
information from your database, save information to your database,
and print information on cards.
Try It Out
Run the project in the Process application to make sure it behaves as
expected and produces error-free results:
• Are text fields wide enough for all the characters that need to be
entered in them?
• Can you save records to the database—and retrieve them?
Also consider having your Process application users test the project
and make suggestions for improvement.
Implement Card Production
When you are satisfied that your project meets your needs, you can
start collecting data and printing ID cards.
14 ID Card Maker Entry Version 6 User Documentation
Page 57

Chapter 2: Plan and Create a Card Design
What Is a Card Design?
A card design defines how a plastic identification card or other printed
output will look when printed: what information will be the same on
each card (such as a logo or enterprise name) and what information
will vary from card to card (the cardholder’s name or photo). The card
design also specifies whether information will appear on one or both
sides of the card and whether the card will have a magnetic stripe. An
ID Card Maker Entry Edition project can contain only one card design.
Card Window
You use the Card window in the ID Card Maker Project application to
create the design for your cards. It contains the following parts.
Title bar
Rulers
Design area
ID Card Maker Entry Version 6 Administrator’s Guide 15
Page 58

Plan and Create a Card Design
Title bar—The title bar shows the name of the card you are editing
(Card in the example above). If you are viewing the back side of the
card, that is noted in the title bar. The title bar changes color when that
card side is active.
Rulers—The rulers help you locate and size card fields. You turn the
rulers on and off by using the View menu. You specify the unit of
measure to display in the computer’s Control Panel, Regional Settings
property sheet, Number tab, Measurement system setting.
Close your project before changing the unit of measure to
display.
Design area—This area represents the card and shows how the card
will look when printed. You place all card fields in this area.
Scroll bars appear if the size of the Card window is smaller than the
size of the card. Use the Maximize button (on the title bar) to make the
Card window as large as possible.
You can create a two-sided card design by simply viewing the back of
the card and placing fields on it. See the online help topic “Create a
two-sided card” for step-by-step instructions.
Orientation
When you start a new ID Card Maker project, you have the
opportunity to decide whether you want your card to be in portrait or
landscape orientation. You can change the card orientation during the
design process, but if you do, you will probably have to move some
fields to keep them visible on the card.
16 ID Card Maker Entry Version 6 User Documentation
Page 59

Plan and Create a Card Design
The front of the card can have a different orientation from the back.
Size
The card design is the industry-standard CR80 card size and cannot be
changed.
Portrait orientation
Landscape orientation
Background
You can specify that your card background be printed with a color,
with a graphic, or with both. You can use graphics that are stored in a
variety of formats. However, for the best printed card quality the
following formats are recommended by Polaroid:
Format Type of File
BMP Windows Bitmap
TIF Tagged Image File Format (single image per file,
uncompressed only)
See the online help topic “Add a graphic or color to a card
background” for step-by-step instructions.
ID Card Maker Entry Version 6 Administrator’s Guide 17
Page 60

Topcoat
A topcoat is a layer of material applied to the top of a card that protects
the image beneath from chemicals and abrasion and adds a level of
protection against card tampering.
Most card fields allow you to specify whether or not to apply the
topcoat over the field. A topcoat would interfere with the operation of
some fields, such as a magnetic stripe field. For this reason, you cannot
specify a topcoat for certain fields.
Types of Card Fields
Card fields are the building blocks of all card designs. You must create
a card field for each item you want to print or encode on the card. You
define each card field by type. The type determines the field’s contents.
ID Card Maker Entry Edition Project includes six types of card fields:
text, photo, bar code, magnetic stripe, static text, and static graphic.
Plan and Create a Card Design
Text Field
Text field
Text fields print information that changes from one card to the next,
such as cardholder name. The data originates from the Production
Form, where it might be retrieved from a database, entered by a
Process application user, or derived from other data. You can specify
18 ID Card Maker Entry Version 6 User Documentation
Page 61

Plan and Create a Card Design
the font and color attributes of a text field, as well as rotate it. See Fonts
on page 9
.
See the online help topic “Add a text field to a card” for step-by-step
instructions.
Photo Field
Your card design can have one photo field. Photo fields contain the
cardholder’s captured image. You can move and size photo fields, as
well as rotate and add a border to them.
Photo field
Photos with borders will not print correctly if they are on a
card side configured to print using only the K-panel.
See the online help topic “Add a photo field to a card” for step-by-step
instructions.
ID Card Maker Entry Version 6 Administrator’s Guide 19
Page 62

Bar Code Field
Bar code field
You create bar code fields to print bar codes on your cards. You can
size, align, and rotate bar code fields.
With some types of bar codes, you can specify density, error checking,
and whether the bar code field uses a checksum algorithm. The kind of
bar code you use in your card design is determined by the bar code
reading equipment you use and the characters you need to encode. See
the documentation for your bar code reader to determine what bar
code type to select. That documentation will also explain the rules for
determining valid information for the bar code type you will use.
Plan and Create a Card Design
You select the bar code type on the Advanced tab of the Edit Field
Properties [Bar Code] dialog box. The following table lists the bar code
types ID Card Maker software supports, as well as the options
available with each bar code type.
Bar Code Type Options Available
Codabar Checksum: none, Mod 16, Mod 10,
Mod10Lib, Mod10Lun
Density: High, Medium, Low
Code 128 Auto Density: High, Medium, Low
20 ID Card Maker Entry Version 6 User Documentation
Page 63

Plan and Create a Card Design
Bar Code Type Options Available
Code 39 Checksum: none, Mod 43, Mod10Lib,
Code 39 Extended Checksum: none, Mod 43
EAN/JAN-13 Supplemental Digits: 0, 2, 5
EAN/JAN-8 Supplemental Digits: 0, 2, 5
Interleaved 2 of 5 Checksum: none, Mod 10, Mod10Lib,
UPCA Supplemental Digits: 0, 2, 5
Mod10Lun
Density: High, Medium, Low
Density: High, Medium, Low
Density: High, Medium, Low
Density: High, Medium, Low
Mod10Lun
Density: High, Medium, Low
Density: High, Medium, Low
UPCE 11 digit Supplemental Digits: 0, 2, 5
Density: High, Medium, Low
The Background Color Options area of the Advanced tab lets you
choose a background color for the bar code field. The default
background color is white. If you have specified a color for the card
background, the Use Card Background Color setting becomes
available.
If you use a color other than white for the bar code
background, print a sample card and test it in your bar code
reading equipment to make sure the colors and size you chose
can be read reliably.
The Interpretation Text Options area of the Advanced tab lets you
choose to have the contents of the bar code displayed in regular text.
ID Card Maker Entry Version 6 Administrator’s Guide 21
Page 64

Plan and Create a Card Design
When Interpretation Text On is selected you can also specify the font
characteristics of the text and the location of the text relative to the bar
code.
You must provide sample bar code data to display and print on the
sample card. You do this on the General tab of the Edit Field
Properties [Bar Code] dialog box. If you enter too much sample data,
the field is filled with diagonal lines. If the bar code type does not
support the data you entered, the field is filled with a crosshatch
pattern.
Too much bar code data
Unsupported bar code data
You must inform your Process application operators about the
amount and kind of data that can be entered in bar code fields.
See the online help topic “Add a bar code field to a card” for step-bystep instructions.
Magnetic Stripe Field
Magnetic stripe field
Your card design can have one magnetic stripe field. You create
magnetic stripe fields to encode information in the magnetic stripe
area of your cards. The ID Card Maker Project application places the
magnetic stripe field in the correct location for a three-track magnetic
22 ID Card Maker Entry Version 6 User Documentation
Page 65

Plan and Create a Card Design
stripe on the most common card stock. You can move the field up or
down on the landscape-oriented card. You cannot change the width of
the magnetic stripe field or move it left or right.
The magnetic stripe field is always encoded in IAT format using the
Polaroid ID Card Printer Magstripe Plug-in. If you are using a nonPolaroid printer but your printer supports special magnetic stripe
printer fonts, you can encode the magnetic stripe on a card by using
one of the magnetic stripe fonts with a Text field. See your printer
documentation for details.
See the online help topic “Add a magnetic stripe field to a card” for
step-by-step instructions.
Static Text Field
Static text field
A static text field prints the same text on each card. You enter the text
that appears in the static text field when the project is designed and at
that time you also specify the font and color attributes of the static text
field. All text in a static text field displays with the same font and color
attributes. You can rotate a static text field. See the online help topic
“Add a static text field to a card” for step-by-step instructions.
Static Graphic Field
You define a static graphic field to print a graphic, such as your
organization’s logo, on each card. While it is possible to use any of the
ID Card Maker Entry Version 6 Administrator’s Guide 23
Page 66

formats listed under Background on page 17, using a bitmap will
provide the highest quality graphic on the printed card. You can size
and rotate static graphic fields.
See the online help topic “Add a static graphic field to a card” for stepby-step instructions.
Printing Sample Cards
Before fine-tuning the card layout, print a sample card. This
allows the software to determine printer characteristics and
size fields more accurately.
While you are designing your card, you can print sample cards by
selecting Print Sample Card from the File menu on the menu bar or
from the right mouse button menu or by clicking the Print Sample
Card button on the toolbar. For best results, use the same card stock
and printing supplies your Process application users will use.
Sample cards are always printed with the sample data you
supplied for the card fields.
Plan and Create a Card Design
Sample cards are not encoded. To check that magnetic stripes
are encoded correctly, start the ID Card Maker Process
application and print a card.
Printing Cards in the Process Application
You can set up your ID Card Maker project to help Process application
users track the progress of print requests. On the Printing tab of the
Card Design Properties dialog box, select a field to identify print jobs.
At print time, the contents of this field will be displayed in the printer’s
print queue.
24 ID Card Maker Entry Version 6 User Documentation
Page 67

Chapter 3: Plan and Create a Production Form
What Is a Production Form?
The Production Form is used by the Process application user to gather
cardholder information and print cards. Through the Production Form
the operator can search the project’s database, add records to the
database, add or update information in the database, or delete
database records. The operator can gather and save text (such as the
cardholder’s name) and a photograph of the cardholder.
An ID Card Maker project contains one Production Form.
Production Form Window
You use the Production Form window to design the form for your
project. It contains the following parts:
ID Card Maker Entry Version 6 Administrator’s Guide 25
Page 68

Plan and Create a Production Form
Title bar
Design
area
Title bar—The title bar changes color when the Production Form
window is active.
Design area—This area represents the window the Process operator
will use. You place all form fields in this area.
Background
You can specify that the background of your Production Form has a
color, a graphic, or both.
All fields are placed on top of the background. If you do not specify a
background, the form background will be the color specified by the
operating system display properties.
See the online help topic “Add a background color or graphic to a
Production Form” for step-by-step instructions.
26 ID Card Maker Entry Version 6 User Documentation
Page 69

Plan and Create a Production Form
Size
The Production Form adjusts automatically to accommodate the fields
you add.
Types of Production Form Fields
Fields are the building blocks of your Production Form. You must
create a field for each item you want to appear on the form, each piece
of variable data you want to appear on your cards, and each field you
want to connect to the project’s database.
The ID Card Maker Entry Edition Project application includes three
types of Production Form fields: text, photo, and static text.
Text Field
Text fields
ID Card Maker Entry Version 6 Administrator’s Guide 27
Page 70

Plan and Create a Production Form
Text fields allow the Process application user to gather alphanumeric
data. The data can then be printed on a card, saved in a database, or
both. You can specify a prompt that reminds the Process aplication
user what data to enter in the field. You can also specify the font and
color attributes of the operator prompt and the text the Process
application user will enter.
Text fields are always searchable.
See the online help topic “Add a text field to a Production Form” for
step-by-step instructions.
Photo Field
Photo field
Each ID Card Maker Entry Edition project can have one photo field.
Photo fields provide a way to capture the cardholder’s image or access
a previously-captured image. You can specify how large the photo
field appears on the Production Form, whether there is a prompt for
the operator, and the font and color attributes of the prompt. You can
28 ID Card Maker Entry Version 6 User Documentation
Page 71

Plan and Create a Production Form
also specify the image capture method (taking a photo with a specific
camera, using an image in an existing file, etc.).
Consider making the photo field on the Production Form the same
shape as the photo field on the card. For example, if the photo area on
the card is square, make the photo field on the Production Form
square by entering the same number for Height as for Width on the
General tab of the Edit Field Properties [Photo] dialog box.
In the Process application, the image capture method you specified is
launched automatically. When a photo file is opened, a black crop box
with sizing handles appears to allow the operator to remove
unwanted background from the photo.
Photos are always stored in the project’s database in compressed JPEG
format.
See the online help topic “Add a photo field to a Production Form” for
step-by-step instructions. Also see Working with Capture Options
page 43, for more information.
on
ID Card Maker Entry Version 6 Administrator’s Guide 29
Page 72

Plan and Create a Production Form
Static Text Field
Static text
field
You can use a static text field to add instructions to the Process
application user or to divide the Production Form into categories of
information. You can specify the font and color attributes of a static
text field. See the online help topic “Add a static text field to a
Production Form” for step-by-step instructions.
30 ID Card Maker Entry Version 6 User Documentation
Page 73

Plan and Create a Production Form
Changing the Tab Order of Fields
You can determine the tab order of the fields so the fields are entered
in a logical progression, without regard to the order in which you
created them. See the online help topic “Change the field tab order”
for step-by-step instructions.
Adding Fields to the Production Form from a Card Design
Developing an ID Card Maker project often involves several iterations.
You may decide to add a field to the card design after you create the
Production Form. The Add Fields to Production Form command on
the Tools menu lets you add card fields to an existing Production
Form quickly and easily. See the online help topic “Add fields to a
Production Form from a card design” for step-by-step instructions.
ID Card Maker Entry Version 6 Administrator’s Guide 31
Page 74

Plan and Create a Production Form
Deleting a field on the card does not delete the corresponding
Production Form field.
Add Fields to Production Form creates field types as follows:
Card Field Type Production Form Field Type
Text Text
Photo Photo
Barcode Text
The field name assigned to each Production Form field matches the
card field name used to create it. The operator prompt for each field is
the field name. Matching Production Form and card fields are
automatically connected. (See Connecting Fields
on page 37.)
32 ID Card Maker Entry Version 6 User Documentation
Page 75

Chapter 4: Using Databases with ID Card Maker Projects
If you want to save information entered in the Production Form for
future use or if you want to use existing information to print cards,
you will do it by connecting fields in your Production Form to
columns in the project’s database.
ID Card Maker Entry Edition automatically creates a single-table
Access database for your project. Use the Add Production Form Fields
to Database command on the Project application Tools menu
(described in
the database for your needs. Database columns added will be named
as described in
Adding Fields to a Database on page 34) to customize
Adding Fields to a Database on page 34.
Database Access
You access the database when you use the Field Connector window in
the ID Card Maker Project application. In the ID Card Maker Process
application, you access the database when you open a project.
Controlling Database Activities
The best place to restrict Process application users’ database access is
on the Database tab of the Edit Production Form Properties dialog
box. There you can prevent operators from creating new database
ID Card Maker Entry Version 6 Administrator’s Guide 33
Page 76

Using Databases with ID Card Maker Projects
records, saving changes to records, deleting records, or searching the
database.
You can also use the Edit Production Form Properties dialog box to
make sure that a database record is saved whenever a card is printed
for that record by selecting the Save On Print option in the Automatic
Actions area. Using this feature also eliminates the need for an explicit
“save” operation for each card printed.
Adding Fields to a Database
Developing an ID Card Maker project often involves several iterations.
You may decide to add a field to the Production Form or to add
information to the database that you first thought you did not need to
save. The Add Production Form Fields to Database command on the
Tools menu becomes available after you have added a field to your
project’s Production Form. See the online help topic “Add fields to a
database” for step-by-step instructions.
Deleting a field on the Production Form does not delete the
corresponding database field. ID Card Maker Project does not
provide a way to delete database fields.
34 ID Card Maker Entry Version 6 User Documentation
Page 77

Using Databases with ID Card Maker Projects
When creating database field names, Add Production Form Fields to
Database starts with the Production Form field name, removes any
characters that are not allowed, and adds “IDCM” to the start of the
name. Adding this prefix prevents the inadvertent creation of a
database field name that is a reserved word. If removing characters
from Production Form field names results in duplicate database field
names, the software tells you to change a Production Form field name.
For example, Production Form fields named “First Name” and
“FirstName” would both result in the database field name
“IDCMFirstName” and you would receive an error message.
Database field names are limited to 64 characters. If the field name is
longer than 64 characters after the characters that are not allowed are
removed, only the first 64 characters are used.
ID Card Maker Entry Version 6 Administrator’s Guide 35
Page 78

Using Databases with ID Card Maker Projects
36 ID Card Maker Entry Version 6 User Documentation
Page 79

Chapter 5: Connecting Fields
Chapter 2 described the types of fields you can place on card designs,
Chapter 3 explained the types of fields available on a Production
Form, and Chapter 4 described the types of database fields ID Card
Maker Entry Edition software supports. This chapter explains how to
make connections between the following:
• Production Form fields and database table fields, so the Process
operator can retrieve, update, create, and delete database records
• Production Form fields and card fields, so information on the form
can be printed or encoded on a card
What Is the Field Connector?
The ID Card Maker field connector lets you establish connections
between and among fields on the various parts of your ID Card Maker
project. You can connect a Production Form field in three ways:
• Connect to both the database and the card. In this case, data
entered in the Production Form is printed on the card and saved in
the database. If data is already in the database, the Production
Form is the conduit for printing that information on the card.
• Connect to the card design only. You may want to print something
on the card that does not need to be saved to the database. For
example, you might give cardholders the option of having a
ID Card Maker Entry Version 6 Administrator’s Guide 37
Page 80

shortened form of their name on their cards, but it is not likely that
you will need to store that information in your database.
• Connect to the database only. If you use the ID Card Maker
Production Form as a data entry vehicle, you can collect and store
information in your database without using it on a card. A home
address is an example of information you might collect and save in
the database but not print on a card.
When making connections, select the Production Form field first and
then the database table column field or card field.
Field Connector Window
You use the Field Connector window to establish connections between
fields. From the menu bar, select View and then Field Connector. The
Field Connector window contains three areas: Data Source, Production
Form, and Card.
When you open the Field Connector window, the Production Form
and card design windows change to viewing field names (if you had
been viewing sample data). This helps you associate field names in the
Field Connector window with fields on your Production Form and
card design.
38 ID Card Maker Entry Version 6 User Documentation
Page 81

Connecting Fields
Data Source
Data Source Area
The names of the database table columns are listed in alphabetical
order.
Production Form Card
Production Form Area
The names of the data input fields in your Production Form are listed
in alphabetical order. If you click on a Production Form field that is
connected to a Data Source column and/or a Card field, a line appears
showing the connection.
Card Area
The names of card fields that will change from card to card appear.
ID Card Maker Entry Version 6 Administrator’s Guide 39
Page 82

Static text and static graphic fields on a card are not listed
because they cannot be connected to a field on the Production
Form.
Connect and Disconnect Buttons
Two sets of buttons let you connect and disconnect fields. The buttons
between the Data Source area and the Production Form area are for
connections between fields in those two parts of the ID Card Maker
project, and the buttons between the Production Form area and the
Card area are for connections between fields in those two parts of the
project.
Restrictions on Connections to Database Columns
A Production Form field can be connected to one and only one
database table column, and a database table column can be connected
to one and only one Production Form field.
You can connect Production Form fields only to compatible database
table columns. For example, if you try to connect a text field on your
Production Form to the database table column created for a photo, the
ID Card Maker software will display an error message.
40 ID Card Maker Entry Version 6 User Documentation
Page 83

Connecting Fields
Restrictions on Connections to Card Design Fields
You can connect a Production Form field to as many card design fields
as necessary, provided the field types are compatible. For example, if a
card design includes the cardholder’s identification number on both
sides of the card, a single text field on the Production Form can be
connected to both card design text fields. The following table lists
compatible field types.
Production Form Field Compatible Card Design Fields
Text Bar code, Magnetic Stripe, Text
Photo Photo
Each card design field can have only one connection.
ID Card Maker Entry Version 6 Administrator’s Guide 41
Page 84

42 ID Card Maker Entry Version 6 User Documentation
Page 85

Chapter 6: Working with Capture Options
In addition to using a computer keyboard to gather character-based
information, ID Card Maker identification software lets you capture
photo images.
The ID Card Maker Process application includes four ways of
capturing photo images:
• Using images stored as files on your system or network.
• Using any capture device (camera, scanner) that complies with the
TWAIN interface standard.
• Using any camera that complies with the Microsoft Video for
Windows or Windows Image Acquisition (WIA) interface
standard.
• Using an integrated photo capture solution, such as the a Polaroid
ID Card Maker Image Capture product.
Using the ID Card Maker Project application, you select the default
capture device on the Source tab of the Edit Field Properties [Photo]
dialog box. The Default Photo Source list has the following choices:
• No Capture
Use if images are already stored in your database and the
Process application user normally will not take new
photos. The operator will be able to select a capture device
in exception cases.
ID Card Maker Entry Version 6 Administrator’s Guide 43
Page 86

Working with Capture Options
• Photo from File
Use if previously-captured images are stored on your
system or network as files. See Photo from File
on page 45.
• TWAIN
Lets the Process application user select the TWAIN device
to use to take the photo. See TWAIN Interface
on page 47.
• TWAIN (Fast)
Use if only one TWAIN device is loaded on the computer or
if one TWAIN device will be used most often. Selects the
last TWAIN device used. See TWAIN Interface
on page 47.
• Video for Windows
Lets the Process application user select the Video for
Windows device to use to take the photo. See Video for
Windows Interface on page 48.
• Video for Windows (Fast)
Use if only one Video for Windows device is loaded on the
computer or if one Video for Windows device will be used
most often. Selects the last Video for Windows device used.
See Video for Windows Interface
on page 48.
In addition, the Default Photo Source list includes any optional
Polaroid photo capture devices present on your computer.
44 ID Card Maker Entry Version 6 User Documentation
Page 87

Working with Capture Options
Photo from File
If you specify Photo from File on the Source tab of the Edit Field
Properties [Photo] dialog box, Process application users will see the
Open dialog box when they enter the photo field on the Production
Form. The operator can navigate to the proper file using standard
Windows navigation techniques.
ID Card Maker Entry Version 6 Administrator’s Guide 45
Page 88

Working with Capture Options
ID Card Maker software can open photos saved in the following
formats:
*
BMP
EPS Encapsulated PostScript
JPG
J2K
PCT Macintosh PICT Drawing
PCX PC Paintbrush
PNG
PSD Adobe Photoshop® (3.0)
Windows Bitmap
*
Joint Photographic Experts Group File Interchange Format
(single image per file)
*
JPEG 2000 File Format
*
Portable Network Graphics
TGA TARGA® Image File Format
*
TIF
Tagged Image File Format (single image per file,
uncompressed only)
WMF Windows Metafile
* Recommended
46 ID Card Maker Entry Version 6 User Documentation
Page 89

Working with Capture Options
TWAIN Interface
If you specify TWAIN on the Source tab of the Edit Field Properties
[Photo] dialog box, Process application users will see the TWAIN
Interface dialog box when they enter the photo field on the Production
Form.
The user must select a device (by clicking the Select Source button and
selecting from available sources listed in the Select Source dialog box)
and then activate the device by clicking the Acquire Photo button.
When the user clicks the Acquire Photo button, ID Card Maker
Process launches the software application provided by the
manufacturer of the TWAIN device.
If you specify TWAIN (Fast) on the Source tab of the Edit Field
Properties [Photo] dialog box, the ID Card Maker Process application
launches the software application provided by the manufacturer of the
TWAIN device that was used most recently. Specifying TWAIN (Fast)
can save your Process application users up to four mouse clicks for
each photo they take.
Because you can use any TWAIN-compliant device from any
manufacturer, ID Card Maker documentation cannot provide step-bystep procedures for Process application users to follow. You must
develop those procedures for your users.
ID Card Maker Entry Version 6 Administrator’s Guide 47
Page 90

Video for Windows Interface
If you specify Video for Windows on the Source tab of the Edit Field
Properties [Photo] dialog box, Process application users will see the
Video for Windows Interface dialog box when they enter the photo
field on the Production Form.
The user must select a device (by clicking the Select Source button and
selecting from available sources listed in the Select Source dialog box)
and then activate the device by clicking the Acquire Photo button.
When the user clicks the Acquire Photo button, the Video for
Windows Camera dialog box opens.
Working with Capture Options
If you specify Video for Windows (Fast) on the Source tab of the Edit
Field Properties [Photo] dialog box, the ID Card Maker Process
application launches the software application provided by the
manufacturer of the Video for Windows device that was used most
recently. Specifying Video for Windows (Fast) can save your Process
application users up to four mouse clicks for each photo they take.
48 ID Card Maker Entry Version 6 User Documentation
Page 91

Working with Capture Options
Optional Capture Devices
Polaroid offers a number of optional capture devices for use with ID
Card Maker systems. These capture devices are explained in separate
online documents that are loaded on your system with the capture
device software.
Configuring Optional Capture Devices
Some optional capture devices allow you to create a configuration—a
group of settings tailored to the way you use the device. You use the
ID Card Maker Administrator application to specify a configuration.
Follow these steps:
1. Start the Administrator application by clicking the Windows Start
button and selecting Programs, Polaroid, ID Card Maker, and
then ID Card Maker Entry Administrator.
2. From the menu bar select Capture and then Configure Capture
Devices. The Configure Capture Devices dialog box opens.
3. From the list, select the capture device you want to configure and
click Configure. The configuration dialog box for the device you
selected opens.
If no device names appear in the list, none of the capture
devices installed on your system can be configured.
ID Card Maker Entry Version 6 Administrator’s Guide 49
Page 92

Working with Capture Options
If you selected Video for Windows as the device to
configure, the Video for Windows Interface dialog box
opens.
A. If you have more than one Video for Windows device
loaded on the computer, click Select Source and choose
the camera you want to configure from the Select
Source dialog box.
B. Click Configure. The Configure Capture Device dialog
box opens.
C. Click the button for the configuration option you want
to change. The device’s configuration dialog box opens.
If a button is unavailable, that option cannot be configured for
your device.
4. See documentation for the capture device for information about
making selections and saving the configuration. When you close
50 ID Card Maker Entry Version 6 User Documentation
Page 93

Working with Capture Options
the configuration dialog box, you return to the Configure Capture
Devices dialog box.
5. Click Close.
ID Card Maker Entry Version 6 Administrator’s Guide 51
Page 94

Working with Capture Options
52 ID Card Maker Entry Version 6 User Documentation
Page 95

Chapter 7: Working with Printer Options
ID Card Maker applications work with two kinds of printers. While
you are developing your card design, you can print to the same kind
of paper printer you would use to print a word processing document
or spreadsheet. But even during development, we recommend
printing sample cards to a card printer.
Printing ID cards is more complex because card printers offer features,
such as topcoating and encoding, that are not available on paper
printers. In addition, each card printer has a different set of available
features.
Introducing Printer Plug-ins
ID Card Maker applications rely on software modules called plug-ins
to provide the interfaces between the main ID Card Maker
applications and the various card printers and encoders for magnetic
stripes. This design allows support of a wide variety of printers
without changing the ID Card Maker software.
The printer plug-in simply “plugs in” to the ID Card Maker
application.
ID Card
Maker
Application
ID Card Maker Entry Version 6 Administrator’s Guide 53
Printer
Plug-in
Encoder
Plug-in
Page 96

Working with Printer Options
Similarly, a magnetic stripe encoder plug-in plugs in to the printer
plug-in, extending the capability of the printer.
Specifying Plug-ins
If the driver for your Polaroid card printer is installed on your
computer when you install the ID Card Maker software, the ID Card
Maker installation program automatically associates the correct printer
plug-in with your card printer. If you add a card printer to your
system after installing ID Card Maker software, you must specify the
association by using the Assign Printer Plug-ins utility in the ID Card
Maker Administrator application. See the ID Card Maker
Administrator online help topic “Assign printer plug-ins” for step-bystep instructions. Printer plug-ins must be assigned on each computer
that prints cards with your ID Card Maker project.
Printing Graphics with the Card Printer’s K-panel
You can specify that all graphics on a card side be printed with the Kpanel using a utility in the ID Card Maker Administrator application.
Field Properties Print Options
Selecting black for the foreground color of a text or static text field
automatically uses the K-panel for that field.
Override Field-level Settings
You can specify that photos and graphics be printed to the K-panel
with the Configure K-Panel Printing utility in the ID Card Maker
Administrator application. You specify K-panel printing for the front
of the card, the back of the card, or both.
54 ID Card Maker Entry Version 6 User Documentation
Page 97

Working with Printer Options
Because card side K-panel conversions are done at print time, the
Project card design and Process Card preview windows always
display graphics in color. You must print a card to see the results of the
settings.
You can use the Configure K-Panel Printing utility in the ID Card
Maker Administrator application to adjust the contrast of images
printed with the K-panel. Contrast refers to the degree of difference
between the lightest and darkest areas of the graphic.
First select the printer you will use. Then move the slider and click
OK. Print a test card and adjust your settings if necessary.
You must set up K-panel configurations on each ID Card Maker
computer and for each printer used by the computer.
See the Administrator online help topic “Configure K-panel printing”
for step-by-step instructions.
ID Card Maker Entry Version 6 Administrator’s Guide 55
Page 98

Working with Printer Options
56 ID Card Maker Entry Version 6 User Documentation
Page 99

Index
A
add fields to Production Form from card
design 31
Administrator application
Assign Printer Plug-ins 54
configure capture devices 49
definition 1
B
background
card design 17
Production Form 26
background color
card fields 10
bar code field
card 20
C
camera,configuring 49
capture device
optional 49
card design
background 17
definition 15
orientation 16
size 17
card field
aligning 12
bar code 20
magnetic stripe 22
photo 19
static graphic 23
static text 23
text 18
Card window 15
cards
printing in Process application 24
configure capture devices 49
connections 37
between Production Form and card 41
between Production Form and
database 40
D
database 33
accessing 33
adding fields (table columns) 34
connections to Production Form 40
create from Project application 34
database setup
automatically saving records 34
connecting to a project 33
restricting privileges 33
F
field
aligning 12
alignment property 8
changing properties 7
changing size 9
copying 11
cutting, copying, pasting 11
definition 5
inserting 5
moving 12
name property 8
pasting 11
position property 9
rotation property 8
sample data property 8
selecting 5
size property 9
stacking order 12
field color 10
field connector 37
definition 37
Field Connector window 38
ID Card Maker Entry Version 6 Administrator’s Guide 57
Page 100

Index
field name view 8
font
card field 9
size 10
foreground color
card fields 10
format, graphics 46
G
graphic
Production Form background 26
static, on card 23
graphics format 46
H
horizontal card orientation 16
I
image
capturing 43
K
keyboard shortcuts 4
K-panel printing 54
L
landscape card orientation 16
M
magnetic stripe field 22
measurement system 16
N
name, see valid name
O
orientation of card 16
P
photo
capturing 43
from file 45
photo field
card 19
connections between Production Form
and card 41
Production Form 28
plug-in
definition 53
printer, assigning 54
specifying 54
plug-ins 53
pop-up menu 4
portrait card orientation 16
printer 53
plug-in 53
printer plug-in, assigning 54
printing cards
sample card in Project application 24
with K-panel 54
Process application
definition 1
Production Form
add fields from card design 31
background 26
connections to database 40
definition 25
size 27
window 25
Production Form field
aligning 12
photo 28
static text 30
tab order 31
text 28
project
creating 13
definition 1
developing 12
Project application
connecting fields 37
creating cards 15
definition 1
58 ID Card Maker Entry Version 6 User Documentation
 Loading...