

Page 1

The Whiteboard That
Connects To Your PC
User Guide
Ibid Software Release 2.0
Page 2

Polaroid Whiteboard User Guide
© 2000 Polaroid Corpor ation
Part Number 310723 Rev. 1.0
Polaroid Corporation
P.O. Box 438
Wayland, MA 01778-0438 USA
Information in this document is subject to change without notice. No part of this
document may be reproduced or transmitted in any form or by any means, electronic or mechanic al, for any p urpose, without the express written permission of
Polaroid Corp.
Trademarks
Polaroid and the Polaroid logo are trade m arks of Pol aroid Corporation. Ibid is a
trademark of MicroTouch Systems, Inc.
All other product names are trademarks of their respective owners.
Page 3

Table of Contents
Table of Contents
Preface
Audience . . . . . . . . . . . . . . . . . . . . . . . . . . . . . . . . . . . . . . v
Using This Guide . . . . . . . . . . . . . . . . . . . . . . . . . . . . . . . . v
Chapter 1: Installing & Configuring ibid
Box Contents . . . . . . . . . . . . . . . . . . . . . . . . . . . . . . . . . 1-2
System Requirements . . . . . . . . . . . . . . . . . . . . . . . . . . 1-2
Mounting Your Whiteboard . . . . . . . . . . . . . . . . . . . . . . 1-3
Connecting Your Whiteboard . . . . . . . . . . . . . . . . . . . . 1-4
Installing the
Starting
ibid
ibid
. . . . . . . . . . . . . . . . . . . . . . . . . . . . . . . . . . 1-5
Configuring Your Whiteboard . . . . . . . . . . . . . . . . . . . . 1-6
Configuring More Than One Whiteboard . . . . . . . . . . . 1-7
Calibrating LCD Projection . . . . . . . . . . . . . . . . . . . . . . 1-8
If you are not in Projection mode . . . . . . . . . . . 1-8
If you are already in Projection mode . . . . . . . . 1-9
Uninstalling
. . . . . . . . . . . . . . . . . . . . . . . . . . . . . 1-10
ibid
Chapter 2: ibid Basics
How the Polaroid Whiteboard Works . . . . . . . . . . . . . . 2-2
Recording writing . . . . . . . . . . . . . . . . . . . . . . . 2-2
Recording erasures . . . . . . . . . . . . . . . . . . . . . . . 2-2
Sounds . . . . . . . . . . . . . . . . . . . . . . . . . . . . . . . . 2-3
Multiple whiteboards . . . . . . . . . . . . . . . . . . . . . 2-3
Data recording formats and resolution . . . . . . . . 2-3
Using Whiteboard Icons . . . . . . . . . . . . . . . . . . . . . . . . 2-4
Viewing Your Whiteboard in
Software . . . . . . . . . . . . . . . . . . . . . . 1-5
. . . . . . . . . . . . . . . . . 2-5
ibid
Using
Using More Than One Whiteboard . . . . . . . . . . . . . . . 2-13
Understanding the
Displaying
toolbars . . . . . . . . . . . . . . . . . . 2-7
ibid
main window . . . . . . . . 2-6
ibid
Viewing images . . . . . . . . . . . . . . . . . . . . . . . . . 2-7
Keeping
Annotation Tools . . . . . . . . . . . . . . . . . . . . 2-10
ibid
displayed . . . . . . . . . . . . . . . . . . . 2-9
ibid
Sample annotation workflow . . . . . . . . . . . . . . 2-10
Using the pens . . . . . . . . . . . . . . . . . . . . . . . . . 2-11
Using the eraser options . . . . . . . . . . . . . . . . . . 2-12
Taking snapshots . . . . . . . . . . . . . . . . . . . . . . . 2-12
Table of Contents i
Page 4

Whiteboard User Guide
Chapter 3: Working with Snapshots
Understanding Snapshots . . . . . . . . . . . . . . . . . . . . . . . . 3-2
Creating Snapshots . . . . . . . . . . . . . . . . . . . . . . . . . . . . 3-2
Taking automatic snapshots . . . . . . . . . . . . . . . . 3-3
Viewing Snapshots . . . . . . . . . . . . . . . . . . . . . . . . . . . . 3-4
Snapshot captions . . . . . . . . . . . . . . . . . . . . . . . 3-5
Selecting Snapshots . . . . . . . . . . . . . . . . . . . . . . . . . . . . 3-5
Copying/Moving Snapshots . . . . . . . . . . . . . . . . . . . . . . 3-5
Copying/Moving snapshots within
Exporting snapshots . . . . . . . . . . . . . . . . . . . . . . 3-6
Dragging and dropping snapshots . . . . . . . . . . . 3-7
Renaming Snapshots . . . . . . . . . . . . . . . . . . . . . . . . . . . 3-7
Deleting Snapshots . . . . . . . . . . . . . . . . . . . . . . . . . . . . 3-8
Annotating Snapshots . . . . . . . . . . . . . . . . . . . . . . . . . . 3-8
Chapter 4: Working with ibid Files
Understanding
Files . . . . . . . . . . . . . . . . . . . . . . . . 4-2
ibid
File formats . . . . . . . . . . . . . . . . . . . . . . . . . . . . 4-2
Opening a File . . . . . . . . . . . . . . . . . . . . . . . . . . . . . . . . 4-3
Opening your last file at startup . . . . . . . . . . . . . 4-3
Saving a File . . . . . . . . . . . . . . . . . . . . . . . . . . . . . . . . . 4-4
Saving in the same file . . . . . . . . . . . . . . . . . . . . 4-4
Saving in a different file . . . . . . . . . . . . . . . . . . 4-4
Creating a New File . . . . . . . . . . . . . . . . . . . . . . . . . . . . 4-5
Closing a File . . . . . . . . . . . . . . . . . . . . . . . . . . . . . . . . . 4-5
. . . . . . 3-6
ibid
Sending a File via E-mail . . . . . . . . . . . . . . . . . . . . . . . . 4-5
Setting the E-mail file size warning . . . . . . . . . . 4-8
Using IbidViewer . . . . . . . . . . . . . . . . . . . . . . . . . . . . . . 4-8
Password Protecting a File . . . . . . . . . . . . . . . . . . . . . . . 4-9
Publishing a File as HTML . . . . . . . . . . . . . . . . . . . . . 4-10
Chapter 5: Printing Your Work
Setting Up for Printing . . . . . . . . . . . . . . . . . . . . . . . . . . 5-2
Printing from the Whiteboard . . . . . . . . . . . . . . . . . . . . 5-2
Printing from the
Printing with custom print options . . . . . . . . . . . 5-3
Printing with current printer settings . . . . . . . . . 5-4
Previewing Your Printout . . . . . . . . . . . . . . . . . . . . . . . 5-4
ii Table of Contents
Application . . . . . . . . . . . . . . . . 5-3
ibid
Page 5

Specifying Print Options . . . . . . . . . . . . . . . . . . . . . . . . 5-5
Printing colors . . . . . . . . . . . . . . . . . . . . . . . . . . 5-5
Using headers and footers . . . . . . . . . . . . . . . . . 5-6
Chapter 6: Customizing ibid
Restoring Window Positions . . . . . . . . . . . . . . . . . . . . . 6-2
Displaying the Last File at Startup . . . . . . . . . . . . . . . . 6-2
Table of Contents
Specifying
Warnings . . . . . . . . . . . . . . . . . . . . . . . 6-3
ibid
Taking Automatic Snapshots . . . . . . . . . . . . . . . . . . . . . 6-3
Customizing
Sounds . . . . . . . . . . . . . . . . . . . . . . . . 6-4
ibid
Changing Pen and Eraser Widths . . . . . . . . . . . . . . . . . 6-6
Changing Default Pen Options . . . . . . . . . . . . . . . . . . . 6-6
Changing the default pen color . . . . . . . . . . . . . 6-6
Changing the default pen time . . . . . . . . . . . . . . 6-7
Changing
Colors . . . . . . . . . . . . . . . . . . . . . . . . . . . 6-8
ibid
Changing default pen and background colors . . . . . 6-8
Restoring default pen and background colors . . . . 6-10
Overriding a Screen Saver . . . . . . . . . . . . . . . . . . . . . . 6-10
Chapter 7: Using Overlays
How Overlays Work . . . . . . . . . . . . . . . . . . . . . . . . . . . 7-2
Creating an Overlay . . . . . . . . . . . . . . . . . . . . . . . . . . . . 7-2
Adding an Overlay . . . . . . . . . . . . . . . . . . . . . . . . . . . . . 7-3
Adding an overlay from a file . . . . . . . . . . . . . . 7-3
Adding the current overlay to another snapshot . . . 7-4
Removing an Overlay . . . . . . . . . . . . . . . . . . . . . . . . . . 7-5
Chapter 8: Using Projection with ibid
Understanding LCD Projection . . . . . . . . . . . . . . . . . . . 8-2
Configuring Projection . . . . . . . . . . . . . . . . . . . . . . . . . 8-2
Customizing Projection Settings . . . . . . . . . . . . . . . . . . 8-6
Entering and Leaving Projection Mode . . . . . . . . . . . . . 8-8
Projection Mode Basics . . . . . . . . . . . . . . . . . . . . . . . . . 8-8
Inserting a screenshot as an overlay . . . . . . . . . 7-4
Configuring projection for one whiteboard . . . . 8-2
Configuring projection with multiple
whiteboards . . . . . . . . . . . . . . . . . . . . . . . . . . . . 8-3
Controlling your PC . . . . . . . . . . . . . . . . . . . . . . 8-8
Using the
Dashboard . . . . . . . . . . . . . . . . . 8-9
ibid
Table of Contents iii
Page 6

Whiteboard User Guide
Annotating in Projection Mode . . . . . . . . . . . . . . . . . . 8-10
Annotating a full screen . . . . . . . . . . . . . . . . . . 8-10
Annotating a selected area of the screen . . . . . 8-11
Toggling between
and the current screen . . . 8-11
ibid
Using the floating annotation tools . . . . . . . . . 8-12
Using Projection with PowerPoint . . . . . . . . . . . . . . . . 8-13
Chapter 9: Using ibid with NetMeeting
NetMeeting and
. . . . . . . . . . . . . . . . . . . . . . . . . . . 9-2
ibid
NetMeeting Requirements . . . . . . . . . . . . . . . . . . . . . . . 9-2
Using
in a NetMeeting . . . . . . . . . . . . . . . . . . . . . . 9-3
ibid
Sharing the
Using
Using
with the NetMeeting whiteboard . . . . . 9-3
ibid
Projection mode with NetMeeting . . . . 9-5
ibid
application in NetMeeting . . . . . 9-3
ibid
Chapter 10: Tips and Help
Getting Online Help . . . . . . . . . . . . . . . . . . . . . . . . . . . 10-2
Troubleshooting Hardware . . . . . . . . . . . . . . . . . . . . . 10-2
Whiteboard . . . . . . . . . . . . . . . . . . . . . . . . . . . . 10-2
Troubleshooting Communications . . . . . . . . . . . . . . . . 10-3
Index
Troubleshooting
Troubleshooting
Scrolling in
Software . . . . . . . . . . . . . . . . . . 10-4
ibid
and NetMeeting . . . . . . . . . . . . 10-5
ibid
while shared . . . . . . . . . . . . . 10-6
ibid
Technical Support . . . . . . . . . . . . . . . . . . . . . . . . . . . . 10-6
Care and Maintenance . . . . . . . . . . . . . . . . . . . . . . . . . 10-7
Caring for the whiteboard . . . . . . . . . . . . . . . . 10-7
Caring for the markers, stylus and eraser . . . . 10-7
Whiteboard Warranty . . . . . . . . . . . . . . . . . . . . . . . . . 10-8
What is not covered . . . . . . . . . . . . . . . . . . . . . 10-8
How to get warranty service . . . . . . . . . . . . . . 10-9
Limitation of damages and implied
warranties . . . . . . . . . . . . . . . . . . . . . . . . . . . . 10-10
How state law relates to the warranty . . . . . . 10-11
iv Table of Contents
Page 7

Audience
Preface
Preface
PrefacePreface
This guide assumes that you have already completed the
following:
•
Installed and configured your Polaroid whiteboard and
•
Begun using the whiteboard and software
This guide also assumes that you are familiar with the
basic terminology and functions of the Microsoft®
Windows operating system.
Using This Guide
This guide is a reference tool for the Polaroid whiteboard
and software. The information is presented based on
operations you may perform with
For details about a spec ific function in the
use the context-sensitive Help built into the application.
ibid
software
ibid
.
software,
ibid
Preface v
Page 8
Whiteboard User Guide
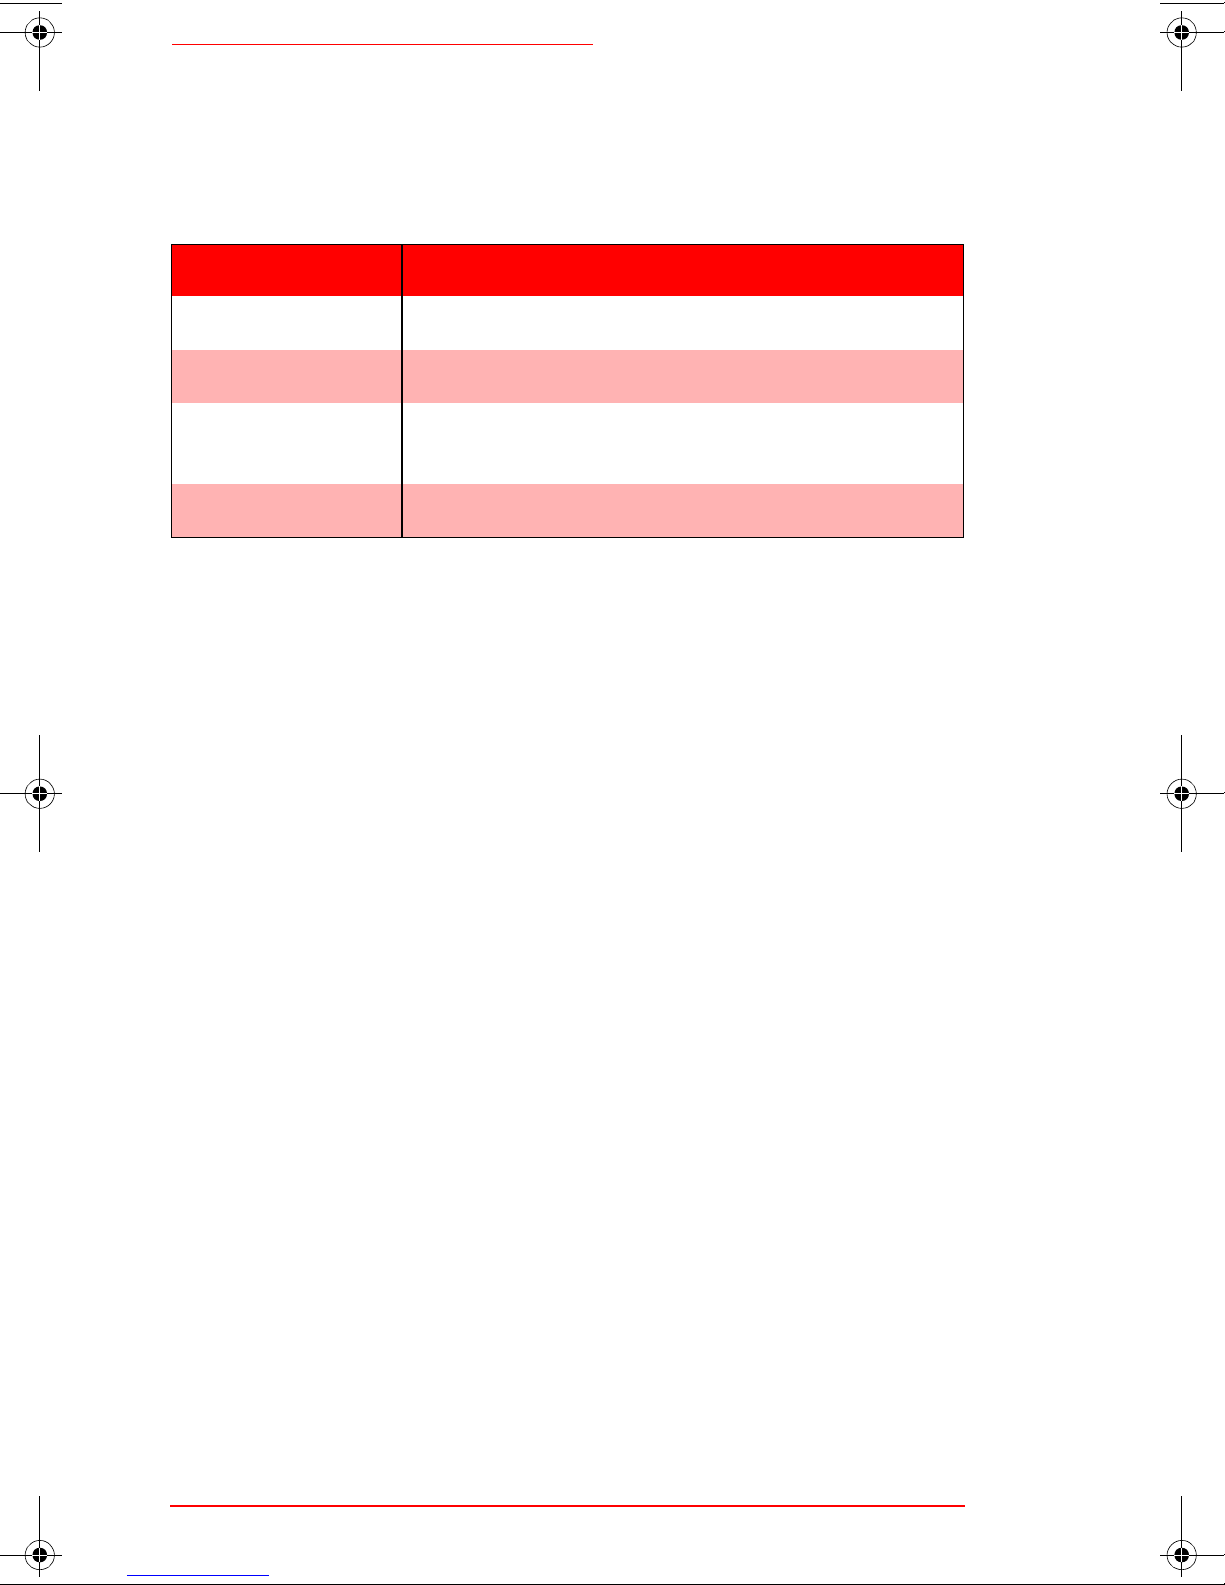
Terminology Used in This Guide
Terminology Used in This Guide
Terminology Used in This GuideTerminology Used in This Guide
Term Meaning
Click At your PC, press the left mouse button once.
Press At the whiteboard, press an icon strip button.
Touch In Projection mode, to uch the whiteboa rd’s whi te surface
with your finger or stylus.
Select Edit->Options Click Edit, then select Options from the dropdown menu.
For your convenience, this guide is installed in your
directory in Adobe® Acrobat® PDF format. To open the
guide, double-click the file called
OOOO
If the PDF file does not open, you may need to
reinstall Adobe Acrobat Reader (for details,
see www.adobe.com).
Manual.pdf
.
ibid
vi Preface
Page 9

Installing &
Installing &
Installing &Installing &
Configuring
Configuring
ConfiguringConfiguring
In This Chapter...
Box Contents
~ 2
~ 2
~ 2 ~ 2
1
1
11
ibid
ibid
ibidibid
~ 2
System Requirements
Mounting Your Whiteboard
Connecting Your Whiteboard
Installing the ibid Software
Configuring More Than One Whiteboard
Calibrating LCD Projection
Uninstalling ibid
~ 2
~ 2 ~ 2
~ 10
~ 10
~ 10 ~ 10
~ 3
~ 3
~ 3 ~ 3
~ 4
~ 4
~ 4 ~ 4
~ 5
~ 5
~ 5 ~ 5
~ 8
~ 8
~ 8 ~ 8
~ 7
~ 7
~ 7 ~ 7
Installing & Configuring ibid 1-1
Page 10

Whiteboard User Guide
Box Contents
•
1 Polaroid whiteboard
•
1 whiteboard stylus
•
4 markers
•
1 whiteboard eraser
•
1 AC power adapter
•
1 serial port cable
•
1 adapter (9-to-25-pin )
•
2 fasteners for wall-mounting
•
1 wall-mounting template
•
1
software CD
ibid
•
1 Polaroid Whiteboard User Guide
Report any missing or damaged items to your dealer
immediately.
System Requirements
•
IBM® compatible PC (120 MHz or higher,
200 MHz or higher for projection)
•
Windows® 95, 98 or NT (4.0 or higher)
•
32 MB RAM
•
20 MB available disk space
•
CD-ROM drive
•
1 available serial (COM) port
1-2 Installing & Configuring ibid
Page 11

Mounting Your Whiteboard
Mounting Your Whiteboard
OOOO
OOOO
You will need a screwdriver and a drill.
1
1
Choose a location wit h proper access to your PC and
1 1
any network connec tions a nd LCD proj ector you a re
using.
2
2
Use the included wall-mounting template, or the
2 2
holes in the top of the accessory box, to mark the
wall for drill holes.
3
3
Drill the holes as marked.
3 3
4
4
Insert the two screws partway into the holes.
4 4
If you are installing on a hollow wall, tap in the
plastic fasteners first, then insert the two
screws.
Screws
Hollow Wall
Fasteners
5
5
Hang the whiteboar d on the scre ws using the s lots at
5 5
the top corners in back.
To mount your whiteboard on an optional stand or easel,
see the instructions included with your stand or easel
(or visit www.polaroid.com/gethelp).
Installing & Configuring ibid 1-3
Page 12
Whiteboard User Guide
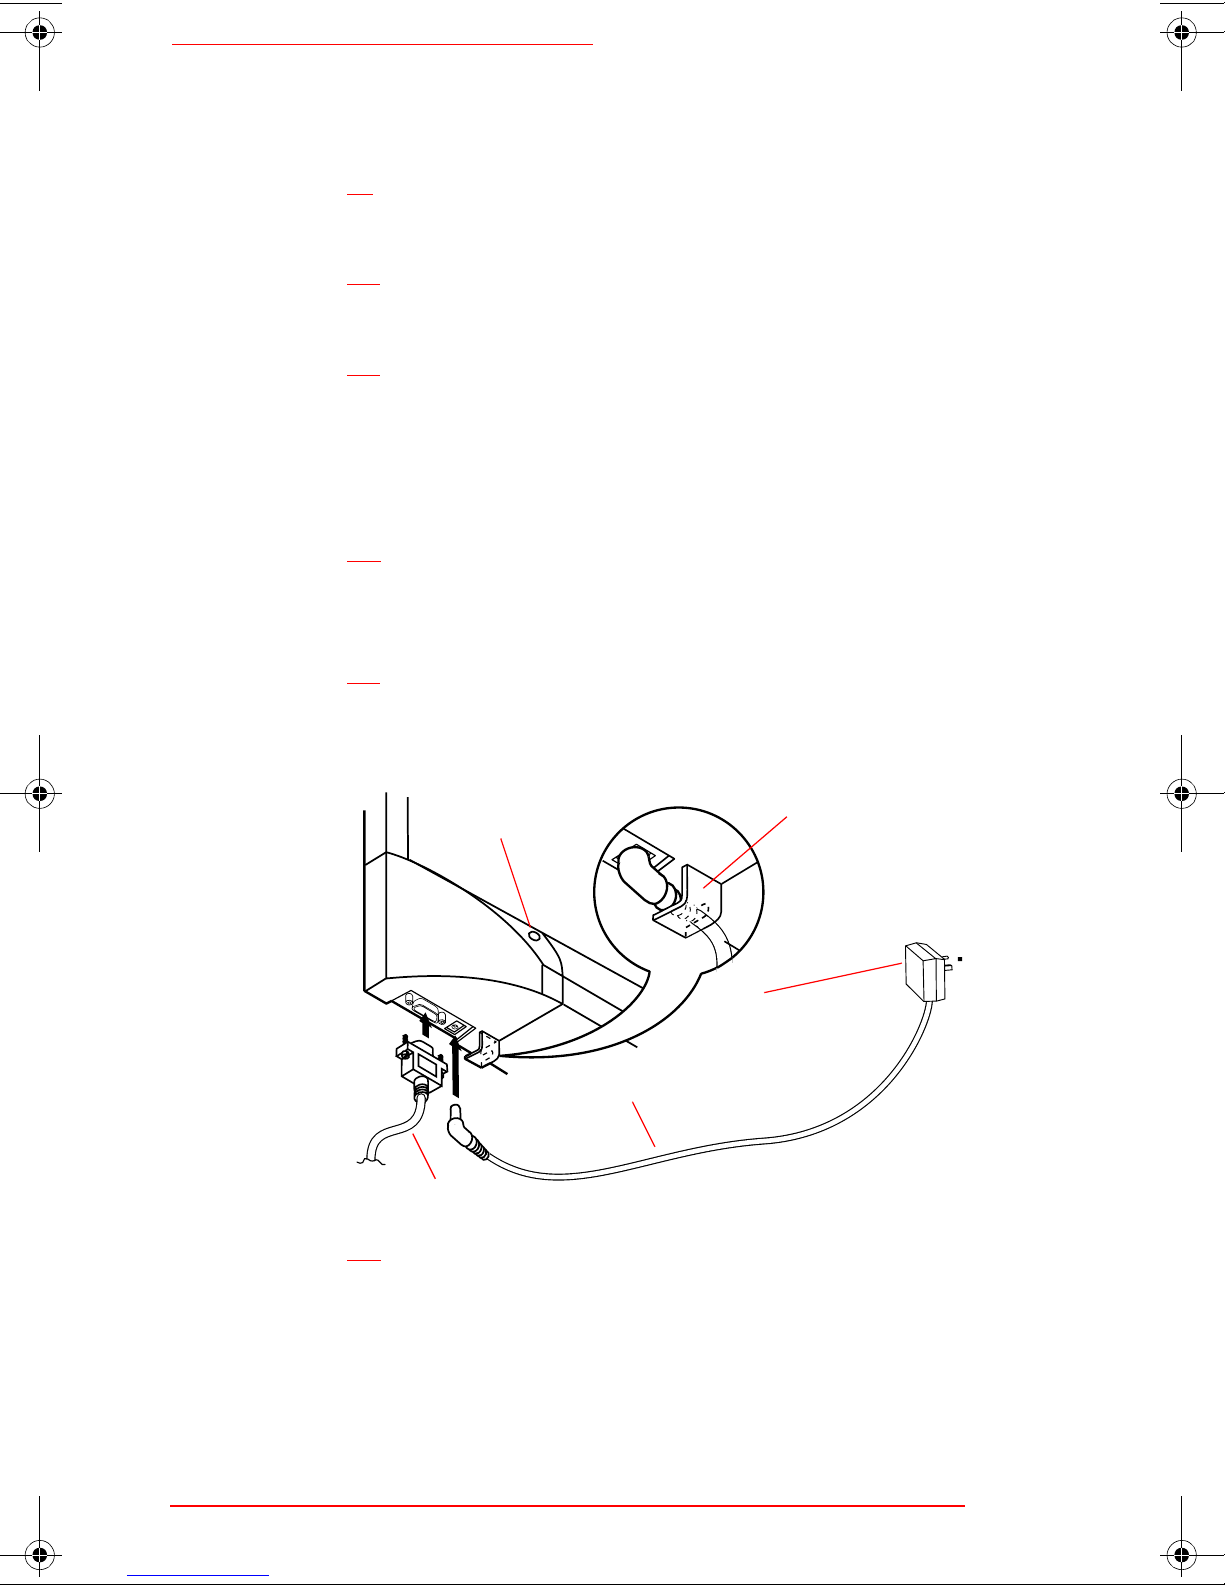
Connecting Your Whiteboard
1
1
Plug the AC power cable into the connector on the
1 1
bottom of the whiteboard, next to the serial port.
2
2
Twist the connector to place the cable behind the
2 2
cable bracket.
3
3
Plug the power adapter into an outlet.
3 3
OOOO
To avoid damaging your whiteboard, always
plug the power cable into the whiteboard first,
then into an outlet.
4
4
Locate an a vailable 9- or 25-pin male serial port o n
4 4
your PC. (If no serial port is available, install a card
with a standard 9-pin or 25-pin connector.)
5
5
Plug the 9-pin male end of the serial cable into the
5 5
whiteboard and tighten the screws.
Green LED
Cable Bracket
Power Adapter
Serial Cable
6
6
Plug the other end into your PC’s serial port (if nec-
6 6
essary, use the 9-to-25-pin adapter) and tighten the
screws.
OOOO
1-4 Installing & Configuring ibid
The maximum serial cable length is 25 feet
(7.5 meters).
AC Power Cable
Page 13
Installing the
Installing the ibid Software
1
1
In Windows, place the
1 1
CD-ROM drive. The setup program starts.
ibid
ibid
Software
Software CD in your
OOOO
2
2
2 2
3
3
3 3
4
4
4 4
5
5
5 5
Starting ibid
1
1
1 1
If the setup program does not start, open Windows Explorer and double-click Setup.exe on
the CD.
Follow the prompts to install the software.
The setup program detects the port to which your
whiteboar d is attached.
At the end of the installation, register your white-
board for warranty purposes and to receive software
upgrades and technical support.
Restart your PC (if prompted).
Start your PC and launch Windows.
2
2
Select Start->Programs->
2 2
starts up and detects your connected whiteboard.
3
3
Use the whiteboard or software tools.
3 3
All your annotations are recorded in
application is open (even minimized).
ibid->ibid
. The software
as long as the
ibid
Installing & Configuring ibid 1-5
Page 14

Whiteboard User Guide
Configuring Your Whiteboard
The
nected to your PC’s COM port. You may need to identi fy
the port manually, for example if you:
To identify your COM port manually:
1
1
1 1
2
2
2 2
3
3
3 3
software d etects the Polaroid whiteboard con-
ibid
•
Add, move or remove serial devices (such as a
modem, laptop, PDA or input device)
•
Add whiteboards for tiling
Make sure the whiteboard is properly connected to
your PC.
Launch the
Select Edit->Configure Whiteboard. The following
dialog appears:
software.
ibid
4
4
Select the COM port to which your whiteboard is
4 4
connected from the dropdown menu, or click Find
Whiteboard. The software locates and displays the
COM port.
5
5
Click Next to save the setting.
5 5
6
6
Click Finish.
6 6
1-6 Installing & Configuring ibid
Page 15

Configuring More Than One Whiteboard
Configuring More Than One Whiteboard
Up to 4 Polaroid whiteboards can be connected to your
PC to increase the writing area. You can also use one
board as a touchscreen (Projection Mode).
To configure more than one Polaroid whiteboard:
1
1
In ibid se lect Edit->Configure Wh iteboard.
1 1
2
2
Click Multi-panel board. The following dialog
2 2
appears:
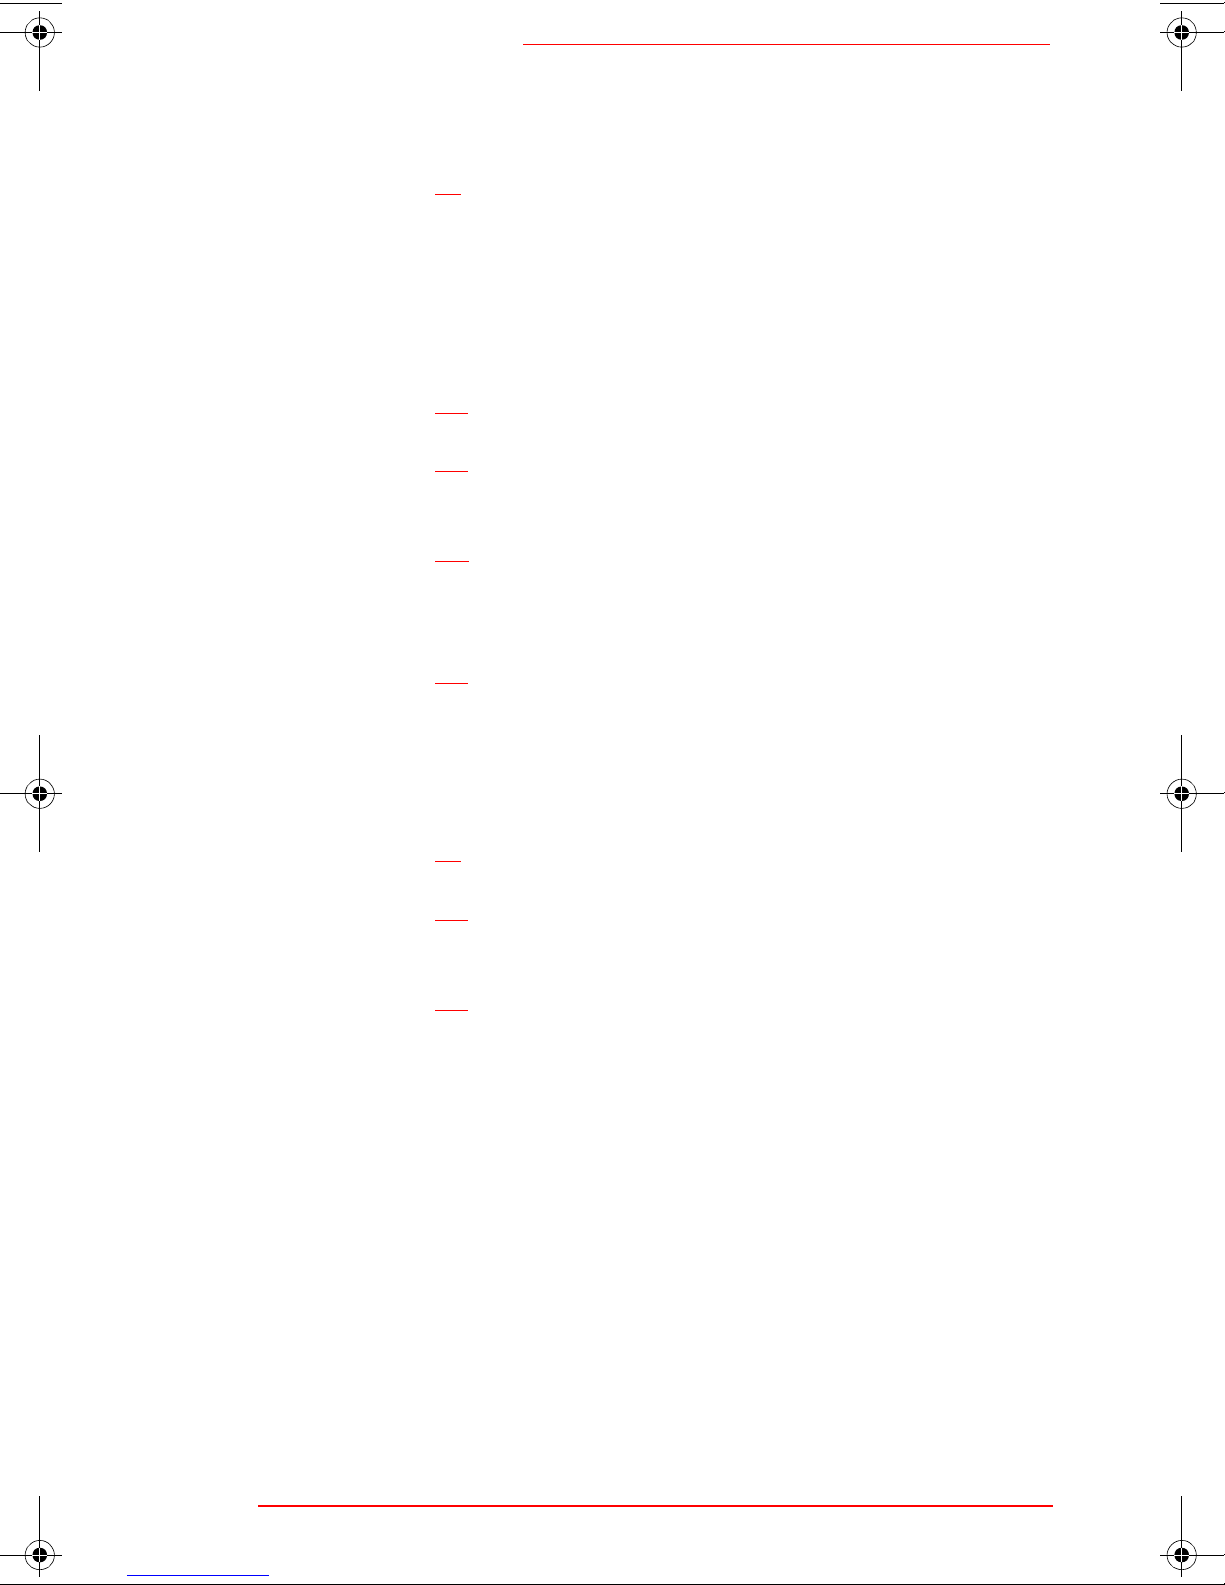
3
3
Click the COM Port checkboxes to select the ports
3 3
to be used for your whiteboards (or click Find
Whiteboards and let ibid detect them). The status is
displayed for any ports already in use.
4
4
Click Next. The following dialog appears:
4 4
Installing & Configuring ibid 1-7
Page 16
Whiteboard User Guide
OOOO
To use one of your whiteboards for LCD projection, see page8-13. Otherwise, deselect
Use projection screen.
5
5
Click OK.
5 5
For information on working with more than one Polaroid
whiteboard, see
Using More Than One Whiteboard
on
page2-13.
Calibrating LCD Projection
Generally, you calibrate LCD projection only the first
time you use Projection mode, or after you move the
projector or whiteboard.
OOOO
If you are not in Projection mode
If you have never used Projection mode
before, follow the complete configuration procedure under
page1-6 instead of the steps below.
1
1
Connect an LCD projector to your PC and project
1 1
Configuring Your Whiteboard
the image completely and squarely onto your whiteboard’s white area, without covering the icon strip
or whiteboard frame.
on
1-8 Installing & Configuring ibid
Page 17

Calibrating LCD Projection
2
2
Press Projection on the whiteboard or click in
2 2
. The Projection LED on the whiteboard lights
ibid
and the following dialog appears:
OOOO
If the dialog does not appear, select
Edit->Options. On the Projection Properties
tab, uncheck the Use previous calibration
points checkbox. Repeat Step 2.
3
3
Touch the points where the red lines intersect in
3 3
order as prompted.
If you are already in Projection mode
1
1
Touch Calibrate on the projected
1 1
OR
In
click Next.
, select Edit->Configure Whiteboard and
ibid
Dashboard:
ibid
2
2
Touch the points where the red lines intersect in
2 2
order as prompted.
Installing & Configuring ibid 1-9
Page 18
Whiteboard User Guide
Uninstalling ibid
Uninstalling the
tion files. Your
1
1
On the Windows taskbar, select
1 1
Start->Programs->
2
2
Click Yes to remove all application components
2 2
completely.
OOOO
You may have to delete some application files
manually after you uninstall ibid.
software removes only the applica-
ibid
(.wbd) files are not deleted.
ibid
->Uninstall
ibid
ibid
:
1-10 Installing & Configuring ibid
Page 19

ibid
ibid
ibidibid
In This Chapter...
How the Polar oid Whiteboard Works
Using Whiteboard Icons
Viewing Your Whiteboard in ibid
Using ibid Annotation Tools
2
2
22
Ba s i c s
Ba s i c s
Ba s i c s Ba s i c s
~ 2
~ 2
~ 2 ~ 2
~ 4
~ 4
~ 4 ~ 4
~ 5
~ 5
~ 5 ~ 5
~ 10
~ 10
~ 10 ~ 10
ibid Basics 2-1
Page 20

Whiteboard User Guide
How the Polaroid Whiteboard Works
The Polaroid whiteboard’s surface is touch-sensitive.
Whenever you write or draw on the whiteboard with dryerase markers and the
nected PC, each stroke is recorded by the software.
OOOO
The whiteboard's surface can be damaged by
sharp objects, such as ballpoint pens and rulers. Scratches can cause permanent ink
stains and data loss due to electrical malfunctions. Use only the recommended markers
and erasers.
Recording writing
records writing data by detecting a single point of
ibid
pressure. Whenever you write on the whiteboard, make
sure there is only one point of contact at a time. Press a
pen icon on the whiteboard then write in that color using
firm, consistent press ure. You can write i n only one color
at a time.
software is running on a con-
ibid
OOOO
It is normal for the whiteboard’s green LED to
glow brighter when you touch or write on the
whiteboard.
Recording erasures
Erase functions are based on a calculated circle around a
single point of pressure. To erase:
•
Large areas:
or click in
against the whiteboard.
•
Small areas:
and use your finger or the edge of the eraser.
Press Wide Erase on the icon strip
and use the eras er felt sid e flat
ibid
Press Narrow Erase or click
2-2 ibid Basics
Page 21

How the Polaroid Whiteboard Works
Sounds
Audible feedback indicates which tool you are using. By
default, the whiteboard emits the following sounds:
•
Fanfare:
•
Beep:
•
Hum:
•
Clicks:
on startup and shutdown
selecting a tool (pen or eraser)
using an eraser function
touching or writing on the whiteboard
Multiple whiteboards
When more than one Pola roid wh iteboard is connec ted t o
your PC (tiling), a pen color or erase function select ed for
one board applies to all boards.
For more information on tiling, see
One Whiteboard
on page 2-13.
Using More Than
Data recording formats and resolution
Your Polaroid whiteboard uses a vector-based system,
recording points as you write and storing those points as
a set of “strokes.” The data transfer rate between the
whiteboard and your PC is 192 points per second as you
move along the whiteboard. Since under most condit ion s
records more data than can be displayed or printed,
ibid
the data is compressed and near identical points are dis-
carded to reduce file size.
can export data in any of the following formats:
ibid
•
Bitmap (.bmp)
•
Windows metafiles (.wmf)
•
JPEG (.jpg)
•
TIFF (.tif)
ibid Basics 2-3
Page 22

Whiteboard User Guide
d
The vector-based d ata
ibid
tion of the output device, e.g., 72 dpi for a typical monitor or 300 dpi for a 300 dpi printer. Since the data is
resolution independent, the higher the resolution of the
monitor or printer, the smoother the output.
Using Whiteboard Icons
Show/Hide the ibid Projection Dashboar
Select Next/Previous Snapshot
Print the Board
Press to print to
your default printer.
Show ibid
Press to bring the
ibid application to
the foreground or
background.
Press the arrows to scan forward/back
through snapshots.
Save the Board’s Contents
Press to save a snapshot of the board in
ibid before making changes or erasing.
Project onto the Whiteboard
Press to turn LCD Projection mode on/off.
Change Pen Color
Press then write on the board in
red, black, green or blue.
records is output at the resolu-
Erase
Press Narrow Erase and use your finger for
small erasure s, or p res s Wide Erase and use
the eraser for large areas.
Erase the Whole Board
Press to save a snapshot of the board’s contents
in ibid an d open up a new, blank board . T hen use
the eraser to erase all the writing on the board.
2-4 ibid Basics
Page 23

Viewing Your Whiteboard in
Viewing Your Whiteboard in ibid
ibid
After you launch
, the software records everything
ibid
you write on the whiteboard to a file. You can use
two ways:
•
Connected to a Polaroid whiteboard to record
your whiteboard activity.
•
Without the whiteboard (or with it disconnected
or unplugged) to work with snapshot files.
OOOO
When using ibid with the whiteboard discon-
nected or off, no whiteboard activity is
recorded. To resume recording whiteboard
activity, plug in the whiteboard again.
To customize your use of
, see Chapter 9.
ibid
ibid
in
ibid Basics 2-5
Page 24

Whiteboard User Guide
Understanding the ibid main window
The
application. Its main components are:
Snapshot Pane
Shows all snapshots
with date/time taken.
main window appears whe nev er y ou l aunc h t he
ibid
ibid Toolbar
Contains file, view,
mode and help tools.
Selection Pane
Shows cur rently selected
board or snapshot.
Current Board Pane
Shows contents of
current board.
OOOO
Status Bar
Displays tips (left) and
status message s (righ t).
Annotation Bar
Contains pen, erase
and zoom tools.
ibid icon functions are also available in the
menus.
2-6 ibid Basics
Page 25

Viewing Your Whiteboard in
Displaying ibid toolbars
ibid
The
Toolbar and Annotation toolbar can be hidden
ibid
or placed horizontally or vertically along any side of the
main window, or anywhere as floating windows. The Sta-
tus Bar can be hidden or displayed only at the bottom.
•
To hide or show a bar (toggle), select
View->Toolbar/Annotation Bar/Status Bar.
•
To move a toolbar, click its border and drag it to
a new location.
OOOO
The Status Bar cannot be moved.
Viewing images
In addition to using standard Windows® window tools
(Restore, Move, Size, Minimize, Maximize, Close), you
can view images in
in different ways.
ibid
Standard viewing Options
Standard viewing Options
Standard viewing OptionsStandard viewing Options
Option Procedure
Fill the Selection pane with an image Click a Snapshot or the Current Board.
Activate a different pane Click the pane or select View->Next/
Previous Pane.
Fill the a pplication window with an
image
Resize panes Drag the dividers between the panes.
View Current Board only Click
View Snapshots, Current Board and
Selection pane (default)
View Snapshots only Click
View Selection only
Double-click the im age .
.
Click
or select Vi ew->Normal.
or select View->Snapshots.
Click
or select View->Selection.
View Selection full-screen (see FullScreen Viewing Options on page 2-9)
Click
ibid Basics 2-7
or select View->Selection.
Page 26
Whiteboard User Guide
Standard viewing Options
Standard viewing Options
Standard viewing OptionsStandard viewing Options
Option Procedure
(continued)
(continued)
(continued) (continued)
Leave full-screen view Click
Zoom in on Selection Click
ground or click
then click an area in the Selection
pane.
Zoom out on Selection Click
Return to original magnification Click .
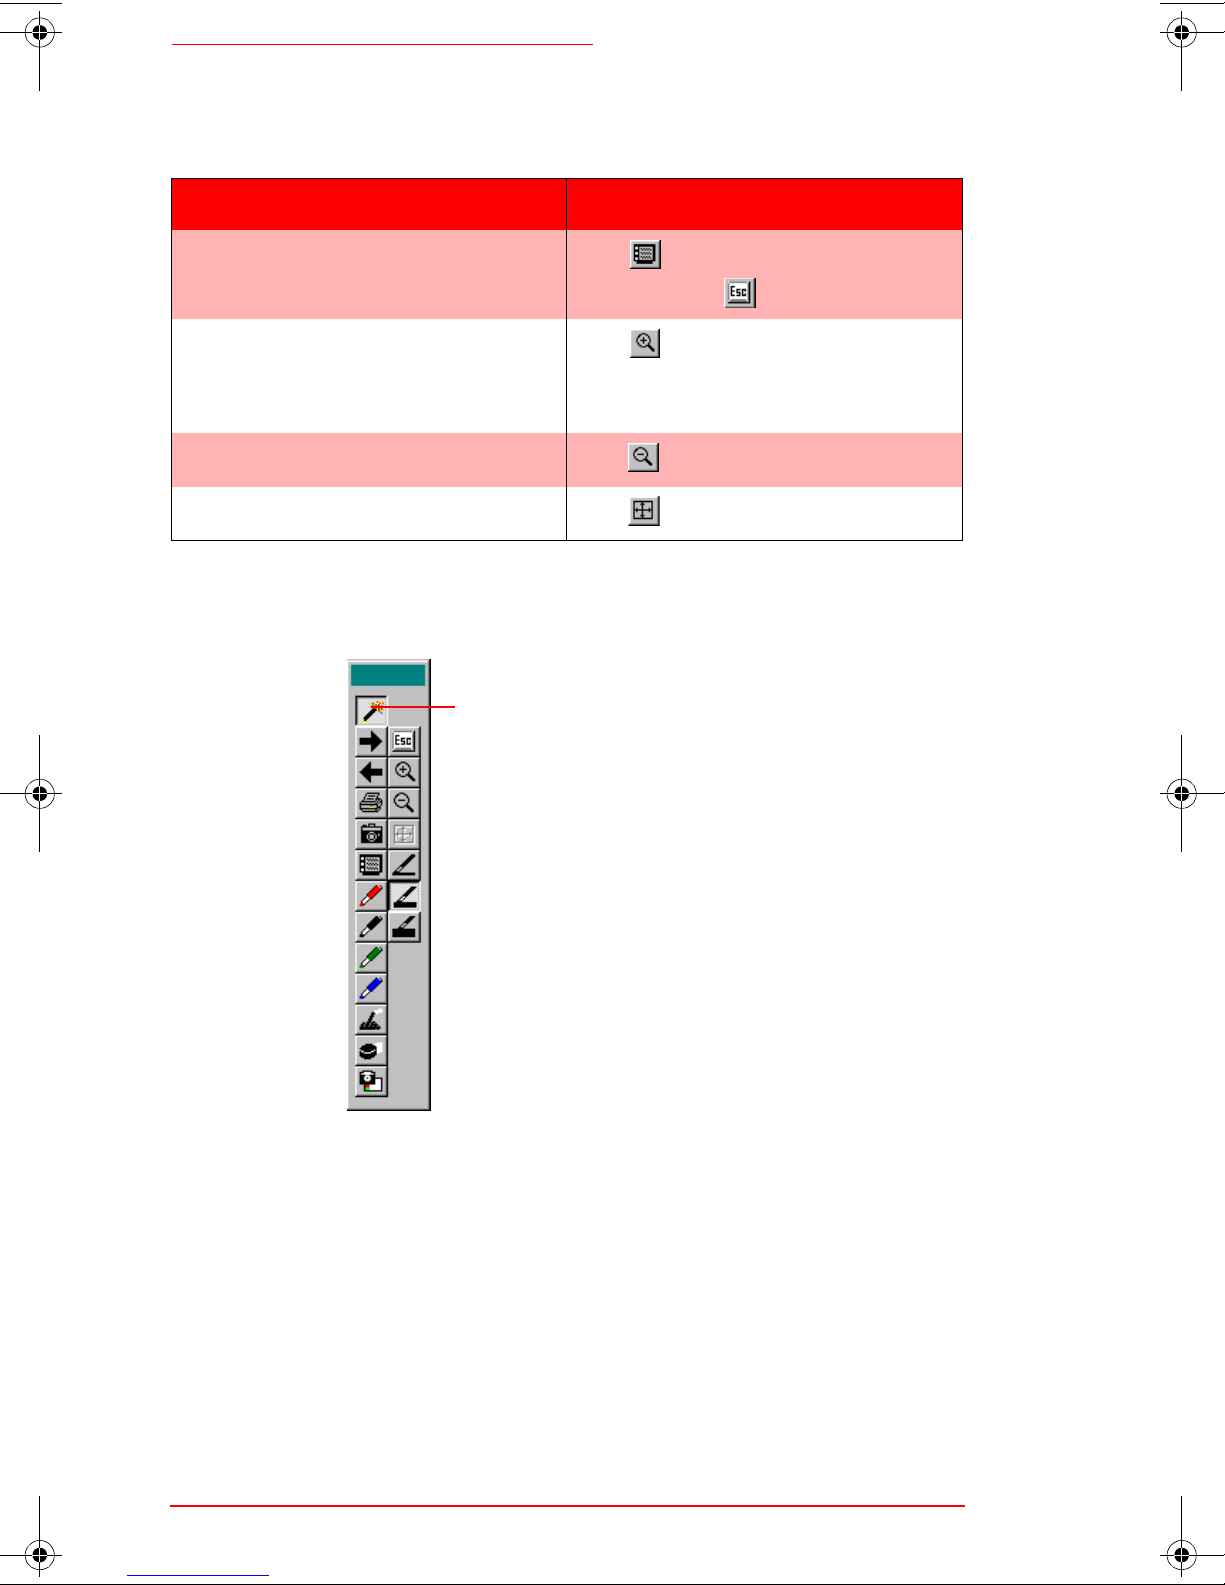
In full-screen view, the floating annotation toolbar
appears:
Touch here to view the tools
in the right column
to bring
to the fore-
ibid
.
or select Vi ew->Zoom In,
or select View->Zoom Out.
OOOO
2-8 ibid Basics
You cannot hide the toolbar in full-screen
view.
Page 27

Viewing Your Whiteboard in
In addition to standard pen tools, the floating toolbar
offers the following viewing options:
Full-Screen Viewing Options
Full-Screen Viewing Options
Full-Screen Viewing OptionsFull-Screen Viewing Options
Option Procedure
ibid
View the next snapshot Click
View the previo us sn aps ho t Click
Zoom in Click
Zoom out Click
Resize the image to fill the screen
(available only in zoom mode)
View more/fewer tools (toggle) Click
Leave full-screen view Click
Click
Keeping ibid displayed
If the
you can bring up the appl ication by pressing Sho w Board
on the whiteboard. In Projection mode, this button tog-
application is mini mized or in t he backgrou nd,
ibid
.
.
and click on an area.
.
.
.
or .
gles between showing
OOOO
If ibid is running, the main window appears.
Otherwise, you must launch the application
first.
To keep
ibid
displayed so you can follow how your
and your current application.
ibid
whiteboard activit y is bei ng re cor ded , disa ble any scr een
saver as follows:
1
1
In
1 1
2
2
Click the General tab.
2 2
3
3
Check the Override screen saver chec kbox .
3 3
, select Edit->Option.
ibid
ibid Basics 2-9
Page 28

Whiteboard User Guide
Setting this option does not affect
data. A slight flickering of the curs or with this o verride
activated is normal.
OOOO
This option does not override a password protected screen saver.
Using ibid Annotation Tools
Annotation consists of writing on the whiteboard or
marking up the Selection pane (showing the Current
Board or a Snapshot) in
You can take a snapshot of the whiteboard at any time to
preserve your annotations or add more later.
OOOO
Annotations on the whiteboard and in the ibid
software are recorded together in the Current
Board and Selection panes.
with the pen/eraser tools.
ibid
’s ability to record
ibid
If you are in Projection mode (for more information, see
Chapter 8), always use the stylus for annotating, not the
markers.
Sample annotation workflow
1
1
If necessary, display the Annotation toolbar in
1 1
by selecting View->Annotation Bar.
2
2
Position the toolbar for your convenience.
2 2
3
3
Select a pen color in th e toolbar or on the whiteboard.
3 3
4
4
Click the Selection pane in
4 4
rent view. The cursor changes to look like a pen.
5
5
Mark up the board or Selection pane.
5 5
6
6
Press or click other pen colors as desired.
6 6
to make it the cur-
ibid
ibid
2-10 ibid Basics
Page 29

Using
7
7
Press Snapshot or click to record your annota-
7 7
ibid
Annotation Tools
tions as desired.
OOOO
To record a snapshot and continue with an
empty whiteboard, press Snapshot/Erase All
or click , then clear the whiteboard with the
eraser .
8
8
Save your work in the
8 8
Using the pens
The default pen colo r at st artu p is Bla ck, indi cated by the
lit Black LED on the whiteboard (and the depressed
black pen icon in
To change the default color at startup, see
Default Pen Options
When you select a pen color, the whiteboard beeps. As
you write, a click confirms that you are starting to anno-
tate. A selected pen color (or eraser) stays in effect until
you select a different one.
file.
ibid
when you are in Projection mode).
ibid
Changing
on page 6-6.
OOOO
By default, ibid switches to the last pen you
used after 45 seconds of inactivity to protect
your work if you accidentally forget to select a
pen again after erasing. T o turn this feature off
or to change the delay time, see
Default Pen Options
In
(not at the whiteboard), you can select three pen
ibid
on page 6-6.
Changing
sizes for annotations:
ibid
ibid
ibidibid
Option Procedure
Small Click or select Edit->Pen Size->Small.
Medium Click or select Edit->Pen Size->Medium.
Large
Click or select Edit->Pen Size->Large.
Pen Sizes
Pen Sizes
Pen Sizes Pen Sizes
ibid Basics 2-11
Page 30
Whiteboard User Guide
OOOO
The pen size applies to all annotations on the
current and future selections. You cannot mix
pen sizes on the same board or snapshot.
Using the eraser options
Whenever you select an erase option, the whiteboard
makes a humming sound as a reminder. There are three
erase options in
•
To make small erasures, press Narrow Erase or
click , then use your finger or the edge of the
eraser on the whiteboard.
•
To erase large areas, press Wide Erase or click
, then use the eraser felt side flat against the
whiteboard.
•
To erase the entire whiteboard, press Snapshot/
ibid
:
Erase All or click , then erase the board.
OOOO
You can also use Snapshot/Erase All with an
empty current board to place a blank snapshot in ibid.
After using an eras e function , it is re commended that you
select a pen color to make sure your next annotations are
recorded properly.
Taking snapshots
T o r ecord your annotat ions at any time, p ress Snaps hot or
click . A snapshot of the cur rent boa rd is re corded, but
any annotations are not affected.
You can take as many snapshots as you like. Each is
stamped with the date and time it is taken.
For more information on working with snapshots, see
Chapter 3.
2-12 ibid Basics
Page 31

Using More Than One Whiteboard
Using More Than One Whiteboard
You can use more than one whiteboard at the same time
in
COM ports on your PC, you c an lin k up to 4 whitebo ard s
to increase the writing space.
(tiling). Provided you have enough available
ibid
OOOO
When tiling, all the whiteboards must be the
same size.
Before using tiling, configure the
Configuring More Than One Whiteboard
(see
software properly
ibid
on page 1-7).
Y o u can also have multiple Pola roid whiteboards whil e in
Projection mode. Use one whiteboard as a touchscreen
for projection and the other(s) for annotations.
The whiteboard butt ons for p en color and era sers activ ate
that function on all tiled Polaroid whiteboards. For exam-
ple, pressing the Red pen button on one whiteboard
selects the red pen color on all whiteboards.
ibid Basics 2-13
Page 32

Whiteboard User Guide
2-14 ibid Basics
Page 33

Working with
Working with
Working withWorking with
Snapshots
Snapshots
SnapshotsSnapshots
In This Chapter...
Understanding Snapshots
Creating Snapshots
~ 2
~ 2
~ 2 ~ 2
~ 2
~ 2
~ 2 ~ 2
3
3
33
~ 4
Viewing Snapshots
Selecting Snapshots
Copying/Moving Snapshots
Renami ng Snapsh ots
Deleting Snapshots
Annotating Snapshots
~ 4
~ 4 ~ 4
~ 5
~ 5
~ 5 ~ 5
~ 7
~ 7
~ 7 ~ 7
~ 8
~ 8
~ 8 ~ 8
~ 8
~ 8
~ 8 ~ 8
~ 5
~ 5
~ 5 ~ 5
Working with Snapshots 3-1
Page 34

Whiteboard User Guide
Understanding Snapshots
A snapshot is an image of the current state of your
Polaroid whiteboard. Taking a snapshot does not change
the image; it simply inserts the image in a running list.
You can continue to annotate or erase the whiteboard.
Snapshots can be:
•
Inserted in an
of annotations
•
Sent in E-mail using the Send command
•
Exported i n bitmap, Windows meta file, JPEG or
TIFF file formats
•
Published on the Worldwide Web as HTML files.
file to reco rd the progr ession
ibid
Snapshots are listed in the order of their creation in the
Snapshot pane (top left) of the
Snapshot function is enabled only if you have made a
change on the whiteboard (erasure or annotation).
OOOO
Select File->Save to permanently save the data.
Creating Snapshots
With
then take a snapshot in one of the following ways:
Manual Snapshot Options
Manual Snapshot Options
Manual Snapshot OptionsManual Snapshot Options
Option Procedure
Take a snapshot and continue
working on the same image
running, annotate your whiteboard as desired,
ibid
main window. The
ibid
Click on the Annotation toolbar, press
Snapshot on the whiteboard or select
Edit->Snapshot.
Take a snapshot and erase the
board’s contents
3-2 Working with Snapshots
Click on the Annotation toolbar, press
Snapshot/Erase All on the whiteboard or
select Edit->Erase All.
Page 35

Creating Snapshots
OOOO
If you use Snapshot/Erase All, erase the whiteboard with the eraser before starting to annotate again.
Taking automatic snapshots
You can also create snapshots automatically at set inter-
vals. To do so:
1
1
OOOO
In
1 1
2
2
Click the Auto Actions tab.
2 2
3
3
Check the checkbox next to Take snapshot after the
3 3
whiteboar d is idle.
4
4
Enter an interval between snapshots.
4 4
The default setting for this option is off.
, select Edit->Options.
ibid
This option does not duplicate snapshots; if no changes
are made during the elapsed time, no snapshot is taken.
Working with Snapshots 3-3
Page 36

Whiteboard User Guide
Viewing Snapshots
Recorded snapshots are displayed in the Snapshot pane
of the
main window as a series of thumbnails:
ibid
Snapshot viewing Options
Snapshot viewing Options
Snapshot viewing OptionsSnapshot viewing Options
Option Procedur e
Scroll through the list of snapshots Click the Snapshot pane scroll bar.
Fill the Selection pane with a
snapshot for better viewing.
Fill the main window with a
snapshot
View all snapshots only
Zoom in on a snapshot Click
Zoom out on a snapshot Click
Click the snapshot.
Double-click the sn aps hot .
Click
click an area in the Selection pane.
or select View->Snapshots.
or select View->Zoom In, then
or select View->Zoom Out.
3-4 Working with Snapshots
Page 37

Snapshot captions
Each snapshot is n amed with a capt ion indicat ing the dat e
and time it was created. Whenever you print a snapshot,
this capt ion is includ ed.
Selecting Snapshots
To change a snapshot caption, see
Renaming Snapshots
on page 3-7.
Selecting Snapshots
You can select snapshots and view, copy, move or export
them.
Snapshot Selection Options
Snapshot Selection Options
Snapshot Selection OptionsSnapshot Selection Options
Option Procedure
Select a snapshot Click the snapshot in the Snapshot pane.
Select a range of sequential snap-
shots
Select several non-sequential
snapshots
Click the first snapshot, then press Shift
and click the last snap shot.
Hold down Ctrl and click all desired snapshots.
Select several snapshots Drag a selection rectangle around the
snapshots.
Copying/Moving Snapshots
Snapshots can be copied or moved:
•
Within the current
•
Into another
•
Into another application
Working with Snapshots 3-5
ibid
.wbd file
ibid
.wbd file
Page 38

Whiteboard User Guide
Copying/Moving snapshots within ibid
Snapshot Copy/Move Options
Snapshot Copy/Move Options
Snapshot Copy/Move OptionsSnapshot Copy/Move Options
Option Procedure
Move a snapshot in the same file Click and drag the snapshot to reposition it.
Copy a snapshot in the same file Click the snapshot and use standard Win-
dows copy and paste commands.
Copy/Move a snapshot to another
file
Select a sequence of snapshots Click the first snapsho t, then press Shi ft and
Select non-sequential snapshots Hold down Ctrl and click all desired snap-
Click and drag the snapshot into any OLEcompliant application or use standard Windows copy/cut and paste commands.
click the last snapshot.
shots.
Exporting snapshots
Snapshots can be exported for use in other Windows
applications as follows:
1
1
Open the
1 1
2
2
Select the snapshot( s) (see
2 2
page 3-5 for details ).
ibid
file.
Selecting Snapshots
on
3
3
Select File->Export Images. The following dialog
3 3
appears:
3-6 Working with Snapshots
Page 39

Renaming Snapshots
4
4
Select a storage location and enter a file name.
4 4
5
5
Select the file type.
5 5
6
6
Click Export.
6 6
The snapshots are saved wi th the file name you provided
followed by a sequential number. For example, if you
named the export file Myfile, the snapshots are named
Myfile1, Myfile2, Myfile3, etc.
Dragging and dropping snapshots
You can drag and drop snapshots directly into any OLE-
compliant Windows application as follows:
1
1
Select the snapshot( s).
1 1
2
2
Press Shift and drag the snapshot(s) to the other
2 2
application (or to your desktop).
OOOO
The snapshot(s) remain on the clipboard for
use in other applications.
Renaming Snapshots
1
1
Select the snapshot. The snapshot and caption are
1 1
highlighted:
2
2
Click the caption to select the text.
2 2
3
3
Enter the n ew caption.
3 3
4
4
Press Enter or click anywhere outside the caption.
4 4
Working with Snapshots 3-7
Page 40

Whiteboard User Guide
Deleting Snapshots
Deleting a snapshot removes only the snapshot. It does
not affect the current image.
OOOO
Snapshot deletion is permanent. There is no
undo.
To delete one or more snapshots:
1
1
Select the snapshot( s).
1 1
2
2
Select Edit->Delete or press Delete on the keyboard.
2 2
Annotating Snapshots
1
1
Click the snap shot in t he Snaps hot pa ne to vi ew it in
1 1
the Selection pane.
2
2
Using the Annotation toolbar or the whiteb oard icon
2 2
strip, select a pen or eraser.
3
3
Annotate the snapshot.
3 3
OOOO
The changes are saved in the snapshot.
3-8 Working with Snapshots
Page 41

Working with
Working with
Working withWorking with
ibid
ibid
ibidibid
In This Chapter...
Understanding ibid Files
Opening a File
~ 3
~ 3
~ 3 ~ 3
4
4
44
Files
Files
Files Files
~ 2
~ 2
~ 2 ~ 2
~ 4
Saving a File
Creating a New File
Closing a File
Sending a File via E-mail
Using IbidViewer
Password Protecting a File
Publishing a File as HTML
~ 4
~ 4 ~ 4
~ 5
~ 5
~ 5 ~ 5
~ 8
~ 8
~ 8 ~ 8
~ 5
~ 5
~ 5 ~ 5
~ 5
~ 5
~ 5 ~ 5
~ 9
~ 9
~ 9 ~ 9
~ 10
~ 10
~ 10 ~ 10
Working with ibid Files 4-1
Page 42

Whiteboard User Guide
Understanding ibid Files
An
file records all pen and eraser strokes, as well as
ibid
snapshots, made on your Polaroid whiteboard. A session
begins when you start wri ting on th e whitebo ard with the
application r unning and e nds when you close the file
ibid
or exit the application.
All whiteboard act ivity duri ng a session is recorded in the
same file, unless you open a different one. Whenever
is running, one file (either a saved or untitled file)
ibid
must be open.
OOOO
Only one ibid file can be open at a time.
Files are saved in a directory named
Ibid
or at the loca-
tion you specified during software installation.
Here are some suggestions to keep your files organized:
•
Create a folder for each topic and a .wbd file for
File formats
ibid
readable only by
ience, the snapshots in
deleted or renamed. You can also export snapshots from
ibid
JPEG and TIFF formats via the Windows clipboard, or
click and drag them into any OLE-compliant application
(e.g., Microsoft Word or Powe rPoint).
OOOO
each session.
•
Create a .wbd file for each topic.
•
Create a file for each day or time period.
uses a propriet ary, compact, vector-based file format
or IbidViewer. For your conven-
ibid
files can be moved, copied,
ibid
files in bitm ap (.bmp), Windows metafile (.wmf),
File export via ibid’s Send feature is limited to
bitmap and Windows metafile formats.
4-2 Working with ibid Files
Page 43

Opening a File
Opening a File
To open an
select the file in the standard Windows file dialog that
appears. You can also click one of the recently opened
files listed at the bottom of the File menu.
The current file does not need to be closed before you
open another one. If there is unsaved data in the current
file, you are prompted to save.
file, select File->Open or click , then
ibid
Opening your last file at startup
You can set
whenever you launch the application:
1
1
Select Edit->Options .
1 1
2
2
Click the General tab.
2 2
3
3
Check the option Open last file at startup:
3 3
to open the file you last worked on
ibid
OOOO
If you do not check this option, ibid opens an
untitled file whenever it is launched.
Working with ibid Files 4-3
Page 44

Whiteboard User Guide
Saving a File
Keep the following points in mind when saving:
•
The default file type is .wbd. If you change the
OOOO
extension,
•
The newly named file becomes the open file.
•
Save untitled files to store the data permanently.
•
Whiteboard activity is recorded as long as
cannot read the file.
ibid
ibid
and the whiteboard are running.
•
Creating a snapsh ot does n ot save yo ur data . Use
File->Save or File->Save As.
•
When an unexpected shutdown occurs (e.g., due
to power failure), data is not necessarily lost.
data is stored in a temporary rescue file dis-
ibid
played when the application is restarted.
If your system shuts down without saving
your ibid session (for example, during a sud-
den power outage), ibid saves the data in a log
file in the WINDOWS\TEMP directory . The next
time you open ibid your data is recovered.
Saving in the same file
To save a file during your
or click . When you save a file for the first ti me, the
Save As dialog appears.
ibid
Saving in a different file
To specify a new name or location fo r a fi le or to rename
a file, select File->Save As.
4-4 Working with ibid Files
session, select Fil e- >Save
Page 45

Creating a New File
Creating a New File
To create a new
select File->New or click . If there is unsaved da ta in
the current
Closing a File
To close an
File->Close. If the file contains unsaved data, you are
prompted to save it.
Closing an
must always have an open file.
OOOO
The Close option is helpful to carry over the
last snapshot from your previous file and continue working on it in the new file.
file — and start a new session —
ibid
session, you are prompted to save.
ibid
file — and end the session — select
ibid
file opens a new, untitled file, since Ibid
ibid
To close a file and stop using
Sending a File via E-mail
Directly in the
others via E-mail in two formats:
•
Selected snapshot(s) in bitmap (.bmp) or Windows metafile (.wmf) format
•
The complete
OOOO
ibid or IbidViewer must be installed on the
recipient’s PC to be able to read the ibid file.
The
E-mail application (e.g., Microsoft Outlook) to send the
ibid
Send option uses your standard MAPI-enabled
ibid
files as E-mail attachments.
application, you ca n send
ibid
ibid
, select Fi le->Exit.
ibid
file (.wbd)
ibid
files to
Working with ibid Files 4-5
Page 46

Whiteboard User Guide
OOOO
Both you and the recipient must use a MAPIenabled electronic mail application installed
on a Windows 95/98 or NT system.
Certain E-mail appli cati ons cann ot handl e lar ge file siz es
(e.g., in excess of 1000 KB). If your E-mail system cannot accommodate large files, send several, smaller ones.
OOOO
You can configure ibid to warn you if the file
size exceeds a limit you set (see
ibid Warnings
Each time you send in
on page 6-3).
, select from the following
ibid
Specifying
options:
ibid
ibid
ibidibid
Option Description
Send Options
Send Options
Send Options Send Options
All snapshots and current board (Default) Sends the entire current ibid file.
Selected Snapshots (grayed out if
no snapshots are selected)
Current board Sends the contents of the c urrent board (you
ibid file Sends the entire ibid (.wbd) file. Recipients
Bitmap files Sends .bmp files, which can be opened in
Windows metafi les Sends .wmf files, which can be opened in
To send all or part of an
Send the selected snapshot(s).
do not need to take a snapshot).
must have ibid or IbidViewer to read the file.
any application that can read bitmap files
(e.g., Paint).
any application that can read metafiles (e.g.,
Word).
file:
ibid
1
1
Open the
1 1
2
2
(optiona l) Select the snapshot(s).
2 2
4-6 Working with ibid Files
ibid
file.
Page 47

Sending a File via E-mail
3
3
Select File->Send. The following dialog appears:
3 3
4
4
Select the sent items: All snapshots and current
4 4
board or Current board.
5
5
Select the file type:
5 5
dows metafiles.
file, Bitmap files or Win-
ibid
OOOO
6
6
Click OK.
6 6
7
7
Select an E-mail application profile (e.g., Microsoft
7 7
Outlook) or create a new one by clicking New.
For more information on profiles, see your
Windows documentation.
8
8
Click OK. Your standard E-mail new message win-
8 8
dow appears with the
9
9
Address and send the E-mail normally.
9 9
file(s) at tached.
ibid
Working with ibid Files 4-7
Page 48

Whiteboard User Guide
Setting the E-mail file size warning
By default,
than 1000 KB. You can specify a different maxi mum fil e
size or deactivate the warning:
1
1
Select Edit->Options .
1 1
2
2
Click the General tab.
2 2
warns you before you send files larger
ibid
3
3
Enter a different maximum file size in the file size
3 3
field.
OR
Uncheck the warning option to deactivate it.
4
4
Click Apply and/or OK to confirm the setting and
4 4
close the dialog.
Using IbidViewer
IbidViewer is a freely distributable application that is
installed along with
do not have
OOOO
Users who do not have ibid cannot edit ibid
files.
ibid
ibid
view
. It is designed to let users who
files.
ibid
4-8 Working with ibid Files
Page 49

Password Protecting a File
To send an
1
1
Use the Send feature to attach your
1 1
mail (see
2
2
Attach IbidViewer to the E-mail.
2 2
3
3
Instruct the recipients to double-click Ibidview.exe
3 3
first to install IbidViewer, then double-click the
file to view it.
file with IbidViewer:
ibid
Sending a File via E-mail
Password Protecting a File
OOOO
A password protected file can be opened only
by entering the correct password.
To password protect a file:
file to an E-
ibid
on page 4-5).
ibid
OOOO
1
1
Open the
1 1
2
2
Select File->Password. The following dialog
2 2
appears:
3
3
Enter a password.
3 3
4
4
Press Tab and enter the password again as a
4 4
confirmation.
5
5
Click OK to apply your password and close the dialog.
5 5
The password applies only to the current ibid
file.
ibid
file.
You can continue working in the file, but once you close
it, you must enter the password to open it.
Working with ibid Files 4-9
Page 50

Whiteboard User Guide
Publishing a File as HTML
You can convert all or part of an
HTML format for posting on the Worldwide Web.
OOOO
Before using this feature, make sure the
Microsoft Web Publishing Wizard is installed
on your PC. If necessary, you can download
the wizard at www.microsoft.com/windows/
software/webpost.
To publish an
1
1
Open the fi le.
1 1
2
2
(optional) Select the snapshot(s) to be published.
2 2
3
3
Select File->Publish HTML. The following dialog
3 3
appears:
file as HTML:
ibid
(.wbd) file to
ibid
4
4
Enter a name for the HTM L file.
4 4
4-10 Working with ibid Files
Page 51

Publishing a File as HTML
5
5
Click Next. The following dialog appears:
5 5
6
6
Select the items to be published: Current Board,
6 6
Selected Snapshots (if you selected snapshots in
Step 2) or both.
OOOO
7
7
Click Next. The following dialog appears:
7 7
8
8
Select the image size and quality.
8 8
The higher the image quality and image size,
the larger the resulting file.
9
9
Click Next.
9 9
10
10
(optional) Enter a heading to appear on the HTML
10 10
page.
Working with ibid Files 4-11
Page 52

Whiteboard User Guide
11
11
Click Next. The following dialog appears:
11 11
12
12
Select Web Page to post the files to your designated
12 12
URL, or select File to save the images in an HTML
file.
OOOO
13
13
Click Finish.
13 13
•
If you selected Fil e, yo u are prompted to select a
destination for the HTML file. The file and its
associated graphics folder are saved at that desti-
nation.
•
If you selected Web Page, the Web Publishing
Wizard starts. Follow the prompts to set up your
Web page.
The designated URL is set up in the Microsoft
Web Publishing Wizard. See your Windows
documentation or contact your network
administrator for more information.
4-12 Working with ibid Files
Page 53

Printing Your
Printing Your
Printing YourPrinting Your
In This Chapter...
Setting Up for Printing
Printing from the Whiteboard
~ 2
~ 2
~ 2 ~ 2
5
5
55
Work
Work
WorkWork
~ 2
~ 2
~ 2 ~ 2
Printing from the ibid Application
~ 4
Previewing Your Printout
Specifying Print Options
~ 4
~ 4 ~ 4
~ 5
~ 5
~ 5 ~ 5
~ 3
~ 3
~ 3 ~ 3
Printing Your Work 5-1
Page 54

Whiteboard User Guide
Setting Up for Printing
Before you print from
tain print o ptions as follows:
1
1
Make sure a t le ast one pr in ter is i nstal le d, conn ected
1 1
and powered on.
2
2
Open an
OOOO
2 2
3
3
Select File->Print Setup. The standard Windows
3 3
Print Setup dialog appears.
4
4
Select your printer.
4 4
5
5
Select th e orientation: Portrait or Lands cape.
5 5
The default orientation matches your board
type.
6
6
Select the print options (paper size, printer proper-
6 6
ties, etc.) normall y.
ibid
file.
, set up your printer and cer-
ibid
Printing from the Whiteboard
At the Polaroid whiteboard, print the current board image
by pressing Print. The whiteboard beeps and a snapshot
of the current board is printed using the current Print
Setup settings.
Pressing Print at the whiteboard does not insert a snapshot into your
file or affect the image in any way.
ibid
5-2 Printing Your Work
Page 55

Printing from the
In Projection mode, pressing Print at the whiteboard pro-
duces the following results:
Projection Mode Print Output
Projection Mode Print Output
Projection Mode Print OutputProjection Mode Print Output
Active Application Print Output
ibid
Application
ibid
NetMeeting whiteboard NetMeeting snapshot (via the Print dialog)
Other Screen contents (no Print dialog)
Selected snapshot (via the Print dialog)
Printing from the ibid Application
Printing with custom print options
1
1
Open an
1 1
2
2
(optiona l) Select the snapshot(s) to print.
2 2
3
3
Select File->Print. The following dialog appears:
3 3
ibid
file.
4
4
Specify your print optio ns. Fo r more in format ion on
4 4
print options, see
page 5-5.
Printing Your Work 5-3
Specifying Print Options
on
Page 56

Whiteboard User Guide
5
5
(optional) Click Preview to check the image before
5 5
it is printed.
6
6
Click Print.
6 6
Printing with current printer settings
1
1
Open an
1 1
2
2
Select th e snapshot (s) to print.
2 2
3
3
Click .
3 3
ibid
file.
Previewing Your Printout
T o see how yo ur output wi ll appear when pri nted with the
current print settings:
1
1
In the
1 1
lowing dialog appears:
2
2
View your snapshots using the navigation buttons
2 2
and scroll bar.
file, select File->Print Preview. The fol-
ibid
3
3
Click Print to bring up the Print dialog, or click the
3 3
close box in the upper right corner to close the dialog and return to the
5-4 Printing Your Work
main window.
ibid
Page 57

Specifying Print Options
Specifying Print Options
When you select File- >Print in
appears:
Use this dialog to specify the following print settings:
•
Printer and printer properties
•
Which item s to print
•
Number of copies
, the following dialog
ibid
•
•
•
Printing colors
OOOO
Printouts are in color only if you are using a
color printer.
In the Color area you can specify two options:
•
•
How to print colors
Orientation
Headers and/or footers
Print pen colors as black:
when printing to a black-and-white printer. Colors are differentiated using shades of gray.
Print white background:
the background color to anything but white, use
this option to print on a white background with-
Select this option
If you have changed
out resetting the background color for the image
or file. If this option is unchecked, your nonwhite background prints as is.
Printing Your Work 5-5
Page 58

Whiteboard User Guide
Using headers and footers
By default,
files are printed with the following bold-
ibid
face header and footer:
Snapshot
caption
Date/time
taken
File name and current
date/time
Standard ibid
footer text
The header and footer text can be formatted using commands represented by codes (e.g., &b for boldface). To
customize your headers or footers, click a header/footer
field, then click Commands (see the table
Header/Footer
Commands
on page 5-7 for definitions).
Keep the following in mind when using header/footer
commands:
•
Always place commands
immediately before
text to which they apply. For example, to print
the word
&B&ICompany
•
You can use multiple commands in a field . Pla ce
Company
.
in bold and italics, enter
a comma between computer-generated data
(e.g., file name, page number) and custom data
(e.g., font name, boldface).
•
If you use more tha n on e command i n a field an d
the commands conflict, the one closest to the te xt
takes precedence. For example, if you enter
&“Courier”&“Arial”Company
, the word
Com-
the
5-6 Printing Your Work
pany
prints in A rial.
Page 59

Specifying Print Options
OOOO
Note about TrueType fonts: If you specify a
large font size in Print Preview for these fonts,
the text may appear incorrectly. However, the
printout will be correct.
Header/Footer Commands
Header/Footer Commands
Header/Footer CommandsHeader/Footer Commands
Command Code Description
Snapshot Date
(Short Format)
Snapshot Date
(Long Format)
Snapshot Time &H or &h Inserts the time the snapshot was taken.
Snapshot Caption &M or &m Inserts the snapshot caption.
Current Date
(Short Format)
&g Inserts the date the snapshot was taken
in the format 01/01/00.
&G Inserts the date the snapshot was taken
in the format January 1, 2000.
&d Inserts the current date in the format
01/01/00.
Current Date
(Long Format)
Current Time &T or &t Inserts the current time.
Filename &F or &f Inserts the filename .
Total Pages &N or &n Inserts the total number of pages in the
Page Number &P or &p Inserts the page number on each page.
Ampersand && Inserts the ampersand character (&).
Bold Text &B or &b Formats all the following tex t in the fiel d in
Italic Text &I or &i Formats all the following text in the field in
Underline Text &U or &u Underlines all the fo llowing text in the
&D Inserts the current date in the format
January 1, 2000.
file.
boldface type.
italic type.
field.
Strike Out Text &S or &s Strikes out all the f ollowing text in the
field.
Printing Your Work 5-7
Page 60

Whiteboard User Guide
Header/Footer Commands
Header/Footer Commands
Header/Footer CommandsHeader/Footer Commands
(continued)
(continued)
(continued) (continued)
Command Code Description
Default Font &Z or &z Returns all the following text to the
default font (Arial).
Font Size &nn Sets the point siz e of all the followin g text
to the number you specify in nn (e.g., 08,
12, 18).
Font Name &"font name" Sets all the following text in the specified
font. Include the quotation marks and
type the font name exactly as it appears
in the Printer install me nu in t he Prog ram
Manager.
5-8 Printing Your Work
Page 61

Customizing
Customizing
CustomizingCustomizing
In This Chapter...
Restoring Window Positions
Displaying the Last File at Startup
~ 2
~ 2
~ 2 ~ 2
~ 2
~ 2
~ 2 ~ 2
6
6
66
ibid
ibid
ibidibid
~ 3
Specifyin g ibid Warnin gs
Taking Automatic Snapshots
Customizing ibid Sounds
Changing Pen and Eraser Widths
Changing Default Pen Options
Changing ibid Colors
Overriding a Screen Saver
~ 3
~ 3 ~ 3
~ 4
~ 4
~ 4 ~ 4
~ 8
~ 8
~ 8 ~ 8
~ 3
~ 3
~ 3 ~ 3
~ 6
~ 6
~ 6 ~ 6
~ 10
~ 10
~ 10 ~ 10
~ 6
~ 6
~ 6 ~ 6
Customizing ibid 6-1
Page 62

Whiteboard User Guide
Restoring Window Positions
When you resize the
can set
launch the application or create a new .wbd file.
To restore your current window positions:
1
1
Select Edit->Options .
1 1
2
2
Click the General tab.
2 2
3
3
Check the Restore previous window positions
3 3
checkbox.
4
4
Click Apply and/or OK to apply the setting and
4 4
close the dialog.
to restore those settings the next time you
ibid
main window and panes, you
ibid
Displaying the Last File at Startup
You can set
the next time you launch the application. To do so:
1
1
Select Edit->Options .
1 1
2
2
Click the General tab.
2 2
3
3
Check the Open last file at startup checkbox.
3 3
OOOO
To open a new, blank file when you launch
ibid, leave this option unchecked.
4
4
Click Apply and/or OK to apply the setting and
4 4
close the dialog.
to open the last file you were working in
ibid
6-2 Customizing ibid
Page 63

Specifying
Specifying ibid Warnings
ibid
Warnings
You can specify whether
following conditions:
•
When exiting
activity is no longer recorded whe n you close the
application.
•
When you send
ments and they exceed a specified size (default:
1000 KB).
To set these warnings:
1
1
Select Edit->Options .
1 1
2
2
Click the General tab.
2 2
3
3
Check the checkbox for the desired option.
3 3
4
4
Click Apply and/or OK to apply the setting and
4 4
close the dialog.
ibid
will warn you under the
ibid
to remind you that whiteboard
snapshots as E-mail attach-
ibid
Taking Automatic Snapshots
You can set
intervals as follows:
1
1
Select Edit->Options .
1 1
to take automatic snapshots at regular
ibid
Customizing ibid 6-3
Page 64

Whiteboard User Guide
2
2
Click the Auto Actions tab. The following dialog
2 2
appears:
3
3
Check the checkbox next to Take snapshot after the
3 3
whiteboar d is idle.
4
4
Enter the amount of time to elapse before
4 4
a snapshot in minutes and seconds.
5
5
Click Apply and/or OK to apply the setting and
5 5
close the dialog.
Customizing ibid Sounds
Audible feedback indicates which tool you are using. By
default, the whiteboard emits the following sounds:
•
Fanfare:
•
Beep:
•
Hum:
•
Clicks:
You can change the sounds associated with functions or
on startup and shutdown
selecting a tool (pen or eraser)
using an eraser function
touching or writing on the whiteboard
ibid
takes
turn them off.
6-4 Customizing ibid
Page 65

Customizing
ibid
Sounds
OOOO
If you turn sounds off, you get no audible
feedback that a particular tool is in use, that
the whiteboard is communicating with your
PC or that an error exists. We recommend that
you not customize sound settings until you
are thoroughly familiar with ibid.
To customize sound settings:
1
1
Select Edit->Options .
1 1
2
2
Click the Sounds tab. The following dialog appears:
2 2
OOOO
3
3
Select a sound for each function (whiteboard button
3 3
press, error, pen and eraser touch) from the dropdown menus.
To restore the default sounds, click Restore
Defaults.
4
4
Click Apply and/or OK to apply the settings and
4 4
close the dialog.
Customizing ibid 6-5
Page 66

Whiteboard User Guide
Changing Pen and Eraser Widths
The pen and eraser width values in
•
•
•
To change width values in the current an d all future files:
1
1
Select Edit->Options .
1 1
2
2
Click the Pen and Eraser Widths tab. The following
2 2
dialog appears:
0.01 - .15 inches
Pen:
Narrow eraser:
Wide eraser:
1 - 5 inches
0.1 - 2.5 inches
ibid
are:
3
3
Enter the pen and eraser widths in the fields.
3 3
4
4
Click Apply and/or OK to apply the settings and
4 4
close the dialog.
Changing Default Pen Options
Changing the default pen color
The default pen colo r in
default color:
1
1
Select Edit->Options .
1 1
6-6 Customizing ibid
is Black. To change the
ibid
Page 67

Changing Default Pen Options
2
2
Click the General tab.
2 2
3
3
Select a color from the Pen color on startup drop-
3 3
down menu.
4
4
Click Apply and/or OK to apply the setting and
4 4
close the dialog.
Changing the default pen time
You can set
specified amoun t of time. This feature pro tects your wor k
if your last action was an erasure and you forgot to spec-
ify a new pen color.
OOOO
If you do not use this option, the tool you
select (pen or eraser) stays in effect until you
select a different one.
To set the default pen time:
1
1
Select Edit->Options .
1 1
2
2
Click the Auto Actions tab. The following dialog
2 2
appears:
to switch to the default pen color after a
ibid
3
3
Check the checkbox next to Switch to last used pen
3 3
after the whiteboard is idle.
Customizing ibid 6-7
Page 68

Whiteboard User Guide
4
4
Enter the amount of time to elapse before
4 4
switches to the default pen in minutes and seconds
(default is 45 seconds).
5
5
Click Apply and/or OK to apply the setting and
5 5
close the dialog.
ibid
T o speci fy the defaul t pen color , see
pen color
on page 6-6.
Changing ibid Colors
Changing default pen and background colors
The available default colors in
•
Pens:
•
Background:
These default pen colors are designed to correspond to
the colors of the buttons on the whiteboard and the markers supplied with the Polaroid whiteboard.
As an example, the default colors appear as follows in
:
ibid
Red, Black, Green, Blue
White
Changing the default
are:
ibid
You can select different colors from a palette of 16 additional co lors.
6-8 Customizing ibid
Page 69

Changing
ibid
Colors
OOOO
The colors you select take the place of the
default colors.
To change the default colors:
1
1
Select Edit->Color. The following dialog appears:
1 1
2
2
Select a new pen and/or background color fr om one
2 2
or more of the dropdown menus.
3
3
To apply the new colors to the current file and all
3 3
future files, click Change Selection or Change All.
OR
To apply the new colors to future files on ly, click
Use for New Files.
If you applied the color change to the current file, your
new colors take effect immediately. For example:
Customizing ibid 6-9
Page 70

Whiteboard User Guide
Restoring default pen and background colors
At any time, return the pen and background colors to the
system defaults b y clic kin g Restore De fa ults in t he Color
dialog.
OOOO
All default colors are restored.
Overriding a Screen Saver
OOOO
This feature is not available under Windows NT.
When you are at the whiteboard, a screen saver running
on your PC may interfere wit h your abili ty to monitor the
application window as you work. You can override
ibid
your PC’s screen saver settings in
change those settings.
When you activate this option, the cursor on your screen
flickers slightly to ind icate that the option is ac tivated.
To override your screen saver:
without having to
ibid
1
1
Select Edit->Options .
1 1
2
2
Click the General tab.
2 2
3
3
Check the Override screen saver checkbox.
3 3
4
4
Click Apply and/or OK to apply the setting and
4 4
close the dialog.
6-10 Customizing ibid
Page 71

Overlays
Overlays
OverlaysOverlays
In This Chapter...
How Overlays Work
Creating an Overlay
~ 2
~ 2
~ 2 ~ 2
~ 2
~ 2
~ 2 ~ 2
7
7
77
Using
Using
UsingUsing
~ 3
Adding an Overlay
Removing an Overlay
~ 3
~ 3 ~ 3
~ 5
~ 5
~ 5 ~ 5
Using Overlays 7-1
Page 72

Whiteboard User Guide
How Overlays Work
Overlays are fil es, creat ed in any Windows applicati on or
in
use overlays:
Using overlays saves time when you create similar
images or want to add the same image to multiple snapshots. Overlays can be reused, even after the whiteboard
, that are placed onto an
ibid
•
As grids or pat te rns for r epe ate d use (such as bar
charts)
•
As forms
•
For headers or footers (for example, to incorpo-
rate logos)
snapshot. You can
ibid
is erased. You can remove an overlay, and only one overlay can be used at a time.
Overlay files can be in any of the formats supported by
(bitmap, Windows metafile, JPEG or TIFF).
ibid
Creating an Overlay
You can create an overlay in
that can generate the following formats:
•
Bitmap (.bmp)
•
Windows metafile (.wmf)
•
JPEG (.jpg)
•
TIFF (.tif)
or in any application
ibid
OOOO
7-2 Using Overlays
ibid creates overlays only in Windows metafile
format.
In
ibid
current board.
, you create an overlay file from a snapshot or the
Page 73

Adding an Overlay
To create an overlay file:
1
1
Open an
1 1
2
2
Click the desired image (snapshot or current board)
2 2
to display it in the Selection pane.
3
3
Select Overlays->Create Overlay File. The follow-
3 3
ing dialog appears:
ibid
file.
4
4
Select the location to save the overlay and enter a
4 4
name for the overlay file.
5
5
(optional) To use the overlay for the current board,
5 5
check the checkbox.
6
6
Click Create.
6 6
Adding an Overlay
You can add an overlay file to one or more snapshots in
your current
Adding an overlay from a file
1
1
Open an
1 1
ibid
ibid
file at any time.
file.
2
2
(optional) Select the snapshot(s) to which you want
2 2
to add the overlay.
Using Overlays 7-3
Page 74

Whiteboard User Guide
3
3
Select Overlays->Add. The following dialog
3 3
appears:
4
4
Enter the path and name of a file in a supported
4 4
format or click Browse to select a file from the file
dialog.
5
5
Click Add to Selection to add the overlay to the
5 5
selected snapshot(s).
OR
Click Add to All to add the overlay to all snapshots
in the file.
ibid
Adding the current overlay to another snapshot
1
1
Add an overlay to the current board.
1 1
2
2
Click a snapshot in the Snapshot pan e to display it in
2 2
the Selection pane.
3
3
Select Overlays->Add from Current Board.
3 3
OOOO
This option is available only if the current
board contains an overlay.
Inserting a screenshot as an overlay
You can add the current contents of the screen to a snapshot
as an overlay. Use this feature, for example, to annotate:
•
Your deskto p
•
An
ibid
window
•
7-4 Using Overlays
A window from another application
Page 75

Removing an Overlay
To insert a screenshot as an overlay:
1
1
Open an
1 1
2
2
(optional) Select the snapshot(s) to which you want
2 2
to add the overlay.
3
3
Select Overlays->Add from Screen.
3 3
ibid
file.
OOOO
OOOO
To avoid capturing the ibid application, minimize it first.
4
4
Arrange the screen contents as desired (including
4 4
opening other applications).
5
5
Press F11.
5 5
Although there is no visible or audible feedback, the screenshot is added to the snapshot(s).
6
6
View the snapshot with the new overlay in
6 6
Removing an Overlay
A snapshot can contain only one overlay at a time. To
ibid
.
OOOO
change overlays, add an overlay to the snapshot. You are
prompted to replace the existing overlay.
To remove an overlay from a snapshot:
1
1
Click the snapsho t in th e Snapsho t pane t o displ ay it
1 1
in the Selection pan e.
2
2
Select Overlays- >Remove .
2 2
3
3
Click Yes to confirm the removal.
3 3
To remove all overlays from all snapshots,
select Overlays->Remove All.
Using Overlays 7-5
Page 76

Whiteboard User Guide
7-6 Using Overlays
Page 77

Projection
Projection
ProjectionProjection
In This Chapter...
Understanding LCD Projection
Using
Using
UsingUsing
with
with
with with
~ 2
~ 2
~ 2 ~ 2
8
8
88
ibid
ibid
ibidibid
~ 2
Configu ring Projection
Customizing Projection Settings
Entering and Leaving Projection Mode
Projection Mode Basics
Annotating in Projection Mode
Using Projection with PowerPoint
~ 2
~ 2 ~ 2
~ 8
~ 8
~ 8 ~ 8
~ 6
~ 6
~ 6 ~ 6
~ 10
~ 10
~ 10 ~ 10
~ 13
~ 13
~ 13 ~ 13
~ 8
~ 8
~ 8 ~ 8
Using Projection with ibid 8-1
Page 78

Whiteboard User Guide
Understanding LCD Projection
Your Polaroid whiteboard and
a PC can be connected to a front-projection LCD projector to provide many useful features:
•
Use the whiteboard as a touchsc reen to con trol
your PC
•
Run slide p resentations entirely fr om the
whiteboard
•
Capture and annotate all or part of a screenshot.
•
Project the
and use the appli cation t ools fr om the whi teboar d
•
Use multiple whiteboards (for example, one for
projection and a second for writing)
In Projection mode you can use all the
tures and use your finger as a mouse to control your PC.
For details, see
Projection Mode Basi cs
application onto the whiteboard
ibid
software installed on
ibid
tools and fea-
ibid
on page 8-8.
Configuring Projection
After you calibrate projection using this procedure, you
can set Polaroid to reta in the calibration settings (see
Customizing Projection Settings
Configuring projection for one whiteboard
1
1
Connect your Polaroid whiteboard, PC and LCD
1 1
projector.
2
2
Turn on the LCD projector and project the image
2 2
completely and squarely onto your whiteboard’s
white area, without covering the icon strip or whiteboard frame.
OOOO
The projected image need not completely
cover the white area.
on page 8-6).
8-2 Using Projection with ibid
Page 79

Configuring Projection
3
3
Launch
3 3
4
4
Press Projection on the whiteboard.The following
4 4
appears:
ibid
.
5
5
On the whiteboard, touch the points where the red
5 5
lines intersect in order as prompted .
OOOO
OOOO
You can also configure projection using the
ibid application (see
tion
on page 1-8).
You are now in Projection mode, indicated by the lit Pro-
jection LED on the whiteboard and the floating
Dashboard on the screen.
It is recommended that you use the stylus to
annotate in Projection Mode (see
in Projection Mode
Calibrating LCD Projec-
Annotating
on page 8-10).
ibid
Configuring projection with multiple whiteboards
1
1
Connect your Polaroid whiteboards, PC and LCD
1 1
projector.
2
2
Determine which whiteboard will be used for
2 2
projection.
Using Projection with ibid 8-3
Page 80

Whiteboard User Guide
3
3
Turn on the LCD projector and project the image
3 3
completely and squarely onto your projection whiteboard’s white area, without covering the icon strip
or whiteboard frame.
OOOO
The projected image need not fill the entire
whiteboard.
4
4
Launch
4 4
5
5
Select Edit->Configure Whiteboard. The following
5 5
dialog appears:
ibid
.
6
6
If the Whiteboard Status indicates that your PC and
6 6
whiteboard are communicating, proceed with the
next step. Otherwise, click Multi-panel board. The
following dialog appears:
8-4 Using Projection with ibid
Page 81

Configuring Projection
7
7
Check off the COM ports to which your whiteboa rds
7 7
are attached or click Find Whiteboards to let
locate them.
8
8
Click Next. The following dialog appears:
8 8
ibid
9
9
Check the Use projection screen feature checkbox.
9 9
10
10
Click Finish. The following dialog appears:
10 10
11
11
Touch the whiteboard you are using for projection.
11 11
The dialog changes to reflect your choice.
12
12
Click Finish.
12 12
Using Projection with ibid 8-5
Page 82

Whiteboard User Guide
13
13
Click Calibrate Boa rd. The following di alog
13 13
appears:
14
14
On the projection whiteboard, touch the points
14 14
where the red lines intersect in order as prompted.
15
15
In
15 15
You are now in Projection mode, indicated by the lit Projection LED on the whiteboard and the floating
Dashboard on the screen.
OOOO
You cannot annotate the whiteboard in this
mode. For details on annotating in Projection
mode, see
page 8-10.
, click Finish.
ibid
Annotating in Projection Mode
Customizing Projection Settings
You can customize projection settings in
1
1
Select Edit->Options .
1 1
as follows:
ibid
ibid
on
8-6 Using Projection with ibid
Page 83

Customizing Projection Settings
2
2
Click the Projection tab. The following dialog
2 2
appears:
3
3
Select your settings (see the table below).
3 3
Projection Tab Settings
Projection Tab Settings
Projection Tab SettingsProjection Tab Settings
Setting Description
Annotation Pen Size Set the default pen size for annotating in
Projection mode.
Mouse Mode Set the default as left or right mouse button
down. (The Dashboard contains a right
mouse click button.)
Dashboard Position Set the default corner of the screen for the
ibid Dashboard to appear. You can drag the
Dashboard to any position on the screen.
Use previous calibration poi nts If your whiteboard and projector are in fixed
positions, chec k this box to use the prev ious
calibration points.
Dashboard autoshrink Reduces the ibid Dashboard to the Show
Tools button after 10 seconds to save space.
Using Projection with ibid 8-7
Page 84

Whiteboard User Guide
Entering and Leaving Projection Mode
Once you have configured your system for projection
Configuring Projection
(see
or leave Projection mode in one of three ways:
•
On the whiteboard, press Projection.
•
•
In
In
, click .
ibid
, select Edit->Projection.
ibid
Projection mode is indicat ed by the lit Proj ection LED o n
the whiteboard and the
on page 8-2), you can enter
Dashboard on screen.
ibid
Projection Mode Basics
Controlling your PC
In Projection mode, your finger or the stylus provided
with the whiteboard act as a mouse:
OOOO
These are default settings with the left mouse
button down. If you set the right button down
as the default (see
page 8-7), add an extra tap for each action.
•
Tap the whiteboard once to click.
•
Tap the whiteboard t wice ra pi dly to double-click.
•
Hold your finger or the stylus down and pull it
across the surface t o simulate a click-and-drag
operation (e.g., to move a dialog).
Projection Tab Settings
on
OOOO
Use only your finger or the stylus in Projection mode, not the markers (see
Projection Mode
•
8-8 Using Projection with ibid
Annotating in
on page 8-10).
For a right click, touch Right Click on the
Dashboard, then tap the whiteboard.
ibid
Page 85

Projection Mode Basics
Using the ibid Dashboard
The
Dashboard appears onl y in Projection mode and
ibid
provides the following tools:
Recalibrate the Whiteboard
Touch to calibrate the board if t he
projector or board has been moved.
Show/Hide the Tools
Touch Show Tools to expand
the Dashboard. Touch Hide
Tools to collapse it to save
space.
Right Mouse Click
Touch to make your
next tap a right
mouse click. (Touch
this button before
each right click.)
Annotate Full Screen
Touch to “freeze” the
entire screen for
annotation.
Annotate a Custom Area
Touch, then drag to select a
custom-shaped area of the projected screen for annotation.
Show Annotation Area Tools
Touch to reveal three anno tation
area choices.
Annotate a Rectangular
Area
T o uch, then drag to selec t
a rectangular area of the
project ed screen for
annotation.
Use the Escape Key
Touch to perform the same action as
the Escape key on the keyboard (for
example, to leave full-screen view).
Using Projection with ibid 8-9
Page 86

Whiteboard User Guide
Annotating in Projection Mode
In Projection mode, you can capture all or part of the
screen and annotate it using the whiteboard pens. When
you are done annotating, you can take a snapshot of the
image. This is particularly useful when viewing other
applications. For example, you can annotate slides in
PowerPoint:
OOOO
The projected image and any annotations are
recorded in ibid, not in the original application
file (e.g., PowerPoint).
For more informat ion on using PowerPoint wi th
Using Projection with PowerPoint
Annotating a full screen
1
1
Display the desired image on the whiteboard.
1 1
2
2
Press a pen button to begin annotating. The screen
2 2
“freezes,” the pen’s LED lights, a pen tool appears
in the middle of the screen and the floating annotation toolbar appears on the right side of the screen.
3
3
Annotate the image as desired.
3 3
on page 8-13.
ibid
, see
8-10 Using Projection with ibid
Page 87

Annotating in Projection Mode
4
4
Use the floating annotation toolbar that appears on
4 4
the right side of the screen to change annotation
tools (see
page 8-12 for more information).
5
5
(optional) Press Snapshot (or touch ) to take a
5 5
snapshot and continue annotating.
OR
Press Snapshot/Erase All (or touch ) to take a
snapshot and leave Annotation mode.
Using the floating annotation tools
Annotating a selected area of the screen
You can select an area of the screen to be annotated as
follows:
on
1
1
Display the desired screen on the whiteboard.
1 1
2
2
OOOO
Touch Annotate on the
2 2
tation area buttons appear.
3
3
Touch the button for the sh ape you want to annotate.
3 3
4
4
Drag your finger around the area to annotate. The
4 4
area is sized to fill the projection area.
Do not lift your finger until you have selected
the entire area.
5
5
Annotate the image (see Steps 2 through 5 under
5 5
Annotating a full screen
Dashboard. Three anno-
ibid
on page 8-10).
Toggling between ibid and the current screen
When annotating in Projection mode, you can switch
between the current screen and the
dow to check how
snapshots:
Using Projection with ibid 8-11
is recording your an notation s and
ibid
application win-
ibid
Page 88

Whiteboard User Guide
•
To bring up the
Show Board.
•
With
in the foreground, to return to the
ibid
application you were most recently in, press
Show Board.
application window, press
ibid
OOOO
Pressing a pen with ibid in the foreground
switches the
pen to Annotation mode.
ibid
Using the floating annotation tools
When annotating in Projection mode, the floating annotation toolbar appears on the right side of the screen. The tools
duplicate the whiteboard and
Show More Tools
Next Snapshot
Previous Snapshot
Print
Snapshot
Show ibid
Red Pen
Black Pen
application functions:
ibid
Leave Annotation
Zoom In
Zoom Out
Fit To Window
Small Pen Size
Medium Pen Size
Large Pen Size
Green Pen
Blue Pen
Narrow Erase
Wide Erase
Snapshot/Erase All
8-12 Using Projection with ibid
(The tools on the right
appear only when you
touch the Show More
Tools button at the top.)
Page 89

Using Projection with PowerPoint
Using Projection with PowerPoint
You can use
to control a Microsoft PowerPoint pre-
ibid
sentation from the whiteboard with no need for a mouse
or keyboard to navigate the slides. Slides can also be
annotated and saved as snapshots in
To use
Projection mode in
jection Mode
in Projection mode with PowerPoint, enter
ibid
Entering and Leaving Pro-
(see
ibid
on page 8-8) and start the slide presenta tion
ibid
.
in PowerPoint.
The whiteboard icon strip buttons function as follows
with PowerPoint:
Show/Hide Dash board
Show Next Slide
Show Previous Slide
Print Slide
Take a Snapshot of the Slide
Show ibid (Minimize ibid to return to PowerPoint)
Enter/Leave Projection Mode
Start Annotating in Red
Start Annotating in Black
Start Annotating in Green
Start Annotating in Blue
Narrow Erase
Wide Erase
Take a Snapshot of the Slide and Erase the Board
OOOO
To annotate a slide, press a pen button (or
touch an icon on the floating annotation toolbar). Press Next, Previous or Snapshot/Erase
All to leave Annotation mode.
Using Projection with ibid 8-13
Page 90

Whiteboard User Guide
8-14 Using Projection with ibid
Page 91

NetMeeting
NetMeeting
NetMeetingNetMeeting
In This Chapter...
NetMeeting and ibid
Using
Using
UsingUsing
ibid
ibid
ibidibid
~ 2
~ 2
~ 2 ~ 2
9
9
99
with
with
with with
NetMeeting Requirements
Using ibid in a NetMeeting
~ 2
~ 2
~ 2 ~ 2
~ 3
~ 3
~ 3 ~ 3
Using ibid with NetMeeting 9-1
Page 92

Whiteboard User Guide
NetMeeting and ibid
Using Microsoft NetMeet ing® you can ho ld video, voi ce
and data conferencing sessions with remote users via:
•
Local or Wide Area Network (LAN/WAN)
•
Internet
•
Modem-to-modem connectio n
By sharing the
conference, all participants can share the whiteboard.
The
tional wi th NetMeeting.
OOOO
annotation and projection tools are fully func-
ibid
For more information about NetMeeting, visit
www.microsoft.com/netmeeting or view the
built-in Help system in the application.
application through a NetMeeting
ibid
NetMeeting Requirements
•
PCs running Windows 95, 98 or NT 4.0
•
A LAN/WAN, Internet or direct modem
connection
•
NetMeeting 2.0 or greater
•
Any model Polaroid whiteboard running
ibid
2.0
9-2 Using ibid with NetMeeting
software
Page 93

Using
ibid
Using ibid in a NetMeeting
in a NetMeeting
You can use
with NetMeeting in two basic ways:
ibid
Sharing the ibid application in NetMeeting
You can share the
all participants the ability to work with the application as
follows:
1
1
Follow the NetMeeting instructions to select
1 1
as a shared application (see the NetMeeting
documentation).
2
2
Make sure the NetMeeting icon on the
2 2
bar is not pressed.
3
3
Minimize
3 3
ibid
application in NetMeeti ng, giving
ibid
.
Using ibid with the NetMeeting whiteboard
ibid
ibid
tool-
You can connect the Polaroid whiteboard and the Net-
Meeting whiteboard so all annotations are recorded on
both boards as follows:
1
1
In
1 1
2
2
Click the NetMeeting Auto Actions tab. The follow-
2 2
ing dialog appears:
, select Edit->Options.
ibid
Using ibid with NetMeeting 9-3
Page 94

Whiteboard User Guide
3
3
Click both Enable buttons.
3 3
OOOO
OOOO
To receive but not participate in a NetMeeting
conference, click the Disable button under
Copy from Ibid into NetMeeting.
4
4
Click Apply and/or OK to apply the setting and
4 4
close the dialog.
5
5
Start or join a NetMeeti ng confer ence (s ee your Net -
5 5
Meeting documentation).
6
6
Connect
6 6
clicking in
whiteboard. The status bar indicates:
If the status bar indicates “Cannot find NetMeeting Whiteboard,” open the NetMeeting
whiteboard in NetMeeting.
to the NetMeeting whiteboard by
ibid
or selecting Edit->NetMeeting
ibid
OOOO
7
7
Use the
7 7
whiteboar d. All participants see th e results on the
NetMeeting whiteboard .
Annotati ons usin g the NetMee ting sha pe tools
(squares, circles, etc.) are not recorded in ibid.
8
8
(optional) Use the snapshot tools to record snapshots
8 8
in
Back.
and scan through them using Forward and
ibid
pen and erase tools to annotate the
ibid
9-4 Using ibid with NetMeeting
Page 95

Using
ibid
in a NetMeeting
Using ibid Projection mode with NetMeeting
If you are in Projection mode and connected to a
NetMeeting conference, note the following:
•
The Show Board button toggles between the
NetMeeting whiteboard (not the Polaroid whiteboard) and the current screen.
•
To check how
is recording data, maxi mize
ibid
the
application window, then press Show
ibid
Board to re turn to the NetMeeting whiteboard
(
minimizes itself).
ibid
•
Use the stylus to annotat e the whiteboard, not the
markers.
Using ibid with NetMeeting 9-5
Page 96

Whiteboard User Guide
9-6 Using ibid with NetMeeting
Page 97

10
10
1010
Tips and Help
Tips and Help
Tips and HelpTips and Help
In This Chapter...
~ 2
Getting Online Help
Troubleshooting Hardware
Troubleshooting Communications
Troubleshooting ibid Software
~ 2
~ 2 ~ 2
~ 2
~ 2
~ 2 ~ 2
~ 4
~ 4
~ 4 ~ 4
~ 3
~ 3
~ 3 ~ 3
Troubleshooting ibid and NetMeeting
~ 6
Technical Support
Care and Maintenance
Whiteboard Warranty
~ 6
~ 6 ~ 6
~ 8
~ 8
~ 8 ~ 8
~ 7
~ 7
~ 7 ~ 7
~ 5
~ 5
~ 5 ~ 5
Tips and Help 10-1
Page 98

Whiteboard User Guide
Getting Online Help
Online Help is availab le while
is running, as well as
ibid
when it is closed:
Accessing
Accessing
Accessing Accessing
Option Procedure
ibid Help file With ibid closed, in the Windows taskbar,
Help topics
Context-sensitive Help for a specific
feature
Context-sensitive Help for a dialog
ibid
ibid
ibidibid
Online Help
Online Help
Online Help Online Help
select Start->Programs->Ibid->Ibid Help.
In ibid, select Help ->Topics or cl ick .
In ibid, press F1 or click , then clic k o n
the feature or dialog.
In the dialog, press F1 or click
the Help
button.
Brief description of a feature Hold your cursor over the feature and read
the bottom left corner of the ibid main
window.
Troubleshooting Hardware
Whiteboard
It is normal for your Pola ro id whiteboar d to make the following sounds:
•
Fanfare:
•
Beep:
•
Hum:
•
Clicks:
on startup and shutdown
selecting a tool (pen or eraser)
using an eraser function
touching or writing on the whiteboard
10-2 Tips and Help
Page 99

Troubleshooting Communications
Whiteboard Troubleshooting
Whiteboard Troubleshooting
Whiteboard TroubleshootingWhiteboard Troubleshooting
Problem Cause Solution
Green LED off No power Plug in the whiteboard
power cable.
Green LED blinking No communication with
the ibid software
Green LED blinking
rapidly
Green LED very bright Whiteboard is being
No sound Sounds turned off
Power supply problem Unplug the whiteboard
touched
Insufficient pressure
while annotating
Re-specify the COM port
for the whiteboard in ibid
(see Troubleshooting
Communications below
and Configuring Your
Whiteboard on page1-6).
power cable and plug it
back in.
Make sure nothing is
touching or leaning
against the whiteboard.
Turn sounds on (see
Customizing ibid Sounds
on page 6-4).
Maintain firm, consistent
pressure wh il e a nn otating.
Troubleshooting Communications
If you cannot establish communications properly with
your Polaroid whiteboard, there may be a device conflict
with another device connected to your PC. Check the
COM ports in use by the whiteboard and other devices.
Typical COM Port Settings
Typical COM Port Settings
Typical COM Port SettingsTypical COM Port Settings
COM Port IRQ Address
COM1 4 3F8
COM2 3 2F8
COM3 4 3E8
COM4 3 2E8
Tips and Help 10-3
Page 100

Whiteboard User Guide
OOOO
For more information on troubleshooting COM
ports and serial devices, see your Windows
documentation.
Troubleshooting ibid Software
Everything you write or draw on the whiteboard is
recorded as long as
Problem Cause Solution
Some annotations not
recorded properly
ibid
ibid
ibidibid
Troubleshooting
Troubleshooting
Troubleshooting Troubleshooting
Insufficient pressure
while annotating on the
whiteboard
Moist markers Let markers dry a little
ibid
is open.
Maintain firm, consistent
pressure wh il e a nn otating.
and repeat the annotation.
Squeaking noise while
using a marker
In Projection mode,
touching the whiteboard
makes a mark
Multiple contact points on
whiteboard
Improper eraser use For narrow erasures,
Device conflict with
another device
Electronic interferenc e Relocate the board.
Too much pressure Use less, but consistent,
Projection annotation is onLeave annotation mode
Contact the whiteboard
only with the pen or
eraser.
maintain firm, consistent
pressure. For wide erasures, place the whiteboard eraser felt-side flat
on the whiteboard.
Make sure the IRQs of the
whiteboard and other
serial device (e.g., modem
or PDA) are different.
pressure.
by touching to show
ibid or .
10-4 Tips and Help
 Loading...