

Page 1

USER MANUAL
Page 2

CONTENTS
Contents 2
Polar Vantage V User Manual 12
Introduction 12
Take full advantage of your Vantage V 12
Polar Flow App 13
Polar Flow web service 13
Get started 14
Setting up your watch 14
Option A: Set up with a mobile device and Polar Flow app 15
Option B: Set up with your computer 16
Option C: Set up from the watch 16
Button functions and gestures 16
Time view and menu 17
Pre-training mode 17
During training 17
Color touch display 18
View Notifications 18
Tap feature 18
Backlight activation gesture 18
2
Page 3

Watch faces and menu 18
Watch faces 18
Menu 22
Pairing a mobile device with your watch 23
Delete a pairing 23
Updating the firmware 24
With mobile device or tablet 24
With computer 24
Settings 26
Physical settings 26
Weight 27
Height 27
Date of birth 27
Sex 27
Training background 27
Activity goal 28
Preferred sleep time 28
Maximum heart rate 29
Resting heart rate 29
VO2max 29
General settings 30
3
Page 4

Pair and sync 30
Bike settings 30
Continuous HR tracking 31
Recovery feedback 31
Flight mode 31
Units 31
Language 31
About your watch 31
Watch settings 31
Alarm 32
Watch face 32
Time 32
Date 32
First day of week 32
Training 34
Wrist-based heart rate measurement 34
Wearing your watch when measuring heart rate from your wrist 34
Wearing your watch when not measuring heart rate from your wrist 35
Start a training session 36
Functions in pre-training mode 36
Start a planned training session 37
4
Page 5

Start a Multisport Training Session 37
During training 38
Browse the training views 38
Mark a lap 40
Switch Sport During a Multisport Session 40
Training with a target 40
Change phase during a phased session 41
View training target information 41
Notifications 41
Pausing/Stopping a training session 41
Training summary 41
After training 41
Training data in Polar Flow App 44
Training data in Polar Flow Web Service 45
Features 46
GPS 47
A-GPS expiry date 47
GPS features 47
Smart Coaching 48
Training Load Pro 48
Cardio Load 48
5
Page 6

Perceived Load 49
Muscle Load 49
Training Load from a single session 49
Strain and Tolerance 50
Cardio Load Status 50
Cardio load status on your watch 51
Long term analysis in the Flow app and web service 51
Recovery Pro 54
Get started with Recovery Pro 54
View your Recovery feedback 56
Orthostatic Test 58
Performing the test 58
Orthostatic test with Recovery Pro 61
Running power from the wrist 61
Running power and muscleload 61
How running power is shown on your watch 61
Polar Running Program 63
Create a Polar Running Program 64
Start a running target 64
Follow your progress 65
Running Index 65
6
Page 7

Short-term analysis 65
Long-term analysis 67
Training Benefit 68
Smart Calories 69
Continuous Heart Rate 70
Continuous Heart Rate on your watch 70
Polar Sleep PlusTM 71
Sleep data in the Flow app and web service 71
24/7 Activity tracking 72
Activity Goal 72
Activity data on your watch 72
Activity data in Flow App and Flow web service 73
Activity Guide 73
Activity Benefit 73
Sport Profiles 74
Heart Rate Zones 75
Speed Zones 77
Speed zones settings 77
Training target with speed zones 78
During training 78
After training 78
7
Page 8

Speed and distance from the wrist 78
Cadence from the wrist 78
Swimming Metrics 79
Pool swimming 79
Pool Length setting 80
Open water swimming 80
Measuring heart rate in water 80
Start a swimming session 81
During your Swim 81
After your Swim 81
Barometer 83
Changeable wristbands 83
Changing the wristband 83
Compatible sensors 84
Polar H10 Heart Rate Sensor 85
Polar Speed sensor Bluetooth® Smart 85
Polar Cadence Sensor Bluetooth® Smart 85
Third-party Power sensors 86
Pairing sensors with your watch 86
Pair a heart rate sensor with your watch 86
Pair a running sensor with your watch 87
8
Page 9

Pair a cycling sensor with your watch 87
Bike settings 88
Measuring wheel size 88
Delete a pairing 89
Polar Flow 90
Polar Flow App 90
Training data 90
Activity data 90
Sleep data 91
Sport profiles 91
Image sharing 91
Start using the Flow app 91
Polar Flow Web Service 92
Feed 92
Diary 92
Progress 92
Community 93
Programs 93
Sport profiles in Polar Flow 93
Add a sport profile 94
Edit a sport profile 95
9
Page 10

Planning your training 97
Create a training target in the Polar Flow web service 97
Quick target 97
Phased target 97
Favorites 98
Sync the targets to your watch 98
Syncing 99
Sync with Flow mobile App 99
Sync With Flow Web Service Via FlowSync 99
Important information 101
Battery 101
Charging the battery 101
Battery status and notifications 103
Caring for your watch 103
Keep your watch clean 103
Take good care of the optical heart rate sensor 104
Storing 104
Service 104
Precautions 104
Interference During Training 105
Minimizing Risks When Training 105
10
Page 11

Technical specification 107
Vantage V 107
Polar FlowSync Software 108
Polar Flow mobile application compatibility 108
Water resistance of Polar products 109
Regulatory information 110
Limited International Polar Guarantee 111
Disclaimer 112
11
Page 12

POLAR VANTAGE V USER MANUAL
This user manual helps you get started with your new watch. To see video tutorials and FAQs, go to sup-
port.polar.com/en/vantage-v.
INTRODUCTION
Congratulations on your new Polar Vantage V!
The Polar Vantage V is a premium GPS multisport watch for multisport and triathlon training with Polar
Precision Prime sensor™ fusion technology for accurate wrist-based heart rate monitoring even in the
most demanding conditions. The watch is packed with tools that help you break your records and reach
your goals: Reach the ideal amount of training to perform at your very best with Training Load Pro which
gives you a holistic view on how your training sessions strain the different systems of your body and
how it affects your performance. The unique recovery solution Recovery Pro helps you prevent over-
training and injuries. It measures how recovered your body is and offers you recovery feedback and guidance.
Polar Vantage V is the first multisport watch to measure running power from the wrist. Running power is
a great complement to heart rate monitoring – it helps you monitor the external load of your running.
Monitor your running progress with the advanced running features, such as Running Index and Running
Programs. Choose your favorite sports from 130+ options and customize settings for each sport.
The Continuous heart rate feature measures your heart rate around the clock. Together with 24/7 Activ-
ity tracking it gives you a complete overview of all your daily activity. The advanced Polar Sleep Plus sleep
analysis follows your sleeping patterns and gives you feedback on your sleep.
With the changeable wristbands, you can personalize your watch to match every situation and style.
We are continuously developing our products for better user experience. To keep your watch up to date
and get the best performance, always make sure to update the firmware whenever a new version is available. The firmware updates enhance the functionality of your watch through new features and improvements.
TAKE FULL ADVANTAGE OF YOUR VANTAGE V
Get connected to the Polar ecosystem and get the most out of your watch.
12
Page 13

POLAR FLOW APP
Get the Polar Flow app from the App Store®or Google PlayTM. Sync your watch with the Flow app after
training, and get an instant overview and feedback on your training results and performance and let all
your friends know about your achievements. In the Flow app you can also check how you’ve slept and
how active you’ve been during the day.
POLAR FLOW WEB SERVICE
Sync your training data to the Polar Flow web service with the FlowSync software on your computer or
via Flow app. In the web service you can plan your training, track your achievements, get guidance and
see detailed analysis of your training results, activity and sleep. Let all your friends know about your
achievements, find fellow exercisers and get motivation from your social training communities.
Find all this at flow.polar.com
13
Page 14

GET STARTED
Setting up your watch 14
Option A: Set up with a mobile device and Polar Flow app 15
Option B: Set up with your computer 16
Option C: Set up from the watch 16
Button functions and gestures 16
Color touch display 18
View Notifications 18
Tap feature 18
Backlight activation gesture 18
Watch faces and menu 18
Watch faces 18
Menu 22
Pairing a mobile device with your watch 23
Delete a pairing 23
Updating the firmware 24
With mobile device or tablet 24
With computer 24
SETTING UP YOUR WATCH
To wake up and charge your watch, plug it into a powered USB port or a USB charger with the custom cable that came in the box. The cable magnetically snaps into place, just make sure to align the ledge
on the cable with the slot on your watch (marked with red). Please note that it may take a while for the
charging animation to appear on the display. We recommend that you charge the battery before you
start using your watch. See Battery for detailed information on charging the battery. Alternatively, you
can wake up your watch by pressing and holding OK for 4 seconds.
OR
14
Page 15

To set up your watch, choose your language and preferred setup method. The watch gives you three
options for setup: Browse to the option most convenient for you with UP/DOWN and confirm your
selection with OK.
A. On your phone: Mobile setup is convenient if you don't have access to a computer
with a USB port, but it might take longer. This method requires an Internet connection.
B. On your computer:Wired computer setup is quicker and you can charge your watch at
the same time, but you need a computer available. This method requires an internet connection.
The A and B options are recommended. You can fill in all the physical details required for
accurate training data at once. You can also choose language and get the latest firmware for
your watch.
C. On your watch: If you don't have a compatible mobile device and can't get to a computer with an internet connection right away, you can start from the watch. Please note
that when you do the setup from the watch, your watch is not yet connected
with Polar Flow. Firmware updates for your watch are available only through
Polar Flow. To make sure you get to enjoy your watch and the unique Polar features at
their best, it’s important that you do the setup later in the Polar Flow web service or with
the Polar Flow mobile app by following the steps in option A or B.
OPTION A: SET UP WITH A MOBILE DEVICE AND POLAR FLOW APP
Please note that you have to do the pairing in the Flow app and NOT in your mobile device’s
Bluetooth settings.
1. Make sure your mobile device is connected to the internet and turn on Bluetooth.
2. Download the Polar Flow app from the App Store or Google Play on your mobile device.
3. Open the Flow app on your mobiledevice.
4. The Flow app recognizes your watch nearby and prompts you to start pairing it. Tap the Start button.
5. When the Bluetooth Pairing Request confirmation message appears on your mobiledevice,
check that the code shown on your mobile device matches the code shown on your watch.
6. Accept the Bluetooth pairing request on your mobile device.
7. Confirm the pin code on your watch by pressing the OK.
8. Pairing done is displayed once the pairing is completed.
9. Sign in with your Polar account or create a new one. We’ll walk you through the sign-up and setup
within the app.
When you’re done with the settings, tap Save and sync and your settings are synced to your watch.
15
Page 16

If you're prompted to update the firmware, please plug your watch into a power source to ensure flaw-
less update operation, and then accept the update.
OPTION B: SET UP WITH YOUR COMPUTER
1. Go to flow.polar.com/start and download and then install the Polar FlowSync data transfer software to your computer.
2. Sign in with your Polar account or create a new one. Plug your watch into your computer's USB
port with the custom cable that came in the box. We’ll walk you through the sign-up and setup
within the Polar Flow web service.
OPTION C: SET UP FROM THE WATCH
Adjust the values with UP/DOWN and confirm each selection with OK. If you want to return and change
a setting at any point, press BACK until you reach the setting you want to change.
When you do the setup from the watch, your watch is not yet connected with the Polar Flow web service. Firmware updates for your watch are available only through Polar Flow. To make sure you get to enjoy
your watch and the unique Polar Smart Coaching features at their best, it's important that you do the
setup later in the Polar Flow web service or with the Flow mobile app by following the steps in option A or B.
BUTTON FUNCTIONS AND GESTURES
You watch has five buttons that have different functionalities depending on the situation of use. See the
tables below to find out what functionalities the buttons have in different modes.
16
Page 17

TIME VIEW AND MENU
LIGHT BACK OK UP/DOWN
Illuminate the display
In time view, press to
view the battery status
symbol
PRE-TRAINING MODE
Enter the menu
Return to the previous
level
Leave settings
unchanged
Cancel selections
Press and hold to return
to time view from menu
In time view, press and
hold to start pairing and
syncing
Confirm the selection
shown on the display
Press and hold to enter
pre-training mode
Press to view more details
about the information
shown on the watch face
Change the watch
face in time view
Move through selection lists
Adjust a selected
value
LIGHT BACK OK UP/DOWN
Illuminate the display Return to time view Start a training session Move
through
sports
list
DURING TRAINING
LIGHT BACK OK UP/DOWN
Illuminate the display Pause training by pressing
once
To stop the session, press and
hold when paused
Mark a lap
Continue training recording
when paused
Change
training
view
17
Page 18

COLOR TOUCH DISPLAY
The always-on color touch display lets you easily swipe between watch faces, through lists and menus, as
well as choose items by pressing the display.
l Swipe up or down to scroll.
l In time view, swipe left or right to switch between the watch faces. Each watch face shows you an
overview of different information.
l Press the display to see more detailed information.
Note that the touch display is disabled during training sessions. To ensure proper function of the touch
display wipe any dirt, sweat or water off the display with a cloth. The touch display won’t respond properly when trying to use it wearing gloves.
VIEW NOTIFICATIONS
Swipe up from the bottom of the display to view notifications. The dot at the bottom of the display indicates if you have any new notifications.
TAP FEATURE
Tap the display firmly with two fingers to take a lap during a training session. Note that the tap feature is
not a touch display feature.
BACKLIGHT ACTIVATION GESTURE
The backlight is automatically switched on when you turn your wrist to look at the watch.
WATCH FACES AND MENU
WATCH FACES
The Vantage V watch faces tell you a lot more than just the time. You'll get the most timely and relevant
information right on the watch face, including your activity status, Cardio Load status, your heart rate
and latest training sessions. You can swipe left or right, or scroll through the watch faces with the UP and
DOWN buttons and open more details by pressing the display or with the OK button.
Note that the watch faces and their contents cannot be edited.
You can choose between analogue and digital display in Watch settings.
18
Page 19

Time
Activity
Basic watch face with time and date.
The circle around the watch face and the percentage below the time and date
show your progress towards your daily activity goal. The circle fills with a light
blue color as you are active.
In addition, when opening the details, you can see the following details of your
day’s accumulated activity:
Cardio Load Status
• Steps you've taken so far. The amount and type of body movements
areregistered and turned into an estimation of steps.
• Active time tells you the cumulative time of body movements that
benefit your health.
• Calories you've burned through training, activity and BMR (Basal
metabolic rate: the minimum metabolic activity required to maintain
life).
For more information, see 24/7 Activity tracking.
19
Page 20

Cardio Load Status looks at the relation between your short term training
load (Strain) and long term training load (Tolerance) and based on that tells
you whether you are in a detraining, maintaining, productive or overreaching
training load status. When recovery feedback is set on and enough data is
available, you'll see your daily training recommendation instead of your Cardio
load status on the watch face.
In addition, when opening the details, you can see the numeric values for your
Cardio Load Status, Strain and Tolerance, and also a verbal description of your
Cardio load status.
l The numeric value for your Cardio load status is Strain divided by
Tolerance.
l Strain shows you how much you have strained yourself with train-
ing lately. It shows your average daily cardio load from the past 7
days.
l Tolerance describes how prepared you are to endure cardio train-
ing. It shows your average daily cardio load from the past 28 days.
l Verbal description of your Cardio load status.
Heart rate
For more information, see Training Load Pro.
You can quickly check your current heart rate without starting a training session. Just tighten your wristband, choose this watch face, press OK and you'll
see your current heart rate in a moment.
20
Page 21

When using the Continuous Heart Rate feature, you can also follow what are
the highest and lowest heart rate readings of your day and you can check what
your lowest heart rate reading was during the previous night. You can turn the
Continuous Heart Rate feature on and off on your watch in Settings > General
settings > Continuous HR tracking.
For more information, see Continuous Heart Rate feature.
Latest training sessions
See the time passed since your latest training session and the sport of the session.
In addition, when opening the details, you can view the summaries of your
training sessions from the last 14 days. Browse to the training session you
want to view with UP/DOWN and press OK to open the summary. For more
information, see Training summary.
21
Page 22

MENU
Enter the menu by pressing BACK and browse through the menu by pressing UP or DOWN. Confirm
selections with the OK button, and return with the BACK button.
Start training
From here, you can start your training sessions. Press OK to enter the pretraining mode and browse to the sport profile you want to use.
You can also enter the pre-training mode by pressing and holding OK in the
time view.
See Start a training session for detailed instructions.
Orthostatic test
From here, you can take the Orthostatic test (H10 heart rate sensor needed),
view your latest results compared to your average and reset the test period.
• Start the test with HR sensor
• Latest results
• Reset test period
See Orthostatic test for detailed instructions.
Settings
You can edit the following settings on your watch:
• Physical settings
• General settings
• Watch settings
For more information, see Settings.
In addition to the settings available on your watch, you can edit Sport Pro-
files in the Polar Flow web service and app. Customize your watch with your
22
Page 23

favorite sports and the information you want to follow during your training sessions. See Sport Profiles in Flow for more information.
PAIRING A MOBILE DEVICE WITH YOUR WATCH
Before you can pair a mobile device with your watch, you need to setup your watch in the Polar Flow
web service or with the Polar Flow mobile app as described in chapter Setting up your watch. If you did
the setup for your watch with a mobile device, your watch has already been paired. If you did the setup
with a computer and would like to use your watch with Polar Flow app, please pair your watch and
mobile as follows:
Before pairing a mobile device
• download Flow app from the App Store or Google Play
• make sure your mobile device has Bluetooth turned on, and airplane mode/flight mode is not
turned on.
• Android users:make sure location is enabled for Polar Flow app in the phone's application set-
tings.
To pair a mobile device:
1. On your mobile device, open Flow app and sign in with your Polar account, which you have created when setting up your watch.
Android users: If you have several Flow app compatiblePolar devices in use, make sure you
have chosen Vantage V as the active device in the Flow app. This way Flow app knows to connect
to your watch. In the Flow app, go to Devices and choose Vantage V.
2. On your watch, press and hold BACK in time mode OR go to Settings > General settings >
Pair and sync > Pair and sync phone and press OK.
3. Open Flow app and bring your watch close to phone is displayed on your watch.
4. When the Bluetooth Pairing Request confirmation message appears on your mobiledevice,
check that the code shown on your mobile device matches the code shown on your watch.
5. Accept the Bluetooth pairing request on your mobile device.
6. Confirm the pin code on your watch by pressing the OK.
7. Pairing done is displayed once the pairing is completed.
DELETE A PAIRING
To delete a pairing with a mobile device:
23
Page 24

1. Go to Settings > General settings > Pair and sync > Paired devices and press OK.
2. Choose the device you want to remove from the list and press OK.
3. Remove pairing? is displayed. Confirm by pressing OK.
4. Pairing removed is displayed when you are done.
UPDATING THE FIRMWARE
To keep your watch up to date and get the best performance, always make sure to update the firmware
whenever a new version is available. Firmware updates are performed to improve the functionality of
your watch. They can include completely new features, improvements to existing features, or bug fixes.
You won't lose any data due to the firmware update. Before the update begins, the data from your
watch is synced to the Flow web service.
WITH MOBILE DEVICE OR TABLET
You can update the firmware with your mobile device if you're using Polar Flow mobile app to sync your
training and activity data. The app will let you know if there's an update available and will guide you
through it. We recommend that you plug in the watch to a power source before starting the update to
ensure flawless update operation.
The wireless firmware update may take up to 20 minutes, depending on your connection.
WITH COMPUTER
Whenever a new firmware version is available, FlowSync will notify you when you connect the watch to
your computer. The firmware updates are downloaded via FlowSync.
To update the firmware:
1. Plug your watch to your computer with the custom cable that came in the box. Make sure that
the cable snaps into place. Align the ledge on the cable with the slot on your watch (marked with
red).
24
Page 25

2. FlowSync starts syncing your data.
3. After syncing, you are asked to update the firmware.
4. Choose Yes. New firmware is installed (this may take up to 10 minutes), and the watch restarts.
Please wait until the firmware update has been finalized before you detach the watch from your
computer.
25
Page 26

SETTINGS
Physical settings 26
Weight 27
Height 27
Date of birth 27
Sex 27
Training background 27
Activity goal 28
Preferred sleep time 28
Maximum heart rate 29
Resting heart rate 29
VO2max 29
General settings 30
Pair and sync 30
Bike settings 30
Continuous HR tracking 31
Recovery feedback 31
Flight mode 31
Units 31
Language 31
About your watch 31
Watch settings 31
Alarm 32
Watch face 32
Time 32
Date 32
First day of week 32
PHYSICAL SETTINGS
To view and edit your physical settings, go to Settings > Physical settings. It is important that you are
precise with the physical settings, especially when setting your weight, height, date of birth and sex, as
they have an impact on the accuracy of the measuring values, such as the heart rate zone limits and calorieexpenditure.
In Physical settings you'll find:
• Weight
• Height
26
Page 27

• Date of birth
• Sex
• Training background
• Activity goal
• Preferred sleep time
• Maximum heart rate
• Resting heart rate
• VO
2max
WEIGHT
Set your weight in kilograms (kg) or pounds (lbs).
HEIGHT
Set your height in centimeters (metric) or in feet and inches (imperial).
DATE OF BIRTH
Set your birthday. The order in which the date settings are depends on which time and date format you
have chosen (24h: day - month - year/12h: month - day - year).
SEX
Select Male or Female.
TRAINING BACKGROUND
Training background is an assessment of your long-term physical activity level. Select the alternative that
best describes the overall amount and intensity of your physical activity during the past three months.
• Occasional (0-1h/week): You do not participate regularly in programmed recreational sport or
heavy physical activity, e.g. you walk only for pleasure or exercise hard enough to cause heavy breathing or perspiration only occasionally.
• Regular (1-3h/week): You participate regularly in recreational sports, e.g. you run 5-10 km or 3-6
miles per week or spend 1-3 hours per week in comparable physical activity, or your work requires
modest physical activity.
• Frequent (3-5h/week): You participate at least 3 times a week in heavy physical exercise, e.g. you
run 20-50 km/12-31 miles per week or spend 3-5 hours per week in comparable physical activity.
27
Page 28

• Heavy (5-8h/week): You participate in heavy physical exercise at least 5 times a week, and you
may sometimes take part in mass sports events.
• Semi-pro (8-12h/week): You participate in heavy physical exercise almost daily, and you exercise
to improve performance for competitive purposes.
• Pro (>12h/week): You are an endurance athlete. You participate in heavy physical exercise to
improve your performance for competitive purposes.
ACTIVITY GOAL
Daily activity goal is a good way to find out how active you really are in your everyday life. Choose
your typical activity level from three options and see how active you need to be to reach your daily activity goal.
The time you need to complete your daily activity goal depends on the level you have chosen and the
intensity of your activities. Age and gender also affect the intensity you need to reach your daily activity
goal.
Level 1
If your day includes only a little sports and a lot of sitting, commuting by car or public transport and so
on, we recommend you pick this activity level.
Level 2
If you spend most of your day on your feet, perhaps due to the type of work you do or your daily
chores, this is the right activity level for you.
Level 3
If your work is physically demanding, you’re into sports or otherwise tend to be on the move and active,
this is the activity level for you.
PREFERRED SLEEP TIME
Set Your preferred sleep time to define how long you aim to sleep every night. By default, it is set to
the average recommendation for your age group (eight hours for adults from 18 to 64 years). If you feel
that eight hours of sleep is too much or too little for you, we recommend you adjust your preferred
sleep time to meet your individual needs. By doing this, you’ll get accurate feedback on how much sleep
you got in comparison to your preferred sleep time.
28
Page 29

MAXIMUM HEART RATE
Set your maximum heart rate, if you know your current maximum heart rate value. Your age-predicted
maximum heart rate value (220-age) is displayed as a default setting when you set this value for the first
time.
HR
during maximum physical exertion.The most accurate method for determining your individual HR
to perform a maximal exercise stress test in a laboratory. HR
is used to estimate energy expenditure. HR
max
is the highest number of heartbeats per minute
max
is also crucial when determining training
max
max
is
intensity. It is individual and depends on age and hereditary factors.
RESTING HEART RATE
Your resting heart rate is the lowest number of heartbeats per minute (bpm) when fully relaxed and
without distractions. Your age, fitness level, genetics, health status and sex affect the resting heart rate.
A typical value for an adult is 55–75 bpm, but your resting heart rate can be significantly lower than that,
for example, if you’re very fit.
It’s best to measure your resting heart rate in the morning after a good night’s sleep, right after you wake
up. It’s OK to go to the bathroom first if it helps you to relax. Don’t do any strenuous training leading up
to the measurement and make sure you’re fully recovered from any activity. You should do the measurement more than once, preferably on consecutive mornings, and calculate your average resting heart
rate.
To measure your resting heart rate:
1. Wear your watch. Lie down on your back and relax.
2. After about 1 minute, start a training session on your wearable. Choose any sport profile, for
example Other indoor.
3. Lie still and breathe calmly for 3–5 minutes. Don’t look at your training data during the measuring.
4. Stop the training session on your Polar device. Sync the wearable with the Polar Flow app or web
service and check the training summary for the value of your lowest heart rate (HR min)—this is
your resting heart rate. Update your resting heart rate to your physical settings in Polar Flow.
VO
2MAX
Set your VO2
VO2
(maximal oxygen uptake, maximal aerobic power) is the maximal rate at which oxygen can be
max
max
.
used by the body during maximal exercise; it is related directly to the maximal capacity of the heart to
deliver blood to the muscles. VO2
can be measured or predicted by fitness tests (e.g. maximal
max
29
Page 30

exercise tests and submaximal exercise tests). You can also use your Running Index score, which is an
estimation of your VO2
max
.
GENERAL SETTINGS
To view and edit your general settings, go to Settings > General settings.
In General settings you'll find:
• Pair and sync
• Bike settings (Visible only if you have paired a cycling sensor with your watch)
• Continuous HR tracking
• Recovery feedback
• Flight mode
• Units
• Language
• About your watch
PAIR AND SYNC
• Pair and sync phone/Pair sensor or other device: Pair sensors or mobiledevices with your
watch. Sync data with Flow app.
• Paired devices: View all the devices you have paired with your watch. These can include heart rate
sensors, running sensors, cycling sensors and mobile devices.
BIKE SETTINGS
Bike settings are visible only if you have paired a cycling sensor with your watch.
Wheel size: Set the wheel size in millimeters. For instructions on measuring the wheel size, see Pairing
sensors with your watch.
Crank length: Set the crank length in millimeters. The setting is visible only if you have paired a power
sensor.
Sensors in use: View all the sensors you have linked to the bike.
30
Page 31

CONTINUOUS HR TRACKING
Turn the Continuous Heart Rate feature On or Off. For more information, see Continuous Heart Rate.
RECOVERY FEEDBACK
Choose On or Off. When set on the watch asks you to schedule an Orthostatic test for at least three
days a week. Choose the days, and choose Save. For information, see Recovery Pro.
FLIGHT MODE
Choose On or Off.
Flight mode cuts off all wireless communication from your watch. You can still use it, but you can't sync
your data with the Polar Flow mobile app or use it with any wireless accessories.
UNITS
Choose metric (kg, cm) or imperial (lb, ft). Set the units used to measure weight, height, distance and
speed.
LANGUAGE
You can choosethe language you want to use on your watch. Your watch supports the following languages: Bahasa Indonesia, Čeština, Dansk, Deutsch, English, Español, Français, Italiano, Neder-
lands, Norsk, Polski, Português, Русский, Suomi, Svenska or Türkçe.
ABOUT YOUR WATCH
Check the device ID of your watch, as well as the firmware version, HW model, A-GPS expiry date and the
Vantage V-specific regulatory labels.
Restart your watch: If you experience problems with your watch, you can try restarting it. Restarting
the watch will not delete any of the settings or your personal data from the watch. Press the OK button
and then press OK again to confirm the restart. You can also restart your watch by pressing and holding
the OK button for 10 seconds.
WATCH SETTINGS
To view and edit your watch settings, go to Settings > Watch settings
In Watch settings you'll find:
31
Page 32

• Alarm
• Watch face
• Time
• Date
• First day of week
ALARM
Set alarm repetition: Off, Once, Monday to Friday or Every day. If you choose Once, Monday to
Friday or Every day, also set the time for the alarm.
When the alarm is set on, a clock icon is displayed in the time view.
WATCH FACE
Choose the watch face:
• Analog
• Digital
TIME
Set the time format: 24 h or 12 h.Then set the time of day.
When syncing with the Flow app and web service, the time of day is automatically updated from the
service.
DATE
Set the date. Also set the Date format, you can choose mm/dd/yyyy, dd/mm/yyyy, yyyy/mm/dd,
dd-mm-yyyy, yyyy-mm-dd, dd.mm.yyyy or yyyy.mm.dd.
When syncing with the Flow app and web service, the date is automatically updated from the service.
FIRST DAY OF WEEK
Choose the starting day of each week. Choose Monday, Saturday or Sunday.
32
Page 33

When syncing with the Flow app and web service, the week's starting day is automatically updated
from the service.
33
Page 34

TRAINING
Wrist-based heart rate measurement 34
Wearing your watch when measuring heart rate from your wrist 34
Wearing your watch when not measuring heart rate from your wrist 35
Start a training session 36
Start a planned training session 37
Start a Multisport Training Session 37
During training 38
Browse the training views 38
Mark a lap 40
Switch Sport During a Multisport Session 40
Training with a target 40
Pausing/Stopping a training session 41
Training summary 41
After training 41
Training data in Polar Flow App 44
Training data in Polar Flow Web Service 45
WRIST-BASED HEART RATE MEASUREMENT
Your watch measures your heart rate from the wrist with the Polar Precision Prime™ sensor fusion
technology. This new heart rate innovation combines optical heart rate measurement with skin contact
measurement, ruling out any disturbances to the heart rate signal. It tracks your heart rate accurately
even in the most demanding conditions and training sessions.
Although there are many subjective clues as to how your body is doing during exercise (perceived exertion, breathing rate, physical sensations), none of them are as reliable as measuring heart rate. It is objective and affected by both internal and external factors—meaning that you will have a dependable
measure of your physical state.
WEARING YOUR WATCH WHEN MEASURING HEART RATE FROM YOUR WRIST
To measure wrist-based heart rate accurately during training (and when using the Continuous Heart Rate
feature) you need to wear your watch snugly on top of your wrist, just behind the wrist bone (see the pic-
ture below). The sensor on the back must be in constant touch with your skin, but the wristband should
not be too tight to prevent blood flow. For most accurate heart rate measurement, we advise you to
wear your watch for a few minutes prior to starting the heart rate measurement. Also it's a good idea to
warm up the skin if your hands and skin get cold easily. Get the blood going before starting your session!
34
Page 35

If you have tattoos on the skin of your wrist, avoid placing the sensor right on it as it may prevent accur-
ate readings.
In sports where it's morechallenging to keep the sensor stationary on your wrist or where you have pressure or movement in muscles or tendons near the sensor, we recommend using a Polar heart rate sensor
with a chest strap if you’re looking for supreme accuracy in your training. Your watch is compatible with
Bluetooth® heart rate sensors, like Polar H10. The Polar H10 heart rate sensor is more responsive to rapidly increasing or decreasing heart rate, so it’s the ideal option also for interval type of training with quick
sprints.
To maintain the best possible performance of the wrist-based heart rate measurement, keep your
watch clean and prevent scratches. After a sweaty training session, we recommend that you wash the
watch under running water with a mild soap and water solution. Then wipe it dry with a soft towel. Let it
fully dry before charging.
WEARING YOUR WATCH WHEN NOT MEASURING HEART RATE FROM YOUR WRIST
Loosen the wristband a bit for a more comfortable fit and to let your skin breathe. Wear the watch just
as you would wear a normal watch.
Every once in a while it’s a good idea to let your wrist have a breather, especially if you have sensitive
skin. Take off your watch and recharge it. This way both your skin and your watch can have a rest, and be
ready for your next training event.
35
Page 36

START A TRAINING SESSION
1. Wear your watch and tighten the wristband.
2. To enter the pre-training mode, press and hold OK in time view
OR
Press BACK to enter the main menu and choose Start training.
3. In the pre-training mode, browse to a sport profile. Stay in the pretraining mode until your watch has found your heart rate. When
training outdoors, also wait until your watch finds the GPS signal to
get accurate speed, distance, altitude and location data.
If you have paired an optional Bluetooth sensor with your watch, the
watch will automatically start searching for the sensor signal as well.
4. To catch GPS satellite signals, go outdoors and away from tall buildings and trees. Keep your watch still with the display upwards. The
circle around the GPS icon will turn green when the GPS is ready.
5. The watch has found your heart rate when your heart rate is shown.
6. When all signals are found, press OK to start training recording.
When you're wearing a Polar heart rate sensor that's paired with your watch, the watch automatically uses the connected sensor to measure your heart rate during training sessions. A blue circle
around the heart rate symbol indicates that your watch uses the connected sensor to measure your
heart rate.
See During Training for more information on what you can do with your watch during training.
FUNCTIONS IN PRE-TRAINING MODE
Set pool length:
When using the Swimming/Pool swimming profile, check that the pool length is correct (shown on the display). To change the pool length, press LIGHT to access the Pool length setting and set the correct
length.
36
Page 37

Calibrate cycling power sensor:
If your have paired a third-party cycling power sensor with your watch, you can calibrate the sensor in
the pre-training mode. Choose one of the cycling sport profiles and wake up the transmitters by rotating
the cranks. Please calibrate power sensor is shown if calibration is needed. Press LIGHT and follow
the on-screen instructions to calibrate your sensor. For calibration instructions specific to your power
sensor, see the manufacturer's instructions.
START A PLANNED TRAINING SESSION
You can plan your training and create detailed training targets in the Polar Flow app or the Polar Flow
web service and sync them to your watch.
To start a planned training session scheduled for the current day:
1. Enter the pre-training mode by pressing and holding OK in time view.
2. You'll be prompted to start a training target you've scheduled for the day.
3. Press OK to view the target information.
4. Press OK to return to pre-training mode, and choose the sport profile you want to use.
5. When the watch has found all the signals, press OK. Recording started is displayed and you can
start training.
Your watch will guide you towards completing your target during training. See During Training for more
information.
START A MULTISPORT TRAINING SESSION
Multisport allows you to include multiple sports in one training session, and seamlessly switch between
sports without interrupting your training recording. During a multisport training session your transition
times between sports are automatically monitored, allowing you to see how long it took you to switch
from one sport to another.
37
Page 38

There are two different ways to perform a multisport training session: fixed multisport and free multisport. In a fixed multisport (multisport profiles in the Polar sports list) like triathlon, the order of the
sports is fixed, and they must be performed in that specific order. In free multisport, you can choose
what sports you perform and in which order you perform them by selecting them from the sport list.
You can also switch back and forth between sports.
Before starting a multisport training session, make sure that you have set the sport profile settings for
each of the sports that you are going to use for the training session. For more information, see Sport pro-
files in Flow.
1. Press BACK to enter the main menu, choose Start training, and then browse to a sport profile.
Choose Triathlon, Free multisport or any other multisport profile (can be added in the Flow web
service).
2. Once your watch has found all the signals, press OK. Recording started is displayed and you can
start training.
3. To change the sport press BACK to go to transition mode.
4. Choose your next sport, and press OK (your transition time is shown) and continue training.
DURING TRAINING
BROWSE THE TRAINING VIEWS
During training you can browse through the training views with UP/DOWN. Note that the available training views and the information you see on the training views depend on the sport you've chosen and on
your edit of the chosen sport profile.
You can add sport profiles on your watch and define the settings for each sport profile in the Polar Flow
app and web service. You can create tailored training views for each sport you do and choose what data
you want to follow during your sessions. For more information, see Sport profiles in Flow.
For example, your training views can have the following information:
Your heart rate and the heart rate ZonePointer
Distance
Duration
Pace/Speed
38
Page 39

Your heart rate and the heart rate ZonePointer
Duration
Calories
Descent
Your current altitude
Ascent
Maximum heart rate
Heart rate graph and your current heart rate
Average heart rate
Maximum power
Power graph and your current power
Average power
Time of day
Duration
39
Page 40

MARK A LAP
Press OK to mark a lap. Laps can also be taken automatically. In sport profile settings in the Polar Flow
app or web service, set Automatic lap to Lap distance or Lap duration. If you choose Lap distance,
set the distance after which each lap is taken. If you choose Lap duration, set the duration after each
lap is taken.
SWITCH SPORT DURING A MULTISPORT SESSION
Press BACK, and choose the sport you want to switch to. Confirm your selection with OK.
TRAINING WITH A TARGET
If you have created a quick training target based on duration, distance or calories in the Flow app or
web service and synced it to your watch, you have the following training target view as the default first
training view:
If you've created a target based on duration or distance, you can see how
much of your target you still have remaining before you reach it.
OR
If you've created a target based on calories, you can see how many calories of
your target you have left to burn.
If you have created a phased training target in the Flow app or web service and synced the target to
your watch, you have the following training target view as the default first training view:
l Depending on the chosen intensity, you can see either your heart
rate or speed/pace and the lower and upper heart rate or
speed/pace limit of the current phase.
l Phase name and phase number/total number of phases
l Duration/distance covered so far
l Target duration/distance of the current phase
See Planning your training for instructions on creating training targets.
40
Page 41

CHANGE PHASE DURING A PHASED SESSION
The phase will changeautomatically when you have finished a phase. The watch notifies you by vibrating
when the phase changes.
VIEW TRAINING TARGET INFORMATION
To view the training target information during training, press and hold OK in the training target view.
NOTIFICATIONS
If you are training outsidethe planned heart rate zones or speed/pace zones, your watch notifies you
with a vibration.
PAUSING/STOPPING A TRAINING SESSION
1. Press BACK to pause your training session.
2. To continue training, press OK. To stop the session, press and hold BACK. You’ll get a summary of
your training session on your watch right after you’ve stopped training.
If you stop your session after pausing, the time elapsed after pausing is not included in the total train-
ing time.
TRAINING SUMMARY
AFTER TRAINING
You'll get a summary of your training session on your watch right after you've stopped training. Get a
more detailed and illustrated analysis in the Polar Flow app or in the Polar Flow web service.
The information shown in your summary depends on the sport profile and data collected. For example,
your training summary can include the following information:
Start time and date
Duration of the session
Distance covered in the session
41
Page 42

Heart rate
Your average and maximum heart rate during the session.
Your Cardio Load from the session
Heart rate zones
Training time spent in different heart rate zones
Calories
Calories burned during the session
Fat burn % of calories: Calories expended from fat during a workout
expressed as a percentage of the total calories burned during the session
Pace/Speed
Average and maximum pace/speed of the session
Running Index:Your running performance class and numerical value. Find out
more from chapter Running Index.
Speed zones
Training time spent in different speed zones
42
Page 43

Cadence
Your average and maximum cadence for the session
Running cadence is measured with a built-in accelerometer from your wrist movements. Cycling cadence is
shown if you have a Polar Cadence Sensor Bluetooth® Smart in use.
Altitude
Maximum altitude during the session
Ascended meters/feet during the session
Descended meters/feet during the session
Power
Average power
Maximum power
Muscle load
Power zones
Training time spent in different power zones
Running power is measured from the wrist when using a running type sport profile and GPS is available. Cyc-
ling power is shown when using a cycling type sport profile and you have an external cycling power sensor in use.
43
Page 44
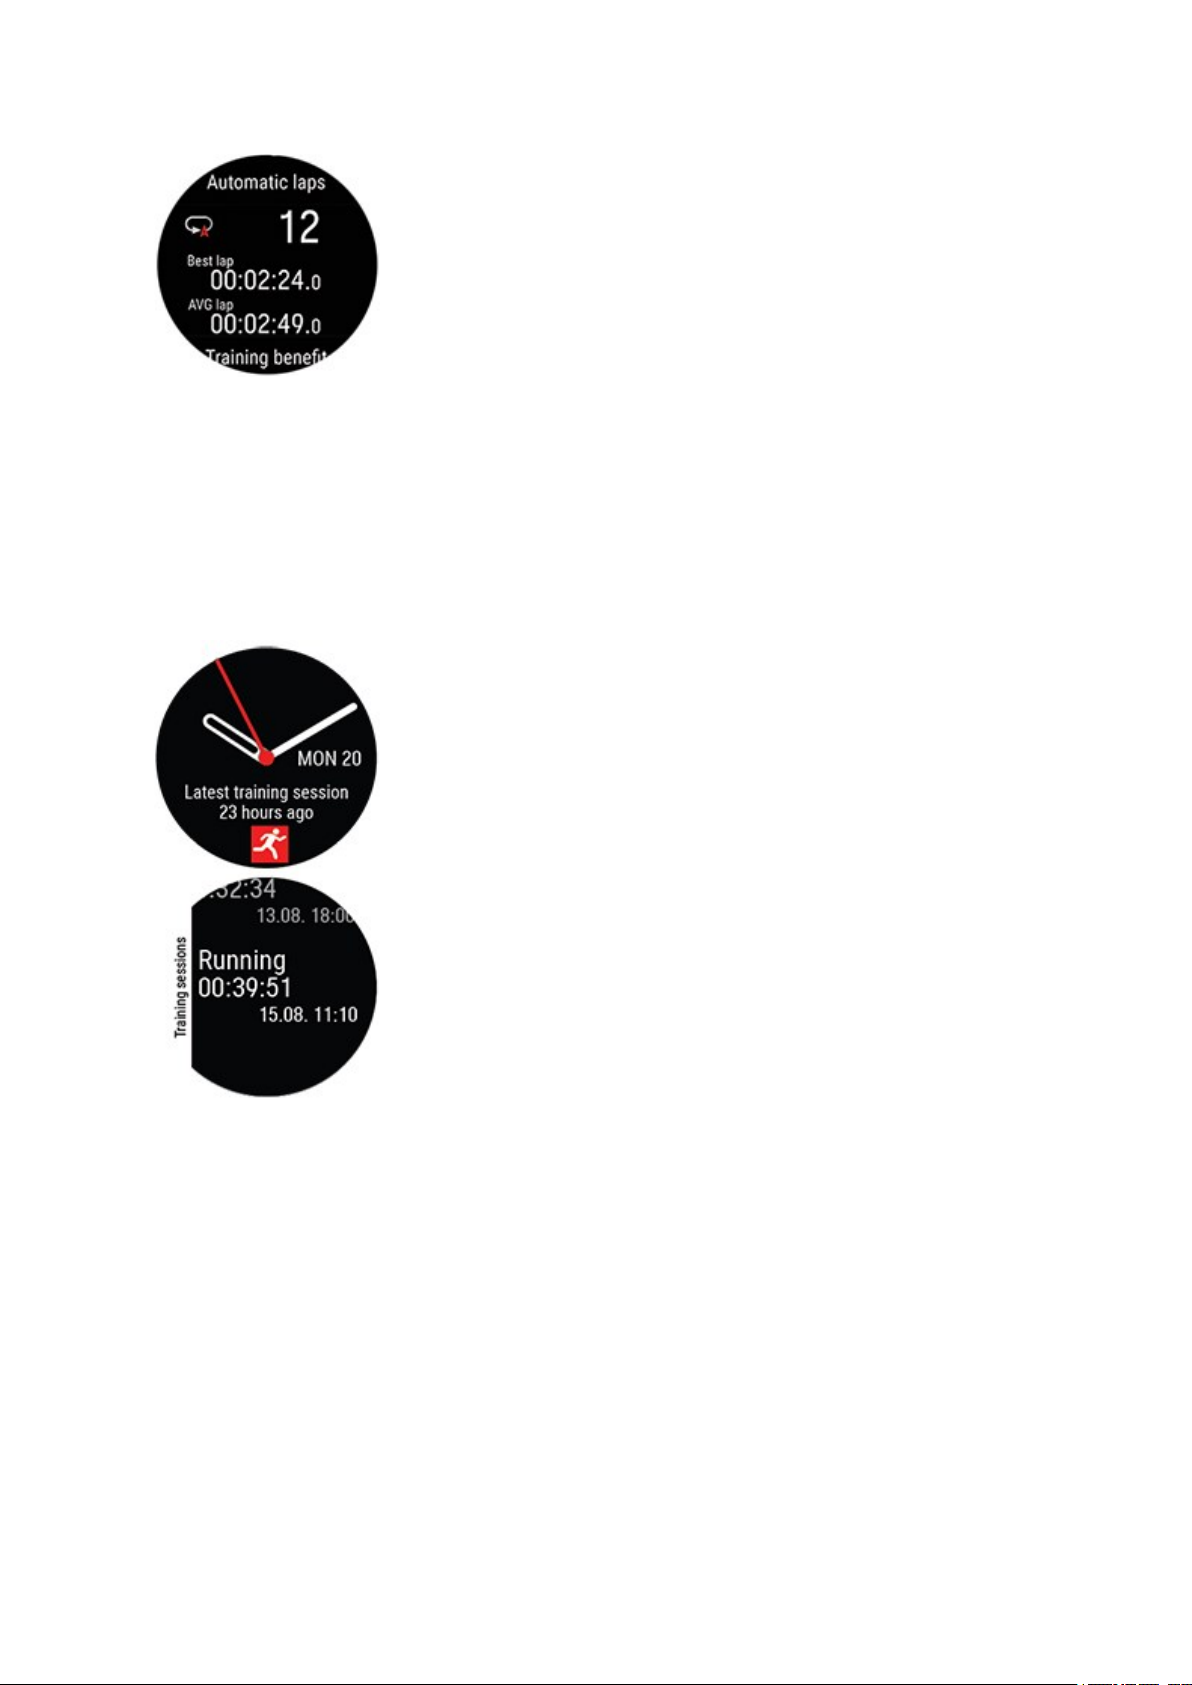
Laps/Automatic laps
Lap number
Best lap
Average lap
Multisport Summary
Multisport summary includes an overall summary of the session as well as sport specific summaries,
which include duration and distance covered in the sport.
To view your training summaries later on your watch:
In time view, use the UP and DOWN buttons to navigate to the Latest training
sessions watch face, and then press OK.
You can view the summaries of your training sessions from the last 14 days.
Browse to the training session you want to view with UP/DOWN and press OK
to open the summary. Your watch can contain a maximum of 20 training summaries.
TRAINING DATA IN POLAR FLOW APP
Your watch syncs with the Polar Flow app automatically after you finish a training session if your phone
is within the Bluetooth range. You can also sync your training data manually from the watch to the Flow
app by pressing and holding the BACK button of your watch when you're signed in to the Flow app and
your phone is within the Bluetooth range. In the app you can analyze your data at a glance after each session. The app allows you to see a quick overview of your training data.
44
Page 45

For more information, see Polar Flow App.
TRAINING DATA IN POLAR FLOW WEB SERVICE
Analyze every detail of your training and learn more about your performance. Follow your progress and
also share your best sessions with others.
For more information, see Polar Flow Web Service.
45
Page 46

FEATURES
GPS 47
GPS features 47
Smart Coaching 48
Training Load Pro 48
Recovery Pro 54
Orthostatic Test 58
Running power from the wrist 61
Polar Running Program 63
Running Index 65
Training Benefit 68
Smart Calories 69
Continuous Heart Rate 70
Polar Sleep PlusTM 71
24/7 Activity tracking 72
Activity Guide 73
Activity Benefit 73
Sport Profiles 74
Heart Rate Zones 75
Speed Zones 77
Speed zones settings 77
Training target with speed zones 78
During training 78
After training 78
Speed and distance from the wrist 78
Cadence from the wrist 78
Swimming Metrics 79
Pool swimming 79
Open water swimming 80
Measuring heart rate in water 80
Start a swimming session 81
During your Swim 81
After your Swim 81
Barometer 83
Changeable wristbands 83
Changing the wristband 83
Compatible sensors 84
Polar H10 Heart Rate Sensor 85
Polar Speed sensor Bluetooth® Smart 85
Polar Cadence Sensor Bluetooth® Smart 85
Third-party Power sensors 86
Pairing sensors with your watch 86
46
Page 47

GPS
Your watch has built-in GPS that provides accurate speed, distance and altitude measurement for a
range of outdoor sports, and allows you to see your route on map in the Flow app and web service after
your session.
The watch uses Assisted GPS (A-GPS) to acquire a fast satellite fix. The A-GPS data tells your watch the
predicted positions of the GPS satellites. This way the watch knows where to search for the satellites and
thus is able to acquire signals from them within seconds, even under difficult signal conditions.
The A-GPS data updates once a day. The latest A-GPS data file is automatically updated to your watch
each time you sync it with the Flow web service via FlowSync software. If you sync your watch with the
Flow web service via Flow app, the A-GPS data file update takes place once a week.
A-GPS EXPIRY DATE
The A-GPS data file is valid for up to 13 days. Positioning accuracy is relatively high during the first three
days, and progressively decreases during the remaining days. Regular updates help to ensure a high level
of positioning accuracy.
You can check the expiry date for the current A-GPS data file from your watch. Go to Settings > Gen-
eral settings > About your watch > A-GPS exp. date. If the data file has expired, sync your watch
with the Flow web service via FlowSync software or with the Flow app to update A-GPS data.
Once the A-GPS data file has expired, more time may be required for acquiring the current position.
GPS FEATURES
Your watch includes the following GPS features:
• Distance: Accurate distance during and after your session.
• Speed/Pace: Accurate speed/pace information during and after your session.
• Running index: Running Index is based on heart rate and speed data measured during the run. It
gives information about your performance level, both aerobic fitness and running economy.
For best GPS performance, wear the watch on your wrist with the display facing up. Due to the location
of the GPS antenna on the watch, it is not recommended to wear it with the display on the underside of
your wrist. When wearing it on the handlebars of a bike, make sure the display is facing up.
47
Page 48

SMART COACHING
Whether it’s assessing your day-to-day fitness levels, creating individual training plans, working out at the
right intensity or receiving instant feedback, Smart Coaching offers a choice of unique, easy-to-use features, personalized to your needs and designed for maximum enjoyment and motivation when training.
Your watch includes the following Polar Smart Coaching features:
• Training Load Pro
• Recovery Pro
• Orthostatic test
• Running power from the wrist
• Running Program
• Running Index
• Training benefit
• Smart calories
• Continuous heart rate
• Polar Sleep Plus
• Activity Guide
• Activity Benefit
TRAINING LOAD PRO
The new Training Load Pro™ feature measures how your training sessions strain your body and helps to
understand how it impacts your performance. Training Load Pro gives you a training load level for your
cardiovascular system Cardio Load, and with Perceived Load you can rate how strained you feel. Training Load Pro also gives you a training load level for your musculoskeletal system (Muscle Load). When
you know how strained each body system is, you can optimize your training by working the right system
at the right time.
Cardio Load
Cardio Load is based on training impulse calculation (TRIMP), a commonly accepted and scientifically
proven method to quantify training load. Your Cardio Load value tells you how much strain your training
session put on your cardiovascular system. The higher the Cardio Load, the more strenuous the training
session was for the cardiovascular system. Cardio Load is calculated after every workout from your heart
rate data and session duration.
48
Page 49

Perceived Load
Your subjective feeling is one useful method of estimating training load for all sports. The Perceived
Load is a value that takes into account your own subjective experience of how demanding your training
session was and the duration of your session. It's is quantified with Rate of Perceived Exertion (RPE),
a scientifically accepted method to quantify subjective training load. Using the RPE scale is especially useful for sports where measuring training load based on heart rate alone has its limitations, for example
strength training.
Rate your session in the Flow mobile app to get your Perceived Load for the session. You can choose
from a scale from 1-10, in which 1 is very, very easy and 10 is maximum effort.
Muscle Load
Muscle Load tells you how much your muscles were strained during your training session. Muscle Load
helps you quantify your training load in high-intensity training sessions, such as short intervals, sprints
and hill sessions, when your heart rate doesn’t have enough time to react to the changes in the intensity.
Muscle load shows the amount of mechanical energy (kJ) that you produced during a running or cycling
session. This reflects your energy output, not the energy input it took you to produce that effort. In general, the fitter you are, the better the efficiency between your energy input and output. Muscle load is calculated based on power and duration. In case of running, also your weight counts.
Muscle Load is calculated from your power data, so you only get a Muscle Load value for your running
workouts, and cycling sessions if you’re using a separate cycling power sensor.
TRAINING LOAD FROM A SINGLE SESSION
Your Training Load from a single session is shown in the summary of your training session on your
watch, in the Flow app and in the Flow web service.
You'll get an absolute training load number for each measured load. The higher the load, the more strain
it caused to your body. In addition, you can see a visual bullet scale interpretation and a verbal description of how hard your training load from the session was compared to your 90 days training load average.
49
Page 50

The scale of bullets and verbal descriptions adapts according to your progress: the smarter you train, the
higher loads you tolerate. As your fitness and tolerance for training improves, a training load that was
ranked worth 3 bullets (Medium) a couple of months ago, could rank for only 2 bullets (Low) later on.
This adaptive scale reflects the fact that the same kind of training session can have a different impact on
your body depending on your current condition.
Very high
High
Medium
Low
Very low
STRAIN AND TOLERANCE
In addition to the Cardio load from individual training sessions, the new Training Load Pro feature measures your short term Cardio load (Strain) and long term Cardio load (Tolerance).
Strain shows you how much you have strained yourself with training lately. It shows your average daily
load from the past 7 days.
Tolerance describes how prepared you are to endure cardio training. It shows your average daily load
from the past 28 days. To improve your tolerance for cardio training, you need to slowly increase your
training over a longer period of time.
CARDIO LOAD STATUS
Cardio load status looks at the relation between your Strain and Tolerance and based on that shows
you whether you are in a detraining, maintaining, productive or overreaching Cardio load status. You will
also get personalized feedback based on your status.
50
Page 51

Cardio load status guides you in evaluating the impact your training has on your body and how it affects
your progress. Knowing how your past training affects your performance today allows you to keep your
total training volume in control and optimizethe timing of training at different intensities. Seeing how
your training status changes after a session helps you understand how much load was caused by the session.
Cardio load status on your watch
In time view, use the UP and DOWN buttons to navigate to the Cardio Load Status watch face.
1. Cardio load status graph
2. Cardio load status
Overreaching (Load much higher than usual):
Productive (Load slowly increasing)
Maintaining (Load slightly lower than usual)
Detraining (Load way lower than usual)
3. The numeric value for your Cardio load status (=Strain divided
by Tolerance.)
4. Strain
5. Tolerance
6. Verbal description of your Cardio load status
LONG TERM ANALYSIS IN THE FLOW APP AND WEB SERVICE
In the Flow app and web service you can follow how your Cardio Load builds up over time and see how
your Cardio loads have varied over the past week or months. To view your Cardio Load Buildup in the
Flow app, tap the vertical three dots icon in the week summary (Cardio Load Status module) or in the
training summary (Training Load Pro module).
51
Page 52

52
Page 53

To view your Cardio load status and Cardio load buildup in the Flow web service, go to Progress > Car-
dio Load report.
The red bars illustrate the cardio load from your training sessions. The higher the bar, the harder the
session was on your cardio system.
The background colors show how hard a session was compared to your session average from the past
90 days, just like the scale of five bullets and verbal descriptions (Very low, Low, Medium, High, Very
high).
Strain shows how much you have strained yourself with training lately. It shows your average daily cardio load from the past 7 days.
Tolerance describes how prepared you are to endure cardio training. It shows your average daily cardio load from the past 28 days. To improve your tolerance for cardio training, slowly increase your
training over a longer period of time.
Learn more about the Polar Training Load Pro feature in this in-depth guide.
53
Page 54

RECOVERY PRO
Recovery Pro is a unique recovery tracking solution that lets you know if your cardio system is recovered
and ready for cardio training. In addition, it offers recovery feedback and training recommendations
based on your short and long-term training and recovery balance.
Recovery Pro works together with Training Load Pro that gives you a holistic view on how your training
sessions strain different systems. Recovery Pro then tells you how your body is coping with this strain,
and how it affects your daily readiness for cardio training, and short and long-term recovery.
Recovery and readiness for cardio training
Your cardio system’s recovery, which affects your daily readiness for cardio training is measured with the
Orthostatic test. Your heart rate variability values measured with the test are compared to your individual baseline to spot if there are any deviations from your averagerange.
Training and recovery balance
Recovery Pro combines your measured and subjective long-term recovery data with your long-term training load (Cardio Load) to monitor the balance between training and recovery. In addition to traininginduced factors affecting your recovery, Recovery Pro also takes into account other factors such as poor
sleep and mental stress with subjective recovery questions asking about your muscle soreness, how
strained you feel and how you slept.
Recovery feedback and daily training recommendation
With Recovery Pro you get feedback for both your cardio system’s current recovery and your longerterm training and recovery balance. Your daily personalized training recommendation is based on these
both. It takes into account your heart rate variability values from the Orthostatic test and your recovery
questions within your personal baseline and normal range for both together with your Cardio Load
status from your training sessions.
GET STARTED WITH RECOVERY PRO
When you start using Recovery Pro, you need to gather data for a while to build up your personal
baseline and typical range before we can give you accurate feedback on your recovery. Recovery feedback is available when:
l Your Cardio load status is available (you’ve done training sessions with heart rate monitoring on at
least three days)
l You’ve taken at least three Orthostatic tests in the previous seven-day window (You’ll need an H10
heart rate sensor for the Orthostatic test. If you already own an H6 or H7, you can also use either
54
Page 55

of them.)
l You have answered the perceived recovery questions three times in a seven-day window
1. Set Recovery feedback on
Start using the Recovery Pro featureby setting recovery feedback on. This is done on your watch. Go to
Settings > General Settings > Recovery feedback > Set Recovery feedback on/off, and set it on.
The Recovery Pro feature and the recovery feedback setting is available on your watch only, it is not
shown in the Flow web service or app.
2. Schedule an Orthostatic test for at least three mornings a week
When recovery feedback is set on, the watch asks you to schedule an Orthostatic test for at least three
mornings per week (e.g. on Mondays, Thursdays and Saturdays). For the most accurate recovery information, we recommend you take the Orthostatic test every morning if possible. By doing this you’ll get
your cardio system’s recovery information every day in addition to daily recovery feedback.
3. Take the Orthostatic test on the scheduled mornings
The Orthostatic test measures your heart rate and heart rate variability (HRV). Heart rate variability is
responsive to training overload and to stress outside of training. Its affected by stress factors such as
mental stress, sleep, latent illness and environmental changes (temperature, altitude) to mention a few.
Recovery Pro uses your resting heart rate variability (RMSSD rest) and standing heart rate variability
(RMSSD stand) measured with the test and compares them to your individual normal range. If your
heart rate variability values deviate from your normal range, this could mean that something is interfering with your recovery.
Your normal range is calculated from your individual mean and standard deviation of your test results
from the past four weeks. If you’ve taken the test more than four times during this period, standard deviation is calculated based in your own individual values. If you’ve taken the test less four than times during the past four weeks, the standard deviation is calculated based on population norms. At least one
test is result is needed during this four-week period.
The more frequently you take the test, the more accurate the results are. To make sure that your results
areas reliable as possible, perform the test in similar conditions every time – we recommend that you
take the test in the morning before breakfast.
In the evening before a scheduled test you’ll get a reminder about it. On the scheduled mornings, you’ll
get a notification to take the test. From the time view on your watch, swipe up from the bottom of the
display to view your notifications which include your Orthostatic test reminder. The test can be started
directly from the reminder. See detailed instructions for taking the Orthostatic test here.
4. Answer the recovery questions daily
55
Page 56

Your watch will ask the recovery questions via a reminder every day, whether there is an Orthostatic test
scheduled for the day or not. From the time view on your watch, swipe up from the bottom of the display to view your notifications which include your recovery question reminder. On days you have an
Orthostatic test, the recovery questions pop up on your watch straight after the test. The questions can
also be answered on the Flow mobile app. Ideally, they should be answered about 30 minutes after waking up.
The questions are designed to help establish if anything is affecting your recovery. Some examples of
factors affecting recovery are excessive muscle fatigue, mental pressure or maybe just a bad night’s
sleep. See the recovery questions below:
l Are your muscles more sore than usual? No, Somewhat, Much more
l Are you feeling more strained than usual? No, Somewhat, Much more
l How did you sleep? Very well, Well, Okay, Poorly, Very poorly.
VIEW YOUR RECOVERY FEEDBACK
Recovery feedback is viewed on your watch. You can conveniently see your daily training recommendation on the Cardio Load status view on your watch face. Swipe left/right or scroll with the UP/
DOWN buttons until you reach it.
1. Press the display or press the OK button to see more details. First, you’ll see your Cardio Load
status (Detraining, Maintaining, Productive or Overreaching), which is a part of Training Load Pro.
When you’ve gathered enough recovery data you’ll see your daily training recommendation on
this view.
2. Swipe or scroll down with the buttons to Recovery feedback. Tap More or press the OK button to
view moredetailed recovery feedback. It’s made up of:
56
Page 57

An icon illustrating your readiness for cardio training today that reflects the daily training recommendation stating how we advise you to train. An increased injury or illness alert icon replaces the training advice icon when your risk for injury or illness is increased. The short training advice can be:
Daily feedback stating if your cardio system is recovered or not*, followed by your daily training recommendation based on that day’s Orthostatic test result, and if available, your recovery question answers
and your history for these together with your training data (Cardio Load) over a longer period of time.
The recommendation can contain a warning about an increased risk of overtraining, or it can alert you
about an increased injury and illness risk.
*To know if your cardio system is recovered or not you need to perform the Orthostatic test on that
day.
Feedback about your long-term training habits and recovery. This can contain information about how
you’re responding to training, if you’ve been training more than or less than usual or if you’re at risk to
57
Page 58

get injured or fall ill because you’ve been training more than usual. It can also contain feedback if you
seem to have too much stress from something else than training. Your long-term feedback is based on:
l Your average mood score of past of the seven days calculated from your perceived recovery ques-
tion answers
l Your seven-day rolling average of your heart rate variability values measured with the Orthostatic
test compared to your individual normal values from the past four weeks
l Your training history (Cardio Load status)
A disclaimer if we don’t have enough data yet to give you accurate feedback. The more you use this feature the more accurate recovery feedback you’ll get.
ORTHOSTATIC TEST
The Orthostatic test is a generally used tool for monitoring the balance between training and recovery. It
allows you to track how your body responds to training. In addition to training induced changes, there
aremany other factors that can affect your Orthostatic test results, such as mental stress, sleep, latent illness and environmental changes (temperature, altitude) to mention a few.
The test is based on measuring heart rate and heart rate variability. Changes in heart rate and heart rate
variability reflect changes in the autonomic regulation of the heart.
PERFORMING THE TEST
For the Orthostatic test, you need to use a Polar H10 heart rate sensor (an H6 orH7 heart rate sensor
can also be used if you have one). The test lasts for four minutes, and to make surethat your results are
as reliable as possible, you need to perform the test in similar conditions every time – we recommend
that you take the test in the morning before breakfast. Do the test regularly to establish your individual
baseline. Sudden deviations from your averages could signify that something is off-balance. See the
instructions below:
l Wear the heart rate sensor with the strap. Moisten the electrode area of the strap and wear the
strap snugly around your chest.
l You should be relaxed and calm.
l There should be no disturbing noises (for example, television, radio or telephone) or other people
talking to you.
l It is recommended to perform the test regularly and at the same time of day in the morning after
waking up to get comparable test results.
On your watch, choose Orthostatic test > Start the test with HR sensor. The watch starts searching for your heart rate. When your heart rate is found Lie down & relax is shown on the display.
58
Page 59

l You can be seated in a relaxed position or lying in bed. The position should always be the same
when you do the test.
l Do not move during this first part of the test, which lasts for two minutes.
l After two minutes, the watch will beep and Stand up is displayed. Stand up and remain standing
for another two minutes until the watch will beeps again, and the test is finished.
You can interrupt the test in any phase by pressing BACK. Test canceled is then displayed.
If your watch cannot receive your heart rate signal, Test failed is displayed. In which case, you should
check that the heart rate sensor electrodes are wet, and that the textile strap fits snugly.
Test results
The test gives you five different heart rate and heart rate variability values. These are:
l HR rest: Average heart rate when lying down
l HRV rest (RMSSD rest): Heart rate variability when lying down
l HR peak: This is the one highest heartbeat that occurs after you stand up.
l HR stand: Average heart rate when standing still.
l HRV stand (RMSSD stand): Heart rate variability when standing still
View your latest test result on your watch in Orthostatic test > Latest results. Only your most recent
result is shown, and only your first successful test for the day is taken into account as a part of Recovery
59
Page 60

Pro. The difference of your HR rest, HR peak and HR stand values to your averages are shown parentheses next to your latest result.
For a visual analysis of your Orthostatic test results, go to the Flow web service and choose the test from
your Diary to view details from it. You can also follow your test results in the long-term and spot any deviations from your baseline.
When you’ve performed at least two Orthostatic tests during 28-day period, you’ll get feedback on your
cardio system’s recovery on your watch after the test. The feedback is based on your heart rate variability values compared to population norms.
After performing at least four tests in a 28-day period your latest Orthostatic test result is compared to
your individual normal heart rate variability (RMMS) range. Your normal range is calculated from the
standard deviation of the test results from the past 4 weeks. As heart rate variability values are very individual, the accuracy of the test result becomes more accurate the more measurements are done.
60
Page 61

ORTHOSTATIC TEST WITH RECOVERY PRO
The Orthostatic test is also an integral part of the Recovery Pro feature in Vantage V that tells if your car-
diovascular system is recovered or not. It compares your Orthostatic test results to your baseline
gathered over time, and also takes into account your subjective recovery, as well as your long-term training history.
RUNNING POWER FROM THE WRIST
Running power is a great complement to heart rate monitoring – it helps you monitor the external load
of your running. Power responds to changes in intensity faster than your heart rate, which is why Running Power is a great guiding metric in interval and hill sessions. You can also use it to maintain a steady
effort level during your run, for example in a race.
The calculation is done with Polar’s proprietary algorithm, and it is based on your GPS and barometer
data. Your weight also affects the calculation, so make sure its up-to-date.
RUNNING POWER AND MUSCLE LOAD
Polar uses running power to calculate Muscle load, one parameter of Training Load Pro. Running causes
musculoskeletal stress, and Muscle load tells you how much your muscles and joints were strained during your training session. It shows the amount of mechanical work (kJ) that you produced during your
running sessions (and cycling sessions if you’re using a cycling power meter). Muscle load helps you
quantify your training load in high-intensity running training sessions, such as short intervals, sprints and
hill sessions, when your heart rate doesn’t have enough time to react to the changes in the intensity.
HOW RUNNING POWER IS SHOWN ON YOUR WATCH
Running power is automatically calculated for your running sessions done with running type sport profiles with GPS available.
Choose the power data you want to view during your sessions by customizing your training views in the
Flow web service sport profile settings.
During your run you can view the following data:
61
Page 62

l Maximum power
l Average power
l Lap power
l Maximum lap power
l Automatic lap power average
l Automatic lap power maximum
Choose how power is shown during sessions and in the Flow web service and app:
l Watts W
l Watts per kilogram W/kg
l Percentage of MAP (% of MAP)
After your session in the training summary on your watch you’ll see:
l Your average power as Watts
l Your maximum power as Watts
l Muscle Load
l Time spent in power zones
How running power is shown in the Polar web service and app
Detailed graphs for analysis are available in the Flow web service and app. See your power values from
your session, and how they were distributed compared to heart rate, and how incline, decline and different speeds affected them.
62
Page 63

POLAR RUNNING PROGRAM
Polar Running program is a personalized program based on your fitness level, designed to make sure
that you train right and avoid overreaching. It’s intelligent, and adapts based on your development, and
lets you know when it might be a good idea to cut back a little and when to step it up a notch. Each program is tailored for your event, taking your personal attributes, training background and preparation
time into account. The program is free, and available in the Polar Flow web service at www.-
polar.com/flow.
Programs are available for 5k, 10k, half marathon and marathon events. Each program has three
phases: Base building, Build-up and Tapering. These phases are designed to gradually develop your performance, and make sure you’re ready on race day. Running training sessions are divided into five types:
easy jog, medium run, long run, tempo run and interval. All sessions include warm-up, work, and cooldown phases for optimal results. In addition, you can choose to do strength, core, and mobility exercises
to support your development. Each training week consists of two to five running sessions, and the total
running training session duration per week varies from one to seven hours depending on your fitness
level. The minimum duration for a program is 9 weeks, and the maximum is 20 months.
63
Page 64

Learn more about the Polar Running Program in this in-depth guide. Or read more about how to get star-
ted with the Running Program.
To see a video, click on one of the following links:
Get Started
How to use
CREATE A POLAR RUNNING PROGRAM
1. Log into the Flow web service at www.polar.com/flow.
2. Choose Programs from the Tab.
3. Choose your event, name it, set the event date, and when you wish to start the program.
4. Fill in the physical activity level questions.*
5. Choose if you want to include supporting exercises in the program.
6. Read and fill in the physical activity readiness questionnaire.
7. Review your program, and adjust any settings if necessary.
8. When you’re done, choose Start program.
*If four weeks of training history is available, these will be pre-filled.
START A RUNNING TARGET
Before starting a session, make sure you’ve synced your training session target to your device. The sessions are synced to your device as training targets.
To start a training target scheduled for the current day:
1. Enter the pre-training mode by pressing and holding OK in time view.
2. You'll be prompted to start a training target you've scheduled for the day.
3. Press OK to view the target information.
4. Press OK to return to pre-training mode, and choose the sport profile you want to use.
64
Page 65

5. When the watch has found all the signals, press OK. Recording started is displayed and you can
start training.
FOLLOW YOUR PROGRESS
Sync your training results from your device to the Flow web service via the USB cable or Flow app. Follow
your progress from the Programs tab. You’ll see an overview of your current program, and how you’ve
progressed.
RUNNING INDEX
Running Index offers an easy way to monitor running performance changes. The Running index score is
an estimate of your maximal aerobic running performance (VO2max). By recording your Running Index
over time, you see how efficient your running is and how you improve your running performance.
Improvement means that running at a given pace requires less of an effort, or that your pace is faster at
a given level of exertion.
To receive the most accurate information on your performance, make sure you have set your HR
value.
Running Index is calculated during every training session when heart rate is measured and the GPS function is on/Stride Sensor is in use, and when the following requirements apply:
max
• Sport profile used is a running type sport (Running, Road Running, Trail running etc.)
• Speed should be 6 km/h / 3,75 mi/h or faster and duration 12 minutes minimum
Calculation begins when you start recording the session. During a session, you may stop twice, for
example, at traffic lights without interrupting the calculation.
You can view your Running Index in the summary of your training session on your watch. Follow your
progress and see race time estimations in the Polar Flow web service.
Compare your result to the table below.
SHORT-TERM ANALYSIS
Men
Age/Years Very low Low Fair Moderate Good Very good Elite
20-24 < 32 32-37 38-43 44-50 51-56 57-62 > 62
65
Page 66

Age/Years Very low Low Fair Moderate Good Very good Elite
25-29 < 31 31-35 36-42 43-48 49-53 54-59 > 59
30-34 < 29 29-34 35-40 41-45 46-51 52-56 > 56
35-39 < 28 28-32 33-38 39-43 44-48 49-54 > 54
40-44 < 26 26-31 32-35 36-41 42-46 47-51 > 51
45-49 < 25 25-29 30-34 35-39 40-43 44-48 > 48
50-54 < 24 24-27 28-32 33-36 37-41 42-46 > 46
55-59 < 22 22-26 27-30 31-34 35-39 40-43 > 43
60-65 < 21 21-24 25-28 29-32 33-36 37-40 > 40
Women
Age/Years Very low Low Fair Moderate Good Very good Elite
20-24 < 27 27-31 32-36 37-41 42-46 47-51 > 51
25-29 < 26 26-30 31-35 36-40 41-44 45-49 > 49
30-34 < 25 25-29 30-33 34-37 38-42 43-46 > 46
35-39 < 24 24-27 28-31 32-35 36-40 41-44 > 44
40-44 < 22 22-25 26-29 30-33 34-37 38-41 > 41
45-49 < 21 21-23 24-27 28-31 32-35 36-38 > 38
50-54 < 19 19-22 23-25 26-29 30-32 33-36 > 36
55-59 < 18 18-20 21-23 24-27 28-30 31-33 > 33
60-65 < 16 16-18 19-21 22-24 25-27 28-30 > 30
The classification is based on a literature review of 62 studies where VO
was measured directly in
2max
healthy adult subjects in the USA, Canada and 7 European countries. Reference: Shvartz E, Reibold RC.
Aerobic fitness norms for males and females aged 6 to 75 years: a review. Aviat Space Environ Med;
61:3-11, 1990.
There may be some daily variation in the Running Indexes. Many factors influence Running Index. The
value you receive on a given day is affected by changes in running circumstances, for example different
surface, wind or temperature, in addition to other factors.
66
Page 67

LONG-TERM ANALYSIS
The single Running Index values form a trend that predicts your success in running certain distances. You
can find your Running Index report in the Polar Flow web service under the PROGRESS tab. The report
shows you how your running performance has improved over a longer time period. If you're using the
Polar Running program to train for a running event, you can follow your Running Index progress to see
how your running is improving towards the goal.
The following chart estimates the duration that a runner can achieve in certain distances when performing maximally. Use your long-term Running Index average in the interpretation of the chart. The prediction is best for those Running Index values that have been received at speed and running
circumstances similar to the target performance.
Running
Index
36 1800 0:36:20 1:15:10 2:48:00 5:43:00
38 1900 0:34:20 1:10:50 2:38:00 5:24:00
40 2000 0:32:20 1:07:00 2:29:30 5:06:00
42 2100 0:30:40 1:03:30 2:21:30 4:51:00
44 2200 0:29:10 1:00:20 2:14:30 4:37:00
46 2300 0:27:50 0:57:30 2:08:00 4:24:00
48 2400 0:26:30 0:55:00 2:02:00 4:12:00
50 2500 0:25:20 0:52:40 1:57:00 4:02:00
52 2600 0:24:20 0:50:30 1:52:00 3:52:00
54 2700 0:23:20 0:48:30 1:47:30 3:43:00
56 2800 0:22:30 0:46:40 1:43:30 3:35:00
58 2900 0:21:40 0:45:00 1:39:30 3:27:00
Cooper test
(m)
5 km (h:m-
m:ss)
10 km (h:m-
m:ss)
21.098 km
(h:mm:ss)
42.195 km
(h:mm:ss)
60 3000 0:20:50 0:43:20 1:36:00 3:20:00
62 3100 0:20:10 0:41:50 1:32:30 3:13:00
64 3200 0:19:30 0:40:30 1:29:30 3:07:00
66 3300 0:18:50 0:39:10 1:26:30 3:01:00
68 3350 0:18:20 0:38:00 1:24:00 2:55:00
70 3450 0:17:50 0:36:50 1:21:30 2:50:00
67
Page 68

Running
Index
72 3550 0:17:10 0:35:50 1:19:00 2:45:00
74 3650 0:16:40 0:34:50 1:17:00 2:40:00
76 3750 0:16:20 0:33:50 1:14:30 2:36:00
78 3850 0:15:50 0:33:00 1:12:30 2:32:00
Cooper test
(m)
5 km (h:m-
m:ss)
10 km (h:m-
m:ss)
21.098 km
(h:mm:ss)
42.195 km
(h:mm:ss)
TRAINING BENEFIT
Training Benefit gives you textual feedback on the effect of each training session helping you to better
understand the effectiveness of your training. You can see the feedback in Flow app and Flow web
service. To get the feedback, you need to have trained at least a total of 10 minutes in the heart rate
zones.
Training Benefit feedback is based on heart rate zones. It reads into how much time you spend and how
many calories you burn in each zone.
The descriptions of different training benefit options are listed in the table below
Feedback Benefit
Maximum training+ What a session! You improved your sprint speed and the nervous system of your
muscles, which make you more efficient. This session also increased your resistance to fatigue.
Maximum training What a session! You improved your sprint speed and the nervous system of your
muscles, which make you more efficient.
Maximum & Tempo training
Tempo & Maximum training
Tempo training+ Great pace in a long session! You improved your aerobic fitness, speed, and ability
Tempo training Great pace! You improved your aerobic fitness, speed, and ability to sustain high
Tempo & Steady state
training
What a session! You improved your speed and efficiency. This session also significantly developed your aerobic fitness and your ability to sustain high intensity
effort for longer.
What a session! You significantly improved your aerobic fitness and your ability to
sustain high intensity effort for longer. This session also developed your speed
and efficiency.
to sustain high intensity effort for longer. This session also increased your resistance to fatigue.
intensity effort for longer.
Good pace! You improved your ability to sustain high intensity effort for longer.
This session also developed your aerobic fitness and the endurance of your
68
Page 69

Feedback Benefit
muscles.
Steady state & Tempo
training
Steady state training + Excellent! This long session improved the endurance of your muscles and your aer-
Steady state training Excellent! You improved the endurance of your muscles and your aerobic fitness.
Steady state & Basic training, long
Steady state & Basic training
Basic & Steady state training, long
Basic & Steady state training
Good pace! You improved your aerobic fitness and the endurance of your
muscles. This session also developed your ability to sustain high intensity effort
for longer.
obic fitness. It also increased your resistance to fatigue.
Excellent! This long session improved the endurance of your muscles and your aerobic fitness. It also developed your basic endurance and your body's ability to burn
fat during exercise.
Excellent! You improved the endurance of your muscles and your aerobic fitness.
This session also developed your basic endurance and your body's ability to burn
fat during exercise.
Great! This long session improved your basic endurance and your body's ability to
burn fat during exercise. It also developed the endurance of your muscles and
your aerobic fitness.
Great! You improved your basic endurance and your body's ability to burn fat during exercise. This session also developed the endurance of your muscles and your
aerobic fitness.
Basic training, long Great! This long, low intensity session improved your basic endurance and your
body's ability to burn fat during exercise.
Basic training Well done! This low intensity session improved your basic endurance and your
body's ability to burn fat during exercise.
Recovery training Very nice session for your recovery. Light exercise like this allows your body to
adapt to your training.
SMART CALORIES
The most accurate calorie counter on the market calculates the number of calories burned based on
your individual data:
• Body weight, height, age, gender
• Individual maximum heart rate (HR
max
)
• The intensity of your training or activity
• Individual maximal oxygen uptake (VO2
max
)
69
Page 70

The calorie calculation is based on an intelligent combination of acceleration and heart rate data. The caloriecalculation measures your training calories accurately.
You can see your cumulative energy expenditure (in kilocalories, kcal) during training sessions, and your
total kilocalories of the session after afterwards. You can also follow your total daily calories.
CONTINUOUS HEART RATE
The Continuous Heart Rate feature measures your heart rate around the clock. It enables a more accurate measurement of daily calorie consumption and your overall activity because also physical activities
with very little wrist movement, such as cycling, can now be tracked.
Polar’s Continuous Heart Rate tracking starts every few minutes or based on your wrist movements.
The timed measurement checks your heart rate every few minutes and if your heart rate is elevated during the check, the Continuous Heart Rate feature starts to track your heart rate. Continuous Heart Rate
tracking can also start based on your wrist movements, for example, when you’re walking with a fast
enough pace for at least one minute.
The continuous tracking of your heart rate stops automatically when your activity level drops low
enough. When your Polar device detects that you’ve been sitting for a long time, the Continuous Heart
Rate tracking starts in order to find the lowest heart rate reading of your day.
Continuous Heart Rate on your watch
You can turn the Continuous Heart Rate feature on and off on your watch in Settings > General settings > Continuous HR tracking.
The feature is off by default. Keeping the Continuous Heart Rate feature on in your watch will drain the
battery quicker.
In time view, use the UP and DOWN buttons to navigate to the Hear Rate watch face.
70
Page 71

You’ll be able to follow what are the highest and lowest heart rate readings
of your day and you can check what your lowest heart rate reading was
during the previous night.
You can follow the readings in more detail and in longer periods in Polar Flow, either in web or in the
mobile app.
Learn more about the Continuous Heart Rate feature in this in-depth guide.
POLAR SLEEP PLUS
TM
Your watch tracks your sleep if you wear it at night. It detects when you fall asleep and when you wake
up and collects the data for deeper analysis in the Polar Flow app and web service. The watch observes
your hand movement during the night to track all interruptions over the entire sleep span, and tells you
how much time you actually spent asleep.
Sleep data in the Flow app and web service
Your sleep data is shown in the Flow app and web service after your watch is synced. You can view the
timing, amount, and quality of your sleep. You can set Your preferred sleep time to define how long
you aim to sleep every night. You can also rate your sleep in the Flow app and web service. You will
receive feedback on how you slept based on your sleep data, your preferred sleep time and your sleep
rating.
In the Flow web service, you can view your sleep under the Sleep tab in your Diary. You can also include
your sleep data to Activity reports under the Progress tab.
71
Page 72

By following your sleep patterns you can see if they’re affected by any changes in your daily life and find
the right balance between rest, daily activity and training.
Learn more about the Polar Sleep Plus in this in-depth guide.
24/7 ACTIVITY TRACKING
The Polar Vantage V tracks your activity with an internal 3D accelerometer that records your wrist movements. It analyzes the frequency, intensity and regularity of your movements together with your physical information, allowing you to see how active you really are in your everyday life, on top of your
regular training. You should wear your watch on your non-dominant hand to ensure you get the most
accurate activity tracking.
ACTIVITY GOAL
You'll get your personal activity goal when you set up your watch. The activity goal is based on your personal data and activity level setting, which you can find in the Polar Flow app or in the Polar Flow web ser-
vice.
If you want to change your goal, open your Flow app, tap your name/profile photo in the menu view,
and swipe down to see Activity goal. Or go to flow.polar.com and sign in to your Polar account. Then
click your name > Settings > Activity goal. Choose one of the three activity levels that best describes
your typical day and activity. Below the selection area, you can see how active you need to be to reach
your daily activity goal on the chosen level. For example, if you'rean office worker and spend most of
your day sitting, you would be expected to reach about four hours of low intensity activity during an
ordinary day. For people who stand and walk a lot during their working hours, the expectations are
higher.
The time you need to be active during the day to reach your activity goal depends on the level you have
chosen and the intensity of your activities. Meet your goal faster with more intense activities or stay active at a slightly more moderate pace throughout the day. Ageand gender also affect the intensity you
need to reach your activity goal. The younger you are, the more intense your activity needs to be.
ACTIVITY DATA ON YOUR WATCH
In time view, use the UP and DOWN buttons to navigate to the Activity watch face.
72
Page 73

The circle around the watch face and the percentage below time and date
show your progress towards your daily activity goal. The circle fills with light
blue color as you are active.
In addition, you can see the following details of your day’s accumulated activity:
• Steps you've taken so far. The amount and type of body movements
areregistered and turned into an estimation of steps.
• Active time tells you the cumulative time of body movements that
benefit your health.
• Calories you've burned through training, activity and BMR (Basal
metabolic rate: the minimum metabolic activity required to maintain
life).
ACTIVITY DATA IN FLOW APP AND FLOW WEB SERVICE
With Flow app you can follow and analyze your activity data on the go and sync it wirelessly from your
watch to the Flow web service. The Flow web service gives you the most detailed insight into your activity
information. With the help of the activity reports (under the PROGRESS tab), you can follow the longterm trend of your daily activity. You can chooseto view either daily, weekly or monthly reports.
Learn more about the 24/7 Activity tracking feature in this in-depth guide.
ACTIVITY GUIDE
The Activity Guide feature shows how active you've been during the day, and tells you how much you
need to still do to reach the recommendations for physical activity per day. You can check how you’re
doing in reaching your activity goal for the day either from your watch, from the Polar Flow app or web
service.
For more information, see 24/7 Activity Tracking.
ACTIVITY BENEFIT
Activity benefit gives you feedback on the health benefits that being active has given you, and also on
what kind of unwanted effects sitting for too long has caused for your health. The feedback is based on
73
Page 74

international guidelines and research on the health effects of physical activity and sitting behavior. The
core idea is: the more active you are, the more benefits you get!
Both Flow app and Flow web service show the activity benefit of your daily activity. You can view the
activity benefit on daily, weekly and monthly basis. In the Flow web service, you can also view the
detailed information on health benefits.
For more information, see 24/7 Activity Tracking.
SPORT PROFILES
Sport profiles are the sport choices you have on your watch. We have created four default sport profiles
to your watch, but you can add new sport profiles to your use in the Polar Flow app or web service and
sync them to your watch, and this way create a list of all your favorite sports.
You can also define specific settings for each sport profile. For example, you can create tailored training
views for each sport you do and choosewhat data you want to see when you train: just your heart rate
or just speed and distance—whatever suits you and your training needs and requirements best.
You can have a maximum of 20 sport profiles on your watch at a time. The number of sport profiles in
Polar Flow mobile app and Polar Flow web service is not limited.
For more information, see Sport Profiles in Flow.
Using the sport profiles makes it possible for you to keep up with what you've done and to see the progress you've made in different sports. See your training history and follow your progress in the Flow web
service.
74
Page 75

HEART RATE ZONES
Polar heart rate zones introduce a new level of effectiveness in heart rate-based training. Training is
divided into five heart rate zones based on percentages of maximum heart rate. With heart rate zones,
you can easily select and monitor training intensities.
Target zone Intensity %
of HR
max
Example:
*
Heart rate
zones**
MAXIMUM 90–100% 171–190
bpm
HARD 80–90% 152–172
bpm
Example
durations
less than 5
minutes
2–10
minutes
Training effect
Benefits: Maximal or near maximal
effort for breathing and muscles.
Feels like: Very exhausting for breathing
and muscles.
Recommended for: Very experienced
and fit athletes. Short intervals only, usually in final preparation for short events.
Benefits: Increased ability to sustain high
speed endurance.
Feels like: Causes muscular fatigue and
heavy breathing.
Recommended for: Experienced athletes for year-round training, and for various durations. Becomes more important
during pre competition season.
MODERATE 70–80% 133–152
bpm
LIGHT 60–70% 114-133 40–80 Benefits: Improves general base fitness,
10–40
minutes
Benefits: Enhances general training pace,
makes moderate intensity efforts easier
and improves efficiency.
Feels like: Steady, controlled, fast breathing.
Recommended for: Athletes training for
events, or looking for performance gains.
75
Page 76

Target zone Intensity %
of HR
max
*
Example:
Heart rate
Example
durations
Training effect
zones**
bpm minutes improves recovery and boosts metabolism.
Feels like: Comfortable and easy, low
muscle and cardiovascular load.
Recommended for: Everybody for long
training sessions during base training
periods and for recovery exercises during competition season.
VERY LIGHT 50–60% 104–114
bpm
* HR
= Maximum heart rate (220-age).
max
20–40
minutes
Benefits: Helps to warm up and cool down
and assists recovery.
Feels like: Very easy, little strain.
Recommended for: For recovery and
cool-down, throughout training season.
** Heart rate zones (in beats per minute) for a 30-year-old person, whose maximum heart rate is 190
bpm (220–30).
Training in heart rate zone 1 is done at a very low intensity. The main training principle is that performance improves when recovering after, and not only during training. Accelerate the recovery process
with very light intensity training.
Training in heart rate zone 2 is for endurance training, an essential part of any training program. Training
sessions in this zone are easy and aerobic. Long-duration training in this light zone results in effective
energy expenditure. Progress will require persistence.
Aerobic power is enhanced in heart rate zone 3. The training intensity is higher than in sport zones 1 and
2, but still mainly aerobic. Training in sport zone 3 may, for example, consist of intervals followed by
recovery. Training in this zone is especially effective for improving the efficiency of blood circulation in
the heart and skeletal muscles.
76
Page 77

If your goal is to compete at top potential, you will have to train in heart rate zones 4 and 5. In these
zones, you exercise anaerobically in intervals of up to 10 minutes. The shorter the interval, the higher the
intensity. Sufficient recovery between intervals is very important. The training pattern in zones 4 and 5 is
designed to producepeak performance.
The Polar target heart rate zones can be personalized by using a laboratory measured HRmax value, or
by taking a field test to measure the value yourself. You can edit the heart rate zone limits separately on
each sport profile you have on your Polar account in the Polar Flow web service.
When training in a target heart rate zone, try to make use of the entire zone. The mid-zone is a good target, but keeping your heart rate at that exact level all the timeis not necessary. Heart rate gradually
adjusts to training intensity. For instance, when crossing from heart rate target zone 1 to 3, the circulatory system and heart rate will adjust in 3-5 minutes.
Heart rate responds to training intensity depending on factors such as fitness and recovery levels, as well
as environmental factors. It is important to look out for subjective feelings of fatigue, and to adjust your
training program accordingly.
SPEED ZONES
With the speed/pace zones you can easily monitor speed or pace during your session, and adjust your
speed/pace to achieve the targeted training effect. The zones can be used to guide the efficiency of your
training during sessions, and help you mix up your training with different training intensities for optimal
effects.
SPEED ZONES SETTINGS
The speed zone settings can be adjusted in the Flow web service. There are five different zones, and zone
limits can be manually adjusted or you can use the default ones. They are sport specific, allowing you to
adjust the zones to best suit each sport. The zones are available in running sports (including team sports
that involve running), cycling sports as well as rowing and canoeing.
Default
If you choose Default, you cannot change the limits. The default zones are an example of speed/pace
zones for a person with a relatively high fitness level.
Free
If you choose Free, all limits can be changed. For example, if you have tested your actual thresholds,
such as anaerobic and aerobic thresholds, or upper and lower lactate thresholds, you can train with
zones based on your individual threshold speed or pace. We recommend that you set your anaerobic
77
Page 78

threshold speed and pace as the minimum for zone 5. If you also use aerobic threshold, set that as the
minimum of zone 3.
TRAINING TARGET WITH SPEED ZONES
You can create training targets based on speed/pace zones. After synchronizing the targets via FlowSync,
you’ll receive guidance from your training device during training.
DURING TRAINING
During your training you can view which zone you are currently training in and the time spent in each
zone.
AFTER TRAINING
In the training summary on your watch, you'll see an overview of the time spent in each speed zone.
After syncing, detailed visual speed zone information can be viewed in the Flow web service.
SPEED AND DISTANCE FROM THE WRIST
Your watch measures speed and distance from your wrist movements with a built-in accelerometer. This
feature comes in handy when running indoors or in places with limited GPS signals. For maximum accuracy make sure you’ve set your handedness and height correctly. Speed and distance from the wrist
works best when running at a pace that is natural and feels comfortable for you.
Wear your watch snugly on your wrist to avoid any shaking. To get consistent readings it should always
be worn on the same position on your wrist. Avoid wearing any other devices like watches, activity trackers or phone armbands on the same arm. In addition, do not hold anything in the same hand like a map
or a phone.
Speed and distance from the wrist is available in the following running type sports: Walking, Running, Jogging, Road running, Trail running, Treadmill running, Track and field running and Ultra running. To see
speed and distance during a training session, make sure you have speed and distance added to the training view of the sport profile you use when running. This can be done in Sport Profiles in the Polar Flow
mobile app or in the Flow web service.
CADENCE FROM THE WRIST
Cadence from the wrist gives you the option to get your running cadencewithout a separate stride
sensor. Your cadence is measured with a built-in accelerometer from your wrist movements. Please note
that when using a stride sensor cadence will always be measured with it.
78
Page 79

Cadence from the wrist is available in the following running type sports: Walking, Running, Jogging, Road
running, Trail running, Treadmill running, Track and field running and Ultra running.
To see your cadence during a training session, add cadence to the training view of the sport profile you
use when running. This can be done in Sport Profiles in the Polar Flow mobile app or in the Flow web
service.
Read more about monitoring running cadence and how to utilize running cadence in your training.
SWIMMING METRICS
Swimming metrics help you analyze each swimming session, and follow your performance and progress
in the long run.
To get the most accurate information, make sure your have set which hand you wear your watch on.
You can check that you’ve set which hand you wear your watch from the product settings in Flow.
POOL SWIMMING
When using the Swimming or Pool swimming profile, the watch records your swim distance, time and
pace, stroke rate, rest times and also identifies your swimming style. In addition, with the help of the
SWOLF score you can keep track of your development.
Pace and Distance:The pace and distancemeasurements are based on pool length, therefore to get
accurate data always make sure you have set the correct pool length. Your watch recognizes when you
turn, and uses this information to give you accurate pace and distance.
Strokes:Your watch tells you how many strokes you take in a minute or per pool length. This information can be used to find out more about your swimming technique, rhythm and timing.
Swimming Styles: Your watch recognizes your swimming style, and calculates style specific metrics as
well as totals for your whole session. Styles the watch recognizes:
l Freestyle
l Backstroke
l Breaststroke
l Butterfly
SWOLF (short for swimming and golf) is an indirect measure of efficiency. SWOLF is calculated by adding
together your time and the amount of strokes it takes you to swim a pool length. For instance, 30
seconds and 10 strokes to swim the length of a pool will equal a SWOLF score of 40. Generally, the lower
your SWOLF is for a certain distance and style, the more efficient you are.
79
Page 80

SWOLF is highly individual, and thus should not be compared to SWOLF scores other people have swam.
It’s rather a personal tool that can help you improve and fine-tune your technique, and find an optimal
efficiency for different styles.
POOL LENGTH SETTING
It’s important that you choose the correct pool length, as it affects pace, distance and stroke calculation,
as well as your SWOLF score. The default lengths are 25 meters, 50 meters and 25 yards, but you can
also set it manually to a custom length. The minimum length that can be chosen is 20 meters/yards.
The chosen pool length is shown in pre-training mode. To change the pool length, press LIGHT to access
the Pool length setting and set the correct length.
OPEN WATER SWIMMING
When using the Open water swimming profile, the watch records your swim distance, time and pace,
stroke rate for freestyle as well as your route.
Freestyle is the only style that the open water swimming profile recognizes.
Pace and Distance: Your watch uses GPS to calculate pace and distance during your swim.
Stroke rate for freestyle:Your watch records your average and maximum stroke rates (how many
strokes you take per minute) for your session.
Route: Your route is recorded with GPS, and you can view it on a map after your swim in the Flow app
and web service. GPS does not work underwater, and because of this your route is filtered from GPS
data acquired when your hand is out of the water or very close to the water surface. External factors
such as water conditions and satellite positions can affect the accuracy of the GPS data, and as a result
data from the same route can vary from day to day.
MEASURING HEART RATE IN WATER
Your watch automatically measures your heart rate from your wrist with the new Polar Precision Prime
sensor fusion technology, offering an easy and comfortable way to measure your heart rate while swimming. Although water may prevent the wrist-based heart rate measurement from working optimally, the
accuracy of Polar Precision Prime is sufficient to allow you monitor your average heart rate and heart
rate zones during your swimming sessions, get accurate calorie burn readings, your Training Load from
the session and the Training Benefit feedback based on your heart rate zones.
80
Page 81

To ensure the best possible accuracy of your heart rate data, it’s important to wear the watch snugly on
your wrist (even more snugly than in other sports). See Training with wrist based heart rate for instruc-
tions on wearing your watch during training.
Note that you can't use a Polar heart rate sensor with a chest strap with your watch when swimming
because Bluetooth doesn't work in water.
START A SWIMMING SESSION
1. Press BACK to enter the main menu, choose Start training, and then browse to the Swimming,
Pool swimming or Open water swimming profile.
2. When using the Swimming/Pool swimming profile, check that the pool length is correct
(shown on the display). To change the pool length, press LIGHT to access the Pool length setting
and set the correct length.
3. Press START to begin training recording.
DURING YOUR SWIM
You can customize what is shown on the display in the sport profiles section in the Flow web service. The
default training views in the swimming sport profiles the following information:
l Your heart rate and the heart rate ZonePointer
l Distance
l Duration
l Rest time (Swimming and Pool swimming)
l Pace (Open water swimming)
l Heart rate graph
l Average heart rate
l Maximum heart rate
l Time of day
AFTER YOUR SWIM
An overview of your swimming data is available in the training summary on your watch right after your
session. You can see the following information:
81
Page 82

The date and time when your session started
The duration of the session
Swimming distance
Average heart rate
Maximum heart rate
Cardio Load
Heart rate zones
Calories
Fat burn % of calories
Average pace
Maximum pace
82
Page 83

Stroke rate (how many strokes you take per minute)
l Average stroke rate
l Maximum stroke rate
Summary by swimming style, which includes:
l Swimming distance
l Average pace (pace/100 meters or pace/100 yards)
l SWOLF (pool swimming)
Sync your watch with Flow for a more detailed visual representation of your swim including a detailed
breakdown of your pool swimming sessions, your heart rate, pace and stroke rate curves.
BAROMETER
The barometer features include altitude, incline, decline, ascent and descent. Altitude is measured with
an atmospheric air pressure sensor and converts the measured air pressure into an altitude reading.
Ascent and descent are shown in meters/feet.
CHANGEABLE WRISTBANDS
The changeable wristbands let you personalize your watch to match every situation and style so you can
wear it all the time and make the best use of the 24/7 activity tracking, continuous heart rate measurement and sleep tracking.
CHANGING THE WRISTBAND
The wristband of your watch is quick and simple to change.
1. To detach a band, push the pin out of the strap with the tool that came in the package, and
remove the band.
2. To attach a band, insert the pin from the opposite side into the pin hole on the band and push it
into place.
83
Page 84

COMPATIBLE SENSORS
Enhance your training experience, and achieve a more complete understanding of your performance
with compatible Bluetooth® sensors. In addition to a number of Polar sensors your watch is fully compatible with several third-party sensors.
View a full list of compatible Polar sensors and accessories
View compatible third-party sensors
Before taking a new sensor into use, it has to be paired with your watch. Pairing only takes a few
seconds, and ensures that your watch receives signals from your sensors only, and allows disturbance-
84
Page 85

free training in a group. Before entering an event or race, make sure that you do the pairing at home to
prevent interference due to data transmission. For instructions, see Pairing sensors with your watch.
POLAR H10 HEART RATE SENSOR
Monitor your heart rate with maximum precision with the Polar H10 heart rate sensor with a chest strap.
Although the Polar Precision Prime is the most accurate optical heart rate measurement technology
there is and works pretty much anywhere, in sports where it's more challenging to keep the sensor stationary on your wrist or where you have pressure or movement in muscles or tendons near the sensor,
the Polar 10 heart rate sensor gives you the best heart rate accuracy. The Polar H10 heart rate sensor is
more responsive to rapidly increasing or decreasing heart rate, so it’s the ideal option also for interval
type of training with quick sprints.
The Polar H10 heart rate sensor has an internal memory that allows you to record one training session
with it without a connected training device or a mobile training app close by. You just need to pair the
H10 heart rate sensor with the Polar Beat app and start the training session with the app. This way, you
can for example record your heart rate from your swimming sessions with the Polar H10 heart rate
sensor. For more information see the support pages for Polar Beat and Polar H10 heart rate sensor.
When using the Polar H10 heart rate sensor during your cycling sessions, you can have your watch mounted to your bike’s handlebars to easily view your training data while riding.
POLAR SPEED SENSOR BLUETOOTH® SMART
There are a range of factors that can affect your cycling speed. Obviously fitness is one of them, however, weather conditions and the varying gradients of the road play a huge part too. The most advanced
way of measuring how these factors affect your performance speed is with the aerodynamic speed
sensor.
l Measures your current, average and maximum speeds
l Track your average speed to see your progress and performance improve
l Light yet tough, and easy to attach
POLAR CADENCE SENSOR BLUETOOTH® SMART
The most practical way of measuring your cycling session is with our advanced wireless cadence sensor.
It measures your real-time, average and maximum cycling cadence as revolutions per minute so you can
compare the technique of your ride against previous rides.
l Improves your cycling technique and identifies your optimal cadence
l Interference-freecadence data lets you evaluate your individual performance
l Designed to be aerodynamic and light
85
Page 86

THIRD-PARTY POWER SENSORS
Cycling Power
Measuring your cycling power helps you to monitor and develop your cycling performance and pedaling
technique. Unlike heart rate, power output is an absolute and objective value of effort. This means that
you can also compare your power values with your fellow cyclists who are of the same sex and about the
same size as you are; or compare watts per kilogram for the most reliable results. Seeing how your heart
rate corresponds to the power zones also gives more insight.
PAIRING SENSORS WITH YOUR WATCH
PAIR A HEART RATE SENSOR WITH YOUR WATCH
When you're wearing a Polar heart rate sensor that's paired with your watch, the watch does not
measure heart rate from the wrist.
There are two ways to pair a heart rate sensor with your watch:
1. Wear the moistened heart rate sensor.
2. On your watch, go to General Settings > Pair and sync >
Pair sensor or other device and press OK.
3. Touch your heart rate sensor with your watch and wait for it
to be found.
4. Once the heart rate sensor is found, the device ID, for
example, Polar H10xxxxxxxx is displayed. Press OK to
start pairing.
5. Pairing completed is displayed when you are done.
OR
1. Wear the moistened heart rate sensor.
2. On your watch, press BACK to enter the main menu and
choose Start training to enter pre-training mode.
3. Touch your heart rate sensor with your watch and wait for it to be found.
86
Page 87

4. You'll be prompted to pair your watch with the sensor. Accept the pairing request by pressing OK.
5. Pairing completed is shown when you are done.
PAIR A RUNNING SENSOR WITH YOUR WATCH
1. On your watch, go to General Settings > Pair and sync > Pair sensor or other device and
press OK.
2. The watch starts searching for your sensor. Touch your sensor with watch, and wait for it to be
found.
3. Once the sensor is found, the device ID is displayed. Press OK to start pairing.
4. Pairing completed is displayed when you are done.
OR
1. On your watch, press BACK to enter the main menu and choose Start training to enter pre-training mode.
2. Touch your running sensor with your watch and wait for it to be found.
3. You'll be prompted to pair your watch with the sensor. Accept the pairing request by pressing OK.
4. Pairing completed is shown when you are done.
PAIR A CYCLING SENSOR WITH YOUR WATCH
Before pairing a cadence sensor, speed sensor or a third-party power sensor, make sure they have been
correctly installed. For more information on installing the sensors see their user manuals.
If you are pairing a third-party power sensor, please make sure that you have the latest firmware both
in your watch and the sensor. If you have two power transmitters, you need to pair the transmitters one at
a time. After pairing the first transmitter, you can immediately pair the second one. Check the device ID on
the backside of each transmitter to make sure you find the correct transmitters from the list.
1. There are two ways to pair a sensor with your watch:
2. On your watch, go to General Settings > Pair and sync > Pair sensor or other device and
press OK.
3. The watch starts searching for your sensor. Cadence sensor: Rotate the crank a few times to
activate the sensor. The flashing red light in the sensor indicates that the sensor is activated.
Speed sensor: Rotate the wheel a few times to activate the sensor. The flashing red light in the
sensor indicates that the sensor is activated. Third-party power sensor:Rotate the cranks to
wake up the transmitters.
4. Once the sensor is found, the device ID is displayed. Press OK to start pairing.
5. Pairing completed is shown when you are done.
OR
87
Page 88

1. On your watch, press BACK to enter the main menu and choose Start training to enter pre-train-
ing mode.
2. The watch starts searching for your sensor. Cadence sensor: Rotate the crank a few times to
activate the sensor. The flashing red light in the sensor indicates that the sensor is activated.
Speed sensor: Rotate the wheel a few times to activate the sensor. The flashing red light in the
sensor indicates that the sensor is activated. Third-party power sensor:Rotate the cranks to
wake up the transmitters.
3. You'll be prompted to pair your watch with the sensor. Accept the pairing request by pressing OK.
4. Pairing completed is shown when you are done.
Bike settings
1. Sensor linked to: is displayed. Choose Bike 1, Bike 2 or Bike 3. Confirm with OK.
2. Set wheel size is displayed if you paired a speed sensor or a power sensor that measures speed.
Set the size and press OK.
3. Crank length: Set the crank length in millimeters. The setting is visible only if you paired a power
sensor.
Measuring wheel size
Wheel sizesettings are a prerequisite for correct cycling information. There are two ways of determining
the wheel size of your bike:
Method 1
l Measure the wheel manually for the most accurate result.
l Usethe valve to mark the point where the wheel touches the ground. Draw a line on the ground
to mark that point. Move your bike forward on a flat surface for one complete rotation. The tire
should be perpendicular to the ground. Draw another line on the ground at the valve to mark a
full rotation. Measure the distance between the two lines.
l Subtract 4 mm to account for your weight on the bike to get your wheel circumference.
Method 2
Look for the diameter in inches or in ETRTO printed on the wheel. Match it to the wheel size in millimeters in the right column of the chart.
ETRTO Wheel size diameter (inches) Wheel size setting (mm)
25-559 26 x 1.0 1884
23-571 650 x 23C 1909
35-559 26 x 1.50 1947
88
Page 89

ETRTO Wheel size diameter (inches) Wheel size setting (mm)
37-622 700 x 35C 1958
52-559 26 x 1.95 2022
20-622 700 x 20C 2051
52-559 26 x 2.0 2054
23-622 700 x 23C 2070
25-622 700 x 25C 2080
28-622 700 x 28 2101
32-622 700 x 32C 2126
42-622 700 x 40C 2189
47-622 700 x 47C 2220
Wheel sizes on the chart are advisory as wheel size depends on the wheel type and air pressure.
DELETE A PAIRING
To delete a pairing with a sensor or mobile device:
1. Go to Settings > General settings > Pair and sync > Paired devices and press OK.
2. Choose the device you want to remove from the list and press OK.
3. Remove pairing? is displayed. Confirm by pressing OK.
4. Pairing removed is displayed when you are done.
89
Page 90

POLAR FLOW
Polar Flow App 90
Training data 90
Activity data 90
Sleep data 91
Sport profiles 91
Image sharing 91
Start using the Flow app 91
Polar Flow Web Service 92
Feed 92
Diary 92
Progress 92
Community 93
Programs 93
Sport profiles in Polar Flow 93
Add a sport profile 94
Edit a sport profile 95
Planning your training 97
Create a training target in the Polar Flow web service 97
Sync the targets to your watch 98
Syncing 99
Sync with Flow mobile App 99
Sync With Flow Web Service Via FlowSync 99
POLAR FLOW APP
In the Polar Flow mobile app, you can see an instant visual interpretation of your training and activity
data. You can also plan your training in the app.
TRAINING DATA
With the Polar Flow app, you can easily access the information of your past and planned training sessions and create new training targets. You can choose to create a quick target or a phased target.
Get a quick overview of your training, and analyze every detail of your performance right away. See
weekly summaries of your training in the training diary. You can also share the highlights of you training
with your friends with the "Image sharing" on the next page function.
ACTIVITY DATA
See details of your 24/7 activity. Find out how much you're missing from your daily activity goal and how
to reach it. See steps, covered distance based on steps and burned calories.
90
Page 91

SLEEP DATA
Follow your sleeping patterns to see if they’re affected by any changes in your daily life and find the right
balance between rest, daily activity and training. With the Polar Flow app, you can view the timing,
amount, and quality of your sleep.
You can set your preferred sleep time to define how long you aim to sleep every night. You can also rate
your sleep. You'll receive feedback on how you slept based on your sleep data, your preferred sleep time
and your sleep rating.
SPORT PROFILES
You can add, edit, remove and reorganize sport profiles easily in the Flow app. You can have up to 20
sport profiles active in Flow app and in your watch.
For more information, see Sport profiles in Polar Flow.
IMAGE SHARING
With Flow app's image sharing function you can share images with your training data on them to most
common social media channels, like Facebook and Instagram, with your training data on them. You can
either share an existing photo or take a new one and customize it with your training data. If you had GPS
recording on during your training session, you can also share a snapshot of your training route.
To see a video, click on the following link:
Polar Flow app | Sharing training results with a photo
START USING THE FLOW APP
You can set up your watch using a mobile device and Flow app.
To start using the Flow app, download it from the App Store or Google Play onto your mobile device. For
support and more information about using Polar Flow app, go to support.polar.com/en/support/Flow_
app.
Before taking a new mobile device (smartphone, tablet) into use, it has to be paired with your watch. See
Pairing for more details.
Your watch syncs your training data to the Flow app automatically after your session. If your phone has
an internet connection, your activity and training data are also synced automatically to the Flow web ser-
91
Page 92

vice. Flow app is the easiest way to sync your training data from your watch with the web service. For
information on syncing, see Syncing.
For more information and instructions on Flow app features, visit Polar Flow app product support page.
POLAR FLOW WEB SERVICE
In the Polar Flow web service, you can plan and analyze your training in detail and learn more about your
performance. Set up and customize your watch to perfectly fit your training needs by adding sport profiles and editing their settings. You can also share the highlights of you training with your friends in the
Flow community, sign up for your club's classes and get a personalized training program for a running
event.
The Polar Flow web service also shows your daily activity goal completion percentage and the details of
your activity, and helps you understand how your daily habits and choices affect your well-being.
You can set up your watch with your computer at flow.polar.com/start. There you are guided to down-
load and install the FlowSync software for syncing data between your watch and the web service, and to
create a user account for the web service. If you did the setup using a mobile device and Flow app, you
can log into the Flow web service with the credentials you created in the setup.
FEED
In Feed you can see what you and your friends have been up to lately. Check out the latest training sessions and activity summaries, shareyour best achievements, comment and like your friends' activities.
DIARY
In Diary you can see your daily activity, sleep, planned training sessions (training targets), as well as
review past training results.
PROGRESS
In Progress you can follow your development with reports.
Training reports are a handy way to follow your progress in training over longer periods. In week, month
and year reports you can choose the sport for the report. In custom period, you can choose both the
period and the sport. Choose the time period and sport for report from the drop-down lists, and press
the wheel icon to choose what data you want to view in the report graph.
92
Page 93

With the help of the activity reports, you can follow the long-term trend of your daily activity. You can
choose to view either daily, weekly or monthly reports. In the activity report you can also see your best
days regarding daily activity, steps, calories and sleep from your chosen time period.
The Running Index report is a tool to help you monitor your long term Running Index development, and
estimate your success in running 10k or a half marathon for example.
In the Cardio Load report you can follow how your Cardio Load builds up over time and see how your
training loads have varied over the past week or months. Following your Cardio Load buildup helps you
understand how your past training affects your performance today, plan future training and continue
improving your fitness.
COMMUNITY
In the Flow Groups, Clubs and Events you can find fellow exercisers who train for the same event or in
the same health club as you do. Or you can create your own group for the people you want to train with.
You can share your exercises and training tips, comment other members’ training results and be part of
the Polar Community. In Flow Clubs you can view class schedules and sign up for classes. Join in and get
motivation from your social training communities!
To see a video, click on the following link:
Polar Flow Events
PROGRAMS
The Polar Running Program is tailored for your goal, based on Polar heart rate zones, taking your personal attributes and training background into account. The program is intelligent, it adapts along the way
based on your development. The Polar Running Programs are availablefor 5k, 10k, half marathon and
marathon events, and consist of two to five running exercises per week depending on the program. It’s
super simple!
For support and more information about using the Flow web service, go to, sup-
port.polar.com/en/support/flow.
SPORT PROFILES IN POLAR FLOW
There are four default sport profiles on your watch. In the Polar Flow app or web service, you can add
new sport profiles to your sports list and edit their settings. Your watch can contain a maximum of 20
sport profiles. If you have over 20 sport profiles in the Polar Flow app and web service, the first 20 in the
list are transferred to your watch when syncing.
93
Page 94

You can change the order of your sport profiles by dragging and dropping them. Choose the sport you
want to move and drag it into the place you want to put it in the list.
To see a video, click on one of the following links:
Polar Flow app | Sport profile editing
Polar Flow web service | Sport Profiles
ADD A SPORT PROFILE
In the Polar Flow mobile app:
1. Go to Sport profiles.
2. Tap the plus sign in the upper right corner.
3. Choose a sport from the list. Tap Done on Android app. The sport is added to your sport profiles
list.
In the Polar Flow web service:
94
Page 95

1. Click your name/profile photo in the upper right corner.
2. Choose Sport Profiles.
3. Click Add sport profile, and choose the sport from the list.
4. The sport is added to your sport list.
You can’t create new sports yourself. The sports list is controlled by Polar, because each sport has certain default settings and values, which affect, for example, the calorie calculation and the training load
and recovery feature.
EDIT A SPORT PROFILE
In the Polar Flow mobile app:
1. Go to Sport profiles.
2. Choose a sport and tap Change settings.
3. When you're ready, tap Done. Remember to sync the settings to your watch.
In the Flow web service:
1. Click your name/profile photo in the upper right corner.
2. Choose Sport Profiles.
3. Click Edit under the sport you want to edit.
In each sport profile, you can edit the following information:
95
Page 96

Basics
• Automatic lap (Can be set to duration or distance-based or turned off)
Heart Rate
• Heart rate view (Beats per minute or % of maximum)
• Heart rate visible to other devices (This means that compatible devices using Bluetooth Smart wire-
less technology, e.g. gym equipment, can detect your heart rate. You can also use your watch during
Polar Club classes to broadcast your heart rate to the Polar Club system.)
• Heart rate zone settings (With the heart rate zones you can easily select and monitor training intens-
ities. If you choose Default, you cannot change heart rate limits. If you choose Free, all limits can be
changed. Default heart rate zone limits are calculated from your maximum heart rate.)
Speed/Pace settings
• Speed/Pace view (Choose speed km/h / mph or pace min/km / min/mi)
• Speed/pace zone settings (With the speed/pace zones you can easily select and monitor your speed
or pace, depending on your selection. Default zones are an example of speed/pace zones for a person with a relatively high fitness level. If you choose Default, you can't change the limits. If you
choose Free, all limits can be changed.)
Training views
Choose what information you see on your training views during your sessions. You can have a total of
eight different training views for each sport profile. Each training view can have a maximum of four different data fields.
Click the pencil icon on an existing view to edit it, or click Add new view.
Gestures and feedback
• Vibration feedback (You can choose to have vibration on or off)
GPSand altitude
• Automatic pause: To use Automatic pause during training, you need to have GPS set to High
Accuracy or a Polar stride sensor in use. Your sessions pause automatically when you stop, and con-
tinue automatically when you start.
96
Page 97

• Choose the GPS recording rate (Can be set off or to High accuracy, meaning that the GPS record-
ing is on)
When you're done with the sport profile settings, click Save. Remember to sync the settings to your
watch.
PLANNING YOUR TRAINING
You can plan your training and create personal training targets for yourself in the Polar Flow web service
or in the Polar Flow app. Note that the training targets need to be synced to your watch with FlowSync
or via Flow app before you can use them. Your watch will guide you towards completing your target during training.
• Quick Target: Choose a duration or calorie target for the training. You can, for example, choose to
burn 500 kcal, run 10 km or swim for 30 minutes.
• Phased Target: You can split your training session into phases and set a different duration and
intensity for each of them. This one is for e.g. creating an interval training session, and adding proper
warm-up and cool-down phases to it.
• Favorites: You can use your favorites as scheduled targets on your watch or as templates for train-
ing targets.
CREATE A TRAINING TARGET IN THE POLAR FLOW WEB SERVICE
1. Go to Diary, and click Add > Training target.
2. In the Add training target view, choose Quick or Phased.
QUICK TARGET
1. Choose Quick.
2. Choose Sport, enter Target name (maximum 45 digits), Date and Time and any Notes
(optional) you want to add.
3. Fill in either Duration, Distance or Calories. You can only fill in one of the values.
4.
Click the favorite icon if you want to add the target to your Favorites.
5. Click Save to add the target to your Diary.
PHASED TARGET
1. Choose Phased.
2. Choose Sport, enter Target name (maximum 45 digits), Date and Time and any Notes
(optional) you want to add.
3. Choose whether you want to Create new or Use template.
97
Page 98

• Creating new: Add phases to your target. Click Duration to add a phase based on duration
or click Distance to add a phase based on distance. Choose Name and Duration/Distance
for each phase, Manual or Automatic next phase start, and Select intensity. Then click
Done. You can go back to edit the phases you've added by clicking the pen icon.
• Using the template: You can edit the template phases by clicking the pen icon on the right.
You can add more phases to the template as instructed above for creating a new phased target.
4.
Click the favorite icon if you want to add the target to your Favorites.
5. Click Save to add the target to your Diary.
FAVORITES
If you have created a target and added it to your favorites, you can use it as a scheduled target.
1. In your Diary, Click +Addon the day when you want to use a favorite as a scheduled target.
2. Click Favorite target to open a list of your favorites.
3. Click the Favorite you want to use.
4. The Favorite is added to your diary as a scheduled target for the day. The default scheduled time
for the training target is at 18.00/6pm. If you want to change the details of the training target,
click the target in your Diary, and modify it to your liking. Then click Save to update the changes.
If you want to use an existing Favorite as a template for a training target, do the following:
1. Go to Diary, and click Add > Training target.
2. In the Add training target view, click Favorite targets. Your training target favorites are
shown.
3. Click Use to select a favorite as a template for your target.
4. Enter Date and Time.
5. Modify the Favorite according to your liking. Editing the target in this view won't change the original Favorite target.
6. Click Add to Diary to add the target to your Diary.
SYNC THE TARGETS TO YOUR WATCH
Remember to sync the training targets to your watch from the Flow web service via
FlowSync or Flow App. If you don't sync them, they are only visible in your Flow web service Diary or
Favorites list.
For information on starting a training target session, see Start a training session.
98
Page 99

SYNCING
You can transfer data from your watch to the Polar Flow app wirelessly via Bluetooth connection. Or,
you can sync your watch with the Polar Flow web service by using a USB port and the FlowSync software. To be able to sync data between your watch and the Flow app you need to have a Polar account. If
you want to sync data from your watch directly to the web service, in addition to a Polar account, you
need the FlowSync software. If you've set up your watch, you have created a Polar account. If you set up
your watch using a computer, you have the FlowSync software on your computer.
Remember to sync and keep your data up-to-date between your watch, the web service and the mobile
app wherever you are.
SYNC WITH FLOW MOBILE APP
Before syncing make sure:
• You have a Polar account and Flow app.
• Your mobile device has Bluetooth turned on, and airplane mode/flight mode is not turned on.
• You have paired your watch with your mobile. For more information, see Pairing.
Sync your data:
1. Sign in to the Flow app, and press and hold the BACK button on your watch.
2. Connecting to phone is displayed, followed by Connecting to Polar Flow app.
3. Syncing completed is displayed when you are done.
Your watch syncs with the Flow app automatically after you finish a training session if your phone is
within the Bluetooth range. When your watch syncs with the Flow app, your activity and training data are
also synced automatically via an internet connection to the Flow web service.
For support and more information about using the Polar Flow app, go to sup-
port.polar.com/en/support/Flow_app.
SYNC WITH FLOW WEB SERVICE VIA FLOWSYNC
To sync data with the Flow web service you need the FlowSync software. Go to flow.polar.com/start, and
download and install it before trying to sync.
1. Plug your watch to your computer. Make sure FlowSync software is running.
2. The FlowSync window opens on your computer, and the syncing starts.
3. Completed is displayed when you are done.
99
Page 100

Every time you plug in your watch to your computer, the Polar FlowSync software will transfer your data
to the Polar Flow web service and sync any settings you may have changed. If the syncing does not automatically start, start FlowSync from the desktop icon (Windows) or from the applications folder (Mac OS
X). Every timea firmware update is available, FlowSync will notify you, and request you to install it.
If you change settings in the Flow web service while your watch is plugged into your computer, press
the synchronize button on FlowSync to transfer to the settings to your watch.
For support and more information about using the Flow web service, go to sup-
port.polar.com/en/support/flow.
For support and more information about using FlowSync software, go to sup-
port.polar.com/en/support/FlowSync.
100
 Loading...