

V650 USER MANUAL

CONTENTS
Contents 2
Introduction 8
V650 8
USB cable 8
Bluetooth® Smart HeartRateSensor* 9
Polar FlowSync Software 9
Polar Flow Web Service 9
Get started 10
Charge the Battery 10
Basic Settings 10
Menu and Functions 11
Menu Items 12
Button Functions 13
Touch Screen Functions 13
Pairing Sensors with V650 14
Settings 15
General Settings 15
Pairing 15
Maps 16
Use GPS time 16
Time 16
2

Date 16
Language 16
Units 16
Pin code lock 17
Front light 17
Display backlight 18
Automatic Power Off 18
About V650 18
Sport Profile Settings 18
Training views 19
HR view 19
Speed View 19
Training sounds 20
GPS 20
Automatic pause 20
Automatic lap 20
Front button takes lap 20
HR zones 20
Power settings 20
Bike Settings 21
Measuring the wheel size 21
Physical Settings 22
Sex 23
3

Height 23
Weight 23
Date of birth 23
HR max 23
Resting HR 23
VO2 max 23
Firmware Update 24
Compatible Sensors 26
Polar Heart rate Sensor Bluetooth® Smart 26
Pair a Heart Rate Sensor with V650 26
Polar Speed Sensor Bluetooth® Smart 26
Pair Speed sensor with V650 27
Polar Cadence Sensor Bluetooth® Smart 27
Pair Cadence sensor with V650 27
Polar LOOK Kéo Power Sensor Bluetooth® Smart 28
Pair Kéo Power with V650 28
Power Settings on V650 29
Calibrate Kéo Power 29
Install Bike Mount 31
Polar Adjustable Bike Mount 31
Training 32
Wear the Heart Rate Sensor 32
Start a Training Session 32
4

Button Functions During Training 34
Side Button Functions 35
Front Button Functions 35
Touchscreen Functions 35
Training Views 35
Time 36
Environment 36
Body Measurement 37
Distance 38
Speed 38
Cadence 39
Power 39
Lap Information 41
Back to Start 42
Pause and Stop Training 43
After Training 44
Summary 44
History 45
Sessions 45
Totals 45
Features 46
GPS 46
Barometer 46
5

Sport Profiles 46
Maps 46
Map Settings 47
During Training 47
Smart Coaching 49
Polar Heart Rate Zones 49
Smart Calories 51
Training Benefit 52
Polar Flow Web Service 54
Syncing 56
Caring for Your V650 57
Polar V650 57
Heart Rate Sensor 57
Speed Sensor Bluetooth® Smart and Cadence Sensor Bluetooth® Smart 57
Storing 58
Service 58
Important Information 59
Batteries 59
Change the Heart Rate Sensor Battery 59
Precautions 60
Interference During Training 60
Minimizing Risks When Training 60
Technical Specifications 62
6

Polar V650 62
Heart Rate Sensor 63
Polar FlowSync Software and USB Cable 63
Water Resistance 63
Limited International Polar Guarantee 64
Disclaimer 65
7
INTRODUCTION
Congratulations on your new V650! Designed for the most ambitious cyclist, the V650 helps you ride with confidence and reach your peak performance.
This user manual includes complete instructions to help you get the most out of your new riding companion.
To check the video tutorials and the latest version of this user manual, please go to www.-
polar.com/en/support/v650.
V650
View your training data, such as heart rate, speed, distance and altitude at a glance from the big screen.
USB CABLE
Use the USB cable to charge the battery and to sync data between your V650 and the Polar Flow web service
via FlowSync software.
8

BLUETOOTH® SMART HEARTRATESENSOR*
See live, accurate heart rate on your V650 during your training sessions. Your heart rate is used to analyze
how your session went.
*Only included in V650 with heart rate sensor sets. If you bought your V650 without a heart rate sensor, not to
worry, you can buy one at any time.
POLAR FLOWSYNC SOFTWARE
Flowsync software allows you to sync data between your V650 and the Flow web service on your computer
via the USB cable. Go to flow.polar.com/start to download and install Polar FlowSync software.
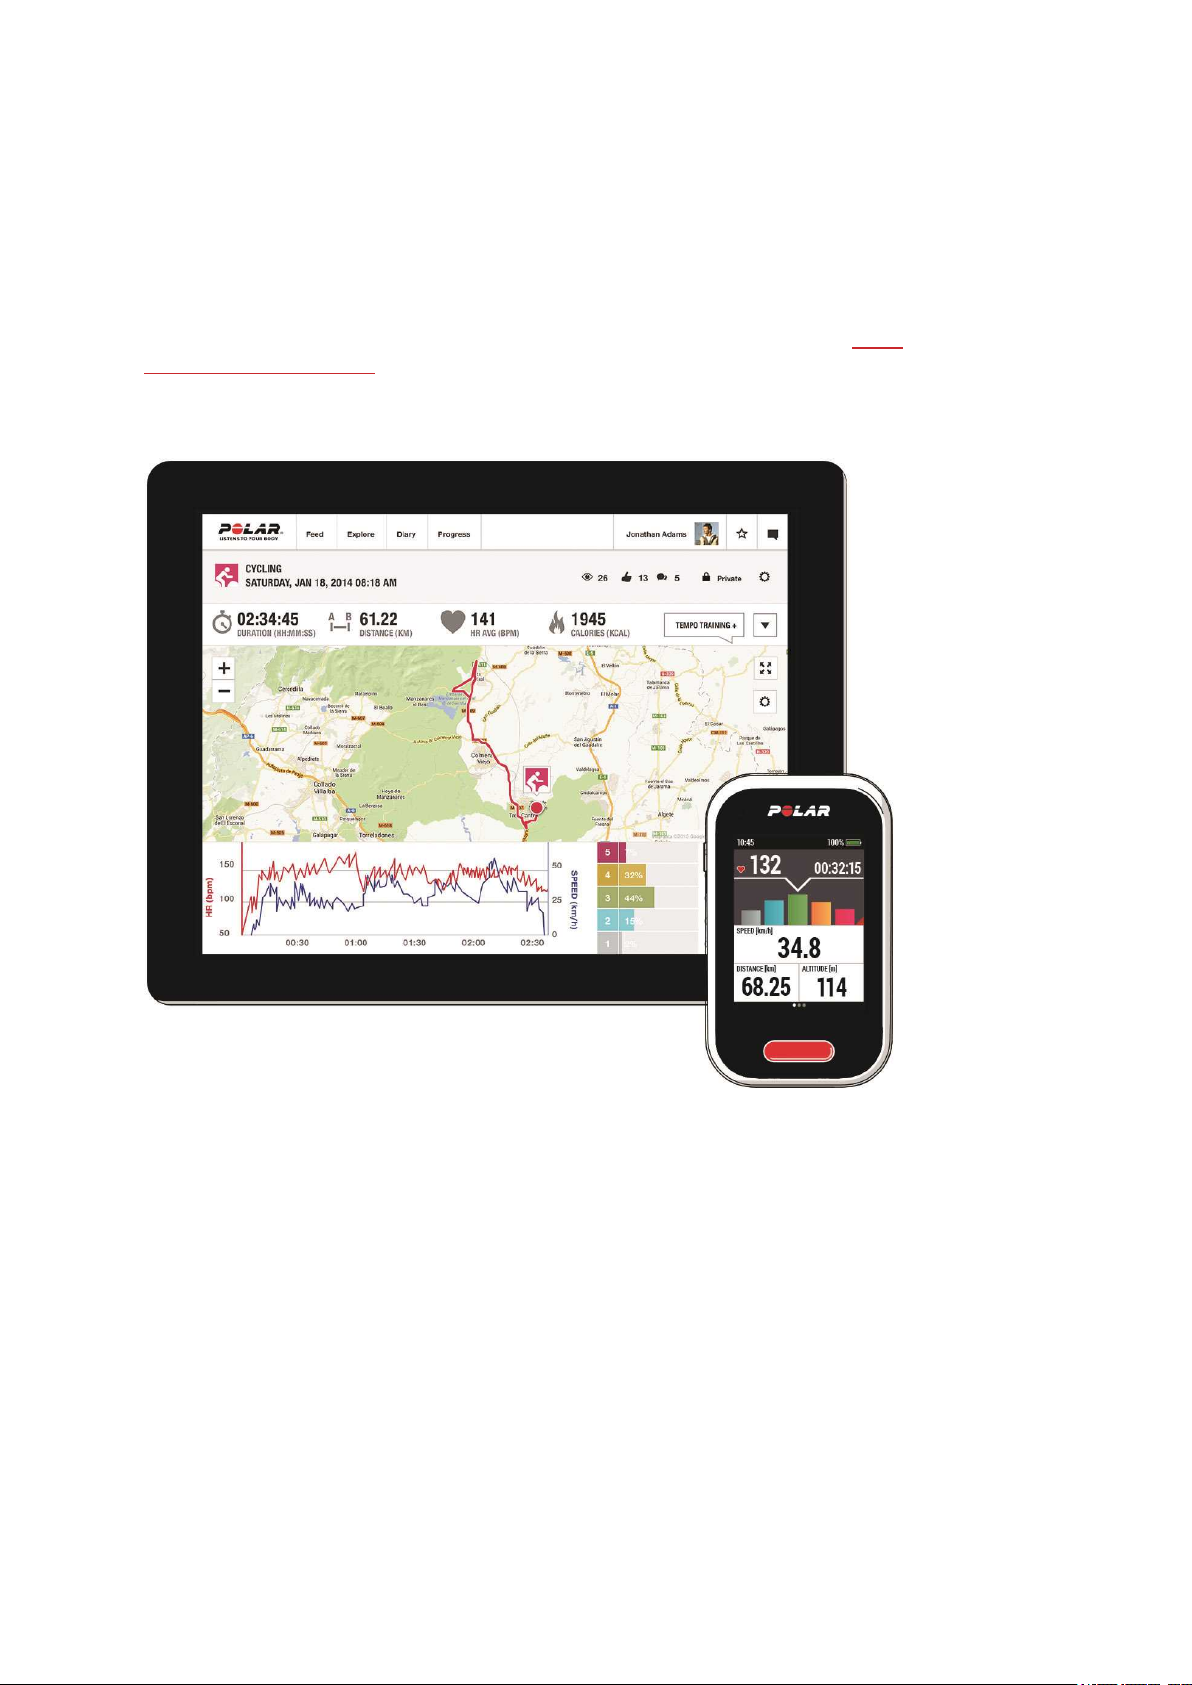
POLAR FLOW WEB SERVICE
Plan and analyze every detail of your training, customize your device and learn more about your performance
at polar.com/flow.
9

GET STARTED
To make sure you get to enjoy your V650 at its best, please go to flow.polar.com/start where simple instruc-
tions will guide you through setting up your V650, downloading the latest firmware and taking the Flow web service into use.
If you’re in a hurry for your first run with V650, you can do a quick set up by entering the basic settings on the
device, as instructed in Basic Settings.
CHARGE THE BATTERY
After unboxing your V650, the first thing you need to do is charge the battery. Let your V650 fully charge before
taking it into use for the first time.
The V650 has an internal, rechargeable battery. Use the USB cable included in the product set to charge your
V650 via the USB connector on your computer. You can also charge the battery via a wall outlet. When charging via a wall outlet use a USB power adapter (not included in the product set). If you use an AC adapter,
make sure that the adapter is marked with "output 5Vdc 1A-2A max". Only use an AC adapter which is
adequately safety approved (marked with "LPS", "Limited Power Supply" or "UL listed").
1. Push down to open the cap.
2. Lift the cap and plug the micro USB connector into the USB port.
3. Plug the other end of the cable into your PC.
4. The charging animation appears on the display. Charging the battery fully takes up to five hours.
The operating time of the battery is approximately 10 hours. The operating time depends on many factors,
such as the temperature of the environment in which you use your V650, the features you select and use, and
battery aging. The operating time is significantly reduced in temperatures well below freezing.
Don't leave the battery fully discharged for a long period of time or keep it fully charged all the time,
because it might affect the battery life time.
BASIC SETTINGS
Wake your V650 by pressing the side button. The first time you do this, your V650 will take you through an initial set up process.
Start by choosing your language from the following options: Dansk, Deutsch, English, Español, Français,
Italiano, Nederlands, Norsk, Português, Suomi, Svenska, 日 本 語 or 简 体 中文 .
If your language is not visible, swipe up to scroll the list. Choose a language by tapping it. The field turns red.
Confirm and continue to the following setting by tapping at the bottom of the screen.
10
To get the most accurate and personal training data, it’s important that you’re precise with physical set-
tings like your age, weight and sex.
Units: Choose Metric (kg/cm) or Imperial (lb/ft) units.
Use GPS time: If you want the V650 to read the Coordinated Universal Time (UTC) from the GPS satellites,
tick the box and choose the UTC Time Zone that is closest to you.
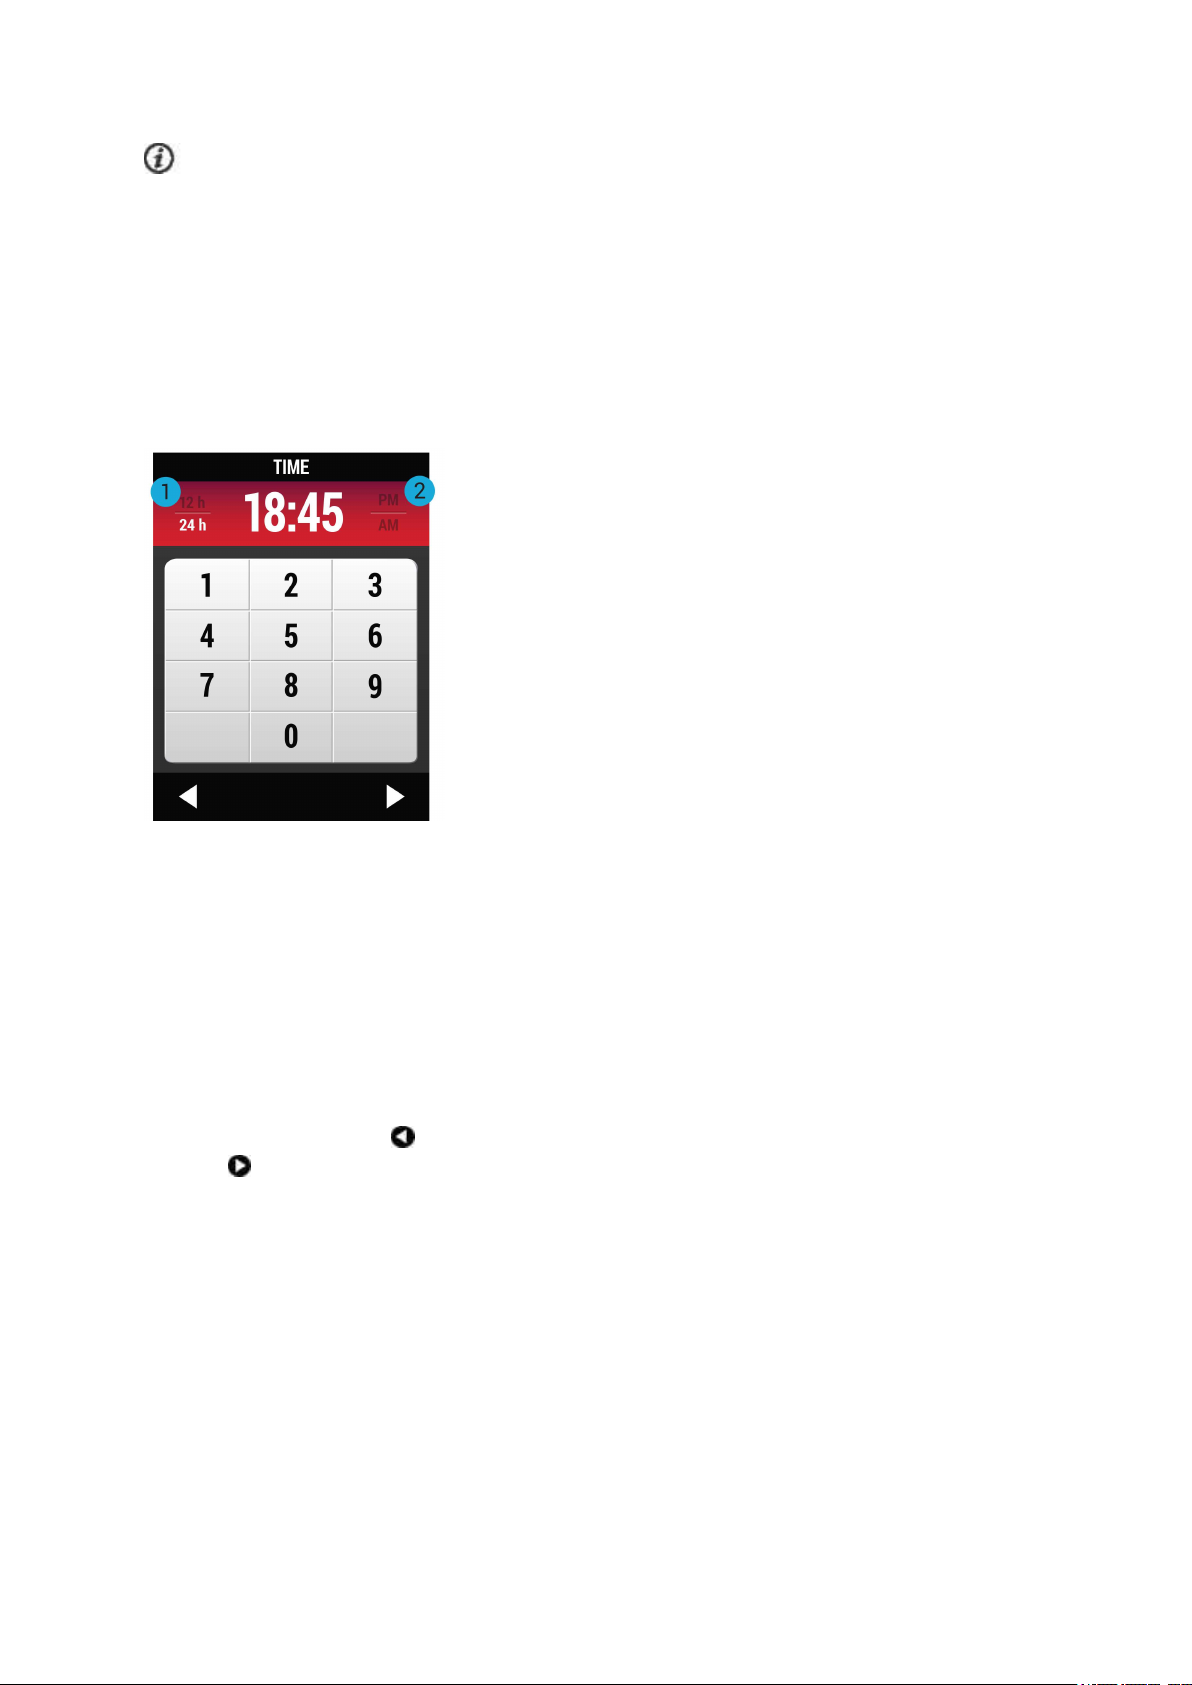
Time of day: Change the time format by touching 12h/24h (1). The chosen time format is written in white. If
you choose the 12h time format, also select AM or PM (2). Then enter the local time.
Date: Enter current date.
Sex: Select Male or Female.
Height: Enter your height.
Weight: Enter your weight.
Date of birth: Enter your date of birth.
To change your settings, tap at the bottom of the screen to return to the desired setting. To accept the settings, tap . The V650 enters the main view.
MENU AND FUNCTIONS
11
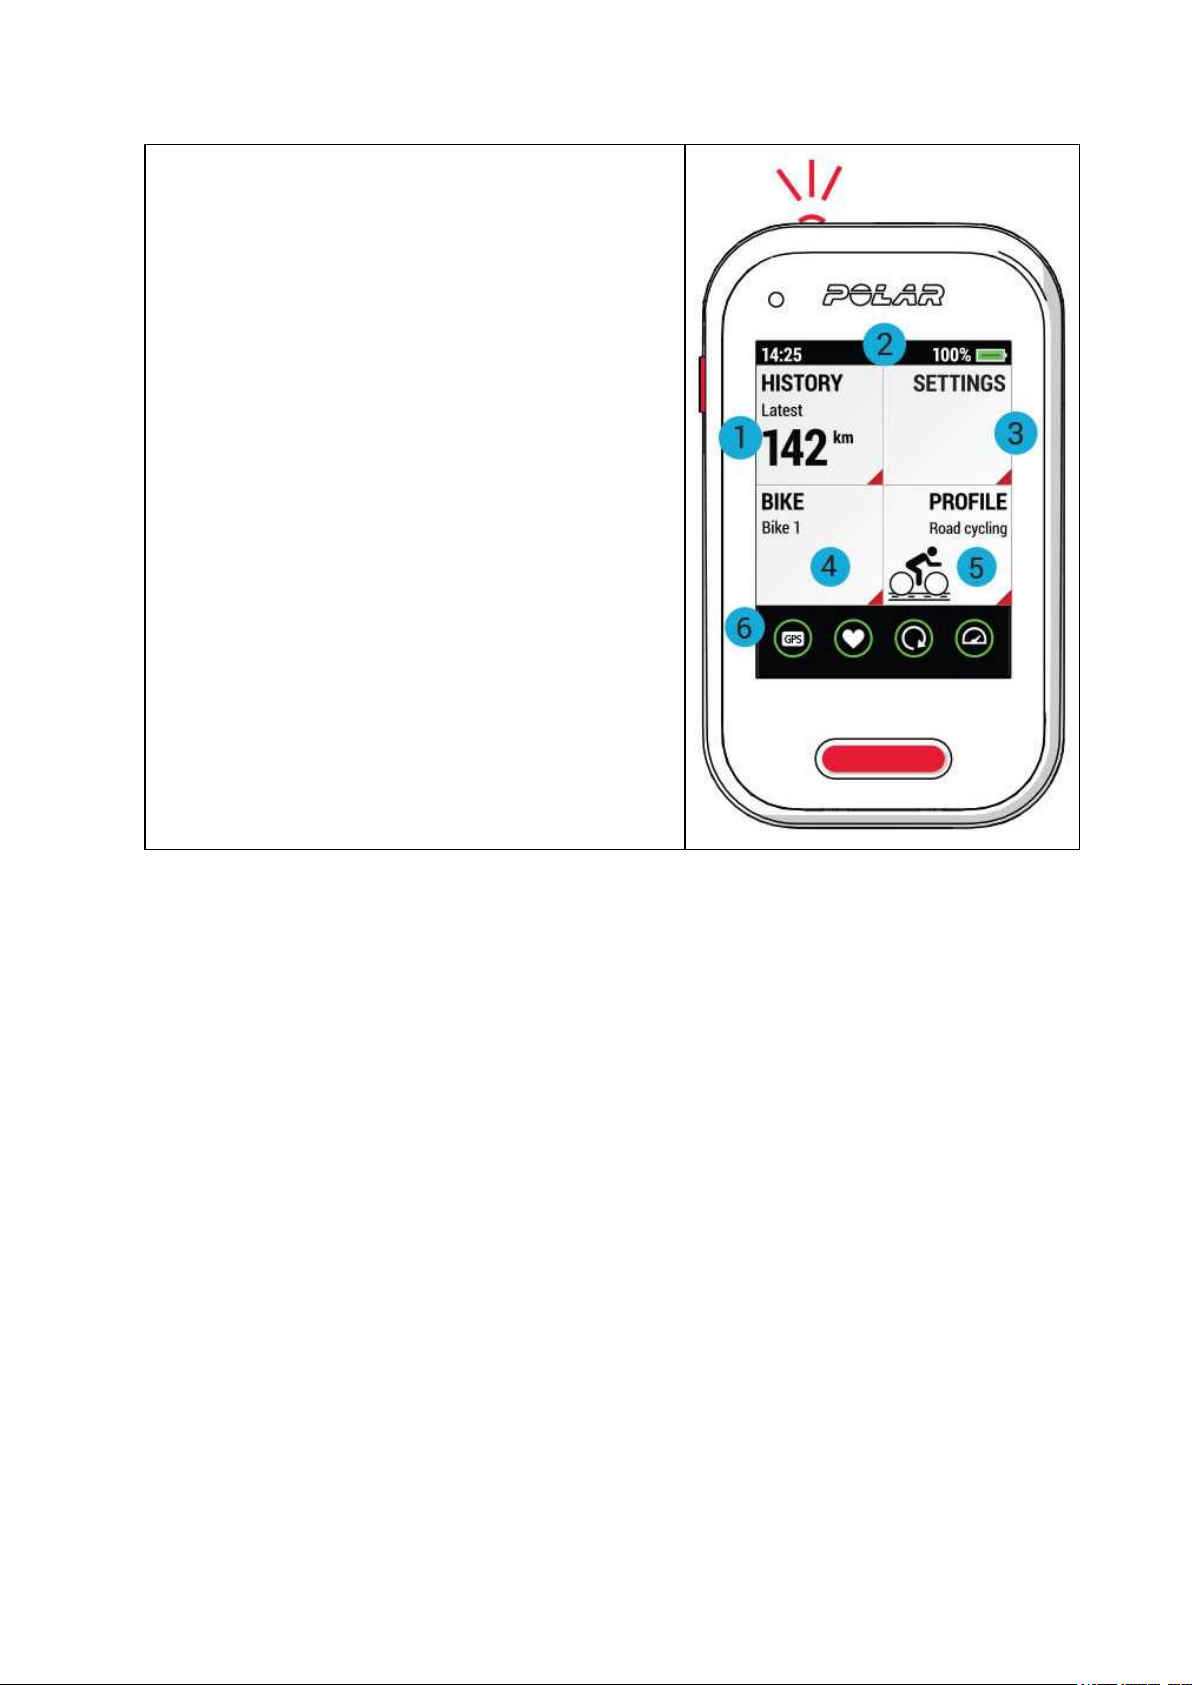
MENU ITEMS
1. HISTORY: See the details of your sessions and the
totals of your cycling history.
2. PULL-DOWNMENU: Swipe down to open the pull-
down menu. There you can adjust the front light, the
training sounds and the display brightness.
3. SETTINGS: Modify the settings to suit your needs.
4. BIKE:Choose the bike for your ride.
5. PROFILE : Choose the profile for your ride.
6. The indicators displayed at the bottom of the display
provide information about the status of the sensors.
12

BUTTON FUNCTIONS
There is one physical button on the side of the V650 and
another button on the front.
Press the side button (1)to view the following options:
o
Calibrate altitude
o
Lock display
o
Turn off V650
o
Search sensor: Search for a heart rate sensor or cyc-
ling sensor.
Press the front button (2) to start recording, press and hold it
to pause.
Take lap with a regular press. See Sport Profile settings
for instructions on setting FRONTBUTTON TAKESLAP
function on/off.
TOUCH SCREEN FUNCTIONS
Tap
l Open what you tap.
l Choose an item.
l
Confirm and return to the previous level by tapping .
l
Continue further by tapping .
Swipe right or left
l Switch training views during training.
l Browse training view layouts in sport profile settings.
l Scroll details of your riding session in HISTORY.
Swipe down from the top edge of the screen
Open the pull-down menu. There you can adjust the frontlight, the training sounds and the display brightness.
13

Swipe up or down
Scroll through what’s on the screen.
PAIRING SENSORS WITH V650
Sensors compatible with V650 use Bluetooth Smart ® wireless technology. Before taking a new heart rate
sensor or cycling sensor into use, it has to be paired with your V650. Pairing only takes a few seconds, and
ensures that your V650 receives signals from your sensors and devices only, and allows disturbance-free
training in a group. Before entering an event or race, make sure that you do the pairing at home to prevent interference due to data transmission.
For more information on pairing specific sensors, see Compatible Sensors.
14

SETTINGS
GENERAL SETTINGS
To view and edit your general settings, go to Settings > General settings.There you'll find:
l Pairing
l Maps
l Use GPStime
l Time
l Date
l Language
l Units
l Pin code lock
l Frontlight
l Display backlight
l Automatic power off
l About V650
Tap to open the setting you want to change, and edit as you like. Confirm and return to previous menu by tapping .
In certain settings (e.g. UNITS), tap the field until you see the correct value.
PAIRING
Before taking a new sensor into use, it has to be introduced to your V650. This is called pairing and only takes
a few seconds. Pairing ensures that the V650 receives signals from your sensor only, and enables disturbance-free training in a group.
Pair new device:Pair a sensor with your V650. For more information on pairing specific sensors, see Com-
patible Sensors.
Paired devices: View all the devices you have paired with your V650.
To remove pairing with a sensor:
1. Go to Settings > General settings > Pairing > Paired devices.
2. Tap the device you want to remove from the list and tap Remove pairing.
15

MAPS
OFFLINEMAP AREA: Define the center point for the offline map area (450 km x 450 km).
l You can browse the map by swiping, and zoom in with a double tap and zoom out with a two-finger tap.
l Once you have defined the area, tap DOWNLOAD.
l Delete old maps? is displayed. A new offline map area selection will delete the previous maps.
Choose CONTINUE to confirm the area selection. V650 returns to MAP SETTINGS.
l Synchronization required is displayed under OFFLINE MAP AREA. New offline map will be
downloaded the next time you synchronize your V650 with Flow web service.
MAPLAYERS: Choose Bike routes and/or Topographic.
In Browse offline map, you can preview the downloaded map before starting a training session. To move the
map to your current location, tap the compass needle in the upper right hand corner of the screen. When you
browse away from your current location, the compass needle turns from red to white.
USE GPS TIME
If you want the V650 to read the Coordinated Universal Time (UTC) from the GPS satellites, tick the box in
USE GPS TIME field, and choose the UTC Time Zone that is closest to you.
TIME
Set the time of day.
If you want to change the time format, tap 12h/24h (image).The currently selected format is written in
white. If you choose the 12h time format, also select AM or PM.
DATE
Set the date.
LANGUAGE
Choose: Dansk, Deutsch, English, Español, Français, Italiano, Nederlands, Norsk, Português, Suomi,
Svenska, 日 本語 or 简体 中 文.
UNITS
Choose metric or imperial. Set the units used to measure weight, height, distance and speed.
16
PIN CODE LOCK
Keep your training information safe by setting a PIN code on your V650. It's a handy way to make sure that
only you have access to your training information.
Tap PIN CODELOCK to turn the function on. Enter a four-digit PIN code and tap . Re-enter and tap to
confirm.
The V650 will ask for your PIN code every time it is turned on.
If you forget your PIN code, you can do a Factory reset on your V650. It removes V650’s connection to
your user account and deletes any saved data on it.
1. Plug in your V650 to your computer’s USB port and go to Polar FlowSync software. The Polar
FlowSync software transfers your training information to the Polar Flow web service.
2. Go to Settings and choose Factory Reset.
3. Go to the Polar Flow web service (flow.polar.com/V650) and repeat what you did when you first started
using the product.
FRONT LIGHT
The function of the front light on the top edge of the V650 is to optimize your cycling security in dark conditions. It's an intelligent feature that you can set to turn on automatically when it gets dark and to turn off
when it gets bright. Alternatively, you can manage it manually from the pull-down menu.
Manual: Manage the front light manually from the pull-down menu. Adjust the Blink rate* by dragging the
slider.
Automatic: The V650 turns the front light on and off according to light conditions. Adjust the Activation level
and the Blink rate* by dragging the slider.
Frontlight settings in pull-down menu
Tap to turn the front light on or off.
17
Tap to set blink mode on or off.
Tap to set the automatic front light on or off.
DISPLAY BACKLIGHT
Manual:The backlight turns on each time you touch the screen, press a button, get a notification or an alarm.
It remains bright for 15 seconds, then goes dim again.
Always on: The backlight is always on.
Automatic: The backlight turns on and off automatically according to light conditions when you're recording a
session. In other modes it works the same way as manual backlight. You can adjust the Activation level by
dragging the slider.
AUTOMATIC POWER OFF
Set On/Off: The power switches off automatically when you haven't touched the buttons/touch screen in 15
minutes (except when the V650 is recording a training sessions or in the pause mode).
ABOUT V650
Check the device ID, firmware version and HW model of your V650.
SPORT PROFILE SETTINGS
To view or modify sport profile settings, go to Settings > Sport profiles and choose the profile you want to
edit.
You'll find the following settings for each profile:
l Training views
l HR view
18

l Speed view
l Training sounds
l GPS
l Automatic pause
l Automatic lap
l Front button takes lap
l HR zones
l Power settings
Tap to open the setting you want to change, and edit as you like. Confirm and return to previous menu by tapping .
In certain settings (e.g. Training sounds), tap the field until you see the correct value.
TRAINING VIEWS
You can choose to have up to six training views for each profile, each training view containing up to eight
items. In addition, you can active the following views: Lap view, AUTOMATICLAPVIEW and Map view.
1. Tick the box on the left side of the display to activate View 1, View 2, View 3, View 4, View 5 or View
6.
2. Tap the view you want to edit.
3. Choose the layout for the view. There are many layout options; simply swipe left or right until you see a
layout you like.
4. If you want to change an item, tap it and choose a new item from the list. The content of the list varies
slightly between different layouts. This is because some of the items (e.g. graphs) don't fit in all the layouts. You can find a complete list of available items in Training Views.
5.
When the layout is complete, confirm and return to the TRAININGVIEWS menu by tapping .
6. If you want to set more training views for the profile, repeat the steps 1-5 .
7. To set Lap view on, tick the box in the Lap view field.
8.
Tap in TRAININGVIEWS menu to save your changes.
HR VIEW
Choose % (percent of maximum heart rate) or bpm (beats per minute).
SPEED VIEW
Choose km/h or min/km.
19

TRAINING SOUNDS
Choose Mute, Soft, Loud and Very loud.
GPS
Set GPS function On/Off.
AUTOMATIC PAUSE
Tick the box to turn the function on.
Tap Activation speed to set the speed at which recording is paused.
AUTOMATIC LAP
Tick the box to turn the function on, then set the automatic lap Duration or Distance.
FRONT BUTTON TAKES LAP
Set the function On/Off. If you set the function on, pressing the front button takes a lap when you're recording
a session.
By default, the function is on in Road cycling, Mountain biking and Indoor cycling.
Pressing and holding the front button pauses recording.
HR ZONES
View and change the heart rate zone limits.
POWER SETTINGS
In the Power settings you'll find:
l Power view: Choose W (Watts), W/kg (Watts/kg) or FTP % (% of FTP).
l FTP (W): Set your FTP value. The range is 60 to 600 watts.
l Power, rolling average: Set how frequently data points of your power are recorded. Choose 3, 10, 30
seconds, or set other (1-99).
l Power zones: View and change the power zone limits.
20
 Loading...