

Page 1

USER MANUAL
Page 2

CONTENTS
Contents 2
Polar Ignite 3 User Manual 7
Introduction 7
Take full advantage of your Polar Ignite 3 8
Polar Flow App 8
Polar Flow web service 8
Get started 9
Setting up your watch 9
Option A: Set up with a phone and Polar Flow app 9
Option B: Set up with your computer 10
Option C: Set up from the watch 10
Button functions and touch display 10
Button functions 10
Color touch display 10
gestures 11
Backlight activation 11
View Notifications 11
Mark a lap during training 11
Watch face, views and menu 11
Watch face 11
Views 11
Menu 12
Backlight and display settings 14
Backlight activation 14
Backlight brightness 14
Always on Display 15
Pairing a phone with your watch 15
Before pairing a phone: 15
To pair a phone: 15
Delete a pairing 15
Updating the firmware 16
With phone or tablet 16
With computer 16
Settings 17
General settings 17
Pair and sync 17
Continuous HR tracking 17
Flight mode 17
Backlight brightness 17
Display always on 17
Do not disturb 17
Phone notifications 18
Music controls 18
Units 18
Language 18
Inactivity alert 18
Vibrations 18
I wear my watch on 18
Positioning satellites 18
About your watch 18
Choose views 19
Watch face settings 24
Layout 24
Hands and background 25
2
Page 3

Color theme 25
Widgets 25
Time & Date 26
Time 26
Date 26
Date format 26
First day of week 26
Physical settings 26
Weight 27
Height 27
Date of birth 27
Sex 27
Training background 27
Activity goal 27
Preferred sleep time 28
Maximum heart rate 28
Resting heart rate 28
VO2max 28
Quick settings 29
Display icons 29
Restarting and resetting 30
To restart the watch 30
To reset the watch to factory settings 30
Factory reset via FlowSync 30
Factory reset from the watch 30
Training 31
Wrist-based heart rate measurement 31
Wearing your watch when measuring heart rate from your wrist or tracking your sleep 31
Wearing your watch when not measuring heart rate from your wrist or tracking your sleep/Nightly recharge 32
Start a training session 32
Start a planned training session 33
Quick menu 33
During training 35
Browse the training views 35
Set timers 36
Interval Timer 36
Countdown Timer 37
Mark a lap 37
Training with a target 37
Change phase during a phased session 38
Notifications 38
Pausing/Stopping a training session 38
Training summary 38
After training 38
Training data in the Polar Flow App 41
Training data in the Polar Flow Web Service 41
Features 42
Smart Coaching 42
Nightly Recharge™ recovery measurement 43
ANS charge details in the Flow app 45
Sleep charge details in Polar Flow 45
For exercise 45
For sleep 46
For regulating energy levels 46
Sleep Plus Stages™ sleep tracking 47
Sleepwise™ guide to daytime alertness 51
Nightly Skin Temperature 55
FitSpark™ daily training guide 57
During training 58
3
Page 4

Work-rest guide based on your heart rate 59
Training with Work-rest guide 60
Guidance on the display 60
Serene™ guided breathing exercise 62
Fitness Test with wrist-based heart rate 63
Before the test 64
Performing the test 64
Test results 64
Fitness level classes 64
Men 64
Women 65
VO2max 65
Walking Test 66
Performing the test 66
Test results 67
Detailed analysis in the Flow web service and app 67
Running Performance Test 69
Performing the test 69
Test results 70
Detailed analysis in the Flow web service and app 71
Polar Running Program 72
Create a Polar Running Program 73
Start a running target 73
Follow your progress 73
Running Index 73
Short-term analysis 74
Long-term analysis 74
Training Load Pro™ 75
Cardio load 75
Perceived load 76
Training load from a single session 76
Strain and Tolerance 76
Cardio load status 77
Cardio load status on your watch 77
Long term analysis in the Flow app and web service 77
FuelWise™ 79
Training with Fuelwise 80
Smart carbs reminder 80
Manual carbs reminder 80
Drink reminder 81
Smart Calories 81
Training Benefit 81
Continuous heart rate 83
Continuous heart rate on your watch 83
24/7 Activity tracking 84
Activity Goal 84
Activity data on your watch 84
Inactivity alert 85
Activity data in the Flow App and web service 85
Activity Guide 85
Activity Benefit 86
Positioning satellites 86
Assisted GPS 86
A-GPS expiry date 86
Back to start 87
Race pace 87
Sport Profiles 88
Heart Rate Zones 88
Speed Zones 89
4
Page 5

Speed zones settings 89
Training target with speed zones 89
During training 89
After training 89
Speed and distance from the wrist 89
Swimming metrics 89
Pool swimming 90
Pool Length setting 90
Open water swimming 90
Measuring heart rate in water 91
Start a swimming session 91
During your Swim 91
After your Swim 91
Weather 92
Power save settings 94
Energy sources 94
Energy sources summary 95
Detailed analysis in the Flow mobile app 95
Voice guidance 95
Phone notifications 96
Set phone notifications on 96
Do not disturb 96
View notifications 97
Music controls 98
Music controls settings in Polar Flow app 98
HR sensor mode 98
To turn on the HR sensor mode: 99
To stop sharing HR: 99
Changeable wristbands 99
Changing the wristband 99
Compatible sensors 100
Polar OH1 optical heart rate sensor 100
Polar Verity Sense 100
Polar H10 heart rate sensor 100
Polar H9 heart rate sensor 101
Pairing sensors with your watch 101
Pair a heart rate sensor with your watch 101
Polar Flow 102
Polar Flow App 102
Training data 102
Activity data 102
Sleep data 102
Sport profiles 102
Image sharing 102
Start using the Flow app 102
Polar Flow Web Service 103
Diary 103
Reports 103
Programs 103
Sport profiles in Polar Flow 103
Add a sport profile 104
Edit a sport profile 104
Planning your training 106
Create a training plan with the Season Planner 106
Create a training target in the Polar Flow web service 107
Create a target based on a favorite training target 108
Sync the targets to your watch 109
Create a training target in the Polar Flow app 109
Favorites 111
5
Page 6

Add a Training Target to Favorites: 111
Edit a Favorite 112
Remove a favorite 112
Syncing 112
Sync with Flow mobile App 112
Sync With Flow Web Service Via FlowSync 112
Important information 114
Battery 114
Charging the battery 114
Charging during training 115
Battery operating time 115
Battery status and notifications 116
Battery status icon 116
Battery notifications 116
Caring for your watch 116
Keep your watch clean 116
Take good care of the optical heart rate sensor 116
Storing 116
Service 117
Precautions 117
Interference During Training 117
Health and training 117
Warning - Keep batteries out of reach of children 118
How to use your Polar product securely 118
Technical specification 119
Polar Ignite 3 119
Polar FlowSync Software 120
Polar Flow mobile application compatibility 121
Water resistance of Polar products 121
Regulatory information 122
Limited International Polar Guarantee 122
Disclaimer 123
6
Page 7

POLAR IGNITE 3 USER MANUAL
This user manual helps you get started with your new watch. To see video tutorials and FAQs, go to
support.polar.com/en/ignite-3.
IN TRO DUC TIO N
Congratulations on your new Polar Ignite 3!
Polar Ignite 3 is a modern-classic fitness watch for a more energized life. With it on your wrist, you get guidance that’s
tailored to your body and lifestyle day and night. Wake up to better days with sleep tracking features and daytime
alertness insights that help you perfect a bedtime routine. Get moving with bespoke workout suggestions and real-time
voice guidance. See meaningful metrics at a glance on a beautifully bright, high-resolution AMOLEDtouchscreen
display with widgets you can customize.
Polar Ignite 3 provides a full analysis of your body’s recovery overnight and a forecast of your energy and alertness for
the day ahead. Sleep Plus Stages™ sleep tracking monitors your sleep stages (REM, light and deep sleep) and gives you
sleep feedback and a numerical sleep score. Nightly Recharge™ is an overnight recovery measurement that shows you
how well you recover from the demands of your day. The new Sleepwise™ feature helps you grasp how sleep
contributes to your daytime alertness level and readiness to perform.
Reach the ideal amount of training to perform at your very best with Training Load Pro. The FitSpark™ training guide
makes sure you’re prepared for your pursuit to conquer the trails with ready-made daily workouts that match your
recovery, readiness and training history. . Stay energized throughout your training session with the new FuelWise™
fueling assistant. FuelWise™ reminds you to refuel and helps you maintain adequate energy levels during your long
sessions. See how your body uses different energy sources during a training session. Monitor your running progress
with advanced running features, such as Running Index and Running Programs. The Voice Guidance feature allows you
to get real-time voice guidance via Polar Flow app with headphones or speakers during training.
Assess your fitness level and track your progress over time with Polar tests. Fitness test is a quick and comfortable way
to check your fitness level when you're about to start training. With the Walking Test you can keep track of how your
aerobic fitness is developing. It's simple, safe and easy to repeat. With the Running Performance Test you know where
your running performance is now, and it allows you to personalize your heart rate and speed zones so that you'll always
make the most of your runs. You can also find out your maximum heart rate with the test.
The Continuous heart rate feature measures your heart rate around the clock. Together with 24/7 Activity tracking it
gives you a complete overview of all your daily activity. The watch helps you relax and relieve stress with the Serene™
guided breathing exercise.
Polar Ignite 3 measures heart rate from the wrist with the Polar Precision Prime™ sensor fusion technology and tracks
speed, pace, distance and route with built-in GPS. It's equipped with dual-frequency GPS technology for pin-point
accuracy and less interference from your surroundings.
With the changeable wristbands, you can personalize your watch to match every situation and style. Polar Ignite 3
comes with the essential smart watch features: music controls, weather and phone notifications. In HR sensor mode
you can easily turn your watch into a heart rate sensor and share your heart rate to other Bluetooth devices like training
apps, gym equipment or cycling computers. You can also use your watch during Polar Club classes to broadcast your
heart rate to the Polar Club system.
We are continuously developing our products for a better user experience. To keep your watch up to date
and get the best performance, always make sure to update the firmware whenever a new version is
available. The firmware updates enhance the functionality of your watch through improvements.
7
Page 8

TA KE F ULL ADV AN TAG E OF YOU R PO LAR IGN ITE 3
Get connected to the Polar ecosystem and get the most out of your watch.
POLAR FLOW APP
Get the Polar Flow app from the App Store® or Google PlayTM. Sync your watch with the Flow app after training, and get
an instant overview and feedback on your training results and performance. In the Flow app you can also see how
active you’ve been during the day, how your body has recovered from training and stress during the night and how well
you have slept. Based on the Nightly Recharge automatic overnight measurement and other parameters we have
measured from you, you get personalized tips in the Flow app on exercise, and tips on sleep and regulating your energy
levels on those particularly rough days.
POLAR FLOW WEB SERVICE
Sync your training data to the Polar Flow web service with the FlowSync software on your computer or via the Flow app.
In the web service you can plan your training, track your achievements, get guidance and see a detailed analysis of your
training results, activity and sleep. Let all your friends know about your achievements, find fellow exercisers and get
motivation from your social training communities.
Find all this at flow.polar.com
8
Page 9

GET STARTED
SE TTI NG U P YO UR WAT CH
To wake up and charge your watch, plug it into a powered USB port or a USB charger with the custom cable that came
in the box. The cable magnetically snaps into place. Please note that it may take a while for the charging animation to
appear on the display. We recommend that you charge the battery before you start using your watch. See Battery for
detailed information on charging the battery.
To set up your watch, choose your language and preferred setup method. The watch gives you three options for setup:
Browse to the option most convenient for you by swiping the display up or down. Tap the display to confirm your
selection.
A. On your phone: Mobile setup is convenient if you don't have access to a computer with a USB port, but
it might take longer. This method requires an internet connection.
B. On your computer: Wired computer setup is quicker and you can charge your watch at the same time,
but you need a computer available. This method requires an internet connection.
The A and B options are recommended. You can fill in all the physical details required for
accurate training data at once. You can also choose your language and get the latest
firmware for your watch.
C. On your watch: If you don't have a compatible mobile device and can't get to a computer with an
internet connection right away, you can start from the watch. Please note that when you do the setup
from the watch, your watch is not yet connected with Polar Flow. It’s important that you do the setup
later via option A or B to get the latest firmware updates to your Ignite 3. In Flow you can also see a
detailed analysis of your training, activity and sleep data.
OPTION A: SET UP WITH A PHONE AND POLAR FLOW APP
Please note that you have to do the pairing in the Flow app and NOT in your phone’s Bluetooth settings.
1. Keep your watch and phone close to each other during setup.
2. Make sure your phone is connected to the internet and turn on Bluetooth.
3. Download the Polar Flow app from the App Store or Google Play on your phone.
4. Open the Flow app on your phone.
5. The Flow app recognizes your watch nearby and prompts you to start pairing it. Tap the Start button on the Flow
app.
6. When the Bluetooth Pairing Request confirmation message appears on your phone, check that the code shown
on your phone matches the code shown on your watch.
7. Accept the Bluetooth pairing request on your phone.
8. Confirm the pin code on your watch by tapping the display.
9
Page 10

Pairing done is displayed once the pairing is completed.
9.
10. Sign in with your Polar account or create a new one. We’ll walk you through the sign-up and setup within the app.
When you’re done with the settings, tap Save and sync and your settings are synced to your watch.
If you're prompted to update the firmware, please plug your watch into a power source to ensure a flawless
update operation, and then accept the update.
OPTION B: SET UP WITH YOUR COMPUTER
1. Go to flow.polar.com/start and download and then install the Polar FlowSync data transfer software onto your
computer.
2. Sign in with your Polar account or create a new one. Plug your watch into your computer's USB port with the
custom cable that came in the box. We’ll walk you through the sign-up and setup within the Polar Flow web
service.
OPTION C: SET UP FROM THE WATCH
Adjust the values by swiping the display and tap to confirm your selection. If you want to return and change a setting at
any point, press the button until you reach the setting you want to change.
Please note that when you do the setup from the watch, your watch is not yet connected with Polar Flow.
Firmware updates for your watch are available only through Polar Flow. To make sure you get to enjoy your
watch and the unique Polar features at their best, it’s important that you do the setup later in the Polar Flow
web service or with the Polar Flow mobile app by following the steps in option A or B.
BU TTO N FU NCT ION S AND TOU CH D ISP LAY
BUTTON FUNCTIONS
You watch has one button that has different functionalities depending on the situation of use. See the table below to
find out what functionalities the button has in different modes.
Time view
Enter the menu
Press and hold to start
pairing and syncing
Illuminate the display
COLOR TOUCH DISPLAY
The color touch display lets you easily swipe between views, through lists and menus, as well as choose items by
tapping the display.
l Tap the display to confirm selections and choose items.
l Swipe up or down to scroll the menu.
l Swipe left or right in time view to access the views.
l Swipe left or right during training to see different training views.
l Swipe down from the top of the display in time view to access the quick settings menu (screen lock, do not
disturb, flight mode).
l Swipe up from the bottom of the display in time view to see notifications.
l Tap the display to see more detailed information.
Menu
Return to the previous
level
Leave settings
unchanged
Cancel selections
Illuminate the display
Pre-training mode
Return to time view
Illuminate the display
During training
Pause training by
pressing once. Tap the
display to continue.
To stop the session,
press and hold when
paused.
Illuminate the display
10
Page 11

To ensure proper function of the touch display wipe any dirt, sweat or water off the display with a cloth. The touch
display won’t respond properly when trying to use it while wearing gloves.
GESTURES
Backlight activation
The backlight is automatically switched on when you turn your wrist to look at the watch.
View Notifications
View the notifications by swiping up from the bottom of the display or by turning your wrist to look at the watch
immediately after the watch vibrates. The red dot at the bottom of the display indicates you have new notifications. For
more information, see Phone notifications.
Mark a lap during training
Slap the display firmly with your fingers to mark a lap during a training session. For more information, see How to mark
a lap during training.
WA TCH FAC E, V IEW S A ND M ENU
WATCH FACE
You can customize the Polar Ignite 3 watch face by choosing different styles and colors from a set of pre-defined
options. In addition, you can choose the widgets displayed on the watch face. Widgets allow you to see information at a
glance and they also provide quick access to functions, such as countdown timer and Serene breathing exercise. Find
out more in Watch face settings.
VIEWS
Swipe left or right from the watch face to access Polar Ignite 3 views. In the views, you'll have a variety of timely and
relevant data ready at your fingertips. Whether you're looking to see information about your daily activity, get insights on
your sleep, get suggestions for ready-made, easy-to-follow workouts, or just check the weather, you'll find the
information with just a few swipes. Scroll through the views by swiping left or right and open a more detailed view by
tapping the display. You can choose the views you want to be displayed. For more information, see
11
Choose views.
Page 12

MENU
Enter the menu by pressing the button and browse through the menu by swiping up or down. Confirm selections by
tapping the display, and return with the button.
Start training
From here you can start your training sessions. Tap the display to enter the pre-training mode
and browse to the sport profile you want to use.
See Start a training session for detailed instructions.
Serene guided breathing exercise
First, tap Serene and then tap Start exercise to start the breathing exercise.
For more information, see Serene™ guided breathing exercise.
Fueling
Stay energized throughout your session with the FuelWise™ fueling assistant. FuelWise™
includes three reminders that remind you to refuel and help you maintain adequate energy
levels during your long sessions. These are Smart carbs reminder, Manual carbs reminder and
Drink reminder.
For more information see Fuelwise.
12
Page 13

Timers
In Timers you'll find an alarm, a stopwatch and a countdown timer.
Alarm
Set alarm repetition: Off, Once, Monday to Friday or Every day. If you choose Once, Monday to
Friday or Every day, also set the time for the alarm.
When the alarm is set on, a clock icon is displayed in the time view.
Stopwatch
To start the stopwatch, tap the top half of the display. To add a lap, tap again. To pause the
stopwatch, press the button.
Countdown Timer
You can set the countdown timer to count down from a preset time.
Set the countdown time, and tap to confirm and start the countdown timer. The countdown
timer is added to the top of the watch face.
At the end of the countdown, the watch notifies you by vibrating. Tap to restart the timer, or
tap to cancel and return to the time view.
During training you can use interval timer and countdown timer. Add the timer
views to training views in the sport profile settings in Flow and sync the settings to
your watch. For more information on using timers during training, see During
training.
13
Page 14

Tests
Settings
Walking test
You can use the Walking Test to keep track of how your aerobic fitness is developing. It's
simple, safe and easy to repeat.
For more information see Walking Test.
Running test
The Running Performance Test helps you keep track of your progress and personalize your
heart rate and speed zones.
For more information see Running Performance Test.
Fitness test
Measure your fitness level easily with wrist-based heart rate while you lie down and relax.
For more information see Fitness Test with wrist-based heart rate.
You can edit the following settings on your watch:
l General settings
l Choose views
l Watch face
l Time & Date
l Physical settings
For more information, see Settings.
In addition to the settings available on your watch, you can edit Sport Profiles in the
Polar Flow web service and app. Customize your watch with your favorite sports
and the information you want to follow during your training sessions. See Sport
Profiles in Flow for more information.
BA CKL IGH T AN D DIS PLA Y SE TTI NGS
BACKLIGHT ACTIVATION
The backlight is not constantly on to save the battery of your watch. The backlight is automatically switched on when
you turn your wrist to look at the watch.
The backlight activation gesture is disabled, when Do not disturb is switched on. You can activate the
backlight when Do not disturb is on by pressing the button. See Quick settings for further information.
BACKLIGHT BRIGHTNESS
You can adjust the backlight brightness from General settings by choosing High, Medium or Low.
Backlight brightness is set to High by default. You can save battery life by turning down the backlight brightness.
14
Page 15

The display has an ambient light sensor that automatically adjusts brightness to suit the ambient light in
your surroundings.
ALWAYS ON DISPLAY
You can choose whether you want the screen to dimly show the time or to turn off completely when it's inactive. By
default, the screen turns off completely. To change the setting, go to General Settings > Display always on and choose
Show time.
Please note that the always on (Show time) selection will drain your battery much faster than the default
setting.
Always on display is disabled, when Do not disturb is switched on.
To enable backlight always on during training:Swipe down from the top of the display to pull down the Quick
settings menu. Tap the Backlight icon to select Always on or Automatic. With always on selected the watch display will
be illuminated throughout your training session. The backlight setting will default back to automatic after you finish
your training session.
PA IRI NG A PHO NE WITH YOU R WA TCH
Before you can pair a phone with your watch, you need to setup your watch in the Polar Flow web service or with the
Polar Flow mobile app as described in chapter Setting up your watch. If you did the setup for your watch with a phone,
your watch has already been paired. If you did the setup with a computer and would like to use your watch with Polar
Flow app, please pair your watch and phone as follows:
Before pairing a phone:
l download Flow app from the App Store or Google Play
l make sure your phone has Bluetooth turned on, and airplane mode/flight mode is not turned on.
l Android users:make sure location is enabled for the Polar Flow app in the phone's application settings.
To pair a phone:
1. On your phone, open the Flow app and sign in with your Polar account, which you have created when setting up
your watch.
Android users: If you have several Flow app compatible Polar devices in use, make sure you have
chosen Polar Ignite 3 as the active device in the Flow app. This way the Flow app knows to connect
to your watch. In the Flow app, go to Devices and choose Polar Ignite 3.
2. On your watch, press and hold the button in time mode OR go to Settings > General settings > Pair and sync >
Pair and sync phone and tap the display.
3. Open Flow app and bring your watch close to phone is displayed on your watch.
4. When the Bluetooth Pairing Request confirmation message appears on your phone, check that the code shown
on your phone matches the code shown on your watch.
5. Accept the Bluetooth pairing request on your phone.
6. Confirm the pin code on your watch.
7. Pairing done is displayed once the pairing is completed.
DELETE A PAIRING
To delete a pairing with a phone:
15
Page 16

1. Go to
2. Choose the device you want to remove by tapping its name on the display.
3. Remove pairing? is displayed. Confirm by tapping the display.
4. Pairing removed is displayed when you are done.
Settings > General settings > Pair and sync > Paired devices and tap the display.
UP DAT ING THE FIRMWA RE
To keep your watch up to date and to get the best performance, always make sure to update the firmware whenever a
new version is available. Firmware updates are performed to improve the functionality of your watch.
You won't lose any data due to the firmware update. Before the update begins, the data from your watch is
synced to the Flow web service.
WITH PHONE OR TABLET
You can update the firmware with your phone if you're using the Polar Flow mobile app to sync your training and activity
data. The app will let you know if there's an update available and will guide you through it. We recommend that you plug
the watch into a power source before starting the update to ensure a flawless update operation.
The wireless firmware update may take up to 20 minutes, depending on your connection.
WITH COMPUTER
Whenever a new firmware version is available, FlowSync will notify you when you connect the watch to your computer.
The firmware updates are downloaded via FlowSync.
To update the firmware:
1. Plug your watch into your computer with the custom cable that came in the box. Make sure that the cable snaps
into place. Align the ledge on the cable with the slot on your watch (marked with red).
2. FlowSync starts syncing your data.
3. After syncing, you are asked to update the firmware.
4. Choose Yes. The New firmware is installed (this may take up to 10 minutes), and the watch restarts. Please wait
until the firmware update has been finalized before you detach the watch from your computer.
16
Page 17

SETTINGS
GE NER AL S ETT ING S
To view and edit your general settings, press the button in Time view, swipe down the menu and tap Settings and then
General settings.
In General settings you'll find:
l Pair and sync
l Continuous HR tracking
l Flight mode
l Backlight brightness
l Display always on
l Do not disturb
l Phone notifications
l Music controls
l Units
l Language
l Inactivity alert
l Vibrations
l I wear my watch on
l Positioning satellites
l About your watch
PAIR AND SYNC
l Pair and sync phone/Pair sensor or other device: Pair sensors or phones with your watch. Sync data with the
Flow app.
l Paired devices: View all the devices you have paired with your watch. These can include heart rate sensors and
phones.
CONTINUOUS HR TRACKING
Turn the Continuous Heart Rate feature On, Off or Night-time only. For more information, see Continuous heart rate.
FLIGHT MODE
Choose On or Off.
Flight mode cuts off all wireless communication from your watch. You can still use it, but you can't sync your data with
the Polar Flow mobile app or use it with any wireless accessories.
BACKLIGHT BRIGHTNESS
You can adjust the backlight brightness by choosing High, Medium or Low. Backlight brightness is set to High by
default.
DISPLAY ALWAYS ON
Choose Show time if you want the screen to dimly show the time when it's inactive. Choose Off if you want the screen
to turn off completely.
By default, the screen turns off completely. Please note that the always on (Show time) selection will drain your battery
much faster than the default setting.
DO NOT DISTURB
Turn the Do not disturb feature On, Off or On ( - ). Set the period when do not disturb is on. Choose when it Starts at
and Ends at. When it is set on, you will not get any notifications or call alerts. Also, the backlight activation gesture is
17
Page 18

disabled.
PHONE NOTIFICATIONS
Set phone notifications Off, On, when not training, On, when training or Always on. Notifications are available when
not training and during training sessions.
MUSIC CONTROLS
Set music controls on for the training display and/or Watch face.
Choose where you want to control music in Training display or in Watch face or in both. The music controls are on by
default but if you don't want to use them, you can turn them off by removing both selections. When you’re done tap
Save.
UNITS
Choose metric (kg, cm) or imperial (lb, ft). Set the units used to measure weight, height, distance and speed.
LANGUAGE
You can choose the language you want to use on your watch. Your watch supports the following languages: Bahasa
Indonesia, Čeština, Dansk, Deutsch, English, Español, Français, Italiano, Nederlands, Norsk, Polski, Português,
Русский, Suomi, Svenska, 简 体中文 , 日 本 語 and Türkçe.
INACTIVITY ALERT
Set the inactivity alert On or Off.
VIBRATIONS
Set vibrations for scrolling menu items On or Off.
I WEAR MY WATCH ON
Choose Left hand or Right hand.
POSITIONING SATELLITES
Choose Better accuracy (dual-frequency GPS) or Power save (single-frequency GPS). For more information, see
Positioning satellites.
ABOUT YOUR WATCH
Check the device ID of your watch, as well as the firmware version, HW model, A-GPS expiry date and the Polar Ignite 3specific regulatory labels. Restart your watch, turn it off or reset all data and settings on it.
Restart: If you experience problems with your watch, you can try restarting it. Restarting the watch will not delete any of
the settings or your personal data from the watch. You can also restart your watch by pressing and holding the button
for 10 seconds.
Turn off: Turn your watch off. To turn it back on press and hold the button.
18
Page 19

Reset all data and settings: Reset the watch back to factory settings. This will erase all data and settings on your
watch.
CH OOS E VI EWS
The Polar Ignite 3 views provide you with a variety of timely and relevant data, including your activity status, weekly
training summary, Nightly Recharge status, Cardio load status, FitSpark training guide and Weather. Swipe left or right
from the watch face to access the views. Scroll through the views by swiping left or right and open a more detailed view
by tapping the display.
Choose the views you want to be shown from Settings > Choose views.
Daily activity
View your progress towards your daily activity goal and steps you've taken so far.
Your progress towards your daily activity goal is shown as a percentage and visualized with a
circle that fills up as you are active. The amount and type of body movements are registered
and turned into an estimation of steps.
In addition, when opening the details, you can see the following details of your day’s
accumulated activity:
l Active time tells you the cumulative time of body movements that benefit your health.
l When using the Continuous heart rate feature, you can check your current heart rate,
your highest and lowest heart rate readings of the day, and also view what your lowest
heart rate reading of the previous night was. You can turn the Continuous heart rate
feature on, off or to night-time only mode on your watch in Settings > General settings >
Continuous HR tracking.
l Calories you've burned through training, activity and BMR (Basal metabolic rate: the
minimum metabolic activity required to maintain life).
For more information, see 24/7 Activity tracking.
19
Page 20

Weekly summary
View an overview of your training week. Your total training time for the week split into different
training zones is illustrated on the display. Tap the display to open more details. You’ll see
distance, training sessions, total calories and time spent in each heart rate zone. To view more
information about a single session, browse to the session you want to view and tap the display
to open the summary.
In addition, you can view last week’s summary and details as well as any sessions planned for
next week.
20
Page 21
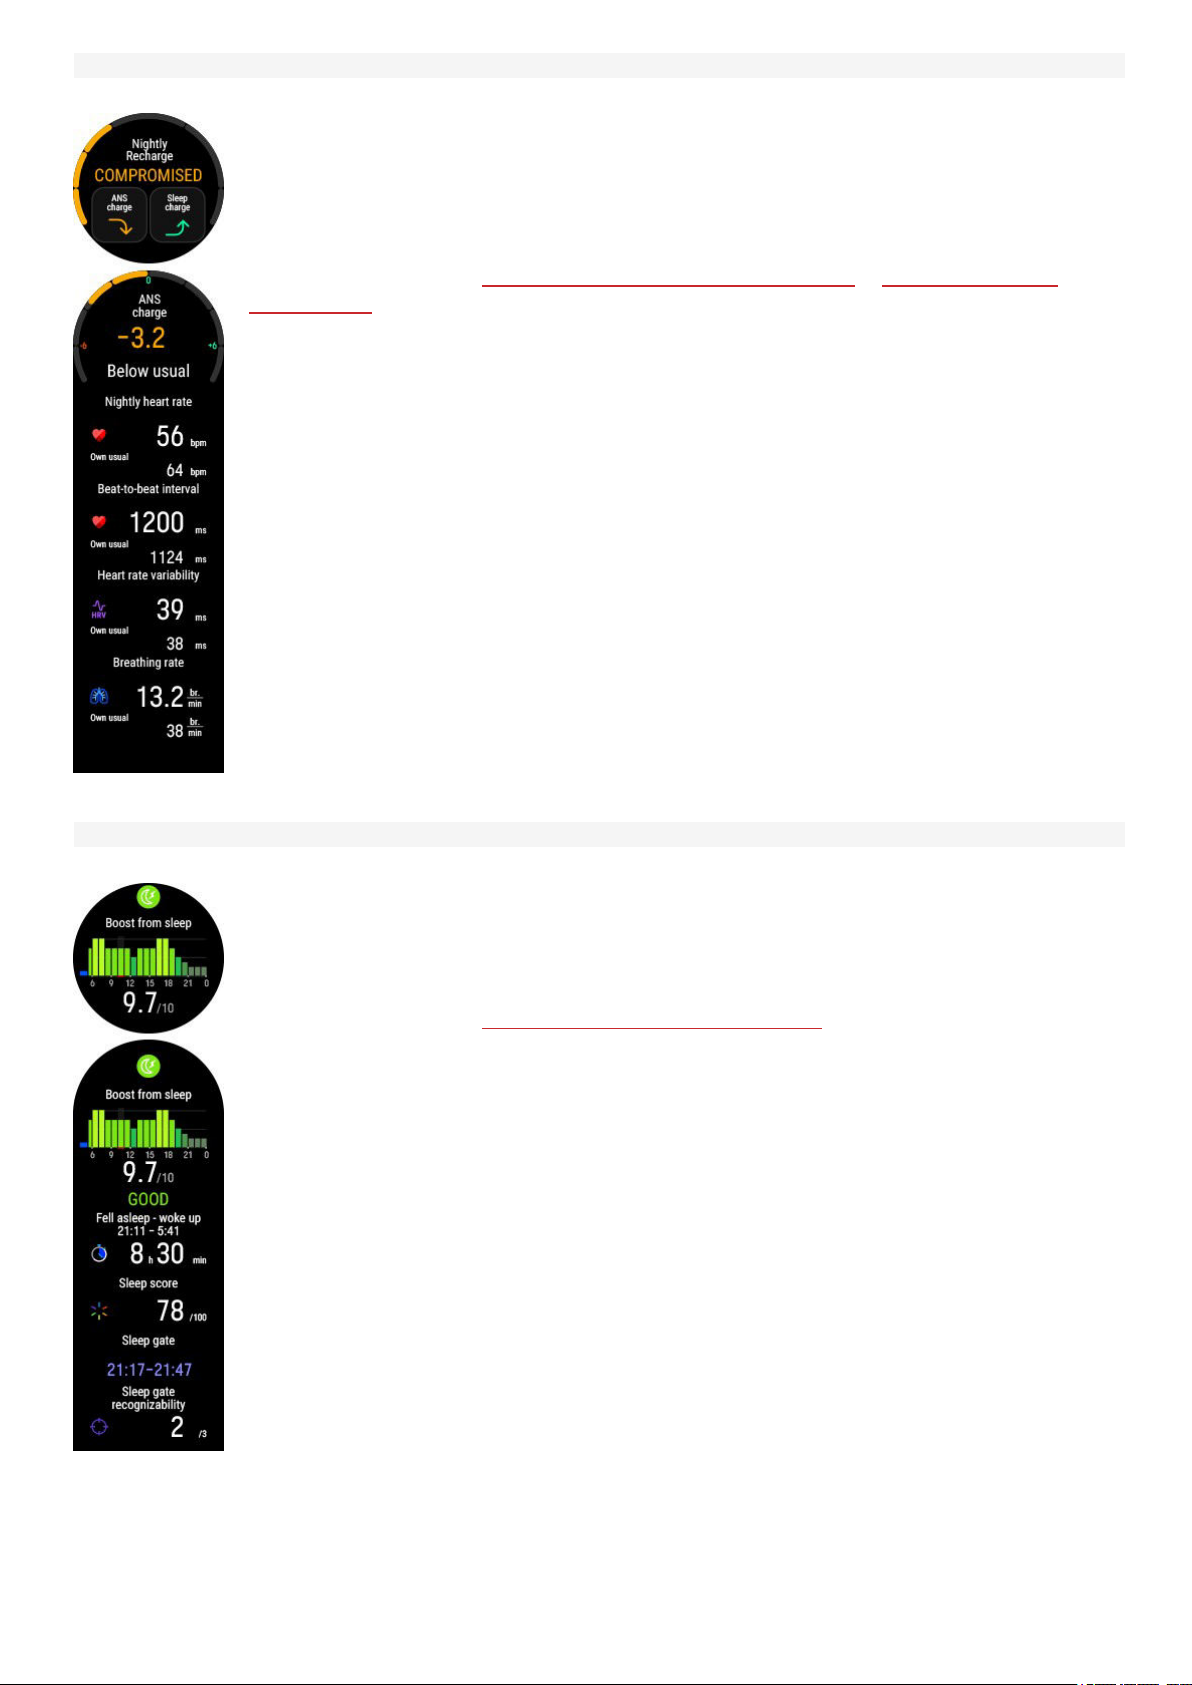
Nightly Recharge
When you wake up you can see your Nightly Recharge status. Nightly Recharge status tells
you how restorative your last night was. Nightly Recharge combines information on how well
your autonomic nervous system (ANS) calmed down during the early hours of your sleep ( ANS
charge) and how well you slept ( sleep charge). Tap ANS charge or Sleep charge to see more
details.
For more information, see Nightly Recharge™ recovery measurement or Sleep Plus Stages™
sleep tracking.
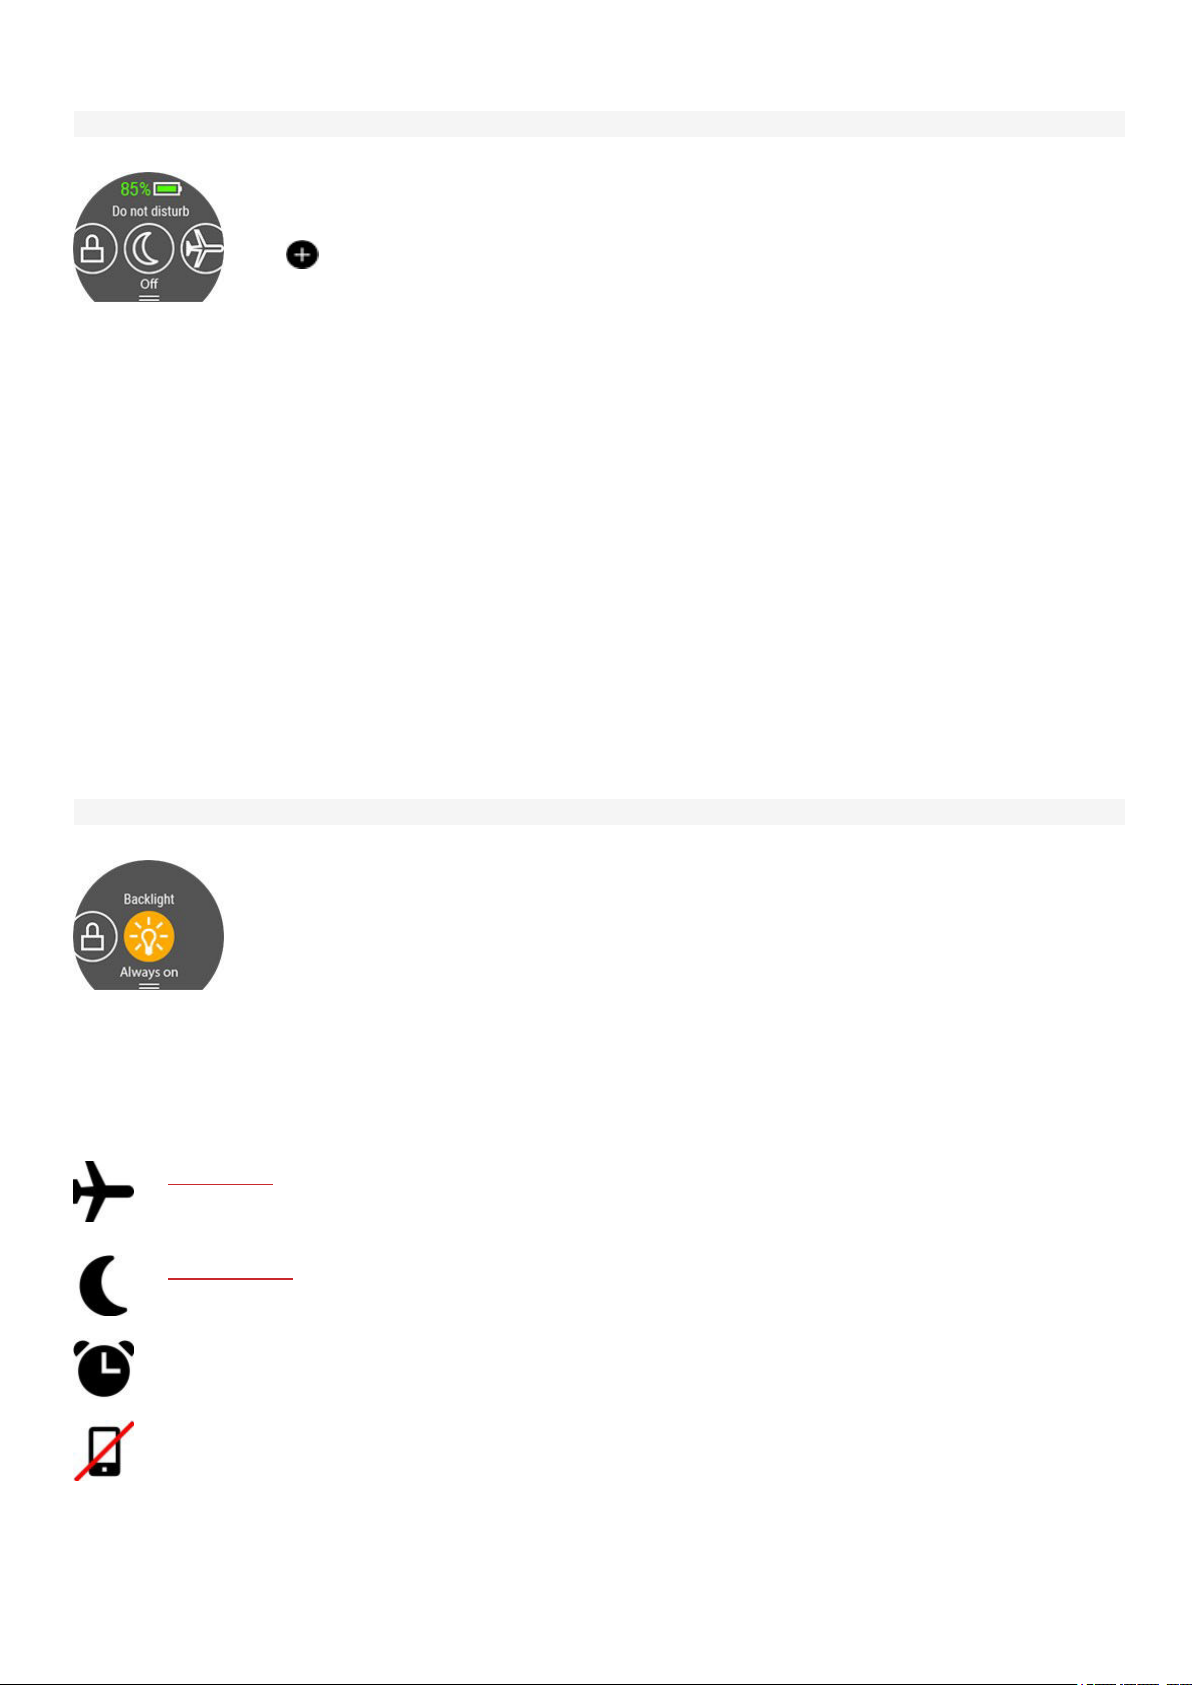
Boost from sleep
The Boost from sleep graph shows how your recent sleep is expected to boost you throughout
the day. The lighter the shade and higher the bar, the higher the boost level. Boost score
summarizes the daily forecast into one number in order to make it easy to compare between
days. Tap the display to see more details.
For more information, see Sleepwise™ guide to daytime alertness.
21
Page 22

Nightly skin temperature
When your watch detects that you have woken up, it compares the skin temperature measured
during sleep with your 28-day average, and shows the variation to that average. When you open
the details, you'll see a graph showing the skin temperature measurements for the last 7 nights.
For more information, see Nightly skin temperature.
Cardio load status
Cardio Load Status looks at the relation between your short term training load (Strain) and long
term training load (Tolerance) and based on that tells you whether you are in a detraining,
maintaining, productive or overreaching training load status.
In addition, you can see the numeric values for your Cardio Load Status, Strain and Tolerance,
and when opening the details, also a verbal description of your Cardio load status.
l The numeric value for your Cardio load status is Strain divided by Tolerance.
l Strain shows you how much you have strained yourself with training lately. It shows your
average daily cardio load from the past 7 days.
l Tolerance describes how prepared you are to endure cardio training. It shows your
average daily cardio load from the past 28 days.
l Verbal description of your Cardio load status.
For more information, see Training Load Pro.
22
Page 23

FitSpark training guide
Your watch suggests the most suitable training targets for you based on your training history,
fitness level and current recovery status. Tap the display to see all the suggested training
targets. Tap one of the suggested training targets to see detailed information about the training
target.
For more information, see FitSpark daily training guide.
Sunrise & sunset
Check when the sun rises, sun sets and the length of day for your current location. Tap the
display to see more details.
l Sunset - dusk
l Dawn - sunrise
l Length of day
Sunrise & sunset data is automatically updated via the Flow app if you've paired your watch
with it. You can also update it manually via GNSS by choosing Update.
Note that sunrise & sunset information can only be found from the sunrise & sunset view.
23
Page 24

Weather
View the current day's hourly forecast straight from your wrist. Tap the display to view more
detailed weather information including for example wind speed, wind direction, humidity and
chance of rain as well as tomorrow's 3-hour and the day after tomorrow's 6-hour forecast.
For more information, see Weather.
Music controls
Control music and media playing on your phone with your watch from the Music controls view.
For more information, see Music controls.
WA TCH FAC E SE TTINGS
Choose the watch face style and the information that appears on the watch face. Swipe up or down to view the options
and confirm your choices by tapping . If at any point you want to return and change your choice, press the button to
return to previous level.
LAYOUT
Choose the watch face layout from a set of pre-defined options:
l Analog watch face with four widgets
l Digital watch face with three widgets
24
Page 25

l Digital watch face with four widgets
l Digital watch face with two widgets
HANDS AND BACKGROUND
Choose hands and/or background style. The options include, for example, the following styles:
COLOR THEME
Choose the color theme for your watch face. The available colors you can choose from are red, orange, yellow, green,
blue, purple, pink and gray.
WIDGETS
Tap the plus icon to add a widget to your watch face. Scroll the list of available widgets, and tap to choose the one you
want to use. When you're ready with your design, swipe up, and then tap to confirm the design.
The Battery status widget shows how much charge is left in the battery.
The Calories widget shows how much calories you've burned through training, activity and BMR
(Basal metabolic rate: the minimum metabolic activity required to maintain life). By tapping the
widget, you can quickly access the Daily activity view.
By tapping the Countdown timer widget, you can quickly access the countdown timer setting. Set
the countdown time, and tap the green tick to confirm and start the countdown timer. At the end of
the countdown, the watch notifies you by vibrating. Tap to restart the timer, or tap to cancel
and return to the time view.
The Heart rate widget allows you to see your current heart rate on the watch face when using the
Continuous Heart Rate feature. By tapping the widget, you can quickly access the Daily activity
view. From the Daily activity view, you can check your current heart rate, your highest and lowest
heart rate readings of the day, and also view what your lowest heart rate reading of the previous
night was.
The Weather widget shows the current temperature. By tapping the widget, you can quickly access
the Weather view.
By tapping the Breathing exercise widget, you can quickly access the Serene™ guided breathing
exercise on your watch.
25
Page 26

The Steps widget shows the steps you've taken so far. The amount and type of body movements
are registered and turned into an estimation of steps. By tapping the widget, you can quickly
access the Daily activity view.
The Activity widget shows your progress towards your daily activity goal as a percentage. Your
daily activity goal is also visualized with a circle that fills up as you are active. By tapping the
widget, you can quickly access the Daily activity view.
Other widget options you can choose from include
Analog seconds, Digital seconds, Date, and Polar logo:
TI ME & DAT E
TIME
Set the time format: 24 h or 12 h.Then set the time of day.
When syncing with the Flow app and web service, the time of day is automatically updated from the
service.
DATE
Set the date.
DATE FORMAT
Also set the Date format, you can choose dd.mm.yyyy, dd/mm/yyyy, dd-mm-yyyy, yyyy.mm.dd, yyyy/mm/dd, yyyy-
mm-dd, mm.dd.yyyy, mm/dd/yyyy or mm-dd-yyyy.
When syncing with the Flow app and web service, the date is automatically updated from the service.
FIRST DAY OF WEEK
Choose the starting day of each week. Choose Monday, Saturday or Sunday.
When syncing with the Flow app and web service, the week's starting day is automatically updated from
the service.
PH YSI CAL SET TIN GS
To view and edit your physical settings, press the button in Time view, swipe down the menu and tap Settings and then
Physical settings.
It is important that you are precise with the physical settings, especially when setting your weight, height, date of birth
and sex, as they have an impact on the accuracy of the measuring values, such as the heart rate zone limits and calorie
expenditure.
In Physical settings you'll find:
l Weight
l Height
l Date of birth
l Sex
l Training background
26
Page 27

Activity goal
l
l Preferred sleep time
l Maximum heart rate
l Resting heart rate
l VO
2max
WEIGHT
Set your weight in kilograms (kg) or pounds (lbs).
HEIGHT
Set your height in centimeters (metric) or in feet and inches (imperial).
DATE OF BIRTH
Set your birthday. The order in which the date settings are depends on which time and date format you have chosen
(24h: day - month - year/12h: month - day - year).
SEX
Select Male or Female.
TRAINING BACKGROUND
Training background is an assessment of your long-term physical activity level. Select the alternative that best
describes the overall amount and intensity of your physical activity during the past three months.
l Occasional (0-1h/week): You do not participate regularly in programmed recreational sport or heavy physical
activity, e.g. you walk only for pleasure or exercise hard enough to cause heavy breathing or perspiration only
occasionally.
l Regular (1-3h/week): You participate regularly in recreational sports, e.g. you run 5-10 km or 3-6 miles per week
or spend 1-3 hours per week in comparable physical activity, or your work requires modest physical activity.
l Frequent (3-5h/week): You participate at least 3 times a week in heavy physical exercise, e.g. you run 20-50
km/12-31 miles per week or spend 3-5 hours per week in comparable physical activity.
l Heavy (5-8h/week): You participate in heavy physical exercise at least 5 times a week, and you may sometimes
take part in mass sports events.
l Semi-pro (8-12h/week): You participate in heavy physical exercise almost daily, and you exercise to improve
performance for competitive purposes.
l Pro (>12h/week): You are an endurance athlete. You participate in heavy physical exercise to improve your
performance for competitive purposes.
ACTIVITY GOAL
Daily activity goal is a good way to find out how active you really are in your everyday life. Choose your typical activity
level from three options and see how active you need to be to reach your daily activity goal.
The time you need to complete your daily activity goal depends on the level you have chosen and the intensity of your
activities. Age and gender also affect the intensity you need to reach your daily activity goal.
Level 1
If your day includes only a little sports and a lot of sitting, commuting by car or public transport and so on, we
recommend you pick this activity level.
Level 2
If you spend most of your day on your feet, perhaps due to the type of work you do or your daily chores, this is the right
activity level for you.
Level 3
If your work is physically demanding, you’re into sports or otherwise tend to be on the move and active, this is the
activity level for you.
27
Page 28

PREFERRED SLEEP TIME
Set Your preferred sleep time to define how long you aim to sleep every night. By default, it is set to the average
recommendation for your age group (eight hours for adults from 18 to 64 years). If you feel that eight hours of sleep is
too much or too little for you, we recommend you adjust your preferred sleep time to meet your individual needs. By
doing this, you’ll get accurate feedback on how much sleep you got in comparison to your preferred sleep time.
MAXIMUM HEART RATE
Set your maximum heart rate, if you know your current maximum heart rate value. Your age-predicted maximum heart
rate value (220-age) is displayed as a default setting when you set this value for the first time.
HR
is used to estimate energy expenditure. HR
max
physical exertion.The most accurate method for determining your individual HR
stress test in a laboratory. HR
is also crucial when determining training intensity. It is individual and depends on age
max
is the highest number of heartbeats per minute during maximum
max
is to perform a maximal exercise
max
and hereditary factors.
RESTING HEART RATE
Your resting heart rate is the lowest number of heartbeats per minute (bpm) when fully relaxed and without
distractions. Your age, fitness level, genetics, health status and sex affect the resting heart rate. A typical value for an
adult is 55–75 bpm, but your resting heart rate can be significantly lower than that, for example, if you’re very fit.
It’s best to measure your resting heart rate in the morning after a good night’s sleep, right after you wake up. It’s OK to
go to the bathroom first if it helps you to relax. Don’t do any strenuous training leading up to the measurement and
make sure you’re fully recovered from any activity. You should do the measurement more than once, preferably on
consecutive mornings, and calculate your average resting heart rate.
To measure your resting heart rate:
1. Wear your watch. Lie down on your back and relax.
2. After about 1 minute, start a training session on your wearable. Choose any sport profile, for example Other
indoor.
3. Lie still and breathe calmly for 3–5 minutes. Don’t look at your training data during the measurement.
4. Stop the training session on your Polar device. Sync the wearable with the Polar Flow app or web service and
check the training summary for the value of your lowest heart rate (HR min)—this is your resting heart rate.
Update your resting heart rate to your physical settings in Polar Flow.
VO
2MAX
Set your VO2
VO2
(maximal oxygen uptake, maximal aerobic power) is the maximal rate at which oxygen can be used by the body
max
max
.
during maximal exercise; it is related directly to the maximal capacity of the heart to deliver blood to the muscles.
VO2
You can also use your
with wrist-based heart rate feature to estimate your VO2
can be measured or predicted by fitness tests (e.g. maximal exercise tests and submaximal exercise tests).
max
Running Index score, which is an estimation of your VO2
and update it to your physical settings.
max
. You can use the Polar Fitness Test
max
28
Page 29
QU ICK SET TIN GS
Quick settings menu
Swipe down from the top of the display in time view to pull down the Quick settings menu.
Swipe left or right to browse and tap to choose a feature.
During training
Tap
Screen lock, Alarm, Countdown timer, Do not disturb, Flight mode and Flashlight.
Battery status icon shows how much charge is left in the battery.
to customize what features you want to see in the quick settings menu. Choose from
l Screen lock: Tap the screen lock icon to switch screen lock on. Press the button for 2
seconds to unlock the screen.
l Alarm: Set alarm repetition: Off, Once, Monday to Friday or Every day. If you choose
Once, Monday to Friday or Every day, also set the time for the alarm.
l Countdown timer: Swipe up or down to set the countdown time, and tap the green tick to
confirm and start the countdown timer.
l Do not disturb: Tap the do not disturb icon to switch it on and tap again to switch it off.
When do not disturb is switched on, you will not get any notifications or call alerts. Also,
the backlight activation gesture is disabled.
l Flight mode: Tap the flight mode icon to switch it on and tap again to switch it off. Flight
mode cuts off all wireless communication from your watch. You can still use it, but you
can't sync your data with the Polar Flow mobile app or use it with any wireless
accessories.
l Flashlight: Tap the flashlight icon to activate flashlight mode. The display will light up at
maximum brightness. To turn off the flashlight, press the button.
DI SPL AY I CON S
Flight mode is on. Flight mode cuts off all wireless communication from your watch. You can still
use it, but you can't sync your data with the Polar Flow mobile app or use it with any wireless
accessories.
Do not disturb mode is on. When do not disturb is switched on, you will not get any notifications or
call alerts. Also, the backlight activation gesture is disabled.
Vibrating alarm is set. To set the alarm, go to Timers > Alarm.
Your paired phone is disconnected and you have notifications and/or music controls turned on.
Check that your phone is within Bluetooth range from your watch and Bluetooth is enabled on your
phone.
l Backlight : Tap the Backlight icon to choose Always on or Automatic. With always on
selected the watch display will be illuminated throughout your training session. The
backlight setting will default back to automatic after you finish your training session.
Please note that the always on selection will drain your battery much faster than the
default setting.
l Screen lock: Tap the screen lock icon to switch screen lock on. Press the button for 2
seconds to unlock the screen.
29
Page 30

Screen lock is on. Press the button for 2 seconds to unlock the screen.
RE STA RTI NG A ND RESE TTI NG
If you experience problems with your watch, you can try restarting it. Restarting the watch will not delete any of the
settings or your personal data from the watch.
TO RESTART THE WATCH
Press the button to access the main menu, swipe down to find Settings, navigate to Settings > General settings >
About your watch > swipe all the way down to find Restart. First, tap Restart and then tap to confirm the restart.
You can also restart your watch by pressing and holding the button for 10 seconds.
TO RESET THE WATCH TO FACTORY SETTINGS
If restarting your watch didn't help, you can reset the watch back to factory settings. Note that resetting the watch back
to factory settings empties all personal data and settings from the watch, and you will need to set it up again for your
personal use. All data that you have synced from your watch to your Flow account is safe. You can do the factory reset
via FlowSync or from the watch.
Factory reset via FlowSync
1. Go to flow.polar.com/start and download and then install the Polar FlowSync data transfer software onto your
computer.
2. Connect your watch to the computer’s USB port.
3. Open settings in FlowSync.
4. Press the Factory Reset button.
5. If you use Flow app to sync, check the list of paired Bluetooth devices on your phone, and remove your watch
from the list if it's there.
Now you need to set up your watch again, either via mobile or computer. Just remember to use the same Polar account
in the setup you've used before resetting.
Factory reset from the watch
1. Press the button to access the main menu, swipe down to find Settings.
2. Choose Settings > General settings > About your watch.
3. Swipe all the way down to find Reset all data and settings.
4. First, tap Reset all data and settings.
5. Then tap to confirm the factory reset.
Now you need to set up your watch again, either via mobile or computer. Just remember to use the same Polar account
in the setup you've used before resetting.
30
Page 31

TRAINING
WR IST -BA SED HEA RT RAT E ME ASU REM ENT
Your watch measures your heart rate from the wrist with the Polar Precision Prime™ sensor fusion technology. This
new heart rate innovation combines optical heart rate measurement with skin contact measurement, ruling out any
disturbances to the heart rate signal. It tracks your heart rate accurately even in the most demanding conditions and
training sessions.
Although there are many subjective clues as to how your body is doing during exercise (perceived exertion, breathing
rate, physical sensations), none of them are as reliable as measuring heart rate. It is objective and affected by both
internal and external factors—meaning that you will have a dependable measure of your physical state.
WEARING YOUR WATCH WHEN MEASURING HEART RATE FROM YOUR WRIST OR
TRACKING YOUR SLEEP
To measure wrist-based heart rate accurately during training, when using the Continuous heart rate and Nightly
Recharge features or while tracking your sleep with Sleep Plus Stages make sure that you wear the watch correctly:
l Wear your watch on top of your wrist, at least a finger’s width up from the wrist bone (see the picture below).
l Tighten the wristband firmly around your wrist. The sensor on the back must be in constant touch with your skin
and the watch should not be able to move on your arm. A good way to check that the wristband is not too loose
is if you push the wristband lightly up from both sides of your arm and make sure the sensor doesn’t lift from
your skin. When pushing the wristband up you shouldn't see the LED light shining from the sensor.
l For most accurate heart rate measurement, we advise you to wear your watch for a few minutes prior to starting
the heart rate measurement. Also it's a good idea to warm up the skin if your hands and skin get cold easily. Get
the blood going before starting your session!
During training you should slide the Polar device further up from the wrist bone and wear the wristband a
bit more tightly to try to minimize any extra moving of the device. Give your skin a few minutes to adapt to
the Polar device before starting a training session. After the training session, loosen the wristband a bit.
If you have tattoos on the skin of your wrist, avoid placing the sensor right on them as they may prevent accurate
readings.
In sports where it's more challenging to keep the sensor stationary on your wrist or where you have pressure or
movement in muscles or tendons near the sensor, we recommend using a Polar heart rate sensor with a chest strap if
you’re looking for supreme accuracy in your training. Your watch is compatible with Bluetooth® heart rate sensors, like
Polar H10. The Polar H10 heart rate sensor is more responsive to rapidly increasing or decreasing heart rate, so it’s the
ideal option also for interval type of training with quick sprints.
To maintain the best possible performance of the wrist-based heart rate measurement, keep your watch
clean and prevent scratches. After a sweaty training session, we recommend that you wash the watch
under running water with a mild soap and water solution. Then wipe it dry with a soft towel. Let it fully dry
before charging.
31
Page 32

WEARING YOUR WATCH WHEN NOT MEASURING HEART RATE FROM YOUR WRIST OR
TRACKING YOUR SLEEP/NIGHTLY RECHARGE
Loosen the wristband a bit for a more comfortable fit and to let your skin breathe. Wear the watch just as you would
wear a normal watch.
Every once in a while it’s a good idea to let your wrist have a breather, especially if you have sensitive skin.
Take off your watch and recharge it. This way both your skin and your watch can have a rest, and be ready
for your next training event.
ST ART A TR AIN IN G SE SSI ON
1. Wear your watch and tighten the wristband.
2. To enter the pre-training mode press the button to enter the main menu and tap Start training.
From the pre-training mode, you can access the quick menu by tapping the quick menu
icon
and whether you are using GPS.
You can, for example, choose a favorite training target you want to perform and add
timers to your training views. For more information, see
After your choice, the watch returns to the pre-training mode.
3. Browse to your preferred sport.
4. Stay in the pre-training mode until the watch has found your heart rate and the GPS satellite signals (if applicable
to your sport) to make sure your training data is accurate. To catch GPS satellite signals, go outdoors and away
from tall buildings and trees. Keep your watch still with the display upwards and avoid touching the watch during
the GPS signal search.
If you have paired an optional Bluetooth sensor with your watch, the watch will automatically start
searching for the sensor signal as well.
~ 38h Estimated training time with current settings. By using power save settings,
the estimated training time can be extended.
. The options displayed in the quick menu depend on the sport you have chosen
Quick menu.
The watch has found your heart rate when your heart rate is shown.
When you're wearing a Polar heart rate sensor that's paired with your watch, the
watch automatically uses the connected sensor to measure your heart rate during training
sessions. A blue circle around the heart rate symbol indicates that your watch uses the
connected sensor to measure your heart rate.
The circle around the GPS icon will turn orange when the minimum amount of
satellites (4) needed for the GPS fix are found. You can start your session but for better
accuracy wait until the circle turns green.
The circle around the GPS icon will turn green when the GPS is ready. The watch
notifies you with a vibration.
Your paired phone is connected and phone notifications, music controls or the voice
guidance feature is turned on.
32
Page 33

5. When all signals are found, tap the display to start training recording.
During Training for more information on what you can do with your watch during training.
See
START A PLANNED TRAINING SESSION
You can plan your training and create detailed training targets in the Polar Flow app or the Polar Flow web service and
sync them to your watch.
To start a planned training session scheduled for the current day:
1. Enter the pre-training mode by first pressing the button and then tappping on Start training.
2. You'll be prompted to start a training target you've scheduled for the day.
3. Tap
4. Tap Start to return to pre-training mode, and choose the sport profile you want to use.
5. When the watch has found all the signals, tap the display. Recording started is displayed and you can start
training.
Your watch will guide you towards completing your target during training. See During Training for more information.
to view the target information.
Your planned training targets will also be included in the FitSpark training suggestions.
QU ICK MEN U
You can access the quick menu by tapping the quick menu icon from pre-training mode and during a session when
paused.
The options displayed in the quick menu depend on the sport you have chosen and whether you are using GPS.
Power save settings:
The power save settings allow you to extend your training time by changing the GPSrecording
rate and setting Wrist-based heart rate off. These settings let you optimize battery usage and get
more training time for extra long sessions or when the battery is running low.
For more information, see Power save settings
Share HR with other devices:
In heart rate sensor mode you can turn your watch into a heart rate sensor and share your heart
rate with other Bluetooth devices like training apps, gym equipment or cycling computers. For more
information, see HR sensor mode.
Training suggestions:
Training suggestions shows you the daily FitSpark training suggestions.
33
Page 34

Pool length:
When using the Swimming/Pool swimming profile, it’s important that you choose the correct pool
length, as it affects pace, distance and stroke calculation, as well as your SWOLF score. Tap Pool
length to access the Pool length setting and change the previously set pool length if necessary.
The default lengths are 25 meters, 50 meters and 25 yards, but you can also set it manually to a
custom length. The minimum length that can be chosen is 20 meters/yards.
The pool length setting is only available in the pre-training mode from the quick menu.
Favorites:
In Favorites you'll find training targets that you have saved as favorites in the Flow web service, and
synced to your watch. Choose a favorite training target you want to perform. After your choice, the
watch returns to the pre-training mode where you can start the training session.
For more information, see Favorites.
Race pace:
The Race Pace feature helps you keep a steady pace and achieve your target time for a set
distance. Define a target time for the distance - 45 minutes for a 10k run for example and follow
how far behind or ahead you are compared to your pre-set target. You can also check what the
steady pace/speed to meet your target is.
Race Pace can be set on your watch. Just choose the distance and target duration and you’re ready
to go. You can also set a Race Pace target in the Flow web service or app, and sync it to your
watch.
For more information, see Race Pace.
Interval timer:
You can set time and/or distance based interval timers to precisely time work and recovery phases
in your interval training sessions.
To add interval timer to your training views for the session, choose Timer for this session > On.
You can use a previously set timer or create a new timer by returning to the quick menu and
choosing Interval timer > Set timers:
1. Choose Time-based or Distance-based: Time-based: Define minutes and seconds for the
timer and tap . Distance-based: Set the distance for the timer and tap . Set another
timer? is shown. To set another timer, tap .
2. When completed, the watch returns to pre-training mode where you can start the training
session. The timer starts when you start the training session.
For more information, see During Training.
Countdown timer:
To add countdown timer to your training views for the session, choose Timer for this session >
On. You can use a previously set timer or create a new timer by returning to the quick menu and
choosing Countdown timer > Set timer. Set the countdown time, and tap the green tick to confirm.
The timer starts when you start the training session.
For more information, see During Training.
34
Page 35

Back to start:
The back to start feature guides you back to the starting point of your session. To add the Back to
start view to your training views of the current training session, choose Back to start on, and press
OK.
For more information, see Back to start.
The back to start feature is only available if GPS is set on for the sport profile.
When you choose a training target for your session, the
the quick menu. This is because you can only choose one target for the session. To change the target, choose the
crossed out option and you will be asked if you want to change your target. Confirm another target by tapping .
Favorites and Training suggestions options are crossed out in
DU RIN G TR AIN ING
BROWSE THE TRAINING VIEWS
During training you can browse through the training views by swiping the display left or right. Note that the available
training views and the information you see on the training views depend on the sport you've chosen and on any edits
you've done to the chosen sport profile.
You can add sport profiles onto your watch and define the settings for each sport profile in the Polar Flow app and web
service. You can create tailored training views for each sport you do and choose what data you want to follow during
your sessions. For more information, see Sport profiles in Flow.
For example, your training views can have the following information:
Your heart rate and the heart rate ZonePointer
Distance
Duration
Pace/Speed
Your heart rate and the heart rate ZonePointer
Duration
Calories
Descent
Your current altitude
Ascent
35
Page 36

Maximum heart rate
Heart rate graph and your current heart rate
Average heart rate
Time of day
Duration
Music controls
For more information, see Music controls.
Backlight always on during training: Swipe down from the top of the screen to pull down the Quick
settings menu. Tap the Backlight icon to select Always on or Automatic. With always on selected the
watch display will be illuminated throughout your training session. The backlight setting will default back to
automatic after you finish your training session. Please note that the always on selection will drain your
battery much faster than the default setting.
SET TIMERS
Before you can use timers during training, you need to add the timers to your training views. You can do this either by
setting the timer view on for your current training session from the Quick menu or by adding the timers to the training
views of the sport profile in the Flow web service sport profile settings and syncing the settings to your watch.
See Sport Profiles in Flow for more information.
Interval Timer
36
Page 37

If you set the timer view on for your training session from the Quick menu, the timer starts when you start
the training session. You can stop the timer and start a new timer as instructed below.
If you have added the timer in the training views of the sport profile you are using, you can start the timer as follows:
1. Browse to the Interval timer view and press and hold the display for 3 seconds. Tap Start to use a previously set
timer or create a new timer in Set interval timer.
2. Choose Time-based or Distance-based: Time-based: Define minutes and seconds for the timer and tap .
Distance-based: Set the distance for the timer and tap .
3. Set another timer? is shown. To set another timer, tap .
4. When completed, tap Start to start the interval timer. At the end of each interval, the watch notifies you by
vibrating.
To stop the timer, press and hold the display for 3 seconds and tap Stop timer.
Countdown Timer
If you set the timer view on for your training session from the Quick menu, the timer starts when you start
the training session. You can stop the timer and start a new timer as instructed below.
If you have added the timer to the training views of the sport profile you are using, start the timer as follows:
1. Browse to the Countdown timer view and press and hold the display for 3 seconds.
2. Tap Start to use a previously set timer or choose Set countdown timer to set a new countdown time. When
completed, tap Start to start the countdown timer.
3. At the end of the countdown, the watch notifies you by vibrating. If you want to restart the countdown timer,
press and hold the display for 3 seconds and tap Start.
MARK A LAP
Laps can be marked both manually and automatically. To mark a lap manually, slap the display firmly with your fingers.
Automatic laps can be taken based on distance, duration, or location. You can turn these functions on in the sport
profile settings in the Polar Flow app or web service. For more information, see How to mark a lap during training.
TRAINING WITH A TARGET
If you have created a training target based on duration, distance or calories in the Flow app and synced it to your
watch, you have the following training target view as the default first training view:
If you've created a target based on duration or distance, you can see how much of your target
you still have remaining before you reach it.
OR
If you've created a target based on calories, you can see how many calories of your target you
have left to burn.
If you have created a phased training target in the Flow app or web service and synced the target to your watch, you
have the following training target view as the default first training view:
37
Page 38

l Depending on the chosen intensity, you can see either your heart rate or speed/pace and
the lower and upper heart rate or speed/pace limit of the current phase.
l Phase name and phase number/total number of phases
l Duration/distance covered so far
l Target duration/distance of the current phase
The Voice guidance feature helps you focus on your training target by providing guidance during training
phases straight to your headphones.
See Planning your training for instructions on creating training targets.
Change phase during a phased session
If you chose manual phase change when you created the phased target, tap the display to continue to the next phase
after finishing a phase.
If your chose automatic phase change, the phase will change automatically when you have finished a phase. The
watch notifies you by vibrating when the phase changes.
Note that when setting very short phases (under 10 seconds) you will not get a vibration alarm when the
phase is over.
Notifications
If you are training outside the planned heart rate zones or speed/pace zones, your watch notifies you with a vibration.
PA USI NG/ STO PPI NG A TRA INI NG S ESS IO N
Press the button to pause your training session.
Tap the display to continue training. To stop the session, press and hold the button.
If you stop your session after pausing, the time elapsed after pausing is not
included in the total training time.
Press and hold the button to stop your training session
To stop the session, press and hold the button. You’ll get a summary of your training session on
your watch right after you’ve stopped training.
TR AIN ING SUM MAR Y
AFTER TRAINING
You'll get a summary of your training session on your watch right after you've stopped training. Get a more detailed and
illustrated analysis in the Polar Flow app or in the Polar Flow web service.
The information shown in your summary depends on the sport profile and data collected. For example, your training
summary can include the following information:
38
Page 39

Start time and date
Duration of the session
Distance covered in the session
Heart rate
Your average and maximum heart rate during the session.
Your Cardio load from the session
Heart rate zones
Training time spent in different heart rate zones
Energy used
Energy used during the session
Carbs
Protein
Fat
For more information, see Energy Sources
Pace/Speed
Average and maximum pace/speed of the session
Running Index:Your running performance class and numerical value. Find out more from
chapter Running Index.
Speed zones
Training time spent in different speed zones
39
Page 40

Cadence
Your average and maximum cadence for the session
Running cadence is measured with a built-in accelerometer from your wrist movements.
Altitude
Maximum altitude during the session
Ascended meters/feet during the session
Descended meters/feet during the session
Lap number
Best lap
Average lap
Tap the arrow, then swipe left or right to view the following details:
l Duration of each lap (the best lap is highlighted in yellow)
l Distance of each lap
l Average and maximum heart rate of each lap in the color of the heart rate zone
l Average speed/pace of each lap
To view your training summaries later on your watch:
From the watch face, swipe left or right to navigate to the Weekly summary view, and then tap
the display. Browse to the training session you want to view by swiping up or down and tap the
training session to open the summary. Your watch can contain a maximum of 20 training
summaries.
40
Page 41

TRAINING DATA IN THE POLAR FLOW APP
Your watch syncs with the Polar Flow app automatically after you finish a training session if your phone is within the
Bluetooth range. You can also sync your training data manually from the watch to the Flow app by pressing and holding
the button of your watch when you're signed in to the Flow app and your phone is within the Bluetooth range. In the app
you can analyze your data at a glance after each session. The app allows you to see a quick overview of your training
data.
For more information, see Polar Flow App.
TRAINING DATA IN THE POLAR FLOW WEB SERVICE
Analyze every detail of your training and learn more about your performance. Follow your progress and also share your
best sessions with others.
For more information, see Polar Flow Web Service.
41
Page 42

FEATURES
SM ART COA CHI NG
Whether it’s balancing training and recovery, assessing your day-to-day fitness levels, creating individual training plans,
working out at the right intensity or receiving instant feedback, Smart Coaching offers a choice of unique, easy-to-use
features, personalized to your needs and designed for maximum enjoyment and motivation when training.
Your watch includes the following Polar Smart Coaching features:
l Nightly Recharge™ recovery measurement
l Sleep Plus Stages™ sleep tracking
l Sleepwise™ guide to daytime alertness
l Nightly Skin Temperature
l FitSpark™ daily training guide
l Work-rest guide based on your heart rate
l Serene™ guided breathing exercise
l Fitness Test with wrist-based heart rate
l Walking Test
l Running Performance Test
l Running Program
l Running Index
l Training Load Pro
l FuelWise™
l Smart calories
l Energy sources
l Training benefit
l Continuous heart rate
l 24/7 Activity tracking
l Activity Guide
l Activity Benefit
42
Page 43

NIGHTLY RECHARGE™ RECOVERY MEASUREMENT
Nightly Recharge™ is an overnight recovery measurement that shows you how well you recover from the demands of
your day. Your Nightly Recharge status is based on two components: how you slept (sleep charge) and how well your
autonomic nervous system (ANS) calmed down during the early hours of your sleep (ANS charge). Both components
are formed by comparing your last night to your usual levels from the past 28 days. Your watch automatically
measures both sleep charge and ANS charge during the night.
You can see your Nightly Recharge status on your watch and in the Polar Flow app. Based on what we've measured
from you, you get personalized daily tips in Polar Flow app on exercise, and tips on sleep and regulating your energy
levels on those particularly rough days. Nightly Recharge helps you make optimal choices in your everyday life to
maintain overall well-being and reach your training goals.
How tostart using Nightly Recharge?
1. Continuous heart rate tracking needs to be enabled for Nightly Recharge to function. To
enable Continuous HR tracking go to Settings > General Settings > Continuous HR
tracking and choose On or Night-time only.
2. Tighten the wristband firmly around your wrist and wear the watch when you sleep. The
sensor on the back of the watch must be in constant touch with your skin. For more
detailed wearing instructions, see Wrist-based heart rate measurement.
3. You need to wear your watch for three nights before you start to see the Nightly
Recharge status on your watch. This is how long it takes to establish your usual level.
Before you get your Nightly Recharge you can view your sleep and ANS measurement
details (heart rate, heart rate variability and breathing rate). After three successful
nightly measurements you can see your Nightly Recharge status on your watch.
Nightly Recharge on your watch
When your watch detects that you've woken up, it will show your Nightly Recharge status on the Nightly Recharge
view. Navigate to the Nightly Recharge view by swiping left or right from the watch face.
The Nightly Recharge status tells you how restorative last night was. Scores for both ANS charge and sleep charge
are taken into account when calculating your Nightly Recharge status. Nightly Recharge status has the following
scale: very poor – poor – compromised – OK – good – very good.
You can also stop the sleep tracking manually if you watch has not yet summarized your sleep. Already
awake? is shown on the Nightly Recharge view when your watch has detected a minimum of four hours
of sleep. Confirm by tapping and the watch summarizes your Nightly Recharge instantly.
Tap ANS charge or Sleep charge to see more details.
43
Page 44

1. Nightly Recharge status graph
2. Nightly Recharge status Scale: very poor – poor – compromised – OK – good – very good.
3. ANS charge graph
4. ANS charge The scale is from -10 to +10. Around zero is your usual level.
5. ANS charge status Scale: much below usual – below usual – usual – above usual – much above usual.
6. Heart rate bpm (4 h average)
7. Beat-to-beat interval ms (4 h average)
8. Heart rate variability ms (4 h average)
9. Breathing rate br./min (4 h average)
10. Sleep score graph
11. Sleep score (1 - 100) A score that summarizes your sleep time and sleep quality into a single number.
12. Sleep charge status = Sleep score compared to your usual level. Scale: much below usual – below usual –
usual – above usual – much above usual.
13. Sleep data details. See "Sleep data on your watch" on page47 for more detailed information.
Nightly Recharge in the Flow app
You can compare and analyze your Nightly Recharge details from different nights in the Polar Flow app. Choose
Nightly Recharge from the Flow app menu to see the details of your last night's Nightly Recharge. Swipe the display
right to see the Nightly Recharge details for previous days. Tap the ANS charge or sleep charge box to open detailed
view of ANS charge or sleep charge.
44
Page 45

ANS charge details in the Flow app
ANS charge gives you information on how well your autonomic nervous system
(ANS) calmed down during the night. The scale is from -10 to +10. Around zero is
your usual level. The ANS charge is formed by measuring your heart rate, heart
rate variability and breathing rate during roughly the first four hours of sleep.
A normal heart rate value for adults can range between 40 and 100 bpm. It is
common for your heart rate values to vary between nights. Mental or physical
stress, exercising late at night, illness, or alcohol can keep your heart rate up
during the early hours of your sleep. It's best to compare your last night's value to
your usual level.
Heart rate variability (HRV) refers to the variation between successive heart
beats. In general, high heart rate variability is linked to general good health, high
cardiovascular fitness and resilience to stress. It can vary greatly from person to
person, ranging from 20 to 150. It's best to compare your last night's value to your
usual level.
Breathing rate shows your average breathing rate during roughly the first four
hours of sleep. It is calculated from your beat-to-beat interval data. Your beat-tobeat intervals shorten when you breathe in and lengthen when you breathe out.
During sleep, breathing rate slows down and varies mainly along with sleep
stages. Typical values for a healthy adult at rest range from 12 to 20 breaths per
minute. Higher values than usual may indicate a fever or impending illness.
Sleep charge details in Polar Flow
For sleep charge information in the Polar Flow app, see "Sleep data in the Flow app and web service" on page48.
Personalized tips in the Flow app
Based on what we've measured from you, you get personalized daily tips in the Polar Flow app on exercise, and tips
on sleep and regulating your energy levels on those particularly rough days. Tips for the day are displayed on the
opening view of Nightly Recharge in the Flow app.
For exercise
You get an exercise tip every day. It tells you if you should take it easy or go for it. The tips are based on:
45
Page 46

l Nightly Recharge status
l ANS charge
l Sleep charge
l Cardio load status
For sleep
If you didn't sleep as well as usual, you get a sleep tip. It tells you how to improve the aspects of your sleep that
weren't as good as usual. Besides parameters we measure from your sleep, we take into account:
l sleep rhythm over a longer period of time
l Cardio load status
l exercise on the previous day
For regulating energy levels
If your ANS charge status or sleep charge is particularly low, you get a tip that helps you get through the days with a
lower recharge. They are practical tips on how to calm down when you're in overdrive, and how to energize when you
need a boost.
Learn more about the Nightly Recharge in this in-depth guide.
46
Page 47

SLEEP PLUS STAGES™ SLEEP TRACKING
Sleep Plus Stages automatically tracks the amount and quality of your sleep and shows you how long you spent in
each sleep stage. It gathers your sleep time and sleep quality components into one easily glanceable value, sleep
score. Sleep score tells you how well you slept compared to the indicators of a good night’s sleep based on the current
sleep science.
Comparing the components of the sleep score to your own usual level help you recognize which aspects of your daily
routine may affect your sleep and may need adjusting. Nightly breakdowns of your sleep are available on your watch
and in the Polar Flow app. Long-term sleep data in the Polar Flow web service helps you analyze your sleep patterns in
detail.
How to start tracking your sleep with Polar Sleep Plus Stages™
1. The first thing you need to do is set your preferred sleep time in the Polar Flow or on your watch. In the Flow
app, tap your profile, and choose Your preferred sleep time. Choose your preferred time and tap Done. Or sign
into your Flow account or create a new one at flow.polar.com, and choose Settings > Physical settings > Your
preferred sleep time. Set your preferred time and choose Save. Set your preferred sleep time on your watch
from Settings > Physical settings > Your preferred sleep time.
Sleep time preference is the amount of sleep you want to get each night. By default, it is set to the average
recommendation for your age group (eight hours for adults from 18 to 64 years). If you feel that eight hours of
sleep is too much or too little for you, we recommend you adjust your preferred sleep time to meet your
individual needs. By doing this, you’ll get accurate feedback on how much sleep you got in comparison to your
preferred sleep time.
2. Continuous heart rate tracking needs to be enabled for Sleep Plus Stages to function. To enable Continuous
HR tracking go to Settings > General Settings > Continuous HR tracking and select On or Night-time only.
Tighten the wristband firmly around your wrist. The sensor on the back of the watch must be in constant touch
with your skin. For more detailed wearing instructions, see Wrist-based heart rate measurement.
3. Your watch detects when you fall asleep, when you wake up and how long you spent sleeping. The Sleep Plus
Stages measurement is based on recording the movements of your non-dominant hand with a built-in 3D
acceleration sensor and recording your heart’s beat-to-beat interval data from your wrist with an optical heart
rate sensor.
4. In the morning you can see your sleep score (1-100) from your watch. You get sleep stages information (light
sleep, deep sleep, REM sleep) and a sleep score after one night, including feedback on sleep themes (amount,
solidity and regeneration). After the third night, you get a comparison to your usual level.
5. You can record your own perception of your sleep quality in the morning by rating it on your watch or in the
Flow app. Your own rating is not taken into account in the sleep charge calculation, but you can record your
own perception and compare it to the sleep charge assessment you get.
Sleep data on your watch
47
Page 48

When you wake up you can access your sleep details via the Nightly Recharge view. Navigate
to the Nightly Recharge view by swiping left or right from the watch face. Tap Sleep charge to
see more details. The sleep charge details view displays the following information:
1. Sleep score status graph
2. Sleep score (1-100) A score that summarizes your sleep time and sleep quality into a
single number.
3. Sleep charge = Sleep score compared to your usual level. Scale: much below usual –
below usual – usual – above usual – much above usual.
4. Sleep time tells you the total duration between when you fell asleep and when you
woke up.
5. Actual sleep (%) tells the time spent asleep between the time you fell asleep and when
you woke up. More specifically, it is your sleep time minus the interruptions. Only the
time you actually spend asleep is included in actual sleep.
6. Continuity (1-5): Sleep continuity is a rating of how continuous your sleep time was.
Sleep continuity is evaluated on a scale from one to five: fragmented – fairly
fragmented – fairly continuous – continuous – very continuous.
7. Long interruptions (min) tells the time you spent awake during the interruptions longer
than one minute. During a normal night's sleep there are numerous short and long
interruptions when you actually awaken from your sleep. Whether you remember these
interruptions or not depends on their duration. The shorter ones we don’t usually
remember. The longer ones, for instance when one might get up for a sip of water, we
can remember. Interruptions are illustrated as yellow bars on your sleep timeline.
8. Sleep cycles: A normal sleeper typically goes through 4-5 sleep cycles over the course
of a night. This equals to a sleep time of approximately 8 hours.
9. REM sleep %: REM stands for rapid eye movement. REM sleep is also called
paradoxical sleep as your brain is active but your muscles are inactive to avoid acting
out dreams. Just as deep sleep restores your body, REM sleep restores your mind, and
enhances memory and learning.
10. Deep sleep %: Deep sleep is the stage of sleep in which it is hard to be awakened since
your body is less responsive to environmental stimuli. Most deep sleep occurs during
the first half of the night. This sleep stage restores your body and supports your
immune system. It also affects certain aspects of memory and learning. The stage of
deep sleep is also called slow wave sleep.
11. Light sleep %: Light sleep serves as a transition stage between wakefulness and the
deeper stages of sleep. You can be easily awoken from light sleep since your
responsiveness to the environmental stimuli remains quite high. Light sleep also
promotes mental and physical recovery, although REM and deep sleep are the most
important sleep stages in that regard.
Sleep data in the Flow app and web service
How you sleep is always individual — instead of comparing your sleep stats to others, follow your own long-term
sleeping patterns to get a full understanding of how you sleep. Sync your watch with the Flow app after waking up to
see your last night’s sleep data in Polar Flow. Follow your sleep on a daily and weekly basis in the Flow app, and see
how your sleeping habits and activity during the day affect your sleep.
Choose Sleep from the Flow app menu to see your sleep data. In the Sleep structure view you see how your sleep has
progressed through different sleep stages (light sleep, deep sleep and REM sleep) and any interruptions to your sleep.
Usually sleep cycles proceed from light sleep into deep sleep and then to REM sleep. Typically, a night's sleep
consists of 4 to 5 sleep cycles. This equals to approximately 8 hours of sleep. During a normal night's sleep there are
numerous short and long interruptions. The long interruptions are displayed with the tall orange bars in the sleep
structure graph.
48
Page 49

The six components of the sleep score are grouped under three themes: amount (sleep time), solidity (long
interruptions, continuity and actual sleep) and regeneration (REM sleep and deep sleep). Each bar in the graph
represents the score for each component. Sleep score is the average of these scores. By choosing the weekly view
you can see how your sleep score and sleep quality (solidity and regeneration themes) vary during the week.
The Sleep rhythm section provides a weekly view of your sleep time and sleep stages.
49
Page 50

To view your long-term sleep data with sleep stages in the Flow web service go to Progress, and choose the Sleep
report tab.
Sleep report gives you a long-term view to your sleep patterns. You can choose to view your sleep details for a 1month, 3-month or 6-month period. You’re able to see averages for the following sleep data: fell asleep, woke up, sleep
time, REM sleep, deep sleep and interruptions to your sleep. You can view a nightly breakdown of your sleep data by
hovering your mouse over the sleep graph.
Learn more about the Polar Sleep Plus Stages in this
in-depth guide.
50
Page 51

SLEEPWISE™ GUIDE TO DAYTIME ALERTNESS
Polar SleepWise™ helps you grasp how sleep contributes to your daytime alertness level and readiness to perform. In
addition to the amount and quality of your recent sleep, we also take the effect of sleep rhythm into account. SleepWise
shows how your recent sleep boosts your daytime alertness and readiness to perform. This is what we call Boost from
sleep. It helps you reach and maintain a healthy sleep rhythm and it describes how your recent sleep affects your
daytime alertness. Better alertness adds up to better readiness to perform by improving reaction time, accuracy,
judgement and decision-making.
To ensure personalized feedback, please make sure that your Preferred sleep time setting matches your real sleep
need.
SleepWise is completely automatic and all you need to do is to track your sleep with Sleep Plus Stages compatible
Polar watch. It is available in the Polar Flow app.
Daily Boost from sleep in the Polar Flow app
Note that you need to have at least five sleep results within the last seven days in order to see your Boost from sleep
forecasts. In case you haven't worn your watch or if the sleep tracking was not successful, you can also add sleep
times manually in the app to increase your sleep result count.
To see your Boost from sleep forecasts in the Polar Flow app, choose Boost from sleep from the menu or get a
glance of the daily Boost from sleep forecast from the card in the Diary. Tapping the card opens the daily Boost from
sleep view.
Boost from sleep view opens:
51
Page 52

In the morning, you can see a forecast for how your sleep boost is expected to vary throughout the day, and plan
alertness boosting activities accordingly (such as naps, coffee, or a walk outside). This provides simple visual and
numeric feedback on any changes in your sleep rhythm. This way, you can easily recognize if the changes are for
better or for worse. This helps helps you understand how the effects of sleep accumulate in the long run. It makes the
impact of sleep debt and irregular sleep-wake rhythm visible.
Boost score summarizes the daily forecast into one number in order to make it easy to compare between days. Your
boost score may be excellent, good, fair, or modest. Excellent boost score means that you get all the benefits of good
sleep to support your day. Your boost score may be modest if you, for example, have a lot of sleep debt. You might
see repeating patterns in the trend, for instance, because of weekends.
The daily Forecast graph shows how your recent sleep is expected to boost you throughout the day.
The lighter the shade and higher the bar, the higher the boost level. It means you're likely to feel sharp and ready to
perform. The darker the shade and lower the boost. It means you may feel less alert – even drowsy.
Boost levels
Please notice that our forecast is based on sleep only. It doesn't react to anything else you might or might not do
during the day. In other words, the graph won't react to the cups of coffee you might consume or the cold showers or
brisk walks you might take. Inner motivation also plays a role in how sharp you feel. No matter how high your sleepbased boost level, you're likely to start feeling drowsy during the course of a very boring lecture. On the other hand,
you might feel quite sharp even after a bad night's sleep, if you have a truly interesting task at hand. By following the
daily forecast, you'll learn that your boost level tends to dip in the afternoon for some time and then go up again.
There's no reason to worry about this afternoon slump though. It's regulated by your internal rhythm and is natural to
all human beings. By studying the course of your past forecasts, you can learn how today's boost levels are not only
affected by last night's sleep but also your recent sleep history. Staying up late on weekends, for example, can affect
several days.
Sleep gate anticipates the time when your body is ready to fall asleep. However, your body's internal rhythm might not
always align with your everyday commitments. That's why your sleep gate is not always your ideal bedtime in real life.
This could be the case, for example, when you go back to work after a break – be it a longer vacation or just a
weekend break.
Daily Boost from sleep on Polar Ignite 3
When your watch detects that you've woken up, it will show your Boost from sleep forecasts on the Boost from sleep
view. Navigate to the Boost from sleep view by swiping left or right from the watch face.
52
Page 53

You can also stop the sleep tracking manually if you watch has not yet summarized your sleep. Zzz is
shown on the Boost from sleep view when your watch has detected a minimum of four hours of sleep.
Already awake? appears if you tap the display. Confirm by tapping and the watch summarizes your
sleep instantly.
The information displayed on the Boost from sleep view includes:
1. Boost from sleep graph shows how your recent sleep is expected to boost you
throughout the day. The lighter the shade and higher the bar, the higher the boost level.
Tap the display to see more details.
2. Boost score summarizes the daily forecast into one number in order to make it easy to
compare between days. Your boost score may be excellent, good, fair, or modest.
Excellent boost score means that you get all the benefits of good sleep to support your
day. Your boost score may be modest if you, for example, have a lot of sleep debt. You
might see repeating patterns in the boost score trend, for instance, because of
weekends.
3. Sleep time tells you the total duration between when you fell asleep and when you
woke up.
4. Sleep score (1-100): A score that summarizes your sleep time and sleep quality into a
single number.
5. Sleep gate anticipates the time when your body is ready to fall asleep. This may be
clearly recognizable from your data or not. Irregular sleep rhythm or unusual sleeping
hours can mess your internal rhythm and make sleep gate less prominent.
6. Sleep gate recognizability (1/3, 2/3 or 3/3): You can expect your sleep gate to be
clearly recognizable (3/3), if your sleep rhythm is regular. In case your sleep rhythm
changes drastically, your sleep gate is difficult to recognize.
Weekly sleep
In the Weekly sleep view you can compare and analyze your Sleep details from different nights. Tap the calendar icon
to access it.
53
Page 54

Boost from sleep graph shows how your sleep has affected your days lately. Based on this, you can consider making
changes to your sleep schedule.
Sleep & Internal rhythm graph shows how much your actual sleep rhythm deviates from your body's internal
circadian rhythm. Syncing these two rhythms – actual and internal – has many health benefits. Sticking to regular
bedtimes and wake-up times can help you sync them. You can see how your behavior affects your internal rhythm.
For example, staying up late on weekends or traveling over time zones may upset the sync of your rhythms.
Sleep gate anticipates the time when your body is ready to fall asleep. This may be clearly recognizable from your
data or not. Irregular sleep rhythm or unusual sleeping hours can mess your internal rhythm and make sleep gate less
prominent.
Sleep gate recognizability
You can expect your sleep gate to be clearly recognizable (3/3), if your sleep rhythm is regular. In case your sleep
rhythm changes drastically, your sleep gate is difficult to recognize.
Internal rhythm
Your body's internal rhythm means there are times when your body naturally wants to be asleep or awake. The purple
lines in the graph show your sleep window – the time span when your body would've naturally wanted to be asleep.
The blue bars show your actual sleep rhythm. Syncing these two rhythms – actual and internal – has many health
benefits. Sticking to regular bedtimes and wake-up times can help you sync them.
Many people working office hours tend to stay up late and sleep in on weekends. This is how they end up shifting their
sleep gate towards staying up late on Sunday night as well. In this very typical case of social jet lag, trouble falling
asleep on Sunday night may result in starting a new working week sleep-deprived. Going by the book, the trick to avoid
Sunday insomnia and sleep-deprived Mondays is to go to bed and get up at the same time every day. However, if
54
Page 55

you've ended up staying up late, you should rather compensate that with a nice early afternoon nap instead of
sleeping in.
Scientific background
Polar SleepWise feature utilizes sleep tracking and biomathematical modeling for predicting daytime alertness based
on how one has slept recently. To predict how sleep boosts one’s alertness, Polar model evaluates sleep amount,
quality, and timing against personal sleep need and one’s body’s internal circadian rhythm. The model predicts one's
boost levels hour-by-hour, daily boost score, sleep gate, and sleep window. A sleep gate marks the start of one's sleep
window - the time when one's body would naturally want to be asleep. It takes from 1 to 2 weeks for SleepWise to
collect enough data to reach full reliability.
Biomathematical modeling is a generally accepted means to predict how different sleep schedules impact on
alertness during waking hours. Several biomathematical models have been introduced in the scientific literature.
While the details and terminology between the models differ, the models typically consider time awake, sleep-wake
history, and the circadian rhythm. The outputs of the models have typically been validated against a psychomotor
vigilance task after modest or severe sleep restrictions. The psychomotor vigilance task is a simple task where one
presses a button as soon as the light appears on a screen. Results from such a task correlate with maintaining
attention, problem solving, and decision making.
NIGHTLY SKIN TEMPERATURE
The Nightly Skin Temperature measurement automatically tracks your skin temperature when you sleep. It then
compares the result with your 28-day average, and shows the variation to that average. Tracking the variations in your
skin temperature can help you detect changes in your body's state.
In contrast to core body temperature, which is usually quite stable around +37 degrees Celsius (98.6 °F), the
temperature of your skin can vary much more. This is because the body regulates its core temperature through
changing the blood flow of the skin. Also, environmental factors affect the skin temperature. A variation of +-1 degrees
Celsius / +-1.8 degrees Fahrenheit is considered usual in skin temperature. Lower temperatures can occur quite often
due to environmental factors, such as colder room temperature or sleeping with your hand outside the covers. Higher
temperatures might be a sign of oncoming illness. Higher temperatures can also indicate being in the latter part of the
menstrual cycle (ovulation and luteal phase).
The skin temperature feature can't be used as a thermometer, as it doesn't show any absolute temperature values, only
the variation to your average skin temperature. If you're feeling under the weather, double-check your temperature with
a thermometer.
The temperature measurement feature and data is not intended for medical purposes, diagnosis or
treatment.
How to start using the Nightly skin temperature feature
1. Continuous heart rate tracking needs to be enabled for Nightly skin temperature
measurement to function. To enable Continuous HR tracking go to Settings > General
Settings > Continuous HR tracking and choose On or Night-time only.
2. Tighten the wristband firmly around your wrist and wear the watch when you sleep. For
detailed wearing instructions, see Wrist-based heart rate measurement.
3. You need to wear your watch for three nights before you start to see your Nightly skin
temperature results on your watch. After three nights, we know your average skin
temperature and show it as baseline (zero). When calculating the baseline, the past 28
nights are taken into account.
Nightly skin temperature on your watch
When your watch detects that you have woken up, it compares the skin temperature measured during sleep to your
average skin temperature, and shows the variation to that average. Navigate to the
55
Nightly skin temperature view by
Page 56

swiping left or right from the watch face.
You can also stop the sleep tracking manually if you watch has not yet summarized your sleep. Zzz... is
shown on the Nightly skin temperature view when your watch has detected a minimum of four hours of
sleep. Already awake? appears when you tap the display. Confirm by tapping and the watch
summarizes your sleep instantly. If sleep isn't recognized, skin temperature won't be available.
The information displayed on the Nightly skin temperature view includes:
1. Variation to your average skin temperature.
2. Your skin temperature compared to usual level. Scale: Below usual – Usual – Above
usual – Much above usual.
Variation within +-1 degrees Celsius or +-1.8 degrees Fahrenheit is considered Usual. If
the variation to your average skin temperature is more than +2 degrees Celsius or +3.6
degrees Fahrenheit, it is considered Much above usual.
3. A graph showing your skin temperature measurements from the last 7 nights.
Nightly skin temperature in the Polar Flow app
Sync your watch with the Polar Flow app to see your skin temperature data in the app. Note that you must sync your
watch using the Flow app. Skin temperature data cannot be synced using the Polar FlowSync software on your
computer.
In the Polar Flow app, choose Skin temperature from the menu (1). From the Skin temperature view (2), you can
check the result of last night's measurement and also see how your skin temperature varies over the course of a week
or month. You can also check the result of last night's measurement from the card in the Diary (3). Tapping the card
opens the Skin temperature view.
56
Page 57
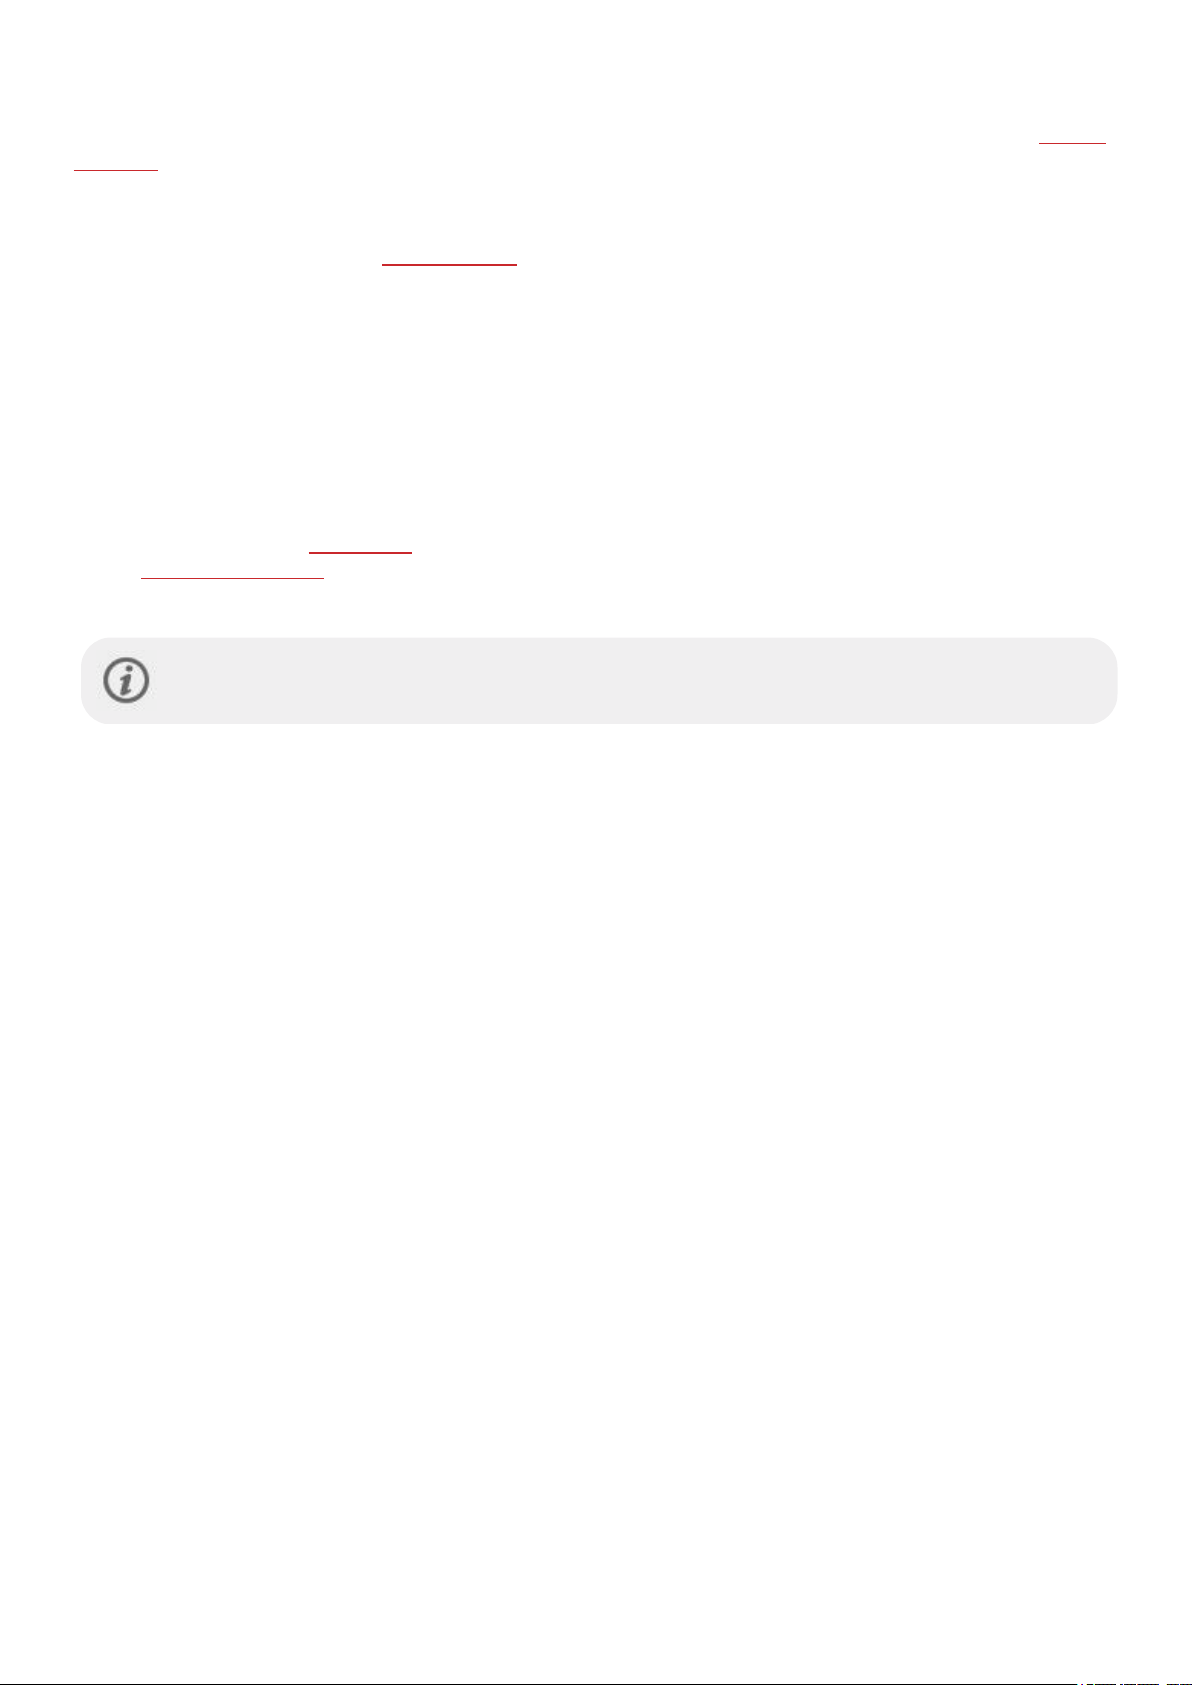
FITSPARK™ DAILY TRAINING GUIDE
The FitSpark™ training guide offers ready-made daily on-demand workouts available easily right on your watch. The
workouts are built to match your fitness level, training history and your recovery and readiness, based on your Nightly
Recharge status from the previous night. FitSpark gives you 2-4 different workout options every day: one that suits you
best and 1-3 other options to choose from. You get a maximum of four suggestions per day and there are 19 different
workouts in total. Suggestions include workouts from the cardio, strength and supportive training categories.
FitSpark workouts are ready-made training targets defined by Polar. The workouts include instructions on how to
perform the exercises and real-time step-by-step guidance to ensure you exercise safely and with proper technique. All
workouts are time-based, and they are adjusted based on your current fitness level, making the sessions suitable for
everyone, regardless of fitness level. The FitSpark workout suggestions are updated after each training session
(including training sessions done without FitSpark), at midnight and when you wake up. FitSpark keeps your training
versatile with different types of daily workouts to choose from.
How is your fitness level determined?
Your fitness level is determined for every workout suggestion based on your:
l Training history (average weekly heart rate zone realization from the previous 28 days)
l VO2max (from the Fitness test on your watch)
l Training background
You can start using the feature without any training history. However, FitSpark will work optimally after 7 days of use.
The higher the fitness level is, the longer the durations of the training targets are. The most demanding
strength targets are not available at low fitness levels.
What type of exercises are included in the training categories?
In cardio sessions you’re guided to train in different heart rate zones for different durations. Sessions include timebased warm-up, work and cool-down phases. Cardio sessions can be completed with any sport profile on your watch.
Strength sessions are circuit training type workouts consisting of strength training exercises with time-based
guidance. Bodyweight workouts can be done using your own body as resistance - there is no need for additional
weights. In circuit training workouts you need a bumper plate, a kettlebell or dumbbells to perform the exercises.
Supportive sessions are circuit training type workouts consisting of strength and mobility exercises with time-based
guidance.
FitSpark on your watch
From the watch face, swipe left or right to navigate to the FitSpark training guide view.
57
Page 58

Tap the display to see the suggested workouts. The most suitable workout for you based on
your training history and fitness level is shown first. Swipe up to see other optional workout
suggestions.
Tap the suggested workout to see a detailed breakdown of the workout. Swipe up to see the
exercises included in the workout (strength and supportive workouts) and tap the individual
exercise to see detailed instructions on how to perform the exercise.
Tap Start to choose the suggested workout, and then tap the sport profile you want to use to
start the training session.
If you have an active Running Program in Polar Flow your FitSpark suggestions are based on the Running
Program training targets.
During training
Your watch gives you guidance during training, which includes training information, time-based phases with heart rate
zones for cardio targets and time-based phases with exercises for strength and supportive targets.
Strength training and supportive training sessions are based on ready-made workout plans with exercise animations
and real-time step-by-step guidance. All sessions include timers and vibrations that let you know when it's time to
switch to the next phase. Continue each movement for 40 seconds, then rest until the minute is full and start the next
movement. When you’ve completed all rounds of the first set, start the next set manually. You can end a training
session any time you like. You cannot skip or re-arrange training phases.
The Voice guidance feature helps you focus on your training target by providing guidance during training
phases straight to your headphones.
58
Page 59

Backlight always on during training: Swipe down from the top of the display to pull down the Quick
settings menu. Tap the Backlight icon to select Always on or Automatic. With always on the watch
display will be illuminated throughout your training session. The backlight setting will default back to
automatic after you finish your training session. Please note that selecting always on will drain your
battery much faster than the default setting.
Training results on your watch and in Polar Flow
You'll get a
detailed analysis in the Polar Flow app or in the Polar Flow web service. For cardio training targets you get a basic
training result, which shows the phases of the session with heart rate data. For strength and supportive training
targets you get detailed training results, which include your average heart rate and time spent on each exercise. These
are displayed as a list, and each exercise is also displayed on the heart rate curve.
summary of your training session on your watch right after you've finished the session. You'll get a more
Training may include some risk. Before beginning a regular training program please read the Minimizing
risks when training guidance.
WORK-REST GUIDE BASED ON YOUR HEART RATE
Optimize your training rhythm and efficiency to get the best possible impact from your workouts. The Work-rest guide
analyzes your heart rate during the work and rest phases of a training session to give you personalized guidance on the
optimal time to start the work phase again. It automatically detects your highest heart rate during a set, and also
monitors your heart rate during rest, and tells you when you are recovered enough to start your next set.
59
Page 60

To use the Work-rest guide feature during training sessions you need to have the Work-rest guide training view added to
the sport profile you wish to use it in. By default, the Work-rest guide training view is on in following sport profiles:
Strength Training, Circuit Training, High-intensity interval training, Functional training, Bootcamp and Kettlebell. You can
add the training view to any sport profile in the sport profile settings in the Polar Flow app or web service.
Training with Work-rest guide
Start your training session with a proper warmup to maximize the benefits of your workout. Warming up improves the
effectiveness of your workout and reduces your risk of injury. Set the Work-rest guide on when you are ready to start
the work phase of your training session. Swipe left or right to navigate to the Work-rest guide training view and tap
Start to turn the feature on.
Guidance on the display
The Work-rest guide training view shows your current heart rate and your real-time heart rate graph. The different colors
indicate the heart rate zone in which you are training in. The following instructions guide you through the work and rest
phases of your session.
Raise your HR is shown if you need to raise your heart rate to start the work phase.
When your heart rate rises to a sufficient level for the work phase, the text on the
display changes to Work. After completing the set, your watch automatically
detects that the work phase has ended, and it also automatically detects the
highest heart rate reached during the work phase. You can also manually end the
work phase by tapping Done.
Rest until your HR is low enough is shown on the display and the watch notifies
you by vibrating when it has defined your target recovery heart rate. During the rest
phase, you can see your current heart rate and target recovery heart rate on the
display. The dashed line on the real-time heart rate graph represents the target
heart rate. The minimum rest time is 20 seconds - if you reach the target recovery
heart rate sooner, Rest for a few seconds more is displayed.
If the rest phase cannot be determined based on your heart rate, a
time-based rest phase is shown. Work time ended. Time to rest.
appears on the display, after which a 30-second countdown timer
appears.
To turn the feature off, press the button in the Work-rest guide view. Stop Work-rest guide? is displayed. Tap to
confirm. Stopping the Work-rest guide does not stop the training session.
Work! is shown on the display and the watch notifies you by vibrating when you
have recovered enough and it's time for your next set.
60
Page 61

Especially in strength training, when you are performing activities that cause extreme pressure on your
wrists, such as weightlifting or pull-ups, your heart rate may be harder to detect with sufficient accuracy
from the wrist. For this reason, we recommend using a Polar H10 heart rate sensor or a Polar Verity Sense
optical heart rate sensor to ensure accurate heart rate measurement, and optimal function of the Work-rest
guide feature.
Learn more about Work-rest guide.
61
Page 62

SERENE™ GUIDED BREATHING EXERCISE
Serene™ is a guided deep breathing exercise that helps you relax your body and mind and manage stress. Serene
guides you to breathe at a slow, regular rhythm – six breaths per minute, which is the optimal breathing rate for
stress-relieving effects. When you breathe slowly, your heart beat starts to synchronize with the rhythm of your
breathing and your heart’s beat-to-beat intervals start to vary more.
During the breathing exercise your watch helps you maintain a regular slow breathing rhythm with an animation on the
watch display and by vibrating. Serene measures your body’s response to the exercise and gives you real-time
biofeedback on how you're doing. After the exercise, you get a summary of the time you spent on the three serenity
zones. The higher the zone, the better the synchronization with the optimal rhythm was. The more time you spend in
the higher zones, the more benefits you can expect to feel in the long-term. When you use the Serene breathing exercise
regularly, it can help you manage stress, improve the quality of your sleep and give you a sense of improved overall
well-being.
Serene breathing exercise on your watch
The Serene breathing exercise guides you to breathe deeply and slowly to calm down the body and mind. When you
breathe slowly, your heart beat starts to synchronize with the rhythm of your breathing. Your heart's beat-to-beat
intervals vary more when your breathing is deeper and slower. Deep breathing produces measurable responses in the
heart’s beat-to-beat intervals. When you breath in, intervals between consecutive heart beats shorten (heart rate
speeds up) and when you breath out, intervals between consecutive heart beats lengthen (heart rate slows down).
The variance of your heart's beat-to-beat intervals is greatest when you are closest to the 6 breathing cycles per
minute rhythm (inhale + exhale = 10 seconds). This is the optimal rate for stress-relieving effects. This is why your
success is measured not only from the synchronization, but also from how close you were to the optimal breathing
rate.
The default duration of Serene breathing exercise is 3 minutes. You can adjust the duration of the breathing exercise
in range between 2-20 minutes. You can also adjust inhale and exhale durations if needed. Fastest breathing
frequency can be 3 seconds for inhale and 3 seconds for exhale resulting 10 breaths per minute. Slowest breathing
frequency is 5 seconds for inhale and 7 seconds for exhale resulting 5 breaths per minute.
Check that your position allows you to keep your arms relaxed and your hands still throughout the entire breathing
exercise. This allows you to relax properly and ensures that your Polar watch can accurately measure the effects of
the session.
1. Wear your watch snugly just behind the wrist bone.
2. Sit or lie down comfortably.
3. On your watch, choose Serene and then choose Start to start breathing exercise. Exercise starts with a 15
seconds preparatory phase.
4. Follow the breathing guidance on the display or through the vibration.
5. You can end the exercise by pressing the button at any time.
6. The main guiding element in the animation changes color according to which serenity zone you're currently in.
7. After the exercise, you'll see your results displayed on your watch as time spent in the different serenity zones.
62
Page 63

The serenity zones are Amethyst, Sapphire and Diamond. The serenity zones tell you how well your heartbeat and
breathing are in sync and how close you are to the optimal breathing rate of six breaths per minute. The higher the
zone, the better the synchronization with the optimal rhythm. For the highest serenity zone, Diamond, you need to
sustain a slow target rhythm of around six breaths per minute, or slower. The more time you spend in the higher
zones, the more benefits you can expect to feel in the long-term.
Breathing exercise result
After the exercise, you get a summary of the time you spent on the three serenity zones.
Learn more about the Serene™ guided breathing exercise in this in-depth guide.
FITNESS TEST WITH WRIST-BASED HEART RATE
The Polar Fitness Test with wrist-based heart rate is an easy, safe and quick way to estimate your aerobic
(cardiovascular) fitness at rest. It's a simple 5-minute fitness level assessment that gives you an estimate of your
maximal oxygen uptake (VO2max). The Fitness Test calculation is based on your resting heart rate, heart rate variability
and your personal information: gender, age, height, weight, and self-assessment of your physical activity level called the
training background. The Polar Fitness Test is developed for use by healthy adults.
Aerobic fitness relates to how well your cardiovascular system works to transport oxygen to your body. The better your
aerobic fitness, the stronger and more efficient your heart is. Good aerobic fitness has many health benefits. For
example, it helps in decreasing the risk of high blood pressure and your risk of cardiovascular diseases and stroke. If
you want to improve your aerobic fitness it takes, on average, six weeks of regular training to see a noticeable change in
your fitness test result. Less fit individuals see progress even more rapidly. The better your aerobic fitness, the smaller
the improvements in your result.
Aerobic fitness is best improved by training types that use large muscle groups. Such activities include running, cycling,
walking, rowing, swimming, skating, and cross-country skiing. To monitor your progress, start by performing the test a
couple of times during the first two weeks in order to get a baseline value, and then repeat the test approximately once
a month.
To make sure the test results are reliable, the following basic requirements apply:
l You can perform the test anywhere - at home, at the office, at a health club - provided the testing environment is
peaceful. There should be no disturbing noises (e.g. television, radio, or telephone) and no other people talking to
you.
l Always take the test in the same environment and at the same hour.
l Avoid eating a heavy meal or smoking 2-3 hours prior to testing.
l Avoid heavy physical exertion, alcohol, and pharmaceutical stimulants on the test day and the previous day.
l You should be relaxed and calm. Lie down and relax for 1-3 minutes before starting the test.
63
Page 64

Before the test
Before starting the test, make sure your physical settings including training background are accurate in Settings >
Physical settings.
Wear your watch snugly on top of your wrist, at least a finger’s width up from the wrist bone. The heart rate sensor on
the back of your watch must be in constant touch with your skin.
Performing the test
To perform the fitness test, press the button and swipe down to find Fitness Test. First, tap Fitness Test and then on
Relax and start the test.
l When heart rate is found, your current heart rate and Lie down & relax is shown on the display. Stay relaxed and
limit body movements and communication with other people.
l You can interrupt the test in any phase by pressing the button. Test canceled is shown.
If the watch cannot receive your heart rate signal, the message Test failed is shown. In which case, you should check
that the heart rate sensor on the back of the watch is in constant touch with your skin. See Wrist-based heart rate
measurement for detailed instructions on wearing your watch when measuring heart rate from your wrist.
Test results
When the test is over, your watch notifies you by vibrating and shows a description of your fitness test result and your
estimated VO
2max
.
Update to VO2
l Tap to save the value to your Physical settings.
l Tap to cancel only if you know your recently measured VO
level class from the result.
Your latest test result is shown in Tests > Fitness test > Latest result. Only your most recently performed test result is
shown.
For a visual analysis of your Fitness test results, go to the Flow web service and select the test from your Diary to view
details from it.
Your watch syncs with the Flow app automatically after the test if your phone is within the Bluetooth range.
Fitness level classes
Men
Age / Years Very low Low Fair Moderate Good Very good Elite
20-24 < 32 32-37 38-43 44-50 51-56 57-62 > 62
to physical settings? is shown.
2max
value, and if it differs more than one fitness
2max
25-29 < 31 31-35 36-42 43-48 49-53 54-59 > 59
30-34 < 29 29-34 35-40 41-45 46-51 52-56 > 56
35-39 < 28 28-32 33-38 39-43 44-48 49-54 > 54
40-44 < 26 26-31 32-35 36-41 42-46 47-51 > 51
45-49 < 25 25-29 30-34 35-39 40-43 44-48 > 48
50-54 < 24 24-27 28-32 33-36 37-41 42-46 > 46
64
Page 65

Age / Years Very low Low Fair Moderate Good Very good Elite
55-59 < 22 22-26 27-30 31-34 35-39 40-43 > 43
60-65 < 21 21-24 25-28 29-32 33-36 37-40 > 40
Women
Age / Years Very low Low Fair Moderate Good Very good Elite
20-24 < 27 27-31 32-36 37-41 42-46 47-51 > 51
25-29 < 26 26-30 31-35 36-40 41-44 45-49 > 49
30-34 < 25 25-29 30-33 34-37 38-42 43-46 > 46
35-39 < 24 24-27 28-31 32-35 36-40 41-44 > 44
40-44 < 22 22-25 26-29 30-33 34-37 38-41 > 41
45-49 < 21 21-23 24-27 28-31 32-35 36-38 > 38
50-54 < 19 19-22 23-25 26-29 30-32 33-36 > 36
55-59 < 18 18-20 21-23 24-27 28-30 31-33 > 33
60-65 < 16 16-18 19-21 22-24 25-27 28-30 > 30
The classification is based on a literature review of 62 studies where VO
was measured directly in healthy adult
2max
subjects in the USA, Canada and 7 European countries. Reference: Shvartz E, Reibold RC. Aerobic fitness norms for
males and females aged 6 to 75 years: a review. Aviat Space Environ Med; 61:3-11, 1990.
VO
2max
A clear link exists between maximal oxygen consumption (VO2
oxygen delivery to tissues is dependent on lung and heart function. VO2
) of the body and cardiorespiratory fitness because
max
(maximal oxygen uptake, maximal aerobic
max
power) is the maximal rate at which oxygen can be used by the body during maximal exercise; it is related directly to the
maximal capacity of the heart to deliver blood to the muscles. VO2
(e.g. maximal exercise tests, submaximal exercise tests, Polar Fitness Test). VO2
can be measured or predicted by fitness tests
max
is a good index of
max
cardiorespiratory fitness and a good predictor of performance capability in endurance events such as distance running,
cycling, cross-country skiing, and swimming.
VO2
can be expressed either as milliliters per minute (ml/min = ml ■ min-1) or this value can be divided by the
max
person’s body weight in kilograms (ml/kg/min = ml ■ kg-1■ min-1).
65
Page 66

WALKING TEST
The walking test is a simple, safe and repeatable way to measure your VO
fitness is developing. Understanding your aerobic fitness level is the cornerstone of efficient training. This makes the
walking test a valuable tool for anyone from occasional to regular trainers. We recommended taking the test when
starting a training program, and repeating the test every three months. However, there's no reason why you shouldn't
take it more often if you wish.
The idea is to walk as far as you can in fifteen minutes - at a steady pace. This means faster than your usual,
comfortable walking speed. Aim at raising your heart rate above 65% of your maximum during the warmup, and keep it
there throughout the test by walking at a fast, brisk pace. Your VO
heart rate during the test, and personal characteristics (age, sex, height and weight). In principle, the higher your walking
speed and the lower your heart rate, the better your aerobic fitness.
result is based on the distance you walk, your
2max
, and to keep track of how your aerobic
2max
Performing the test
Before taking the test, read the Health and Training section in this user manual or in the Important information sheet
that came in the product package. Do not take the test during illness, injury or if you have any doubts over your health.
Also make sure your physical settings – including height, weight, age as well as which hand you wear your watch on –
are up to date. We use them in calculating the result. GPS(GNSS) is used to track your speed, therefore the test needs
to be taken outdoors.
Take the test in flat terrain, track or road in a location that has an unobstructed view of the sky for optimal GPS(GNSS)
performance. Avoid routes with traffic lights or other possible hindrances that might force you to stop or slow down.
Tall buildings, tunnels, partially covered stadiums and trees can also affect GPS(GNSS) accuracy.
The conditions before testing should be fairly similar each time. For instance, you can mess up the results if you have
an intense training session the day before or a heavy meal right before testing. During the test, you should walk as fast
as you can, at a steady pace. Running is not allowed. Try to keep your heart rate above 65% of your maximum heart
rate. There’s no upper limit. The longer your walking distance, the better your result. If your heart rate is too low, the
watch will alert you. It means you need to walk faster to raise your heart rate.
The walking test including warmup and cool down phases takes about 25 minutes to perform. It's comprised of
warmup (5 minutes) , test (15 minutes) and cool down (5 minutes) phases. Have a look at the instructions on your
watch in Tests > Walking test > How to once more before starting to see a detailed breakdown of the test, and
instructions on performing it.
1. Go to Tests > Walking test > Start, and scroll down to see an overview of the test. When you’re ready to start the
test, choose Next.
2. Check the questions concerning your health and accept to go to the pre-training mode.
3. The walking sport profile is used for the test. It’s shown in a purple color in the test view. Stay in the pre-training
mode until the watch has found your heart rate and the GPS satellite signals (GPS icon turns green).
4. Get started with a proper warmup. Aim at raising your heart rate above 65% of your maximum heart rate by
walking at a fast, brisk pace. Follow the guidance on the display to complete the warmup.
5. When you've reached at least 65% of your maximum heart rate or warmed up for at least three minutes the test
can be started. Choose Start test to start the actual test.
6. Keep your heart rate above 65% of your maximum heart rate during the test.
7. The test phase ends after 15 minutes. Tap the display to confirm and continue to the cool down phase.
8. Cool down by walking slowly to promote your recovery.
9. After finishing the cool down you'll see the distance you walked on the display.
10. Press the button once to pause your session, once paused press and hold the button to end the session.
During the test: Your current heart rate and the heart rate value above which you need to stay are shown at the top of
the display. At the bottom of the display you'll see the time elapsed.
66
Page 67

Test results
l The test summary shows your VO
age group ranging from very low to elite.
l Test distance (the distance you walked during the test)
l Test heart rate (your average heart rate from the last 5 minutes of the test)
l Test speed/pace (your average speed/pace during the test)
l Tips for next time (these tips are meant to enhance the repeatability of the test and
they're only shown on your watch)
You can view your latest result in Tests > Walking test > Latest result.
. The result is also classified based on gender and
2max
Note that to update your VO
opening the Flow app after syncing you'll be asked if you want to update it.
value based on your test result you need to sync the results to the Flow app. When
2max
Detailed analysis in the Flow web service and app
Remember to sync your test result to Polar Flow. To help long-term follow up, we’ve gathered all the test data in one
place in the Polar Flow web service. In the Tests page you can see all the tests you’ve performed and compare their
results. You can see your long-term progress and easily view changes in your performance.
67
Page 68

68
Page 69

RUNNING PERFORMANCE TEST
The Running Performance Test is a tool especially designed for runners allowing them to track their progress and find
out their unique training zones (heart rate, speed and power zones) for running sports. Regular and frequent testing
helps you plan your training wisely and follow changes in your running performance
You can take the test as maximal or submaximal (at least 85 % of your maximum heart rate). The maximal test requires
all-out effort, but it gives you more accurate results. Taking the maximal test is a good way to find out your current
individual maximum heart rate, and get your settings up to date. The load of the maximal running test is considerably
heavier compared to the submaximal test. Therefore, it's recommended that you include only light training sessions in
your plan for the next 1-3 days after the maximal test.
The submaximal test, which requires that at least 85% of HR
is exceeded, is a reproducible, safe and non-exhaustive
max
alternative to the maximal test. You can repeat the submaximal test as often as you wish, and you can also perform it
as a warmup before a training session. It's important that your maximum heart rate is set correctly in your physical
settings in order to get accurate results from the submaximal test as the submaximal test uses your HR
calculating your results. If you don’t know your HR
, you could benefit from doing maximal test first to find out your
max
max
when
maximum heart rate.
The idea of the test is to run at a steadily increasing speed, following the given target speed as precisely as possible. To
complete the test successfully you have to run for at least six minutes and reach at least 85 % or your maximum heart
rate. If you have trouble reaching this, your current HR
value might be too high. You can change it manually in your
max
physical settings.
Performing the test
Before taking the test, read the Health and Training section in this user manual or in the Important information sheet
that came in the product package. Do not take the test during illness, injury or if you have any doubts over your health.
Take the test only when you feel recovered. Avoid exercise that causes fatigue on the day preceding the test. Wear
running shoes and clothes that allow freedom of movement.
Take the test in flat terrain, track or road, and repeat it regularly under similar conditions. Run at a steadily increasing
speed, following the given target speed as precisely as possible. Also, the conditions before testing should be fairly
similar each time. For instance, an intense training session the day before or a heavy meal right before testing can
influence your test result. You need to run for at least six minutes and reach at least 85 % or your maximum heart rate
to complete the test.
Check heart rate sensor is shown if your heart rate cannot be detected during the test.
Speed unavailable, GPS signal lost is shown if the satellite signals cannot be detected during the test.
Have a look at the instructions on your watch in Tests > Running test > How to once more before starting to see a
detailed breakdown of the test, and instructions on performing it.
1. First, define your initial speed for the test in Tests > Running test > Initial speed. The initial speed can be set
between 4-10 min/km. Note that if you set the initial speed too high, you may have you to quit the test too soon.
2. Then go to Tests > Running test > Start and scroll down to see an overview of the test. When you’re ready to
start the test, choose Next.
3. Check the questions concerning your health and accept to go to the pre-training mode.
4. The sport profile is shown in a purple color in the test view. Choose an appropriate indoor or outdoor running
sport profile. Stay in the pre-training mode until the watch has found your heart rate and the GPS satellite signals
(GPS icon turns green).
5. Tap the display to begin. The watch guides you through the test.
6. The test begins with a warmup phase (~ 10 min). Follow the guidance on the display to complete the warmup.
7. After a proper warmup, choose Start test. Then you need to reach the initial speed for the actual test to start.
During the test: The blue value shows the steadily increasing target speed that you should follow as precisely as
possible. The white value below it shows your current speed. The watch notifies you by vibrating if you go too fast or
too slow.
69
Page 70

The blue curve with the speed values at each end illustrates the allowed range.
At the bottom, you can see your current heart rate, the minimum heart rate required for the submaximal test and your
current maximum heart rate value.
Your watch will ask Was this your maximum effort? if didn't reach or exceed your maximum heart rate value. Your test
is considered submaximal, if your effort wasn't maximal but you reached at least 85 % of your maximum heart rate.
Your test is automatically considered maximal, if you reach or exceed your current maximum heart rate value.
Test results
The Running Performance Test gives you your maximum aerobic power (MAP), maximum aerobic speed (MAS) and
maximal oxygen uptake (VO2max) as results. In addition, if you performed the maximal test you get your maximum
heart rate (HR
) value. You can view your latest result in Tests > Running test > Latest result.
max
l Your maximum aerobic power (MAP) is the lowest exercise intensity where your body reaches its maximum
ability to consume oxygen (VO2
). Maximum aerobic power can usually be sustained for a few minutes only.
max
l Your maximum aerobic speed (MAS) is the lowest exercise intensity where your body reaches its maximum
ability to consume oxygen (VO2
l Your maximal oxygen uptake (VO2
). Maximum aerobic speed can usually be sustained for a few minutes only.
max
) is your body's maximum capacity to consume oxygen during maximum
max
effort.
If you choose to update your sport profile settings with your new MAP, MAS and VO2
results, your speed, pace and
max
power zones, as well as calorie calculation are updated to match your current condition. If you performed the maximal
test you can also update your heart rate zones based on your new HR
max
value.
70
Page 71

Note that to update your training zones and HR
the Flow app after syncing you'll be asked if you want to update your values. The sport profile settings for all running
type sports will be updated with the new values.
Whether you should follow power zones, speed/pace zones or heart rate zones in your training, depends on your goals
and training routines. Power zones work in all types of terrains – flat or hilly. Speed zones are reliable only when you run
in flat terrain. Speed or power zones are also a good choice for interval training.
If you want to use the Running Performance Test to track your progress and help you choose the right training
intensities, we recommend that you repeat the maximal test every three months to ensure that your training zones are
always up to date. If you want to follow your progress more closely, you can repeat the submaximal test as often as you
wish in between the maximal tests.
Note that you will not get a Running Index result from your Running Performance Test.
Your weight is used as one input in the Running Performance Test. Note that if you change your weight setting, it also
affects the comparability of your test results.
value you need to sync the results to the Flow app. When opening
max
Detailed analysis in the Flow web service and app
Remember to sync your test result to Polar Flow. To help long-term follow up, we’ve gathered all the test data in one
place in the Polar Flow web service. In the Tests page you can see all the tests you’ve performed and compare their
results. You can see your long-term progress and easily view changes in your performance.
71
Page 72

POLAR RUNNING PROGRAM
Polar Running program is a personalized program based on your fitness level, designed to make sure that you train
right and avoid overreaching. It’s intelligent, and adapts based on your development, and lets you know when it might
be a good idea to cut back a little and when to step it up a notch. Each program is tailored for your event, taking your
personal attributes, training background and preparation time into account. The program is free, and available in the
Polar Flow web service at flow.polar.com.
Programs are available for 5k, 10k, half marathon and marathon events. Each program has three phases: Base building,
Build-up and Tapering. These phases are designed to gradually develop your performance, and make sure you’re ready
on race day. Running training sessions are divided into five types: easy jog, medium run, long run, tempo run and
interval. All sessions include warm-up, work, and cool-down phases for optimal results. In addition, you can choose to
do strength, core, and mobility exercises to support your development. Each training week consists of two to five
running sessions, and the total running training session duration per week varies from one to seven hours depending on
your fitness level. The minimum duration for a program is 9 weeks, and the maximum is 20 months.
Learn more about the Polar Running Program in this
Running Program.
To see a video, click on one of the following links:
in-depth guide. Or read more about how to get started with the
72
Page 73

Get Started
How to use
Create a Polar Running Program
1. Log into the Flow web service at flow.polar.com.
2. Choose Programs from the Tab.
3. Choose your event, name it, set the event date, and when you wish to start the program.
4. Fill in the physical activity level questions.*
5. Choose if you want to include supporting exercises in the program.
6. Read and fill in the physical activity readiness questionnaire.
7. Review your program, and adjust any settings if necessary.
8. When you’re done, choose Start program.
*If four weeks of training history is available, these will be pre-filled.
Start a running target
Before starting a session, make sure you’ve synced your training session target to your device. The sessions are synced
to your device as training targets.
To start a training target scheduled for the current day:
1. Enter the pre-training mode by pressing first the button and then tapping Start training.
2. You'll be prompted to start a training target you've scheduled for the day.
3. Tap to view the target information.
4. Press the button to return to pre-training mode, and choose the sport profile you want to use.
5. When the watch has found all the signals, tap the display. Recording started is displayed and you can start
training.
Follow your progress
Sync your training results from your device to the Flow web service via the USB cable or the Flow app. Follow your
progress from the Programs tab. You’ll see an overview of your current program, and how you’ve progressed.
RUNNING INDEX
Running Index offers an easy way to monitor running performance changes. The Running index score is an estimate of
your maximal aerobic running performance (VO2max). By recording your Running Index over time, you see how
efficient your running is and how you improve your running performance. Improvement means that running at a given
pace requires less of an effort, or that your pace is faster at a given level of exertion.
To receive the most accurate information on your performance, make sure you have set your HR
Running Index is calculated during every training session when heart rate and the GPS function is on and when the
following requirements apply:
l Sport profile used is a running type sport (Running, Road Running, Trail running etc.)
l Pace should be 6 km/h / 3.7 mph or faster and duration 12 minutes minimum.
max
value.
Calculation begins when you start recording the session. During a session, you may stop twice, for example, at traffic
lights without interrupting the calculation. After your session, your watch displays a Running Index value and stores the
result in the training summary.
73
Page 74

You can view your Running Index in the summary of your training session on your watch. Follow your
progress and see race time estimations in the Polar Flow web service.
Compare your result to the table below.
Short-term analysis
Men
Age/Years Very low Low Fair Moderate Good Very good Elite
20-24 < 32 32-37 38-43 44-50 51-56 57-62 > 62
25-29 < 31 31-35 36-42 43-48 49-53 54-59 > 59
30-34 < 29 29-34 35-40 41-45 46-51 52-56 > 56
35-39 < 28 28-32 33-38 39-43 44-48 49-54 > 54
40-44 < 26 26-31 32-35 36-41 42-46 47-51 > 51
45-49 < 25 25-29 30-34 35-39 40-43 44-48 > 48
50-54 < 24 24-27 28-32 33-36 37-41 42-46 > 46
55-59 < 22 22-26 27-30 31-34 35-39 40-43 > 43
60-65 < 21 21-24 25-28 29-32 33-36 37-40 > 40
Women
Age/Years Very low Low Fair Moderate Good Very good Elite
20-24 < 27 27-31 32-36 37-41 42-46 47-51 > 51
25-29 < 26 26-30 31-35 36-40 41-44 45-49 > 49
30-34 < 25 25-29 30-33 34-37 38-42 43-46 > 46
35-39 < 24 24-27 28-31 32-35 36-40 41-44 > 44
40-44 < 22 22-25 26-29 30-33 34-37 38-41 > 41
45-49 < 21 21-23 24-27 28-31 32-35 36-38 > 38
50-54 < 19 19-22 23-25 26-29 30-32 33-36 > 36
55-59 < 18 18-20 21-23 24-27 28-30 31-33 > 33
60-65 < 16 16-18 19-21 22-24 25-27 28-30 > 30
The classification is based on a literature review of 62 studies where VO
subjects in the USA, Canada and 7 European countries. Reference: Shvartz E, Reibold RC. Aerobic fitness norms for
males and females aged 6 to 75 years: a review. Aviat Space Environ Med; 61:3-11, 1990.
was measured directly in healthy adult
2max
There may be some daily variation in the Running Indexes. Many factors influence Running Index. The value you receive
on a given day is affected by changes in running circumstances, for example different surface, wind or temperature, in
addition to other factors.
Long-term analysis
The single Running Index values form a trend that predicts your success in running certain distances. You can find your
Running Index report in the Polar Flow web service under the
PROGRESS tab. The report shows you how your running
74
Page 75

performance has improved over a longer time period. If you're using the
event, you can follow your Running Index progress to see how your running is improving towards the goal.
The following chart estimates the duration that a runner can achieve in certain distances when performing maximally.
Use your long-term Running Index average in the interpretation of the chart. The prediction is best for those Running
Index values that have been received at speed and running circumstances similar to the target performance.
Polar Running program to train for a running
Running Index Cooper test (m) 5 km (h:mm:ss) 10 km (h:mm:ss) 21.098 km (h:m-
m:ss)
36 1800 0:36:20 1:15:10 2:48:00 5:43:00
38 1900 0:34:20 1:10:50 2:38:00 5:24:00
40 2000 0:32:20 1:07:00 2:29:30 5:06:00
42 2100 0:30:40 1:03:30 2:21:30 4:51:00
44 2200 0:29:10 1:00:20 2:14:30 4:37:00
46 2300 0:27:50 0:57:30 2:08:00 4:24:00
48 2400 0:26:30 0:55:00 2:02:00 4:12:00
50 2500 0:25:20 0:52:40 1:57:00 4:02:00
52 2600 0:24:20 0:50:30 1:52:00 3:52:00
54 2700 0:23:20 0:48:30 1:47:30 3:43:00
56 2800 0:22:30 0:46:40 1:43:30 3:35:00
58 2900 0:21:40 0:45:00 1:39:30 3:27:00
42.195 km (h:mm:ss)
60 3000 0:20:50 0:43:20 1:36:00 3:20:00
62 3100 0:20:10 0:41:50 1:32:30 3:13:00
64 3200 0:19:30 0:40:30 1:29:30 3:07:00
66 3300 0:18:50 0:39:10 1:26:30 3:01:00
68 3350 0:18:20 0:38:00 1:24:00 2:55:00
70 3450 0:17:50 0:36:50 1:21:30 2:50:00
72 3550 0:17:10 0:35:50 1:19:00 2:45:00
74 3650 0:16:40 0:34:50 1:17:00 2:40:00
76 3750 0:16:20 0:33:50 1:14:30 2:36:00
78 3850 0:15:50 0:33:00 1:12:30 2:32:00
TRAINING LOAD PRO™
The Training Load Pro™ feature measures how your training sessions strain your body and helps to understand how it
impacts your performance. The Training Load Pro gives you a training load level for your cardiovascular system Cardio
load, and with Perceived load you can rate how strained you feel.
Cardio load
Cardio load is based on training impulse calculation (TRIMP), a commonly accepted and scientifically proven method to
quantify training load. Your Cardio load value tells you how much strain your training session put on your
75
Page 76

cardiovascular system. The higher the Cardio load, the more strenuous the training session was for the cardiovascular
system. Cardio load is calculated after every workout from your heart rate data and session duration.
Perceived load
Your subjective feeling is one useful method of estimating training load for all sports. The
takes into account your own subjective experience of how demanding your training session was and the duration of
your session. It's is quantified with Rate of Perceived Exertion (RPE), a scientifically accepted method to quantify
subjective training load. Using the RPE scale is especially useful for sports where measuring training load based on
heart rate alone has its limitations, for example strength training.
Rate your session in the Flow mobile app to get your Perceived load for the session. You can choose from
a scale from 1-10, in which 1 is very, very easy and 10 is maximum effort.
Perceived load is a value that
Training load from a single session
Your training load from a single session is shown in the summary of your training session on your watch, in the Flow
app and in the Flow web service.
You'll get an absolute training load number for each measured load. The higher the load, the more strain it caused to
your body. In addition, you can see a visual bullet scale interpretation and a verbal description of how hard your training
load from the session was compared to your 90 days training load average.
The scale of bullets and verbal descriptions adapts according to your progress: the smarter you train, the higher loads
you tolerate. As your fitness and tolerance for training improves, a training load that was ranked worth 3 bullets
(Medium) a couple of months ago, could rank for only 2 bullets (Low) later on. This adaptive scale reflects the fact that
the same kind of training session can have a different impact on your body depending on your current condition.
Very high
High
Medium
Low
Very low
Strain and Tolerance
In addition to the Cardio load from individual training sessions, the new Training Load Pro feature measures your short
term Cardio load (Strain) and long term Cardio load (Tolerance).
Strain shows you how much you have strained yourself with training lately. It shows your average daily load from the
past 7 days.
76
Page 77

Tolerance describes how prepared you are to endure cardio training. It shows your average daily load from the past 28
days. To improve your tolerance for cardio training, you need to slowly increase your training over a longer period of
time.
Cardio load status
Cardio load status looks at the relation between your Strain and Tolerance and based on that shows you whether you
are in a detraining, maintaining, productive or overreaching Cardio load status. Cardio load status guides you in
evaluating the impact your training has on your body and how it affects your progress. Knowing how your past training
affects your performance today allows you to keep your total training volume in control and optimize the timing of
training at different intensities. Seeing how your training status changes after a session helps you understand how
much load was caused by the session.
Cardio load status on your watch
From the watch face, swipe left or right to view the Cardio Load Status view.
1. Cardio load status graph
2. Cardio load status and the numeric value for your Cardio load status (=Strain divided by
Tolerance.)
Overreaching (Load much higher than usual):
Productive (Load slowly increasing)
Maintaining (Load slightly lower than usual)
Detraining (Load way lower than usual)
3. Strain and Tolerance
4. Verbal description of your Cardio load status
Long term analysis in the Flow app and web service
In the Flow app and web service you can follow how your Cardio Load builds up over time and see how your Cardio
loads have varied over the past week or months. To view your Cardio Load Buildup in the Flow app, tap the three dots
icon in the training summary (Training Load Pro module).
77
Page 78

To view your Cardio load status and Cardio load buildup in the Flow web service, go to Progress > Cardio Load report.
78
Page 79

Cardio load status
Overreaching (Load much higher than usual):
Productive (Load slowly increasing)
Maintaining (Load slightly lower than usual)
Detraining (Load way lower than usual)
The red bars illustrate the cardio load from your training sessions. The higher the bar, the harder the session was
on your cardio system.
The background colors show how hard a session was compared to your session average from the past 90 days,
just like the scale of five bullets and verbal descriptions (Very low, Low, Medium, High, Very high).
Strain shows how much you have strained yourself with training lately. It shows your average daily cardio load
from the past 7 days.
Tolerance describes how prepared you are to endure cardio training. It shows your average daily cardio load
from the past 28 days. To improve your tolerance for cardio training, slowly increase your training over a longer
period of time.
FUELWISE™
Stay energized throughout your session with the FuelWise™ fueling assistant. FuelWise™ includes three features that
remind you to refuel and help you maintain adequate energy levels during your long sessions. These features are Smart
carbs reminder, Manual carbs reminder and Drink reminder.
It’s crucial for any serious endurance athlete to maintain adequate energy levels and stay hydrated throughout a long
performance. To perform at your best, you need to fuel your system with carbohydrates and drink regularly in the
course of a long race or a training session. With two useful tools, carbs reminder and drink reminder, FuelWise helps
you find the optimal way to fuel and stay hydrated.
Carbohydrates are ideal for fueling because they can be absorbed and converted into glucose quickly, unlike fat or
protein. Glucose is the primary source of energy used during training. The higher your training intensity, the more
glucose you use in proportion to fat. If your session is shorter than 90 minutes, you don't usually need to fuel with
carbs. However, extra carbs may help you stay more alert and focused even during a shorter session.
79
Page 80

Training with Fuelwise
FuelWise™ is located in the main menu under Fueling, and consists of three types of reminders during training
sessions. These are Smart carbs reminder, Manual carbs reminder and Drink reminder. The Smart carbs reminder
calculates your refueling need from your estimated session intensity and duration taking your training background and
physical details into account. The Manual carbs reminder and Drink reminder are time-based, which means you'll get a
reminder at preset intervals, every 15 or 30 minutes for example.
When using any of the fueling features the training session is started from the Fueling menu. After setting your
reminder and choosing Next , you'll be taken straight to the pre-training mode. Then choose your sport profile and start
your session.
Smart carbs reminder
When using the smart carbs reminder, set the estimated session duration and intensity, and we'll estimate the amount
of carbs you'll need for refueling during your session. When estimating your carbohydrate need for refueling we take
your training background and physical settings including age, gender, height, weight, maximum heart rate, resting heart
rate, VO2max, aerobic heart rate threshold and anaerobic heart rate threshold into account.
Your capability to absorb carbohydrates is estimated from your training background. This limits the maximum amount
of carbohydrates (grams per hour) that the smart carbs reminder can give you. This data is used to pre-calculate the
relationship between your heart rate and carbohydrate consumption rate based on your physical settings. The
recommended carbohydrate intake rate is then adjusted up or down (within min/max limits) based on your heart rate
data and the pre-calculated heart rate vs. carbohydrate consumption rate relationship.
During training, your watch will track your actual energy expenditure and adjust the frequency of the reminders
accordingly but the portion size (carbs in grams) is always the same during a session.
Set smart carbs reminder
1. In the main menu choose Fueling > Smart carbs reminder.
2. Set the estimated duration of your session. The minimum is 30 minutes.
3. Set the estimated intensity of your session. The intensity is set with heart rate zones. See heart rate zones to
learn more about different training intensities.
4. Set the carbs per serving (5 -100 grams) of your preferred sports fuel.
5. Choose Next
After setting the reminder you'll see an overview of your selection. At this point you can still remove the reminder you
just set or add a drink reminder. When you're ready to start your session choose Use now to go to pre-training mode.
When adding a drink reminder to a smart carbs reminder, you'll also get an estimation of your hydration need per
reminder. This is based on the average sweat rate in moderate conditions
Take ( ) g carbs! is shown on the display and the watch notifies you by vibrating when it's time
to take some carbs.
Manual carbs reminder
A time-based reminder that helps you stay fueled by reminding you to take some carbs at preset intervals. Can be set to
remind you in 5 to 60-minute intervals.
Set manual carbs reminder
80
Page 81

1. In the main menu choose
2. Set the interval (5-60 minutes) of the reminder.
After setting the reminder you'll see an overview of your selection. At this point you can still remove the reminder you
just set or add a drink reminder. When you're ready to start your session choose Use now to go to pre-training mode.
Take carbs! is shown on the display and the watch notifies you by vibrating when it's time to
take some carbs.
Drink reminder
A time-based reminder that helps you stay hydrated by reminding you to drink. Can be set to remind you in 5 to 60minute intervals.
Set drink reminder
1. In the main menu choose Fueling > Drink reminder.
Fueling > Manual carbs reminder.
2. Set the interval (5-60 minutes) of the reminder.
After setting the reminder you'll see an overview of your selection. At this point you can still remove the reminder you
just set or add a carbs reminder. When you're ready to start your session choose Use now to go to pre-training mode.
Drink! is shown on the display and the watch notifies you by vibrating when it's time to drink.
Learn more about FuelWise™
SMART CALORIES
The most accurate calorie counter on the market calculates the number of calories burned based on your individual
data:
l Body weight, height, age, gender
l Individual maximum heart rate (HR
l The intensity of your training or activity
l Individual maximal oxygen uptake (VO2
max
)
max
)
The calorie calculation is based on an intelligent combination of acceleration and heart rate data. The calorie
calculation measures your training calories accurately.
You can see your cumulative energy expenditure (in kilocalories, kcal) during training sessions, and your total
kilocalories of the session afterwards. You can also follow your total daily calories.
TRAINING BENEFIT
Training Benefit gives you textual feedback on the effect of each training session helping you to better understand the
effectiveness of your training. You can see the feedback in Flow app and Flow web service. To get the feedback, you
need to have trained at least a total of 10 minutes in the heart rate zones.
81
Page 82

Training Benefit feedback is based on heart rate zones. It reads into how much time you spend and how many calories
you burn in each zone.
The descriptions of different training benefit options are listed in the table below
Feedback Benefit
Maximum training+ What a session! You improved your sprint speed and the nervous system of your
muscles, which make you more efficient. This session also increased your resistance to
fatigue.
Maximum training What a session! You improved your sprint speed and the nervous system of your
muscles, which make you more efficient.
Maximum & Tempo training
Tempo & Maximum training
Tempo training+ Great pace in a long session! You improved your aerobic fitness, speed, and ability to
Tempo training Great pace! You improved your aerobic fitness, speed, and ability to sustain high intens-
Tempo & Steady state training
Steady state & Tempo training
Steady state training + Excellent! This long session improved the endurance of your muscles and your aerobic
Steady state training Excellent! You improved the endurance of your muscles and your aerobic fitness.
What a session! You improved your speed and efficiency. This session also significantly
developed your aerobic fitness and your ability to sustain high intensity effort for longer.
What a session! You significantly improved your aerobic fitness and your ability to sustain high intensity effort for longer. This session also developed your speed and efficiency.
sustain high intensity effort for longer. This session also increased your resistance to
fatigue.
ity effort for longer.
Good pace! You improved your ability to sustain high intensity effort for longer. This session also developed your aerobic fitness and the endurance of your muscles.
Good pace! You improved your aerobic fitness and the endurance of your muscles. This
session also developed your ability to sustain high intensity effort for longer.
fitness. It also increased your resistance to fatigue.
Steady state & Basic training, long
Steady state & Basic training
Basic & Steady state training, long
Basic & Steady state training
Basic training, long Great! This long, low intensity session improved your basic endurance and your body's
Basic training Well done! This low intensity session improved your basic endurance and your body's
Recovery training Very nice session for your recovery. Light exercise like this allows your body to adapt to
Excellent! This long session improved the endurance of your muscles and your aerobic
fitness. It also developed your basic endurance and your body's ability to burn fat during
exercise.
Excellent! You improved the endurance of your muscles and your aerobic fitness. This
session also developed your basic endurance and your body's ability to burn fat during
exercise.
Great! This long session improved your basic endurance and your body's ability to burn
fat during exercise. It also developed the endurance of your muscles and your aerobic
fitness.
Great! You improved your basic endurance and your body's ability to burn fat during
exercise. This session also developed the endurance of your muscles and your aerobic
fitness.
ability to burn fat during exercise.
ability to burn fat during exercise.
your training.
82
Page 83
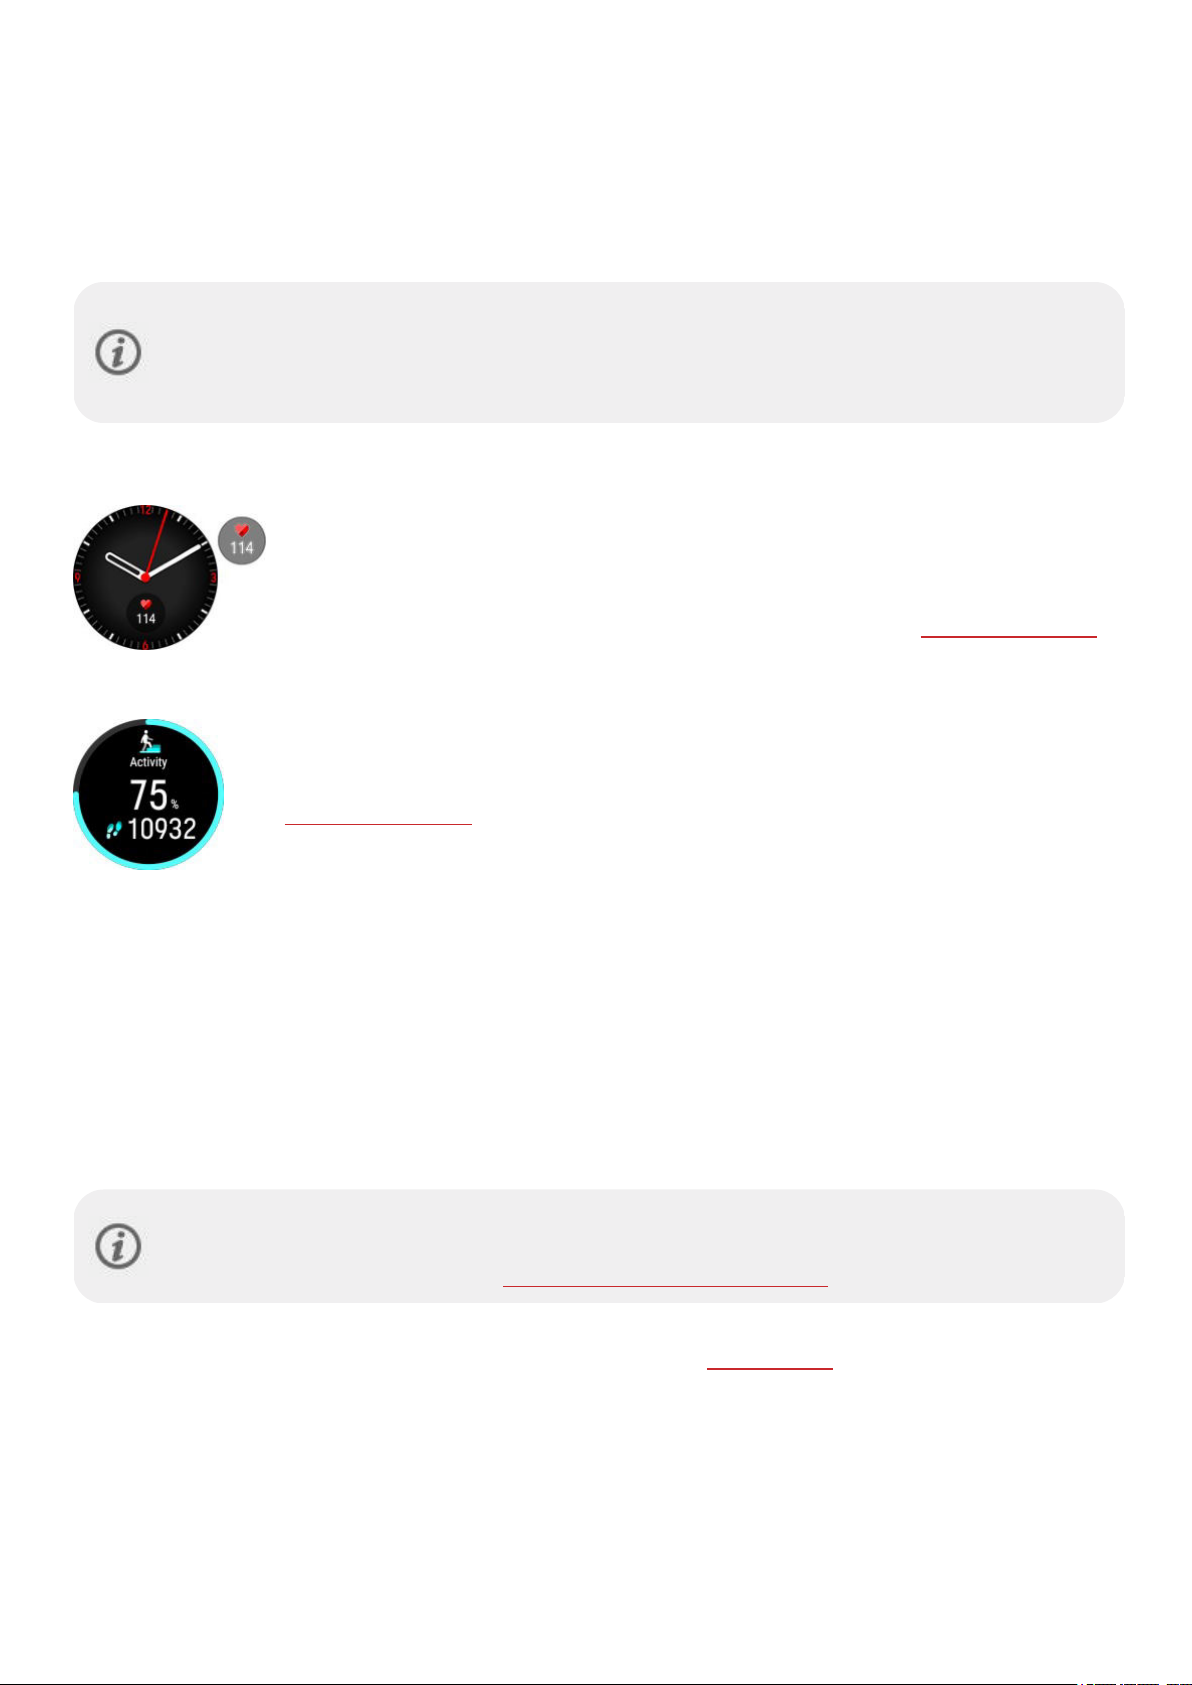
CONTINUOUS HEART RATE
The Continuous heart rate feature measures your heart rate around the clock. It enables a more accurate measurement
of daily calorie consumption and your overall activity because also physical activities with very little wrist movement,
such as cycling, can now be tracked.
You can turn the Continuous heart rate feature on, off or to night-time only mode on your watch in Settings > General
settings > Continuous HR tracking. If you choose Night-time only mode, set heart rate tracking to begin at the earliest
time you might go to bed.
The feature is on by default. Keeping the Continuous Heart Rate feature on in your watch will drain the
battery quicker. Continuous heart rate tracking needs to be enabled for Nightly Recharge to function. If you
want to save battery and still use Nightly Recharge, set the continuous heart rate tracking to be on only at
night.
Continuous heart rate on your watch
The Heart rate widget allows you to see your current heart rate on the watch face when using
the Continuous Heart Rate feature. You can add it to the watch face in the Watch face settings.
By tapping the widget, you can access the Daily activity view. From the Daily activity view, you
can check your current heart rate, your highest and lowest heart rate readings of the day, and
also view what your lowest heart rate reading of the previous night was. For more information,
see 24/7 Activity tracking.
The watch tracks your heart rate in 5-minute intervals and records the data for later analysis in the Flow app or web
service. If the watch detects that your heart rate is elevated, it starts to record your heart rate continuously. Continuous
recording can also start based on your wrist movements, for example, when you’re walking with a fast enough pace for
at least one minute. The continuous recording of your heart rate stops automatically when your activity level drops low
enough. When your watch detects that your arm is not moving or when your heart rate is not elevated it tracks your
heart rate in 5-minute cycles to find your lowest reading of the day.
In some cases, it is possible that you’ve seen a higher or lower heart rate on your watch during the day than is shown in
the continuous heart rate summary as the highest or lowest reading of your day. This can happen if the reading you’ve
seen falls outside the tracking interval.
The LEDs on the back of your watch are always on when the continuous heart rate feature is on and the
sensor on the back is in touch with your skin. For instructions on how to wear your watch for accurate
heart rate readings from the wrist, see Wrist-based heart rate measurement.
You can follow the Continuous Heart Rate data in more detail and in longer periods in Polar Flow, either in web or in the
mobile app. Learn more about the Continuous Heart Rate feature in this in-depth guide.
83
Page 84

24/7 ACTIVITY TRACKING
Your watch tracks your activity with an internal 3D accelerometer that records your wrist movements. It analyzes the
frequency, intensity and regularity of your movements together with your physical information, allowing you to see how
active you really are in your everyday life, on top of your regular training. You should wear your watch on your nondominant hand to ensure you get the most accurate activity tracking.
Activity Goal
You'll get your personal activity goal when you set up your watch. The activity goal is based on your personal data and
activity level setting, which you can find on your watch (Settings > Physical settings > Activity level), in the Polar Flow
app or in the Polar Flow web service.
If you want to change your goal, open your Flow app, tap your name/profile photo in the menu view, and swipe down to
see Activity goal. Or go to flow.polar.com and sign in to your Polar account. Then click your name > Settings > Activity
goal. Choose one of the three activity levels that best describes your typical day and activity. Below the selection area,
you can see how active you need to be to reach your daily activity goal on the chosen level.
The time you need to be active during the day to reach your activity goal depends on the level you have chosen and the
intensity of your activities. Meet your goal faster with more intense activities or stay active at a slightly more moderate
pace throughout the day. Age and gender also affect the intensity you need to reach your activity goal. The younger you
are, the more intense your activity needs to be.
Activity data on your watch
From the watch face, swipe left or right to navigate to the Daily activity view.
84
Page 85

View your progress towards your daily activity goal and steps you've taken so far.
Your progress towards your daily activity goal is shown as a percentage and visualized with a
circle that fills up as you are active. The amount and type of body movements are registered
and turned into an estimation of steps.
In addition, when opening the details, you can see the following details of your day’s
accumulated activity:
l Active time tells you the cumulative time of body movements that benefit your health.
l When using the Continuous heart rate feature, you can check your current heart rate,
your highest and lowest heart rate readings of the day, and also view what your lowest
heart rate reading of the previous night was. You can turn the Continuous heart rate
feature on, off or to night-time only mode on your watch in Settings > General settings >
Continuous HR tracking.
l Calories you've burned through training, activity and BMR (Basal metabolic rate: the
minimum metabolic activity required to maintain life).
Inactivity alert
It's widely known that physical activity is a major factor in maintaining health. In addition to being physically active, it's
important to avoid prolonged sitting. Sitting for long periods of time is bad for your health, even on those days when you
train and gain enough daily activity. Your watch spots if you’re being inactive for too long during your day and this way
helps you to break up your sitting to avoid the negative effects it has on your health.
If you’ve been still for 55 minutes, you'll get an inactivity alert: It's time to move is shown along with a small vibration.
Stand up and find your own way to be active. Take a short walk, stretch, or do some other light activity. The message
goes away when you start moving or press the button. If you don't get active in five minutes, you'll get an inactivity
stamp, which you can see on the Flow app and Flow web service after syncing. The Flow app and Flow web service
show you the whole history of how many inactivity stamps you have received. This way you can check back on your
daily routine and make changes towards a more active life.
Activity data in the Flow App and web service
With the Flow app you can follow and analyze your activity data on the go and sync it wirelessly from your watch to the
Flow web service. The Flow web service gives you the most detailed insight into your activity information. With the help
of the activity reports (under the REPORTS tab), you can follow the long-term trend of your daily activity. You can
choose to view either daily, weekly or monthly reports.
Learn more about the 24/7 Activity tracking feature in this in-depth guide.
ACTIVITY GUIDE
The Activity Guide feature shows how active you've been during the day, and tells you how much you need to still do to
reach the recommendations for physical activity per day. You can check how you’re doing in reaching your activity goal
for the day either from your watch, from the Polar Flow app or web service.
For more information, see
24/7 Activity Tracking.
85
Page 86

ACTIVITY BENEFIT
Activity benefit gives you feedback on the health benefits that being active has given you, and also on what kind of
unwanted effects sitting for too long has caused to your health. The feedback is based on international guidelines and
research on the health effects of physical activity and sitting behavior. The core idea is: the more active you are, the
more benefits you get!
Both the Flow app and Flow web service show the activity benefit of your daily activity. You can view the activity benefit
on daily, weekly and monthly basis. In the Flow web service, you can also view the detailed information on health
benefits.
For more information, see 24/7 Activity Tracking.
PO SIT ION ING SAT EL LIT ES
Your watch has built-in GPS (GNSS) that provides speed, pace, distance and altitude measurement for a range of
outdoor sports, and allows you to see your route on map in the Flow app and web service after your session. The watch
uses GPS, GLONASS, Galileo, BeiDou and QZSS systems simultaneously for maximum accuracy around the globe. By
default, the watch also utilizes dual-frequency GPS for improved positioning accuracy especially in difficult use
conditions. Alternatively, you can use a power-saving single-frequency GPS mode on your watch. Single-frequency GPS
mode does not give as accurate results in difficult use conditions, but it will improve the battery lifetime during exercise.
The setting is located in General settings > Positioning satellites. Choose Better accuracy (dual-frequency GPS) or
Power save (single-frequency GPS).
ASSISTED GPS
The watch uses Assisted GPS (A-GPS) to acquire a fast satellite fix. The A-GPS data tells your watch the predicted
positions of the GPS, Glonass, Galileo, BeiDou and QZSS satellites. This way the watch knows where to search for the
satellites and thus makes defining your initial location faster and improves the accuracy of the positioning data.
The A-GPS data updates once a day. The latest A-GPS data file is automatically updated to your watch each time you
sync it with the Flow web service via FlowSync software or via the Flow app.
A-GPS expiry date
The A-GPS data file is valid for up to 14 days. Positioning accuracy is relatively high during the first three days, and
progressively decreases during the remaining days. Regular updates help to ensure a high level of positioning accuracy.
You can check the expiry date for the current A-GPS data file from your watch. Go to Settings > General settings >
About your watch > Assisted GPS expires. If the data file has expired, sync your watch with the Flow web service via
FlowSync software or with the Flow app to update A-GPS data.
Once the A-GPS data file has expired, more time may be required for acquiring your current position and the positioning
data accuracy may decrease.
86
Page 87

For best GPS performance, wear the watch on your wrist with the display facing up. Due to the location of
the GPS antenna on the watch, it is not recommended to wear it with the display on the underside of your
wrist. When wearing it on the handlebars of a bike, make sure the display is facing up.
BA CK T O ST ART
The back to start feature guides you back to the starting point of your session.
To use the back to start feature for one session:
1.
In pre-training mode, tap the quick menu icon
2. Choose
You can also set back to start on during a training session by pausing your session and opening the quick menu by
tapping the quick menu icon
If you add the back to start training view to a sport profile in Polar Flow, it is always set on for that sport profile and it
does not need to be switched on every session.
To return to your starting point:
l Keep your watch in a horizontal position in front of you.
l Keep moving in order for your watch to determine which direction you are going. An arrow will point in the
direction of your starting point.
l To get back to the starting point, always turn in the direction of the arrow.
l Your watch also shows the bearing and the direct distance (beeline) between you and the starting point.
Back to start from the list, and choose On.
and by scrolling to Back to start, and choosing on.
to enter the quick menu.
When in unfamiliar surroundings, always keep a map at hand in case the watch loses the satellite signal or the battery
runs out.
RA CE P ACE
The race pace feature helps you to keep a steady pace and achieve your target time for a set distance. Define a target
time for the distance - 45 minutes for a 10k run for example and follow how far behind or ahead you are compared to
your pre-set target.
Race pace can be set on your watch, or you can also set a Race Pace target in the Flow web service or app, and sync it
to your watch.
If you have scheduled race pace target for that day your watch suggests you to start it when entering pre-training mode.
Create a race pace target on your watch
You can create race pace target from the Quick menu in pre-training mode.
87
Page 88

1. Press the button to enter the main menu and tap
Start training.
2.
In pre-training mode, tap the quick menu icon
3. Choose
to meet your target time and then returns to pre-training mode where you can start the training session.
Create a race pace target in the Flow web service
1. In the Flow web service, go to Diary, and click Add > Training target.
2. In Add training target, choose Sport, and enter a Target name (maximum 45 digits), Date and Time and any
Notes (optional) you want to add.
3. Choose Race Pace.
4. Fill in two of the following values: Duration, Distance or Race Pace. You get the third one automatically.
5.
Click Add to favorites
6. Click
Sync the target to your watch via FlowSync, and your ready to go.
Race pace from the list and set the distance and duration. The watch displays the pace/speed required
to add the target to your list of favorites, if you want.
Save to add the target to your Diary.
to enter the quick menu.
SP ORT PRO FIL ES
Sport profiles are the sport choices you have on your watch. We have created four default sport profiles to your watch,
but you can add new sport profiles in the Polar Flow app or web service and sync them to your watch, and this way
create a list of all your favorite sports.
You can also define specific settings for each sport profile. For example, you can create tailored training views for each
sport you do and choose what data you want to see when you train: just your heart rate or just speed and distance—
whatever suits you and your training needs and requirements best.
You can have a maximum of 20 sport profiles on your watch at a time. The number of sport profiles in Polar Flow
mobile app and Polar Flow web service is not limited.
For more information, see Sport Profiles in Flow.
Using the sport profiles makes it possible for you to keep up with what you've done and to see the progress you've
made in different sports. See your training history and follow your progress in the Flow web service.
You can use Polar Ignite 3 with Polar Club during group exercise classes in fitness clubs. Select one of the
indoor sport profiles for the training session and make sure that the Heart rate visible to other device
feature is set on in the sport profile settings.
Please note that in a number of indoor sports, group sports and team sports profiles the HR visible to
other devices setting is enabled by default. This means that compatible devices using Bluetooth Smart
wireless technology, e.g. gym equipment, can detect your heart rate. You can check which sport profiles
have Bluetooth broadcasting enabled by default from the Polar Sport profiles list. You can enable or disable
Bluetooth broadcasting from sport profile settings.
HE ART RAT E ZO NES
The range between 50% and 100% of your maximum heart rate is divided into five heart rate zones. By keeping your
heart rate within a certain heart rate zone you can easily control the intensity level of your workout. Each heart rate zone
carries its own main benefits, and understanding these benefits will help you achieve the effect you want from your
workout.
Learn more about the Heart Rate Zones:
What are Heart Rate Zones?.
88
Page 89

SP EED ZON ES
With the speed/pace zones you can easily monitor speed or pace during your session, and adjust your speed/pace to
achieve the targeted training effect. The zones can be used to guide the efficiency of your training during sessions, and
help you mix up your training with different training intensities for optimal effects.
SPEED ZONES SETTINGS
The speed zone settings can be adjusted in the Flow web service. There are five different zones, and zone limits can be
manually adjusted or you can use the default ones. They are sport specific, allowing you to adjust the zones to best suit
each sport. The zones are available in running sports (including team sports that involve running), cycling sports as well
as rowing and canoeing.
Default
If you choose Default, you cannot change the limits. The default zones are an example of speed/pace zones for a
person with a relatively high fitness level.
Free
If you choose Free, all limits can be changed. For example, if you have tested your actual thresholds, such as anaerobic
and aerobic thresholds, or upper and lower lactate thresholds, you can train with zones based on your individual
threshold speed or pace. We recommend that you set your anaerobic threshold speed and pace as the minimum for
zone 5. If you also use aerobic threshold, set that as the minimum of zone 3.
TRAINING TARGET WITH SPEED ZONES
You can create training targets based on speed/pace zones. After synchronizing the targets via FlowSync, you’ll receive
guidance from your training device during training.
DURING TRAINING
During your training you can view which zone you are currently training in and the time spent in each zone.
AFTER TRAINING
In the training summary on your watch, you'll see an overview of the time spent in each speed zone. After syncing,
detailed visual speed zone information can be viewed in the Flow web service.
SP EED AND DIS TA NCE FRO M TH E WR IST
Your watch measures speed and distance from your wrist movements with a built-in accelerometer. This feature
comes in handy when running indoors or in places with limited GPS signals. For maximum accuracy make sure you’ve
set your handedness and height correctly. Speed and distance from the wrist works best when running at a pace that is
natural and feels comfortable for you.
Wear your watch snugly on your wrist to avoid any shaking. To get consistent readings it should always be worn on the
same position on your wrist. Avoid wearing any other devices like watches, activity trackers or phone armbands on the
same arm. In addition, do not hold anything in the same hand like a map or a phone.
Speed and distance from the wrist is available in the following running type sports: Walking, Running, Jogging, Road
running, Trail running, Treadmill running, Track and field running and Ultra running. To see speed and distance during a
training session, make sure you have speed and distance added to the training view of the sport profile you use when
running. This can be done in Sport Profiles in the Polar Flow mobile app or in the Flow web service.
SW IMM ING MET RIC S
Swimming metrics help you analyze each swimming session, and follow your performance and progress in the long
run.
89
Page 90

To get the most accurate information, make sure your have set which hand you wear your watch on. You
can check that you’ve set which hand you wear your watch from the product settings in Flow.
POOL SWIMMING
When using the Swimming or Pool swimming profile, the watch records your swim distance, time and pace, stroke rate,
rest times and also identifies your swimming style. In addition, with the help of the SWOLF score you can keep track of
your development.
Swimming Styles: Your watch recognizes your swimming style, and calculates style specific metrics as well as totals
for your whole session. Styles the watch recognizes:
l Freestyle
l Backstroke
l Breaststroke
l Butterfly
Pace and Distance: Once the watch has recognized your swimming style as one of the four swimming styles
mentioned above, it will be able to detect your turns and use this information to give you accurate pace and distance.
The pace and distance measurements are based on detected turns and the set pool length. Every time you turn, one
pool length gets added to the total distance swam.
Strokes:Your watch tells you how many strokes you take in a minute or per pool length. This information can be used
to find out more about your swimming technique, rhythm and timing.
SWOLF (short for swimming and golf) is an indirect measure of efficiency. SWOLF is calculated by adding together your
time and the amount of strokes it takes you to swim a pool length. For instance, 30 seconds and 10 strokes to swim the
length of a pool will equal a SWOLF score of 40. Generally, the lower your SWOLF is for a certain distance and style, the
more efficient you are.
SWOLF is highly individual, and thus should not be compared to SWOLF scores other people have swam. It’s rather a
personal tool that can help you improve and fine-tune your technique, and find an optimal efficiency for different styles.
Pool Length setting
It’s important that you choose the correct pool length, as it affects pace, distance and stroke calculation, as well as your
SWOLF score. The default lengths are 25 meters, 50 meters and 25 yards, but you can also set it manually to a custom
length. The minimum length that can be chosen is 20 meters/yards.
The chosen pool length is shown in pre-training mode. To change the pool length, tap the quick menu icon
access the
Pool length setting and set the correct length.
to
OPEN WATER SWIMMING
When using the Open water swimming profile, the watch records your swim distance, time and pace, stroke rate for
freestyle as well as your route.
Freestyle is the only style that the open water swimming profile recognizes.
Pace and Distance: Your watch uses GPS to calculate pace and distance during your swim.
Stroke rate for freestyle:Your watch records your average and maximum stroke rates (how many strokes you take per
minute) for your session.
Route: Your route is recorded with GPS, and you can view it on a map after your swim in the Flow app and web service.
GPS does not work underwater, and because of this your route is filtered from GPS data acquired when your hand is out
of the water or very close to the water surface. External factors such as water conditions and satellite positions can
affect the accuracy of the GPS data, and as a result data from the same route can vary from day to day.
90
Page 91

MEASURING HEART RATE IN WATER
Your watch automatically measures your heart rate from your wrist with the new Polar Precision Prime sensor fusion
technology, offering an easy and comfortable way to measure your heart rate while swimming. Although water may
prevent the wrist-based heart rate measurement from working optimally, the accuracy of Polar Precision Prime is
sufficient to allow you monitor your average heart rate and heart rate zones during your swimming sessions, get
accurate calorie burn readings, your Training Load from the session and the Training Benefit feedback based on your
heart rate zones.
To ensure the best possible accuracy of your heart rate data, it’s important to wear the watch snugly on your wrist (even
more snugly than in other sports). See Training with wrist based heart rate for instructions on wearing your watch
during training.
Note that you can't use a Polar heart rate sensor with a chest strap with your watch when swimming
because Bluetooth doesn't work under water.
START A SWIMMING SESSION
1. Press the button to enter the main menu, choose Start training, and then browse to the Swimming, Pool
swimming or Open water swimming profile.
2. When using the Swimming/Pool swimming profile, check that the pool length is correct (shown on the display).
To change the pool length, tap the quick menu icon
Do not start the training session recording until you are in the pool, however, do avoid pushing the
button under water.
3. Tap the display to start training recording.
and tap Pool length and set the correct length.
DURING YOUR SWIM
You can customize what is shown on the display in the sport profiles section in the Flow web service. The default
training views in the swimming sport profiles the following information:
l Your heart rate and the heart rate ZonePointer
l Distance
l Duration
l Rest time (Swimming and Pool swimming)
l Pace (Open water swimming)
l Heart rate graph
l Average heart rate
l Maximum heart rate
l Time of day
AFTER YOUR SWIM
An overview of your swimming data is available in the training summary on your watch right after your session. You can
see the following information:
The date and time when your session started
The duration of the session
Swimming distance
91
Page 92

Average heart rate
Maximum heart rate
Cardio Load
Heart rate zones
Energy used during the session
Carbs
Protein
Fat
For more information, see Energy Sources
Average pace
Maximum pace
Stroke rate (how many strokes you take per minute)
l Average stroke rate
l Maximum stroke rate
Sync your watch with Flow for a more detailed visual representation of your swim including a detailed breakdown of
your pool swimming sessions, your heart rate, pace and stroke rate curves.
WE ATH ER
The weather view brings the current day's hourly forecast, as well as tomorrow's 3-hour and the day after tomorrow's 6hour forecast to your wrist. Other weather information provided includes wind speed, wind direction, humidity and the
chance of rain.
Weather information can only be found from the weather view. From the watch face, swipe left or right until you reach
it.
To use the weather feature you need to have Flow app on your mobile, and your watch needs to be paired with it.
Location Services (iOS) or Location Settings (Android) need also to be set on to get weather information.
92
Page 93

Today's forecast
View the current day's hourly forecast. Tap the display to view more detailed weather
information, including the following:
l Location of forecast
l When updated last
l Refresh (shown if weather info needs to updated for example because your location has
changed or if it's been a while since it was last updated)
l Current temperature
l Feels like
l Rain
l Wind speed
l Wind direction
l Humidity
l Hourly forecast
Note that weather history including information on what the weather was during training sessions is not available.
Tomorrow's forecast
l Forecast low/high for each 3-hour period
The day after tomorrow's forecast
93
Page 94

l Forecast low/high for each 6-hour period
PO WER SAV E SE TTI NG S
The power save settings allow you to extend your training time by changing the GPSrecording rate or setting wristbased heart rate off. These settings let you optimize battery usage and get more training time for extra long sessions or
when the battery is running low.
The power save settings are found in the quick menu. You can access the quick menu from pre-training mode, during a
session when paused and during transition mode in multisport sessions by tapping the quick menu icon
After setting on any of the power save settings, you'll see their effect on the estimated training time in pre-training
mode. Note that the power save settings are set on for each session separately. The settings are not stored.
Note that the temperature affects the estimated training time. When training in cold conditions the actual
training time can be less than what is indicated when starting the session.
GPS recording rate
Set the GPS recording rate to a less frequent interval (1 minute or 2 minutes). Handy in ultra-long sessions when long
battery life is essential.
Note that changing the GPS recording rate to a less frequent interval may reduce the accuracy of other
measurements, such as speed/pace and distance, depending on the sport profile and sensors used.
.
Wrist-based heart rate
Set wrist-based heart rate off. Set it off to save power when you don't necessarily need heart rate data. When using a
heart rate monitor with a chest strap wrist-based heart rate is set off by default.
EN ERG Y SO URC ES
The energy sources breakdown shows how much of different energy sources (fats, carbohydrates, proteins) you used
during your session. On your watch, you can see it in the training summary right after finishing your session. More
detailed information can be viewed in the Flow mobile app after syncing your data.
During physical activity, your body uses carbohydrates and fat as main sources of energy. The higher your training
intensity, the more carbs you use in proportion to fat, and vice versa. The role of protein is usually quite small, but during
high intensity activity and during long sessions your body can use about 5 to 10 % of its energy from protein.
We calculate the use of different energy sources based on your heart rate, but we also take your physical settings into
account. These include your age, gender, height, weight, maximum heart rate, resting heart rate, VO2max, aerobic
94
Page 95

threshold and anaerobic threshold. It's important that you've set these settings as precisely as possible so you'll get the
most accurate energy source consumption data.
ENERGY SOURCES SUMMARY
After your session, you'll see the following information the training summary:
Carbs, protein and fat you've used during your session.
Note that you shouldn't interpret the used energy sources and their amounts as
guidelines when eating after your session.
DETAILED ANALYSIS IN THE FLOW MOBILE APP
In the Flow app you can also view how much of these sources you used at each point of your session and how they
accumulated throughout it. The graph shows how your body makes use of different energy sources at different training
intensities, and also at different stages of your training session. You can also compare the breakdown from similar
sessions over time, and see how your ability to use fat as the primary energy source develops.
Learn more about energy sources
VO ICE GUI DAN CE
The voice guidance feature helps you focus on your training by providing relevant training data straight to your
headphones. It removes the need to look at the watch during the workout. The information you get in audio format
includes lap details, changes in heart rate, and guidance during training phases. To use the voice guidance feature, you
need to have the Flow app running on your phone, and it also needs to be paired with your watch. For instructions, see
Pairing a mobile device with your watch.
You can set the voice guidance feature on in the Flow app device settings. In the Flow app, go to Devices and choose
Polar Ignite 3 if you have more than one Polar device. Scroll down to Voice guidance, tap it open and turn the feature
on. Then choose what type of information is included in the voice guidance:
l Choose Training guidance to get guidance during the phases of your training targets and daily training
suggestions.
l Choose Laps to hear the lap details when you take a lap manually or a lap is automatically taken based on
duration, distance or location.
l Choose
Zones to find out about changes in your heart rate.
95
Page 96

Note that in addition to the information you choose from the above options, you will receive audio feedback when
l you start, pause, continue or stop the training session and when you receive a training summary
l real-time connection between phone and watch is lost/recovered
l the watch battery is low
For more information, see the support document Voice Guidance in Polar Flow app.
PH ONE NOT IFI CAT IO NS
The phone notifications feature allows you to get alerts about incoming calls, messages and notifications from apps
onto your watch. You’ll get the same notifications on your watch that you get on your phone screen. Notifications are
available when not training and during training sessions. You can choose when you want to receive them. Phone
notifications are available for iOS and Android phones.
To use phone notifications, you need to have the Flow app running on your phone, and it also needs to be paired with
your watch. For instructions, see Pairing a mobile device with your watch.
Set phone notifications on
On your watch go to Settings > General settings > Phone notifications to set them on. Set phone notifications Off, On,
when not training, On, when training or Always on.
You can also set the phone notifications on in the Flow app device settings. After setting the notifications on sync your
watch with the Flow app.
Please note that when phone notifications are set on, the battery of your watch and phone will run out
faster because Bluetooth is continuously on.
Do not disturb
If you want to disable notifications and call alerts for a certain period of time, set do not disturb on. When it is on, you
will not receive any notifications or call alerts during the time period you have set.
96
Page 97

On your watch go to
when do not disturb is on. Choose when it Starts at and Ends at.
Settings > General settings > Do not disturb. Choose Off, On or On (22.00 - 7.00), and the period
VIEW NOTIFICATIONS
When not training, whenever you receive a notification your watch will vibrate and a red dot will appear at the bottom of
the display. View the notification by swiping up from the bottom of the display or by turning your wrist to look at the
watch immediately after the watch vibrates.
When receiving a notification during a training session, your watch will vibrate and show the sender. To remove the
notification, tap the display when viewing it and choose Clear. To remove all notifications on your watch, scroll down on
the notification list and choose Clear all.
When receiving a call your watch will vibrate and show the caller. You can also answer or decline the call with your
watch.
Phone notifications may function differently depending on the model of your Android phone.
97
Page 98

MU SIC CON TRO LS
Control music and media playing on your phone with your watch during training sessions as well as from the Music
controls view when not training. Music controls are available for iOS and Android phones. To use the music controls
you need to have the Flow app running on your phone, and it also needs to be paired with your watch. For instructions,
see Pairing a mobile device with your watch. If you did the setup for your watch via the Flow app your watch is already
paired with your phone.
Set the music controls on from Settings > General settings > Music controls.
The music controls setting becomes visible after pairing your watch with your phone via the Flow app.
Choose Training display to control music during your training sessions and watch face to access the controls when
not training.
l During training, swipe left or right to scroll to the music controls training view. The
music controls training view is enabled when the player is on and a session has been
started
l When not training, swipe left or right from the watch face to navigate to the Music
controls view.
l Adjust the volume with volume controls
l Pause/play or switch between songs with the controls.
MUSIC CONTROLS SETTINGS IN POLAR FLOW APP
You can adjust the Music controls settings also from the Polar Flow app Devices
menu:
l Tap the button next to Music controls to set the Music controls feature on or
off
l Always on: You can control music from both the training display and the
Music controls view.
l Training: On: You can control music from the training display.
l Training: Off: You can control music from the Music controls view.
If you change your settings remember to sync your watch with the
Flow app.
HR SEN SOR MOD E
In heart rate sensor mode you can turn your watch into a heart rate sensor and share your heart rate with other
Bluetooth devices like training apps, gym equipment or cycling computers. To use your watch in HR sensor mode, you
first need to pair it with the receiving external device. Refer to receiving device's user guide for detailed pairing
instructions.
98
Page 99

To turn on the HR sensor mode:
1. Press the button to enter the main menu and tap Start training. Browse to your preferred sport.
2.
Open the quick menu by tapping the quick menu icon
Choose Share HR with other devices.
Choose Add a new device
3. Activate the external device's pairing mode.
4. Choose Ignite 3 from the external device.
5. Accept pairing Ignite 3 with the external device.
6. You should be able to see your heart rate in both Ignite 3 and the external device. When you’re ready, just start
your session from the external device. To record your training session with your watch, return to pre-training
mode and start training recording by tapping the display.
.
To stop sharing HR:
Choose Stop sharing. HR sharing stops also when you exit pre-training mode or stop the training recording.
CH ANG EAB LE W RIS TB AND S
The changeable wristbands let you personalize your watch to match every situation and style so you can wear it all the
time and make the best use of the 24/7 activity tracking, continuous heart rate measurement and sleep tracking.
You can choose your favorite wristband from Polar’s selection or use any other watch band that uses 20 mm spring
bars.
CHANGING THE WRISTBAND
The wristband of your watch is quick and simple to change.
1. To detach a band, pull the quick-release knob inwards and pull the band away from the watch.
2. To attach a band, insert the pin (the opposite side of the quick-release knob) into the pin hole on the watch.
3. Pull the quick-release knob inwards and align the other end of the pin with the hole on the watch.
4. Release the knob to lock the band in place.
99
Page 100

CO MPA TIB LE S ENS ORS
Enhance your training experience, and achieve a more complete understanding of your performance with compatible
Bluetooth® sensors.
View a full list of compatible Polar sensors and accessories
Before taking a new sensor into use, it has to be paired with your watch. Pairing only takes a few seconds, and ensures
that your watch receives signals from your sensors only, and allows disturbance-free training in a group. Before
entering an event or race, make sure that you do the pairing at home to prevent interference due to data transmission.
For instructions, see Pairing sensors with your watch.
POLAR OH1 OPTICAL HEART RATE SENSOR
Polar OH1 is a compact optical heart rate sensor that measures heart rate from your arm or temple. It's versatile and
offers a great option to heart rate chest straps and wrist-based heart rate devices. With Polar OH1 you can broadcast
your real-time heart rate to your sports watch, smart watch or Polar Beat or other fitness app via Bluetooth, and
simultaneously to ANT+ devices. Polar OH1 has an inbuilt memory so you can start your workout with OH1 alone and
transfer the training data to your phone afterwards. It comes with a comfortable machine-washable armband and a
swimming goggle strap clip (in Polar OH1 + product package).
It can also be used with Polar Club, Polar GoFit and Polar Team app.
POLAR VERITY SENSE
Polar Verity Sense is a versatile high-quality optical heart rate sensor that measures heart rate from your arm or temple.
Polar Verity Sense is a great alternative to heart rate chest straps and wrist-based devices. You can use it with the
product's armband, swimming goggle strap clip or just place it anywhere snug and firm against your skin. Polar Verity
Sense allows maximum freedom of movement and works in countless different sports. As a highlight, Polar Verity
Sense records heart rate, distance, pace and turns when you swim in the pool. You can record your workouts in the
internal memory and transfer workout data to your phone afterwards or you can connect it to a compatible device and
follow your heart rate in real time during your workout.
POLAR H10 HEART RATE SENSOR
Monitor your heart rate with maximum precision with the Polar H10 heart rate sensor with a chest strap.
Although the Polar Precision Prime is the most accurate optical heart rate measurement technology there is and works
pretty much anywhere, in sports where it's more challenging to keep the sensor stationary on your wrist or where you
have pressure or movement in muscles or tendons near the sensor, the Polar 10 heart rate sensor gives you the best
heart rate accuracy. The Polar H10 heart rate sensor is more responsive to rapidly increasing or decreasing heart rate,
so it’s the ideal option also for interval type of training with quick sprints.
100
 Loading...