

Planet FGSD-1022, FGSD-1022HP, FGSD-1022P Quick Installation Manual

FGSD-1022
8-Port 10/100Mbps + 2G TP/SFP Combo
Managed Switch
FGSD-1022P
8-Port 10/100Mbps + 2G TP/SFP Combo
Managed PoE Switch
FGSD-1022HP
8-Port 10/100Mbps + 2G TP/SFP Combo
Managed 802.3at PoE Switch
Quick Installation Guide
-
1

Quick Installation Guide
Table of Contents
1. Package Content....................................................................................3
2. Requirements.........................................................................................4
3. Terminal Setup .......................................................................................5
4. Logon to the Console .............................................................................7
5. Configure IP address..............................................................................8
6. Start Web Management........................................................................11
7. While IP Address be changed or forgotten admin password –.............14
8. Customer Support................................................................................15
- 2 -

Quick Installation Guide
1. Package Content
Thank you for purchasing PLANET 8-Port Fast Ethernet + 2-Port Gigabit
TP/SFP Combo Managed Switch, FGSD-1022, FGSD-1022P and
FGSD-1022HP. Terms of “Managed Switch” means the switches
mentioned titled in the cover page of this Quick Installation Guide.
Upon open the box of the Managed Switch and carefully unpack it. The
box should contain the following items:
The Managed Switch x 1
This Quick Installation Guide x 1
User’s Manual CD x 1
Power Cord x 1
Rubber Feet x 4
Two Rack-mounting Brackets with Attachment Screws x 1 (Set)
RS-232 DB9 Male Console Cable x1
If any item is found missing or damaged, please contact your local
reseller for replacement.
- 3 -
Quick Installation Guide
2. Requirements
The Managed Switch provide remote Web interface for manage; the
following equipments are necessary for further management.
Workstation installed with Ethernet NIC (Network Interface Card)
The operate system of subscriber PC that running Windows
XP/2003, Vista, Windows 7, MAC OS X , Linux, Fedora, Ubuntu or
other platform compatible with TCP/IP protocols.
Ethernet Port connect
• Network cables - use standard network (UTP) cables with RJ45
connectors.
• Above Workstation installed with WEB Browser and JAVA runtime
environment Plug-in
Serial Port connect
• Above PC with COM Port (DB-9 / RS-232) or USB-to-RS-232
converter
It is recommended to use Internet Explore 6.0 or above to
access the Managed Switch.
- 4 -
Quick Installation Guide
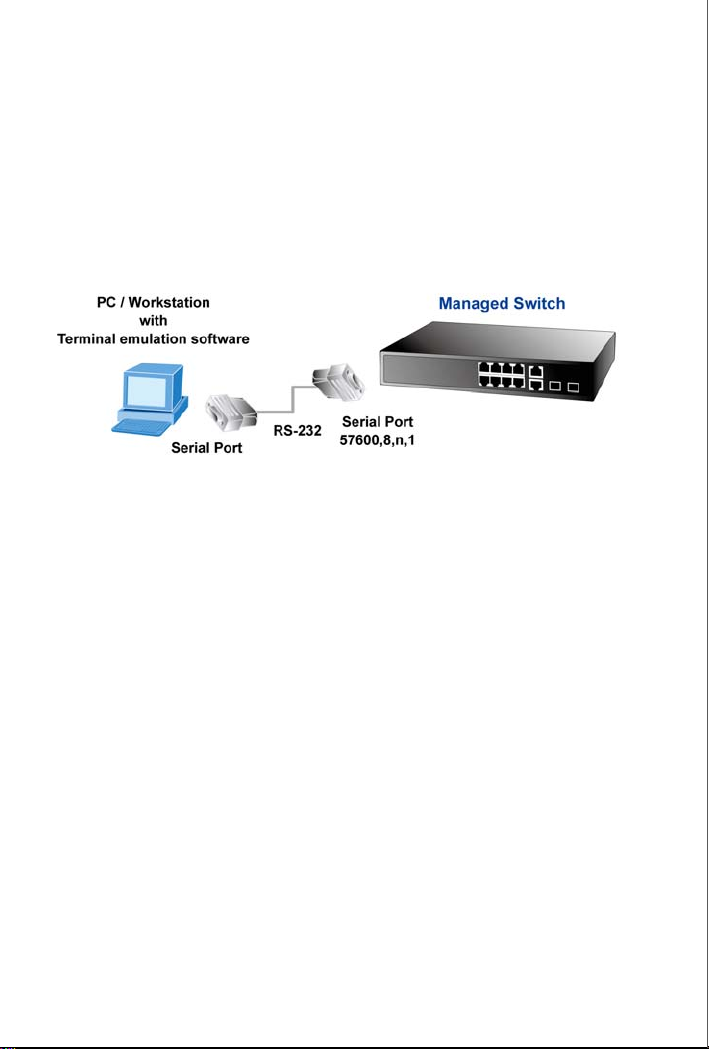
3. Terminal Setup
To configure the system, connect a serial cable to a COM port on a PC or
notebook computer and to serial (console) port of the Managed Switch.
The console port of the Managed Switch is DCE already, so that you can
connect the console port directly through PC without the need of Null
Modem.
Figure 3-1 Serial / Console connection
A terminal program is required to make the software connection to the
Managed Switch. Windows' Hyper Terminal program may be a good
choice. The Hyper Terminal can be accessed from the Start menu.
1. Click START, then Programs, Accessories and then Hyper
Terminal.
2. When the following screen appears, make sure that the COM port
should be configured as:
♦ Baud : 57600
♦ Parity : None
♦ Data bits : 8
♦ Stop bits : 1
♦ Flow Control : None
- 5 -
 Loading...