

Page 1

User’s Manual
10/100/1000Base-T PCI Express
Gigabit Ethernet Adapter
ENW-9702
www.PLANET.com.tw
Page 2

User Manual of ENW-9702
Trademarks
Copyright PLANET Technology Corp. 2013.
Contents subject to which revision without prior notice.
PLANET is a registered trademark of PLANET Technology Corp. All other trademarks belong to their
respective owners.
Disclaimer
PLANET Technology does not warrant that the hardware will work properly in all environments and
applications, and makes no warranty and representation, either implied or expressed, with respect to the
quality, performance, merchantability, or fitness for a particular purpose.
PLANET has made every effort to ensure that this User's Manual is accurate; PLANET disclaims liability
for any inaccuracies or omissions that may have occurred.
Information in this User's Manual is subject to change without notice and does not represent a
commitment on the part of PLANET. PLANET assumes no responsibility for any inaccuracies that may
be contained in this User's Manual. PLANET makes no commitment to update or keep current the
information in this User's Manual, and reserves the right to make improvements to this User's Manual
and/or to the products described in this User's Manual, at any time without notice.
If you find information in this manual that is incorrect, misleading, or incomplete, we would appreciate
your comments and suggestions.
FCC Warning
This equipment has been tested and found to comply with the limits for a Class B digital device, pursuant
to Part 15 of the FCC Rules. These limits are designed to provide reasonable protection against harmful
interference when the equipment is operated in a commercial environment. This equipment generates,
uses, and can radiate radio frequency energy and, if not installed and used in accordance with the
Instruction manual, may cause harmful interference to radio communications. Operation of this
equipment in a residential area is likely to cause harmful interference in which case the user will be
required to correct the interference at whose own expense.
CE Mark Warning
This is a Class B product. In a domestic environment, this product may cause radio interference, in which
case the user may be required to take adequate measures.
WEEE Warning
To avoid the potential effects on the environment and human health as a result of
the presence of hazardous substances in electrical and electronic equipment, end
users of electrical and electronic equipment should understand the meaning of the
crossed-out wheeled bin symbol. Do not dispose of WEEE as unsorted municipal
waste and have to collect such WEEE separately.
vision
Re
PLANET 10/100/1000Base-T PCI Express Gigabit Ethernet Adapter User’s Manual
FOR MODEL: ENW-9702
REVISION: 1.0 (FEBRUARY.2013)
Part No.: EM-ENW9702_v1.0 (2081-A14140-000)
- 2 -
Page 3

User Manual of ENW-9702
Table of Contents
CHAPTER 1 INTRODUCTION................................................................................................. 4
1.1 Package Content............................................................................................................................ 5
1.2 Features .........................................................................................................................................5
1.3 Gathering Tools and Documentations ............................................................................................5
CHAPTER 2 HARDWARE INSTALLATION............................................................................ 6
2.1 LED Definition ................................................................................................................................6
2.2 Hardware Installation...................................................................................................................... 7
CHAPTER 3 DRIVER INSTALLATION.................................................................................... 8
3.1 Installing Driver to Windows XP / Server 2003...............................................................................8
3.2 Installing Driver to Windows 7 / Server 2008................................................................................11
3.3 Installing Driver to Linux ...............................................................................................................15
CHAPTER 4 SPECIFICATIONS ............................................................................................ 18
- 3 -
Page 4
User Manual of ENW-9702
Chapter 1 Introduction
Thank you for purchasing PLANET ENW-9702 PCI Express Gigabit Ethernet adapter. It is a
10/100/1000Mbps Ethernet adapter for PCI local bus-compliant PCs, supports Auto-Negotiation for
10/100/1000Mbps Ethernet connection.
More Bandwidth and Advanced Functions
The ENW-9702 PCI Express Gigabit Ethernet adapter that designed to address high-performance
system application requirements, with the bandwidth of x1 PCI Express Bus Architecture, the ENW-9702
provide higher performance than the network cards which base on 32/64bit PCI architecture. It is
specifically designed to allow throughput at rates up to 2Gbps, thus eliminating the existing 32/64bit PCI
network card.
High Performance, Boosts Network Traffic Speed
The ENW-9702 PCI Express Gigabit Ethernet adapter also provides a highly cost-effective solution to
upgrading to the Gigabit network with your existing Fast Ethernet infrastructures; it can provide the best
solution for one of the major issues of Local Area Networks - communication speed. Ten times as fast as
the existing 100Base-TX solutions, using the PLANET ENW-9702 to connect your servers and
workstations guarantees extremely high throughput and excellent signal quality.
- 4 -
Page 5

User Manual of ENW-9702
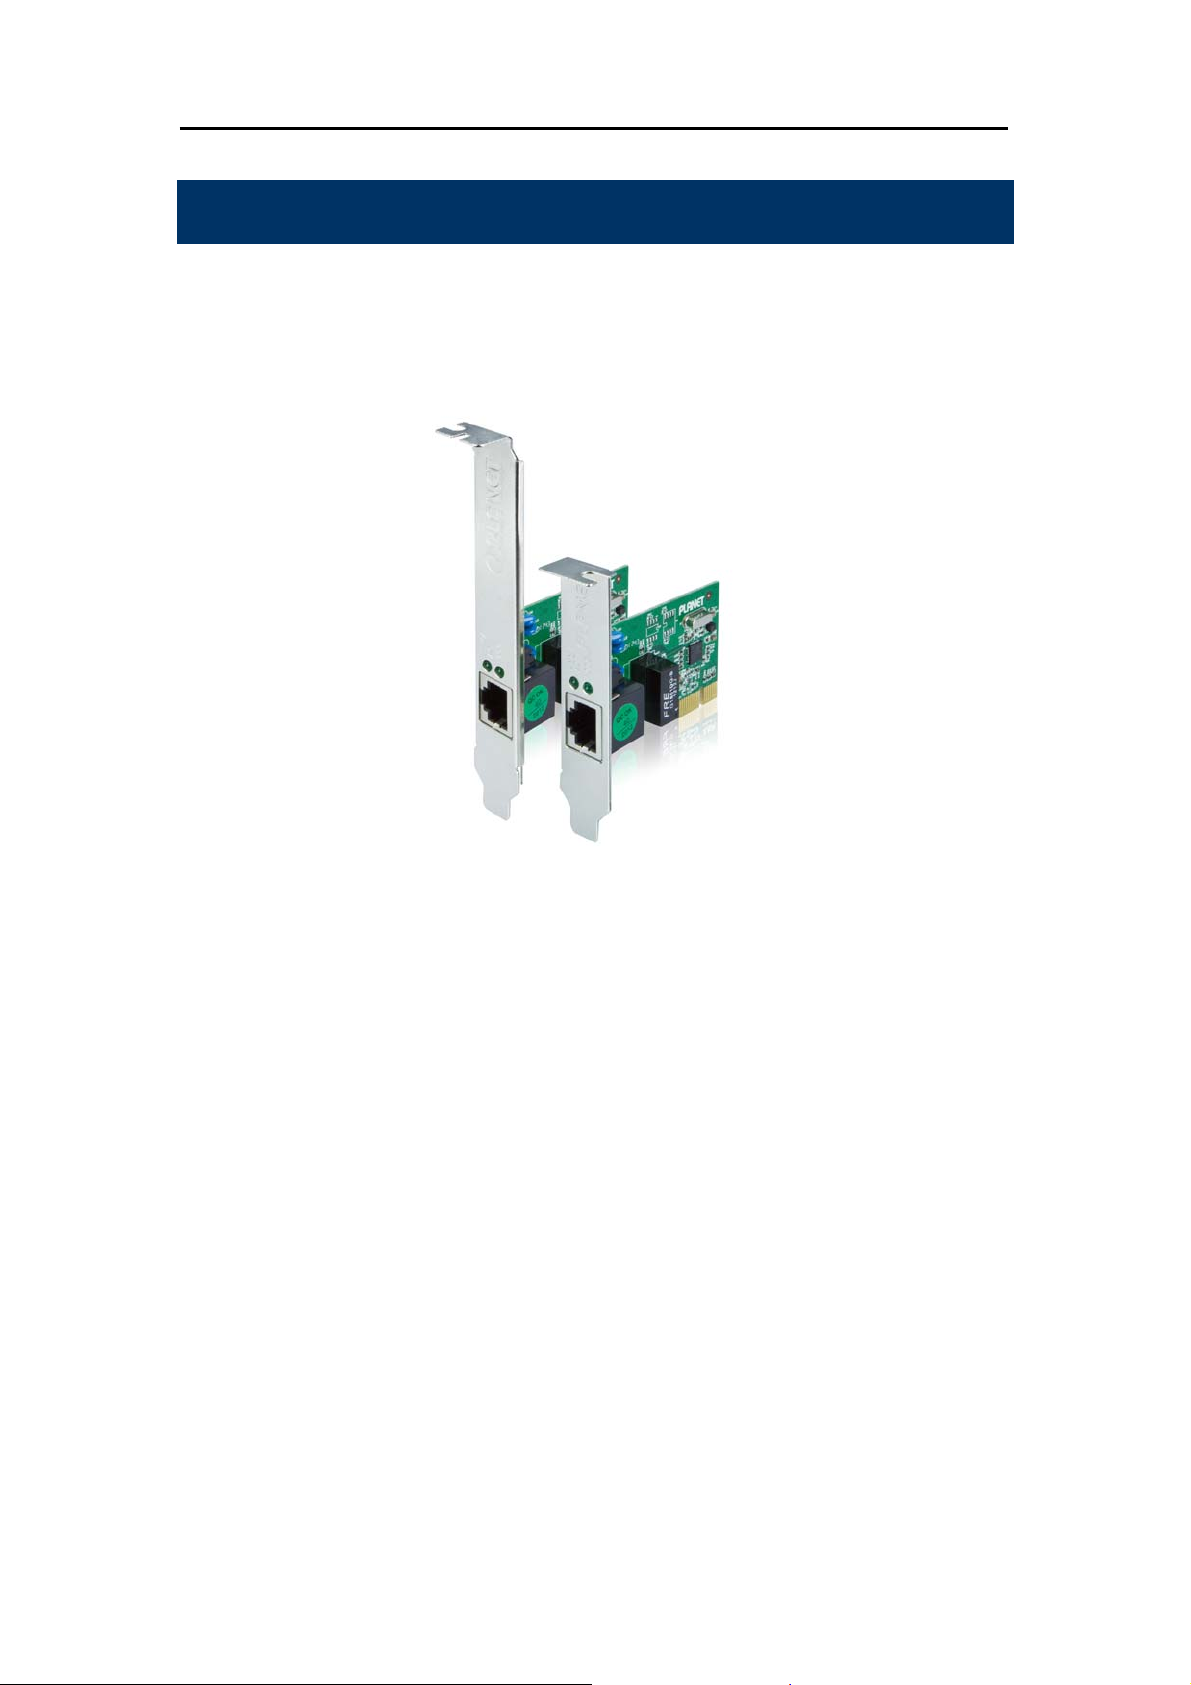
1.1 Package Content
Check that your package contains the following items:
1 x ENW-9702 Gigabit Ethernet Adapter (w/ long faceplate)
1 x Quick Installation Guide
1 x CD-ROM (Include this User’s Manual / Quick Installation Guide / Driver)
1x Low Profile Bracket
If any of these are missing or damaged, please contact your dealer immediately, if possible, retain the
carton including the original packing material, and use them against to repack the product in case there
is a need to return it to us for repair.
1.2 Features
PCI Express x1 serial Bus
10/100/1000Mbps Auto-Negotiation for Optimal Connection
Supports Auto MDI / MDI-X to swap the Transmission and Receipt
IEEE 802.1Q VLAN Tagging
Supports 9K Jumbo Frame
IEEE 802.3x Full-Duplex Flow Control
Complies to Microsoft and Linux Platform
1.3 Gathering Tools and Documentations
To install the ENW-9702 Gigabit Ethernet adapter, you need the following items:
A suitable screw driver
Your operating system documentation
Your system unit documentation, including any service documentation
- 5 -
Page 6
User Manual of ENW-9702
Chapter 2 Hardware Installation
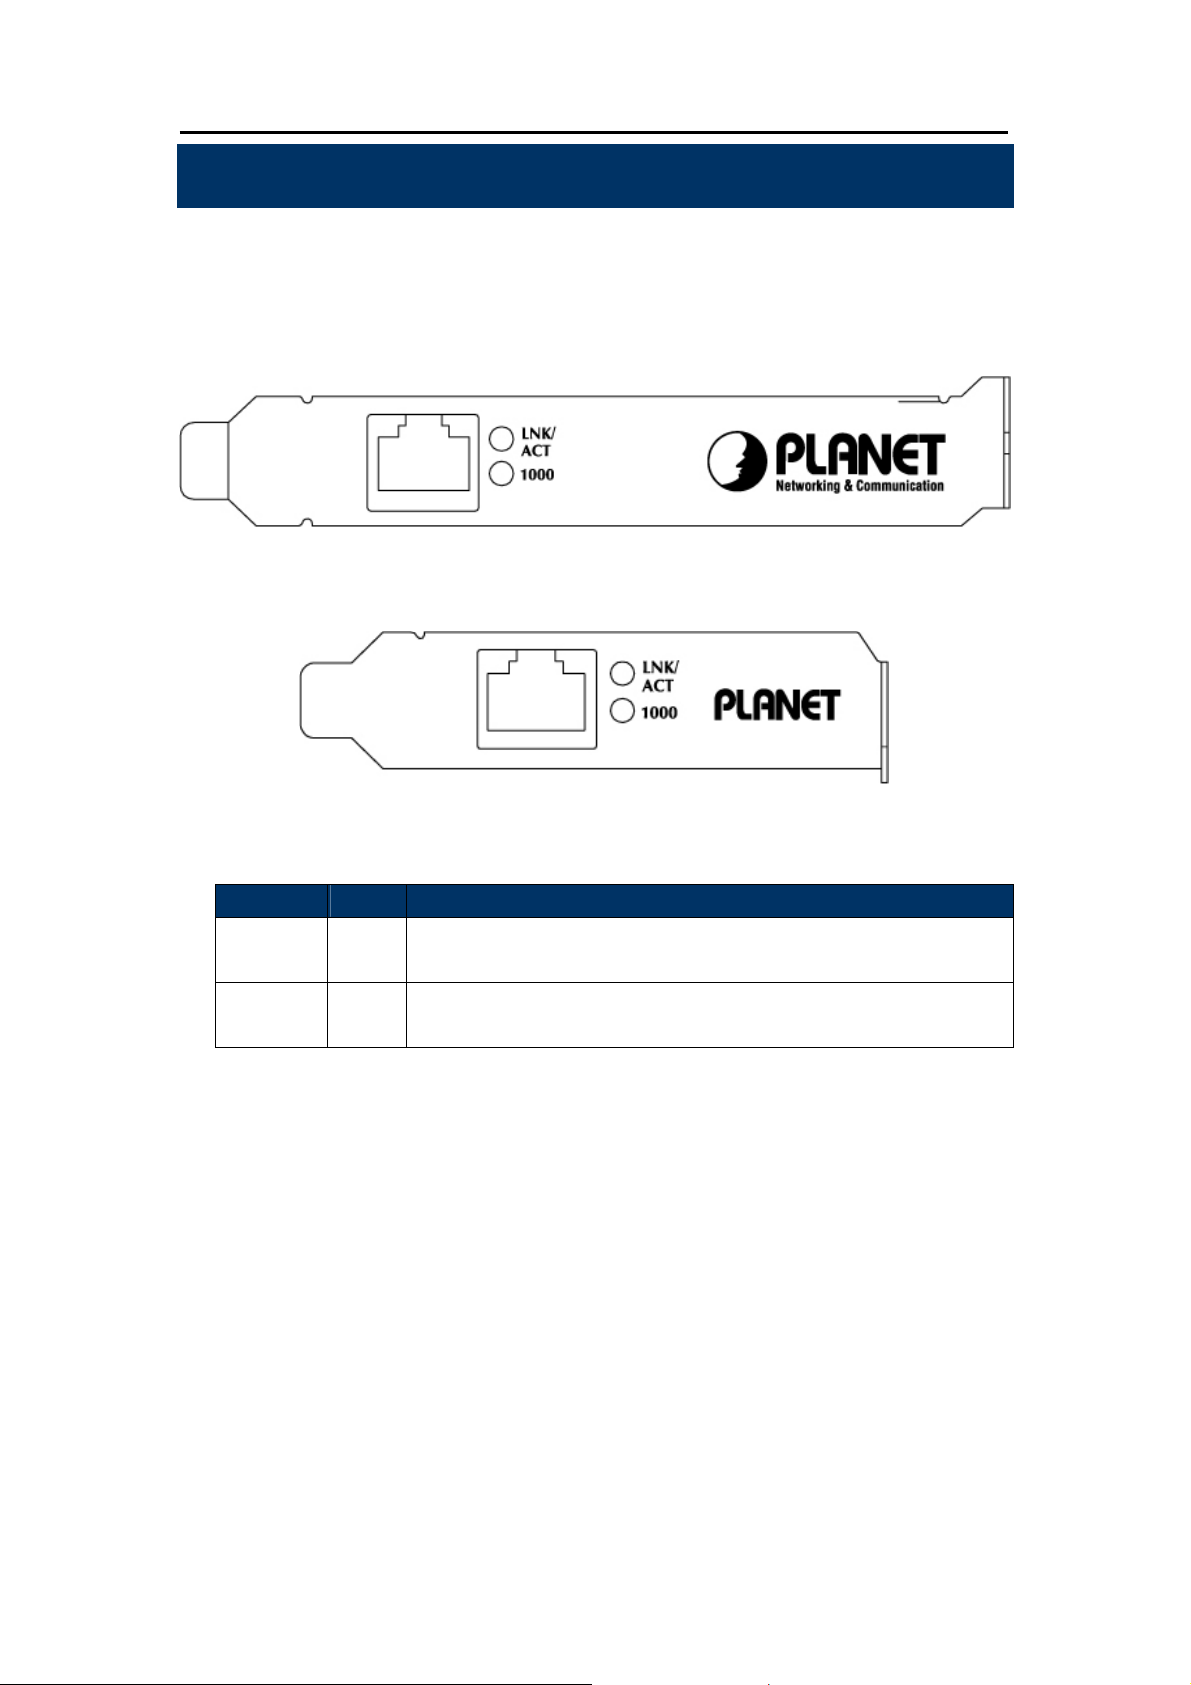
2.1 LED Definition
The faceplate of ENW-9702 has two LED: Link / ACT and 1000. The pictures below have showed the
faceplate of ENW-9702. Table 2-1 explains the function and state of the LED.
Figure 1: Long Profile Bracket of ENW-9702
LED Color Description
LNK/ACT Green
1000 Green
Figure 2: Low Profile Bracket of ENW-9702
Blinks slowly to indicate a functional network link through the port.
Blinks fast to indicate data transmit and receive through the port.
Lights to indicate the port is running at 1000Mbps.
Off to indicate the port is running at 10/100Mbps speed mode.
Table 2-1: Descriptions of ENW-9702 LED
- 6 -
Page 7

2.2 Hardware Installation
Step 1: Please turn off your PC.
Step 2: Remove any metal decorations from your hands and wrists.
User Manual of ENW-9702
Step 3: Remove the cover from your PC.
Step 4: Locate an empty PCI Express slot and remove the corresponding back plate. Save the screw for
use in Step 6.
Step 5: Carefully insert the Gigabit Ethernet Adapter into the chosen slot and press firmly with proper
push to ensure it is fully seated in the slot.
S
tep 6: Secure the Gigabit Ethernet Adapter with the screw you saved in step 4.
Step 7: Replace the PC cover.
Step 8: Power on your PC and refer to next section to install driver.
- 7 -
Page 8

User Manual of ENW-9702
Chapter 3 Driver Installation
A device driver must be installed before your ENW-9702 can be used with your computer. This chapter
describes how to install the driver for various operating systems. Before you begin the driver installation
process, make sure you have the installation disks for your computer’s operation system.
3.1 Installing Driver to Windows XP / Server 2003
The following installation uses ENW-9702 and operates under Windows XP; the Install
procedures will be similar to the Windows Server 2003.
1. After installing ENW-9702 to your PC and boot up, Windows XP will detect it and you have to install
driver.
- 8 -
Page 9

User Manual of ENW-9702
2. Please move and right click the mouse button for Ethernet Controller item and select “Update
Driver”.
3.
Please select the second option and click “Next”.
- 9 -
Page 10

User Manual of ENW-9702
4. Please select “Include this location in the search” and then click “Browse” to specify the driver
location to install. (Assume "D" is your CD-ROM drive, the driver can be found in
D:\ENW-9702\Win_XP_2000_2003_2003R2\WinXP). Click “Next” to continue.
5. WinXP will show this dialog box to prompt you the driver has not passed Windows logo testing,
please click “Continue Anyway”, then WinXP will start to install the driver.
- 10 -
Page 11

6. Click “Finish” to complete the driver installation.
User Manual of ENW-9702
3.2 Installing Driver to Windows 7 / Server 2008
The following installation uses ENW-9702 and operates under Windows 7; the Install
procedures will be similar to the Windows Server 2008.
1. After installing ENW-9702 to your PC and boot up, Windows 7 will detect it and you have to install
driver.
- 11 -
Page 12

User Manual of ENW-9702
2. Please move and right click the mouse button for Ethernet Controller item and select “Update
Driver Software”
3. Please select “Browser my computer for driver software” for next step.
- 12 -
Page 13

User Manual of ENW-9702
4. Insert the bundled CD into the CD-ROM driver.
5. Please click “Browse” to specify the driver location to install. (Assume "E" is your CD-ROM drive,
the driver can be found in E:\ENW-9702\Win_7\64). Click “Next” to continue.
T
he driver installs process.
- 13 -
Page 14

User Manual of ENW-9702
6. During the Driver installation, it will pop up one Windows Security message. Please Click “Install
this driver software anyway” button for continue installation.
7. Click “Clo
se” button to complete the driver installation.
- 14 -
Page 15

User Manual of ENW-9702
3.3 Installing Driver to Linux
<Requirements>
- Kernel source tree (supported Linux kernel 2.6.x and 2.4.x)
- For linux kernel 2.4.x, this driver supports 2.4.20 and latter.
- Compiler/binutils for kernel compilation
<Quick install with proper kernel settings>
Unpack the tarball :
# tar vjxf r8168-8.aaa.bb.tar.bz2
Change to the directory:
# cd r8168-8.aaa.bb
If you are running the target kernel, then you should be able to do :
# ./autorun.sh (as root or with sudo)
You can check whether the driver is loaded by using following commands.
# lsmod | grep r8168
# ifconfig -a
If there is a device name, ethX, shown on the monitor, the linux driver is loaded. Then, you can
use the following command to activate the ethX.
# ifconfig ethX up
,where X=0,1,2,...
<Set the network related information>
1. Set manually
a. Set the IP address of your machine.
# ifconfig ethX "the IP address of your machine"
b. Set the IP address of DNS.
Insert the following configuration in
/etc/resolv.conf. nameserver "the IP address of DNS"
c. Set the IP address of gateway.
# route add default gw "the IP address of gateway"
2. Set by doing configurations in /etc/sysconfig/network-scripts
/ifcfg-ethX for Redhat and Fedora, or /etc/sysconfig/network
/ifcfg-ethX for SuSE.
There are two examples to set network configurations.
a. Fixed IP address:
DEVICE=eth0
BOOTPROTO=static
ONBOOT=yes
TYPE=ethernet
NETMASK=255.255.255.0
IPADDR=192.168.1.1
- 15 -
Page 16

User Manual of ENW-9702
GATEWAY=192.168.1.254
BROADCAST=192.168.1.255
b. DHCP:
DEVICE=eth0
BOOTPROTO=dhcp
ONBOOT=yes
<Modify the MAC address>
There are two ways to modify the MAC address of the NIC.
1. Use ifconfig:
# ifconfig ethX hw ether YY:YY:YY:YY:YY:YY
,where X is the device number assigned by Linux kernel, and
YY:YY:YY:YY:YY:YY is the MAC address assigned by the user.
2. Use ip:
# ip link set ethX address YY:YY:YY:YY:YY:YY
,where X is the device number assigned by Linux kernel, and
YY:YY:YY:YY:YY:YY is the MAC address assigned by the user.
<Force Link Status>
1. Force the link status when insert the driver.
If the user is in the path ~/r8168, the link status can be forced
to one of the 5 modes as following command.
# insmod ./src/r8168.ko speed=SPEED_MODE duplex=DUPLEX_MODE
autoneg=NWAY_OPTION
,where
SPEED_MODE = 1000 for 1000Mbps
= 100 for 100Mbps
= 10 for 10Mbps
DUPLEX_MODE = 0 for half-duplex
= 1 for full-duplex
NWAY_OPTION = 0 for auto-negotiation off (true force)
= 1 for auto-negotiation on (nway force)
For example:
# insmod ./src/r8168.ko speed=100 duplex=0 autoneg=1 will force PHY to
operate in 100Mpbs Half-duplex(nway force).
2. Force the link status by using ethtool.
a. Insert the driver first.
b. Make sure that ethtool exists in /sbin.
c. Force the link status as the following command.
# ethtool -s ethX speed SPEED_MODE duplex DUPLEX_MODE autoneg
- 16 -
Page 17

User Manual of ENW-9702
NWAY_OPTION
,where
SPEED_MODE = 1000 for 1000Mbps
= 100 for 100Mbps
= 10 for 10Mbps
DUPLEX_MODE = half for half-duplex
= full for full-duplex
NWAY_OPTION = off for auto-negotiation off (true force)
= on for auto-negotiation on (nway force)
For example:
# ethtool -s eth0 speed 100 duplex full autoneg on will force PHY to operate in
100Mpbs Full-duplex(nway force).
<Jumbo Frame>
Transmitting Jumbo Frames, whose packet size is bigger than 1500 bytes, please change mtu
by the following command.
# ifconfig ethX mtu MTU
, where X=0,1,2,..., and MTU is configured by user.
- 17 -
Page 18

User Manual of ENW-9702
Chapter 4 Specifications
Product
Hardware Specification
Attachment Interface PCI Express serial Bus Interface
Media Interface 10/100/1000Base-T RJ-45 Copper Interface
Cabling Options
Jumbo Frame 9K Bytes
LED Indicators LNK / ACT & 1000 per port
Dimension (W x D x H)
Weight
Advanced Function
Layer 2 Features
Operation System Support
Standards Conformance
Regulation Compliance FCC Part 15 Class B, CE
Standards Compliance
Environment
Operating
ENW-9702
10/100/1000Base-T PCI Express Gigabit Ethernet Adapter
10Base-T: UTP category 3, 4, 5 cable (maximum 100m)
EIA/TIA-568 100Ω STP (maximum 100m)
100Base-TX: UTP category 5, 5e cable (maximum 100m)
EIA/TIA-568 100Ω STP (maximum 100m)
1000Base-T: UTP category 5, 5e cable (maximum 100m)
EIA/TIA-568 100Ω STP (maximum 100m)
65 x 40 x 19mm
32g
IEEE 802.3x Flow Control support
IEEE 802.1Q VLAN support
Windows 98 / ME
Windows 2000 / 2000 / 2003 / 2003R2
Windows XP
Windows Vista
Windows 7
Windows 8
Linux / MAC OS
IEEE 802.3
EEE 802.3u
IEEE 802.3ab
IEEE 802.3x
IEEE 802.1Q
Temperature: 0 ~ 50 Degree C
Relative Humidity: 10 ~ 90% (non-condensing)
10Base-T Ethernet
100Base-TX Fast Ethernet
1000Base-T Gigabit Ethernet
Flow Control and Back pressure
VLAN Tagging
Storage
Temperature: -40 ~ 70 Degree C
Relative Humidity: 10 ~ 90% (non-condensing)
- 18 -
Page 19

EC Declaration of Conformity
For the following equipment:
*Type of Product : 10/100/1000Base-T PCI Express Gigabit Ethernet Adapter
*Model Number : ENW-9702
* Produced b
y:
Manufacturer‘s Name : Planet Technology Corp.
Manufacturer‘s Address : 10F., No.96, Minquan Rd., Xindian Dist.,
New Taipei City 231, Taiwan (R.O.C.)
Is herewith confirmed to comply with the requirements set out in the Council Directive on the
Approximation of the Laws of the Member States relating to Electromagnetic Compatibility
(2004/108/EC). For the evaluation regarding the electromagnetic compatibility, the following
standards were applied:
EN 55022 (CLASS B, 2010)
EN 55024 (2010)
EN 61000-4-2 (2009)
EN 61000-4-3 (2006 + A1:2008 + A2:2010)
EN 61000-4-4 (2004 + A1:2010)
EN 61000-4-5 (2006)
EN 61000-4-6 (2009)
EN 61000-4-8 (2010)
Responsible for marking this declarati o n i f the:
Manufacturer Authorized representative established within the EU
Authorized representative established within the EU (if applicable):
Company Name: Planet Technology Corp.
Company Address: 10F., No.96, Minqu an Rd., Xindian Dist., New Taipei City 231, Taiwan
Person responsible for making this declaration
Name, Surname Kent Kang
Position / Title : Product Manager
(R.O.C.)
Taiwan 8, March, 2013
Place Date Legal Signature
PLANET TECHNOLOGY CORPORATION
e-mail: sales@planet.com.tw http://www.planet.com.tw
10F., No.96, Minquan Rd., Xindian Dist., New Taipei City, Taiwan, R.O.C. T el:886-2-2219-9518 ax:886-2-2219-9528
 Loading...