How it Works
Log In / Sign Up
Buy Points
How it Works
FAQ
Contact Us
Questions and Suggestions
Users
Pioneer
Loading...
#
ПУЛЬТЫ
РH045CL301
РH090CL301
РH135CL301
X
XW-BTS5-K
XW-BTS5-W
2
XW-BTS7-T
XW-BTSA1
XW-BTSA1-K
2
XW-BTSA1-N
3
XW-BTSA1-W
8
XW-BTSP1-N
XW-BTSP1-W
XW-DV1WS
XW-DV515
9
XW-DV525
2
XWDV535W
9
XW-HT1
2
XW-HTD525
XW-HTD630
5
XW-HTD630A
XWHTD-640
3
XWHTP-550
2
XW-LF1
XW-LF1-K
3
XW-LF1-L
2
XW-LF1-W
3
XW-LF3
XW-LF3-K
XW-LF3-T
2
XW-NAC1
2
XW-NAC1-K
6
XW-NAC1-W
XW-NAC3-K
4
XW-NAC3-R
3
XW-NAC3R-R
XW-NAC3-W
4
XW-NAS3
5
XWNAS-3-K
2
XW-NAS5
6
XW-NAS5-K
2
XW-NAS5-R
3
XW-NAS5-S
2
XW-NAS5-W
2
XW-NAV1-K
9
XW-NAV1K-K
6
XW-PSS01
6
XWPSS01-L
5
XWPSS02-S
5
XW-SMA1
12
XW-SMA1-K
25
XW-SMA1-W
24
XW-SMA3
10
XW-SMA3-K
30
XW-SMA3-W
31
XW-SMA4
11
XW-SMA4-K
24
XW-SX50
2
XW-SX50-B
XW-SX50-H
XW-SX70
2
XW-SX70-B
XZ-9
2
Y
YN009GMFI22RPD
YN012GMFI22RPD
YN018GMFI22RPD
YN024GMFI22RPD
YN036GMFI17RUD
YN038GMFI17RUD
YPM-2106
2
YPM-2106ZF
YPM-2136
YPM 2136 A R
YPM-2236
YPM-2296
YPM-2306
YPM-2306ZF
YPM-2406
YPM-2406ZF
YPMMG-2196
YPM-MG2196ZF
YRD5301BS
Loading...
Loading...
Nothing found
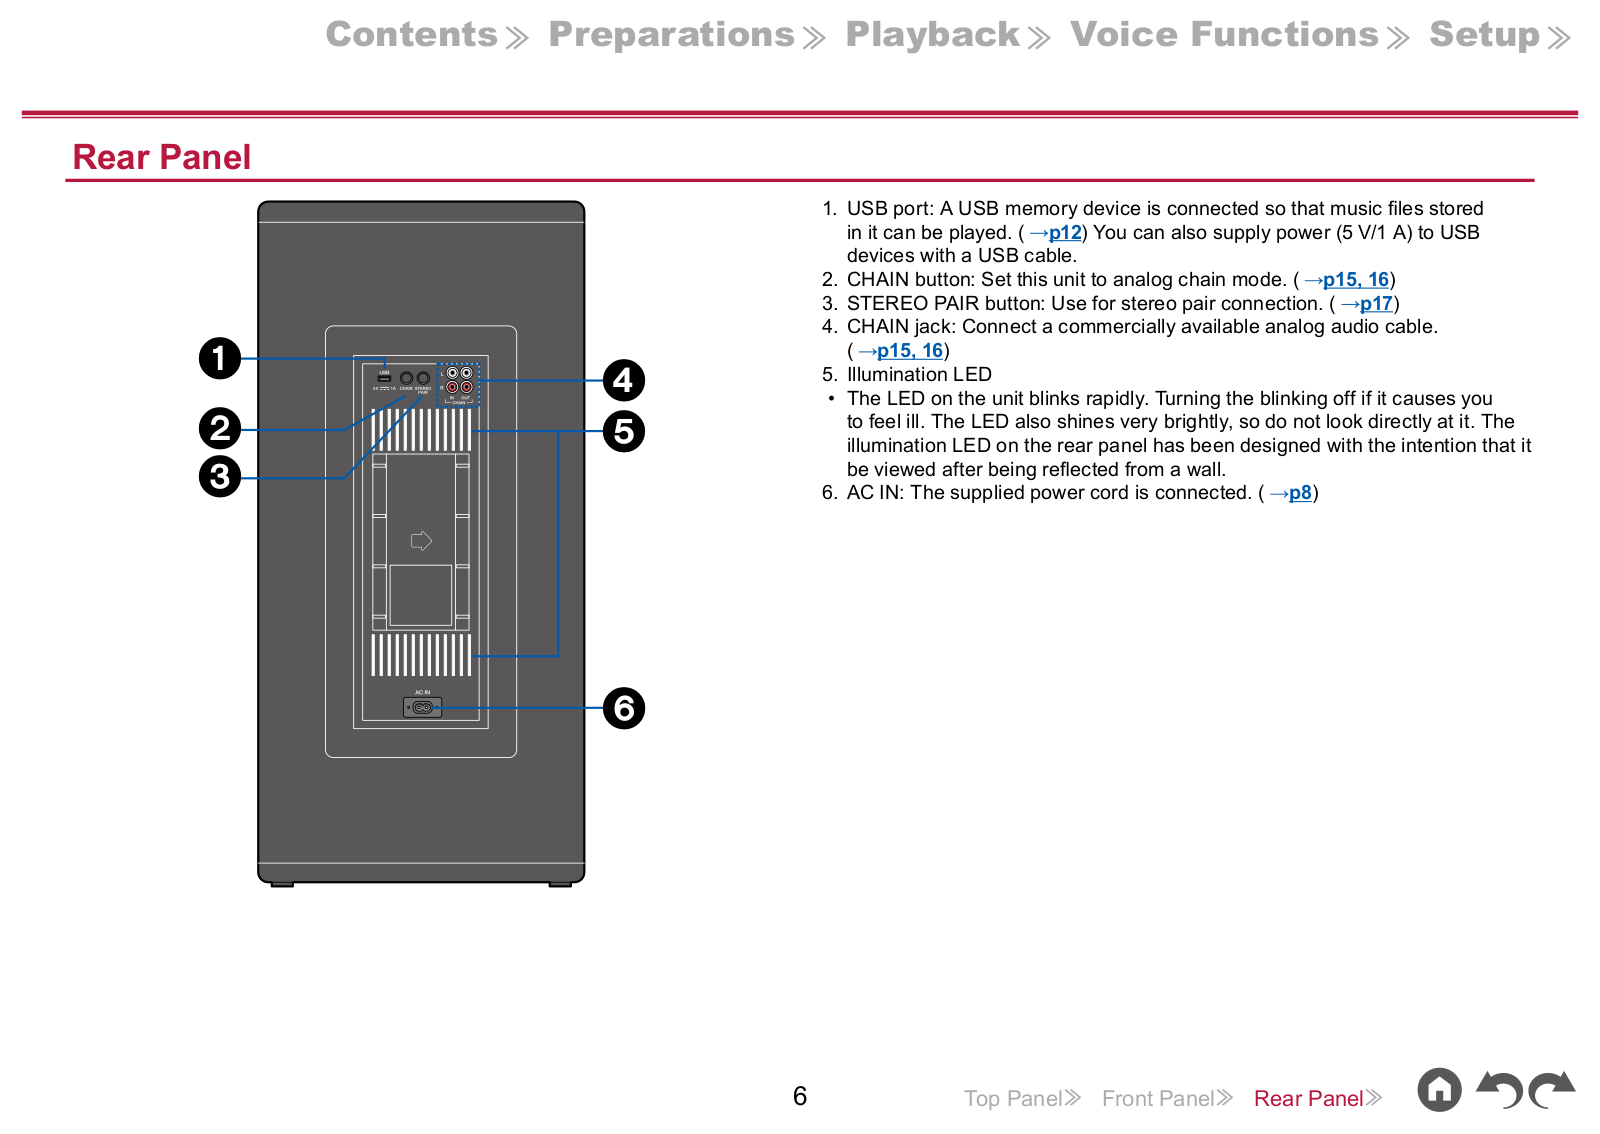
XW-SX70
User manual
39 pgs
5.1 Mb
0
User Manual [ru]
38 pgs
1.34 Mb
0
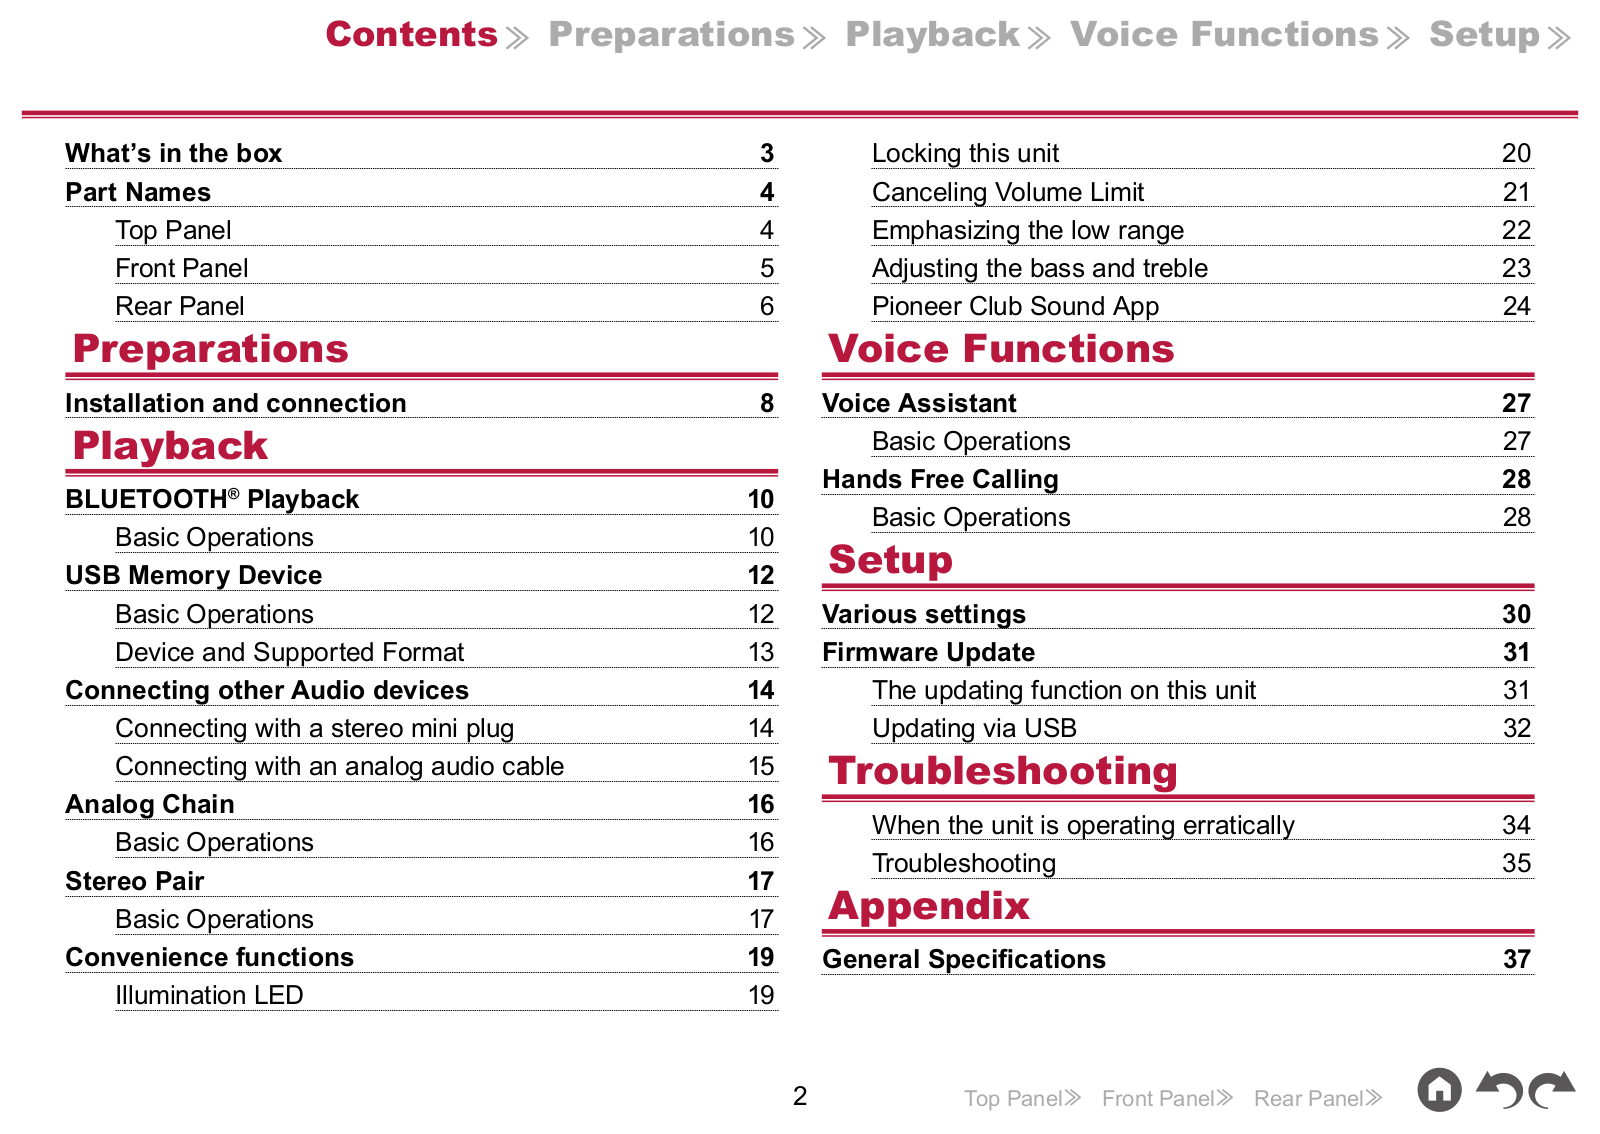
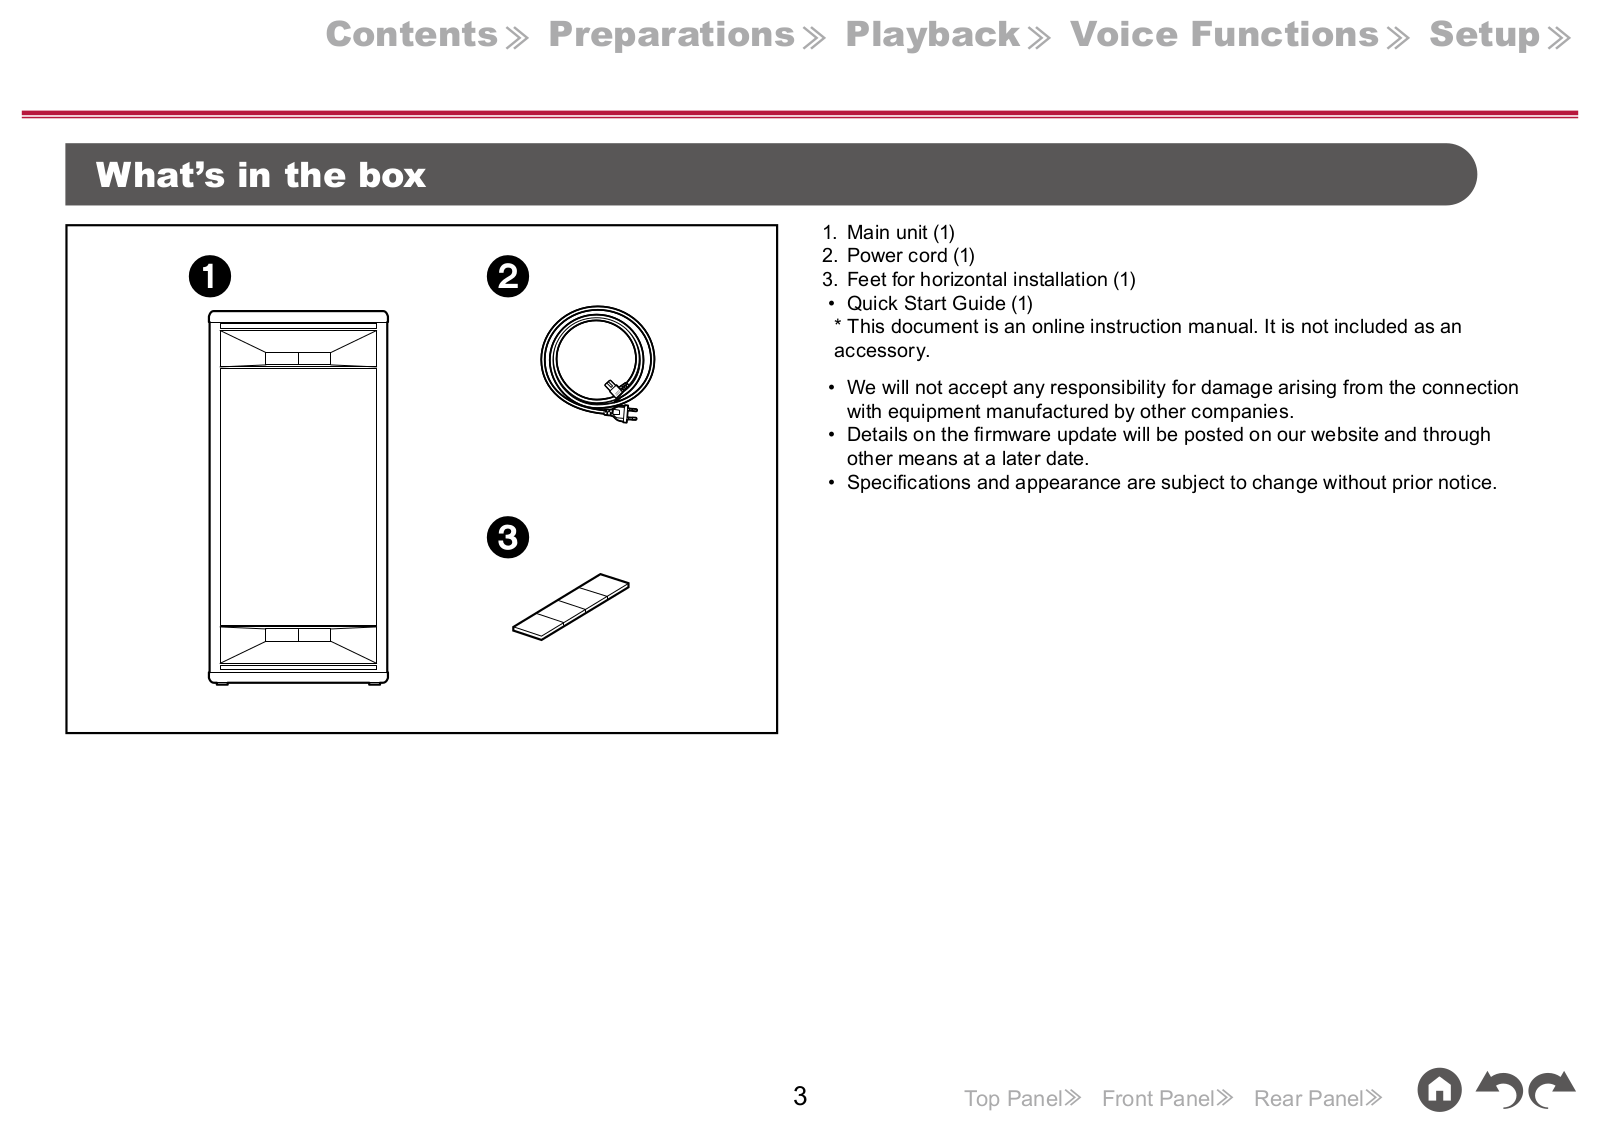
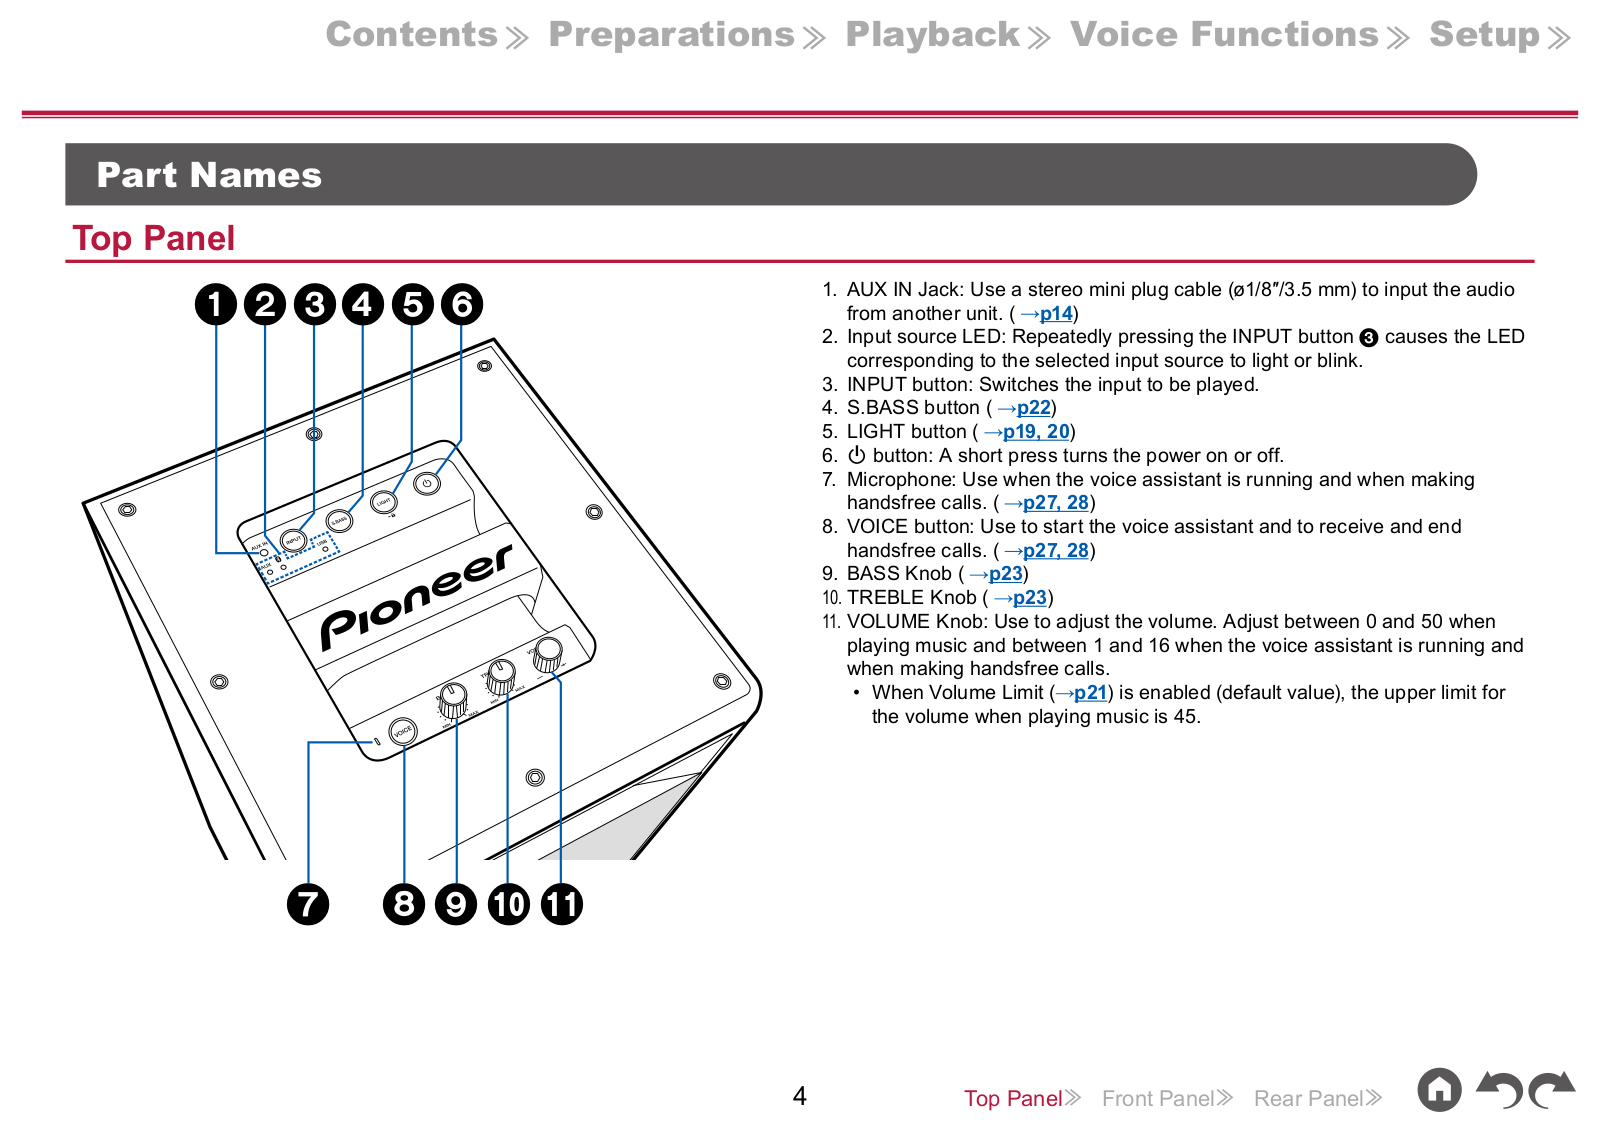
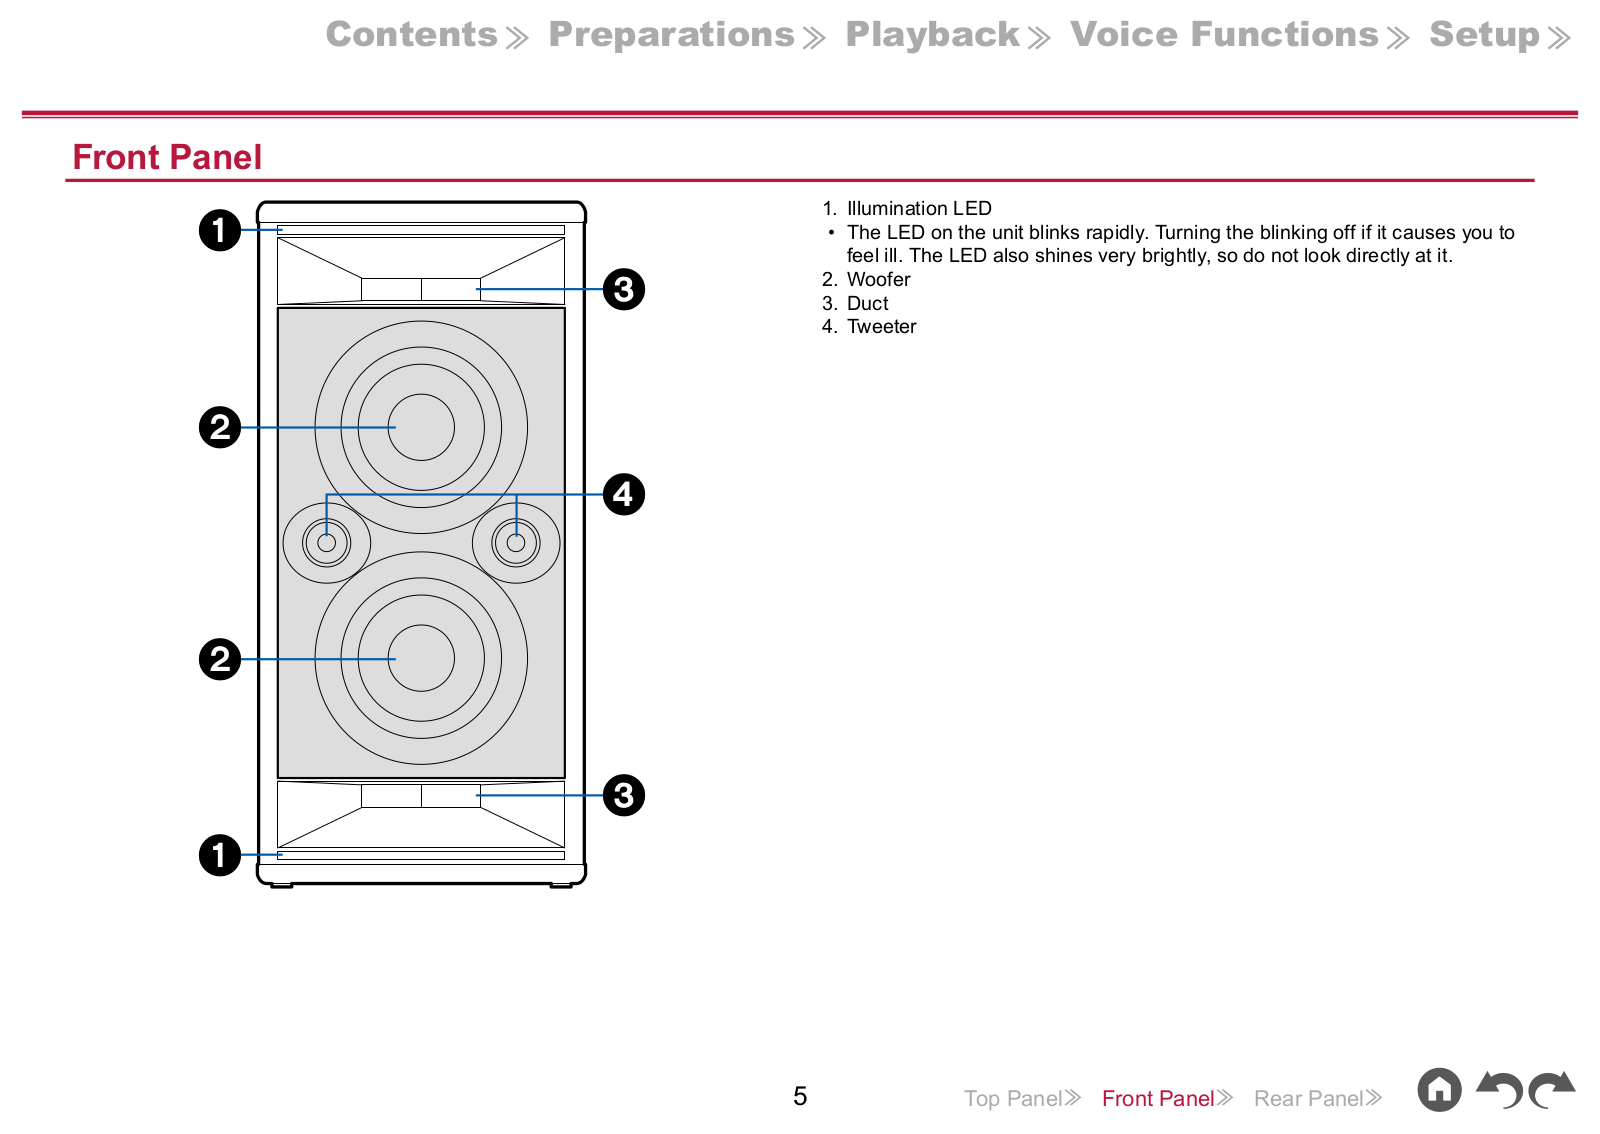
Table of contents
Loading...
Pioneer XW-SX70, XW-SX50 User manual
...
Pioneer User manual
Download
Specifications and Main Features
Frequently Asked Questions
User Manual
Download
Loading...
+
27
hidden pages
Unhide
You need points to download manuals.
1 point = 1 manual.
You can buy points or you can get point for every manual you upload.
Buy points
Upload your manuals
 Loading...