

Pioneer S-HTD50, XV-HTD50, S-HTD5, XV-HTD5 User Manual

DVD/CD RECEIVER
XV-HTD50
XV-HTD5
SPEAKER SYSTEM
S-HTD50
S-HTD5
Operating Instructions
CLASS 1
LASER PRODUCT
CAUTION :
VORSICHT :
ADVARSEL :
VARNING :
VARO! :
VISIBLE AND INVISIBLE LASER RADIATION WHEN OPEN.
AVOID EXPOSURE TO BEAM.
SICHTBARE UND UNSICHTBARE LASERSTRAHLUNG, WENN
ABDECKUNG GEÖFFNET NICHT DEM STRAHL AUSSETZEN!
SYNLIG OG USYNLIG LASERSTRÅLING VED ÅBNING
UNDGÅ UDSÆTTELSE FOR STRÀLING.
SYNLIG OCH OSYNLIG LASERSTRÅLNING NÄR DENNA
DEL ÄR ÖPPNAD BETRAKTA EJ STRÅLEN.
AVATTAESSA ALTISTUT NÄKYVÄ JA NÄKYMÄTTÖMÄLLE
LASERSATEIL YLLE. ÄLÄ KATSO SÄTEESEN.
VRW1699
2
En

3
En
Before You Start1
Features
• Superlative audio performance with
Dolby Digital* and DTS** software
The XV–HTD50/ XV–HTD5 delivers breathtaking sound
quality with Dolby Digital and DTS discs.
• Graphical Setup Navigator
Setting up your home theater is easy using the
graphical Setup Navigator. Answer the questions that
appear on-screen and the Setup Navigator makes the
necessary video and language settings for you.
• This product incorporates copyright protection
technology that is protected by method claims of
certain U. S. patents and other intellectual property
rights owned by Macrovision Corporation and
other rights owners. Use of this copyright protection technology must be authorized by Macrovision
Corporation, and is intended for home and other
limited viewing uses only unless otherwise
authorized by Macrovision Corporation. Reverse
engineering or disassembly is prohibited.
* Manufactured under license from Dolby
Laboratories. “Dolby”, “Pro Logic” and the
double-D symbol are trademarks of Dolby
Laboratories.
** “DTS” and “DTS Digital Surround” are
registered trademarks of Digital Theater Systems,
Inc.
What’s in the box
Confirm that the following accessories are in the box
when you open it.
• Remote control
• AA/R6P dry cell batteries x2
• AM loop antenna
• FM antenna
• Video cord (yellow)
• Power cord x1 (x2 (Central and South American
models only))
• These operating instructions
• Warranty card (European and Australian models
only)
• Speaker cords 5m x2 (for front L-R speakers)
• Speaker cord 5m x1 (for center speaker)
• Speaker cords 10m x2 (for surround L-R speakers)
• Speaker cord 5m x1 (for subwoofer)
• Non-slip pads x20
• Power plug adapter (For Taiwan, the Philippines,
Saudi Arabia, the Near East, American PX, Japanese
tax-exempt export models and Central & South
American models)
Using this manual
This manual is for the XV–HTD50/ XV–HTD5 DVD/CD
Receiver. It is divided into several sections: system basics
and connecting up (chapters 1 and 2); an explanation
of the controls and displays (chapter 3); setting up for
surround sound and other preferences (chapter 4);
getting started (chapter 5); advanced features (chapters
6–10); system settings and preferences (chapter 11).
Chapter 12 provides additional information, including a
glossary of terms used in this manual, and a troubleshooting section.
4
En

Contents
1Before You Start
1 Before You Start
Features 4
What’s in the box 4
Using this manual 4
Putting the batteries in
the remote control 6
Using the remote control 6
Hints on installation 6
Avoiding problems with
condensation 7
Moving the system 7
Discs compatible with this system 7
DVD Video regions 7
2 Connecting Up
Connecting the speakers 8
Placing the speakers 9
Wall mounting the center and
surround speaker system 9
Connecting to your TV 10
Setting the TV System 10
Connecting the supplied antennas 11
AM loop antenna 11
FM wire antenna 11
Connecting external antennas 12
External AM antenna 12
External FM antenna 12
Connecting other components 13
Connecting the power 13
3 Controls & Displays
Remote control 14
Front panel 15
Display 15
4 Setting Up
Switching on and setting the clock 16
Setting up for surround sound 16
Setting the speaker distances 16
Balancing the surround sound 17
Using the Setup Navigator 18
5 Getting Started
Playing DVDs, CDs and Video CDs 19
Basic playback controls 19
Navigating DVD disc menus 20
Navigating Video CD PBC menus 20
Exchanging discs 21
Listening to the radio 21
Improving FM stereo sound 22
Saving station presets 22
Listening to station presets 22
Listening to other components 22
6 Using Surround Sound
Adjusting the bass and treble 23
Using P.Bass 23
Using sound modes 23
Listening to surround-sound
sources 23
Listening to other sources with
room effects 24
Adjusting the effect level 24
Listening at low volume 25
Direct recording 25
7 Playing Discs
Introduction 26
Finding what you want on a disc 26
Switching camera angles 26
Switching subtitles 26
Switching audio language 26
Switching audio channel 26
Making a program list 27
More programming options 28
Using random play 28
Using repeat play 28
Looping a section of a disc 29
Playing CDs only (CD Mode) 29
Bookmarking a place in a disc 29
Memorizing disc settings 30
Displaying disc information 30
Singing karaoke (XV-HTD5 only) 31
8 Using RDS
(XV-HTD50
only)
Using RDS 32
RDS Program types 32
Displaying RDS information 33
Searching for a program type 33
9 Using the Timer
Using the wake up timer 34
Activating/deactivating the
wake up timer 34
Checking the timer settings 35
Using the sleep timer 35
10 Advanced Sound Setup
Advanced sound settings 36
LFE attenuator 36
Dynamic Range Control 36
Dual-mono setting 37
Adjusting channel volume levels 37
11 DVD Setup Menu
Using the DVD Setup menu 38
Video settings 38
TV Screen 38
Picture Quality 38
S-Video Out 39
Still Picture 39
On Screen Display 39
Angle Indicator 39
Language settings 39
OSD language 39
Audio Language 40
Subtitle Language 40
Auto Language 40
DVD Language 41
Subtitle Display 41
Subtitle Off 41
General settings 41
Setup Menu Mode 41
Parental Lock 42
Changing the parental lock level 42
Changing your password 42
Screen Saver 43
Background Color 43
12 Additional Information
Switching the AM frequency
interval 44
Setting the display brightness 44
Switching the time format 44
Resetting the system 44
Taking care of your system 45
Disc lens cleaner 45
Taking care of your discs 45
Storing discs 45
Discs to avoid 45
Glossary 46
Language code list 47
Troubleshooting 48
Screen sizes and disc formats 50
Specifications 51
Switching the demo mode on/off 52
5
En
Before You Start1
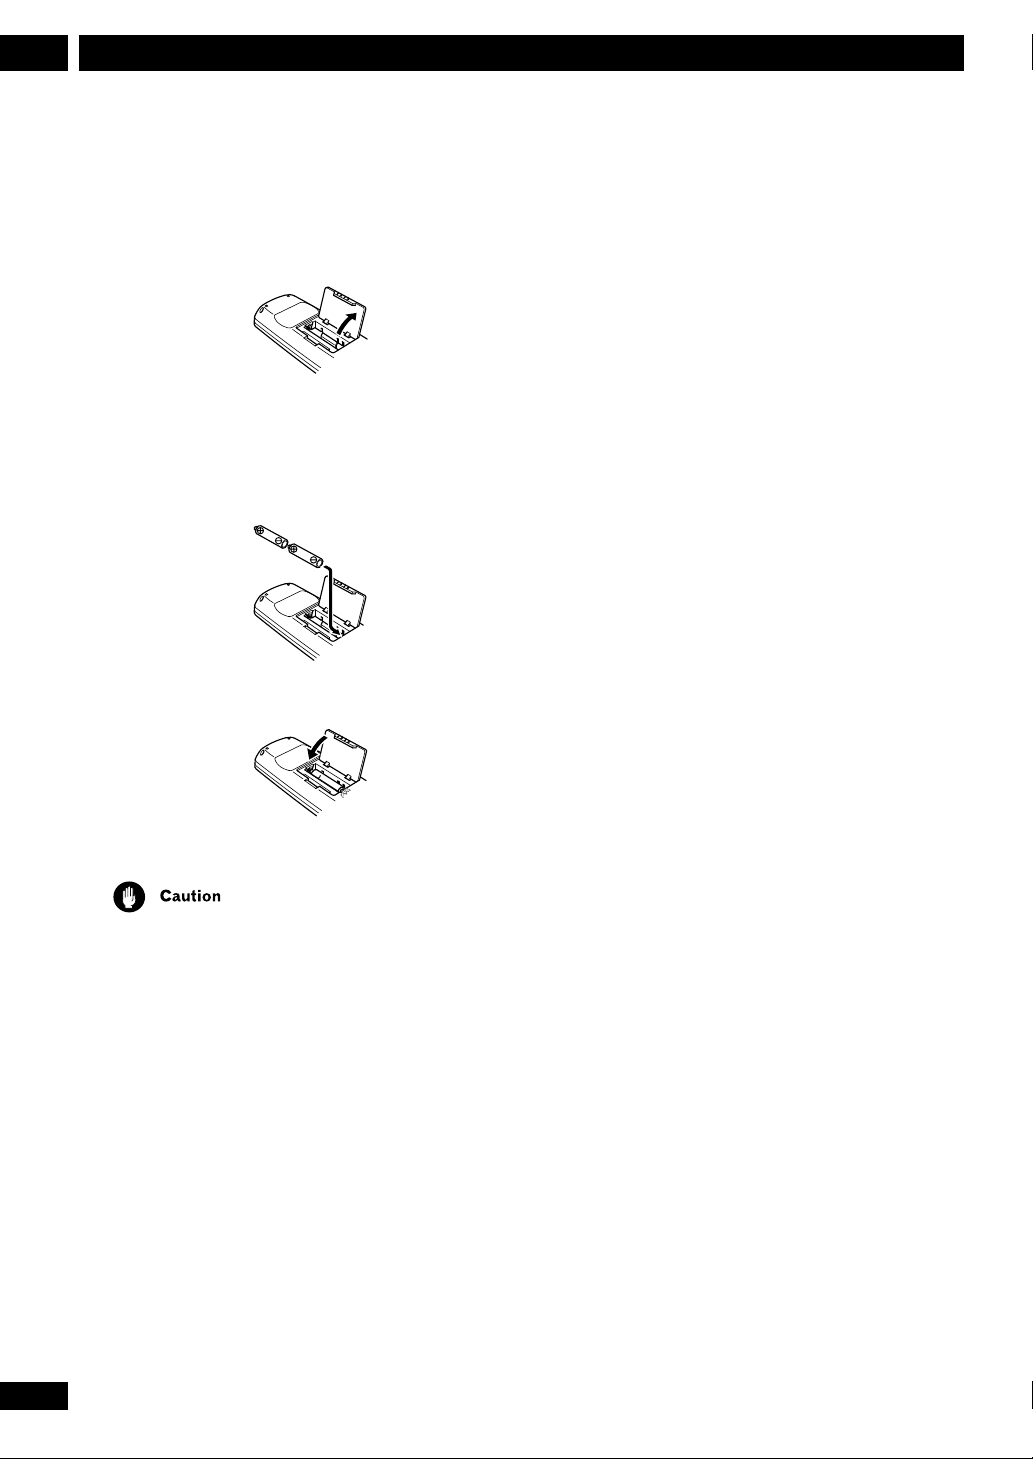
Putting the batteries in the remote
control
1 Open the battery compartment cover on
the back of the remote control.
2 Insert two AA/R6P batteries into the
battery compartment following the
indications (ª, ·) inside the
compartment.
3 Close the cover.
Using the remote control
Keep in mind the following when using the remote
control:
• Make sure that there are no obstacles between the
remote control and the remote sensor on the unit.
• Use within 7 meters of the remote sensor and at an
angle of less than 30º.
• Remote operation may become unreliable if strong
sunlight or fluorescent light is shining on the unit’s
remote sensor.
• Remote controllers for different devices can interfere
with each other. Avoid using remotes for other equipment located nearby this unit.
• Replace the batteries when you notice the operating
range of the remote starts to decrease.
Hints on installation
We want you to enjoy using this unit for years to come,
so please bear in mind the following points when
choosing a suitable location for it:
• Remove the batteries if the remote is not going to be
used for a month or more.
• Remove dead batteries promptly—they can leak and
damage the unit.
• When disposing of used batteries, please comply with
governmental regulations or environmental public
institution’s rules that apply in your country or area.
Do...
✓ Use in a well-ventilated room.
✓ Place on a solid, flat, level surface, such as a table,
shelf or stereo rack.
Don’t...
✗ Use in a place exposed to high temperatures or
humidity, including near radiators and other heatgenerating appliances.
✗ Place on a window sill or other place where the
system will be exposed to direct sunlight.
✗ Use in an excessively dusty or damp environment.
✗ Place directly on top of an amplifier, or other
component in your stereo system that becomes hot in
use.
✗ Use near a television or monitor as you may
experience interference—especially if the television
uses an indoor antenna.
✗ Use in a kitchen or other room where the system
may be exposed to smoke or steam.
6
En
1Before You Start
✗ Use on a thick rug or carpet, or cover with cloth—
this may prevent proper cooling of the unit.
✗ Place on an unstable surface, or one that is not large
enough to support all four of the unit’s feet.
Avoiding problems with condensation
Condensation may form inside the system if it is
brought into a warm room from outside, or if the
temperature of the room rises quickly. Although the
condensation won’t damage the system, it may
temporarily impair its performance. For this reason you
should leave it to adjust to the warmer temperature for
about an hour before switching on and using.
Moving the system
If you need to move the system, first switch it off and
unplug from the wall outlet. Never lift or move the unit
during playback—discs rotate at a high speed and may
be damaged.
Discs compatible with this system
General Disc Compatibility
• This player was designed and engineered to be compatible
with software containing one or more of the following
logos.
DVD-Video Video CDAudio CD CD-R
CD-RW
Special note about particular formats or software follows
below:
CD-R/RW Compatibility
• This unit will play CD-R and CD-RW discs recorded
in CD Audio or Video CD format. However, any other
content may cause the disc not to play, or create
noise/distortion in the output.
• This unit cannot record CD-R or CD-RW discs
• Un-finalized CD-R/RW discs recorded in CD Audio can be
played, but not all Table of Contents (playing time, etc..)
will be displayed.
DVD-R/RW Compatibility
• This unit will play DVD-R/RW discs that were recorded
using the DVD Video format.
• This unit will not play DVD-RW discs that were recorded
using the Video Recording format.
• This unit cannot record DVD-R/RW discs
• Un-finalized DVD-R/RW discs cannot be played in this
player.
PC Created Disc Compatibility
• If you record a disc using a Personal Computer, even if it is
recorded in a “compatible format” as listed above, there
will be cases in which the disc may not be playable in this
machine due to the setting of the application software used
to create the disc. In these particular incidences, check with
the software publisher for more detailed information.
• DVD-R/RW and CD-R/RW software disc boxes also have
additional compatibility information.
• Other formats, including but not limited to the following,
are not playable in this player:
DVD-Audio / SACD / Photo CD / DVD-RAM / DVD-
ROM / CD-ROM
• DVD-R/RW and CD-R/RW discs (Audio CDs and Video CDs)
recorded using a DVD Recorder, CD Recorder or Personal
Computer may not be playable on this machine. This may
be caused by a number of possibilities, including but not
limited to: the type of disc used; the type of recording; or
damage, dirt or condensation on either the disc or the
player’s pick-up lens.
DVD Video regions
ALL
432
All DVD Video discs carry a region mark on the case
somewhere that indicates which region(s) of the
world the disc is compatible with. Your DVD system
also has a region mark, which you can find on the
rear panel. Discs from incompatible regions will
not play in this system. Discs marked
in any player.
ALL will play
7
En
Connecting Up2
S-VIDEO
OUT
SURROUND
R
SUB-
WOOFER
CENTER
FRONT
LR L
SPEAKERS
Before making or changing any rear panel connections,
make sure that all the components are switched off and
unplugged from the power supply.
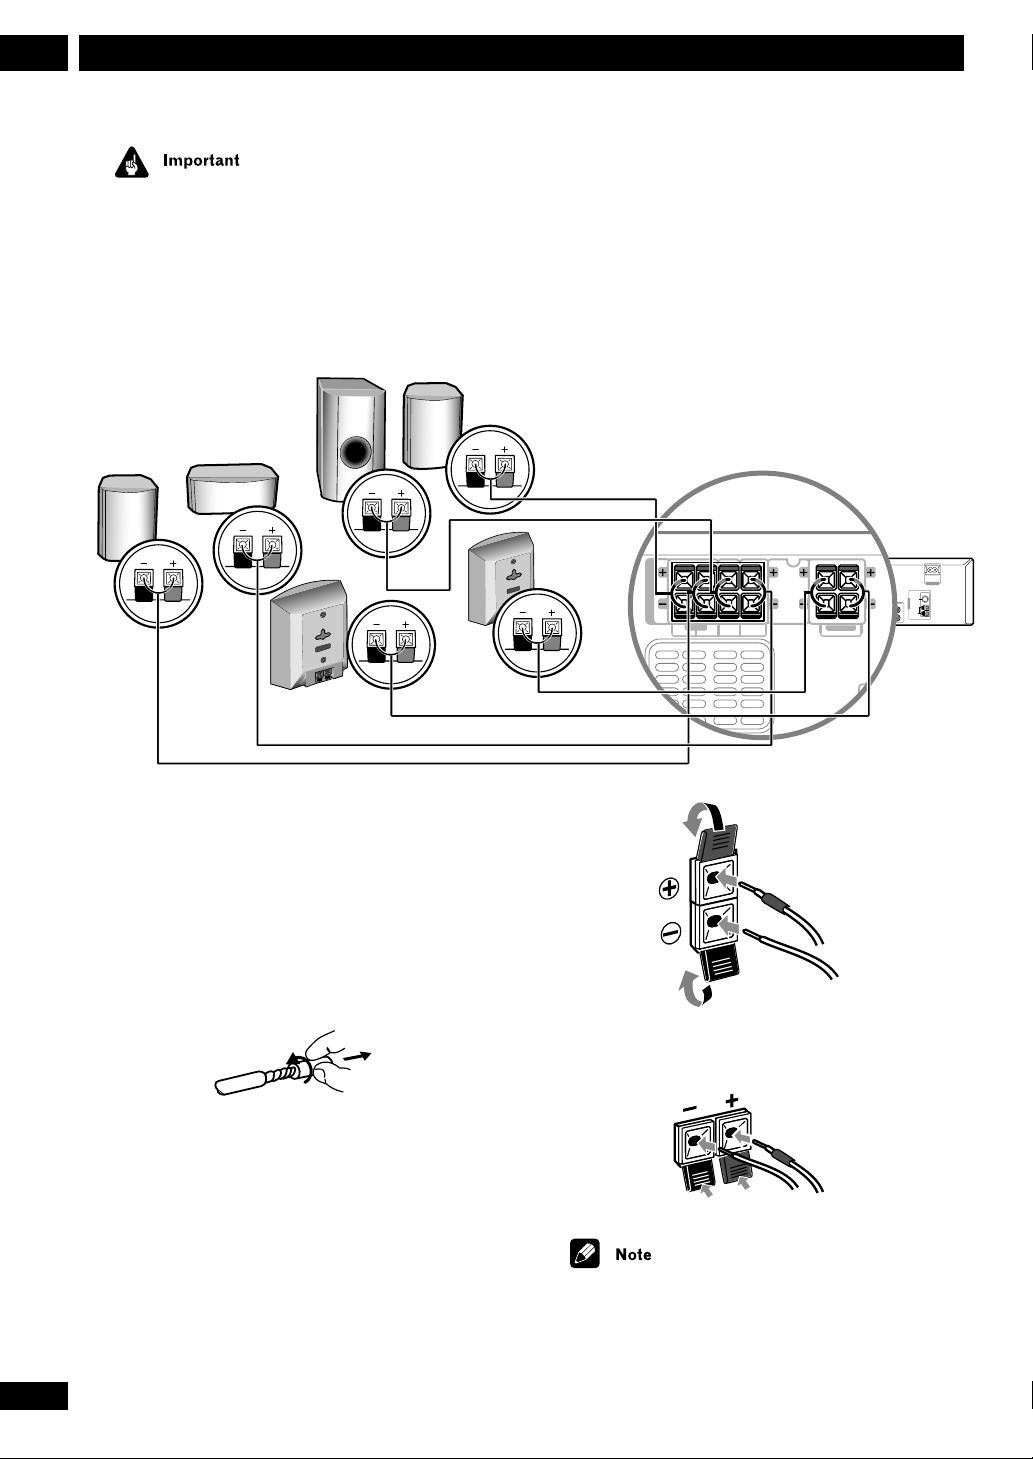
Connecting the speakers
Subwoofer
Front left
Center
Purple
Green
White
Surround left
Blue
Connect each speaker using the color-coded speaker
cords. Match them to the colored labels above the
speaker terminals.
Front right
Red
Surround right
Gray
SPEAKERS
FRONT
SUB-
SURROUND
CENTER
R
LR L
WOOFER
S-VIDEO
VIDEO
DIGITAL
OUT
OUT
IN
COAX
OUT IN IN
AUX TV/VCR
AC INLET
FM
UNBAL
75Ω
AM
ANTENNA
LOOP
ANTENNA
H
1 Twist and pull off the protective shields
on each wire.
2 Connect one end to the DVD receiver.
Match the colored wire with the colorcoded label (above the tabs), then insert
the colored wire into the red (+) tab and
the other wire with the black (–) tab.
8
En
3 Connect the other end to the speaker in
the same way.
Remove the supplied non-slip pads from the paper, and
stick four onto the base of each satellite speaker. Actual
speakers supplied may differ from those shown.
2Connecting Up
Do not connect any of the supplied speakers to any
other amplifier. This may result in malfunction or fire.
This DVD receiver has been designed for best performance when connected to the supplied speakers. We do
not, therefore, recommend that you connect and use
other speakers with this system.
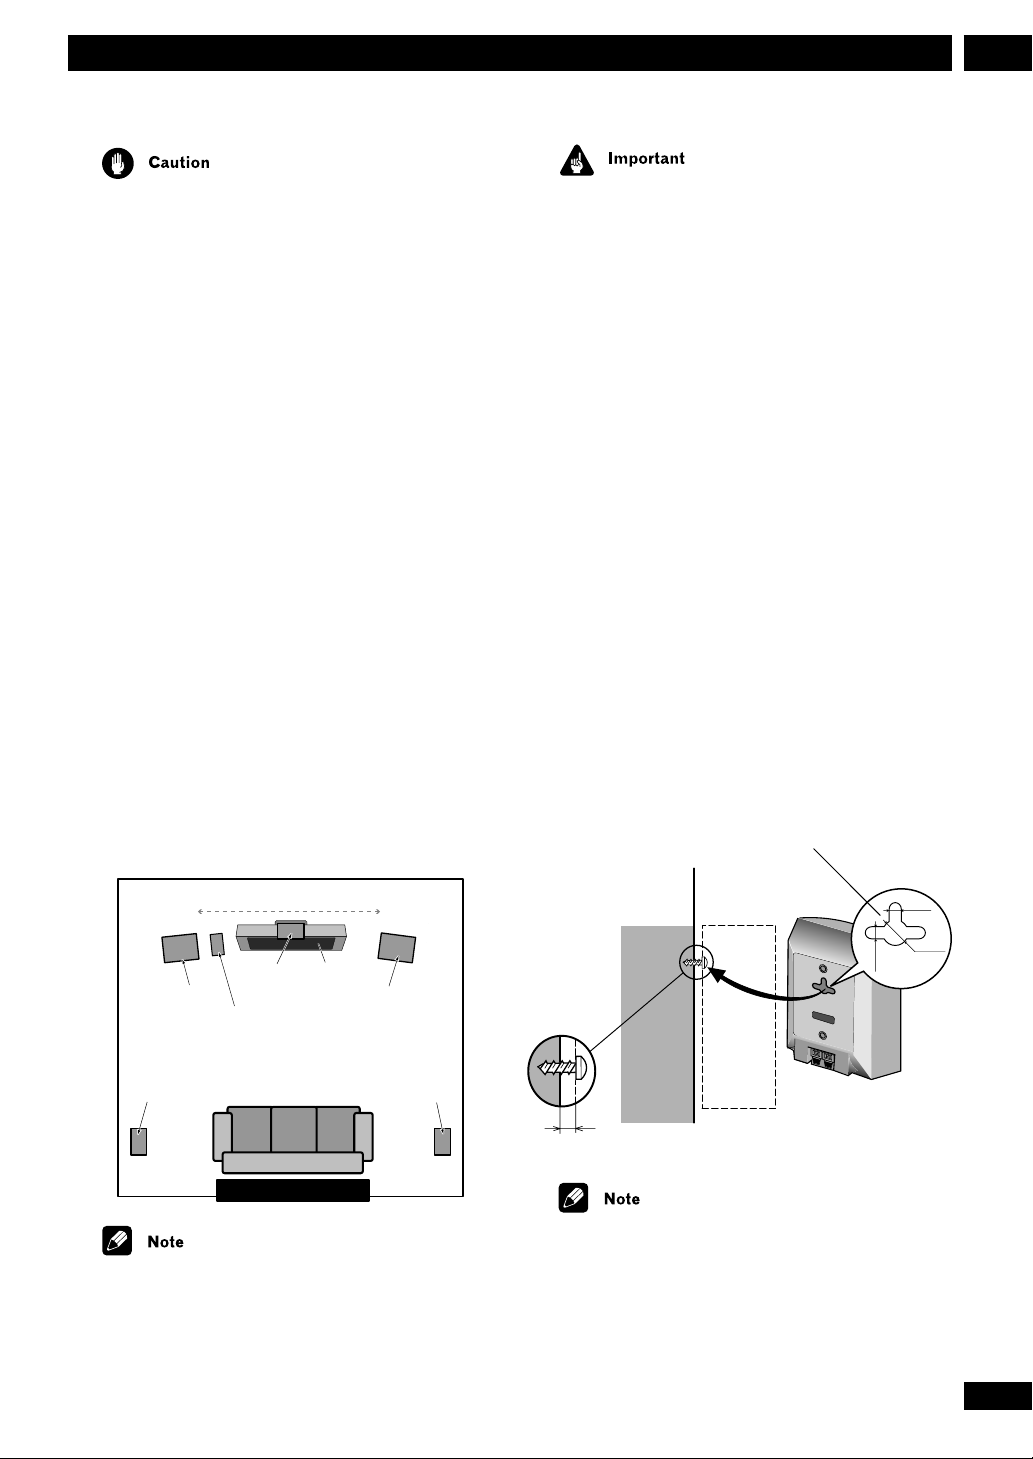
Placing the speakers
Where you put your speakers in the room has a big
effect on the quality of the sound. The following
guidelines should help you to get the best sound from
your system.
• The subwoofer can be placed on the floor. Ideally, the
other speakers should be at about ear-level when you’re
listening to them. Putting the speakers on the floor
(except the subwoofer), or mounting them very high on
a wall is not recommended.
• For the best stereo effect, place the front speakers 2–
3m apart.
• The surround speakers should not be further away
from your listening position than the front speakers.
• The center speaker should be as close as possible to
the TV screen so that movie dialog is localized properly.
The front and center speakers supplied with this system
are magnetically shielded. However, placing them
extremely close to a television may result in color
distortion on the screen. If this happens, move the
speakers a little further away and switch off the
television for 15–30 minutes.
The subwoofer and surround speakers are not
magnetically shielded, so they should not be placed
near a TV or monitor.
Wall mounting the center and
surround speaker system
Before mounting
• Remember that this speaker system is heavy and that
its weight may cause the wood screw to work loose or
the wall to fail to support it, in which case the speaker
system may fall on the floor. This is extremely dangerous. Make absolutely sure that the wall is sturdy enough
to support the weight of the speaker system. Do not
mount it on plywood boards or soft-surface walls. The
mounting screws are not included with this unit.
Please find the correct screws for your application.
Wall-mounting bracket
2-3 meters
Front L
Surround L
Center TV
Front R
Subwoofer
Surround R
Your listening position
If you install the center speaker on top of your TV, be
sure to secure it with tape or by some other suitable
means. An unsecured speaker may fall from the TV due
to external shocks such as earthquakes, endangering
those nearby or damaging the speaker.
Wood screw
Protrude:5-7mm
• If you are unsure of the qualities and strength of the
walls, consult a professional for advice.
• PIONEER is not responsible for any accidents or
damage that result from improper installation.
5 mm
5 mm
10 m m
9
En
Connecting Up2
L
COAX
S-VIDEO
OUT
VIDEO
OUT
DIGITAL
IN
SPEAKERS
FRONT
SUB-
SURROUND
CENTER
R
WOOFER
LR L
S-VIDEO
VIDEO
DIGITAL
OUT
OUT
IN
COAX
AUX TV/VCR
OUT IN IN
AC INLET
FM
UNBAL
75Ω
AM
ANTENNA
LOOP
ANTENNA
H
10
En
ANTENNA
AM
LOOP
ANTENNA
FM
UNBAL
75Ω
H
European model
S-VIDEO
VIDEO
DIGITAL
OUT
OUT
IN
COAX
Except European model
AUX TV/VCR
OUT IN IN
AC INLET
AM
ANTENNA
LOOP
ANTENNA
2Connecting Up
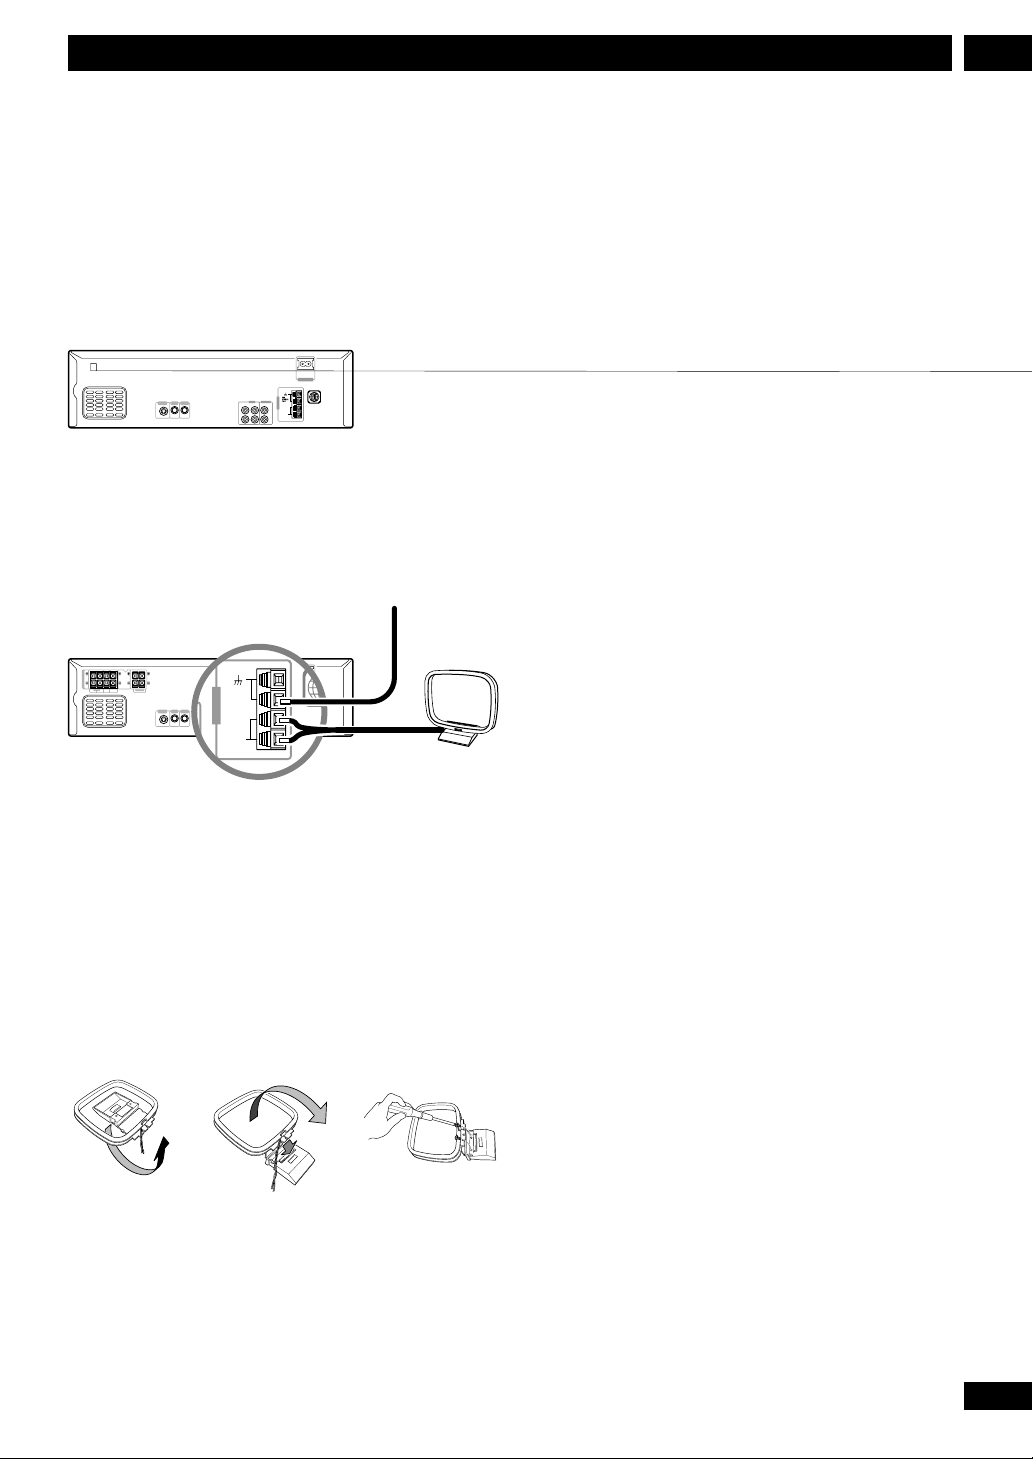
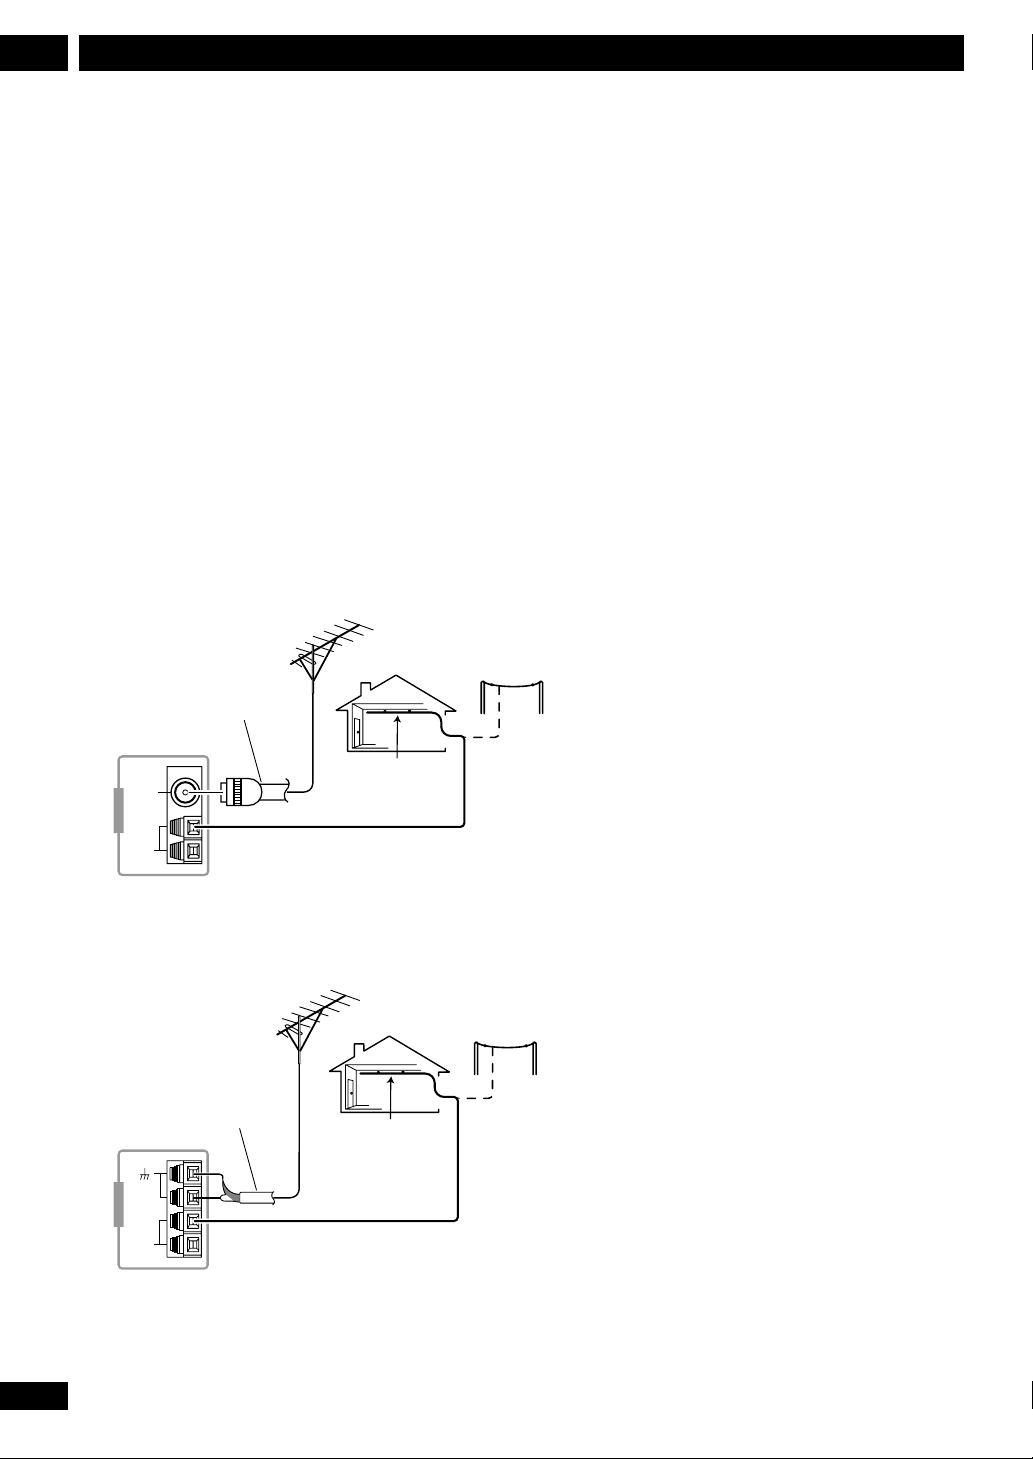
FM wire antenna
AM loop
antenna
SPEAKERS
FRONT
SUB-
SURROUND
CENTER
R
LR L
WOOFER
S-VIDEO
VIDEO
DIGITAL
OUT
OUT
IN
COAX
AUX TV/VCR
OUT IN IN
AC INLET
AM
ANTENNA
LOOP
ANTENNA
H
fig. A fig. B fig. C
11
En
Connecting Up2
Connecting external antennas
External AM antenna
Use 5–6 meters of vinyl-insulated wire and set up either
indoors or outdoors. Leave the supplied AM loop
antenna connected.
External FM antenna
Except European model : Use 75Ω coaxial cable to
hook up an external FM antenna. Do not leave the
supplied FM wire antenna attached.
European model : Use 75Ω coaxial cable with a PAL
connector to hook up an external FM antenna.
European model
PAL connector
FM
UNBAL
75Ω
AM
ANTENNA
LOOP
ANTENNA
H
Except European model
75 Ω coaxial cable
FM
UNBAL
75Ω
AM
ANTENNA
LOOP
ANTENNA
H
Outdoor
AM antenna
Indoor
AM antenna
Outdoor
AM antenna
Indoor
AM antenna
12
En

2Connecting Up
13
En
Controls & Displays3
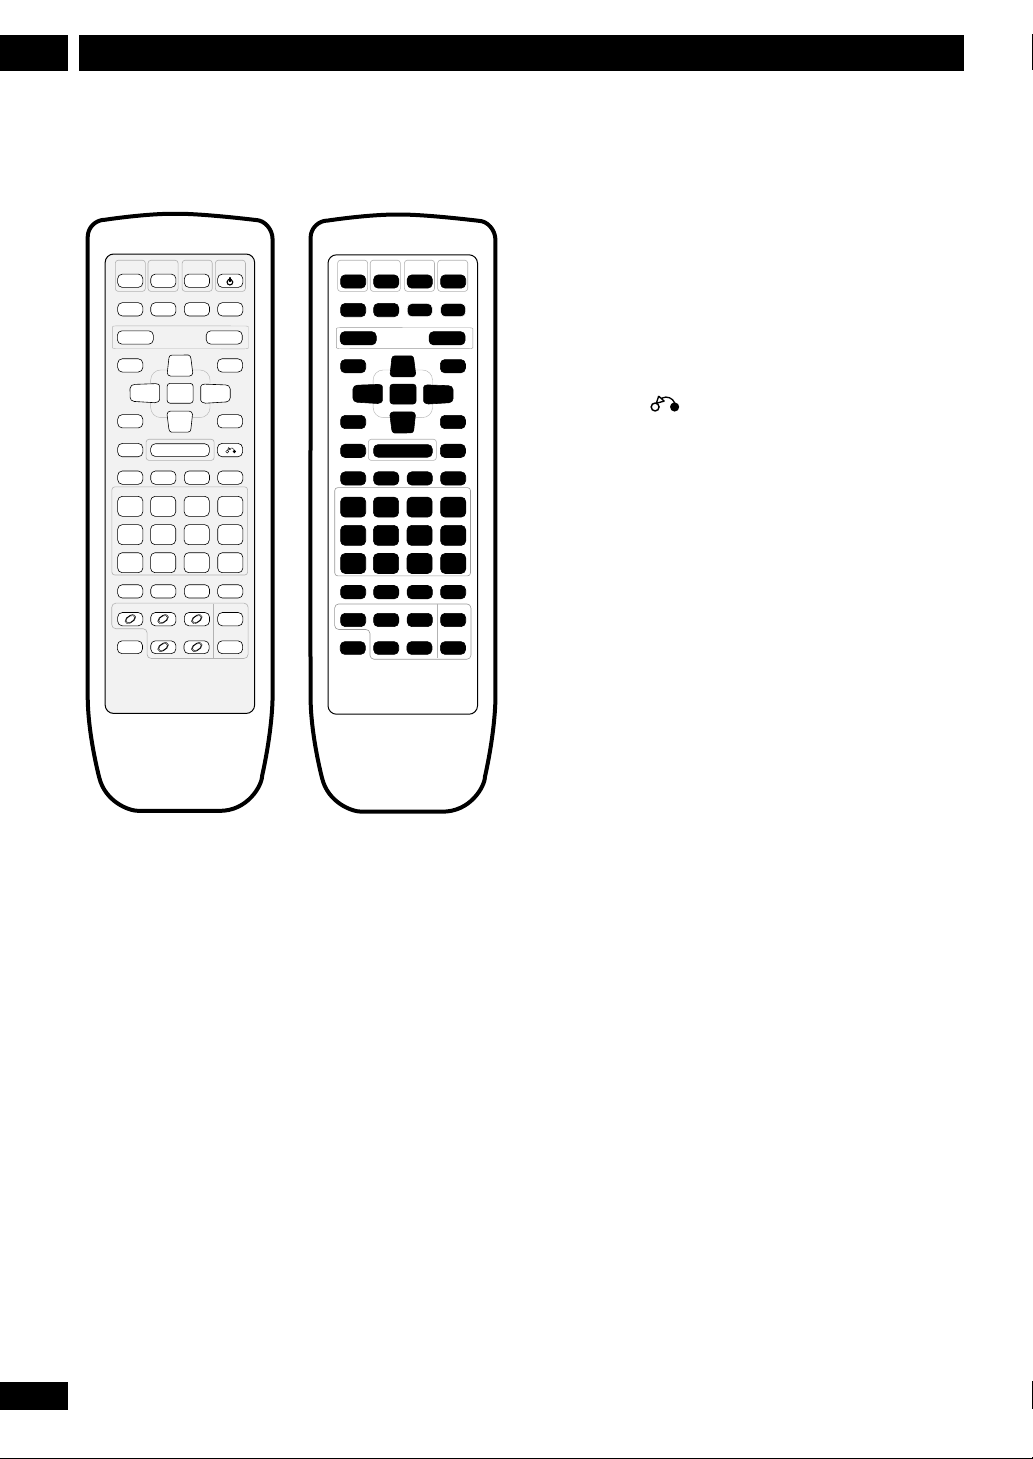
Remote control
DVD
TUNER
/CD
/BANDTV/AUX
TEST TONE
MUTE
CH LEVEL
—+
DVD SETUP SYSTEM SETUP
2
TOP MENU
76
e STEP/SLOW E
— PREV NEXT +
4¢
CONDITION LAST MEMO SEARCH DVD DISP
123
ANGLE MONO SLEEP
456
PROGRAM RANDOM REPEAT REP A—B
789
CD MODE AUDIO SUBTITLE SYSTEM DISP
DISC 1 DISC 2 DISC 3 DISC SKIP
SHIFT DISC 4 DISC 5
1 DVD/CD Pages 19, 34
2 TUNER/BAND Pages 21-22, 34
3 TV/AUX Pages 22, 34
4 STANDBY/ON Page 19
5 MUTE Silences/restores all sound.
6 TEST TONE/CH LEVEL Page 17
7 SURROUND MODE Pages 17, 24
8 DSP Page 24
9 VOLUME – Lowers the volume.
10 VOLUME + Raises the volume.
11 DVD SETUP Pages 18, 38
12 Cursor up Use for navigating menus and on-screen
displays.
13 SYSTEM SETUP Pages 16, 22, 34-37, 44
14 Cursor left Use for navigating menus and on-screen
displays.
VOLUME
ENTER
SURROUND
5
∞
MODE
¡1
STANDBY
3
RETURN
CLEAR
FL DIMMER
/ON
DSP
SOUNDMENU
>10
10/0
OPEN/
CLOSE
1234
5678
9
11 13
17 1 9
20 22
23 24 25 26
27 28 29 30
31 32 33 34
35 36 37 38
39 4 0 41 42
43 44 45 46
0
47 48 49 50
10
12
1514 16
18
21
15 ENTER
16 Cursor right Use for navigating menus and on-screen
displays.
17 MENU Page 20
TOP MENU Page 20
18 Cursor down Use for navigating menus and on-screen
displays.
19 SOUND Page 23, 25
20 7 Page 19
21 3/8 Page 19
22 RETURN Page 20
23 4 / –PREV Pages 19-20
24 1 / STEP/SLOW e Pages 19-20
25 ¡ / STEP/SLOW E Pages 19-20
26 ¢ / NEXT+ Pages 19-20
27 1 / CONDITION (SHIFT & 1) Page 30
28 2 / LAST MEMO (SHIFT & 2) Page 29
29 3 / SEARCH (SHIFT & 3) Page 26
30 CLEAR Clears/cancels various functions
DVD DISP (SHIFT & CLEAR) Page 30
31 4 / ANGLE (SHIFT & 4) Page 26
32 5 / MONO (SHIFT & 5) Page 22
33 6 / SLEEP (SHIFT & 6) Page 35
34 >10 Selects numbers over 10 Page 20
FL DIMMER (SHIFT & >10) Page 44
35 7 / PROGRAM (SHIFT & 7) Pages 27-28
36 8 / RANDOM (SHIFT & 8) Page 28
37 9 / REPEAT (SHIFT & 9) Pages 28-29
38 REP A–B (SHIFT & 10/0) Page 29
10/0 Number button (10 and 0)
39 CD MODE Page 29
40 AUDIO Page 26
41 SUBTITLE Page 26
42 SYSTEM DISP Page 16
43 DISC 1 Page 20
44 DISC 2 Page 20
45 DISC 3 Page 20
46 DISC SKIP Pages 19, 21
47 SHIFT Hold down to access secondary button functions
48 DISC 4 Page 20
49 DISC 5 Page 20
50 OPEN/CLOSE 0 Pages 19, 21
14
En

Front panel
3Controls & Displays
15
En
Setting Up4
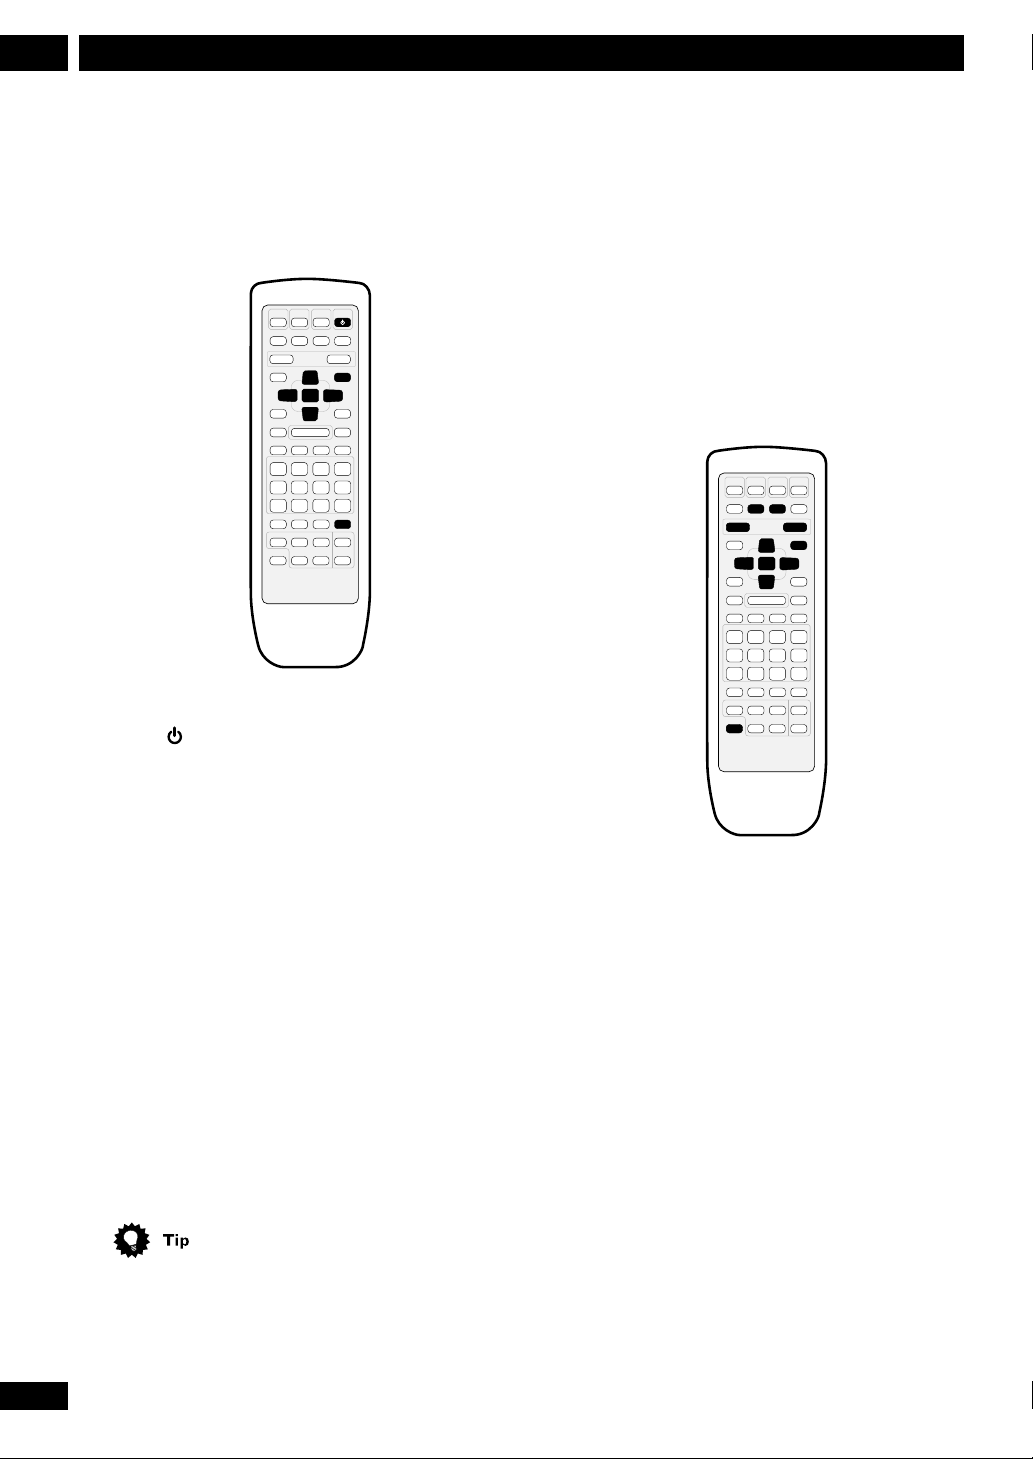
Switching on and setting the clock
This system has a built-in clock, which needs to be set
to be able to use the timer features.
STANDBY
/ON
SYSTEM SETUP
5
ENTER
3
2
∞
SYSTEM DISP
1 Press to switch on.
Setting up for surround sound
You can use this system right out of the box for
surround sound with just the default settings. However,
for really great surround sound, we recommend that
you spend a few minutes making some settings that
match this system to your listening room. Unless you
change the layout of your speakers or main listening
position, you only need to make most of these settings
once.
TEST TONE
SURROUND
MODE
/CH LEVEL
VOLUME
–+
SYSTEM SETUP
5
ENTER
3
2
∞
SHIFT
2 Press SYSTEM SETUP.
3 Press the 2 or 3 button until you see
TIMER in the display.
4 Press ENTER.
5 Press 2 or 3 until you see CLOCK ADJ in
the display.
6 Press ENTER.
The display shows a clock, with the hour blinking.
7 Use the 5 and ∞ buttons to set the hour,
then press ENTER.
8 Use the 5 and ∞ buttons to set the
minute, then press ENTER.
The display blinks to indicate that the time has been set.
• Press SYSTEM DISP anytime to see the clock when
the system is on or in standby.
Setting the speaker distances
1 Press SYSTEM SETUP.
2 Press the 2 or 3 button until you see
FRT. SP in the display.
3 Use the 5 and ∞ buttons to set the
distance from your main listening posi-
tion to the front speakers.
Ideally, your listening position should be equidistant
from the two front speakers.
The default setting is 3m. You can adjust the range
from 0.3m to 9.0m in steps of 0.3m.
16
En
 Loading...