

Pioneer XV-DV303, S-DV303 User Manual
DVD/CD RECEIVER
XV-DV303
SPEAKER SYSTEM
S-DV303
Operating Instructions
CONGRATULATIONS ON YOUR PURCHASE OF THIS FINE PIONEER PRODUCT.
Pioneer is on the leading edge of DVD research for consumer products and this unit incorporates
the latest technological developments.
We are sure you will be fully satisfied with the DVD player.
Thank you for your support.
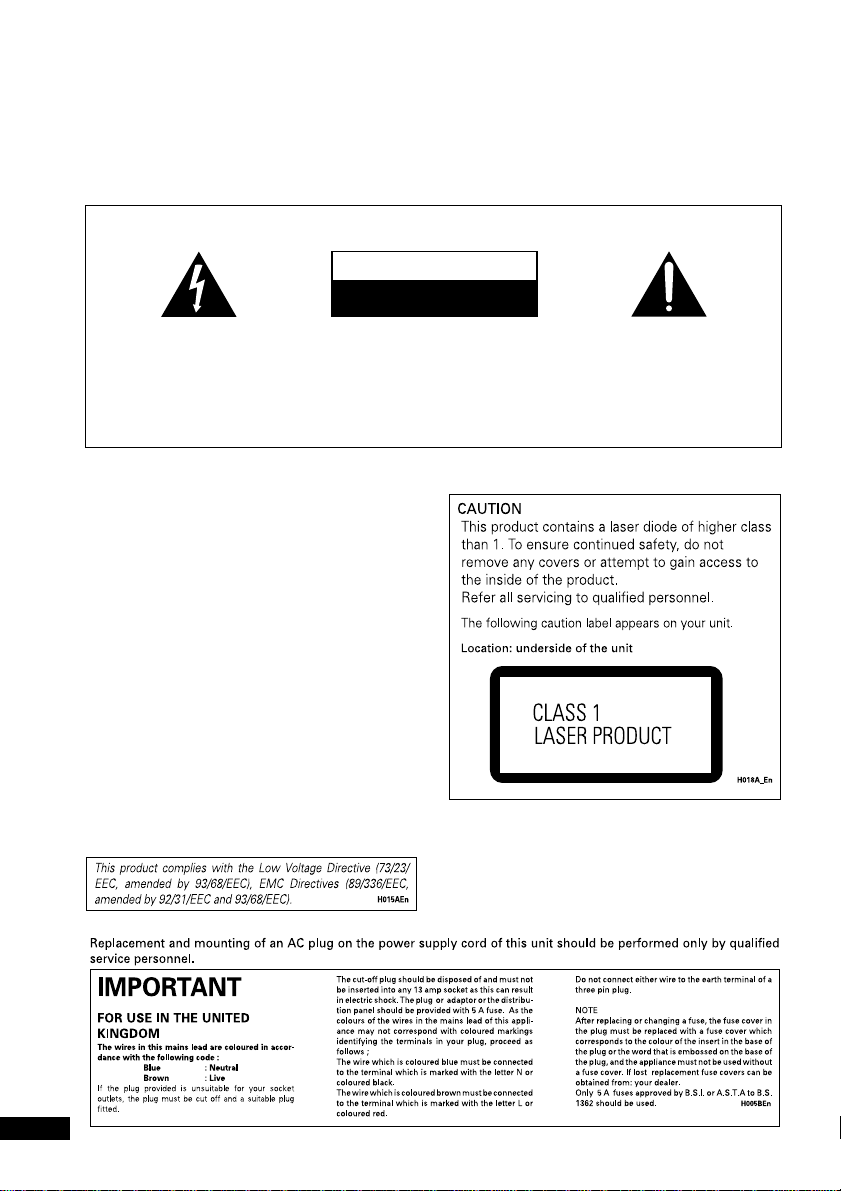
Location: underside of the unit
IMPORTANT
CAUTION
RISK OF ELECTRIC SHOCK
DO NOT OPEN
The lightning flash with arrowhead
symbol, within an equilateral
triangle, is intended to alert the
user to the presence of uninsulated
“dangerous voltage” within the
product's enclosure that may be of
sufficient magnitude to constitute
a risk of electric shock to persons.
CAUTION:
TO PREVENT THE RISK OF ELECTRIC
SHOCK, DO NOT REMOVE COVER
(OR BACK). NO USER-SERVICEABLE
PARTS INSIDE. REFER SERVICING
TO QUALIFIED SERVICE
PERSONNEL.
The exclamation point within an
equilateral triangle is intended to
alert the user to the presence of
important operating and
maintenance (servicing)
instructions in the literature
accompanying the appliance.
H002_En
WARNING:
WATERPROOF. TO PREVENT FIRE OR SHOCK
HAZARD, DO NOT EXPOSE THIS APPARATUS TO
RAIN OR MOISTURE AND DO NOT PUT ANY
WATER SOURCE NEAR THIS APPARATUS, SUCH
AS VASES, FLOWER POTS, COSMETICS
CONTAINERS, MEDICINE BOTTLES, ETC.
WARNING:
FOR THE FIRST TIME, READ THE FOLLOWING
SECTION CAREFULLY. THE VOLTAGE OF THE
AVAILABLE POWER SUPPLY DIFFERS
ACCORDING TO COUNTRY OR REGION. BE SURE
THAT THE POWER SUPPLY VOLTAGE OF THE
AREA WHERE THIS UNIT WILL BE USED MEETS
THE REQUIRED VOLTAGE (E.G., 230V OR 120V)
WRITTEN ON THE REAR PANEL.
THIS APPARATUS IS NOT
BEFORE PLUGGING IN THE UNIT
H041A_En
European model only:
2
En
÷
÷
÷
VENTILATION:
European and Australian models:
When installing this unit, make sure to
leave space around the unit for ventilation
to improve heat radiation (at least 10 cm at
top, 10 cm at rear, and 10 cm at each side).
Australian model:
ENERGY STAR
ENERGY STAR
certification mark are
registered US marks.
®
and
K001B_En
All other models:
When installing this unit, make sure to
leave space around the unit for ventilation
to improve heat radiation (at least 20 cm at
top, 15 cm at rear, and 15 cm at each side).
WARNING: Slot and openings in the
cabinet are provided for ventilation and to
ensure reliable operation of the product
and to protect it from overheating, to
prevent fire hazard, the openings should
never be blocked and covered with items,
such as newspapers, table-cloths, curtains,
etc. Also do not put the apparatus on the
thick carpet, bed, sofa, or fabric having a
thick pile. H040 En
WARNING: NO NAKED FLAME SOURCES,
SUCH AS LIGHTED CANDLE, SHOULD BE
PLACED ON THE APPARATUS. IF NAKED FLAME
SOURCES ACCIDENTALLY FALL DOWN, FIRE
SPREAD OVER THE APPARATUS THEN MAY
CAUSE FIRE.
H044_En
Energy-saving design
This system is designed to use 0.5 W of
electricity when power is switched to Standby.
CAUTION:
SECONDARY CONNECTED AND THEREFORE
DOES NOT SEPARATE THE UNIT FROM MAINS
POWER IN STANDBY POSITION. therefore install
the unit suitable places easy to disconnect the
MAINS plug in case of the accident. The MAINS
plug of unit should be unplugged from the wall
socket when left unused for a long period of
time.
Operating Environment
Operating environment temperature and
humidity:
+5ºC – +35ºC (+41ºF – +95ºF); less than 85%RH
(cooling vents not blocked)
Do not install in the following locations
Location exposed to direct sunlight or strong
artificial light
Location exposed to high humidity, or poorly
ventilated location
THE STANDBY/ON BUTTON IS
H017B_En
H045_En
3
En

Contents
01 Before you start
Introduction to home theater ............................ 6
General disc compatibility ................................. 6
CD-R/RW compatibility ................................ 6
DVD-R/RW compatibility ............................. 7
PC-created disc compatibility ..................... 7
MP3 audio compatibility .............................. 7
Titles, chapters and tracks ........................... 8
DVD Video regions ....................................... 8
02 Controls and displays
Front panel .......................................................... 9
Remote control ................................................. 10
Display .............................................................. 12
03 Getting started
Setting the unit to match your TV system ...... 14
Using the Quick Room Setup ......................... 15
Setting the clock .............................................. 15
Changing the clock format ........................ 16
Setting up the remote to control your TV ....... 16
Using the on-screen displays .......................... 17
Playing discs .................................................... 17
Basic playback controls ............................. 19
Front panel controls .............................. 20
DVD-Video disc menus .............................. 20
Video CD PBC menus ................................ 21
Listening to auxiliary components ................. 21
Automatic power on buttons .......................... 21
04 Playing discs
Introduction ...................................................... 22
Using the Disc Navigator to browse
the contents of a disc ...................................... 22
Scanning discs ................................................. 23
Playing in slow motion .................................... 23
Frame advance/frame reverse ........................ 24
Looping a section of a disc ............................. 24
Using repeat play ............................................. 25
Using the OSD ............................................ 25
Using the front panel display .................... 26
Using random play ........................................... 26
Using the OSD ............................................ 26
Using the front panel display .................... 27
Creating program lists ..................................... 28
Using the OSD ............................................ 28
Editing program lists
using the OSD ....................................... 29
Other functions available from
the OSD program menu ....................... 30
Using the front panel display .................... 30
Clearing a track from
the program list ..................................... 31
Clearing the program list ..................... 31
Searching a disc .............................................. 31
Switching subtitles .......................................... 32
Switching DVD audio languages .................... 32
Switching audio channels when
playing a Video CD ........................................... 32
Zooming the screen ......................................... 32
Switching camera angles ................................ 33
Displaying disc information ............................ 33
Using the OSD ............................................ 33
Using the front panel display .................... 34
05 Listening to the radio
Choosing stations ............................................ 35
Improving poor FM reception .................... 35
Memorizing stations ........................................ 36
Listening to station presets ....................... 36
An introduction to RDS ................................... 37
Using the RDS display ............................... 38
Searching for RDS programs .................... 38
06 Setting up for surround sound
Choosing your surround sound settings ....... 39
Front speaker distance setting .................. 40
Center speaker distance setting ............... 40
Surround speaker distance setting ........... 40
Dynamic range control setting .................. 40
Dual mono setting ...................................... 41
LFE attenuator setting ................................ 41
Setting the relative volume level
of each channel ................................................ 41
4
En

07 Playing sources
Using the multi-channel sound modes ......... 43
Auto ............................................................. 43
Surround modes ......................................... 43
Advanced Surround modes ....................... 43
Stereo .......................................................... 44
Listening to multi-channel playback .............. 44
Listening to a stereo source ............................ 45
Using Advanced Surround .............................. 46
Using the headphones with
Advanced Surround ................................... 46
08 Adjusting the sound
Adjusting the bass and treble ......................... 47
Adjusting the effect level ................................. 47
Boosting the bass level .................................... 47
Using Midnight and Quiet listening ............... 48
Muting the sound ............................................. 48
Reducing the TV and line signal levels .......... 48
09 Using the timer
Setting the wake-up timer ............................... 49
Turning the wake-up timer on/off .............. 50
Setting the sleep timer .................................... 50
10 The Initial Settings menu
Using the Initial Settings menu ...................... 51
Video settings ................................................... 51
TV Screen .................................................... 51
S Video Out ................................................. 52
Language settings ........................................... 52
Audio Language ......................................... 52
Subtitle Language ...................................... 52
DVD Menu Language ................................. 53
Subtitle Display ........................................... 53
Display settings ................................................ 53
OSD Language ............................................ 53
On Screen Display ...................................... 53
Angle Indicator ........................................... 54
Options .............................................................. 54
Parental Lock .............................................. 54
Registering a new password ................ 54
Changing your password ..................... 55
Setting/changing the
Parental Lock level ................................ 55
Setting/changing the
Country Code ......................................... 56
11 Additional information
Switching off the demo ................................... 57
Dimming the display ........................................ 57
Changing the frequency step .......................... 57
Setting the TV format ....................................... 57
Resetting the unit ............................................. 57
Child Lock ......................................................... 58
Using discs with this unit ................................ 59
Handling discs ............................................ 59
Storing discs ............................................... 59
Discs to avoid .............................................. 59
Proper installation and
maintenance of this unit ................................. 60
Hints on installation ................................... 60
Cleaning the pickup lens ........................... 60
Problems with condensation ..................... 60
Moving the unit ........................................... 60
Additional connections ................................... 61
Connecting external
antennas ...................................................... 61
Connecting auxiliary
components ...................................................... 61
Troubleshooting ................................................ 63
General ........................................................ 63
DVD/CD/Video CD player ........................... 64
Tuner ............................................................ 65
Error Messages ........................................... 65
Screen sizes and disc formats ........................ 66
Widescreen TV users .................................. 66
Standard TV users ...................................... 66
Language code list ........................................... 67
Country code list .............................................. 67
Preset Code List ............................................... 68
Glossary ............................................................ 70
Specifications ................................................... 72
Power cord caution .................................... 73
English
En
5
Before you start01
Introduction to home theater
You are probably used to using stereo
equipment to listen to music, but may not be
used to home theater systems that give you
many more options (such as surround
sound) when listening to soundtracks.
Home theater refers to the use of multiple
audio channels to create a surround sound
effect, making you feel like you're in the
middle of the action or concert. The surround sound you get from a home theater
system depends not only on the speakers
you have set up in your room, but also on the
source and the sound settings of the system.
DVD-Video has become the basic source
material for home theater due to its size,
quality, and ease of use. Depending on the
DVD, you can have up to seven different
audio tracks coming from one disc, all of
them being sent to different speakers in your
system. This is what creates a surround
sound effect and gives you the feeling of
‘being there’.
This receiver will automatically decode Dolby
Digital, DTS or Dolby Surround DVD-Video
discs. In most cases, you won’t have to make
changes for realistic surround sound, but
other possibilities (like listening to a CD with
multi-channel surround sound) are explained
in Playing sources, starting on page 43.
General disc compatibility
This player was designed and engineered to
be compatible with software bearing one or
more of the following logos.
DVD-Video
Video CDAudio CD CD-R CD-RW
Other formats, including but not limited to
the following, are not playable in this player:
• DVD-Audio, SACD, Photo CD, DVDRAM, DVD-ROM, CD-ROM*
(*except those that contain MP3 files
formatted as specified in the MP3 audio
compatibility section)
• DVD-R/RW and CD-R/RW discs (Audio
CDs and Video CDs) recorded using a
DVD recorder, CD recorder or personal
computer may not be playable on this
machine. This may be caused by a
number of possibilities, including but
not limited to: the type of disc used; the
type of recording; damage, dirt or
condensation on either the disc or the
player’s pick-up lens.
CD-R/RW compatibility
• This unit will play CD-R and CD-RW
discs recorded in CD Audio or Video CD
format, or as a CD-ROM containing MP3
audio files. However, any other content
may cause the disc not to play, or create
noise/distortion in the output.
6
En

Before you start
01
• This unit cannot record CD-R or CD-RW
discs.
• Unfinalized CD-R/RW discs recorded as
CD Audio can be played, but the full
Table of Contents (playing time, etc.) will
not be displayed.
DVD-R/RW compatibility
• This unit will play DVD-R/RW discs that
were recorded using the DVD Video
format.
• This unit will not play DVD-RW discs
that were recorded using the Video
Recording format.
• This unit cannot record DVD-R/RW
discs.
• Unfinalized DVD-R/RW discs cannot be
played in this player.
PC-created disc compatibility
• If you record a disc using a personal
computer, even if it is recorded in a
compatible format as listed above, there
will be cases in which the disc may not
be playable in this machine due to the
setting of the application software used
to create the disc. In these particular
instances, check with the software
publisher for more detailed information.
• Check the DVD-R/RW or CD-R/RW
software disc boxes for additional
compatibility information.
MP3 audio compatibility
• This unit will play CD-ROM discs
containing files saved in the MPEG-1
Audio Layer 3 format (MP3) with a
sampling rate of 32, 44.1 or 48kHz.
Incompatible files will not play and
UNPLAYABLE will show in the display.
• Fixed bit-rate files are recommended.
Variable bit-rate (VBR) files are playable,
but playing time may not be shown
correctly.
• The CD-ROM used to compile your MP3
files must be ISO 9660 Level 2 compliant.
• CD physical format: Mode1, Mode2 XA
Form1.
• This player only plays tracks that are
named with the file extension “.mp3” or
“.MP3”.
• This player is not compatible with multisession discs. If you try and play a multisession disc, only the first session will
be played.
• Use CD-R or CD-RW media for recording your MP3 files. The disc must be
finalized in order to play in this unit.
• This player can recognize a maximum of
250 folders and 250 tracks. Discs
containing more than 250 folders or 250
tracks will play, but only the first 250
folders / tracks.
• Folder and track names (excluding the
“.mp3” extension) are displayed.
English
En
7

Before you start01
• There are many different recording bitrates available to encode your MP3 files.
This unit was designed to be compatible
with all of them. Audio encoded at
128Kbps should sound close to regular
CD Audio quality. This player will play
lower bit-rate MP3 tracks, but please
note that the sound quality becomes
noticeably worse at lower bit-rates.
Titles, chapters and tracks
DVD discs are generally divided into one or
more titles. Titles may be further subdivided
into chapters.
Title 1 Title 2 Title 3
Chapter 1 Chapter 2 Chapter 3 Chapter 1 Chapter 1 Chapter 2
CDs and Video CDs are divided into tracks.
Track 1 Track 2 Track 3 Track 4 Track 5 Track 6
CD-ROMs containing MP3 files are divided
into folders and tracks. Folders may also
contain further subfolders.
DVD Video regions
All DVD Video discs carry a region mark on
the case somewhere that indicates which
region(s) of the world the disc is compatible
with. Your DVD player also has a region
mark, which you can find on the rear panel.
Discs from incompatible regions will not play
in this player. Discs marked ALL will play in
any player.
The diagram below shows the various DVD
regions of the world.
8
En
mp3
mp3
mp3
mp3
Folder A Folder B Folder C
Track 1Track 2 Track 3 Track 1Track 1
mp3
mp3
Track 2
Controls and displays
02
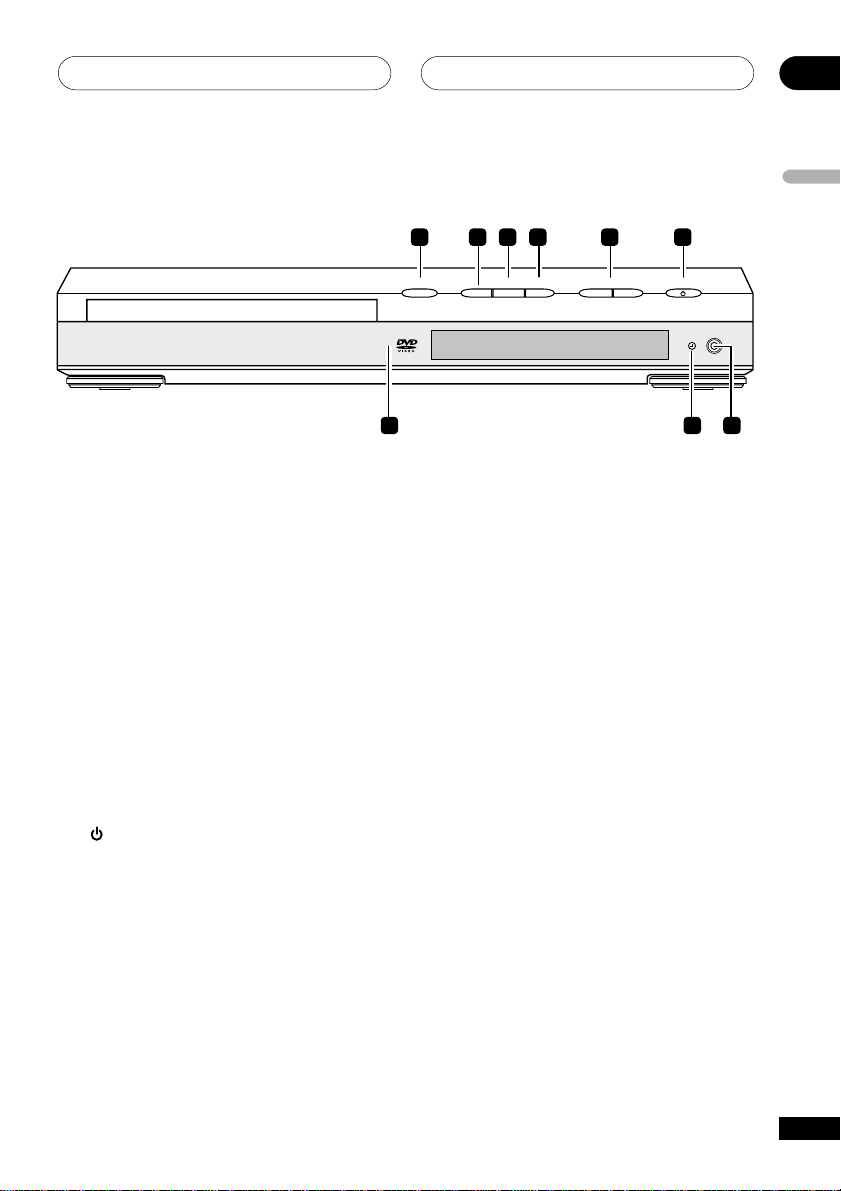
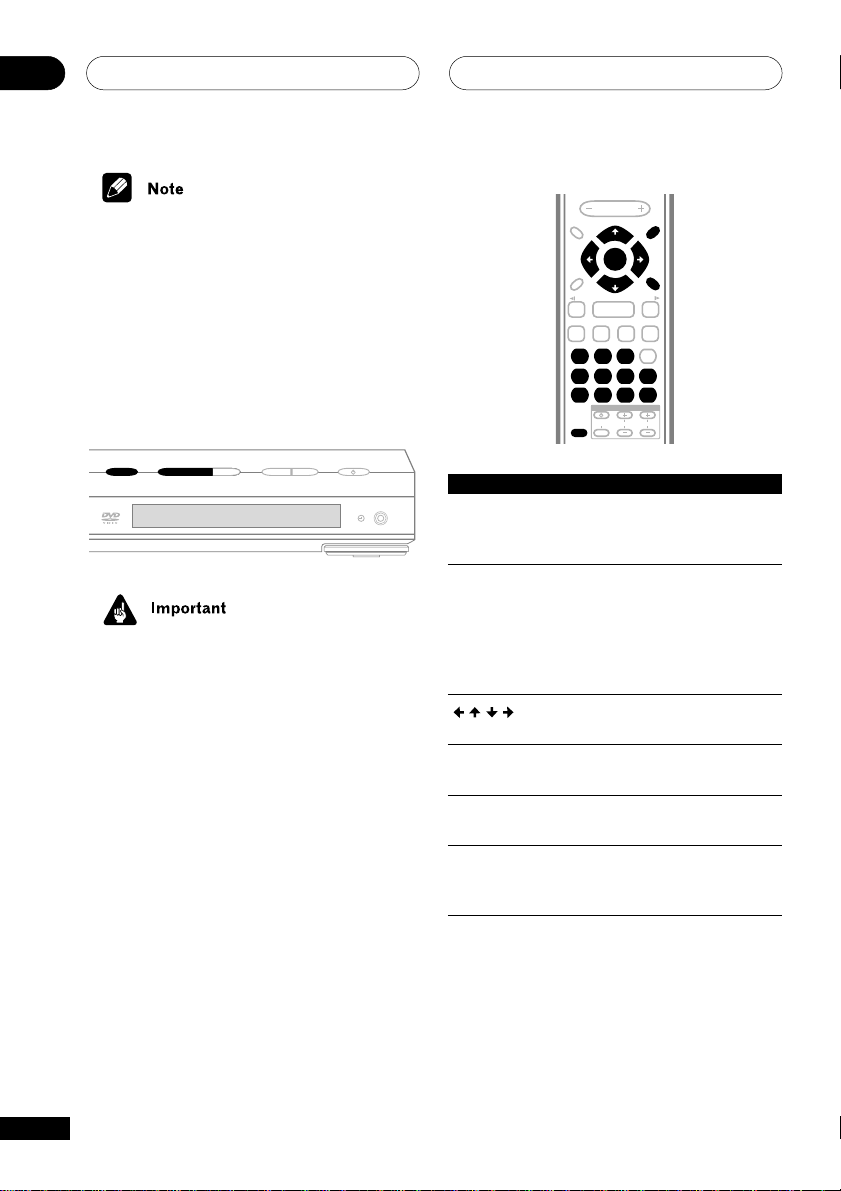
Front panel
1 OPEN/CLOSE
Opens the disc tray
2 7
Stops playback
3 DVD/CD / 6
Switches to the DVD/CD function and starts/
pauses/resumes playback
4 FM/AM (TUNER)
Switches to the tuner function and toggles
between the AM and FM bands
1 2 3 4 5 6
OPEN/CLOSE
DVD/CD FM/AM DOWN VOLUME UPSTANDBY/ON
TUNER
67 ¶0
—
+
PHONES
7 8 9
English
5 VOLUME buttons
Adjusts the volume
6 STANDBY/ON
Switches the player on or into standby
7 Remote sensor
8 Timer indicator
Lights when the timer is set
9 PHONES jack
Headphone jack
9
En
Controls and displays02
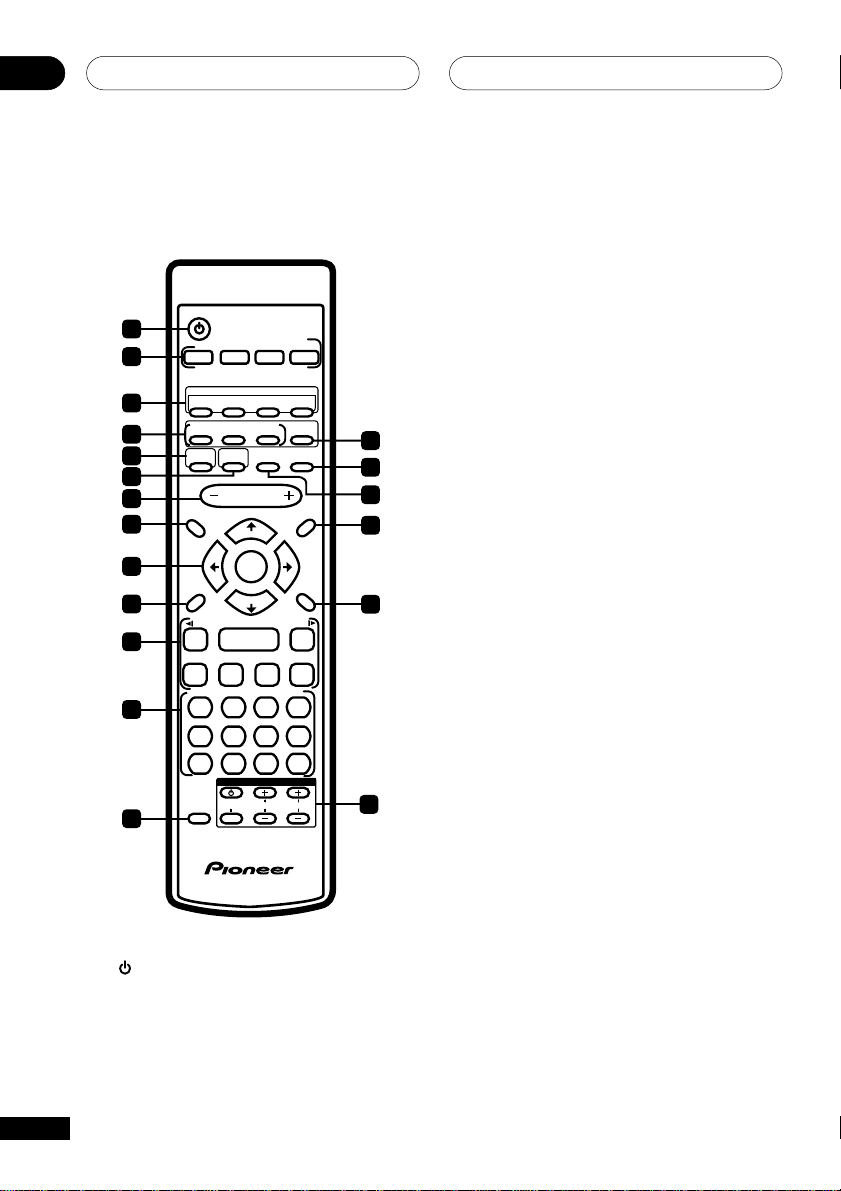
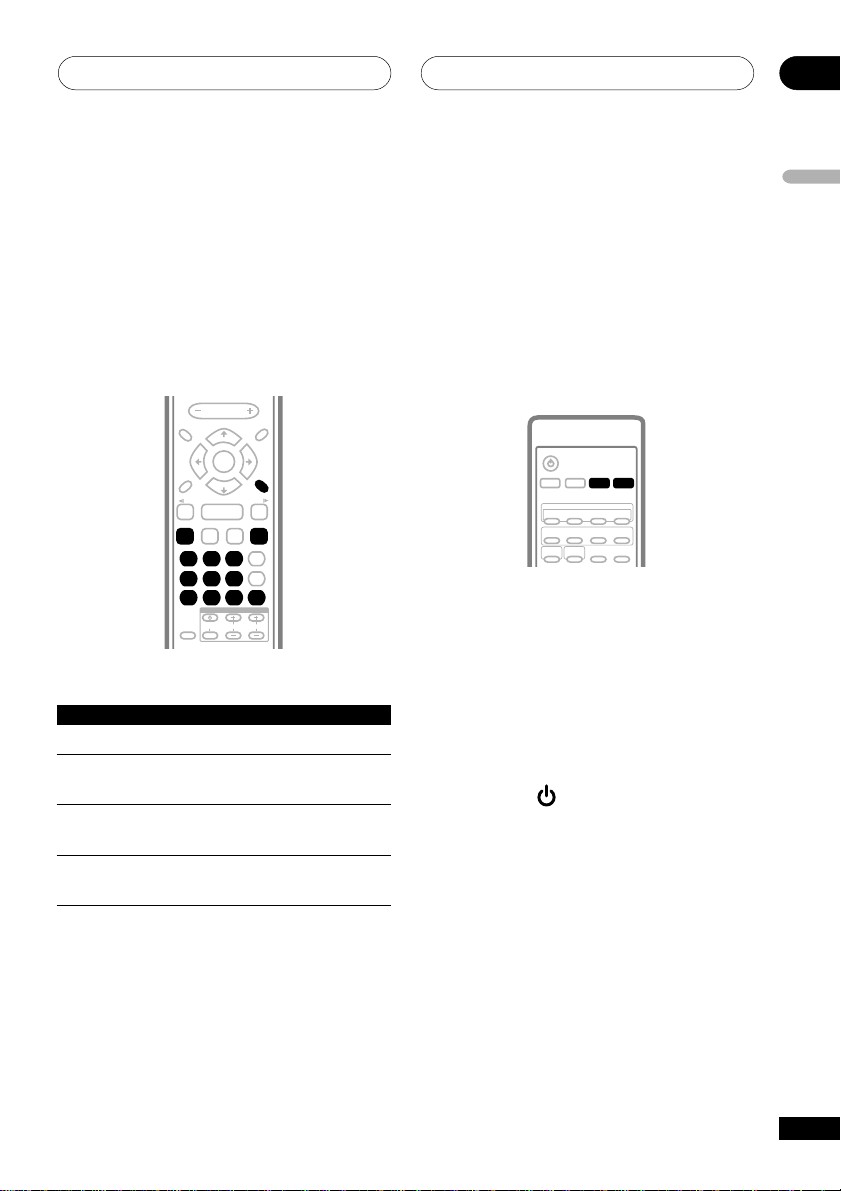
Remote control
STANDBY/ON
1
DVD/CDTVFM/AM LINE
2
DVD
SUBTITLE
3
4
5
6
7
8
9
10
11
12
13
AUDIO
AUTO
SURROUND
ROOM
BASS MODE
SETUP
VOLUME
SYSTEM SETUP
/e
1
4
8
PROGRAM
REPEAT
1 2 3
TEST TONE
CH LEVEL
TUNE +
ENTER
TUNE –
3
DVD SETUP
SOUND
MODE
4 5 6
7 8 9 0
SHIFT
ANGLE ZOOM
ADVANCED
SYSTEM DISP
7
RANDOM
TIMER
DIMMERDVD DISP
TV CONTROL
CHANNELINPUT VOLUME
ST+ST–
L1/L2
QUIET/
MIDNIGHT
MUTE
TOP MENU
DVD MENU
RETURN
E/
¡
FOLDER +FOLDER –
¢
CLEAR
ENTER
14
15
16
17
18
19
3 DVD buttons
AUDIO
Selects the audio channel or language
(page 32)
SUBTITLE
Selects a subtitle display (page 32)
ANGLE
Changes the camera angle during DVD
multi-angle scene playback (page 33)
ZOOM
Changes the zoom level (page 32)
4 Sound mode buttons
AUTO
Automatically selects a decoding format
depending on the source (pages 43–45)
SURROUND
Selects a surround mode (pages 43–45)
ADV. SURROUND
Selects a DSP mode (pages 43–44, 46)
5 ROOM SETUP
Press to automatically adjust the surround
sound settings according to your room type (S,
M, or L) (page 15)
6 BASS MODE
Press to bring up the low end for certain kinds
of music or sound sources (page 47)
1 STANDBY/ON
Switches the player on or into standby
2 Function select buttons
Selects the source you want to listen to
10
En
7 VOLUME
Adjusts the volume
8 DVD SETUP
Displays (or exits) the on-screen DVD
display

Controls and displays
02
SYSTEM SETUP (SHIFT+DVD SETUP)
Press to make various system settings in
standby; choose your surround sound
settings when the unit is switched on
9 ENTER, TUNE & cursor control buttons
Navigates on-screen displays and menus;
ENTER selects an option or executes a
command
10 SOUND MODE
Adjusts the tone and effect level (page 47)
11 Playback controls
3
Starts/resumes playback
1 and
Use for reverse slow motion playback,
frame reverse and reverse scanning
¡ and
Use for forward slow motion playback,
frame advance and forward scanning
4 / FOLDER –
Jumps to the beginning of the current
chapter/track (or folder by pressing SHIFT
+ 4), then to previous chapters/tracks/
folders
¢ / FOLDER +
Jumps to the next chapter/track (or folder
by pressing SHIFT + ¢ )
8
Pauses playback; press again to restart
7
Stops playback
/e
E/
12 Number buttons and SHIFT functions
The number buttons can be used for selecting
tracks directly, the functions above the buttons
are accessed by pressing SHIFT at the same
time as the button.
PROGRAM
Use to program/play a program list (pages
30–31)
REPEAT
Selects a repeat play mode (page 26)
RANDOM
Selects a random play mode (page 27)
TEST TONE
Outputs the test tone (for speaker setup)
(pages 41–42)
CH LEVEL
Press to adjust the speaker level (page 42)
TIMER
Selects the timer menu (pages 49–50, 15)
DVD DISP
Changes the displayed information on the
display (pages 33–34)
DIMMER
Makes the fluorescent display (FL) dimmer
or brighter (page 57)
CLEAR
Clears an entry
ENTER
Selects menu options, etc. (works exactly
the same as the ENTER button in 9 above)
13 SHIFT
Press to access the functions/commands
written in green on the remote
English
11
En
Controls and displays02
14 QUIET/MIDNIGHT
Adjusts the sound for low listening levels
(page 48)
15 MUTE
Mutes the volume
16 SYSTEM DISP
Switches between information and clock
displays
17 DVD MENU
Displays the DVD menu (for CDs, Video
CDs and MP3 discs, the Disc Navigator
screen appears)
TOP MENU (SHIFT + DVD MENU)
Displays the top menu of a DVD disc
Display
1 2 3 4 5 6 7 8 9
18 RETURN
Press to return to a previous menu screen
19 TV CONTROL
Switches the TV on or into standby
INPUT SELECT
Switches the TV input
CHANNEL +/–
Selects channels on the TV
VOLUME +/–
Adjusts the volume on the TV
MIDNIGHT
QUIET
MP3 PGM RPT - 1 RDM ATT
10 11 12 13
1 3
Lights during playback of a CD, VCD, DVD or
MP3
2 MIDNIGHT
Lights during Midnight listening
12
En
PRO LOGIC
DIGITAL
96kHz
ADV.S U RR.
kHz
MHz
3 QUIET
Lights when the Quiet mode is switched on
4 MP3
Lights during playback of an MP3 disc
Controls and displays
02
5 PGM
Lights during program play
6 RPT-1
RPT lights during repeat play (RPT-1 lights
during repeat one-track play)
7 RDM
Lights during random playback
8ATT
Lights when you attenuate (reduce) the line
signal level (can only be used with an analog
signal)
9 Surround sound indicators
2 PRO LOGIC II
This lights to indicate Dolby Prologic II
decoding
2 DIGITAL
This lights to indicate decoding of a Dolby
Digital*1 signal
96kHz
Lights when a 96kHz source is detected
(won’t light if the source is copy–protected)
ADV. SURR
Lights when one of the Advanced Surround listening modes is selected
English
Even when all indicators are lit, you may
not hear sound from all the speakers in
your setup.
10 Tuner indicators
European model only
Lights when in one of the RDS display or
search modes
Lights when a broadcast is being received
Lights when a stereo FM broadcast is
being received in auto stereo mode
Lights when FM mono reception is
selected
11 Timer indicators
Lights when the wake-up timer is active
Lights when the timer is set
DTS
This lights to indicate decoding of a DTS
signal
Speaker indicators ( )
These indicate either stereo ( ) or multichannel (all speakers light in the display)
listening
*2
Lights when the sleep timer is active
12
Lights during multi-angle scenes on a DVD disc
13 Character display
*1 Manufactured under license from Dolby
Laboratories. “Dolby”,”Pro Logic” and the double-D
symbol are trademarks of Dolby Laboratories.
*2 “DTS” and “DTS Digital Surround” are registered
trademarks of Digital Theater Systems, Inc.
13
En
Getting started03
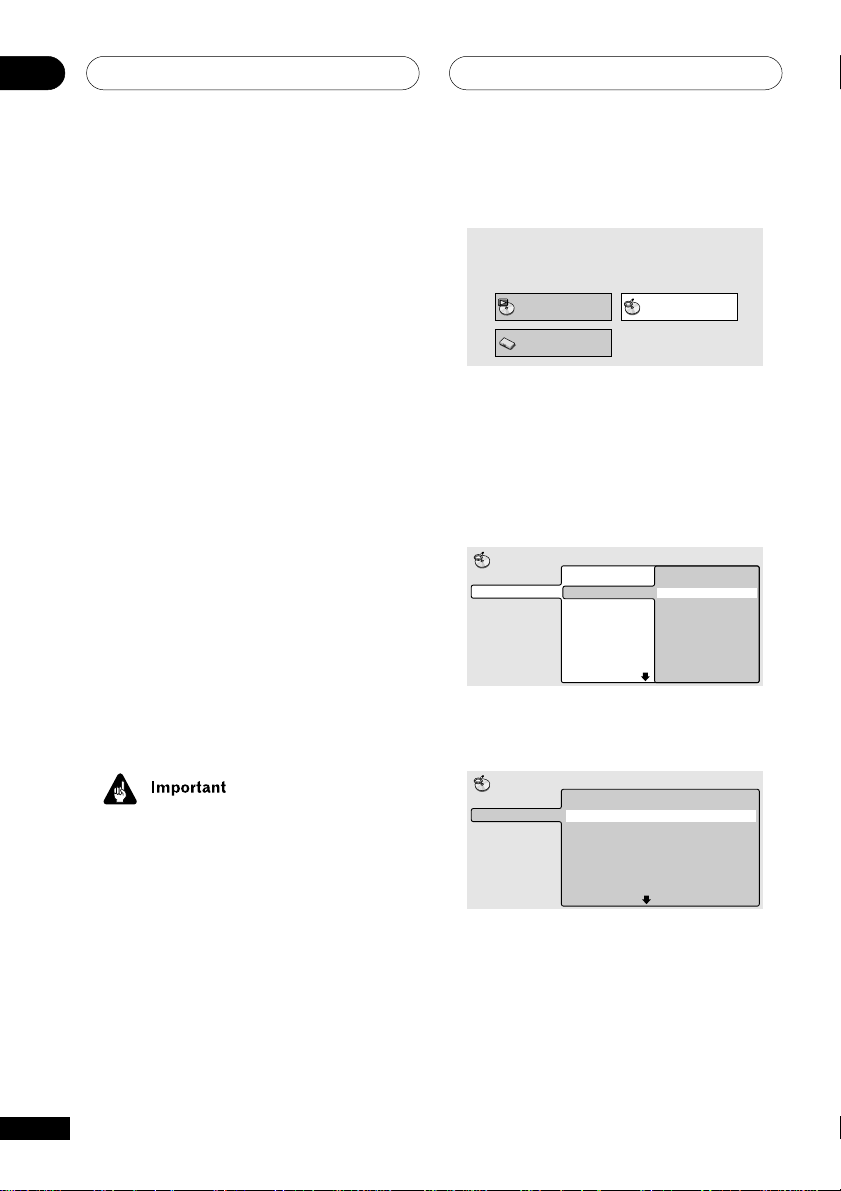
Setting the unit to match
your TV system
When you switch on the system for the first
time, you should see a welcome screen
displayed on your TV. From here you can set
up the player to work with the kind of TV you
have. After this, use the Quick Room Setup
(next page) to jump right in and start playing
some discs.
VOLUME
SYSTEM SETUP
DVD SETUP
SOUND
MODE
/e
1
4
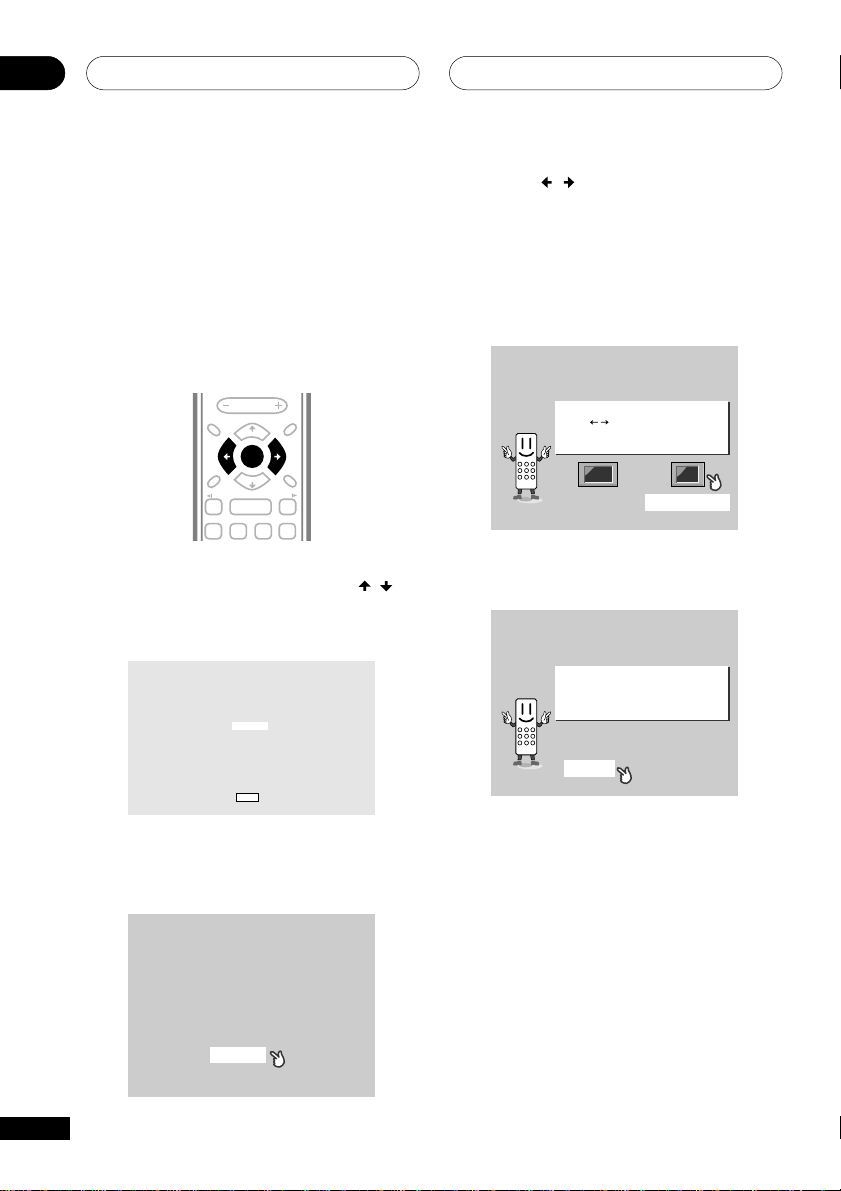
1 European model only: Use the
buttons (cursor up/down) to choose a
language.
Hello!
Select the display language
using the cursor keys on the remote
Choose one then press
ENTER
8
English
français
Deutsch
Italiano
Español
Enter
TOP MENU
TUNE +
DVD MENU
ST+ST–
RETURN
TUNE –
E/
¡
3
FOLDER +FOLDER –
¢
7
/
3 Use the / (cursor left/right)
buttons to select either ‘Wide screen’ or
‘Standard size screen’ according to the
kind of TV you have, then press ENTER.
See also Screen sizes and disc formats on
page 66 if you’re not sure which one to
choose.
Let's Get Started Menu
What kind of TV do you have?
Use the / cursor buttons
to choose, then press [ENTER]
Wide screen (16:9) Standard size screen (4:3)
4 Press ENTER again to finish setting up.
Let's Get Started Menu
Setup complete
If you're finished setting up,
choose [Complete],
to start again choose [Back]
Complete Back
2 Press ENTER to move on to the next
screen.
Welcome to Pioneer DVD!
Thank you for purchasing this Pioneer DVD player.
Before using, please take a little time
to setup your DVD player
Put the batteries into the remote control
Next, press the [ENTER] button on the remote control
and start the Let's Get Started Menu
Next
14
En
• Select BACK then press ENTER if you
want to go back and change the setting
you just made.

Getting started
03
Using the Quick Room Setup
• Default setting: M (not applicable to the
European model—see note below)
Depending on the distance of your speakers
from the listening position, choose between
Small, Medium, or Large (see the following
table).
• Press ROOM SETUP repeatedly to
select your room type then press ENTER.
S
M
Front
Center
Surround
1.8m
(6 ft)
1.5m
(5 ft)
0.9m
(3 ft)
1.8m
(6 ft)
1.5m
(5 ft)
1.8m
(6 ft)
• The channel levels will also be adjusted
according to the distance setting.
• If you have already set the channel
levels manually (see Setting the relative
volume level of each channel on page
41), you will see ROOM – – in the
display when you first press the ROOM
SETUP button.
European model only
• Since the default channel levels are not
the same as the channel levels for any
of the room setup options, ROOM – –
will show in the display when you first
press the ROOM SETUP button. See
Setting the relative volume level of each
channel on page 41 for more on
individual channel level settings.
L
1.8m
(6 ft)
1.5m
(5 ft)
2.7m
(9 ft)
Setting the clock
After setting the unit to match your TV
system, the first thing to do is to set the
clock. This only needs to be done once
(unless all power to the unit is cut) and will
enable you to use the timer features.
STANDBY/ON
SUBTITLE
SURROUND
BASS MODE
CH LEVEL
8
REPEAT
DVD
VOLUME
TUNE +
ENTER
TUNE –
3
TV CONTROL
ANGLE ZOOM
ADVANCED
SYSTEM DISP
ST+ST–
7
RANDOM
TIMER
DIMMERDVD DISP
CHANNELINPUT VOLUME
MIDNIGHT
TOP MENU
DVD MENU
FOLDER +FOLDER –
CLEAR
ENTER
L1/L2
QUIET/
MUTE
RETURN
E/
¡
¢
DVD/CDTVFM/AM LINE
AUDIO
AUTO
ROOM
SETUP
SYSTEM SETUP
DVD SETUP
SOUND
MODE
/e
1
4
PROGRAM
1 2 3
TEST TONE
4 5 6
7 8 9 0
SHIFT
1 Press TIMER (SHIFT+6).
2 If CLOCK ADJ isn’t already selected,
use the
buttons to select it.
/
3 Press ENTER.
/
4 Use the
buttons to set the hour.
5 Press ENTER.
English
15
En
Getting started03
6 Use the / buttons to set the
minute.
7 Press ENTER to confirm.
The display flashes to indicate the clock is
set.
• Press SYSTEM DISP anytime to cycle
through display options to show the
current time. See Displaying disc
information on pages 33–34 for more on
this.
Changing the clock format
• Default setting: 12–HOUR
You can choose to display the clock in either
12 or 24 hour formats.
1 Switch the system into standby.
2 Press SYSTEM SETUP (SHIFT+DVD
SETUP).
/
3 Use the
format (Default setting: 12–HOUR).
The current clock format is shown in the
display.
4 Use the
12 or 24 hour clock format.
5 Press ENTER to confirm.
buttons to select hour
/
buttons to select either
Setting up the remote to
control your TV
You can set up the supplied remote to
control your TV. Here’s how to set it up.
1 Switch on your TV.
2 Find the name of the manufacturer of
your TV in the Preset Code List on page
68-69.
Next to each manufacturer is one or more
three digit codes. These tell the remote what
kind of TV you have.
If the name of the manufacturer of your TV
does not appear in the table, you won’t be
able to set up this remote to control your TV.
3 Point the remote at your TV, hold
down the CLEAR button, then enter the
three digit code for your TV.
The remote transmits an on/off signal to the
TV. If you’ve entered the correct code, your TV
should switch off.
If your TV doesn’t turn off, repeat the
procedure using the next code in the list
until your TV switches off successfully. Once
set, you can then use the following individual
TV controls.
Button What it does
Switches your TV on or into
standby.
CHANNEL +/– Changes the TV channel.
VOLUME +/– Adjusts the volume.
INPUT Switches the TV’s input
between the built in TV tuner
and an external video source.
16
En
Getting started
03
Using the on-screen displays
For ease of use, this player makes extensive
use of graphical on-screen displays (OSDs).
You should get used to the way these work as
you’ll need to use them when setting up the
player, using some of the playback features,
such as program play, and when making
more advanced settings for audio and video.
All the screens are navigated in basically the
same way, using the cursor buttons to
change the highlighted item and pressing
ENTER to select it.
QUIET/
ADVANCED
AUTO
ROOM
SETUP
SYSTEM SETUP
DVD SETUP
SOUND
MODE
/e
1
4
PROGRAM
1 2 3
TEST TONE
4 5 6
7 8 9 0
Button What it does
DVD SETUP Displays/exits the on-screen
display
Changes the highlighted
menu item
ENTER Selects the highlighted menu
item (both ENTER buttons
work in exactly the same way)
RETURN Returns to the main menu
without saving changes
SURROUND
BASS MODE
CH LEVEL
VOLUME
8
REPEAT
MIDNIGHT
SYSTEM DISP
MUTE
TOP MENU
TUNE +
DVD MENU
ST+ST–
ENTER
RETURN
TUNE –
E/
¡
3
FOLDER +FOLDER –
¢
7
RANDOM
CLEAR
TIMER
ENTER
DIMMERDVD DISP
English
• Throughout this manual, ‘Select’ means
use the cursor buttons to highlight an
item on-screen, then press ENTER.
• The button guide at the bottom of every
OSD screen shows you which buttons
you’ll need to use for that screen.
Playing discs
The basic playback controls for playing DVD,
CD, Video CD and MP3 discs are covered
here. Further functions are detailed in the
next chapter.
1 If the player isn’t already on, press
STANDBY/ON to switch it on.
If you’re playing a DVD or Video CD, also turn
on your TV and make sure that it is set to the
correct video input.
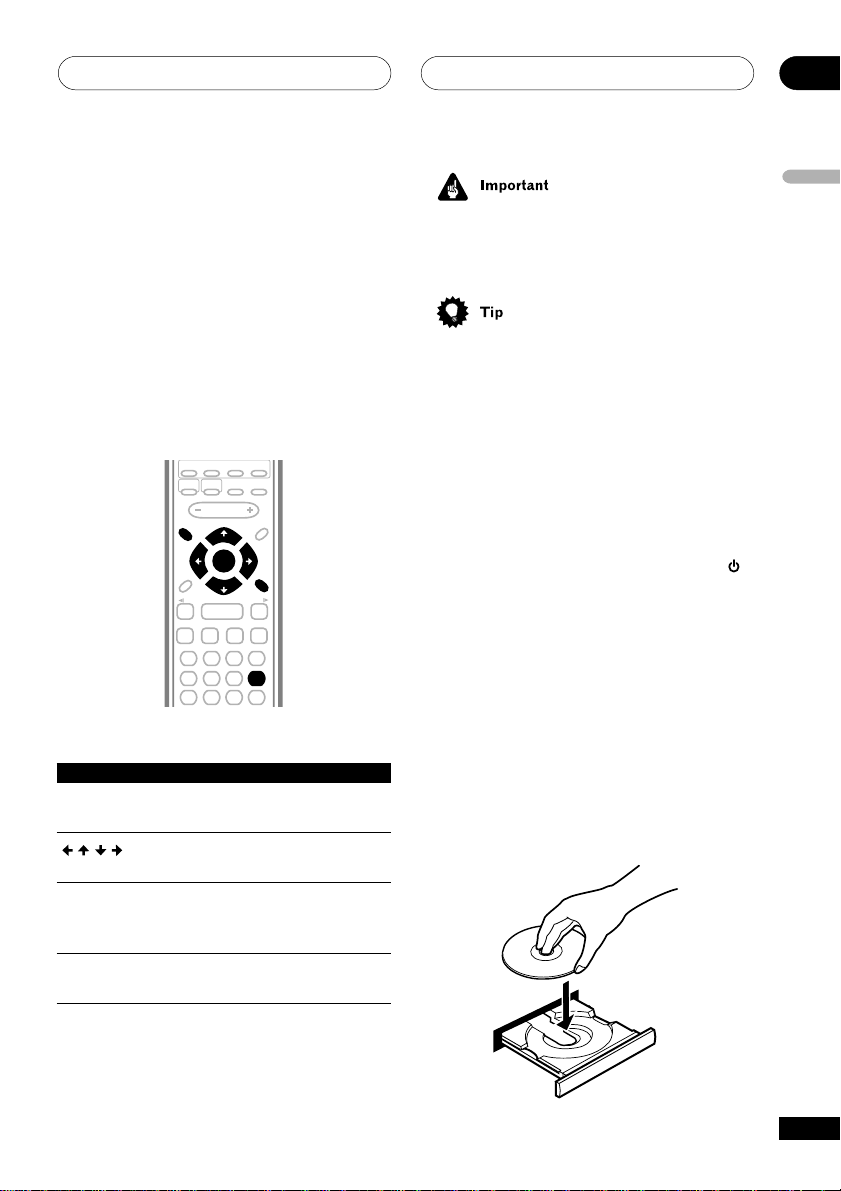
2 Press 0 OPEN/CLOSE to open the disc
tray.
3 Load a disc.
Load a disc with the label side facing up,
using the disc tray guide to align the disc (if
you’re loading a double-sided DVD disc, load
it with the side you want to play face down).
17
En

Getting started03
4 Press 3 (6) to start playback.
If you’re playing a DVD or Video CD, a menu
may appear. See pages 20–21 for how to
navigate these.
If you’re playing an MP3 disc, it may take a
few seconds before playback starts, depending on the complexity of the file structure on
the disc.
• After I load a DVD disc, it ejects automatically after a few seconds!
Most likely, the disc is the wrong region
for your player. The region number
should be printed on the disc; check it
against the region number of the player
(which you can find on the rear panel).
See also page 8.
If the region number is OK, it may be
that the disc is damaged or dirty. Clean
the disc and look for signs of damage.
See also page 59.
• Why won’t the disc I loaded play?
First check that you loaded the disc the
right way up (label side up), and that it’s
clean and not damaged. See page 59 for
information on cleaning discs.
If a disc loaded correctly won’t play, it’s
probably an incompatible format or disc
type, such as DVD-Audio or DVD-ROM.
See page 6 for more on disc compatibility.
• I have a widescreen TV so why are there
black bars at the top and bottom of the
screen when I play some discs?
Some movie formats are such that even
when played on a widescreen TV, black
bars are necessary at the top and
bottom of the screen. This is not a
malfunction.
• I have a standard (4:3) TV and set the
player to show widescreen DVDs in pan &
scan format, so why do I still get black
bars top and bottom with some discs?
Some discs override the display
preferences of the player, so even if you
have 4:3 (Pan & Scan) selected, those
discs will still be shown in letterbox
format. This is not a malfunction.
18
En
Getting started
03
Basic playback controls
The table below shows the basic controls on
the remote for playing discs. The following
chapter covers more playback features in
more detail.
STANDBY/ON
SUBTITLE
SURROUND
BASS MODE
REPEAT
CH LEVEL
VOLUME
8
DVD
ADVANCED
SYSTEM DISP
TUNE +
ENTER
TUNE –
3
RANDOM
DIMMERDVD DISP
TV CONTROL
CHANNELINPUT VOLUME
ANGLE ZOOM
ST+ST–
7
TIMER
FOLDER +FOLDER –
L1/L2
QUIET/
MIDNIGHT
MUTE
TOP MENU
DVD MENU
RETURN
E/
¡
¢
CLEAR
ENTER
DVD/CDTVFM/AM LINE
AUDIO
AUTO
ROOM
SETUP
SYSTEM SETUP
DVD SETUP
SOUND
MODE
/e
1
4
PROGRAM
1 2 3
TEST TONE
4 5 6
7 8 9 0
SHIFT
Button What it does
3 Starts playback.
DVD and Video CD: if the
display shows RESUME,
playback starts from the
resume point.
8 Pauses a disc that’s playing,
or restarts a paused disc.
7 Stops playback.
DVD and Video CD: Display
shows RESUME. Press 7
again to cancel the resume
function.
1 Press to start fast reverse
scanning. Press 3 (play) to
resume normal playback.
¡ Press to start fast forward
scanning. Press 3 (play) to
resume normal playback.
4 Skips to the start of the
current track or chapter, then
to previous tracks/chapters.
¢ Skips to the next track or
chapter.
FOLDER +/- Skips to the next/previous
(SHIFT+ folder when listening to an
4/¢) MP3 disc.
Numbers • If the disc is stopped,
playback starts from the
selected title (for DVD) or track
number (for CD/Video CD)
after a few seconds (or after
pressing ENTER).
• If the disc is playing,
playback jumps to the start of
the selected chapter or track
after a few seconds (or after
pressing ENTER).
English
19
En
Getting started03
• With Video CDs, the RESUME function
is canceled when you switch to another
function.
Front panel controls
The 0 (OPEN/CLOSE) button opens the disc
tray. The 7 (stop), and 6 (play/pause)
buttons on the front panel work in exactly the
same way as the 7, 3 and 8 buttons on the
remote control.
VOLUME
SYSTEM SETUP
DVD SETUP
ENTER
SOUND
MODE
/e
1
4
8
PROGRAM
REPEAT
1 2 3
TEST TONE
CH LEVEL
4 5 6
7 8 9 0
SHIFT
TUNE +
TUNE –
3
7
RANDOM
TIMER
DIMMERDVD DISP
TV CONTROL
CHANNELINPUT VOLUME
TOP MENU
DVD MENU
ST+ST–
RETURN
E/
¡
FOLDER +FOLDER –
¢
CLEAR
ENTER
OPEN/CLOSE
DVD/CD FM/AM DOWN VOLUME UPSTANDBY/ON
67 ¶0
—
TUNER
TUNER
+
PHONES
• You may find with some DVD discs that
some playback controls don’t work in
certain parts of the disc. This is not a
malfunction.
DVD-Video disc menus
Many DVD-Video discs contain menus from
which you can select what you want to
watch. They may give access to additional
features, such as subtitle and audio language selection, or special features such as
slideshows. See the disc packaging for
details.
Sometimes DVD-Video menus are displayed
automatically when you start playback;
others only appear when you press DVD
MENU or TOP MENU.
Button What it does
TOP MENU Displays the ‘top menu’ of a
(SHIFT+ DVD disc—this varies with the
DVD MENU) disc.
DVD MENU Displays a DVD disc menu—
this varies with the disc and
may be the same as the ‘top
menu’ (for CDs, Video CDs
and MP3 discs, the Disc
Navigator screen appears).
Moves the cursor around the
screen.
ENTER Selects the current menu
option.
RETURN Returns to the previously
displayed menu screen.
Numbers Highlights a numbered menu
option (some discs only).
Press ENTER to select.
20
En
Getting started
03
Video CD PBC menus
Some Video CDs have menus from which
you can choose what you want to watch.
These are called PBC (Playback control)
menus.
You can play a PBC Video CD without having
to navigate the PBC menu by starting
playback using a number button to select a
track, rather than the 3 (6) button.
VOLUME
SYSTEM SETUP
DVD SETUP
SOUND
MODE
/e
1
4
PROGRAM
1 2 3
TEST TONE
4 5 6
7 8 9 0
SHIFT
Button What it does
RETURN Displays the PBC menu.
Numbers Selects a numbered menu
option.
4 Displays the previous menu
page (if there is one).
¢ Displays the next menu page
(if there is one).
REPEAT
CH LEVEL
8
TUNE +
ENTER
TUNE –
3
RANDOM
DIMMERDVD DISP
TV CONTROL
CHANNELINPUT VOLUME
TOP MENU
DVD MENU
ST+ST–
RETURN
E/
¡
FOLDER +FOLDER –
¢
7
CLEAR
TIMER
ENTER
Listening to auxiliary
components
After you have connected a source to the
LINE jack(s) on the rear of the unit, you can
listen to the auxiliary component(s) by
pressing the LINE button.
If you have chosen to connect your TV (or a
component other than the TV) to the TV
(AUDIO) jacks on the rear panel, press the
TV button to hear it.
STANDBY/ON
DVD
SUBTITLE ANGLE ZOOM
ADVANCED
SURROUND
BASS MODE
SYSTEM DISP
MIDNIGHT
L1/L2
QUIET/
MUTE
DVD/CDTVFM/AM LINE
AUDIO
AUTO
ROOM
SETUP
• Press the LINE button repeatedly to
switch between LINE 1 (analog) and LINE
2 (digital).
• Press the TV button to hear the TV
through this system.
Automatic power on buttons
There are a number of buttons other than
STANDBY/ON (
unit on. OPEN/CLOSE (front panel only),
DVD/CD (6 on the front panel), FM/AM,
TV, and LINE switch the unit on directly into
that function. (In the case of DVD/CD (6),if
there is a DVD or a CD loaded it will start
playing.)
) which will switch the
English
21
En
Playing discs04
Introduction
With most of the features described in this
chapter, you can make use of on-screen
displays. For an explanation of how to navigate
these, see Using the on-screen displays on page
17.
Many of the functions covered in this chapter
apply to DVD discs, Video CDs, CDs and MP3s,
although the exact operation of some varies
slightly with the kind of disc loaded. With CDs
and MP3 discs, you can use the front panel
display instead of the OSD for many features.
Some DVD discs restrict the use of some
functions (random or repeat, for example). This
is not a malfunction.
When playing Video CDs, some of the functions
are not available during PBC playback. If you
want to use them, start the disc playing using a
number button to select a track.
Using the Disc Navigator to
browse the contents of a disc
(Available only when using the OSD)
Use the Disc Navigator to browse through the
contents of a disc to find the part you want to
play.
1 Press DVD SETUP and select ‘Disc
Navigator’ from the on-screen display.
Play Mode Disc Navigator
Initial Settings
2 Select what you want to play.
Depending on the type of disc you have loaded,
the Disc Navigator looks slightly different.
The screen for DVD discs shows the titles on
the left and the chapters on the right. Select a
title, or a chapter within a title.
Disc Navigator
DVD
Title 1-10
Title 01
Title 02
Title 03
Title 04
Title 05
Title 06
Title 07
Title 08
Chapter 1-3
Chapter 001
Chapter 002
Chapter 003
The screen for CDs and Video CDs shows a list
of tracks.
22
En
• It’s not possible to use the Disc Navigator
when playing a Video CD in PBC mode, or
an unfinalized CD-R/RW disc.
Disc Navigator
CD
Track 1-10
Track 01
Track 02
Track 03
Track 04
Track 05
Track 06
Track 07
Track 08
Playing discs
04
The screen for an MP3 disc shows the folder
names on the left and the track names on the
right. Select a folder, or a track within a folder.
Disc Navigator
MP3
Folder 1-17
001. ACP
002. Nth Degree
003. Pfeuti
004. Live
005. Glitch music
006. CodHead
007. Thermo
008. Missing Man
Track 1-10
001. Gravity deluxe
002. Tesla's patent
003. Border dispute
004. Delayed by rain
005. Accident incident
006. Pigeon post
007. Outernational
008. Vacuum tube
Playback starts after you press ENTER.
• The disc navigator is not available unless
there is a disc loaded.
• Another way to find a particular place on a
disc is to use one of the search modes.
See Searching a disc on page 31.
Scanning discs
You can fast-scan discs forward or backward at
various different speeds.
1 During playback, press 1 or ¡
(remote) to start scanning.
2 Press repeatedly to increase the
scanning speed.
• The scanning speed is shown on-screen.
3 To resume normal playback, press 3
(play).
• Sound can be heard while scanning audio
CDs and MP3 discs.
• MP3 discs have one scanning speed only.
• There are no subtitles displayed and no
sound while scanning DVDs and Video
CDs.
• Depending on the disc, normal playback
may automatically resume when a new
chapter is reached on a DVD disc.
Playing in slow motion
You can play DVDs and Video CDs forward or
backward at various slow motion speeds.
1 During playback, press 8 (pause).
/e
2 Press and hold
slow motion playback starts.
• The slow motion speed is shown onscreen.
• There is no sound during slow motion
playback
3 Press repeatedly to change the slow
motion speed.
• The slow motion speed is displayed onscreen.
4 To resume normal playback, press 3
(play).
or
E/
until
English
23
En
 Loading...