Pioneer PDV-LC20, PDV-20 User Manual
PORTABLE DVD PLAYER
PDV-LC20
(built-in screen)
PDV-20
Operating Instructions
(This mark applies only to US and Canadian models)
IMPORTANT
CAUTION
RISK OF ELECTRIC SHOCK
DO NOT OPEN
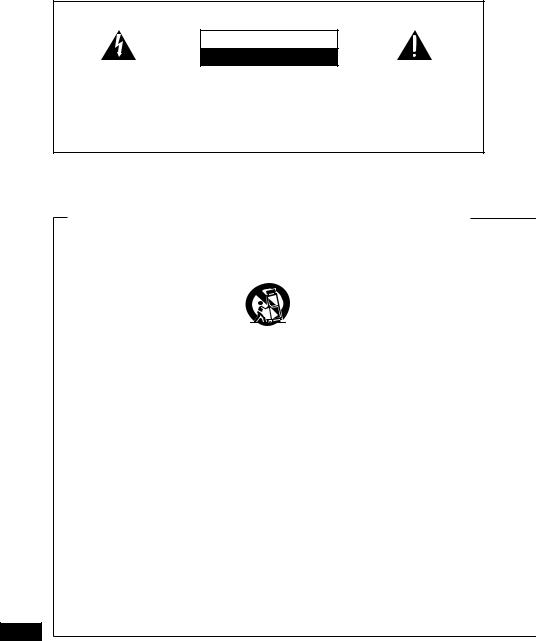
The lightning flash with arrowhead symbol, within an equilateral triangle, is intended to alert the user to the presence of uninsulated "dangerous voltage" within the product's enclosure that may be of sufficient magnitude to constitute a risk of electric shock to persons.
CAUTION:
TO PREVENT THE RISK OF
ELECTRIC SHOCK, DO NOT REMOVE COVER (OR BACK). NO USER-SERVICEABLE PARTS INSIDE. REFER SERVICING TO QUALIFIED SERVICE PERSONNEL.
The exclamation point within an equilateral triangle is intended to alert the user to the presence of important operating and maintenance (servicing) instructions in the literature accompanying the appliance.
WARNING: TO PREVENT FIRE OR SHOCK HAZARD,
DO NOT EXPOSE THIS APPLIANCE TO RAIN OR
MOISTURE.
IMPORTANT SAFETY INSTRUCTIONS
READ INSTRUCTIONS — All the |
CART — A product and cart combination |
GROUNDING OR POLARIZATION |
|
safety and operating instructions |
should be moved with care. Quick |
• If this product is equipped with a |
|
should be read before the product is |
stops, excessive force, and uneven |
polarized alternating current line |
|
operated. |
surfaces may cause the product and |
plug (a plug having one blade wider |
|
RETAIN INSTRUCTIONS — The safety |
cart combination to overturn. |
than the other), it will fit into the |
|
and operating instructions should be |
|
outlet only one way. This is a safety |
|
retained for future reference. |
|
feature. If you are unable to insert |
|
HEED WARNINGS — All warnings on |
|
the plug fully into the outlet, try |
|
the product and in the operating |
|
reversing the plug. If the plug should |
|
instructions should be adhered to. |
|
still fail to fit, contact your electrician |
|
FOLLOW INSTRUCTIONS — All |
|
to replace your obsolete outlet. Do |
|
operating and use instructions |
VENTILATION — Slots and openings in |
not defeat the safety purpose of the |
|
should be followed. |
polarized plug. |
||
the cabinet are provided for ventilation |
|||
CLEANING — Unplug this product from |
• If this product is equipped with a |
||
and to ensure reliable operation of the |
|||
the wall outlet before cleaning. The |
three-wire grounding type plug, a |
||
product and to protect it from |
|||
product should be cleaned only with |
plug having a third (grounding) pin, it |
||
overheating, and these openings must |
|||
a polishing cloth or a soft dry cloth. |
will only fit into a grounding type |
||
not be blocked or covered. The |
|||
Never clean with furniture wax, |
power outlet. This is a safety |
||
openings should never be blocked by |
|||
benzine, insecticides or other |
feature. If you are unable to insert |
||
placing the product on a bed, sofa, rug, |
|||
volatile liquids since they may |
the plug into the outlet, contact your |
||
or other similar surface. This product |
|||
corrode the cabinet. |
electrician to replace your obsolete |
||
should not be placed in a built-in |
|||
ATTACHMENTS — Do not use |
outlet. Do not defeat the safety |
||
installation such as a bookcase or rack |
|||
attachments not recommended by |
purpose of the grounding type plug. |
||
unless proper ventilation is provided or |
|||
the product manufacturer as they |
POWER-CORD PROTECTION — |
||
the manufacturer’s instructions have |
|||
may cause hazards. |
Power-supply cords should be |
||
been adhered to. |
|||
WATER AND MOISTURE — Do not |
routed so that they are not likely to |
||
POWER SOURCES — This product |
|||
use this product near water — for |
be walked on or pinched by items |
||
should be operated only from the type |
|||
example, near a bathtub, wash |
placed upon or against them, paying |
||
of power source indicated on the |
|||
bowl, kitchen sink, or laundry tub; in |
particular attention to cords at plugs, |
||
marking label. If you are not sure of |
|||
a wet basement; or near a |
convenience receptacles, and the |
||
the type of power supply to your |
|||
swimming pool; and the like. |
point where they exit from the |
||
home, consult your product dealer or |
|||
ACCESSORIES — Do not place this |
product. |
||
local power company. |
|||
product on an unstable cart, stand, |
|
||
LOCATION – The appliance should be |
|
||
tripod, bracket, or table. The product |
|
||
installed in a stable location. |
|
||
may fall, causing serious injury to a |
|
||
NONUSE PERIODS – The power cord of |
|
||
child or adult, and serious damage |
|
||
the appliance should be unplugged |
|
||
to the product. Use only with a cart, |
|
||
from the outlet when left unused for a |
|
||
stand, tripod, bracket, or table |
|
||
long period of time. |
|
||
recommended by the manufacturer, |
|
||
|
|
||
or sold with the product. Any |
|
|
|
mounting of the product should |
|
|
|
follow the manufacturer’s |
|
|
|
instructions, and should use a |
|
|
|
mounting accessory recommended |
|
|
|
by the manufacturer. |
|
|
2
En
English
OUTDOOR ANTENNA GROUNDING
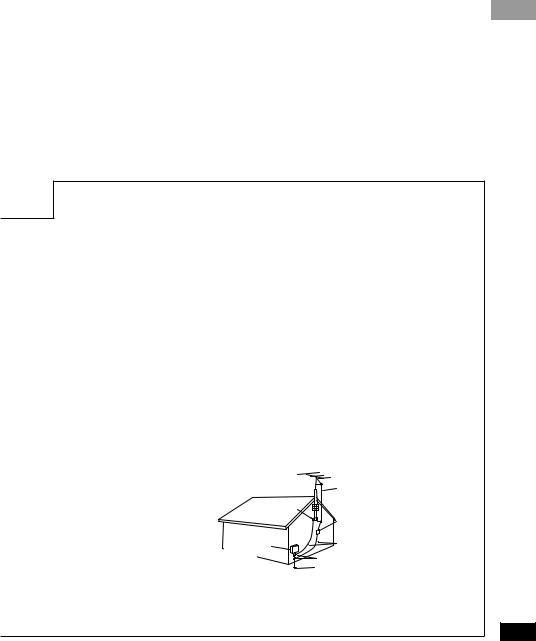
— If an outside antenna or cable system is connected to the product, be sure the antenna or cable system is grounded so as to provide some protection against voltage surges and built-up static charges. Article 810 of the National Electrical Code, ANSI/NFPA 70, provides information with regard to proper grounding of the mast and supporting structure, grounding of the lead-in wire to an antenna discharge unit, size of grounding conductors, location of antenna-discharge unit, connection to grounding electrodes, and requirements for the grounding electrode. See Figure A.
LIGHTNING — For added protection for this product during a lightning storm, or when it is left unattended and unused for long periods of time, unplug it from the wall outlet and disconnect the antenna or cable system. This will prevent damage to the product due to lightning and power-line surges.
POWER LINES — An outside antenna system should not be located in the vicinity of overhead power lines or other electric light or power circuits, or where it can fall into such power lines or circuits. When installing an outside antenna system, extreme care should be taken to keep from touching such power lines or circuits as contact with them might be fatal.
OVERLOADING — Do not overload wall outlets, extension cords, or integral convenience receptacles as this can result in a risk of fire or electric shock.
OBJECT AND LIQUID ENTRY —
Never push objects of any kind into this product through openings as they may touch dangerous voltage points or short-out parts that could result in a fire or electric shock. Never spill liquid of any kind on the product.
SERVICING — Do not attempt to service |
product to its normal operation. |
|
this product yourself as opening or |
• If the product has been dropped or |
|
removing covers may expose you to |
damaged in any way. |
|
dangerous voltage or other hazards. |
• When the product exhibits a distinct |
|
Refer all servicing to qualified service |
change in performance — this |
|
personnel. |
indicates a need for service. |
|
DAMAGE REQUIRING SERVICE — |
REPLACEMENT PARTS — When |
|
Unplug this product from the wall |
replacement parts are required, be |
|
outlet and refer servicing to qualified |
sure the service technician has used |
|
service personnel under the following |
replacement parts specified by the |
|
conditions: |
manufacturer or have the same |
|
• When the power-supply cord or plug is |
characteristics as the original part. |
|
damaged. |
Unauthorized substitutions may |
|
• If liquid has been spilled, or objects |
result in fire, electric shock, or other |
|
have fallen into the product. |
hazards. |
|
• If the product has been exposed to |
SAFETY CHECK — Upon completion of |
|
rain or water. |
any service or repairs to this |
|
• If the product does not operate |
product, ask the service technician |
|
normally by following the operating |
to perform safety checks to |
|
instructions. Adjust only those controls |
determine that the product is in |
|
that are covered by the operating |
proper operating condition. |
|
instructions as an improper |
WALL OR CEILING MOUNTING — |
|
adjustment of other controls may |
The product should not be mounted |
|
result in damage and will often |
to a wall or ceiling. |
|
require extensive work by a |
HEAT — The product should be |
|
qualified technician to restore the |
situated away from heat sources |
|
|
such as radiators, heat registers, |
|
|
stoves, or other products (including |
|
|
amplifiers) that produce heat. |
|
|
ANTENNA |
|
|
LEAD IN WIRE |
|
GROUND |
ANTENNA |
|
CLAMP |
DISCHARGE UNIT |
|
|
(NEC SECTION 810-20) |
|
ELECTRIC |
GROUNDING CONDUCTORS |
|
SERVICE |
||
(NEC SECTION 810-21) |
||
EQUIPMENT |
||
|
GROUND CLAMPS
POWER SERVICE GROUNDING Fig. A ELECTRODE SYSTEM
(NEC ART 250, PART H)
NEC — NATIONAL ELECTRICAL CODE
3
En
CONGRATULATIONS ON YOUR PURCHASE OF THIS FINE PIONEER PRODUCT.
Pioneer is on the leading edge of DVD research for consumer products and this unit incorporates the latest technological developments.
We are sure you will be fully satisfied with the DVD player.
Thank you for your support.
IMPORTANT NOTICE [For U.S. model]
The serial number for this equipment is located on the rear panel. Please write this serial number on your enclosed warranty card and keep it in a secure area. This is for your security.
Please read through these operating instructions so you will know how to operate your model properly. After you have finished reading the instructions, put them away in a safe place for future reference.
• This player is not suitable for commercial use.
CAUTION: This product satisfies FCC regulations when shielded cables and connectors are used to connect the unit to other equipment. To prevent electromagnetic interference with electric appliances such as radios and televisions, use shielded cables and connectors for connections.
Information to User
Alteration or modifications carried out without appropriate authorization may invalidate the user's right to operate the equipment.
NOTE: This equipment has been tested and found to comply with the limits for a Class B digital device, pursuant to Part 15 of the FCC Rules. These limits are designed to provide reasonable protection against harmful interference in a residential installation. This equipment generates, uses, and can radiate radio frequency energy and, if not installed and used in accordance with the instructions, may cause harmful interference to radio communications. However, there is no guarantee that interference will not occur in a particular installation. If this equipment does cause harmful interference to radio or television reception, which can be determined by turning the equipment off and on, the user is encouraged to try to correct the interference by one or more of the following measures:
–Reorient or relocate the receiving antenna.
–Increase the separation between the equipment and receiver.
–Connect the equipment into an outlet on a circuit different from that to which the receiver is connected.
–Consult the dealer or an experienced radio/TV technician for help.
4
En
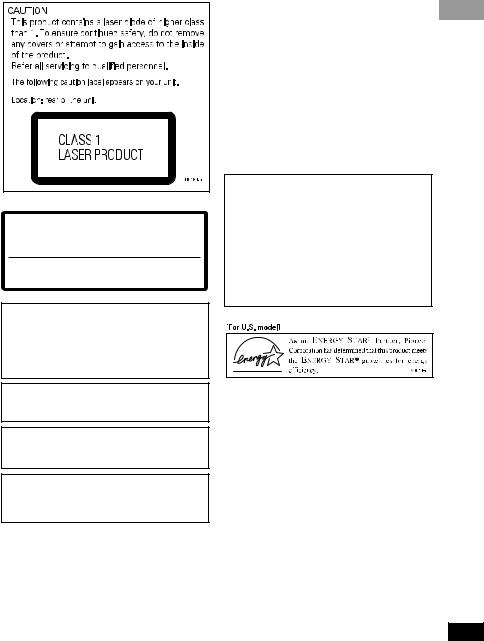
On the bottom of the player
CAUTION : |
VISIBLE AND INVISIBLE LASER RADIATION WHEN OPEN. |
|
AVOID EXPOSURE TO BEAM. |
VORSICHT : |
SICHTBARE UND UNSICHTBARE LASERSTRAHLUNG, WENN |
|
ABDECKUNG GEÖFFNET NICHT DEM STRAHL AUSSETZEN! |
ADVARSEL : SYNLIG OG USYNLIG LASERSTRÅLING VED ÅBNING UNDGÅ UDSÆTTELSE FOR STRÀLING.
VARNING |
: |
SYNLIG OCH OSYNLIG LASERSTRÅLNING NÄR DENNA DEL ÄR |
|
|
|
ÖPPNAD BETRAKTA EJ STRÅLEN. |
|
VARO! |
: |
AVATTAESSA ALTISTUT NÄKYVÄ JA NÄKYMÄTTÖMÄLLE |
|
|
|
LASERSATEIL YLLE. ÄLÄ KATSO SÄTEESEN. |
VRW1860 |
CAUTION
•Use of controls or adjustments or performance of procedures other than those specified herein may result in hazardous radiation exposure.
•The use of optical instruments with this product will increase eye hazard.
[For Canadian model]
This Class B digital apparatus complies with Canadian ICES-003.
[Pour le modèle Canadien]
Cet appareil numérique de la Classe B est conforme à la norme NMB-003 du Canada.
THE ON (3) BUTTON IS SECONDARY CONNECTED AND THEREFORE DOES NOT SEPARATE THE UNIT FROM MAINS POWER IN STANDBY POSITION.
[For Canadian model]
CAUTION: TO PREVENT ELECTRIC SHOCK, DO NOT USE THIS (POLARIZED) PLUG WITH AN EXTENSION CORD, RECEPTACLE OR OTHER OUTLET UNLESS THE BLADES CAN BE FULLY INSERTED TO PREVENT BLADE EXPOSURE.
ATTENTION: POUR PREVENIR LES CHOCS ELECTRIQUES NE PAS UTILISER CETTE FICHE POLARISEE AVEC UN PROLONGATEUR, UNE PRISE DE COURANT OU UNE AUTRE SORTIE DE COURANT, SAUF SI LES LAMES PEUVENT ETRE INSEREES A FOND SANS EN LAISSER AUCUNE PARTIE A DECOUVERT.
This product incorporates copyright protection technology that is protected by method claims of certain U.S. patents and other intellectual property rights owned by Macrovision Corporation and other rights owners. Use of this copyright protection technology must be authorized by Macrovision Corporation, and is intended for home and other limited viewing uses only unless otherwise authorized by Macrovision Corporation. Reverse engineering or disassembly is prohibited.
English
5
En

01 Before You Start
Features
•DVD-RW compatibility (page 9)
Play DVD discs recorded on a DVD-RW recorder (US and Canadian models only).
•CD-R and CD-RW compatibility (page 9)
Play audio discs recorded on CD-R/RW recorder.
•Compact design
The PDV-LC20/PDV-20 measures just 190mm x 142mm. Attach the optional battery pack for a truly use-anywhere, portable DVD player.
•7" widescreen LCD screen (PDVLC20)
•Two headphone jacks for shared listening and viewing (page 58)
•Compatible with 5.1 channel surround sound Dolby Digital* and DTS** software (pages 22, 43, 53)
Connect to an external AV amplifier for full surround sound.
•Compatible with 24-bit/96kHz software
Connect to an external 24-bit/96kHz– compatible amplifier for rich, detailed and dynamic audio playback.
•Setup Navigator (page 21)
Setup your DVD player quickly and easily using on-screen displays.
6
•Low standby power consumption
This unit is designed to use less than 0.7 W of energy when this player is in standby mode (US and Canadian models).
(Standby power consumption for other models is 1.1W.)
*Manufactured under license from Dolby Laboratories. “Dolby” and the double- D symbol are trademarks of Dolby Laboratories. Confidential unpublished works. © 1992-1997 Dolby Laboratories. All rights reserved.
**“DTS” is trademark of Digital Theater Systems, Inc.
En

Contents |
|
01 Before You Start |
|
Features .............................................................. |
6 |
Checking what's in the box ............................... |
8 |
Disc types ............................................................ |
9 |
DVD disc features .............................................. |
10 |
Using this player with DVD discs ..................... |
10 |
Navigating DVDs, CDs and Video CDs .............. |
10 |
Preparation for use .......................................... |
11 |
Connecting up to your TV ................................ |
12 |
01 Before You Start
|
English |
04 The Setup Menu |
|
Using the Setup Menu ...................................... |
40 |
OSD language .................................................. |
40 |
Video settings .................................................... |
41 |
Audio settings ................................................... |
43 |
Language settings ............................................ |
45 |
Miscellaneous settings ..................................... |
48 |
Other settings .................................................... |
50 |
Resetting all the player settings ....................... |
52 |
02 Getting Started |
|
Plugging in and switching on ......................... |
13 |
Playing discs ..................................................... |
14 |
Navigating disc menus .................................... |
16 |
Still-frame and frame review/advance ............ |
18 |
Playing slow-motion video .............................. |
19 |
Taking out the disc, switching off and nplugging .. |
20 |
Using the Setup Navigator ............................... |
21 |
03 Advanced Features |
|
Finding what you want on a disc .................... |
24 |
Switching camera angles ................................. |
26 |
Switching subtitles and audio languages ........ |
27 |
Switching audio channels ............................... |
28 |
Using repeat and looped playback ................... |
29 |
Making program lists ....................................... |
31 |
Using random play .......................................... |
34 |
Bookmarking a place on a disc ....................... |
35 |
Memorizing disc settings1 ............................... |
36 |
Displaying disc information ............................ |
37 |
Using the Setup menu ..................................... |
40 |
OSD settings ...................................................... |
40 |
05 Connections |
|
Listening through an external AV amplifier .... |
53 |
Connecting to a TV using the S-Video cable ... |
54 |
Watching an external video source |
|
(PDV-LC20 only) ............................................ |
55 |
Listening through headphones ........................ |
55 |
06 Control and Display |
|
Top panel controls ............................................ |
56 |
Player (front) ................................................... |
57 |
Player (rear) ..................................................... |
57 |
Player (right side) ............................................ |
58 |
Display (PDV-20 only) ..................................... |
59 |
LCD screen (PDV-LC20 only) ........................... |
60 |
Remote control (Replacing the battery) ......... |
61 |
07 Additional Information |
|
Taking care of your player ............................... |
63 |
Taking care of your discs ................................. |
65 |
Glossary ............................................................ |
66 |
Troubleshooting ............................................... |
68 |
Screen sizes and disc formats .......................... |
70 |
Using the player with a battery pack ............... |
71 |
Language code list ........................................... |
73 |
Specifications ................................................... |
74 |
7
En

01 Before You Start
Checking what's in the box
Thank you for buying this Pioneer product. Before starting to set up and use your new portable DVD player, please check that you have received the following supplied accessories.
•AC adapter
•Power cable
•Remote control unit (with lithium battery)
•AV cable (2 mini-plugs to 3 RCA)
•S-Video cable (mini-plug to S-Video plug)
•Optical fiber cable (PDV-LC20 European model only)
•PDV-BT20 battery pack (PDV-LC20 only)
•These operating instructions
Optional accessories:
•PDV-BT20 battery pack
•PDV-BT25 high capacity battery pack
8
En
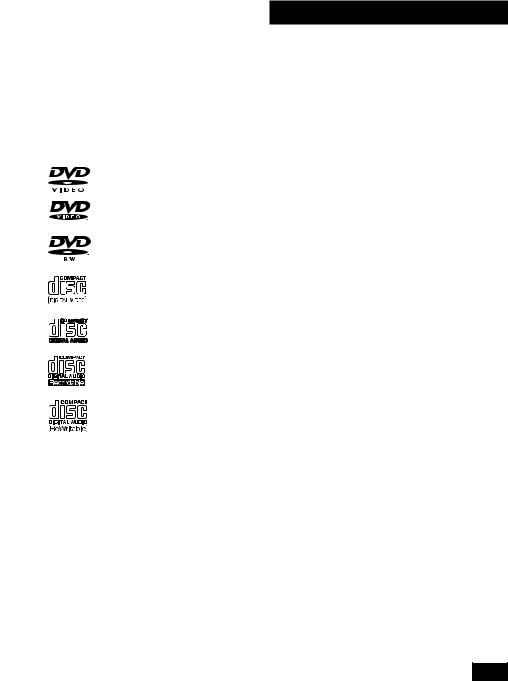
Disc types
Any disc carrying one of the following logos (either on the disc or its packaging) should play in this player. Other types of disc, including DVD-ROM, DVD-Audio and CD-ROM, cannot be played.
DVD video
DVD-RW (rewriteable)*
Video CD
CD (audio)
CD-R (recordable)**
CD-RW (rewriteable)**
Note: This player can play 8cm discs without an adapter. Do not use an adapter when playing 8cm discs.
01 Before You Start
|
|
* Playing DVD-RW discs |
English |
|
|
• Only US and Canadian models are |
|
DVD-RW compatible. |
|
• You may not be able to play non- |
|
finalized DVD-RW discs. |
|
• Copyrighted content originally provided |
|
with the permission of one generation |
|
and recorded on DVD discs cannot be |
|
played on this player. |
|
• When playing a DVD-RW disc that was |
|
edited on a DVD recorder, the screen |
|
may go momentarily black at the edited |
|
point (Play List edit, A-B erase, etc.). |
|
• When playing a DVD-RW disc that was |
|
edited on a DVD recorder, you may see |
|
scenes from just before the edited point. |
|
This is not a malfunction. |
|
• Up to 20 characters of a title name can |
|
be displayed. |
|
** Playing recordable CDs |
|
• Note that this unit cannot record onto |
|
recordable discs. |
|
• This unit can play music-use CD-R and |
|
CD-RW discs. However, depending on |
|
the condition of the CD recorder and |
|
the disc, you may find that not all discs |
|
will play successfully. (For example, if |
|
the disc is scratched or dirty, or if the |
|
player’s pickup lens is dirty.) |
|
9
En
01 Before You Start
DVD disc features
Look on the box of a DVD disc to find out what features are available. Some discs feature multiple audio and subtitle languages, multiple camera angles and widescreen video.
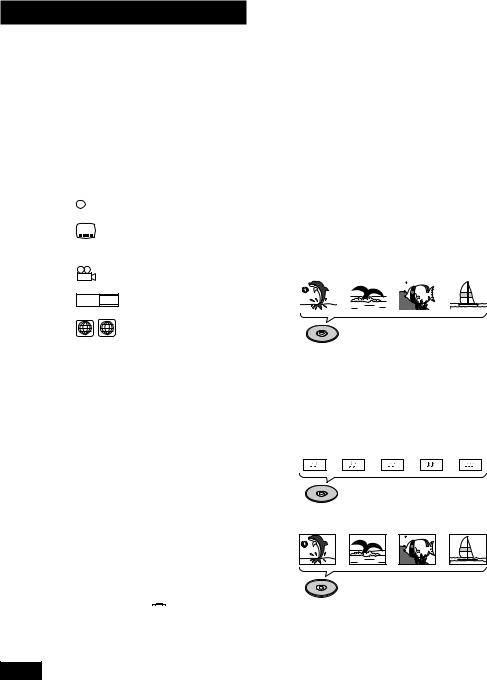
You may come across the following marks on disc boxes:
2  Number of audio languages
2Number of subtitle languages
3 |
Number of camera angles |
|
16 : 9 |
LB |
Aspect ratios available |
|
||
2 |
ALL |
Compatible regions* |
|
|
|
*Different regions of the world are assigned different region codes. Your player also has a region code and will only play discs from a compatible region. You can find the region code on the underside of the player.
Using this player with
DVD discs
Not all the functions of this player are available all the time with all discs. If you try and use a certain function and see either a  or a
or a 
 symbol appear onscreen, it means that either the player or the disc does not allow the use of that function at that time.
10
Navigating DVDs, CDs
and Video CDs
All discs are divided up into smaller, more manageable sections so that you can find specific content more easily.
DVD and DVD-RW discs are divided into one or more titles. Each title may be further divided into several chapters. Occassionally, a chapter may contain index points, effectively dividing the chapter up into several parts, too.
|
Title1 |
|
|
|
|
Title2 |
|
||||
|
|
|
|
|
|||||||
Chapter 1 |
|
Chapter 2 |
|
Chapter 1 |
|
Chapter 2 |
|||||
|
|
|
|
|
|
|
|
|
|
|
|
|
|
|
|
|
|
|
|
|
|
|
|
DVD/DVD-RW
CDs and Video CDs are divided into a number of tracks. In rare cases, a track may contain a number of index points, effectively dividing the track up into several parts.
Track 1 Track 2 Track 3 Track 4 Track 5
CD
Track 1 Track 2 Track 3 Track 4
Video CD
En
Preparation for use
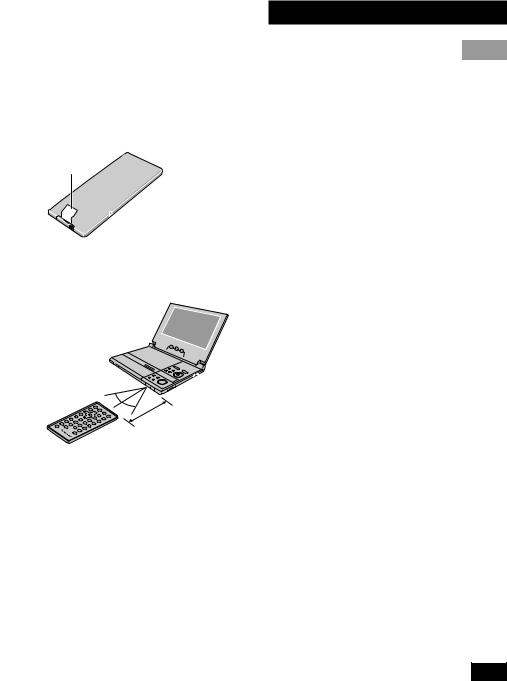
Before using for the first time, remove the battery protector from the remote control.
•Pull out the film from the back of the remote control unit.
Film
Use the remote control within the operating range shown below.
30°  30°
30° 
4m (13.2 ft)
01 Before You Start
English
11
En
01 Before You Start
Connecting up to your TV
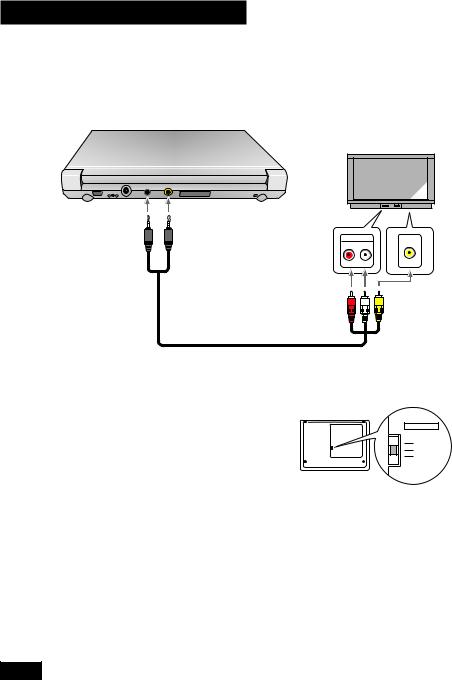
Use the supplied AV cable to connect this DVD player to your TV. This cable feeds both audio and video to your TV. Before connecting, make sure that both this player and your TV are switched off and disconnected from the wall outlet.
DC IN 9.8V |
AUDIO |
VIDEO |
– + |
IN/OUT |
IN/OUT |
Black |
Yellow |
Audio input |
Video input |
|
AUDIO IN |
VIDEO IN |
|||
ringed |
ringed |
|||
R L |
|
|||
plug |
plug |
|
|
|
Red/white |
Supplied AV cable |
plugs |
|
Yellow plug |
•Read the instructions that came with your TV if you’re unsure which inputs to use.
•Do not connect this player to your TV through a VCR. Some discs are copyprotected and will not play properly when played via a VCR or when recorded on a VCR.
•See pages 53 to 55 for how to connect this player up to an AV amplifier and other components.
Setting the TV system
(Except US and Canadian models)
This player is compatible with both PAL and NTSC TV systems. If your TV is compatible with both systems then set the
12
TV SYSTEM switch to AUTO, otherwise set it to the system your country or region uses.
TV SYSTEM
PAL / LCD
AUTO
NTSC
•When using the PDV-LC20 with the built-in screen, always set to PAL/LCD.
•You cannot play PAL DVDs when the TV SYSTEM switch is set to NTSC.
•You may need to adjust the vertical hold control on some PAL TVs when playing NTSC discs. Depending on the TV, you may also see black bars at the top and bottom of the screen.
En
02 Getting Started
Plugging in and switching on


 1
1
2
3 
|
|
|
|
4 1 ¡ ¢ |
|
|
|
8 |
7 |
3 |
5 |
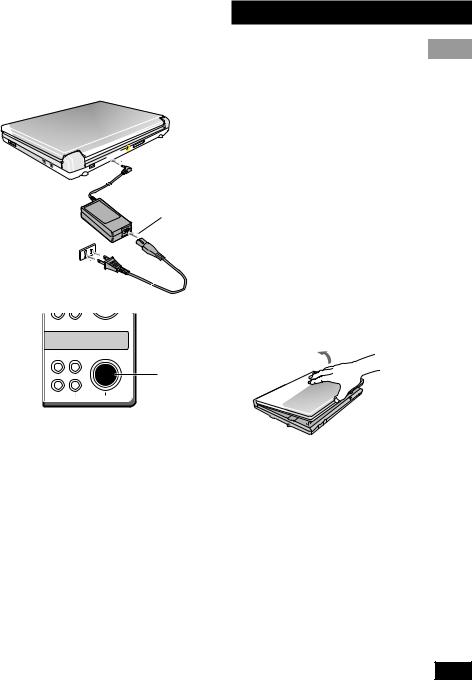
1Connect the power cord to the AC adapter.
2Plug the power connector into the DC IN jack on the rear of the player.
3Plug the other end of the power cord into a wall power outlet.
•The supplied AC adapter is compatible with 100~240V AC power so that it can be used almost anywhere in the world (although you may need a plug adapter).
4Open the LCD screen in the direction of the arrow (PDVLC20 only).
English
OFF |
ON |
Power-cord caution
Handle the power cord by the plug. Do not pull out the plug by tugging the cord and never touch the power cord when your hands are wet as this could cause a short circuit or electric shock. Do not place the unit, a piece of furniture, etc., on the power cord, or pinch the cord. Never make a knot in the cord or tie it with other cords. The power cords should be routed such that they are not likely to be stepped on. A damaged power cord can cause a fire or give you an electrical shock. Check the power cord once in a while. When you find it damaged, ask your nearest Pioneer authorized service center or your dealer for a replacement.
5Press and hold the 3(ON) button until the player switches on.
•With the power on the power indicator lights green.
•You can use the  button on the remote control to switch the player into standby. When in standby, the power indicator lights red.
13
En
02 Getting Started
Playing discs 


|
AUDIO |
SUBTITLE |
ANGLE |
|
DISPLAY |
|
|
MENU |
TOP MENU |
|
|
|
|
SETUP |
|
ENTER |
|
|
|
PREV |
|
|
NEXT |
RETURN |
4 |
|
|
¢ |
|
REV |
PLAY |
|
FWD |
CLEAR |
1 |
3 |
3 |
¡ C |
|
1 |
2 |
|
|
|
STEP/SLOW |
PAUSE |
STEP/SLOW |
STOP |
|
e |
8 |
6 |
E |
7 |
4 |
5 |
+10 |
||
RANDOM |
REPEAT |
|
|
PROGRAM |
7 |
8 |
9 |
A-B |
0 |
|
||||
LAST MEM. COND.MEM. |
|
SEARCH MODE |
||
SHIFT
Î
DVD/AV-IN
|
|
ENTER |
SETUP |
MENU |
|
|
|
5 |
RETURN TOP MENU |
2 3 |
|
|
|
|
4 1 ¡ ¢ |
|
|
8 |
7 |
3 |
|
OFF |
ON |
14
1Open the display (PDV-LC20 only).
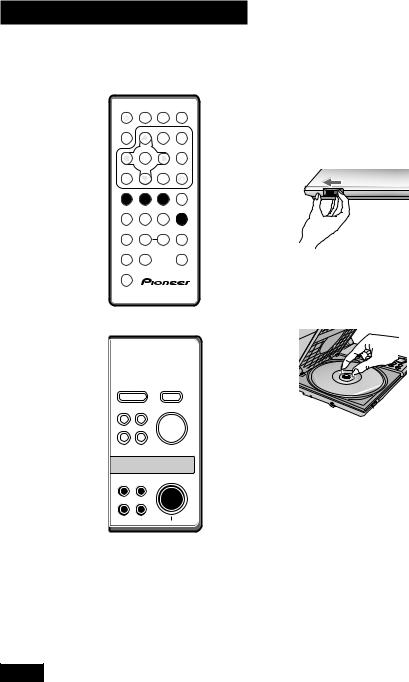
2Slide the DISC COVER 2OPEN catch to the left to open the disc cover.
DISC COVER
2 OPEN
Always use the DISC COVER 2OPEN slide catch; never force open the disc cover.
3Load a disc.
•The recorded side of the disc should be face-down in the player (for doublesided DVDs, the side you want to play should be face-down).
•Make sure that the disc clicks into place properly.
4Push the disc cover shut.
5Press 3to start playback.
•If a menu screen appears, see the following page for how to navigate it.
•Adjust the volume using the rotary volume control on the right side of the player.
En

6To pause playback, press 8.
•On a DVD, DVD-RW or Video CD, the picture should be paused.
•To restart playback, press 3or 8.
7To skip back/forward a chapter or track, press 4·1 or
¡·¢.
•On the remote, use the 4and ¢ buttons.
8To scan backwards/forwards, press and hold 4·1 or
¡·¢.
•On the remote, use the 1and ¡ buttons.
•Release the button to resume normal playback.
•If you scan for more than about 5 seconds, scanning continues even after you release the button. In this case, press 3to resume normal playback.
9To stop playback, press 7.
•If you start the disc playing again (3), playback starts from the point last stopped (see Resuming play below).
•To switch the player off, press and hold OFF (7) for about two seconds.
02 Getting Started
|
|
When you stop playback, the player |
English |
Resuming play |
|
remembers where on the disc you got to. As |
|
long as you leave the disc in the player, |
|
even if you switch the player off, the next |
|
time you press 3, playback resumes from |
|
that point. |
|
To start playback from the beginning of the |
|
disc again, press 7while the disc is |
|
stopped. |
|
•For resume to work with CDs and DVDRW discs, do not switch the player off using the front panel OFF (7) button. If you have a CD loaded and want to
switch off, use the  button on the remote to put the player into standby.
•Resume may not work reliably with some discs.
•When a DVD disc is loaded, pressing 4or ¢resumes playback from the start of the title that was playing when the disc was stopped last time.
•See also Bookmarking place on a disc on page 35.
15
En
02 Getting Started
Navigating disc menus
AUDIO |
SUBTITLE |
ANGLE |
DISPLAY |
MENU |
TOP MENU |
|
|
SETUP |
ENTER |
|
|
PREV |
NEXT |
RETURN |
4 ¢
¢ 

REV |
PLAY |
FWD CLEAR |
1¡ C
1 |
2 |
3 |
|
STEP/SLOW |
PAUSE |
STEP/SLOW STOP |
|
4 |
5 |
6 |
+10 |
RANDOM |
REPEAT |
|
PROGRAM |
7 |
8 |
9 |
0 |
LAST MEM. COND.MEM. |
|
SEARCH MODE |
|
SHIFT
Î
DVD/AV-IN
|
|
ENTER |
SETUP |
MENU |
|
|
|
5 |
RETURN TOP MENU |
2 3 |
|
|
|
|
4 1 ¡ ¢ |
|
|
8 |
7 |
3 |
|
OFF |
ON |
16
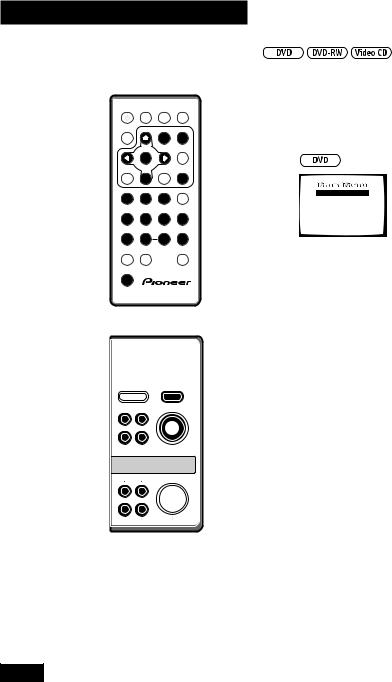
After you start playing a DVD, DVD-RW or Video CD, you may see a menu appear onscreen, from which you can choose what to watch.
1Start movie
2Scene selection
3Credits
4Extras
5Subtitles
6Languages
1 Use the cursor (25 3) buttons to highlight a menu option, then press ENTER to select it.
•If you’re using the remote control, you can also use the number buttons to select items from numbered menus (press and hold SHIFT while using the number buttons).
•To display this disc menu during playback, press MENU or TOP MENU.
En
02 Getting Started
(US and Canadian models only)
Original Play List
No. |
Title |
|
|
|
Page |
1/2 |
1 |
5/28 |
Sun |
21:19 |
12ch |
|
|
2 |
5/31 |
Wed |
08:34 |
8ch |
|
|
3 |
6/20 |
Tue |
17:43 |
6ch |
|
|
4 |
6/20 |
Tue |
22:00 |
6ch |
|
|
5 |
7/19 |
Wed |
10:54 |
3ch |
|
|
Move |
|
|
|
|
|
EXIT |
|
|
|
|
MENU |
||
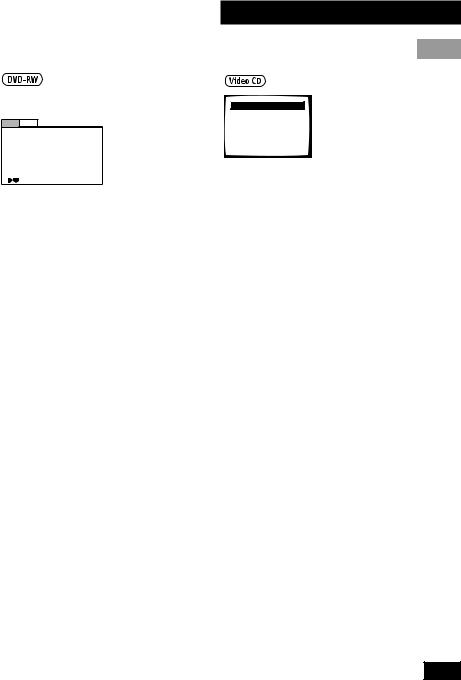
1Use the cursor (2and 3) buttons to toggle between Original and Play List.
The Original screen shows the contents of the disc as recorded. The Play List screen shows the contents in the order programmed by the person who recorded the disc (not all DVD-RW discs contain a Play List).
•You can’t switch between Original and Play List while a disc is playing.
2Use the cursor (5 and ) buttons to highlight a menu item in the list, then press ENTER to select it.
•Use the 4·1and ¡·¢ buttons to see the previous/next page (4and ¢on the remote).
•To preview the first frame of the highlighted menu item, press the cursor right (3) button.
•To display this disc menu during playback, press MENU.
English
1It's a Bust
2Caravan Lowdown
3Rue de Salle
4The Surgeon's Daughter
5Pigeon Post
1 Use the number buttons to select items from the list (press and hold SHIFT while using the number buttons).
•If there is more than one page of menu items, use the 4·1and ¡·¢buttons to select the page (4and ¢on the remote).
•To return to this menu during playback, press RETURN.
•To play a PBC Video CD without the menu system, stop playback then use one of the number buttons on the remote, or the 4·1and ¡·¢buttons to start playback.
17
En
02 Getting Started
Still-frame and frame review/advance 


AUDIO |
SUBTITLE |
ANGLE |
DISPLAY |
MENU |
TOP MENU |
|
|
SETUP |
ENTER |
|
|
PREV |
NEXT |
RETURN |
4 |
¢ |
|
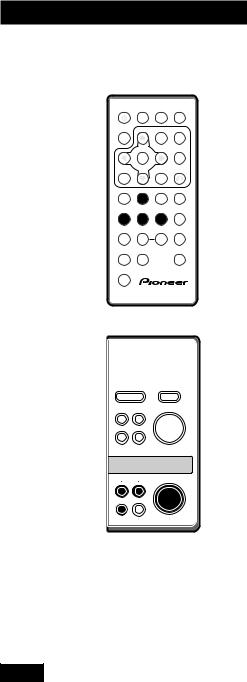
1During playback, press e, 8 or Eto pause the disc.
•You can change the way a DVD stillframe is displayed—see page 15.
2Use the eand Ebuttons to go to the previous/next frame.
REV |
PLAY |
FWD |
CLEAR |
1 |
3 |
¡ C |
|
1 |
2 |
3 |
|
STEP/SLOW |
PAUSE |
STEP/SLOW STOP |
|
e |
8 |
E |
7 |
4 |
5 |
6 |
+10 |
RANDOM |
REPEAT |
|
PROGRAM |
7 |
8 |
A-B |
0 |
9 |
|||
LAST MEM. COND.MEM. |
|
SEARCH MODE |
|
SHIFT
Î
On the top panel, use the 4·1and ¡·¢buttons.
•You can't use frame review (e) with Video CDs.
•Due to the way in which DVD video is encoded, frame review steps are larger than frame advance steps.
3To restart normal playback, press 3.
DVD/AV-IN
|
|
ENTER |
SETUP |
MENU |
|
|
|
5 |
RETURN TOP MENU |
2 3 |
|
|
|
|
4 1 ¡ ¢ |
|
|
8 |
7 |
3 |
|
OFF |
ON |
18
En
02 Getting Started
Playing slow-motion video 


AUDIO SUBTITLE ANGLE
DISPLAY |
MENU TOP MENU |
Slow forward play
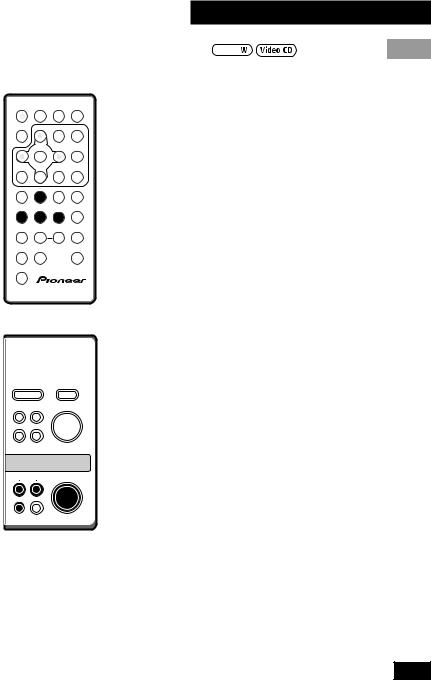
1During playback or while paused, press and hold Efor about 2 seconds.
English
SETUP
ENTER
PREV |
NEXT RETURN |
4 ¢
¢ 

REV |
PLAY |
FWD |
CLEAR |
1 |
3 |
¡ C |
|
1 |
2 |
3 |
|
STEP/SLOW |
PAUSE |
STEP/SLOW STOP |
|
e |
8 |
E |
7 |
4 |
5 |
6 |
+10 |
RANDOM |
REPEAT |
|
PROGRAM |
7 |
8 |
A-B |
0 |
9 |
|||
LAST MEM. COND.MEM. |
|
SEARCH MODE |
|
SHIFT
Î
DVD/AV-IN
|
|
ENTER |
SETUP |
MENU |
|
|
|
5 |
RETURN TOP MENU |
2 3 |
|
|
|
|
4 1 ¡ ¢ |
|
|
8 |
7 |
3 |
On the top panel, press 8, then press and hold ¡·¢for about 2 seconds.
Slow-motion playback starts at 1/2 speed.
•There's no sound during slow-motion play.
2Use eand Eto change the play speed.
On the top panel, use the 4·1and ¡·¢buttons.
•There are four slow play speeds: 1/2, 1/4, 1/8 and 1/16.
3To restart normal playback, press 3.
Slow reverse play
You can only use slow reverse play with DVD and DVD-RW discs.
1During playback or while paused, press and hold efor about 2 seconds.
OFF |
ON |
On the top panel, press 8, then press and hold 4·1for about 2 seconds.
Reverse slow-motion playback starts.
•There's no sound during slow-motion play.
2To restart normal playback, press 3.
19
En
02 Getting Started
Taking out the disc, switching off and unplugging
AUDIO |
SUBTITLE |
ANGLE |
DISPLAY |
MENU |
TOP MENU |
|
|
SETUP |
ENTER |
|
|
PREV |
NEXT |
RETURN |
4 ¢
¢ 

REV |
PLAY |
FWD |
CLEAR |
1 |
3 |
¡ C |
|
1 |
2 |
3 |
|
STEP/SLOW |
PAUSE |
STEP/SLOW STOP |
|
e |
8 |
E |
7 |
4 |
5 |
6 |
+10 |
RANDOM |
REPEAT |
|
PROGRAM |
7 |
8 |
A-B |
0 |
9 |
|||
LAST MEM. COND.MEM. |
|
SEARCH MODE |
|
SHIFT
Î
DVD/AV-IN
|
|
ENTER |
SETUP |
MENU |
|
|
|
5 |
RETURN TOP MENU |
2 3 |
|
|
|
|
4 1 ¡ ¢ |
|
|
8 |
7 |
3 |
|
OFF |
ON |
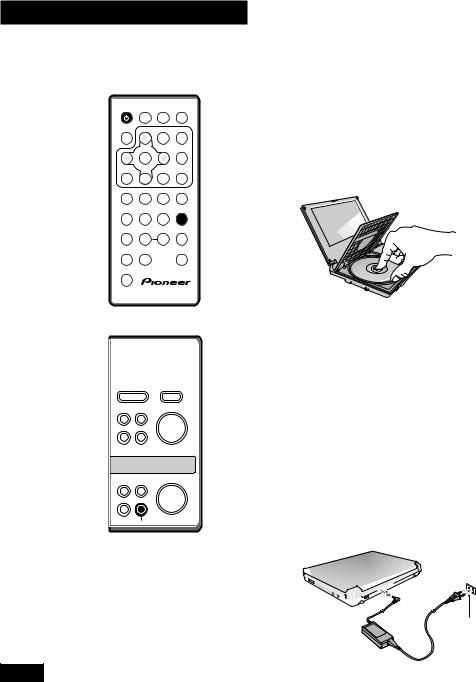
1If the disc is playing, press 7 to stop it.
2Slide the DISC COVER 2OPEN catch to the left to open the disc cover.
3Take out the disc.
4Close the disc cover.
5Press and hold OFF (7) for about two seconds.
The power indicator goes off.
•Press  on the remote to put the player into standby. The power indicator turns from green to red. Press
  again to switch back on.
6Unplug from the wall outlet.
7Unplug the power cord from the DC IN jack.


 7
7
6
20
En
Using the Setup Navigator
AUDIO SUBTITLE ANGLE
DISPLAY MENU TOP MENU
SETUP
ENTER
PREV |
NEXT RETURN |
4 ¢
¢ 

REV |
PLAY |
FWD |
CLEAR |
1 |
3 |
¡ C |
|
1 |
2 |
3 |
|
STEP/SLOW |
PAUSE |
STEP/SLOW STOP |
|
e |
8 |
E |
7 |
4 |
5 |
6 |
+10 |
RANDOM |
REPEAT |
|
PROGRAM |
7 |
8 |
A-B |
0 |
9 |
|||
LAST MEM. COND.MEM. |
|
SEARCH MODE |
|
SHIFT
Î
02 Getting Started
|
|
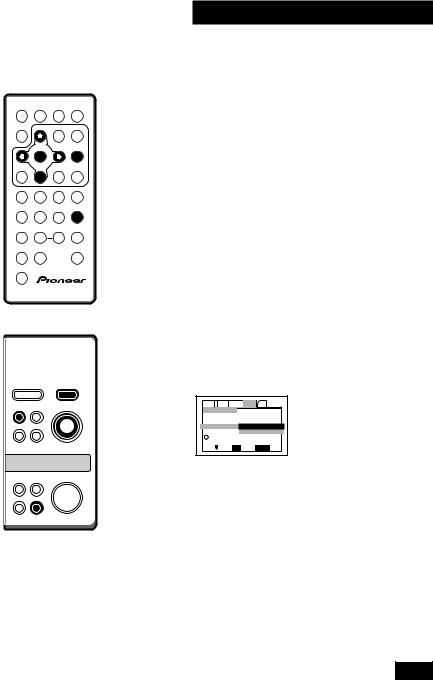
we recommend using the Setup Navigator. |
English |
Before playing any discs with the PDV-20, |
|
This makes all the basic DVD system |
|
settings for you. |
|
The Setup Navigator is also available on |
|
the PDV-LC20. Use it if you have connected |
|
an AV amplifier and/or TV to your player. |
|
1Make sure that the player is switched on.
•If you’re using the PDV-20, also turn on your TV and make sure that it is set to the correct video input.
•If a disc that’s already loaded starts to play, press 7to stop it.
2Press SETUP.
The Setup Navigator on-screen display (OSD) appears:
DVD/AV-IN
|
|
|
ENTER |
|
|
|
|
|
|
|
|
|
Audio1 2 Video Language General Other |
|
|||
SETUP |
MENU |
|
|
Setup Navigator |
|
|
|
|
|
|
|
|
|
|
|
||
|
|
|
5 |
|
|
|
|
|
RETURN TOP MENU |
2 |
3 |
Setup Navigator |
Start |
|
|
||
|
|
|
|
|
|
Auto Start Off |
|
|
|
|
|
i Setup using the Setup Navigator |
|
||||
|
|
|
|
Move |
ENTER |
Select |
SETUP |
Exit |
Navigate all of the following OSDs using
4 1 ¡
1 ¡ ¢
¢
8 7 3
these controls:
5, – Cursor up/down
OFF |
ON |
ENTER – Select the highlighted menu option
2– Go back to the previous question
The control possibilities for the current OSD are shown at the bottom of each screen.
21
En
02 Getting Started
3 |
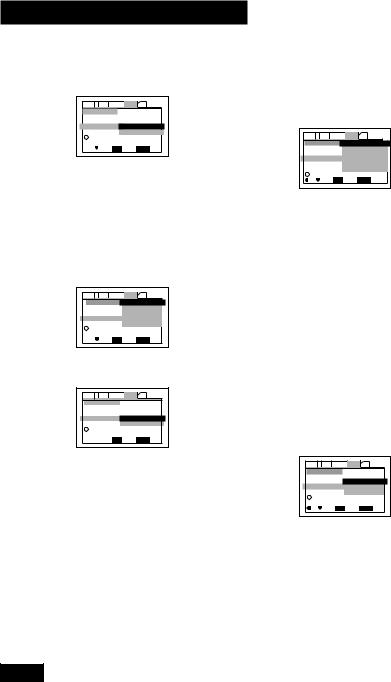
Select Start. |
|
Audio1 2 Video Language General Other |
|
Setup Navigator |
|
Setup Navigator Start |
|
Auto Start Off |
|
i Setup using the Setup Navigator |
|
Move ENTER Select SETUP Exit |
|
Remember: Press ENTER to select an |
|
option. |
|
• If you decide you don’t want to use the |
|
Setup Navigator, select Auto Start |
|
Off here instead. |
4Choose an OSD menu language.
Audio1 2 Video Language General Other |
|
||||
|
Setup Navigator |
English |
|
|
|
|
|
|
franç ais |
|
|
|
Language |
|
Deutsch |
|
|
|
OSD Language |
Italiano |
|
|
|
|
|
|
Españ ol |
|
|
i |
Select the On Screen Language |
|
|||
|
Move |
ENTER |
Select |
SETUP |
Exit |
5Select the type of TV you have.
Audio1 2 Video Language General Other
Setup Navigator |
|
TV Connection |
|
TV Type |
Widescreen (16:9) |
|
Standard (4:3) |
iWidescreen TV 16:9 aspect ratio

 Move ENTER Select SETUP Exit
If you’re using the built-in screen of the PDV-LC20, set this to Widescreen (16:9).
•See Aspect ratio in the Glossary on page 66 if you’re unsure of the difference between widescreen and standard TVs.
6 Select the digital audio formats |
|
the connected AV amplifier is |
|
compatible with. |
|
Audio1 2 Video Language General Other |
|
Setup Navigator |
Dolby Digital |
|
Dolby Digital/DTS |
Amp Connection |
Dolby Digital/MPEG |
Digital Jack |
Dolby D/DTS/MPEG |
|
PCM |
|
Not Connected |
i Compatible with Dolby Digital |
|
Move ENTER Select SETUP Exit |
|
• All options (except Not Con- |
|
nected) assume PCM compatibility. |
|
The PCM options means only |
|
compatible with PCM. |
|
• More information on these audio |
|
formats is available in the Glossary |
|
starting on page 66. |
|
• Consult the manual that came with |
|
your AV amplifier if you’re unsure about |
|
compatibility with any of the formats |
|
mentioned. |
|
7 Confirm whether your AV |
amplifier is compatible with |
96kHz audio. |
Audio1 2 Video Language General Other |
Setup Navigator |
Amp Connection No |
96 kHz PCM Audio Yes |
Don't Know |
i Digital jack not compatible with 96 kHz |
Move ENTER Select SETUP Exit |
• You won’t see this screen if you selected |
Not Connected in step 6. |
• Selecting Don’t Know has the same |
effect as selecting No. Any 96kHz |
audio will be downsampled to a more |
compatible 48kHz at the digital output. |
22
En

8Select Save Changes to make the settings.
Audio1 2 Video Language General Other |
|
||||
|
Setup Navigator |
|
|
|
|
|
|
|
Save Changes |
|
|
|
Exit Setup Navigator |
Delete Changes |
|
||
|
|
|
Start Again |
|
|
i |
Changes are saved |
|
|
|
|
|
Move |
ENTER |
Select |
SETUP |
Exit |
9Press SETUP to exit.
Congratulations, set up is complete!
If you want to use the Setup Navigator again at any time, it is available from the General menu. Also, each individual setting can be changed using the appropriate menu option—chapter 04 explains all menu options in detail.
02 Getting Started
English
23
En
 Loading...