

PIONEER DEH-S5000BT User Manual
CD RDS RECEIVER
AUTORADIO CD RDS
SINTOLETTORE CD RDS
REPRODUCTOR DE CD CON RECEPTOR RDS
CD RDS-EMPFÄNGER
CD RDS-ONTVANGER
DEH-S5000BT
English Français Italiano Español Deutsch Nederlands
Owner’s Manual
Mode d’emploi
Manuale d’istruzioni
Manual de instrucciones
Bedienungsanleitung
Handleiding

English
About this manual:
Table of Contents
Before You Start....................................................................................... 5
Getting Started........................................................................................ 6
Radio....................................................................................................... 10
CD/USB/iPhone/AUX............................................................................ 12
Bluetooth............................................................................................... 14
App Mode .............................................................................................. 19
Spotify® .................................................................................................. 20
Using Pioneer ARC APP....................................................................... 22
Using the Karaoke Function............................................................... 24
Audio Adjustments .............................................................................. 25
Settings .................................................................................................. 26
FUNCTION settings ............................................................................... 27
AUDIO settings ...................................................................................... 29
SYSTEM settings.................................................................................... 31
ILLUMINATION settings........................................................................ 34
MIXTRAX settings.................................................................................. 35
MICROPHONE settings......................................................................... 36
Connections/Installation .................................................................... 37
Additional Information ....................................................................... 42
• In the following instructions, a USB memory or USB audio player are referred to as
“USB device”.
• When an iPhone is connected to the unit, the source name on the unit appears as
[iPod]. Pl ease note that this unit supp orts only iPhones (iPhone 5 or later) regardless of
the source name (for details, refer to page 47).
- 2 -

English
Declaration of Conformity with regard to the Radio Equipment Directive 2014/53/EU
Manufacturer:
Pioneer Corporation
28-8, Honkomagome 2-chome, Bunkyo-ku,
Tokyo 113-0021, Japan
EU Representative’s & Importer:
Pioneer Europe NV
Haven 1087, Keetberglaan 1, 9120 Melsele,Belgium
http://www.pioneer-car.eu
[*] DEH-S5000BT
English:
Hereby, Pioneer declares that the radio equipment type
[*] is in compliance with Directive 2014/53/EU.
The full text of the EU declaration of conformity is
available at the following internet address: http://
www.pioneer-car.eu/compliance
Suomi:
Pioneer vakuuttaa, että radiolaitetyyppi [*] on direktiivin
2014/53/EU muk ainen.
EU-vaatimustenmukaisuusvakuutuksen täysimittainen
teksti on saatavilla seuraavassa internetosoitteessa:
http://www.pioneer-car.eu/compliance
Nederlands:
Hierbij verklaar ik, Pioneer, dat het type radioapparatuur
[*] conform is met Richtlijn 2014/53/EU.
De volledige tekst van de EU-conformiteitsverklaring
kan worden geraadpleegd op het volgende
internetadres: http://www.pioneer-car.eu/compliance
França is:
Le soussigné, Pioneer, déclare que l’équipement
radioélectri que du type [*] est conforme à l a directive
2014/53/UE.
Le texte complet de la déclaration UE de conformité est
disponible à l’adresse internet sui vante: http://
www.pioneer-car.eu/compliance
Svenska:
Härmed försäkrar Pioneer att denna typ av
radioutrustning [*] överensstämmer med direktiv 2014/
53/EU.
Den fullständiga texten till EU-försäkran om
överensstämmelse finns på följande webbadress: http://
www.pioneer-car.eu/compliance
Dansk:
Hermed erklærer Pioneer, at radioudstyrstypen [*] er i
overensstemmelse med direktiv 2014/53/EU.
EU-overensstemmelseserklæringens fulde tekst kan
findes på følgende internetadresse: http://
www.pioneer-car.eu/compliance
Deutsch:
Hiermit erklärt Pioneer, dass der Funkanlagentyp [*] der
Richtlinie 2014/53/ EU entspricht.
Der vollständige Text der EU-Konformitätserklärung ist
unter der folgenden Internetadresse verfügbar: http://
www.pioneer-car.eu/compliance
Ελληνικά:
Με την παρούσα ο/η Pioneer, δηλώνει ότι ο
ραδιοεξοπλισμός [*] πληροί την οδηγία 2014/53/ΕΕ.
Το πλήρες κείμενο της δήλωσης συμμόρφωσης ΕΕ
διατίθεται στην ακόλουθη ιστοσελίδα στο διαδίκτυο:
http://www.pioneer-car.eu/compliance
Italiano:
Il fabbricante, Pioneer, dichiara che il tipo di
apparecchiatura radio [*] è conforme alla direttiva 2014/
53/UE.
Il testo comple to della dichiarazione di confor mità UE è
disponibil e al seguente indirizzo Internet: http://
www.pioneer-car.eu/compliance
Español:
Por la presente, Pioneer declara que el tipo de equipo
radioeléctrico [*] es conforme con la Directiva 2014/53/
UE.
El texto completo de la declaración UE de conformidad
está disponible en la dirección Internet siguiente: http://
www.pioneer-car.eu/compliance
Português:
O(a) abaixo assinado(a) Pioneer declara que o presente
tipo de equipamento de rádio [*] está em conformidade
com a Diretiva 2014/5 3/UE.
O texto integral da declaração de conformidade está
disponível no seguinte endereço de Internet: http://
www.pioneer-car.eu/compliance
Čeština:
Tímto Pioneer prohlašuje, že typ rádiového zařízení [*] je
v souladu se smě rnicí 2014/53/EU.
Úplné znění EU prohlášení o shodě je k dispozici na této
internetové adrese: http://www.pioneer-car.eu/
compliance
Eesti:
Käesolevaga deklareerib Pioneer, et käesolev
raadioseadme tüüp [*] vastab direktiivi 2014/53/EL
nõuetele.
ELi vastavusdeklaratsiooni täielik tekst on kättesaadav
järgmisel internetiaadressil: http://www.pioneer-car.eu/
compliance
Magyar:
Pioneer igazolja, hogy a [*] típusú rádióberendezés
megfelel a 2014/53/EU irá nyelvnek.
Az EU-megfelelőségi nyilatkozat teljes szövege elérhető
a következő internetes címen: http://www.pioneercar.eu/compliance
Latviešu valoda:
Ar šo Pioneer deklarē, ka radioiekārta [*] atbilst
Direktīvai 2014/53 /ES.
Pilns ES atbilstības deklarācijas teksts ir pieejams šādā
interneta vietnē: http://www.pioneer-car.eu/compliance
Lietuvių kalba:
Aš, Pioneer, patvirtinu, kad radijo įrenginių tipas [*]
atitinka Direkt yvą 2014/53/ES.
Visas ES atitikties deklaracijos tekstas prieinamas šiuo
interneto adresu: http://www.pioneer-car.eu/
compliance
- 3 -

English
Malti:
B’dan, Pioneer, niddikjara li dan it-tip ta’ tagħmir tarradju [*] huwa konfor mi mad-Direttiva 2014/53/UE.
It-test kollu tad-dikjarazzjoni ta’ konformità tal-UE huwa
disponibbli f’dan l-indirizz tal-Internet li ġej: http://
www.pioneer-car.eu/compliance
Slovenčina:
Pioneer týmto vyhlasuje, že rádiové zariadenie typu [*]
je v súlade so smernico u 2014/53/EÚ.
Úplné EÚ vyhlásenie o zhode je k dispozícii na tejto
internetovej adrese: http://www.pioneer-car.eu/
compliance
Slovenščina:
Pioneer potrjuje, da je tip radijske oprem e [*] skladen z
Direktivo 2014/53/ EU.
Celotno besedilo izjave EU o skladnosti je na voljo na
naslednjem spletnem naslovu: http://www.pioneercar.eu/compliance
Română:
Prin prezenta, Pioneer declară că tipul de echipamente
radio [*] este în conformitate cu Directiva 2014/53/UE.
Textul integral al declarației UE de conformitate este
disponibil la următoarea adresă internet: http://
www.pioneer-car.eu/compliance
български:
С настоящото Pioneer декларира, че този тип
радиосъоръжение [*] е в съответствие с Директива
2014/53/ЕС.
Цялостният текст на ЕС декларацията за
съответствие може да се намери на следния
интернет адрес: http://www.pioneer-car.eu/
compliance
Polski :
Pioneer niniejszym oświadcza, że typ urządzenia
radiowego [*] jest zgodny z dyrektywą 2014/53/UE.
Pełny tekst deklaracji zgodności UE jest do stępny pod
następującym adresem internetowym: http://
www.pioneer-car.eu/compliance
Norsk:
Herved Pioneer erklærer at radioutstyr type [*] er i
samsvar med direktiv 20 14/53/EU.
Den fullstendige teksten i EU-samsvarserklæringen er
tilgjengelig på følgende internettadresse: http://
www.pioneer-car.eu/compliance
Íslenska:
Hér með Pioneer lýsir yfir að tegund þráðlausan búnað
[*] er í samræmi vi ð tilskipun 2014/53/ESB.
The full ur texti af ES B-samræmis yfirlýsing u er í boði á
eftirfarandi veffangi: http://www.pioneer-car.eu/
compliance
Hrvatski:
Pioneer ovime izjavljuje da je radijsk a oprema tipa [*] u
skladu s Direktivom 2014/53/EU.
Cjeloviti tekst EU izjave o sukladnosti dostupan je na
sljedećoj internetskoj adresi: http:// www.pioneercar.eu/compliance
Türk:
Burada. Pioneer ra dyo ekipmani turunun [*] 2014/53/EU
direktiflerine uyumlu oldugunu beyan eder.
Avrupa uyumluluk beyaninin tam metni belirtilen
internet sitesinde mevcuttur: http://www.pioneercar.eu/compliance
- 4 -
English
WAR NING
CAUTION
Before You Start
Thank you for purchasing this PIONEER product
To ensure proper use, please read through this manu al before using this product. It i s especially
important that you read and observe WAR NI NG s and CAUTIONs in this manual. Please keep the
manual in a safe and accessible place for future reference.
If you want to disp ose this product, do not mi x it with general househo ld waste. There is a separate
collection system for used electronic products in accordance with legislation that requires proper
treatment, recovery and recycling.
Private households in the member states of the EU, in Switzerland and Norway may return their used
electronic prod ucts free of charge to designated col lection facilities or to a retai ler (if you purchase a
similar new one).
For countries not mentioned above, please contact your local authorities for the correct method of
disposal.
By doing so you wil l ensure that your di sposed product undergoes the nec essary treatment, recover y
and recycling and thus prevent potential negative effects on the environment and human health.
• Do not attempt to install or service this product by yourself. Installation or servicing of this
product by persons with out training and experience in electro nic equipment and automotive
accessories may be dangerous and could expose you to the risk of electric shock, injury or other
hazards.
• Do not attempt to operate the unit while driving. Make sure to pull off the road and park your vehicle
in a safe location before attempting to use the controls on the device.
• Do not allow this unit to come into contact with moisture and/or liquids. Electrical shock could result.
Also, damage to this unit, smoke, and overheating could result from contact with liquids.
• Always keep the volume low enough to hear outside sounds.
• The Pioneer CarStereo -Pass is for use only in Germany.
• This product is evaluated in moderate and tropical climate condition under the Audio, video and
similar electronic apparatus - Safety requirements, IEC 60065.
CAUTION
This product is a class 1 laser product classified under the Safety of laser products, IEC 60825-1:2007.
- 5 -- 5 -

English
If you experience problems
Detach button
Display window
M.C. (multi-control) dial
BAND/
DISP (display)
SRC (source)/OFF
USB port
(eject)
AUX input jack (3.5 mm stereo jack)
Disc loading slot
Should this unit fail to work properly, please contact your dealer or nearest authorized PIONEER Service
Station.
Getting Started
Basic operation
DEH-S5000BT
Frequently used operations
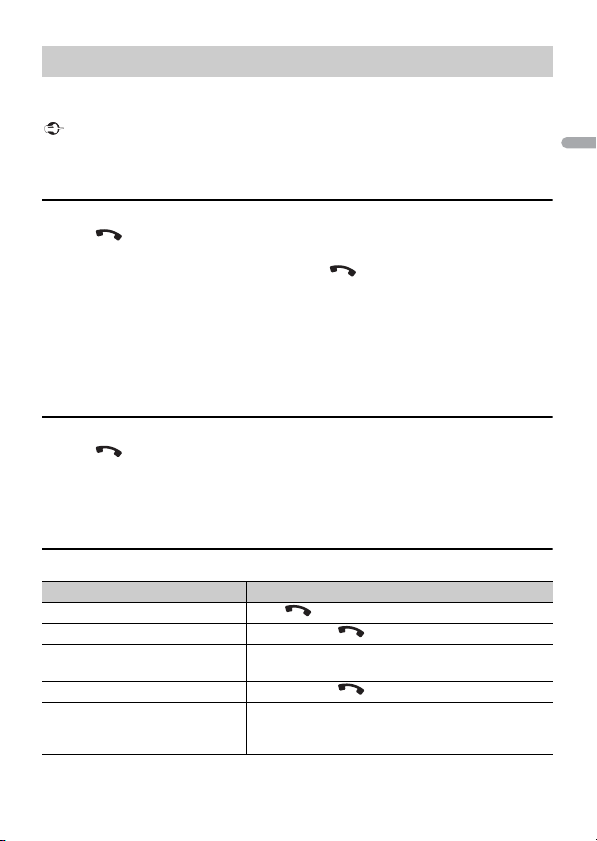
Purpose Operation
Turn on the power* Press SRC/OFF to turn on the power.
Adjust the volume Turn the M.C. dial.
Select a source Press SRC/OFF repeatedly.
Change the display information Press DISP repeatedly.
Return to the previous display/list Press BAND/.
Return to the normal display from the menu Press and hold BAND/.
Change the display brightness Press and hold BAND/.
Press and hold SRC/OFF to turn off the
power.
- 6 -
English
Important
Purpose Operation
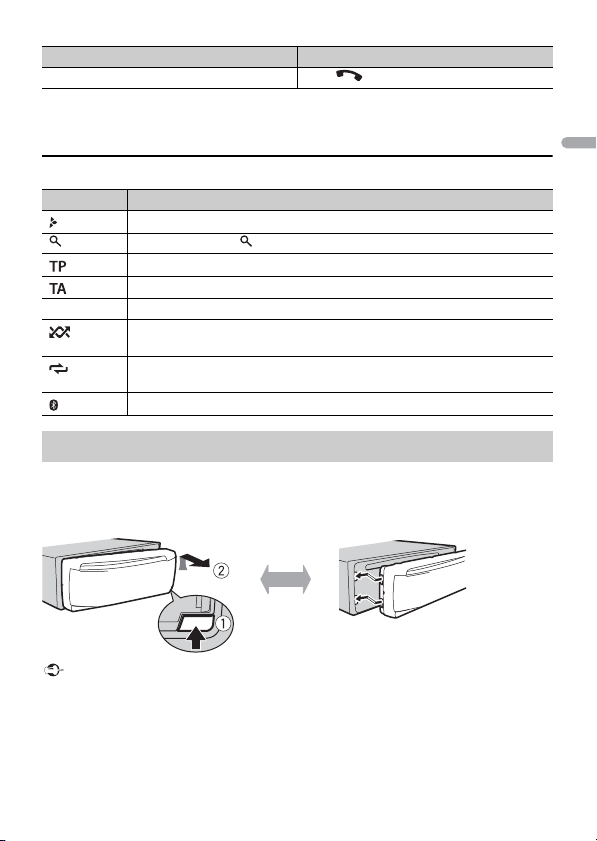
Detach Attach
Answering/ending a call Press .
* When this unit ’s blue/white lead is connected to th e vehicle’s auto-antenna re lay control terminal,
the vehicle’s antenn a extends when this unit’s source is turned on. To retract the antenna , turn the
source off.
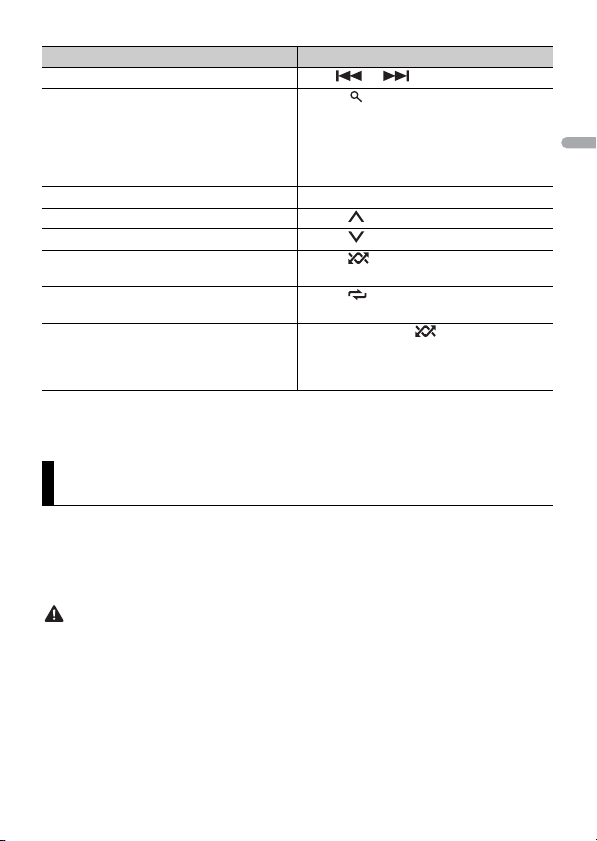
Display indication
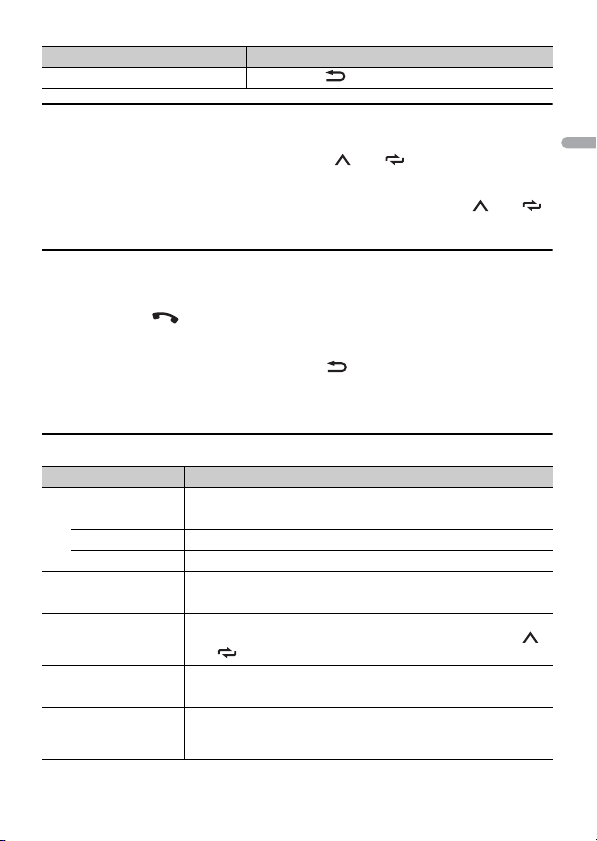
Indication Description
Appears when a lower tier of the menu or folder exists.
Appears when the button is pressed.
Appears when a traffic program is received.
Appears when the TA (traffic announcements) function is set (page 27).
BASS Appears when [HI]/[LOW] is selected in [D.BASS] (page 30).
Appears when random/shuffle play is set (except when BT AUDIO is
selected as the source).
Appears when repeat play is set (except when BT AUDIO is selected as the
source).
Appears when a Bluetooth connection is made (page 14).
Detaching the front panel
Detach the front panel to prevent thef t. Remove any cables and devices attached to the
front panel and turn off the unit before detaching it.
• Avoid subjecting the front panel to excessive shock.
• Keep the front pa nel out of direct sunlight a nd high temperatures.
• Always store the detached front panel in a protective case or bag.
- 7 -- 7 -
English
WAR NIN G
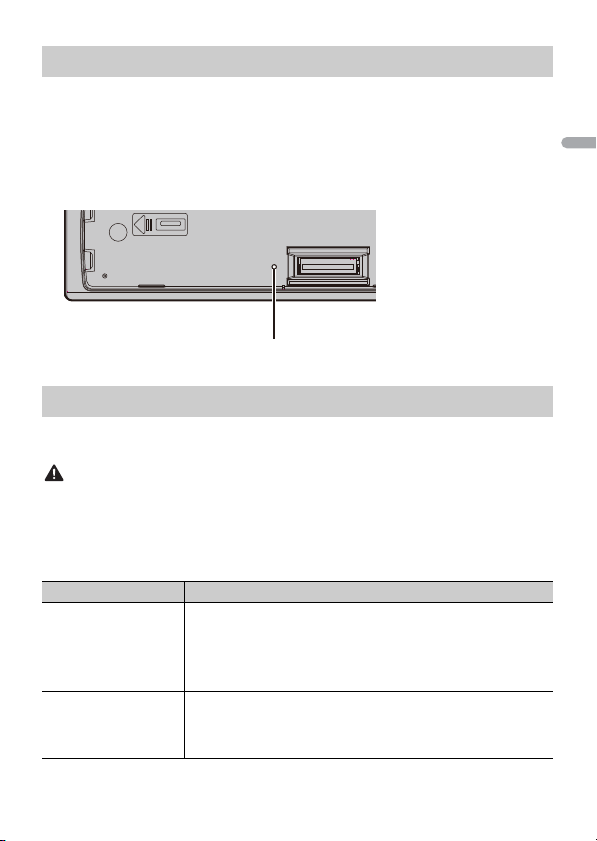
Resetting the microprocessor
RESET button
The microprocessor must be reset in the following situations:
– Before using this unit for the first time after installation
– If the unit fails to operate properly
– When strange or incorrect messages appear on the display
1 Remove the front panel (page 7).
2 Press the RESET button with a pointed instrument longer than 8 mm.
Setup menu
When you turn the ignition switch to ON af ter installation, the setup menu appears in
the display.
Do not use the unit in standard mode when a speaker system for network mode is connected to the
unit. Do not use the unit in network mode when a speaker system for standard mode is connected to
the unit. Thi s may cause damage to the speakers.
1 Tu rn the M.C. dial to select the options, then press to confirm.
To proceed to the next menu option, you need to confirm your selection.
Menu Item Description
LANGUAGE Select the language to display the text information from a
[ENG](English),
[РУС](Russian),
[TUR](Turkish),
[FRA](French)
CLOCK SET Set the clock.
compressed audio file.
1 Turn t he M.C. dial to adjust th e hour, then press to confirm.
The indicator moves to the minute setting automatically.
2 Turn t he M.C. dial to adjust the minute, then press to confirm.
- 8 -

English
NOTE
Menu Item Description
FM STEP Select the FM tuning step from 100 kHz or 50 kHz.
[100], [50]
SPEAKER MODE Switch between two operation modes: the 2-way network mo de
[STANDARD],
[NETWORK]
(NETWORK) and the standard mode (STANDARD) according to
the connections you have established. For details on operation
modes, see page 25.
After selecting the appropriate mode, turn the M.C. dial to
select [YES], then press to confirm.
• You cannot complete the setup menu without setting the
[SPEAKER MODE].
• Once the speaker mode is set, this setting cannot be changed
unless the default settings of this product are restored. Restore
the default settings to change the speaker mode setting (refer
to SYSTEM RESET on page 10).
• When [NETWORK] is selected, the beep tone function is not
availa ble.
2 [QUIT :YES] appears when all the settings have been made.
To return to the first item of the setup menu, turn the M.C. dial to select [QUIT :NO],
then press to confirm.
3 Press the M.C. dial to confirm the settings.
These settings other than [SPEAKER MODE] can be made at any time from the SYSTEM settings
(page 31) and INITIAL settings (pa ge 9).
Canceling the demonstration display (DEMO OFF)
1 Press the M.C. dial to display the main menu.
2 Tu rn the M.C. dial to select [SYSTEM], then press to confirm.
3 Tu rn the M.C. dial to select [DEMO OFF], then press to confirm.
4 Tu rn the M.C. dial to select [YES], then press to confirm.
INITIAL settings
1 Press and hold SRC/OFF until the unit turns off.
2 Press and hold SRC/OFF to display the main menu.
- 9 -- 9 -
English
3 Tu rn the M.C. dial to select [INITIAL], then press to confirm.
NOTE
TIP
4 Tu rn the M.C. dial to select an option, then press to confirm.
Menu Item Description
FM STEP Select the FM tuning step from 100 kHz or 50 kHz.
[100], [50]
REAR-SP Select when there is a full-range speaker connected to the rear
[FUL]
[SW] Select when there is a subwoofer connected directly to the rear
SYSTEM UPDATE Select [SYSTEM INFO] to confirm the latest system information
[SYSTEM INFO], [S/
W UPDATE]
SYSTEM RESET Select [YES] to initialize the unit settings. The unit will be
[YES], [NO]
speaker output leads.
speaker output leads without any auxiliary amplifier.
on the unit.
Select [S/W UPDATE] to update the unit to the latest software
and initialize the unit settings. For details on the latest software
and updating, visit our website.
restarted automatically.
Radio
The tuner frequencies on this unit are allocated for use in Western Europe, Asia, the
Middle East, Africa and Oceania. Use in other areas may result in poor reception. The RDS
(radio data system) function only works in areas that broadcast RDS signals for FM
stations.
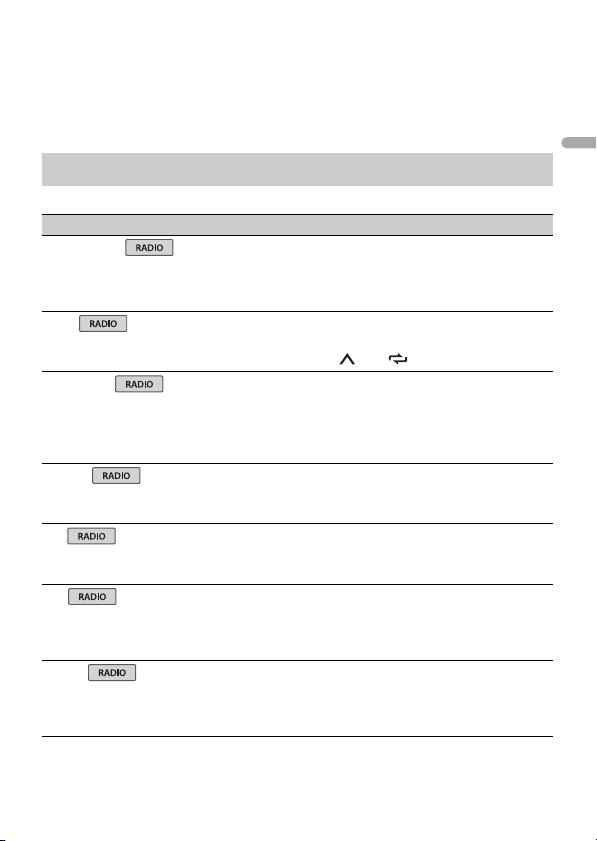
Receiving preset stations
1 Pre ss SRC/OFF to select [RADIO].
2 Pre ss BAND/ to select the band from [FM1], [FM2], [FM3], [MW] or [LW].
3 Press a number button (1/ to 6/).
You can select a preset channel by pressing and turning the M.C. dial.
The / buttons can be also used to select a preset station when [SEEK] is set to [PCH] in the
FUNCTION settings (page28).
- 10 -
English
NOTE
NOTE
NOTES
Best stations memory (BSM)
The six strongest stations are stored on the number buttons (1/ to 6/).
1 After selecting the band, press the M.C. dial to display the main menu.
2 Tu rn the M.C. dial to select [FUNCTION], then press to confirm.
3 Tu rn the M.C. dial to select [BSM], then press to confirm.
To seek a station manually
1
After selecting the band, press / to select a station.
Press and hold / then release to seek an available station. Scanning stops
when the unit receives a station. To cancel seek tuning, press / .
[SEEK] needs to be set to [MAN] in the FUNCTION settings (page 28).
To store stations manually
1
While receiving the station you want to store, press and hold one of the number
buttons (1/ to 6/ ) until it stops flashing.
You can select a preset channel by pressing and turning the M.C. dial. After selecting a channel,
press and hold the M.C. dial to store a station.
Using PTY functions
The unit searches for a station by PTY (program type) information.
1 Press and hold during FM reception.
2 Tu rn the M.C. dial to select a program type from [NEWS/INFO], [POPULAR],
[CLASSICS] or [OTHERS].
3 Press the M.C. dial.
The unit begins to search for a station. When it is found, its program service name is
displayed.
• To cancel the search, press the M.C. dial.
• The program of some stations ma y differ from that in dicated by the trans mitted PTY.
• If no station is broadcasting the type of program you searched for, [NOT FOUND] is displayed for
about two seco nds and then the tuner returns to th e original station.
- 11 -- 11 -
English
NOTE
CAUTION
NOTE
CD/USB/iPhone/AUX
Playing back
Disconnect headphones from the device before connecting it to the unit.
CD
1
Insert a disc into the disc loading slot with the label side up.
To eject a disc, stop playback first then press .
USB devices (including Android™)/iPhone
1
Open the USB port cover.
2 Plug in the USB device/iPhone using an appropriate cable.
To automatically switch to [USB] source when a USB device/ iPhone is connected to the uni t, set [USB
AUTO] to [ON] in the SYSTEM settings (page 32).
Use an optional Pioneer USB cable (CD-U50E) to connect the USB device as any device connected
directly to the unit will protrude out from the unit, which could be dangerous.
Before removing the device, stop playback.
AOA connections
For details on AOA connection, see page 23.
MTP connection
A device installed with Android OS 4.0 or later can be connected to the unit via MTP, using the cable
supplied with the device. However, depending on the connected device and the numbers of the files in
the device, audi o files/songs may not be able to be played back via MTP. Note that MTP con nection is
not compatible with WAV file formats and FLAC file formats, and cannot be used with the MIXTRAX
function.
If you use an MTP connection, [PHONE CONNECT] needs to be set to [USB MTP] in the SYSTEM settings
(page 32).
AUX
1
Insert the stereo mini plug into the AUX input jack.
2 Press SRC/OFF to select [AUX] as the source.
- 12 -
English
NOTE
If [AUX] is set to [OFF] in the SYSTEM settings, [AUX] cannot be selected as a source (page 31).
NOTES
Operations
You can make various adjustments in the FUNCTION settings (page 27).
Note that the following operations do not work for an AUX device. To operate an AUX
device, use the device itself.
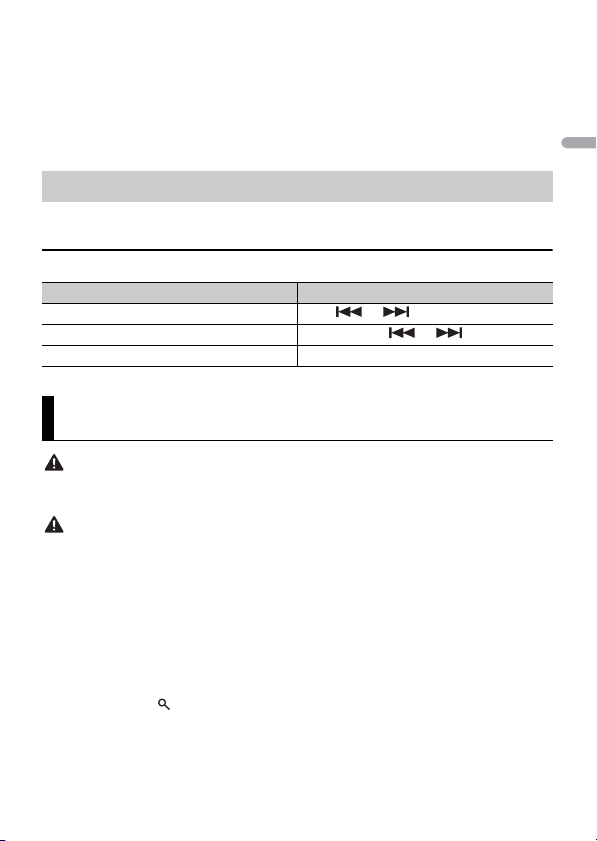
Purpose Operation
Select a folder*1 Press 1/ or 2/.
Select a track/song (chapter) Press or .
Fast forward or reverse*2 Press and hold or .
Search for a file from a list (CD/ USB only) 1 Press to display the list.
View a list of the files in the selected folder/
category*1
Play a song in the selected folder/
category*1
Repeat play Press 6/.
Random/shuffle play Press 5/.
Pause/resume playback Press 4/PAUS E.
Return to root folder (CD/USB only)*1 Press and hold 1/.
Switch between compressed audio and CD-
DA (CD o nly)
*1 Compressed a udio files only
*2 When you use the fast forward or reverse function while playing a VBR file, the playback time may
be not correct.
2 Tur n the M.C. dial to select the desired
file (folder) name or category, then press
to confirm.
3 Tur n the M.C. dial to select the desired
file, then press to confirm.
Playback starts.
Press the M.C. dial when a folder/category
is selected.
Press and hold the M.C. dial when a folder/
category is selected.
Press BAND/.
About MIXTRAX (USB/iPhone only)
The MIXTRAX function creates a non-stop mix of your music library, accompanied by
illumination effects. For details on MIXTRAX settings, see page 35.
• iPhone needs to be connected with Pioneer ARC APP via USB for using this function (page 22).
- 13 -- 13 -

English
• This function is not compatible with an Android device connected via MTP.
Important
NOTES
TIP
• Depending on the file/song, sound effects may not be available.
• Turn the MIXTRAX function off if the illumination effects it produces interfere with driving.
1 Pre ss 3/MIX to turn MIXTRAX on/off.
Bluetooth
Bluetooth connection
If ten or more Bluetooth devices (e.g. a phone and separate audio player) are connected, they may not
work properly.
1 Turn on the Bluetooth function of the device.
If you make a Bluetooth connection from the device, proceed to step 6.
2 Press to display the phone menu.
3 Tu rn the M.C. dial to select [BT SETTING], then press to confirm.
4 Tu rn the M.C. dial to select [ADD DEVICE], then press to confirm.
The unit starts to search for available devices, then displays them in the device list.
• To cancel searching, press the M.C. dial.
• If the desired device is not in the list, select [RE-SEARCH].
• If there is no device available, [NOT FOUND] appears in the display.
5 Tu rn the M.C. dial to select a device from the device list, then press to confirm.
Press and hold the M.C. dial to switch the displayed de vice information between the
Bluetooth device address and device name.
If you make a Bluetooth connection from the unit, proceed to step 7.
6 Select [Pioneer BT Unit] shown in the device display.
7 Make sure the same 6-digit number appears on this unit and the device, then
select “Yes” on the device.
• [DEVICE FULL] appears if the unit has already been paired with ten other devices. In this case, delete
one of the paired devices. See [DEL DEVICE] in the Bluetooth settings (page 15).
• Depending on the device, the PIN code is required in step 7. In this case, input [0000].
The Bluetooth connection can be also made by detecting the unit from the Bluetooth device. To do so,
[VISIBLE] in the Bluetooth settings ne eds to be set to [ON]. For detail s on Bluetooth device operati ons,
refer to the operating instructions supplied with the Bluetooth device.
- 14 -

English
Bluetooth settings
Menu Item Description
DEVICELIST Display the list of paired Bluetooth devices. “*” appears on the
device name when the Bluetooth connection is established.
When no device is selected in the device list, this function is not
available.
DEL DEVICE Delete the device information.
[DELETE YES],
[DELETE NO]
ADD DEVICE Register a new device.
If ten devices are already paired, this function is not available.
You can check the number of paired devices on the [DEVICELIST]
setting.
A.CONN Select [ON] to connect to a Bluetooth device automatically.
[ON], [OFF]
VISIBLE Select [ON] so that a Bluetooth device can detect the unit when
[ON], [OFF]
PIN CODE Change the PIN code.
DEV. INFO Switch the device information on the display between the
A.PAIRING Select [ON] to pair the unit and iPhone or Android device
[ON], [OFF]
the unit is connected via Bluetooth to another device.
1 Press the M. C. dial to display the setting mode.
2 Turn t he M.C. dial to select a number.
3 Press the M. C. dial to move the cursor to the next position.
4 After inputting the PIN code, press and hold the M.C. dial.
After inputting the PIN code, pressing the M.C. dial returns you
to the PIN code input display, and you can change the PIN code.
device name and Bluetooth device address.
automatically when an iPhone or Android device is connected
to the unit via USB. (This function may not be available
depending on the version of iOS you are using.)
• When you are using an Android device, this function is
available in the following situations:
– Your device has Android OS 4.4 or later installed.
– Be sure to turn on the B luetooth function of the devi ce and confirm
that the device is not connected to the unit via Bluetooth.
– [P.APP AUTO ON] needs to be set to [ON] (page32).
– Pioneer ARC APP needs to be installed on your Android device and
[PHONE CONNECT] needs to b e set to [APP CONTROL] (page 22).
– A confirmation butt on should be pressed on the caution window
displayed on Pioneer ARC APP after a connection with the Pioneer
ARC APP is made.
- 15 -- 15 -
English
Important
TIP
Bluetooth telephone
First, make a Bluetooth connection with the Bluetooth telephone (page 14). Up to two
Bluetooth telephones can be connected simultaneously.
• Leaving the unit on standby to connect to your phone via Bluetooth while the engine is not running
can drain the vehicle’s battery.
• Be sure to p ark your vehicle in a safe place and apply the parking brake before operation.
To make a phone call
1
Press to display the phone menu.
When two phones are connected, a phone name appears first then a phone menu
will display. To switch to another phone, press again.
2 Tu rn the M.C. dial to select [RECENTS] or [PHONE BOOK], then press to confirm.
If you select [PHONE BOOK], proceed to step 4.
3 Tu rn the M.C. dial to select [MISSED], [DIALLED] or [RECEIVED], then press to
confir m.
4 Tu rn the M.C. dial to select a name or phone number, then press to confirm.
The phone call starts.
To answer an incoming call
1
Press when a call is received.
When two phones are connected to the unit via Bluetooth and there is an incoming call while one
phone is being used for a call, a message will appear in the display. To answer that incoming call, you
need to end the existing call.
Basic operations
Purpose Operation
End a call Press .
Reject an incoming call Press and hold when a call is received.
Switch between the current caller
and a caller on hold
Cancel a caller on hold Press and hold .
Adjust the volume of the caller’s
voice (When private mode is on,
this function is not available.)
Press the M.C. dial.
Tur n the M.C. dial during the call.
- 16 -
English
NOTE
Purpose Operation
Turn the private mode on or off Press BAND/ during the call.
To preset phone numbers
1
Select a phone number from a phone book or call history.
2 Press and hold one of the number buttons (1/ to 6/).
The contact is stored in the selected preset number.
To make a call using a preset number, press one of the number buttons (1/ to 6/),
then press the M.C. dial.
Voice recognition (Only for iPhone)
This function is only available when an iPhone equipped with voice recognition is
connected to the unit via Bluetooth.
1 Press and hold to activate the voice recognition mode.
2 Press the M.C. dial and then talk into the microphone to input voice commands.
To exit the voice recognition mode, press BAND/.
For details on the voice recognition features, refer to the manual supplied with your iPhone.
Phone menu
Menu Item Description
RECENTS Display the missed call histor y.
[MISSED]
[DIALLED] Display the dialed call history.
[RECEIVED] Display the received call history.
PHONE BOOK Display the contacts in your phone. Set [VISIBLE] in the
PRESET 1-6 Recall the preset phone numbers. You can also recall the preset
A.ANSR* Select [ON] to answer an incoming call automatically.
[ON], [OFF]
R.TONE Select [ON] if the ring tone does not come out from the car
[ON], [OFF]
Bluetooth settings to [ON] to browse the contacts via this unit.
phone numbers by pressing one of the number buttons (1/
to 6/).
speakers. Depending on the connected phone, this function
may not work.
- 17 -- 17 -
English
Important
Menu Item Description
PB INVT Invert the order of names in the phone book (name view).
BT SETTING You can adjust various settings for Bluetooth connections. For
* If two phones are connected, this function does not work on incoming calls that are received while
one of the phones is being used for a call.
details on Bluetooth settings, see page 15.
Bluetooth audio
• Depending on the B luetooth audio player connected to thi s unit, the available operations will be
limited to the following two levels:
– A2DP (Advanced Audio Dist ribution Profile) can only play back songs on you r audio player.
– AVRCP (Audio/Video Remote Control Profile) can perform functions such as playback, pause, select
song, etc.
• The sound of the Bluetooth audio player will be muted when the phone is in use.
• When the Bluetooth audio player is in use, you cannot connect to a Bluetooth telephone
automatically.
• Depending on the type of Bluetooth audio player you have connected to this unit, operation and
information displayed may vary based on availability and functionality.
1 Make a Bluetooth connection with the Bluetooth audio player.
2 Pre ss SRC/OFF to select [BT AUDIO] as the source.
3 Pre ss BAND/ to star t playback.
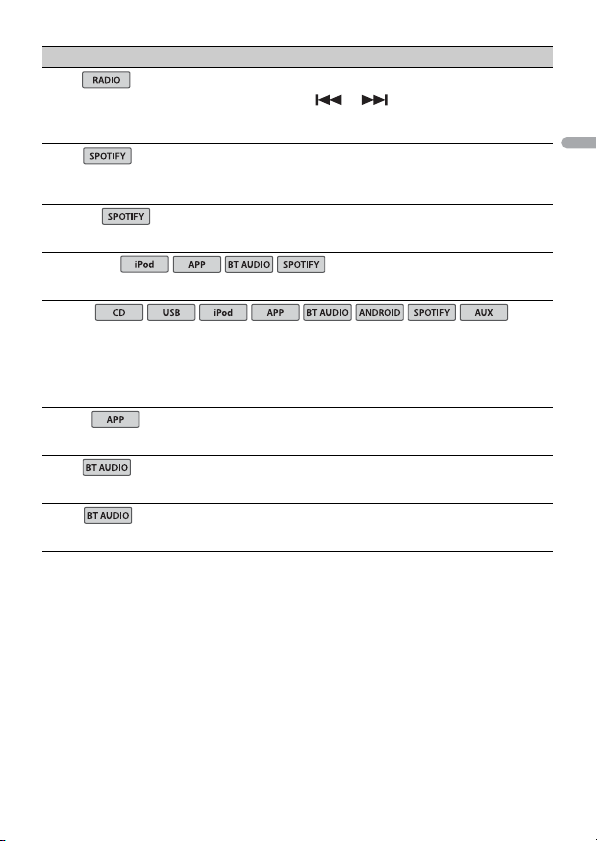
Basic operations
You can make various adjustments in the FUNCTION settings (page 27).
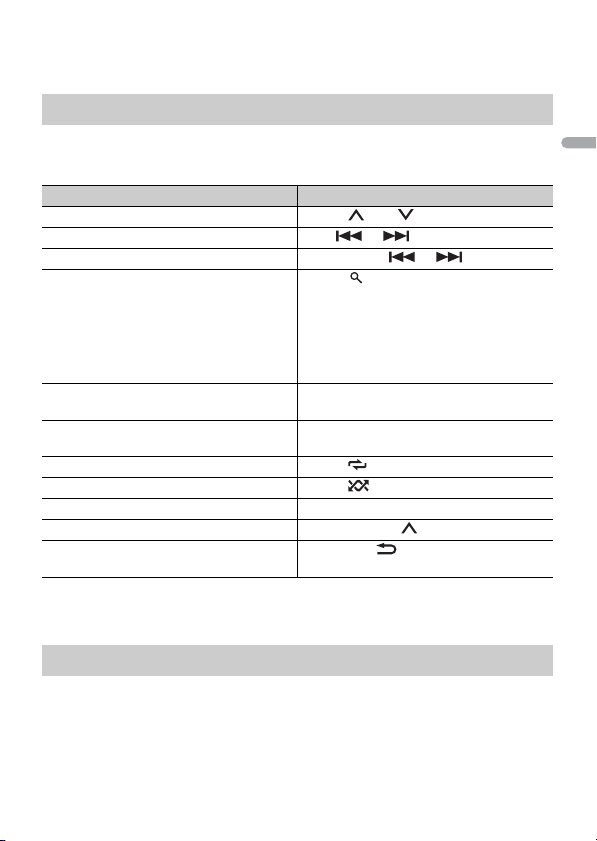
Purpose Operation
Fast forward or reverse Press and hold or .
Select a track Press or .
Repeat play* Press 6/.
Random play* Press 5/.
Pause/resume playback Press 4/PAUS E.
Search for a file from a list 1 Press to display a list.
2 Tur n the M.C. dial to select the desired
folder name, then press to confirm.
3 Tur n the M.C. dial to select the desired
file, then press to confirm.
Playback starts.
- 18 -

English
Important
NOTE
Purpose Operation
Switch the Bluetooth device name in the
device list according to the connec tion
order
* Depending on the connected device, these operations may not be available.
Press 1/ or 2/.
App Mode
You can enjoy listening to an application on an iPhone/Android device via the unit. In
some cases, you can control an application by using the unit.
For details on compatible devices, visit our website.
Use of third part y apps may involve or require the provisio n of personally identifiable information,
whether through the creation of a user account or otherwise, and for certain applications, the provision
of geolocation da ta.
ALL THIRD PART Y APPS ARE THE SOLE RESPONSIBILITY OF THE PROVIDERS, INCLUDING WITHOUT
LIMITATION COLLECTION AND SECURITY OF USER DATA AND PRIVACY PRACTICES. BY ACCESSING
THIRD PARTY APPS, YOU AGREE TO REVIEW THE TERMS OF SERVICE AND PRIVACY POLICIES OF THE
PROVIDERS. IF YOU DO NOT AGREE WITH THE TERMS OR POLICIES OF ANY PROVIDER OR DO NOT
CONSENT TO THE USE OF GEOLOCATION DATA WHERE APPLICABLE, DO NOT USE THAT THIRD PARTY
APP.
For iPhone use rs
This function is compatible with iPhones installed with iOS 6.0 or later.
For Android device users
This function is compatible with devices that have Android OS 2.3 or later installed.
PIONEER IS NOT LIABLE FOR ANY THIRD PARTY APPS OR CONTENT, INCLUDING WITHOUT LIMITATION
THEIR ACCURACY OR COMPLETENESS. THE CONTENT AND FUNCTIONALITY OF SUCH APPS ARE THE
SOLE RESPONSIBILITY OF THE APP PROVIDER.
Playback of an application via the unit
1 Connec t this unit with the mobile device.
• iPhone via USB (page 12)
• iPhone/Android device via Bluetooth (page 14)
2 Press the M.C. dial to display the main menu.
3 Tu rn the M.C. dial to select [SYSTEM], then press to confirm.
4 Tu rn the M.C. dial to select [PHONE CONNECT], then press to confirm.
- 19 -- 19 -
English
5 Tu rn the M.C. dial to select one of the below, then press to confirm.
NOTE
NOTE
• Select [IPHONE] for iPhone.
• Select [ANDROID] for Android device.
6 Tu rn the M.C. dial to select one of the below.
• Select [WIRED] for the USB connection.
• Select [BLUETOOTH] for the Bluetooth connection.
When the connec tion setting is changed, a me ssage that lets you know that the connectio n
setting had been changed will appear in the display. Press the M.C. dial and turn the M.C. dial to
select [SRC OFF :YES], then press to confirm . The unit turns off automatica lly and the setting is
executed.
7 Pre ss SRC/OFF to select [APP].
8 Operate the mobile device to start up the application.
When you connect a mobile device other than iPhone/Android device, select [OTHERS] in the [PHONE
CONNECT] menu and select [WIRED] (for the USB connection) or [BLUETOOTH] (for the Bluetooth
connection). Depending on your mobile device, it may not operate correctly.
Basic operations
You can make various adjustments in the FUNCTION settings (page 27).
Purpose Operation
Select a track Press or .
Fast forward or reverse Press and hold or .
Pause/resume playback Press BAND/.
Spotify®
Spotify is a music streaming distribution service not affiliated with Pioneer. More
information is available at http://www.spotify.com.
The Spotify application is available for compatible smartphones, please visit https://
support.spotify.com/ for the latest compatibility information.
To enjoy Spotify as you drive, first download the Spotify app to your iPhone or Android
device. You can download it on the iTunes App Store or Google Play™. Choose a free
account or a paid Premium account, either in the app or at spotify.com. A Premium
account gives you more features, like offline listening.
- 20 -

English
Important
• This product incorporates Spotify software which is subject to 3rd party licenses found here:
NOTE
NOTE
NOTE
www.spotify.com/connect/third-party-licenses.
• For information on the countrie s and regions where Spotify can be us ed, take a look at https://
www.spotify.com/us/select-your-country/.
Listening to Spotify
Update the firmware of the Spotify application to the latest version before use.
1 Connec t this unit with the mobile device.
• iPhone via USB (page 12)
• iPhone/Android device via Bluetooth (page 14)
If you choose a USB connection, proceed to step 6.
2 Pre ss SRC/OFF to select [SPOTIFY].
3 Press and hold 1/ to display [PHONE CONNECT].
4 Tu rn the M.C. dial to select one of the below, then press to confirm.
• Select [IPHONE] for iPhone.
• Select [ANDROID] for Android device.
5 Tu rn the M.C. dial to select [BLUETOOTH] for iPhone/Android device via
Bluetooth.
When the connec tion setting is changed, a me ssage that lets you know that the connectio n
setting had been changed will appear in the display. Press the M.C. dial and turn the M.C. dial to
select [SRC OFF :YES], then press to confirm . The unit turns off automatica lly and the setting is
executed.
6 Pre ss SRC/OFF to select [SPOTIFY].
7 Launch the Spotify application on the mobile device and start playback.
When you connect a mobile device other than iPhone/Android device, select [OTHERS] in the [PHONE
CONNECT] menu and select [WIRED] (for the USB connection) or [BLUETOOTH] (for the Bluetooth
connection). Depending on your mobile device, it may not operate correctly.
Basic operations
You can make various adjustments in the FUNCTION settings (page 27).
The available operations may vary according to the type of contents (track/album/artist/playlist/radio)
you want to play.
- 21 -- 21 -
English
NOTE
WAR NIN G
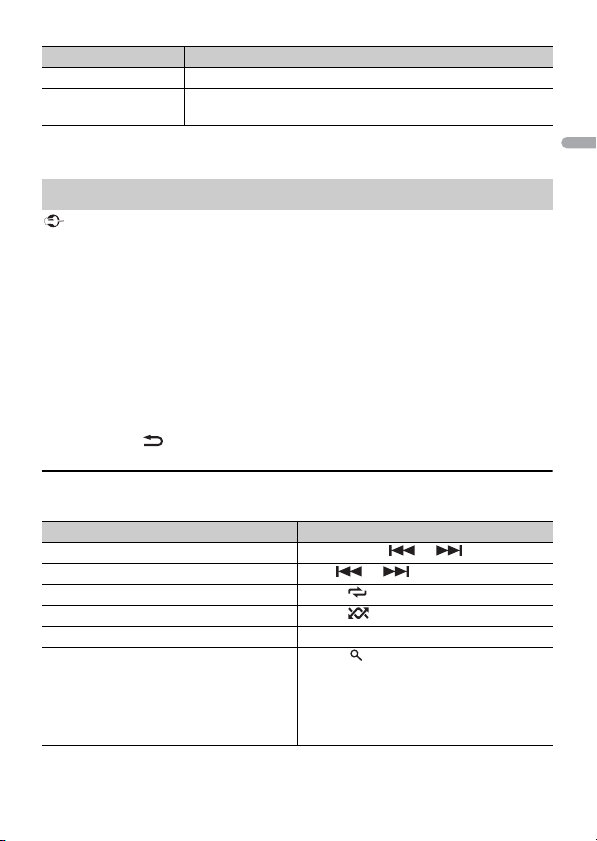
Purpose Operation
Skip a track Press or .
Search for a track from a list 1 Press (list) to display the list.
Pause/resume playback Press 4/PAUSE.
Thumbs Up (Only for radio) Press 1/.
Thumbs Down (Only for radio) Press 2/.
Random play (Only for track/album/artist/
playlist)
Repeat play (Only for track/album/artist/
playlist)
Start a radio channel based on the song
currently being played.
Some functions of Spotify may not be operated from the unit.
2 Tur n the M.C. dial to select the desired
category, then press to confirm.
3 Tur n the M.C. dial to select the desired
file, then press to confirm.
Playback starts.
Press 5/.
Press 6/.
1 Press and hold 5/ to start a radio.
2 Press the M.C. dial.
• This function may not be available
depending on the selected song.
Using Pioneer ARC APP
You can operate the unit from Pioneer ARC APP installed on an iPhone/Android device.
In some cases, you can control aspects of the application, such as source selection,
pause, etc., by using the unit.
For details on what operations are available on the application , see the application’s help
section.
Do not attempt to op erate the application while dr iving. Make sure to pull off the road and pa rk your
vehicle in a safe location before attempting to use the controls on the application.
For iPhone use rs
This function is compatible with iPhones (iPhone 5 or later) installed with iOS 8.0 or later.
You can download Pioneer ARC APP on iTunes App Store.
- 22 -

English
For Android device users
NOTE
NOTE
NOTE
This function is compatible with devices that have Android OS 4.1 or later installed and
also support AOA (Android Open Accessory) 2.0.
You can download Pioneer ARC APP on Google Play.
Some Android devices connected via AOA 2.0 may not work properly or emit sounds due to their own
software design , regardless of the OS version.
Making a connection with Pioneer ARC APP
1 Connec t this unit with the mobile device.
• iPhone/Android device via USB (page 12)
• iPhone/Android device via Bluetooth (page 14)
2 Press the M.C. dial to display the main menu.
3 Tu rn the M.C. dial to select [SYSTEM], then press to confirm.
4 Tu rn the M.C. dial to select [PHONE CONNECT], then press to confirm.
5 Tu rn the M.C. dial to select one of the below, then press to confirm.
• Select [IPHONE] for iPhone.
• Select [ANDROID] for Android device.
When the connec tion setting is changed, a me ssage that lets you know that the connectio n
setting had been changed will appear in the display. Press the M.C. dial and turn the M.C. dial to
select [SRC OFF :YES], then press to confirm . The unit turns off automatica lly and the setting is
executed.
6 Tu rn the M.C. dial to select one of the below.
When [IPHONE] is selected in step 5
• Select [WIRED] for the USB connection.
• Select [BLUETOOTH] for the Bluetooth connection.
When [ANDROID] is selected in step 5
• Selec t [APP CONTROL] for the USB connection.
• Select [BLUETOOTH] for the Bluetooth connection.
When you select the USB connection, Pioneer ARC APP on the Android device starts
automatically if [ON] is selected in [P.APP AUTO ON] (page 32).
If Pioneer ARC APP has not been installed on your Android device yet, a message that prompts you
to install the application will app ear on your Android device. Select [OFF] in [P.APP AUTO ON] to
clear the message (page 32).
7 Pre ss SRC/OFF to select any source.
- 23 -- 23 -
English
8 Launch Pioneer ARC APP on the mobile device via USB connection.
NOTE
WAR NIN G
CAUTION
NOTES
Press and hold M.C. dial via Bluetooth connection.
When you connect a mobile device other than iPhone/Android device, select [OTHERS] in the [PHONE
CONNECT] menu and select [WIRED] (for the USB connection) or [BLUETOOTH] (for the Bluetooth
connection). Depending on your mobile device, it may not operate correctly.
Listening to music on Android
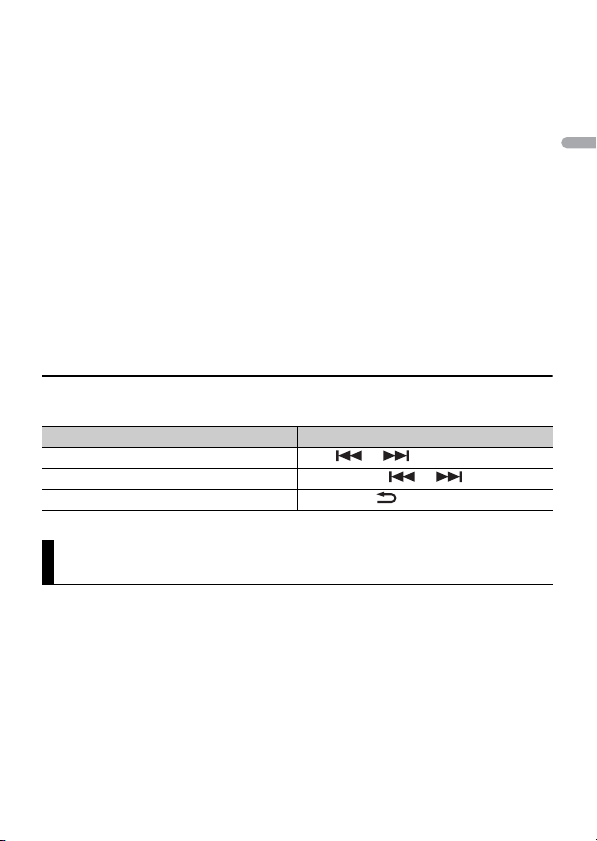
1 Pre ss SRC/OFF to select [ANDROID].
Basic operations
Purpose Operation
Select a track Press or .
Fast forward or reverse Press and hold or .
Pause/resume playback Press 4/PAUS E.
Using the Karaoke Function
• A driver should never sing with a microphone while driving. Doing so may result in an accident.
• Do not carelessly leave a microphone for preventing an accident.
It is extremely dangerous to allow the microphone lead to become wound around the steering column,
brake pedal or shift lever, which may cause an accident. Be sure to install the microphone in such a way
that it will no t obstruct driving.
• Use a commercially available dynamic mic and not the supplied microphone.
• This function is not available when the selected source is the following.
–RADIO
–AUX
1 Insert the stereo mini plug of your microphone into the AUX input jack.
2 Pre ss and hold to activate the karaoke m ode.
When the karaoke mode is activated, the volume on the unit is muted. Adjust the
microphone volume on the [MIC VOL] setting.
- 24 -

English
NOTE
You can also activate the karaoke mode in the MICROPHONE settings (page 26).
NOTES
To adjust the microphone volume
1
Press and hold to display [MIC VOL].
2 Tu rn the M.C. dial to adjust the volume level.
• You can also adjust the microphone volume in the MICROPHONE settings (page 26).
• If howling occurs when using the microphone, keep the microphone away from the speaker or lower
the microphone volume.
Audio Adjustments
You can also make various adjustments in the AUDIO settings (page 29).
Operation modes
This unit features two operation modes: network mode and standard mode. You can
switch between modes as desired (page 9).
Network mode
You can create a 2-way + SW multi-amp and multi-speaker system with high range
speaker, middle range speaker and subwoofer for reproduction of high, middle and low
frequencies (bands).
Standard mode
You can create a 4-speaker system with front and rear speakers or front speakers and
subwoofers, or a 6-speaker system with front and rear speakers and subwoofers.
Adjusting the cut-off frequency value and the slope
value
You can adjust the cut-off frequency value and the slope value of each speaker.
The following speakers can be adjusted.
Network mode:
[HIGH] (high-range speaker HPF), [MID HPF] (middle-range speaker HPF), [MID LPF]
(middle-range speaker LPF), [SUBWOOFER]
- 25 -- 25 -

English
Standard mode:
NOTE
[FRONT], [REAR], [SUBWOOFER]
[SUBWOOFER] can only be selected when [ON] is selected in [SUBWOOFER] (page 29).
1 Press the M.C. dial to display the main menu.
2 Tu rn the M.C. dial to select [AUDIO], then press to confirm.
3 Tu rn the M.C. dial to select [CROSSOVER], then press to confirm.
4 Tu rn the M.C. dial to select the speaker unit (filter) to be adjusted, then press to
confirm.
5 Tu rn the M.C. dial to select [HPF] or [LPF] according to the speaker unit (filter),
then press to confirm.
6 Tu rn the M.C. dial to select an appropriate cut-off frequency for the speaker unit
(filter) selected in step 4, then press to confirm.
Network mode:
[1.25K] to [12.5K] (if you choose [HIGH] or [MID LPF])
[25] to [250] (if you choose [MID HPF] or [SUBWOOFER])
Standard mode:
[25HZ] to [250HZ]
7 Tu rn the M.C. dial to select an appropriate slope for the speaker unit (filter)
selected in step 4.
Network mode:
[–6] to [–24] (if you choose [HIGH], [MID HPF] or [MID LPF])
[–12] to [–36] (if you choose [SUBWOOFER])
Standard mode:
[–6] to [–24] (if you choose [FRONT] or [REAR])
[–6] to [–36] (if you choose [SUBWOOFER])
Settings
You can adjust various settings in the main menu.
1 Press the M.C. dial to display the main menu.
2 Tu rn the M.C. dial to select one of the categories below, then press to confirm.
• FUNC TION settings (page 27)
• AUDIO settings (page 29)
- 26 -
English
• SYSTEM settings (page 31)
• ILLUMINATION settings (page 34)
• MIXTRAX settings (page 35)
• MICROPHONE settings (page 36)
3 Tu rn the M.C. dial to select the options, then press to confirm.
FUNCTION settings
The menu items vary according to the source.
Menu Item Description
FM SETTING
[TALK], [STANDARD], [MUSIC] Match the sound quality level with the broadcast
BSM
REGIONAL
[ON], [OFF] Limit the reception to the specific regional
LOC AL
FM: [OFF], [LV1], [LV2], [LV3], [LV4]
MW/LW: [OFF], [LV1], [LV2]
TA
[ON], [OFF] Receive current traffic information if available.
AF
[ON], [OFF] Allow the unit to retune to a different frequency
NEWS
[ON], [OFF] Interrupt the currently selected source with
signal conditions of the FM band signal.
(Available only when FM band is selected.)
Store the six strongest stations on the number
buttons (1/ to 6/ ) automatically.
programs when AF (alternative frequencies
search) is selected. (Available only when FM
band is selected.)
Restrict the tuning station according to the
signal strength.
(Available only when FM band is selected.)
providing the same station. (Available only when
FM band is se lected.)
news programs. (Available only when FM band is
selected.)
- 27 -- 27 -
English
Menu Item Description
iPod
USB
iPod
AUX
SEEK
[MAN], [PCH] Assign or buttons to seek the stations
one by one (manual tuning) or select a station
from the preset channels.
SAVE
Store the information about the song currently
being played to your music list on Spotify.
UNSAVE
Remove the song information stored in [SAVE].
SEL DEVICE
Connect a Bluetooth device in the list.
S.RTRV
[1] (effective for low compression
rates),
[2] (effective for high
compression rates),
[OFF]
Enhance compressed audio and restore rich
sound.
PAUS E
Pause or resume playback.
PLAY
Start playback.
STOP
Stop playback.
- 28 -

English
AUDIO settings
Menu Item Description
EQ SETTING
[SUPER BASS], [POWERFUL],
[NATURAL], [VOCAL], [CUSTOM1],
[CUSTOM2], [FLAT]
Select an equalizer band and
level for further customising.
Equalizer band: [50HZ] to
[12.5kHZ]
Equalizer level: [–6] to [+6]
FAD ER *1 (Only for standard mode)
BALANC E
SUBWOOFER
[ON], [OFF] Set to [ON] when using a subwoofer speaker.
SUBWOOFER*2
[NOR], [REV] Select the subwoofer phase.
SPEAKER LEVEL
Network mode: [HIGH L], [HIGH
R], [MID L], [MID R], [SUBWOOFER]
Standard mode: [FRONT L],
[FRONT R], [REAR L], [REAR R],
[SUBWOOFER]
Output level: [–24] to [10]
CROSSOVER
POSITION
[OFF], [FRONT LEFT] (front seat
left), [FRONT RIGHT] (front seat
right), [FRONT] (front seats), [ALL]*
* Only for standard mode
Select or customise the equalizer curve.
• When you select a setting other than
[CUSTOM1] and [CUSTOM2], you can also
customise the equalizer curve by pressing and
holding the M.C. dial, then store the
customised equalizer curve in [CUSTOM1].
Adjust the front and rear speaker balance.
Adjust the left and right speaker balance.
Select a speaker unit (filter) and adjust the
output level.
• Each value you have adjusted changes when
you change the [POSITION] setting (page 29).
Select a speaker unit (f ilter) to adjust the HPF or
LPF cut-off frequency and the slope for each
speaker unit.
For details on the [CROSSOVER] setting, see
page 25.
Select a listening posit ion to adjust the speakers'
output levels automatically and add a delay time
that corresponds to the number and locations of
occupied seats.
- 29 -- 29 -

English
Menu Item Description
TIME ALGNMNT
[INITIAL], [OFF], [CUSTOM]
Select a type of speaker and
adjust the speaker distance for
further customising in [CUSTOM].
Network mode: [HIGH L], [HIGH
R], [MID L], [MID R], [SUBWOOFER]
Standard mode: [FRONT L],
[FRONT R], [REAR L], [REAR R],
[SUBWOOFER]
Speaker distance (cm): [350] to
[0.0]
SAVE SETTINGS
[YES], [NO] Save to later recall the following sound settings
LOAD SET TING S
D.BA SS
[OFF], [LOW], [HI] Boost the bass level dynamically to offer an
LOU DNES S
[OFF], [LOW], [MID], [HI] Compensate for clear sound at low volume.
SLA
[+4] to [–4] Adjust the volume level for each source except
*1 Not available when [SW] is selected in [REAR-SP] in the INITIAL settings (page 10).
*2 Not available when [FUL] is selected in [REAR-SP] in the INITIAL settings (page 10).
Select or customise the time alignment settings
to reflect the distance between the listener’s
position and each speaker.
• Select [INITIAL] to initialize the setting value.
• Select [OFF] to reset all setting values to 0.
• The [CUSTOM] setting is available when
[FRONT LEFT] or [FRONT RIGHT] is selected in
[POSITION] (page 29).
• The [CUSTOM] setting is not available when
[OFF] is selected in [SUBWOOFER] (page 29).
at their current values: [CROSSOVER], [SPEAKER
LEVEL], [EQ SETTING], [POSITION], [TIME
ALGNMNT], [D.BASS], [SUBWOOFER].
Load the sound settings, when you have already
performed [SAVE SETTINGS].
effect as if a subwoofer was added to the system.
FM.
Each of the below combinations are set to the
same setting automatically.
• When making a USB connection, set USB, iPod,
ANDROID, SPOTIFY, and APP.
• When making a Bluetooth connecti on, set BT
AUDIO, iPod, ANDROID, SPOTIFY, and APP.
- 30 -
 Loading...