

Page 1
Operation Manual
Multi-CD control DSP High power CD/MP3/WMA/
AAC player with Bluetooth Wireless Technology and
FM/AM tuner
DEH-P9850BT
Black plate (1,1)
English
<CRB2179-A/N>1
Page 2
Black plate (2,1)
Contents
Thank you for buying this Pioneer product.
Please read through these operating instructions so you will know how to operate
your model properly. After you have finished reading the instructions, keep this man-
ual in a safe place for future reference.
Before You Start
About this unit 6
– Operating environment 6
About this manual 6
Features 6
About WMA 7
About AAC 7
About Bluetooth 7
Resetting the microprocessor 8
Clearing all memory 8
Protecting your unit from theft 8
– Removing the front panel 9
– Attaching the front panel 9
About the demo mode 9
– Reverse mode 9
– Feature demo mode 10
Use and care of the remote control 10
– Installing the battery 10
– Using the remote control 10
– FUNCTION button and AUDIO
button 10
What’s What
Head unit 12
Remote control 12
Basic Operations
Turning the unit on 14
Selecting a source 14
Loading a disc 14
Adjusting the volume 15
Turning the unit off 15
Tuner
Listening to the radio 16
Introduction of advanced tuner
operation 17
Storing and recalling broadcast
frequencies 17
Storing the strongest broadcast
frequencies 17
Selecting stations from the preset channel
list 18
Tuning in strong signals 18
Built-in CD Player
Playing a CD 19
Selecting a track directly 19
Introduction of advanced built-in CD player
operation 20
Repeating play 20
Playing tracks in random order 20
Scanning tracks of a CD 21
Pausing CD playback 21
Selecting the search method 21
Searching every 10 tracks in the current
disc 21
Using disc title functions 22
– Entering disc titles 22
– Displaying disc titles 23
Using CD TEXT functions 23
– Displaying text information on CD TEXT
discs 23
– Scrolling text information in the
display 23
– Selecting tracks from the track title
list 23
MP3/WMA/AAC/WAV Player
Playing MP3/WMA/AAC/WAV files 24
Selecting a track directly in the current
folder 25
Introduction of advanced built-in CD player
(MP3/WMA/AAC/WAV) operation 26
Repeating play 26
Playing tracks in random order 26
Scanning folders and tracks 27
Pausing MP3/WMA/AAC/WAV playback 27
Selecting the search method 27
Searching every 10 tracks in the current
folder 27
2
En
<CRB2179-A/N>2
Page 3
Contents
Black plate (3,1)
English
Displaying text information on MP3/WMA/
AAC/WAV disc 28
– When playing back an MP3/WMA/AAC
disc 28
– When playing back a WAV disc 28
Scrolling text information in the display 28
Selecting tracks from the file name list 29
Displaying jacket arts on CD-ROM discs 29
– Reading jacket arts 29
– Selecting folders with jacket arts 30
Bluetooth Telephone
Hands-free phoning with cellular phones
featuring Bluetooth wireless
technology 31
About the telephone source 32
– Standby mode 32
Setting up for hands-free phoning 32
Basic operation of hands-free phoning 33
– Making a phone call 33
– Taking a phone call 34
Introduction of advanced hands-free phoning
operation 35
Connecting a cellular phone 35
– Searching for available cellular
phones 36
– Using a cellular phone to initiate a
connection 36
Disconnecting a cellular phone 37
Registering connected cellular phone 37
Deleting a registered phone 37
Connecting to a registered cellular
phone 38
– Connecting to a registered phone
manually 38
– Connecting to a registered phone
automatically 38
Using the Phone Book 39
– Transferring entries to the Phone
Book 39
– Changing the Phone Book display
order 40
– Calling a number in the Phone
Book 40
– Assign genres to phone numbers 40
– Editing the name of a Phone Book
entry 41
– Editing phone numbers 42
– Selecting the icon of a Phone Book
entry 42
– Clearing a Phone Book entry 43
– Using preset numbers 43
Clearing memory 43
Using the Call History 44
– Displaying the Call History 44
– Calling a number from the Call
History 45
– Assigning preset numbers 45
Making a call by entering phone number 45
Echo canceling and noise reduction 46
Changing the ring tone 46
Setting the automatic rejecting 47
Setting the automatic answering 47
Selecting the icon for user phone 47
Displaying BD (Bluetooth Device)
address 47
– Displaying BD address of your cellular
phone 48
– Displaying BD address of this unit 48
Displaying system version for repair 48
Bluetooth Audio
Listening to songs on BT Audio (Bluetooth
audio player) 49
Setting up for Bluetooth audio player 49
Connecting a Bluetooth audio player 50
Function operation 51
Playing songs on Bluetooth audio player 51
Pausing a song 51
Stopping playback 51
Disconnecting a Bluetooth audio player 52
En
3
<CRB2179-A/N>3
Page 4
Contents
Black plate (4,1)
Displaying BD address of this unit 52
Displaying system version for repair 52
Multi-CD Player
Playing a CD 53
Selecting a track directly 53
50-disc multi-CD player 54
Introduction of advanced multi-CD player
operation 54
Repeating play 55
Playing tracks in random order 55
Scanning CDs and tracks 55
Pausing CD playback 56
Using ITS playlists 56
– Creating a playlist with ITS
programming 56
– Playback from your ITS playlist 56
– Erasing a track from your ITS
playlist 57
– Erasing a CD from your ITS playlist 57
Using disc title functions 57
– Entering disc titles 57
– Displaying disc titles 58
– Selecting discs from the disc title
list 58
Using CD TEXT functions 58
– Displaying text information on CD TEXT
discs 59
– Scrolling text information in the
display 59
– Selecting tracks from the track title
list 59
Playing songs on iPod
Listening to songs on your iPod 60
Browsing for a song 60
– Searching for a song 61
– Selecting a playlist 61
Displaying text information on iPod 61
Introduction of advanced iPod adapter
operation 62
Repeating play 62
Playing songs in a random order
(shuffle) 62
Pausing a song 63
TV tuner
Watching the television 64
Introduction of advanced TV tuner
operation 65
Storing and recalling broadcast stations 65
Storing the strongest broadcast stations
sequentially 65
Selecting stations from the preset channel
list 66
DVD Player
Playing a disc 67
Selecting a disc 67
Selecting a folder 67
Introduction of advanced DVD player
operation 68
Repeating play 68
Pausing disc playback 69
Playing tracks in random order 69
Scanning tracks of a CD/MP3/WMA 69
Using ITS playlist and disc title functions 69
Using disc title functions 69
– Entering disc titles 70
Audio Adjustments
Adjusting the audio easily 71
Adjusting the audio finely 71
Extra functions 71
Introduction of audio adjustments 71
Using the position selector 72
Using balance adjustment 72
Using the time alignment 73
– Adjusting the time alignment 73
Using subwoofer output 74
– Adjusting subwoofer settings 74
4
En
<CRB2179-A/N>4
Page 5
Contents
Black plate (5,1)
English
– Adjusting low pass filter attenuation
slope 74
Using the high pass filter 75
– Muting the speaker units (filters) 75
– Setting the high pass filter for front
speakers 75
– Setting the high pass filter for rear
speakers 76
Using the auto-equalizer 76
Using the equalizer 76
– Recalling equalizer curves 76
– Adjusting equalizer curves 77
– Adjusting 16-band graphic
equalizer 77
Using BBE sound 78
Using compression and BMX 78
Adjusting loudness 79
Adjusting source levels 79
Using auditory user interface 79
Auto TA and EQ (auto-time alignment and
auto-equalizing) 80
– Before operating the auto TA and EQ
function 80
– Carrying out auto TA and EQ 81
Initial Settings
Adjusting initial settings 83
Selecting the display language 83
Setting the date 83
Setting the clock 84
Setting the FM tuning step 84
Setting the AM tuning step 84
Switching the warning tone 85
Switching the face auto open 85
Switching the auxiliary setting 85
Switching the dimmer setting 85
Adjusting the brightness 85
Correcting distorted sound 86
Switching the sound muting/attenuation 86
Switching the feature demo 86
Switching the reverse mode 87
Switching the Ever Scroll 87
Calibrating the RPMs 87
Activating the BT Audio source 87
Entering PIN code for Bluetooth wireless
connection 88
Resetting the Bluetooth wireless technology
module 88
Other Functions
Turning the clock display on or off 89
Using the AUX source 89
– About AUX1 and AUX2 89
– Selecting AUX as the source 89
– Setting the AUX title 89
Using different entertainment displays 90
– Setting the entertainment display 90
– Setting the background display 91
Rewriting the entertainment displays and the
icons for telephone functions 92
Additional Information
Understanding built-in CD player error
messages 93
Understanding auto TA and EQ error
messages 93
Understanding error message on rewriting
the entertainment displays 94
CD player and care 94
CD-R/CD-RW discs 94
Dual Discs 95
MP3, WMA, AAC and WAV files 95
– MP3 additional information 96
– WMA additional information 96
– AAC additional information 96
– WAV additional information 97
About folders and MP3/WMA/AAC/WAV
files 97
Terms 99
Specifications 101
En
5
<CRB2179-A/N>5
Page 6
Section
01
Black plate (6,1)
Before You Start
About this unit
CAUTION
! Do not allow this unit to come into contact
with liquids. Electrical shock could result.
Also, this unit damage, smoke, and overheat
could result from contact with liquids.
! Keep this manual handy as a reference for op-
erating procedures and precautions.
! Always keep the volume low enough so that
you can hear sounds from outside the vehicle.
! Protect this unit from moisture.
! If the battery is disconnected or discharged,
the preset memory will be erased and must be
reprogrammed.
! If this unit does not operate properly, contact
your dealer or nearest authorized Pioneer Service Station.
Operating environment
This unit should be used within the temperature ranges shown below.
Operating temperature range: –10 °C to +60
°C (14 °F to 140 °F)
EN300328 ETC test temperature: –20 °C and
+55 °C (–4 °F and 131 °F)
you read and observe WARNINGs and CAU-
TIONs in this manual.
Features
CD playback
Music CD/CD-R/CD-RW playback is possible.
MP3 file playback
You can play back MP3 files recorded on CDROM/CD-R/CD-RW (ISO9660 Level 1/Level 2
standard recordings).
! Supply of this product only conveys a li-
cense for private, non-commercial use and
does not convey a license nor imply any
right to use this product in any commercial
(i.e. revenue-generating) real time broadcasting (terrestrial, satellite, cable and/or
any other media), broadcasting/streaming
via internet, intranets and/or other networks or in other electronic content distribution systems, such as pay-audio or
audio-on-demand applications. An independent license for such use is required.
For details, please visit
http://www.mp3licensing.com.
About this manual
This unit features a number of sophisticated
functions ensuring superior reception and operation. All the functions have been designed
for the easiest possible use, but many are not
self-explanatory. This operation manual will
help you benefit fully from this unit’s potential
and to maximize your listening enjoyment.
We recommend that you familiarize yourself
with the functions and their operation by reading through the manual before you begin
using this unit. It is especially important that
6
En
WMA file playback
You can play back WMA files recorded on CDROM/CD-R/CD-RW (ISO9660 Level 1/Level 2
standard recordings).
AAC file playback
You can play back AAC files recorded on CDROM/CD-R/CD-RW (ISO9660 Level 1/Level 2
standard recordings).
WAV file playback
You can play back WAV files recorded on CDROM/CD-R/CD-RW (Linear PCM (LPCM)/MS
ADPCM recordings).
<CRB2179-A/N>6
Page 7
Before You Start
Black plate (7,1)
Section
01
English
Hands-free phoning
This unit realizes effortless hands-free phoning
with Bluetooth wireless technology.
Bluetooth audio player compatibility
When you use this unit with a Bluetooth audio
player featuring Bluetooth wireless technology, you can control the Bluetooth audio
player.
®
iPod
compatibility
When you use this unit with a Pioneer iPod
adapter (CD-IB100), you can control an iPod
with Dock Connector.
! iPod is a trademark of Apple Computer,
Inc., registered in the U.S. and other
countries.
About WMA
The Windows Media™ logo printed on the box
indicates that this unit can play back WMA
data.
WMA is short for Windows Media Audio and
refers to an audio compression technology
that is developed by Microsoft Corporation.
WMA data can be encoded by using Windows
Media Player version 7 or later.
Windows Media and the Windows logo are trademarks or registered trademarks of Microsoft
Corporation in the United States and/or other
countries.
Notes
! This unit may not operate correctly depending
on the application used to encode WMA files.
! Depending on the version of Windows Media
Player used to encode WMA files, album
names and other text information may not be
correctly displayed.
! There may be a slight delay when starting
playback of WMA files encoded with image
data.
About AAC
AAC is short for Advanced Audio Coding and
refers to an audio compression technology
standard used with MPEG 2 and MPEG 4.
Several applications can be used to encode
AAC files, but file formats and extensions differ depending on the application which is
used to encode.
This unit plays back AAC files encoded by
®
iTunes
version 4.8 and earlier.
iTunes is a trademark of Apple Computer, Inc.,
registered in the U.S. and other countries.
About Bluetooth
Bluetooth is a short-range wireless radio connectivity technology that is developed as a
cable replacement for mobile phones, handheld PCs and other devices. Bluetooth operates in 2.4 GHz frequency range and transmits
voice and data at speeds up to 1 megabit per
second. Bluetooth was launched by a special
interest group (SIG) that comprises of Ericsson
Inc., Intel Corp., Nokia Corp., Toshiba and IBM
in 1998, and it is currently developed by nearly
2 000 companies worldwide.
<CRB2179-A/N>7
En
7
Page 8
Section
01
Black plate (8,1)
Before You Start
! The Bluetooth word mark and logos are
owned by the Bluetooth SIG, Inc. and any
use of such marks by Pioneer Corporation
is under license. Other trademarks and
trade names are those of their respective
owners.
Resetting the microprocessor
The microprocessor must be reset under the
following conditions:
! Prior to using this unit for the first time
after installation
! If the unit fails to operate properly
! When strange or incorrect messages ap-
pear on the display
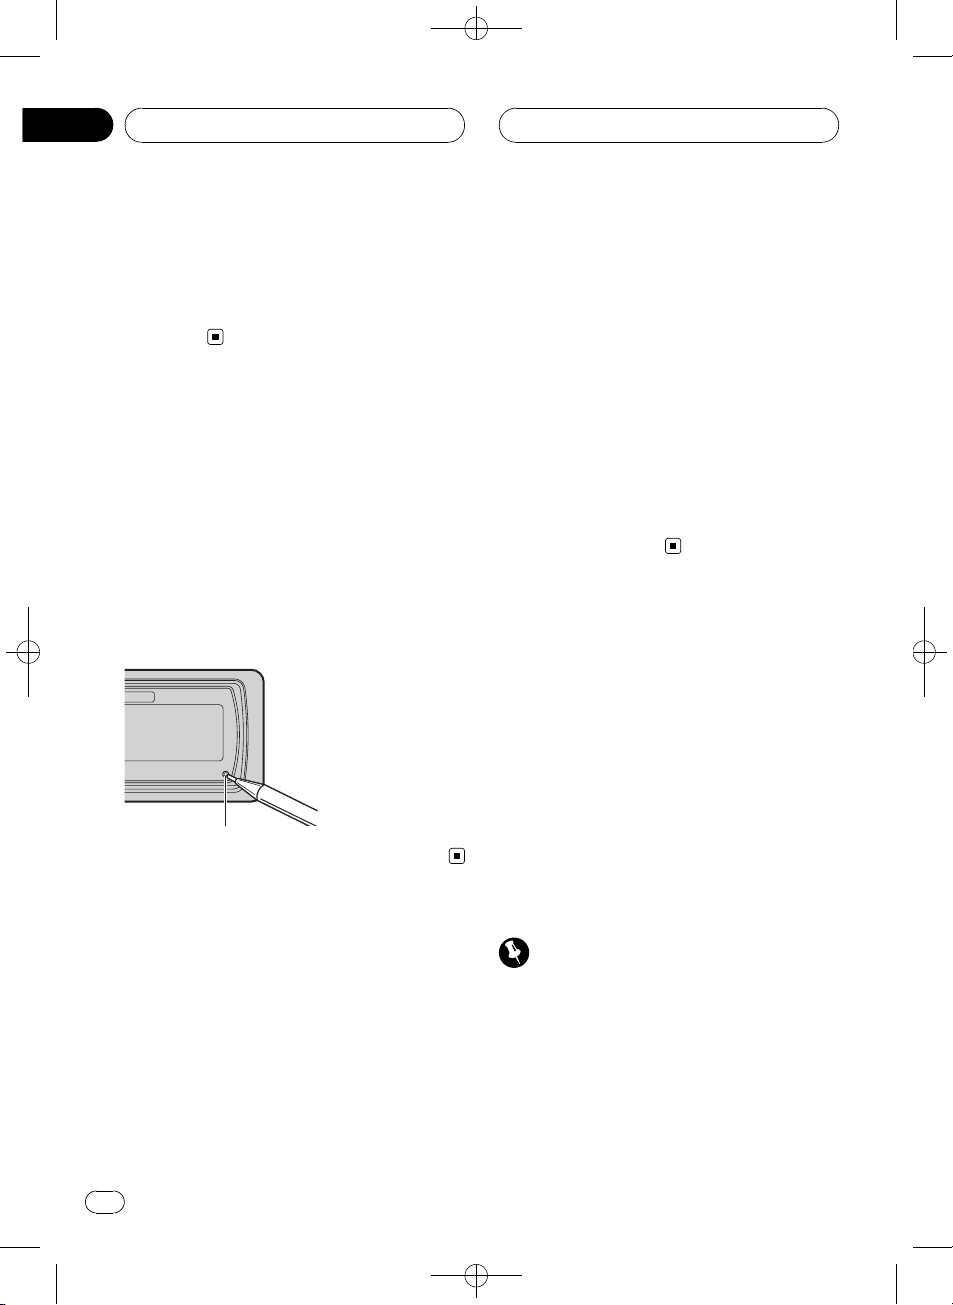
% Press RESET with a pen tip or other
pointed instrument.
RESET button
Clearing all memory
To protect personal and private information,
data about the phone stored in this unit can
be deleted.
1 Press SOURCE and hold until the unit
turns off.
2 Press MULTI-CONTROL and hold until
Language select appears in the display.
3 Turn MULTI-CONTROL to select
Phone reset.
Phone reset appears in the display.
4 Push MULTI-CONTROL right to show a
confirmation display.
Clear memory YES is displayed. Clearing
memory is now on standby.
# If you do not want to reset phone memory,
press BAND.
5 Press MULTI-CONTROL to clear the
memory.
All data in the telephone source, including
Phone Book entries, number presets and the
Call History is cleared.
Protecting your unit from
theft
The front panel can be detached from the
head unit and stored in the provided protective
case to prevent theft.
! If the front panel is not detached from the
head unit within five seconds of turning off
the ignition, a warning tone will sound and
the front panel will open.
! You can turn off the warning tone. See
Switching the warning tone on page 85.
! You can turn off the face auto open. See
Switching the face auto open on page 85.
Important
! Never use force or grip the display and the
buttons too tightly when removing or attaching.
! Avoid subjecting the front panel to excessive
shocks.
! Keep the front panel out of direct sunlight and
high temperatures.
8
En
<CRB2179-A/N>8
Page 9
Before You Start
Black plate (9,1)
Section
01
English
! A few seconds after turning the ignition
switch to on or off, the front panel automatically moves. When this happens, your fingers
may become jammed in the panel, so keep
your hands away from it.
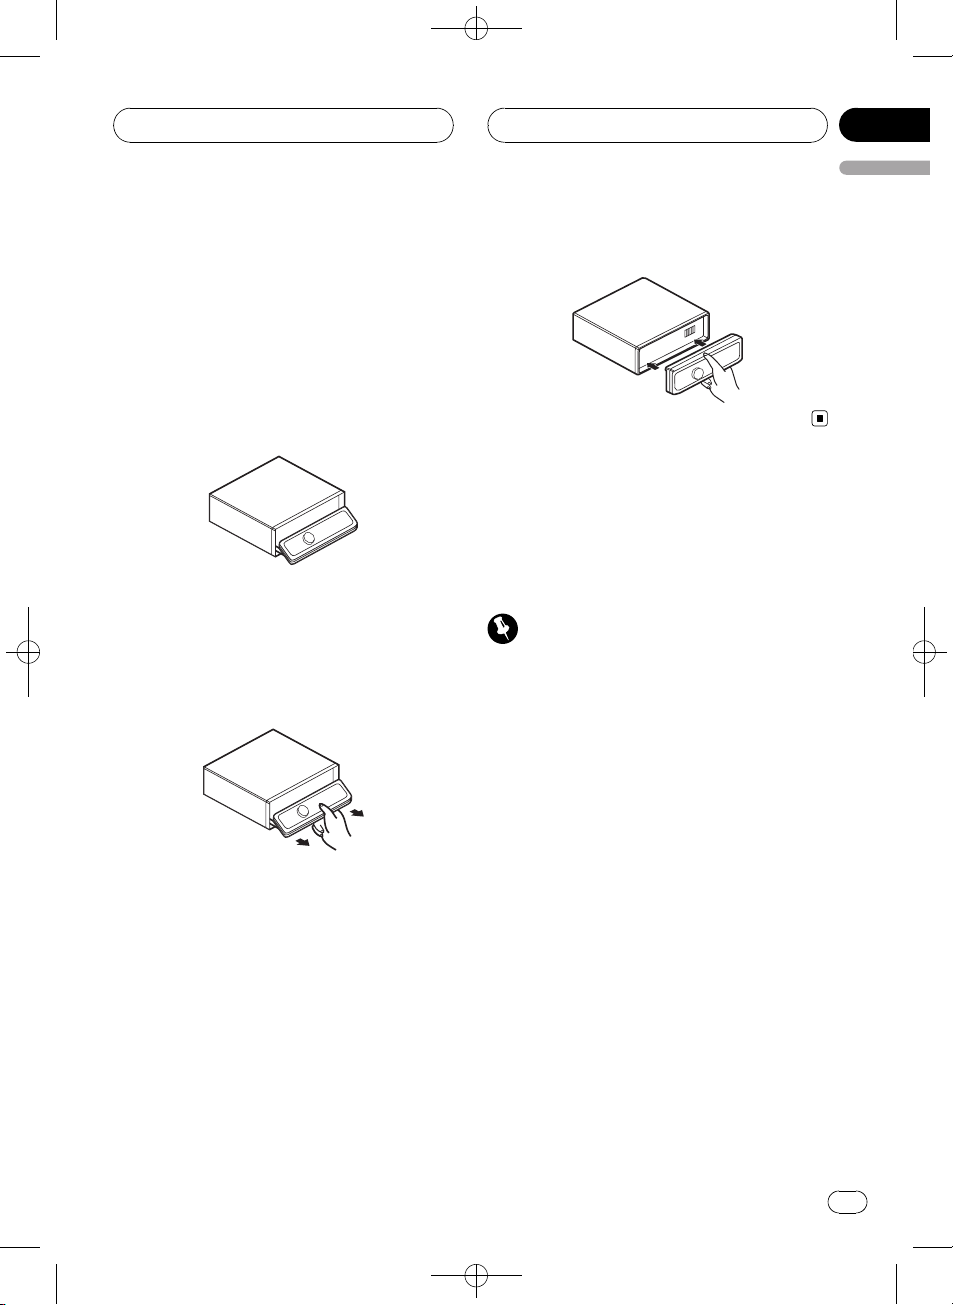
Removing the front panel
1 Press and hold EJECT to open the front
panel.
2 Slide and remove the front panel toward you.
Take care not to grip it too tightly or to drop
the front panel and protect it from contact
with water or other fluids to prevent permanent damage.
3 Put the front panel into provided protective case for safe keeping.
2 Replace the front panel by clipping it
into place.
About the demo mode
This unit features two demonstration modes.
One is the reverse mode, the other is the feature demo mode.
Important
The red lead (ACC) of this unit should be connected to a terminal coupled with ignition switch
on/off operations. If this is not done, the vehicle
battery may be drained.
Reverse mode
If you do not perform an operation within
about 30 seconds, screen indications start to
reverse, and then continue reversing every 10
seconds. Pressing BAND when power to this
unit is turned off while the ignition switch is
set to ACC or ON cancels the reverse mode.
Press BAND again to start the reverse mode.
Attaching the front panel
1 Make sure the inner cover is closed.
<CRB2179-A/N>9
En
9
Page 10
Section
01
Black plate (10,1)
Before You Start
Feature demo mode
The feature demo automatically starts when
power to this unit is turned off while the ignition switch is set to ACC or ON. Pressing
DISPLAY during feature demo operation cancels the feature demo mode. Press DISPLAY
again to start the feature demo mode. Remember that if the feature demo continues operating when the car engine is turned off, it may
drain battery power.
Use and care of the remote
control
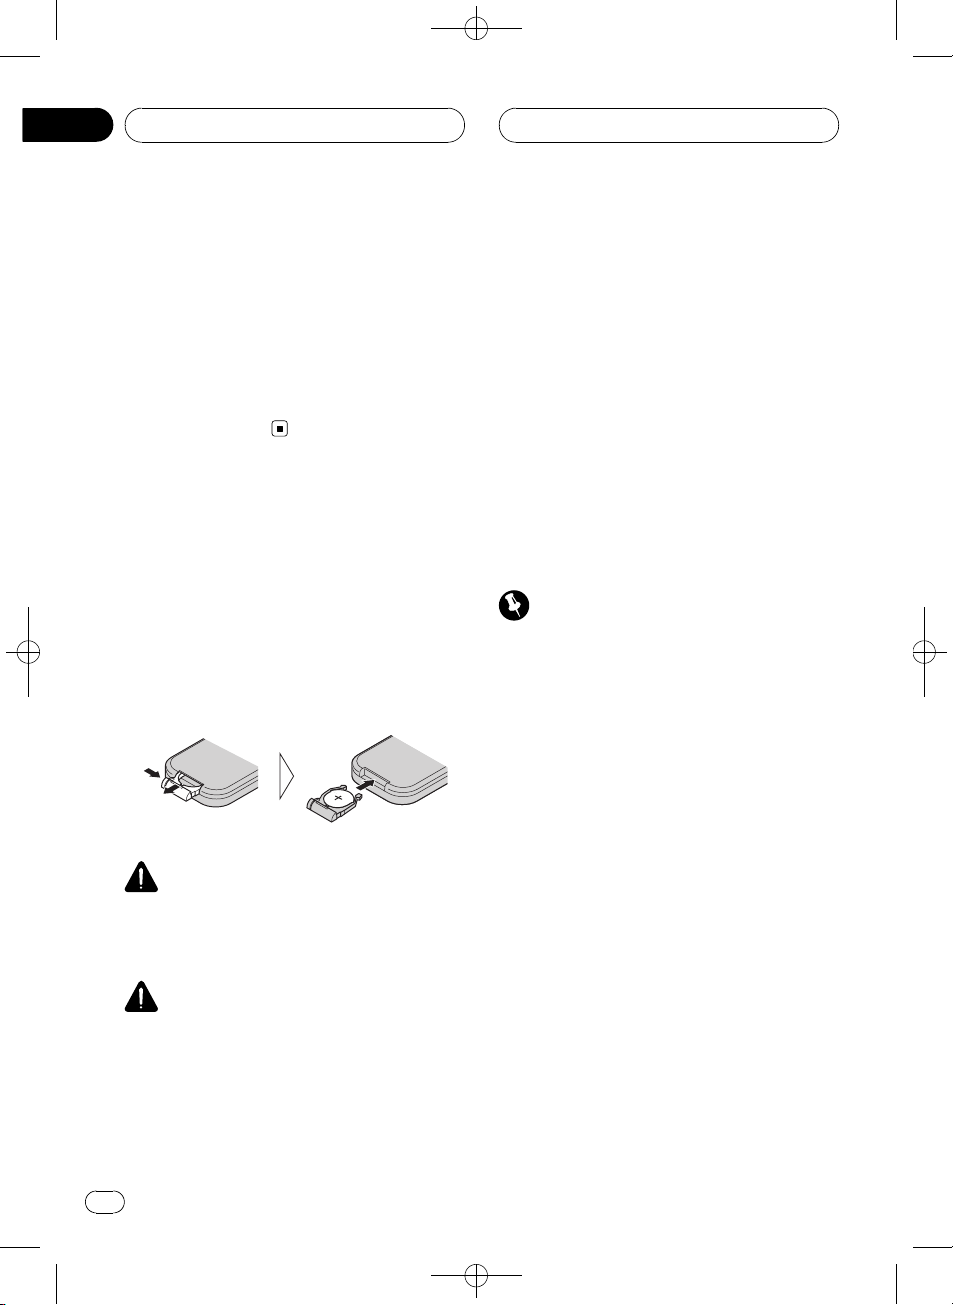
Installing the battery
Slide the tray out on the back of the remote
control and insert the battery with the plus (+)
and minus (–) poles pointing in the proper direction.
! When using for the first time, pull out the
film protruding from the tray.
WARNING
Keep the battery out of the reach of children.
Should the battery be swallowed, immediately
consult a doctor.
! Do not store the battery with metallic materi-
als.
! In the event of battery leakage, wipe the re-
mote control completely clean and install a
new battery.
! When disposing of used batteries, please
comply with governmental regulations or environmental public institutions’ rules that
apply in your country/area.
Using the remote control
Point the remote control in the direction of the
front panel to operate.
! The remote control may not function prop-
erly in direct sunlight.
Important
! Do not store the remote control in high tem-
peratures or direct sunlight.
! Do not let the remote control fall onto the
floor, where it may become jammed under the
brake or accelerator pedal.
FUNCTION button and AUDIO button
You can also select the desired mode by
FUNCTION button and AUDIO button on the
remote control. But operation of FUNCTION
button and AUDIO button on the remote control differs from the operation of
MULTI-CONTROL on the head unit. When operating the remote control, switch through the
modes as described below to select the mode.
CAUTION
! Use only one CR2025 (3 V) lithium battery.
! Remove the battery if the remote control is not
used for a month or longer.
! Do not recharge, disassemble, heat or dispose
of the battery in fire.
! Do not handle the battery with metallic tools.
10
En
FUNCTION button operation
% Press FUNCTION to select the desired
mode (e.g., built-in CD player).
Press FUNCTION repeatedly to switch between the following modes:
<CRB2179-A/N>10
Page 11

Before You Start
Play mode (repeat play)—Random mode
(random play)—Scan mode (scan play)—
Pause (pause)—Search mode (search method)—Title Input (disc title input)—Jacket art
(jacket art read)
Note
Refer to Introduction of advanced built-in CD
player operation on page 20.
AUDIO button operation
% Press AUDIO to select the desired
mode.
Press AUDIO repeatedly to switch between
the following modes:
Fader (balance adjustment)—Position (position selector)—TA Mode (time alignment setting)—Time Alignment (time alignment
adjusting)—Loudness (loudness)—Powerful
(graphic equalizer adjustment)—FREQ. (16band graphic equalizer adjustment)—
Subwoofer1 (subwoofer on/off)—
Subwoofer2 (subwoofer cut-off frequency)—
Subwoofer3 (subwoofer slope)—Front HPF
(front high pass filter slope)—
Front HPF FREQ. (front high pass filter cut-off
frequency)—Rear HPF (rear high pass filter
slope)—Rear HPF FREQ. (rear high pass filter
cut-off frequency)—BBE (BBE)—COMP/BMX
(Compression and BMX)—Auto EQ (autoequalizer on/off)—SLA (source level adjustment)—AUI sound level (auditory user interface)
Black plate (11,1)
Section
01
English
Note
Refer to Introduction of audio adjustments on
page 71.
<CRB2179-A/N>11
En
11
Page 12
2
8
6
5
9
b
3
4
7
a
1
Section
02
Black plate (12,1)
What’s What
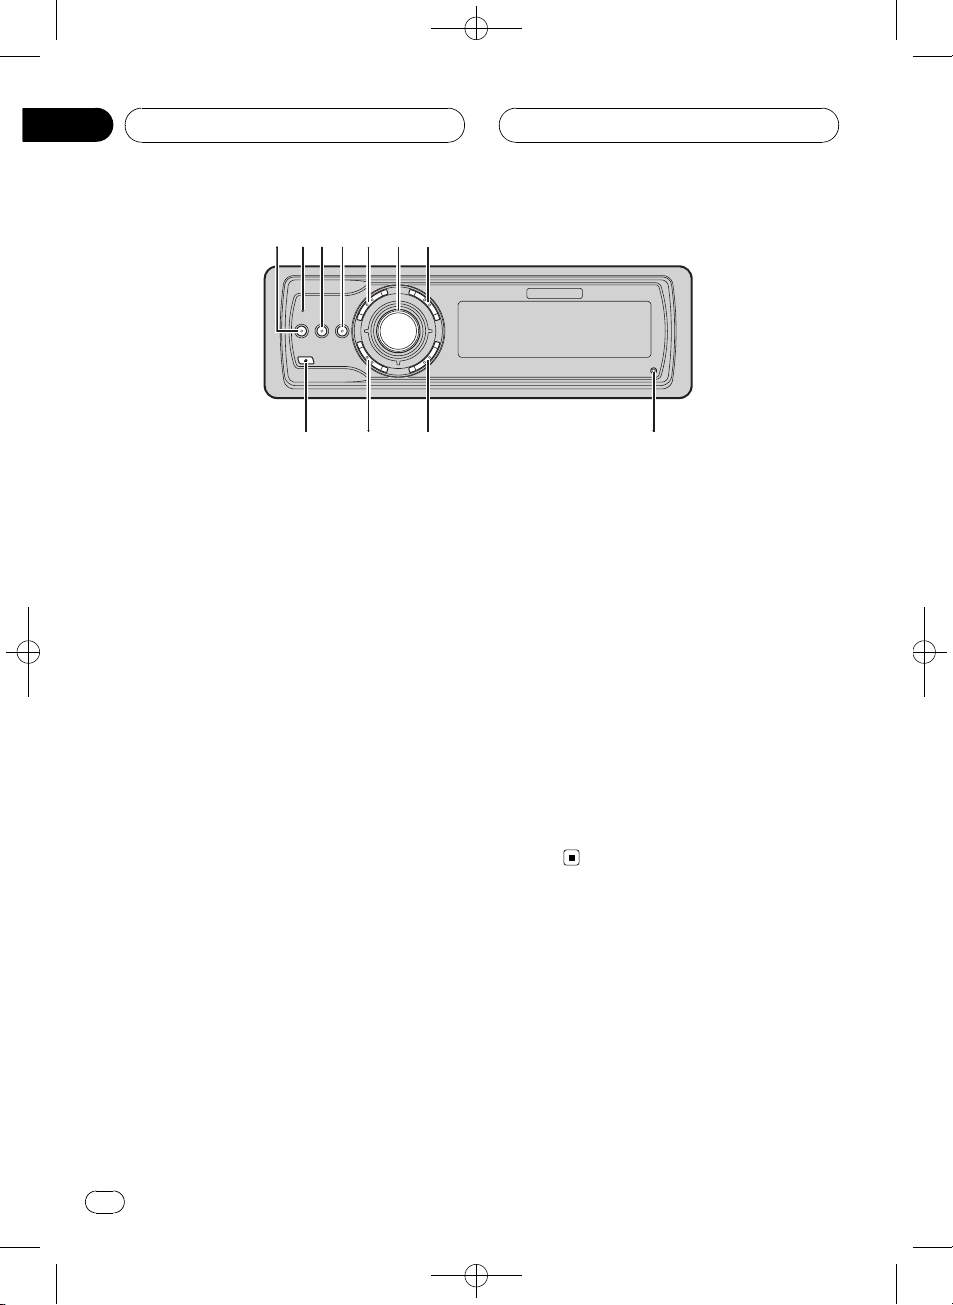
Head unit
1 EQ button
Press to select various equalizer curves.
2 Connection status indicator
Lights up when your cellular phone is connected via Bluetooth wireless technology.
3 DISPLAY button
Press to select different displays.
4 CLOCK button
Press to change to the clock display.
5 PHONE button
Press to select the phone as the source.
While operating a phone source, press to
end a call, reject an incoming call or cancel
making a call.
6 MULTI-CONTROL
Move to perform manual seek tuning, fast
forward, reverse and track search controls.
Also used for controlling functions.
Turn to increase or decrease the volume.
7 LIST button
Press to display the disc title list, track title
list, folder list, file list or preset channel list
depending on the source.
8 RESET button
Press to reset the microprocessor.
9 BAND button
Press to select among three FM bands and
one AM band and to cancel the control
mode of functions.
a SOURCE button
This unit is turned on by selecting a source.
Press to cycle through all the available
sources.
b EJECT button
Press to eject a CD from your built-in CD
player.
Press and hold to open or close the front
panel.
Remote control
Operation is the same as when using the buttons on the head unit.
c VOLUME buttons
Press to increase or decrease the volume.
d FUNCTION button
Press to select functions.
12
En
<CRB2179-A/N>12
Page 13

c9d
e
f
g
h
i
k
j
l
a
m
What’s What
Black plate (13,1)
Section
02
English
j ON HOOK button
While operating the phone source, press to
end a call or reject an incoming call.
k ATT button
Press to quickly lower the volume level, by
about 90%. Press once more to return to the
original volume level.
l ENTERTAINMENT button
Press to change to the entertainment display.
m AUDIO button
Press to select various sound quality controls.
e Joystick
Move to perform manual seek tuning, fast
forward, reverse and track search controls.
Also used for controlling functions.
Functions are the same as
MULTI-CONTROL except for volume control.
f DIRECT button
Press to directly select the desired track.
g CLEAR button
Press to cancel the input number when 0–9
are used.
h 0–9 buttons
Press to directly select the desired track,
preset tuning or disc. Buttons 1–6 can operate the preset tuning for the tuner or disc
number search for the multi-CD player.
i OFF HOOK button
Press to start talking on the phone while operating a phone source.
En
13
<CRB2179-A/N>13
Page 14

Section
03
Black plate (14,1)
Basic Operations
Turning the unit on
% Press SOURCE to turn the unit on.
When you select a source, the unit is turned
on.
Selecting a source
You can select a source you want to listen to.
To switch to the built-in CD player, load a disc
in the unit (refer to page 19).
% Press SOURCE to select a source.
Press SOURCE repeatedly to switch between
the following sources:
Tuner—Television—DVD player/MultiDVD player—Built-in CD player—MultiCD player—iPod—External unit 1—External unit 2—AUX1—AUX2—Telephone—
BT Audio
Notes
! In the following cases, the sound source will
not change:
— When there is no unit corresponding to the
selected source connected to this unit.
— When there is no disc in the unit.
— When there is no disc in the DVD player.
— When there is no magazine in the multi-
CD player.
— When there is no magazine in the multi-
DVD player.
— When the AUX (auxiliary input) is set to off
(refer to page 85).
— When the BT Audio source is set to off
(refer to Activating the BT Audio source on
page 87).
! External unit refers to a Pioneer product (such
as one available in the future) that, although
incompatible as a source, enables control of
basic functions by this unit. Two external units
can be controlled by this unit. When two external units are connected, the allocation of
them to external unit 1 or external unit 2 is
automatically set by this unit.
! When this unit’s blue/white lead is connected
to the vehicle’s auto-antenna relay control
terminal, the vehicle’s antenna extends when
this unit’s source is turned on. To retract the
antenna, turn the source off.
Loading a disc
1 Press EJECT to open the front panel.
CD loading slot appears.
# After a CD has been inserted, press SOURCE
to select the built-in CD player.
2 Insert a CD into the CD loading slot.
Front panel is closed automatically, and playback will start.
! With jacket art function on, jacket arts on
CD-ROM disc are automatically read in this
unit when the disc is inserted. To cancel
reading jacket arts, press BAND. For details, refer to Reading jacket arts on page 29.
CD loading slot
# You can eject a CD by pressing EJECT.
Notes
! The built-in CD player plays one standard, 12-
cm or 8-cm CD at a time. Do not use an adapter when playing 8-cm CDs.
! Do not insert anything other than a CD into
the CD loading slot.
14
En
<CRB2179-A/N>14
Page 15
Basic Operations
! There is sometimes a delay between starting
up CD playback and the sound being issued.
When being read, Format read is displayed.
! If you cannot insert a disc completely or if
after you insert a disc the disc does not play,
check that the label side of the disc is up.
Press EJECT to eject the disc, and check the
disc for damage before inserting it again.
! When the CD loading or ejecting function
does not operate properly, you can eject the
CD by pressing and holding EJECT while
opening the front panel.
! If an error message such as ERROR-11 is dis-
played, refer to Understanding built-in CD
player error messages on page 93.
Black plate (15,1)
Section
03
English
Adjusting the volume
% Use MULTI-CONTROL to adjust the
sound level.
With the head unit, turn MULTI-CONTROL to
increase or decrease the volume.
With the remote control, press VOLUME to increase or decrease the volume.
Turning the unit off
% Press SOURCE and hold until the unit
turns off.
<CRB2179-A/N>15
En
15
Page 16
43521
6
Section
04
Black plate (16,1)
Tuner
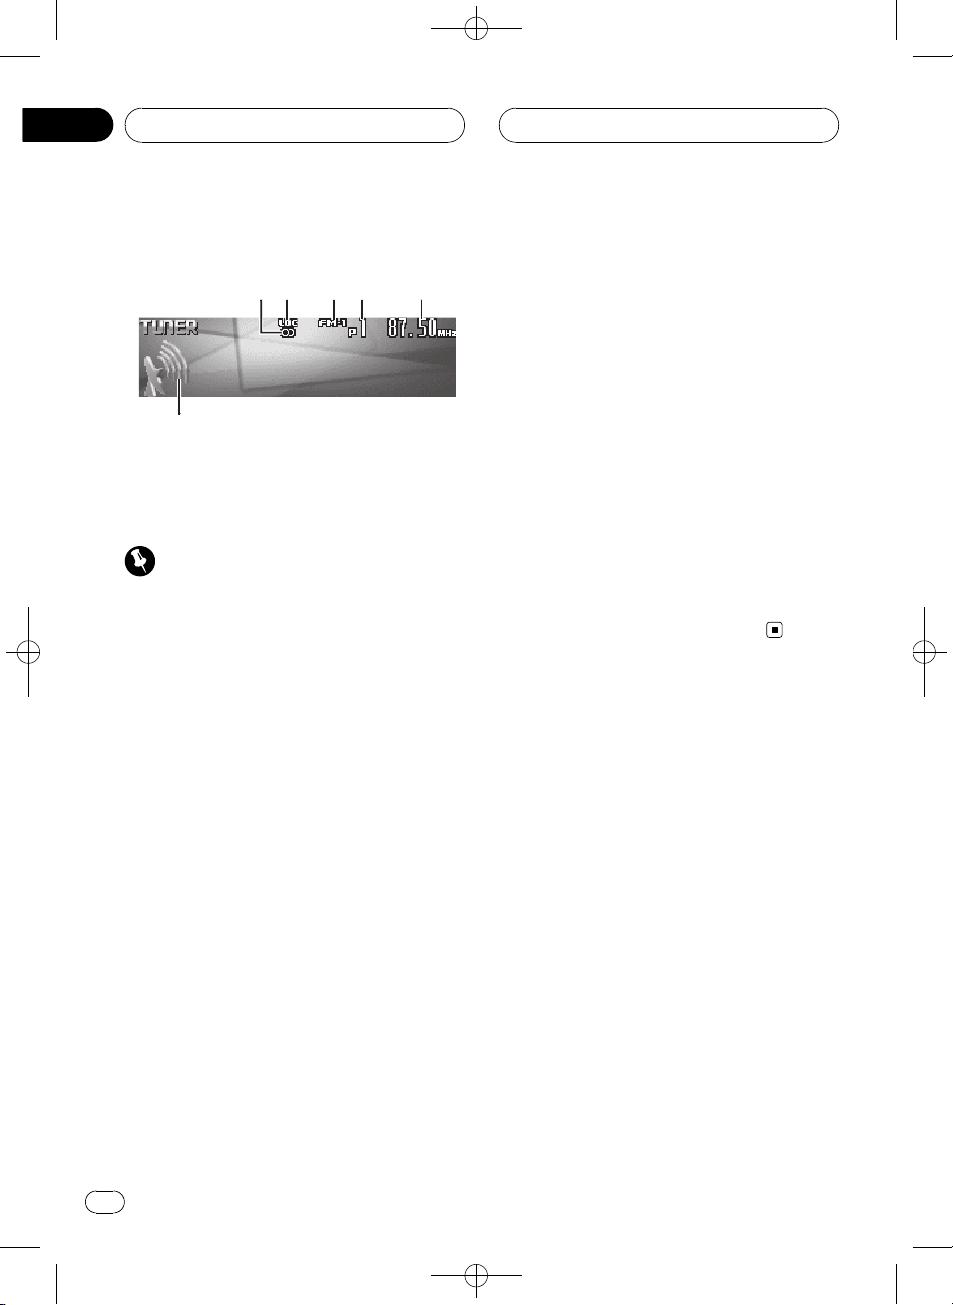
Listening to the radio
These are the basic steps necessary to operate
the radio. More advanced tuner operation is
explained starting on the next page.
Important
If you are using this unit in North, Central or
South America, reset the AM tuning step (see
Setting the AM tuning step on page 84).
1 Stereo (5) indicator
Shows when the selected frequency is
being broadcast in stereo.
2 LOC indicator
Shows when local seek tuning is on.
2 Press BAND to select a band.
Press BAND until the desired band (FM-1,
FM-2, FM-3 for FM or AM) is displayed.
3 To perform manual tuning, push
MULTI-CONTROL left or right.
The frequencies move up or down step by
step.
4 To perform seek tuning, push and hold
MULTI-CONTROL left or right for about one
second and release.
The tuner will scan the frequencies until a
broadcast strong enough for good reception is
found.
# You can cancel seek tuning by pushing
MULTI-CONTROL left or right.
# If you push and hold MULTI-CONTROL left or
right you can skip stations. Seek tuning starts as
soon as you release MULTI-CONTROL.
3 Band indicator
Shows which band the radio is tuned to, AM
or FM.
4 Preset number indicator
Shows which preset has been selected.
5 Frequency indicator
Shows the frequency to which the tuner is
tuned.
6 Signal level indicator
Shows the radio wave strength.
1 Press SOURCE to select the tuner.
Press SOURCE until you see Tuner displayed.
16
En
<CRB2179-A/N>16
Page 17

1
Tuner
Black plate (17,1)
Section
04
English
Introduction of advanced
tuner operation
1 Function display
Shows the function status.
1 Press MULTI-CONTROL to display the
main menu.
FUNCTION, AUDIO and ENTERTAINMENT
appear on the display.
2 Use MULTI-CONTROL to select
FUNCTION.
Turn to change the menu option; press to select.
The function name appears on the display.
3 Turn MULTI-CONTROL to select the
function.
Turn MULTI-CONTROL clockwise or counterclockwise to switch between the functions in
the following order:
BSM (best stations memory)—Local (local
seek tuning)
# To return to the frequency display, press
BAND.
Note
If you do not operate the function within about 30
seconds, the display is automatically returned to
the frequency display.
Storing and recalling
broadcast frequencies
You can easily store up to six broadcast frequencies for later recall.
1 When you find a frequency that you
want to store in memory press LIST to
switch to the preset channel list mode.
2 Use MULTI-CONTROL to store the selected frequency in memory.
Turn to change the preset number; press and
hold to store.
The preset number you have selected will
flash and then remain lit. The selected radio
station frequency has been stored in memory.
# If you do not operate the list within about 30
seconds, the preset channel list mode is canceled automatically.
Notes
! Up to 18 FM stations, six for each of the three
FM bands, and six AM stations can be stored
in memory.
! You can also store radio station frequencies
assigned to preset tuning numbers by pressing and holding one of the preset tuning buttons 1–6 on the remote control.
Storing the strongest
broadcast frequencies
BSM (best stations memory) lets you automatically store the six strongest broadcast frequencies under preset tuning buttons 1–6.
Once stored you can tune in to those frequencies with the touch of button.
1 Use MULTI-CONTROL to select BSM in
the function menu.
BSM appears in the display.
<CRB2179-A/N>17
En
17
Page 18
Section
04
Black plate (18,1)
Tuner
2 Press MULTI-CONTROL to turn BSM on.
Searching is displayed. While Searching is
displayed, the six strongest broadcast frequencies will be stored under preset tuning numbers 1–6 in the order of their signal strength.
When finished, the preset channel list appears.
# To cancel the storage process, press
MULTI-CONTROL.
3 Use MULTI-CONTROL to select the desired station.
Turn to change the station; press to select.
# You can also change the station by pushing
MULTI-CONTROL up or down.
Note
Storing broadcast frequencies with BSM may replace broadcast frequencies you have saved
using buttons 1–6.
Selecting stations from the
preset channel list
The preset channel list lets you see the list of
preset stations and select one of them to receive.
1 Press LIST to switch to the preset channel list mode during the frequency display.
2 Use MULTI-CONTROL to select the desired station.
Turn to change the station; press to select.
# You can also change the station by pushing
MULTI-CONTROL up or down.
# If you do not operate the list within about 30
seconds, the preset channel list mode is canceled automatically.
Notes
! You can also recall radio station frequencies
assigned to preset tuning numbers by pushing MULTI-CONTROL up or down during the
frequency display.
! You can also recall radio station frequencies
assigned to preset tuning numbers by pressing one of the preset tuning buttons 1–6 on
the remote control.
Tuning in strong signals
Local seek tuning lets you tune in only those
radio stations with sufficiently strong signals
for good reception.
1 Use MULTI-CONTROL to select Local in
the function menu.
Local appears in the display.
2 Press MULTI-CONTROL to turn local
seek tuning on.
Local seek sensitivity (e.g., Level 2) appears in
the display.
# To turn local seek tuning off, press
MULTI-CONTROL again.
3 Push MULTI-CONTROL left or right to
set the sensitivity.
There are four levels of sensitivity for FM and
two levels for AM:
FM: Level 1—Level 2—Level 3—Level 4
AM: Level 1—Level 2
The Level 4 setting allows reception of only
the strongest stations, while lower settings let
you receive progressively weaker stations.
18
En
<CRB2179-A/N>18
Page 19
132
Built-in CD Player
Black plate (19,1)
Section
05
English
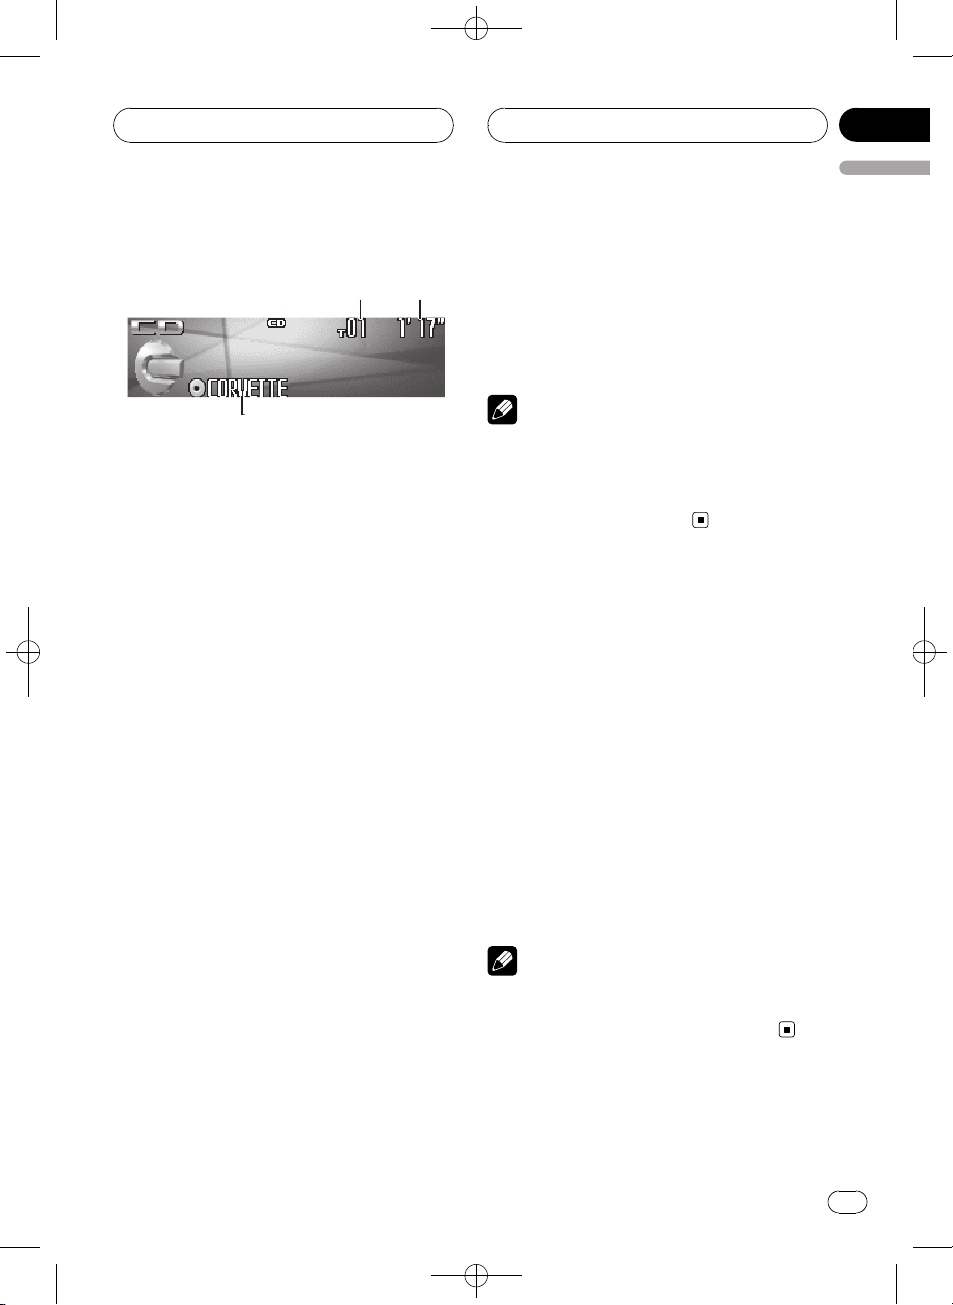
Playing a CD
These are the basic steps necessary to play a
CD with your built-in CD player. More advanced CD operation is explained starting on
the next page.
1 Track number indicator
Shows the track number currently playing.
2 Play time indicator
Shows the elapsed playing time of the current track.
3 Disc title indicator
Shows the title of the currently playing disc.
! If no title has been entered for the cur-
rently playing disc, nothing is displayed.
1 Press SOURCE to select the built-in CD
player.
Press SOURCE until you see Compact Disc
displayed.
# If no disc is loaded in the unit, you cannot select Compact Disc (built-in CD player). Insert a
disc in the unit. (Refer to page 14.)
2 To perform fast forward or reverse,
push and hold MULTI-CONTROL left or
right.
# If you select Rough search, pushing and hold-
ing MULTI-CONTROL left or right enables you to
search every 10 tracks in the current disc. (Refer
to Selecting the search method on page 21.)
3 To skip back or forward to another
track, push MULTI-CONTROL left or right.
Pushing MULTI-CONTROL right skips to the
start of the next track. Pushing
MULTI-CONTROL left once skips to the start
of the current track. Pushing again will skip to
the previous track.
Note
When a CD TEXT disc is inserted, the disc title
automatically begins to scroll in the display.
When Ever Scroll is set to ON at the initial setting,
the disc title scrolls continuously. Refer to Switch-
ing the Ever Scroll on page 87.
Selecting a track directly
When using the remote control, you can select
a track directly by entering the desired track
number.
1 Press DIRECT.
Track number input display appears.
2 Press 0–9 buttons to enter the desired
track number.
# You can cancel the input number by pressing
CLEAR.
3 Press DIRECT.
The track of entered number will play.
Note
After entering the number input mode, if you do
not perform an operation within about eight seconds, the mode is automatically canceled.
<CRB2179-A/N>19
En
19
Page 20

1
Section
05
Black plate (20,1)
Built-in CD Player
Introduction of advanced
built-in CD player operation
1 Function display
Shows the function status.
1 Press MULTI-CONTROL to display the
main menu.
FUNCTION, AUDIO and ENTERTAINMENT
appear on the display.
2 Use MULTI-CONTROL to select
FUNCTION.
Turn to change the menu option; press to select.
The function name appears on the display.
3 Turn MULTI-CONTROL to select the
function.
Turn MULTI-CONTROL clockwise or counterclockwise to switch between the functions in
the following order:
Play mode (repeat play)—Random mode
(random play)—Scan mode (scan play)—
Pause (pause)—Search mode (search method)—Title Input (disc title input)—Jacket art
(jacket art read)
# To return to the playback display, press BAND.
Notes
! When playing a CD TEXT disc, you cannot
switch to Title Input. The disc title will have
already been recorded on a CD TEXT disc.
! When playing audio data (CD-DA), it is not ef-
fective even if you turn Jacket art on. (Refer to
page 29.)
! If you do not operate the function within about
30 seconds, the display is automatically returned to the playback display.
Repeating play
There are two repeat play ranges for the builtin CD player: Disc repeat (disc repeat) and
Track repeat (one-track repeat).
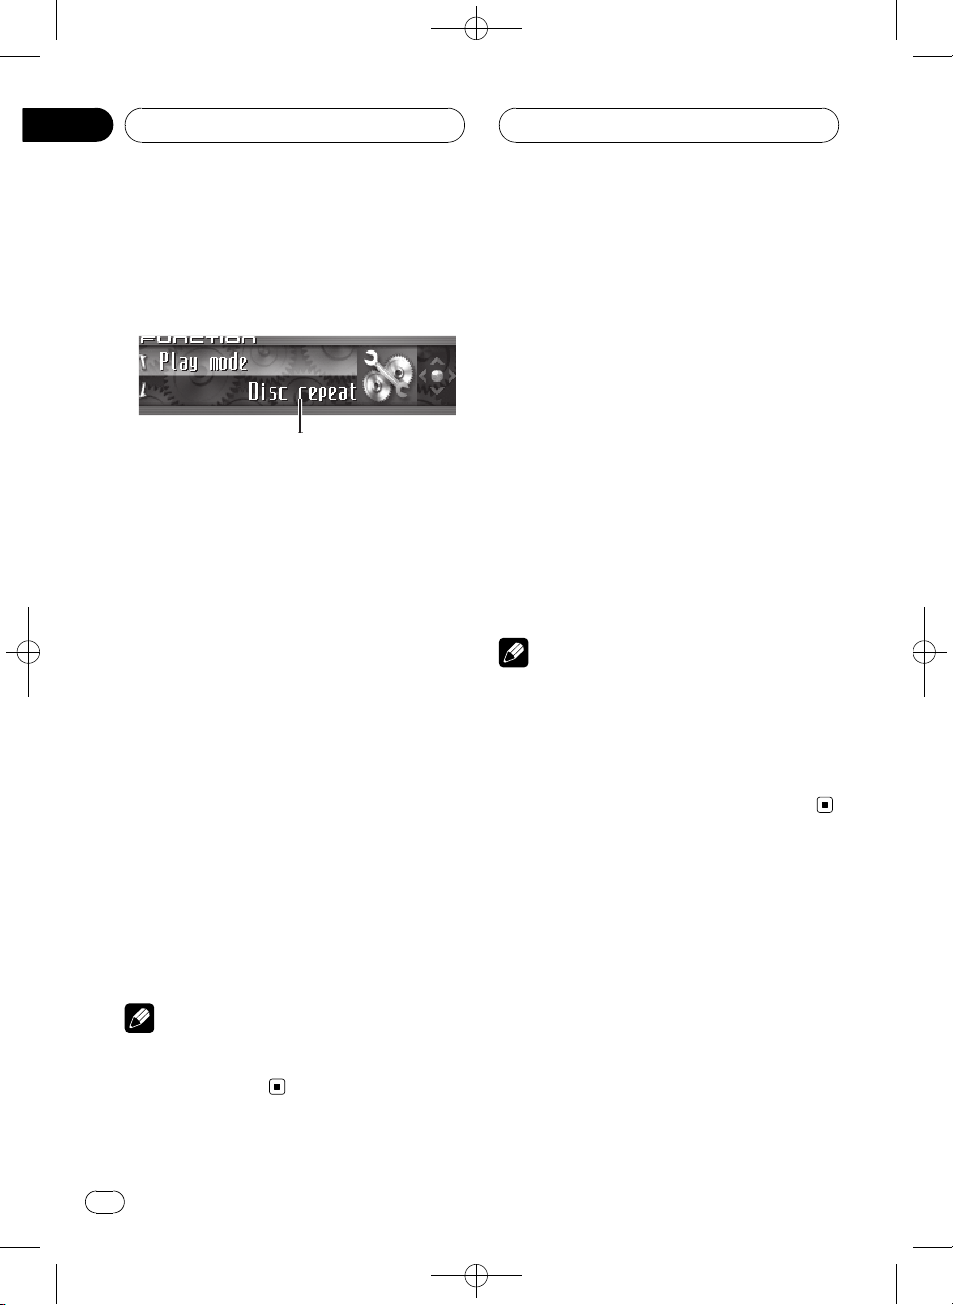
1 Use MULTI-CONTROL to select
Play mode in the function menu.
Play mode appears in the display.
2 Press MULTI-CONTROL to select the repeat range.
Press MULTI-CONTROL repeatedly until the
desired repeat range appears in the display.
! Disc repeat – Repeat the current disc
! Track repeat – Repeat just the current
track
Note
If you perform track search or fast forward/reverse during Track repeat, the repeat play range
changes to Disc repeat.
Playing tracks in random order
Random play lets you play back tracks on the
CD in a random order.
1 Use MULTI-CONTROL to select
Random mode in the function menu.
Random mode appears in the display.
2 Press MULTI-CONTROL to turn random
play on.
Tracks will play in a random order.
# To turn random play off, press
MULTI-CONTROL again.
20
En
<CRB2179-A/N>20
Page 21
Built-in CD Player
Black plate (21,1)
Section
05
English
Scanning tracks of a CD
Scan play lets you hear the first 10 seconds of
each track on the CD.
1 Use MULTI-CONTROL to select
Scan mode in the function menu.
Scan mode appears in the display.
2 Press MULTI-CONTROL to turn scan play
on.
The first 10 seconds of each track is played.
3 When you find the desired track press
MULTI-CONTROL to turn scan play off.
The track will continue to play.
# If the display has automatically returned to
the playback display, select Scan mode again by
using MULTI-CONTROL.
Note
After scanning of a CD is finished, normal playback of the tracks will begin again.
Pausing CD playback
Pause lets you temporarily stop playback of
the CD.
1 Use MULTI-CONTROL to select Pause in
the function menu.
Pause appears in the display.
2 Press MULTI-CONTROL to turn pause
on.
Playback of the current track pauses.
# To turn pause off, press MULTI-CONTROL
again.
Selecting the search method
You can switch the search method between
fast forward/reverse and searching every 10
tracks.
1 Use MULTI-CONTROL to select
Search mode in the function menu.
Search mode appears in the display.
2 Press MULTI-CONTROL to select the
search method.
Press MULTI-CONTROL until the desired
search method appears in the display.
! FF/REV – Fast forward and reverse
! Rough search – Searching every 10
tracks
Searching every 10 tracks in
the current disc
If a disc contains over 10 tracks, you can
search every 10 tracks. When a disc contains
many tracks, you can roughly search for the
track you want to play.
1 Select the search method Rough search.
Refer to Selecting the search method on this
page.
2 Push and hold MULTI-CONTROL left or
right to search every 10 tracks on a disc.
# If a disc contains less than 10 tracks, pushing
and holding MULTI-CONTROL right recalls the
last track of the disc. Also, if the remaining number of tracks after searching every 10 tracks is
less than 10, pushing and holding
MULTI-CONTROL right recalls the last track of
the disc.
<CRB2179-A/N>21
En
21
Page 22
Section
05
Black plate (22,1)
Built-in CD Player
# If a disc contains less than 10 tracks, pushing
and holding MULTI-CONTROL left recalls the first
track of the disc. Also, if the remaining number of
tracks after searching every 10 tracks is less than
10, pushing and holding MULTI-CONTROL left re-
calls the first track of the disc.
Using disc title functions
You can input CD titles and display the title.
The next time you insert a CD for which you
have entered a title, the title of that CD will be
displayed.
Use the disc title input feature to store up to
48 CD titles in the unit. Each title can be up to
10 characters long.
! When playing a CD TEXT disc, you cannot
switch to disc title input display. The disc
title will have already been recorded on a
CD TEXT disc.
Entering disc titles
You can display the text information of any
disc that has had a disc title entered.
1 Play the CD that you want to enter a
title for.
4 Push MULTI-CONTROL up or down to
select a letter of the alphabet.
Each time MULTI-CONTROL is pushed up, alphabet, numbers or symbols are displayed in
ascending order (A B C ...). Each time
MULTI-CONTROL is pushed down, letters are
displayed in descending order.
5 Push MULTI-CONTROL right to move
the cursor to the next character position.
When the letter you want is displayed, push
MULTI-CONTROL right to move the cursor to
the next position and then select the next letter. Push MULTI-CONTROL left to move backwards in the display.
6 Move the cursor to the last position by
pushing MULTI-CONTROL right after entering the title.
When you push MULTI-CONTROL right one
more time, the entered title is stored in memory.
7 Press BAND to return to the playback
display.
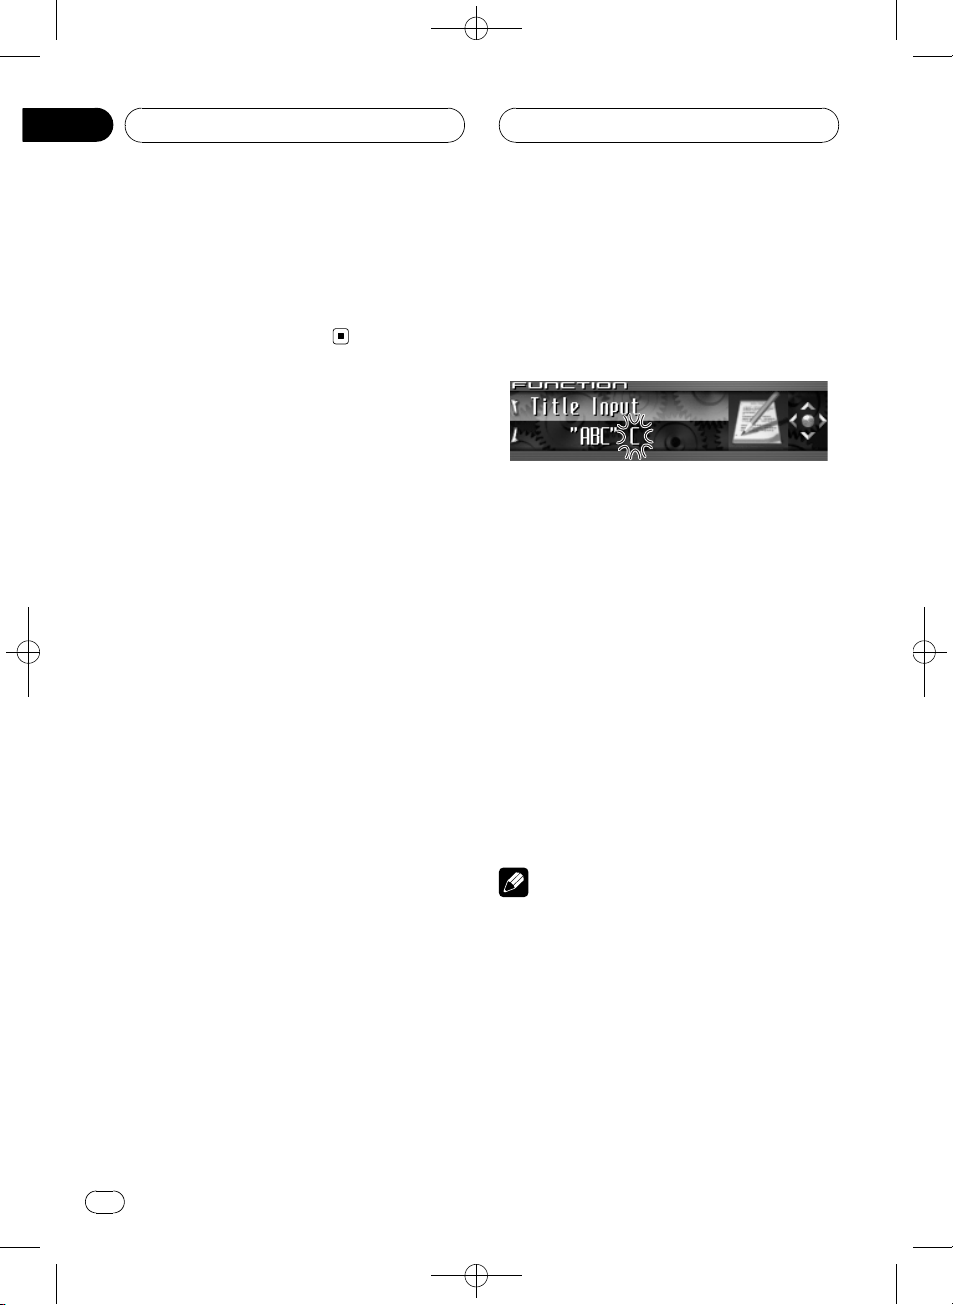
2 Use MULTI-CONTROL to select
Title Input in the function menu.
Title Input appears in the display.
3 Press DISPLAY to select the desired
character type.
Press DISPLAY repeatedly to switch between
the following character types:
Alphabet (upper case), numbers and symbols
—Alphabet (lower case)—European letters,
such as those with accents (e.g. á, à, ä, ç)—
Numbers and symbols
22
En
Notes
! Titles remain in memory, even after the disc
has been removed from the unit, and are recalled when the disc is reinserted.
! After data for 48 discs has been stored in
memory, data for a new disc will overwrite the
oldest one.
! If you connect a multi-CD player, you can
input disc titles for up to 100 discs.
! When a multi-CD player that does not support
disc title functions is connected, you cannot
enter disc titles in this unit.
<CRB2179-A/N>22
Page 23
Built-in CD Player
Black plate (23,1)
Section
05
English
Displaying disc titles
You can display the text information of any
disc that has had a disc title entered.
% Press DISPLAY.
Press DISPLAY repeatedly to switch between
the following settings:
: disc title—Simple display
Using CD TEXT functions
Some discs have certain information encoded
on the disc during manufacture. These discs
may contain such information as the CD title,
track title, artist’s name and playback time
and are called CD TEXT discs. Only these specially encoded CD TEXT discs support the
functions listed below.
Displaying text information on
CD TEXT discs
You can display the text information of any
disc that has had a disc title entered.
% Press DISPLAY.
Press DISPLAY repeatedly to switch between
the following settings:
: disc title— : disc artist name— : track
title—
track artist name—Simple display
# If specific information has not been recorded
on a CD TEXT disc, title or name is not displayed.
: track artist name— : disc title and
: disc artist name— : track title and :
than 24 letters, you can scroll the text information as follows.
! When the source icon is turned off, this
unit can display the first 30 letters of text information.
% Press DISPLAY and hold until the text
information begins to scroll through the
display.
The titles scroll.
Note
When Ever Scroll is set to ON at the initial setting,
text information scrolls continuously in the display. Refer to Switching the Ever Scroll on page 87.
Selecting tracks from the track
title list
Track title list lets you see the list of track titles
on a CD TEXT disc and select one of them to
play back.
1 Press LIST to switch to the track title list
mode.
2 Use MULTI-CONTROL to select the desired track title.
Turn to change the track title; press to play.
# You can also change the track title by pushing
MULTI-CONTROL up or down.
# If you do not operate the list within about 30
seconds, the track title list mode is canceled
automatically.
Scrolling text information in
the display
This unit can display the first 24 letters of disc
title, disc artist name, track title and track artist name. When the text information is longer
<CRB2179-A/N>23
En
23
Page 24

364
251
Section
06
Black plate (24,1)
MP3/WMA/AAC/WAV Player
Playing MP3/WMA/AAC/
WAV files
These are the basic steps necessary to play an
MP3/WMA/AAC/WAV with your built-in CD
player. More advanced MP3/WMA/AAC/WAV
operation is explained starting on page 26.
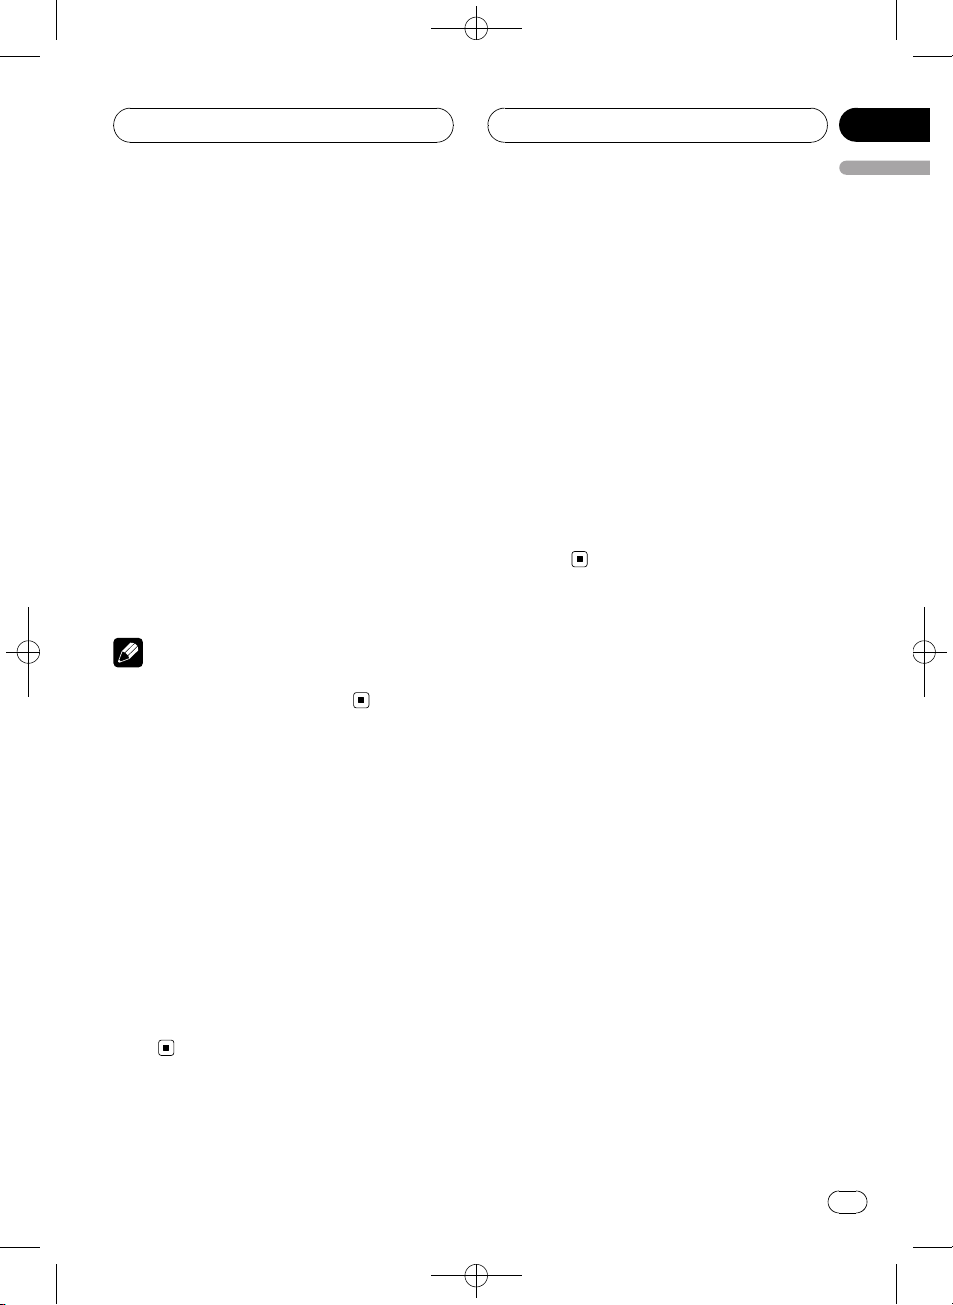
1 MP3/WMA/AAC/WAV indicator
Shows the type of file currently playing.
2 Folder number indicator
Shows the folder number currently playing.
3 Track number indicator
Shows the track (file) number currently playing.
4 Play time indicator
Shows the elapsed playing time of the current track (file).
5 Bit rate/sampling frequency indicator
Shows the bit rate or sampling frequency of
the current track (file).
6 Folder name indicator
Shows the name of the currently playing
folder.
1 Press SOURCE to select the built-in CD
player.
Press SOURCE until you see Compact Disc
displayed.
# If no disc is loaded in the unit, you cannot select Compact Disc (built-in CD player). Insert a
disc in the unit. (Refer to page 14.)
2 Push MULTI-CONTROL up or down to
select a folder.
# You cannot select a folder that does not have
an MP3/WMA/AAC/WAV file recorded in it.
# To return to folder 01 (ROOT), press and hold
BAND. However, if folder 01 (ROOT) contains no
files, playback commences with folder 02.
3 To perform fast forward or reverse,
push and hold MULTI-CONTROL left or
right.
# If you select Rough search, pushing and hold-
ing MULTI-CONTROL left or right enables you to
search every 10 tracks in the current folder. (Refer
to Selecting the search method on page 27.)
4 To skip back or forward to another
track, push MULTI-CONTROL left or right.
Pushing MULTI-CONTROL right skips to the
start of the next track. Pushing
MULTI-CONTROL left once skips to the start
of the current track. Pushing again will skip to
the previous track.
Notes
! When playing discs with MP3/WMA/AAC/
WAV files and audio data (CD-DA) such as
CD-EXTRA and MIXED-MODE CDs, both types
can be played only by switching mode between MP3/WMA/AAC/WAV and CD-DA with
BAND.
! If you have switched between playback of
MP3/WMA/AAC/WAV files and audio data
(CD-DA), playback starts at the first track on
the disc.
! The built-in CD player can play back an MP3/
WMA/AAC/WAV file recorded on CD-ROM.
(Refer to page 95 for files that can be played
back.)
24
En
<CRB2179-A/N>24
Page 25
MP3/WMA/AAC/WAV Player
Black plate (25,1)
Section
06
English
! Playback is carried out in order of file number.
Folders are skipped if they contain no files. (If
folder 01 (ROOT) contains no files, playback
commences with folder 02.)
! When playing back files recorded as VBR
(variable bit rate) files, the play time will not be
correctly displayed if fast forward or reverse
operations are used.
! When playing back MP3 files recorded as VBR
(variable bit rate) files, the bit rate value is not
displayed even after switching to bit rate.
(VBR will be displayed.)
! When playing back WMA files recorded as
VBR (variable bit rate) files, the average bit
rate value is displayed.
! There is no sound on fast forward or reverse.
! When an MP3/WMA/AAC/WAV disc is in-
serted, folder name automatically begins to
scroll in the display. When Ever Scroll is set to
ON at the initial setting, folder name scrolls
continuously. About Ever Scroll, refer to
Switching the Ever Scroll on page 87.
Selecting a track directly in
the current folder
When using the remote control, you can select
a track directly by entering the desired track
number.
Note
After entering the number input mode, if you do
not perform an operation within about eight seconds, the mode is automatically canceled.
1 Press DIRECT.
Track number input display appears.
2 Press 0–9 buttons to enter the desired
track number.
# You can cancel the input number by pressing
CLEAR.
3 Press DIRECT.
The track of entered number will play.
<CRB2179-A/N>25
En
25
Page 26
1
Section
06
Black plate (26,1)
MP3/WMA/AAC/WAV Player
Introduction of advanced
built-in CD player (MP3/
WMA/AAC/WAV) operation
1 Function display
Shows the function status.
1 Press MULTI-CONTROL to display the
main menu.
FUNCTION, AUDIO and ENTERTAINMENT
appear on the display.
2 Use MULTI-CONTROL to select
FUNCTION.
Turn to change the menu option; press to select.
The function name appears on the display.
3 Turn MULTI-CONTROL to select the
function.
Turn MULTI-CONTROL clockwise or counterclockwise to switch between the functions in
the following order:
Play mode (repeat play)—Random mode
(random play)—Scan mode (scan play)—
Pause (pause)—Search mode (search method)—Jacket art (jacket art read)
# To return to the playback display, press BAND.
Repeating play
For MP3/WMA/AAC/WAV playback, there are
three repeat play ranges: Folder repeat (folder
repeat), Track repeat (one-track repeat) and
Disc repeat (repeat all tracks).
1 Use MULTI-CONTROL to select
Play mode in the function menu.
Play mode appears in the display.
2 Press MULTI-CONTROL to select the repeat range.
Press MULTI-CONTROL repeatedly until the
desired repeat range appears in the display.
! Folder repeat – Repeat the current folder
! Track repeat – Repeat just the current
track
! Disc repeat – Repeat all tracks
Notes
! If you select another folder during repeat play,
the repeat play range changes to Disc repeat.
! If you perform track search or fast forward/re-
verse during Track repeat, the repeat play
range changes to Folder repeat.
! When Folder repeat is selected, it is not pos-
sible to play back a subfolder of that folder.
Playing tracks in random order
Random play lets you play back tracks in a
random order within the repeat range,
Folder repeat and Disc repeat.
Note
If you do not operate the function within about 30
seconds, the display is automatically returned to
the playback display.
26
En
1 Select the repeat range.
Refer to Repeating play on this page.
2 Use MULTI-CONTROL to select
Random mode in the function menu.
Random mode appears in the display.
<CRB2179-A/N>26
Page 27
MP3/WMA/AAC/WAV Player
Black plate (27,1)
Section
06
English
3 Press MULTI-CONTROL to turn random
play on.
Tracks will play in a random order within the
previously selected Folder repeat or
Disc repeat ranges.
# To turn random play off, press
MULTI-CONTROL again.
Scanning folders and tracks
While you are using Folder repeat, the beginning of each track in the selected folder plays
for about 10 seconds. When you are using
Disc repeat, the beginning of the first track of
each folder is played for about 10 seconds.
1 Select the repeat range.
Refer to Repeating play on the previous page.
2 Use MULTI-CONTROL to select
Scan mode in the function menu.
Scan mode appears in the display.
3 Press MULTI-CONTROL to turn scan play
on.
The first 10 seconds of each track of the current folder (or the first track of each folder) is
played.
4 When you find the desired track (or
folder) press MULTI-CONTROL to turn scan
play off.
The track (or folder) will continue to play.
# If the display has automatically returned to
the playback display, select Scan mode again by
using MULTI-CONTROL.
Note
After track or folder scanning is finished, normal
playback of the tracks will begin again.
Pausing MP3/WMA/AAC/
WAV playback
Pause lets you temporarily stop playback of
the MP3/WMA/AAC/WAV.
1 Use MULTI-CONTROL to select Pause in
the function menu.
Pause appears in the display.
2 Press MULTI-CONTROL to turn pause
on.
Playback of the current track pauses.
# To turn pause off, press MULTI-CONTROL
again.
Selecting the search method
You can switch the search method between
fast forward/reverse and searching every 10
tracks.
1 Use MULTI-CONTROL to select
Search mode in the function menu.
Search mode appears in the display.
2 Press MULTI-CONTROL to select the
search method.
Press MULTI-CONTROL until the desired
search method appears in the display.
! FF/REV – Fast forward and reverse
! Rough search – Searching every 10
tracks
Searching every 10 tracks in
the current folder
If the current folder contains over 10 tracks,
you can search every 10 tracks. When one
folder contains a lot of tracks, you can roughly
search for the track you want to play.
<CRB2179-A/N>27
En
27
Page 28
Section
06
Black plate (28,1)
MP3/WMA/AAC/WAV Player
1 Select the search method Rough search.
Refer to Selecting the search method on the
previous page.
2 Push and hold MULTI-CONTROL left or
right to search every 10 tracks in the current folder.
# If the current folder contains less than 10
tracks, pushing and holding MULTI-CONTROL
right recalls the last track of the folder. Also, if the
remaining number of tracks after searching every
10 tracks is less than 10, pushing and holding
MULTI-CONTROL right recalls the last track of
the folder.
# If the current folder contains less than 10
tracks, pushing and holding MULTI-CONTROL
left recalls the first track of the folder. Also, if the
remaining number of tracks after searching every
10 tracks is less than 10, pushing and holding
MULTI-CONTROL left recalls the first track of the
folder.
Displaying text information
on MP3/WMA/AAC/WAV disc
Text information recorded on an MP3/WMA/
AAC/WAV disc can be displayed.
When playing back an MP3/
WMA/AAC disc
% Press DISPLAY.
Press DISPLAY repeatedly to switch between
the following settings:
: folder name— : file name— : folder
name and
: album title— : artist name and : track
title—
ple display
# If specific information has not been recorded
on an MP3/WMA/AAC disc, title or name is not
displayed.
: file name— : artist name and
: comment and : file name—Sim-
# Depending on the version of iTunes
write MP3 files onto a disc, comment information
may not be correctly displayed.
# Depending on the version of Windows Media
Player used to encode WMA files, album names
and other text information may not be correctly
displayed.
®
used to
When playing back a WAV disc
% Press DISPLAY.
Press DISPLAY repeatedly to switch between
the following settings:
: folder name— : file name— : folder
name and
# If specific information has not been recorded
on a WAV disc, name is not displayed.
# You can only play back WAV files in the frequencies 16, 22.05, 24, 32, 44.1 and 48 kHz
(LPCM), or 22.05 and 44.1 kHz (MS ADPCM). The
sampling frequency shown in the display may be
rounded.
: file name—Simple display
Scrolling text information
in the display
This unit can display the first 24 letters only of
folder name, file name, track title, artist name,
album title and comment. When the recorded
information is longer than 24 letters, you can
scroll the text to the left so that the rest of the
text information can be seen.
! When the jacket art is turned off, this unit
can display the first 30 letters of text information.
% Press DISPLAY and hold until the text
information begins to scroll through the
display.
The text information scrolls.
28
En
<CRB2179-A/N>28
Page 29
MP3/WMA/AAC/WAV Player
Black plate (29,1)
Section
06
English
Notes
! Unlike MP3, WMA and AAC file format, WAV
files display only the folder name and the file
name.
! When Ever Scroll is set to ON at the initial set-
ting, text information scrolls continuously in
the display. Refer to Switching the Ever Scroll
on page 87.
Selecting tracks from the
file name list
File name list lets you see the list of file names
(or folder names) and select one of them to
playback.
1 Press LIST to select the file name list
mode.
Press LIST repeatedly to switch between the
following lists:
Folder/file name list—jacket art list—playback
display
2 Use MULTI-CONTROL to select the desired file name (or folder name).
Turn to change the name of file or folder;
press to play; push right to see a list of the
files (or folders) in the selected folder.
# You can also change the name of file or folder
by pushing MULTI-CONTROL up or down.
# To return to the previous list (the folder one
level higher), push MULTI-CONTROL left.
# If the folder/file number is more than 100, last
2-digit of the folder/file number is displayed.
# Number of the folders/files in the currently selected folder will be indicated on the right side of
the display.
# If you do not operate the list within about 30
seconds, the file name list mode is canceled
automatically.
Displaying jacket arts on
CD-ROM discs
If jacket arts are recorded on CD-ROM disc,
you can display them on this unit so you can
easily find a specific folder looking at the jacket art.
! Record jacket arts for folders on CD-ROM
in advance using your computer. For details, please visit the following site:
http://www.pioneer.co.jp/car/pclink4/indexe.html
! Jacket arts (max. 15 images) directly be-
neath the ROOT folder can be read. If
images have been recorded on the lower
tier than the ROOT folder, these images are
not displayed. In this case, preset images
are displayed. Refer to About folders and
MP3/WMA/AAC/WAV files on page 97.
Reading jacket arts
With this function on, jacket arts on CD-ROM
disc are automatically read in this unit when
the disc is inserted.
! Up to 15 jacket arts can be read in this unit.
! Reading jacket arts can take approx. 40
seconds. If the disc is reloaded, this unit
read jacket arts again from the beginning.
! Jacket arts are not displayed if MIXED-
MODE CD or partial CD is inserted into this
unit.
! For other folders with no jacket arts re-
corded, this unit automatically assigns preset images to them.
1 Use MULTI-CONTROL to select
Jacket art in the function menu.
Jacket art appears in the display.
2 Press MULTI-CONTROL to turn jacket art
read on.
# To turn jacket art function off, press
MULTI-CONTROL again.
<CRB2179-A/N>29
En
29
Page 30

Section
06
MP3/WMA/AAC/WAV Player
Selecting folders with jacket arts
You can display the list of folders that are already assigned jacket arts and select one to
start playback.
! In the jacket art list, this unit displays up to
15 folders with jacket arts.
! For other folders with no jacket arts re-
corded, this unit automatically assigns preset images to them.
1 Press LIST to select the jacket art list
mode.
Press LIST repeatedly to switch between the
following lists:
Folder/file name list—jacket art list—playback
display
2 Push MULTI-CONTROL up or down to
change the group of jacket art.
Black plate (30,1)
3 Use MULTI-CONTROL to select jacket art
of the desired folder.
Turn to change the jacket art of folder; press to
play.
# You can also change the jacket art of folder by
pushing MULTI-CONTROL left or right.
# If you do not operate the list within about 30
seconds, the jacket art list mode is canceled
automatically.
30
En
<CRB2179-A/N>30
Page 31

51234
6
7
Bluetooth Telephone
Black plate (31,1)
Section
07
English
Hands-free phoning with
cellular phones featuring
Bluetooth wireless technology
If your cellular phone features Bluetooth wireless technology, you can connect to this unit
for hands-free, wireless calls, even while driving.
Important
! Since this unit is on standby to connect with
your cellular phones via Bluetooth wireless
technology, using this unit without running
the engine can result in battery drainage.
! When phone is selected as a source, no audio
adjustments, except balance adjustment, are
possible.
1 Battery strength indicator
Shows the battery strength of cellular
phone.
! Battery strength indicator may differ
from the actual battery strength.
! If the battery strength is not available,
nothing is displayed in the battery
strength indicator area.
2 Signal level indicator
Shows the signal strength of cellular phone.
! Signal level indicator may differ from the
actual signal level.
! Depending on the cellular phones featur-
ing Bluetooth wireless technology, radio
field intensity is not available. In this
case, the signal level indicator does not
appear.
3 Automatic answering/Automatic rejecting indicator
Shows AUTO when the automatic answering function is on (for more details, refer to
Setting the automatic answering on page
47).
Shows REF when the automatic rejecting
function is on (for more details, refer to Set-
ting the automatic rejecting on page 47).
4 Incoming call notice indication
Shows when an incoming call has been received and not checked yet.
5 Device name
Shows the device name of the cellular
phone.
6 Calendar display
Shows the date, and time.
7 User number indicator
Shows the registration number of the cellular phone.
Notes
! This unit’s phone call reception is on standby
when ignition switch is set to ACC or ON.
! The line-of-sight distance between this unit
and your cellular phone must be 10 meters or
less for sending and receiving voice and data
via Bluetooth wireless technology. However,
the transmission distance may become shorter than the estimated distance, depending on
the environment in use.
! In order to use Bluetooth wireless technology,
devices must be able to interpret certain profiles. This unit is compatible with the following
profiles.
— GAP (Generic Access Profile)
— SDP (Service Discovery Protocol)
<CRB2179-A/N>31
En
31
Page 32

Section
07
Black plate (32,1)
Bluetooth Telephone
— OPP (Object Push Profile)
— HSP (Head Set Profile)
— HFP (Hands Free Profile)
! When phone is selected as a source, volume
and equalizer curve are automatically changed to suitable settings for the phone source.
When the source is returned to another
source, volume and equalizer settings automatically return to the original setting.
About the telephone source
Standby mode
Once connected via Bluetooth wireless technology, this unit will remain on telephone
source standby in the background all the
while the connection is sustained. This means
you can freely use the other functions of this
unit, but still be ready to receive a call.
% Press SOURCE to select the telephone.
Press SOURCE until you see Telephone dis-
played.
# You can also select the Telephone by press-
ing PHONE.
nology, refer to Connecting a cellular phone on
page 35.
# Your phone should now be temporarily connected; however, to make best use of the technology, we recommend you register the phone to
this unit.
2 Registration
Refer to Registering connected cellular phone
on page 37 for instructions on how to register
your temporarily connected phone.
3 Volume adjustment
Adjust the earpiece volume on your cellular
phone for comfort. When adjusted, the volume
level is memorized in this unit as the default
setting.
# Caller’s voice volume and ring volume may
vary depending on the type of cellular phones.
# If the difference between the ring volume and
caller’s voice volume is big, overall volume level
may become unstable.
# Before disconnecting cellular phone from this
unit, make sure to adjust the volume to proper
level. If the volume has been muted (zero level)
on your cellular phone, the volume level of your
cellular phone remains muted even after the cellular phone is disconnected from this unit.
Setting up for hands-free
phoning
Before you can use the hands-free phoning
function you will need to set up the unit for
use with your cellular phone. This entails establishing a Bluetooth wireless connection between this unit and your phone, registering
your phone with this unit, and adjusting the
volume level.
1 Connection
For detailed instructions on connecting your
phone to this unit via Bluetooth wireless tech-
32
En
<CRB2179-A/N>32
Page 33

Bluetooth Telephone
Black plate (33,1)
Section
07
English
Basic operation of handsfree phoning
These are the basic operations to use handsfree phoning via Bluetooth wireless technology. More advanced hands-free phoning operations are explained starting on Introduction
of advanced hands-free phoning operation on
page 35.
Making a phone call
Dial a number
The most basic way to make a call is to simply
dial the number.
1 Press DIRECT on the remote control and
dial a phone number by pressing 0–9.
2 Press JOYSTICK on the remote control
to confirm the number.
3 Press OFF HOOK on the remote control
to call the number.
# You can also dial a phone number in the function menu.
Refer to Making a call by entering phone number
on page 45 for detailed instructions.
Calling a number in the Phone Book
or the Call History
Refer to Calling a number in the Phone Book
on page 40 and Calling a number from the Call
History on page 45 for detailed instructions.
Preset number
Numbers that you dial frequently can be assigned to presets for quick recall.
Refer to Using preset numbers on page 43 for
how to assign a number to a preset.
1 Push MULTI-CONTROL up or down to
select a preset number.
Preset numbers Dial preset 1–10 appear in
the display.
# You can also recall preset numbers
Dial preset 1–10 by pressing 0–9 on the remote
control.
# If the number is already in the Phone Book
then the name is also displayed.
# No data is displayed for preset numbers that
have not been assigned.
2 Press MULTI-CONTROL to make a call.
# You can also perform this operation by pressing OFF HOOK on the remote control.
Voice recognition
If your cellular phone features voice recognition technology, you can make a call by voice
commands.
! Operation varies depending on the type of
your cellular phone. Refer to the instruction
manual that came with your cellular phone
for detailed instructions.
! This function can be operated only when
the connection is established with HFP
(Hands Free Profile).
1 Press BAND and hold until Voice dial
appears in the display.
Voice dial appears in the display. When
Voice dial ON is displayed, voice recognition
function is now ready.
# If your cellular phone does not feature voice
recognition function, No voice dial appears in
the display and opearation is not available.
2 Pronounce the name of your contact.
For more details concerning the voice recognition operation, refer to your cellular phone’s
instruction manual.
<CRB2179-A/N>33
En
33
Page 34

Section
07
Black plate (34,1)
Bluetooth Telephone
Taking a phone call
Answering an incoming call
Even when a source other than Telephone is
selected or when this unit itself is turned off,
you can still answer incoming calls. If you set
this unit to automatically answering incoming
calls, refer to Setting the automatic answering
on page 47.
1 When a call comes in, press
MULTI-CONTROL.
# You can also perform this operation by pressing OFF HOOK on the remote control.
# If the private mode is selected on the cellular
phone, hands-free phoning may not be performed.
2 To end the call, press PHONE.
The estimated call time appears in the display
(this may differ slightly from the actual call
time).
# You can also perform this operation by pressing ON HOOK on the remote control.
# You may hear a noise when you disconnect
the phone.
Rejecting an incoming call
You can reject an incoming call. If you want to
set this unit to automatically rejecting all incoming calls, refer to Setting the automatic re-
jecting on page 47.
% When a call comes in, press PHONE.
The call is rejected.
# You can also perform this operation by pressing ON HOOK on the remote control.
# The rejected call is recorded in missed call
history list. About the missed call history list,
refer to Using the Call History on page 44.
Answering a call waiting
If while you are talking on the phone another
call comes in, the number (or name if it is in
your phone book) of the new caller appears in
the display to signal that you have a call waiting. You can put the first caller on hold while
you answer the call waiting, or you can choose
to reject the call, in which case the number is
logged as a missed call.
1 Press MULTI-CONTROL to answer a call
waiting.
# You can also perform this operation by pressing OFF HOOK on the remote control.
# Pressing MULTI-CONTROL switches between
callers on hold.
2 Press PHONE to end all calls.
Pressing PHONE ends all calls including a call
waiting on line.
# You can also perform this operation by pressing ON HOOK on the remote control.
# Except for switching between the calls on line,
you cannot end each call waiting individually.
Pressing PHONE ends all calls.
Rejecting a call waiting
If you would rather not interrupt your current
call to answer a call waiting, you can reject it
and have the number added to the missed call
history list.
! With some cellular phones, this feature
may not be possible.
% Press PHONE to reject a call waiting.
# You can also perform this operation by press-
ing ON HOOK on the remote control.
34
En
<CRB2179-A/N>34
Page 35

1
Bluetooth Telephone
Black plate (35,1)
Section
07
English
Introduction of advanced
hands-free phoning operation
1 Function display
Shows the function status.
1 Press MULTI-CONTROL to display the
main menu.
FUNCTION, AUDIO and ENTERTAINMENT
appear on the display.
2 Use MULTI-CONTROL to select
FUNCTION.
Turn to change the menu option; press to select.
Function names for hands-free phoning appear on the display.
3 Turn MULTI-CONTROL to change functions.
Turn MULTI-CONTROL clockwise or counterclockwise to switch between the functions.
Function names that appear in the display are
different depending on your cellular phone’s
connection and registration status.
If not connected yet
Search & connect (search and connect)—
Connection open (connection open)—
Connect phone (connect phone)—
Delete phone (delete phone)—
Phone book transfer (phone book transfer)—
Refuse calls (automatic reject setting)—
Auto answer (automatic answer setting)—
Ring tone (ring tone select)—Auto connect
(automatic connection setting)—Echo cancel
(echo cancel)—Device INFO. (device information)
If connected but not registered yet
Disconnect phone (disconnect phone)—
Set phone (registering phone)—
Delete phone (delete phone)—
Phone book transfer (phone book transfer)—
Number dial (call by entering number)—
Refuse calls (automatic reject setting)—
Auto answer (automatic answer setting)—
Ring tone (ring tone select)—Auto connect
(automatic connection setting)—Echo cancel
(echo cancel)—Device INFO. (device information)
If already connected and registered
Disconnect phone (disconnect phone)—
Delete phone (delete phone)—
Phone book transfer (phone book transfer)—
Phone book name view (phone book name
view)—Clear memory (clear memory)—
Number dial (call by entering number)—
Refuse calls (automatic reject setting)—
Auto answer (automatic answer setting)—
Ring tone (ring tone select)—Auto connect
(automatic connection setting)—Echo cancel
(echo cancel)—Telephone icon (telephone
icon)—Device INFO. (device information)
# Phone book name view and
Telephone icon cannot be selected for cellular
phone registered guest phone.
# If cellular phone is connected to this unit via
Bluetooth wireless technology with HSP (Head
Set Profile), Phone book name view,
Clear memory, Number dial and Refuse calls
cannot be selected.
# To return to the playback display, press
BAND.
Connecting a cellular phone
To use a phone wirelessly with this unit, it is
necessary first to establish a connection using
Bluetooth wireless technology. There are several ways you can do this.
<CRB2179-A/N>35
En
35
Page 36

Section
07
Black plate (36,1)
Bluetooth Telephone
! Connection is normally established by HFP,
which gives you a full control of functions
available on the telephone source. However, in some cases when you make connection from your cellular phone, the
connection may be made by HSP and several functions may not be available.
! A phone may be connected via Bluetooth
wireless technology but not yet registered
with this unit. In this case it is said to be
temporarily connected, and the available
features are limited. To take full advantage
of all the features available, we recommend
you register your phone with this unit.
Refer to Registering connected cellular
phone on the next page for more on this.
Searching for available cellular
phones
You can have this unit search for any available
phones in the area that have Bluetooth wireless technology, then select which you want to
connect to from a list displayed on-screen.
1 Use MULTI-CONTROL to select
Search & connect in the function menu.
Search & connect appears in the display.
2 Press MULTI-CONTROL to search for
available cellular phones.
While searching, Searching is displayed.
When available cellular phones featuring
Bluetooth wireless technology are found, device names or Name not found (if names
cannot be obtained) are displayed.
# If this unit fails to find any available cellular
phones, Not found is displayed.
3 Push MULTI-CONTROL up or down to
select a device name you want to connect.
4 Press MULTI-CONTROL to connect the
selected cellular phone.
While connecting, Connecting is displayed.
To complete the connection, please check the
device name (Pioneer BT unit) and enter the
link code on your cellular phone. If the connection is established, Connected is displayed.
# The link code is set to 0000 as default. You
can change this code in the initial setting. Refer
to Entering PIN code for Bluetooth wireless con-
nection on page 88.
Using a cellular phone to
initiate a connection
Putting the unit in Connection open mode allows you to establish a Bluetooth wireless connection from your phone. You may need to
refer to the operation manual that came with
your phone if you are unsure how to initiate a
connection from your phone.
1 Use MULTI-CONTROL to select
Connection open in the function menu.
Connection open appears in the display.
2 Press MULTI-CONTROL to open the connection.
Always waiting is displayed and the unit is
now on standby for connection from cellular
phone.
3 Use cellular phone to connect to this
unit.
# Operation varies depending on the type of
your cellular phone. Refer to the instruction manual that came with your cellular phone for detailed instructions.
# You may need to enter the link code on your
cellular phone to complete the connection.
36
En
<CRB2179-A/N>36
Page 37

Bluetooth Telephone
Black plate (37,1)
Section
07
English
# The link code is set to 0000 as default. You
can change this code in the initial setting. Refer
to Entering PIN code for Bluetooth wireless con-
nection on page 88.
Disconnecting a cellular phone
When you are done using your phone with this
unit, you can close the Bluetooth wireless connection.
1 Use MULTI-CONTROL to select
Disconnect phone in the function menu.
Disconnect phone, and device name of the
connected phone appear in the display.
2 Press MULTI-CONTROL to disconnect a
cellular phone from this unit.
After the disconnection is completed,
Disconnected is displayed.
Registering connected
cellular phone
You can register a phone that is temporarily
connected to this unit in order to take full advantage of the features available with Bluetooth wireless technology. A total of five
phones can be registered: three user cellular
phones and two guest phones. When registered as a user phone, all the possible functions are available for use. When registered as
a guest phone, some functions are limited.
1 Use MULTI-CONTROL to select
Set phone in the function menu.
Set phone appears in the display.
2 Push MULTI-CONTROL up or down to
select a registration assignment.
Each time MULTI-CONTROL is pushed up or
down, the registration assignment is switched
in the following order:
Phone1 (user phone 1)—Phone2 (user phone
2)—Phone3 (user phone 3)—Guest1 (guest
phone 1)—Guest2 (guest phone 2)
# As you select each assignment, you can see
whether or not a phone is already registered
there. If the assignment is empty, No data is displayed. If the assignment is already taken, the device name appears. If you want to replace an
assignment with a new phone, first delete the
current assignment. For more detailed instructions, see Deleting a registered phone on this
page.
# If you need to know the BD (Bluetooth Device)
address of the phone, push MULTI-CONTROL left
here.
3 Press MULTI-CONTROL to register the
cellular phone to this unit.
When the registration is completed,
Reg. completed is displayed.
Deleting a registered phone
If you no longer need to use a registered
phone with this unit, you can delete it from the
registration assignment for another phone.
! If a registered phone is deleted from this
unit, the Phone Book and other settings of
that phone are cleared simultaneously.
1 Use MULTI-CONTROL to select
Delete phone in the function menu.
Delete phone appears in the display.
<CRB2179-A/N>37
En
37
Page 38

Section
07
Black plate (38,1)
Bluetooth Telephone
2 Push MULTI-CONTROL up or down to
select a registration assignment.
Each time MULTI-CONTROL is pushed up or
down, the registration assignment is switched
in the following order:
Phone1 (user phone 1)—Phone2 (user phone
2)—Phone3 (user phone 3)—Guest1 (guest
phone 1)—Guest2 (guest phone 2)
# If the assignment is empty, No data is dis-
played and the operation is not possible.
# If you need to know the BD (Bluetooth Device)
address of the phone, push MULTI-CONTROL left
here.
3 Push MULTI-CONTROL right to select
Delete YES.
Delete YES is displayed. Deleting phone is
now on standby.
4 Press MULTI-CONTROL to delete the
phone.
After the phone is deleted, Deleted is displayed.
Connecting to a registered
cellular phone
Once your phone is registered with this unit it
is a simple matter to establish a Bluetooth
wireless connection, either manually by selecting a registration assignment, or automatically
when a registered phone is within range.
Connecting to a registered
phone manually
Select a phone from the registration assignments to connect to the phone manually.
1 Use MULTI-CONTROL to select
Connect phone in the function menu.
Connect phone appears in the display.
2 Push MULTI-CONTROL up or down to
select a registration assignment.
Each time MULTI-CONTROL is pushed up or
down, the registration assignment is switched
in the following order:
Phone1 (user phone 1)—Phone2 (user phone
2)—Phone3 (user phone 3)—Guest1 (guest
phone 1)—Guest2 (guest phone 2)
# If the assignment is empty, No data is dis-
played and the operation is not possible.
# If you need to know the BD (Bluetooth Device)
address of the phone, push MULTI-CONTROL left
here.
3 Press MULTI-CONTROL to connect the
selected cellular phone.
While connecting, Connecting is displayed.
After the connection is completed, Connected
is displayed.
Connecting to a registered
phone automatically
When Automatic Connection is active the unit
will automatically establish a connection with
a registered phone when it comes into range.
! This feature may not work with all phones.
If your registered phone fails to connect
with Automatic Connection, use the manual connection method explained in Con-
necting to a registered phone manually on
this page.
! This feature is not possible if you are play-
ing back songs on your Bluetooth audio
player via Bluetooth wireless technology. In
such case, stop the playback and switch to
another source for your cellular phone to
connect to this unit through this function.
! While you are operating in the function
menu of Telephone source or BT Audio
source, this unit does not initiate an automatic connection to your registered phone.
! This feature cannot be set for each different
user phone.
38
En
<CRB2179-A/N>38
Page 39

Bluetooth Telephone
Black plate (39,1)
Section
07
English
1 Use MULTI-CONTROL to select
Auto connect in the function menu.
Auto connect appears in the display.
2 Press MULTI-CONTROL to turn automatic connection on.
ON appears in the display.
If your cellular phone is set ready for Bluetooth
wireless connection, the connection to this
unit will be automatically established.
# To turn automatic connection off, press
MULTI-CONTROL again.
Note
Automatic connection is performed in the registration number order.
Using the Phone Book
The Phone Book can store up to 500 names
and numbers. Use the Phone Book to browse
for numbers on the unit’s display and select
numbers to call. Names and phone numbers
stored in a registered user phone’s address
book can be transferred to the Phone Book, allowing you to fill the Phone Book quickly and
easily with your contacts.
Transferring entries to the
Phone Book
This function is available only for cellular
phones registered to this unit as user. Phone
books from guest phones cannot be transferred
to this unit.
To populate the Phone Book you can transfer
the numbers in a registered user phone’s address book.
The Phone Book can hold a total of 500 entries; 300 from User 1, 150 from User 2, and 50
from User 3.
! With some cellular phones, it may not be
possible to transfer whole phone book at a
time. In this case, transfer phone book entries one by one from your phone by using
your cellular phone.
! Depending on the cellular phone con-
nected via Bluetooth wireless technology,
this unit cannot display the Phone Book
correctly. (Some characters may be
garbled.)
! If the phone book in the cellular phone con-
tains image data, phone book may not be
correctly transferred.
1 Use MULTI-CONTROL to select
Phone book transfer in the function menu.
Phone book transfer appears in the display.
2 Press MULTI-CONTROL to enter in the
phone book transfer standby mode.
Transfer appears in the display.
# With Telephone source selected, you can
also display the phone book transfer standby
mode by pressing and holding PHONE.
3 Use cellular phone to perform phone
book transfer.
Perform phone book transfer using the cellular phone. For detailed instruction on this,
refer to the instruction manual that came with
your cellular phone.
# While transferring the phone book, hourglass
icon is displayed.
# The display indicates how many entries have
been transferred and the total number to be
transferred.
4 Data transferred is displayed and
phone book transfer is completed.
<CRB2179-A/N>39
En
39
Page 40

Section
07
Black plate (40,1)
Bluetooth Telephone
Changing the Phone Book
display order
You can choose to display the Phone Book
sorted alphabetically by first name or last
name.
! With some cellular phones, this feature
may not be possible.
1 Use MULTI-CONTROL to select
Phone book name view in the function
menu.
Phone book name view appears in the dis-
play.
2 Press MULTI-CONTROL to change the
name view order.
Inverted is displayed and the name view
order is changed.
Pressing MULTI-CONTROL repeatedly
changes the name view order between first
name and last name.
Calling a number in the Phone
Book
After finding the number in the Phone Book
you want to call, you can select the entry and
make the call.
1 Press LIST to display the Phone Book.
3 Press MULTI-CONTROL to display entries.
The display shows the first three Phone Book
entries starting with that letter (e.g. “Ben”,
“Brian” and “Burt” when “B” is selected).
# If you want to go back and select another alphabetical letter, push MULTI-CONTROL left.
4 Push MULTI-CONTROL up or down to
select a Phone Book entry you want to call.
Pushing MULTI-CONTROL up or down
changes Phone Book entries.
5 Push MULTI-CONTROL right to display
the detailed list of the selected entry.
The phone number, name and genre (if assigned) of entries are displayed in the detailed
list.
# You can scroll the name and phone number
by holding DISPLAY.
# If several phone numbers are entered to an
entry, select one by turning MULTI-CONTROL.
# If you want to go back and select another
entry, push MULTI-CONTROL left.
6 Press MULTI-CONTROL to make a call.
7 To end the call, press PHONE.
The estimated call time appears in the display
(this may differ slightly from the actual call
time).
2 Push MULTI-CONTROL left or right to
select the first letter of the name you are
looking for.
Each time MULTI-CONTROL is pushed left or
right alphabetical letters are changed.
# Turning MULTI-CONTROL clockwise or coun-
terclockwise can also perform the same operation.
40
En
Assign genres to phone numbers
If there are a lot of entries in the Phone Book it
can be useful to assign them to specific genres (categories) for easier searching. There are
four preset genres that you can assign entries
to: Home, Mobile, Office and Others.
1 Press LIST to display the Phone Book.
<CRB2179-A/N>40
Page 41

Bluetooth Telephone
Black plate (41,1)
Section
07
English
2 Use MULTI-CONTROL to display the detailed list of your desired Phone Book
entry.
See step 2 to 5 on Calling a number in the
Phone Book on the previous page for how to
do this.
3 Press and hold MULTI-CONTROL to display the genre input screen.
Edit genre is displayed.
4 Push MULTI-CONTROL up or down to
select a genre.
Each time MULTI-CONTROL is pushed up or
down, the genres are switched in the following
order:
Home (home)—Mobile (mobile)—Office (office)—Others (others)
5 Press MULTI-CONTROL to assign the
genre to the phone number.
The selected genre is assigned to the phone
number, and the display reverts to the detailed
list.
Editing the name of a Phone
Book entry
You can edit the names of Phone Book entries.
Each name can be up to 40 characters long.
1 Press LIST to display the Phone Book.
2 Use MULTI-CONTROL to display the detailed list of your desired Phone Book
entry.
See step 2 to 5 on Calling a number in the
Phone Book on the previous page for how to
do this.
3 Press and hold MULTI-CONTROL to display the genre input screen.
Edit genre is displayed.
4 Turn MULTI-CONTROL clockwise or
counterclockwise to switch to the name
input screen.
Turning MULTI-CONTROL switches input
screens in the following order:
Edit genre (genre input screen)—Edit name
(name input screen)—Edit number (number
input screen)—Edit icon (icon selection
screen)—Clear memory (clear memory
screen)
5 Press DISPLAY to select the desired
character type.
Each press of DISPLAY switches the character
types in the following order:
Alphabet (upper case), numbers and symbols
—alphabet (lower case)—numbers and symbols—European characters, such as those
with accents (e.g., á, à, ä, ç) or Russian characters
# Pressing and holding DISPLAY enables you to
switch character set between ISO8859-1 (European characters) and ISO8859-5 (Russian characters) alternately.
# European characters and Russian characters
can’t be mixed.
6 Push MULTI-CONTROL up or down to
select a letter.
# To delete a character and leave a space, select
“_” (underbar).
7 Push MULTI-CONTROL right to move
the cursor to the next character position.
When the letter you want is displayed, push
MULTI-CONTROL right to move the cursor to
the next position and then select the next letter. Push MULTI-CONTROL left to move backwards in the display.
8 Press MULTI-CONTROL to store the new
name.
After the name is stored, the display reverts to
the Phone Book entry list.
<CRB2179-A/N>41
En
41
Page 42

Section
07
Black plate (42,1)
Bluetooth Telephone
Editing phone numbers
You can edit the phone numbers of Phone
Book entries.
1 Press LIST to display the Phone Book.
2 Use MULTI-CONTROL to display the detailed list of your desired Phone Book
entry.
See step 2 to 5 on Calling a number in the
Phone Book on page 40 for how to do this.
3 Press and hold MULTI-CONTROL to display the genre input screen.
Edit genre is displayed.
4 Turn MULTI-CONTROL clockwise or
counterclockwise to switch to the number
input screen.
Turning MULTI-CONTROL switches input
screens in the following order:
Edit genre (genre input screen)—Edit name
(name input screen)—Edit number (number
input screen)—Edit icon (icon selection
screen)—Clear memory (clear memory
screen)
5 Push MULTI-CONTROL left or right to
move the cursor to the number you want
to change.
6 Push MULTI-CONTROL up or down to
change numbers.
Repeat these steps until you have finished
changing.
7 Press MULTI-CONTROL to store the new
number.
After the number is stored, the display reverts
to the detailed list.
Selecting the icon of a Phone
Book entry
You can select the icon of Phone Book entries.
When you make a call or answer an incoming
call, that icon is displayed.
1 Press LIST to display the Phone Book.
2 Use MULTI-CONTROL to display the detailed list of your desired Phone Book
entry.
See step 2 to 5 on Calling a number in the
Phone Book on page 40 for how to do this.
3 Press and hold MULTI-CONTROL to display the genre input screen.
Edit genre is displayed.
4 Turn MULTI-CONTROL clockwise or
counterclockwise to switch to the icon selection screen.
Turning MULTI-CONTROL switches input
screens in the following order:
Edit genre (genre input screen)—Edit name
(name input screen)—Edit number (number
input screen)—Edit icon (icon selection
screen)—Clear memory (clear memory
screen)
5 Push MULTI-CONTROL left or right to
select an icon.
Each time MULTI-CONTROL is pushed left or
right, the icons are switched in the following
order:
icon 1 (icon 1)—icon 2 (icon 2)— icon 3 (icon
3)—icon 4 (icon 4)—icon 5 (icon 5)
6 Press MULTI-CONTROL to assign the
icon to the Phone Book entry.
The selected icon is assigned to the Phone
Book entry, and the display reverts to the detailed list.
42
En
<CRB2179-A/N>42
Page 43

Bluetooth Telephone
Black plate (43,1)
Section
07
English
Note
You can rewrite icons of Phone Book entries.
(Refer to Rewriting the entertainment displays and
the icons for telephone functions on page 92.)
Clearing a Phone Book entry
You can delete Phone Book entries in the
Phone Book one by one.
To clear all of your entries in the Phone Book,
refer to Clearing memory on this page.
1 Press LIST to display the Phone Book.
2 Use MULTI-CONTROL to display the detailed list of your desired Phone Book
entry.
See step 2 to 5 on Calling a number in the
Phone Book on page 40 for how to do this.
3 Press and hold MULTI-CONTROL to display the genre input screen.
Edit genre is displayed.
4 Turn MULTI-CONTROL clockwise or
counterclockwise to switch to the clear
memory screen.
Turning MULTI-CONTROL switches input
screens in the following order:
Edit genre (genre input screen)—Edit name
(name input screen)—Edit number (number
input screen)—Edit icon (icon selection
screen)—Clear memory (clear memory
screen)
6 Press MULTI-CONTROL to delete the
Phone Book entry.
Cleared is displayed.
The Phone Book entry is deleted. The display
returns to Phone Book entry list.
Using preset numbers
Assigning preset numbers
You can assign up to ten frequently called
phone numbers to number presets
(Dial preset 1–10).
! To call the number you assigned to preset,
refer to Preset number on page 33.
1 Press LIST to display the Phone Book.
2 Use MULTI-CONTROL to display the detailed list of your desired Phone Book
entry.
See step 2 to 5 on Calling a number in the
Phone Book on page 40 for how to do this.
3 Press and hold one of 0–9 on the remote control to store the selected phone
number in that preset.
Press 1 to store in Dial preset 1; 4 to store in
Dial preset 4, etc. Press 0 to store in preset
Dial preset 10. Hold the button down until
you hear a beep.
# Up to 50 phone numbers (10 phone numbers
for each of the three registered phones and two
guest phones) can be stored in memory.
5 Push MULTI-CONTROL right to show a
confirmation display.
Clear memory YES is displayed.
# If you do not want to clear memory that you
have selected, push MULTI-CONTROL left. The
display reverts.
Clearing memory
You can clear memory of each item; Phone
Book, dialed/received/missed call history list
and preset phone number.
En
<CRB2179-A/N>43
43
Page 44

Section
07
Black plate (44,1)
Bluetooth Telephone
1 Use MULTI-CONTROL to select
Clear memory in the function menu.
Clear memory appears in the display.
2 Push MULTI-CONTROL up or down to
select an item.
Each time MULTI-CONTROL is pushed up or
down, the items are switched in the following
order:
Phone book (phone book)—Missed calls
(missed call history)—Dialled calls (dialled
call history)—Received calls (received call history)—Preset memory (preset phone numbers)—All clear (delete all memory)
# If you select All clear, all memory regardless
of items will be cleared.
# If guest phone is connected to this unit via
Bluetooth wireless technology, Phone book cannot be selected.
3 Push MULTI-CONTROL right to determine the item that you want to delete
from this unit.
Clear memory YES is displayed. Clearing
memory is now on standby.
# If you do not want to clear memory that you
have selected, push MULTI-CONTROL left. The
display reverts.
4 Press MULTI-CONTROL to clear the
memory.
Cleared is displayed and data on the selected
item is cleared from this unit’s memory.
Using the Call History
The ten most recent calls made (dialed), received and missed, together with their times
and dates, are stored in the Call History. You
can browse the Call History and call numbers
from it.
Displaying the Call History
The Call History is divided into three groups:
Missed calls, Dialed calls, and Received calls.
You can see the time and date of the call, as
well as the number (and name if the number
is in the Phone Book).
1 Press LIST to display the list.
Press LIST repeatedly to switch between the
following lists:
PHONE BOOK (phone book)—MISSED
(missed call)—DIALLED (dialled call)—
RECEIVED (received call)
# About the Phone Book list, refer to Using the
Phone Book on page 39.
# If no phone numbers have been stored in the
selected list, No Data is displayed.
2 Turn MULTI-CONTROL to select a phone
number.
Turning MULTI-CONTROL clockwise or counterclockwise to change the phone numbers
stored in the list.
# If the number is already in the Phone Book
the name is displayed.
# You can also change the phone number by
pushing MULTI-CONTROL up or down.
3 Push MULTI-CONTROL right to display
the detailed list.
Calling time and date, and phone number are
displayed in the detailed list.
# If the number is already in the Phone Book
then the name is also displayed.
# Turning MULTI-CONTROL clockwise or coun-
terclockwise switches to the previous or next
phone number diplayed in the detailed list.
# If you do not operate anything within about 30
seconds, the list display is canceled automatically.
44
En
<CRB2179-A/N>44
Page 45

Bluetooth Telephone
Black plate (45,1)
Section
07
English
Calling a number from the Call
History
1 Display the list and select a phone number.
Display the phone number you want to make a
call.
2 Push MULTI-CONTROL right to display
the detailed list.
Calling time and date, and phone number are
displayed in the detailed list.
# If the number is already in the Phone Book
then the name is also displayed.
3 Press MULTI-CONTROL to make a call.
4 To end the call, press PHONE.
The estimated call time appears in the display
(this may differ slightly from the actual call
time).
Calling an international number
from the Call History
When calling an international number stored
in the Call History, proceed the country code
with a +.
Assigning preset numbers
You can assign up to ten frequently called
phone numbers to number presets
(Dial preset 1–10).
1 Display the list and select a phone number.
Display the phone number you want to store
in memory.
2 Push MULTI-CONTROL right to display
the detailed list.
Calling time and date, and phone number are
displayed in the detailed list.
3 Press and hold one of 0–9 on the remote control to store the selected phone
number in that preset.
The selected phone number has been stored
in memory. The next time you press the same
preset button, the phone number is recalled
from memory.
# Up to 50 phone numbers (10 phone numbers
for each of the three registered phones and two
guest phones) can be stored in memory.
1 With the detailed list displayed, press
MULTI-CONTROL and hold to add +.
Pressing and holding MULTI-CONTROL adds
+ to the phone number.
# + can only be added when the detailed list of
Missed call, Dialled call or Received call is selected.
# Pressing and holding MULTI-CONTROL again
deletes +.
2 Press MULTI-CONTROL to make a call.
3 To end the call, press PHONE.
Making a call by entering
phone number
You can make a call by directly entering phone
numbers on this unit.
1 Use MULTI-CONTROL to select
Number dial in the function menu.
Number dial appears in the display.
# You can also enter in this menu from the
standby display by pressing DIRECT on the remote control.
En
<CRB2179-A/N>45
45
Page 46

Section
07
Black plate (46,1)
Bluetooth Telephone
2 Push MULTI-CONTROL up or down to
select a number.
Pushing MULTI-CONTROL up repeatedly
changes numbers in 012...9+#*_order.
Pushing it down changes in _*#+9...210
order.
# You can also input numbers by pressing 0–9
on the remote control.
3 Push MULTI-CONTROL right to move
the cursor to the next position.
When the number you want is displayed, push
MULTI-CONTROL right to move the cursor to
the next position and then select the next
number. Push MULTI-CONTROL left to move
backwards in the display.
# Up to 24 digits can be entered.
4 If you have completed entering the
number, press MULTI-CONTROL.
Call confirmation appears.
5 Press MULTI-CONTROL again to make a
call.
While dialing, Dialing appears in the display.
6 To end the call, press PHONE.
The estimated call time appears in the display
(this may differ slightly from the actual call
time).
Echo canceling and noise
reduction
When you are operating hands-free phoning
in the vehicle, you may hear undesired echo.
This function reduces the echo and noise and
keeps a certain sound quality.
! This feature cannot be set for each different
user phone.
1 Use MULTI-CONTROL to select
Echo cancel in the function menu.
Echo cancel appears in the display.
2 Press MULTI-CONTROL to turn echo canceling on.
ON appears in the display.
# To turn echo canceling off, press
MULTI-CONTROL again.
Changing the ring tone
The unit offers you to turn the ring tone for incoming calls on or off.
! The ring tone you select for this unit has no
effect on the ring tone used by your phone.
If you do not want your phone and this unit
to ring at the same time, we recommend
you turn the ring tone of one or the other
off.
1 Use MULTI-CONTROL to select
Ring tone in the function menu.
Ring tone appears in the display.
2 Push MULTI-CONTROL left or right to
select a ring tone.
Each time MULTI-CONTROL is pushed left or
right, the ring tone is selected in the following
order:
OFF (ring tone off)—Ring tone1 (ring tone 1)
—Ring tone2 (ring tone 2)—Ring tone3 (ring
tone 3)
Note
Ring tone3 differs depending on the situation of
the source (on or off).
46
En
<CRB2179-A/N>46
Page 47

Bluetooth Telephone
Black plate (47,1)
Section
07
English
Setting the automatic
rejecting
If this function is on, this unit automatically rejects all incoming calls.
! This feature cannot be set for each different
user phone.
1 Use MULTI-CONTROL to select
Refuse calls in the function menu.
Refuse calls appears in the display.
2 Press MULTI-CONTROL to turn automatic call rejection on.
ON appears in the display.
# To turn automatic call rejection off, press
MULTI-CONTROL again.
Setting the automatic
answering
If this function is on, this unit automatically
answers all incoming calls.
! This feature cannot be set for each different
user phone.
1 Use MULTI-CONTROL to select
Auto answer in the function menu.
Auto answer appears in the display.
Selecting the icon for user
phone
You can select one of icons to be displayed for
telephone source.
A different icon can be assigned for each different user phone.
1 Use MULTI-CONTROL to select
Telephone icon in the function menu.
Telephone icon appears in the display.
2 Push MULTI-CONTROL left or right to
select an icon.
Each time MULTI-CONTROL is pushed left or
right, the icons are switched in the following
order:
icon 1 (icon 1)—icon 2 (icon 2)— icon 3 (icon
3)—icon 4 (icon 4)—icon 5 (icon 5)
3 Press MULTI-CONTROL to assign the
icon to the user phone.
The selected icon is assigned to the user
phone.
Note
You can rewrite icons for user phones. (Refer to
Rewriting the entertainment displays and the
icons for telephone functions on page 92.)
2 Press MULTI-CONTROL to turn automatic answering on.
ON appears in the display.
# To turn automatic answering function off,
press MULTI-CONTROL again.
Note
If both the automatic reject and automatic answer functions are set to ON, the automatic reject
is prioritized and all incoming calls are automatically rejected.
Displaying BD (Bluetooth
Device) address
Each device featuring Bluetooth wireless technology is allocated a unique 48-bit device address. Each device address consists of a 12digit of hexadecimal string.
You can display the BD address of your cellular phone and this unit.
En
<CRB2179-A/N>47
47
Page 48

Section
07
Black plate (48,1)
Bluetooth Telephone
Displaying BD address of your
cellular phone
1 Use MULTI-CONTROL to select
Delete phone in the function menu.
Delete phone appears in the display.
2 Push MULTI-CONTROL up or down to
select a registration assignment.
Each time MULTI-CONTROL is pushed up or
down, the registration assignment is switched
in the following order:
Phone1 (user phone 1)—Phone2 (user phone
2)—Phone3 (user phone 3)—Guest1 (guest
phone 1)—Guest2 (guest phone 2)
# If the assignment is empty, No data is dis-
played and the operation is not possible.
3 Push MULTI-CONTROL left to switch to
the BD address.
12-digit hexadecimal string is displayed.
# Pushing MULTI-CONTROL right returns to the
device name.
4 Press BAND to return to the standby
display.
pears. About the system version, refer to Displaying system version for repair on this page.
Displaying system version
for repair
Should this unit fails to operate properly and
you consult with dealer for repair, you may be
asked to indicate the system versions of this
unit and of Bluetooth module. You can display
the versions and confirm them.
1 Use MULTI-CONTROL to select
Device INFO. in the function menu.
The device name (Pioneer BT unit) of this unit
appears in the display.
2 Push MULTI-CONTROL down to switch
to the system version of this unit.
The system (microprocessor) version of this
unit is displayed.
# Pushing MULTI-CONTROL left displays the
version of the Bluetooth module of this unit.
Pushing MULTI-CONTROL right returns to the
system version of this unit.
Displaying BD address of this unit
1 Use MULTI-CONTROL to select
Device INFO. in the function menu.
The device name (Pioneer BT unit) of this unit
appears in the display.
2 Push MULTI-CONTROL left to switch to
the BD address.
12-digit hexadecimal string is displayed.
# Pushing MULTI-CONTROL right returns to the
device name.
Note
When you push MULTI-CONTROL down while
the BD address (or the device name) of this unit
is displayed, the system version of this unit ap-
48
En
<CRB2179-A/N>48
Page 49

1
2
Bluetooth Audio
Black plate (49,1)
Section
08
English
Listening to songs on BT Audio
(Bluetooth audio player)
You can use this unit to control a separately
sold portable audio player featuring Bluetooth
wireless technology (Bluetooth audio player).
Even though your audio player does not contain a Bluetooth module, you can still control
it from this unit via Bluetooth wireless technology using a Bluetooth adapter (sold separately).
Important
! This unit can control a Bluetooth audio player
via A2DP or AVRCP profile. Bluetooth audio
players (or Bluetooth adapters) compatible
with those profiles can be connected to this
unit.
— A2DP profile (Advanced Audio Distribution
Profile): Only playing back songs on your
audio player is possible.
— AVRCP profile (Audio/Video Remote Con-
trol Profile): Playing back, pausing, selecting songs, etc., are possible.
! Since there are a number of Bluetooth audio
players available on the market, operations
with your Bluetooth audio player using this
unit vary in great range. Please refer to the instruction manual that came with your Bluetooth audio player as well as this manual
while operating your player on this unit.
! Information about songs (e.g. the elapsed
playing time, song title, song index, etc.) cannot be displayed on this unit.
! While you are listening to songs on your Blue-
tooth audio player, please refrain from operat-
ing on your cellular phone as much as
possible. If you try operating on your cellular
phone, the signal from your cellular phone
may cause a noise on the song playback.
! When you are talking on the cellular phone
connected to this unit via Bluetooth wireless
technology, the song playback from your Bluetooth audio player connected to this unit is
muted.
! Even if while you are listening to song on your
Bluetooth audio player you switch to another
source, the playback of song continues to
elapse.
1 Connection indicator
Shows the Bluetooth wireless connection
status.
2 Device name
Shows the device name of the connected
Bluetooth audio player (or Bluetooth adapter).
% Press SOURCE to select Bluetooth audio
player.
Press SOURCE until you see BT Audio displayed.
# If you cannot display BT Audio, first activate
the BT audio source in the initial setting. For detailes, refer to Activating the BT Audio source on
page 87.
Setting up for Bluetooth
audio player
Before you can use Bluetooth audio player
you will need to set up the unit for use.
1 Activation
Refer to Activating the BT Audio source on
page 87 for instructions on how to turn the
BT Audio on.
<CRB2179-A/N>49
En
49
Page 50

Section
08
Black plate (50,1)
Bluetooth Audio
2 Connection
Refer to Connecting a Bluetooth audio player
on this page on how to connect your Bluetooth audio player to this unit.
# Once connected via Bluetooth wireless technology, “Play”, “Stop” and “Pause” on Bluetooth
audio player can be operated in the BT Audio
source.
# Before you can use audio players you may
need to enter the PIN code into this unit. If your
player requires a PIN code to establish a connection, look for the code on the player or in its accompanying documentation. Enter the PIN code
referring to Entering PIN code for Bluetooth wire-
less connection on page 88.
Connecting a Bluetooth
audio player
For this unit to control your Bluetooth audio
player it needs to establish a Bluetooth wireless connection.
This function initiates the connection via Bluetooth wireless technology.
1 Press MULTI-CONTROL to display the
main menu.
FUNCTION, AUDIO and ENTERTAINMENT
appear on the display.
4 Press MULTI-CONTROL to open the connection.
Always waiting is displayed. This unit is now
on standby for connection from Bluetooth
audio player.
5 Use your Bluetooth audio player to
connect to this unit.
When the connection is successfully established, Connected is displayed.
# Operation varies depending on the type of
your Bluetooth audio player. Refer to the instruction manual that came with your Bluetooth audio
player for detailed instructions.
2 Use MULTI-CONTROL to select
FUNCTION.
Turn to change the menu option; press to select.
The function name appears on the display.
3 Turn MULTI-CONTROL to select
Connection open.
50
En
<CRB2179-A/N>50
Page 51

1
Bluetooth Audio
Black plate (51,1)
Section
08
English
Function operation
1 Function display
Shows the function status.
Once connected via Bluetooth wireless technology, “Play”, “Stop” and other functions on
Bluetooth audio player can be controlled from
this unit’s function menu.
1 Press MULTI-CONTROL to display the
main menu.
FUNCTION, AUDIO and ENTERTAINMENT
appear on the display.
2 Use MULTI-CONTROL to select
FUNCTION.
Turn to change the menu option; press to select.
The function name appears in the display.
3 Turn MULTI-CONTROL to select the
function.
Turn MULTI-CONTROL clockwise or counterclockwise to switch between the functions in
the following order:
Disconnect audio (disconnect audio)—Play
(Play)—Stop (Stop)—Pause (pause)—
Device INFO. (device information)
# If a Bluetooth audio player is connected via
A2DP profile, only Disconnect audio and
Device INFO. appear in the function menu.
# If a Bluetooth audio player has not been connected to this unit yet, Connection open and
Device INFO. appear in the function menu and
other functions are not available.
# To return to the playback display, press BAND.
Notes
! If you do not operate the function within about
30 seconds, the display is automatically returned to the playback display.
! Depending on Bluetooth audio players con-
nected to this unit, function operations may
not be correctly operated.
Playing songs on Bluetooth
audio player
1 Use MULTI-CONTROL to select Play in
the function menu.
Play appears in the display.
2 Press MULTI-CONTROL to start
playback.
Pausing a song
Pause lets you temporarily stop playback of a
song.
1 Use MULTI-CONTROL to select Pause in
the function menu.
Pause appears in the display.
2 Press MULTI-CONTROL to turn pause
on.
Playback of the current song pauses.
# To turn pause off, press MULTI-CONTROL
again.
Stopping playback
1 Use MULTI-CONTROL to select Stop in
the function menu.
Stop appears in the display.
<CRB2179-A/N>51
En
51
Page 52

Section
08
Black plate (52,1)
Bluetooth Audio
2 Press MULTI-CONTROL to stop the playback.
Playback of the current song stops.
Disconnecting a Bluetooth
audio player
When you are done using your Bluetooth
audio player with this unit, you can close the
Bluetooth wireless connection.
1 Use MULTI-CONTROL to select
Disconnect audio in the function menu.
Disconnect audio appears in the display.
2 Press MULTI-CONTROL to disconnect
the Bluetooth audio player.
Disconnected is displayed. The Bluetooth
audio player is now diconnected from this
unit.
Displaying BD address of
this unit
Each device featuring Bluetooth wireless technology is allocated a unique 48-bit device address. Each device address consists of a 12digit of hexadecimal string.
You can display the BD address of this unit.
Note
When you push MULTI-CONTROL down while
the BD address (or the device name) of this unit
is displayed, the system version of this unit appears. About the system version, refer to Display-
ing system version for repair on page 48.
Displaying system version
for repair
Should this unit fails to operate properly and
you consult with dealer for repair, you may be
asked to indicate the system versions of this
unit and of Bluetooth module. You can display
the versions and confirm them.
1 Use MULTI-CONTROL to select
Device INFO. in the function menu.
The device name (Pioneer BT unit) of this unit
appears in the display.
2 Push MULTI-CONTROL down to switch
to the system version of this unit.
The system (microprocessor) version of this
unit is displayed.
# Pushing MULTI-CONTROL left displays the
version of the Bluetooth module of this unit.
Pushing MULTI-CONTROL right returns to the
system version of this unit.
1 Use MULTI-CONTROL to select
Device INFO. in the function menu.
The device name (Pioneer BT unit) of this unit
appears in the display.
2 Push MULTI-CONTROL left to switch to
the BD address.
12-digit hexadecimal string is displayed.
# Pushing MULTI-CONTROL right returns to the
device name.
52
En
<CRB2179-A/N>52
Page 53

243
1
Multi-CD Player
Black plate (53,1)
Section
09
English
Playing a CD
You can use this unit to control a multi-CD
player, which is sold separately.
These are the basic steps necessary to play a
CD with your multi-CD player. More advanced
CD operation is explained starting on the next
page.
1 Disc number indicator
Shows the disc number currently playing.
2 Track number indicator
Shows the track number currently playing.
3 Play time indicator
Shows the elapsed playing time of the current track.
4 Disc title indicator
Shows the title of the currently playing disc.
! If no title has been entered for the cur-
rently playing disc, nothing is displayed.
until the disc number appears in the display.
3 To perform fast forward or reverse,
push and hold MULTI-CONTROL left or
right.
4 To skip back or forward to another
track, push MULTI-CONTROL left or right.
Pushing MULTI-CONTROL right skips to the
start of the next track. Pushing
MULTI-CONTROL left once skips to the start
of the current track. Pushing again will skip to
the previous track.
Notes
! When the multi-CD player performs the pre-
paratory operations, Ready is displayed.
! If an error message such as ERROR-11 is dis-
played, refer to the multi-CD player owner’s
manual.
! If there are no discs in the multi-CD player ma-
gazine, No Disc is displayed.
! When you select a CD TEXT disc on a CD TEXT
compatible multi-CD player, the disc title automatically begins to scroll in the display. Ever
Scroll function is ON at the initial setting, the
disc title scrolls continuously. About Ever
Scroll, refer to Switching the Ever Scroll on
page 87.
1 Press SOURCE to select the multi-CD
player.
Press SOURCE until you see Multi-CD displayed.
2 Push MULTI-CONTROL up or down to
select a disc you want to listen to.
# You can also select a disc by using 1–6 but-
tons on the remote control.
! For discs 1 to 6, press the corresponding
button number.
! For discs 7 to 12, press and hold the corre-
sponding numbers, such as 1 for disc 7,
Selecting a track directly
When using the remote control, you can select
a track directly by entering the desired track
number.
1 Press DIRECT.
Track number input display appears.
2 Press 0–9 buttons to enter the desired
track number.
# You can cancel the input number by pressing
CLEAR.
En
<CRB2179-A/N>53
53
Page 54

1
Section
09
Black plate (54,1)
Multi-CD Player
3 Press DIRECT.
The track of entered number will play.
Note
After entering the number input mode, if you do
not perform an operation within about eight seconds, the mode is automatically canceled.
50-disc multi-CD player
Only those functions described in this manual
are supported by 50-disc multi-CD players.
This unit is not designed to operate disc title
list functions with a 50-disc multi-CD player.
About the disc title list functions, please refer
to Selecting discs from the disc title list on
page 58.
Introduction of advanced
multi-CD player operation
1 Function display
Shows the function status.
1 Press MULTI-CONTROL to display the
main menu.
FUNCTION, AUDIO and ENTERTAINMENT
appear on the display.
2 Use MULTI-CONTROL to select
FUNCTION.
Turn to change the menu option; press to select.
The function name appears on the display.
3 Turn MULTI-CONTROL to select the
function.
Turn MULTI-CONTROL clockwise or counterclockwise to switch between the functions in
the following order:
Play mode (repeat play)—Random mode
(random play)—Scan mode (scan play)—
Pause (pause)—ITS play mode (ITS play)—
ITS memory (ITS programming)—Title Input
(disc title input)
# To return to the playback display, press BAND.
54
Notes
! When playing a CD TEXT disc on a CD TEXT
compatible multi-CD player, you cannot
switch to disc title input. The disc title will
have already been recorded on a CD TEXT
disc.
En
<CRB2179-A/N>54
Page 55

Multi-CD Player
Black plate (55,1)
Section
09
English
! If you do not operate the function within about
30 seconds, the display is automatically returned to the playback display.
Repeating play
There are three repeat play ranges for the
multi-CD player: Multi-CD repeat (multi-CD
player repeat), Track repeat (one-track repeat)
and Disc repeat (disc repeat).
1 Use MULTI-CONTROL to select
Play mode in the function menu.
Play mode appears in the display.
2 Press MULTI-CONTROL to select the repeat range.
Press MULTI-CONTROL repeatedly until the
desired repeat range appears in the display.
! Multi-CD repeat – Repeat all discs in the
multi-CD player
! Track repeat – Repeat just the current
track
! Disc repeat – Repeat the current disc
Notes
! If you select other discs during repeat play,
the repeat play range changes to
Multi-CD repeat.
! If you perform track search or fast forward/re-
verse during Track repeat, the repeat play
range changes to Disc repeat.
2 Use MULTI-CONTROL to select
Random mode in the function menu.
Random mode appears in the display.
3 Press MULTI-CONTROL to turn random
play on.
Tracks will play in a random order within the
previously selected Multi-CD repeat or
Disc repeat ranges.
# To turn random play off, press
MULTI-CONTROL again.
Scanning CDs and tracks
While you are using Disc repeat, the beginning of each track on the selected disc plays
for about 10 seconds. When you are using
Multi-CD repeat, the beginning of the first
track of each disc is played for about 10 seconds.
1 Select the repeat range.
Refer to Repeating play on this page.
2 Use MULTI-CONTROL to select
Scan mode in the function menu.
Scan mode appears in the display.
3 Press MULTI-CONTROL to turn scan play
on.
The first 10 seconds of each track of the current disc (or the first track of each disc) is
played.
Playing tracks in random order
Random play lets you play back tracks in random order within the repeat range,
Multi-CD repeat and Disc repeat.
1 Select the repeat range.
Refer to Repeating play on this page.
4 When you find the desired track (or
disc) press MULTI-CONTROL to turn scan
play off.
The track (or disc) will continue to play.
# If the display has automatically returned to
the playback display, select Scan mode again by
using MULTI-CONTROL.
En
<CRB2179-A/N>55
55
Page 56

Section
09
Black plate (56,1)
Multi-CD Player
Note
After track or disc scanning is finished, normal
playback of the tracks will begin again.
Pausing CD playback
Pause lets you temporarily stop playback of
the CD.
1 Use MULTI-CONTROL to select Pause in
the function menu.
Pause appears in the display.
2 Press MULTI-CONTROL to turn pause
on.
Playback of the current track pauses.
# To turn pause off, press MULTI-CONTROL
again.
Using ITS playlists
ITS (instant track selection) lets you make a
playlist of favorite tracks from those in the
multi-CD player magazine. After you have
added your favorite tracks to the playlist you
can turn on ITS play and play just those selections.
2 Use MULTI-CONTROL to select
ITS memory in the function menu.
ITS memory appears in the display.
3 Select the desired track by pushing
MULTI-CONTROL left or right.
4 Push MULTI-CONTROL up to store the
currently playing track in the playlist.
Memory complete is displayed and the cur-
rently playing selection is added to your playlist.
5 Press BAND to return to the playback
display.
Note
After data for 100 discs has been stored in memory, data for a new disc will overwrite the oldest
one.
Playback from your ITS playlist
ITS play lets you listen to the tracks that you
have entered into your ITS playlist. When you
turn on ITS play, tracks from your ITS playlist
in the multi-CD player will begin to play.
1 Select the repeat range.
Refer to Repeating play on the previous page.
Creating a playlist with ITS
programming
You can use ITS to enter and play back up to
99 tracks per disc from up to 100 discs (with
the disc titles). (With multi-CD players sold before the CDX-P1250 and CDX-P650, up to 24
tracks can be stored in the playlist.)
1 Play a CD that you want to program.
Push MULTI-CONTROL up or down to select
the CD.
56
En
2 Use MULTI-CONTROL to select
ITS play mode in the function menu.
ITS play mode appears in the display.
3 Press MULTI-CONTROL to turn ITS play
on.
Playback begins of those tracks from your
playlist within the previously selected
Multi-CD repeat or Disc repeat ranges.
# If no tracks in the current range are programmed for ITS play, then ITS empty is displayed.
# To turn ITS play off, press MULTI-CONTROL
again.
<CRB2179-A/N>56
Page 57

Multi-CD Player
Black plate (57,1)
Section
09
English
Erasing a track from your ITS
playlist
You can delete a track from your ITS playlist if
ITS play is on.
If ITS play is already on, skip to step 2. If ITS
play is not already on, use MULTI-CONTROL.
1 Play the CD with the track you want to
delete from your ITS playlist, and turn ITS
play on.
Refer to Playback from your ITS playlist on the
previous page.
2 Use MULTI-CONTROL to select
ITS memory in the function menu.
ITS memory appears in the display.
3 Select the desired track by pushing
MULTI-CONTROL left or right.
4 Push MULTI-CONTROL down to erase
the track from your ITS playlist.
The currently playing selection is erased from
your ITS playlist and playback of the next track
from your ITS playlist begins.
# If there are no tracks from your playlist in the
current range, ITS empty is displayed and normal play resumes.
5 Press BAND to return to the playback
display.
3 Push MULTI-CONTROL down to erase
all tracks on the currently playing CD from
your ITS playlist.
All tracks on the currently playing CD are
erased from your playlist and
Memory deleted is displayed.
4 Press BAND to return to the playback
display.
Using disc title functions
You can input CD titles and display the titles.
Then you can easily search for and play a desired disc.
Entering disc titles
Use the disc title input feature to store up to
100 CD titles (with ITS playlist) into the multiCD player. Each title can be up to 10 characters long.
1 Play the CD that you want to enter a
title for.
Push MULTI-CONTROL up or down to select
the CD.
2 Use MULTI-CONTROL to select
Title Input in the function menu.
Title Input appears in the display.
Erasing a CD from your ITS playlist
You can delete all tracks of a CD from your ITS
playlist if ITS play is off.
1 Play the CD that you want to delete.
Push MULTI-CONTROL up or down to select
the CD.
2 Use MULTI-CONTROL to select
ITS memory in the function menu.
ITS memory appears in the display.
3 Press DISPLAY to select the desired
character type.
Press DISPLAY repeatedly to switch between
the following character types:
Alphabet (upper case), numbers and symbols
—Alphabet (lower case)—European letters,
such as those with accents (e.g. á, à, ä, ç)—
Numbers and symbols
En
<CRB2179-A/N>57
57
Page 58

Section
09
Black plate (58,1)
Multi-CD Player
4 Push MULTI-CONTROL up or down to
select a letter of the alphabet.
Each time MULTI-CONTROL is pushed up, alphabet, numbers or symbols are displayed in
ascending order (A B C ...). Each time
MULTI-CONTROL is pushed down, letters are
displayed in descending order.
5 Push MULTI-CONTROL right to move
the cursor to the next character position.
When the letter you want is displayed, push
MULTI-CONTROL right to move the cursor to
the next position and then select the next letter. Push MULTI-CONTROL left to move backwards in the display.
6 Move the cursor to the last position by
pushing MULTI-CONTROL right after entering the title.
When you push MULTI-CONTROL right one
more time, the entered title is stored in memory.
7 Press BAND to return to the playback
display.
Notes
! Titles remain in memory, even after the disc
has been removed from the magazine, and
are recalled when the disc is reinserted.
! After data for 100 discs has been stored in
memory, data for a new disc will overwrite the
oldest one.
Displaying disc titles
You can display the text information of any
disc that has had a disc title entered.
% Press DISPLAY.
Press DISPLAY repeatedly to switch between
the following settings:
: disc title—Simple display
Selecting discs from the disc
title list
Disc title list lets you see the list of disc titles
that have been entered into the multi-CD
player and select one of them to play back.
1 Press LIST to switch to the disc title list
mode during the playback display.
2 Use MULTI-CONTROL to select the desired disc title.
Turn to change the disc title; press to play.
# You can also change the disc title by pushing
MULTI-CONTROL up or down.
# If no title has been entered for a disc,
No D.Title will be displayed.
# No Disc is displayed next to the disc number
when there is no disc in the magazine.
# If you do not operate the list within about 30
seconds, the disc title list mode is canceled automatically.
Using CD TEXT functions
You can use these functions only with a CD
TEXT compatible multi-CD player.
Some discs have certain information encoded
on the disc during manufacture. These discs
may contain such information as the CD title,
track title, artist’s name and playback time
and are called CD TEXT discs. Only these specially encoded CD TEXT discs support the
functions listed below.
58
En
<CRB2179-A/N>58
Page 59

Multi-CD Player
Black plate (59,1)
Section
09
English
Displaying text information on
CD TEXT discs
% Press DISPLAY.
Press DISPLAY repeatedly to switch between
the following settings:
: disc title— : disc artist name— : track
title—
track artist name—Simple display
# If specific information has not been recorded
on a CD TEXT disc, title or name is not displayed.
: track artist name— : disc title and
: disc artist name— : track title and :
Scrolling text information in
the display
This unit can display the first 24 letters of disc
title, disc artist name, track title and track artist name. When the text information is longer
than 24 letters, you can scroll the text information as follows.
! When the source icon is turned off, this
unit can display the first 30 letters of text information.
% Press DISPLAY and hold until the text
information begins to scroll through the
display.
The titles scroll.
1 Press LIST to switch to the disc title list
mode during the playback display.
# If you want to display the track title list of the
currently playing disc, push MULTI-CONTROL
right.
2 Use MULTI-CONTROL to select the desired disc title of CD TEXT.
Turn to change the disc title; press to play.
# You can also change the disc title by pushing
MULTI-CONTROL up or down.
# If no title has been entered for a disc,
No D.Title will be displayed.
# No Disc is displayed next to the disc number
when there is no disc in the magazine.
3 Push MULTI-CONTROL right to switch
to the track title list.
# Push MULTI-CONTROL left to return to the
disc title list.
4 Use MULTI-CONTROL to select the desired track title.
Turn to change the track title; press to play.
# You can also change the track title by pushing
MULTI-CONTROL up or down.
# If you do not operate the list within about 30
seconds, the track title list mode is canceled
automatically.
Note
When Ever Scroll is set to ON at the initial setting,
text information scrolls continuously in the display. Refer to Switching the Ever Scroll on page 87.
Selecting tracks from the track
title list
Track title list lets you see the list of track titles
on a CD TEXT disc and select one of them to
play back.
<CRB2179-A/N>59
En
59
Page 60

3
2
1
Section
10
Black plate (60,1)
Playing songs on iPod
Listening to songs on your
iPod
You can use this unit to control an iPod adapter,
which is sold separately.
These are the basic steps necessary to operate
an iPod adapter. More advanced iPod adapter
operation is explained starting on Introduction
of advanced iPod adapter operation on page 62.
1 Song number indicator
Shows the number of song played in the selected list.
2 Play time indicator
Shows the elapsed playing time of the current song.
3 Album title indicator
Shows the title of the currently playing
album.
1 Press SOURCE to select the iPod.
Press SOURCE until you see iPod displayed.
2 To perform fast forward or reverse,
push and hold MULTI-CONTROL left or
right.
of the current song. Pushing again will skip to
the previous song.
Browsing for a song
The operation of this unit to control an iPod is
designed to be as close to the operation of the
iPod as possible for easy operation and song
search.
1 Press LIST to switch to the top menu of
the list search.
2 Use MULTI-CONTROL to select a category.
Turn to change the category; press to select.
Playlists (playlists)—Artists (artists)—
Albums (albums)—Songs (songs)—Genres
(genres)
List from the selected category is displayed.
# You can start playback throughout the selected category by pressing and holding
MULTI-CONTROL.
# You can also change the category by pushing
MULTI-CONTROL up or down.
# You can also select the category by pushing
MULTI-CONTROL right.
# To return to the previous list, push
MULTI-CONTROL left.
# To go to the top menu of the list search, push
and hold MULTI-CONTROL lef t.
# If you do not operate the list within about 30
seconds, the list search is cancelled automatically.
3 To skip back or forward to another
song, push MULTI-CONTROL left or right.
Pushing MULTI-CONTROL right skips to the
start of the next song. Pushing
MULTI-CONTROL left once skips to the start
60
En
<CRB2179-A/N>60
Page 61

Playing songs on iPod
Black plate (61,1)
Section
10
English
Searching for a song
1 Press LIST to switch to the top menu of
the list search.
2 Use MULTI-CONTROL to select a Genres,
Artists, Albums or Songs from among the
categories.
Turn to change the category; press to select.
List from the selected category is displayed.
3 Use MULTI-CONTROL to select a song,
album, artist or genre.
Turn to change the item; press to select.
List from the selected item is displayed.
# If you select Songs (songs), playback starts in-
stantly from the selected one.
4 Repeat step 3 to find a song you want
to listen to.
Selecting a playlist
You can select a playlist from your iPod playlist.
1 Press LIST to switch to the top menu of
the list search.
2 Use MULTI-CONTROL to select a
Playlists from among the categories.
Turn to change the category; press to select.
List from Playlists (playlists) is displayed.
4 Use MULTI-CONTROL to select a song
from the selected playlist.
Turn to change the song; press to play.
# If no songs have been stored in playlist, STOP
is displayed and playback stops.
Displaying text
information on iPod
Text information recorded on the iPod can be
displayed.
% Press DISPLAY.
Press DISPLAY repeatedly to switch between
the following settings:
: album title— : song title— : artist name
—
: artist name and : album title— :
song title and
and
: album title—Simple display
# If the characters recorded on the iPod are not
compatible with this unit, those characters will
not be displayed.
Notes
! You can scroll to the left the text information
by pressing and holding DISPLAY.
! When Ever Scroll is set to ON at the initial set-
ting, text information scrolls continuously in
the display. Refer to Switching the Ever Scroll
on page 87.
: artist name— : song title
3 Use MULTI-CONTROL to select a playlist.
Turn to change the playlist; press to select.
Song list from the selected playlist is displayed.
# You can start playback throughout the selected playlist by pressing and holding
MULTI-CONTROL.
<CRB2179-A/N>61
En
61
Page 62

1
Section
10
Black plate (62,1)
Playing songs on iPod
Introduction of advanced
iPod adapter operation
1 Function display
Shows the function status.
1 Press MULTI-CONTROL to display the
main menu.
FUNCTION, AUDIO and ENTERTAINMENT
appear on the display.
2 Use MULTI-CONTROL to select
FUNCTION.
Turn to change the menu option; press to select.
The function name appears on the display.
3 Turn MULTI-CONTROL to select the
function.
Turn MULTI-CONTROL clockwise or counterclockwise to switch between the functions in
the following order:
Play mode (repeat play)—Shuffle mode (random play)—Pause (pause)
# To return to the playback display, press BAND.
Note
If you do not operate the function within about 30
seconds, the display is automatically returned to
the playback display.
Repeating play
For playback of the songs on the iPod, there
are two repeat play ranges: Repeat one (re-
peat one song) and Repeat all (repeat all
songs in the list).
! While Play mode is set to Repeat one, you
cannot select the other songs.
1 Use MULTI-CONTROL to select
Play mode in the function menu.
Play mode appears in the display.
2 Press MULTI-CONTROL to select the repeat range.
Press MULTI-CONTROL repeatedly until the
desired repeat range appears in the display.
! Repeat one – Repeat just the current song
! Repeat all – Repeat all songs in the se-
lected list
Playing songs in a random
order (shuffle)
For playback of the songs on the iPod, there
are two random play methods: Shuffle Songs
(play back songs in a random order) and
Shuffle Albums (play back albums in a random order).
1 Use MULTI-CONTROL to select
Shuffle mode in the function menu.
Shuffle mode appears in the display.
2 Press MULTI-CONTROL to select your favorite setting.
Press MULTI-CONTROL repeatedly until the
desired setting appears in the display.
! Shuffle Songs – Play back songs in a ran-
dom order within the selected list
! Shuffle Albums – Select an album ran-
domly, and then play back all the songs in it
in order
! Shuffle OFF – Cancel the random play
62
En
<CRB2179-A/N>62
Page 63

Playing songs on iPod
Pausing a song
Pause lets you temporarily stop playback of a
song.
1 Use MULTI-CONTROL to select Pause in
the function menu.
Pause appears in the display.
2 Press MULTI-CONTROL to turn pause
on.
Playback of the current song pauses.
# To turn pause off, press MULTI-CONTROL
again.
Black plate (63,1)
Section
10
English
<CRB2179-A/N>63
En
63
Page 64

213
Section
11
Black plate (64,1)
TV tuner
Watching the television
You can use this unit to control a TV tuner,
which is sold separately.
For details concerning operation, refer to the
TV tuner’s operation manual. This section provides information on TV operations with this
unit which differs from that described in the
TV tuner’s operation manual.
1 Band indicator
Shows which band the TV tuner is tuned to.
2 Preset number indicator
Shows which preset has been selected.
3 Channel indicator
Shows which channel the TV tuner is tuned.
1 Press SOURCE to select the TV.
Press SOURCE until you see Television dis-
played.
# You can cancel seek tuning by pushing
MULTI-CONTROL left or right.
# If you push and hold MULTI-CONTROL left or
right, you can skip broadcasting channels. Seek
tuning starts as soon as you release
MULTI-CONTROL.
2 Press BAND to select a band.
Press BAND until the desired band is displayed, TV-1 or TV-2.
3 To perform manual tuning, push
MULTI-CONTROL left or right.
The channels move up or down step by step.
4 To perform seek tuning, push and hold
MULTI-CONTROL left or right for about one
second and release.
The tuner will scan the channels until a broadcast strong enough for good reception is
found.
64
En
<CRB2179-A/N>64
Page 65

1
TV tuner
Black plate (65,1)
Section
11
English
Introduction of advanced
TV tuner operation
1 Function display
Shows the function status.
1 Press MULTI-CONTROL to display the
main menu.
FUNCTION, AUDIO and ENTERTAINMENT
appear on the display.
2 Use MULTI-CONTROL to select
FUNCTION.
BSSM appears on the display.
# To return to the channel display, press BAND.
Note
If you do not operate the function within about 30
seconds, the display is automatically returned to
the channel display.
Storing and recalling
broadcast stations
You can easily store up to 12 broadcast stations for later recall.
1 When you find a station that you want
to store in memory press LIST to switch to
the preset channel list mode.
2 Use MULTI-CONTROL to store the selected station in memory.
Turn to change the preset number; press and
hold to store.
The preset number you have selected will
flash and then remain lit. The selected station
has been stored in memory.
# If you do not operate the list within about 30
seconds, the preset channel list mode is canceled automatically.
Notes
! Up to 24 stations, 12 for each of two TV bands,
can be stored in memory.
! You can also store stations assigned to preset
tuning numbers 1–6 by pressing and holding
one of the preset tuning buttons 1–6 on the remote control.
Storing the strongest
broadcast stations
sequentially
1 Use MULTI-CONTROL and select
FUNCTION to display BSSM.
2 Press MULTI-CONTROL to turn BSSM
on.
Searching is displayed. While Searching is
displayed, the 12 strongest broadcast stations
will be stored in order from the lowest channel
up. When finished, the preset channel list appears.
# To cancel the storage process, press
MULTI-CONTROL.
3 Use MULTI-CONTROL to select the desired station.
Turn to change the station; press to select.
# You can also change the station by pushing
MULTI-CONTROL up or down.
<CRB2179-A/N>65
En
65
Page 66

Section
11
TV tuner
# If you do not operate the list within about 30
seconds, the preset channel list mode is canceled automatically.
Note
Storing broadcast stations with BSSM may replace broadcast stations you have saved using
P01–P12.
Selecting stations from the
preset channel list
The preset channel list lets you see the list of
preset stations and select one of them to receive.
Black plate (66,1)
1 Press LIST to switch to the preset channel list mode during the channel display.
2 Use MULTI-CONTROL to select the desired station.
Turn to change the station; press to select.
# You can also change the station by pushing
MULTI-CONTROL up or down.
# If you do not operate the list within about 30
seconds, the preset channel list mode is canceled automatically.
Notes
! You can also recall stations assigned to preset
tuning numbers by pushing MULTI-CONTROL
up or down during the channel display.
! You can also recall stations assigned to preset
tuning numbers 1–6 by pressing one of the
preset tuning buttons 1–6 on the remote control.
66
En
<CRB2179-A/N>66
Page 67

35421
DVD Player
Black plate (67,1)
Section
12
English
Playing a disc
You can use this unit to control a DVD player or
multi-DVD player, which is sold separately.
For details concerning operation, refer to the
DVD player ’ s or multi-DVD player’s operation
manual. This section provides information on
DVD operations with this unit which differs
from that described in the DVD player’sor
multi-DVD player’s operation manual.
These are the basic steps necessary to play a
DVD video with your DVD player. More advanced DVD video operation is explained starting on the next page.
1 DVD-V/VCD/CD/MP3/WMA indicator
Shows the type of disc currently playing.
2 Disc number indicator
Shows the disc number currently playing
when using a multi-DVD player.
3 Title/Folder/Disc number indicator
Shows the title (when playing DVD video),
folder (when playing MP3 or WMA) or disc
(when playing video CD or CD) of the selection currently playing.
5 Play time indicator
Shows the elapsed playing time of the current track.
1 Press SOURCE to select the DVD player/
multi-DVD player.
Press SOURCE until you see DVD displayed.
2 To perform fast forward or reverse,
push and hold MULTI-CONTROL left or
right.
3 To skip back or forward to another
chapter/track, push MULTI-CONTROL left or
right.
Selecting a disc
! You can operate this function only when a
multi-DVD player is connected to this unit.
% Push MULTI-CONTROL up or down to
select the desired disc.
Selecting a folder
! You can operate this function only when a
DVD player which is corresponding to
MP3/WMA playback is connected to this
unit.
% Push MULTI-CONTROL up or down to
select a folder.
4 Chapter/track number indicator
Shows the chapter (when playing DVD
video) or track (when playing video CD, CD,
MP3 or WMA) currently playing.
<CRB2179-A/N>67
En
67
Page 68

1
Section
12
Black plate (68,1)
DVD Player
Introduction of advanced
DVD player operation
1 Function display
Shows the function status.
1 Press MULTI-CONTROL to display the
main menu.
FUNCTION, AUDIO and ENTERTAINMENT
appear on the display.
2 Use MULTI-CONTROL to select
FUNCTION.
Turn to change the menu option; press to select.
The function name appears on the display.
3 Turn MULTI-CONTROL to select the
function.
Turn MULTI-CONTROL clockwise or counterclockwise to switch between the functions in
the following order:
During DVD video or Video CD playback
Play mode (repeat play)—Pause (pause)
During CD playback
Play mode (repeat play)—Random mode
(random play)—Scan mode (scan play)—
Pause (pause)—ITS play mode (ITS play)—
ITS memory (ITS input)—Title Input (disc
title input)
During MP3/WMA playback
Play mode (repeat play)—Random mode
(random play)—Scan mode (scan play)—
Pause (pause)
# To return to the playback display, press BAND.
Note
When using this unit with multi-DVD player, you
can switch to ITS play mode, ITS memory and
Title Input.
Repeating play
! During PBC playback of Video CDs, this
function cannot be operated.
1 Use MULTI-CONTROL to select
Play mode in the function menu.
Play mode appears in the display.
2 Press MULTI-CONTROL to select the repeat range.
During DVD video playback
Press MULTI-CONTROL repeatedly until the
desired repeat range appears in the display.
! Disc repeat – Repeat the current disc
! Chapter repeat – Repeat just the current
chapter
! Title repeat – Repeat just the current title
During Video CD or CD playback
Press MULTI-CONTROL repeatedly until the
desired repeat range appears in the display.
! Disc repeat – Repeat the current disc
! Track repeat – Repeat just the current
track
During MP3/WMA playback
Press MULTI-CONTROL repeatedly until the
desired repeat range appears in the display.
! Disc repeat – Repeat the current disc
! Folder repeat – Repeat the current folder
! Track repeat – Repeat just the current
track
Notes
! If you select other discs during repeat play,
the repeat play range changes to Disc repeat.
68
En
<CRB2179-A/N>68
Page 69

DVD Player
Black plate (69,1)
Section
12
English
! During video CD or CD playback, if you per-
form track search or fast forward/reverse during Track repeat, the repeat play range
changes to Disc repeat.
! During MP3/WMA playback, if you select an-
other folder during repeat play, the repeat play
range changes to Disc repeat.
! During MP3/WMA playback, if you perform
track search or fast forward/reverse during
Track repeat, the repeat play range changes
to Folder repeat.
Pausing disc playback
1 Use MULTI-CONTROL to select Pause in
the function menu.
Pause appears in the display.
2 Press MULTI-CONTROL to turn pause
on.
Playback of the current track pauses.
# To turn pause off, press MULTI-CONTROL
again.
Playing tracks in random order
! You can operate this function during CD/
MP3/WMA playback.
1 Use MULTI-CONTROL to select
Random mode in the function menu.
Random mode appears in the display.
Scanning tracks of a CD/
MP3/WMA
! You can operate this function during CD/
MP3/WMA playback.
1 Use MULTI-CONTROL to select
Scan mode in the function menu.
Scan mode appears in the display.
2 Press MULTI-CONTROL to turn scan play
on.
The first 10 seconds of each track is played.
3 When you find the desired track press
MULTI-CONTROL to turn scan play off.
The track will continue to play.
# If the display has automatically returned to
the playback display, select Scan mode again by
using MULTI-CONTROL.
Using ITS playlist and disc
title functions
! You can operate these functions only when
a multi-DVD player is connected to this
unit.
! This function differs slightly from ITS play-
back with a multi-CD player. With multiDVD player, ITS playback applies only to the
CD playing. For details, refer to Using ITS
playlists on page 56.
2 Press MULTI-CONTROL to turn random
play on.
Tracks will play in a random order.
# To turn random play off, press
MULTI-CONTROL again.
Using disc title functions
You can input CD titles and display the titles.
Then you can easily search for and play a desired disc.
! You can operate this function during CD
playback.
En
<CRB2179-A/N>69
69
Page 70

Section
12
DVD Player
Entering disc titles
Disc title input lets you input CD titles up to 10
letters long into the DVD player. For details
concerning operation, refer to Entering disc ti-
tles on page 57.
! You can operate this function only when a
DVD player is connected to this unit.
! When playing a CD TEXT disc on a CD TEXT
compatible DVD player, you cannot switch
to disc title input. The disc title will have already been recorded on a CD TEXT disc.
Black plate (70,1)
70
En
<CRB2179-A/N>70
Page 71

1
Audio Adjustments
Black plate (71,1)
Section
13
English
Adjusting the audio easily
The following functions let you easily adjust
your audio system to match the car interior
acoustic characteristics, which vary depending on the type of car.
! Recalling equalizer curves
! Using the position selector (Position)
! Adjusting equalizer cur ves
Adjusting the audio finely
By carrying out the following settings/adjustments in the order shown, you can create a finely-tuned sound field effortlessly.
! Using the position selector (Position)
! Using balance adjustment (Fader)
! Using subwoofer output (Subwoofer1)
! Adjusting subwoofer settings
(Subwoofer2)
! Adjusting low pass filter attenuation slope
(Subwoofer3)
! Setting the high pass filter for front speakers
(Front HPF, Front HPF FREQ.)
! Setting the high pass filter for rear speakers
(Rear HPF, Rear HPF FREQ.)
! Auto TA and EQ (auto-time alignment and
auto-equalizing)
! Recalling equalizer curves
! Adjusting equalizer cur ves
! Adjusting 16-band graphic equalizer
(FREQ.)
Extra functions
These functions are helpful in adjusting the
sound to suit your system or your personal
preferences.
! Using BBE sound (BBE)
! Using compression and BMX (COMP/BMX)
! Adjusting loudness (Loudness)
! Adjusting source levels (SLA)
! Using auditory user interface
(AUI sound level)
Introduction of audio
adjustments
Important
When phone is selected as a source, no audio adjustments, except balance adjustment, are possible.
1 Audio display
Shows the audio adjustment status.
1 Press MULTI-CONTROL to display the
main menu.
FUNCTION, AUDIO and ENTERTAINMENT
appear on the display.
2 Use MULTI-CONTROL to select AUDIO.
Turn to change the menu option; press to select.
The audio function name appears on the display.
3 Turn MULTI-CONTROL to select the
audio function.
Turn MULTI-CONTROL clockwise or counterclockwise to switch between the audio functions in the following order:
<CRB2179-A/N>71
En
71
Page 72

Section
13
Black plate (72,1)
Audio Adjustments
Fader (balance adjustment)—Position (position selector)—TA Mode (time alignment setting)—Time Alignment (time alignment
adjusting)—Loudness (loudness)—Powerful
(graphic equalizer adjustment)—FREQ. (16band graphic equalizer adjustment)—
Subwoofer1 (subwoofer on/off)—
Subwoofer2 (subwoofer cut-off frequency)—
Subwoofer3 (subwoofer slope)—Front HPF
(front high pass filter slope)—
Front HPF FREQ. (front high pass filter cut-off
frequency)—Rear HPF (rear high pass filter
slope)—Rear HPF FREQ. (rear high pass filter
cut-off frequency)—BBE (BBE)—COMP/BMX
(Compression and BMX)—Auto EQ (autoequalizer on/off)—SLA (source level adjustment)—AUI sound level (auditory user interface)
# When selecting OFF in TA Mode, you cannot
switch to Time Alignment.
# You can select Subwoofer2 and
Subwoofer3 only when subwoofer output is
turned on in Subwoofer1.
# When tuner, television or AUX is selected as a
source, you cannot select COMP/BMX.
# When selecting the FM tuner as the source,
you cannot switch to SLA.
# To return to the display of each source, press
BAND.
Note
If you do not operate the audio function within
about 30 seconds, the display is automatically returned to the source display.
Using the position selector
One way to assure a more natural sound is to
clearly position the stereo image, putting you
right in the center of the sound field. The position selector function lets you automatically
adjust the speakers’ output levels and inserts
a delay time to match the number and position of occupied seats.
1 Use MULTI-CONTROL to select Position.
Position appears in the display.
2 Push MULTI-CONTROL left, right, up or
down to select a listening position.
Direction Display Position
Left Front Left Front seat left
Right Front Right Front seat right
Up Front Front seats
Down All All seats
# To cancel the selected listening position, push
MULTI-CONTROL in the same direction again.
Using balance adjustment
You can change the fader/balance setting so
that it can provide you an ideal listening environment in all occupied seats.
1 Use MULTI-CONTROL to select Fader.
Fader appears in the display.
# If the balance setting has been previously adjusted, Balance will be displayed.
72
2 Push MULTI-CONTROL up or down to
adjust front/rear speaker balance.
Each time MULTI-CONTROL is pushed up or
down, the front/rear speaker balance moves
towards the front or rear.
En
<CRB2179-A/N>72
Page 73

6
1
2
345
Audio Adjustments
Black plate (73,1)
Section
13
English
Front 25 to Rear 25 is displayed as the front/
rear speaker balance moves from front to rear.
# Front/Rear 0 is the proper setting when only
two speakers are used.
3 Push MULTI-CONTROL left or right to
adjust left/right speaker balance.
Each time MULTI-CONTROL is pushed left or
right, the left/right speaker balance moves towards the left or right.
Left 25 to Right 25 is displayed as the left/
right speaker balance moves from left to
right.
Using the time alignment
The time alignment lets you adjust the distance between each speaker and the listening
position.
1 Use MULTI-CONTROL to select
TA Mode.
TA Mode appears in the display.
2 Push MULTI-CONTROL left or right to
select the time alignment.
Each time MULTI-CONTROL is pushed left or
right, time alignment is selected in the following order:
Initial (initial)—Custom (custom)—Auto TA
(auto-time alignment)—OFF (off)
! Initial is the factory supplied time align-
ment.
! Custom is an adjusted time alignment that
you can create for yourself.
! Auto TA is the time alignment created by
auto TA and EQ. (Refer to Auto TA and EQ
(auto-time alignment and auto-equalizing)
on page 80.)
# Please set Auto TA appears. This indicates
that you cannot select Auto TA if auto TA and EQ
has not been carried out.
Adjusting the time alignment
You can adjust the distance between each
speaker and the selected position.
! An adjusted time alignment is memorized
in Custom.
1 Use MULTI-CONTROL to select
TA Mode.
TA Mode appears in the display.
2 Press MULTI-CONTROL to select a unit
of distance.
Each press of MULTI-CONTROL selects the
unit of distance in the following order:
cm (centimeter)—inch (inch)
3 Use MULTI-CONTROL to select
Time Alignment.
Time Alignment appears in the display.
# Can't adjust TA. Set position FL/FR appears
when neither Front Left nor Front Right is selected in the position selector mode (Position).
# When selecting OFF in TA Mode, you cannot
switch to Time Alignment.
4 Push MULTI-CONTROL left or right to
select the speaker to be adjusted.
Each time MULTI-CONTROL is pushed left or
right, the speaker is selected in the following
order:
1 Front speaker left
2 Front speaker right
3 Rear speaker right
4 Subwoofer right
5 Subwoofer left
6 Rear speaker left
<CRB2179-A/N>73
En
73
Page 74

Section
13
Black plate (74,1)
Audio Adjustments
Front speaker left—Front speaker right—Rear
speaker right—Rear speaker left—Subwoofer
left—Subwoofer right
# You cannot select subwoofer left and subwoofer right when the subwoofer output is off.
5 Push MULTI-CONTROL up or down to
adjust the distance between the selected
speaker and the listening position.
Each time MULTI-CONTROL is pushed up or
down, the distance increases or decreases.
400.00cm to 0.00cm is displayed as the distance is increased or decreased, if you have
selected centimeters (cm).
160.0inch to 0.0inch is displayed as the distance is increased or decreased, if you have
selected inches (inch).
# You can adjust the distance for the other
speakers in the same way.
6 Press BAND to cancel the time alignment mode.
Using subwoofer output
This unit is equipped with a subwoofer output
which can be turned on or off. When a subwoofer is connected to this unit, turn the subwoofer output on.
The subwoofer output phase can be switched
between normal and reverse.
1 Use MULTI-CONTROL to select
Subwoofer1.
Subwoofer1 appears in the display.
3 Push MULTI-CONTROL left or right to
select stereo or monaural.
Push MULTI-CONTROL left to select monaural
and MONO appears in the display. Push
MULTI-CONTROL right to select stereo and
STEREO appears in the display.
Adjusting subwoofer settings
When the subwoofer output is on, you can adjust the cut-off frequency and the output level
of the subwoofer.
1 Use MULTI-CONTROL to select
Subwoofer2.
Subwoofer2 appears in the display.
# When the subwoofer output is on, you can select Subwoofer2.
2 Push MULTI-CONTROL left or right to
select cut-off frequency.
Each time MULTI-CONTROL is pushed left or
right, cut-off frequencies are selected in the
following order:
50—63—80—100—125—160—200 (Hz)
Only frequencies lower than those in the selected range are outputted from the subwoofer.
3 Push MULTI-CONTROL up or down to
adjust the output level of the subwoofer.
Each time MULTI-CONTROL is pushed up or
down, subwoofer level increases or decreases.
+6 to –24 is displayed as the level is increased
or decreased.
2 Press MULTI-CONTROL to turn subwoofer output on.
ON appears in the display. Subwoofer output
is now on.
# To turn subwoofer output off, press
MULTI-CONTROL again.
74
En
Adjusting low pass filter
attenuation slope
When the subwoofer output is on, you can adjust the continuity of sound between speaker
units.
<CRB2179-A/N>74
Page 75

Audio Adjustments
Black plate (75,1)
Section
13
English
1 Use MULTI-CONTROL to select
Subwoofer3.
Subwoofer3 appears in the display.
# When the subwoofer output is on, you can select Subwoofer3.
2 Push MULTI-CONTROL up or down to
select the phase of subwoofer output.
Push MULTI-CONTROL up to select normal
phase and
MULTI-CONTROL down to select reverse
phase and
3 Push MULTI-CONTROL left or right to
select slope.
Each time MULTI-CONTROL is pushed left or
right, slopes are selected in the following
order:
–18— –12— –6 (dB/oct.)
Note
When slope of subwoofer and high pass filter are
–12dB, and same cut-off frequency, the phase is
reversed 180 degrees at the cut-off frequency. In
this case, reversing the phase assures improved
sound continuity.
appears in the display. Push
appears in the display.
Using the high pass filter
When you do not want low sounds from the
subwoofer output frequency range to play
from the front or rear speakers, turn on the
HPF (high pass filter). Only frequencies higher
than those in the selected range are outputted
from the front or rear speakers.
! If you mute the selected speaker unit (fil-
ter), MUTE ON is displayed and no adjustments are possible.
! Even if any speaker unit (filter) is muted,
you can adjust the parameters for other
speaker units (filters).
1 Use MULTI-CONTROL to select
Front HPF (or Rear HPF).
Front HPF (or Rear HPF) appears in the dis-
play.
2 Push and hold MULTI-CONTROL down
to mute the selected speaker unit (filter).
MUTE ON is displayed.
# To cancel the muting, push MULTI-CONTROL
up.
Setting the high pass filter for
front speakers
1 Use MULTI-CONTROL to select
Front HPF.
Front HPF appears in the display.
2 Push MULTI-CONTROL left or right to
select slope.
Each time MULTI-CONTROL is pushed left or
right, slopes are selected in the following
order:
–12— –6—Pass (0) (dB/oct.)
# If you set the slope to 0 dB/oct. (Pass), the
audio signal bypasses the filter, so the filter does
not have an effect.
3 Turn MULTI-CONTROL to select
Front HPF FREQ.
Front HPF FREQ. appears in the display.
Muting the speaker units (filters)
You can mute front and rear speaker units (filters) separately. When speaker units (filters)
are muted, no sound is outputted from those
speakers.
4 Push MULTI-CONTROL left or right to
select cut-off frequency.
Each time MULTI-CONTROL is pushed left or
right, cut-off frequencies are selected in the
following order:
En
<CRB2179-A/N>75
75
Page 76

Section
13
Black plate (76,1)
Audio Adjustments
50—63—80—100—125—160—200 (Hz)
Only frequencies higher than those in the selected range are output from the front speakers.
5 Push MULTI-CONTROL up or down to
adjust the output level of the front speakers.
Each time MULTI-CONTROL is pushed up or
down, the level of the front speakers increases
or decreases. 0 to –24 is displayed as the level
is increased or decreased.
Setting the high pass filter for
rear speakers
1 Use MULTI-CONTROL to select
Rear HPF.
Rear HPF appears in the display.
2 Push MULTI-CONTROL left or right to
select slope.
Each time MULTI-CONTROL is pushed left or
right, slopes are selected in the following
order:
–12— –6—Pass (0) (dB/oct.)
# If you set the slope to 0 dB/oct. (Pass), the
audio signal bypasses the filter, so the filter does
not have an effect.
5 Push MULTI-CONTROL up or down to
adjust the output level of the rear speakers.
Each time MULTI-CONTROL is pushed up or
down, the level of the rear speakers increases
or decreases. 0 to –24 is displayed as the level
is increased or decreased.
Using the auto-equalizer
The auto-equalizer is the equalizer curve created by auto TA and EQ (refer to Auto TA and
EQ (auto-time alignment and auto-equalizing)
on page 80).
You can turn the auto-equalizer on or off.
1 Use MULTI-CONTROL to select Auto EQ.
Auto EQ appears in the display.
# Please set Auto EQ appears. This indicates
that you cannot turn the auto-equalizer on if auto
TA and EQ has not been carried out.
2 Press MULTI-CONTROL to turn the autoequalizer on.
ON appears in the display.
# To turn auto-equalizer off, press
MULTI-CONTROL again.
3 Turn MULTI-CONTROL to select
Rear HPF FREQ.
Rear HPF FREQ. appears in the display.
4 Push MULTI-CONTROL left or right to
select cut-off frequency.
Each time MULTI-CONTROL is pushed left or
right, cut-off frequencies are selected in the
following order:
50—63—80—100—125—160—200 (Hz)
Only frequencies higher than those in the selected range are output from the rear speakers.
76
En
Using the equalizer
The equalizer lets you adjust the equalization
to match car interior acoustic characteristics
as desired.
Recalling equalizer curves
There are seven stored equalizer curves which
you can easily recall at any time. Here is a list
of the equalizer curves:
<CRB2179-A/N>76
Page 77

Audio Adjustments
Black plate (77,1)
Section
13
English
Display Equalizer curve
Powerful Powerful
Natural Natural
Vocal Vocal
Flat Flat
Custom1 Custom 1
Custom2 Custom 2
Super Bass Super bass
! Custom1 and Custom2 are adjusted equal-
izer curves that you create. Adjustments
can be made with a 16-band graphic equalizer.
! When Flat is selected no supplement or
correction is made to the sound. This is
useful to check the effect of the equalizer
curves by switching alternatively between
Flat and a set equalizer curve.
% Press EQ to select the equalizer.
Press EQ repeatedly to switch between the following equalizers:
Powerful—Natural—Vocal—Flat—Custom1
—Custom2—Super Bass
Adjusting equalizer curves
The factory supplied equalizer curves, with the
exception of Flat, can be adjusted to a fine degree (nuance control).
1 Use MULTI-CONTROL to select the graphic equalizer adjustment.
Powerful appears in the display.
# If the equalizer curve has been previously selected, the curve of that previously selected will
be displayed instead of Powerful.
2 Push MULTI-CONTROL left or right to
select an equalizer curve.
Each time MULTI-CONTROL is pushed left or
right, equalizer curves are selected in the following order:
Powerful—Natural—Vocal—Flat—Custom1
—Custom2—Super Bass
3 Push MULTI-CONTROL up or down to
adjust the equalizer curve.
Each time MULTI-CONTROL is pushed up or
down, the equalizer curve increases or decreases respectively.
+6 to –6 is displayed as the equalizer cur ve is
increased or decreased.
# The actual range of the adjustments are different depending on which equalizer curve is selected.
# The equalizer curve with all frequencies set to
0 cannot be adjusted.
Adjusting 16-band graphic
equalizer
For Custom1 and Custom2 equalizer curves,
you can adjust the level of each band.
! A separate Custom1 curve can be created
for each source. (The built-in CD player and
the multi-CD player are set to the same
equalizer adjustment setting automatically.) If you make adjustments when a
curve other than Custom2 is selected, the
equalizer curve settings will be memorized
in Custom1.
! A Custom2 curve can be created common
to all sources. If you make adjustments
when the Custom2 curve is selected, the
Custom2 curve will be updated.
1 Recall the equalizer curve you want to
adjust.
See Recalling equalizer curves on the previous
page.
<CRB2179-A/N>77
En
77
Page 78

Section
13
Black plate (78,1)
Audio Adjustments
2 Use MULTI-CONTROL to select 16-band
graphic equalizer adjustment.
FREQ. appears in the display.
3 Push MULTI-CONTROL left or right to
select the equalizer band to adjust.
Each time MULTI-CONTROL is pushed left or
right, equalizer bands are selected in the following order:
20—31.5—50—80—125—200—315—500—
800—1.25k—2k—3.15k—5k—8k—12.5k—
20k (Hz)
4 Push MULTI-CONTROL up or down to
adjust the level of the equalizer band.
Each time MULTI-CONTROL is pushed up or
down, the level of the equalization band increases or decreases.
+6 to –6 is displayed as the level is increased
or decreased.
# You can then select another band and adjust
the level.
5 Press BAND to cancel the 16-band graphic equalizer adjustment.
Using BBE sound
With BBE, playback very close to the original
sound can be obtained by correction with a
combination of phase compensation and
high-range boost for the delay of the high-frequency components and the amplitude deviation occurring during playback. This function
makes it possible to reproduce the dynamic
sound field as if you are listening to a live performance.
With BBE sound processing technology, you
can adjust the level of BBE.
1 Use MULTI-CONTROL to select BBE.
BBE appears in the display.
2 Press MULTI-CONTROL to turn BBE on.
# To turn BBE off, press MULTI-CONTROL
again.
3 Push MULTI-CONTROL up or down to
adjust the level of BBE.
Each time MULTI-CONTROL is pushed up or
down, the level of BBE increases or decreases.
+4 to –4 is displayed as the level is increased
or decreased.
Note
Manufactured under license from BBE Sound,
Inc. The mark BBE is a trademark of BBE Sound,
Inc.
Using compression and BMX
Using the COMP (compression) and BMX
functions let you adjust the sound playback
quality of this unit. Each of the functions has a
two-step adjustment. The COMP function balances the output of louder and softer sounds
at higher volumes. BMX controls sound reverberations to give playback a fuller sound. Listen to each of the effects as you select
through them and use the one that best enhances the playback of the track or CD that
you are listening to.
! When tuner, television or AUX is selected
as a source, you cannot select
COMP/BMX.
1 Use MULTI-CONTROL to select
COMP/BMX.
COMP/BMX appears in the display.
2 Press MULTI-CONTROL to turn COMP/
BMX on.
# To turn COMP/BMX off, press
MULTI-CONTROL again.
78
En
<CRB2179-A/N>78
Page 79

Audio Adjustments
Black plate (79,1)
Section
13
English
3 Push MULTI-CONTROL left or right to
select the desired setting.
Each time MULTI-CONTROL is pushed left or
right, settings are selected in the following
order:
COMP 1—COMP 2—BMX 1—BMX 2
Adjusting loudness
Loudness compensates for deficiencies in the
low- and high-sound ranges at low volume.
1 Use MULTI-CONTROL to select
Loudness.
Loudness appears in the display.
2 Press MULTI-CONTROL to turn loudness
on.
ON appears in the display.
# To turn loudness off, press MULTI-CONTROL
again.
Adjusting source levels
SLA (source level adjustment) lets you adjust
the volume level of each source to prevent radical changes in volume when switching between sources.
! Settings are based on the FM tuner volume
level, which remains unchanged.
3 Push MULTI-CONTROL up or down to
adjust the source volume.
Each time MULTI-CONTROL is pushed up or
down, source volume increases or decreases.
+4 to –4 is displayed as the source volume is
increased or decreased.
Notes
! The AM tuner volume level can also be ad-
justed with source level adjustments.
! The built-in CD player and the multi-CD player
are set to the same source level adjustment
volume automatically.
! External unit 1 and external unit 2 are set to
the same source level adjustment volume
automatically.
Using auditory user interface
AUI (auditory user interface) lets you adjust
the volume level of AUI sounds output when
operating this unit. Depending on the operations, different AUI sounds are output.
! No AUI sounds are output when the
sources are off.
! No AUI sounds are output when the level is
set to 0.
1 Use MULTI-CONTROL to select
AUI sound level.
AUI sound level appears in the display.
1 Compare the FM tuner volume level
with the level of the source you wish to adjust.
2 Use MULTI-CONTROL to select SLA.
SLA appears in the display.
# When selecting the FM tuner as the source,
you cannot switch to SLA.
2 Push MULTI-CONTROL up or down to
adjust AUI sound level.
Each time MULTI-CONTROL is pushed up or
down, AUI sound level increases or decreases.
Level 0 to Level 12 is displayed as AUI sound
level is increased or decreased.
En
<CRB2179-A/N>79
79
Page 80

Section
13
Black plate (80,1)
Audio Adjustments
Auto TA and EQ (auto-time
alignment and autoequalizing)
The auto-time alignment is automatically adjusted for the distance between each speaker
and the listening position.
The auto-equalizer automatically measures
the car interior acoustic characteristics, and
then creates the auto-equalizer curve based
on that information.
WARNING
To prevent accidents, never carry out auto TA and
EQ while driving. When this function measures
the car interior acoustic characteristics to create
an auto-equalizer curve, a loud measurement
tone (noise) may be outputted from the speakers.
CAUTION
! Carrying out auto TA and EQ under the follow-
ing conditions may damage the speakers. Be
sure to check the conditions thoroughly before carrying out auto TA and EQ.
— When speakers are incorrectly connected.
(e.g., When a rear speaker is connected to
a subwoofer output.)
— When a speaker is connected to a power
amp delivering output higher than the
speaker’s maximum input power capability.
! If the microphone is placed in an unsuitable
position the measurement tone may become
loud and measurement may take a long time,
resulting in a drain on battery power. Be sure
to place the microphone in the specified location.
Before operating the auto TA
and EQ function
! Carry out auto TA and EQ in as quiet a
place as possible, with the car engine and
air conditioning switched off. Also cut
power to car phones or portable telephones
in the car, or remove them from the car be-
fore carrying out auto TA and EQ. Sounds
other than the measurement tone (sur-
rounding sounds, engine sound, tele-
phones ringing etc.) may prevent correct
measurement of the car interior acoustic
characteristics.
! Be sure to carry out auto TA and EQ using
the supplied microphone. Using another
microphone may prevent measurement, or
result in incorrect measurement of the car
interior acoustic characteristics.
! When front speaker is not connected, auto
TA and EQ cannot be carried out.
! When muting the front speaker units, auto
TA and EQ cannot be carried out. (Refer to
page 75.)
! When this unit is connected to a power
amp with input level control, auto TA and
EQ may not be possible if you lower power
amp input level. Set the power amp’s input
level to the standard position.
! When this unit is connected to a power
amp with an LPF, turn off the LPF on the
power amp before carrying out auto TA and
EQ. In addition, the cut-off frequency for
built-in LPF of an active subwoofer should
be set to the highest frequency.
! The time alignment value calculated by
auto TA and EQ may differ from the actual
distance in the following circumstances.
However, the distance has been calculated
by computer to be the optimum delay to
give accurate results for the circum-
stances, so please continue to use this
value.
— When the reflected sound within a vehi-
cle is strong and delays occur.
80
En
<CRB2179-A/N>80
Page 81

Audio Adjustments
— When delays occur for low sounds due
to the influence of the LPF on active
subwoofers or external amps.
! Auto TA and EQ changes the audio settings
as below:
— The fader/balance settings return to the
center position. (Refer to page 72.)
— The graphic equalizer curve switches to
Flat. (Refer to page 76.)
— When a subwoofer is connected to this
unit, it will be adjusted automatically to
both subwoofer output and high pass filter setting for rear speaker.
! If you carry out auto TA and EQ when a pre-
vious setting of this already exists, the setting will be replaced.
Carrying out auto TA and EQ
CAUTION
Never use the microphone for hands-free phoning to operate the auto TA and EQ. Using the microphone unfit for the auto TA and EQ may
damage the speaker. Be sure to connect the
AUTO TA&EQ microphone into the microphone
input jack.
1 Stop the car in a place that is as quiet
as possible, close all doors, windows and
the sun roof, and then turn the engine off.
If the engine is left running, engine noise may
prevent correct auto TA and EQ.
2 Fix the supplied microphone in the center of the headrest of the driver’s seat, facing forward, using the belt (sold
separately).
The auto TA and EQ may differ depending on
where you place the microphone. If desired,
place the microphone on the front passenger
seat to carry out auto TA and EQ.
Black plate (81,1)
Section
13
English
3 Turn the ignition switch to ON or ACC.
If the car’s air conditioner or heater is turned
on, turn it off. Noise from the fan in the air
conditioner or heater may prevent correct auto
TA and EQ.
# Press SOURCE to turn the source on if this
unit is turned off.
4 Select the position for the seat on
which the microphone is placed.
Refer to Using the position selector on page
72.
# If no position is selected before you start auto
TA and EQ, Front Left is selected automatically.
5 Press SOURCE and hold until the unit
turns off.
If anything is connected to the microphone
input jack, disconnect it.
6 Press and hold EQ to enter the auto TA
and EQ measurement mode.
7 Plug the microphone into the microphone input jack on this unit.
AUTO TA&EQ microphone
<CRB2179-A/N>81
En
81
Page 82

Section
13
Audio Adjustments
8 Press MULTI-CONTROL to start the auto
TA and EQ.
9 Get out of the car and close the door
within 10 seconds when the 10-second
count-down starts.
The measurement tone (noise) is outputted
from the speakers, and auto TA and EQ begins.
# When all speakers are connected, auto TA
and EQ is completed in about six minutes.
# To stop auto TA and EQ, press
MULTI-CONTROL again.
# To cancel auto TA and EQ part way through,
press BAND.
10 When auto TA and EQ is completed,
Setup complete is displayed.
When correct measurement of car interior
acoustic characteristics is not possible, an
error message is displayed. (Refer to Under-
standing auto TA and EQ error messages on
page 93.)
Black plate (82,1)
11 Press BAND to cancel the auto TA and
EQ mode.
12 Store the microphone carefully in the
glove compartment.
Store the microphone carefully in the glove
compartment or any other safe place. If the
microphone is subjected to direct sunlight for
an extended period, high temperatures may
cause distortion, color change or malfunction.
82
En
<CRB2179-A/N>82
Page 83

1
Initial Settings
Black plate (83,1)
Section
14
English
Adjusting initial settings
Using the initial settings, you can customize
various system settings to achieve optimal performance from this unit.
1 Function display
Shows the function status.
1 Press SOURCE and hold until the unit
turns off.
2 Press MULTI-CONTROL and hold until
Language select appears in the display.
3 Turn MULTI-CONTROL to select one of
the initial settings.
Turn MULTI-CONTROL clockwise or counterclockwise to switch between the functions in
the following order:
Language select (language selection)—
Calendar (calendar)—Clock (clock)—
FM tuning step (FM tuning step)—
AM tuning step (AM tuning step)—
Warning tone (warning tone)—
Face auto open (face auto open)—AUX1
(auxiliary input 1)—AUX2 (auxiliary input 2)—
Dimmer (dimmer)—Brightness (brightness)
—Digital ATT (digital attenuator)—Mute
(sound muting/attenuation)—Demonstration
(feature demo)—Reverse mode (reverse
mode)—Ever-scroll (ever scroll)—Calibration
(RPM calibration)—BT AUDIO (Bluetooth
audio)—Pin code input (pin code input)—
Phone reset (phone reset)
Use the following instructions to operate each
particular setting.
# To cancel initial settings, press BAND.
Selecting the display language
For your convenience, this unit equips multiple language display. You can select the language best suited to your first language.
1 Use MULTI-CONTROL to select
Language select.
Language select appears in the display.
2 Press MULTI-CONTROL to select the language.
Each press of MULTI-CONTROL selects lan-
guages in the following order:
English—Español—Português
Setting the date
The calender display adjusted in this mode appears when the telephone source is selected
or sources and the feature demo are off.
1 Use MULTI-CONTROL to select
Calendar.
Calendar appears in the display.
2 Push MULTI-CONTROL left or right to
select the segment of the calendar display
you wish to set.
Pushing MULTI-CONTROL left or right will se-
lect one segment of the calendar display:
Day—Month—Year
As you select segments of the calendar display the segment selected will blink.
<CRB2179-A/N>83
En
83
Page 84

Section
14
Black plate (84,1)
Initial Settings
3 Push MULTI-CONTROL up or down to
set the date.
Pushing MULTI-CONTROL up will increase
the selected day, month or year. Pushing
MULTI-CONTROL down will decrease the selected day, month or year.
Setting the clock
Use these instructions to set the clock.
1 Use MULTI-CONTROL to select Clock.
Clock appears in the display.
2 Push MULTI-CONTROL left or right to
select the segment of the clock display you
wish to set.
Pushing MULTI-CONTROL left or right will se-
lect one segment of the clock display:
Hour—Minute
As you select segments of the clock display
the segment selected will blink.
3 Push MULTI-CONTROL up or down to
set the clock.
Pushing MULTI-CONTROL up will increase
the selected hour or minute. Pushing
MULTI-CONTROL down will decrease the selected hour or minute.
Notes
! You can match the clock to a time signal by
pressing MULTI-CONTROL.
— If the minute is 00 to 29, the minutes are
rounded down. (e.g., 10:18 becomes
10:00.)
— If the minute is 30 to 59, the minutes are
rounded up. (e.g., 10:36 becomes 11:00.)
! Even when the sources are off, the clock dis-
play appears on the display. Pressing CLOCK
when the sources and feature demo are off,
turns the clock display on or off.
Setting the FM tuning step
The FM tuning step employed by seek tuning
can be switched between 100 kHz, the preset
step, and 50 kHz.
1 Use MULTI-CONTROL to select
FM tuning step.
FM tuning step appears in the display.
2 Press MULTI-CONTROL to select the FM
tuning step.
Pressing MULTI-CONTROL repeatedly will
switch the FM tuning step between 50 kHz
and 100 kHz. The selected FM tuning step will
appear in the display.
Note
If seek tuning is performed in 50 kHz steps, stations may be tuned in imprecisely. Tune in the stations with manual tuning or use seek tuning
again.
Setting the AM tuning step
The AM tuning step can be switched between
9 kHz, the preset step, and 10 kHz. When
using the tuner in North, Central or South
America, reset the tuning step from 9 kHz (531
kHz to 1 602 kHz allowable) to 10 kHz (530 kHz
to 1 640 kHz allowable).
1 Use MULTI-CONTROL to select
AM tuning step.
AM tuning step appears in the display.
84
En
<CRB2179-A/N>84
Page 85

Initial Settings
Black plate (85,1)
Section
14
English
2 Press MULTI-CONTROL to select the AM
tuning step.
Pressing MULTI-CONTROL repeatedly will
switch the AM tuning step between 9 kHz and
10 kHz. The selected AM tuning step will appear in the display.
Switching the warning tone
If the front panel is not detached from the
head unit within four seconds of turning off
the ignition, a warning tone will sound. You
can turn off the warning tone.
1 Use MULTI-CONTROL to select
Warning tone.
Warning tone appears in the display.
2 Press MULTI-CONTROL to turn warning
tone on.
ON appears in the display.
# To turn warning tone off, press
MULTI-CONTROL again.
Switching the face auto open
For theft protection, the front panel opens
automatically and easily detaches. Face auto
open is on as a default.
1 Use MULTI-CONTROL to select
Face auto open.
Face auto open appears in the display.
Switching the auxiliary setting
Auxiliary equipments connected to this unit
can be activated individually. Set each AUX
source to ON when using. About connecting
or using auxiliary equipments, refer to Using
the AUX source on page 89.
1 Use MULTI-CONTROL to select AUX1/
AUX2.
AUX1/AUX2 appears in the display.
2 Press MULTI-CONTROL to turn AUX1/
AUX2 on.
ON appears in the display.
# To turn AUX off, press MULTI-CONTROL
again.
Switching the dimmer setting
To prevent the display from being too bright at
night, the display is automatically dimmed
when the car’s headlights are turned on. You
can turn the dimmer on or off.
1 Use MULTI-CONTROL to select Dimmer.
Dimmer appears in the display.
2 Press MULTI-CONTROL to turn dimmer
on.
ON appears in the display.
# To turn dimmer off, press MULTI-CONTROL
again.
2 Press MULTI-CONTROL to turn the face
auto open on.
ON appears in the display.
# To turn the face auto open off, press
MULTI-CONTROL again.
Adjusting the brightness
You can adjust the display brightness. Initially
this mode is set to 24.
1 Use MULTI-CONTROL to select
Brightness.
Brightness appears in the display.
En
<CRB2179-A/N>85
85
Page 86

Section
14
Black plate (86,1)
Initial Settings
2 Push MULTI-CONTROL left or right to
adjust the brightness level.
Each time MULTI-CONTROL is pushed left or
right, brightness level increases or decreases.
0 to 31 is displayed as the level is increased or
decreased.
# When dimmer is functioning, the brightness
level can be adjusted 0 to 21.
Correcting distorted sound
When listening to a CD or other source on
which the recording level is high, setting the
equalizer curve level to high may result in distortion. You can switch the digital attenuator
to low to reduce distortion.
! Sound quality is better at the high setting
so this setting is usually used.
1 Use MULTI-CONTROL to select
Digital ATT.
Digital ATT appears in the display.
2 Press MULTI-CONTROL to select the digital attenuator level.
Pressing MULTI-CONTROL repeatedly will
switch between High (high) and Low (low)
and that status will be displayed.
Switching the sound
muting/attenuation
Sound from this system is muted or attenuated automatically when the signal from the
equipment with mute function is received.
! The sound is muted or attenuated, MUTE
or ATT are displayed and no audio adjustment is possible.
! Sound from this system returns to normal
when the muting or attenuation is canceled.
1 Use MULTI-CONTROL to select Mute.
Mute appears in the display.
2 Press MULTI-CONTROL to select the desired setting.
Press MULTI-CONTROL repeatedly to switch
between the following settings:
! TEL mute – Muting
! 10dB ATT – Attenuation
! 20dB ATT – Attenuation (20dB ATT has a
stronger effect than 10dB ATT)
Switching the feature demo
The feature demo automatically starts when
power to this unit is turned off while the ignition switch is set to ACC or ON.
1 Use MULTI-CONTROL to select
Demonstration.
Demonstration appears in the display.
2 Press MULTI-CONTROL to turn the feature demo on.
ON appears in the display.
# To turn the feature demo off, press
MULTI-CONTROL again.
Notes
! Remember that if the feature demo continues
operating when the car engine is turned off, it
may drain battery power.
! You can also turn on or off feature demo by
pressing DISPLAY while this unit is turned off.
For more details, see Feature demo mode on
page 10.
86
En
<CRB2179-A/N>86
Page 87

Initial Settings
Black plate (87,1)
Section
14
English
Switching the reverse mode
If you do not perform an operation within
about 30 seconds, screen indications start to
reverse, and then continue reversing every 10
seconds.
1 Use MULTI-CONTROL to select
Reverse mode.
Reverse mode appears in the display.
2 Press MULTI-CONTROL to turn the reverse mode on.
ON appears in the display.
# To turn the reverse mode off, press
MULTI-CONTROL again.
Note
You can also turn on or off reverse mode by pressing BAND while this unit is turned off. For more
details, see Reverse mode on page 9.
Switching the Ever Scroll
When Ever Scroll is set to ON, CD text information scrolls continuously in the display. Set
to OFF if you prefer the information to scroll
just once.
1 Use MULTI-CONTROL to select
Ever-scroll.
Ever-scroll appears in the display.
2 Press MULTI-CONTROL to turn the Ever
Scroll on.
ON appears in the display.
# To turn the Ever Scroll off, press
MULTI-CONTROL again.
Calibrating the RPMs
Follow the instructions below to measure the
RPM of your vehicle and records them. By
doing this, the tachometer of this unit can
work properly.
! Tachometer of this unit cannot work if you
do not perform the RPM calibration.
! In some vehicles, the tachometer may not
work properly even if you performed the
RPM calibration.
1 Park your vehicle in a safe place and be
sure to apply the parking brake.
2 Use MULTI-CONTROL to select
Calibration.
Calibration appears in the display.
3 Keep RPMs of the engine at 4 000 rpm
and press MULTI-CONTROL.
To measure the RPM of your vehicle properly,
keep RPMs of the engine at 4 000 rpm for a
few seconds.
When the RPM calibration is completed,
Completed is displayed.
# Some vehicles have a rev limiter that kicks in
early (e.g., 3 000 rpm) while parking. In this case,
perform RPM measurement at 2 000 rpm.
# To switch between 4000 rpm and 2000 rpm,
push MULTI-CONTROL left or right.
Activating the BT Audio source
You need to activate the BT Audio source in
order to use a Bluetooth audio player.
1 Use MULTI-CONTROL to select
BT AUDIO.
BT AUDIO appears in the display.
<CRB2179-A/N>87
En
87
Page 88

Section
14
Black plate (88,1)
Initial Settings
2 Press MULTI-CONTROL to turn the
BT Audio source on.
ON appears in the display.
# To turn the BT Audio source off, press
MULTI-CONTROL again.
Entering PIN code for
Bluetooth wireless connection
To connect your cellular phone to this unit via
Bluetooth wireless technology, you need to
enter PIN code on your phone to verify the
connection. The default code is 0000, but you
can change this in this function.
! With some Bluetooth audio players, you
may be required to enter to this unit in advance PIN code of your Bluetooth audio
player, in order to set this unit ready for a
connection from your Bluetooth audio
player.
1 Use MULTI-CONTROL to select
Pin code input.
Pin code input appears in the display.
2 Push MULTI-CONTROL up or down to
select a number.
Pushing MULTI-CONTROL up or down
changes the number.
When you press MULTI-CONTROL again on
the same display, the PIN code you entered is
stored in this unit.
# Pusing MULTI-CONTROL right in the confir-
mation display returns you to the PIN code input
display, and you can change the PIN code.
Resetting the Bluetooth
wireless technology module
Should you need to, you can reset the built-in
Bluetooth wireless technology module. This
will also clear all memories set in the telephone source, including Phone Book entries,
number presets, registration assignments and
the Call History.
For instruction on this operation, refer to Clear-
ing all memory on page 8.
3 Push MULTI-CONTROL right to move
the cursor to the next position.
When the number you want is displayed, push
MULTI-CONTROL right to move the cursor to
the next position and then select the next
number. Push MULTI-CONTROL left to move
backwards in the display.
4 After inputting PIN code (up to 16 digits), press MULTI-CONTROL.
PIN code you entered is now standby to be
stored in memory.
88
En
<CRB2179-A/N>88
Page 89

Other Functions
Black plate (89,1)
Section
15
English
Turning the clock display
on or off
You can turn the clock display on or off.
% Press CLOCK to turn the clock display
on or off.
Each press of CLOCK turns the clock display
on or off.
Note
Even when the sources are off, the clock display
appears on the display. Pressing CLOCK when
the sources and feature demo are off, turns the
clock display on or off.
Using the AUX source
This unit can control up to two auxiliary equipments such as VCR or portable devices (sold
separately). When connected, auxiliary equipments are automatically read in as AUX
sources and assigned to AUX1 or AUX2. The
relationship between AUX1 and AUX2
sources is explained below.
About AUX1 and AUX2
You have two methods to connect auxiliary
equipments to this unit.
AUX1 source:
When connecting auxiliary equipment using a
stereo mini plug cable
% Insert the stereo mini plug into the
AUX input jack on this unit.
For more details, refer to the installation manual.
The allocation of this auxiliary equipment is
automatically set to AUX1.
AUX2 source:
When connecting auxiliary equipment using an
IP-BUS-RCA Interconnector (sold separately)
% Use an IP-BUS-RCA Interconnector such
as the CD-RB20/CD-RB10 (sold separetely)
to connect this unit to auxiliary equipment
featuring RCA output.
For more details, refer to the IP-BUS-RCA Interconnector owner’s manual.
The allocation of this auxiliary equipment is
automatically set to AUX2.
# You can only make this type of connection if
the auxiliary equipment has RCA outputs.
Selecting AUX as the source
% Press SOURCE to select AUX (AUX1 or
AUX2) as the source.
Press SOURCE until AUX appears in the display.
# If the auxiliary setting is not turned on, AUX
cannot be selected. For more details, see Switch-
ing the auxiliary setting on page 85.
Setting the AUX title
The title displayed for each AUX1 or AUX2
source can be changed.
1 After you have selected AUX as the
source, use MULTI-CONTROL and select
FUNCTION to display Title Input.
2 Press DISPLAY to select the desired
character type.
Press DISPLAY repeatedly to switch between
the following character types:
Alphabet (upper case), numbers and symbols
—Alphabet (lower case)—European letters,
such as those with accents (e.g. á, à, ä, ç)—
Numbers and symbols
<CRB2179-A/N>89
En
89
Page 90

231
Section
15
Black plate (90,1)
Other Functions
3 Push MULTI-CONTROL up or down to
select a letter of the alphabet.
Each time MULTI-CONTROL is pushed up, alphabet, numbers or symbols are displayed in
ascending order (A B C ...). Each time
MULTI-CONTROL is pushed down, letters are
displayed in descending order.
4 Push MULTI-CONTROL right to move
the cursor to the next character position.
When the letter you want is displayed, push
MULTI-CONTROL right to move the cursor to
the next position and then select the next letter. Push MULTI-CONTROL left to move backwards in the display.
5 Move the cursor to the last position by
pushing MULTI-CONTROL right after entering the title.
When you push MULTI-CONTROL right one
more time, the entered title is stored in memory.
6 Press BAND to return to the playback
display.
Using different
entertainment displays
You can change the entertainment display to
be displayed on all sources.
1 Entertainment display name
Shows name of the currently selected entertainment display.
2 Background display name
Shows name of the currently selected background display.
3 Source icon
Shows which source has been selected.
! Jacket art of current folder is displayed
when playing an MP3/WMA/AAC/WAV
disc.
90
Setting the entertainment display
You can change the entertainment display and
text color.
! When you select Vehicle Dynamics 1,
Vehicle Dynamics 2 or
Vehicle Dynamics 3, perform the RPM ca-
libration. Refer to Calibrating the RPMs on
page 87.
1 Press MULTI-CONTROL to display the
main menu.
FUNCTION, AUDIO and ENTERTAINMENT
appear on the display.
En
<CRB2179-A/N>90
Page 91

Other Functions
Black plate (91,1)
Section
15
English
2 Use MULTI-CONTROL to select
ENTERTAINMENT.
Turn to change the menu option; press to select.
3 Turn MULTI-CONTROL to select a desired entertainment display.
Turn MULTI-CONTROL clockwise or counterclockwise to switch between the displays in
the following order:
Standard (standard)—Visualizer1 (visualizer
1)—Visualizer2 (visualizer 2)—Visualizer3 (visualizer 3)—Visualizer4 (visualizer 4)—
Visualizer5 (visualizer 5)—VisualizerRDM
(random visualizer)—LevelMeter (level meter)
—Spectrum Analyzer (spectrum analyzer)—
Vehicle Dynamics 1 (vehicle dynamics pro-
cessor 1)—Vehicle Dynamics 2 (vehicle dynamics processor 2)—Vehicle Dynamics 3
(vehicle dynamics processor 3)—Movie
(movie screen)—Clock (entertainment clock)
—OFF (entertainment display off)
# You can also switch between the entertainment display by pressing ENTERTAINMENT on
the remote control.
# When Standard is selected, source icon can
be turned on or off by pressing DISPLAY.
4 Push MULTI-CONTROL up or down to
select a desired text color.
Each time MULTI-CONTROL is pushed up or
down, the text color changes. You can select
the text color from among 11 colors.
# When Vehicle Dynamics 1,
Vehicle Dynamics 2 or Vehicle Dynamics 3 is
selected, you can choose the color of gauge appearance from among five color combinations.
# Texts are not displayed on Movie and OFF set-
ting.
5 Press MULTI-CONTROL to determine
the entertainment display and text color
setting.
The choices you made on the color and the entertainment display are stored in memory and
the display reverts.
Setting the background display
Some entertainment displays allow you to
change the backgrounds. Try different backgrounds and colors (if available) until you find
the desirable background display setting for
the selected entertainment display.
1 Select an entertainment display whose
background can be changed.
If the entertainment display you selected is
available for the background setting,
are displayed on the left and right side of
FRONT. Refer to Setting the entertainment dis-
play on the previous page.
2 Push MULTI-CONTROL right to switch
to the background display selection mode.
3 Turn MULTI-CONTROL to select a desired background.
Turn MULTI-CONTROL clockwise or counterclockwise to switch between the displays in
the following order:
BGV1 (background visual 1)—BGV2 (background visual 2)—BGV3 (background visual 3)
—BGV4 (background visual 4)—BGV5 (back-
ground visual 5)—BGP1 (background picture
1)—BGP2 (background picture 2)—BGP3
(background picture 3)—BGP4 (background
picture 4)—BGP5 (background picture 5)—
BGP6 (background picture 6)—BGP7 (background picture 7)—BGP8 (background picture
8)—Slideshow (slideshow)—Texture1 (texture 1)—Texture2 (texture 2)—Texture3 (tex-
ture 3)—Texture4 (texture 4)—OFF
(background display off)
and
<CRB2179-A/N>91
En
91
Page 92

Section
15
Black plate (92,1)
Other Functions
# You cannot use ENTERTAINMENT on the re-
mote control to switch between the background
display.
4 When BGV1, BGV2 or Texture3 is selected, push MULTI-CONTROL up or down
to select a desired color for the background.
Each time MULTI-CONTROL is pushed up or
down, the background color changes. You can
select the background color from among 11
colors (including rainbow mode).
! When the rainbow mode is selected, the
background color continuously changes
through all the colors.
5 Press MULTI-CONTROL to determine
the background display setting.
The choices you made on the color and the
background display are stored in memory and
the display reverts.
Rewriting the
entertainment displays and
the icons for telephone
functions
You can rewrite the entertainment displays
and the icons for telephone functions. Please
create or download the data using your Computer, and record it on CD-R. For details,
please visit the following site:
http://www.pioneer.co.jp/car/pclink4/indexe.html
Important
Once the rewriting process has started, do not remove the front panel or turn the ignition off, until
it is completed.
1 Press SOURCE and hold until the unit
turns off.
2 Press and hold EQ and LIST until the
unit goes into download mode.
Front panel is opened automatically and then
Download and Insert disc is displayed.
# If a disc is loaded in the unit, it is ejected automatically.
# When the front panel is open, does not go into
download mode even if you press and hold EQ
and LIST.
3 Insert the disc containing the rewritten
data into the CD loading slot.
Download Ready appears in the display, and
then data rewriting will start automatically.
Now loading is displayed during rewriting.
CD loading slot
4 After Finished is displayed, press EJECT
to eject the disc.
Download mode is exited and unit turns off.
Notes
! Do not insert anything other than a CD into
the CD loading slot.
! It can take several minutes to complete this
operation.
! During download mode, buttons other than
EJECT are inactive.
! To cancel download mode, press EJECT.
! If an error message such as CD ERROR is dis-
played, refer to Understanding error message
on rewriting the entertainment displays on
page 94.
92
En
<CRB2179-A/N>92
Page 93

Additional Information
Black plate (93,1)
Appendix
English
Understanding built-in CD
player error messages
When you contact your dealer or your nearest
Pioneer Service Center, be sure to record the
error message.
Message Cause Action
ERROR-11, 12,
17, 30
ERROR-11, 12,
17, 30
ERROR-10, 11,
12, 15, 17, 30,
A0
ERROR-15 The inserted disc
ERROR-23 The CD format
NO AUDIO The inserted disc
Track Skipped The inserted disc
PROTECT All the files on
Dirty disc Clean disc.
Scratched disc Replace disc.
Electrical or mechanical
does not contain
any data
cannot be played
back
does not contain
any files that can
be played back
contains WMA
files that are protected by DRM
the inserted disc
are secured by
DRM
Turn the ignition
ON and OFF, or
switch to a different source, then
back to the CD
player.
Replace disc.
Replace disc.
Replace disc.
Replace disc.
Replace disc.
pears, refer to the table below to see what the
problem is and the suggested method of correcting the problem. After checking, try again.
Message Cause Action
Check MIC
type
MIC ERROR Microphone is
Front Speaker
ERROR, Front
left Speaker
ERROR, Front
right Speaker
ERROR, Rear
left Speaker
ERROR, Rear
right Speaker
ERROR, Subwoofer
ERROR, Subwoofer Lch
ERROR, Subwoofer Rch
ERROR
Noise ERROR The surrounding
Microphone is
connected to microphone input.
not connected.
The microphone
cannot pick up
the measuring
tone of a speaker.
noise level is too
high.
Disconnect the microphone.
Plug the supplied
microphone securely into the
jack.
! Confirm that the
speakers are connected correctly.
! Cancel muting
the front speaker
units.
! Correct the input
level setting of the
power amp connected to the
speakers.
! Set the microphone correctly.
! Stop your car in
a place that is as
quiet as possible,
and switch off the
engine, air conditioner or heater.
! Set the microphone correctly.
Understanding auto TA and
EQ error messages
When correct measurement of car interior
acoustic characteristics is not possible using
the auto TA and EQ, an error message may appear on the display. If an error message ap-
<CRB2179-A/N>93
En
93
Page 94

Appendix
Black plate (94,1)
Additional Information
Understanding error
message on rewriting the
entertainment displays
When you contact your dealer or your nearest
Pioneer Service Center, be sure to record the
error message.
Message Cause Action
CD ERROR CD player error Press EJECT and
CD ERROR A0 Electrical error Turn the ignition
Disc ERROR The disc does not
Download
ERROR, Transmit ERROR
FILE ERROR File error Rewrite the file.
contain the necessary data
Writing error Press EJECT and
check the disc.
ON and OFF.
Press EJECT and
replace the disc.
retry the rewriting.
CD player and care
! Use only CDs that have either of the two
Compact Disc Digital Audio marks as
shown below.
! Check all CDs for cracks, scratches or
warping before playing. CDs that have
cracks, scratches or are warped may not
play properly. Do not use such discs.
! Avoid touching the recorded (non-printed)
surface when handling the disc.
! Store discs in their cases when not in use.
! Keep discs out of direct sunlight and do
not expose the discs to high temperatures.
! Do not attach labels, write on or apply che-
micals to the surface of the discs.
! To clean a CD, wipe the disc with a soft
cloth outward from the center.
! If the heater is used in cold weather, moist-
ure may form on components inside the
CD player. Condensation may cause the CD
player to malfunction. If you think that con-
densation is a problem turn off the CD
player for an hour or so to allow it to dry
out and wipe any damp discs with a soft
cloth to remove the moisture.
! Road shocks may interrupt CD playback.
! Use only normal, round CDs. If you insert ir-
regular, non-round, shaped CDs they may
jam in the CD player or not play properly.
94
En
CD-R/CD-RW discs
! When CD-R/CD-RW discs are used, play-
back is possible only for discs which have
been finalized.
! It may not be possible to play back CD-R/
CD-RW discs recorded on a music CD re-
corder or a personal computer because of
disc characteristics, scratches or dirt on
the disc, or dirt, condensation, etc., on the
lens of this unit.
<CRB2179-A/N>94
Page 95

Additional Information
Black plate (95,1)
Appendix
English
! Playback of discs recorded on a personal
computer may not be possible, depending
on the application settings and the environment. Please record with the correct format. (For details, contact the manufacturer
of the application.)
! Playback of CD-R/CD-RW discs may be-
come impossible in case of direct exposure
to sunlight, high temperatures, or the storage conditions in the vehicle.
! Titles and other text information recorded
on a CD-R/CD-RW disc may not be displayed by this unit (in the case of audio
data (CD-DA)).
! Read the precautions with CD-R/CD-RW
discs before using them.
Dual Discs
! Dual Discs are two-sided discs that have a
recordable CD for audio on one side and a
recordable DVD for video on the other.
! Since the CD side of Dual Discs is not phy-
sically compatible with the general CD
standard, it may not be possible to play the
CD side with this unit.
! Frequent loading and ejecting of a Dual
Disc may result in scratches on the disc.
Serious scratches can lead to playback problems on this unit. In some cases, a Dual
Disc may become stuck in the disc loading
slot and will not eject. To prevent this, we
recommend you refrain from using Dual
Disc with this unit.
! Please refer to the information from the
disc manufacturer for more detailed information about Dual Discs.
MP3, WMA, AAC and WAV files
! MP3 is short for MPEG Audio Layer 3 and
refers to an audio compression technology
standard.
! WMA is short for Windows Media™ Audio
and refers to an audio compression technology that is developed by Microsoft Corporation. WMA data can be encoded by
using Windows Media Player version 7 or
later.
! AAC is short for Advanced Audio Coding
and refers to an audio compression technology standard.
! WAV is short for waveform. It is a standard
audio file format for Windows
! This unit may not operate correctly depend-
ing on the application used to encode
WMA files.
! Depending on the version of Windows
Media Player used to encode WMA files,
album names and other text information
may not be correctly displayed.
! There may be a slight delay when starting
playback of WMA/AAC files encoded with
image data.
! This unit allows playback of MP3/WMA/
AAC/WAV files on CD-ROM, CD-R and CDRW discs. Disc recordings compatible with
level 1 and level 2 of ISO9660 and with the
Romeo and Joliet file system can be played
back.
! It is possible to play back multi-session
compatible recorded discs.
! MP3/WMA/AAC/WAV files are not compati-
ble with packet write data transfer.
! The maximum number of characters which
can be displayed for a file name, including
the extension (.mp3, .wma, .m4a or .wav), is
64, from the first character.
! The maximum number of characters which
can be displayed for a folder name is 64.
! In case of files recorded according to the
Romeo file system, only the first 64 characters can be displayed.
®
.
<CRB2179-A/N>95
En
95
Page 96

Appendix
Black plate (96,1)
Additional Information
! When playing discs with MP3/WMA/AAC/
WAV files and audio data (CD-DA) such as
CD-EXTRA and MIXED-MODE CDs, both
types can be played only by switching
mode between MP3/WMA/AAC/WAV and
CD-DA.
! The folder selection sequence for playback
and other operations becomes the writing
sequence used by the writing software. For
this reason, the expected sequence at the
time of playback may not coincide with the
actual playback sequence. However, there
also is some writing software which permits setting of the playback order.
! Some audio CDs contain tracks that merge
into one another without a pause. When
these discs are converted to MP3/WMA/
AAC/WAV files and burned to a CD-R/CDRW/CD-ROM, the files will be played back
on this player with a short pause between
each one, regardless of the length of the
pause between tracks on the original audio
CD.
Important
! When naming an MP3/WMA/AAC/WAV file,
add the corresponding filename extension
(.mp3, .wma, .m4a or .wav).
! This unit plays back files with the filename ex-
tension (.mp3, .wma, m4a or .wav) as an MP3/
WMA/AAC/WAV file. To prevent noise and
malfunctions, do not use these extensions for
files other than MP3/WMA/AAC/WAV files.
MP3 additional information
! Files are compatible with the ID3 Tag Ver.
1.0, 1.1, 2.2, 2.3 and 2.4 formats for display
of album (disc title), track (track title), artist
(track artist) and comments. Ver. 2.x of ID3
Tag is given priority when both Ver. 1.x and
Ver. 2.x exist.
! The emphasis function is valid only when
MP3 files of 32, 44.1 and 48 kHz frequen-
cies are played back. (16, 22.05, 24, 32,
44.1, 48 kHz sampling frequencies can be
played back.)
! There is no m3u playlist compatibility.
! There is no compatibility with the MP3i
(MP3 interactive) or mp3 PRO formats.
! The sound quality of MP3 files generally be-
comes better with an increased bit rate.
This unit can play recordings with bit rates
from 8 kbps to 320 kbps, but in order to be
able to enjoy sound of a certain quality, we
recommend using only discs recorded with
a bit rate of at least 128 kbps.
WMA additional information
! This unit plays back WMA files encoded by
Windows Media Player version 7, 7.1, 8, 9
and 10.
! You can only play back WMA files in the fre-
quencies 32, 44.1 and 48 kHz.
! The sound quality of WMA files generally
becomes better with an increased bit rate.
This unit can play recordings with bit rates
from 48 kbps to 320 kbps (CBR) or from 48
kbps to 384 kbps (VBR), but in order to be
able to enjoy sound of a certain quality, we
recommend using discs recorded with a
higher bit rate.
! This unit doesn’t support the following for-
mats.
— Windows Media Audio 9 Professional
(5.1ch)
— Windows Media Audio 9 Lossless
— Windows Media Audio 9 Voice
AAC additional information
! This unit plays back AAC files encoded by
®
iTunes
version 4.8 and earlier.
96
En
<CRB2179-A/N>96
Page 97

1
2
3
Additional Information
! This unit plays back AAC files in the sam-
pling frequencies 11.025, 16, 22.05, 24, 32,
44.1 and 48 kHz.
! The sound quality of AAC files generally be-
comes better with an increased transmission rate. This unit can play recordings
with transmission rates from 16 kbps to
320 kbps, but in order to be able to enjoy
sound of a certain quality, we recommend
using discs recorded with a higher transmission rate.
! This unit doesn’t support the following for-
mats.
— Apple Lossless
WAV additional information
! This unit plays back WAV files encoded in
Linear PCM (LPCM) format or MS ADPCM
format.
! You can only play back WAV files in the fre-
quencies 16, 22.05, 24, 32, 44.1 and 48 kHz
(LPCM), or 22.05 and 44.1 kHz (MS
ADPCM). The sampling frequency shown
in the display may be rounded.
! The sound quality of WAV files generally be-
comes better with a larger number of quantization bits. This unit can play recordings
with 8 and 16 (LPCM) or 4 (MS ADPCM)
quantization bits, but in order to be able to
enjoy sound of a certain quality, we recommend using discs recorded with the larger
number of quantization bits.
About folders and MP3/
WMA/AAC/WAV files
! An outline of a CD-ROM with MP3/WMA/
AAC/WAV files on it is shown below. Subfolders are shown as folders in the folder
currently selected.
Black plate (97,1)
Appendix
English
1 First level
2 Second level
3 Third level
Notes
! This unit assigns folder numbers. The user
cannot assign folder numbers.
! It is not possible to check folders that do not
include MP3/WMA/AAC/WAV files. (These
folders will be skipped without displaying the
folder number.)
<CRB2179-A/N>97
En
97
Page 98

Appendix
Additional Information
! MP3/WMA/AAC/WAV files in up to 8 tiers of
folders can be played back. However, there is
a delay in the start of playback on discs with
numerous tiers. For this reason we recommend creating discs with no more than 2
tiers.
! It is possible to play back up to 99 folders on
one disc.
Black plate (98,1)
98
En
<CRB2179-A/N>98
Page 99

Additional Information
Black plate (99,1)
Appendix
English
Terms
A2DP
A2DP is short for Advanced Audio Distribution
Profile. This profile allows the high quality
audio data of either stereo or monaural to be
transmitted via Bluetooth wireless technology.
AAC
AAC is short for Advanced Audio Coding and
refers to an audio compression technology
standard used with MPEG 2 and MPEG 4.
AVRCP
AVRCP is short for Audio/Video Remote Control Profile. This profile enables interoperability
between audio and video features of the Bluetooth device connected via Bluetooth wireless
technology.
Bit rate
This expresses data volume per second, or bps
(bits per second) units. The higher the rate,
the more information is available to reproduce
the sound. Using the same encoding method
(such as MP3), the higher the rate, the better
the sound.
Bluetooth
Bluetooth is a short-range wireless radio connectivity technology that is developed as a
cable replacement for mobile phones, handheld PCs and other devices. Bluetooth operates in 2.4 GHz frequency range and transmits
voice and data at speeds up to 1 megabit per
second. Bluetooth was launched by a special
interest group (SIG) that comprises of Ericsson
Inc., Intel Corp., Nokia Corp., Toshiba and IBM
in 1998, and it is currently developed by nearly
2 000 companies worldwide.
GAP
GAP is short for Generic Access Profile. This is
a basic profile of Bluetooth wireless technology.
HFP
HFP is short for Hands Free Profile. This profile
is used for hands-free phoning with the devices featuring Bluetooth wireless technology.
HSP
HSP is short for Head Set Profile. This profile
is used for connecting headset and communication terminal via Bluetooth wireless technology.
ID3 tag
This is a method of embedding track-related
information in an MP3 file. This embedded information can include the track title, the artist’s name, the album title, the music genre,
the year of production, comments and other
data. The contents can be freely edited using
software with ID3 Tag editing functions.
Although the tags are restricted as to the number of characters, the information can be
viewed when the track is played back.
ISO9660 format
This is the international standard for the format logic of CD-ROM folders and files. For the
ISO9660 format, there are regulations for the
following two levels.
Level 1:
The file name is in 8.3 format (the name consists of up to 8 characters, half-byte English
capital letters and half-byte numerals and the
“_” sign, with a file-extension of three characters).
Level 2:
The file name can have up to 31 characters (including the separation mark “.” and a file extension). Each folder contains less than 8
hierarchies.
Extended formats
Joliet:
File names can have up to 64 characters.
Romeo:
File names can have up to 128 characters.
<CRB2179-A/N>99
En
99
Page 100

Appendix
Black plate (100,1)
Additional Information
Linear PCM (LPCM)/Pulse code
modulation
This stands for linear pulse code modulation,
which is the signal recording system used for
music CDs and DVDs.
m3u
Playlists created using the “WINAMP” software have a playlist file extension (.m3u).
MP3
MP3 is short for MPEG Audio Layer 3. It is an
audio compression standard set by a working
group (MPEG) of the ISO (International Standards Organization). MP3 is able to compress
audio data to about 1/10th the level of a conventional disc.
MS ADPCM
This stands for Microsoft adaptive differential
pulse code modulation, which is the signal recording system used for the multimedia software of Microsoft Corporation.
Multi-session
Multi-session is a recording method that allows additional data to be recorded later.
When recording data on a CD-ROM, CD-R or
CD-RW, etc., all data from beginning to end is
treated as a single unit or session. Multi-session is a method of recording more than 2 sessions on one disc.
Number of quantization bits
The number of quantization bits is one factor
in the overall sound quality; the higher the
“bit-depth”, the better the sound quality. However, increasing the bit-depth also increases
the amount of data and therefore storage
space required.
data, schedule data and so on between devices featuring Bluetooth wireless technology.
Packet write
This is a general term for a method of writing
on CD-R, etc., at the time required for a file,
just as is done with files on floppy or hard
discs.
SDP
SDP is short for Service Discovery Protocol.
This protocol is to search for available services
and service characteristics on other devices
featuring Bluetooth wireless technology.
VBR
VBR is short for variable bit rate. Generally
speaking CBR (constant bit rate) is more
widely used. But by flexibly adjusting the bit
rate according to the needs of audio compression, it is possible to achieve compressionpriority sound quality.
WAV
WAV is short for waveform. It is a standard
audio file format for Windows
®
.
WMA
WMA is short for Windows Media™ Audio
and refers to an audio compression technology that is developed by Microsoft Corporation. WMA data can be encoded by using
Windows Media Player version 7 or later.
Windows Media and the Windows logo are trademarks or registered trademarks of Microsoft
Corporation in the United States and/or other
countries.
OPP
OPP is short for Object Push Profile. This profile is used for transferring the phonebook
100
En
<CRB2179-A/N>100
 Loading...