

Page 1

Avid Studio
Version 1
Avid Studio Ultimate
Your Life in Movies
Page 2

Documentation by Nick Sullivan and Terri Morgan. Contributors: Dieter
Huber, Jim Sugg and Markus Weber.
Copyright ©1996-2011 A vid Technology, Inc. All rights reserved.
Please respect the Rights of Artists and Creators. Content such as music,
photos, video and celebrity images are protected by the laws of many
countries. You may not use other people’s content unless you own the
rights or have the permission of the owner.
This product or portions thereof are protected in the United States by one or
more of the following United States Patents: 5,495,291; 6,469,711;
6,532,043; 6,901,211; 7,124,366; 7,165,219; 7,286,132; 7,301,092 and
7,500,176; and in Europe by one or more of the following European
Patents: 0695094 and 0 91 6136. Other patents are pending.
Mpegable DS 2.2 ©2004 Dicas Digital Image Coding GmbH. Manufactured under license from Dolby Laboratories. This product contains one or
more programs protected under international and U.S. copyright laws as
unpublished works. They are confidential and proprietary to Dolby
Laboratories. Their reproduction or disclosure, in whole or in part, or the
production of derivative works therefrom without the express permission of
Dolby Laboratories is prohibited. Copyright 1993-2005 by Dolby
Laboratories. All rights reserved. MPEG Layer-3 audio coding
technology licensed from Fraunhofer IIS and Thomson Multimedia.
Portions of this product were created using LEADTOOLS ©1991-2006,
LEAD Technologies, Inc. All rights reserved. Portions utilize Windows
Media Technologies ©1999-2005 Microsoft Corporation. Real Producer
SDK ©1995-2005 Real Networks Inc. This product contains portions of
imaging code owned and copyrighted by Pegasus Imaging Corporation,
Tampa, FL. All rights reserved. MPEG Layer II Audio by QDesign
Corp. This product contains a YouTube API.
MPEG Audio technology may be included with this product. Audio MPEG,
Inc. and SISVEL, S.P.A. require this notice: This product contains MPEG
Audio technology licensed by Audio MPEG and SISVEL only for use in
accordance with Avid’s EULA.
No part of this manual may be copied or distributed, transmitted,
transcribed, stored in a retrieval system, or translated into any human or
computer language, in any form by any means, electronic, mechanical,
magnetic, manual, or otherwise, without the express written permission of
Avid Technology, Inc .
Avid
280 North Bernardo Avenue
Mountain View, CA 949 43
ii Avid Studio
Page 3

Table of contents
BEFORE YOU START ..................................................................... IX
Equipment requirements .............................................................................. ix
Abbreviations and conventions ................................................................... xi
On-line help ................................................................................................ xii
CHAPTER 1: USING AVID STUDIO ................................................. 1
The Library ................................................................................................... 3
The Movie Editor and the Disc Editor.......................................................... 5
The media editors ......................................................................................... 6
The Player .................................................................................................... 7
CHAPTER 2: THE LIBRARY ............................................................. 9
Understanding the Library ...................................................................... 11
Location tabs .............................................................................................. 13
The Asset Tree ........................................................................................... 14
Collections .................................................................................................. 16
Managing Library assets ............................................................................ 17
The Browser ............................................................................................... 19
The Library preview ................................................................................... 23
Using the Library ..................................................................................... 25
Choosing what to display ........................................................................... 25
Tags ............................................................................................................ 28
Correcting media ........................................................................................ 30
Video scene detecti on ................................................................................. 30
Table of contents iii
Page 4

SmartSlide and SmartMovie ................................................................... 32
SmartSlide .................................................................................................. 33
SmartMovie ................................................................................................ 35
CHAPTER 3: THE MOVIE EDITOR ................................................ 39
The project timeline ................................................................................. 41
Timeline fundamentals ............................................................................... 41
The timeline toolbar ................................................................................... 43
The timeline track header ........................................................................... 48
Timeline audio functions ............................................................................ 49
Editing movies .......................................................................................... 49
Adding clips to the timeline ....................................................................... 50
Title Editor, Scorefitter, voice-over ............................................................ 54
Deleting clips .............................................................................................. 54
Clip operations ........................................................................................... 55
Using the Clipboard.................................................................................... 64
Speed .......................................................................................................... 65
Movies within movies ................................................................................ 66
Transitions .................................................................................................. 68
Clip effects ................................................................................................. 71
Clip context menus ..................................................................................... 72
CHAPTER 4: MEDIA EDITING: CO RRE CTI O NS ........................... 75
Media editing overvi e w .............................................................................. 77
Correcting photos ..................................................................................... 81
Photo editing tools ...................................................................................... 81
Photo corrections ........................................................................................ 82
Correcting video ....................................................................................... 86
Video tools ................................................................................................. 87
Video corrections ....................................................................................... 89
Correcting audio ....................................................................................... 90
iv Avid Studio
Page 5

CHAPTER 5: MEDIA EDITING: EFFECTS ..................................... 91
Effects in the media editors ........................................................................ 92
Effects on the timeline ................................................................................ 95
The Settings panel ...................................................................................... 96
Working with keyframes ............................................................................ 98
Video and photo effects ............................................................................ 100
Pan-and-zoom ........................................................................................... 102
CHAPTER 6: MONTAGE ..............................................................107
The Montage section of the Library ......................................................... 108
Using Montage templates ....................................................................... 109
Montage clips on the project timeline ...................................................... 111
Anatomy of a template ............................................................................. 112
The Montage Editor ............................................................................... 115
CHAPTER 7: THE TITLE EDITOR ................................................117
Launching (and leaving) the Title Editor ................................................. 118
The File menu .......................................................................................... 120
The Library ............................................................................................. 120
The Presets Selector ............................................................................... 121
Preset Looks ............................................................................................. 122
Preset Motions .......................................................................................... 123
Creating and editing Titles .................................................................... 125
Background settings ................................................................................. 127
Look settings ............................................................................................ 128
The Edit window ...................................................................................... 131
Text and text settings ................................................................................ 133
The Layer List ........................................................................................ 137
Working with the Layer List .................................................................... 138
Working with layer groups ....................................................................... 142
Table of contents v
Page 6

CHAPTER 8: SOUND AND MUSIC ..............................................145
The Audio Editor .................................................................................... 147
Audio corrections ..................................................................................... 151
Audio effects ............................................................................................ 154
Audio on the timeline ............................................................................. 156
Timeline audio functions .......................................................................... 157
Audio creation tools................................................................................ 163
ScoreFitter ................................................................................................ 164
The Voice-over tool.................................................................................. 165
CHAPTER 9: DISC PROJECTS ....................................................169
Disc menus ............................................................................................... 170
Adding disc menus ................................................................................... 172
Previewing disc me nus ............................................................................. 174
Menu editing on the timeline ................................................................. 176
Timeline menu markers ............................................................................ 176
Authoring tools ......................................................................................... 177
The Chapter Wizard ................................................................................. 179
The Menu Editor .................................................................................... 182
Menu buttons ............................................................................................ 183
The Disc Simulator ................................................................................. 185
CHAPTER 10: THE IMPORTER....................................................187
Using the Importer ................................................................................... 188
Importer panels ...................................................................................... 189
The Import From panel ............................................................................. 189
The Import To panel ................................................................................. 192
The Mode panel ........................................................................................ 195
The Compression Options window .......................................................... 197
The Scene Detection Opt ions window ..................................................... 198
The Metadata panel .................................................................................. 199
The Filename panel .................................................................................. 199
vi Avid Studio
Page 7

Selecting media for import .................................................................... 201
Import from file-based media ................................................................... 201
Selecting files for Import .......................................................................... 201
Scan for media .......................................................................................... 207
Import from DV or HDV camera ............................................................. 207
Import from analog sources ...................................................................... 211
Import from DVD or Blu-ray Di sc ........................................................... 212
Import from digital cameras ..................................................................... 213
Stop motion .............................................................................................. 213
Snapshot ................................................................................................... 215
CHAPTER 11: THE EXPORTER ...................................................219
Output to disc media .............................................................................. 221
Output to file ........................................................................................... 224
Output to the web ................................................................................... 231
CHAPTER 12: SETTINGS .............................................................235
APPENDIX A: TROUBLESHOOTING ..........................................241
Contacting support ................................................................................. 242
Top support issues .................................................................................. 243
Compatibility with past content................................................................ 243
Capture hardware compatibility ............................................................... 246
Serial number information ........................................................................ 247
Error or crash while installing .................................................................. 248
Hangs or crashes while launching ............................................................ 249
Troubleshooting software crashes ............................................................ 250
Export problems ....................................................................................... 255
Disc playback problems ........................................................................... 255
Resources, tutorials and training .............................................................. 258
Table of contents vii
Page 8

APPENDIX B: VIDEOGRAPHY.....................................................259
Creating a shooting plan ........................................................................... 259
Editing ...................................................................................................... 260
Rules of thumb for video editing .............................................................. 263
Soundtrack productio n ............................................................................. 264
Title .......................................................................................................... 265
APPENDIX C: GLOSSARY ...........................................................267
APPENDIX D: KEYBOARD SHORTCUTS ...................................279
INDEX .............................................................................................283
viii Avid Studio
Page 9

Before you start
Thank you for purchasing Avid Studio. We hope you enjoy using the
software.
If you have not used Avid Studio before, we recommend that you keep the
manual handy for reference even if you don’t actually read it all the way
through.
In order to ensure that your movie-making experience gets off on the right
foot, please review the topics below before continuing to Chapter 1: Using
Avid Studio.
Equipment requirements
In addition to your Avid Studio software, an efficient editing system
requires certain levels of system performance as noted below.
Remember too that while specifications are important, th ey do not tell the
whole story. For instance, the proper functioning of hardware devices can
also depend on manufacturer-supplied driver software. Checking the
maker’s web-site for driver updates and support information can often be
helpful in solving problems with graphics cards, sound cards and other
devices.
Operating system
A 64-bit operating system is recommended if you are planning to edit HD
material.
RAM
The more RAM you have, the easier it is to work with Avid Studio. You
will need at least 1 GB of RAM to achieve satisfactory operation, and we
highly recommend 2 GB (or more). If you work with HD or AVCHD
video, the recomme nda t ion rises to 4 GB.
Before you start ix
Page 10
Motherboard
Intel Pentium or AMD Athlon 2.4 GHz or higher – the higher the better.
AVCHD editing demands a more powerful CPU. The minimum
recommendation ranges up to 2.66 GHz for editing 1920-pixel AVCHD
video. A multi-core system like Core i7, Core i5 or Core i3 is
recommended.
Graphics card
To run Studio, your Direc tX-compatible graphics card needs:
• For typical use, at least 128 MB of onboard memory (256 MB
preferred).
• For HD and AVCHD, at least 256 MB (512 MB preferred).
The hard drive
Your hard drive must be capable of sustained reading and writing at 4
MB/sec. Most drives are capable of this. The first time you capture, Studio
will test your drive to make sure it is fast enough.
Video files are often quite large, so you also need a good amount of
available hard drive space. For instance, video in the DV format fills
3.6 MB of hard drive space per second of footage: a gigabyte every four
and a half minutes.
Tip: For capture from video tape, we recommend using a separate hard
drive in order to avoid competition between Avid Studio and other
software, including Windows, for use of the drive.
Video capture hardware
Studio can capture video from a variety of digital and analog sources.
Please see “The Import From panel ” o n pa ge 189 for details.
Video output hardware
Studio can output video to:
• Any HDV, DV or Digital8 camcorder or VCR. This requires an OHCI-
compliant IEEE-1394 (FireWire) port (as provided by Avid Studio DV).
The camcorder must be set up to record from DV Input.
x Avid Studio
Page 11

• Any analog (8mm, Hi8, VHS, SVHS, VHS-C or SVHS-C) camcorder or
VCR. This requires Avid Studio USB-700, PCI-500, PCI-700, or
another Avid device with analog outputs. Output to analog camcorders
or VCRs is also possible using a Avid Studio DV or other OHCIcompliant 1394 port if your DV or Digital8 camcorder or VCR can pass
a DV signal through to its analog outputs (see your camcorder manual
and Chapter 11: The Exporter, for more information).
Abbreviations and conventions
This guide uses the following conventions to help organize the material.
Common terms
AVCHD: A video data format used by some high-definition camcorders,
and for creating DVD discs that can be read on Blu-ray players. Successful
editing of AVCHD files requires more computing power than other formats
supported by Avid Studio.
DV: This term refers to DV and Digital8 camcorders, VCRs and tapes.
HDV: A ‘high-definition video’ format that allows video in frame sizes of
1280x720 or 1440x1080 to be recorded in MPEG-2 format on DV media.
1394: The term ‘1394’ applies to OHCI-compliant IEEE-1394, F ireWire,
DV or i.LINK interfaces, ports and cables.
Analog: The term ‘analog’ applies to 8mm, Hi8, VHS, SVHS, VHS-C or
SVHS-C camcorders, VCRs and tapes, and to Composite/RCA and SVideo cables and connectors.
Buttons, menus, dialog boxes and windows
Names of buttons, menus and related items are written in italics to
distinguish them from the surrounding text, whereas window and dialog
names are written with initial capital letters. For example:
Click the Edit menu button to open your menu in the Menu Editor.
Choosing menu commands
The right arrowhead symbol () denotes the path for hierarchical menu
items. For example:
Select File Burn Disc Image.
Before you start xi
Page 12

Context menus
A ‘context menu’ is a pop-up list of commands that appears when you click
with the right mouse-button on certain areas of the application interface.
Depending where you click, a context menu may pertain either to an
editable object (like a clip on an editing timeline), to a window, or to a zone
such as a control panel. Once open, context menus behave just like the ones
on the main menu bar.
Context menus are available in most parts of the Avid Studio interface. Our
documentation generally takes for granted that you know how to open and
use them.
Mouse clicks
When a mouse click is required, the default is always a left-click unless
otherwise specified, or unless the click is to open a context menu:
Right-click and select Title Editor. (Or, one might say, “Select Title
Editor from the context menu.”)
Key names
Key names are spelled with an initial capital and are underlined. A plus
sign denotes a key combination. For example:
Press
Please refer to Appendix D: Keyboard shortcuts for a comprehensive table
of available shortcuts.
+A to select all the clips on the Timeline.
Ctrl
On-line help
Two kinds of immediate help are available while you are working in Avid
Studio:
• Help file: To open the Avid Studio help file, click the
.
help button in the main menu bar, or press
• Tool tips: To find out what a button or other Studio
control does, pause your mouse pointer over it. A ‘tool tip’ pops up, like
‘Help (F1)’ in the illustration above, to explain the control’s function.
xii Avid Studio
F1
Page 13

CHAPTER 1:
Using Avid Studio
For a simple outline of the digital movie-making process, you don’t have to
look any further than the central tab group of Avid Studio’s main window.
Avid Studio’s main control bar summarizes the movie-making process.
(The Export button does not appear if you have the Li brary tab selected.)
The Importer
Import, on the left, is a preparatory step. It involves procedures like
‘capturing’ video from your analog or DV camcorder, bringing in photos
from a digital camera, and copying media files to your local hard drive
from a network location.
Principal controls in the Importer’s Snapshot tool.
Chapter 1: Using Avid Studio 1
Page 14
The Avid Studio Importer provides tools for these tasks, along with a
Snapshot feature for grabbing frames from video files, and a Stop motion
tool for building up video frame-by-frame. See Chapter 10: The Importer
for details.
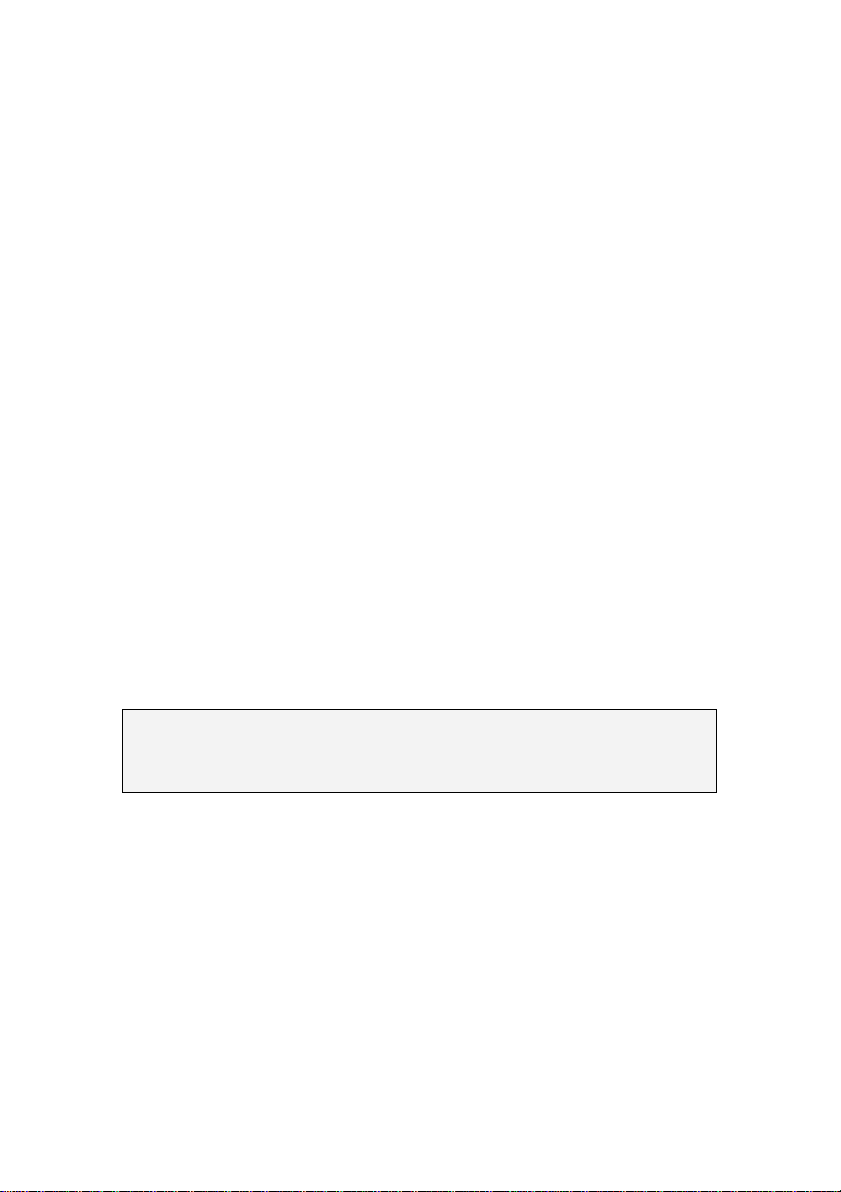
The Exporter
At the other end of the movie-making process is Export. By the time you
get to this stage, the hard part of the task is behind you. The creative energy
that went into making your movie has paid off in a production that now
lacks only one ingredient – an audience.
Preparing to create a video file in the Exporter.
The Avid Studio Exporter helps you over that last hurdle with tools for
taking your movie to its viewers, whoever and wherever they might be.
Create a digital movie file in the format of your choice, burn a DVD , or
even upload directly to your YouTube account.
Like the Importer, the Exporter opens in a separate window, and returns to
the main window after its work is done. Turn to Chapter 11: The Exporter
to learn more.
The central tabs
The three central tabs, Library, Movie and Disc, are where most of your
work in Avid Studio takes place. The first of these opens the main view of
the Library, where you can ‘curate’ your media collections.
The other tabs open the two project editors, one for digital movies, and the
other for disc projects, which are digital movies enhanced with interactivity
in the form of DVD menus.
2 Avid Studio
Page 15
The Library
The Library is a cataloging and management tool for all the file-based
resources – or assets – that you can draw on when authoring. Almost all of
the materials of your movie – video footage, music and audio files, and
many specialized resources such as transitions and effects – originate as
assets in the Library. Many Library assets are supplied with Avid S tudio,
and are available for royalty-free use. These include professionallydesigned titles, DVD menus, sound effects and more.
The Library uses watch-folders for keeping up automatically with the
changing population of media files on your system. On the watch-folders
page of the Avid Studio Settings, enter the names of your media directories,
especially those that you update frequently. From now, the Library will
scan those directories regularly for changes, and update itself accordingly.
See “Watch-folders” on page 235 for details.
Main view: When you click the Library tab, the Library takes over the
main window. This ‘main view’ gives you spacious access to a number of
cataloging and search tools, including those for categorizing assets by
means of ratings and tags, and those for creating user-defined asset
collections.
The main view of the Library consists of navigation controls for
exploring the catalog structure (left) and a browser for examining and
selecting assets (right).
Chapter 1: Using Avid Studio 3
Page 16

Compact view: The ‘compact view’ of the Library squeezes virtually the
whole functionality of the main view into a panel embedded within certain
other windows, such as the Movie Editor and the Disc Editor. The primary
purpose of the compact view is to allow assets to be brought into a movie
or disc project from the Library by drag-and-drop.
Player: The tools available from within the Library include the Player, a
viewer that works for all media types handled by the application. When
used from the main view of the Library, the Player opens in a separate
window. When the compact Library is used, an embedded version of the
Player appears in the same window. See “The Player” on page 7 for further
information.
Previewing a Library video asset in the resizable Player window, with
full transport controls including a shuttle wheel. You can keep working
in the main window while the pop-up Player is open.
For comprehensive coverage of the Library and its uses, please see Chapter
2: The Library.
The next step
The next step, once you know your way around the Libr ary and have made
any changes needed to the default set-up, is to start creating a movie. There
are two ways to go about this.
The usual way: If you want to exert detailed control over the way media
assets are used in your production, you will usually start building your
movie or disc project from scratch in one of the two project editors. These
are described below.
4 Avid Studio
Page 17
The easiest way: For ultra-quick results, the Library offers another way.
Clicking the SmartSlide or SmartMovie tools at the bottom of the Library
main view opens an extra tray of controls. With either of these you select
some visual media assets to serve as the basis of the project, choose music
for a soundtrack, and make a handful of other customizations. Then the
software takes over, automatically generating a full-scale Avid Studio
project containing the media and options requested. You can export the
project immediately, or edit it further by hand as you choose. For details,
please see “SmartSlide” on page 33 and “SmartMovie” on page 35.
The Movie Editor and the Disc Editor
Once you have gathered your materials together and organized them to your
satisfaction in the Library, it’s time to get to work on a video or a
slideshow. If you are working on a disc production specifically, you can
immediately start work in the Disc Editor, which is just like the Movie
Editor but has extra tools for creating and setting up DVD menus. The Disc
Editor is described in Chapter 9: Disc projects.
If you aren’t planning on creating a disc, or aren’t sure, or if disc is only
one of the output media you are targeting, the Movie Editor is the right
place to start. Once your movie is completed, you can export it to the Disc
Editor and add in the menus.
The Movie Editor and the Disc Editor exist side-by-side, but apart from the
export feature just mentioned, they do not interact. If you want, you can
have a regular movie project and a disc project loaded simultaneously, and
switch from one to another at will.
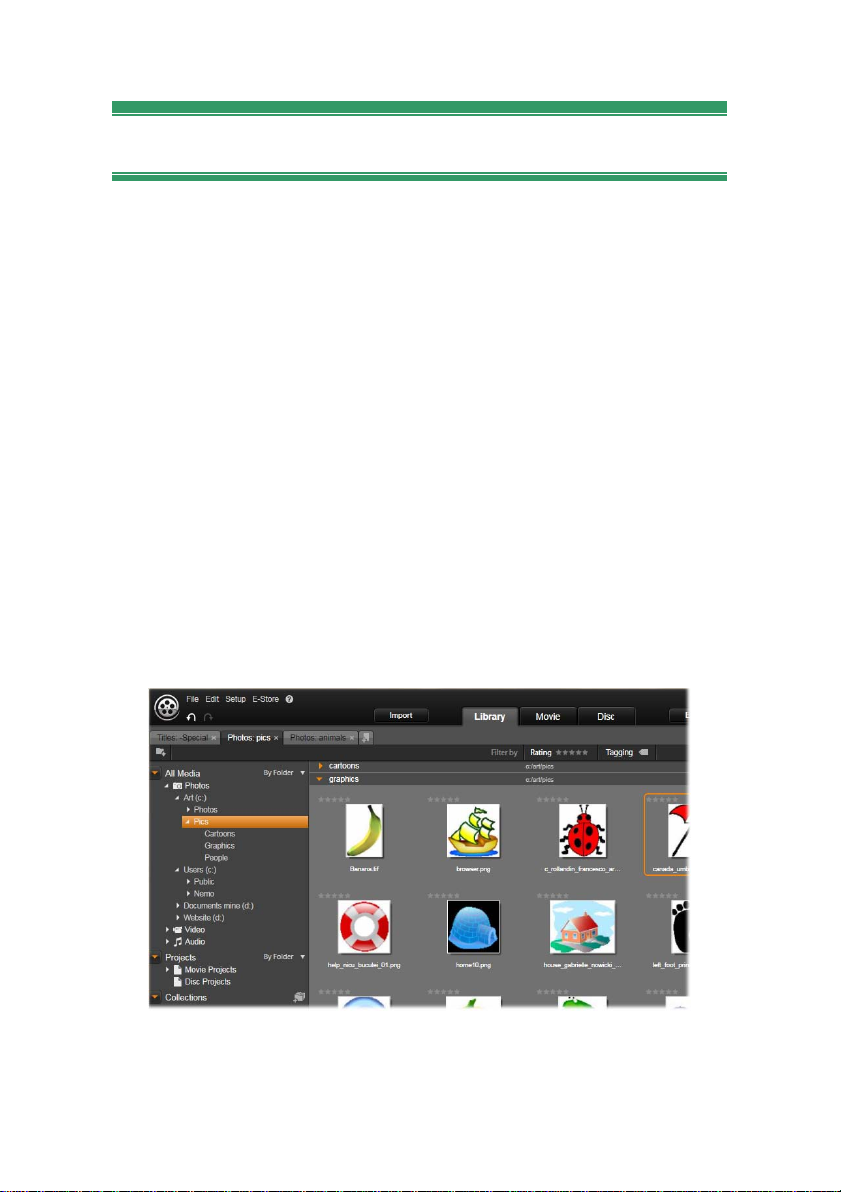
In both the Movie Editor and the Disc Editor, a multitrack timeline
occupies the lower part of the display. Most of the ‘clips’ on the timeline
come from the Library; a few types, like automatic background music,
are generated with special tools.
Chapter 1: Using Avid Studio 5
Page 18

As mentioned above, both project editors include embedded versions of the
Library and the Player in addition to the timeline display. To build a
project, drag assets from the Library onto the timeline tracks, where they
are known as ‘clips’.
The preview type control above the Player lets you switch between viewing
the current Library asset (‘source’) and the current timeline clip. In the Disc
Editor, an additional preview type (‘menu’) lets you use the Player as an
editor for linking disc menus to points on the project timeline.
Timeline editing, a central activity in project authoring, is covered in detail
in Chapter 3: The Movie Editor.
The media editors
When needed, both the Library and the project timeline open additional
windows for working with particular types of media and other assets. In
general, you can open an editor window appropriate to any asset or clip by
double-clicking the item.
Corrections from the Library: The editors for the standard media types of
video, photo and audio are particularly important. When invoked from the
Library (by double-clicking an asset), each of these editors provides a suite
of correction tools appropriate to its media type. These tools can be applied
directly to Library assets in order to remove camera shake from video, trim
unwanted material from a photo, or suppress audio hiss, to give just a few
examples.
When a correction is applied to a Library asset, the media file is not
modified. Instead the correction parameters are saved in the Library
database. They can be altered at any time, or removed, as your needs
dictate. The corrections you make in the Library are brought with the asset
when you add it to your project timeline as a clip.
Corrections from the timeline: When you open one of the standard media
editors by double-clicking a timeline clip, the correction tools are again
available, although in this case they apply only to the clip in the pr oject, not
to the underlying Library asset.
Effects: When they are invoked from the project timeline, the media editors
also offer effects, which cover a wide-range of enhancements in all three
media types. Effects range from the practical (Brightness and contrast) to
6 Avid Studio
Page 19

the theatrical (Fractal fire). Effects can be animated with keyframed
parameter changes to any degree of complexity. They provide innumerable
ways to add creative interest to your productions.
Pan-and-zoom: The Photo Editor provides one more tool, pan-and-zoom,
of its own. Like the effects just discussed, pan-and-zoom can be animated
with keyframes to create any desired combination of simulated pan and
zoom camera moves within the boundaries of a single photo.
The Correction tools, and the media editors in general, are the subject of
Chapter 4: Media editing: Corrections. The effects, and the pan-and-zoom
tool, are described in Chapter 5: Media editing: Effects.
The Player
The Player is a preview screen in which you can examine Library media,
play back your movie project, work on disc menus, and much more. In each
window or context in which it is used, the Player exhibits somewhat
different controls.
For an introduction to the Player and its basic controls, please see “The
Library preview” on page 23. For the use of the Player in trim mode on the
timeline, see “Clip operations” on page 55. For information on using the
Player with Montage, see “The Montage Editor” on page 115. For the use
of the Player in editing disc menus, see “Previewing disc menus” on page
174.
Chapter 1: Using Avid Studio 7
Page 20

Page 21
CHAPTER 2:
The Library
The Avid Studio Library, or simply ‘the Library’, is a cataloging and
management tool for all the file-based resources you can draw on when
authoring. Its purpose is to let you choose and use the video segments,
photos, sound bites, transition effects, titles and other ‘assets’ (as they are
often called) for your movies as easily, rapidly and intuitively as possible.
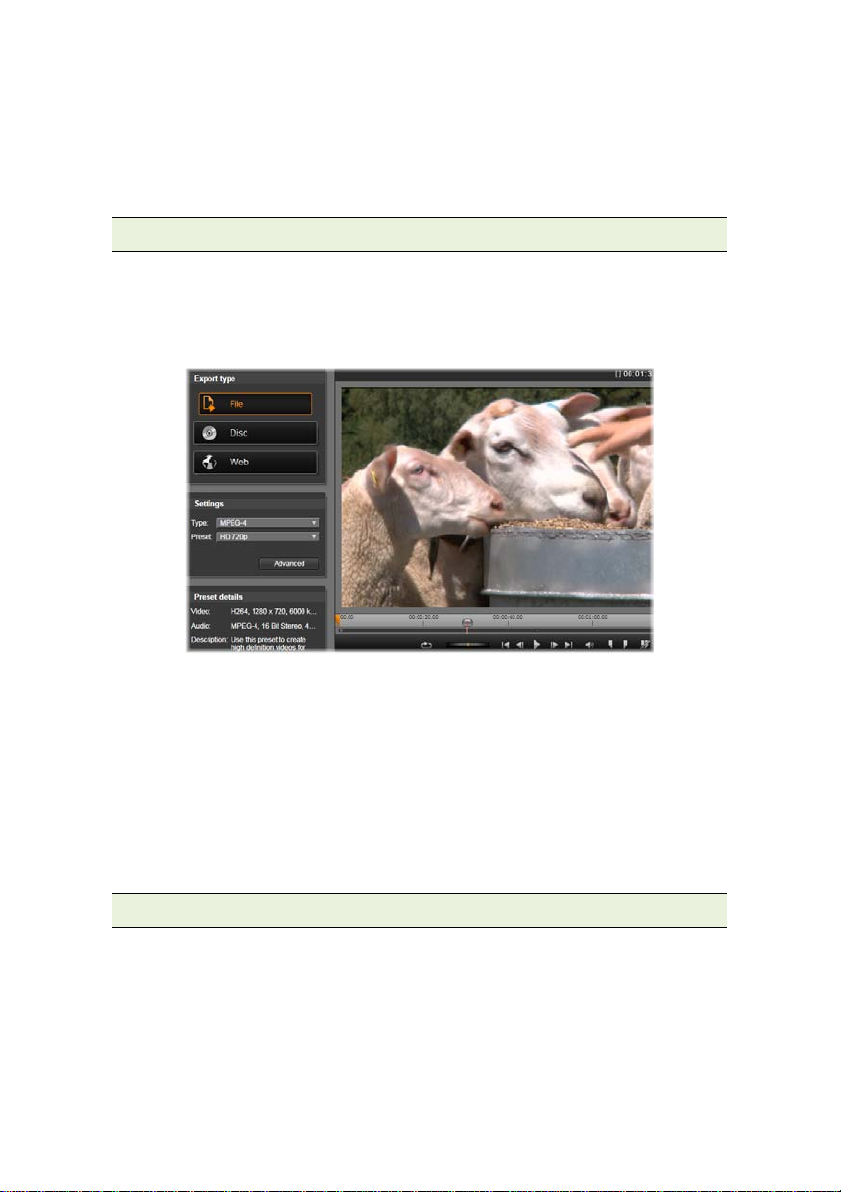
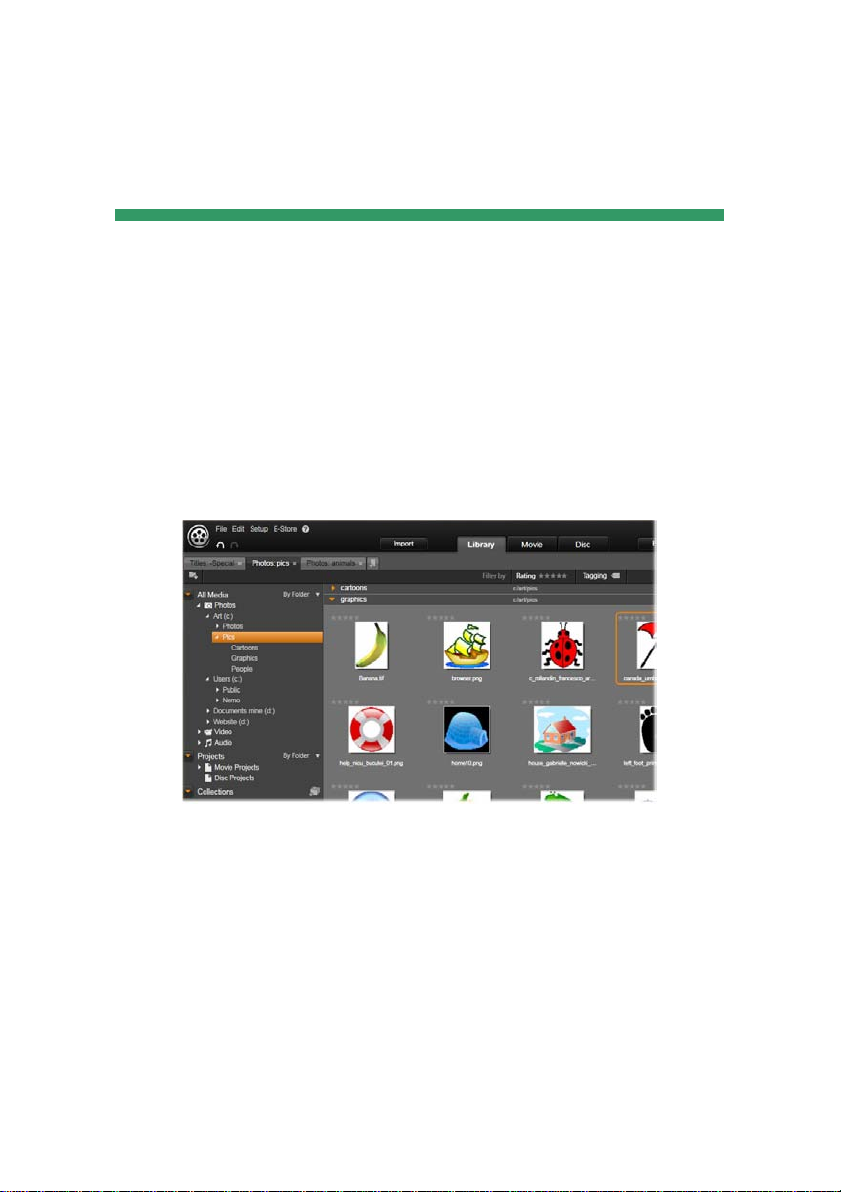
The Avid Studio Media Library opened on a folder of graphic images.
The Library’s classification scheme resembles what you might see in a filesystem viewer. While the viewer groups files under their physical storage
locations such as hard drives, the Library groups assets under their type –
video, photo, and so on. In other respects, the tree view concept for
accessing subgroups of assets is virtually identical and should feel
immediately familiar.
In addition to audio, photo and video files in standard formats, the Library
includes specialized auxiliary media like titles and disc menus. They are
found, along with transitions, filters and other effects, in the main category
called ‘Creative Elements’.
Chapter 2: The Library 9
Page 22
The Library can easily manage large media holdings such as are often
found nowadays even on a home system. All of the dozens of media file
types usable in Avid Studio can be browsed, organized and previewed
within its integrated interface.
Assets are displayed either as icons or text records within collapsible
folders that stack up in the Library’s Browser. The folders may correspond
either to real directories in your computer’s file system, or to virtual
groupings based on ratings, file type, creation date, or membership in a
user-defined Collection.
Adding assets to a project
Two views of the Library are found in Avid Studio. The Main view takes
over the application window when you click the Library tab. It uses the full
available space to provide as much information as possible.
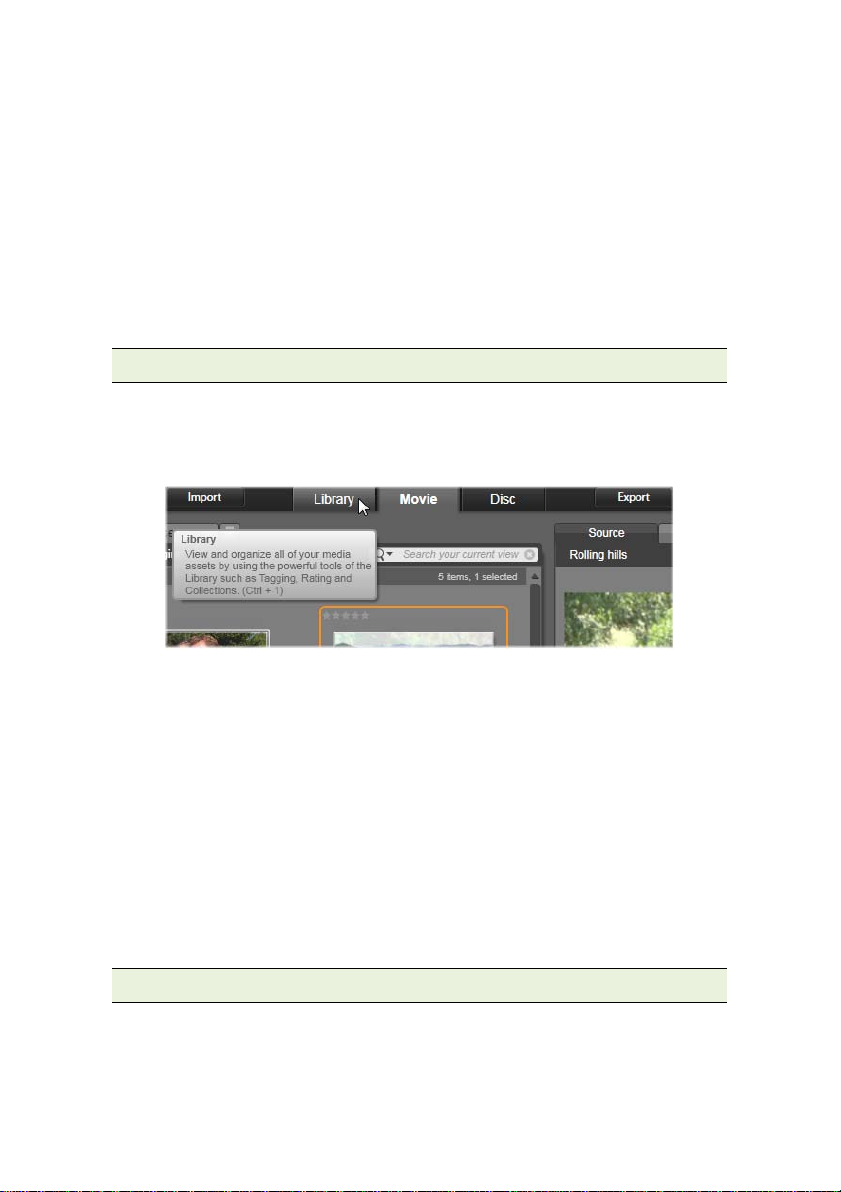
To open the Main Library view, click the Library tab
at the top of the Avid Studio application window.
The Compact view of the Library is a panel, either docked (as in the Movie
and Disc project editors) or floating (as in the Title Editor). The Co mpact
view retains the full functionality of the Library. Its pri mary purpose is to
allow you to bring Library assets into a movie or disc project with dragand-drop.
The current set of Library tabs, and the contents of the Browser, are
common to all views of the Library. For instance, if you are browsing in a
particular folder of disc menus in the Main view, that same folder will be
open in the Compact view if you now switch to the Movie Editor.
Correcting media files
With regard to technical quality, media files are not all created equal.
Occasionally, you do come across the perfect photo, clip, or sound effect.
More often, though, the photo needs cropping, the video is shaky, or the
10 Avid Studio
Page 23

sound starts with an annoying hiss. Avid Studio’s media correction tools let
you fix these and similar issues by applying correction filters to a problem
clip after you have placed it on the timeline of your project.
Often, however, an even better solution is to apply the correction to the
Library asset itself, before adding it to a project. That way, any production
using the asset will start with the corrected version, not the uns atisfactory
original. Such corrections can quickly be made by opening media editors
from the Library. The file underlying the corrected asset is not modified:
instead, the correction parameters are stored in the Library database and
reapplied whenever the item is displayed or used.
Instant gratification: SmartSlide and SmartMovie
In addition to the core functions mentioned so far, the Library offers a
matching pair of tools for automatically constructing a complete project
using media resources you specify. Just select some photos or video
sequences, enter a few settings, and start. You can output the proj ect Studio
generates without further modification, or refine it with manual ed iting as
you prefer.
UNDERSTANDING THE LIBRARY
The Avid Studio Library lets you manage and efficiently use the entire pool
of media and other assets available for use in your productions.
What exactly does the Library contain?
The full range of assets that you can draw on for your projects is
summarized by the four main branches of the Asset Tree. Each branch is
further divided into more specialized subsections.
All Media contains the standard media files on your system in subsections
named Photos, Video and Audio. Many standard file types are supported.
The purpose of the fourt h s u bsection, Missing media, is described below.
Projects are your own Avid Studio movie and disc projects, with
subsections named accordingly. You can open a project right from the
Library and begin editing it, or you can add it to the timeline of another
project to serve as an ordinary clip.
Chapter 2: The Library 11
Page 24
Collections are custom groupings of Library media. The more time you
spend on media management, the more you will probably use Collections.
They can serve as temporary holding places while you work, or for
classifying and setting aside media for later use. Collections may be
automatically generated, but most are user defined. Hierarchicallyorganized Collections are also
supported. The top-level Collections in
the hierarchy are used as the
subsections of the Collections branch.
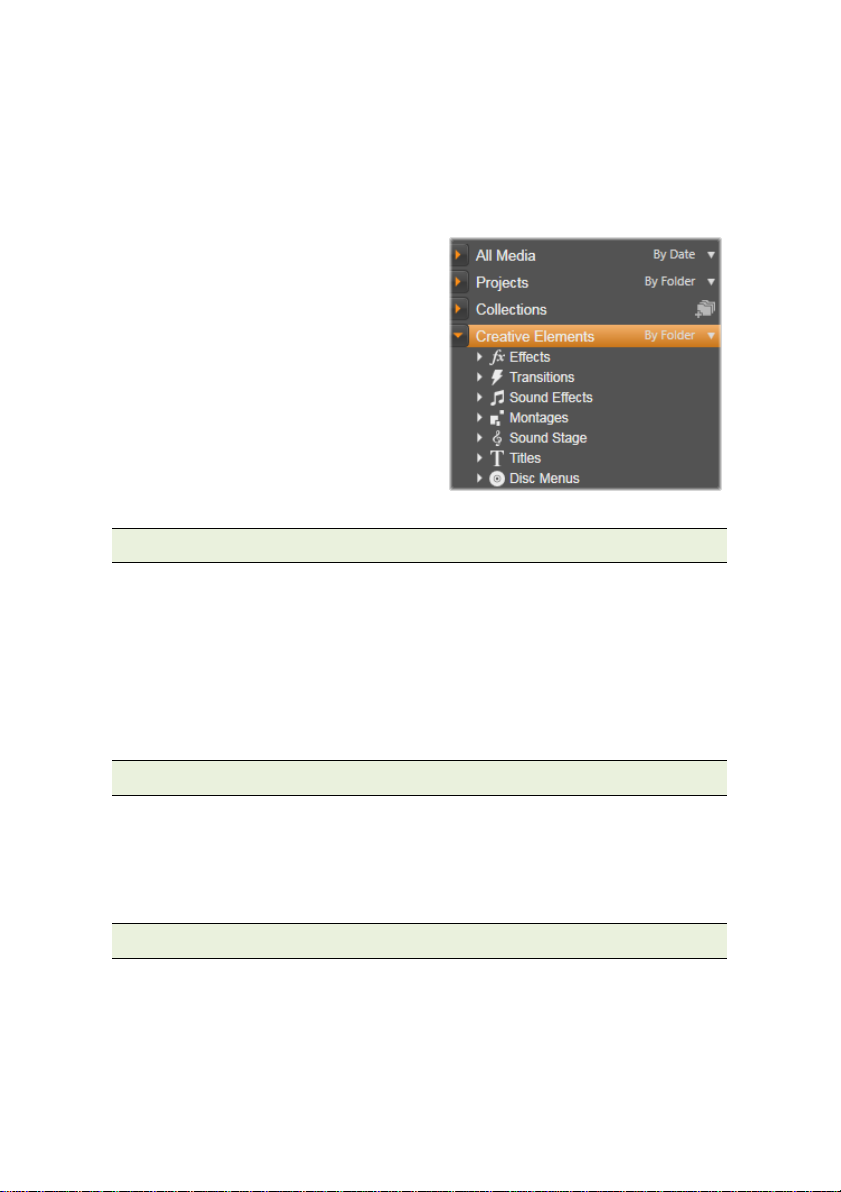
The Creative Elements branch is
shown open in the illustration at right,
revealing its subsections. Each is
either a type of special effect (Effects
and Transitions), or a special media
type (the rest). Ready-to-use, royaltyfree collections of all seven types are
included with Avid St udio.
Storage of Library assets
Every asset in the Library – every clip, sound, transition, and so on –
corresponds to a file somewhere in the local storage of your computer
system. The Library doesn’t ‘own’ these files, and never modifies them
unless specifically requested to do so. Rather, it keeps track of their names,
locations and properties in an internal database. The information stored also
includes any tags and ratings with which you have annotated particular
items, and the parameters of any correction filters you have applied.
The database
The files that make up the Library database are stored in a folder with
single-user rather than shared access rights under Microsoft Windows. If
Avid Studio is used on your computer by multiple users with individual
log-ins, a separate Library will be created for each.
Missing media
Operations like adding, removing and renaming a Library asset are database
operations that have no effect on the media file itself. When you remove an
asset from the Library, an option on the confirmation dialog box does let
you go one step further and delete the actual file as well, but the option is
off by default – you have to specifically request the action.
12 Avid Studio
Page 25
By the same token, when you delete or move an
asset file in Windows Explorer or another
application outside of Avid Studio, the database
record of the file continues to exist. Since the
Library can’t actually access the file, however, an
error graphic is added to the f ile’s listing. If the file
still exists, but has simply been moved to another folder or device, relinking
it to the Library is easy. Double-click the item to pop up a standard File
Open dialog with which you can point the way to the file’s new location.
Incidentally, to check if there are missing media anywhere in the Library,
look in the special subsection All media Missing media of the Asset Tree.
The Asset Tree is descri bed below (page 14).
Location tabs
Editing a video project involves coordinating the various media and other
assets at your disposal. As you proceed, it’s likely that you’ ll find yourself
browsing repeatedly in various parts of the Library that are relevant to the
project. No doubt you will also change your viewing and filtering options
from time to time, depending on the material you’re reviewing.
Like a web browser that uses a row of tabs to allow flipping effortlessly
amongst multiple open web sites, the Library lets you create and configure
location tabs as you work. The tabs provide direct access to each of the
various locations in which you are currently working.
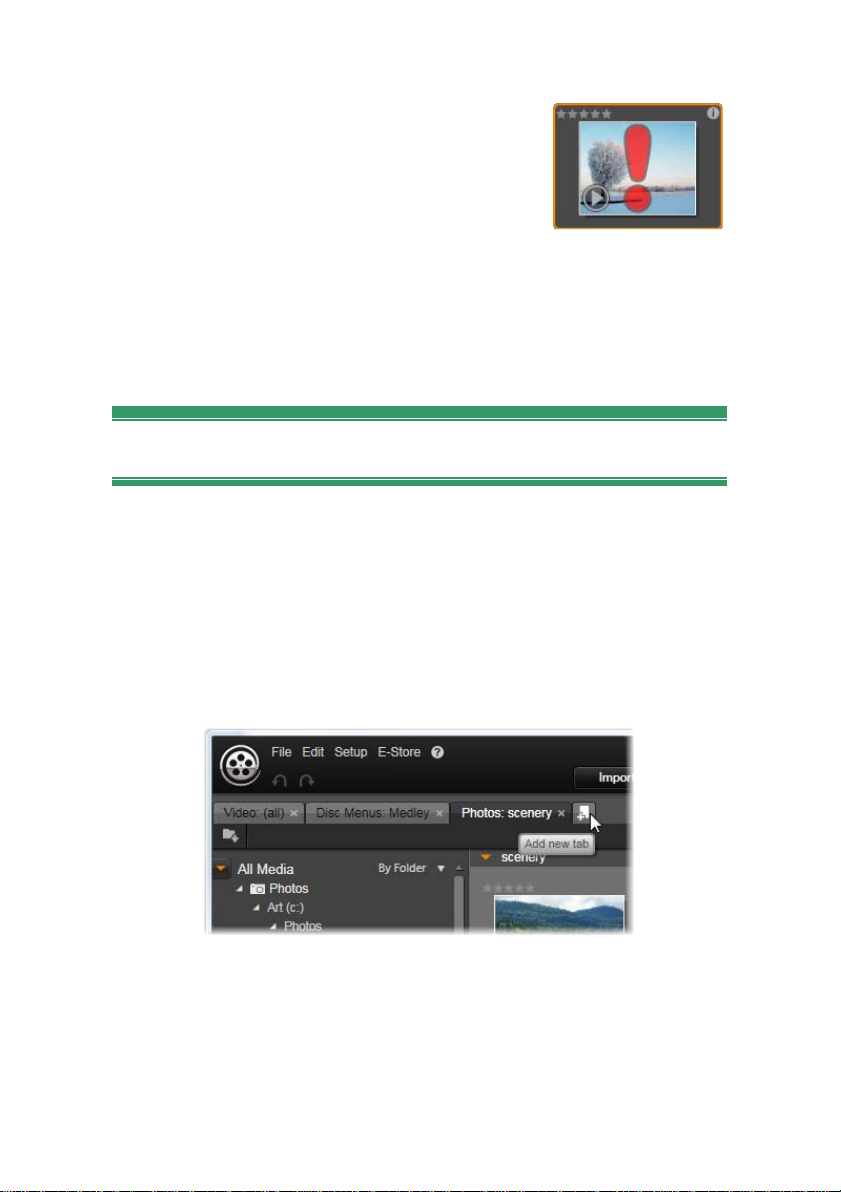
Here three tabs give access to media required by different parts of a disc
project. The mouse pointer is poised to create a new tab. To close a tab,
click the x icon to the right of the tab caption.
To set the location of the current tab, click a name in the Asset Tree.
Changes you make to viewing and filtering options while the tab is active
are retained between accesses.
Chapter 2: The Library 13
Page 26
The Asset Tree
The entire gamut of Library assets is organized into a folder tree whose
structure and general usage should be familiar from file-system tools like
Windows Explorer. When you select a location in the Asset Tree, the folder
name appears on the caption of the active location tab, and its contents are
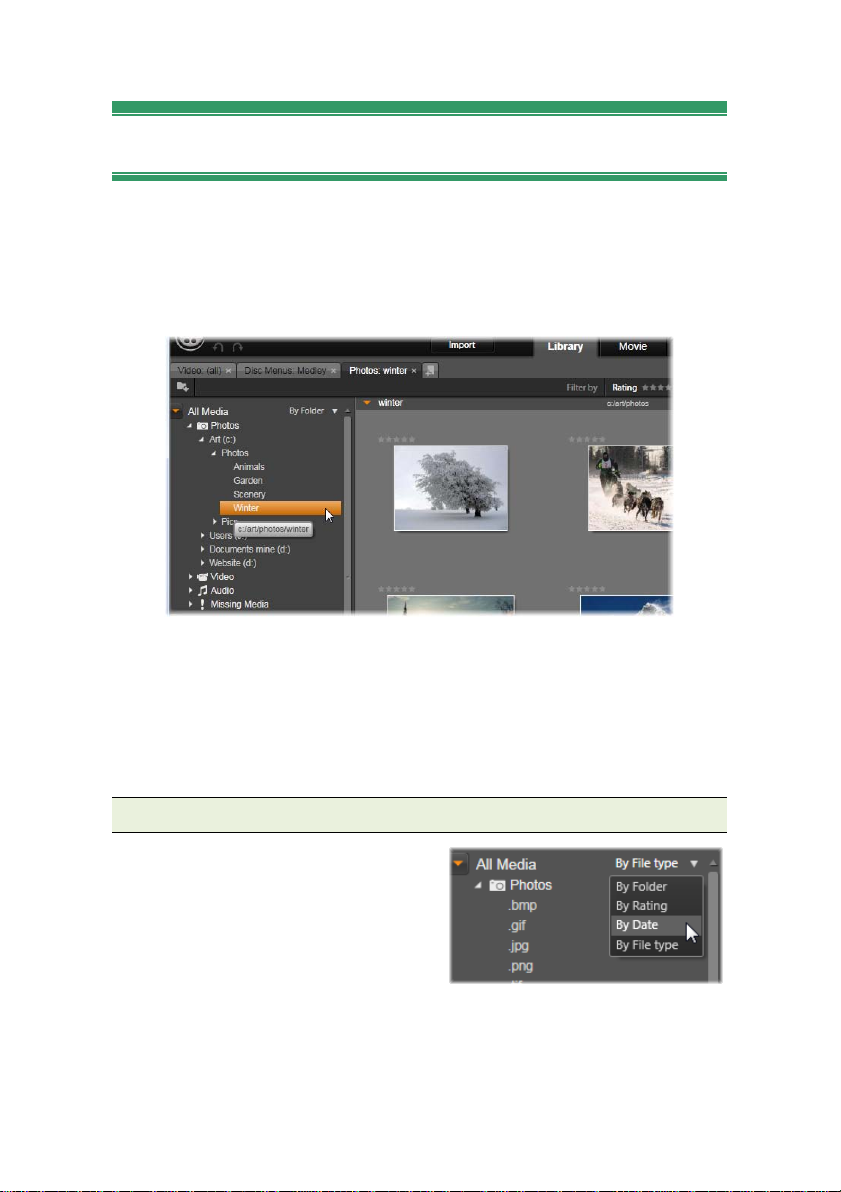
displayed in the neighboring Browser.
In the Main Library, shown here, the Asset Tree occupies the left-hand
pane of the workspace. In the compact view of the Library used by Avid
Studio’s project and media editing tools, the Asset Tree is presented
instead as a dropdown li s t on the active tab.
The four main ‘branches’ of the Asset Tree were introduced above (page
11).
The Group By menu
The header line of the All media
branch offers a small dropdown menu
of options to control how the
groupings within each subsection of
the branch are created.
When you group by folder (the
default), the folder structure corresponds to actual directories on your hard
drive, flash drive, or other file-system device. Some standard folders are
included by default; you can add others at will using the watch folder
system. Grouping by folder is shown in the Main Library illustration above.
14 Avid Studio
Page 27
When you use another grouping, by rating, by date or by file type, exactly
the same asset files are listed within each subsection as with the by folder
grouping. However, instead of classifying them by the file system folders in
which they are stored, the Asset Tree groups them into ‘virtual folders’
according to the chosen property.
Grouping by rating, for example, divides each subsection into six virtual
folders. Five of them display media files to which you have given star
ratings; the sixth is for those you haven’t rated yet. See “The Browser”
(page 19) for more information about file ratings and their uses.
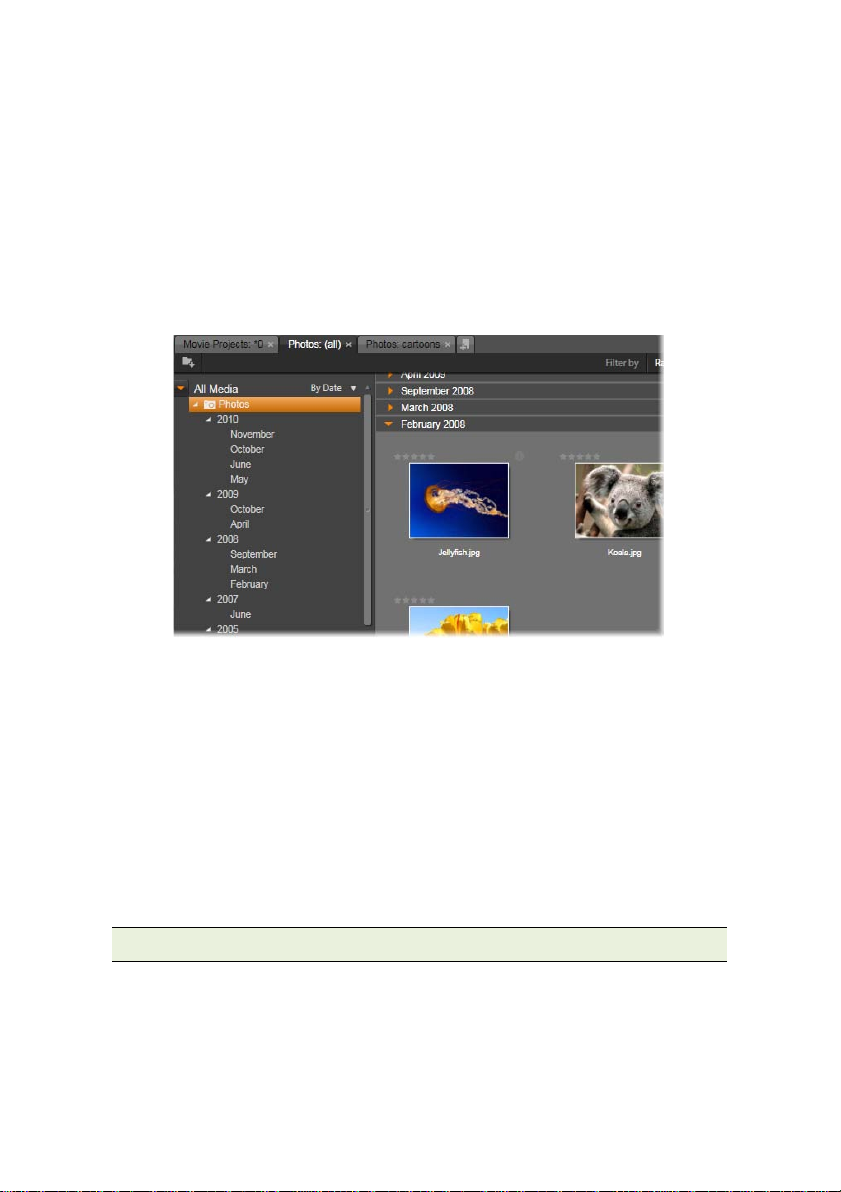
The Main Library with grouping By Date selected in the All Media
branch of the Asset Tree. The bottom-level folders in the Asset Tree are
displayed in the Browser (right). These ‘virtual’ folders each represent
all the photos whose file date falls within a particular month.
In the illustration above, the Photos subsection of the All Media branch is
shown grouped by file type. The virtual folders have names like bmp, gif
and jpg – one virtual folder for each recognized file extension in the
subsection’s media files.
Under group by date, the fo lders represent the year of the file’s creation;
within these, the files are further grouped by month.
Grouping in other subsections
The Projects and Creative Elements branches of the Asset Tree also
provide a group by menu, so it is possible for branches to be in different
grouping modes. The menu commands are the same as described above for
the All Media branch, except that the by file type option is not needed and
doesn’t appear.
Chapter 2: The Library 15
Page 28
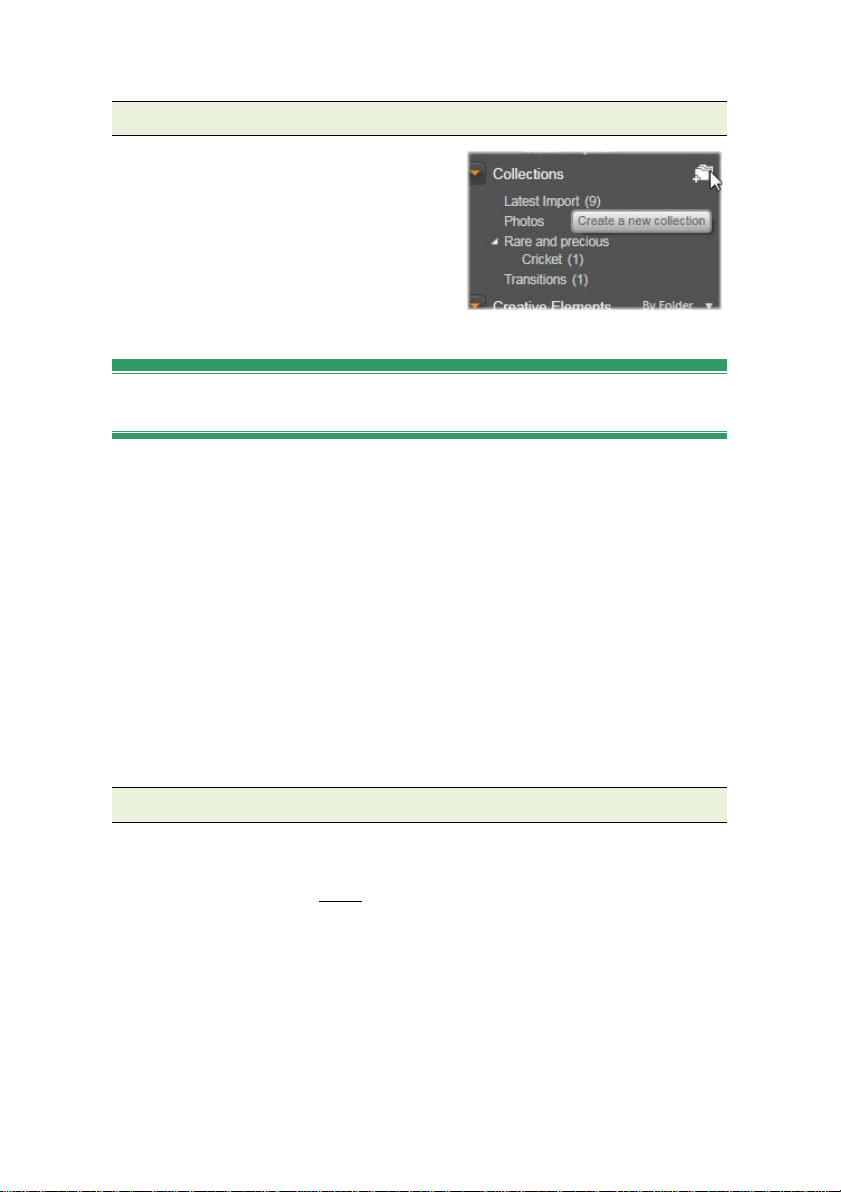
The add collection button
The Collections branch does not exhibit
a group by menu. This button on the
branch header lets you create a new
Collection as described under
“Collection operations” below.
Collections
From the Library’s point of view, a Collection is just an arbitrary grouping
of assets – a set of Library items with no organizing principle. You may
well have a good reason for gathering certain files into a particular
collection, but the Library doesn’t have to know what it is. Inside a
Collection, any asset can rub shoulders with any other.
One special Collection, with the name Latest import, is automatically
updated after each import operation to display the media added.
Immediately after importing, you can turn to this Collection and start
working with the new material.
Another automatically-generated Collection is Latest Smart Creation,
which stores the media you selected for your most recent SmartSlide or
SmartMovie production.
Collection operations
To create a new Collection, click the icon in the header line of the
Collections branch and enter a name in the provided text field. Complete
Enter
the process by pressing
Create new collection from any asset’s context menu.
Manage Collections: The context menu for any Collection provides
commands for renaming and deleting the Collection, and one for creating a
subcollection that has the current Collection as its parent ‘folder’.
Drag and drop: Collections can be organized in the Asset Tree with the
mouse. A dragged Collection becomes a subcollection when dropped upon
another.
16 Avid Studio
. Alternatively, choose Add to collection
Page 29

Displaying collected assets
Clicking the name of a Collection causes it to be displayed in the Browser.
There is one important difference between the Browser view of Collections
and those of all other categories: The media assets in any subcollections are
visually merged with those of the selected Collection, but not subgrouped.
However, a special feature of the Browser makes it easier to keep track of
the assets when viewing Collections, even if you’re not a robotically
systematic sort of person: As your mouse pointer passes over any listed
asset, the Collections to which the asset belongs ‘light up’ in the Asset
Tree.
Operations on collected assets
These operations can be performed from the context menu of any
Collection item. To act on a group of items, first select them with the
mouse (using
by dragging out a frame around the items. Then right-click within the
selection to access the context menu.
Add to collection: Choose a target Collection on the Add to collection
submenu to add the selected item or items. Alternatively, drag the selection
onto the target Collection.
Ctrl-click and Shift
-click for multiple selections as needed) or
Remove from Collection: The Remove command removes the item (or
items) from the Collection. As usual with the Library, the underlying media
items involved are not affected, so removing a video or other item from a
Collection in the Library will neither delete the media file from your hard
drive nor from the asset type category.
Managing Library assets
Media and other assets find their way into the Library in several ways. For
instance, the original contents of the Creative Elements branch of the
Library are installed with Avid Studio.
The Library automatically discovers some assets on your system by
regularly scanning Windows-standard media locations. These are set up on
Avid Studio installation as watch-folders. Media files in these locations will
Chapter 2: The Library 17
Page 30

automatically be brought into the Library. You can add your own watchfolders (see below), and they will be automatically updated, too.
Finally, you can import media manually by any of several methods (see
“Importing” below) .
Watch-folders
‘Watch-folders’ are directories on your computer that Avid Studio
monitors. If you add media files such as video clips to a watch-folder, or
one of its subfolders, they automatically become part of the Library.
Updating occurs each time the application is launched and while the
application is running.
Watch-folders are set up on the Watch-folders page of the Settings dialog.
For each folder that you add, you can specify that either one particular
supported media type will be ‘watched for’, or all of them.
Importing
If you need to import a large amount or variety of media, or to import from
analog media such as VHS tape, click the Import button near the top of the
application window to open the Importer. See Chapter 10: The Importer for
full information.
Quick Import
The Quick Import button at the top left of the Library opens a
Windows file dialog for fast import of files from a hard drive or
other local storage.
New folders in the corresponding media categories (video, audio and
images) are created for the files specified. In addition, the imported items
are included in the Last Import Collection. (Collections were described
earlier in this chapter, on page 16.)
Direct import via drag and drop
To select and import items in one step, use drag-and-drop from Windows
Explorer or the desktop into the Browser. The new items are immediately
displayed in the Collection ‘Latest Import’, which is created for the
occasion if necessary.
18 Avid Studio
Page 31

Removing items from the Library
To remove an item from the Library, or a selection containing multiple
items, choose Delete selected from its context menu or press the
key. A confirmation dialog verifies the names of the media files to be
removed from the Library database. By default, the media files themselves
will not be affected, but the Remove from library and delete option lets you
delete the files too, if desired. Be careful, as this command works on all
kinds of Library assets, including your Avid Studio projects if any of those
are selected.
When all the files in a folder are removed, the Library hides the folder as
well.
You may also remove a folder and all the assets it contains from the Library
when removing the folder from the watch-folders list. However, this is not
automatic and you will be asked if you want to keep your current assets
listed in the Library, but still stop monitoring the location.
Delete
The Browser
This is the area in which the Library displays its media assets – the videos,
photos, audio, projects, collections and ‘creative elements’ that are
available for you to use in your movie and disc projects. The items are
displayed either as a list of text records or as a grid of icons. Visual asset
types use thumbnail images for their icons; other types use graphic
symbols.
The Library would not be much help if the Browser displayed all its assets
at once. It therefore has several controls that help you screen out items that
aren’t relevant to your purpose. See “Choosing what to display” below for
details.
Thumbnails, Details, Show scenes
Each asset is displayed in the Browser in one of two formats, depending on
the view selected. Because the icons of thumbnails view and the text
records of details view represent the same assets, they have certain features
in common. For instance, the context menu for assets is the same regardless
of which representation is used.
Chapter 2: The Library 19
Page 32

Similarly, standard media assets (video, photo and audio), along with
Sound effects in the Creative Elements branch, open an appropriate media
correction editor when double-clicked in either view. The correction editors
are also available from your project timeline, but when applied to a Library
asset the corrections are carried forward into any future project that
includes it. See “Correcting media defects” on page 30 for more
information.
Details
In details view, each asset is presented as one line in a list of text records.
In thumbnail view, it appears as a thumbnail image (for visual media types)
or graphic icon.
To switch the Browser to details view, click the icon on the details
view button at the bottom of the Library. The arrow beside the
button opens a panel where you can choose the columns to be included in
the text records. The columns available for inclusion are Name, File size,
File type, Date, Tags, Rating and Duration.
In Details view, each asset is displayed as a one-line text record. A
dropdown list beside the Details view button lets you select which
columns to show. In the illustration, ‘animals’ and ‘scenery’ are the
names of folders in the All Media branch of the Library.
Thumbnails
The button to the left of the details view button selects thumbnails
view, in which assets are represented by icons rather than text. The
arrow beside the button opens a panel where you can choose additional data
to be shown in conjunction with each icon. The options are Text, Tag
indicator, Collection indicator, Ratings and Corrections indicator.
20 Avid Studio
Page 33

In addition to these optional controls, whenever the mouse pointer is
positioned over the icon, an info button is displayed. Clicking the button
opens the information panel at the bottom of the Browser view. See page 23
for details.
When the mouse pointer is over a Library asse t icon
the Info button (top right corner) appears.
At the bottom left of most asset icons a preview button,
a standard triangular play symbol within a circle, is
displayed. In the compact version of the Library (used in
the project editor and some media editors), the preview
is shown on the Source tab of the embedded Player. In
the Main Library, preview occurs in a separate Player window. See “The
Library Preview” on page 23 for more information.
Alt
In either version of the Library,
preview button will give you a mini-preview on the
asset icon itself. With video and audio media, you can
preview under manual control with a scrubber that
appears below the thumbnail whenever the mouse is
over the icon.
-clicking the
Show Scenes
On video files this button will switch to Scene View. Scenes are
managed by the Library Player. See “The Library Preview” on page
23 for more information.
The optional controls
The optional indicators and buttons on an asset icon let you access asset
information without having to burrow deeper.
Text: The caption below the icon is the Library alias
for the asset, which you can set with the Edit caption
context menu command for any asset. It is not
necessarily the name of the asset file (which is
shown in the tooltip).
Chapter 2: The Library 21
Page 34

Tag indicator: The lower of the two symbols at the
bottom right of the thumbnail is shown if the asset has
any tags assigned to it. Hover the mouse pointer over
the indicator to bring up a menu on which the existing
tags for the asset are shown. As you pass the pointer
over a tag name on this menu, a remove button
appears. Click it to unset the tag. Click remove all at
the bottom of the menu to clear all tags from the
asset. The creation and application of tags is discussed further below, and
under “Tags” on page 28.
Collection indicator: Just above the tag indicator,
the presence of this icon indicates that you have
included the asset in one or more Collections. To
see which ones, hover the mouse over the icon. As
with the tag indicator menu, a remove button is
shown as you position the mouse on each
Collection name; click it to remove the asset from
the Collection. The remove all command removes the asset from all
Collections of which it is a member.
The Ratings control is displayed at the left above the thumbnail (or
graphic icon, depending on the media type). At top-right is the Info
button. The Corrections indicator is also at upper right but within the
thumbnail.
Ratings: The row of stars above the top left of the icon lets you set the
asset rating. If no stars are lit, the asset is said to b e unrated. To set the
rating of one asset or a selection of assets, either click the corresponding
star on the indicator (click the first star twice to make the asset unrated
again) or choose the setting on the Apply rating context submenu.
Corrections indicator: The Library allows you to apply image and audio
correction filters ‘non-destructively’ on Library media assets, meaning that
the original file remains intact. The types of corrections that have been
applied to an asset, and the parameters that were used to control them, are
stored in the Library database. The corrections indicator is shown on all
assets to which corrections have been applied. See page 30 for information
about applying correcitons to Library assets.
22 Avid Studio
Page 35

The Library preview
Most types of Library asset support previewing in the Browser. The
capability is indicated by a preview button on the asset icon, and the
presence of a Show preview command on its context menu.
Remember too that most asset types can be previewed on the icon itself
Alt
with an
The Library Player
Clicking the preview button in the lower left cor ner of the asset icon loads
the item into the Library Player for viewing.
-click on the play button.
Previewing a video clip in the Library Player window. The transport
controls are at the bottom, starting with a Loop button at the far left and
a Shuttle wheel. The third in the group of five arrow buttons starts
playback. The two buttons on each side of it are for navigating from
asset to asset in the Library folder.
Along the top of the Player, the current viewing p osition is displayed. At
the bottom is a toolbar of transport controls and function buttons.
Transport controls
First among the transport controls is the loop button, which causes playback
in a continuous loop from the start of the media. Next is a shuttle wheel
Chapter 2: The Library 23
Page 36

with which you can sensitively control the speed of playback by dragging
backwards and forwards on the control.
The center play button in the cluster of five arrow controls begins preview
of the video or audio asset. The two buttons on either side of it are for
navigating from the viewed asset to others in its folder. When previewing a
photo the play button does n o t appear; only the navigat i on buttons remain.
Click the mute button to the right of the transport controls to toggle the
audio associated with the clip. A volume slider appears next to the mute
button when the mouse is over it.
Function buttons
Some buttons in the final group at the bottom of the
Player appear only with particular asset types. A video
file uses all four types, in the order shown and described here.
Here, data regarding a Library asset, a photo, is displayed in the
Information view of the Player. Click the Info button again to return to
the Playback view.
24 Avid Studio
Page 37

Show Scenes: This button activates a mode in which the Browser displays
a separate icon or text record for each scene in the video file. (As explained
under Video scene detection, a scene in the most general sense is just any
portion of a video file.)
When Show Scenes is active, the neighboring Open in media editor button
is removed, and a Split scene button takes its place. This allows you to
define your own scenes instead of, or as well as, relying on the automatic
scene detection feature.
For more information about video scenes in the Library see “Video scene
detection” on page 30.
Open in media editor: The media file is opened for editing in the
correction editor appropriate for its type.
Full-screen: The preview is shown in a special full-screen window, with its
own basic set of transport controls. To close the full-screen display, click
Esc
the close button in the top right corner of the window, or press
Info: This button switches between the Player’s information and playback
views. The information view can be opened directly by clicking the info
button on a media asset icon in the Browser. Audio assets have no separate
playback view; instead, full scrubbing controls are shown in the
information view.
.
USING THE LIBRARY
The Library is much more than a passive storehouse of material for your
Avid Studio productio ns .
Choosing what to display
The Library Browser has several features for decluttering your view by
hiding assets that aren’t relevant to your purpose. No matter how numerous
your media files, the combined power of these techniques can greatly speed
your browsing.
Chapter 2: The Library 25
Page 38

Location tabs
Most importantly, each location tab corresponds to a different selection on
the Asset Tree. Like web browser tabs, location tabs are readily defined (by
clicking on the ‘+’ icon at the right end of the tab list), and come in handy
for keeping track of multiple things simultaneously.
Clicking within the Asset Tree sets the location for the current tab;
conversely, clicking another tab transfers you to its saved location on the
tree. Only the assets within the chosen location are displayed in the
Browser. If the location has subfolders, however, their contents will be
included. To keep things simple, choose a location as near the bottom of the
folder hierarchy as possible.
Other controls let you restrict the display further b y filtering out some of
the assets in the chosen location. Each location tab maintains its own set of
filters, so any change of filtering settings affects the current tab only.
Filter by rating
The Filter by rating control at the top of the Library hides all assets that
don’t have at least the specified rating from one to five stars (zero stars
means ‘unrated’). To use the filter, simply click on the star that represents
the minimum rating you want to bother with. The default filter setting is to
show all assets regardless of rating.
See “Inadvertent filtering” (page 27) for instructions on switching off all
filters at once. To deactivate just the rating filter click the last selected star
or double-click any star.
In this close-up, three stars are highlighted, meaning that only assets
with ratings of three stars or better are on display. The mouse is poised
to click the fifth star, which would set the rating filter to hide all but fivestar assets.
26 Avid Studio
Page 39

Filter by tags
Another way to narrow the field of displayed assets is with filtering by tags.
Tags are keywords that you can assign to assets as you work. Once tags
have been defined, you can use them in several ways to control which
assets are displayed by the Browser. See “Tags” on page 28 for details.
Search
At the top right of the Library is a search field that gives one further way to
filter the display. As you begin entering your search term, the Browser
continually updates the view to include only those assets with text that
matches your search term.
Even when multiple terms are separated by spaces, partial-word as well as
whole-word matches are allowed in each term. A dropdown list lets you
choose whether the search will be satisfied if even a single search term
matches the asset text, or if all terms must match.
Inadvertent filtering
The three filtering types can be combined at will. Should you leave any of
the filtering types switched on when you don’t need it, it’s likely that some
assets will be hidden that should be displayed. When an item is
unexpectedly missing in the Browser, verify that filters are inactive.
The Browser guards against the possibility of inadvertent filtering by
displaying a ‘filter alert’ that remains visible as long as any filter is in use.
A filter alert like the one shown here is displayed at the top of the
Browser whenever filtering is in force. Click the x icon at the right-hand
end to clear all filtering at once.
Chapter 2: The Library 27
Page 40

Tags
The Library is capable of handling a great number of asset files, sometimes
far more in even a single folder than can be viewed conveniently. The
Browser therefore provides a number of methods of winnowing out
irrelevant assets from the display.
One method of streamlining the display of assets in the Bro wser is filtering
by tags. A tag is a word or short phrase that you think would be useful as a
search term. It is up to you whether you assign tags to your media, but if
you do, they provide a powerful way of selecting assets to display.
Tag management and filtering
Management of tags, and filtering by tags, are the purpose of a panel that
appears when the Tags button at the top of the Library is clicked.
Manage and Filter, the two tabs of the tags panel.
Manage tags
The Manage tab of the tags panel lists the tags you have defined so far, and
lets you delete or rename them. Hovering the mouse over a tag reveals
controls for those tasks.
Hovering over a tag in the Manage tab reveals the Rename and Delete
buttons. Clicking the tag itself applies it to any currently-selected assets.
28 Avid Studio
Page 41

The Create new tag button opens a text input for entering another keyword.
There is no limit to the number of tags you can define.
To apply a tag to all currently-selected assets in the Browser, click the tag
name. Selecting multiple assets to tag makes the process much more
efficient than if you could tag only one item at a time.
Filtering with tags
The Filter tab of the tags panel is the one that narrows the set of items
displayed in the Browser. As you check and uncheck the tags, the view
updates automatically.
The exact effect of your selections depends on another control, the Match
dropdown at the bottom of the Filter tab. The list provides three options.
None displays only assets that have none of your checkmarked tags. If you
have a tagged set of animal photos, checking both the ‘dog’ and ‘cat’ tags,
then selecting ‘None’, should hide most of the pet pictures.
Partial selects assets with any of your tags, which happens to be exactly
those hidden by ‘No match’. If you leave ‘dog’ and ‘cat’ checked, but
switch to ‘Partial’, all the dogs and cats will be displayed, including the
handful of photos in which both animals appear. Photos with neither tag
will be hidden.
Full selects only the assets that have all your tags. Now with the same
boxes checked you should see only those photos in which at least one cat
and one dog appear. Notice that under ‘Partial’ you will see more assets
displayed as you check more tags, but with ‘Full’ you will see fewer.
Turning off tag filtering
To cancel filtering by tags, uncheck any checked tags on the Filter tab, and
either ‘Partial’ or ‘Full’ in the Match dropdown.
Sorting tags
At the bottom of the Filter tab is the Sort by dropdown, offering just two
choices: ‘Abc’, in which the tags are sorted alphabetically, or ‘Relevance’,
which sorts them in descending order of their popularity in the set of assets
currently on display. Under the second choice, you will see the tags being
resorted each time one is checked or unchecked.
Chapter 2: The Library 29
Page 42

The art of tagging
There is no prescribed way of using tags. The best way to use them – if you
do – is the way that wo rks best for you. Cons istency is importan t, however.
The more faithful and systematic you are about assigning tags to your
media, the more useful they will be.
Since the idea is to locate an asset quickly when you need it, tags should be
chosen to work well as search terms. With family photos, your tags might
include the names of the people in each shot. For vacation video scenes,
tags naming the locations visited would prob a bly be useful.
Videographic terms (‘two-shot’, ‘silhouette’, ‘exterior’) can also serve as
good tags by making it easier to find assets that fulfil par ticular stru c tural or
creative requirements.
Correcting media
You can apply the media correction tools in the video, photo and audio
editors directly to Library assets. This kind of editing does not change the
underlying files. Instead, the editing parameters are stored in the Library
database and are reapplied whenever the asset is recalled. See Chapter 4:
The media editors for details.
Video scene detection
Using the Library’s automatic scene detection function, video footage can
be split into multiple scenes either au tomatically or manually. Dividing raw
files into scene-length portions can make some editing tasks much less
cumbersome than they w ould be otherwise.
The time required for scene detection varies depending on the length of the
clip and the detection method selected. A progress bar keeps you informed
of the status.
To initiate scene detection, select one of the methods on the Detect scenes
context menu command for video assets.
30 Avid Studio
Page 43

By date and time: This option often results in logical scene boundaries that
reflect your intention while shooting. In many digital recording formats,
such as DV and HDV, a discontinuity in the recorded timecode data occurs
whenever the camera is restarted after bei ng stopped. These shooting breaks
are treated as scene breaks under the option.
By content: Under this option, the scene detection tool analyzes the image
content of the material frame by frame, and establishes a new scene
whenever there is an abrupt change in content. However, a quick pan or
rapid movement across the frame may produce some unneeded breaks.
By time interval: In this variant you define
the length of the scenes to be created. A small
editing window opens for entering the desired
Enter
value in hours, minutes, seconds and milliseconds; press
to confirm
your input.
Show the scenes
To show the catalog of scenes for a particular video file, either select Show
scenes from its context menu; or select the clip, then click the Show scenes
button that appears at the bottom right of the Library.
A single video file can contain many scenes. This makes the footage
easier to manipulate during editing than if it were treated as a single
segment. The scenes are visually indicated by stylized film perforations.
Chapter 2: The Library 31
Page 44

Scene view is a temporary viewing mode. The orange bar at the top of th e
Browser alerts you that scene view is active. At the right hand end of the
bar is an x button you can use to terminate the mode. Click ing the Show
scenes tool again has the same effect.
During editing, scene clips behave identically to other video clips.
Manually creating scenes
If you want to manually divide a video file into individual scenes, select
Show scenes from the asset’s context menu. If you haven’t previously
subdivided the file, it will now appear in the Browser as a single scene.
In the Library Player, navigate within the clip to each frame where a scene
break should occur, then click the split scene button. See “Function
buttons” on page 24 for further information.
Removing scenes
To empty the entire list of scenes for a video file, select Scene detection
Remove scenes on the asset’s context menu.
Delete
To remove individual scenes, select one or more scenes then press
.
SMARTSLIDE AND SMARTMOVIE
SmartSlide and SmartMovie are built-in project generators that allow you
to create a slideshow or movie automatically based on media you supply.
The created production will include animated transitions, a full music
soundtrack and eye-catching image effects.
At the bottom of the Library window, click SmartSlide
for fast slideshows, or SmartMovie for fast movies.
To begin, select from the Library a series of photos (or other images) or
video files. Your music might come from digital audio assets already in the
Library, or you can cook up a soundtrack on the spot with the Scorefitter
tool.
32 Avid Studio
Page 45

That might be all it takes, though you can work on the project further with
manual editing if you wish. Once you have a final product you like, it takes
only a few clicks to burn it onto a disc o r save it as a file for other uses,
such as upload to the web.
SmartSlide
To open the SmartSlide tool, click the SmartSlide button at the bottom of
the Library window.
The SmartSlide controls are presented on a panel that slides up into the
window from below. It contains three subpanels. The leftmost of these
presents information about SmartSlide, and advice on how many files to
include. The center subpanel is a storage area with bins for photos and other
images (top) and audio. The right subpanel contains controls for
customizing the show.
Adding media
To add images to the slideshow, drag them from the Browser into the upper
bin in the storage area. Drag thumbnails within the storage area to get the
order you want. Continue adding further images until you are satisfied.
To add music, drag one or more sound files to the lower bin in the
storage area. Alternatively you can click the clef button in the
bottom left corner of the audio bin to create a music soundtrack in
ScoreFitter.
Preview, edit and export
Once your media are in place, click the Preview button on the footer bar
below the tool. The project is created and presented in a preview window. If
necessary, you can return to the SmartSlide tool to modify your media
selections.
When you click the Preview button, the media you have chosen are
automatically saved in a Collection named Latest Smart Creation. If you
expect to make further use of this grouping of assets, rename the Collection
to prevent it being overwritten the next time you look at a SmartSlide or
SmartMovie preview.
Chapter 2: The Library 33
Page 46

The Edit button brings your slideshow to the Movie Editor timeline for
detailed editing. It’s a good idea to check that the timeline video settings
match your requirements for the show. The video settings button on the
settings panel (below) provides access to these. Also see“Timeline” on page
41.
When the presentation is the way you want it, click Export to burn a disc or
create a file for upload.
The storage area
The photos in the upper bin are displayed as icons, while the music and
sound files in the lower bin appear as text lines giving the file name and
duration of each asset. Both bins support multiple selection, drag-and-drop
reordering, and a context menu with just two commands:
Delete selected: The selected media are removed from the SmartSlide
production. They remain available in the Library for other uses. (Shortcut:
Delete
.)
Open editor: This command opens the Corrections tool of the Photo Editor
or the Audio Editor. Any modifications you make to the media apply only
within this SmartSlide production. (Shortcut: double-click.)
SmartSlide settings
The settings on this subpanel are for customizing the SmartSlide
production.
The settings entered will be used the next time the slideshow is generated.
The video settings button lets you set up the timeline options that will apply
if you take the production into the Movie Editor. The clear project button
removes all media from the project and returns to default settings.
Title: Enter a caption to be used as the main title of the slideshow.
Adjust length to music: When this op tion is checked, SmartSlide attempts
to adjust its timing p arameters so that the generated s lideshow lasts exactly
as long as the music soundtrack you have specified. The information
subpanel provides advice about how many images to employ when the
option is in force.
34 Avid Studio
Page 47
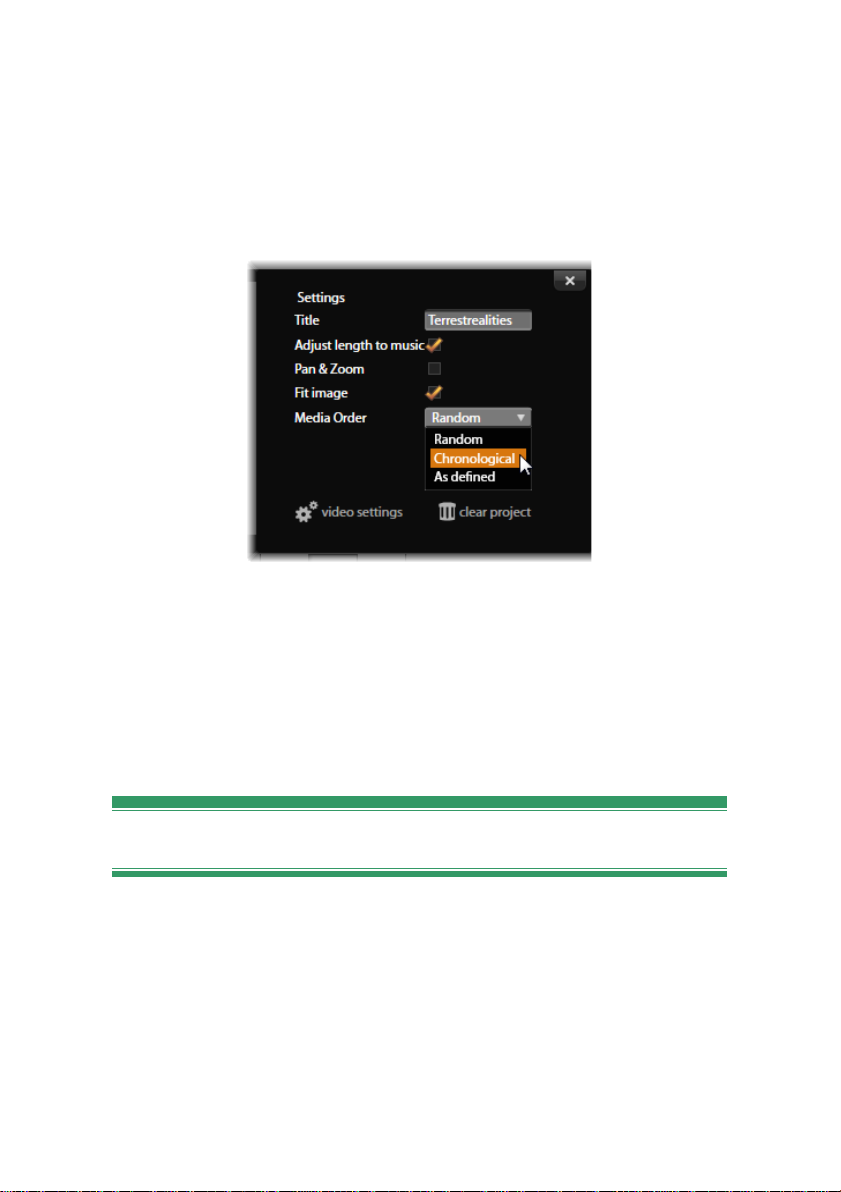
Pan and zoom: Checking this option enlivens your presentation with
simulated camera moves.
Fit image: Check this option to enlarge images that are too small for the
selected format. For a more flexible approach, you can also consider
correcting the asset with the Crop corrections tool.
Here the mouse pointer selects chronological order on the Media Order
list of the SmartSlide settings panel. At the bottom of the panel are
buttons for adjusting video settings for the generated project, and for
starting over from scratch.
Media order: Select an option for the order of slides, from ‘As defined’
(the sequence is set by you), ‘Chronological’ (according to the file
timestamp), and ‘Random’.
SmartMovie
To open the SmartMovie tool, click the SmartMovie button at the bottom of
the Library window.
SmartMovie, like SmartSlide, presents its controls on a panel that slides up
into the Library from below. Again there are three subpanels. The leftmost
presents information and advice concerning your SmartMovie. The center
subpanel is a storage area with bins for video and photos (top) and audio.
The right subpanel contains controls for customizing the show.
Chapter 2: The Library 35
Page 48

Adding media
The visual elements in your SmartMovie can include photos and other still
images along with the video. Drag the assets you want to use from the
Browser into the upper bin in the storage area. You can also drag
thumbnails within the storage area to get the order you want. Continue
adding further material until you are satisfied.
To add music, drag one or more sound files to the lower bin in the
storage area. Alternatively you can click the clef button in the
bottom left corner of the audio bin to create a music soundtrack in
ScoreFitter.
As media are added, the total running time of the source material is
displayed in the top-left corner of the bin. This is not necessarily the length
of the resulting movie.
Preview, edit and export
Having placed your media, click Preview on the footer bar below the tool.
The project is created and opened in a preview window. If necessary, you
can return to SmartMovie to modify your media selections.
The analysis phase of generating a SmartMovie may take some time to
complete the first time the material is analysed. Full rendering of the
project, with progress indicated by shading on the time-ruler of the
Player, may introduce an additional delay before a fully-detailed
preview is available.
When you click Preview, the media you have chosen are automatically
saved in a Collection named Latest Smart Creation. If you expect to make
further use of this grouping of assets, rename the Collection to prevent it
being overwritten the next time you generate a SmartSlide or SmartMovie
preview.
The Edit button brings your production to the Movie Editor timeline for
detailed editing. As usual, it’s a good idea to check that the timeline video
settings match your requirements for the show. The video settings button on
the settings panel (below) provides access to these. Also see“The project
timeline” on page 41.
When the presentation is the way you want it, click Export to burn a disc or
create a file for upload.
36 Avid Studio
Page 49

The storage area
The visual assets in the upper bin are displayed as icons, while the music
and sound files in the lower bin appear as text lines giving the file name and
duration of each asset. Both bins support multiple selection, drag-and-drop
reordering, and a short context menu:
Delete selected: The selected media are removed from the SmartMovie
production. They remain available in the Library for other uses. (Shortcut:
Delete
.)
Open editor: This command opens the Corrections tool of the Video
Editor, the Photo Editor or the Audio Editor. Any modifications you make
to the media apply only within this SmartMovie. (Shortcut: double-click.)
SmartMovie settings
The settings on this subpanel are for customizing the SmartMovie
production.
Here the mouse pointer selects the ‘long’ Clip Length setting on the
SmartMovie settings panel. At the bottom of the panel are buttons for
adjusting video settings for the generated project, and for starting over
from scratch.
The settings entered will be used the next time the movie is generated. The
video settings button lets you set up the timeline options that will apply if
you take the production into the Movie Editor. The clear project button
removes all media from the project and returns to default settings.
Title: Enter a caption to be used as the main title of the movie.
Clip lengths: The visual tempo of your movie increases as the clip length
is shortened. To use the original length of the asset, choose Maximum.
Chapter 2: The Library 37
Page 50

Pan and zoom: Checking this option enlivens your presentation with
simulated camera moves.
Fit image: Check this option to enlarge material that is too small for the
frame format of your project.
Video volume: Set the volume of the original audio in the video segments
you are using. If you want the soundtrack to contain background music
only, set this value to zero.
38 Avid Studio
Page 51

CHAPTER 3:
The Movie Editor
The Movie Editor is Avid Studio’s main editing screen for digital movie
creation. The editor brings together three main components:
The Library, in its compact view, provides the assets available to your
project.
The project timeline lets you organize the assets as clips within a
schematic representation of your production.
A portion of the Movie Editor display, with the compact view of the
Library at upper left, the Player at upper right (partly visible), and at
bottom the timeline and the Navigator.
Chapter 3: The Movie Editor 39
Page 52

The Player lets you preview Library assets before adding them to your
project. It also lets you view – on a frame-by-frame basis if you like – how
any part of the production will actually appear to you r audience when you
export it (save it as a file or upload it to YouTube).
In addition, the Movie Editor calls upon a variety of tools and windows for
creating and editing titles, adding effects, and other purposes.
Disc editing
If you plan ultimately to release your movie on DVD with interactive
menus, you will at some point need the special features of the Disc Editor.
It provides all the same timeline editing features as the Movie Editor, but
also lets you create and work on the disc menus with which users will
navigate your product i on.
Avid Studio lets you smoothly transition a movie to a disc project at any
time during development, so it’s all right to start in the Movie Editor even
if you end up targeting DVD for output instead of or as well as the other
options. Please turn to Chapter 9: Disc projects for information about the
special features provided for disc authoring. The other aspects of timeline
editing are covered in this and subsequent chapters.
The compact Library
The compact view of the Library, which uses the top left of the Movie
Editor screen, is a core feature of the editing environment. If you switch
back and forth between the Library and the Movie Editor, you will see that
the same location tab is selected in both views, and that the same Library
assets are on display.
With the compact Library and the timeline together in the same window,
adding assets to your movie becomes a breeze: just drag the items you want
from the Library Browser onto the project timeline.
Slideshow productions
In addition to all types of video productions – ‘movies’ – the Movie Editor
(and the Disc Editor) can be used for authoring complex slideshows and
presentations from still images. The same editing techniques apply in both
cases.
40 Avid Studio
Page 53

THE PROJECT TIMELINE
The timeline is where you create your movie, by adding video, photo and
audio assets from the Library, by editing and trimming these core media,
and by enlivening them with transitions, effects, and other enhancements.
Timeline fundamentals
The timeline consists of multiple tracks – as many as you require – in a
vertical stack. Tracks nearer the top of the stack are positioned towards the
front when viewed, their opaque parts obscuring the tracks below.
The basic action of movie authoring is to drag an asset from the Library to a
timeline track, where it is called a clip. With a little pr actice, you can lay
out a rough edit of a movie very quickly just by adding its main media
assets at their approximate timeline positions.
At the left end of the timeline are track headers with several controls per
track: a lock button, the track name, and monitoring buttons for the
track’s video and audio. Here the current default track is ‘Main’.
The track header: To the left of each track is a header area that provides
access to functions such as disabling video or audio monitoring for the
track.
The default track: One track is highlighted with lighter background color,
and is also marked with an orange bar to the left of the track header. This is
the default track. It has a special role in certain editing procedures; for
Chapter 3: The Movie Editor 41
Page 54

instance, it serves as the target track for paste operations. To make another
track the default track, simply click in its header.
Your current position on the timeline corresponds to the
video frame shown in the Player when it is in Timeline
mode. The current position is indicated by a vertical red
line, at the top of which is a draggable scrubber handle.
Another vertical line marks the same position in the
Navigator (see below).
The toolbar
Above the tracks, the timeline toolbar provides several clusters of editingrelated tools. (In the Disc Editor, the toolbar also includes tools specifically
for disc authoring.)
The Navigator
Below the tracks, the timeline Navigator shows a bird’s-eye view of your
whole project at a reduced scale. The bars representing clips have the same
colors as on the timeline, except that the bar representing the selected clip is
drawn in orange. Clicking in the Navigator allows you to speedily visit any
timeline location.
A portion of the Navigator view window, showing the current position
(vertical line, left) and a sizing handle (right).
The orange rectangle that encloses a portion of the Navigator display – the
view window – indicates the section of your movie currently visible on the
timeline tracks.
To change which part of the movie is in view, click and drag horizontally
within the view window. The timeline sc rolls in parallel as you drag. Since
your timeline position does not change, this may take the scrubber out of
view.
Zoom
To change the zoom level of the timeline, either click and drag horizontally
in the time-ruler along the top of the timeline, or drag the sides of the view
window. The first method has the advantage that it always leaves the screen
42 Avid Studio
Page 55

position of the play line undisturbed, which may make it easier to orient
yourself after the zoom.
To change the zoom of the Navigator itself, use the plus and minus buttons
immediately to its right.
Double-clicking on the view window adjusts the zoom of both the
Navigator and the timeline such that your entire movie fits within the
Movie Editor window.
Resizing
The height of the timeline, along with the relative proportions of the
Library and the Player, can be adjusted with the sizing grip in the form of
an inverted T in the middle of the screen.
To adjust the height of individual timeline tracks, grab and adjust the
separator lines between the track headers on the left. If the vertical size of
all tracks exceeds the available viewing area, a scroll bar at the right will
allow you to select which tracks are in view.
Set the height of the Navigator by vertically dragging the horizontal
separator across the top.
The timeline toolbar
The toolbar above the timeline offers various settings, tools and functions
that apply to the timeline and timeline editing.
Timeline settings
By default your timeline settings are copied from the first video clip
you add to the timeline. If that will give the right result, you won’t
have to alter them.
If you do want to change them, click the leftmost button on the toolbar to
open the Timeline Resolution window and configure the three settings
provided.
Aspect: Choose between a 4x3 and a 16x9 display.
Size: Choose amongst the HD and SD pixel resolutions available for the
given aspect ratio.
Chapter 3: The Movie Editor 43
Page 56

Frame rate: Choose from a selection of frame rates consistent with the
other settings.
Timeline settings
These settings can be changed at any time during development of your
movie, but you should be aware that a change of the frame rate can cause a
slight shifting of clips on the timeline as they adjust to new frame
boundaries.
Video material that is not in compliance with the chosen project settings
will be converted automatically on being added to the timeline.
If you want to choose a video standard for your projects explicitly, rather
than relying on inheriting the format from the first clip added, open the
Project settings page of the application settings. See “Project settings” on
page 238.
Audio mixer
This button opens the enhanced audio control area with volume
adjustment tools and access to the Panner, a surround panning
control. See “Timeline audio functions” on page 49 for details.
Scorefitter
Scorefitter is the integrated music generator of Avid Studio,
providing you with custom-composed, royalty-free music exactly
adjusted to the duration required for your movie. See “Scorefitter” on page
164.
Title
The Create title button opens the Title Editor. If none of the many
supplied titles answers your need, why not author one of your own?
See “The Title Editor” on page 117.
44 Avid Studio
Page 57

Voice-over
The voice-over tool lets you record commentary or other audio
content live while viewing your movie. See “The Voice over tool”
on page 165.
Razor blade
To split one or more clips at the play line position, click the razor
blade button. No material is deleted by this operation, but each
affected clip becomes two clips that can be handled separately with respect
to trimming, moving, adding effects and so on.
If there are selected clips at the play line on any track, only those clips
will be split. Both parts of those clips remain selected after the split.
If there are no selected clips at the play line, all clips intersected by it will
be split and the right-hand parts w ill be selected to facilitate easy removal
in case that is desired.
Locked tracks are exempt from the split operation.
Trash can
Click the trash can button to delete all selected items from the
timeline. See “Deleting clips” on page 54 for details on how other
timeline clips may be affected by the deletion.
Markers
The marker functions available here are identical to those provided
in the media editors for video and audio. Please see “Markers” on
page 88.
Instead of being attached to a particular clip, however, timeline markers are
considered to belong to the video composite at the marked point. Only if
there is a clip selection embracing all tracks at the marked point, and only if
no track is locked, will the markers change positions during timeline
editing.
Magnetic snapping
Magnet mode simplifies the insertion of clips during dragging.
While the mode is active, clips are ‘magnetically’ drawn to other
items on the timeline when they approach within a critical distance. This
makes it easy to avoid the unnecessary – though often indiscernib ly small –
Chapter 3: The Movie Editor 45
Page 58
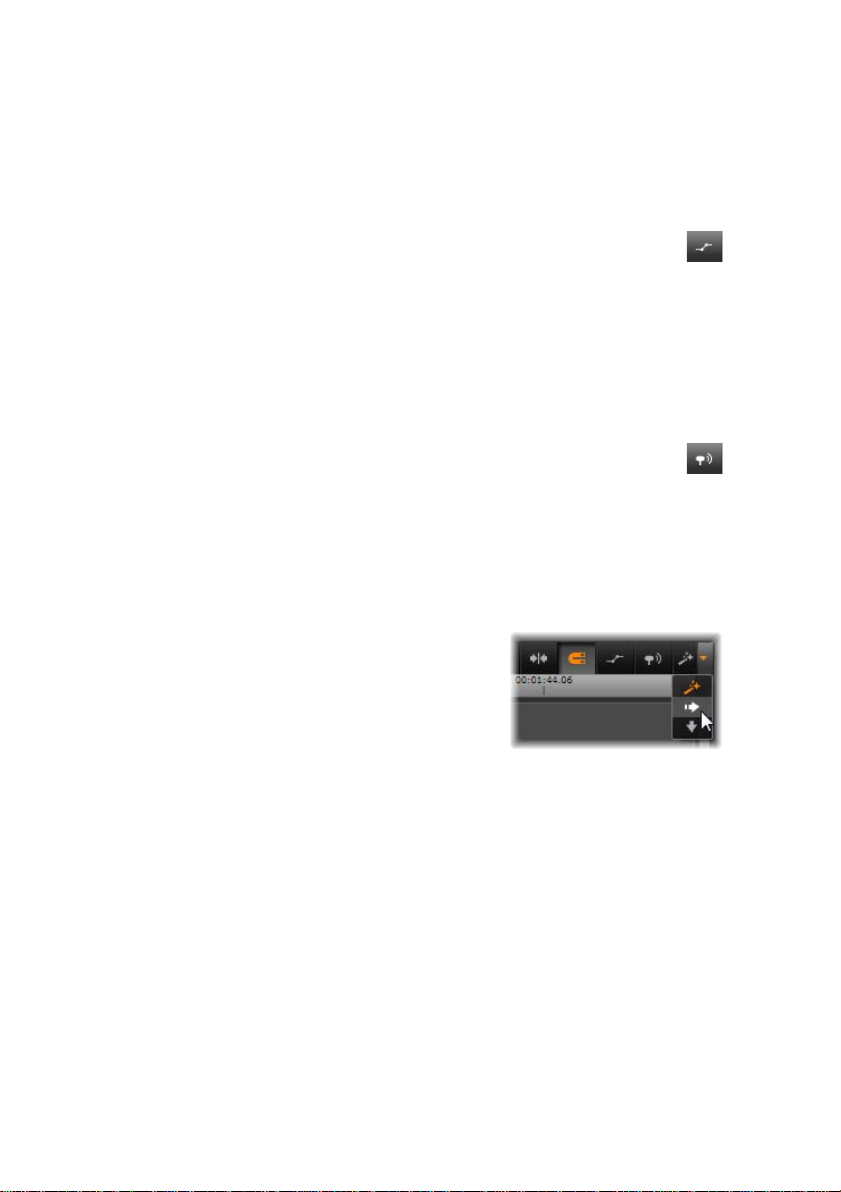
gaps between items that are otherwise apt to arise during editing. If you
want to deliberately create such a gap, however, simply turn off the mode to
allow the preferred placement.
Volume keyframe editing
The volume keyframe editing button toggles keyframe-based editing
of clip audio. While the button is engaged, the green volume contour
on each timeline clip becomes editable. In this mode you can add control
points to the contour, drag contour sections, and other operations. While the
button is off, the volume keyframes are protected against modification.
Opening the Audio Mixer automatically activates the button.
Audio scrubbing
By default, the audio portion of a project can be heard only during
playback in the preview. The audio scrubbing button on the timeline
toolbar provides an audio preview even while just ‘scrubbing’ through your
movie by dragging the timeline scrubber control.
The shuttle wheel of the Player also provides audio scrubbing.
Editing mode
The editing mode selector at the right-hand
end of the timeline toolbar determines the
behavior of other clips when editing changes
are made. Material to th e left of the edit point
is never affected in timeline editing, so this
applies only to clips that extend rightward
from the edit point.
Three choices of editing mode are available: smart, insert and overwrite.
The default is smart, in which Avid Studio selects from insert, overwrite
and sometimes more complex strategies in the context of each editing
operation.
Smart mode is designed to maintain synchronization between timeline
tracks as far as possible. In a multitrack editing situation, clips typically
have vertical as well as horizontal relationships. When you have carefully
placed your cuts to coincide with the beats of a music track, for example,
you don’t want to disrupt everything when you make additional edits.
Insert mode is always non-destructive: it moves other clips on the track out
of the way before inserting new material. It will also automatically clo se
46 Avid Studio
Page 59

gaps created by removing material. Only the target track is affected. Any
prior synchronization with other tracks from the edit point rightwards is
lost.
Insert is most useful in the early stages of a project, when you are collecting
and arranging clips on the timeline. It ensures that no material will be lost,
and makes it very easy to reorder clips and sequences of clips.
In the later stages, when the structure of your project is approaching its
final state and you have started carefully synchronizing material on
different tracks, insert mode is less helpful. The very properties that favor
its use for the early stages (the ‘ripple’ behavior) count against it when
finalizing. This is where overwrite comes into play.
Overwrite d irectly affects only the clip s you select. Changing the length or
position of a clip in overwrite mode will o verwr ite neighb oring clip s (if you
lengthen) or leave gaps (if you shorten). It will never affect the
synchronization between tracks.
Alternative mode
The smart editing mode works by predicting what you’re trying to do and
determining whether insert, overwrite or even some more complex strategy
would be best to apply. You’ll find it usually does what you want, but there
are sure to be other times when you have something else in mind.
Many actions support both insert and overwrite, but no other possibilities.
Smart mode will use sometimes one and sometimes the other, but if insert
isn’t what you want, overwrite usually is, and vice versa. All you need,
therefore, is a method of overriding smart mode’s default beha vior.
To change insert to overwrite behavior, or overwrite to insert, hold down
Alt key while carrying out your edit as usual. You can press (or release)
the
Alt
as you please while setting up the edit: what counts is the state of the
key at the instant the operation is finally enacted – when you drop dragged
items on the timeline, for example.
The trick works in all editing modes, so it’s always available when you
need it. If you are not satisfied with the default behavior, just cancel or
.
undo as needed, then try again with
Alt
In one timeline editing operation – that of replacing one clip by another
key
while retaining its duration, effects and other properties – the
takes on a similar role. See “Replacing a clip” on page for details.
Chapter 3: The Movie Editor 47
53
Shift
Page 60

The timeline track header
In the header area of the timeline are a number of controls affecting the
arrangement and organization of the timeline tracks. These are covered
here, while the audio functions controlled from the timeline header, such as
track volume, are described starting on page 156.
The all tracks area above the track headers offers controls similar to those
found on each track header but with global effect: they apply to all tracks
simultaneously, overruling the individual settings.
Default track
The orange vertical line to the left of the track header, together with a
lighter background shade, identifies the default track. It provides a
destination track for certain functions, including send to and paste. Newlycreated titles and Scorefitter songs are also added on this track. For more
information see “Sending to the timeline” (page 53), “Using the Clipboard”
(page 64), “The Title Editor” (page 117) and “ScoreFitter” (page 164).
To make another track the default track, simply click anywhere within the
track header boundarie s other than on a button or other control.
Locking
Click the padlock buttons to protect a track from unintended edits. The
same button in the all tracks area confers this protection on the whole
project.
Track name
To edit the name of a track, click the name once to access the in-place
editor, or select Edit track name from the track header context menu.
Confirm your edit with
Enter, or cancel it with Esc
.
Video and audio monitoring
The video and audio buttons in the track header control whether this track
contributes its video and audio to the composite output of the project. They
support the many editing situations in which it is advantageous to block the
output of one or more tracks in order to simplify the preview. The same
48 Avid Studio
Page 61

buttons in the all tracks area toggle audio and video monitoring for the
entire project.
Additional track functions
The following functions are available in the track-header context menu:
New track: You can insert a new track either above or below the existing
track.
Delete track: Delete a track and all clips on it.
Move track: Drag the track header up or down to a new layer position. As
you drag, a bright horizontal line appears at valid placements.
Ctrl
Copy track: Keeping the
the track instead of move it.
Track size: The context menu contains four fixed track sizes (Small,
Medium, Large, Very large). For custom sizing, drag the separator line
between the track headers to seamlessly adjust the height.
View waveforms: Toggle the waveform view for audio clips.
key p ressed while moving a track will copy
Timeline audio functions
Please see “Audio on the timeline” on page 156 for coverage of these
functions.
EDITING MOVIES
The first step in any movie editing session is to bring your project into the
Movie Editor to begin wo rk.
To launch a -new production: Choose File New Movie from the
main menu. Before adding your first clip, make sure that the timeline video
format will be right for the project (see below).
Chapter 3: The Movie Editor 49
Page 62

To edit an existing movie: Select a recent project from th e File Recent
menu; click File Open Movie to browse for a movie project to open; or
locate the movie you want to open in the Projects Movies folder of the
Library.
To open a Pinnacle Studio project: Choose File Import previous Studio
projects. Please note that some features of your Pinnacle Studio project
may not be supported in Avid Studio.
Timeline settings
To start editing a new project, verify that the video format settings of your
project – aspect ratio, frame-size and playback speed – are as you want
them. You can choose in the Project settings tab of the application settings
to set the values of these properties automatically by matching the f irst clip
added to the project. You can also set them manually. See “Project settings”
on page 238 for configuring the automatic feature, and “The timeline
toolbar” on page 43 for instructions on entering project settings manually.
Depending on your timeline settings, clips in some formats might not be
instantly playable. Such content will automatically be rendered in an
appropriate format.
Establishing tracks
With only minor exceptions, timeline tracks in Avid Studio do not have
specialized roles. Any clip can be placed on any track. As your projects
become more complex, however, you will find it increasingly helpful to
give some thought to the organization of tracks, and rename them according
to their function in the movie. For information on track properties and how
to edit them, please see “The timeline track header” on page 48.
Adding clips to the timeline
Most types of Library asset can be brought onto the timeline as independent
clips. The types include video and audio clips, photos, graphics, Scorefitter
songs, Montage and Titles. You can even add your other movie projects as
container clips that work just like video clips in your project. Disc projects,
however, cannot be added as container clips to a timeline, since they
require a capability – user interactivity – that timeline clips don’t have.
50 Avid Studio
Page 63

Drag-and-drop
Drag-and-drop is the commonest and usually the most convenient method
of adding material to a project. Click any asset in the Movie Editor’s
compact view of the Library and drag it wherever you like on the timeline.
When crossing into the timeline area during the drag and continuing to the
target track, watch for the appearance of a vertical line under the mouse
pointer. The line indicates where the first frame of the clip would be
inserted if dropped immediately. The line is drawn in green if the drop
would be valid, and red if it would not be possible to insert a clip where
indicated (because the track is protected, for example).
It is possible to insert multiple clips into the timeline at the same time.
Simply select the desired Library assets, then drag any one of them t o the
timeline. The sequence in which the clips appear on the track corresponds
to their ordering in the Library (not the order in which you selected them).
Magnet mode: By default, magnet mode is switched on. This makes it
easier to insert clips so that their edges meet exactly. The new clip snaps to
certain positions, like the ends of clips or the positions of markers, as if
drawn by a magnet once the mouse pointer gets close to the potential target.
On the other hand, don’t worry about whether the first clip is right at the
start of the timeline. Not every movie starts with a hard cut to the first
scene!
Live editing preview
In order to eliminate the confusion created by complex editing situations,
Avid Studio provides a full dynamic preview of the results of editing
operations as you drag clips around on the timeline. If things seem to jump
around a bit more than you’re used to during timeline editing, this is the
cause. Don’t worry: you will quickly get used to and learn to take
advantage of the extra information provided. Take it slowly at first. Watch
the changes on the timeline as you hover the dragged item over various
possible landing places, and complete the drop when you see the result you
want.
If it turns out that drag-and-drop isn’t working the way you want, either
Esc or move the mouse pointer out of the timeline area and release the
press
button. Either of these abandons the drag-and-drop operation. To call back
Ctrl
a drag-and-drop after it’s complete, press
Don’t forget that you can vary many timeline editing operations with
alternative mode: just press and hold
one-for-one clip replacement (see “Replacing a clip”, below),
significant.
+Z or click the undo button.
Alt while dragging or trimming. In a
Shift is also
Chapter 3: The Movie Editor 51
Page 64

Advanced drag-and-drop
After you have assembled an assortment of clips on a timeline track, it’s
only matter of time before you want to start changing things around. For
instance, you might want to:
• Fill a gap with clips.
• Insert some clips before a specific clip.
• Replace a clip already on the timeline with a different one.
The smart editing mode helps you achieve any of these goals with ease.
Filling a gap
Smart mode makes it simple to fill a particular timeline gap with new
material, for example. Rather than having to painstakingly pre-trim the new
material to the space available, you simply drag items into the gap. Any
clips that are not needed for filling the gap will be dropped, and the last clip
used will automatically be trimmed to the appropriate length. No existing
clips are affected, so no synchronization problems can result.
Inserting clips
Suppose that your goal is to add new material to the timeline at a point
where there is an existing clip. You don’t want the clip already there to be
overwritten, however; you just want it (and any clips to its right) to move
rightwards far enough to make room for the new material.
Here again, smart editing provides a painless answer. Simply drag the new
material to the start of the clip that is in the way, rather than into a gap. The
clip moves aside exactly as far as necessary.
Inserting with split
If you drop an item onto the middle of an existing clip, rather than at a cut,
the clip will be split. The new material is inserted at the point you specified,
and is followed immediately by the displaced portion of the original clip.
In smart mode, synchronization of the target track with all other tracks is
maintained by inserting in each of them a gap of length equal to the new
clip. To avoid affecting the other tracks in this way, use insert instead of
smart mode. Alternatively, pressing
cause it to overwrite a portion of the existing clip. A third approach is to
lock any track that should not be modified, although this will affect the
synchronization of clips on locked tracks with those on unlocked tracks.
52 Avid Studio
Alt as you drop the new material will
Page 65

Replacing a clip
To replace a clip, drag a single Library asset onto the clip you want to
replace while holding down
effects and transitions that were applied to the orig inal clip. Correction s are
not inherited, however, since they are usually meant to address the issues of
a particular media item.
In smart mode, the replace operation will succeed only if the Library clip is
long enough to cover the full length of the clip being replaced. In other
modes a Library clip of insufficient length will be extended using over-
trimming. The direction and amount of the extension is based on your
mouse position as you drag. For information on over-trimming, please see
page
56.
If the Library asset is longer th an needed, it will be truncated to the same
length as the clip being replaced.
Shift
. The replacement clip will inherit any
Sending to the timeline
In addition to dragging a clip to the timeline, you can ‘send’ it to the default
track at the position of the play line. The operation is equivalent to drag-
and-drop, so smart mode is applied accordingly when deciding how other
clips will be affected.
The Send to timeline command is found on the context menu of an
individual asset or multiple selection in the compact view of the Library.
Sending from the Player
There is also a second ‘send’ method that provides greater control.
If you click on a Library asset when working in the Movie Editor, the
Player switches to Source mode for previewing. For trimmable media
(video and audio), the Player also provides trim calipers for cutting out a
starting or ending portion of the asset.
Clicking the Send To Timeline button in the Player
after trimming a Library video asset.
Chapter 3: The Movie Editor 53
Page 66

After previewing the asset and trimming it if required, use the send to
timeline button at the bottom left of the Player. As usual, the asset is added
to the project on the default track and at the play line. A useful variation is
to drag the send to timeline button itself onto the timeline track. The asset is
then added at the drop point rather than at the play line.
Title Editor, Scorefitter, voice-over
These three functions add new clips to the project timeline,
clips that are not underpinned by any Library asset.
Instead, they are created from settings and other actions you take during
editing.
Once your editing is complete, both titles and ScoreFitter clips will be sent
to the default track on the timeline using the Send to timeline function,
while voice-over clips will go to the special voice-over track instead. For
details please see Chapter 7: The Title Editor (page 117), “Scorefitter”
(page 164) and “The voice-over tool” (page 165).
Deleting clips
To delete one or more clips, first select them, then press Delete
Alternatively, click the trash can icon on the timeline toolbar, or choose
Delete from the selection’s context menu.
In smart mode, if the deletion produces a gap that spans all tracks, it is
closed by shifting material to the right of the gap lef twards. This lets you
avoid accidentally creating empty sections in your movie, while still
ensuring that synchronization between tracks is maintained.
Alt
If the
unclosed.
In insert mode, gaps on the tracks from which clips are deleted will also be
closed, but other tracks will be unaffected. No effort is made to preserve
synchronization to the right of the deletion.
With regard to synchronization, the safest editing mode for deletion is
overwrite, which will simply remove the clips and leave everything else
unchanged.
54 Avid Studio
key is held down when deleting, any gaps produced will be left
.
Page 67

Clip operations
The project timeline provides comprehensive support for selecting,
adjusting, trimming, moving and copying clips.
Selecting
Select clips in preparation for performing editing operations upon them. A
selected clip receives an orange frame and is displayed as solid orange in
the Navigator.
To select one clip, click it with the mouse. Any previous selections are
removed. For a fast multiple selection, click in an open timeline area then
drag out a selection frame that intersects the clips of interest. To select all
Ctrl
clips with one command, press
To clear a selection click into any gap area of the timeline.
Multiple selection with keyboard and mouse
To create more complex multiple selections, left-click while pressing Shift,
Ctrl
or both together.
+A.
To select a series of clips: Click on the first and
two clips together define a bounding rectangle, or selection frame, within
which all clips are selected.
Toggle selection of one clip: Use
a single clip without affecting any of the others.
Select rest of track: Press
after the start position of the clicked clip. This function is particularly
useful if you quickly want to get the rest of your timeline ‘out-of-the w ay’
for inserting new material, or to manually ripple left to close timeline gaps.
Ctrl
Ctrl+Shift
-click to reverse the selection state of
-click to select all clips that start at or
-click on the last. The
Shift
Adjusting
As you move your mouse pointer slowly over the clips on your timeline,
you will notice that it changes to an arrow symbol while crossing the sides
of each clip, an indication that you can click and drag to adjust the clip
boundary.
Adjusting changes the length of a single clip on the timeline in overwrite
mode (since insert mode would cause synchronization issues). If you drag
Chapter 3: The Movie Editor 55
Page 68

the start of a clip to the right, a gap will be opened on the left side. If there
is a clip to the immediate left of the clip being adjusted, dragging to th e lef t
overwrites it.
The adjustment pointer also appears when the mouse hovers at the ends of a
gap – an empty space on a timeline track with at least one clip to its right.
It turns out that adjusting gaps in overwrite mode, as we do for clips, is not
especially helpful. However, gaps do come in handy when you’re editing in
smart mode if you want to ripple an individual track left or right, ignoring
any resulting synchronization issues. Adjusting gaps therefore occurs in
insert mode.
Even if no gap is available, incidentally, you can get the same result by
Alt
holding
while adjusting the sides of a clip.
Over-trimming
Over-trimming occurs when you try to extend the duration of a clip beyond
the limits of its source material, a situation you typically want to avoid.
Notice that if you have over-trimmed your clip the invalid parts are shown
in pink.
Overtrimmed clip: The first and last frames
will be frozen in the over-trimmed sections.
Over-trimming is not a crisis situation. You do not need to take action
immediately. Avid Studio will simply extend the clip as specified by
‘freezing’ the first and last frames of the clip into the over-trimmed areas.
Depending on the duration of the over-trim, and the context, this simple
approach may be all you need. A brief freeze-frame can even be visually
effective in its own right.
The freeze-frame method will probably not give satisfactory results if it
happens during a sequence involving rapid motion, however. In such
exacting cases you might consider supplementing or replacing the clip, or
prolonging it with the Speed function. (See “Speed” on page 65.)
56 Avid Studio
Page 69

Trimming
Changing the length of clips or gaps on the timeline is called ‘trimming’.
Multitrack trimming is a valuable editing skill. By tr imming multip le tracks
at once, you can assure that the clips coming later on the project timeline
maintain their relative synchronization.
Trimming clips without consideration for content later on the timeline can
disrupt the synchronization of your project. Soundtracks that don’t match
the action and badly-timed titles are the kinds of problem that may result.
Multiple track trimming
A rule for staying in sync
Avid Studio has powerful trimming tools to allow you to perform
multitrack trimming without risk. Fortunately, there is a simple rule for
safeguarding synchronization even on a complex timeline: open exactly one
trim point on every track. Whether the trim poin t is attached to a clip or a
gap, and at which end, are up to you.
Opening trim points
Move the mouse pointer to the beginning or end of a clip. No tice that the
trim pointer faces left at the start of the clip and right at the end.
While the trim pointer is showing, click once at the point you want to trim.
Then continue to open trim points on other clips if required.
Ctrl
You can open two trim points per track by holding down the
create the second point. This feature is useful for the trim both, slip trim,
and slide trim operations, all described below.
You can also open a trim point by positioning the timeline scrubber
near the cut you want to trim, then clicking the toggle trim mode
button on the timeline toolbar.
Chapter 3: The Movie Editor 57
key to
Page 70

When a trim point is opened several things happen:
• The left or right edge of the clip is highlighted with an orange bar.
• The toggle trim mode button becomes active.
• The transport controls under the Player become trim adjustment tools.
• You will see an orange outline around your preview to alert you that you
are now in trim mode.
Trim mode with trim adjust buttons
Closing trim mode
Trim mode can be closed either by clicking in a gray area away from the
trim points, or by clicking the toggle trim mode button.
Editing modes
The current editing mode – smart, overwrite
or insert – determines how trimming will
affect other clips on the timeline. Select the
mode from the dropdown list at the far right of
the timeline toolbar.
58 Avid Studio
Page 71

Insert mode: Clips to the right of a trimmed clip and on the same track will
shift left or right to accommodate the new length of the clip.
Synchronization with other tracks may be lost, but no clips are overwritten.
Overwrite mode: Only the clips you are trimming, and any neighboring
clips they happen to overwrite, are altered in this mode. Synchronization
across tracks is not affected.
Smart mode: During trimming, smart mode is equivalent to insert mode.
Trimming the beginning of a clip
Prepare to trim the beginning of a clip (the ‘mark-in’ point) by clicking at
the left-hand edge of the clip while the trim pointer is v isible. With a trim
point thus established, you can add or remove frames from the beginning of
the clip.
To trim on the clip, drag the trim point to the left or right.
To trim on the Player, use the trim buttons to trim one or ten frames either
forwards or backwards. Click the loop play button for a looping preview of
the trim region.
In-point trim selected
Trimming the end of the clip
To trim the end of the clip (or ‘mark-out’ point), open a trim point by
clicking at the right-hand edge of a clip when the mouse pointer changes to
a rightward-pointing arrow. Now you can add or remove frames from the
end of your clip.
Chapter 3: The Movie Editor 59
Page 72

Once again you can trim directly on the clip by dragging the trim point, or
on the Player while it remains in trim mode.
Out-point trim selected
Trimming gaps
The project timeline lets you trim not just the clips upon it but also the gaps
between them. Trimming gaps might not sound terribly useful at first, but is
in fact handy. For instance, the easiest way to insert or delete space on a
single timeline track is to trim the right-hand edge of a gap. All clips to the
right of the gap are shifted as a block when this is done.
Two gaps selected and an audio out point trim
Also, when you need to open a trim point on each track in order to maintain
synchronization while trimming, you may often choose to trim the duration
60 Avid Studio
Page 73

of a gap rather than that of a clip. (Remember the rule: one trim point on
every track is required for keeping in sync.)
Trimming a gap, whether at the start or the end, is accomplished in exactly
the same way described above for trimming a clip.
Trim both
In this operation, two adjacent clips (or a clip and an adjacent gap) are
trimmed simultaneously. Any frames added to the left-hand item are taken
away from the one on the right, and vice versa, as long as space and
material are available. All you are moving is the cut-point where the items
meet. One application for this technique is adjusting visual cuts to the beat
of a music soundtrack.
To start, click at the end of the left-hand clip to open the first trim point,
Ctrl
then
When positioned over the adjacent trim points you just opened, the mouse
pointer should be a horizontal two-headed arrow. Drag left or right to move
the clip boundary, or use the Player in trim mode.
-click at the beginning of the right-hand clip to open the second.
Trim both: Adjacent out and in trim-points have been selected
Slip trim
To change the starting frame of a clip within the source material, but leave
its duration unchanged, open one trim point at the start of a clip, and
another at the end of either the same clip or one later on its timeline track.
Chapter 3: The Movie Editor 61
Page 74

Drag either trim point horizontally or use the Player trim controls to
reposition the clip within its source.
Slip trim: In and out trim-points of clip selected
Slide trim
A slide trim is an extended version of the trim both technique described
above. In this case you open trim-points at the end of one clip and the
beginning of another later on th e timeline. Instead of sliding a single clip
boundary along the timeline, as in trim both, you are sliding two that move
together. All clips between the two trim points are repositioned earlier or
later on the timeline.
Slide trim: An out trim-point has been opened
on the first clip, and an in-point on the third
62 Avid Studio
Page 75

Both slip trimming and slide trimming can be useful for synchronizing clip
contents to material on other tracks.
Monitoring trim points
When you are trimming with multiple trim points, it is helpful to switch the
preview from one trim location to another to make sure that each is
properly set. Selecting a trim-point for monitoring makes it the source for
audio and video during preview.
Opening a trim-point causes it to be monitored. When multiple trim-points
are involved, therefore, you can check on each one as it is created. To select
a trim-point for monitoring directly,
Tab
pressing
cycles through the open p oi nts.
Ctrl-click it. While trim mode is active,
Moving and copying
To move a selection of one or more clips, place the mouse pointer on any
selected clip and watch for it to change to a hand symbol. When it does,
start dragging the clip to the desired position.
Move can be thought of as a two-step process. First, the selection is deleted
from the current timeline, according to the rules of the current edit mode.
Second, the selection is moved to the desired end position, where it is
inserted in a left-to-right fashion per track. The relative position of all
selected clips on all tracks is retained.
Moving a ‘sparse selection’ (a selection in which some clips per track are
selected while others in the same region are not) is possible, but may be
confusing unless executed in overwrite mode. Moving either single clips or
a complete timeline cross-section is more straightforward and should be
preferred when possible.
Alt
Holding down the
insert and overwrite modes. Standard smart operation is the same as insert,
since the most frequent use of horizontal moves is to reorder the playback
sequence.
key while moving clips allows you to toggle between
Copy
Holding down the
clips instead of moving them.
Chapter 3: The Movie Editor 63
Ctrl key while moving a selection of clips, will copy the
Page 76

Using the Clipboard
Although drag-and-drop operations provide somewhat greater power when
dealing with clips, the timeline does support the standard Clipboard
operations cut, copy and paste, with the usual shortcut keys. The Clipboard
also provides the only method for moving and copying transitions and
effects between clips.
From the Library
After selecting one or more clips in the Library, select Copy from the
Ctrl
selection’s context menu or press
application’s Clipboard. (Cut, the other usual command for adding to the
Clipboard, is not available in the Library.)
On the project timeline, position the play line at the point where the paste
operation should begin, and select the desired track by clicking in its
header.
+C to put the selection on the
Now press Ctrl
track, starting at the play line.
If you select Paste from the timeline’s context menu rather than pressing
Ctrl
+V, the clips will be pasted at the mouse pointer position on the default
track, not at the play line.
You can rep eat the paste operation with the same set of clips as often as
desired.
+V to insert the clips from the Clipboard onto the given
From the timeline
Select one or more clips on the timeline, then click either Copy or Cut on
the selection’s context menu, or press
commands add the clips to the Clipboard; Cut removes the original clips
from the project, while Copy leaves them in place.
Paste the Clipboard contents onto the timeline as described above. The clips
paste onto the same tracks as they originally occupied; and with the same
horizontal spacing. Unlike drag-and-drop, the Clipboard does not support
moving clips between tracks.
64 Avid Studio
Ctrl+C ( copy) or Ctrl
+X (cut). Both
Page 77

Effects on the Clipboard
Clips to which effects have been added have a magenta line along the upper
edge. Right-click the line to access the Effect context menu, which provides
Cut all and Copy all commands for transferring or sharing a set of effects
Ctrl
between clips. Select one or more target clips, then press
Paste on the timeline context menu.
The effects stack will be pasted to all selected clips. The target clips retain
any effects they may already have had. The pasted effects stack will be
placed on top of the existing effects.
+V or click
Transitions on the Clipboard
Right-click in the transition area in the upper corner at the start or end of a
clip to access the Transition context menu. Select Cut or Copy to put the
transition on the Clipboard.
As with effects, transitions can be pasted to one or more target clips, but
any existing transition of the type (start or end) being pasted will be
overwritten. The paste fails if the duration of the transition on the Clipboard
is longer than the target clip.
Speed
The Speed Control window is launched by selecting Speed Add or Speed
Edit in the context menu of a timeline video or audio clip. You can adjust
the settings to produce any degree of slow motion or fast motion over a
wide range.
The actual playback speed of your project always remains the same. It is set
once and for all by the frames per second rate in your project settings. To
achieve slow motion, new frames are interpolated between the original
ones; for fast motion, some source frames are suppressed.
The options provided on the dialog are divided into several groups.
Constant
Select the clip playback speed as a value from 10 to 500 percent relative to
the original material. Anything under 100 percent is slow motion.
Chapter 3: The Movie Editor 65
Page 78

Anchor: When Constant is selected, the clip is anchored to the timeline by
a specified frame during trimming operations. You can choose the first or
last frame of the clip, or the frame indicated by the current position of the
play line, to serve as the anchor. This can be useful for coordinating action
between the speed-affected clip and material such as background music on
other tracks.
Stretch
Under this option, the first and last frames of the clip as currently trimmed
will remain locked when the clip is trimmed on the timeline. Shortening the
clip, instead of trimming material from the end, speeds it up just enough so
that it finishes at the same frame as before. Lengthening the clip by
trimming its end rightwards slows it down rather than exposing any
trimmed material.
Video
Reverse reverses the direction of playback without affecting the speed.
Synchronous audio, if any, is suppressed with this option, since it is
generally undesirable to play sound backwards.
The Speed Control window
66 Avid Studio
Page 79

Smooth motion: This option applies a special transition technique to
achieve maximum fluidity of movement from frame to frame.
Audio
Hold pitch: This option maintains the original pitch of the recorded audio
even when it is played back accelerated or slowed. The function becomes
less effective the more the speed is changed. Beyond certain limits, it is
switched off completely.
Movies within movies
All the movie projects that you create in Avid Studio appear as assets in the
Projects branch of the Library. But the purpose of Library assets is to serve
as the ingredients of movies. What will happen if you try to drag Movie
Project A onto the timeline of Movie Project B?
The answer is simple enough: As with most types of assets, Project A
becomes a single clip on Project B’s timeline. From the standpoint of
timeline editing, it behaves just like any of your other video assets. You can
trim it, move it around, apply effects and transitions, and so on. (The same
is not true of disc projects. These cannot be used as clips in another
project.)
Nevertheless, a copy of the internal structure of Project A remains intact
inside this container clip, along with all of the project’s clips, effects, titles
and other components. What’s more, if you double-click the container clip
or select Edit movie from its context menu, a subsidiary Movie Editor
opens in a new window to let you work on the ‘sub-movie’. Any
modifications you make affect only the copy of the project inside the
container clip, not the original.
The length of the container clip on the timeline of the main project is not
tied to the length of the sub-movie on its own timeline. Extending or
shortening the sub-movie in the nested editor does not alter the length of the
container clip in the parent movie. You need to manually trim the container
clip if you want it to match the duration of the sub-movie.
Chapter 3: The Movie Editor 67
Page 80

Transitions
A transition is a specialized animated effect for easing – or emphasizing –
the passage from one clip to the next. Fades, wipes and dissolves are
common types of transition. Others are more exotic, and many employ
sophisticated 3-D geometry to calculate the animated sequences.
Creating a default fade-in transition by
‘folding back’ a clip’s upper left corner.
Two transitions can be assigned to any clip, one at each end. A clip newly
created on the timeline has neither. When a new clip starts, it does so with a
hard cut to the first frame. When it ends, it switches to the next clip (or
black) with equal abruptness.
Avid Studio offers a wide variety of transitions for softening, dressing up or
dramatizing the change from one clip to another.
Creating a transition
The most straightforward method of creating a transition is to click in the
top left corner of the clip and ‘fold back’ the corner. This creates a fade-in.
The wider you make the fold, the longer it will take the transition to
complete. A fade-out results from the corresponding operation on the top
right corner of the clip.
A transition dragged to the project timeline.
68 Avid Studio
Page 81

Transitions can also be added to the timeline from their section of the
Library (under Creative Elements). When you find one you want, drag it
onto a timeline clip. If you drag the transition onto the start or end of the
clip, you can mark the length of the transition and drop it into place in a
single operation. If the clip already has a transition at the chosen end, the
dragged one replaces it.
Yet another way to apply a transition uses the Send to timeline context
menu command for assets in the Movie Editor’s compact Library view, or
the Send-to timeline button in the Player when in Source mode. The
transition is added to the clip on the default track at the play line.
Types of transitions
If magnetic snapping is on, the duration of transitions is snapped to the
default duration defined in the Avid Studio Control Panel Project settings
(one second by default). You can still drag freely to any duration outside
the snap range. See “Project settings” on page 238 for details.
A fade-out transition is applied in ripple (or insert) mode, which creates
an overlap by shifting the right-hand clip and all its neighbors somewhat to
the left. This behavior saves the left-hand clip from having to be extended
rightwards to create the transition, which might produce over-trimming.
However, shifting the rightward clips causes a break in the synchronization
with other tracks that may have to be worked around.
A fade-in transition is added in overwrite fashion. No synchronization
issue will result, but over-trimming may be produced in the left-hand clip.
Alt
To invert the fade-in and fade-out behaviors, press the
key during
dragging and trimming.
To apply a transition to multiple selected clips, hold down the
Shift key
while dragging a transition from the Library onto one of the selected clips.
The position at which you drop the transition on that clip determines
whether it will be placed at the beginning of each selected clip, or the end.
The duration you drag out for the transition on the target clip is used for all
the transitions created. The transition will not be applied to any clips that
are shorter than the transition you create.
Chapter 3: The Movie Editor 69
Page 82

To keep tracks synchronized when inserting transitions in the out position,
use this multiple-apply feature to add the same transition once on each
track. Since each track will be affected in the same way, they will all
remain synchronized.
When a fade-in follows a fade-out, the result is termed a ‘fade through
black’. The left-hand clip fades all the way out, then the right-hand clip
fades all the way in. It is not necessary to leave a one-frame gap between
the clips.
Replacing a transition
Select the transition you want and simply drag it onto an existing transition.
This replaces the transition animation while retaining the original type (in
or out) and duration.
Adjusting transitions
The durations of transitions can be adjusted just like those of clips. Notice
the adjustment pointer when the mouse is positioned near the vertical side
of the transition rectangle. Use this to change the duration of your
transition.
As usual, fade-out transitions use insert mode during adjustment, whereas
fade-in is done in overwrite mode. Hold down
this behavior.
Alt
while adjusting to invert
You can adjust a transition so that its duration is zero, effectively deleting
it. Alternatively, use Transition Remove on the transition’s context menu.
Once again, ripple mode is used for fade-out, and overwrite for fade-in,
with the
To set the duration of a transition numerically, click the duration field that
appears when the mouse pointer is above the transition rectangle. (Zoom
the timeline in to enlarge the screen width of the transition ‘fold’ if the field
does not appear.) Clicking the field activates in-place editing, allowing you
to enter a duration via the keyboard.
Alt
key available to reverse the default.
Transition context menu
Edit: This command invokes a pop-up window, the basic transition editor,
where the transition duration can be set.
If the transition is one that offers a custom editor for configuring special
properties, the Edit button in the basic transition editor provide s acc es s.
70 Avid Studio
Page 83

A Reverse checkbox is available with some transitions for reversing the
transition animation.
Basic transition editor
Copy: This comman d puts the transition on the Clipboard, together with its
type (fade-in, fade-out) and its duration. These proper ties will be retained
by the transition when pasted. It is therefore no t possible to paste a fade-in
as a fade-out or vice versa.
To paste the transition to a particular clip, select Paste on its context menu.
To paste the transition to all selected clips, selec t Paste from the context
menu of either an empty timeline area or any selected clip; or just press
Ctrl
+V.
Remove: This command deletes a transition. Fade-in transitions are
removed without further ado. Removing a fade-out transition causes clips to
the right to be rippled further rightwards by the duration of the transition.
This can cause loss of synchronization with other tracks.
Clip effects
Clip effects (also called filters or video effects) operate on one clip at a
time. Effects are of many kinds, and vary widely in purpose. With
keyframing, effect parameters can be arbitrarily varied throughout the clip.
To apply a specific effect to a clip, either locate it in the Effects section of
the Library and drag it to the clip you want to enhance, or double-click the
clip and select the effect from those offered under the Effects tab of the
clip’s media editor.
Chapter 3: The Movie Editor 71
Page 84

Multiple effects can be applied to a clip using either or both of these
methods. By default, multiple effects are processed for playback in the
order they were added.
On the timeline, the upper border of any clip to which an effect has been
applied is drawn in magenta. This clip effect indicator has its own context
menu, which provides the Clipboard commands for cutting and copying
effects between clips. See “Using the Clipboard” on page 64 for more
information.
Double-clicking any clip opens it in its media editor, where effects may be
added, removed or configured. Please see Chapter 5: Media editing: Effects
for detailed information.
Clip context menus
Right-clicking a clip opens a context menu with commands appropriate to
the item type. A video clip has a different menu than a title clip, for
example. Some commands are shared between most or all types however.
Differences of applicability are noted in the following descriptions.
Edit movie: Available only for movie (container) clips, this command
opens the container in its own movie editor. The nested editor offers the
same functions and areas as the primary one.
Edit title: For titles only, this opens the Title Editor. (See page 117).
Edit music: This command is for editing Scorefitter clips. (See page 164.)
Edit montage: Edit a montage clip in the Montage editor. (See page 115).
Open effects editor: Opens the media editor for the clip, whatever its type,
with the Effects tab selected. Montage, title and container clips are treated
in the same manner as ordinary video clips.
Speed: This command opens the Speed Control dialog, where you can
apply fast and slow motion effects to selected clips. This option is not
available for containers. See “Speed” on page 65.
Scaling: The first two options affect the treatment of clips that are not in
conformance with the current timeline format when brought into the
project. See “Timeline toolbar” on page 43).
• Fit displays the image at its correct aspect ratio, and scaled as large as
possible without cropping. Unused parts of the frame are treated as
transparent.
72 Avid Studio
Page 85

• Fill also maintains the aspect ratio of the image, but scales it such that
there are no unused parts of the screen. Portions of the image will be
cropped if the aspect ratios do not match.
To further fine-tune the scaling behavior of a clip, try pan-and-zoom.
• Keep alpha, Remove alpha, Generate alpha: These commands apply to
content with an alpha channel (specifying transparency pixel-by-pixel).
Such alpha information can conflict with Avid Studio effects. The
command isn’t available for pure audio clips.
Active streams: This command is available for disabling individual
streams in clips containing both video and audio. It is typically used as an
easy way to discard unneeded camera audio.
Adjust duration: Enter a duration numerically in the pop-up window. A ll
selected clips will be trimmed to the duration requested by adjusting their
out points.
Detach audio: In clips with both video and audio, this command detaches
the audio stream into a separate clip on a separate track, allowing advanced
editing operations like L-cuts.
Find source: This command opens the Library Browser at the folder
containing the asset that is the source of the video, photo or audio clip.
Cut, Copy, Paste: Move or copy a selection of clips using Clipboard
commands instead of drag-and-drop.
Delete: Delete the selected clip or clips.
Display information: Display properties of the clip and underlying media
files in textual form.
Chapter 3: The Movie Editor 73
Page 86

Page 87

CHAPTER 4:
Media editing: Corrections
Avid Studio provides media editors for each of the three main media types:
video, photos (and other images), and audio. The usual way to access one
of these editors is by double-clicking either a media asset in the Library or a
media clip on your project timeline.
All three editors provide two main families of tools, called Corrections and
Effects. These are presented as tabs at the top of the editor window. (The
Photo Editor has a third tab, for the Pan-and-zoom tool.)
The six groups under the Effects family in the Video Editor. When an
editor is invoked from the Library, the Effects tab does not appear.
The tools in the Corrections family are designed to fix imperfections in the
video, photos and other media that you use in your projects. The defects
addressed by the tools are those most frequently encountered in recorded
media. You can straighten a photo with a tilted horizon, improve the clarity
of a muffled music track, or correct the ‘white balance’ of a video scene, to
name just a few possibilities.
The application of Corrections does not modify your media files
themselves. Instead, the parameters you set are stored either in the Library
database (associated with a particular asset) or in a project (associated with
a particular clip).
Chapter 4: Media editing: Corrections 75
Page 88

Correcting Library assets
Just one tool-family tab – Corrections – is available for use when you bring
Library assets into a media editor. The Effects tab, and Pan-and-zoom for
photos, appear only when the editor was opened to work on a timeline clip.
Using corrected assets: When you apply Corrections to a Library asset, the
correction settings ride along with the asset when you add it to a project.
All future projects get the benefit of the correction. You can make further
corrections on the timeline, if you want, but they will have no effect on the
Library asset.
Save alternative corrections: Corrected Library assets can optionally be
saved (with File Save as) as independent asset files. This lets you have
two (or more) variations of a particular asset under different names, each
incorporating a different set of corrections.
Removing corrections: The context menu for Library assets that have
corrections includes a Revert to original command for restoring the
uncorrected state.
Corrections under direct export: If you choose to export Library media
directly, rather than build a project on the movie or disc timelines, the
correction settings are applied to the output.
Correcting timeline clips
When a clip from the Movie Editor or the Disc Editor timeline is opened in
one of the media editors, you can use the Corrections family of tools to
change it in any way you like without affecting either Library assets or
other clips. Such changes to the clip become part of your project.
If you want to remove corrections from a clip on the timeline, select the
context menu command Open Effects Editor, then switch to the Corrections
tool. The settings panels indicate with highlighting which settings have
been modified. Use this to locate and reset the corrections.
For details on using a particular media editor, please turn to “Correcting
photos” on page 81; “Correcting video” on page 86; or “Correcting audio”
on page 90.
76 Avid Studio
Page 89

Media editing overview
The media editors can be opened to access the available tools in a number
of ways from both the Library and the project timeline.
To open from the Library:
• Double-click the icon or text record of a video, photo or audio asset; or,
• Select the Open in corrections command from the asset’s context menu.
To open from the Library Player:
• After clicking the play button on a Library item to open the Library
Player, click the gear wheel icon at bottom right.
To open from the project timeline:
• Double-click the clip in the timeline; or,
• Select the Open effects editor command from the clip’s context menu;
or,
• Use the context menu Effect Edit on the colored strip that appears
along the upper edge of clips to which any effects have been applied.
To close the media editor window:
• Click the Cancel button; or,
• Click the close (X) button in the upper right corner. If you have made
changes, you will be given a chance to save them.
• Click the OK button.
Previewing
The central panel in each of the media editors is either a visual preview of
media showing the result of applying corrections and effects, or an audio
visualization.
When video media with an integral soundtrack is
being edited, both the Audio Editor and the Video
Editor are simultaneously available via tabs at the top left of the window.
Chapter 4: Media editing: Corrections 77
Page 90

Title bar
File and Edit menus: If you invoked the media editor from the Library, the
File menu offers the ability to save a new copy (or ‘Shortcut’) of the
currently-loaded asset. Shortcuts are stored back to the Library und er the
original name plus a sequence number. The Edit menu offers the standard
editing commands for Undo / Redo, as well as Cut, Copy, Paste.
Undo/Redo: At the upper left of the window, beside the
menus, the graphical undo and redo buttons let you step
forward and back through your editing history.
Working with the Enhance group of corrections in the Video Editor.
The Navigator
The Navigator strip at the bottom of all media editor windows gives you an
opportunity to load other Library items or other timeline clips.
When called from the Library, the Navigator strip at the bottom of the
media editor lets you ac c e ss other assets on display in the Library.
The current item is highlighted. You can switch to editing a different ite m
by clicking a different element in the Navigator, using the arrows at right
and left to assist scrolling if required. When you do so, any changes made
to the currently-loaded item are automatically saved, as though you had
clicked the OK button.
78 Avid Studio
Page 91

You can hide the Navigator by clicking its button at the bottom of
the media editor window.
View options
Sharing the bottom toolbar with the Navigator button is a series of viewrelated buttons.
Solo: This button is available only if the media editor is selected
from the project timeline. While it is highlighted, the current clip
in the Navigator is shown in isolation when previewed, without taking into
account the effect of any clips either above or below it on the timeline.
While the button is not highlighted, all timeline tracks can contribute to the
preview.
Zoom: The scroll bar at the far right of the toolbar provides continuous
scaling of the preview image.
Preview zoom options: Fit adjusts the size of the preview so that
the height and width of the image do not exceed the available
space even when all tools are open. Fill utilizes the entire available working
area, including under the settings panel and ruler. Actual size (1:1) displays
the image at the original size of the source.
Full screen: When active, this button scales the preview image to
the size of the current monitor and removes other tools from view.
Esc
To exit the full screen mode, press
top right of the window.
, or use the close (X) button at the
Before-and-after view: This button appears for photo media only.
For details, see “Before-and-after” on page
81.
Magnifier zoom
Unless an effect or correction tool is active, the mouse pointer is a
Alt
magnifying glass icon. With this pointer, a simple click enlarges,
reduces, and double-click toggles between Fit (see “Preview zoom options”
above) and the current sc a l ing.
-click
Moving the preview in the window
The preview image can be dragged with the mouse anywhere within the
working area. This is useful for scanning the image while it is zoomed in.
The wave visualization in the Audio Editor is not draggable, however.
Chapter 4: Media editing: Corrections 79
Page 92

Info and captions
The Info button at the bottom left of any media editor opens a window
with information about the current file.
The Caption field, which is available only when you invoke the media
editor from the Library, allows you to rename the current asset.
The settings panel
When you select an effect or tool that has adjustable settings, a panel
appears in the upper-right section of the window.
The settings panel lets you adjust the available settings for a correction
or effect. Here the settings for the Enhance group of photo corrections
are displayed.
Setting numeric values: Numeric settings fields have a gray slider bar
within a darker gray field. Click once within this field to put it into n umeric
input mode, where you can type the desired value for the parameter.
Alternatively, drag the slider bar to the left or right using the mouse.
Double-clicking restores the default value.
Comparing parameter sets: A highlighted (orange) dot appears to the
right of the field when the value of a setting is changed from the default.
80 Avid Studio
Page 93

Thereafter, clicking the dot toggles between the default and the most recent
non-default values. The dot to the right of the effect or correction name
toggles between the default and custom values of all parameters.
Linked parameters: Some parameters are configured to change in lockstep. The presence of a lock symbol indicates this. Click the symbol to
toggle the link.
CORRECTING PHOTOS
For information about opening the Photo Editor to access the correction
tools, along with general functions of the media editors, please see “Media
editing overview” on pa ge 77.
Photo editing tools
These tools are located on the bottom bar of the Photo Editor. They are
available for photos and other graphic images loaded from the Library only.
Images opened from the project timeline do not have access to them.
Image rotation
Two rotary arrow icons are located to the left below the
image preview. Click the icons to rotate a Library image
either clockwise or counterclockwise in 9 0-degree increments.
Rotation is only available in the Photo Editor when a photo is opened from
the Library. Clips opened from the project timeline can be rotated using the
2D Editor effect.
Before-and-after
When editing photos you can directly compare the original against
the corrected version. The three available views can be accessed b y
the arrow at the right of the button.
Chapter 4: Media editing: Corrections 81
Page 94

Split image: The lower half of the preview displays the corrections. You
can adjust the vertical position of the dividing line by dragging the center
portion of the line up or down with the mouse. You can also divide the
image diagonally by grabbing the line on either side and rotating.
Full image side-by-side: The right image shows the corrections.
Full image above and below: The lower image shows the corrections.
Photo corrections
The Corrections within the Photo Editor are Enhance, Crop, Straighten and
Red-Eye.
Enhance photos
This area includes tools for fixing problems to do with color and
illumination.
Contrast
This control increases the difference between the light and dark areas of an
image. Boos ting the con tras t may enliven a d ull photograph, although at the
risk of losing definition in areas that are already very bright or very dark.
Temperature
The color temperature control changes the color composition of an image
to make it seem ‘warmer’ or ‘cooler’. Indoor lighting such as a tungsten
bulb or candlelight is perceived as warm, while daylight, especially shade,
is perceived as cold. Using the temperature control primarily changes the
yellow and blue values in an image, with little effect on green and magenta.
Brightness
This control functions like the brightness button on a television . It impacts
the light and dark areas of the image equally. For finer control in brightness
editing, use Selective Brightness instead.
82 Avid Studio
Page 95

Saturation
This control regulates the color intensity of an image. Increasing the value
pumps up the colors, making them more vivid, or even lurid. Decreasing
the value drains the image of color until at zero only shades of gray remain.
For finer control of saturation, use Selective Saturation instead.
White balance
Poor white balance is detected when supposedly white areas of an image
bear a slight tint or color cast. To correct this, you adjust the image
spectrum with two controls.
Gray-scale picker: Activate the picker and click in a nominally white or
gray area of the image, where no coloration ought to be present.
Color circle: Slide the control point from the center of the color field until
the undesired tint is removed from the image.
Selective brightness
To enable you to edit particular brightness zones in an image without
impacting others, five separate brightness controls are provided:
Blacks: This slider affects only the darkest areas in the image. For best
results, leave editing both Blacks and Whites until last.
Fill light: Increasing this slider may produce better detail in shadowy (but
not black) areas of a full-contrast photograph.
Midrange: The zone impacted by this slider includes the entire medium
range of illumination.
Highlights: This slider affects the bright locations in the image. It can be
used to mute areas overexposed due to flashes, reflections or brilliant
sunshine.
Whites: This slider impacts the parts of the image that are considered
‘white’. Edit Whites and Blacks last.
Selective saturation
Whereas the standard Saturation correction increases color saturation
equally across the entire spectrum, Selective saturation allows for
individually boosting or suppressing the primary and secondary colors. For
example, if blue appears to be too strong, it can be turned down while other
colors retain their intensity.
Chapter 4: Media editing: Corrections 83
Page 96

Advanced
This panel of additional controls provides a number of useful functions.
Exposure: This simulates the effect that would have been produced by
increasing or decreasing the image exposure (the total amount of light used
to create a photograph).
Soft clipping: Soft clipping attempts to recov er lost detail at the top and
bottom of the luminance range and at the top of the saturation range by
reducing extreme highlights, blacks and saturation.
Blend with original: This slider mixes the original image (in its initial
position) with the changed one (0 to 100%).
CCIR Limits: This setting limits the color values used in the image to the
range for TV video signals permitted by the CCIR (Comité Consultatif
International des Radiocommunication).
Show info: Check this box to display various histogram representations of
the image data.
Crop
Use this tool to emphasize a specific section in an image, or to remove
undesired components.
Cropping an image.
Bounding box (cropping frame): After you select the cropping tool, a
resizable frame is placed over the image. Drag the sides and corners of the
frame to crop the image, or drag the center of the bounding box after
cropping to adjust its position.
84 Avid Studio
Page 97

Aspect ratio: The Aspect ratio dropdown on the control bar can be use to
ensure that the crop rectangle maintains a desired standard proportion while
being resized. Standard (4:3) and wide (16:9) frame aspect ratios are
supported.
Preview: This function displays the cropped image without the surrounding
Esc
material. Press
or click the image to return to the editing view.
Clear, Cancel and Apply: Clear returns the bounding box to its original
dimensions; Cancel closes without saving any edits made; Apply saves the
changed image without exiting the editor.
Straighten
This correection enables you to straighten an image in which elements that
should be exactly horizontal or vertical are visibly tilted. Unless you have
cropped the image, it dynamically resizes as you rotate to keep the corners
from being visibly cut off. With a cropped image, no resizing takes place as
long as there is sufficient excess material to fill in the empty corners.
Ready to straighten an image (with crosshairs).
Several functions pertaining to Straighten are provided on the toolbar
below the preview.
Guide line options: The two buttons at the far left of the toolbar set the
mode for the lines that are superimposed on the preview as a guide to
straightening. Selecting either button deselects the other. The Crosshairs
(leftmost) button adds a pair of crossed lines that can be dragged with the
mouse to serve as a reference for true vertical and horizontal alignment
anywhere in the image. The Grid button produces a fixed, repeating grid
pattern over the entire image.
Chapter 4: Media editing: Corrections 85
Page 98

Set angle: To set the degree of rotation you can either use the slider on the
toolbar below the image, or click and hold the left mouse button while
dragging over the image. Rotations up to 20 degrees in either direction are
supported.
Clear, Cancel and Apply: Clear sets the image back to its original state ;
Cancel closes without saving any edits made; Apply saves the changed
image without exiting the editor.
Red-eye
This tool corrects the red-eye effect that often occurs in flash photography
when the subject’s gaze is towards the camera. Mark the area around both
red eyes with the mouse. Extreme precision shouldn’t be necessary, but you
can experiment with changing the area slightly if you are dissatisfied with
the correction.
Clear, Cancel and Apply: Clear sets the image back to its original state ;
Cancel closes without saving any edits made; Apply saves the changed
image without exiting the editor.
CORRECTING VIDEO
For information about opening the Video Editor to access the correction
tools, along with general functions of the media editors, please see “Media
editing overview” on pa ge 77.
Like the other media editors, the Video Editor has a central preview
display, and an area at right for correction and effect settings. If the video
includes an audio track, floating panels for audio management will also
appear. These are positioned originally at upper left, but you can drag them
to new docking positio ns o n e i ther side of the window.
Video / audio switch
If an audio track is present, a tab is provided at the
top left of the screen for switching to the Audio
Editor. For details on the controls available when the Audio tab is selected,
please turn to “The Audio Editor” on page 147.
86 Avid Studio
Page 99

Waveform display
This floating panel shows a section of the audio
volume graph over the span of the video. The region
of the waveform that is shown is centered on the
current playback posi t ion.
When you switch to the Audio Editor, you will see
a video preview panel at the same screen location. See “The Audio Editor”
on page 147.
Video tools
These tools are located on the timeline toolbar below the Video Editor
preview. At the left are the marker controls described on page 88. The
remaining controls are devoted to previewing and trimming the media.
Shuttle: The shuttle wheel provides smooth, bidirectional control over a
range of speeds when browsing video or audio. Both media types can be
viewed at a reduced speed. Shortcuts J
and each of these in combination with the
easy scrubbing and shuttling from the keyboard also.
(reverse), K (pause), L (forward),
Shift
key (for slow play), allow
Transport controls: The oval arrow icon activates loop playback. The
remaining controls are (from left to right): Jump backward, Frame
backward, Play, Frame forward, Jump forward.
Audio monitor: The loudspeaker icon sets the system playback volume but
does not affect the recorded audio level. Click once on the loudspeaker to
mute, or click on the slider to the right of the icon to adjust monitoring
volume. To set the playback level of the clip itself, u se the channel mixer.
See “Channel mixer” on page 148.
Time-code displays: The left field indicates the duration of the media as
trimmed. The right field displays the current play position. For a Library
asset, the play position is relative to the start of the media. For a timeline
clip, the play position within the project is given.
Setting the position numerically: Click the right-hand time-code field for
the position and enter a position in ‘hh:mm:ss.xxx’ format. When you press
Enter, the play line jumps to the specified location if that position is present
on the clip. Press
Chapter 4: Media editing: Corrections 87
Esc to undo the change and exit the input mode.
Page 100

Asset trimming: For Library assets, the orange calipers at either end of the
time-ruler let you choose your own entry and exit points for playback.
Doing so establishes the clip endpoints when the asset is used in a project.
Ruler: The time-ruler displays a scale whose gradations depend on the
current zoom factor. If you click anywhere on this ruler, the play line (see
below) jumps to this position.
Play line: This red line, with its handle the scrubber, is synchronized with
the image currently displayed (for video) and also with the red line shown
on the waveform display (for audio). You can position it arbitrarily by
clicking and dragging the s c rubber, or by dragging within the waveform.
Scroll bar and zoom: By dragging the double lines at the end of the scroll
bar to the right and left, you change the zoom level of the display. When the
bar becomes smaller, the scroll bar can be moved back and forth as a
whole, enabling you to zoom into an audio clip’s waveform or scrub with
extra precision. Double-click the scroll bar to return it to the full width of
the clip. You can also zoom in and out by dragging left and right on the
ruler area.
Markers
Markers are visual reference points that can be set on the time-ruler to
identify changes of scene or other editing cues.
The Marker Panel
Setting and moving markers: Position the play line at the location where
the marker should be set. Click the toggle marker button at the left of the
toolbar, or press M
88 Avid Studio
. Only one marker may be set per frame.
 Loading...