

Page 1

Handbook
Page 2

Edition 6.1
September 2009
Handbook written by Tom Clarke and Daniel Spreadbury.
See the About Sibelius dialog for a full list of the software development team and other credits.
We would like to thank all those (too numerous to list) who have provided helpful comments and
suggestions for Sibelius and its documentation.
Please email any suggestions for improvements to this Handbook to docs@sibelius.com (but please
do not use this address for suggestions or queries about the Sibelius program itself – see the separate
Latest information & technical help sheet for the correct address for your country).
This product is subject to the terms and conditions of a software license agreement.
Sibelius copyright © Avid Technology, Inc. and its licensors 1987–2009
Sibelius Handbook copyright © Avid Technology, Inc. 1992–2009
Published by Avid Technology, Inc., The Old Toy Factory, 20–23 City North, Fonthill Road, London
N4 3HF, UK
All rights reserved. This Handbook may not be reproduced, stored in a retrieval system or transmitted in any form or by any means – electronic,
recording, mechanical, photocopying or otherwise – in whole or in part, without the prior written consent of the publisher. Although every care has been
taken in the preparation of this Reference, neither the publisher nor the authors can take responsibility for any loss or damage arising from any errors or
omissions it may contain.
Sibelius, the Sibelius logo, Scorch, Flexi-time, Espressivo, Rubato, Rhythmic feel, Arrange, ManuScript, Virtual Manuscript Paper, House Style,
SoundStage, Opus, Inkpen2, Helsinki, Reprise, magnetic, multicopy, Optical, Dynamic parts, SoundWorld, Panorama, the blue notes and double helix
logos, SibeliusMusic.com, SibeliusEducation.com, ‘The fastest, smartest, easiest way to write music’ and ‘99% inspiration, 1% perspiration’ are all trade-
marks or registered trademarks of Avid Technology, Inc. in the USA, UK and other countries. All other trademarks are acknowledged as the property of
their respective owners.
2
Page 3

Contents
Start here 5
The story of Sibelius. . . . . . . . . . . . . . . . . . . 7
About this Handbook. . . . . . . . . . . . . . . . . . 8
Before you install . . . . . . . . . . . . . . . . . . . . 11
Installing Sibelius for Windows . . . . . . . . 12
Installing Sibelius for Mac. . . . . . . . . . . . . 17
Registering Sibelius . . . . . . . . . . . . . . . . . . 21
MIDI setup for Windows . . . . . . . . . . . . . . 26
MIDI setup for Mac . . . . . . . . . . . . . . . . . . 29
About the projects . . . . . . . . . . . . . . . . . . . 32
Project 1 33
1.1 Opening a score . . . . . . . . . . . . . . . . . . 35
1.2 Editing and inputting notes . . . . . . . . 40
1.3 Selections and copying music. . . . . . . 46
1.4 Flexi-time™ input . . . . . . . . . . . . . . . . . 50
1.5 Alphabetic and step-time input . . . . . 53
1.6 Playback. . . . . . . . . . . . . . . . . . . . . . . . . 57
1.7 Text and dynamics . . . . . . . . . . . . . . . . 60
Project 2 65
2.1 Creating a new score . . . . . . . . . . . . . . 67
2.2 Scanning . . . . . . . . . . . . . . . . . . . . . . . . 71
2.3 Clefs, key signatures and tuplets . . . . 74
2.4 Marking up a score . . . . . . . . . . . . . . . . 76
2.5 Layout and formatting . . . . . . . . . . . . . 81
2.6 Dynamic parts™ . . . . . . . . . . . . . . . . . . . 85
2.7 Exporting . . . . . . . . . . . . . . . . . . . . . . . . 88
Project 3 89
3.1 Writing for keyboard. . . . . . . . . . . . . . . 91
3.2 Writing for guitar. . . . . . . . . . . . . . . . . . 93
3.3 Ideas and drum notation . . . . . . . . . . . 95
3.4 Chord symbols . . . . . . . . . . . . . . . . . . 101
3.5 Repeats and codas . . . . . . . . . . . . . . . 105
3.6 Arranging and playback . . . . . . . . . . 108
Project 4 111
4.1 Setting up a worksheet . . . . . . . . . . . 113
4.2 Scales and arpeggios . . . . . . . . . . . . . 117
4.3 Layout and formatting . . . . . . . . . . . 120
4.4 Classroom Control. . . . . . . . . . . . . . . 124
Project 5 127
5.1 Using video. . . . . . . . . . . . . . . . . . . . . 129
5.2 Writing music to picture. . . . . . . . . . 131
5.3 Adding a soundtrack to video . . . . . 134
Index 135
3
Page 4

Contents
4
Page 5

Start here
Start here
Page 6

Start here
6
Page 7

The story of Sibelius
The story of Sibelius
Twins Ben and Jonathan Finn first began work on Sibelius when they were students in 1987, and
spent six years of their spare time developing a vast range of sophisticated features, with an intuitive user interface and built-in intelligence that had never been seen in previous music programs.
In 1993, after graduating from Oxford and Cambridge Universities, the Finns started their own
company to sell the program, unsure of what to expect.
Sibelius proved to be an instant success, and over the course of the following decade the Finns’
company grew beyond all expectations, with offices in the USA, UK and Australia, and customers
in more than 100 countries worldwide.
In 2006, Sibelius was acquired by Avid, makers of Pro Tools and other industry-standard
products for digital media production and music creation, and continues to go from strength to
strength. In fact, it’s the world’s best-selling music notation software.
Who uses Sibelius?
Sibelius is designed for every kind of musician – including you! Sibelius users range from students,
teachers, schools and universities to composers, arrangers, performers, and the world’s leading
publishers. It’s perhaps a tribute to the ease of use and sophistication of Sibelius that one and the
same program is used both by elementary schools and top professionals.
Start here
It handles every kind of music, too – from early music to jazz, from rock to avant garde, from choir
to symphony orchestra.
Famous Sibelius users include conductor Michael Tilson Thomas, composer Steve Reich, choral
composer John Rutter, rock guitarist Andy Summers, jazz musician Jamie Cullum, and the Royal
Academy of Music, London. Top publishers such as Hal Leonard, Music Sales and Boosey &
Hawkes use Sibelius both for traditional publishing and to deliver music via the Internet straight to
a customer’s printer.
Sibelius has also won extraordinary acclaim including Keyboard magazine’s Key Buy award,
Electronic Musician’s Editors’ Choice award (three times), MacWorld’s 5 Star rating (twice), and an
unbeatable 10/10 score from Computer Music magazine. Sibelius 5 picked up an unprecedented
four Editor’s Choice awards from the specialist press.
7
Page 8
Start here
Boxes in Reference
You’ll find boxes like these
scattered throughout the
Reference, explaining various notation and music
engraving rules.
About this Handbook
Warning!
However much you may dislike manuals, you must read the whole of this Start here section in
order to get started with the program.
You are then very strongly advised to work through at least the first three of the five projects
contained in this Handbook before embarking on any serious work of your own with Sibelius.
Sibelius is easy to learn and mostly self-explanatory, but if you don’t work through these projects
you will run a risk of never discovering some basic features, particularly if you are used to notation
programs that work in different ways. By the time you have completed the projects – which will
take you only a few hours – you will be able to input, edit, play back and print out straightforward
music, and you’ll know how to get going on more complicated music too.
This Handbook assumes a basic understanding of how to use your computer (such as the mouse,
keyboard, menus and files).
On-screen Reference
More advanced topics are covered one by one in the Sibelius Reference, which explains
every feature in complete detail (with a Glossary of special terms). To start the onscreen Reference, click the toolbar button shown on the right, or choose Help
Documentation > Sibelius Reference (shortcut F1 or X?).
>
The Reference is not meant to be read from start to finish, because most people only use quite a
small proportion of music notation anyway. You can browse through relevant parts of Reference at
your leisure.
The Reference is also available as a printed book as an optional extra; to buy this if you don’t
already have it, go to www.sibelius.com/buy.
Typography and cross-references
Names of computer keys, menus and dialogs are written like this.
Items in menus and sub-menus are denoted with
means “choose Open from the File menu.”
b 2.1 Accidentals means “see the Accidentals topic (within Reference)”
(either on-screen by choosing Help
Reference, or by looking in the optional Reference book).
>, so “choose File > Open”
> Documentation > Sibelius
8
Page 9

About this Handbook
Basic terminology
Most of the computer terminology that follows will be understood by almost all readers, but has
been included in case one or two of the terms is unfamiliar:
* Some keys are labeled differently on different keyboards, particularly on Mac. For the purposes
of this Handbook, these are the conventions:
Mac symbol Mac name Windows equivalent
X Command Ctrl (“Control”)
x Shift Shift
z Option Alt
R Return Return (on main keyboard)
E Enter Enter (on numeric keypad)
* Sibelius is almost identical on Windows and Mac, but where there are differences, mainly in
keyboard shortcuts, the Windows convention is listed first. For more information on the
differences between Mac and Windows keyboard shortcuts,
in Reference, which lists all keyboard shortcuts available. Shortcuts are also shown in menus.
* “Type Ctrl+A or XA” means hold down the Ctrl (Windows) or X (Mac) key and type A. Even
though A is written as a capital letter, don’t type Shift unless explicitly told to do so. Similarly, for
standard shortcuts like Ctrl+? or
Ctrl+/ or
* Similarly, “Alt+click or z-click” means hold down the Alt (Windows) or z (Mac) key and click.
* On Windows, to click something means to move the mouse arrow over it and click the left mouse
X/ without using Shift.
X? where both / and ? exist on the same key, you actually type
button. To right-click something means to point at it with the mouse and click the right mouse
button.
* On Mac, to click something means to move the mouse arrow over it and click the left mouse but-
ton, if you have one; if you are using one of the older models of mouse that has only one button,
then click the mouse’s only button. To Control-click means to hold down the Control key on
your keyboard (sometimes labeled Ctrl) and click the left or only mouse button; if, however, you
have a mouse with a right mouse button, you can simply click the right mouse button instead.
* To drag something means to point at it with the mouse, and then click and hold the left mouse
button (or the only mouse button on Mac) while moving the mouse. To finish dragging, just let
go of the mouse button.
* A dialog is a window with buttons on. Some dialogs are divided into several pages and have a
pop-up combo box (Mac), labeled tabs at the top, or a list box, which you can click to switch
between pages of the dialog.
* The numeric keypad is the rectangle of numbers and other characters at the very right-hand side
of your computer keyboard. (Notebook (laptop) computers usually don’t have a separate
numeric keypad –
* “Return” is the large key to the right of the letter keys. On some keyboards it is labeled with
b 5.12 Menus and shortcuts in Reference for more information.)
“Enter” or a special arrow symbol, but we always call it Return.
* “Enter” is the large key at the bottom right of the numeric keypad. On some keyboards it is unla-
beled, but it still means Enter.
b 5.12 Menus and shortcuts
Start here
Less well-known terminology is in the Glossary at the end of Reference.
9
Page 10

Start here
American and British English
Sibelius and this Handbook use American English, but for the benefit of readers in other countries,
some non-American terms such as “crotchet” are included in parentheses.
British readers may be interested to know that in America, both “bar” and “measure” are used (so
for universality we’ve opted for “bar”), and “staff” means British “stave.” Any British readers who
are offended by the American spelling of “center,” “color” and so on will just have to use a pen to
amend the spelling in the Handbook or (less effectively) on the screen.
Suggestions
We are always happy to receive reports of errors or misprints, and suggested improvements to the
Handbook and Reference. Please email them to docs@sibelius.com.
We would also like to hear your suggestions for improvements to the Sibelius program itself; please
post these suggestions to the chat page on the Sibelius web site, or contact technical help.
10
Page 11

Before you install
Before you install
What’s in the box
Unless you have X-ray vision, you’ve already managed to open the box to get at this Handbook. You
should also find:
* Installation DVD-ROM in a plastic case. Your program’s serial number is on the back of the case,
so don’t lose it!
* A sheet entitled Latest information and technical help, with details of how to get help if
you get stuck
* Form for faxing your registration information to us – but it’s easiest to provide this information
by the Internet, explained later
* If you’ve purchased a network site license, you’ll also find a CD-ROM (in the same case as the
Sibelius DVD-ROM) and a separate booklet entitled Sibelius 6 Licence Server User Guide.
Single copies
If you have bought just a single copy of Sibelius (as opposed to a 5-pack or educational site license),
skip to Installing Sibelius for Windows (page 12) or Installing Sibelius for Mac (page 17)
as appropriate.
Start here
5-packs and stand-alone site licenses
Stand-alone site licenses let you run Sibelius on five or more non-networked computers at the
same time. If you’ve bought five copies, you will have received one installation DVD-ROM. If
you’ve bought more than five copies, you may have been sent a combination of “5-packs” (each
containing a single DVD-ROM) and single copies, or a single DVD-ROM that you can install on a
specified number of computers. If you have two or more 5-packs, use each DVD-ROM and serial
number to install on five of your computers.
Whatever size of site license you have purchased, you must install and register Sibelius on each
stand-alone machine separately, following the instructions in Installing Sibelius for Win-
dows (page 12) or Installing Sibelius for Mac (page 17). You cannot install stand-alone copies
of Sibelius onto a network or virtual disk – it must be installed on each client machine’s local hard
disk.
All copies of the site license must be installed on a single geographical site of an educational
institution. You may not install site license copies on notebooks (laptops), teachers’ home
computers or elsewhere, unless authorized by Sibelius.
If you want to use Sibelius on a network but you have bought a stand-alone site license, please contact technical help.
Network licenses
If you have bought a network site license, please refer to the enclosed Sibelius 6 Licence Server
User Guide booklet for details on installing and registering Sibelius.
11
Page 12

Start here
Installing Sibelius for Windows
Minimum hardware requirements
Minimum requirements for Sibelius 6 alone:
Windows XP 32-bit SP2 or later, Windows Vista 32-bit SP1 or later, Windows 7 32-bit or 64-bit,
512MB+ RAM, 550MB hard disk space, DVD-ROM drive
Additional recommendations for using the included Sibelius Sounds Essentials sound library:
Intel Core Duo or AMD Turion or better, 1GB+ total physical RAM (2GB recommended), 3.5GB
total hard disk space, ASIO-compatible soundcard
You can use Sibelius Sounds Essentials if your computer doesn’t meet the recommended
requirements, but you may find that you cannot use as many sounds simultaneously.
You must be running Windows XP Service Pack 2 or later to install and run Sibelius 6. If you have
Windows 95, Windows 98, Windows Me, Windows 2000 or Windows NT 4.x, you need to purchase
an upgrade to a more recent version of the Windows operating system.
How to determine if you are running Windows XP SP2 or SP3
If you have Windows XP but are unsure whether or not you have Windows XP SP2 or SP3:
* Click the Start button, then choose Run...
* Ty pe winver in the Open box, and hit Return (on the main keyboard)
* You will see a simple window, like this:
You sh ou ld see Service Pack 2 or Service Pack 3 at the end of the second line of text. If you don’t,
then you need to update: the simplest way of doing this is to download it automatically by choosing
Windows Update from the Start menu. If the computer on which you want to run Sibelius isn’t
connected to the Internet, you can obtain Windows XP Service Pack 2 on CD-ROM or via a special
download that can be burned to CD and deployed on another computer. See http://www.micro-
soft.com/windowsxp/sp2/default.mspx for more details.
Connecting MIDI devices
Before you install Sibelius, you might want to connect any external MIDI devices you plan to use –
or see
b MIDI setup for Windows on page 26.
12
Page 13

Installing Sibelius for Windows
However, you can do this at any time, so if you don’t feel like grappling with MIDI cables at the
moment, go ahead and install Sibelius now.
Administrator privileges
You must install Sibelius using a user account on your computer with administrator privileges. In
order to register Sibelius after installing it, you must either be using an administrator user account,
or be able to provide an administrator username and password when prompted.
Therefore we recommend that you install Sibelius, then after installing it, launch it and register it
as an administrator user.
After having registered the software, we recommend that you run Sibelius (like all other
applications) as a non-privileged user, to increase the security of your system.
If you’re the only person who uses your computer, or you don’t know anything about user accounts
or administrator privileges on your computer, you can safely ignore the above and install the
software as usual.
Installing Sibelius
It is traditional for software manuals to gloss over the crucial installation process, and say something like: “follow the instructions on the screen.” What this really means is that the author isn’t
quite sure what will happen next. For all he knows, the programmers might have changed the
installation procedure at the last minute.
Start here
However, we’ll go out on a limb and tell you what actually happens when installing Sibelius:
* Exit any programs that are running. It’s a particularly good idea to exit any anti-virus or anti-
spyware programs loaded automatically at start-up.
* Take the Sibelius DVD-ROM out of its case, put it (labeled side up) in the DVD-ROM drive of the
computer, and close the drive slot
* Wait for a few seconds. The DVD-ROM drive should start up and a dialog will appear on the
screen. (If there’s no sign of activity after a while, click the Start menu, choose Run and type
D:\autorun, where D is the letter of your DVD-ROM drive, then hit Return on the main key-
board.)
* On Windows Vista or Windows 7, you may see a small window called AutoPlay appear. Under
Install or run program, click Run autorun.exe.
* In the main installation window, click Install Sibelius 6 to start upgrading Sibelius
* On Windows Vista or Windows 7, your screen may now go dark and a window titled User
Account Control will appear. Click Continue to tell Windows that you are happy for the
installation to proceed.
* On Windows XP, if you do not have the Microsoft Windows Installer installed, you will be told
that it must be installed. Click Install, and wait while the Windows Installer kit is installed. This
may take a couple of minutes.
*
Similarly, if you are running Windows XP and do not have the Microsoft .NET Framework 2.0
installed, you will be told that it must be installed. Click
license agreement, click
Accept
to accept the terms of the license agreement you are shown, and
Install
, then if you are prompted to read a
then wait patiently while the .NET Framework is installed. This may take a couple of minutes.
13
Page 14

Start here
* After a few more seconds, a window appears that says Welcome to the Sibelius 6 Installation
Wizard. Click Next.
* You are given the opportunity to read the Sibelius license agreement, which is also at the end of
Reference. Choose the I accept the license agreement radio button, then click Next.
* The installer suggests a folder to install Sibelius into. Unless you have strong feelings about
where you want Sibelius to go and you know how to alter it, leave this set to the default. You’re
asked if you want to install Sibelius for Anyone who uses this computer or Only for me,
which determines whether everybody who uses your computer will see a shortcut to Sibelius on
the Desktop, or just you. We recommend you leave it on Anyone who uses this computer.
Click Next.
* It tells you you’re now ready to install Sibelius. Click Next.
* Things flash and zoom past on the screen as Sibelius is installed. This may take several minutes.
* When the installer has completed, click Finish to return to the window that first appeared when
you inserted the DVD-ROM.
Before you run Sibelius 6 for the first time, you should now consider whether to install any other
applications from the Sibelius 6 DVD-ROM.
Installing Sibelius Sounds Essentials
Sibelius Sounds Essentials is a high-quality library of sounds for use with Sibelius. To install it:
* In the main installation window, click Install Sibelius Sounds Essentials
* After a few moments, the installer will start.
* On Windows Vista or Windows 7, your screen may now go dark and a window titled User
Account Control will appear. Click Continue to tell Windows that you are happy for the
installation to proceed.
* A window appears that says Welcome to the Sibelius Sounds Essentials for Sibelius 6
Installation Wizard. Click Next.
* You are given the opportunity to read the license agreement. Choose the I accept the
agreement radio button, then click Next.
* The installer suggests a folder to install the sounds into. Unless you have strong feelings about
where you want the sounds to go and you know how to alter the location, leave this set to the
default. Click Next.
* It tells you you’re now ready to install Sibelius Sounds Essentials. Click Install.
* Things flash and zoom past on the screen as the sounds are installed. This will take several
minutes, so please be patient.
* When the installer has completed, click Finish.
Installing PhotoScore Lite
PhotoScore Lite is an application from Neuratron that allows you to scan printed music, or PDF
files downloaded from the Internet, into Sibelius and edit, transpose and print them as if you had
inputted them yourself.
Unless you have purchased PhotoScore Ultimate, you should now install PhotoScore Lite from
your Sibelius 6 DVD-ROM:
14
Page 15

Installing Sibelius for Windows
* In the main installation window, click Install PhotoScore Lite
* On Windows Vista, your screen may now go dark and a window titled User Account Control
will appear. Click Continue to tell Windows that you are happy for the installation to proceed.
* Click Next to see the license agreement for PhotoScore Lite. Read it and click Next
* You’re asked to fill in a few details: type in your Name; the Product ID field is filled in for you.
When you’ve filled in the form, click Next.
* PhotoScore Lite tells you where it will be installed; again, you can change this if you have strong
feelings about it. Otherwise, click Next.
* Click Next once more and PhotoScore Lite will be installed, then click Finish.
Installing AudioScore Lite
AudioScore Lite is an application that automatically transcribes music that you sing or play an
acoustic instrument into a microphone, so that you can send it to Sibelius for further editing.
Unless you have purchased AudioScore Ultimate, you should now install AudioScore Lite from
your Sibelius 6 DVD-ROM:
* In the main installation window, click Install AudioScore Lite
* On Windows Vista or Windows 7, your screen may now go dark and a window titled User
Account Control will appear. Click Continue to tell Windows that you are happy for the
installation to proceed.
* Click Next to see the license agreement for AudioScore Lite. Read it and click Next
* You’re asked to fill in a few details: type in your Name; the Product ID field is filled in for you.
When you’ve filled in the form, click Next.
* AudioScore Lite tells you where it will be installed; again, you can change this if you have strong
feelings about it. Otherwise, click Next.
* Click Next once more and AudioScore Lite will be installed, then click Finish.
Start here
Installing Sibelius Scorch
You should now install Scorch, the free web browser plug-in for viewing, playing, transposing and
printing Sibelius scores on the Internet:
* First, quit any web browsers that are running.
* In the main installation window, click Install Scorch
*
It may take up to a minute or longer for the Scorch installer to start: please be patient. Eventually, a
window appears that says
Click
Next.
* You are given the opportunity to read the Scorch license agreement. Read it, choose the I Agree
radio button, then click Next.
* You are prompted to choose an installation folder for Scorch. Again, simply click Next.
* It tells you you’re now ready to install Scorch. Click Next.
* On Windows Vista or Windows 7, your screen may now go dark and a window titled User
Account Control will appear. Click Continue to tell Windows that you are happy for the instal-
lation to proceed.
Welcome to the Sibelius Scorch (all browsers) Setup Wizard
.
15
Page 16

Start here
* Things flash and whizz across the screen as Scorch is installed. This only takes a few moments.
* When the installer has completed, click Close.
Reinstalling Sibelius
If you need to reinstall Sibelius, simply insert the DVD-ROM into your computer and proceed as if
you were installing Sibelius for the first time. The installer will detect that Sibelius is already
installed on your computer and show a dialog with three options: choose
then
Next
again to confirm your choice. Wait while the application is reinstalled, then click
Repair
and click
Uninstalling Sibelius
Uninstalling means taking your copy of Sibelius off your computer, probably so that you can install
it on another computer. If your copy of Sibelius becomes corrupted for some reason, you can normally just install it again in the same place without uninstalling it first – see Reinstalling
Sibelius above.
Do not attempt to move or rename the Sibelius program folder or the folder of any other program,
as the operating system doesn’t like this.
* Open Control Panel from the Start menu. Double-click Add/Remove Programs (Windows XP)
or Programs and Features (Windows Vista or Windows 7).
* If you have installed PhotoScore Lite, uninstall it first. It’s listed as Neuratron PhotoScore Lite;
select it, click Add/Remove (Windows XP) or Uninstall (Windows Vista or Windows 7), then
follow the instructions on the screen.
* If you have installed AudioScore Lite, uninstall it next. It’s listed as Neuratron AudioScore Lite;
select it, click Add/Remove (Windows XP) or Uninstall (Windows Vista or Windows 7), then
follow the instructions on the screen.
* If you have installed Sibelius Sounds Essentials, uninstall it next. It’s listed as Sibelius Sounds
Essentials for Sibelius 6; select it, click Add/Remove (Windows XP) or Uninstall (Windows
Vista or Windows 7), then follow the instructions on the screen.
* You don’t need to uninstall Scorch.
* To uninstall Sibelius itself, select Sibelius 6 in the list, and click Add/Remove (Windows XP) or
Uninstall (Windows Vista or Windows 7). Then follow the instructions on the screen.
Next
Finish
,
.
16
Page 17
Installing Sibelius for Mac
Installing Sibelius for Mac
Minimum hardware requirements
Minimum requirements for Sibelius 6 alone:
Mac OS X 10.4.11 or later, Mac OS X 10.5.7 or later, or Mac OS X 10.6, 512MB+ RAM, 550MB
hard disk space, DVD-ROM drive
Additional recommendations for using the included Sibelius Sounds Essentials sample library:
Intel Core Duo or better, 1GB+ total physical RAM (2GB recommended), 3.5GB total hard disk
space
You can use Sibelius Sounds Essentials if your computer doesn’t meet the recommended
requirements, but you may find that you cannot use as many sounds simultaneously.
If you are running a version of Mac OS X earlier than Mac OS X 10.4, you cannot install and run
Sibelius. You should upgrade Mac OS X now, although this normally incurs an upgrade fee. See
www.apple.com for details.
It is recommended that you are running the most up-to-date version of Mac OS X to use Sibelius.
Choose the Software Update pane from System Preferences to check that you are using the
latest version.
Start here
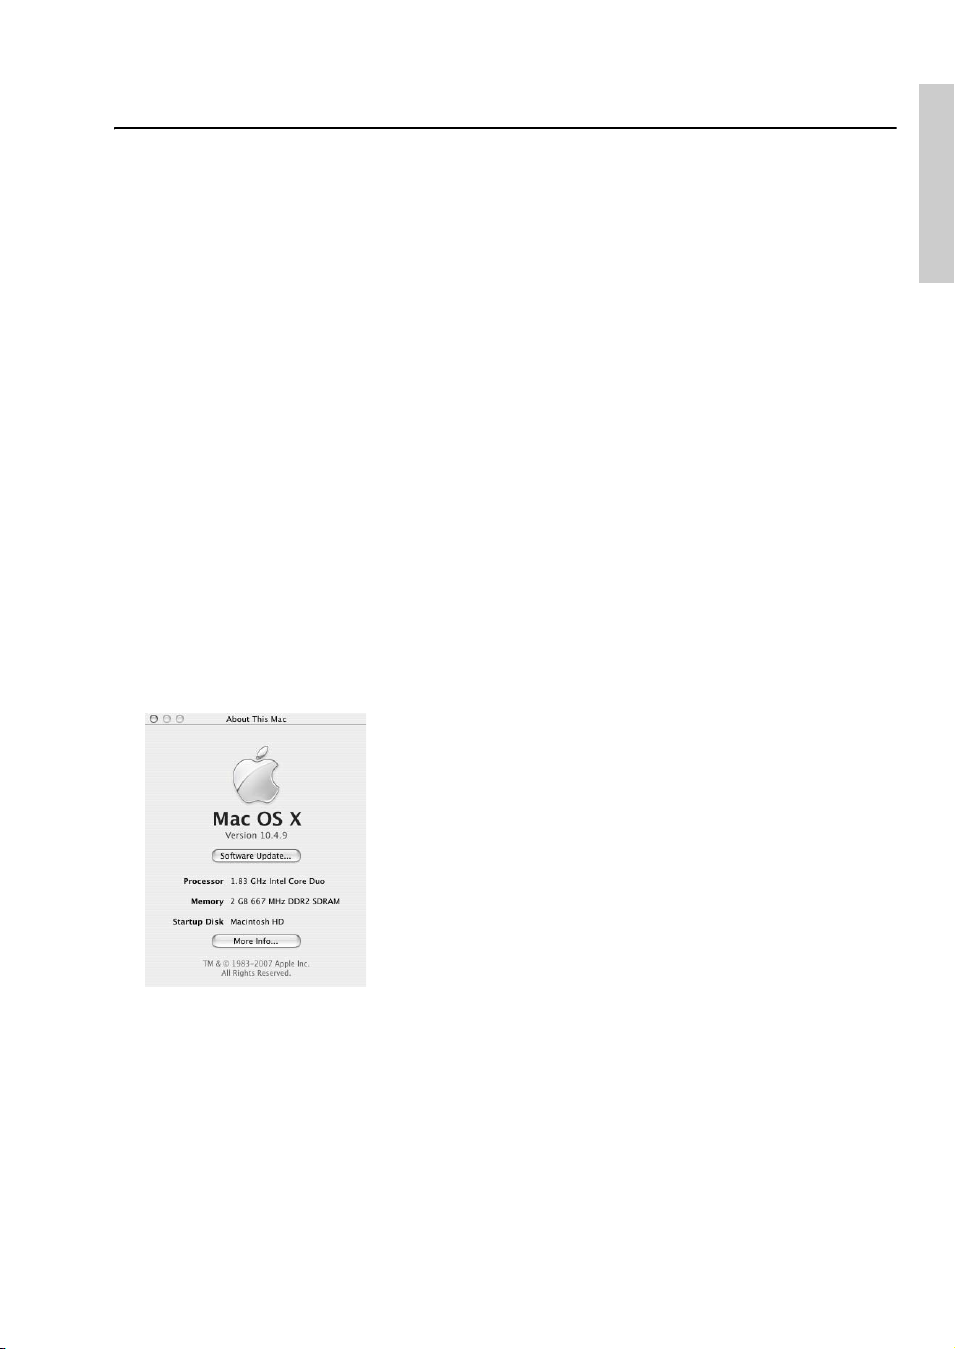
How to determine if you are running Mac OS X 10.4 Tiger or later
Choose About This Mac from the Apple menu. You will see a simple window, like this:
Just below the large text that reads Mac OS X you will see text that reads something like Version
10.4.10. Provided the first part of this number is 10.4 or greater, you are running Mac OS X 10.4
Tiger or a newer version of Mac OS X, and you can install and run Sibelius 5.
Connecting MIDI devices
Before you install Sibelius, you might want to connect any external MIDI devices you plan to use –
see MIDI setup for Mac on page 29.
However, you can do this at any time, so if you don’t feel like grappling with MIDI cables at the
moment, go ahead and install Sibelius now.
17
Page 18

Start here
Administrator privileges
In order to correctly install and register Sibelius, you must be able to provide an administrator
password when prompted.
After having registered the software, we recommend that you run Sibelius (like all other applications) as a non-privileged user, to increase the security of your system.
If you’re the only person who uses your computer, or you don’t know anything about user accounts
or administrator privileges on your computer, you can safely ignore the above and install the software as usual.
Installing Sibelius
* Take the Sibelius DVD-ROM out of its case, put it (labeled side up) in the DVD-ROM drive of the
computer, and close the drive slot.
* Wait for a few seconds. An icon for the DVD, labeled Sibelius 6, should appear on your desktop,
and a window should open automatically; if it doesn’t, double-click the Sibelius 6 icon.
* To install your upgrade, double-click the Install Sibelius 6 icon, which will start the installation
process.
* A window appears, titled Welcome to the Sibelius 6 Installer. Click Continue.
* You are given the opportunity to read the Sibelius license agreement, which is also at the end of
Reference. Read it, click Continue, then Agree.
* You are told how much space on your computer will be used by installing Sibelius 6. (If you are
reinstalling Sibelius 6, you may be told that the installation will take up almost no space on your
computer.) You have to install Sibelius on your Mac’s boot disk, so don’t click Change Install
Location: simply click Install.
* You are prompted for your administrator password: type it and click OK.
* A progress bar appears as the software is installed. This may take several minutes.
* Eventually, you will be informed that installation was successful. Click Close.
Before you run Sibelius 6 for the first time, you should now consider whether to install any other
applications from the Sibelius 6 DVD-ROM.
Installing Sibelius Sounds Essentials
Sibelius Sounds Essentials is a high-quality library of sounds for use with Sibelius. To install it:
* Double-click Install Sibelius Sounds Essentials to start the installation.
* A window appears, titled Welcome to the Sibelius Sounds Essentials for Sibelius 6
Installer. Click Continue.
* You are given the opportunity to read the license agreement. Read it, click Continue, then
Agree.
* Sibelius Sounds Essentials must be installed on your Mac’s boot disk (you can move it later, if
you want – see Moving Sibelius Sounds Essentials below), so don’t click Change Install
Location: simply click Install.
* You are prompted for your administrator password: type it and click OK.
18
Page 19

Installing Sibelius for Mac
* A progress bar appears as the software is installed. This will take several minutes, so please be
patient!
* After a few minutes, you will be informed that installation was successful. Click Close.
Installing Scorch
You should now install Sibelius Scorch (which allows you to view, play, transpose and print Sibelius
scores on the Internet):
* First, quit any web browsers that are running.
* Double-click Install Sibelius Scorch to start the installation.
* A window appears, titled Welcome to the Sibelius Scorch Installer. Click Continue.
* You are given the opportunity to read the license agreement. Read it, click Continue, then
Agree.
* Scorch must be installed on your Mac’s boot disk, so don’t click Change Install Location:
simply click Install.
* You are prompted to type your computer’s administrator password. Type it, and click OK.
* You are given the opportunity to read Scorch’s license agreement; read it, and click Accept
* On the next screen, simply click Install
* A progress bar zooms across the screen, and you’re then told that installation was successful.
Click Close.
Start here
Installing PhotoScore Lite
PhotoScore Lite is an application from Neuratron that allows you to scan printed music, or PDF
files downloaded from the Internet, into Sibelius and edit, transpose and print them as if you had
inputted them yourself.
Unless you have purchased PhotoScore Ultimate, you should now install PhotoScore Lite from
your Sibelius 6 DVD-ROM:
* Double-click Install PhotoScore Lite to start the installation.
* A window appears, titled Welcome to the PhotoScore Lite Installer. Click Continue.
* You are shown PhotoScore Lite’s license agreement; read it, click Continue, then Agree
* On the next screen, simply click Install
* You are prompted to type your computer’s administrator password. Type it, and click OK.
* A progress bar zooms across the screen, and you’re then told that installation was successful.
Click Close.
Installing AudioScore Lite
AudioScore Lite is an application that automatically transcribes music that you sing or play an
acoustic instrument into a microphone, so that you can send it to Sibelius for further editing.
Unless you have purchased AudioScore Ultimate, you should now install AudioScore Lite from
your Sibelius 6 DVD-ROM:
* Double-click Install AudioScore Lite to start the installation.
* A window appears, titled Welcome to the AudioScore Lite Installer. Click Continue.
19
Page 20

Start here
* You are shown AudioScore Lite’s license agreement; read it, click Continue, then Agree
* On the next screen, choose your Mac’s boot disk, then click Continue
* You are told how much disk space the installation will use: click Install.
* You are prompted to type your computer’s administrator password. Type it, and click OK.
* A progress bar zooms across the screen, and you’re then told that installation was successful.
Click Close.
Reinstalling Sibelius
If you need to reinstall Sibelius for any reason:
* First, drag the existing Sibelius 6 application icon from your Applications folder to the Trash
* You may also want to trash the Sibelius 6 preferences file, which is in both Users/username/
Library/Preferences and /Library/Preferences, called com.sibelius.sibelius6.plist
* Insert the Sibelius 6 DVD-ROM into your computer, then follow the instructions for Installing
Sibelius above.
Uninstalling Sibelius
Uninstalling means taking your copy of Sibelius off your computer, probably so that you can install
it on another computer. If your copy of Sibelius becomes corrupted for some reason, you can normally just install it again in the same place – see Reinstalling Sibelius above.
To uninstall Sibelius for Mac, simply drag the Sibelius 6 icon from your Applications folder to
the trash. Likewise, to uninstall PhotoScore Lite or AudioScore Lite, just drag the PhotoScore Lite
or AudioScore Lite icon to the trash.
What next?
Now turn to Registering Sibelius on page 21.
Moving Sibelius Sounds Essentials
To move Sibelius Sounds Essentials to another volume, e.g. an external hard disk, after installation:
* Quit Sibelius, if it is running.
* In the Finder, go to /Library/Application Support/Sibelius Software/Sibelius Sounds.
* You will see at least two folders: Essentials for Sibelius 6 and Libraries.
* Drag the Essentials for Sibelius 6 folder to your preferred location. Do not move the Libraries
folder.
* Run Sibelius again: you will be told that Sibelius is unable to find the Essentials sound library.
Click Yes to choose the new location, then click Choose. You will be prompted for your
administrator password, so provide it and click OK.
20
Page 21

Registering Sibelius
Registering Sibelius
You should register your copy of Sibelius in the first week or two of using it. This is quick and easy
to do, and once you have registered, you will be eligible for technical help, future upgrades, and
access to online support via the Sibelius web site (www.sibelius.com).
To protect us against piracy, and to protect you against having your software stolen, unregistered
copies of Sibelius will not save. But so you can use Sibelius before you get around to registering it,
you will be able to save for the first 15 days without registering.
If you don’t register Sibelius in the first 15 days, saving will be temporarily disabled. When you
subsequently get round to registering, it will be re-enabled. (Please don’t try altering your computer’s date or reinstalling Sibelius in order to extend the 15 days; this will not work and will
instead cause saving to be disabled until you register.)
Running Sibelius on more than one computer
If (and only if) you have a single-user copy of Sibelius, you can install and register Sibelius on two
computers for your own personal and exclusive use. Both copies of Sibelius must be used only by
you, and they may not be used simultaneously. To register Sibelius on a second computer, simply
follow the instructions under Registering on the Internet below.
If you later need to install Sibelius on a new computer, you can move one of your copies to your
new machine, as long as you never have more than two registered copies of Sibelius at any given
time. To do this, see Moving Sibelius to another computer below.
Start here
Registering 5-pack and site licenses
You can register educational 5-pack and site license copies of Sibelius in exactly the same way as a
single copy, so follow the instructions in Registering on the Internet below. You will only
need to fill in your details when you register the first copy (unless you have more than one Sibelius
installation DVD-ROM and serial number).
Registering network licenses
You cannot register network copies of Sibelius over the Internet; you must contact Sibelius by
phone, fax or email to register. Consult the separate Sibelius 6 Licence Server User Guide booklet
for further details.
Registering on the Internet
Sibelius will prompt you to register each time you run it, but you might as well get it out of the way
now. Run Sibelius 6 either by double-clicking the Sibelius 6 icon on your desktop (Windows) or in
your Applications folder (Mac). Then the following will happen:
*
You are told that Sibelius 6 must be run for the first time using an administrator account; click OK:
% On Windows Vista, your screen may now go dark and a window titled User Account
Control will appear. Click Continue to tell Windows that you are happy to proceed, or enter
an administrator password if prompted.
% On Windows XP, you may be prompted for an administrator password, in which case enter it.
% On Mac, you will be prompted for your administrator password: type it and click OK.
21
Page 22

Start here
* Now you are asked to enter your Sibelius serial number. You will find this printed on a label on
the CD case that your copy of Sibelius came in; it’s the number beginning with S. Type it in, then
click OK.
* You will then be prompted to register Sibelius. You can either use the Internet connection on the
computer on which Sibelius is installed (the quickest and easiest of all), or a web browser on
another computer (see Registering using a web browser below).
*
Choose the
* If your computer isn’t already connected to the Internet, Sibelius will now prompt you to
Register using this computer’s Internet connection
radio button and click
connect; click Connect
* If you are using a firewall, make sure that you allow Sibelius access to the Internet, otherwise
registration will fail. Most firewalls will warn you when a program is trying to access the Internet
for the first time. The precise message that appears will depend on the firewall (if any) you are
using, but when asked if you want to give Sibelius access to the Internet, choose the appropriate
option to allow it.
* Once it has established a connection, Sibelius will check the registration status of your copy; if it
has been registered before (e.g. if you are registering further copies of a multi-user license, or
installing a second copy for your own personal use, or reinstalling an existing copy) it will give
you a further message. Click Yes to proceed.
* You will next be prompted to enter your contact details. We need your name and address details
to enable you to get technical help, future upgrades, etc. We are committed to your privacy – see
Privacy policy below.
* If this copy of Sibelius is owned by you personally, enter your home address and leave
Organization blank. If it’s owned by your school, college, university, church, business or other
organization, enter the organization’s address (including the Organization field). Then type in
your details, making sure to fill in all required fields; click Next.
* Next you’re asked to fill in some details about your musical interests, how you heard about
Sibelius, and so on. When choosing from the Activity list, if you are a professor, school, college
or university, choose one of the Te ac her options. If you are a student yourself, choose one of the
Student options.
* You are also shown some basic information about your computer setup that you can choose to
send to us so that we can more easily assist you if you require technical help; you are not obliged
to send this information, but it may save you time later if you send it now.
Fill out all the fields, and click Finish.
* If you are registering an educational copy bought in North/South/Central America, you may be
asked to confirm your eligibility. See Educational copies in North/Central/South
America below for eligibility requirements.
* Click Finish. A few seconds later you will be told that Sibelius has been successfully registered.
Next
.
Registering using a web browser
If the computer on which Sibelius is installed does not have an Internet connection, choose Help >
Register Sibelius, choose the Register using a web browser on this or another computer
radio button, and click Next.
22
Page 23

Registering Sibelius
You will be instructed to visit a page on the Sibelius web site in order to provide your registration
information. At the end of the process, you will be given a Registration Number to type into the
Register Sibelius dialog in order to complete your registration.
If you have no access whatsoever to an Internet connection, you can register by fax or phone.
Registering by fax
We recommend you register on the Internet instead if possible. But to register by fax, please fill in
and fax the form included in the Sibelius box to the fax number given on the form. To obtain your
Computer Number (which you need to write on the form you fax to us):
* Choose Help > Register Sibelius
* Choose the Register using a web browser on this or another computer radio button, and
click Next
* Write dow n your Serial Number and Computer Number, then click Register Later.
When you receive a reply (normally within one working day), you need to enter the Registration
Number in the same way via Help
tion (if applicable), type in the Registration Number, then click Finish. You will be told that
Sibelius has been successfully registered.
There’s no need to keep a record of the Computer Number or Registration Number after you have
registered.
> Register Sibelius: this time, fill in your name and organiza-
Start here
Registering by phone
We recommend you to register on the Internet instead if possible. But to register by phone:
* Choose Help > Register Sibelius
* Choose Register using a web browser on this or another computer, and click Next.
* Call the number below, and ensure you can see your computer screen while you are on the phone
* You will be given a Registration Number (beginning with the letter R) to type into the box on the
screen. When you have typed in the Registration Number and click Finish, your program will be
registered (and will continue to be able to save).
There’s no need to keep a record of the Computer Number or Registration Number after you have
registered.
Users who purchased in North, Central & South America:
Monday to Friday 7am–4.30pm PST, except holidays. Call 1-888-280-9995 toll-free (outside
the USA, call 1-650-731-6106). See below for eligibility requirements for educational copies.
Users who purchased in Australia:
To register or re-register, call 1300 652 172, Monday–Friday (except public holidays) between
9am–5pm.
Users who purchased in the UK or any other country:
To register or re-register, call 020 7561 7995 (+44 20 7561 7995), Monday–Friday (except
public holidays) between 10am–6pm
23
Page 24

Start here
Educational copies in North/Central/South America
If you purchased an educational copy of Sibelius in North/South/Central America, you may only
use it if you are eligible to do so. When you register Sibelius, you will be asked whether you are
eligible; we may require you to provide proof of status.
To be eligible, you must live in North/South/Central America, and also one of the following must
be true:
* You are currently an educator or full-time student at a fully accredited, non-profit educational
institution, or
* This copy is installed for staff/student use in a fully accredited, non-profit educational
institution, or
* You are currently an official music ministry representative of a church or other religious
institution, or
* You are a private music teacher and also a current member of MTNA, MENC or an MTNA/
MENC allied group.
If you are not eligible, then do not register or use Sibelius, but instead please return it to the dealer
you bought it from within 14 days of purchase for a refund. You can instead purchase a professional copy of Sibelius, or if you live outside North/South/Central America, you may be eligible to
purchase an educational copy from a dealer in your country.
Reinstalling and re-registering Sibelius
If, for any reason, you need to reinstall Sibelius and you find it is no longer registered, you can reregister it automatically over the Internet provided you are reinstalling on the same computer on
which you previously had Sibelius installed.
To re-register, simply use the Help
> Register Sibelius dialog, in exactly the same way as
registering for the first time. Sibelius will know that this copy has been registered before.
If you have a single-user license and are reinstalling Sibelius on a different computer, then it will be
assumed that you are in fact installing a second copy of Sibelius (see Running Sibelius on more
than one computer above).
Moving Sibelius to another computer
If you need to move a registered copy of Sibelius from one computer to another, you can use Help >
Unregister Sibelius, provided both computers can connect to the Internet.
When you choose this option, your copy of Sibelius contacts our server and informs it that the
copy running on that machine is no longer registered, and disables the saving feature. You can
then install Sibelius on another computer and use Help
over the Internet in the normal way.
This method requires that both computers (the one on which you are unregistering Sibelius, and
the one on which you are subsequently registering Sibelius) be able to connect to the Internet. If
either or both of the computers are unable to connect to the Internet, you should contact technical
help for assistance.
> Register Sibelius to register Sibelius
24
Page 25

Registering Sibelius
Problems registering Sibelius?
If you have technical problems while registering Sibelius, contact technical help (see the separate
Latest information and technical help sheet); it doesn’t matter if your free entitlement to
technical help by telephone has expired.
Privacy policy
We are committed to protecting your privacy, and are registered under the Data Protection Act.
By registering or upgrading Sibelius, you agree to our privacy policy – see www.sibelius.com/
privacy or contact us for the full policy, but a summary is as follows:
We may use personal information you provide us with (e.g. when registering) to verify your
identity or send you information so you can get technical help, upgrades, special offers, other
products, etc. We will not give personal information about you to anyone else without your permission, except for sharing it with other Avid companies, with your country’s distributor or with
manufacturers of other products we provide you with (e.g. PhotoScore) so they can provide you
with technical help, upgrades, information etc. on our behalf.
If you don’t want to receive information from us by email, just use the unsubscribe link which we
include in our email mailings and on www.sibelius.com. If you don’t want us to send you
information (including information about Sibelius upgrades) by post or email, or to share your
information with partner companies as detailed above, please contact us.
Start here
Piracy
Thank you for buying your copy of Sibelius legitimately. Please respect our efforts in developing
Sibelius by ensuring that no-one attempts to make illegal copies of it.
Piracy deprives software companies of the revenue needed to improve their programs and develop
new products. In some countries, piracy is so widespread that some companies are unable to
justify distributing software at all.
If you know of anyone copying Sibelius, please email piracy@sibelius.com with full details.
25
Page 26

Start here
MIDI setup for Windows
If you are using Sibelius Sounds Essentials for playback, b 4.4 Sibelius Sounds Essentials in
Reference for how to set it up.
There are three steps to setting up your MIDI devices: connecting the hardware, installing the necessary software, and then setting up MIDI in Sibelius. This topic takes you through the first two
steps; if you need more information, see
Connecting MIDI devices to your computer
MIDI stands for Musical Instrument Digital Interface. It is a standard, not a thing – the universal
standard for connecting electronic musical instruments together. MIDI keyboards, synthesizers,
sound modules, samplers and other electronic music gadgets can all be plugged into one another
with MIDI cables, and can also be plugged into your computer. Soundcards and software synthesizers are also MIDI compatible, and as they’re already in your computer you don’t need to attach
cables at all in order to play music back.
How your MIDI devices connect to your computer depends on a number of factors, including the
model of your computer, the model of your MIDI devices, and which other hardware you already
have connected; but in general there are three kinds of connection:
* Many MIDI devices such as keyboards have USB connections, enabling you to connect your
MIDI keyboard directly to your computer using only one USB cable
* You can connect a separate MIDI interface to a USB port on the back of your computer, and plug
your MIDI controller into the MIDI interface using MIDI cables
* You can connect an external MIDI device directly to the “gameport” (or joystick port) on your
computer’s soundcard with a special cable.
b 1.10 Input Devices in Reference.
Most Windows computers are supplied with a soundcard that is capable both of General MIDI
playback, and also of connecting your computer to external MIDI devices via the gameport. Many
computers have both a gameport and a USB port – neither option is more preferable than the
other, however if you want to upgrade your system in the future, you should probably opt for a
MIDI interface or a keyboard that can connect directly to one of your system’s USB sockets.
Connecting MIDI devices directly via USB
Most new MIDI keyboards and other devices can connect directly to your computer’s USB sockets
without the need for a separate MIDI interface. To install one of these devices, simply connect a
USB cable (which may be provided with your device) to your computer, and follow the on-screen
instructions to install the necessary driver software.
Once the drivers are correctly installed, you can set up input and playback in Sibelius –
Input devices in Reference.
You should switch on the power on your USB-connected MIDI devices before running Sibelius.
Failure to do so may result in Sibelius not correctly detecting your MIDI device when it loads.
26
b 1.10
Page 27

MIDI setup for Windows
Connecting MIDI devices via a MIDI interface
A MIDI interface is a small box that sits between your computer and your external MIDI devices,
sending MIDI data back and forth. MIDI interfaces usually connect to a USB port on your computer. You might need a separate MIDI interface if:
* your external MIDI device doesn’t have its own USB connection; or if
* your soundcard doesn’t support “full duplex” operation (e.g. if you find that Sibelius plays back
through your external MIDI device, but you’re unable to play music into Sibelius from your
external device); or if
* your computer doesn’t have a gameport, because it’s a notebook (laptop).
MIDI interfaces usually require additional driver software, which will be supplied by your device’s
manufacturer.
We’ll assume your MIDI interface connects via USB, and show
you some common MIDI setups. Connections between MIDI
devices all use standard MIDI cables, pictured on the right.
To plug in just a MIDI keyboard, connect its “Out” socket to the MIDI interface’s “In” socket. This
means that music played on the keyboard will go out of the keyboard, along the cable and in to the
computer.
To make the computer play back music into the keyboard (e.g. if the keyboard has sounds built
into it), also connect the MIDI interface’s “Out” to the keyboard’s “In.”
Start here
If your keyboard has two “In” or “Out” sockets, it usually doesn’t matter which you use – they’re
just convenient duplicates of each other.
So connecting up a keyboard alone looks like this:
If you want to connect just, say, a sound module, rather than a keyboard, simply connect the MIDI
interface’s “Out” to the sound module’s “In.”
Once you’ve connected your MIDI devices to your computer, you can set up input in Sibelius –
b 1.7 Input Devices in Reference.
Connecting MIDI devices via the gameport
In general, you won’t need to buy a separate MIDI interface for your computer, provided you have a
soundcard that supports “full duplex” operation (check with the manufacturer), or if you can use a
direct USB connection instead.
27
Page 28

Start here
Using your soundcard’s gameport also has the advantage of not requiring any further driver software – you can just plug in your MIDI device, and away you go.
The gameport is usually found next to the sockets used to connect speakers and microphones to
your computer. Typically, it will be on the soundcard, which looks something like this:
The gameport is the rectangular-ish connector, shown here at the far left. To connect this to an
external MIDI device, you’ll need a “Y-shaped” MIDI-to-gameport cable, which looks something
like this:
Note how the two MIDI plugs are labeled “In” and “Out.” To connect this cable to, say, a MIDI keyboard, you should connect the plug labeled “In” to the socket on the back of the keyboard marked
“Out,” and the plug labeled “Out” to the socket on the keyboard marked “In.”
That’s all there is to it. Provided you have the “In” and “Out” plugs in the right sockets on your
MIDI keyboard (or sound module), you can now finish setting things up –
b 1.10 Input
Devices in Reference.
28
Page 29

MIDI setup for Mac
MIDI setup for Mac
If you are using Sibelius Sounds Essentials for playback, b Sibelius Sounds Essentials in Reference.
To set up MIDI on Mac, simply connect your MIDI devices as described below, use Mac OS X’s
Audio MIDI Setup utility, then
input in Sibelius.
Connecting MIDI devices to your Mac
MIDI stands for Musical Instrument Digital Interface. It is a standard, not a thing – the universal
standard for connecting electronic musical instruments together. MIDI keyboards, synthesizers,
sound modules, samplers and other electronic music gadgets can all be plugged into one another
with MIDI cables, and can also be plugged into your computer. Soundcards and software synthesizers are also MIDI compatible, and as they’re already in your computer you don’t need to attach
cables at all in order to play music back.
On Mac, MIDI devices connect via USB or Firewire ports. In both cases, you often have the choice
of connecting a MIDI device either directly (to the computer’s USB or Firewire ports), or via a
MIDI interface.
For example, to connect a Roland SC-88 Pro sound module to a new iMac or G4 with USB, you’ll
need to use an external MIDI interface, because it’s a fairly old model. However, the newer Roland
SC-8820 connects directly via USB connection, so no MIDI interface is required.
b Input Devices in Reference to find out how to set up MIDI
Start here
Connecting MIDI devices directly
This diagram shows how to connect a sound module (shown) or MIDI keyboard directly.
There is normally a switch on the back of the keyboard or sound module that determines which of
the connections it should send and receive data
through, so ensure that this is set correctly (in this
case, it should be set to USB). You may have to switch your sound module or keyboard off and on
again to make it take notice of changing this setting.
Check your module or keyboard’s manual for precise connection details. Direct connections often
require additional driver software, which will be supplied by your device’s manufacturer.
29
Page 30

Start here
Connecting MIDI devices via a MIDI interface
A MIDI interface is a small box that connects MIDI devices to your Mac via its USB port.
Connect a sound module using a MIDI interface like this:
The MIDI cable is connected from the “Out” socket on the MIDI interface to the “In” socket on the
sound module.
To add a MIDI keyboard or other input device, you should connect your devices as shown below:
The second MIDI cable goes from the “Out” socket on the keyboard to the “In” socket on the MIDI
interface.
MIDI interfaces often require additional driver software, which will be supplied by your device’s
manufacturer.
Audio MIDI Setup
Once you have connected up your external MIDI equipment, you need to use the Mac OS X utility
Audio MIDI Setup to tell the operating system what each of the devices are:
* Run Audio MIDI Setup by double-clicking its icon, which is in the Utilities folder inside the
Applications folder
* Click the MIDI Devices tab
* Provided your MIDI device is correctly installed, it should appear in the large white window
* If the attached MIDI device is a sound module, you don’t need to do anything else – just quit
Audio MIDI Setup and refer to
* If the attached device is a MIDI interface, you should click the Add Device button to add a new
external device
* Double-click the new external device icon. In the dialog that appears, change its Name (to
match the name of the device, e.g. Roland JV-1080), then choose the most appropriate avail-
30
b 4.11 Playback Devices in Reference for what to do next
Page 31

MIDI setup for Mac
able options from the Manufacturer and Model lists. (Advanced users with complex MIDI setups may need to click the More Properties button to control additional parameters such as on
which MIDI channels the device can send and receive data.
* Now you need to tell your Mac that your new device is connected to your MIDI interface. Drag
from the arrows on the icon representing each device to draw “wires” between their inputs and
outputs.
* When you’re done, simply quit Audio MIDI Setup, then b 1.10 Input Devices in Reference
for what to do next.
Further information on using the Audio MIDI Setup utility can be found on the Web here:
http://www.sonosphere.com/MusicSoftware/MacOSX/AudioMIDISetup/
Start here
31
Page 32

Start here
About the projects
The remainder of this Handbook is taken up with five projects, which will take you roughly eight
hours to work through from start to finish. You are recommended to work through at least the first
three projects, as these explain all of the key concepts and features that you will use every day in
Sibelius. The fourth and fifth projects are more tightly focused on specific features, but you should
work through them as well if you can make the time.
Project 1 (2 hours)
This project shows you how to open a score, introduces the concepts of navigating around them
using both the Navigator window and various keyboard and mouse shortcuts, making selections,
and copying and pasting. Using an arrangement of the folk song Scarborough Fair, you will learn
how to edit and input notes using your mouse, computer keyboard and MIDI keyboard, and how
to input lyrics. You will be introduced to playback, and to marking up your score with text and
dynamics.
Project 2 (2 hours)
In this project, you will learn to recreate an excerpt from Elgar’s String Quartet in E minor, Op. 83
by scanning the four instrumental parts using PhotoScore Lite, then copying and pasting them
into a newly-created score. You will learn how to create clef and key signature changes, more
advanced note input including tuplets, and explore the different kinds of objects – including articulations, lines, ties, slurs and text – commonly used to mark up scores. You will also be introduced
to dynamic parts, and exporting graphics from Sibelius.
Project 3 (2 hours)
This project teaches you the basics of writing for keyboard, guitar and drums, together with an
introduction to creating chord symbols and repeat structures (including 1st and 2nd ending lines,
and D.S. al Coda). You will also explore adjusting playback using the Mixer window, and learn how
to use Sibelius’s Ideas window to store and re-use snippets of music.
Project 4 (1 hour)
This project is especially useful if you are planning to produce learning materials for students or
teach with Sibelius in the classroom, but it should also be of interest if you want to learn some of the
more advanced techniques for laying out and formatting music. In this project you will create a
worksheet of scales, and learn how to indent staves, hide empty staves, change text fonts, and more.
Project 5 (1 hour)
This project introduces the Video window, and explores techniques for writing to picture,
including working with timecode, hit points, and a plug-in for adujsting the duration of a section
of music. Using a video from the animated series Mr. Bean, you will also learn how to export an
audio track from Sibelius in order to add it as a soundtrack to a video in an editing package such as
Pinnacle Studio.
32
Page 33

Project 1
Project 1
Page 34

Project 1
34
Page 35

1.1 Opening a score
1.1 Opening a score
The first chapter of this project shows you how to open a score in Sibelius and navigate around;
you’ll also learn how to print a copy of the arrangement we’re going to create in the subsequent
chapters.
Opening a file
Sibelius comes with some example scores that demonstrate various aspects of the program. You
can modify these without fear of retribution, as the originals remain unaltered on your installation
DVD-ROM. Let’s open one now.
Choose Open recent file on the Quick Start dialog and make sure that Project 1.sib is shown in
the drop-down list, then click OK.
Alternatively, you can open the file the old-fashioned way: click the toolbar button shown
to the left, or choose File
appears.
On Windows, you should find that you are inside a folder called Scores, which will contain a
shortcut to a folder called Example Scores. On Mac, you should find an alias called Sibelius
Example Scores. Double-click this, then go into the Project Files folder, select the score called
Project 1, and then click Open. This is an arrangement of a traditional ballad called Scarborough
Fair.
> Open (shortcut Ctrl+O or XO). A standard Open dialog
Project 1
As an aside, you can also open scores when Sibelius isn’t running – just find the file on
your computer and double-click it to open it in Sibelius (which automatically starts
Sibelius if it isn’t already running). Sibelius scores have icons that look like the one
pictured on the right.
When you’ve opened the Scarborough Fair score, the music appears, looking somewhat like this:
35
Page 36

Project 1
Moving around the score
There are a number of ways to move around the score, but the simplest of these is by dragging the
paper on the screen with your mouse. To do this, click a blank part of the paper and drag the page.
As you do so, you should notice that the display on the gray rectangle in the bottom left-hand corner of the screen moves around too. This rectangle is called the Navigator; it shows a miniature
view of some of the pages. The white rectangle on the Navigator shows which portion of the music
is shown on the screen.
If the Navigator isn’t open, switch it on by choosing Window
or
zXN) – see Hiding and showing tool windows below.
> Navigator (shortcut Ctrl+Alt+N
Click anywhere on the Navigator, and the view will instantly jump to that part of the score.
Alternatively, click the Navigator’s white rectangle and drag it around, which pans the window
smoothly around the score. This effect is very striking and enhances the disconcerting impression
that you are moving a video camera around a real score.
In long scores, if you drag the white rectangle towards the left-hand or right-hand side of the
Navigator, the view of the score will continue to move leftwards or rightwards. The further you
drag, the faster it moves through the score. This allows you to move continuously across any
number of pages.
By moving around the score with the Navigator, you can see that pages are laid side-by-side on a
blue desk. With long scores, pages are joined in pairs as if in a score opened flat, so you can see
where page-turns will occur. You can change the way pages of the score are laid out, so that they
appear top-to-bottom or side-by-side, and as single pages or spreads – see
b 5.23 View menu
in Reference.
You can’t drag the white rectangle off the top or bottom edges of the page displayed in the Navigator, or off the left edge of the first page or the right edge of the last page. However, it is possible to
click on the paper and drag the score off the edge of the screen. If you do this, click anywhere on
the Navigator to show the score again.
If moving around the score is slow, try setting the paper and/or background textures of the full
score and parts to plain colors. For tips on changing Sibelius’s display,
b 5.6 Display settings
in Reference.
If you have a mouse with a wheel button, you can also use the wheel to scroll around the score:
* Scroll the wheel up and down to move the page up and down; hold down Alt or z to move a
screenful at a time
* Hold Shift and scroll the wheel to move the page left and right; hold down Alt or z as well to
move a screenful at a time
* You can also use the wheel to zoom by holding down Ctrl or X – see Zooming below.
You can also move around the score using keyboard shortcuts. Sibelius is full of shortcuts that let
you perform an action by typing a key rather than using the mouse. It’s a good idea to learn keyboard shortcuts at least for the most common operations – these are listed on the back cover of this
Handbook, and in full detail in
b 5.12 Menus and shortcuts in Reference.
Try experimenting with the following shortcuts, which are for moving around the score:
36
Page 37

1.1 Opening a score
* Page Up (8
* Home (4 on Mac) and End (7 on Mac) move left or right a screenful, or a whole page if the
on some Mac keyboards) and
Page Down
(9 on Mac) move up or down a screenful
whole width of the page is in view.
* Ctrl+Home or X4 and Ctrl+End or X7 go to the first or last page. (Some Mac keyboards do
not have a
7 (End) key, in which case you can use x4 instead to go right a screenful, and xX4
to go to the last page.)
In Sibelius, typing the Ctrl or
other words hitting the other key without Ctrl or
the Ctrl or
Ctrl or
X key performs a bigger version of the operation. Various operations in Sibelius use
X to do things in big steps, such as moving notes or other objects (such as text), increasing
X key with another key generally means “do this, but bigger” – in
X would perform the operation normally; adding
or decreasing note spacing, and so on.
Possibly the most important key you need when using Sibelius is the Esc key. Esc is your get-outof-jail-free card in all eventualities! If you click on a note (or any other object in a score) and select
it without meaning to, hit Esc to deselect everything; if you want to cancel or stop an operation in
Sibelius, hit Esc.
Panorama
Sibelius has a wide range of tools to help make it easier for you to work on a score. For a more
convenient way of viewing a score while you work on it, you can use Panorama.
To switch to Panorama, choose View
button shown on the right. Your score is instantly laid out as a single system on an
infinitely wide page:
> Panorama (shortcut Shift-P), or click the toolbar
Project 1
Using Panorama allows you to input your music without Sibelius moving the page up and down,
which can be distracting; instead, the score only scrolls left to right. All the navigation methods
we’ve already discussed work the same way in Panorama as they do in normal view, with the
37
Page 38

Project 1
exception of the Navigator, which doesn’t appear in Panorama (because your score isn’t laid out on
pages any longer).
This kind of view is sometimes called scroll view or gallery view in other programs. Switch
Panorama off again by choosing View
> Panorama, or clicking the toolbar button again. You may
have noticed the blue magic margin, which always displays the clef, key signature and instrument
name for each staff, superimposed over the left-hand margin in Panorama view.
For more information about Panorama,
b 5.13 Panorama in Reference.
Zooming
There are several ways to adjust the magnification of the score, but the quickest of these is by using
the keyboard shortcuts for zooming: type Ctrl++ or
X+ to zoom in, or Ctrl+– or X– to zoom out.
If you have a note or other object selected then Sibelius zooms in on the thing you select. Try clicking on the first note of the vocal staff in the Scarborough Fair score and zooming in. Notice as you
do this how the percentage zoom factor shown in the drop-down list on the toolbar changes. You
can select a particular zoom factor preset from the list, or type in your own.
If you have a mouse with a wheel button, you can zoom in and out smoothly by holding Ctrl or
and scrolling the wheel up and down.
Try zooming out so that you can see the whole page of music on your screen. Then zoom back in to
100%, which is a convenient size for doing most things in Sibelius.
Hiding and showing tool windows
If your screen starts to get cluttered, then you can click the buttons on the toolbar to hide any of
Sibelius’s tool windows, including the Navigator, which we’ve already discussed.
The Keypad at the bottom right of the screen is an indispensible tool for inputting notes,
accidentals, articulations, ties and other markings, and can be shown or hidden by switching Window
> Keypad on or off, or by clicking on the toolbar button (shown on the right).
You can also hide all of Sibelius’s tool windows by clicking the Hide Tool Windows button
on the toolbar, shown on the left. Click the button again to show the windows you had open
previously.
X
Versi ons
While you work on a piece of music, it can be very useful to save different versions of the same
score – especially if you’re going to experiment, or you want to produce different arrangements of
the same piece. Sibelius allows you to store all of these different versions in the same file, so that
you can go backwards (or forwards) in time through the life of your score.
All of the project files you’ll be working on in this Handbook have a
number of different versions, corresponding to the chapter headings, so you
can easily see where to start working from.
You can quickly see which version you’re viewing – and view other
versions in the file – from the drop-down list on the toolbar, shown on the
right.
38
Page 39

1.1 Opening a score
All versions except the Current version are non-editable, so you won’t be able to change anything
in the score, although you can play them, print them, select notes and other objects, and copy
music from them. To view another version, simply click in the drop-down list on the name of the
version you want to see.
You’ll need a printout of the finished arrangement of Scarborough Fair to refer to while completing
the rest of this project, so let’s print one now. Choose File
> Versions > Edit Versions or click the
Edit Versions button on the toolbar (to the left of the versions drop-down menu), which opens the
Edit Versions dialog. From the list of versions, select 1 Opening a file, and click Make Current.
Sibelius will ask you if you want to make this version the current one, and make a new non-editable version of the existing one. Click Yes . You should now see a completed arrangement of
Scarborough Fair without the string staves visible.
See
b 5.22 Versions in Reference for more details.
Focus on Staves
The score you’ve just made into the current version uses Sibelius’s Focus on Staves feature to hide
the staves that you’re not currently working on. You won’t need to work on any of the string parts at
any point in this project, so we’ll save paper by hiding them in our printout!
Project 1
Click the toolbar button shown on the right, or choose View
Ctrl+Alt+F or
zXF) to switch Focus on Staves off.
> Focus on Staves (shortcut
Instantly the string parts that were hidden are shown; because we don’t need to work on them,
switch Focus on Staves back on by clicking the toolbar button again, or by choosing View
on Staves.
For more information,
b 5.8 Focus on Staves in Reference.
Printing a score
Choose File > Print (shortcut Ctrl+P or XP) to open a standard Print dialog. Don’t worry about all
the options: just click OK on Windows or Print on Mac to print your score.
Within a few moments, a high-quality printout of the Scarborough Fair score should emerge from
your printer. Hold on to this printout, because you’ll be reading music from it when we cover note
input shortly.
If you ran into any problems,
For the next chapter of this project, we need to be able to edit another version. Choose File
Versions > Edit Versions again. From the list of versions, select 2 Editing and inputting notes,
and click Make Current. Sibelius will ask you if you want to make this version the current one,
and make a new non-editable version of the existing one. Click Yes . You should now see an
incomplete arrangement of Scarborough Fair.
b 5.16 Printing in Reference for help.
> Focus
>
39
Page 40

Project 1
1.2 Editing and inputting notes
In order to complete this section of the project, you should have already made the 2 Editing and
inputting notes version into the Current version (see above).
choose
File > Versions > Edit Versions
Most of the actions you will perform in Sibelius are related to inputting notes and editing what
you’ve inputted. Sibelius allows you to input music in a number of ways – by scanning sheet music,
playing a MIDI keyboard or guitar, placing notes with the mouse, opening files from other programs – but the fastest way of all is by typing using your computer keyboard and editing as you go.
, select this version in the list, and clicking
Escape is your best friend
Before we learn how to enter and edit notes in a score, do you remember that we looked at using
the Esc key as a get-out-of-jail-free card? Well, when you’re inputting or editing your music in any
of the ways Sibelius allows, Esc is of the utmost importance. It can be used in any of the following
situations:
* When adding notes with the mouse, hitting Esc will stop you placing any more notes
* When typing notes with your computer keyboard, hitting Esc will stop you adding any more
notes and leave the most recently-added note selected
* If you’re editing a piece of text, hitting Esc will stop you typing or deleting any text and leave the
object selected
* If you have something selected, hitting Esc will deselect it
* When Sibelius is playing back your score, hitting Esc will stop it playing back.
If you haven’t already done so,
Make current
.
You can also click the top left button on any Keypad layout – the one with the picture of the mouse
pointer on it – to perform the same function (see The Keypad, below).
Moving between notes
While Sibelius lets you click on a note to select it (that’s why it turns blue, so that you can edit or
change it), the fastest way to move between notes in Sibelius is to use your computer keyboard. You
can move forwards and backwards from one note or rest to the next one by using the
to move to the first note or rest in a bar, simply type Ctrl+
another example of “do this, but bigger.”
You can also use the Ta b key (above Caps Lock on your computer keyboard) to move forward
through every object attached to a particular stave. Tab selects the first object on the page, so you
don’t need to use your mouse at all. Try this out in the Scarborough Fair score: make sure you have
nothing selected (by hitting Esc) and then hit Tab. You should see the first note on the vocal staff of
the score turn blue. Keep hitting Tab and you’ll advance through the notes, rests, dynamic markings, lyrics and so on. To go backward in this way, simply type Shift-Tab.
40
0 or Ctrl+1. Did you notice? This is
0 and 1 keys;
Page 41

1.2 Editing and inputting notes
The Keypad
The Keypad at the bottom right of the screen is where you choose note
values, accidentals, articulations, ties and other markings for creating and editing notes. (Articulations are symbols above or below a note such as staccato,
tenuto and accent. Note value means the length of a note. These words and
other musical and technical terminology are explained in the Glossary in Reference.)
The numeric keys at the right of your computer keyboard correspond to the
buttons on the Keypad. Typing these keys does exactly the same as clicking the
buttons with the mouse, and is quicker. If you use a notebook (laptop)
computer, see Notebook (laptop) shortcuts below.
The six little tabs just below the bar that says Keypad choose between six different layouts of
musical symbols on the Keypad, which we’ll call the first layout, second layout, etc. To change lay-
out, you can either click the tabs with the mouse, hit F7–F12, or click the button (shortcut +) to
cycle through the layouts; the button (shortcut F7 on Windows, – on the numeric keypad on
Mac) goes back to the first layout.
Have a quick look to see what’s in the other layouts – fairly obscure stuff. The first layout is the one
you’ll be using most of the time.
The row of numbers at the bottom of the Keypad are for setting the “voice” of the note you’re
inputting or editing. This is so that you can have multiple rhythms played simultaneously on the
same staff. We’ll talk about this more later on.
Project 1
Beware that because the numeric keypad is used for specific functions in Sibelius, you can’t switch
off Num Lock to use the number keys as alternative arrow keys etc. while using Sibelius, as you
can with other programs.
The button at the top left-hand corner of each Keypad layout (shown at the left) can be
used as a substitute for the Esc key – this is particularly useful if you are using Sibelius on
an interactive whiteboard in a classroom, since you don’t have to carry a keyboard under
your arm the whole time!
Notebook (laptop) shortcuts
If you use a notebook (laptop) computer without a separate numeric keypad, you may already be
wondering how you’ll input any notes at all. Thankfully you don’t need to resort to laboriously
entering every note individually with the mouse; nor do you need to find a friend to hold down the
Fn key while you type!
Sibelius has some alternative single-key shortcuts built in, which allow you the same freedom and
speed when inputting notes. To use these, choose File
Mac, shortcut Ctrl+, or
(laptop) shortcuts from the menu at the top of the dialog, then click OK.
Instead of using the numbers on the keypad, you can use the standard numbers along the top of
your keyboard which will correspond to the same numbers on the Keypad. When this feature set is
X,), then select the Menus and Shortcuts page. Select Notebook
> Preferences (in the Sibelius menu on
41
Page 42

Project 1
in use, use Shift-1 to Shift-9 to enter intervals above a note –
b 5.12 Menus and shortcuts
in Reference.
You can also purchase a separate numeric keypad to connect to your computer via USB that will
allow you to use Sibelius’s standard shortcuts.
Save your work!
Before we get down to the real business of learning how to edit and input notes, let’s take a moment
to save the score. You should always save your work regularly, and keep backups, preferably on a
removable device like a USB flash memory stick (sometimes called a “pen drive”) or by burning
onto CD-R.
To save a score for the first time, choose File
toolbar button shown here, find a suitable location (e.g. your Scores folder), give your
score a name, then click Save. On Windows the Scores folder is inside your My
Documents folder; on Mac, the Scores folder is inside your user Documents folder.
However, because we’re working on an existing score that already has a name, we should use File
Save As (shortcut Ctrl+Shift+S or xXS) to save a copy of the score under a new name. Call it e.g.
Scarborough and save it to your Desktop.
Sibelius also automatically saves a copy of your score into a special folder every few minutes. If
your computer should suffer a power failure or crash, the next time you start Sibelius you will be
given the opportunity to restore any lost work.
> Save (shortcut Ctrl+S or XS) or click the
>
You can save a version of your score at any point, which you can then use to save and
review drafts, to keep track of arrangements, to save a pristine copy before you make a
major change or to export a log showing the development of your score. Choose File
Save Version or click the toolbar button shown here.
Furthermore, every time you save your score using File
> Save, Sibelius makes a numbered backup
and puts it into the Backup Scores folder inside your Scores folder. If, say, your score gets deleted
by accident, or if you make a major change that you later decide you don’t want, check inside the
Backup Scores folder for a recent backup.
For more information on these useful features,
b 5.22 Versions and b 9. Files in Reference.
Editing notes with the Keypad
All of the Keypad keys instantly modify the currently-selected note. So to change the duration or
add accidentals to a note, simply click on it to select it and choose the corresponding Keypad button. You will find that if you learn to use the numeric keys and navigate with the arrow keys, you
can work much faster than by clicking on the buttons with your mouse.
Let’s try it:
* In the Scarborough Fair score, select the second note of the vocal part in bar 11, a B natural
quarter note (crotchet)
* Hit 3 (on the numeric Keypad) to change this to an eighth note (quaver) – notice how Sibelius
has helpfully padded out the bar with an eighth note rest after the note to ensure that the bar
remains the correct length
>
42
Page 43

1.2 Editing and inputting notes
* Change it back to a quarter note duration, and hit 9 (on the numeric Keypad) to change the
natural to a flat. If you hit 9 again, Sibelius then removes the redundant accidental – but the note
will play back as a Bb (there’s a Bb in the key signature). To test this, hit Esc to deselect the note,
then click it to select it again – you should hear Sibelius play a Bb. Hit 7 once more to put the
natural back on the note.
If none of this seems to work properly then you probably weren’t in the first Keypad layout, in
which case just click the first layout tab (or hit F7) and try again.
You can also use the arrow keys on your keyboard to change the pitch of selected notes. With the B
natural selected, hit
moves the selected pitch up and down by an octave; try moving the D up an octave by typing
Ctrl+
3 or X3.
You sh ou ld end up wit h:
2 until the pitch changes to a D below the staff. Typing Ctrl+3/2 or X3/2
Undo and Redo
If you make a mistake, or you are unhappy with changes you’ve made, you can save
yourself the trouble of going back and correcting your score manually. For example,
select the quarter note (crotchet) D and hit 5 on the numeric keypad to change it to a
half note (minim). Notice how the next note in the bar is overwritten. Try clicking the left-arrow
toolbar button shown here or choose Edit
operation you did, and you should see the deleted note miraculously reappear. Sibelius supports
multi-level undo – try typing Ctrl+Z or
how it was before you began to edit it. Keep undoing until the note is a B natural again.
> Undo (shortcut Ctrl+Z or XZ). This undoes the last
XZ a number of times to see your score restore itself to
Project 1
Click the right-arrow toolbar button or choose Edit
ever you just undid.
Sibelius even includes an “undo history” that lists all the operations you’ve recently done, and lets you
jump back to any earlier point in time. More details are in
Sadly, this only works for actions you’ve performed in Sibelius, so if you spill your coffee all over
the computer keyboard, it can’t help you at all.
Mouse input and the Keyboard window
Inputting notes with a mouse is simple in Sibelius, but it can be quite time-consuming, so you
should try to use the shortcuts we’ve just discussed to speed things up.
Before we begin inputting notes, choose Window
toolbar to open the Keyboard window. This is a virtual, on-screen piano keyboard which can
display over seven octaves of keys at three different sizes (just drag the bottom right-hand corner
of the window and drag it to resize). Click on a key with your mouse to hear the note played back:
> Redo (shortcut Ctrl+Y or XY) to redo what-
b 5.21 Undo and Redo
> Keyboard or click the Keyboard button on the
in Reference.
43
Page 44

Project 1
We’re going to input a section of the countermelody from the start of the clarinet staff, to
complement the vocal melody. We’ll begin by choosing our first note from the Keypad. First,
ensure nothing in your score is selected by hitting Esc (or clicking the top left button on the Keypad). Now hit 4 (on the numeric keypad) to choose a quarter note (crotchet). The mouse pointer
turns dark blue, to show that it is “carrying” a note. Hit . (on the numeric keypad) to make the
quarter note dotted. As you move the mouse pointer over the score, a gray shadow note is drawn,
showing you where the dotted quarter note will be created when you click. Notice how it even
draws leger lines above and below the staff, so you can position high and low notes accurately.
Now click the mouse pointer near the start of the clarinet staff, pointing at the A space, second
space up:
If you clicked in the wrong place, you can use
inputted it.
Notice that the note you just added is dark blue, showing that it’s selected, and a vertical dark blue
line – called the caret – is just to the right of it.
The caret means that Sibelius is ready for you to input more notes. You should think of the caret
like the familiar line you find in word processing software. The caret is especially useful for alphabetic input, which we’ll come on to a little later, so we’ll explain exactly what it does then.
Hit 3 to select the eighth note (quaver) on the Keypad and click with the mouse to add a G on the
second line up, then hit 4 to select the quarter note again and click to add a note in the F space.
The quarter note button on the Keypad stays selected, so you can carry on creating more notes by
clicking with the mouse – you don’t need to re-choose the quarter note button. Add another three
quarter notes to fill the next bar, clicking the mouse pointer to add a G, F and E:
The next bar begins with a quarter note rest, so hit 0 on the numeric keypad to create a rest (the
quarter note should still be selected).
44
3 and 2 to adjust the pitch of the note after you’ve
Page 45

1.2 Editing and inputting notes
Let’s continue inputting the countermelody using the Keyboard window, clicking on the keys and
using the numeric keypad to change the note values. Begin by hitting 3 to select eighth notes (quavers) and enter the melody below, using the Keyboard window; when you need to add the quarter
note, simply hit 4 on the numeric keypad before you click the key on the Keyboard window (or
click in the score) to add the note. You should end up with:
You can also use your computer keyboard to “play” the Keyboard window – see
window in Reference.
b 1.3 Keyboard
Adding articulation and ties with the Keypad
To finish our countermelody, we’re going to add some articulation instructions for the benefit of
performers – you’ll see later on that Sibelius will also obey these articulations when playing back
your score!
In the same way as we learned how to change the selected note’s duration or accidentals, the Keypad buttons instantly add or remove articulations and ties. Just click a note, then choose a Keypad
button to add one of these objects to the note, or remove it again.
Let’s try it:
* Select the quarter note (crotchet) D in the third bar of the clarinet staff
* Hit the key on your numeric keypad that corresponds to the . (staccato dot) on the top row of
buttons on the Keypad. This adds a staccato mark to the note.
* Repeat this for the quarter note D in the next bar
Now navigate to the start of the second system to add a tie:
* Select the half note (minim) A in the ninth bar of the clarinet staff
* Hit Enter (on the numeric keypad) to put a tie after the note:
* Now use the arrow keys and the numeric keypad to add articulations and ties to the rest of the
clarinet countermelody.
Project 1
45
Page 46

Project 1
1.3 Selections and copying music
If you are starting from this section of the project, you should open the example score called
1
and make the
File > Versions > Edit Versions
Now that we’ve discussed how to edit existing notes, and use the keyboard shortcuts to make those
edits faster, we’re ready to look at selecting passages of music to manipulate, copy or delete notes
and other objects en masse.
3 Selections and copying music
, selecting this version in the list, and clicking
version into the
Current version
Make current
, by choosing
Selections and passages
When objects in the score are selected, they go colored, which shows that you can do things to
them using the mouse and keyboard. Almost everything you will do to change your score in
Sibelius involves selections.
There are three main kinds of selection:
* Single selections, where just one object is selected
* Multiple selections, where several separate objects are selected
* Selected passages, where continuous stretches of music are selected, shown with a light blue box
(“staff passage”) or purple double-box (“system passage”) round them.
You can do pretty much the same things to all three kinds of selection. The main difference is how
you select the objects in the first place.
We’ll look at how to make and use different kinds of selection in the Scarborough Fair score. Select-
ing single objects is simple enough, we’ve already looked at how to select notes by clicking them
with the mouse, or by hitting the Tab key.
Project
.
To select multiple objects, select a single object, then Ctrl+click or
or
X key and click the left mouse button) one or more other objects to add them to the selection.
Try this by selecting the first note of the clarinet staff in the first bar of the Scarborough Fair score.
Now carefully Ctrl+click or
try Ctrl+clicking or
way, you can remove it by Ctrl+clicking or
the selection.
Multiple selections let you perform edits to specific objects: try using the
the selected notes up and down. This is mainly useful for objects other than notes, chords and rests
– e.g. selecting multiple articulations or several bits of text.
Before we learn how to make a passage selection, you should deselect the current objects by hitting
Esc (or clicking the top left button on the Keypad).
A passage is a continuous chunk of music, maybe running over many pages. It can run along one
staff or several. You’ll most often select a passage in order to copy music from one instrument to
another, e.g. because they’re doubling each other. Passages allow you to edit, copy or delete lots of
notes at once.
46
X-click the next note. You can select text and other objects this way, so
X-clicking on the title. If you accidentally add an object to the selection in this
X-clicking the object again. Try removing the title from
X-click (i.e. hold down the Ctrl
3 and 2 keys to move
Page 47

1.3 Selections and copying music
To make a staff passage selection, begin by clicking on the first note of the clarinet staff in the first
bar. Now carefully Shift-click on an empty part of the staff in the fourth bar of the acoustic guitar
staff. You should see a single light blue box surrounding all the intervening notes:
Notice how every object attached to the staff is selected in the range of the passage. This is really
useful for copying music, because all articulations, dynamic markings, text and other objects
attached to the staff get copied too! Again, you can use the
3 and 2 keys to move the selected notes
up and down. You can also see the selection in miniature on the Navigator.
There are various ways to select certain types of staff passage quickly:
* Clicking an empty part of a bar selects that bar on one staff (e.g. to copy a bar)
* Double-clicking an empty part of a bar selects that staff for the duration of the system
* Triple-clicking an empty part of a bar selects that staff throughout the score
* After single-, double- or triple-clicking, you can Shift-click another staff to add all staves in
between to the selection, or add or remove individual staves using Ctrl+click or
X-click.
Project 1
To make a system passage selection, Ctrl+click or
X-click on an empty part of the first bar of the
vocal staff. You should see a purple double-box appear around all the staves for that bar:
* You ca n h old Ctrl or X while single-, double- or triple-clicking to select system passages for a
bar, the duration of the system, or the whole score, respectively
* You can even select the entire score at once by choosing Edit > Select > Select All (shortcut
Ctrl+A or
XA). This is particularly useful for transposing the whole score, altering the format of
the whole score, or for selecting particular types of object throughout the score.
More details on selections are in
b 1.9 Selections and passages in Reference.
Deleting notes and other objects
Try selecting various objects, then deleting them with the Delete key:
* Delete a piece of text, e.g. the Arranger text (from the top of the first page)
* Delete a note: it turns into a rest, to ensure that the rhythm still adds up.
You can delete a rest, which hides it, and leaves the rest of the rhythm still aligned as if the rest
were still there. When you first delete a rest, its color changes to a lighter shade to show that it’s
been hidden; when you deselect it, it’ll disappear altogether. You shouldn’t normally hide rests, but
it can sometimes be useful for special notations. Other objects can also be hidden for special purposes. To see where hidden objects are, they will be shown in gray if you switch on View
Objects (shortcut Ctrl+Alt+H or
You ca n a ls o us e Backspace to delete objects, or choose Edit
zXH).
> Delete.
> Hidden
47
Page 48

Project 1
Edit
> Cut (shortcut Ctrl+X or XX) is similar to Delete, but cuts objects to the clipboard so that
you can paste them elsewhere with Edit
> Paste (shortcut Ctrl+V or XV). This is not used much in
Sibelius, so there’s no need to try it now.
Remember that you can use Undo and Redo to restore anything you delete.
Deleting bars
Often you’ll find that you want to remove one or more bars – empty or not – from your score, so
this is a very important function to learn. There are two ways to delete bars in Sibelius.
The easiest way is to make a passage selection containing the bars you want to remove from the
score (see
Ctrl+Backspace or
and notice that you can switch on a checkbox labeled
stop mollycoddling you (after all, there’s always
Selections and passages
XBackspace
). You’ll be asked if you’re sure you want to continue: click
above), then choose
Don’t say this again
Undo
!). If you feel like living dangerously and
Edit > Delete Bars
if you want Sibelius to
(shortcut
switching this option on, but later come to regret your rashness, you can make this and other similarly dismissed warning messages appear again by clicking
of
File > Preferences
(in the
Sibelius
menu on Mac).
Show All Messages
on the
Other
Another way to delete bars is to make a system passage selection, then hit Delete.
Try deleting the last three bars of the Scarborough Fair score, then use Undo to restore them again.
Copying
Copying music between bars, staves, and even different files is very easy in Sibelius. Let’s try it;
click on the staccato quarter note (crotchet) in the fifth bar of the clarinet staff and then Alt+click
or
z-click onto a space in the empty sixth bar of the acoustic guitar staff. The note is copied
exactly, but ends up at the pitch corresponding to the staff line or space where your mouse pointer
was when you clicked. Notice that the staccato dot is copied too; any articulations on a note will be
copied in this way.
Yes
page
,
This method works well for copying large chunks of music. Begin by selecting the fifth bar of the
acoustic guitar staff:
Now Alt+click or
z-click onto the space at the start of the bar before the note you just placed in
the sixth bar, and you’ll see this:
Sibelius overwrites the note you’d previously placed there with the newly-copied music. You can
use Alt+click or
z-click to copy any combination of objects in a score, by making single, multiple
or passage selections.
On Windows, if you have a third (i.e. middle) mouse button or a clickable scroll wheel, you can use
it instead of Alt+click to do a copy and paste in a single action. If you only have a two-button
48
Page 49

1.3 Selections and copying music
mouse, you can do this by performing a chord-click, that is, clicking the left and right mouse buttons simultaneously, to duplicate the function of the middle mouse button.
Sibelius also allows you to duplicate notes or other objects in your score so that an exact copy
appears immediately after the original by choosing Edit
of the bass line you just entered using Alt+click or
> Repeat (shortcut R). Select the four bars
z-click, and hit R to see the bars repeated
immediately after themselves. You can use this to quickly repeat any note, chord, text, passage of
music or various other objects after itself.
You can also use the traditional way of copying music to clipboard by choosing
Ctrl+C or
XC), followed by
Edit > Paste
(shortcut
Ctrl+V or
XV) to paste it elsewhere. This
Edit > Copy
(shortcut
method is slower than the previous ones and so is not particularly recommended, except for copying
music between different scores (because
Alt
+click or z-click only copies within the same score).
Both Edit > Copy and Edit > Paste functions are available on the context-sensitive menu you get by
right-clicking (Windows) or Control-clicking (Mac) when one or more objects is selected.
Using the different methods we’ve discussed for copying music, complete the missing bars in the
guitar part by copying the preceding bar (or bars) into any remaining empty bars on the acoustic
guitar staff.
Project 1
49
Page 50

Project 1
1.4 Flexi-time™ input
If you are starting from this section of the project, you should open the example score called
Project 1 and make the 4 Flexi-time input
Versions > Edit Versions
We’ve already looked at note entry by clicking on a staff with the mouse, and by inputting notes
using the Keyboard window. There are, however, much faster ways to input notes, which you
should try and see which one feels most comfortable for you – or mix and match; you don’t need to
tell Sibelius that you’re changing input method. We’re going to look now at Sibelius’s unique realtime note input system, which is called Flexi-time.
“Real-time” input simply means that you can play into a computer program and it will write down
both the pitches and the rhythm you play. That’s the theory, anyway. In practice, it is very difficult
for any program to understand what rhythm you are playing without either analyzing the music
after your performance, or being given a lot of help. This usually means you have to play along as
exactly as possible with a metronome click, and then “quantize” the music afterwards in an
attempt to clean up any inaccuracies in your rhythm.
However, Sibelius takes a unique approach that enables you to play in a rather freer style, and still
get good results.
, selecting this version in the list, and clicking
version into the
Current version
Make current
, by choosing
.
File >
If you don’t have a MIDI keyboard or MIDI guitar, skip on to
time input on page 53.
b 1.5 Alphabetic and step-
Using a MIDI device
To use Flexi-time, you must have a MIDI keyboard or MIDI guitar connected to your computer –
see 1.1 MIDI setup for Windows on page 26 or 1.1 MIDI setup for Mac on page 29.
Once your MIDI device is correctly installed, you can set up input and playback in Sibelius. To do
this, you should choose File
Devices page:
> Preferences (in the Sibelius menu on Mac) and go to the Input
50
Page 51

1.4 Flexi-time™ input
Ti me c o d e
readout
Rewind
Current
tempo
Flexi-time
Tempo slider
Move Playback
Line to Start
Play
Fast-forward
Stop
Move Playback
Line to End
Live
Playback
Click (on/off)
Timeline slider
MIDI in & out
indicators
Record Live
Te mp o
Play Live
Te mp o
You should find your device’s name in the table at the top of the page (e.g.
check that the
the
Type
Use
checkbox is switched on. If you are using a MIDI guitar, you will need to change
value by clicking the drop-down menu and choosing
Guitar
M-Audio Oxygen 8
, rather than
Keyboard
For this chapter, we’re going to be using a MIDI keyboard. To learn more about setting up input
and playback with MIDI devices,
b 1.10 Input Devices in Reference.
Flexi-time options
The easiest thing to do is to try playing in a single melodic line. Let’s do this first – you should be
looking at the Scarborough Fair score we’ve been working on.
We’re going to record one verse of the clarinet part, so to ensure that we get the best results, choose
Notes
> Flexi-time Options (shortcut Ctrl+Shift+O or xXO).
Because we’re recording in time with other instruments – and we’re only recording one line of
music – you should choose None (non rubato) from the Flexibility of tempo drop-down list,
and switch off the Record into multiple voices checkbox.
Click OK to return to the score.
Trying it o ut
You’ll need the printout of the score that we made at the start of this project in order to read the
music from it.
The Playback window allows you to view and control Sibelius’s playback. If you can’t see the
Playback window, switch it on by choosing Window
> Playback (shortcut Ctrl+Alt+Y or zXY):
) and
.
Project 1
We’ll start playing in notes using Flexi-time from bar 43 until the end of the verse in bar 61: select
bar 43 in the clarinet staff so that it is enclosed in a single light blue box (or select the little bar rest
rectangle itself); this tells Sibelius where to start recording from
Now brace yourself, because as soon as you choose Notes > Flexi-time Input (shortcut
Ctrl+Shift+F or
Sibelius will give you one bar count-in, then start recording what you play. Try it now:
* Flexi-time gives you a single bar’s count-in by default – so in this case you should hear three
xXF) or click the circular record button on the Playback window,
clicks count-in. (If you do not hear a metronome click, check your playback device is switched
on, then
b 1.4 Flexi-time or b 4.1 Working with playback in Reference.)
51
Page 52

Project 1
* At the end of the count-in, try playing the next few bars smoothly, following the speed of the
clicks
* Keep going for as long as you like, and notice how Sibelius displays the notes on the screen (it
will usually be several notes behind you). It may be easiest not to watch the screen while you’re
recording!
* When you want to stop recording, click the square stop button on the Playback window or hit
Space.
Take a look at what Sibelius has transcribed – if you’re not happy with the result, then simply select
the bars you’ve just inputted, hit Delete and select bar 43 again. Take as many attempts as you
need, until you’re happy with the result. If you want Sibelius to slow down your score while you
record, see Adjusting the recording tempo, below.
In Project 3 of this Handbook, we’ll learn how to input onto two staves simultaneously. You can
also change other options such as rubato (the flexibility of your tempo), the sound and count-in of
the metronome click, and the way in which triplets and other tuplets are recognized –
Flexi-time in Reference.
Adjusting the recording tempo
Don’t worry if you’re having difficulty or your keyboard skills are a bit rusty – Sibelius doesn’t
expect you to be a virtuoso! In a moment we’ll look at tidying up the transcription, but first we’ll
learn how to make Flexi-time recording a bit easier.
b 1.4
The tempo slider on the Playback window allows you to speed up or (more importantly in this
case) slow down playback of your score. This applies to recording Flexi-time input too – set the
slider to the left-hand side and the click will slow down, allowing you to play more carefully.
You should only use the tempo slider to change the speed of playback for your whole score; for
changes in tempo you should use tempo text and metronome markings added to the score – see
b 1.7 Text and dynamics on page 60.
Renotate Performance
If you find that you end up with unwanted rests, overlapping notes or incorrect note durations, you
can use one of Sibelius’s plug-ins (powerful extra features) to make these more legible. Select the
passage and choose Plug-ins
ple dialog. Since the music we recorded doesn’t use any note value smaller than an eighth note
(quaver), set the Quantization unit (minimum duration) drop-down to Longer: 1/8 note
(quaver). Make sure that the Overwrite selected passage checkbox is switched on, and click
OK. Sibelius will recalculate the Flexi-time transcription and produce a rhythmically and visually
simpler version.
If there are still any mistakes, you can use the editing techniques you have already learned to correct the note values and pitches. You may also like to experiment with the other plug-ins in the
Plug-ins
> Simplify Notation menu.
To learn more about plug-ins, b 6.1 Working with plug-ins in Reference.
> Simplify Notation > Renotate Performance, which opens a sim-
52
Page 53

1.5 Alphabetic and step-time input
1.5 Alphabetic and step-time input
If you are starting from this section of the project, you should open the example score called
1
and make the
File>
Versions>
Now let’s finish inputting the notes into the clarinet staff; we’re going to learn two more ways of
creating notes in Sibelius. You’ll need the printout of the score that we made at the start of this
project in order to read the music from it.
5 Alphabetic and step-time input
Edit Versions
, selecting this version in the list, and clicking
version into the
Current version
Make current
, by choosing
Alphabetic input
You can input notes into Sibelius by typing the pitches using the letters A–G directly from the
computer keyboard, and make chords using the numbers 1–9 on the main keyboard (not the
numeric keypad). This is much quicker than mouse input once you’re used to it.
Try adding the music to the clarinet part from bar 66 to bar 68:
* Click the little bar rest rectangle in bar 66 of the clarinet staff, so that it goes dark blue – this tells
Sibelius where to begin. From now on, do not touch the mouse – however tempted you are!
* Hit N (the shortcut for Notes > Input Notes), which makes the caret appear
* Hit F7 to see the first Keypad layout (if it isn’t showing), then type 3 on the numeric keypad to
choose an eighth note (quaver). You must choose a note value, so that Sibelius knows how long
you want the notes to be.
* Ty pe F C A. Notice that Sibelius has input the A an octave too low, so type Ctrl+3 or X3 to
move the note up an octave. Notice that the caret moves after every note you input, showing you
where the next note will be added.
* Ty pe F C and then Ctrl+3 or X3 to move the C up an octave
* Ty pe A to add another eighth note
* Ty pe 5 on the keypad to select a half note (minim)
* Ty pe D 4 (on the numeric keypad) C A. This inputs a D half note, C and A quarter notes
* Now, to input a B natural, type 7 (on the numeric keypad) to select the natural
* Ty pe B G to input the B natural and a G quarter note
* Hit Esc twice to stop creating notes and deselect the last note, as we’ve stopped adding notes for
the moment.
Project
.
Project 1
You should end up with this:
Just as notes are only created by the mouse when you actually click in the score, with alphabetic
input, a note is only actually created in the score when you type the letters A–G. Any buttons cho-
sen on the keypad are merely preparing what will happen when you type A–G or click the mouse.
So, as with mouse input, you need to type any accidentals, articulations, or other Keypad markings
before typing the letter. (If you forget, you can always go back afterwards and edit the note.) The
53
Page 54

Project 1
only exception is adding ties (by hitting Enter) which is done after creating the note (just because
it feels more natural as the tie is after the note).
Once you get used to changing the durations with one hand, using the numeric keypad, and inputting the pitches with the other hand, using the letters A–G and R, you’ll find this a very fast
method of creating notes.
Remember, you can edit an existing note’s articulations, accidentals and other attributes just by
selecting the note and choosing the appropriate button on the Keypad. Changing the pitch of a note
is just as simple: select the note and type the new pitch using the letters
A–G
. We’ve already seen how
to change the length of a note by selecting it and choosing different note values from the Keypad.
Use alphabetic input to enter the rest of the missing music from the clarinet part into your score
from bar 69.
For more details
b 1.1 Note input in Reference.
Chords in alphabetic input
There are two simple ways to build chords in alphabetic input. Input one of the notes in the chord
as normal, then:
* on a regular keyboard, type a number 1–9 on the main keyboard (not the numeric keypad) to
add a note an interval above, or type Shift-1–9 to add a note below; e.g. 1 adds a unison note, 3
adds a note a third above, Shift-6 adds a note a sixth below
* on a notebook (laptop) computer’s keyboard (see Notebook (laptop) shortcuts on page
41), type Shift-1–9 to add an interval above, e.g. Shift-4 adds a note a third above
* on either kind of keyboard, type Shift-A–G to add a note of that pitch above the current note.
(There aren’t shortcuts for adding notes below by letter-name.)
You can keep adding further notes to a chord in the same way.
Especially useful, you can select passages of notes and add notes above/below all of them at once
using 1–9 or Shift-1–9.
Step-time input
We’ve already looked at how to use a MIDI device to input music into Sibelius by recording in a
real-time performance. You can also use your MIDI keyboard (or MIDI guitar) to play in pitches in
a similar way to the alphabetic input.
If you don’t have a MIDI device connected to your computer, complete this section using the
alphabetic input method we just learned – or use the Keyboard window as a virtual MIDI
keyboard! (
b 1.3 Keyboard window in Reference.)
Step-time input is like alphabetic input using a MIDI input device, and is faster still. All you do is:
* Select a rest to start creating notes from, and type N to make the caret appear
* Choose a note value on the Keypad (you must remember to do this, or Sibelius has to guess)
* Start playing notes on the MIDI keyboard. As with alphabetic input, choose any articulations or
other markings on the Keypad before creating a note. These Keypad keys remain on until you rechoose them.
54
Page 55

1.5 Alphabetic and step-time input
* To change note value, choose a new note value from the Keypad before creating the note
* To in put a re st, hit 0 on the keypad, which inputs a rest of the value selected on the Keypad.
The only differences from alphabetic input are:
* You don’t need to input accidentals, as Sibelius can of course tell when you’re playing a black
note. Sibelius makes an intelligent guess as to how you want black notes “spelled” – e.g. as F# or
Gb – on the basis of the key signature and the musical context. However, you can ask Sibelius to
“respell” a note after creating it just by hitting Return (on the main keyboard).
* Similarly, Sibelius always knows which octave you want
* You can input chords instantly just by playing them (you don’t have to input one note and then
add further notes to it, as you would with alphabetic input).
These differences make step-time input somewhat faster than alphabetic input. Try inputting the
rest of the missing music onto the acoustic guitar staff from bar 69, using step-time input:
* First, select the bar rest in bar 69 in the acoustic guitar staff (so it goes dark blue)
* Next, choose eighth notes (quavers) from the Keypad
* Now begin playing in the notes, changing the note lengths from the Keypad as you go.
You can always go back with the arrow keys if you made a mistake, or want to change something.
As with alphabetic input, to correct a note or chord’s pitch you can just select it and re-play it on
your MIDI keyboard. Or there’s always Undo!
Project 1
It is much faster to use your MIDI keyboard (or MIDI guitar) to create chords than by clicking
notes with the mouse or typing using your computer keyboard. For more details,
b 1.1 Note
input in Reference.
Don’t forget that you can use Alt-click or
z-click to copy music, and R to repeat notes or bars.
Transposing scores
By default, your score is shown at sounding (concert) pitch. To switch to transposing pitch
and show the clarinet staff at the correct pitch for the performer to read, simply choose
Notes
> Transposing Score (shortcut Ctrl+Shift+T or xXT) or click the button on the
toolbar (shown above left) – try this now. Notice how all of the music and key signatures on the
clarinet staff are instantly changed to the clarinet’s transposing pitch. Sibelius automatically handles all other complications produced by transposing instruments.
When playing back a transposing score, Sibelius reads transposing instruments correctly to produce the correct pitch. Sibelius transposes music when you copy it between transposing instruments so that it always sounds the same. (When viewing instrumental parts from a sounding pitch
score, Sibelius automatically transposes transposing instruments for you – see below.)
Sibelius’s note input methods allow you to enter notes into a score with Notes
Score switched on. If you type notes using the letters A–G, then the corresponding written pitches
will appear on the staff:
* Choose Notes > Transposing Score or click the toolbar button to switch to transposing score
* Select the first two bars of the clarinet staff and hit Delete to clear the notes
* Ty pe N to make the caret appear and choose a note value from the Keypad
> Trans po sin g
55
Page 56

Project 1
* Ty pe A B C D, which inputs the pitches A, B, C and D on the staff
* Choose Notes > Transposing Score or click the toolbar button again to switch to sounding
pitches – notice how the pitches transpose automatically to become G, A, Bb and C.
However, when you play pitches in step-time using a MIDI input device, then the sounding pitches
will appear on the staff:
* Choose Notes > Transposing Score or click the toolbar button to switch to transposing score
* Select the first two bars of the clarinet staff and hit Delete to clear the notes
* Ty pe N to make the caret appear and choose a note value from the Keypad
* play the notes A, B, C and D on your MIDI input device.
Notice how this inputs the pitches B, C#, D and E on the staff.
b 2.18 Instruments in Reference
for more details.
Undo the changes you made and restore the clarinet countermelody by choosing Edit
> Undo.
Working with parts
As well as automatically transposing instruments in a score, Sibelius creates a set of instrumental
parts – one for each instrument in your score. These only contain notation relevant to the
instrument and Sibelius takes care of all the formatting, transposing and laying out.
Sibelius uses a revolutionary approach by which any change made in the score is automatically
made in the part, and vice versa. These magical creations are known as dynamic parts™.
You can edit dynamic parts in exactly the same way as you would a score. You can move, add and
delete notes, add slurs, expression markings etc. just as you would normally. But whenever you
change something in the score, the parts are instantly updated, and vice versa. You don’t need to
extract dynamic parts, and in fact, they’re all kept in the same file as the full score – so they’re
easier to organize, too.
Because parts are created automatically when you start a score, you don’t need to do anything. Let’s
look at the parts for the instruments in the Scarborough Fair score:
* Click on the drop-down menu on the toolbar that says Full Score; this is the parts menu
* Choose Clarinet in Bb from the list – the view changes to display one instrument, laid out on
cream-colored paper to help you quickly differentiate between a score and a part.
This part is ready for you to give to a performer; it has the same title, the same notes as the score
(but at the correct written transposition) – in fact, it has everything the instrumentalist needs to
perform this part, and nothing that they don’t!
Try selecting a bar and transposing it up an octave by typing Ctrl+
Window
> Switch to Full Score (shortcut W) or click the toolbar button on the left.
3 or X3, then choose
Sibelius has transposed the same passage up an octave in the full score. Type Ctrl+2 or X2, to
move the passage back to the original octave.
We’ll learn more about how to work with dynamic parts in the other projects in this Handbook –
for more details,
b 7.1 Working with parts in Reference.
56
Page 57

1.6 Playback
1.6 Playback
If you are starting from this section of the project, you should open the example score called
Project 1 and make the 6 Playback
Versions > Edit Versions
One of the most powerful features of Sibelius – which we’ve not really seen yet – is the ability to
play your score back.
, selecting this version in the list, and clicking
version into the
Current version
Make current
, by choosing
.
File >
Playback controls
Click the Play button on the Playback window, or hit Space to start the music, which should begin
to play back (if it doesn’t, then see below). You can also find this function in the Play menu, but
who needs menus?
Sibelius automatically hides the Keypad (and the Properties window, if it’s open) and zooms to show
you a full page of music. You’ll see a vertical green line (called the playback line) passing through the
music to indicate the position as it plays, and the score moves around to follow the music.
Why not listen to the arrangement of Scarborough Fair all the way through? When you want to
stop, just click the Stop button on the Playback window, or hit Space again.
You can rewind and fast-forward through a score using the appropriate buttons on the Playback
window or by using the keyboard shortcuts [ (rewind) and ] (fast-forward).
Clicking the Play button or typing Space will tell Sibelius to play again from the point where it left
off, i.e. wherever you stopped it playing before, so to play a piece from the start again, you should
rewind to the beginning of the score – to quickly rewind or fast-forward to the start and end of the
score, use Ctrl+[/] or
To play from a particular point, you can alternatively click on a note to select it, and hit P. So an even
quicker way to play from the start of the score is to hit
If you have problems with playback, see I can’t hear anything! below.
X[/].
Esc
to deselect everything, then hit P to play.
The Mixer window
As you play back Scarborough Fair, you may have noticed that the instruments sound like they
are at different stereo positions – this is Sibelius’s SoundStage™ feature at work, which positions
instruments in 3D space as if set out on a concert stage.
Project 1
You can adjust the position and volume (as well as applying reverb and other effects) for
each instrument yourself from Sibelius’s powerful Mixer window. To show the Mixer, click
the toolbar button (shown here), choose Window
or M.
The Mixer is divided into color-coded strips. In the picture above, you can see that each staff in
your score gets its own light blue staff strip. Find the acoustic guitar staff strip, and click and drag
the volume fader to the right-hand side, to make the guitar sound louder during playback. Drag
the volume fader up to 118.
> Mixer, or hit the shortcut Ctrl+Alt+M
57
Page 58

Project 1
Now, let’s change the stereo position of the drums. Find the drum set staff strip and click the
arrowhead to the left of the instrument name, which expands the staff strip:
You will see lots more controls, including another slider above the Reverb and Chorus knobs. Hit
Space, and while Sibelius plays back the score, click and drag this slider all the way to the lefthand side. Can you hear how the drum sounds seem to “move” to your left?
Let’s look at how to use the Mixer to add effects such as reverb and chorus to instruments in a
score:
* Find the guitar staff strip and expand it by clicking the arrowhead
* Click on the knob labeled Reverb
* Drag with the mouse to turn the knob and adjust the amount of effect applied to the guitar –
listen to how the sound changes. The Scarborough Fair score uses the powerful built-in Sibelius
Player and the Sibelius Sounds Essentials sound library to create incredibly realistic sounds. As
you mix more reverb into the guitar sound, can you hear how it starts to sound like the guitarist
is playing in a big concert hall?
Any changes to volume, effects, stereo position (pan) and so on that you make in the Mixer are
saved when you save your score (or save a version of your score) so that everything is just as you
left it when you open it again.
To learn all about Sibelius’s playback and the Mixer,
b 4. Playback & video in Reference.
58
Page 59

1.6 Playback
I can’t hear anything!
If you press Play but can’t hear any noise, there are a number of things you should try before throwing your computer out of the window.
First, check that your computer speakers, MIDI keyboard or other playback equipment are
plugged in, switched on and have the volume turned up. Next, check to see if your computer operating system is configured to play audio produced by Sibelius. Find your operating system from the
list below and follow the instructions.
Windows XP:
* Go to the Start menu and choose Control Panel, then double-click Sounds and Audio Devices
* Click the Audio tab at the top, then click the Volume button
* Make sure the main Volume Control and MIDI Synth/SW Synth are turned up and Mute is
not selected.
Windows Vista:
* Go to the Start menu and choose Control Panel, then Hardware and Sound
* Select the Adjust system volume link immediately underneath the Sound heading
* Make sure the Sibelius volume (under Applications) and the main Device volume are not
muted and are turned up
Project 1
Mac OS X:
* Go to the Apple menu and choose System Preferences
* Select Sound and then click on the Output tab
* Make sure the Output volume is turned up and Mute is not selected.
If you still can’t hear anything during playback, check that Sibelius is correctly configured:
* Choose Play > Playback Devices
* Select Sibelius Sounds from the Configuration drop-down menu
* Select Sibelius Player in the right-hand column, then click the Tes t button
* If you still can’t hear any sound, click Audio Engine Options at the bottom of the dialog
* Check that your preferred interface is selected (on Windows, choose ASIO if available; otherwise
choose Primary Sound Driver) and click Close
* Select the Sibelius Player entry in the right-hand column, then click the Tes t button again.
If you are still unable to hear Sibelius play your score, please contact technical help.
See
b 4.12 Playback Devices in Reference for more information.
59
Page 60

Project 1
1.7 Text and dynamics
If you are starting from this section of the project, you should open the example score called
Project 1 and make the 7 Text and dynamics
File > Versions > Edit Versions
Other than the notes, many instructions for musicians playing from a score take the form of text. A
lot of the text in a Sibelius score is entirely automatic so you don’t have to think about adding it, e.g.
page numbers, bar numbers and instrument names. But you’ll also want to add all kinds of other
text yourself, from dynamics and lyrics to metronome marks and tempo text. Most text instructions play back, so when you create dynamics or tempo markings, Sibelius understands them and
plays back accordingly.
, selecting this version in the list, and clicking
A word about text
Each type of text you can create in Sibelius has its own so-called text style, which specifies its font,
size, position and other characteristics. Text styles are called obvious things like Title, Lyrics and
Tempo. If you want to change the font or size, you can change pieces of text individually, but it’s
usually best to do so by editing the text style, as this will instantly change all similar text
throughout the score –
There are a few things you should remember when editing text:
b 3.9 Edit Text Styles in Reference.
version into the
Current version
Make current
, by choosing
.
*
If you just want to change the characteristics of a small amount of text, you should use the options
on the
Text
panel of the Properties window. By default, the Properties window is not shown on
the screen, because you won’t often need to adjust settings in there. Switch it on by choosing
Window>
* If you want to change all of the text in your score to use another font (e.g. to change the title,
instrument names, lyrics, technique instructions etc. to another font in a single operation),
choose House Style
* If you want to change all the text throughout the score in just one particular text style, you
should edit the text style itself instead (
cally change all existing text and also all new text you create in that style thereafter. For example,
if you decide you want your lyrics in a different font, you should edit the text style rather than
changing all the existing words manually.
Properties
(shortcut
> Edit All Fonts, and choose a new Main Text Font.
Ctrl+Alt+P or
zXP
).
b 5.17 Properties
b 3.9 Edit Text Styles), because this will automati-
in Reference.
Adding lyrics
The vocal staff in the Scarborough Fair score has no lyrics, which isn’t very helpful for any singer
wanting to perform our arrangement!
Let’s add the lyrics:
* Click on bar 5 of the vocal staff to select it
* Choose Create > Te xt > Lyrics > Lyrics line 1 (shortcut Ctrl+L or XL)
* A flashing caret appears below the first note
* Now type the first line of lyrics.
60
Page 61

1.7 Text and dynamics
Are
mf
you go ing-toScarbo- rough- Fair?
5
To add a break between syllables, type – (hyphen) and Sibelius will automatically position the text
cursor at the next note. If the syllable spans more than one note, hit hyphen repeatedly (once for
each note) until the cursor appears under the note where you want to enter the next syllable. To
add a break between words, type Space. If the last syllable of the word you entered spans more
than one note, repeatedly type Space until the cursor appears under the note where you want to
start the next word. Sibelius will indicate that the word is supposed to continue melismatically by
drawing a line up to the point at which the syllable ends.
You should now see:
Importing lyrics from a text file
Typing in lyrics by hand can be quite a laborious task – especially if you have to work out where to
syllabify words. Sibelius can import a text file containing the lyrics to your song and automatically
syllabify them for you. A text file containing the words to Scarborough Fair is included in the
Project Files folder of example scores.
Let’s import the lyrics:
* Triple-click the vocal staff to make a passage selection around the entire staff
* Choose Create > Tex t > Lyrics > From Tex t File
* Click Browse to see a standard Open dialog. On Windows, you should find that you are inside a
folder called Scores, which will contain a shortcut to a folder called Example Scores. On Mac,
you should find an alias called Sibelius Example Scores. Double-click this, then go into the
Project Files folder, select the text file called Project 1 Lyrics, and then click Open.
* Click OK to import the lyrics (they will automatically overwrite the first line of lyrics you just
typed in).
Project 1
You can also copy lyrics from other programs (such as word processors), create multiple verses of
lyrics, and control every aspect of their appearance and formatting –
b 3.3 Lyrics in Reference.
Dynamics
The term dynamics is used to mean both text instructions like mp and hairpins (wedge-shaped
cresc./dim. lines), which Sibelius will respect when playing back your score – just as you’d expect a
performer to do. Text dynamics are written in a text style called Expression.
Let’s create a text dynamic at the start of the piece:
* Select the first note of the clarinet staff
* Choose Create > Tex t > Expression (shortcut Ctrl+E or XE)
* A flashing caret appears below the first note
* Hold down Ctrl or X and type F – holding down Ctrl or X tells Sibelius to write the letters using
the special bold characters which should be used for dynamics – you could instead right-click
(Windows) or Control-click (Mac) to see a menu of useful words appear. This menu is,
appropriately enough, called a word menu.
61
Page 62

Project 1
Voice
Allegro
* Hit Esc to stop creating text.
You should now see:
f
Now add the rest of the missing text dynamics to the vocal, clarinet and acoustic guitar staves in
the score, referring to the printout of Scarborough Fair that we made at the start of this project. You
can write all the dynamics in this arrangement either by holding down Ctrl or
to tell Sibelius to use the special bold characters, or by using the word menu.
X as you type them
Tempo text
Tempo text is used at the start of a score and at sections where the tempo of the music changes dramatically. Sibelius follows tempo text during playback and changes the speed accordingly. You may
have noticed when playing back the score during the previous chapter that it sounds a little too
slow. If you didn’t notice, hit Space now to play back your score and listen again!
Let’s change the tempo by adding some Tempo text:
* Ty pe Ctrl+Home or X4 to go back to the start of the score, and select the first bar (this tells
Sibelius where to put the tempo marking)
* Choose Create > Te xt > Temp o (shortcut Ctrl+Alt+T or zXT)
* A flashing caret appears above the bar – Sibelius knows that this type of text should go above the
staff, so it automatically puts it there
* Now right-click (Windows) or Control-click (Mac) to display the tempo markings word menu
* Choose Allegro from the menu and click it. The menu disappears and the word Allegro
appears in your score.
* Hit Esc to stop creating text.
Technique text
62
You should now see:
Now, rewind the score to the beginning and hit Space to play back your score (make sure that the
tempo slider on the Playback window is set to its middle position to hear exactly the right speed).
You could try experimenting with a few of the different tempo suggestions available in the word
menu by deleting the Allegro marking and choosing Create
score would sound using Prestissimo or Maestoso.
To tell a performer to change the sound of an instrument, or to employ a particular instrumental
technique or device, use Technique text. Sibelius understands your instructions too, and will play
them back (depending on your playback device), so that you can use mutes, pizzicato, tremolo,
distortion, and other effects in your score.
> Text > Te mp o again – see how the
Page 63

1.7 Text and dynamics
Technique text is like Expression text, but it appears above the staff and non-italicized by default.
To create a technique marking, choose Create
> Text > Tech niqu e (shortcut Ctrl+T or XT).
For more about Expression, Tempo and Technique text and other common text styles, b 3.2
Common text styles in Reference.
Editing existing text
To edit text that’s already in your score, you can double-click it, or select it and hit Return (on the
main keyboard). Let’s change the name of an instrument in this way:
* select the instrument name Drum Set at the start of the first system
* double-click the text to edit it
* delete the existing text and type Drum Kit
* hit Esc once to stop editing text, then again to deselect.
You can do this to any piece of text in your score, so it’s easy to change titles, lyrics, dynamics and
other instructions.
Magnetic Layout
As we’ve been editing, you may have noticed that text and other objects in your score move around
as the notes move. Or, you may have seen that some objects, when they’re selected, have a shadow
object appearing underneath them.
What you’re seeing are the effects of Magnetic Layout, Sibelius’s revolutionary collision avoidance
and detection feature. No other notation software does the work of automatically laying-out your
score beautifully for you as you create and edit the music! Magnetic Layout constantly adjusts the
position of objects on the staves so that they don’t overlap each other or obscure the notes.
We’ll learn more about how it works in Project 2, or
b 8.2 Magnetic Layout in Reference.
Project 1
63
Page 64

Project 1
64
Page 65

Project 2
Project 2
Page 66

Project 2
66
Page 67

2.1 Creating a new score
2.1 Creating a new score
In this project, you will learn how to create a new score from scratch, how to scan music into Sibelius and how to present your score beautifully and clearly for the benefit of performers.
The first chapter of this project shows you how to create a string quartet score ready for you to
input notes; you’ll learn how to quickly set up a “manuscript paper” containing everything you
need to start writing music.
Printout
Before we start creating a string quartet score, you’ll need a printout of the finished score of the
music we’ll be creating, to refer to whilst completing the rest of this project. Choose File
(shortcut Ctrl+O or
inside the example scores folder. Open this score and choose 1 Creating a new score from the
versions drop-down list on the toolbar.
You should now see a completed string quartet arrangement of an excerpt from Edward Elgar’s
String Quartet in E minor, Op.83, III. Finale: Allegro molto.
XO) and find the example score called Project 2 in the Project Files folder
> Open
Project 2
Choose File
your score. Within a few moments, a printout of the String Quartet in E minor score should
emerge from your printer. Hold on to this, because you’ll be reading music from it when we edit
our arrangement shortly.
> Print (shortcut Ctrl+P or XP) and click OK on Windows or Print on Mac to print
Starting a new score
To start a new score, click the icon on the toolbar shown on the left, or choose File > New
(shortcut Ctrl+N or
through the creation of your score in five easy steps:
* Choose the instruments from a list of pre-defined “manuscript papers,” or create your own
instrumentation, and choose the page size and orientation
* Decide the appearance of the score, e.g. whether to use a traditional or handwritten music
design
* Set the initial time signature and tempo
* Set the initial key signature
* Finally, give your score a title, enter the composer’s name, etc., and create a title page, if you want
one.
You ca n click Finish after any step, so you don’t have to make all of these decisions at the very
beginning if you don’t want to.
The dialog is so simple to use that you probably don’t need any help getting from one end to the
other, but since we want to set up a particular kind of score, let’s work through it together.
XN). A dialog captioned New Score appears, which guides you
67
Page 68

Project 2
Manuscript paper
The first page of the dialog lists many types of instrumentation in alphabetical order. Just like
selecting real manuscript paper in a store, you can choose between different shapes and sizes (at
the bottom), or pick paper that is pre-printed with standard groups of instruments.
If you’re writing for a standard ensemble, it’s a good idea to use one of Sibelius’s built-in
manuscript papers rather than defining your own, because the supplied ones have numerous helpful defaults, such as special instrument name formats, suitable staff sizes and so on, already set up
for you. (Later you can learn how to create your own manuscript papers.)
To start a string quartet score (which is what we want) it’s quickest to use the String quartet manuscript paper, but for the moment just choose Blank (which is, as the name suggests, completely
blank manuscript paper), because we want to learn how to create instruments.
When you click Next, Sibelius will ask you if you want to add instruments to your score. Click Yes.
Creating instruments
You can create new instruments whenever you like – you don’t need to decide them all at the start –
but you should pick at least one instrument initially otherwise you’ll have nothing to write music for!
Because Sibelius knows about so many instruments (more than 600), the Choose from list at the
top left of the dialog shows you more convenient selections from the whole set. By default, Sibelius
shows you the Common instruments, which number around 90; however, if you’re itching to
write for more obscure instruments such as Quint Bassoon, Ondes Martenot or Hurdy-Gurdy, click
All instruments to display the complete set. If you’re writing specifically for band, jazz or
68
Page 69

2.1 Creating a new score
orchestral ensembles, choose the appropriate option from the list to see standard instruments used
in those ensembles. Don’t worry if you can’t find a particularly unusual instrument – Sibelius also
lets you design your own (
The instruments are listed in the standard order in which they would appear in a score, but again
you can customize the order if you want to.
We’re going to input an excerpt from Elgar’s String Quartet in E minor, so we’ll need to add two
violin instruments, a viola and a cello. Choose Strings in the Family list, then Violin (solo) in the
Instruments list, and click Add twice to put two solo violin staves into the rightmost Staves in
Score list. Add the Viola (solo) and Violoncello (solo) instruments in the same manner and
then click OK. The instrument names for the violins aren’t correct, but you can fix that later on.
b 8.14 Edit Instruments in Reference).
(You can see this dialog again at any time by choosing Create
single key shortcut I. It’s very useful, as it allows you not only to add and remove instruments from
your score, but also to change their order at any time.)
> Instruments, or by typing the
House style
You’re now returned to the second page of the
style of the score you’re about to create. You can think of the house style as the “look” or appearance
of your score; different publishers have different house styles, and Sibelius allows you to tweak the
look of your score in just about every imaginable way, from the fonts you use, to the size of the
staves and notes, to the most intricate details, such as the thickness of final double barlines!
We don’t need to worry about these details at the moment though, so you can leave (Unchanged)
selected in the list. If you want, take a look at the list of pre-defined house styles shown on the
screen; clicking on them in the list updates the preview display of your score. The names indicate
the music font (i.e. the design of the notes and other symbols) used in the house style, e.g. Opus,
and the main text font, e.g. Times. (You may like to experiment in future with different house
styles. The ones using the Reprise and Inkpen2 music fonts look handwritten – particularly suitable for jazz. And the Helsinki music font has a traditional engraved look.)
Leave the main text font at the default setting (Unchanged), and click Next.
New Score
dialog, which allows you to set the house
Time signatures and tempo
The third page of the dialog allows you to choose a time signature and set the tempo of your score.
Project 2
69
Page 70

Project 2
Leave the time signature at the default choice, 4/4, and because we want a pick-up (upbeat) bar,
switch on Start with bar of length. Our pick-up bar is one sixteenth note (semiquaver) long, so
choose that from the menu. You can, of course, change time signature (and just about everything
else) at any point while working on your score, so we’re just setting the initial time signature here.
We need to add a tempo marking, so for Tempo text, type Allegro molto and switch on
Metronome mark to add a specific tempo. Our tempo is 132 quarter notes (crotchet) per minute,
so choose a quarter note from the menu and type 132. Now click Next.
Key signatures
The fourth page of the dialog allows you to choose a key signature. Choose Minor keys, then select
E minor from the left-hand list, and click Next.
Score info
The fifth and final page of the dialog allows you to enter some text, such as the title of the score, the
name of the composer/lyricist, and copyright information. The text is automatically added to the
first page of music, and if you switch on Create title page, Sibelius will add the title and
composer to an extra title page it creates for you, too – for now, leave this switched off, since we’ll
learn how to add a title page later on.
For now, enter Quartet for Strings as the Title, Edward Elgar, Op.83 as the Composer, and
click Finish. (As we mentioned earlier, you can in fact skip some of the steps when starting a score
by clicking Finish at any earlier point.)
A mere blink of an eye later, Sibelius has created your score, ready for you to start adding notes:
One detail to take care of: double-click the “Violin” instrument name on the first violin staff and
edit it to “Violin I”, then do the same for the second violin staff, changing it to “Violin II.” There!
Save your score
Don’t forget to save the score at this point! We’re going to need to input some scanned music into it
in the next chapter, so choose File
your Scores folder or the Desktop), give your score a name – such as Elgar – then click Save. On
Windows, the Scores folder is inside your My Documents folder; on Mac, the Scores folder is
inside your user Documents folder.
> Save (shortcut Ctrl+S or XS), find a suitable location (e.g.
70
Page 71

2.2 Scanning
2.2 Scanning
If you are starting from this section of the project, you should open the example score called
Project 2 and make the 2 Scanning
Versions > Edit Versions
Sibelius comes with a free scanning program called PhotoScore Lite, which scans and reads
printed music. If you have existing printed sheet music, or PDF files, you can scan and read the
music directly into Sibelius, ready to edit or transpose, play back, create parts and print – just as if
you’d inputted it yourself.
This chapter shows you how to turn the new score you just created into a full conductor’s score
from a set of string quartet parts. (If you don’t have a scanner attached to your computer, you can
still complete this chapter, since we’ll be scanning PDF files.)
, selecting this version in the list, and clicking
Scanning in PhotoScore Lite
Before we go any further, you should make sure that you’ve installed PhotoScore Lite from your
Sibelius DVD-ROM.
version into the
Current version
Make current
, by choosing
.
File >
Project 2
In Sibelius, choose File
(shown here) to launch PhotoScore. When PhotoScore has opened, click the Open PDFs
button on the toolbar.
A standard Open dialog appears. Find the folder named Project Files in the example scores
folder, select the String Quartet - Violin I.pdf file and click Open.
Before PhotoScore scans and processes the PDF file, it allows you to choose the resolution (in dpi)
to scan at. Higher resolutions are scanned in greater detail, but take longer to process. Set your
own resolution by typing 600 into the text field then click OK.
PhotoScore now processes the file and automatically “reads” the scanned pages to work out what
the notes and other markings are.
> Scan with PhotoScore or click the Scan button on the toolbar
71
Page 72

Project 2
Editing scanned music
Once the music has been read by PhotoScore Lite, its interpretation of the first page of the violin
part pops up in the main window. Here you can edit any mistakes PhotoScore Lite has made.
The top part of the window (with a buff-colored background) shows you the original page. The
Full detail view window at the top right-hand corner shows a zoomed-in portion of the original
page, according to where you point your mouse.
The large bottom part of the window (with a light gray background) shows PhotoScore Lite’s
interpretation of the first scan – that is, what PhotoScore thinks the first page of the original says.
Hence this part of the window is where PhotoScore Lite’s mistakes can occur.
Notice that PhotoScore Lite has a Keypad in the bottom right-hand corner and a Create menu at
the top of the window. Both of these are similar in function to the Keypad and Create menu in
Sibelius, though features not appropriate for PhotoScore Lite have been omitted.
Let’s correct some of the mistakes by comparing the bottom part of the window with the original
scan at the top.
The pick-up (upbeat) bar at the start of the part has dotted red lines above and below the staff, followed by a series of blue notes over the barline, showing the number of missing or extra beats. This
is because PhotoScore Lite has read the time signature as 4/4 and can’t understand why the bar is
only one sixteenth note (semiquaver) long.
Select the time signature in the output window (so that it turns light blue) and choose Create
Time Signature (shortcut T) to choose a different time signature. Click Other and choose 1/16
from the drop-down lists. Make sure you switch on Invisible (for pick-up and irregular bars) so
that PhotoScore hides the time signature.
Notice how the rest of the bars in the piece turn red and show blue notes over the barlines. To
correct this, add a second time signature to the start of the first full bar of the part:
* Hit T again to create a time signature and choose 4/4, make sure Invisible (for pick-up and
irregular bars) is switched off, then click OK
>
72
Page 73

2.2 Scanning
* The mouse pointer turns dark blue, to show that it is “carrying” an object
* Click at the start of the first full bar to place the time signature there; the red dotted lines will
disappear.
Mistakes such as pitch can be corrected in Sibelius, but correcting key signatures and time
signatures is much easier in PhotoScore Lite, so we recommend that you do that before sending
the output score to Sibelius.
For more details on editing PhotoScore’s output,
b 1.5 Scanning in Reference.
Sending to Sibelius
Once you have edited all the pages in a score, you should send them to Sibelius. Choose File > Send
to > Sibelius (shortcut Ctrl+D or XD), or simply click the little Sibelius icon ( ) next to the
Save score button at the top of the output window.
The Open PhotoScore or AudioScore File dialog will appear in Sibelius – don’t worry about the
options here, just click OK and let Sibelius open the file for you. The violin part now appears in a
new score in Sibelius. We’re going to transfer it to the score we prepared in the first chapter of this
project:
* triple-click in the first bar of the violin part we just imported from PhotoScore Lite to select all
the music on the staff
* choose Edit > Copy (shortcut Ctrl+C or XC) to copy the music to the clipboard
* switch to the score we prepared earlier by selecting it from the Window menu, or by typing
Ctrl+Ta b (Windows) or
* select the sixteenth note (semiquaver) rest in the pick-up (upbeat) bar of the Violin I staff
* choose Edit > Paste (shortcut Ctrl+V or XV) to paste the music from the imported score into
the prepared score.
Instantly your score is filled with beautifully-written music including all appropriate accidentals,
slurs and ties; notice that Sibelius automatically adds bars into your score to fill with the copied
music. You may also have noticed that PhotoScore has shortened some of the slurs over notes –
don’t worry for now, we’ll correct this later.
X~ (Mac)
Project 2
Adding the remaining music
Now, you should use PhotoScore Lite to scan, read and send to Sibelius the remaining string parts:
String Quartet – Violin II.pdf, String Quartet - Viola.pdf
and
String Quartet - Violoncello.pdf
The PDF files for each of these parts are located in the same folder as the part we already scanned.
Once you’ve sent them to Sibelius, copy and paste them onto the appropriate staff in the score we
created, just as we did for the music on the Violin I staff.
Save a version
At this point, you should choose File > Save Version or click on the toolbar button. Sibelius will
ask you to name your version and you can optionally add a comment to identify it later. Give this
version a memorable name, for example Version 1 - scanned input, then click OK.
We’ll be using this version later on to show how you can compare scores or versions quickly.
.
73
Page 74

Project 2
2.3 Clefs, key signatures and tuplets
If you are starting from this section of the project, you should open the example score called
2
and make the
ing
File>
3 Clefs, key signatures and tuplets
Versions>
Edit Versions
, selecting this version in the list, and clicking
version into the
Current version
Make current
, by choos-
The score we’ve just assembled is ready to be turned into an arrangement. We’ve already seen how
to use the New Score dialog to set up a score in Sibelius, but you can add the same information
after you’ve inputted music into a score and change it retrospectively. This chapter shows you how
to add clef changes, key signatures and tuplets (triplets, in this case) to an existing score.
Clef changes
When you create a score using Sibelius, the clefs are automatically added to the start of every system so you don’t have to think about them. However, in certain situations, you may want to add a
change of clef to a staff. This can make it easier for a performer to read if the music strays too far
above or below the staff in the normal clef. Sometimes clef changes are for a short passage, maybe
a bar or less; at other times you may want the clef change to apply permanently from that point on.
In bar 15, the cello part suddenly has two very high notes, the Ab and G eighth notes (quavers) in
the second half of the bar. Let’s put a clef change before them to make the notes easier for the cellist
to read:
* Select the Ab eighth note (quaver)
* Shift-click the G eighth note (quaver) immediately after it to make a passage selection
* Choose Create > Clef (shortcut Q for “qlef”)
* Select the tenor clef (fourth from the top) in the left-hand list and click OK
* Sibelius adds a small tenor clef and then automatically changes the clef back again after the
passage you selected. Notice how the notes are spaced further apart to allow room for the clefs.
Project
.
Let’s add another tenor clef change for the cellist at bar 26; this time we’ll place it using the mouse:
* Hit Esc to make sure you have nothing selected
* Choose Create > Clef
* Select the tenor clef in the left-hand list and click OK
* The mouse pointer turns dark blue, to show that it is “carrying” an object
* Click in the empty space at the start of bar 26 in the Violoncello staff
* Again, Sibelius adds a small tenor clef – this time, however, it’s been added to the very end of bar
25 on the previous system. Notice how the normal clef at the start of every system after this point
has changed into a tenor clef.
Change the staff back to a bass clef after the first quarter note (crotchet) in bar 28 in the same way.
Now add the remaining clef changes to the Viola and Violoncello staves in bars 43–44, referring to
the printout of the full arrangement that we made.
For more information,
b 2.11 Clefs in Reference.
74
Page 75

2.3 Clefs, key signatures and tuplets
3
3
Key signatures
You may have already noticed that towards the end of this excerpt, the music changes key,
modulating to A major; notice the increased occurrence of sharp accidentals on notes. We’re going
to add a key signature to bar 53, to show the key change.
* Hit Esc to make sure you have nothing selected.
* Choose Create > Key Signature (shortcut K)
* Select A major in the left-hand list and click OK
* The mouse pointer turns dark blue, to show that it is “carrying” an object
* Click at the start of bar 53
*
Sibelius creates a double barline and a key signature of three sharps. See that the sharp accidentals
in the following bars rendered unnecessary by the new key signature are automatically removed.
Clef changes and key signatures can be selected and copied, deleted or moved. If you drag a clef
change or key signature, you’ll see the Sibelius automatically shifts the music up or down, removing or adding accidentals as appropriate, so that the notes sound the same.
For more information,
b 2.20 Key signatures in Reference.
Trip lets and ot her t uplets
Tuplets are rhythms which are played at some fraction of their normal speed – most commonly
they are triplets. We’re going to create some triplets in bar 30 of the Violin II staff, which were
missing in the scanned part:
* Select the bar rest and hit 3 (on the numeric keypad) to choose an eighth note (quaver)
* Ty pe 8 G Shift-6 (use the 6 on the main keyboard, not the numeric keypad). This inputs a G#
eighth note, then adds a note a sixth below it, to make a two-note chord. (You could instead have
inputted the B below the staff, then typed 8 (on the numeric keypad) G to choose a sharp and
add the G above the B.)
* Now type Ctrl+3 or X3; a triplet bracket and number appear:
* Input two more notes to complete the triplet (a high E, top space of the staff, and another G#).
Notice how the bracket disappears automatically, which is the conventional notation for this case:
Project 2
As you might expect, tuplets in Sibelius are intelligent: brackets are automatically hidden if the
notes within the tuplet are joined by a continuous beam, and the tuplet brackets (when they are
shown) are “magnetic,” sticking to the notes if they change pitch.
Finish adding the rest of the notes in this bar. You can type Ctrl or
quintuplet or 6 for a sextuplet; or for more complex tuplets such as 73:51 you can use the Create
Tupl et dialog. For more information, b 2.35 Triplets and other tuplets in Reference.
X with any number, e.g. 5 for a
>
75
Page 76

Project 2
2.4 Marking up a score
If you are starting from this section of the project, you should open the example score called Project 2 and make the 4 Marking up a score
Versions>
Edit Versions
, selecting this version in the list, and clicking
So far, we’ve assembled an excerpt from Elgar’s String Quartet in E minor, Op.83, III. Finale:
Allegro molto by creating an empty score, scanning the individual parts from PDF files and copying them into the score. Now we’re going to add some color and life to it, by marking the music
with dynamics, technique text, tempo markings, slurs and articulations.
This chapter shows you how to add these various markings, and we’ll observe how they interact
with Sibelius’s revolutionary collision avoidance system, called Magnetic Layout™.
Expression text
In the first project of this Handbook we learned how to add text dynamics, technique and tempo
markings. Using the printout of the score that we made earlier, let’s add the missing text dynamic
marks. As before, remember the following:
* Choose Create > Te xt > Expression (shortcut Ctrl+E or XE) to add text dynamics
* Hold down Ctrl or X as you type to produce bold text dynamics such as f, p, sf or rfz – holding
down Ctrl or
be used for dynamics
* Right-click (Windows) or Control-click (Mac) to see a word menu of useful dynamic terms
appear (this is where you’ll find espress., dolce, poco, cresc. and dim.)
* Type any terms not shown in the word menu (e.g. risoluto, rubato, brilliante and appassionato)
straight into Sibelius to appear in normal italicized text.
X tells Sibelius to write the letters using the special bold characters which should
version into the
Current version
Make current
, by choosing
.
File
>
By copying text dynamics from one staff to another, you’ll find that the process of marking up a
score becomes much quicker – you can use any of the copying methods we learned in the first
project of this Handbook. The fastest way is to select the text you want to copy, then Alt+click or
z-click where you want it to appear. If you want to copy a text object to its default position (i.e.
where it appears at when you create it with a note selected) rather than the exact place that your
mouse pointer is, then use Shift+Alt-click or
xz-click.
Multicopying an object
Where all the staves in your score have the same dynamic marks (e.g. the ff at the start of bar 43, or
the sf at bar 53), you can save time by multicopying the dynamic across all the staves:
* Create the dynamic mark using Expression text (as above) on the Violin I staff
* Select the dynamic and choose Edit > Copy (shortcut Ctrl+C or XC) to copy it to the clipboard
* Hit Esc to deselect
* Make a passage selection around the same bar in the remaining three staves
* Choose Edit > Paste (shortcut Ctrl+V or XV) to copy the item to the start of the passage, one
copy on each staff.
76
Page 77

2.4 Marking up a score
You can also multicopy several objects and paste them vertically across any number of staves –
doing this can save you a lot of time when marking up your scores.
Tech niq ue text
Now that we’ve added all the missing text dynamics, let’s add the technique instructions from the
printout:
* Choose Create > Tex t > Te ch ni qu e (shortcut Ctrl+T or XT) to add technique instructions
* Right-click (Windows) or Control-click (Mac) to see a word menu of useful technique terms
appear (this is where you’ll find senza sord.)
* Type any terms not shown in the word menu (e.g. colla parte and ten.) straight into Sibelius to
appear in normal non-italicized text.
Tempo text
Once all the missing technique terms are added to your score, we can add the tempo markings. But
before we do, it’s important that we understand the differences between staff text and system text.
Expression and Technique text styles are both examples of staff text. This means that they apply
only to a single staff, and you should duplicate them on another staff if you want the same effect to
apply to any other instruments in a score.
System text, on the other hand, applies to all staves in the score. Tempo markings are examples of
this kind of text: if we add Tempo text to our score, it appears once above the system (and in scores
with many instruments it may also appear above another staff further down the score), but it
appears in each instrumental part.
Project 2
Let’s add the missing tempo markings. First, the A tempo marking in bar seven:
* Select the seventh bar of the Violin I staff
* Choose Create > Tex t > Te mp o (shortcut Ctrl+Alt+T or zXT) to add tempo markings
* Right-click (Windows) or Control-click (Mac) to see a word menu of useful tempo terms appear
* Click A tempo to add it to your score
* Hit Esc twice to stop editing and deselect the text.
In the same way, add the A tempo markings to bars 20, 56 and 60.
Hairpins and other lines
There are still dynamic markings and tempo instructions that appear on the printout that we
haven’t yet added to our score. These are different types of lines: hairpins (crescendo and diminuendo marks), slurs and ritardandos.
To add lines, simply select a note or other object in your score to tell Sibelius where you want the
line to start, then type L (or choose Create
In the excerpt we’re marking up, we’ll be creating hairpins and slurs, which have their own
shortcuts: H for a crescendo hairpin, Shift-H for a diminuendo hairpin and S for a slur.
Let’s start by adding the crescendo hairpin to the Violin I staff in the second full bar of the excerpt:
* Select the second note of the Violin I staff in the second bar after the pick-up (upbeat) bar
> Line) to open a dialog of different lines available.
77
Page 78

Project 2
p
p
* Ty pe H to add a crescendo hairpin beneath the note
* Hit Space four times, to extend the hairpin a note at a time, until you reach the middle of the
bar, a sixteenth note (semiquaver) E. If you go too far, use Shift-Space to retract it again.
* Now select the ninth note in the same bar – also a sixteenth note (semiquaver) E – and Shift-
click the last note of the bar, to extend the selection to the end of the bar
* Ty pe Shift-H to add a diminuendo: notice that it is automatically created to the same length as
the selection you just made. This is another time-saving tip.
Now you can go through the rest of the score, adding missing hairpins – you can multicopy hairpins onto multiple staves, in the same way as we did for text dynamics.
Let’s add the missing tempo lines:
* Select bar 19 of the Violin I staff by clicking on an empty part of the bar
* Hit L to open the Line dialog
* Scroll down the right-hand list of System lines until you reach poco rit.
* Choose the second instance of poco rit. (this line doesn’t display a dashed duration line after
the text)
* click OK to add the line to bar 19.
Add an identical poco rit. line to bar 59 in the same way, only this time select an eighth note
(quaver) halfway through the bar and hit L.
Finally, add a rit. line to the last bar of the excerpt – again, choose the second instance of rit. in
the System lines list so that a dashed duration line isn’t shown after the text.
For more on lines,
Slurs
Slurs and phrase-marks are a special kind of line and – like hairpins – are so commonly-used that
they have their own easy-to-remember shortcut: S. Sibelius treats these identically, and calls them
all “slurs,” since a phrase-mark is actually just drawn as a big slur.
When we scanned the PDF files of the string quartet parts, PhotoScore Lite didn’t recognise the
slurs on the part (although the full version, PhotoScore Ultimate, can do this for you), so you’ll
need to add the missing slurs.
To place a slur, select the note you want it to start from and hit S. If you create a slur in the wrong
place, simply select it and hit Delete, then select the note or rest where you want the slur to begin
and hit S. As with extending hairpins, use Space to extend the slur a note at a time and Shift-
Space to retract it if you go too far.
78
b 2.21 Lines in Reference.
Page 79

2.4 Marking up a score
Try selecting a note at either end of a slur and moving it up and down – notice how the slur is magnetic, sticking as neatly as possible to the notes at either end. When you select a slur, notice how a
faint outline with six boxes appears around the slur. These boxes are called handles, and they give
you an enormous amount of control over the shape of a slur. Clicking on any of these points and
dragging it changes the shape in a particular direction.
You should be very careful to distinguish between slurs and ties between notes in your scores – ties
are added from the Keypad (see below) and behave very differently than slurs.
For more on slurs,
b 2.28 Slurs in Reference.
Articulations
In the first project in this Handbook, we learned how to add articulations to notes from the
Keypad, including staccato and tenuto marks, accents and ties. Hit F10 (or click on the
Articulations tab on the Keypad) to find more articulation marks on the fourth Keypad layout.
Here you can add wedges, bowing marks, marcato and staccatissimo marks and fermatas of
varying duration.
You can add articulations to notes in a multiple or passage selection, which can speed up the marking-up process considerably. For example, every note in bar three of the Violin I and Violin II
staves is played staccato:
* Click in an empty part of the third bar of the Violin I staff and Shift-click on the third bar of the
Violin II staff to make a passage selection
* Make sure that the first Keypad layout is displayed by hitting F7
* Hit the key on your numeric keypad that corresponds to the . (staccato dot) on the top row of
buttons on the Keypad. This adds a staccato mark to every note in the bar for both staves.
Now go through the excerpt, adding the missing articulations from the printout we made earlier.
You should find that most articulations you need are on the first Keypad layout, but you’ll need the
fourth Keypad layout to add these additional marks:
* Marcato markings in bars 8 and 38 of the Violin I staff;
* Marcato markings in bars 20, 22, 29 and 40 of the Violin II staff;
* Marcato markings in bars 9, 10, 21, 23, 40, and 49–52 of the Viola staff;
* Marcato markings in bars 49–52 of the Violoncello staff;
* Staccatissimo marks in bar 48 on all staves;
* A staccatissimo mark in bar 49 of the Violin II staff.
Project 2
For more on articulations,
b 2.3 Articulations in Reference.
Comparing versions
Whether you’re a composer, arranger or music copyist, you may find it very helpful to be able to
compare the newly-marked up score with a previous version, in order to highlight any differences
once you’ve added detail to a score in this manner. Sibelius’s Compare window allows you to compare two different scores – or two versions of the same score – and produce a summary of the differences between them; if you like, you can also produce a very detailed comparison of every
79
Page 80

Project 2
difference – very useful for proof-reading, or for documenting the development of a piece of
music.
To show the Compare window, choose Window
> Compare, or click the button on the
toolbar (shown on the right).
At the top of the Compare window are two drop-down menus, from which you can select any
scores that you have open and the versions they contain. Let’s compare the score in its current state
with the version that you saved earlier:
* select the score title, e.g. Elgar (or whatever name you gave to your score when you saved it),
from the first drop-down menu (this compares the current version of the score)
* select – Version 1 – scanned input (or whatever name you gave to your saved version) from
the second drop-down menu:
(If you skipped the preceding chapters and opened the project file at this point, you should select
the 3 Clefs, key signatures and tuplets version in the second list.)
* Click the Compare button ( ) next to the drop-down menus
* Sibelius will analyze the versions and show dialog containing a brief summary of the differences
between the scores
* Click Close to view the detailed differences in the Compare window.
Notice how Sibelius displays the two versions you asked it to compare side-by-side. Doubleclicking in the Compare window on any of the differences found will move the view to that difference in both windows. Sibelius also adds a colored background to objects that have been added
(green), removed (red) or altered (orange).
Try comparing some of the other versions in the project scores to see how comprehensive the
comparison can be.
With this powerful tool you can even generate a detailed report of the differences Sibelius finds –
complete with screenshots of the scores – to open in your word processing software. For more on
versions and comparing scores,
b 5.22 Versions in Reference.
80
Page 81

2.5 Layout and formatting
2.5 Layout and formatting
If you are starting from this section of the project, you should open the example score called
Project 2 and make the 5 Layout and formatting
File>
Versions>
Once you’ve inputted the notes in a score and finished marking it up, you’ll want to ensure that
your music is flawlessly presented. Since Sibelius adjusts the score layout as you add more music,
instruments, text and other objects, it’s best to wait until the score is fairly complete. Otherwise
your adjustments may have to be undone.
We’ve already noted some of the effects of Magnetic Layout, Sibelius’s collision avoidance and
detection feature, adjusting your score for you as you create and edit the music. Sibelius has a wide
array of tools and features to help you with formatting your music (formatting is the process of
laying it out onto pages).
In this chapter, we’ll learn how to create breaks, manipulate the page orientation and staff size,
change staff spacing and create title pages, all in order to produce a beautiful and elegant score.
Edit Versions
, selecting this version in the list, and clicking
Magnetic Layout
First, we’ll look at Magnetic Layout in action and show how Sibelius is able to recalculate the
positions of objects on the staff to prevent them overlapping each other or obscuring the notes.
Let’s see how this works:
version into the
Current version
Make current
, by choosing
.
Project 2
* Select the F# sixteenth note (semiquaver), the penultimate note at the end of the first full bar of
the Violoncello staff
* Use 2 to lower the pitch
* As you move the pitch down, the dynamics below the staff move down to avoid the note.
Notice how Sibelius cleverly moves the whole line of dynamics together below the system, preserving their relative positions horizontally. Now, if you click on one of the dynamic marks (e.g. the
hairpin) to select it, you’ll see a dashed light blue line indicating that the dynamics are grouped
together, meaning Sibelius will move them together if any one of them needs to move to avoid a
collision. You’ll also see a set of gray shadow dynamics appearing across the system in the place
where the dynamics would normally be.
This works for all text objects, symbols, lines and other objects (e.g. chord symbols).
You can drag objects around on the staff and Sibelius will use the space available to ensure that they
don’t overlap or obscure each other. This is done intelligently, so that less important objects (such
as text, lines and symbols) move out of the way of more important objects (e.g. notes, accidentals,
rests, articulations etc.) which need to remain in fixed positions, usually closer to the staff.
You can also switch Magnetic Layout on or off for individual objects, so that they aren’t moved or
avoided, and “freeze” the positions in a score when you’re happy with the layout and want to prevent
objects from moving around magnetically. To learn how,
Now let’s look at the various formatting controls which are available in Sibelius.
b 8.2 Magnetic Layout
in Reference.
81
Page 82

Project 2
Breaks
Whether you’re composing, arranging or just copying out music, you will always want to go back
and change things, such as adding bars in the middle of music you’ve already written. Sibelius has
to react properly by reformatting the music that follows – which it does instantly.
One advantage of this instant reformatting is that there’s no command to add a new system or page
– this just happens as you go along.
Sometimes, however, you need a system or a page to end at a particular point – for example, in the
Elgar String Quartet excerpt, the A tempo marking at bar 7 marks the start of a new system,
because a system break has been added there.
To add a system break, select a barline and choose Layout
> Break > System Break, or use the
shortcut Return (on the main keyboard). You should use this to open up the spacing if you think
the music on one system is too crowded, or conversely if you think that a system is too widelyspaced relative to the system above (in which case you can add a system break to the previous
system to move one of its bars onto the next system). Try adding system breaks to the score we’ve
been working on.
Sibelius also lets you add page breaks, which you should normally use only at the end of sections,
e.g. in a piece with several movements, or when the next section has a new title at the start. To find
out more, and to learn how to “lock” passages of music to stop them reformatting,
b 8.1 Layout
and formatting in Reference. In parts, Sibelius can even add breaks automatically in helpful
places –
b 8.4 Auto Breaks in Reference.
Document Setup
Another advantage of Sibelius’s instant reformatting is that you can make massive changes to
music you’ve already inputted – such as changing the page shape – and the layout of the whole
score is instantly updated accordingly.
To show an extreme example of the kind of formatting that happens all the time, let’s change the
orientation of the paper the score is shown on from portrait (taller than it is wide) to landscape
(wider than it is tall) format. Choose Layout
> Document Setup (shortcut Ctrl+D or XD):
82
Page 83

2.5 Layout and formatting
Switch the orientation from Portrait to Landscape, see how it changes in the score preview on the
right of the dialog, and click OK. The score now looks like this:
Project 2
Try d ecreasing t he Staff size option to 4mm, and see how the music is reduced in size to fit onto
fewer pages.
You can also adjust the page size and margins from here. For full details about this dialog,
Document Setup in Reference.
Staff spacing
As you add more music to a score, you’ll quickly find that the page gets very busy and you need to
space staves further apart to give notes and other objects more room to move around in. There are
a number of ways to do this; try experimenting with these on your own scores.
The default distances between staves and systems are controlled by settings in House Style
Engraving Rules, a dialog that allows you to change the appearance of most aspects of your score
in a single operation. Take a quick look at each page to get an idea of just how comprehensive the
options are, most of which you’ll probably never have to worry about. However, the Staves page
contains the staff and system spacing options, and you should always try adjusting these values
before making individual adjustments directly in the score.
Sometimes, however, it is useful to be able to increase the distance between staves within a single
system in order to avoid collisions involving very high or low notes. You can ask Sibelius to make
the best use of the space you’ve chosen between staves and systems by choosing Layout
Optimize Staff Spacing. Sibelius now calculates the smallest distance to move the staves so that
objects on one staff no longer collide with those on another. Let’s try this out on the first page of
our score:
b 8.6
>
>
* Click on the pick-up (upbeat) bar of the Violin I staff to select it
83
Page 84

Project 2
* Shift-click the Violoncello staff in the last bar of the bottom system of the first page
* Choose Layout > Optimize Staff Spacing
* Sibelius works out the best way to stop the music on one staff colliding with any other staves.
As a last resort, you may find that you need to manually resolve a collision on a single system,
which you can do by dragging the staves. Try this out: select a bar in the Violin II staff by clicking
on a blank bit of staff and drag it up and down – or use the shortcuts Alt+
or
X for larger steps). Notice how Sibelius reformats the music as you move the staff.
3/2 or z3/2 (hold Ctrl
You can change the spacing in this way between staves throughout your score, or for a single
system, or indeed for any other passage you select. If you make a mistake, you can use the Layout
Reset Space Above/Below Staff options to reset the spacing to its default.
For further details on these and other sophisticated tools for altering staff spacing, b 8.10 Staff
spacing in Reference.
Creating title pages
You can create a title page when you first create your score (as we saw in the first chapter of this
project) by switching on the Create title page option on the final page of the File
However, you can also create a title page at any point, so let’s do that now. Choose Create > Title
Page to see a dialog with options to choose how many blank pages to add at the start of your score
and other details you may wish to add. (Since we added title and composer credits in the File
New dialog, Sibelius will automatically fill these in here, ready for you to add to the title page.)
> New dialog.
>
>
Switch on the Include part name option to display “Full Score” at the top of the page, then click
OK to create a single title page with the title and composer text added.
Deleting title pages
When you create a title page – whether you choose Create > Title Page or add one from
the File
the left). If you can’t see this, check that View
To delete a title page the title page you just created, simply click on this layout mark to select it and
hit Delete. (Doing this will remove all blank pages from the start of your score, so if you want to
remove one of a number of blank pages, you should refer to
As with all other editing functions in Sibelius, you can always undo any changes you make to title
pages – click Undo now to restore the title page we just deleted.
> New dialog – a special layout mark appears at the start of the score (shown on
> Layout Marks is switched on.
b 8.5 Breaks in Reference.)
84
Page 85

2.6 Dynamic parts™
2.6 Dynamic parts™
If you are starting from this section of the project, you should open the example score called
Project 2 and make the 6 Dynamic Parts
Versions>
In the first project we learned about dynamic parts – the set of instrumental parts Sibelius creates
for every score, showing notation relevant to one instrument and automatically updating to match
the full score. It’s important to remember that if you edit or move anything in the full score, it also
changes in the part. However, if you move something other than a note or chord in a part, it doesn’t
move in the score; and it goes orange, to show that it’s now different in the part and score. This is
so you can tweak the position of markings in parts without affecting the layout of your score.
This chapter shows you how to create cues, edit the layout of parts, create new instrumental parts
and produce a simple piano reduction of the string quartet arrangement.
Edit Versions
, selecting this version in the list, and clicking
Parts window
The Parts window (choose Window > Parts, shortcut Ctrl+Alt+R or zXR) allows you to make
various changes to your parts individually, altogether, or to a specific selection of parts. You can
print multiple parts, adjust the automatic layout of parts, create new parts, remove or add staves
from existing parts, and so on, all from the Parts window. You can also view any part by doubleclicking on it in the Parts window.
version into the
Current version
Make current
, by choosing
.
File
>
Project 2
Under normal circumstances, you should not need to worry too much about the existence of the
Parts window, so you can usually leave it switched off. However, to adjust the automatic layout of
parts or to cater for situations where a part needs to contain more than one instrument (e.g.
instrumental doubling or choral music), it is very useful. For full details,
b 7. Parts in Reference.
Cues
Cue notes are small notes included to help the player keep track of where they are, and are not
meant to be played. Cue passages can also indicate optional music, for example a harmonica solo
might be cued in a clarinet part with an indication to “play if no harmonica is available.”
Sibelius makes it simple to add cues to your parts; let’s try adding a cue:
* Make sure you are viewing the full score
* Select bar 8 of the Violin I staff by clicking on an empty part of the staff
* Choose Edit > Copy (shortcut Ctrl+C or XC) to copy the music to the clipboard
85
Page 86

Project 2
* Now select the corresponding empty bar of the Violin II staff
* Choose Edit > Paste As Cue (shortcut Ctrl+Shift+Alt+V or xzXV) to create a cue.
Hit W with the cue selected to view the Violin II part; hit Esc to deselect the cue and notice how
Sibelius has created small, cue-sized notes and other markings, added a bar rest in a separate voice
(but, as we’ll see, has hidden the cue in the full score) and indicated the cued instrument above the
staff. If necessary, Sibelius will also add automatic clef changes or octave transpositions, change the
staff type (to e.g. a guitar tab staff) and copy lyrics.
Hit W again to return to the full score; the same bar on the Violin II staff appears to be empty but
the cue is simply hidden.
Layout of parts
In general, when editing a score you should first input music into the full score, rather than the
parts; and then tweak the position and design of things in the parts in the course of making final
adjustments.
Note though, that you can make layout changes such as moving staves, adjusting system and page
breaks and changing note spacing quite freely in parts – this doesn’t count as moving objects
around, because it doesn’t matter that the score and part end up with a quite different layout.
Sibelius will intelligently lay out your parts so that mundane tasks such as making suitable page
turns for players, adding system breaks at changes of tempo and section and the general justification (spreading the music out horizontally or vertically to fill up a page to the margins) of your
parts are all handled without you having to do anything. This is all achieved by Sibelius’s Layout
Auto Breaks feature. You have control over every automated aspect applied to the layout of your
parts, and if you are feeling particularly imperious, you can switch it off completely.
>
For more information,
b 8.4 Auto Breaks in Reference.
Create a new part
In situations where you need to rearrange a piece of music to incorporate different instruments,
the ability to create a new part from existing music is a huge time-saver. We’re going to create an
alternative bassoon part from the cello staff. Make sure the Parts window is open, then:
* First, click the New Part button ( ) in the Parts window.
* A dialog appears, which allows you to choose which staves the new part should contain
* Select Violoncello from the left-hand list and click Add to Part, then click OK
* you should now see a second part called Violoncello appearing in the Parts window; double-
click this to open it.
To turn this into a bassoon part, we need to add an instrument change; instrument changes can be
added to part of a score (for instrumental doubling) or can replace one instrument with another,
preserving the existing music:
* Choose Create > Other > Instrument Change (shortcut Ctrl+Shift+Alt+I or xzXI)
* The Choose from list shows convenient selections from the whole set of instruments (as in the
Create
family choose Bassoon and click OK
86
> Instruments dialog); choose Common Instruments, then from the Woodwind
Page 87

2.6 Dynamic parts™
* The mouse pointer turns dark blue, to show that it is “carrying” an object
* Click to the left of the initial barline, before the very start of the first system of music in the part.
The part is changed into a bassoon part automatically – notice how the instrument name appearing at the top left-hand corner of the page is updated, as is the part name in the Parts window.
Creating a piano reduction
Sibelius comes supplied with over 100 useful plug-ins – extra features written in Sibelius’s built-in
programming language, ManuScript – designed to make repetitive tasks quicker by automatically
doing things which might otherwise be quite time-consuming. These automate all kinds of procedures, such as adding chord symbols, harmonizing tunes, working out harp pedal changes or
proof-reading your music. If you’re that way inclined, you can even write your own plug-ins.
We’re going to use one of these plug-ins to create a simple piano reduction of our Elgar excerpt:
* Hit W to look at the full score.
* Choose Create > Instruments (shortcut I), and add a Piano instrument to the score.
* Triple-click on the Violin I staff to make a passage selection around the whole staff, then Shift-
click on the Violin II staff to select all bars on both staves.
* Choose Plug-ins > Composing Tools > Reduce.
* In the dialog that appears, choose Use existing staff as destination, and choose Piano from
the drop-down list.
* Click OK, and the Reduce plug-in will condense the music from the two violin staves onto the
right-hand piano staff.
* Now triple-click on the Viola staff to make a passage selection around the whole staff, then
Shift-click on the Violoncello staff to select all bars on both staves.
* Choose Plug-ins > Composing Tools > Reduce again.
* This time, in the dialog choose Piano~(2) from the drop-down list.
* Click OK, and the Reduce plug-in will condense the music from the Viola and Violoncello
staves onto the left-hand piano staff.
Project 2
If you like, you can tidy up the piano part using the editing skills you’ve learned so far, or use Plugins
> Simplify Notation > Renotate Performance to simplify untidy passages.
Notice that Sibelius has already created a new Piano part, with the music from both piano staves
included in it.
87
Page 88

Project 2
2.7 Exporting
If you are starting from this section of the project, you should open the example score called
Project 2 and make the 7 Exporting
Versions>
Edit Versions
, selecting this version in the list, and clicking
In Sibelius, you can export files, pages or smaller sections of your score into other programs, either
as a PDF or a graphics files in various formats. You can also copy and paste graphics directly from
Sibelius. In addition, Sibelius helps you publish music on the Internet, so other people can view it,
play it back, change key and instruments, and print it out, using Sibelius’s free Scorch plug-in.
This chapter shows you how to copy a graphic from Sibelius into another program (e.g. Microsoft
Word), and how to publish your music on SibeliusMusic.com.
Copying graphics to other programs
Let’s learn how to export snippets of music as graphics, using simple copy and paste.
* Make a passage selection around the whole of the first system of music
* Choose Edit > Select > Select Graphic (shortcut Alt+G or XG): a dashed box with handles
appears around the music
* Move the handles at the edges of the box to adjust its size, if necessary, by clicking and dragging
* Choose Edit > Copy (shortcut Ctrl+C or XC) to copy the contents of the box to the clipboard
* Hit Esc to clear the selection
* Open the application into which you wish to paste the graphic (e.g. Microsoft Word)
* Choose Edit > Paste (shortcut Ctrl+V or XV).
version into the
Current version
Make current
, by choosing
.
File
>
Et voila! If you find that the resulting graphic is not detailed enough, adjust Dots per inch on the
Other page of File
> Preferences (in the Sibelius menu on Mac) and redo the steps above.
Sibelius also allows you to export graphics as files in EPS, PNG, TIFF, BMP, EMF (Windows only)
and PICT (Mac only) formats. For details,
b 9.8 Exporting graphics in Reference.
Publishing music on SibeliusMusic.com
Once you have completed your score, make sure you have saved it. Now let’s publish it online:
* Choose File > Publish on SibeliusMusic.com
* You are shown a web page in your browser, into which you can enter all the various details about
your piece. You may be asked for your username and password, or be prompted to create an
account (see below).
* Once you have supplied all the information about your score, click Next
* Your score should appear in the SibeliusMusic.com site for all the world to see within 24 hours!
If you have not previously created an account with SibeliusMusic.com, click Join at the top left of
the web page and enter your details to create a new account.
With SibeliusMusic you can also sell your own music, upload and listen to live recordings, create
your own member pages, review scores, view bestseller charts and create your own online stores.
For more details,
88
b 5.19 SibeliusMusic.com in Reference.
Page 89

Project 3
Project 3
Page 90

Project 3
90
Page 91

3.1 Writing for keyboard
3.1 Writing for keyboard
In this project, you will learn some of the important features to help you produce jazz and
commercial music: inputting complex keyboard music and writing for guitar; storing and re-using
snippets of music using the Ideas window; how to create chord symbols using text and MIDI input;
using repeat structures and producing horn arrangements; as well as how to make your scores
sound more realistic for making audio recordings.
The first chapter of this project builds on the note input skills we learned in the first project of this
Handbook, and shows you how to input more complex keyboard music with your MIDI keyboard
using Sibelius’s Flexi-time input.
Printout
First, choose File > Open (shortcut Ctrl+O or XO) and find the example score called Project 3 in
the Project Files folder in the example scores folder. Open this score. You should now see a completed arrangement of a funk tune called Urbane Filigree.
Since we’ll need to refer to a printout of this arrangement throughout this project, choose File
Print (shortcut Ctrl+P or XP) and click OK on Windows or Print on Mac to print the score.
Within a few moments, a printout of Urbane Filigree should emerge from your printer. Hold on to
this printout, because you’ll be reading music from it when we edit our arrangement shortly.
Now, in order to carry on with the project, choose File
Writing for keyboard version from the list and click Make Current. Click Ye s to make this into
the current version and then click Close. You should now see an arrangement which is missing
music from the Electric Stage Piano and Electric Guitar parts.
> Versions > Edit Versions, then select the 1
Using a MIDI keyboard
To use Flexi-time you must have a MIDI device connected to your computer. To set up input and
playback in Sibelius, choose File
Devices page.
For this chapter, we’re going to be using a MIDI keyboard. To learn more about setting up input
and playback with MIDI devices,
> Preferences (in the Sibelius menu on Mac) and go to the Input
b 1.10 Input Devices in Reference.
Flexi-time Options
We’re going to learn how to play complex music into Sibelius using a MIDI keyboard using Flexitime input. If you would prefer not to record music into Sibelius in real-time, you can still input the
missing music using the step-time input method we learned in the first project of this Handbook.
If you don’t have a MIDI keyboard, skip on to 3.2 Writing for guitar on page 91.
>
Project 3
We’re going to record the missing Electric Stage Piano part, so to ensure we get the best results,
choose Notes
rubato) from the Flexibility of tempo drop-down list, and switch off the Record into multiple
voices checkbox. Click OK to return to the score. If you want to slow the tempo down to make it
easier for you to record, drag the tempo slider on the Playback window to the left-hand side.
> Flexi-time Options (shortcut Ctrl+Shift+O or xXO). Choose None (non
91
Page 92

Project 3
Two-handed Flexi-time input
Place the printout so that you can clearly read the music on the Electric Stage Piano staves (or, if
you prefer, improvise your own part following the chord symbols above the staves on the printout).
Then select the first bar of the two adjacent Electric Stage Piano staves in the score: click the upper
staff, then Shift-click the lower staff so that both are selected; this tells Sibelius where to start from
and which instrument you want to record into. Now:
* Click the red button on the Playback window, or choose Notes > Flexi-time (shortcut
Ctrl+Shift+F or
* Flexi-time gives you at least a whole bar’s count-in by default – so in this case you should hear
one bar and three beats count-in to the pick-up.
* At the end of the count-in, try playing the next few bars smoothly, following the speed of the
clicks. As you play, the music you’re playing will appear in notation on the screen.
* When you reach the existing music in the upper staff at bar 9, simply stop playing with your
right hand.
* At bar 17, resume playing the right hand Electric Stage Piano part.
* When you want to stop recording, click the square stop button on the Playback window or hit
Space or Esc.
xXF).
For more about recording Flexi-time input,
b 1.4 Flexi-time in Reference.
Simplify notation plug-ins
If you find that Flexi-time produces complicated notation and you want to simplify it, there are
two plug-ins you should try:
* Plug-ins > Simplify Notation > Change Split Point allows you to change the point at which
notes are split between the right-hand and left-hand staves of a keyboard instrument. If you
have passages in your recorded input where notes would be better suited to being on a different
staff, select the music on both staves and run the plug-in.
* Plug-ins > Simplify Notation > Renotate Performance allows you to tidy up unwanted rests,
overlapping notes or incorrect note durations. As we saw in Project 1, by selecting a passage in
both staves and running the plug-in, you can tell Sibelius to recalculate the Flexi-time
transcription and produce a rhythmically and visually simpler version.
If there are still any mistakes, you can use the editing techniques you have already learned to
correct the note values and pitches. You may also like to experiment with the other plug-ins in the
Plug-ins
To learn more about plug-ins,
> Simplify Notation menu.
b 6. Plug-ins in Reference.
92
Page 93

3.2 Writing for guitar
3.2 Writing for guitar
If you are starting from this section of the project, you should open the example score called
Project 3 and make the 2 Writing for guitar
Versions>
Sibelius has a number of tools and features specifically designed to make it easier to write for
guitar. Among these is the ability to notate music using guitar tablature. Sibelius contains information about all kinds of stringed instruments which can be notated using “tab” and displays the
correct number of strings and appropriate tuning, whether you want to write for a standard guitar,
four, five or six string bass guitar, lute or the more familiar bass balalaika! You can copy music
from notation staves onto a guitar tab staff – and vice versa; you can even change from a standard
notation staff to a tab staff in the middle of a system.
In this chapter, we’ll learn how to record music into Sibelius as standard notation and change it
into guitar tab, and how to input guitar tab.
(If you have a MIDI guitar, you should try to complete this chapter by using it to input notes into
Sibelius. Otherwise, you can use a MIDI keyboard or the alphabetic note input method we learned
in Project 1.)
Edit Versions
, selecting this version in the list, and clicking
Using a MIDI guitar
If you have a MIDI guitar (or a guitar with a hexaphonic pick-up and guitar MIDI interface)
connected to your computer that you want to use for this chapter, you should set up the input and
playback in Sibelius. To do this, choose File
to the Input Devices page.
version into the
> Preferences (in the Sibelius menu on Mac) and go
Current version
Make current
, by choosing
.
File
>
Project 3
You should find your device’s name in the table at the top of the page and check that the Use
checkbox is switched on. You will need to change the Type value by clicking the drop-down menu
and choosing Guitar, rather than Keyboard; then select the number of strings.
To learn more about setting up input and playback with a MIDI guitar,
Reference.
b 1.10 Input Devices in
Input the guitar part
You should refer to the printout we made earlier to see the music we’re going to input.
If you have a MIDI device connected to your computer, record the guitar part as far as bar 20 using
Flexi-time input by selecting the first bar of the staff and choosing Notes
(shortcut Ctrl+Shift+F or
Otherwise, use a combination of your preferred note input methods to enter the music up to bar
20: mouse input, alphabetic input, step-time input and the Keyboard/Fretboard windows. These
are not alternative “modes” of writing music that you have to switch on or off – you can change
input methods whenever you like.
Once you have inputted the guitar part, you’ll see that you need to change some of the notes and
chords to use a muted (cross) notehead. To do this, select the note or chord (hint: you can doubleclick on a chord to select all the notes it contains) and type the shortcut Shift+Alt+1 or
xXF) or clicking the red button on the Playback window.
> Flexi-time Input
xz1 to
93
Page 94

Project 3
4
4
1
1
4
4
1
1
3
0
0
4
1
1
X
X
X
X
X
X
4
1
1
3
0
0
4
1
1
XX4
5
5
7
0
4
6
6
3
5
5
4
6
6
X
X
X
X
X
X
4
6
6
3
5
5
4
6
6
5
6
7
7
4
5
6
6
change the notehead to a cross. We’ll learn more about changing noteheads later in this project;
also
b 2.25 Noteheads in Reference.
Convert to tab
Sibelius can instantly turn standard notation into tab, using an instrument change:
* Choose Create > Other > Instrument Change (shortcut Ctrl+Shift+Alt+I or xzXI)
* Select Common Instruments from the Choose from list
* From the Guitars family, choose Electric Guitar, standard tuning [tab] and click OK
* The mouse pointer turns dark blue, to show that it is “carrying” an object
* Click on the Electric Guitar staff at the very start of the first system of music, to the left of its
initial barline.
The notation staff is changed into a six-string tab staff automatically – notice how all the music is
converted into tab notation. You can still copy music to and from this tab staff using Alt+click or
z-click – Sibelius will transform copied music into the appropriate notation for the staff type.
Writing tab notation
Now we’ve seen how Sibelius can switch between standard and tab notation, let’s try inputting
some music from scratch:
* Select the bar rest in bar 21 of the guitar staff
*
Hit N to start note input – make sure you have the first Keypad layout showing (hit F7 to be sure)
* Ty pe 3 0 (on the numeric keypad) to input an eighth note (quaver) rest
* Hit 3 once to move up to the fourth string and type 4 (on the main keyboard this time)
* Add a staccato articulation from the Keypad
* Advance to the next position by typing 1 then type 4 (on the numeric keypad) to change to a
quarter note (crotchet)
* Hit 3 twice to move up to the second string and type 1 (on the main keyboard)
* Move up to the first string and type 1 again.
You should see the following:
Now input the remainder of the last four bars as tab, as shown below:
Let’s turn the guitar staff back to conventional notation – use an instrument change to turn the
staff back to Electric Guitar [notation].
94
Page 95

3.3 Ideas and drum notation
3.3 Ideas and drum notation
If you are starting from this section of the project, you should open the example score called
Project 3 and make the 3 Ideas and drum notation
ing
File>
Versions>
In this chapter we’ll explore one of Sibelius’s most powerful creative tools, the Ideas window, with
which you can save snippets of music of any length, called ideas, for later retrieval and re-use. You
can provide tags (or keywords) for each idea, making it easy to find them later on.
Not only does Sibelius allow you to capture your own creativity so quickly, but it also comes with
more than 1500 built-in ideas covering a variety of musical genres and many different instruments, so if you’re stuck for inspiration or looking for something stylish to kickstart your creative
process, you’ll find something suitable in seconds.
Having already looked at writing for keyboard and guitar, we’ll also learn how to create drum
notation in this chapter. Using the Ideas window to help with writing for percussion can save you a
lot of time, as we’ll see.
Edit Versions
, selecting this version in the list, and clicking
Add a drum staff to the score
The score we’ve been working on so far has no drum staff in it, so let’s add one:
* Choose Create > Instruments, or hit the shortcut I
* From the Choose from list, select Common Instruments
* Choose the Percussion and Drums family and then select Drum Set (Rock)
* Click Add to Score, and Drum Set (Rock) will appear in the Staves in score list; click on it
there to select it
* Use the Down button to re-order Drum Set (Rock) so that it appears between 5-string Bass
Guitar and Synthesizer (a)
* Click OK to return to the score.
version into the
Current version
Make current
, by choos-
.
Project 3
Now you should see a percussion staff added to your score, ready for you to write a drum part.
Auditioning drum ideas
Show the Ideas window, if it’s not already shown, by choosing Window > Ideas (shortcut
Ctrl+Alt+I or
in compact view, which looks like this:
zXI). The Ideas window has two views, compact and detailed. By default it opens
95
Page 96

Project 3
Try swi tc hing bet ween Library, Score and All. When the Library button is switched on, you have
access to the more than 2000 built-in ideas. Try scrolling up and down the list.
Each idea shows a small preview of the music or other objects contained within it; normally you
will see two or three bars of one staff (although ideas can contain any number of bars or instruments). Important tags are shown in the four corners around the notation preview: at the top left,
the idea’s name; at the top right the letter L appears if the idea is located in the library rather than
the current score; at the bottom left, the time signature of the idea; and at the bottom right, the
tempo of the idea.
To check how an idea sounds, simply click and hold the mouse button on it: the idea will play in a
loop repeatedly until you release the mouse button.
You can search for ideas that correspond to a particular style or genre by typing different tags at
the top of the window. This way you can quickly narrow the list of ideas down to ones that might
be suitable.
Try typing a few tags to get an inkling of just how many different ideas in a variety of styles and
genres are included with Sibelius: motown, funk, happy, melody, slow. Now, let’s use some ideas
suitable for the score we’ve just created; clear any tags you have typed from the top of the window
and click on the Score button. Near the top of the list you will see Urbane Funky Drum Loop 1.
Pasting an idea
So let’s use this idea for ourselves. First, select Urbane Funky Drum Loop 1 in the Ideas window;
notice how a border appears around it to show that it’s selected. Now copy it to the clipboard,
either by typing Ctrl+C or
can also right-click (Windows) or Control-click (Mac) and choose Copy from the context menu.)
XC, or by clicking the Copy button at the bottom of the window. (You
Pasting an idea into a score is just like any other kind of pasting: either select the place in the score
where you want the idea to appear, then choose Edit
sure you have nothing selected, then choose Edit
> Paste (shortcut Ctrl+V or XV); or make
> Paste, and click in the score where you want the
idea to go. You could also click the Paste button at the bottom of the Ideas window. Select the first
full bar of the Drum Set staff in the score, and type Ctrl+V or
XV to paste it in.
You should see that the idea we just pasted in matches the first four bars of drum notation after the
pick-up (upbeat) on your printout.
You can add the next bar of music by pasting the Urbane Funky Drums 2 idea into bar 5 in the
same manner.
Inputting drum notation
When inputting into percussion staves, you can use any of the note input methods we’ve already
learned, but for drum notation – which uses different types of noteheads – it is much quicker to
use step-time or Flexi-time input.
If you have a MIDI keyboard connected to your computer, you can simply play the pitch that
corresponds to the line or space on the staff (as if it’s a treble clef staff) and Sibelius automatically
chooses the correct notehead. (If you don’t have a MIDI keyboard connected, input the notes using
alphabetic input and see Changing noteheads below to change them manually.)
Let’s input the drum pattern in bar 6:
96
Page 97

3.3 Ideas and drum notation
* Select the bar rest in bar 6 and hit N to begin note input
* Hit 3 on the numeric keypad to choose an eighth note (quaver)
* On your MIDI keyboard, play the G above the staff; this corresponds to a closed hi-hat
* Notice how Sibelius changes the notehead to a cross:
* Input another three eighth note hi-hats
* Hit 2 on the numeric keypad to choose a sixteenth note (semiquaver)
* Play G on your MIDI keyboard twice to input two sixteenth note hi-hats.
In this way, continue to input the hi-hat notes for the rest of the bar; to add the circle symbol to the
open hi-hat note, simply hit F10 to choose the fourth Keypad layout, then hit . (on the numeric
keypad), which corresponds to the Harmonic/Open button. You can hit . again to remove the
circle symbol if you need to; make sure you hit F7 to return to the first Keypad layout to continue
inputting notes.
Sibelius can write up to four independent voices, or lines of notes and chords, on a single staff. The
voices are color-coded: voice 1 (which we’ve used so far) is dark blue, voice 2 is green, voice 3 is
orange, and voice 4 is pink; you’ll rarely need to use more than two voices at a time.
In order to add the bass drum and snare pattern so that their stems always point down while the
hi-hat note stems point up, we’ll be using voice two:
* First, hit Esc to make sure you have nothing selected
* Now type Alt+2 or z2 to switch voices, or click 2 on the row of buttons at the bottom of the
Keypad
* Choose a sixteenth note by hitting 2 on the numeric keypad
* The mouse pointer turns green, to show that it is “carrying” an object which will be inputted in
voice 2
* Now click the mouse pointer near the start of the sixth bar, pointing at the F space, the bottom
space on the staff:
Finish adding the bass and snare drum pattern to bar 6 using your MIDI keyboard as before.
For lots more detail about voices,
Changing noteheads
If you enter notes into a percussion staff using alphabetic input, Sibelius doesn’t change the noteheads automatically for you, so let’s learn how to do that manually by inputting the same pattern in
bar 7, this time using the computer keyboard:
* Select the bar rest in bar 7 and hit N to begin note input
* Hit 3 on the numeric keypad to choose an eighth note (quaver)
Project 3
b 2.36 Voices in Reference.
97
Page 98

Project 3
* Ty pe G on your computer keyboard; make sure it goes above the staff
* Input another three eighth notes by hitting R
* Hit 2 on the numeric keypad to choose a sixteenth note (semiquaver)
* Ty pe G on your computer keyboard twice to input two sixteenth note
Now that you’ve added the hi-hat notes, input the bass drum and snare pattern in voice 2:
Sibelius allows you to filter a selection, which means that you can select a set of objects with
particular characteristics. Let’s try this now:
* Select bar 7 so that it is surrounded by a blue box
* Choose Edit > Filter > Voices > Voice 1 (shortcut Ctrl+Shift+Alt+1 or xzX1)
* Sibelius makes a multiple selection of only the notes in voice 1, i.e. the hi-hat notes.
Now any edits you make will only apply to the selected notes in voice 1. So let’s change the notehead:
* Change the notehead by typing Shift+Alt+1 or xz1
* All the notes change to display a cross notehead:
Alternatively you can choose the notehead from the menu in the Notes panel of the Properties
window. If you can’t see the Properties window, you can switch it on by choosing Window
Properties (shortcut Ctrl+Alt+P or zXP).
To learn more about noteheads, b 2.25 Noteheads in Reference.
Capturing an idea
Now let’s try making a new idea. The process of putting an idea into the Ideas window is called
capturing an idea:
* select bar 7 so that it is surrounded by a blue box
* choose Edit > Capture Idea (shortcut Shift-I), or click on the Capture Idea button ( ) at the
bottom of the Ideas window.
The music you selected immediately appears at the top of the list in the Ideas window, so you can
re-use it later.
Editing an idea
You can edit both the music and the tags of ideas.
To try out editing tags, select the idea you just captured in the Ideas window, then click the Edit
Idea Info button ( ) at the bottom of the window (or right-click (Windows) or Control-click
98
>
Page 99

3.3 Ideas and drum notation
(Mac) on an idea in the list and choose Edit Idea Info from the context menu). A simple dialog
appears:
* Give your idea a new Name here; type Urbane Funky Drums 1
* You can also type a few tags into the Tags box: there’s no limit on what you can type, so use as
many words as you can think of that will help you to find your idea again later on
* Click Color to show a color picker and choose a new background color for your idea. Again, you
can use color to categorize your ideas and to make it easier to find them again later on.
* When you’re satisfied with your choices, click OK to close the Edit Idea Info dialog.
To edit the music in an idea, select your idea again in the Ideas window, then click the Edit Idea
button ( ) at the bottom of the window (or choose Edit Idea from the context menu). A new
document window will appear, as if you had opened another score. You can edit it just like any
other score, e.g. adding or deleting notes and bars, adding text, lines and other markings, and so
on. When you have finished editing your idea, simply save it by choosing File
Ctrl+S or
XS), then close the window by choosing File > Close (shortcut Ctrl+W or XW) to
> Save (shortcut
return to your original score.
If you want to discard any unsaved changes in your idea, simply choose File
> Close, then click No
when asked if you want to save your changes.
We’ve barely scratched the surface of what you can do with ideas. So don’t forget –
b 5.11 Ideas
in Reference.
Repeat bars
Often, drum and other percussion parts are made up of repeated patterns of one or two bars’
length. Rather than copying the same bar out numerous times, arrangers often add a repeat bar
symbol. This tells the performer to play the exactly the same pattern as the previous bar. Sibelius
understands this and plays back repeat bars just as a real performer would.
Let’s add a tambourine part to the score to learn how this works:
* Choose Create > Instruments, or hit the shortcut I
* From the Choose from list, select Common Instruments
* Choose the Percussion and Drums family and then select Ta mbo uri ne
* Click Add to Score
* Select Tambourine from the Staves in score list and use the Down button to re-order it so that
it appears between Drum Set (Rock) and Synthesizer (a)
* Click OK to return to the score.
Now you should see a percussion staff added to your score, ready for you to write a drum part.
Next, click the Score button in the Ideas window and find the Urbane Tambourine 1 idea from
the list. Copy and paste this idea into bar 9.
Project 3
To add a repeat bar symbol, select bar 10 of the tambourine staff and hit F11 to view the fifth
Keypad layout. Now hit 1 (on the numeric keypad) to add a single repeat bar. Keep typing 1 until
you reach bar 16.
99
Page 100

Project 3
Notice that you can also add 2- and 4-bar repeats from the fifth Keypad layout. Sibelius will pla
back all these different kinds of repeats.
For more about repeat bars,
b 2.27 Repeat bars in Reference.
Finish the percussion parts
Input the remainder of the music on the Drum Set and Tambourine parts, referring to the printout
we made earlier. Use the Ideas window, repeat bars and multiple voices to help you finish inputting
the percussion parts.
100
 Loading...