

Pinnacle Systems Sibelius - 2018.4 User Manual

Sibelius® and Sibelius | Ultimate Tutorials

Legal Notices
© 2018 Avid Technology, Inc., (“Avid”), all rights reserved. This guide may not be duplicated in whole or in part without the written consent of Avid.
For a current and complete list of Avid trademarks visit: www.avid.com/legal/trademarks-and-other-notices
Bonjour, the Bonjour logo, and the Bonjour symbol are trademarks of Apple Computer, Inc.
Thunderbolt and the Thunderbolt logo are trademarks of Intel Corporation in the U.S. and/or other countries.
This product may be protected by one or more U.S. and non-U.S. patents. Details are available at www.avid.com/patents.
Product features, specifications, system requirements, and availability are subject to change without notice.
Guide Part Number 9329-65959-00 REV A 4/18

Contents
Introduction . . . . . . . . . . . . . . . . . . . . . . . . . . . . . . . . . . . . . . . . . . . . . . . . . . . . . . . . . . . . . . . . . . . . . . . . . . . . . . . . . . . . . . 1
Naming Conventions for Sibelius Software . . . . . . . . . . . . . . . . . . . . . . . . . . . . . . . . . . . . . . . . . . . . . . . . . . . . . . . 1
Sibelius Reference Guide . . . . . . . . . . . . . . . . . . . . . . . . . . . . . . . . . . . . . . . . . . . . . . . . . . . . . . . . . . . . . . . . . . . . . 1
Commands in the Ribbon . . . . . . . . . . . . . . . . . . . . . . . . . . . . . . . . . . . . . . . . . . . . . . . . . . . . . . . . . . . . . . . . . . . . . 1
System Requirements and Compatibility Information . . . . . . . . . . . . . . . . . . . . . . . . . . . . . . . . . . . . . . . . . . . . . . . 2
Conventions Used in Sibelius Documentation. . . . . . . . . . . . . . . . . . . . . . . . . . . . . . . . . . . . . . . . . . . . . . . . . . . . . 2
Resources. . . . . . . . . . . . . . . . . . . . . . . . . . . . . . . . . . . . . . . . . . . . . . . . . . . . . . . . . . . . . . . . . . . . . . . . . . . . . . . . . . 3
About the Projects . . . . . . . . . . . . . . . . . . . . . . . . . . . . . . . . . . . . . . . . . . . . . . . . . . . . . . . . . . . . . . . . . . . . . . . . . . . 4
Part I Opening and Editing a Score
Opening a Score. . . . . . . . . . . . . . . . . . . . . . . . . . . . . . . . . . . . . . . . . . . . . . . . . . . . . . . . . . . . . . . . . . . . . . . . . . . . . . . . . . 6
Opening a File . . . . . . . . . . . . . . . . . . . . . . . . . . . . . . . . . . . . . . . . . . . . . . . . . . . . . . . . . . . . . . . . . . . . . . . . . . . . . . 6
Introducing the Ribbon . . . . . . . . . . . . . . . . . . . . . . . . . . . . . . . . . . . . . . . . . . . . . . . . . . . . . . . . . . . . . . . . . . . . . . . 7
Moving Around the Score . . . . . . . . . . . . . . . . . . . . . . . . . . . . . . . . . . . . . . . . . . . . . . . . . . . . . . . . . . . . . . . . . . . . . 8
Note Input and Editing . . . . . . . . . . . . . . . . . . . . . . . . . . . . . . . . . . . . . . . . . . . . . . . . . . . . . . . . . . . . . . . . . . . . . . . . . . . 12
The Escape Key . . . . . . . . . . . . . . . . . . . . . . . . . . . . . . . . . . . . . . . . . . . . . . . . . . . . . . . . . . . . . . . . . . . . . . . . . . . . 12
Moving Between Notes . . . . . . . . . . . . . . . . . . . . . . . . . . . . . . . . . . . . . . . . . . . . . . . . . . . . . . . . . . . . . . . . . . . . . . 12
The Keypad. . . . . . . . . . . . . . . . . . . . . . . . . . . . . . . . . . . . . . . . . . . . . . . . . . . . . . . . . . . . . . . . . . . . . . . . . . . . . . . . 13
Notebook (laptop) Shortcuts . . . . . . . . . . . . . . . . . . . . . . . . . . . . . . . . . . . . . . . . . . . . . . . . . . . . . . . . . . . . . . . . . . 13
Editing Notes with the Keypad . . . . . . . . . . . . . . . . . . . . . . . . . . . . . . . . . . . . . . . . . . . . . . . . . . . . . . . . . . . . . . . . 14
Undo and Redo. . . . . . . . . . . . . . . . . . . . . . . . . . . . . . . . . . . . . . . . . . . . . . . . . . . . . . . . . . . . . . . . . . . . . . . . . . . . . 15
Mouse Input and the Keyboard Panel. . . . . . . . . . . . . . . . . . . . . . . . . . . . . . . . . . . . . . . . . . . . . . . . . . . . . . . . . . . 16
Adding Articulation and Ties with the Keypad . . . . . . . . . . . . . . . . . . . . . . . . . . . . . . . . . . . . . . . . . . . . . . . . . . . . 17
Selections and Copying Music. . . . . . . . . . . . . . . . . . . . . . . . . . . . . . . . . . . . . . . . . . . . . . . . . . . . . . . . . . . . . . . . . . . . 18
Selections and Passages. . . . . . . . . . . . . . . . . . . . . . . . . . . . . . . . . . . . . . . . . . . . . . . . . . . . . . . . . . . . . . . . . . . . . 18
Deleting Notes and Other Objects. . . . . . . . . . . . . . . . . . . . . . . . . . . . . . . . . . . . . . . . . . . . . . . . . . . . . . . . . . . . . . 19
Flexi-time Input. . . . . . . . . . . . . . . . . . . . . . . . . . . . . . . . . . . . . . . . . . . . . . . . . . . . . . . . . . . . . . . . . . . . . . . . . . . . . . . . . . 22
Using a MIDI Device . . . . . . . . . . . . . . . . . . . . . . . . . . . . . . . . . . . . . . . . . . . . . . . . . . . . . . . . . . . . . . . . . . . . . . . . . 22
Flexi-time Options . . . . . . . . . . . . . . . . . . . . . . . . . . . . . . . . . . . . . . . . . . . . . . . . . . . . . . . . . . . . . . . . . . . . . . . . . . 23
Recording MIDI Input with Flexi-time . . . . . . . . . . . . . . . . . . . . . . . . . . . . . . . . . . . . . . . . . . . . . . . . . . . . . . . . . . . 23
Alphabetic and Step-time Input . . . . . . . . . . . . . . . . . . . . . . . . . . . . . . . . . . . . . . . . . . . . . . . . . . . . . . . . . . . . . . . . . . . 25
Alphabetic Input . . . . . . . . . . . . . . . . . . . . . . . . . . . . . . . . . . . . . . . . . . . . . . . . . . . . . . . . . . . . . . . . . . . . . . . . . . . . 25
Step-time Input. . . . . . . . . . . . . . . . . . . . . . . . . . . . . . . . . . . . . . . . . . . . . . . . . . . . . . . . . . . . . . . . . . . . . . . . . . . . . 26
Transposing Scores. . . . . . . . . . . . . . . . . . . . . . . . . . . . . . . . . . . . . . . . . . . . . . . . . . . . . . . . . . . . . . . . . . . . . . . . . 28
Working with Parts. . . . . . . . . . . . . . . . . . . . . . . . . . . . . . . . . . . . . . . . . . . . . . . . . . . . . . . . . . . . . . . . . . . . . . . . . . 28
Sibelius and Sibelius | Ultimate Tutorials iii

Playback . . . . . . . . . . . . . . . . . . . . . . . . . . . . . . . . . . . . . . . . . . . . . . . . . . . . . . . . . . . . . . . . . . . . . . . . . . . . . . . . . . . . . . . . 30
Playback Controls. . . . . . . . . . . . . . . . . . . . . . . . . . . . . . . . . . . . . . . . . . . . . . . . . . . . . . . . . . . . . . . . . . . . . . . . . . . 30
The Mixer Panel . . . . . . . . . . . . . . . . . . . . . . . . . . . . . . . . . . . . . . . . . . . . . . . . . . . . . . . . . . . . . . . . . . . . . . . . . . . . 30
I Can’t Hear Anything! . . . . . . . . . . . . . . . . . . . . . . . . . . . . . . . . . . . . . . . . . . . . . . . . . . . . . . . . . . . . . . . . . . . . . . . 32
Text and Dynamics. . . . . . . . . . . . . . . . . . . . . . . . . . . . . . . . . . . . . . . . . . . . . . . . . . . . . . . . . . . . . . . . . . . . . . . . . . . . . . . 33
About Text. . . . . . . . . . . . . . . . . . . . . . . . . . . . . . . . . . . . . . . . . . . . . . . . . . . . . . . . . . . . . . . . . . . . . . . . . . . . . . . . . 33
Adding Lyrics . . . . . . . . . . . . . . . . . . . . . . . . . . . . . . . . . . . . . . . . . . . . . . . . . . . . . . . . . . . . . . . . . . . . . . . . . . . . . . 33
Dynamics . . . . . . . . . . . . . . . . . . . . . . . . . . . . . . . . . . . . . . . . . . . . . . . . . . . . . . . . . . . . . . . . . . . . . . . . . . . . . . . . . 34
Tempo Text . . . . . . . . . . . . . . . . . . . . . . . . . . . . . . . . . . . . . . . . . . . . . . . . . . . . . . . . . . . . . . . . . . . . . . . . . . . . . . . . 35
Technique Text . . . . . . . . . . . . . . . . . . . . . . . . . . . . . . . . . . . . . . . . . . . . . . . . . . . . . . . . . . . . . . . . . . . . . . . . . . . . . 35
Editing Existing Text . . . . . . . . . . . . . . . . . . . . . . . . . . . . . . . . . . . . . . . . . . . . . . . . . . . . . . . . . . . . . . . . . . . . . . . . 36
Magnetic Layout . . . . . . . . . . . . . . . . . . . . . . . . . . . . . . . . . . . . . . . . . . . . . . . . . . . . . . . . . . . . . . . . . . . . . . . . . . . . 36
Part II Creating a Score and Parts
Creating a New Score . . . . . . . . . . . . . . . . . . . . . . . . . . . . . . . . . . . . . . . . . . . . . . . . . . . . . . . . . . . . . . . . . . . . . . . . . . . . 38
Printout . . . . . . . . . . . . . . . . . . . . . . . . . . . . . . . . . . . . . . . . . . . . . . . . . . . . . . . . . . . . . . . . . . . . . . . . . . . . . . . . . . . 38
Starting a New Score . . . . . . . . . . . . . . . . . . . . . . . . . . . . . . . . . . . . . . . . . . . . . . . . . . . . . . . . . . . . . . . . . . . . . . . . 38
Manuscript Paper . . . . . . . . . . . . . . . . . . . . . . . . . . . . . . . . . . . . . . . . . . . . . . . . . . . . . . . . . . . . . . . . . . . . . . . . . . . 39
Creating Instruments . . . . . . . . . . . . . . . . . . . . . . . . . . . . . . . . . . . . . . . . . . . . . . . . . . . . . . . . . . . . . . . . . . . . . . . . 40
Document Setup . . . . . . . . . . . . . . . . . . . . . . . . . . . . . . . . . . . . . . . . . . . . . . . . . . . . . . . . . . . . . . . . . . . . . . . . . . . . 41
Scanning Music. . . . . . . . . . . . . . . . . . . . . . . . . . . . . . . . . . . . . . . . . . . . . . . . . . . . . . . . . . . . . . . . . . . . . . . . . . . . . . . . . . 44
Scanning in PhotoScore Lite . . . . . . . . . . . . . . . . . . . . . . . . . . . . . . . . . . . . . . . . . . . . . . . . . . . . . . . . . . . . . . . . . . 44
Editing Scanned Music. . . . . . . . . . . . . . . . . . . . . . . . . . . . . . . . . . . . . . . . . . . . . . . . . . . . . . . . . . . . . . . . . . . . . . . 45
Sending to Sibelius. . . . . . . . . . . . . . . . . . . . . . . . . . . . . . . . . . . . . . . . . . . . . . . . . . . . . . . . . . . . . . . . . . . . . . . . . . 46
Adding the Remaining Music. . . . . . . . . . . . . . . . . . . . . . . . . . . . . . . . . . . . . . . . . . . . . . . . . . . . . . . . . . . . . . . . . . 46
Save a Version . . . . . . . . . . . . . . . . . . . . . . . . . . . . . . . . . . . . . . . . . . . . . . . . . . . . . . . . . . . . . . . . . . . . . . . . . . . . . 46
Clefs, Key Signatures, and Tuplets . . . . . . . . . . . . . . . . . . . . . . . . . . . . . . . . . . . . . . . . . . . . . . . . . . . . . . . . . . . . . . . . 47
Clef Changes. . . . . . . . . . . . . . . . . . . . . . . . . . . . . . . . . . . . . . . . . . . . . . . . . . . . . . . . . . . . . . . . . . . . . . . . . . . . . . . 47
Key Signatures . . . . . . . . . . . . . . . . . . . . . . . . . . . . . . . . . . . . . . . . . . . . . . . . . . . . . . . . . . . . . . . . . . . . . . . . . . . . . 48
Triplets and Other Tuplets . . . . . . . . . . . . . . . . . . . . . . . . . . . . . . . . . . . . . . . . . . . . . . . . . . . . . . . . . . . . . . . . . . . . 48
Marking Up a Score . . . . . . . . . . . . . . . . . . . . . . . . . . . . . . . . . . . . . . . . . . . . . . . . . . . . . . . . . . . . . . . . . . . . . . . . . . . . . . 50
Expression Text . . . . . . . . . . . . . . . . . . . . . . . . . . . . . . . . . . . . . . . . . . . . . . . . . . . . . . . . . . . . . . . . . . . . . . . . . . . . 50
Multicopying an Object. . . . . . . . . . . . . . . . . . . . . . . . . . . . . . . . . . . . . . . . . . . . . . . . . . . . . . . . . . . . . . . . . . . . . . . 50
Technique Text . . . . . . . . . . . . . . . . . . . . . . . . . . . . . . . . . . . . . . . . . . . . . . . . . . . . . . . . . . . . . . . . . . . . . . . . . . . . . 51
Tempo Text . . . . . . . . . . . . . . . . . . . . . . . . . . . . . . . . . . . . . . . . . . . . . . . . . . . . . . . . . . . . . . . . . . . . . . . . . . . . . . . . 51
Hairpins and Other Lines . . . . . . . . . . . . . . . . . . . . . . . . . . . . . . . . . . . . . . . . . . . . . . . . . . . . . . . . . . . . . . . . . . . . . 51
Slurs . . . . . . . . . . . . . . . . . . . . . . . . . . . . . . . . . . . . . . . . . . . . . . . . . . . . . . . . . . . . . . . . . . . . . . . . . . . . . . . . . . . . . 52
Articulations . . . . . . . . . . . . . . . . . . . . . . . . . . . . . . . . . . . . . . . . . . . . . . . . . . . . . . . . . . . . . . . . . . . . . . . . . . . . . . . 53
Comparing Versions. . . . . . . . . . . . . . . . . . . . . . . . . . . . . . . . . . . . . . . . . . . . . . . . . . . . . . . . . . . . . . . . . . . . . . . . . 53
Sibelius and Sibelius | Ultimate Tutorials
iv

Layout and Formatting . . . . . . . . . . . . . . . . . . . . . . . . . . . . . . . . . . . . . . . . . . . . . . . . . . . . . . . . . . . . . . . . . . . . . . . . . . . 55
Magnetic Layout . . . . . . . . . . . . . . . . . . . . . . . . . . . . . . . . . . . . . . . . . . . . . . . . . . . . . . . . . . . . . . . . . . . . . . . . . . . . 55
Breaks . . . . . . . . . . . . . . . . . . . . . . . . . . . . . . . . . . . . . . . . . . . . . . . . . . . . . . . . . . . . . . . . . . . . . . . . . . . . . . . . . . . . 55
Document Setup . . . . . . . . . . . . . . . . . . . . . . . . . . . . . . . . . . . . . . . . . . . . . . . . . . . . . . . . . . . . . . . . . . . . . . . . . . . . 56
Staff Spacing. . . . . . . . . . . . . . . . . . . . . . . . . . . . . . . . . . . . . . . . . . . . . . . . . . . . . . . . . . . . . . . . . . . . . . . . . . . . . . . 57
Title Pages . . . . . . . . . . . . . . . . . . . . . . . . . . . . . . . . . . . . . . . . . . . . . . . . . . . . . . . . . . . . . . . . . . . . . . . . . . . . . . . . 57
Dynamic Parts™ . . . . . . . . . . . . . . . . . . . . . . . . . . . . . . . . . . . . . . . . . . . . . . . . . . . . . . . . . . . . . . . . . . . . . . . . . . . . . . . . . 59
The Parts Tab . . . . . . . . . . . . . . . . . . . . . . . . . . . . . . . . . . . . . . . . . . . . . . . . . . . . . . . . . . . . . . . . . . . . . . . . . . . . . . 59
Cues . . . . . . . . . . . . . . . . . . . . . . . . . . . . . . . . . . . . . . . . . . . . . . . . . . . . . . . . . . . . . . . . . . . . . . . . . . . . . . . . . . . . . 60
Laying Out Parts. . . . . . . . . . . . . . . . . . . . . . . . . . . . . . . . . . . . . . . . . . . . . . . . . . . . . . . . . . . . . . . . . . . . . . . . . . . . 60
Create a New Part . . . . . . . . . . . . . . . . . . . . . . . . . . . . . . . . . . . . . . . . . . . . . . . . . . . . . . . . . . . . . . . . . . . . . . . . . . . 61
Creating a Piano Reduction . . . . . . . . . . . . . . . . . . . . . . . . . . . . . . . . . . . . . . . . . . . . . . . . . . . . . . . . . . . . . . . . . . . 62
Exporting. . . . . . . . . . . . . . . . . . . . . . . . . . . . . . . . . . . . . . . . . . . . . . . . . . . . . . . . . . . . . . . . . . . . . . . . . . . . . . . . . . . . . . . . 63
Copying Graphics to Other Programs. . . . . . . . . . . . . . . . . . . . . . . . . . . . . . . . . . . . . . . . . . . . . . . . . . . . . . . . . . . 63
Exporting MusicXML Files . . . . . . . . . . . . . . . . . . . . . . . . . . . . . . . . . . . . . . . . . . . . . . . . . . . . . . . . . . . . . . . . . . . . 63
Part III Writing for Keyboard, Guitar, and Drums
Writing for Keyboard . . . . . . . . . . . . . . . . . . . . . . . . . . . . . . . . . . . . . . . . . . . . . . . . . . . . . . . . . . . . . . . . . . . . . . . . . . . . . 66
Printout . . . . . . . . . . . . . . . . . . . . . . . . . . . . . . . . . . . . . . . . . . . . . . . . . . . . . . . . . . . . . . . . . . . . . . . . . . . . . . . . . . . 66
Using a MIDI Keyboard. . . . . . . . . . . . . . . . . . . . . . . . . . . . . . . . . . . . . . . . . . . . . . . . . . . . . . . . . . . . . . . . . . . . . . . 66
Writing for Guitar . . . . . . . . . . . . . . . . . . . . . . . . . . . . . . . . . . . . . . . . . . . . . . . . . . . . . . . . . . . . . . . . . . . . . . . . . . . . . . . . 68
Using a MIDI Guitar. . . . . . . . . . . . . . . . . . . . . . . . . . . . . . . . . . . . . . . . . . . . . . . . . . . . . . . . . . . . . . . . . . . . . . . . . . 68
Convert to Tab . . . . . . . . . . . . . . . . . . . . . . . . . . . . . . . . . . . . . . . . . . . . . . . . . . . . . . . . . . . . . . . . . . . . . . . . . . . . . 69
Writing Tab Notation. . . . . . . . . . . . . . . . . . . . . . . . . . . . . . . . . . . . . . . . . . . . . . . . . . . . . . . . . . . . . . . . . . . . . . . . . 69
Ideas and Drum Notation . . . . . . . . . . . . . . . . . . . . . . . . . . . . . . . . . . . . . . . . . . . . . . . . . . . . . . . . . . . . . . . . . . . . . . . . . 70
The Ideas Panel. . . . . . . . . . . . . . . . . . . . . . . . . . . . . . . . . . . . . . . . . . . . . . . . . . . . . . . . . . . . . . . . . . . . . . . . . . . . . 70
Drum Notation. . . . . . . . . . . . . . . . . . . . . . . . . . . . . . . . . . . . . . . . . . . . . . . . . . . . . . . . . . . . . . . . . . . . . . . . . . . . . . 72
Chord Symbols . . . . . . . . . . . . . . . . . . . . . . . . . . . . . . . . . . . . . . . . . . . . . . . . . . . . . . . . . . . . . . . . . . . . . . . . . . . . . . . . . . 76
Typing Chord Symbols. . . . . . . . . . . . . . . . . . . . . . . . . . . . . . . . . . . . . . . . . . . . . . . . . . . . . . . . . . . . . . . . . . . . . . . 76
Creating Chord Symbols by Playing MIDI. . . . . . . . . . . . . . . . . . . . . . . . . . . . . . . . . . . . . . . . . . . . . . . . . . . . . . . . 76
Generating Chord Symbols from Selected Notes. . . . . . . . . . . . . . . . . . . . . . . . . . . . . . . . . . . . . . . . . . . . . . . . . . 78
Equivalent Chord Text . . . . . . . . . . . . . . . . . . . . . . . . . . . . . . . . . . . . . . . . . . . . . . . . . . . . . . . . . . . . . . . . . . . . . . . 78
Respelling a Chord Symbol . . . . . . . . . . . . . . . . . . . . . . . . . . . . . . . . . . . . . . . . . . . . . . . . . . . . . . . . . . . . . . . . . . . 79
Copying Chord Symbols . . . . . . . . . . . . . . . . . . . . . . . . . . . . . . . . . . . . . . . . . . . . . . . . . . . . . . . . . . . . . . . . . . . . . 79
Revoicing Chord Diagrams . . . . . . . . . . . . . . . . . . . . . . . . . . . . . . . . . . . . . . . . . . . . . . . . . . . . . . . . . . . . . . . . . . . 79
Chord Symbol Plug-ins . . . . . . . . . . . . . . . . . . . . . . . . . . . . . . . . . . . . . . . . . . . . . . . . . . . . . . . . . . . . . . . . . . . . . . 80
Repeats and Codas . . . . . . . . . . . . . . . . . . . . . . . . . . . . . . . . . . . . . . . . . . . . . . . . . . . . . . . . . . . . . . . . . . . . . . . . . . . . . . 81
Repeat Barlines. . . . . . . . . . . . . . . . . . . . . . . . . . . . . . . . . . . . . . . . . . . . . . . . . . . . . . . . . . . . . . . . . . . . . . . . . . . . . 81
Coda and dal Segno (D.S.) Repeats. . . . . . . . . . . . . . . . . . . . . . . . . . . . . . . . . . . . . . . . . . . . . . . . . . . . . . . . . . . . . 82
Sibelius and Sibelius | Ultimate Tutorials
v

Arranging and Playback . . . . . . . . . . . . . . . . . . . . . . . . . . . . . . . . . . . . . . . . . . . . . . . . . . . . . . . . . . . . . . . . . . . . . . . . . . 84
Add String Backings. . . . . . . . . . . . . . . . . . . . . . . . . . . . . . . . . . . . . . . . . . . . . . . . . . . . . . . . . . . . . . . . . . . . . . . . . 84
Mixing Your Score . . . . . . . . . . . . . . . . . . . . . . . . . . . . . . . . . . . . . . . . . . . . . . . . . . . . . . . . . . . . . . . . . . . . . . . . . . 85
Effects Parameters . . . . . . . . . . . . . . . . . . . . . . . . . . . . . . . . . . . . . . . . . . . . . . . . . . . . . . . . . . . . . . . . . . . . . . . . . . 86
Deleting an Instrument from a Score. . . . . . . . . . . . . . . . . . . . . . . . . . . . . . . . . . . . . . . . . . . . . . . . . . . . . . . . . . . . 87
Exporting an Audio File . . . . . . . . . . . . . . . . . . . . . . . . . . . . . . . . . . . . . . . . . . . . . . . . . . . . . . . . . . . . . . . . . . . . . . 87
Part IV Worksheets and Classroom Control
Setting up a Worksheet. . . . . . . . . . . . . . . . . . . . . . . . . . . . . . . . . . . . . . . . . . . . . . . . . . . . . . . . . . . . . . . . . . . . . . . . . . . 89
Worksheet Creator . . . . . . . . . . . . . . . . . . . . . . . . . . . . . . . . . . . . . . . . . . . . . . . . . . . . . . . . . . . . . . . . . . . . . . . . . . 89
Creating a Worksheet from Scratch. . . . . . . . . . . . . . . . . . . . . . . . . . . . . . . . . . . . . . . . . . . . . . . . . . . . . . . . . . . . . 89
Add to Worksheet Templates. . . . . . . . . . . . . . . . . . . . . . . . . . . . . . . . . . . . . . . . . . . . . . . . . . . . . . . . . . . . . . . . . . 92
Scales and Arpeggios . . . . . . . . . . . . . . . . . . . . . . . . . . . . . . . . . . . . . . . . . . . . . . . . . . . . . . . . . . . . . . . . . . . . . . . . . . . . 93
Adding Scales. . . . . . . . . . . . . . . . . . . . . . . . . . . . . . . . . . . . . . . . . . . . . . . . . . . . . . . . . . . . . . . . . . . . . . . . . . . . . . 93
Respelling Enharmonic Accidentals . . . . . . . . . . . . . . . . . . . . . . . . . . . . . . . . . . . . . . . . . . . . . . . . . . . . . . . . . . . . 93
Changing a Scale . . . . . . . . . . . . . . . . . . . . . . . . . . . . . . . . . . . . . . . . . . . . . . . . . . . . . . . . . . . . . . . . . . . . . . . . . . . 94
Layout and Formatting . . . . . . . . . . . . . . . . . . . . . . . . . . . . . . . . . . . . . . . . . . . . . . . . . . . . . . . . . . . . . . . . . . . . . . . . . . . 96
Adding Another Staff . . . . . . . . . . . . . . . . . . . . . . . . . . . . . . . . . . . . . . . . . . . . . . . . . . . . . . . . . . . . . . . . . . . . . . . . 96
Incomplete Scales. . . . . . . . . . . . . . . . . . . . . . . . . . . . . . . . . . . . . . . . . . . . . . . . . . . . . . . . . . . . . . . . . . . . . . . . . . . 96
Dragging and Indenting Staves . . . . . . . . . . . . . . . . . . . . . . . . . . . . . . . . . . . . . . . . . . . . . . . . . . . . . . . . . . . . . . . . 97
Adding Text to a Worksheet. . . . . . . . . . . . . . . . . . . . . . . . . . . . . . . . . . . . . . . . . . . . . . . . . . . . . . . . . . . . . . . . . . . 98
Classroom Control . . . . . . . . . . . . . . . . . . . . . . . . . . . . . . . . . . . . . . . . . . . . . . . . . . . . . . . . . . . . . . . . . . . . . . . . . . . . . 100
Distributing Work Using the Sibelius Licence Server. . . . . . . . . . . . . . . . . . . . . . . . . . . . . . . . . . . . . . . . . . . . . . 100
Retrieving Scores Using the Sibelius Licence Server . . . . . . . . . . . . . . . . . . . . . . . . . . . . . . . . . . . . . . . . . . . . . 100
Part V Video
Using Video . . . . . . . . . . . . . . . . . . . . . . . . . . . . . . . . . . . . . . . . . . . . . . . . . . . . . . . . . . . . . . . . . . . . . . . . . . . . . . . . . . . . 103
Adding a Video to a Score . . . . . . . . . . . . . . . . . . . . . . . . . . . . . . . . . . . . . . . . . . . . . . . . . . . . . . . . . . . . . . . . . . . 103
The Video Window . . . . . . . . . . . . . . . . . . . . . . . . . . . . . . . . . . . . . . . . . . . . . . . . . . . . . . . . . . . . . . . . . . . . . . . . . 104
Finding Videos . . . . . . . . . . . . . . . . . . . . . . . . . . . . . . . . . . . . . . . . . . . . . . . . . . . . . . . . . . . . . . . . . . . . . . . . . . . . 104
Writing Music to Picture . . . . . . . . . . . . . . . . . . . . . . . . . . . . . . . . . . . . . . . . . . . . . . . . . . . . . . . . . . . . . . . . . . . . . . . . . 105
Add Timecode and Duration . . . . . . . . . . . . . . . . . . . . . . . . . . . . . . . . . . . . . . . . . . . . . . . . . . . . . . . . . . . . . . . . . 105
Add Hit Points. . . . . . . . . . . . . . . . . . . . . . . . . . . . . . . . . . . . . . . . . . . . . . . . . . . . . . . . . . . . . . . . . . . . . . . . . . . . . 106
Editing Hit Points . . . . . . . . . . . . . . . . . . . . . . . . . . . . . . . . . . . . . . . . . . . . . . . . . . . . . . . . . . . . . . . . . . . . . . . . . . 106
Fit Existing Music to Picture . . . . . . . . . . . . . . . . . . . . . . . . . . . . . . . . . . . . . . . . . . . . . . . . . . . . . . . . . . . . . . . . . 107
Adding a Soundtrack to Video . . . . . . . . . . . . . . . . . . . . . . . . . . . . . . . . . . . . . . . . . . . . . . . . . . . . . . . . . . . . . . . . . . . 108
Exporting an Audio File . . . . . . . . . . . . . . . . . . . . . . . . . . . . . . . . . . . . . . . . . . . . . . . . . . . . . . . . . . . . . . . . . . . . . 108
Open a Movie in your Video Editor . . . . . . . . . . . . . . . . . . . . . . . . . . . . . . . . . . . . . . . . . . . . . . . . . . . . . . . . . . . . 108
Sibelius and Sibelius | Ultimate Tutorials
vi

Introduction
If you work through at least the first three of the five tutorial projects before embarking on any serious work of your own with Sibelius®
or Sibelius | Ultimate you will be able to input, edit, play back and print out straightforward music, and you’ll know how to get going
on more complicated music too. Sibelius and Sibelius | Ultimate are easy to learn and mostly self-explanatory, but if you don’t work
through these projects you will run a risk of never discovering some basic features, particularly if you are used to notation programs that
work in different ways.
Throughout these tutorials, “Sibelius” refers to both Sibelius and Sibelius | Ultimate for the sake of readability.
Naming Conv entions for Sibelius Software
“Sibelius” software (version 2018.1 and lower) has been renamed “Sibelius | Ultimate” software (version 2018.4 and higher). Sibelius | Ultimate is the top-tier version of the Sibelius software product line. Likewise, “Sibelius | First” (version 2018.1 and lower) has been renamed “Sibelius” software (version 2018.4 and higher).
Old versus new naming conventions for Sibelius software
Sibelius 2018.1 and Lower Sibelius 2018.4 and Higher
Sibelius Sibelius | Ultimate
Sibelius | First Sibelus
Sibelius Reference Guide
More advanced topics are covered one by one in the Sibelius Reference Guide, which explains every feature in complete detail (with a
Glossary of special terms). The Reference Gu ide is not meant to be read from start to finish, because most people only use quite a small
proportion of music notation anyway. You can browse through relevant parts of the Sibelius
To open a PDF of the Reference Guide:
Click the “?” button in the toolbar.
Choose File > Help > Sibelius Reference.
Press F1, or Command+/ (Mac) or Control+/ (Windows).
The
Reference Guide is also available for separate purchase as a printed book; to buy this if you don’t already have it, visit the
®
online store (shop.avid.com) or your favorite online bookseller.
Avid
Reference Guide at your leisure.
Commands in the Ribbon
The main way in which you find commands in Sibelius is in the ribbon, a wide band of command buttons that appear at the top of the
screen when you click a tab (like
so on.); when you click a tab, the ribbon changes to show the buttons that let you use those commands. Each ribbon tab contains a number of groups of related commands.
As a quick way of describing how to access a particular command, these tutorials use the following format: “choose
ments > Add or Remove
bon is explained in greater detail on the following pages.
File or Home. Each tab describes a related set of commands (Note Input, Notations, Text, Layout, and
Home > Instru-
” means “click the Home tab, look for the Instruments group, and click the Add or Remove button.” The rib-
Introduction
1

System Requirements and Compatibility Information
Avid can only assure compatibility and provide support for hardware and software it has tested and approved.
For complete system requirements and a list of qualified computers, operating systems, hard drives, and third-party devices, visit:
www.avid.com/compatibility
Conventions Used in Sibelius Documentation
Sibelius documentation uses the following conventions to indicate menu choices, keyboard commands, and mouse commands:
:
Convention Action
File > Save Choose Save from the File tab
Control+N Hold down the Control key and press the N key
Control-click Hold down the Control key and click the mouse but-
Right-click Click with the right mouse button
ton
The names of Commands, Options, and Settings that appear on-screen are in a different font.
The following symbols are used to highlight important information:
User Tips are helpful hints for getting the most from Sibelius.
Important Notices include information that could affect data or the performance of Sibelius.
Shortcuts show you useful keyboard or mouse shortcuts.
Cross References point to related sections in this guide and other Avid documentation.
How to Use this PDF Guide
This PDF provides the following useful features:
• The Bookmarks on the left serve as a continuously visible table of contents. Click on a subject heading to jump to that page.
• Click a + symbol to expand that heading to show subheadings. Click the – symbol to collapse a subheading.
• The Table of Contents provides active links to their pages. Select the hand cursor, allow it to hover over the heading until i t turns
into a finger. Then click to locate to that subject and page.
• All cross references in
• Select Find from the Edit menu to search for a subject.
• When viewing this PDF on an iPad, it is recommended that you open the file using iBooks to take advantage of active links within
the document. When viewing the PDF in Safari, touch the screen, then touch
blue are active links. Click to follow the reference.
Open in “iBooks”.
Introduction
2

Resources
The Avid website (www.avid.com) is your best online source for information to help you get the most out of Sibelius.
Account Activation and Product Registration
Activate your product to access downloads in your Avid account (or quickly create an account if you do not have one). Register your
purchase online, download software, updates, documentation, and other resources.
www.avid.com/account
Support and Downloads\
Contact Avid Customer Success (technical support), download software updates and the latest online manuals, browse the Compatibility documents for system requirements, search the online Knowledge Base or join the worldwide Avid user community on the User Conference.
www.avid.com/support
Training and Education
Study on your own using courses available online, find out how you can learn in a classroom setting at an Avid-certified training center,
or view video tutorials and webinars.
www.avid.com/education
Products and Developers
Learn about Avid products, download demo software, or learn about our Development Partners and their plug-ins, applications, and
hardware.
www.avid.com/products
Introduction
3

About the Projects
These tutorials are made up of five projects, which will take you roughly eight hours to work through from start to finish. You are recommended to work through at least the first three projects, as these explain all of the key concepts and features that yo u wil l use every
day in Sibelius and Sibelius | Ultimate. The fourth and f ifth projects are more tightly focused on specific features, but you should work
through them as well if you can make the time.
Project 1 (2 hours)
This project shows you how to open a score, introduces the ribbon, explains how to navigate around a score using both the Navigator
panel and various keyboard and mouse shortcuts, making selections, and copying and pasting. Using an arrangement of the folk song
Scarborough Fair, you will learn how to edit and input notes using your mouse, computer keyboard and MIDI keyboard, and how to
input lyrics. You will be introduced to playback, and to marking up your score with text and dynamics.
Project 2 (2 hours)
In this project, you will learn to recreate an excerpt from Elgar’s String Quartet in E minor, Op. 83 by scanning the four instrumental
parts using PhotoScore Lite, then copying and pasting them into a newly-created score. You will learn how to create clef and key signature changes, more advanced note input including tuplets, and explore the different kinds of objects – including articulations, lines,
ties, slurs and text – commonly used to mark up scores. You will also be introduced to dynamic parts, and exporting graphics from Sibelius or Sibelius | Ultimate.
Project 3 (2 hours)
This project teaches you the basics of writing for keyboard, guitar and drums, together with an introduction to creating chord symbols
and repeat structures (including 1st and 2nd ending lines, and D.S. al Coda). You will also explore adjusting playback using the
panel, and learn how to use
Ideas panel to store and re-use snippets of music.
Mixer
Project 4 (1 hour)
(Sibelius Ultimate Only)
This project is especially useful if you are planning to produce learning materials for students or teach with Sibelius | Ultimate in the
classroom, but it should also be of interest if you want to learn some of the more advanced techniques for laying out and formatting music. In this project you will create a worksheet of scales, and learn how to indent staves, hide empty staves, change text fonts, and more.
Project 5 (1 hour)
(Sibelius Ultimate Only)
This project introduces the Video window, and explores techniques for writing to picture, including working with timecode, hit points,
and a plug-in for adjusting the duration of a section of music. Using a video from the animated series Mr . Bean, you will also learn how
to export an audio track from Sibelius | Ultimate in order to add it as a soundtrack to a video in an editing package such as Avid Media
Composer
®
.
Introduction
4

Project 1: Opening and
Editing a Score
Opening a Score
This project shows you how to open and navigate a score in Sibelius. You’ll also learn how to print a copy of the arrangement.
Opening a File
Sibelius comes with some example scores that demonstrate various aspects of the program. You can modify these without fear of retribution, as the originals remain unaltered on your installation DVD-ROM.
To open the score for Project 1:
1 Choose the Recent tab in the Quick Start dialog.
2 Click Project 1.
3 Click Open.
To open any Sibelius score file from within Sibelius:
1 Choose File > Open.
To open a score, press Command+O (Mac) or Control+O (Windows).
2 In the resulting Open dialog, navigate to and select the Sibelius score you want to open.
3 Click Open.
On Windows, you should find that you are inside a folder called
ample Scores
. Double-click this, then go into the Project Files folder, select the score called Project 1, and then click Open. This is
an arrangement of the traditional ballad Scarborough Fair.
Sibelius Score File
Scores, which will contain a shortcut to a folder called Sibelius Ex-
Opening a Score
6

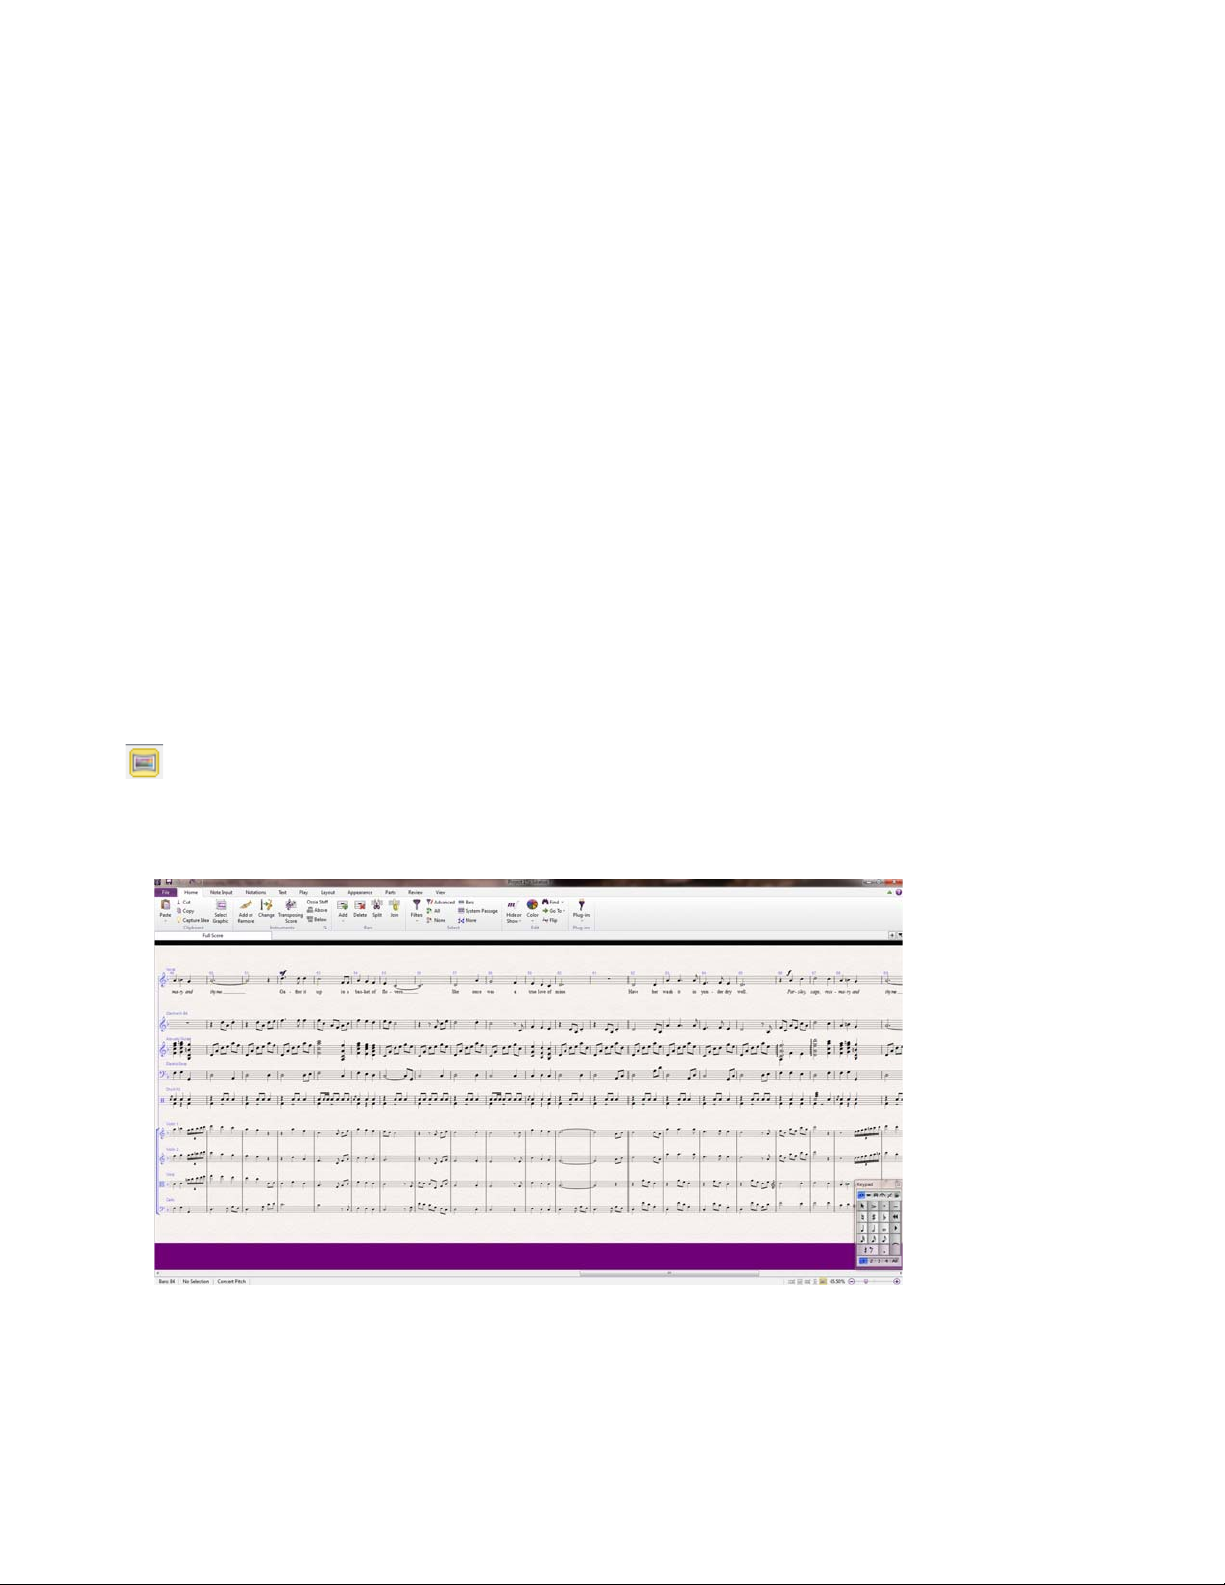
When you’ve opened the Scarborough Fair score, the music appears, looking somewhat like this:
The ribbon
Ribbon tabs
Help button
Open new tab
Switch tab
Status bar Zoom controlsDocument view
buttons
Infor matio n
read-outs
Tit le ba r
Minimize r ibbon
button
Win dow but ton s
Document tabs
Open score in Sibelius
Introducing the Ribbon
The ribbon is the wide band of command buttons that appears at the top of the Sibelius window, housing all of the features of the program, organized according to task.
The ribbon provides 11 tabs for Sibelius | Ultimate and 10 tabs for Sibelius. The
and export files in different formats, print, access special learning and teaching features, get detailed help – the whole of
in the Reference Guide is devoted to this.The othe r tabs are ordered roughly according to the order in which you typically perform tasks
while working on a score, so as you make your way from the start of a project towards its end, you will typically work your way through
the tabs of the ribbon from left to right.
The remaining tabs contain the following kinds of commands, organized into groups:
Home
Basic score setup operations, like adding or removing instruments (staves) and bars, plus key editing operations, including clip-
board operations and Sibelius’s powerful filters—see
Note Input
and compositional tools such as explode/reduce and transformations such as retrograde, inversion, and so on—see
Commands relating to alphabetic, step-time and Flexi-time input, plus note editing operations, including switching voices,
2. Home tab in the Reference Guide.
in the Reference Guide.
Notations
head types, and so on—see
Text
tions—see
All of the basic markings that are not notes, including clefs, key and time signatures, special barlines, lines, symbols, note-
4. Notations tab in the Reference Guide.
Font style and size controls, choice of text style, plus lyrics, chord symbols, rehearsal marks, and bar and page numbering op-
5. Text tab in the Reference Guide.
File tab is different from the other tabs; it lets you import
1. File tab
3. Note Input tab
Play
Choice of playback configuration, transport control, Live Tempo, Live Playback, and options for how Sibelius should interpret the mark-
ings in your score during playback—see
Layout
Document setup options such as page and staff size, staff spacing, hiding staves, Magnetic Layout options, plus formatting con-
trols—see
Opening a Score
7. Layout tab in the Reference Guide.
6. Play tab in the Reference Guide.
7

Appearance
Options that affect the visual appearance of your score, including choice of house style, note spacing and instrument
names, plus commands to reset the design, position or other properties of the objects in your score—see
Reference Guide.
8. Appearance tab in the
Parts (Sibelius | Ultimate Only)
Options relating to individual instrumental parts—see 9. Parts tab (Sibelius | Ultimate Only) in
the Reference Guide.
Review
various proof-reading plug-ins—see
View
Add and review sticky note comments, create and manage multiple ve rsions within your score, compare revisions, and access
10. Review tab in the Reference Guide.
Change the settings relating to the appearance of “invisibles” (helpful markings that don’t print, but which provide useful information about the setup of your score), hide or show extra panels for advanced operation, and arrange or switch between the open document windows—see
11. View tab in the Reference Guide.
To learn more about the ribbon, see Working with the ribbon in the Reference Guide.
Moving Around the Score
There are a number of ways to move around the score, but the simplest of these is by dragging the paper on the screen with your mouse.
To do this, click a blank part of the pap er an d dr a g th e pa ge . As you do so, you should notice that the display on the gray rectangle on
the left-hand side of the screen moves around too. This rectangle is called the Navigator; it shows a miniature view of some of the pages.
The white rectangle on the Navigator shows which portion of the music is shown on the screen
To view the Navigator, do oe of the following:
Choosing View > Panels > Navigator—see Hiding and Showing Panels below.
Press Command+Option+N (Mac) or Control+Alt+N (Windows).
Click anywhere on the Navigator, and the view will instantly jump to that part of the score.
Alternatively, click the Navigator’s white rectangle and drag it around, which pans the window smoothly around the score. This effect
is very striking and enhances the disconcerting impression that you are moving a video camera around a real score.
In long scores, if you dra g the white rect angl e towa rds t he le ft-h and o r rig ht- hand side of t he Na vigat or,the view of the score will con-
tinue to move leftwards or rightwards. The further you drag, the faster it moves through the score. This allows you to move continuously
across any number of pages.
By moving around the score with the Navigator, you can see that pages are laid side-by-side on a blue desk. With long scores, pages are
joined in pairs as if in a score opened flat, so you can see where page-turns will occur. You can change the way pages of the score are
laid out, so that they appear top-to-bottom or side-by-side, and as single pages or spreads—see
11. View tab in the Reference Guide.
You can’t drag the white rectangle off the top or bottom edges of the page displayed in the Navigator, or off the left edge of the first page
or the right edge of the last page. However, it is possible to click on the paper and drag the score off the edge of the screen. If you do
this, click anywhere on the Navigator to show the score again.
If moving around the score is slow, try setting the paper and/or backgr o und te xt ur e s of th e fu ll score and parts to plain colors. For tips
on changing the score display,
To use the scroll wheel on your mouse to scroll around the score, do any of the following:
Scroll the wheel up and down to move the page up and down; hold down Option (Mac) or Alt (Windows) to move a screenful at a
1.27 Display settings in the Reference Guide.
time.
Hold Shift and scroll the wheel to move the page le ft and right; hold down Option (Mac) or Alt (Windows) to move a screenful at a
time.
You can also use the wheel to zoom by holding down Command (Mac) or Control (Windows)—see Zooming below.
You can also move around the score using keyboard shortcuts. Sibelius is full of shortcuts that let you perform an action by typing a key
rather than using the mouse. It’s a good idea to learn keyboard shortcuts at least for the most common operations—these are listed in
Keyboard shortcuts in the Reference Guide.
8
Opening a Score
To move around the score with keyboard shortcuts, do any of the following:
Press Page Up and Page Down to move up or down a screenful.
Press Home and End to move left or right a screenful, or a whole page if the whole width of the page is in view.
Press Command+Home (Mac) or Control+Home (Windows) and Command+End (Mac) or Control+End (Windows) to go to the
first or last page.
In Sibelius, typing the
words pressing the other key without
(Mac) or Control (Windows) key
Control (Windows) key to
Command (Mac) or Control (Windows) key with another key generally means “do this, but bigger”—in other
Command (Mac) or Control (Windows) performs the operation normally; adding the Command
performs a bigger version of the operation. Various operations in Sibelius use Command (Mac) or
do things in big steps, such as moving notes or other objects (such as text), increasing or decreasing note spac-
ing, and so on.
Possibly the most important key you need when using Sibelius is the
you click on a note (or any other object in a score) and select it without meaning to, press
cel or stop an operation in Sibelius, press
Esc.
Esc key. Esc is your get-out-of-jail-free card in every situation. If
Esc to deselect everything; if you want to can-
Panorama View
Sibelius has a wide range of tools to help make it easier for you to work on a score. For a more convenient way of viewing a score while
you work on it, you can use Panorama.
To switch to Panorama view, do one of the following:
Choose View > Document View > Panorama.
Press Shift+P.
Click the Panorama button on the status bar that runs along the bottom of the window.
Panorama button
Your score is instantly laid out as a single system on an infinitely wide page:
Panorama View
Using Panorama view lets you input your music without Sibelius moving the page up and down, which can be distracting; instead, the
score only scrolls left to right. All the navigation methods already discussed work the same way in Panorama as they do in normal view,
with the exception of the Navigator, which doesn’t appear in Panorama (because your score isn’t laid out on pages any longer).
9
Opening a Score
This kind of view is sometimes called scroll view or gallery view in other programs. Switch Panorama off again by choosing View >
Document View > Panorama
, or clicking the status bar button again. You may have noticed the blue magic margin, which always dis-
plays the clef, key signature and instrument name for each staff, superimposed over the left-hand margin in Panorama view.
For more information about Panorama view, see 11.1 Document view in the Reference Guide.
Zooming
There are several ways to adjust the magnification of the score, but the quickest of these is by using the keyboard shortcuts for zooming:
press Command + “+” (Mac) or Control+ “
+” (Windows) to zoom in, or Command+ “–” (Mac) or Control+ “–” (Windows) to zoo m
out. If you have a note or other object selected then Sibelius zooms in on the thing you select. Try clicking on the first note of the vocal
staff in the
Scarborough Fair score and zooming in. Notice as you do this how the percentage zoom factor shown in the drop-down list
on the toolbar changes. You can select a particular zoom factor preset from the list, or type in your own.
If you have a mouse with a wheel button, you can zoom in and out smoothly by holding Command (Mac) or Control (Windows) while
scrolling the wheel up and down.
Try zooming out so that you can see the whole page of music on your screen. Then zoom back in to 100%, which is a convenient size
for doing most things in Sibelius.
Hiding and Showing Panels
If your screen starts to get cluttered, then you can use the checkboxes in View > Panels to hide any panel (including the Navigator).
The Keypad at the bottom right of the screen is an indispensible tool for inputting notes, accident als, articula tions, ties and other mark-
ings, and can be shown or hidden by switching
View > Panels > Keypad on or off.
You can also hide all panels by ch oosing
View > Panels > Hide All. Click the button again to show the panels you had open previously.
Versions
While you work on a piece of music, it can be very useful to save different ver sions of the same score—especi ally if you’re goi ng to experiment, or you want to produce different arrangements of the same piece. Sibelius allows you to store all of these different versions
in the same file, so that you can go backwards (or forwards) in time through the life of your score.
All of the project files you’ll be working on in these tutorials have a number of different versions, corresponding to the chapter headings,
so you can easily see where to start working from.
You can quickly see which version you ’re vie wing—an d view othe r vers ions in the file—by referring to the document tabs, below the
ribbon. These allow you to open multiple different views of the same document inside a single window.
You can open new tabs using the
views from the current score, including versions. You can also reach this menu by right-clicking (
on the document tab bar.
Plus button
All saved versions except the
play them, print them, select notes and other objects, and copy music from them. To view another version, choose it from the menu to
open it in a new document tab.
You’ll need a printout of the finished arrangement of Scarborough Fair to refer to while completing the rest of this project, so let’s print
one now. Choose
ing a file
, and click Make Current. Sibelius will ask you if you want to make this version the current one, and make a new non-editable
Review > Versions > Edit Versions or click to open the Edit Versions dialog. From the list of versions, select 1 Open-
version of the existing one. Click
ible.
+ button at the right-hand side of the document tab bar, which opens a menu showing all the available
or Control-clicking on Mac) anywhere
Current version are non-editable, so you won’t be able to change anything in the score, although you can
Yes. You should now see a completed arrangement of Scarborough Fair without the string staves vis-
See 10.4 Versions in the Reference Guide for more details.
Opening a Score
10

Focus on Staves
The score you’ve just made into the current version uses Focus on Staves to hide the staves that you’re not currently working on. You
won’t need to work on any of the string parts at any point in this project, so you’ll save paper by hiding them in the printout.
To hide staves by turning Focus on Staves off:
Choose Layout > Hiding Staves > Focus on Staves.
Press Command+Option+F (Mac) or Control+Alt+F (Windows) to turn off Focus on Staves.
Instantly the string parts that were hidden are shown. Because you don’t need to work on them, you should switch
back on by choosing
Layout > Hiding Staves > Focus on Staves. (You can tell at a glance if any staves have been hidden in this way
Focus on Staves
by referring to the status bar along the bottom of the window, which will read “Focus on Staves” when that feature is switched on.)
For more information, 7.4 Focus on Staves (Sibelius | Ultimate Only) in the Reference Guide.
Printing a Score
To print your score:
Choose File > Print to see the Print pane and preview. (Don’t worry about all the options: just click the Print button to print your
score.)
Within a few moments, a high-quality printout of the Scarborough Fair score should emerge from your printer. Hold on to this printout,
because you’ll be reading music from it shortly for Note Input.
If you ran into any problems, 1.11 Printing in the Reference Guide for help.
For the next chapter of this project, you need to be able to edit another version. Choose
the list of versions, select
2 Editing and inputing note s, and click Make Current. Sibelius will ask you if you want to make this version
the current one, and make a new non-editable version of the existing one. Click
of Scarborough Fair.
Review > Versions > Edit Versions again. From
Yes. You should now see an incomplete arrangement
Opening a Score
11

Note Input and Editing
In order to complete this section of the project, you should have already made the 2 Editing and inputting notes version into the Current
version
(see above).
Make current
Most of the actions you will perform in Sibelius are related to inputting notes and editing what you’ve inputted. Sibelius lets you input
music in a number of ways—scanning sheet music, pl aying a MIDI keyboard or guitar, placing notes with the mouse, opening files from
other programs—but the fastest way of all is by typing using your computer keyboard and editing as you go.
The Escape Key
Before you learn how to enter and edit notes in a score, you can use the Esc key as a get-out-of-jail-free card. When you’re inputting or
editing your music in any of the ways Sibelius allows,
• When adding notes with the mouse, pressing Esc stops placing any more notes
• When typing notes with your computer keyboard, pressing
selected
• If you’re editing a piece of text, pressing
• If you have something selected, pressing
• When Sibelius is playing back your score, pressing
If you haven’t already done so, choose
.
Review > Versions > Edit Versions
Esc is of the utmost importance. It can be used in any of the following situations:
Esc stops adding any more notes and leave the most recently-added note
Esc stops typing or deleting any text and leave the object selected
Esc deselects it
Esc stops play back.
. Select this version in the list and click
You can also click the top left button on any Keypad layout—the one with the picture of the mouse pointer on it—to perform the same
function (see
The Keypad, below).
Moving Between Notes
While Sibelius lets you click on a note to select it (that’s why it turns blue, so that you can edit or change it), the fastest way to move
between notes in Sibelius is to use your computer keyboard. You can move forwards and backwards from one note or rest to the next
one by using the Left and Right Arrow keys; to move to the first note or rest in a bar, press
Arrow key. This is another example of “do this, but bigger.”
You can also use the
ticular stave.
score: make sure you have nothing selected (by pressing
score turn blue. Keep pressing
this way, simply press
Tab key (above Caps Lock on your computer keyboard) to move forward through every object attached to a par-
Tab selects the first object on the page, so you don’t need to use your mouse at all. Try this out in the Scarborough Fair
Esc) and then press Tab. You should see the first note on the vocal staf f of the
Tab and you’ll advance through the notes, rests, dynamic markings, lyrics and so on. To go backward in
Shift+Tab.
Control+Left Arrow key or Control+Right
Note Input and Editing
12
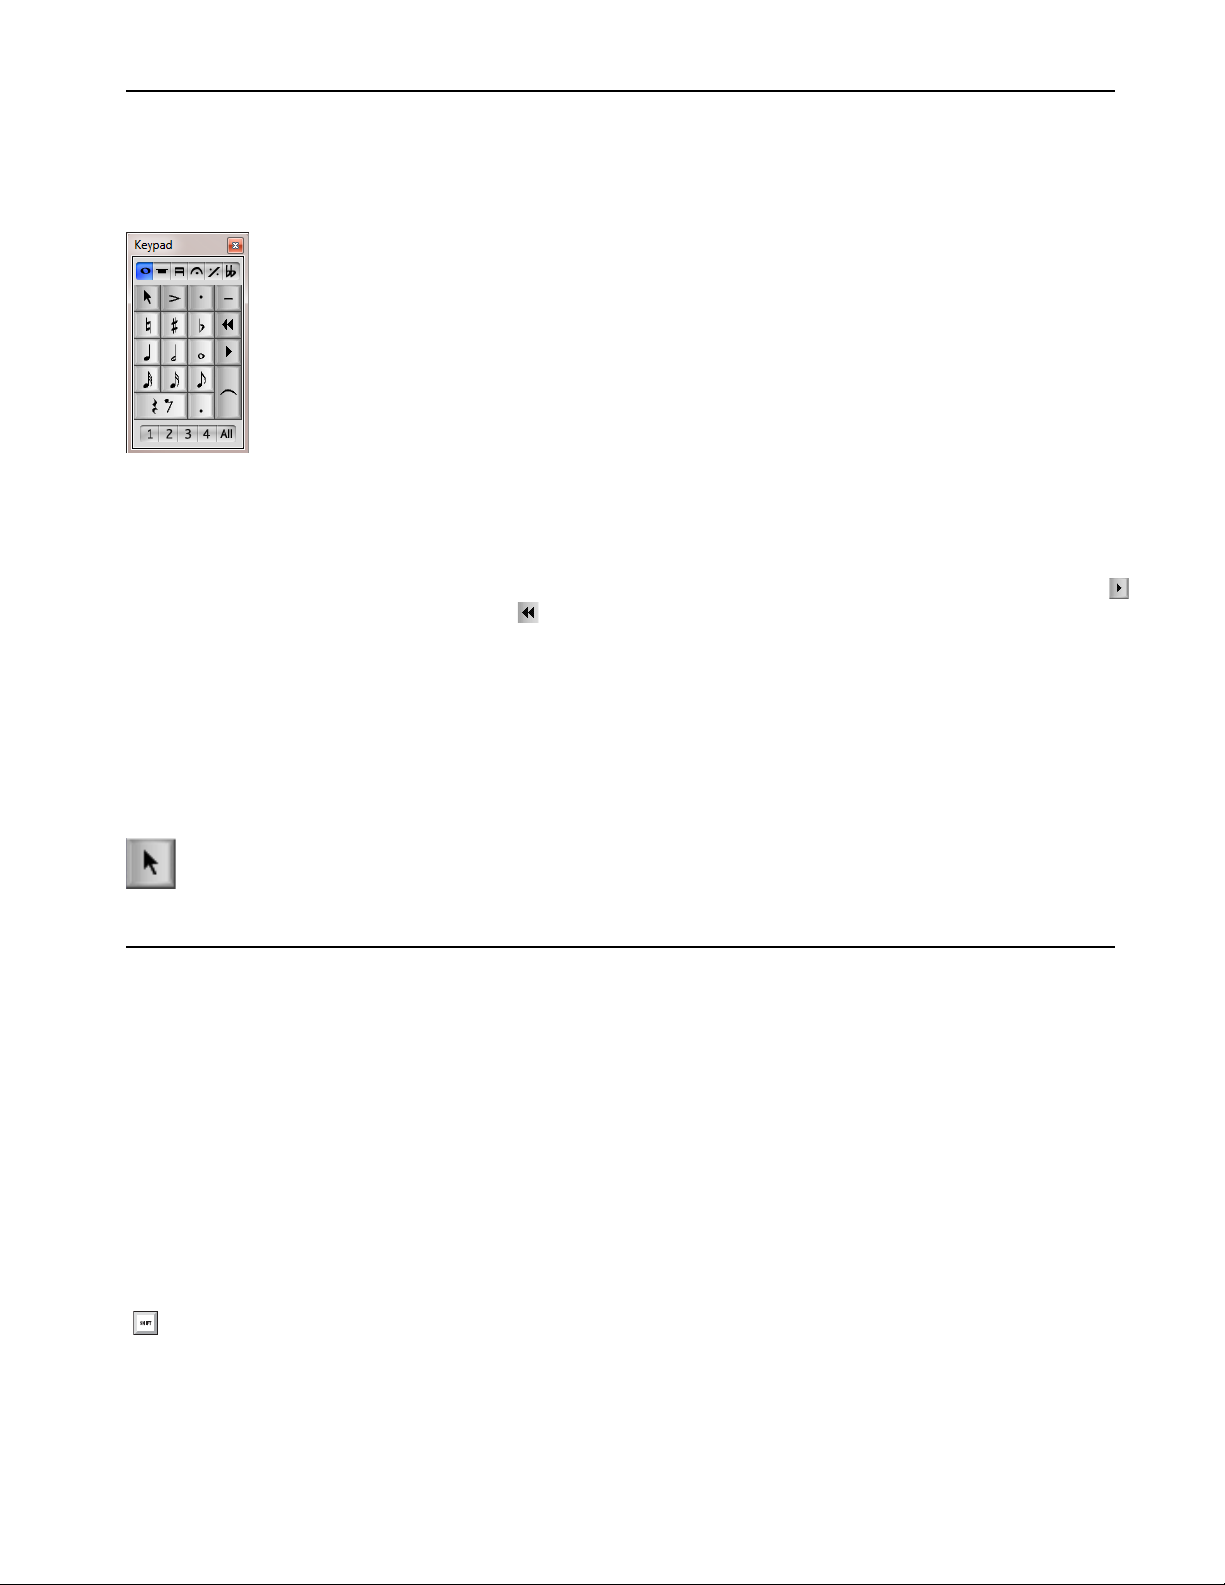
The Keypad
The Keypad at the bottom right of the screen is where you choose note values, accidentals, articulations, ties and other markings for creating and editing notes. (Articulations are symbols above or below a note such as staccato, tenuto and accent. Note value means the
length of a note. These words and other musical and technical termin ology are explained in the
Keypad window
The numeric keys at the right of your computer keyboard correspond to the buttons on the Keypad. Typing these keys does exactly the
same as clicking the buttons with the mouse, and is quicker. If you use a notebook (laptop) computer, see
The six little tabs just below the bar that says Keypad choose between six different layouts of musical symbols on the Keypad, which
calledyou first layout, second layout, etc. To change layout, you can either click the tabs with the mouse, press
button (shortcut
+) to cycle through the layouts; the button (shortcut F7 on Windows, – on the numeric keypad on Mac) goes back
to the first layout.
Have a quick look to see what’s in the other layouts—fairly obscure stuff. The first layout is the one you’ll be using most of the time.
Glossary in the Reference Guide.)
Notebook (laptop) Shortcuts.
F7–F12, or click the
The row of numbers at the bottom of the Keypad are for setting the “voice” of the note you’re inputting or editing. This is so that you
can have multiple rhythms played simultaneously on the same staff. More about this later on.
Beware that because the numeric keypad is used for specific functions in Sibelius, you can’t switch off
Num Lock to use the number
keys as alternative arrow keys etc. while using Sibelius, as you can with other programs.
The button at the top left-hand corner of each Keypad layout (shown at the left) can be used as a substitute for the
Esc key –
this is particularly useful if you are using Sibelius on an interactive whiteboard in a classroom, since it means you don’t have
to carry a keyboard under your arm the whole time just to be able to press
Esc!
Notebook (laptop) Shortcuts
If you use a notebook (laptop) computer without a separate numeric keypad, you may already be wondering how you’ll input any notes
at all. Thankfully you don’t need to resort to laboriously entering every note individually with the mouse; nor do you need to find a
friend to hold down the
Sibelius has some alternative single-key shortcuts built in, which allow you the same freedom and speed when inputting notes.
To use Notebook (laptop) keyboard shortcuts with Sibelius:
1 Choose File > Preferences.
2 Select the Keyboard Shortcuts page.
3 Select Notebook (laptop) shortcuts from the Current feature set menu at the top of the dialog.
4 Click OK.
Fn key while you type.
Press Command+ “,” (Mac) or Control+ “,” (Windows) to open the Sibelius Preferences.
Now, instead of using the numbers on the keypad, you can use the standard numbers along the top of your keyboard which will correspond to the same numbers on the Keypad. When this feature set is in use, use
Shift+1 to Shift+9 to enter intervals above a note—see
.2 Keyboard shortcuts in the Reference Guide.
13
Note Input and Editing

You can also purchase a separate numeric keypad to connect to your computer over USB that will allow you to use Sibelius’s standard
shortcuts.
Save your work!
Before you get down to the real business of learning how to edit and input notes, let’s take a moment to save the score. You should al-
ways save your work regularly, and keep backups, preferably on a removable device like a USB flash memory stick (sometimes call ed
a “pen drive”) or by burning onto CD-R.
To save a score for the first time:
1 Choose File > Save.
2 Find a suitable location (such as your Scores folder).
3 Name the score.
4 Click Save.
On Windows the
Scores folder is inside your My Documents folder; on Mac, the Scores folder is inside your user Documents folder.
Press Command+S (Mac) or Control+S (Windows) to save your score.
However, because you’re working on an existing score that already has a name, use
a new name. Call it something like “
Scarborough” and save it to your Desktop.
File > Save As to save a copy of the score under
Press Command+Shift+S (Mac) or Control+Shift+S (Windows) to save a copy of your score.
Sibelius also automatically saves a copy of your score into a special folder every few minutes. If your computer should suffer a power
failure or crash, the next time you start Sibelius you will be given the opportunity to restore any lost work.
You can save a version of your score at any point, which you can then use to save and review drafts, to keep track of arrangements.
To save a pristine copy before you make a major change or to export a log showing the development of your score:
Choose Review > Versions > New Version.
Furthermore, every time you save your score using
folder inside your
don’t want, check inside the
Scores folder. If, say, your score gets deleted by accident, or if you make a major change that you later decide you
Backup Scores folder for a recent backup.
For more information on these useful features,
File > Save, Sibelius makes a numbered backup and puts it into the Backup Scores
10.4 Versions and 1.1 Working with files in the Reference Guide.
Editing Notes with the Keypad
All of the Keypad keys instantly modify the currently-selected note. So to change the duration or add accidentals to a note, simply click
on it to select it and choose the corresponding Keypad button. You will find that if you learn to use the numeric keys and navigate wi th
the arrow keys, you can work much faster than by clicking on the buttons with your mouse.
To edit notes with the Keypad (example):
1 In the Scarborough Fair score, select the second note of the vocal part in bar 11, a B natural quarter note.
2 Press 3 (on the numeric Keypad) to change this to an eighth note—notice how Sibelius has helpfully padded out the bar with an eighth
note rest after the note to ensure that the bar remains the correct length.
3 Change it back to a quarter note duration, and press 9 (on the numeric Keypad) to change the natural to a flat. If you press 9 again,
Sibelius then removes the redundant ac cident al—but the note will play bac k as a Bb (ther e’s a Bb in the key signature). To test this,
Esc to deselect the note, then click it to select it again—you should hear Sibelius play a Bb.
press
4 Press 7 once more to put the natural back on the note.
If none of this seems to work properly then you probably weren’t in the first Keypad layout, in which case just click the first layout tab
(or press
Note Input and Editing
F7) and try again.
14
You can also use the arrow keys on your keyboard to change the pitch of selected notes. With the B natural selected, press the Down
Arrow until the pitch changes to a D below the staff. Typing Command+Up/Down Arrows (Mac ) or Contro
dows) moves the selected pitch up and down by an octave; try moving the D up an octave by typing Command+Up Arrow (Mac ) or
l+Up Arrow (Windows).
Contro
You should end up with:
If you have switched to Sibelius from another music notation program then you may be familiar with a different arrangement of numeric
keypad shortcuts for note duration (such as where
to use this arrangement and even use an alternative note input method characterized by specifying pitch before duration, rather than the
other way around—see
Specifying Pitch Before Duration on page 27.
5 corresponds to a quarter note). If you wish, you can change Sibelius’s Keypad layout
l+Up/Down Arrows (Win-
Undo and Redo
If you make a mistake, or you are unhappy with changes you’ve made, you can save yourself the trouble of going back and correcting
your score manually. For example, select the quarter note D and press
the next note in the bar is overwritten.
To Undo the last action, do one of the following:
Press Command+Z (Mac) or Control+Z (Windows).
5 on the numeric keypad to change it to a half note. Notice how
On Mac, choose Edit > Undo.
On Windows, click the left-arrow button on the quick access toolbar.
This undoes the last operation you did, and you should see the deleted note miraculously reappear. Sibelius supports mul ti -leve l undo,
so you can undo your any number of your previous actions and see your score restored to how it was before you began to edit it.
Keep undoing until the note is a B natural again.
To Redo any undone action, do one of the following:
Press Command+Y (Mac) or Control+Y (Windows).
On Mac, choose Edit > Redo on Mac.
On Windows, click the right-arrow quick access toolbar button
Sibelius even includes an “undo history” that lists all the operations you’ve recently done, and lets you jump back to any earlier point
in time.
For more information, see Undo and Redo in the Reference Guide.
15
Note Input and Editing

Mouse Input and the Keyboard Panel
Inputting notes with a mouse is simple in Sibelius, but it can be quite time-consuming, so you should try to use the shortcuts just discussed to speed things up.
Before you begin inputting notes, choose
board which can display over seven octaves of keys at three different sizes. Click on a key with your mouse to hear the note played back.
Keyboard panel
You’re going to input a section of the counter-melody from the start of the clarinet staff, to complement the vocal melody.
To input a section of the counter-melody from the start of the clarinet staff (example):
1 Select the first note from the Keypad.
2 Ensure nothing in your score is selected by pressing Esc (or clicking the top left button on the Keypad).
3 Now press 4 (on the numeric keypad) to select a quarter note. The mouse pointer turns dark blue, to show that it is “carrying” a note.
4 Press “.” (on the numeric keypad) to make the quarter note dotted.
As you move the mouse pointer over the score, a gray shadow note is drawn, showing you where the dotted quarter note will be created
when you click. Notice how it even draws leger lines above and below the staff, so you can position high and low notes accurately.
View > Panels > Keyboard to open the Keyboard panel. This is a virtual, on-screen piano key-
5 Now click the mouse pointer near the start of the clarinet staff, pointing at the A space, second space up:
If you clicked in the wrong place, you can use the Up and Down Arrows to adjust the pitch of the note after you’ve input it.
Notice that the note you just a dded is d ark blue, showing tha t it’s sel ected, and a vertical dark bl ue line—c alled the ca ret—is just to the
right of it.
The caret means that Sibelius is ready for you to input more notes. You should think of the caret like the familiar line you find in word
processing software. The caret is especially useful for alphabetic input, which you’ll come to a little later.
6 Press 3 to select the eighth note on the Keypad.
7 Click with the mouse to add a G on the second line up on top of the eighth rest.
8 Press 4 to select the quarter note again and click to add a note in the F space on top of the quarter rest.
The quarter note button on the Keypad stays selected, so you can carry on creating more notes by clicking with the mouse—you don’t
need to re-choose the quarter note button.
16
Note Input and Editing
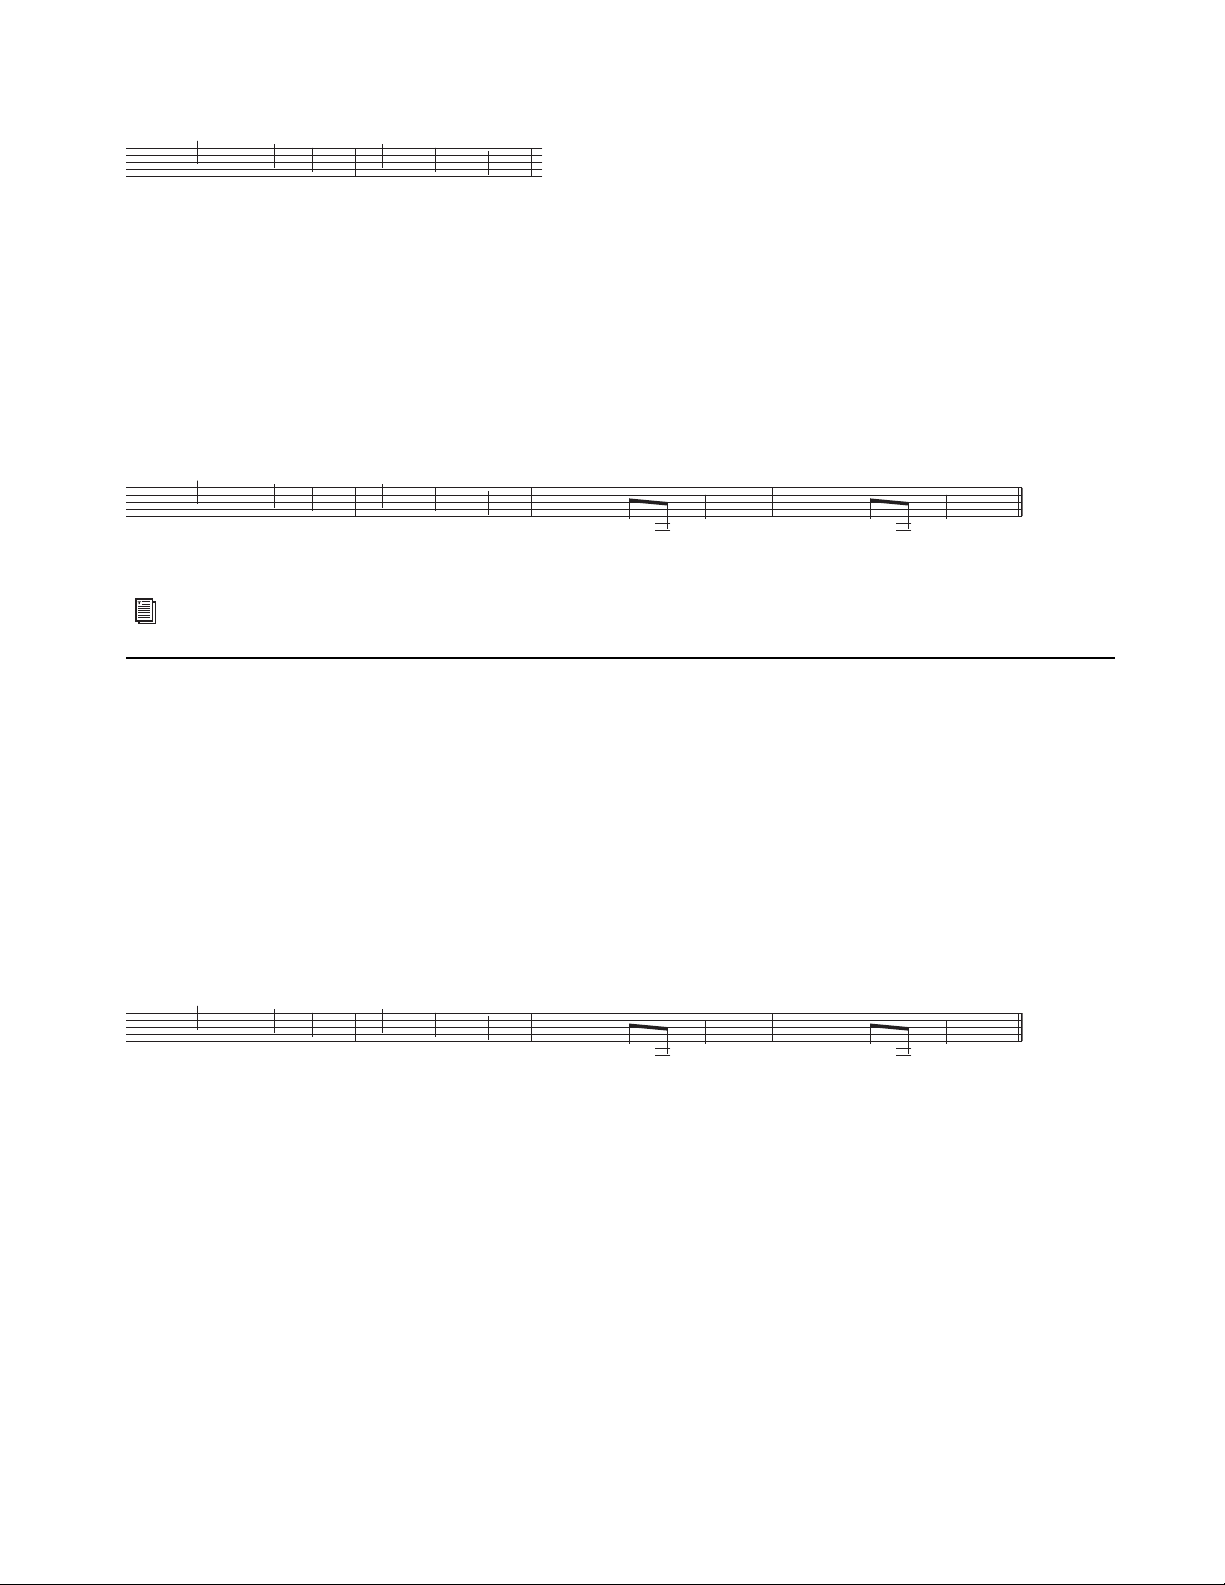
9 Add another three quarter notes to fill the next bar, clicking the mouse pointer to add a G, F and E:
The next bar begins with a quarter note rest.
10 Press 0 on the numeric keypad to create a rest (the quarter note should still be selected).
11 Continue to input the counter-melody using the Keyboard panel, clicking on the keys and using the numeric keypad to change the
note values.
12 Press 3 to select eighth notes and enter the melody below, using the Keyboard panel; when you need to add the quarter note, press 4
on the numeric keypad before you click the key on the Keyboard panel (or click in the score) to add the note.
You should end up with:
You can also use your computer keyboard to “play” the Keyboard panel—see 3.5 Keyboard window in the Reference Guide.
Adding Articulation and Ties with the Keypad
To finish the counter-melody, you’re going to add some articulation instructions for the benefit of performers—you’ll see later on that
Sibelius will also obey these articulations when playing back your score.In the same way as you learned how to change the selected
note’s duration or accidentals, the Keypad buttons instantly add or remove articulations and ties: select a note, then choose a Keypad
button to add one of these objects to the note, or remove it again.
To add articulations to the counter-melody (example):
1 Select the quarter note D in the third bar of the clarinet staff.
2 Press the key on your numeric keypad that corresponds to the “.” (staccato dot) on the top row of buttons on the Keypad. This adds
a staccato mark to the note.
3 Repeat this for the quarter note D in the next bar.
4 Navigate to the start of the second system to add a tie by doing the following:
• Select the half note A in the ninth bar of the clarinet staff.
• Press
5 Use the arrow keys and the numeric keypad to add articulations and ties to the rest of the clarinet counter-melody.
Enter (on the numeric keypad) to put a tie after the note.
17
Note Input and Editing

Selections and Copying Music
If you are starting from this section of the project, you should open the example score called Project 1 and make the 3 Selections and
copying music
Make current.
Now you will learn how to select passages of music to manipulate, copy, or delete notes and other objects en masse.
Selections and Passages
When objects in the score are selected, they go col ored, whic h shows tha t you can do thing s to them using th e mouse and keyboar d. Almost everything you will do to change your score in Sibelius involves selections.
There are three main kinds of selection:
• Single selections, where just one object is selected (such as a note or a text object).
• Multiple selections, where several separate objects are selected.
• Selected passages, where continuous stretches of music are selected, shown with a light blue (“staff passage”) or purple (“system pas-
sage”) highlight round them.
You can do pretty much the same things to all three kinds of selection. The main difference is how you select the objects in the first
place.
version into the Current version by choosing Review > Versions > Edit Versions. Select this version in the list and click
Now you will learn how to make and use different kinds of selections in the Scarborough Fair score. Selecting single objects is simple
enough, you’ve already looked at how to select notes by clicking them with the mouse, or by pressing the
To select multiple objects:
1 Select a single object.
2 Command-click (Mac) or Control-click (Windows) one or more additional objects to add them to the selection.
Tab key.
Try this by selecting the first note of the clarinet staff in the first bar of the Scarborough Fair score.
3 Command-click (Mac) or Control-click (Windows) the next note.
You can select text and other object s this wa y.
tally add an object to the selection in this way, you can remove it by
Command-click (Mac) or Control-click (Windows) the Title to select it. If you acciden-
Command-clicking (Mac) or Control-clicking (Windows) the object
again. Try removing the Title from the selection as prac ti c e.
Multiple selections let you perform edits to specific objects. You can use the Up and Down Arrow keys to move the selected notes up
and down by step. This is really useful for objects other than notes, chords, and rests—such as for selecting multiple articulations or several bits of text.
Before you learn how to make a passage selection, deselect the current objects by pressing
Esc (or clicking the top left button on the
Keypad).
A passage is a continuous chunk of music, possibly running over many pages. It can run along one staff or several. You’ll most often
select a passage in order to copy music from one instrument to another—for example if they’re doubling each other. Passage selections
let you edit, copy, or delete lots of notes all at once.
Selections and Copying Music
18
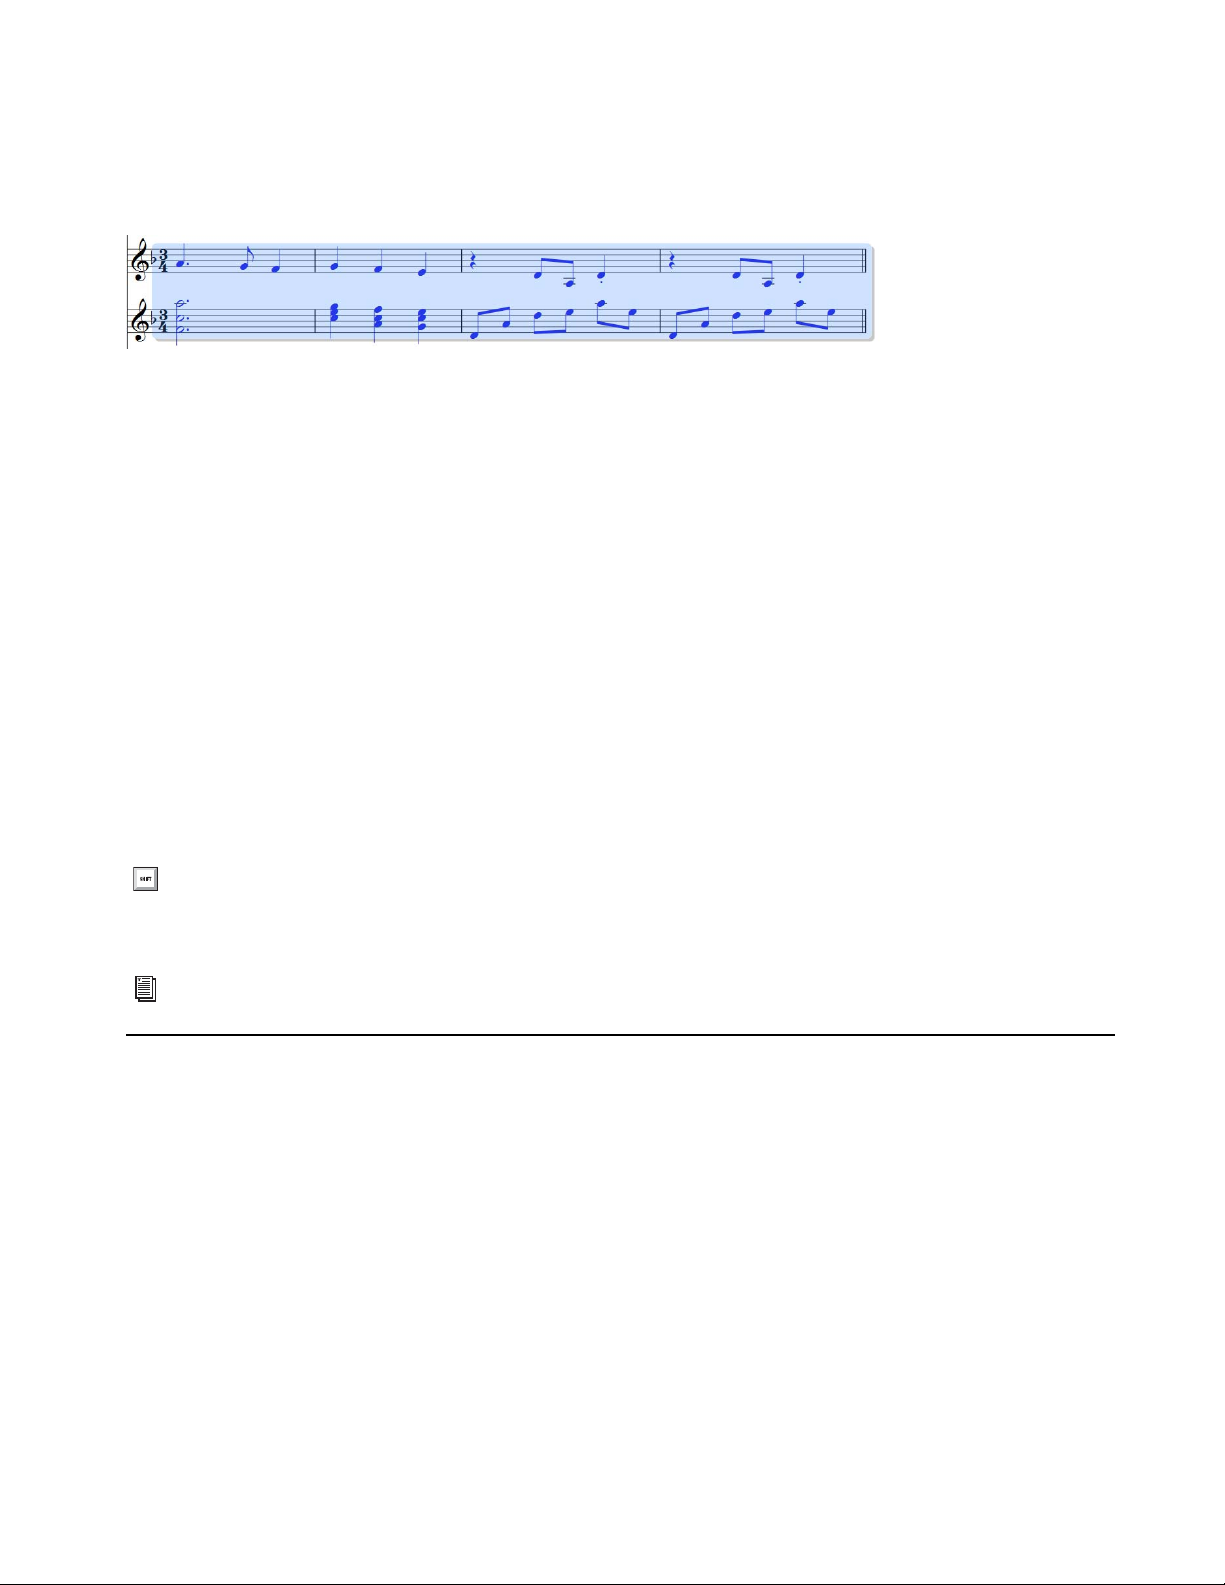
To make a staff passage selection:
1 Click the first note of the clarinet staff in the first bar.
2 Shift-click on an empty part of the staff in the fourth bar of the acoustic guitar staff.
You should see a light blue highlight surrounding all the intervening notes:
Passage selection
Notice how every object attached to the staff is selected in the range of t he passage. This is really us eful for copying music, because all
articulations, dynamic markings, text and other objects attached to the staff get copied too! Again, you can use the Up and Down Arrow
keys to move the selected notes up and down by step. You can also see the selection in miniature in the Navigator.
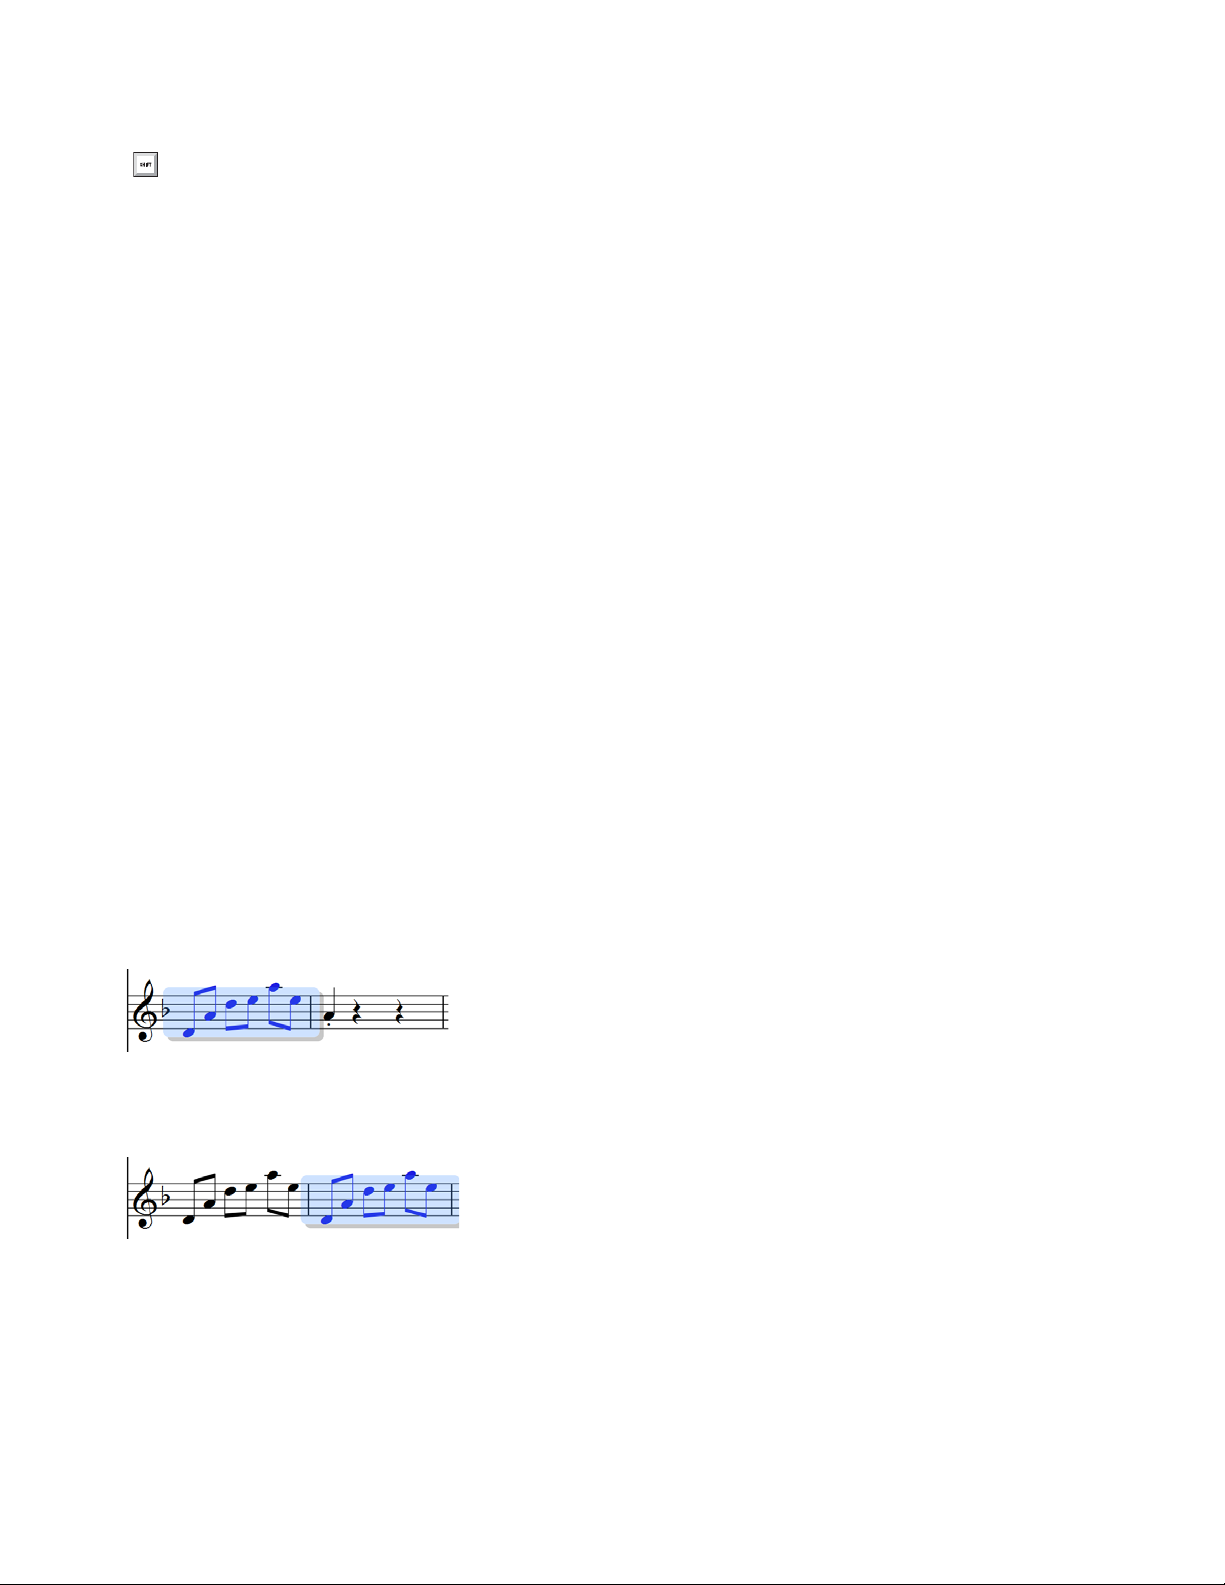
There are various ways to select certain types of staff passage quickly:
• Clicking an empty part of a bar selects that bar on one staff.
• Double-clicking an empty part of a bar selects that staff for the duration of the system.
• Triple-clicking an empty part of a bar selects that staff throughout the score
• After single-, double- or triple-clicking, you can
individual staves by Command-clicking (Mac) or
Shift-click another staff to add all staves in between to the selection, or add or remove
Control+clicking (Windows).
To make a system passage selection:
1 Command-click (Mac) or Control-click (Windows) on an empty part of the first bar of the vocal staff. You should see a purple high-
light appear around all the staves for that bar.
2 Press Command (Mac) or Control (Windows) while single-, double- or triple-clicking to select system passages for a bar, the dura-
tion of the system, or the whole score, respectively.
3 You can even select the entire score at once by choosing Home > Select > All.
Press Command+A (Mac) or Control+A (Windows) to select all.
This is particularly useful for transposing the whole score, altering the format of the whole score, or for selecting particular types of object throughout the score.
For more information on selections, see
2.1 Selections and passages in the Reference Guide.
Deleting Notes and Other Objects
Try selecting various objects, then deleting them with the Delete key:
• Delete a piece of text, such as the “Arranger” text (from the top of the first page).
• If you delete a note it turns into a rest to ensure that the rhythm still adds up.
You can also press
You can delete a rest, it is hidden, and the rest of the rhythm in the bar remains aligned as if the rest were still there. When you first delete
a rest, its color changes to a lighter shade to show that it’s been hidden.When you deselect it, it’ll disappear altogether. You shouldn’t
normally hide rests, but it can sometimes be useful for special notations. Other objects can also be hidden for special purposes.
Backspace to delete selected objects.
To see hidden objects, do one of the following:
Select View > Invisibles > Hidden Objects.
Press Command+Option+H (Mac) or Control+Alt+H (Windows).
Hidden objects are shown in gray.
Selections and Copying Music
19
Home > Clipboard > Cut is similar to Delete, but cuts objects to the clipboard so that you can paste them elsewhere with Home > Clipboard > Paste
.
Press Command+X (Mac) or Control+X (Windows) to cut the selection and copy it to the clipboard. Press Command+V (Mac)
or Control+V (Windows) to paste the contents of the clipboard.
Remember that you can use
Undo and Redo to restore anything you delete.
Deleting Bars
Often you’ll find that you want to remove one or more bars—empty or not—from your score, so this is a very important function to
learn.
There are two ways to delete bars in Sibelius:
1 The easiest way is to make a passage selection containing the bars you want to remove from the score (see Selections and Passages
above), then choose
asked if you’re sure you want to continue: click
Home > Bars > Delete—or press Command+Backspace (Mac) or Control+Backspace (Windows). You’ll be
Yes, and notice that you can switch on a checkbox labeled Don’t say this again if
you want Sibelius to skip the confirmation prompt. You can make this and other similarly dismissed warning messages appear again
by clicking
2 Another way to delete bars is to make a system passage selection, then press Delete.
Try deleting the last three bars of the Scarborough Fair score, then click
Show All Messages on the Other page of File > Preferences.
Undo or choose Edit > Undo on Mac to restore them again.
Copying
Copying music between bars, staves, and even different files is very easy in Sibelius.
To copy music from one location to another (example):
1 Click on the staccato quarter note in the fifth bar of the clarinet staff to select it.
2 Option-click (Mac) or Alt-click (Windows) onto a space in the empty sixth bar of the acoustic guitar staff.
The note is copied exactly, but ends up at the pitch corresponding to the staff line or space where your mouse pointer was when you
clicked. Notice that the staccato dot is copied too. Any articulations on a note will be copied in this way.
This method works well for copying large chunks of music.
3 Select the fifth bar of the acoustic guitar staff.
4 Now Option-click (Mac) or Alt-click (Windows) onto the space at the start of the bar before the note you just placed in the sixth bar,
and you’ll see this:
Sibelius overwrites the note you’d previously placed there with the newly-copied music. Use
Option-click (Mac) or Alt-click (Win-
dows) to copy any combination of objects in a score with single, multiple, or passage selections.
On Windows, if you have a third (middle) mouse button or a click-able scroll wheel, you can use it instead of
Alt
-click (Windows) to do a copy and paste in a single action. If you only have a two-button mouse, you can do this by performing a
Option-click (Mac) or
two finger–click—that is, cl ick the l eft and ri ght mouse buttons simultaneously—to duplicate the function of the middle mouse button.
Selections and Copying Music
20

Sibelius also lets you duplicate notes or other objects in your score so that an exact copy appears immediately after the original.
To duplicate notes or other objects:
1 Select the note or other objects you want to duplicate.
2 Choose Note Input > Note Input > Repeat or press R.
For example, select the four bars of the bass line you just entered using
Option-click (Mac) or Alt-click (Windows), and press R to see
the bars repeated immediately after themselves. You can use this to quickly repeat any note, chord, text, passage of music or various
other objects after itself.
You can also use the traditional way of copying music to clipboard and pasting the contents of the clipboard to another location.
To copy and past a selection:
1 Make a selection.
2 Choose Home > Clipboard > Copy.
Press Command+C (Mac) or Control+C (Windows) to copy.
3 Click at the location you want to past the content of the clipboard.
4 Choose Home > Clipboard > Paste.
Press Command+V (Mac) or Control+V (Windows) to paste.
This method is slower than the previous ones and so is not particularly recommended, except for copying music between different
scores—
Both
Option-click (Mac) or Alt-click (Windows) only copies within the same score.
Copy and Paste functions are available on the context-sensitive menu you get by Control-clicking (Mac) or right-clicking (Mac
and Windows) when one or more objects is selected.
Using any of these different methods for copying music, complete the missing bars in the guitar part by copying the preceding bar (or
bars) into any remaining empty bars on the acoustic guitar staff.
Selections and Copying Music
21

Flexi-time Input
If you are starting from this section of the project, you should open the example score called Project 1 and make the 4 Flexi-time input
version into the
You have already learned how to input notes by clicking on a staff with the mouse as well as by using the Keyboard panel. There are,
however, much faster ways to input notes, which you should try and see which one feels most comfortable for you—or mix and match;
you don’t need to tell Sibelius that you’re changing input method. Now you will learn to use Sibelius’s unique real-time note input system, called Flexi-time™.
“Real-time” input simply means that you can play into a computer program and it will write down both the pitches and the rhythm you
play. That’s the theory, anyway. In practice, it is very difficult for any program to understand what rhythm you are playing without either
analyzing the music after your performance or being given a lot of help. This usually means you have to play along as exactly as possible
with a metronome click, and then “quantize” the music afterwards in an attempt to clean up any inaccuracies in your rhythm.
However, Sibelius takes a unique approach that enables you to play in a rather freer style and still get good results. If you don’t have a
MIDI keyboard or MIDI guitar, skip on to
Using a MIDI Device
To use Flexi-time, you must have a MIDI keyboard or MIDI guitar connected to your computer.
To select a MIDI device for MIDI input and playback:
1 Make sure your MIDI device is correctly installed (drivers and cable connections).
Current version
, by choosing
Alphabetic and Step-time Input on page 25.
Review > Versions > Edit Versions
. Select this version in the list and click
Make current
.
2 Choose Note Input > Setup > Input Devices.
Sibelius Preferences, Input Devices
3 Locate your device’s name in the table at the top of the page (such as an M-Audio Oxygen 8) and ensure that the Use checkbox is
selected.
If you are using a MIDI guitar, you will need to change the
Keyboard. However, for this chapter, you’re going to be using a MIDI keyboard.
To learn more about setting up input and playback with MIDI devices, see 3.13 Input Devices in the Reference Guide.
Flexi-time Input
Type value by clicking the drop-down menu and choosing Guitar, rather than
22

Flexi-time Options
Ti me c o de
readout
Rewind
Current
tempo
Flexi-time
Tempo s lide r
Move Playback
Line to Start
Play
Fast-forward
Stop
Move Playback
Line to End
Live
Playback
Click (on/off)
Timeline slider
MIDI in & out
indicators
Record Live
Te mp o
Play Live Tempo
The easiest thing to do is to try playing in a single melodic line. Let’s do this first—you should be looking at the Scarborough Fair score
you’ve been working on. You’re going to record one verse of the clarinet part.
To enable MIDI recording with Flexi-time:
1 Click the dialog launcher button in Note Input > Flexi-time.
Press Command+Shift+O (Mac) or Control+Shift+O (Windows) to enable Flexi-time.
2 Because you’re recording in time with other instruments—and you’re only recording one line of music—select None
(
non rubato) from the Flexibility of tempo drop-down list, and switch off the Record int o mu lt iple voices checkbox.
3 Click OK to return to the score.
Recording MIDI Input with Flexi-time
You’ll need the printout of the score that you made at the start of this project in order to read the music from it.
The Transport panel lets you view and control score playback.
To show the Transport panel:
Choose View > Panels > Transport.
Press Command+Option+Y (Mac) or Control+Alt+Y (Windows) to open the Transport panel.
Transport panel
If you prefer, many of the playback controls are also accessible from
Play > Transport.
You’ll start playing in notes using Flexi-time from bar 43 until the end of the verse in bar 61: select bar 43 in the clarinet staff so that
it is enclosed in a light blue highlight (or select the little bar rest rectangle itself). Sibelius will start recording from here.
Flexi-time Input
23

To record with Flexi-time:
1 Choose Note Input > Flexi-time > Flexi-time Input or click the circular record button on the Transport panel, Sibelius plays
a one bar count-in and then starts recording what you play.
Press Command+Shift+F (Mac) or Control+Shift+F (Windows) to start recording with Flexi-time.
2 Flexi-time gives you a single bar’s count-in by default—so in this case you should hear three clicks count-in. (If you do not hear a
metronome click, check your playback device is switched on, then
3.14 Flexi-time or 6.1 Working with playback in the Ref-
erence Guide.)
3 At the end of the count-in, try playing the next few bars smoothly, following the speed of the clicks.
4 Keep going for as long as you like, and notice how Sibelius displays the n otes on the screen (however it will usually be several notes
behind you so you may not want to watch the screen while you’re recording).
5 To stop recording, click the square Stop button on the Transport panel or press the Spacebar.
Take a look at what Sibelius has transcribed—if you’re not happy with the result, then simply select the bars you’ve just recorded, press
Delete and select bar 43 again. Take as many attempts as you need, until you’re happy with the result. If you want Sibelius to slow down
your score while you record, see
In
Project 3 of these tutorials, you will learn how to input onto two staves simultaneously. You can also change other options such as
Adjusting the Recording Tempo, below.
rubato (the flexibility of your tempo), the sound and count-in of the metronome click, and the way in which triplets and other tuplets
are recognized—see
3.14 Flexi-time in the Reference Guide.
Adjusting the Recording Tempo
Don’t worry if you’re having difficulty or your keyboard skills are a bit rusty—Sibelius doesn’t expect you to be a virtuoso! In a moment
you’ll be tidying up the transcription, but first you’ll learn how to make Flexi-time recording a bit easier.
The tempo slider on the Transport panel lets you speed up or (more importantly in this case) slow down playback of your score. This
applies to recording Flexi-time input too—set the slider to the left-hand side and the click will slow down, allowing you to play more
carefully.
You should only use the tempo slider to change the speed of playback for your whole score; for changes in tempo you should use tempo
text and metronome markings added to the score—see
Text and Dynamics on page 33.
Renotate Performance
If you find that you end up with unwanted rests, overlapping notes or incorrect note du rations, you can have Sibelius make these more
legible.
To renotate your performance:
1 Select the passage you just recorded.
2 Choose Note Input > Flexi-time > Renotate Performance, which opens a simple dialog.
3 Since the music you recorded doesn’ t use any note value smaller than an eighth note, set the Quantization unit (minimum duration)
drop-down to
4 Click OK.
Sibelius recalculates the Flexi-time transcription and produces a rhythmically and visually simpler version.
Normal: 1/8 note.
If there are still any mistakes, you can use the editing techniques you have already learned to correct the note values and pitches. You
may also like to experiment with the other plug-ins in the
Notation
Flexi-time Input
heading.
Note Input > Plug-ins > Plug-ins menu—especially those under the Simplify
24
 Loading...