


(The model number in all attached pictures is only an example)
1. Introduction
The version of this software is ver1.13
2. Key Features added in this software version
Initial release
3. Software Version Verification Procedure
It is important to write down the system version information of your Music Center before
you start the upgrade procedure. This information is also useful in case you need to call
Philips Customer Care Center.
1. Press MENU.
2. Press ▲/▼ to select “Information”. Press OK.
3. Press ▲/▼ to select “System”. Press OK.
4. The software version number is shown on the display.
5. If the software version is not the latest one, you need to upgrade waCS7500.
1

4. How to upgrade waCS7500
There are 2 ways to update the embedded CDDB.
A) Using CD-Rom
B) Using WADM
A. Using CD-Rom
I. Software Upgrade Disc Preparation
Tools Required
You will need the following items:
• PC (Pentium III 300MHz processor or higher)
•
CD-R/RW writer and writing application software
•
Blank CD-R or CDRW disc
• Broadband / High speed internet connection
II. How to download the software to your computer
1. Visit Philips supporting web site http://www.philips.com/support to download the
software.
2. Unzip the .zip file and extract files into your PC.
Note: DO NOT rename the filename!
2
If you do not have the software to open the .zip file, please visit below website
to download the software.
http://www.winzip.com/
III. Steps to upgrade the waCS7500
1. Make sure the Music Station has connected to the Music Center.
2. Burn the file to blank CD-R or CDRW. Finalize the disc. (The application may do this
automatically.)
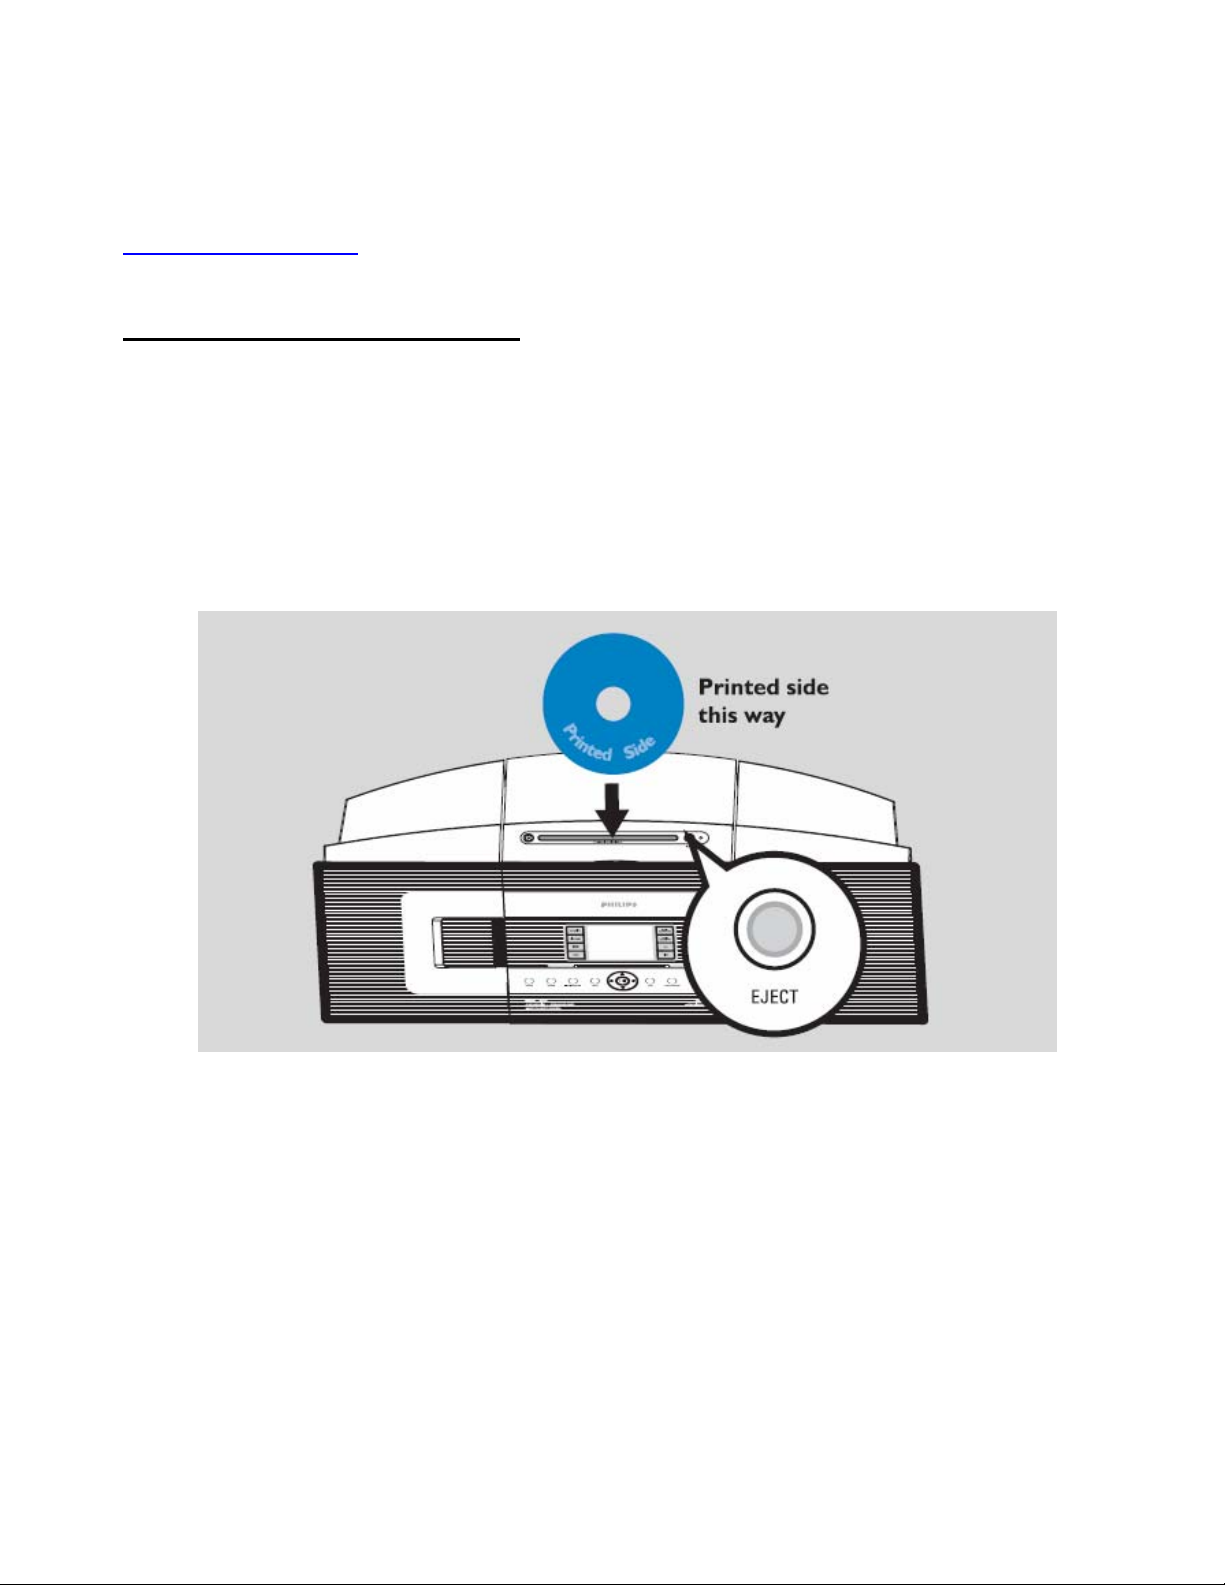
3. Turn on the Music Center and turn off the Music Station, insert the CD to the slot
loader, CD graphic printed side facing you.
4. The Music Center will upgrade automatically.
Note: DO NOT power off the Music Center at this stage.
5. It will take several minutes to complete the firmware upgrade for the Music Center.
6. When done, the Music Center will go to the HD mode automatically. Turn on the
Music Station (paired earlier), the Music Center will upgrade the Station wireless
automatically.
7. It takes several minutes to complete the firmware upgrade for the Music Station.
Note: Do NOT power off the Music Station at this stage.
3

8. When done, the Music Station will go to the HD mode. You can start the normal
operations afterward.
IV. After the upgrade
Do confirm the software version by checking the system version.
Please follow the procedure described in the section “Software Version Verification
Procedures”.
4

B. Using WADM
I. How to download the software to your computer
1. Visit Philips supporting web site http://www.philips.com/support to download the
software.
2. Unzip the .zip file and extract files into your PC.
Note: DO NOT rename the filename
If you do not have the software to open the .zip file, please visit below website
to download the software.
http://www.winzip.com/
5
II. Steps to upgrade waCS7500
Option 1: Build the connection by selecting “Connect Now”.
1. Connect the Center with the computer by using the supplied Ethernet cable.
2. Power on the Music Center. (Power off the Music Station at the same time)
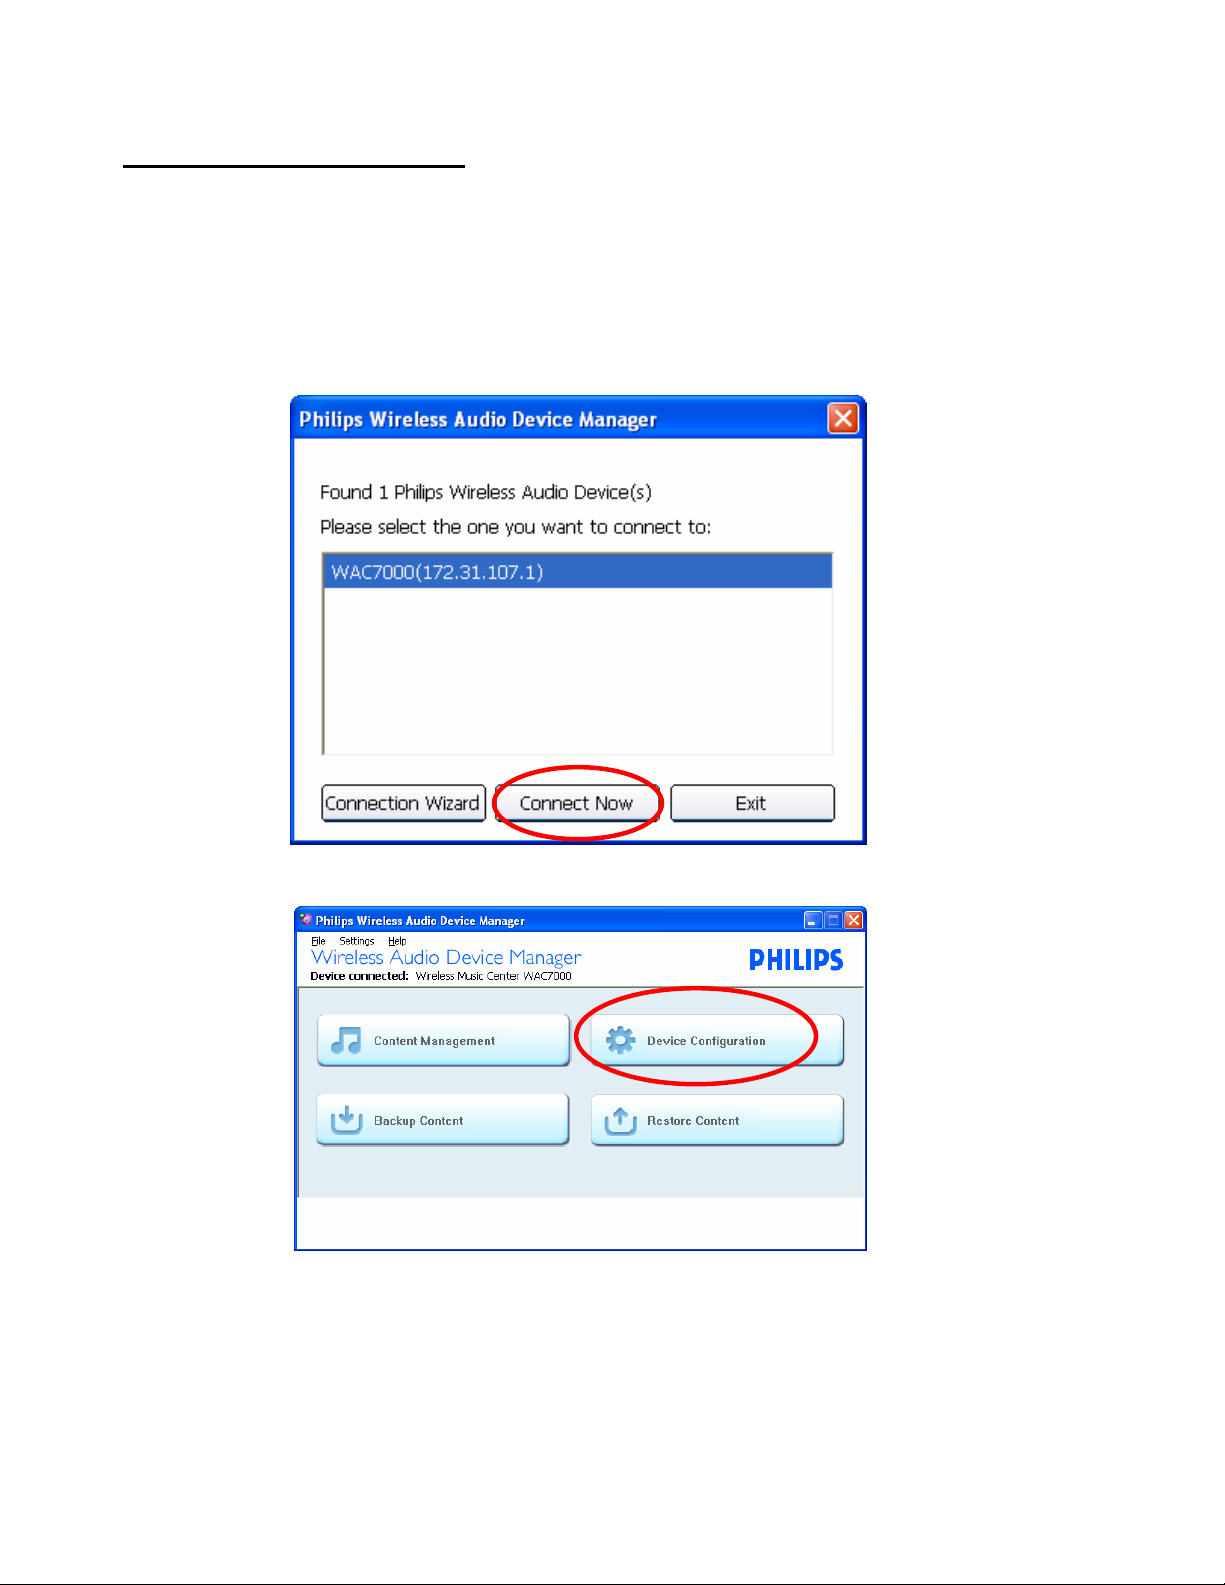
3. Launch WADM. The display will show the below message. Click “Connect Now”.
4. Select “Device configuration”
6
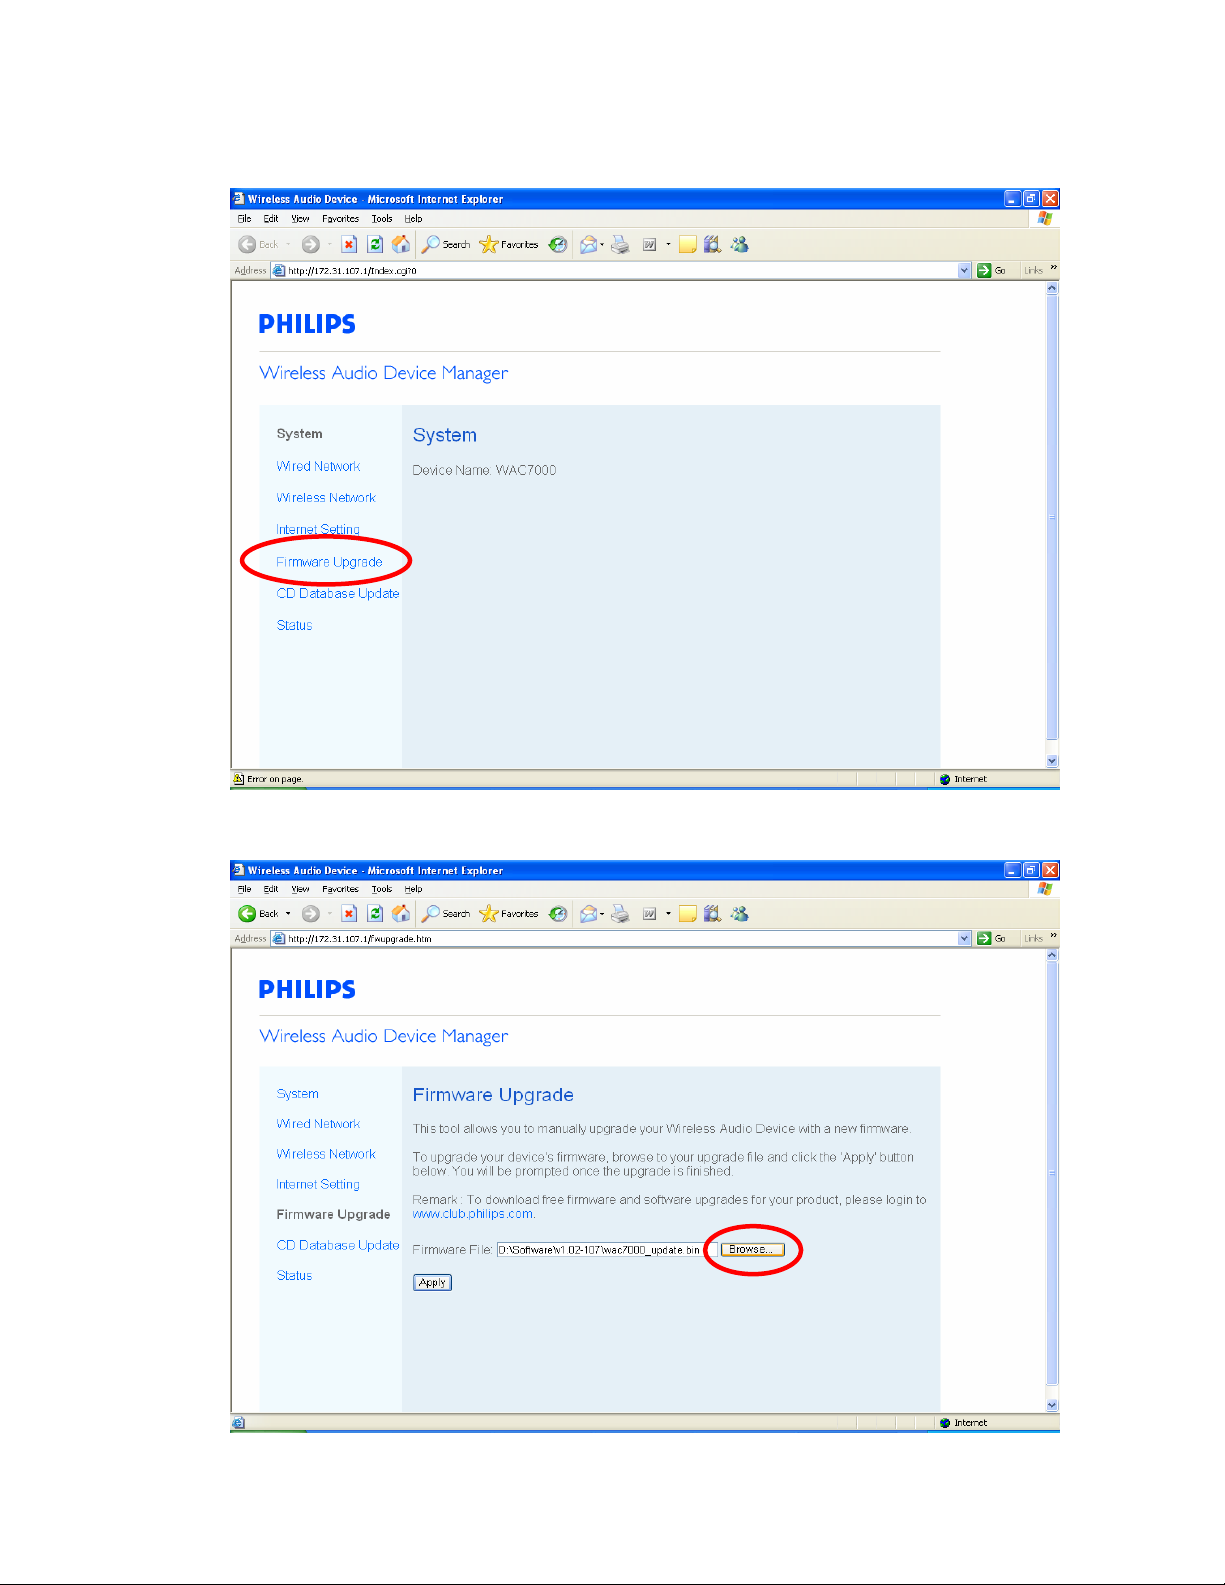
5. Select “Firmware Upgrade”
6. Select the .bin file by clicking “Browse”, and then press “Apply”.
7

7. The .bin file starts being transferred to the Music Center.
Note: DO NOT power off the Music Center & disconnect the Music Station from the
computer.
8. After the .bin file is transferred to the Music Center successfully, the Music Center starts
upgrading the Music Center automatically.
8
9. Power on the Music Station, the Music Center will upgrade the Station wireless automatically.
Option 2: Build the connection by selecting “Connection Wizard”.
1. Connect the Center with the computer by using the supplied Ethernet cable.
2. Power on the Music Center. (Power off the Music Station at the same time)
3.
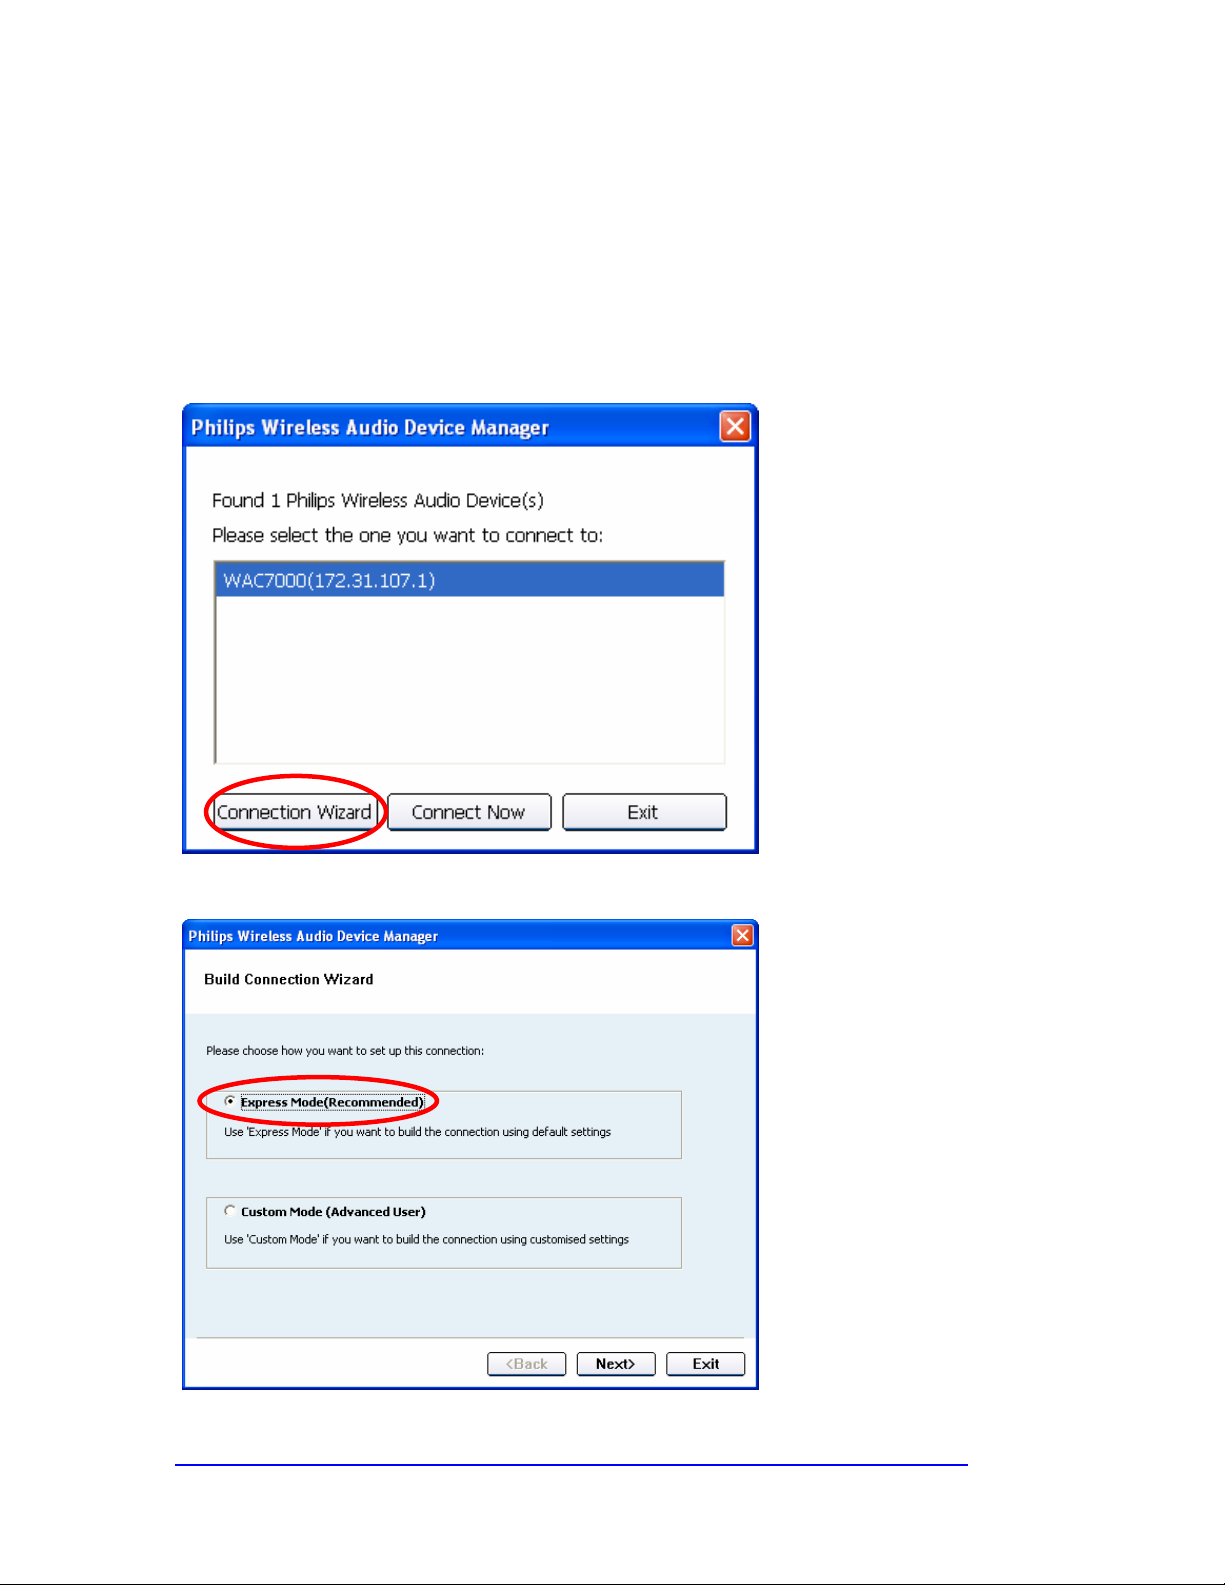
Launch WADM. The display will show the below message. Click “Connection Wizard”.
4. Select “Express Mode” (Recommended), and then click “Next>”.
How to build the connection by selecting “Custom Mode (Advanced User)”?
9

5. Click “Next>” as the computer display prompts until the below picture appears.
6. Repeat the above step 4-9 to finish building the connection.
If “Custom Mode” is selected at step 4. The below picture will appear on the display.
Use the numeric keys on the remote controller to change IP address to be consistent with the Music
Center with the highlighted digits different from the Music Center.
Click “Next>” then “Finish” as the display prompts.
Repeat Step 4-9 to finish building the connection.
10

After the upgrade
Do confirm the software version by checking the system version.
Follow the procedure described in the section “
Software Version Verification Procedures”.
5. Software History
Version Number Advantage Remark
Ver1.13 Initial release
11
 Loading...