

Page 1
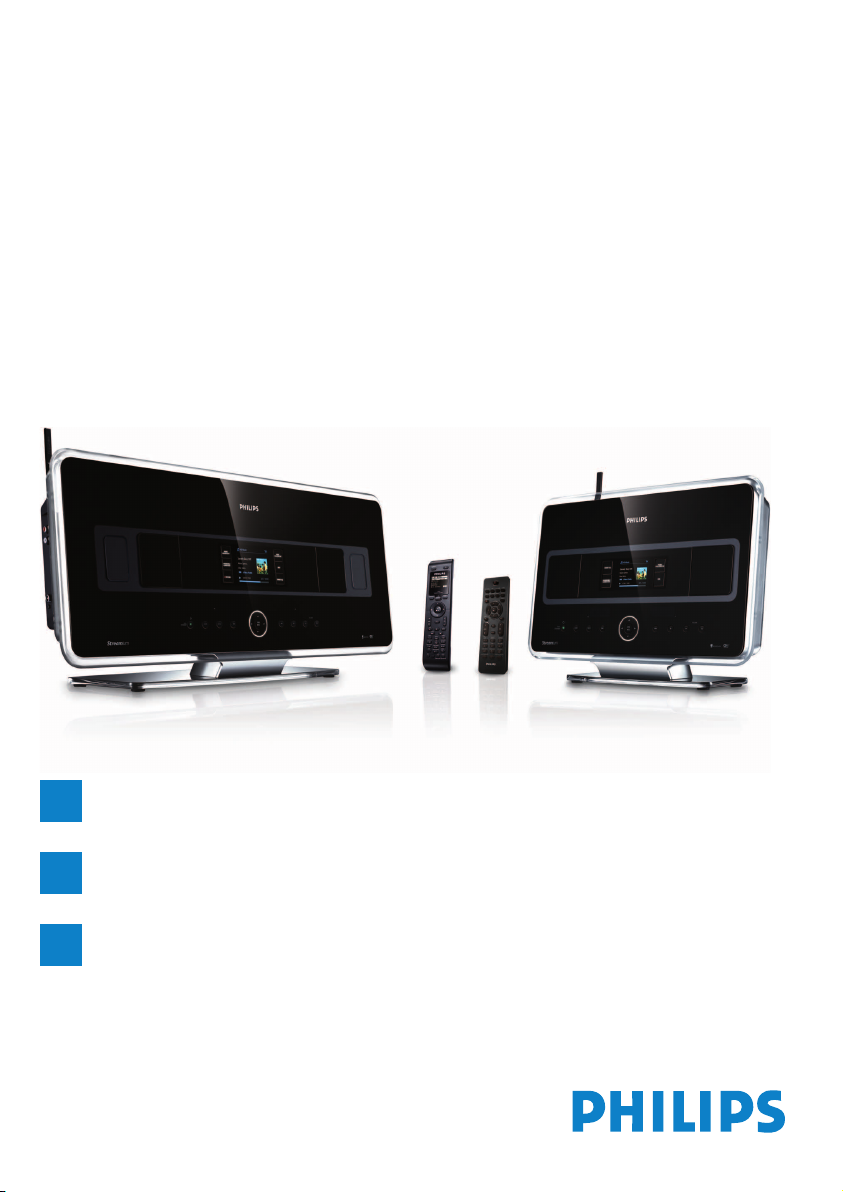
Philips Streamium
Wireless Music Center + Station
Quick start guide
1
2
3
WACS7500
WAS7500
Prepare
Connect
Enjoy
Page 2
ii
EN
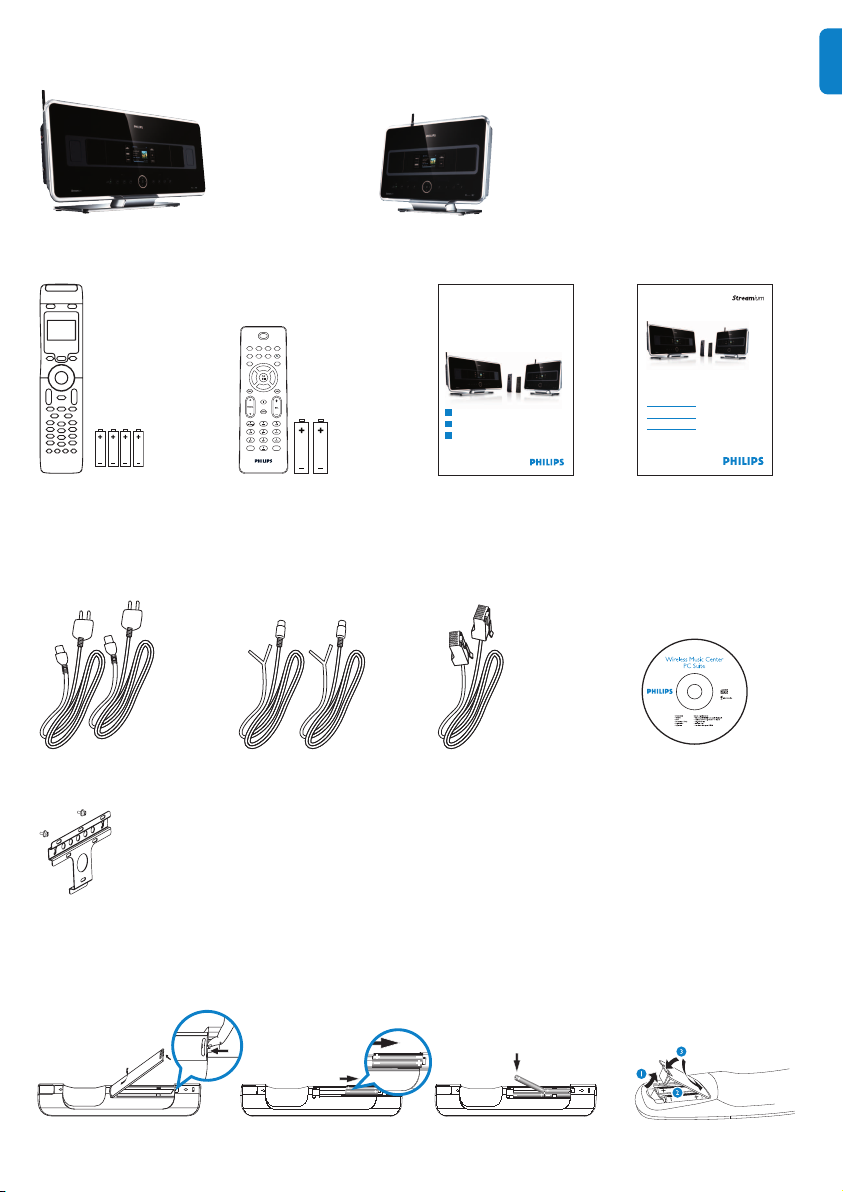
Before using the remote control:
Insert batteries as shown.
2-way remote control (only for WACS7500) 1-way remote control
3
2
1
What’s in the box
2-way remote control
(for Center ) 4 x AAA
batteries
(only included in
WACS7500 set)
Remote control, 1-way,
incl. 2x AAA batteries
Quick start guide User manual
WACS7500
Congratulations on your purchase
and welcome to Philips!
To fully benefit from the support that
Philips offers,register your product at
www.philips.com/welcome
For support call 0906 1010 017
Digital audio video player
Power cable, 2x FM wire antenna, 2x Ethernet cable, 1x PC Suite CD, 1x
Mounting kit, 1x (for
Station)
Wireless Music Center WAC7500
(only included in WACS7500 set)
Wireless Music Station WAS7500
WACS7500
WAS7500
Philips Streamium
Wireless Music Center + Station
Quick start guide
1
Prepare
2
Connect
Enjoy
3
Page 3

How to use this guide
I want to ... See page(s):
Connect:
... connect the Center to a home network / PC 4 /
... add a Station to the network of the Center 5
... relocate a connected Center or Station 5
... set up the Center and Station without a network 5
Record / rip / copy:
... build an HD library (rip CDs) on the Center 8
... transfer music from a PC to the Center 4 / + 10 /11
... record music to a USB device 15
Play:
... play HD (Harddisk) music from the Center 6
... play CDs on the Center 7
... listen to FM radio 9
... listen to Internet radio* 4 / + 13
... stream music from a PC 12
... broadcast music to all connected Stations 14
... let the music follow you to another location 14
... play portable USB devices 15
Find out more:
... FAQ - Frequently Asked Questions 16/17
... check what is compatible with the product 17
L
K
J
H
IBA
F
D
A
M
GBA
E
D
E
C
BA
* Internet radio requires broadband Internet access.
Page 4

iv
Benefits
Enjoy all your music in every room
Total music enjoyment and freedom
All your music on one wireless system
• Wireless streaming between Music Center, Station(s) and PC
• 80GB hard disk to store up to 1500 CDs
• CD and USB Direct playback
• Enjoy Internet radio
• Docking cradle for iPod (optional)
Easy navigation and control
• View album art in full color
• My Room, My Music: Listen to different music in each room
• Music Broadcast: Listen to the same music on all stations
• Music Follows Me:Take your music with you from room to room
Quality sound performance
• 80W RMS/Center, 30W RMS/Station with Super Sound Panel
Expandable
• Extend your system by adding up to 5 Wi-Fi Stations
Page 5
1
EN
Prepare
1
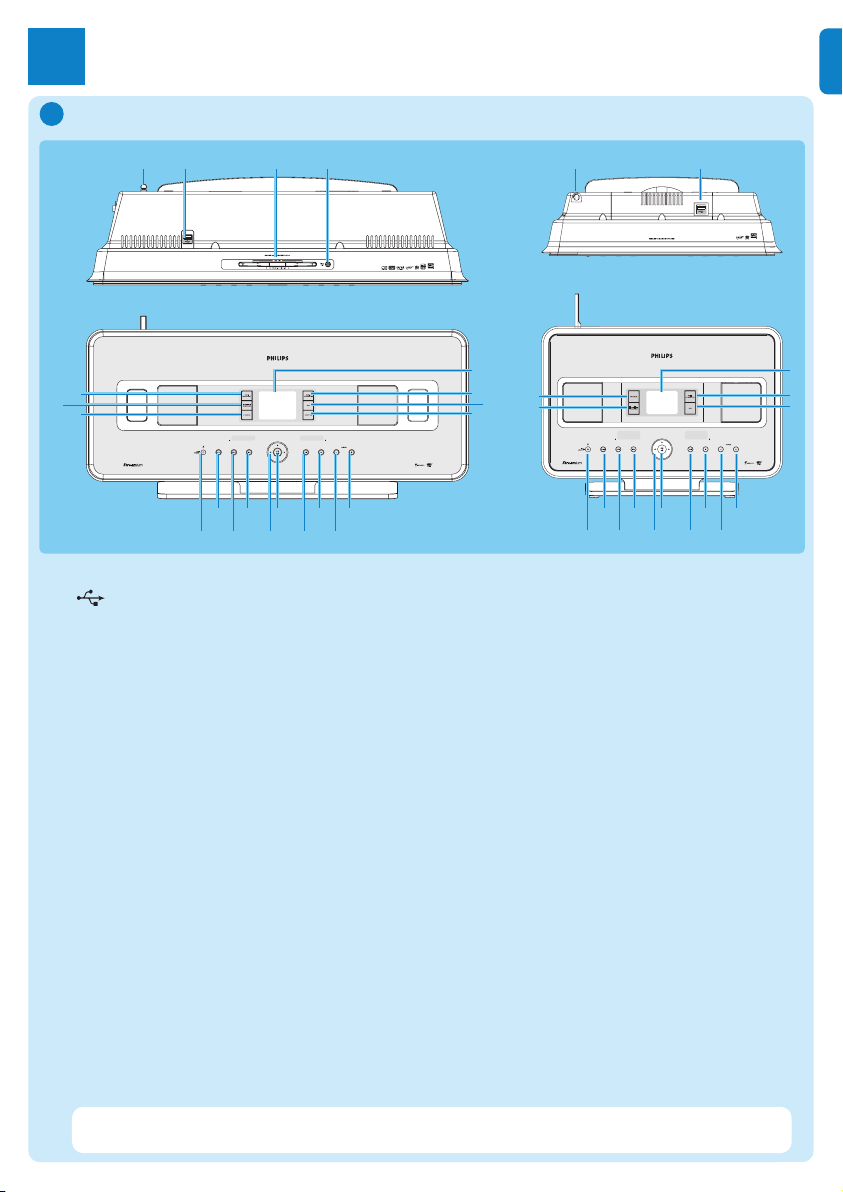
1 Antenna
2 USB jack
3 Disc slot (loader)
Insert discs with graphics facing you
4
/ Disk eject
5 LCD
6
MUSIC FOLLOWS ME
7 DBB (Dynamic Bass Boost)
8 SMART EQ
9 VOLUME +
10 VOLUME -
11 9 Stop
12 )K Skip forward
13 OK / 2; OK/ Play/pause
14 1 / 2 / 3 / 4 Navigation left / right / up / down
15 J( Skip back
16
MENU
17 HOME
18 y ON / STANDBY / ECO STANDBY
• Press briefly to toggle between modes Standby and ON.
• Press & hold to toggle power modes between ON and Eco Standby (power-saving mode).
19
0 RECORD
20 INCR.SURR. Incredible Surround sound
21 MUSIC BROADCAST or
SMART EQ
2143
6
5
7
8
21
20
19
9
10
11
12
13
14
15
16
17
18
21
6
5
7
21
20
9
10
11
12
13
14
15
16
17
18
Controls on Center & Station
A
Note The illumination of one corner of the casing is a design element.
Page 6
2
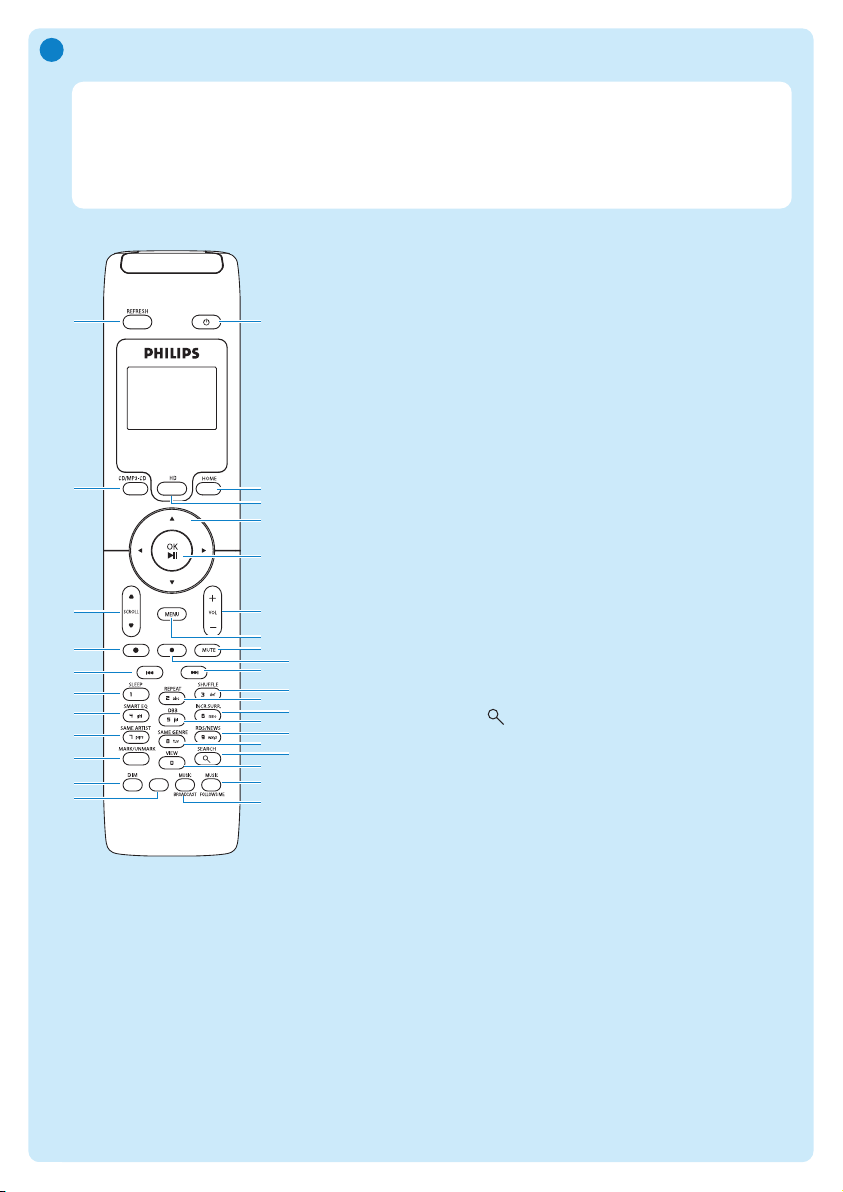
Controls on the remote controls
B
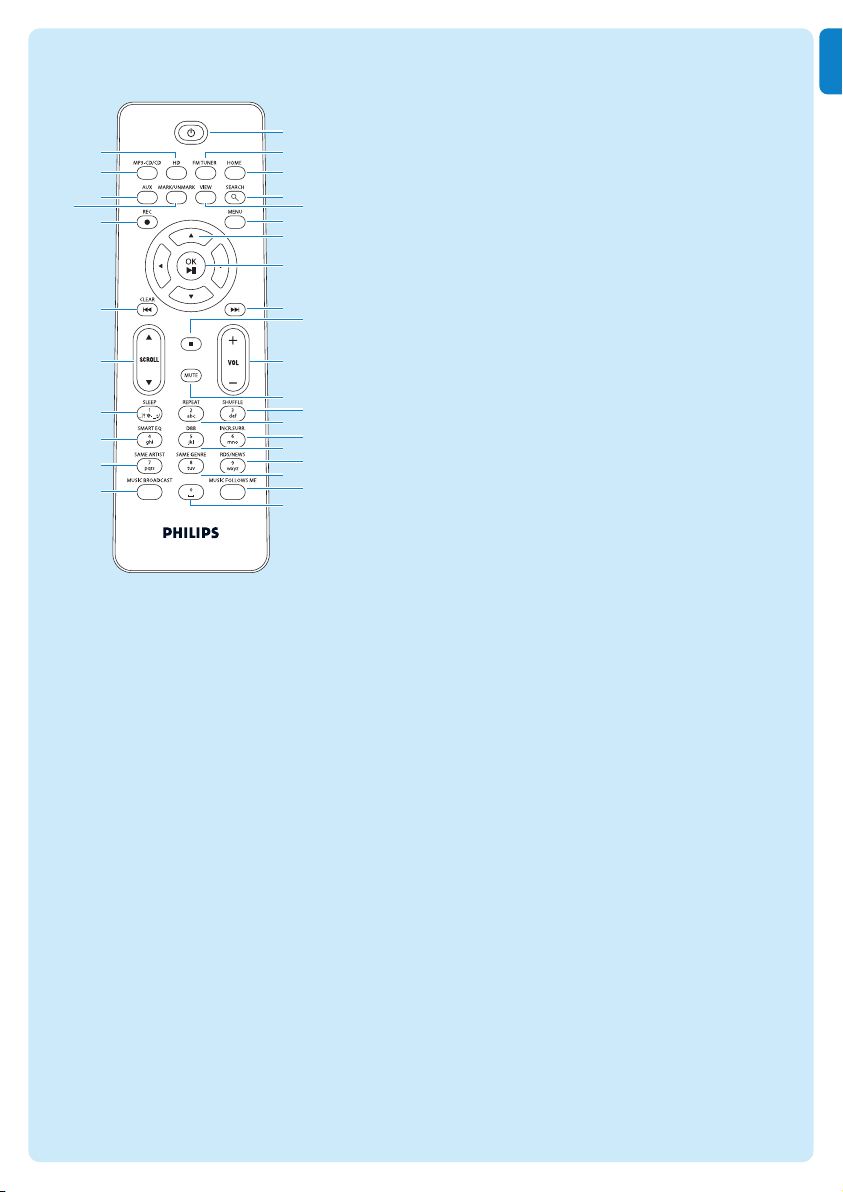
2-way remote control
(Only supplied with WACS7500
Center + Station set.)
1
2
3
4
5
6
7
8
9
11
13
15
17
10
14
16
31
30
29
28
27
26
25
24
23
22
21
18
19
20
12
1 y On, Standby, Eco Standby
2
HOME
3 HD (Hard Disk)
4
1 / 2 / 3 / 4 Navigation controls
5
OK, 2/;
6 VOL +, -
7 MENU
8 MUTE
9 9 Stops
10
)K Skip forward
11
SHUFFLE (3 def)
12
REPEAT (2 abc)
13
INCR.SURR. (6 mno) Incredible Surround sound
14
DBB (Dynamic Bass Boost) (5 jkl)
15
RDS/NEWS (9 wxyz)
16
SAME GENRE (8 tuv)
17
SEARCH ()
18
MARK/UNMARK (0 )
19
MUSIC FOLLOWS ME
20 MUSIC BROADCAST
21 Spare
22
DIM (display)
23
VIEW
24 SAME ARTIST (7 pqrs)
25
SMART EQ (4 ghi)
26
SLEEP (1 .,?!’@-_:;/)
27
J( Skip back
28
REC 0
29 SCROLL 3, 4
30 CD/MP3-CD
31 REFRESH
Important!
You must always use the 1-way remote control for the following tasks:
• Internet radio registration
• Network configuration
• Editing track information
Page 7
3
EN
1-way remote control
1
2
3
4
6
7
8
9
10
12
14
16
18
11
15
17
31
30
29
27
26
25
24
23
22
21
28
19
20
5
13
1 y On, Standby, Eco Standby
2
FM TUNER (radio)
3
HOME
4 SEARCH
5 VIEW
6 MENU
7 1 / 2 / 3 / 4 Navigation controls
8
OK, 2/;
9 )K Skip forward
10
9 Stop
11
VOL +, -
12 MUTE
13
SHUFFLE
(3 def)
14
REPEAT (2 abc)
15
INCR.SURR. (6 mno) Incredible Surround sound
16
DBB (Dynamic Bass Boost) (5 jkl)
17
RDS/NEWS
(9 wxyz)
18
SAME GENRE (8 tuv)
19
MUSIC FOLLOWS ME
20 (0 )
21
MUSIC BROADCAST
22 SAME ARTIST (7 pqrs)
23
SMART EQ (4 ghi)
24
SLEEP (1 .,?!’@-_:;/)
25
SCROLL 3, 4
26 J( Skip back
27
REC 0
28 MARK/UNMARK (0 )
29
AUX
30 CD/MP3-CD
31 HD (Hard Disk)
Page 8
4
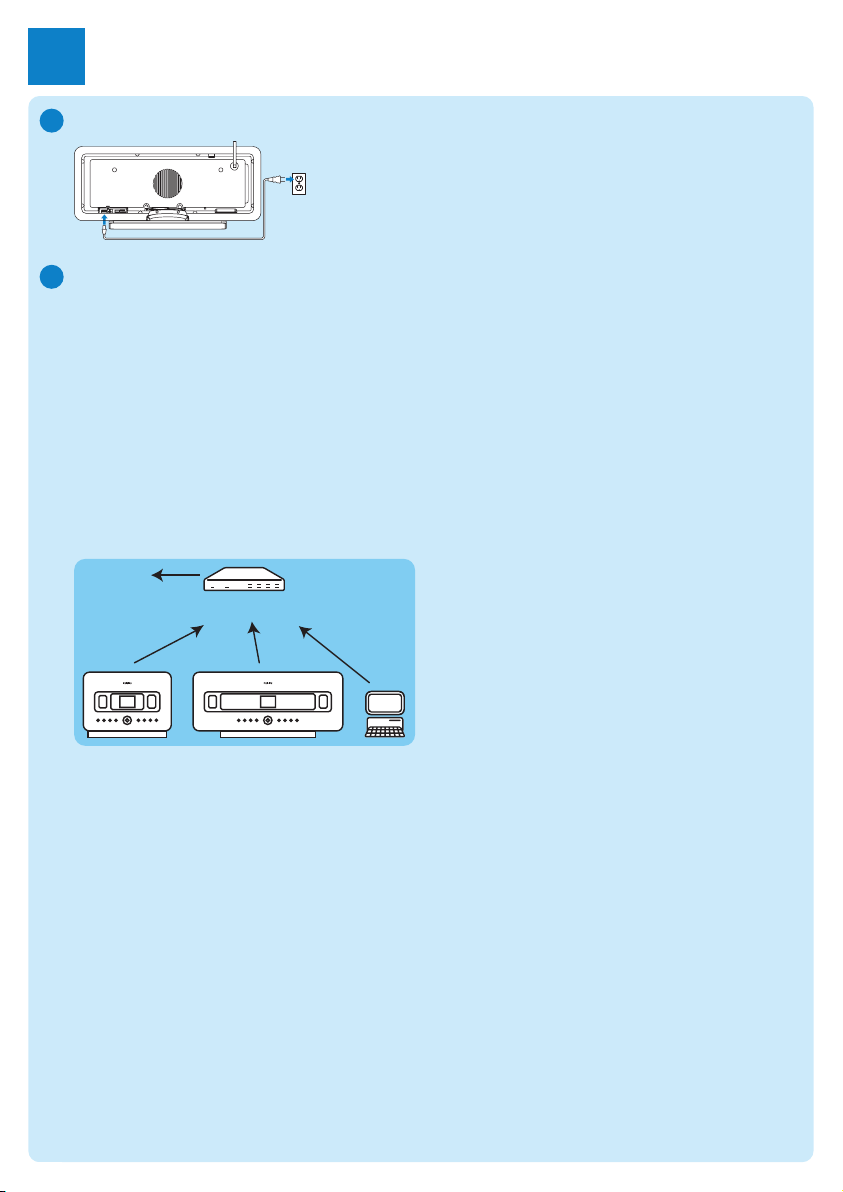
Connect the Center to the power supply
A
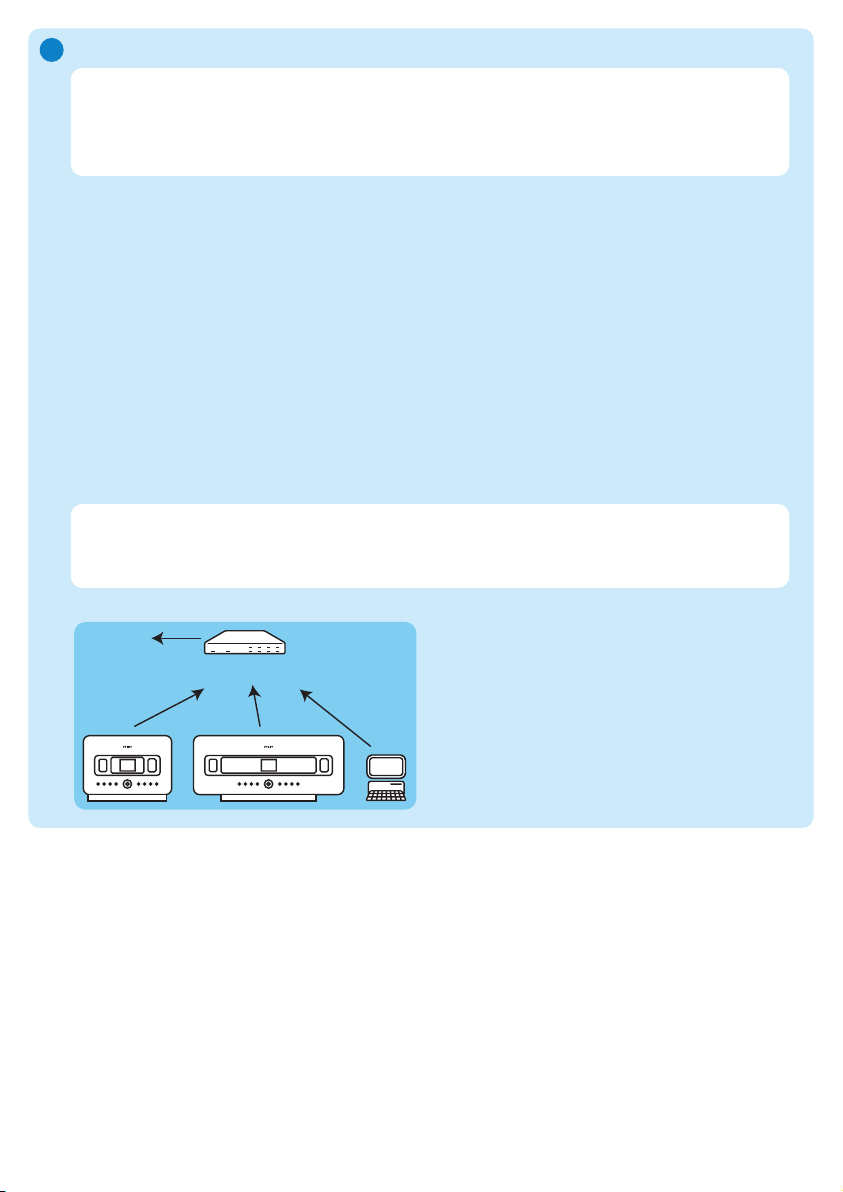
Connect the Center to your home network / PC
This section describes the simplest way to set up a wireless connection between the Center and
your home network / PC.You can add up to 5 Stations to the connection. For more advanced
setups, see section Connect to PC in the user manual.
When you connect the Center (and Station) to your network
• You can use the Internet Radio feature
• You can connect to the internet for firmware updates
• The product can query the online Gracenote DB for the latest CD and song information
(including the retrieval of album artwork)
• You can transfer music from your PC hard disk to the product
• Your can stream music using UPNP
Connection example:
This is the most commonly used home network setup.Your home network may be protected,
hold ready your network password or the encryption key.
1 Ensure the Center is turned on.
2 Press
MENU
3 Select Settings > Network >
• Wireless (if your router has 802.11b/g wireless feature)
• Wired (if you use an Ethernet cable to connect your PC or network device to your home
network)
> Center shows list of networks in range.
4 Press
3 or 4, then 2 to select your home network.
5 Press alphanumeric buttons to enter encryption key (if you are asked to do so), then 2.
6 Select
• Automatic, if your router is capable of serving IP addresses and network settings (DHCP
enabled).
• Static, if you have to enter IP addresses to introduce new devices in your home network.
> The display shows: Apply Settings?
7 Select Ye s .
8 Press
2 to complete the configuration process.
To add a Station, continue with the next section: Add a Station to the network of the Center.
Wireless / Wired
Router
www
B
Connect
2
Page 9
5
EN
C
D
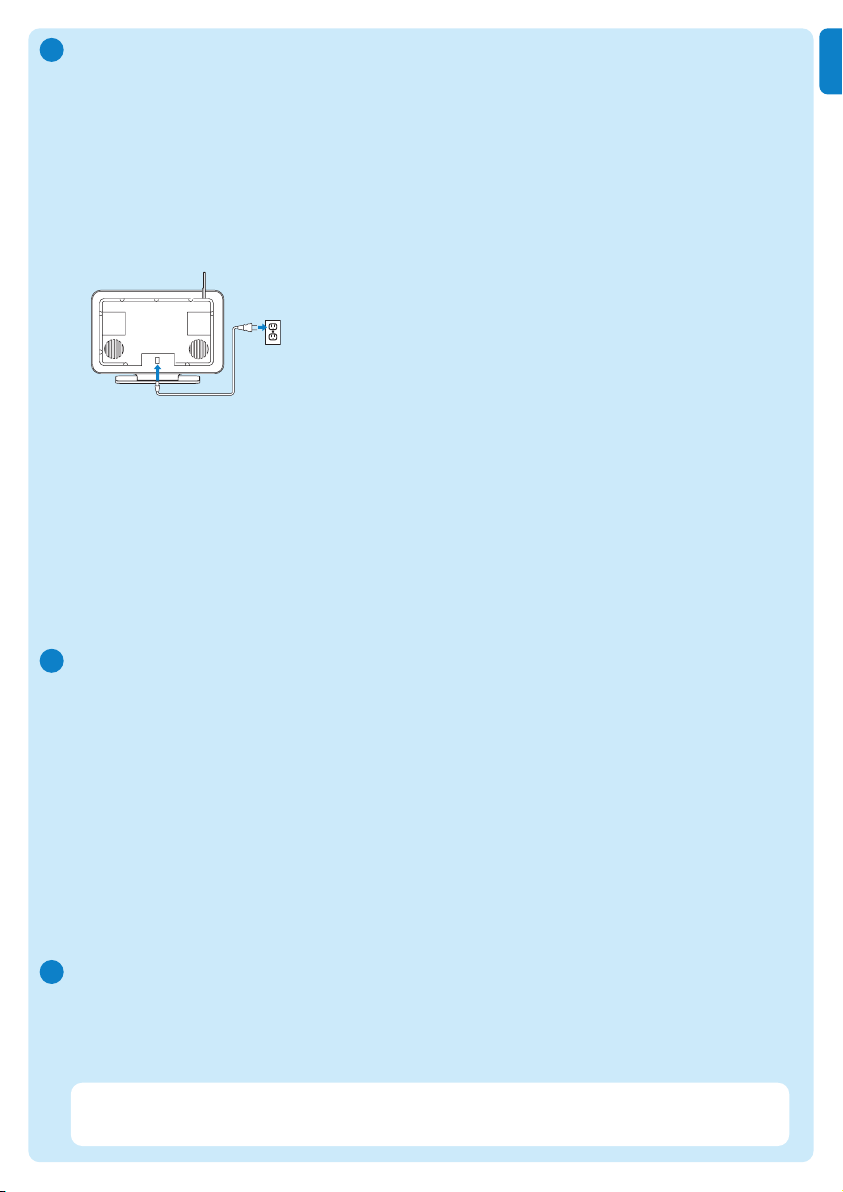
Add a Station to the network of the Center:
On the Center:
1 Press
HOME.
2 Press
3 or 4, then 2 to select HD (Harddisk) mode.
3 Press
MENU to enter the menu display.
4 Press
3 or 4, then 2 to select Station Management (Mgnt).
5 Press 3 or 4, then 2 to select Add New Station.
> The Center searches for the new Station.
On the Station:
1 Connect the Station to the power supply.
2 Turn on the Station.
• If you turn on the Station for the first time, press
3 or 4, then 2 to select the language.
• If you already used the Station with a Center, press
MENU, followed by
3 or 4, then 2 to
select Installation Mode.
> The display shows: Center found
The display shows: Connecting to Center...
On the Center:
1 When all Stations are found, press
STOP 9, to stop the search for Stations.
> The Center returns to HD mode.
To relocate a device, refer to the section Relocate a device in this guide.
If you do not have an Internet connection / PC...
Set up Center and Station without a network
You can operate the Center and Station without a network connection.The following steps show
you how to set up the Center and Station on their own for the first time.
1 Place Center and Station side by side on a level surface strong enough to support the devices.
2 Use the supplied power cables to connect first the Center, then the Station to the power supply.
3 Select the language on the Center and on the Station.
> The installation process starts.
The Center searches for Stations within range.
4 When the Center has detected all the Stations within range, press STOP 9 on the Center to
stop the search.
> The Station registration process starts.
After the successful registration, the displays of the Center and all connected Stations show HD Music.
Relocate a connected device
1 Press and hold y to switch the device to Eco Standby.
2 Disconnect the device from the power supply.
3 Reconnect the device to the power supply in the new location.
> The Wi-Fi connection between the devices recovers automatically.
Tip For better Wi-Fi reception, rotate the Wi-Fi antenna or adjust the location of the Center
and the Station.
E
Page 10
6
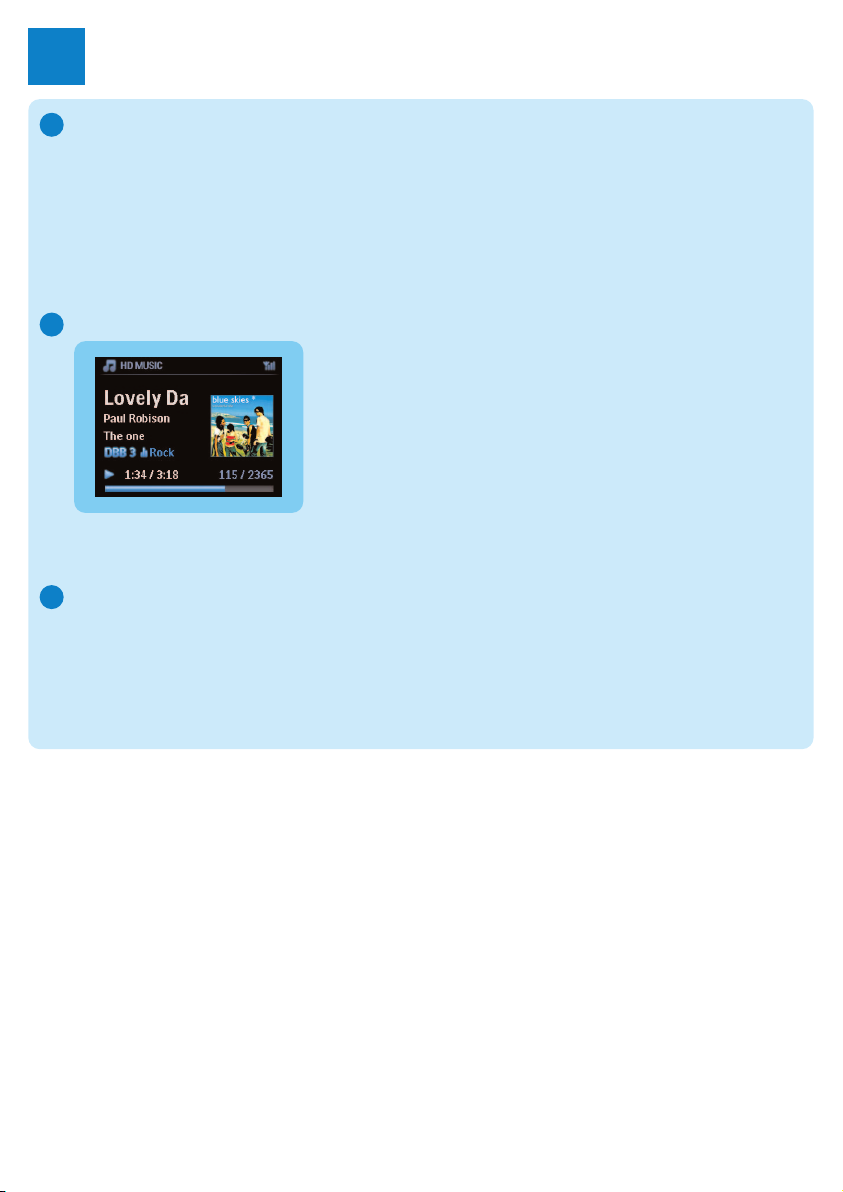
Play HD (Harddisk) music from the Center
1 Ensure that the device is turned on.
2 Press HOME.
3 Press HD on the remote control.
4 Press
3 4 1 2 to select your playback options.
Demo tracks are stored under All tracks.
5 Press
OK / 2; to start play.
6 Press STOP 9 to stop play.
Change your playback option:
1 During play, press 1 once or more to enter previous option lists.
2 Press 3 4 1 2 to select, then OK / 2; .
Change your remote control:
By default, the 2-way remote control works with the Center only. If you want to use the 2-way
remote control for the Station:
1 Press and hold
REFRESH until the display of the remote control shows: Select Device.
2 Press
3 or 4 then 2 to select the Station check box.
3 Press
OK.
For more information, see User manual, Prepare: Using the remote control.
A
B
C
Enjoy
3
Page 11
7
EN
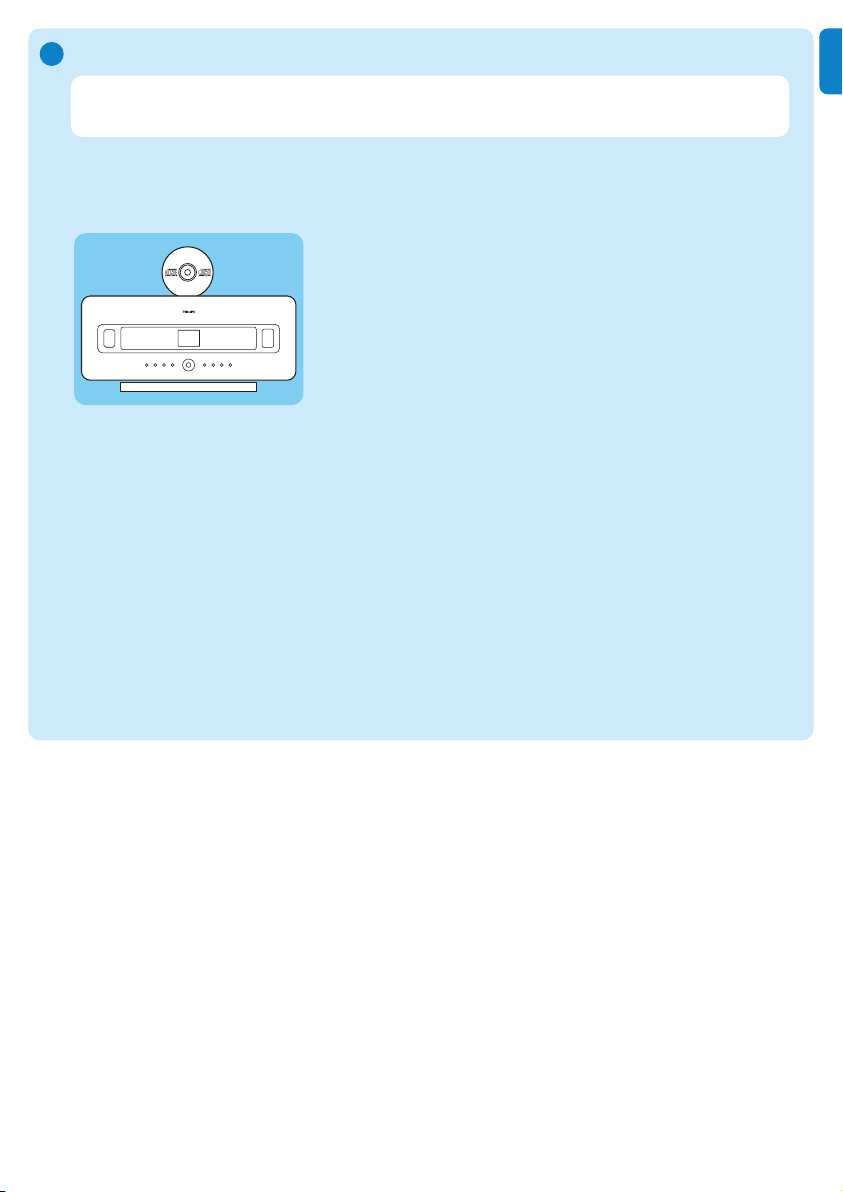
Play CDs on the Center
D
Important! For reasons of CD copyright protection, during CD play the features Music
Broadcast and Music Follows Me are not supported.
You can play
• all prerecorded audio CDs
• all finalized audio CDR and CDRW discs
• MP3/WMA/m4a-CDs (CD-R/CD-RW with MP3/WMA/m4a files)
1 Ensure that the device is turned on.
2 Insert a CD into the Center (see Controls on the Center) with the printed side facing
towards the front panel.
> The display shows the list of CD tracks.
For CD recorded with MP3/WMA/m4a audio files:
1 To enter a track list, press
2 on a highlighted folder.
2 Press
OK /
2; to start play.
3 Press STOP 9 to stop play.
4 To remove the CD, press EJECT /.
For CDs recorded with all other audio files:
1 Press
3 4 1 2 to select a track or album.
2 Press OK / 2; to start play.
3 Press STOP 9 to stop play.
4 To remove the CD, press
EJECT /.
Page 12
8
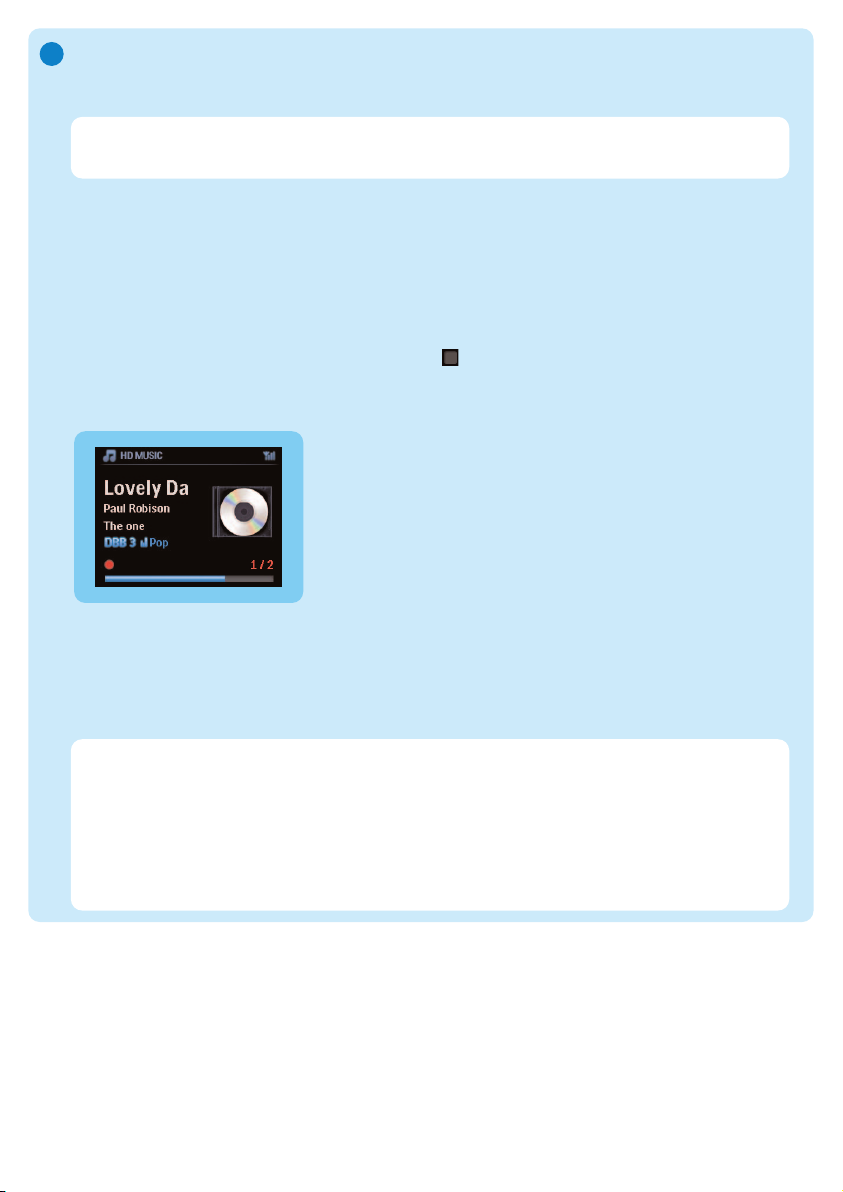
Build an HD music library (Rip CDs) on the Center:
You can build a music library on the hard disk of the Center by ripping music from CDs,
importing MP3/WMA/m4a files from a PC, or recording audio from radio or external sources.
Rip from CDs
1 Insert a CD into the Center (see Controls on the Center), with the printed side facing
towards the front panel.
> The display shows the list of CD tracks.
For CD recorded with MP3/WMA/m4a audio files:
1 To enter a track list, press
2 on a highlighted folder.
2 In the track list, press
RECORD.
> The display shows a list of tracks with check boxes .
If you want to rip the whole CD:
1 Press
RECORD.
If you want to rip only part of the CD:
1 Press
MARK/UNMARK on the remote control to select / deselect tracks.
2 Press
RECORD.
> The display shows the album name of the current track.
When the rip is complete, the Center returns to CD mode.
E
Tip:
• To rip a CD during playback (audio CD only), see User manual, HD: Building music
library on Center.
• To record from the radio or from an external source, see User manual, HD: Building
music library on Center.
• To edit the track information and import MP3/WMA/m4a files from PC using the supplied
Wireless Audio Device Manager (WADM), see section Enjoy.
Important! It takes some time to rip CD music and to convert the ripped music to MP3 file
format.
Page 13
9
EN
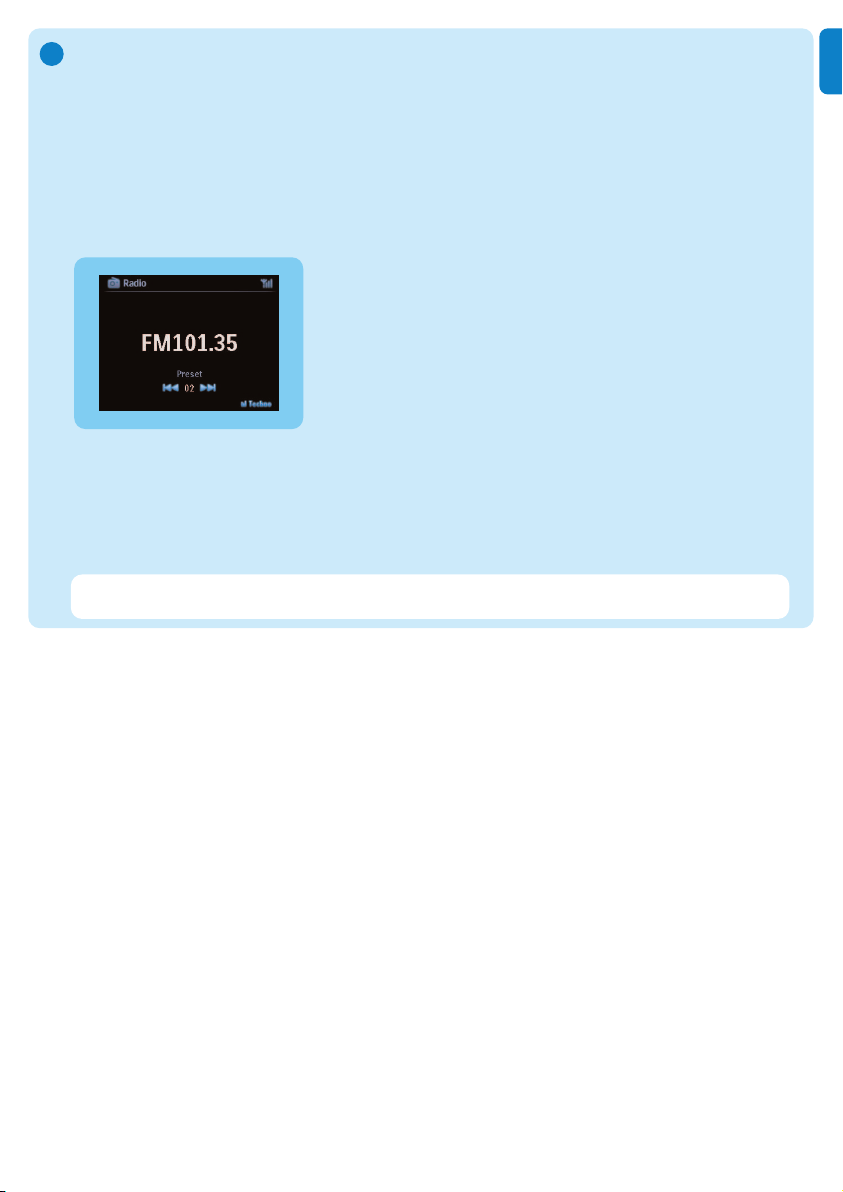
Listen to FM Radio
1 Ensure that the device is switched on.
2 Press HOME.
3 Press FM TUNER on the remote control.
4 Press MENU.
5 Press
3 or 4, then 2 to select Autostore radio.
> When all available stations are stored, the first auto stored preset station plays.
You can store up to 60 preset radio stations in the memory (including a maximum of 10 RDS
stations).
When the radio plays, to directly switch from one preset station to another:
1 Press
J( or )K .
When the radio plays, to select a station from the list of preset stations:
1 Press
2.
2 Press 3 or 4, then 2 to select.
F
Tip When the radio plays, you can also record from the radio by pressing REC 0.
Page 14
10
Minimum PC requirements:
• Windows XP SP2 or Vista
• Pentium III 500MHz processor or higher
• 256MB RAM
• CD-ROM drive
• Ethernet adapter, enabled (for wired connection) - or
Wireless Network adapter 802.11 b/g (for wireless connection)
• 500MB free hard disk space
Install PC Software
1 Insert the PC Suite CD into the PC.
2 Follow the instructions on the PC to install WADM.
3 When the security alert message (Microsoft Windows Firewall) pops up, press Unblock to
allow the WADM application to run on the PC.
> The Microsoft Windows Firewall is still effective and only allows the WADM to run.
Transfer music from my PC to the Center
G
Important!
• Before you continue, first complete the steps in section ‘Connect the device to your home
network / PC’.
• Ensure that you install the provided PC software before you try to transfer music from a PC.
4 Follow screen instructions on the PC.
Wireless
Router
www
Tip
You can also consult the user manual of the Microsoft Windows Firewall and manually add the
WADM application to your list of programs that are safe to run.
Page 15
11
EN
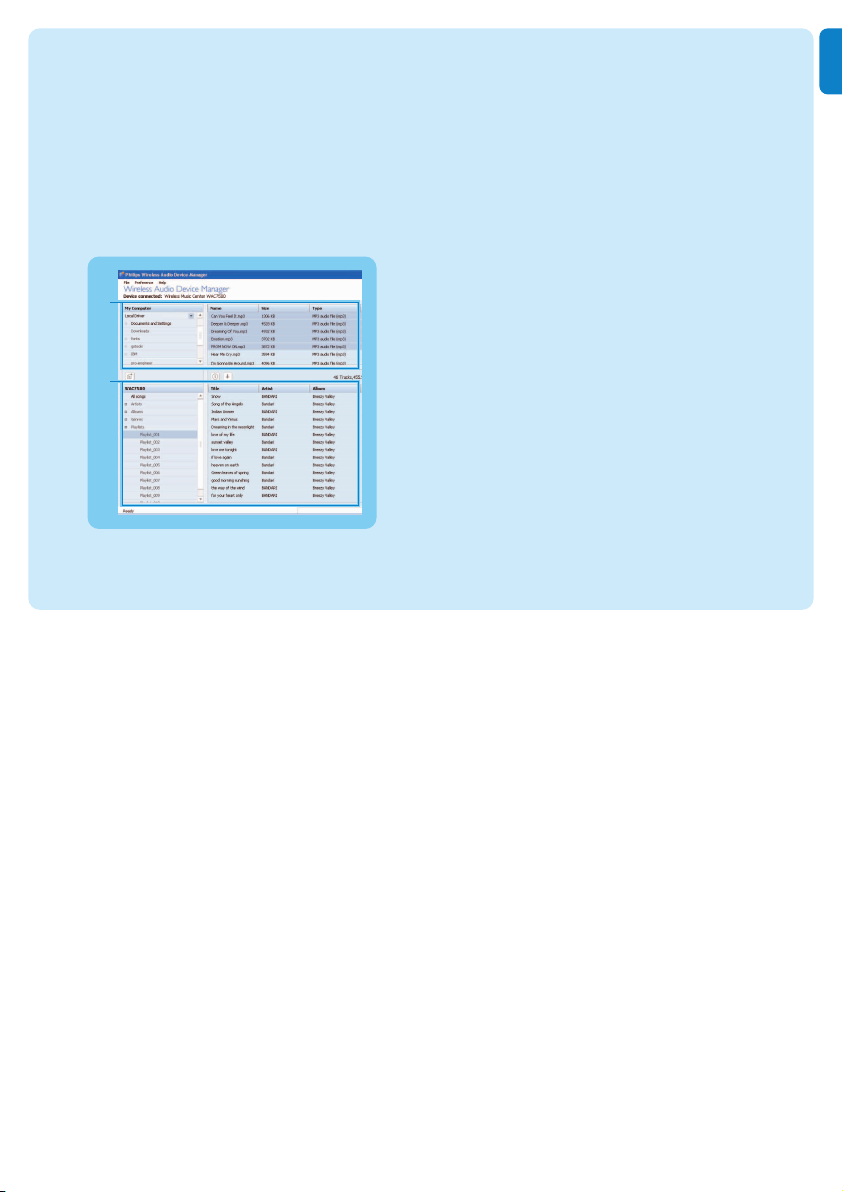
WADM - Wireless Audio Device Manager
Launch WADM:
1 Double click WADM icon on Desktop.
2 Select your Center from the list.
3 Click Connect now.
> You can transfer music from your PC to the Center.
Transfer music from your PC to the Center
1 Launch the WADM software.
2 On My Computer panel, click to highlight a desired file/folder
3 Drag selection to WACS7500 panel
4 While transferring, you can add more file/folder(s) to the transfer queue.
2
3
Page 16
12
Stream music from a PC
You can stream music without transferring audio files.When you use UPnP (Universal Plug and
Play), you can stream music from a PC or another content server to the Center / Station.
For Windows XP / Vista:
1 Ensure that your administrator rights are enabled on the PC.
2 Insert the PC suite CD into the PC.
3 Click Install Windows Media Player 11 to start the installation of Windows Media Player.
On the PC:
1 Click Start > Programs > Windows Media Player.
2 In the Windows Media Player interface, click on the Library pull-down menu and select More
Options...
3 In the Library interface, select Configure Sharing.
4 In the Media Sharing pop-up window, check Share my media, then click OK.
> When the WAC7500 is connected to you home network, the window shows a .
5 Click the WAC7500 icon.
6 Click Allow, then OK.
On the Center or Station:
1 Press
HOME.
2 Press
3 or 4, then 2 to enter UPnP mode.
> The display shows: Searching for UPnP Servers, then the list of media servers.
3 Press 3 or 4, then 2 to select your PC.
4 Press 2.
Tip To download Microsoft Windows Media Player 11, use the following URL:
http://www.microsoft.com/windows/windowsmedia/download.
H
Page 17

13
EN
Internet radio
You have to register your product with a valid email address when using the Internet feature for
the first time:
1 Ensure that the Center / Station is turned on.
2 Ensure that the Center / Station is connected to the Internet.
3 Ensure you have a valid email address.
4 Ensure that you use the 1-way remote control of the Station for the registration process.
5 On the Center / Station, press
HOME.
6 Select RADIO > INTERNET RADIO.
> The Internet radio registration display is shown.
7 Press ALPHANUMERIC BUTTONS on the 1-way remote control to enter the valid email
address.
8 Press
2.
> The display confirms the automated email dispatch to your mailbox.
9 On the PC, check the email inbox for a message from [email protected] with
the subject Your Streamium Registration....
10 Follow the instructions in the email to complete your registration process on the Philips
website.
> The display of the Center / Station returns to the Radio menu.
The email address is stored in the memory.
To return to the Home menu, press
HOME.
Listen to Internet radio
1 Ensure that the Center / Station is turned on.
2 Ensure that the Center / Station is connected to the Internet.
3 Press
HOME.
4 Select RADIO > INTERNET RADIO > USER > SERVICES.
> The service list is displayed.
5 Press
3/4 to select from the list. Examples: RADIOIO, LIVE365
6 Press
2.
7 Press
3/4 to select the station, then press 2.
To return to the Home menu, press
HOME.
I
* Internet radio requires broadband Internet access.
Page 18
14
Broadcast music
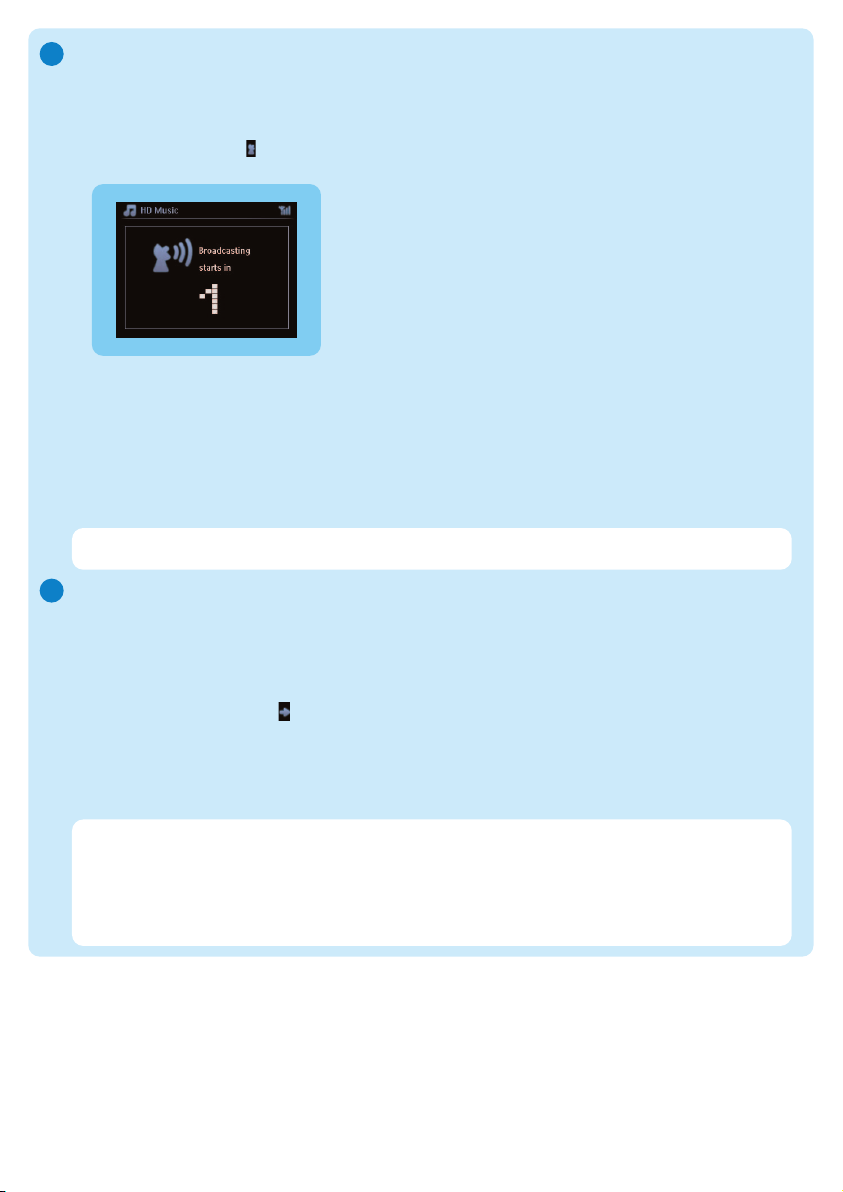
When the Center and Station(s) are switched on and the Center is in HD play mode, you can
broadcast the music form the Center to all connected Stations.
1 When in HD play on the Center, press
MUSIC BROADCAST.
> The display shows the icon and the HD music is broadcast to all connected Stations.
2 To stop music broadcast, press
STOP 9 on the Center.
To exit music broadcast on a Station:
1 Press
STOP 9 on the Station.
To broadcast music to the Station again:
1 Press
STOP 9 on the Center.
2 Start HD play on the Center.
3 Press
MUSIC BROADCAST on the Center.
To deactivate the feature, press
MUSIC BROADCAST again on the Center.
Tip Music broadcast stops when the selected album or playlist has reached the end.
Let the music follow me to another location
As you move around at home you can let the music move with you between the Center and
Station or between Stations.
On the source unit (Center or Station) where music is playing:
1 During play, press
MUSIC FOLLOWS ME to activate the function.
> The display shows the icon .
On the destination unit where you want continue to listen to the music:
2 Ensure that the device is turned on.
3 Press
MUSIC FOLLOWS ME.
> Play stops on the source unit and continues on the destination unit.
Tip
• Music Follows Me is deactivated again, if you do not press MUSIC FOLLOWS ME on
the destination unit within 5 minutes.
• Selected play modes are retained on the destination unit (see User manual section Play
modes REPEAT, SHUFFLE).
K
J
Page 19
15
EN
M
Play portable USB devices
You can play USB flash memory devices (USB 2.0 or USB 1.1) and USB flash players (USB 2.0 or
USB 1.1) with the Center or Station.
1 Insert the USB plug of the USB device into the socket on the Center / Station.
2 Ensure that the Center /Station and the USB device are turned on.
3 On the Center / Station, press
HOME.
4 Select Portable > USB.
5 Press
OK /
2; to start play.
Record music to USB devices
1 Ensure that the USB device is connected to the Center.
2 Ensure that the Center and the USB device are turned on.
3 Press
HD on the remote control.
4 Press
3 or 4, then 2 to select your option.
Enter the list of tracks, if necessary.
5 Press REC 0.
6 Press
MARK/UNMARK on the remote control to select or deselect the tracks you want to
record.
To select / deselect all tracks, press and hold
MARK/UNMARK on remote control.
7 Press
REC 0 to start recording.
> The display shows transferring... The number of tracks transferred / to be transferred appears.
Tip Transferred tracks are saved under MUSIC in the USB device.
L
Page 20

16
FAQ - Frequently asked questions
About the Environment
About Recording from CDs/ Track Information
Q:What does ‘Ripping from CDs’
mean and what functions can I use
while the recording is in progress?
A:‘Ripping from CDs’ is the process by which a CD track is
converted into the much smaller MP3 format, and is then added to
the Wireless Music Center's music library (Hard Disk). On the
Wireless Music Center,‘Ripping from CDs’ requires two steps: first,
it reads the CD content and stores it temporarily on the Hard Disk.
Then, it converts this temporary CD content into MP3 format - a
process called ‘background encoding’. It takes 1 hour to convert 1
hour of CD music. During this stage you cannot stream or
broadcast music on Center, though you can still stream music from
Stations.Always switch the set to Eco Standby (power-saving mode)
before removing its power plug.
Q: Do I need to immediately
update the Gracenote music
recognition database stored in
Philips Wireless Music Center
straight after bringing it home?
A: No.There is already a massive CD-tracks database pre-stored in
Philips Wireless Music Center, which should match most of the CDs
released within the last six months.
Q: Does Philips provide Gracenote
music recognition database
updates?
A:Yes.We provide quarterly updates of the Gracenote music
recognition database through the website
http://www.club.philips.com. Download the file to your PC and
update the built-in Gracenote music recognition database from the
PC using WADM in the supplied PC suite. Or you can burn the
downloaded file on a CD and insert the CD into the CD loader on
Center for update.
Q: Is there a maximum distance of
transmission between Philips
Wireless Music Center and
Stations for effective streaming?
A:Yes.The maximum distance of Wi-Fi transmission is 250m
measured in open spaces. However, in a home environment, where
solid obstacles such as walls and doors are present the effective
transmission distance is significantly reduced to approximately 50 100m.Try to re-position the sets if you experience transmission
problems.
Q: Do I need a computer or home
network to use Philips Wireless
Music Center and Station?
A: No. Philips Wireless Music Center and Station are designed to
work independent of the computer.You can record music from CDs
to the music library of Center (Hard Disk), and stream music to
Stations without any computer or home networking structure.
Q:Would my neighbors be able to
access the music I stored on Philips
Wireless Music Center if they also
have Philips Wireless Music Station?
A: No. Every Philips Wireless Music Station has a unique encryption
code that will only be recognized by the Philips Wireless Music
Center during the installation process.
Page 21
17
EN
About Music Management
Compatibility
Philips Streamium Wireless Music
Products
The Philips Wireless Music Centers (WAC700/7000/7500,
WAC3500D) are compatible with any Philips Wireless Music
Stations (WAS700/7000/7500)
Flash Player Philips KEY007, KEY010, KEY013, HDD1XX (HDD100 /
HDD120), SA16X (SA160 / SA164 / SA165 / SA167 /
SA169), SA170, SA175, SA177, SA179, SA159, SA26X
(SA261), PSA61X / PSA612, HDD084, HDD1XXX
(HDD1830 / HDD1420 / HDD1620 / HDD1630 /
HDD1835), HDD6XXX (HDD6320/00), SA1100/02,
SA1115/02, SA12XX, SA13XX (SA1300/02), SA2000,
SA40XX, SA5000, PMC7230, SA9XXX (SA9200, Flat I),
SA21XX, SA31XX, SA41XX, SA51XX
Apple iPod Shuffle, Shuffle Gen 2, Mini, Nano Gen 1/2, Photo,
Video Gen 1/2
Creative Zen Micro, MuVo TX FM, MuVo Micro N200, MuVo
VIDZ,
Zen Music.Photo Vision:M, DMPFX200
Sony NW-HD3, NW-E105,NW-E307
iRiver U10CT (0081) OR 103, H10,T10
JNC SSF-F302
Samsung YP-T7V
SanDisk Sansa m260
Flash Drive SanDisk Cruzer Flash Drive, Cruzer U3 Flash drive
Sony Mirco Vault Elite
Toshiba Flash memory U3
PQI PQI
Q:What is Philips Wireless Audio
Device Manager (WADM)?
A:WADM mainly serves to transfer your PC's music library to the
Wireless Music Center. In addition, it provides a one-stop solution
to help you manage the music library on Center music library, such
as edit track information, create/rename playlists, backup/restore
music library in Center, as well as network setting,
Gracenote music recognition update, Firmware upgrade. For details,
see the manual Connect to your PC and WADM help file.
Q: How do I transfer the
MP3/WMA files of my PC's music
library to Philips Wireless Music
Center?
A: Once you have installed Philips Wireless Audio Device Manager
(WADM) and connected your PC to the Philips Wireless Music
Center with the supplied Ethernet cable, you can use this software
to drag and drop music files from your PC to the ‘device window’ of
WADM.Transfer of track will start automatically and the average
time it takes to transfer one track is 4-15 seconds.
Always press and hold y to switch the set to Eco Standby (power-
saving mode) before removing its power plug.
Q: Is Philips Wireless Music Center
and Station upgradeable?
A:Yes, Philips Wireless Music Center and Station are software
upgradeable, which means that they are ready for future functional
upgrades if available. Check our website regularly for the latest news
on new features and improvements at
http://www.philips.com/support
Page 22

18
Need help?
User Manual
See the User manual that came with your player.
Online
Go to www.philips.com/welcome
Disposal of your old product
Your product is designed and manufactured with high quality materials and components, which can be recycled and reused.
When this crossed-out wheeled bin symbol is attached to a product it means the product is covered by the European Directive 2002/96/EC
Please inform yourself about the local separate collection system for electrical and electronic products.
Please act according to your local rules and do not dispose of your old products with your normal household waste.
The correct disposal of your old product will help prevent potential negative consequences for the environment and human health.
Batteries contain chemical substances that may pollute the environment, so they should be disposed of at an official collection point.
Page 23
Printed in China
wk8033
Specifications are subject to change without notice.
Trademarks are the property of Koninklijke Philips Electronics N.V. or
their respective owners
© 2008 Koninklijke Philips Electronics N.V.
All rights reserved.
www.philips.com
 Loading...