

Philips Sunstudio HB595/A Service Manual

Sunstudio
HB595/A
Philips Domestic Appliances and Personal Care
Service Manual
PRODUCT INFORMATION
- MOST REPAIRS HAVE TO BE DONE WITH HELP
OF A SECOND PERSON.
- The acrylic sheets can be cleaned with a moist cloth and
some washing-up liquid.
Avoid the use of alcohol, alcohol based cleaners, petrol
acetone or abrasives! These substances can cause
irreparable damage to the sheets.
- Always use protecting goggles when looking in the
direction of burning lamps.
- Interchange starters, lamps or ballasts to establish
whether they are defective. If they are not defective,
check the internal wiring, especially that connected to
the lamp holders.
- An unusual early blackening of the end of the TL’s points
to a wiring fault or a defective starter.
- New HPA lamps may show colour differences.
This is not a defect, but a characteristic phenomenon of
lamps of this type.
The discolorations disappear after a short period of use.
- When exchanging the HPA lamp, make sure you do
not touch the new lamp with your bare hands, as finger
prints could burn in and reduce the lamp’s performance.
- After repair, always check whether the glass pane has
been properly mounted.
- If the canopy and/or couch have to be placed on the
floor, put them on the floor with the tube lamps facing
downwards to avoid internal damage.
- Used-up or broken lamps are chemical waste and must be
disposed of in the appropriate manner.
Wall
30
50
Free space in cm
50
Published by Philips Domestic Appliances and Personal Care Printed in the Netherlands © Copyright reserved Subject to modification
06/09
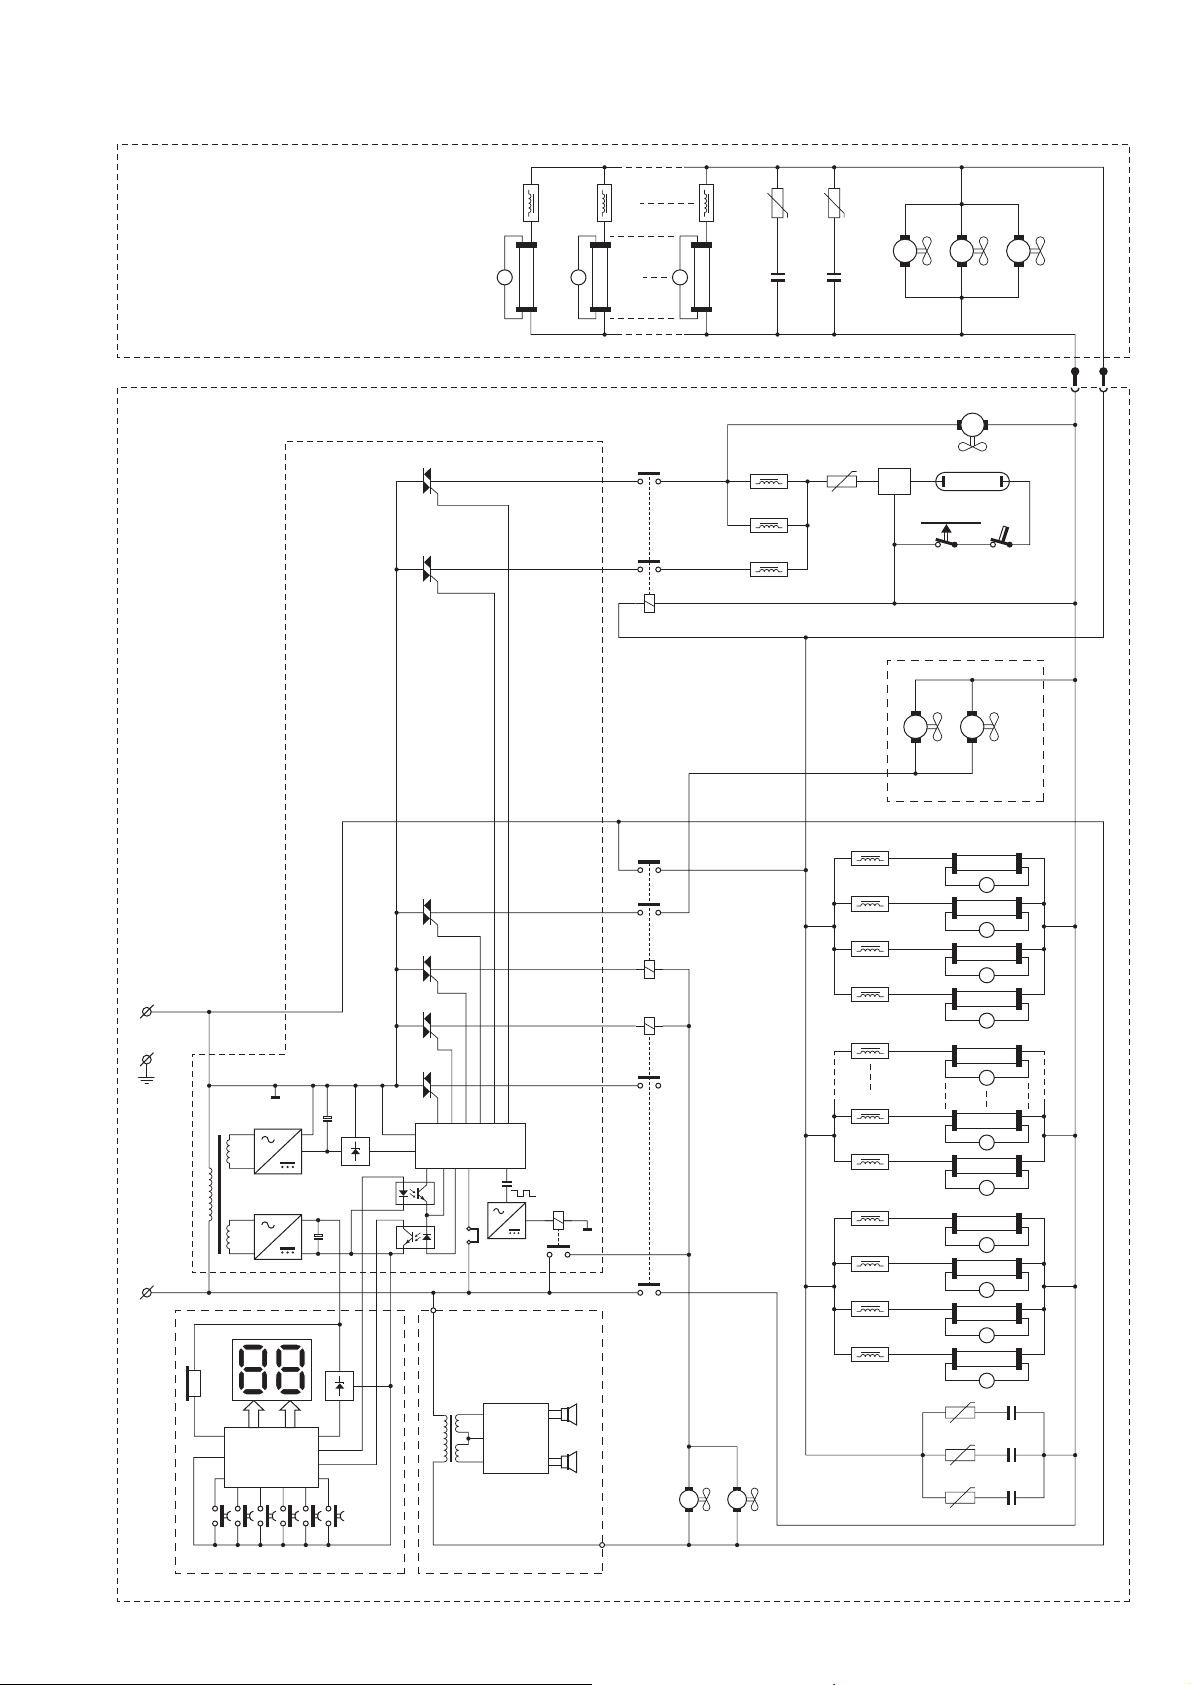
ELECTRICAL DIAGRAM
11x
L15
100W
La15
S La25S
L16
S
La16
L25
NTC5
-t
C4
NTC6
-t
C5
HB595/A
1
1
M6 M7 M8
2
2
1
2
Couch
Power
PCB
L
GND
61
12V
7
9
9V
5
10
-12Vdc -5V
N
Buz
µC
User interface Sound PCB
Canopy
Tr1
Tr2
Tr3
Tr4
Tr5
Tr6
11 x TL
M3
12
96
74
BA
L14a
100W
L14b
100W
L14c
80W
-t
21
NTC4
21
21
S14
21
3
SK2
La14
12
21
12
SK1
Re3
2
2
M4 M5
1
1
Bodycooler
-t
NTC3
-t
NTC2
-t
NTC1
13 x TL
La13
S
La12
S
La11
S
La10
S
La9
S
La5
S
La4
S
La4
S
La3
S
La2
S
La1
S
C3
C2
C1
96
L12
L13
74
L11
Re1
Re2
BA
BA
47
L10
4x
100W
L9
L6
µC
Safety
relais
GND
69
1
L5
5x
80W
L4
L3
L2
L1
4x
100W
Amplifier
BTL 12V
Ls
Ls
2
M221M1
2
1
2-11

TECHNICAL INFORMATION
HB595/A
- Operating voltage : 230 V, 50 Hz
- Power consumption : approx. 3150 W
- Lamp canopy : 8 x TL Cleo
Performance 100 W-S-R
: 5 x TL Cleo
Performance 80 W-S-R
: 1 x HPA HP400SH
- Lamp couch : 11 x TL Cleo
Performance 100 W-S-R
- Ballast canopy : 8 x TL + 1 x HPA - 100W
: 5 x TL + 2 x HPA - 80 W
- Ballast couch : 11 x 100 W
DISASSEMBLY & REPAIR INSTRUCTION
- Remove the mains plug from the wall socket.
Replacement of lamps/starters
- Remove the end cover at the head of the canopy by undoing
the screws.
- First pull the acrylic sheet approx. 10 cm out of the
appliance. Then undo the snap strip on the rear side of the
canopy. Do the same with the snap strip on the front side.
- Remove the acrylic sheet.
- Now the tube lamps and starters can be removed.
- The lamps and starters of the couch can in principle be
replaced in the same way.
Check on internal wiring
- Remove the push rivets in the top cover with an appropriate
knife or screwdriver.
- Remove the end cover at the head of the canopy by undoing
the screws.
- Pull the top cover approx. 10 cm out of the appliance.
- Pull the top cover on both sides out of the groove of the
side panel and place it on a soft surface.
- Now the ballasts, lamp holders and internal wiring can be
checked.
- The internal wiring of the couch can be checked in the
same way.
- However, the canopy must be removed first with help of a
second person.
- Do not forget to pull the connecting cable out of the socket.
- Starter canopy : 13 x S12 / Cleo sunstarter
: 1 x Magnetek ZG 4,5
- Starter couch : 11 x S12 / Cleo sunstarter
- Timer : 30 min. (digital)
- Safety :
- Mains cord : 3 m, 2 x 1.5 mm², class II plug
- Tanning field : 195 x 80 cm
- Dimensions : 214 x 100 x 92 cm (L x W x H)
- Weight canopy : approx. 65 kg
- Weight couch : approx. 64 kg
- Protecting goggles : 2 x HB072
Replacement of gas spring
- Remove the acrylic sheet as described under ‘replacement of
lamps/starters’.
- Remove the top cover as described under ‘check on internal
wiring’.
- Loosen the connecting wires of the body cooler and remove
the end cover by undoing the screws.
- Fold the canopy up and have a second person lock it in this
position.
- Now the gas springs can be removed.
Replacement of timer
- Remove the end cover on the side where the timer is
located.
- Pull the top cover on this side out of the groove of the side
panel.
- Now the timer panel with timer can be taken out.
, Cenelec, UV-type III
3-11
HB595/A
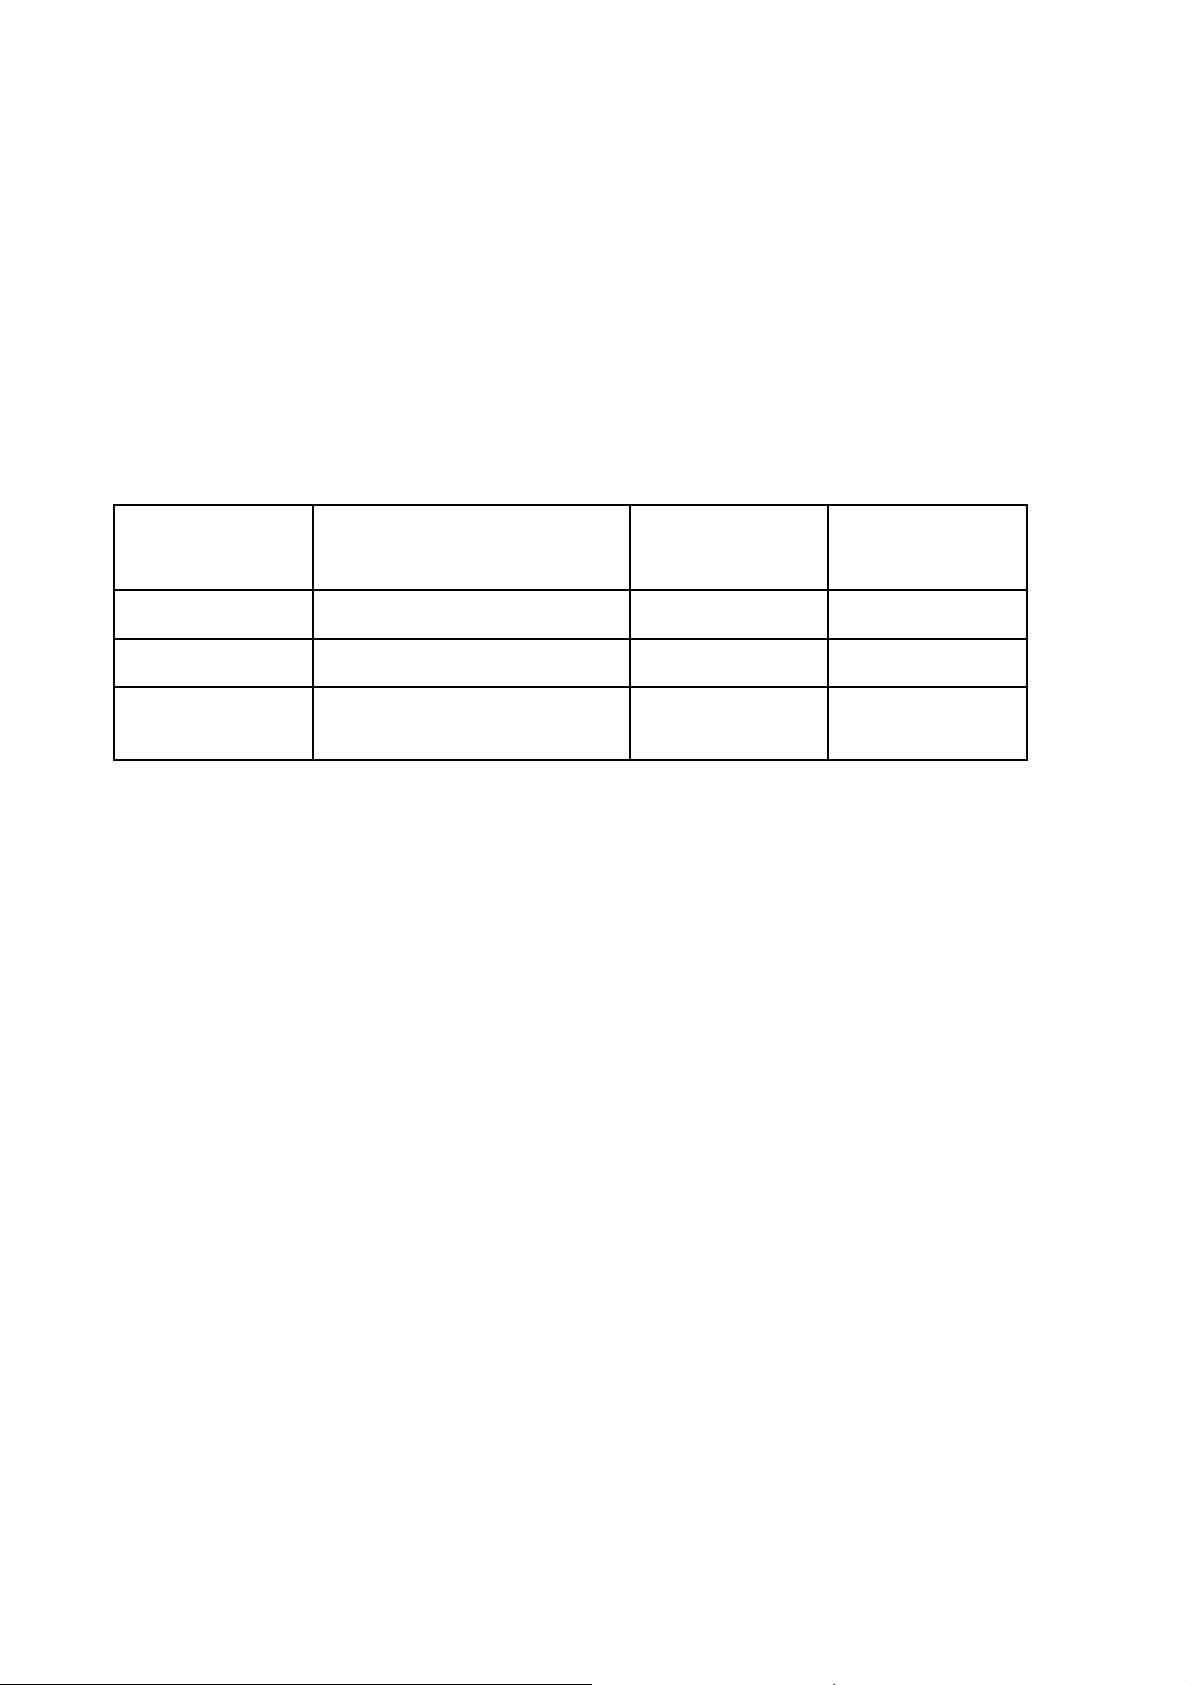
TANNING MEASUREMENT
- The measuring data indicated below where established with help of an UVX 36 meter and may only be checked with this
equipment, since the values measured are relative values.
- The measurements must be taken after approx. 5 minutes in the centre of the tanning field and at the distance indicated.
- The following aspects must be checked or the following preliminary measurements must be taken:
• Mains voltage: 230 V, 50 Hz
• Room temperature 22 - 28 °C
• Check the fans for failure-free operation as optimal tanning is only guaranteed at the correct operating temperatures
• Clean the lamps, the acrylic sheets and the glass pane.
- With regard to the minimum values indicated below, you should bear in mind that this is not an absolute value at which the
lamps must be replaced.
- Depending on the skin type, the tanning session may also be extended so that the lamps can be used a little longer.
output in mW/cm²
UVX 36 meter distance in cm
Couch 2.5 cm from acrylic sheet couch 9.5 6.6
Canopy 30 cm from acrylic sheet couch 10.0 7.0
Canopy beneath the
facial tanner
Note: Switch SK1 of facial tanner in position ’HIGH’.
2.5 cm from acrylic sheet couch, and
on 14 cm from edge of the end cover
NEW
(approx.)
5.2 3.6
Output in mW/cm²
(approx.)
MIN
4-11
 Loading...