

Page 1
SRU 8112/27
Register your product
and get support at
www.philips.com/welcome
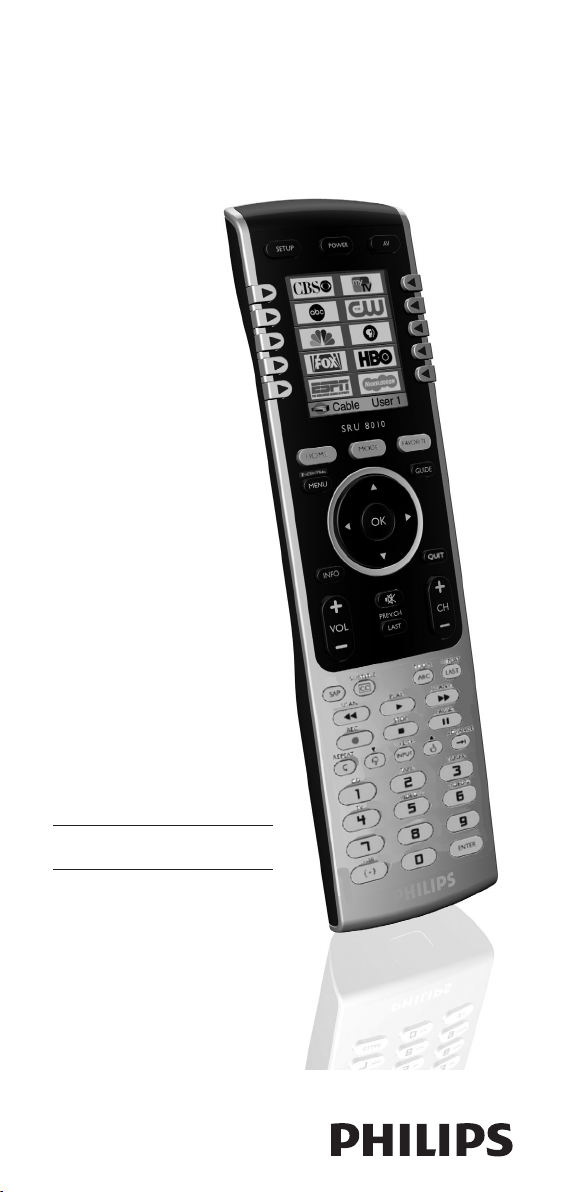
Universal remote control
EN Remote control
Page 2
1
2
2
2
10
11
12
13
2
3
2
3
4
5
6
21
7
8
9
20
19
18
14
15
17
16
Page 3
Table of contents
1 Your universal remote control 3
2 Installing the remote control 3-5
3 Using the remote control 5-8
3.1 Keys and functions 5-7
3.2 Selecting devices 7-8
4 Extra possibilities 8-18
4.1 Home menu 8-9
4.2 Devices 9-10
4.3 Favorite channels 10-12
4.4 Macros 12-14
4.5 Advanced options 14-15
4.6 Learning key functions 16-18
5 Frequently asked questions 18-20
6 Need help? 20
Limited warranty 21
1 Your universal remote control
Congratulations on your purchase and welcome to Philips.
To fully benefit from the support that Philips offers,
register your product at www:philips.com/welcome
For quick, clean and easy setup go to: www.philips.com/urc
After installing the universal remote control you can operate
a maximum of 12 different devices with it. During setup you
can define yourself exactly which devices can be operated
(see table under 2.‘Installing the remote control’).
2 Installing the remote control
Remove the protective foil from the display.
Press the tab of the battery compartment cover inwards
and lift off the cover.
2
1
3Installing the remote control
ENGLISH
Page 4

Insert three 1.5 LR6 (AA) type alkaline batteries noting
the + and - configuration in the battery compartment.
Be sure to use fresh batteries.
Replace the cover and click firmly into place.
• The language selection screen appears.
Select your preferred language by pressing the
corresponding side key.
• The ‘Setup wizzard’ screen appears.
Press any key to continue.
Follow the on-screen instructions to set up the remote
control for all devices you wish to operate, using the
remote control.
• You can set up the remote control for any of the devices
listed below.
• To exit the ‘Setup wizard’ at any time, select ‘Quit’.
• After setting up the remote control to operate your devices,
the ‘Favorites’ set up screen appears.
For setting up favorite channels (‘favorites’),
refer to chapter 4.3 ‘Favorite channels’.
Notes
• To save battery life, the remote control automatically
turns off if any button (or button combination) is pressed
for 30 seconds or more.
• When the batteries are almost empty, the battery low
indication ( ) flashes on the display. Replace the
batteries and follow the local regulations for battery
disposal.
Device name Description
TV Traditional TV and flat screen TVs
DVD DVD player and recorder
Sat Satellite receiver
DVDR DVD player and recorder
Cable Cable set-top box
Amp Amplifier / tuner
VCR Video cassette player and recorder
DVBT Digital Video Broadcasting Terrestrial
device
STB Set-top box
7
6
EN
FR
ES
5
4
3
4 Installing the remote control
ENGLISH
Page 5

ENGLISH
5Using the remote control
CD CD player and recorder
LCD LCD TV
Plasma Plasma TV
Audio Amplifier / tuner
Tuner Amplifier / tuner
Tape Audio cassette tape player and recorder
MD Mini Disk player and recorder
PVR Personal Video Recorder (digital video
recorder)
DMR Digital Media Receiver
TV / VCR TV with integrated VCR
TV / DVD TV with integrated DVD
DVD / VCR DVD / VCR combination
DVDR / HDD DVD / Hard Disk Drive combination
PC Personal Computer
HTS Home Theatre System
Note
Settings made during this initial set up can be changed
afterwards. For this, refer to chapter 4 ‘Extra possibilities’.
3 Using the remote control
After installing the remote control you can operate the
devices the remote control is set up for. For operation the
appropriate keys on the remote control can be used as well
as the additional on-screen keys that are displayed when a
device is selected. For this, refer to chapter 3.2 ‘Selecting
devices’.
3.1 Keys and functions
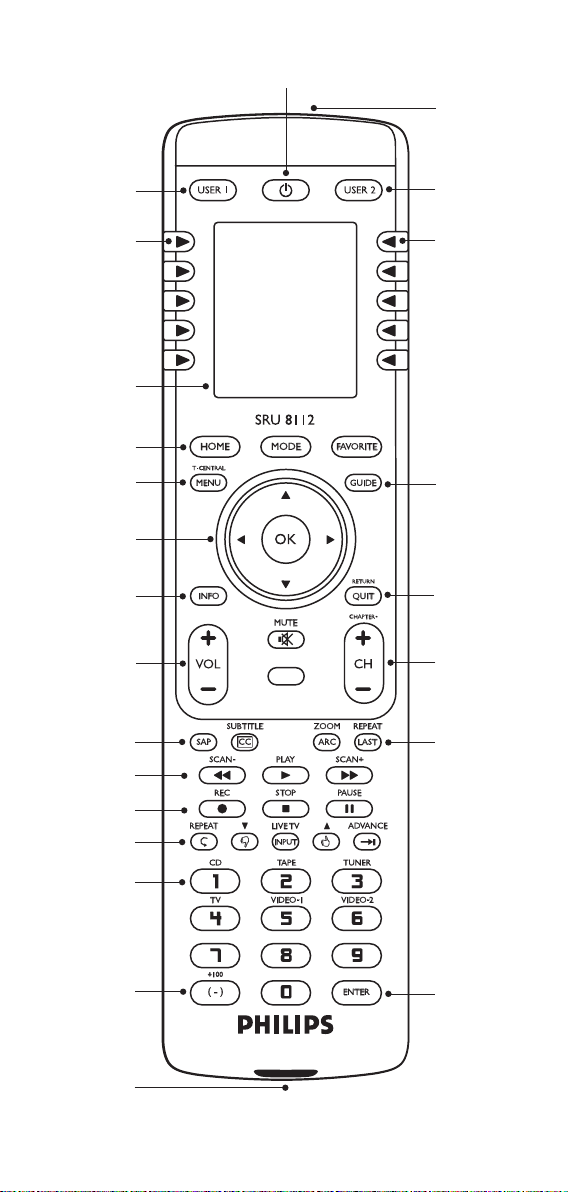
The illustration on page 2 gives an overview of all keys and
their functions.
1 y Standby switches the selected device on or off.
2 USER 1 / USER 2 display favorite channels for
‘User 1’ and ‘User 2’.
3 Side keys direct access device features.
4 Display shows the current remote control
status.
5 HOME enters / exits ‘Home’ mode and opens
the starting screen for most remote
control operations.
MODE displays list of devices that can be
selected.
Page 6

FAVORITE displays list of users and items for
which favorite channels are set up
(‘User 1’, 2,‘Sports’, ‘Movies’, etc. ).
6 T-CENTRAL TiVo key. Selects TiVo Central.
MENU turns the menu screen on the selected
device on and off.
7 Cursor keys cursor up, down, left, right in a menu.
The cursor left key jumps back one
level in the SRU 8112 menus.
OK confirms your selection.
8 INFO displays on-screen information.
9 - VOL + adjusts the volume of the selected
device.
s
mutes the sound of the selected device.
10 SAP selects Secondary Audio Program (if
available).
SUBTITLE selects DVD subtitles.
CC TV Closed Caption (if your TV has this
feature)
11 SCAN - / 5 • rewind.
• goes through a program in reverse
direction.
PLAY / 2 play.
SCAN + / 6 • wind.
• fast forward through a program.
12 REC / 0 record (press twice).
STOP / 9 stop.
PAUSE / ; pause.
13 REPEAT Replays the last 8 seconds of a
program.
Thumbs down 4 sets you TiVo Thumbs rating.
LIVE TV switches to Live TV broadcast.
INPUT • dispays the DVD player’s Setup menu.
• Selects between TV and VCR.
Thumbs up 3 sets you TiVo Thumbs rating.
ADVANCE catches you up to the live broadcast.
14 Numeric keys direct choice of channels, text input
and other functions. Functions in red
are available in audio mode.
15 + 100 selects channel numbers, greater than
100.
(-) selects digital channels (e.g. 2-3).
16 IR transmitter sends IR commands to the selected
device.
17 ENTER used after direct channel selection
(with the numeric keys), to
immediately switch to the selected
channel.
Using the remote control
ENGLISH
6
Page 7
7
ENGLISH
Using the remote control
18 ZOOM enlarges a specific area of the screen.
ARC Aspect Ratio Control.Selects viewing
format for the displayed picture. E.g.
Wide, Zoom, etc.
REPEAT A-B Repeat (RPT A.B).
Repeats playback of current Chapter
or Track in DVD mode.
LAST • returns to the previously selected
channel.
• repeats DVD.
19 - CHAPTER + selects previous / next track in CD
and DVD mode.
- CH + selects previous / next channel.
20 RETURN returns to previous on-screen
selection.
QUIT exits on-screen menu mode.
21 GUIDE displays Electronic Program Guide.
22 IR receiver receives IR signals in ‘Learning’ mode.
For this, refer to chapter 4.6 ‘Learning
key functions’.
3.2 Selecting devices
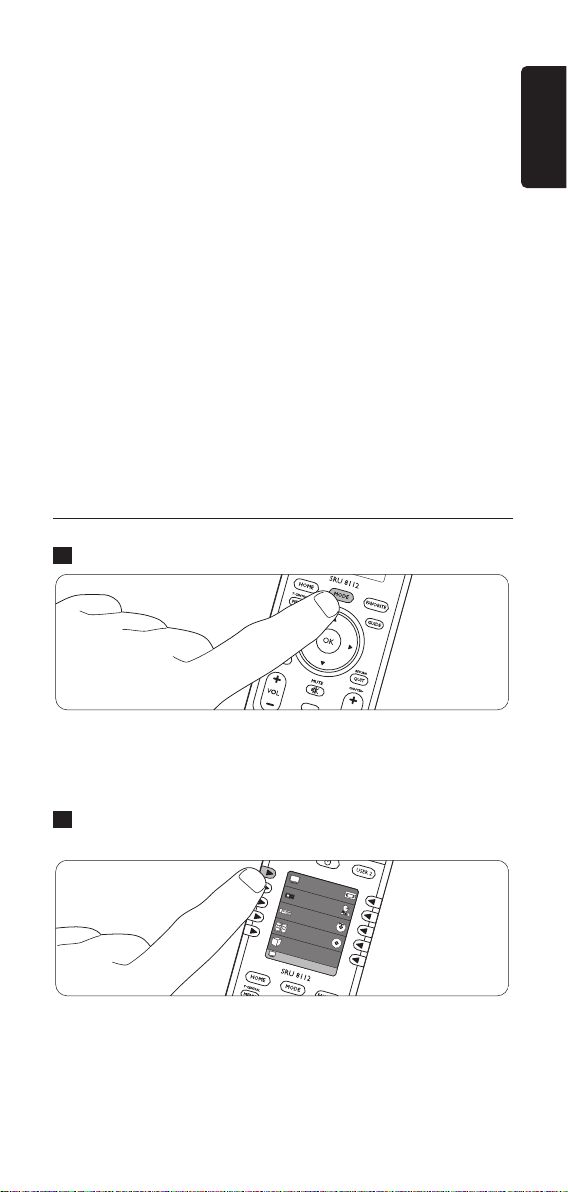
Press the MODE key.
• The ‘Mode’ screen appears.The devices that can be selected
are highlighted. Only devices for which the remote control is
set up can be selected. For this, refer to chapter 2.‘Installing
the remote control’.
Press the corresponding side key to select the desired
device.
• The selected device will be displayed at the bottom left of
the display. More functions for operating the device are
shown in the upper part of the display.
TV
Cable
DVR
Aud
io
HTS
Mor
e
Sat
VCR
DVD
CD
Pick Device
2
1
Page 8

You can now operate the selected device, using the
appropriate keys on the remote control. for this,
refer to chapter 3.1 ‘Keys and functions’.
• To use the additional functions, shown on the display,
press the corresponding side keys. Press ‘Next’ to scroll
through the list of functions.
• Each time a remote control command is sent,
this will be indicated at the bottom left of the display.
• To set up the remote control for other (more) devices
(adding devices), refer to chapter 4.2 ‘Devices’.
4 Extra possibilities
4.1 Home menu
Via the ‘Home’ menu you have access to the various extra
and advanced features of the SRU 8112.
Press the HOME key to enter the ‘Home’ menu.
• The ‘Home’ screen appears.The options below are available
in the ‘Home’ menu.
• Use the side keys to make selections in the ‘Home’ menu
and submenus.
• Use the cursor left key to go back a the previous level in
the menu.
Q
uickPowe
r
Slee
p
Macros
Setup
Help
C
ab
le
1
3
8 Extra possibilities
ENGLISH
Page 9

9
ENGLISH
Extra possibilities
Quickpower
Switches the device you wish to operate on / off.
Only devices for which the remote control is set up can be
selected.
• Select ‘QuickPower’, then select the device to switch
on / off.
Sleep
Sets devices to switch off at a preset time.The switch-off time
can be set in intervals of 15 minutes. Maximum switch-off
time is 90 minutes.
Only devices for which the remote control is set up can be
selected.
• Select ‘Sleep’, then select the device(s) to set a switch-off
time for.
• Press the corresponding side key(s) to set the desired
switch-off time(s).
• Make sure the remote control points at the device(s) you
have set a switch-off time for.
Macros
Shows available macros,if macros have already been set up.
If no macros are available, you can set up macros here.
For this, refer to chapter 4.4 ‘Macros’.
Setup
Devices: allows you to add and delete devices. For this,
refer to chapter 4.2 ‘Devices’.
Favorites: allows you to add, edit, reorder, delete and / or
rename favorite channels. For this, refer to
chapter 4.3 ‘Favorite channels.
Macros: allows you to add,edit, delete, rename and / or
extend macros. For this, refer to chapter 4.4
‘Macros’.
Advanced: See 4.5 ‘Advanced options’.
Learn: See 4.6 ‘Learning key functions’.
Help
Gives you extra information on how to set up and use your
remote control.
Page 10

10 Extra possibilities
ENGLISH
4.2 Devices
During installation you set up the remote control to operate
a number of devices.The ‘Setup’ submenu enables you to add
and delete devices at any time.
Adding devices
You can add a device more than once and save it under a
different name each time.
Press the HOME key and select ‘Setup’ in the ‘Home’
menu.
Select ‘Devices’.
• The available devices (already added) are highlighted on the
display.
Select the device you wish to set up the remote control
for (add) and follow the on-screen instructions.
Select ‘Save’, then ‘Save code’ when finished.
Repeat above steps for other devices you wish to set up
the remote control for (add).
• Select ‘Quit’ to exit the ‘Setup’ submenu at any time.
Deleting devices
Press the HOME key and select ‘Setup’ in the ‘Home’
menu.
Select ‘Advanced’.
Select ‘Clear Settings’.
Select ‘Devices’.
Select the device you wish to delete.
Select ‘Clear’.
Repeat step 4-6 for all devices you wish to delete.
• For selecting devices, refer to chapter 3.2 ‘Selecting
devices’.
4.3 Favorite channels
You can set favorite channels for various users (‘User 1’,‘User
2’,‘Kids’, etc.) and / or various items (‘Sports’, ‘News’, ‘Movies’,
etc.).
Adding / editing favorite channels
Press the HOME key and select ‘Setup’ in the ‘Home’
menu.
Select ‘Favorites’.
Select ‘Add/Edit’.
Select the user (‘User 1’,‘User 2’, etc.) or the item
(‘General’,‘Movies’, etc.) you wish to add favorite channels
to.
Press the OK key.
5
4
3
2
1
7
6
5
4
3
2
1
5
4
3
2
1
Page 11

Enter the channel number, using the numeric keys.
If desired, select a logo (‘Pick Logo’) or enter a label name
(‘Label’).
Select ‘Done’ to exit ‘Add/Edit’ mode.
Select ‘Save’ to save the favorite channel.
Repeat steps 6 - 8 to add more favorite channels to the
selected user or item.
If you wish to change (edit) channel number, logo or label,
select user or item and re-enter data.
Deleting favorite channels
Press the HOME key and select ‘Setup’ in the ‘Home’
menu.
Select ‘Favorites’.
Select ‘Delete’.
Select the group (user or item) you wish to delete
channnels from (‘User 1’,‘Sports’, etc.).
Select the channel you wish to delete and press the ‘OK’
key.
Confirm by selecting ‘Yes’ or select ‘Quit’ to exit ‘Delete’
mode.
Other options
Select:
• ‘Wizard’ to add up to 99 favorite channels to users or
items already stored.
• ‘Reorder’ to move already stored favorite channels to a
different position in the menu.
• ‘Rename’ to rename user or item names.
Press the OK key to confirm settings.
Selecting favorite channels
Press the FAVORITE key.
• The ‘Favorite’ screen appears.The users and items for which
favorite channels are set up are highlighted.
1
2
1
6
5
4
3
2
1
10
9
8
7
6
11
ENGLISH
Extra possibilities
Page 12

Press the corresponding side key to select your desired
group of favorite channels.
• The display shows the favorite channels for the selected user
/ item.
Press the corresponding side key to select the desired
favorite channel.
• The SRU 8112 sends out a signal and the TV switches to
the selected channel.
Note
Pressing the USER 1 or USER 2 key will always display the
favorite channels for user 1 or user 2.
4.4 Macros
A macro is a series of remote control commands (key
presses) that the SRU 8112 sends out with a single key press.
For example: switch on TV, switch on DVD, switch on
amplifier and start playing DVD.
Setting up macros
Press the HOME key and select ‘Macros’ in the ‘Home’
menu.
Press the OK key.
Select the first device.
Select a key.
Select ‘Set Delay’ and use the corresponding side key to
set the time after which the first command is to be
executed (delay time).
Repeat steps 2-4 for for any command (key press) in the
macro.
Select ‘Save’ to save the macro.
Select ‘Done’ when finished.
8
7
6
5
4
3
2
1
Cable
User 1
3
TV
Use
r 1
User 2
Kids
Babysitter
Gue
st
Gen
eral
Mov
ies
Spo
rts
Music
News
2
12 Extra possibilities
ENGLISH
Page 13

Editing macros (renaming, adding a key command)
Press the HOME key and select ‘Setup’ in the ‘Home’
menu.
Select ‘Macros’.
• The available macros are displayed.
Select the macro (M1, M2, M3, etc.) that you wish to edit.
Select ‘Rename’ or ‘Add key’ and follow the on-screen
instructions.When renaming the macro, use the numeric
keys on the remote control to enter characters. Use the
CLEAR key to delete the last entered character.
Select ‘Done’ when finished.
Adding macros
Press the HOME key and select ‘Setup’ in the ‘Home’
menu.
Select ‘Macros’.
Select an ‘empty’ macro (not highlighted) and follow the
on-screen instructions.
Select ‘Done’ when finished.
Deleting macros
Press the HOME key and select ‘Setup’ in the ‘Home’
menu.
Select ‘Macros’.
Select the macro you wish to delete (highlighted), select
‘Delete’ and follow the on-screen instructions.
Select ‘Yes’ to delete the macro.
Selecting macros
Make sure all equipment you wish to operate is switched
on.
Press the HOME key and select ‘Macros’ in the ‘Home’
menu.
• The available macros are shown on the display.
QuickPower
Lan
guage
Macr
os
Setup
Help
TV
2
1
4
3
2
1
4
3
2
1
5
4
3
2
1
13
ENGLISH
Extra possibilities
Page 14

Press the corresponding side key to activate the desired
macro.
• The SRU 8112 sends out the sequence of key presses for
the selected macro and your equipment will respond
accordingly.
4.5 Advanced options
Press the HOME key and select ‘Setup’ in the ‘Home’
menu.
Select ‘Advanced’.
• The following advanced options are available:
Options
Backlight delay: sets the time for the backlight to switch off.
• Use the corresponding side keys to increase / decrease
the delay time. Press the OK key to save.
Key transmit time: sets the speed at which the remote control
commands are transmitted.
• Use the corresponding side keys to increase / decrease
the transmit time. Press the OK key to save.
Language: selects English, French or Spanish language.
• Use the corresponding side keys to select the desired
language.
Default: sets default backlight delay and key transmit time.
• Use the corresponding side key to select. Press the OK
key to save.
Device codes
Displays the codes for the devices the remote control is set
up for.You will need these codes when you call our helpline
or use on-line support.
Punch through
Allows you to define how the volume keys (+ VOL -),
the channel keys (+ CH -) and the play key (2) operate in
various device modes. For instance, you can set the volume
keys (+ VOL -) to always control the TV volume even if the
remote control is in VCR mode.
2
1
TV
BOB
M 3
M 5
M 9
M 7
M 2
M 4
M 6
Next
M 8
3
14 Extra possibilities
ENGLISH
Page 15

Select a device for ‘Volume’, ‘Channel’ and ‘Play’, using the
left or right side keys. For example ‘TV’,‘TV’ and ‘VCR’.
Select ‘Save’.
• In this example the volume (+VOL -) and channel (+CH -)
keys will always control the TV and the play key (2) will
always control the VCR.
• Punch through key functions for other devices as
described above.
KidSafe
Allows you to set a parental control by entering a personal
code.When the code is activated your children will only have
acces to favorite channels you allow them to watch.When
‘KidSafe’ is selected for the first time you are asked if you
wish to use this option.
Select ‘Yes’.
Enter your code and confirm by selecting ‘OK’.
Select ‘Pick Favorites’ to select the group of favorite
channels (e.g.‘Kids’) your children are allowed to watch.
Select ‘Turn on’ to activate the code.
• Other groups of favorite channels are now only accessible
after entering the correct code.
• The ‘Setup’ feature in the ‘Options’ menu is now only
accessible after entering the correct code.
• If ‘Turn on’ is not activated all groups of favorite channels
remain accessible.
Select ‘Clear’ to enter a new code.
Select ‘Quit’ to exit.
• To delete the code you have to delete all user settings.
For this, refer to ‘Clear settings’.
Clear settings
Allows you to clear various settings.
Devices: clears device settings.
Favorites: clears favorite channels for users and items.
Learned: clears key functions, learned from another
remote control. For learning key functions,
refer to chapter 4.5 ‘Learning key functions’.
Punchthrough: clears punchtrhough settings.
Master Clear: clears all user settings.All original functions of
the remote control will be resetted and any
extra functions will be deleted.
6
5
4
3
2
1
2
1
15
ENGLISH
Extra possibilities
Page 16

4.6 Learning key functions
If you miss certain functions from your original remote
control, the SRU 8112 can learn these functions from the
original remote control.
Tips on learning key functions
• Only one original remote type should be learned per
individual mode.
• First clear all learned functions for a device mode
(TV, DVD,DVDR,VCR, etc.) to make sure there are no
previously learned functions for that mode.
For this, refer to ‘Clearing all learned functions for a
device mode’ hereafter.
• In ‘Learn’ mode, you will see a red ‘halo’ around the
transmit icon at the bottom left of the display.
During learning this ‘halo’ starts flashing.When the ‘halo’
flashes very fast, the IR transmitter (original remote
control) and the IR receiver (SRU 8112) are correctly
aligned and on proper distance from each other.
To achieve this, gently move the original remote control
around, without lifting it up, until the ‘halo’ flashes very
fast.The remote controls are then in the right position
and should not be moved during learning.
• Note that the IR receiver, used for learning key functions,
of the SRU 8112 is located at the bottom of the remote
control.
• Some functions of some types of remote control might
not be learned.
• When learning, you should normally not release the key
being learned until the display prompts you to do so.
However, some keys might be learned multiple times if
you do this. If this happens, just ’tap’ the key you want to
learn, rather than press and hold it. For example, keys that
you normally hold down for awhile (like volume up or
down) will likely require a long press when learning.
Keys that you normally give a quick press (like the
numbers, and channel up/down) will likely require a quick
press when learning. If after learning, say, the channel-up
key, you find that it changes multiple channels when
pressed once, try relearning it with a short key press.
• Keep at least 1 metre (3.3 feet) away from incandescent
or low-energy lights when learning.
16
Extra possibilities
ENGLISH
Page 17

• You can store a function under any of the available keys,
except under HOME, MODE, MORE
and FAVORITE,
USER 1 and USER 2.
• Use fresh batteries for both the learning and the original
remote control.
Learning
Place both remote controls on a flat surface (like a coffee
table) and aim them in such way that the IR transmitter
(at the top) of the original remote control points at the
IR receiver (at the bottom) of the SRU 8112.Keep about
40 mm in between the remote controls.You may need to
adjust the height of one of the remote controls to achieve
this.
Press the HOME key and select ‘Setup’ in the ‘Home’
menu.
Select ‘Learn’.
Select ‘Side keys’ or ‘Main keys’.
Select device and follow the on-screen instructions until
‘Success! Key learned’ is displayed.
• The key has now successfully learned the new function.
Repeat steps 4 and 5 to learn other keys.
If learning fails:
• Check that the IR transmitter (original remote control) and
the IR receiver (SRU 8112) are correctly aligned.
For this, refer to ‘Tips on learning key functions’.
• Adjust the distance between the two remote controls
(closer or further away) until the red ‘halo’ flashes very fast.
For this, refer to ‘Tips on code learning’.
• Try learning the original remote keys again.
• If problems reoccur with the same key, check if the original
remote control is transmitting and operates the target
device.
• Clear all learned settings and try learning again.
Labelling learned keys
When a key has successfully learned a new function,you can
label the key.
Select ‘Change label’.
Select ‘Done’ when finished.
2
1
6
5
4
3
2
1
40 mm
(1.6 inch)
17
ENGLISH
Extra possibilities
Page 18

Clearing all learned functions for a device mode
Press the HOME key and select ‘Setup’ in the ‘Home’
menu.
Select ‘Advanced’.
Select ‘Clear Settings’.
Select ‘Learned’.
Select the device for which you wish to clear learned
functions.
Select ‘Clear’.
5 Frequently asked questions
In this chapter you find answers to the most frequently asked
questions about your universal remote control.
Setup
I cannot enter the ‘Home’ mode.
Battery level too low.
• Replace the old batteries with three new AA batteries.
We recommend Philips Alkaline batteries.
How do I set up the remote control for combo
devices (TV / VCR,TV / DVD, DVD / VCR, etc)?
Some combo devices require you to set up two different
source selection keys to control both parts of the combo
device. For example, if you have a TV / DVD combo, you might
need to set up the remote control for both TV and DVD to
operate your TV / DVD combo.
I cannot find the brand of my device.
Not all brands are available in the data base of the remote
control.
• When in ‘Home’ mode (‘Home’,‘Setup’,‘Devices’), select
‘No’ when asked if you know the brand name of your
device.The remote control will perform a full database
search.This may take up to 5 minutes.
Or:
• Try copying key functions from the original remote
control. For this, refer to chapter 4.6 ‘Learning key
functions’.
Operation
The remote control does not wake up anymore.
Battery level too low.
• Replace the old batteries with three new AA batteries.
We recommend Philips Alkaline batteries.
6
5
4
3
2
1
18 Frequently asked questions
ENGLISH
Page 19

The device I want to operate does not respond and
the device mode indicator (TV, STB,DVD, etc.) at the
bottom left of the display does not flash when I press
a key.
Battery level too low.
• Replace the old batteries with three new AA batteries.
We recommend Philips Alkaline batteries.
The device I want to operate does not respond but the
device mode indicator (TV, STB,DVD, etc.) at the
bottom left of the display does flash when I press a key.
• Point the remote control at the device and make sure that
there are no obstructions between the remote control
and the device.
The remote control does not respond to all key
commands.
Not all key functions are available in the database of the
remote control.
• Try copying key functions from the original remote
control. For this, refer to chapter 4.6 ‘Learning key
functions’.
The volume and mute keys are not working properly.
When setting up the remote control for a device (adding a
device), the remote control automatically copies the volume
and mute keys as follows:
– Video devices (DVD,VCR, DVDR, etc.) use the volume
and mute keys of the TV;
– Audio devices (CD, DMR, tuner, etc.) use the volume and
mute keys of the amplifier / receiver.
If the remote control was not set up for TV, amplifier and / or
reciver, the volume and mute keys will not work.To activate
the keys:
• Set up the remote control for TV, amplifier and / or
receiver. For this, refer to chapter 4.2 ‘Devices - Adding
devices’.
Or:
• Try copying the volume and mute keys from another
device. For this, refer to chapter 4.5 ‘Advanced options Punch through’.
19
ENGLISH
Frequently asked questions
Page 20

Batteries
Will my settings be deleted when I replace the
batteries?
No.All user settings will be stored in the remote control
memory.
Can I use rechargeable batteries in the remote
control?
Yes, but rechargeable batteries tend to drain faster then
alkaline batteries.
6 Need help?
First of all, read this User Manual carefully.
When you have additional questions about the usage, setup or
warranty of the SRU 8112/27, see www.philips.com/support
Make sure the SRU 8112/27 is at hand when you call our
helpline so that our operators can help you determine
whether it is working properly.
The model number of your Philips universal remote control is
SRU 8112/27.
If you want to look up the correct device codes for your
remote, see www.philips.com/URC
20
Need help?
ENGLISH
Page 21

Only for US - One Year Limited Warranty
Philips warrants that this product shall be free from defects in
material, workmanship and assembly, under normal use,
in accordance with the specifications and warnings, for a
period of one year from the date of purchase.
This warranty extends only to the original purchaser of the
product, and is not transferable.To exercise your rights under
this warranty, you must provide proof of purchase in the form
of an original sales receipt that shows the product name and
the date of purchase.
For customer support or to obtain warranty service, please
visit our website http://www.philips.com/welcome or call
toll nr 919-573-7854.
THERE ARE NO OTHER EXPRESS OR IMPLIED WARRANTIES.
Philips’ liability is limited to repair or, at its sole option,
replacement of the product. Incidental, special and
consequential damages are disclaimed where permitted by
law.This warranty gives you specific legal rights.You may also
have other rights that vary from state to state.
21
HELPLINE
Limited Warranty
Page 22

© 2008 Koninklijke Philips Electronics N.V.
All rights reserved. Reproduction in whole or in part is
prohibited without the prior written consent of the copyright
owner.The information presented in this document does not
form part of any quotation or contract,is believed to be accurate
and reliable and may be changed without notice.
No liability will be accepted by the publisher for any consequence
of its use. Publication there of does not convey nor imply any
license under patent- or other industrial or intellectual property
rights.
March 2008
www.philips.com N’MW/RR/RD/1208
 Loading...