

Page 1
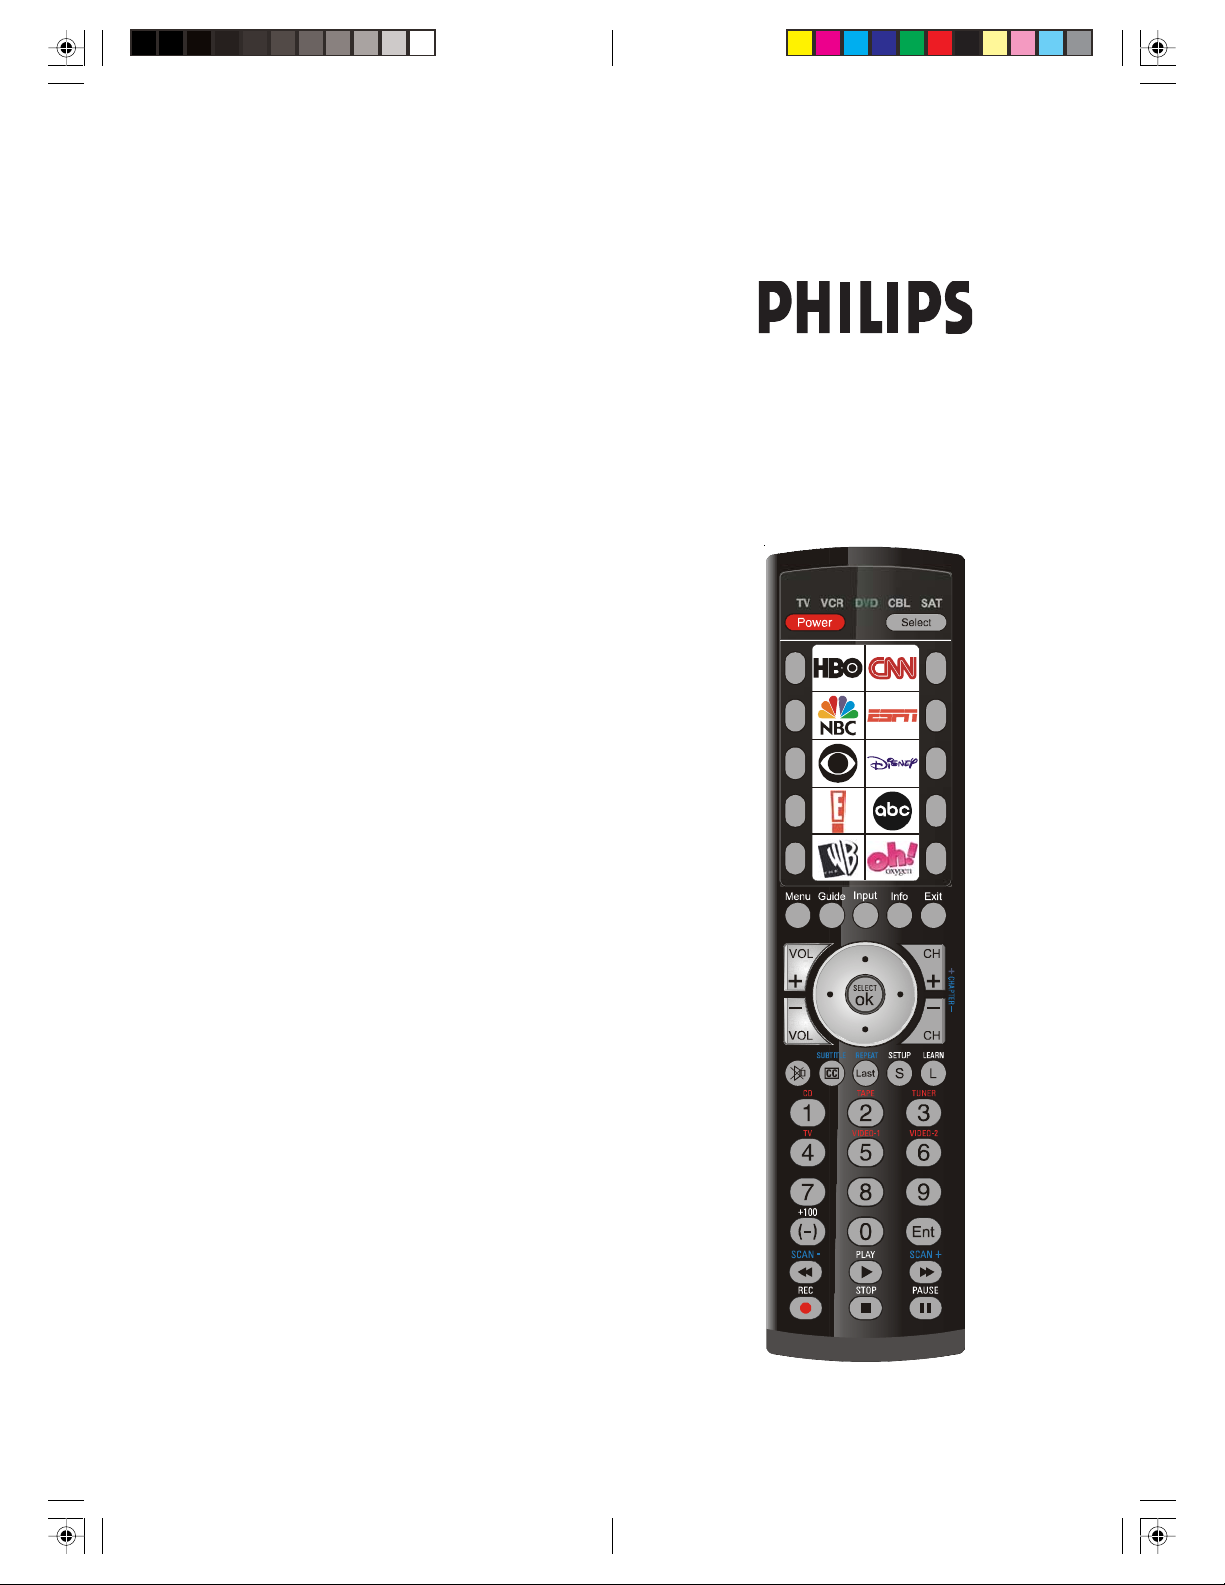
SRU4105WM/17
Owner’s Manual
Page 2

IntroductionTable of Contents
Introduction ...................................................... 3
Button Functions ............................................... 4
DVD/SAT Functions .................................... 6
Setup ............................................................... 7
Battery Installation ....................................... 7
Battery Saver ...............................................7
Code Saver ................................................. 7
Power-On Default ....................................... 7
Code Setup ................................................. 7
Direct Code Entry ............................................ 8
Code Search .................................................... 8
Brand Search ................................................... 9
Code Identification Feature ............................... 9
Setting Favorites ............................................. 10
Adjusting Delay Between Digits ...................... 11
Setup ............................................................. 12
Programming Combo Device Codes .......... 12
VCR/DVD/DVR Punch-Through Feature .. 12
Volume/Mute Control Feature ....................12
Setting Volume/Mute Punch-Through .......... 13
Setting Mode to Use Own Volume/Mute ....13
Code Learning ................................................ 14
Tips on Learning ........................................ 14
IR Transmitter Finder ...................................... 16
Learning Commands .......................................17
Clearing Commands ....................................... 18
Clearing Learned Commands ..................... 18
Master Clear .................................................. 18
INPUT ........................................................... 19
Troubleshooting .............................................. 20
Lifetime Warranty ...........................................21
Instrucciones en Español ................................. 22
Congratulations on your purchase of this Philips
Universal Remote Control. You are now the
proud owner of a revolutionary remote that
remembers your favorite channels for you! Press
an icon button and you’re instantly taken to your
favorite channel!
Universal Remotes let you replace a broken or
lost remote or combine more than one remote into
one. In addition, this remote is equipped with a
command learning feature which lets the remote
learn commands from your original equipment
remote control!
This remote control operates the common features
of most but not all models and brands of IR
Infrared Controlled Video Equipment. This
remote may provide functions that are not
available on your equipment. Some functions of
your particular equipment (e.g. menu functions)
may not be controlled by this remote. In such
cases, use the original remote control for your
equipment. Please use this manual to become
familiar with your Universal Remote. After you are
familiar with your remote the first thing you need
to do is to install batteries and setup your remote
for your particular product and brand.
Thank you for buying this remote and we hope it
will give you many years of service.
32
Page 3
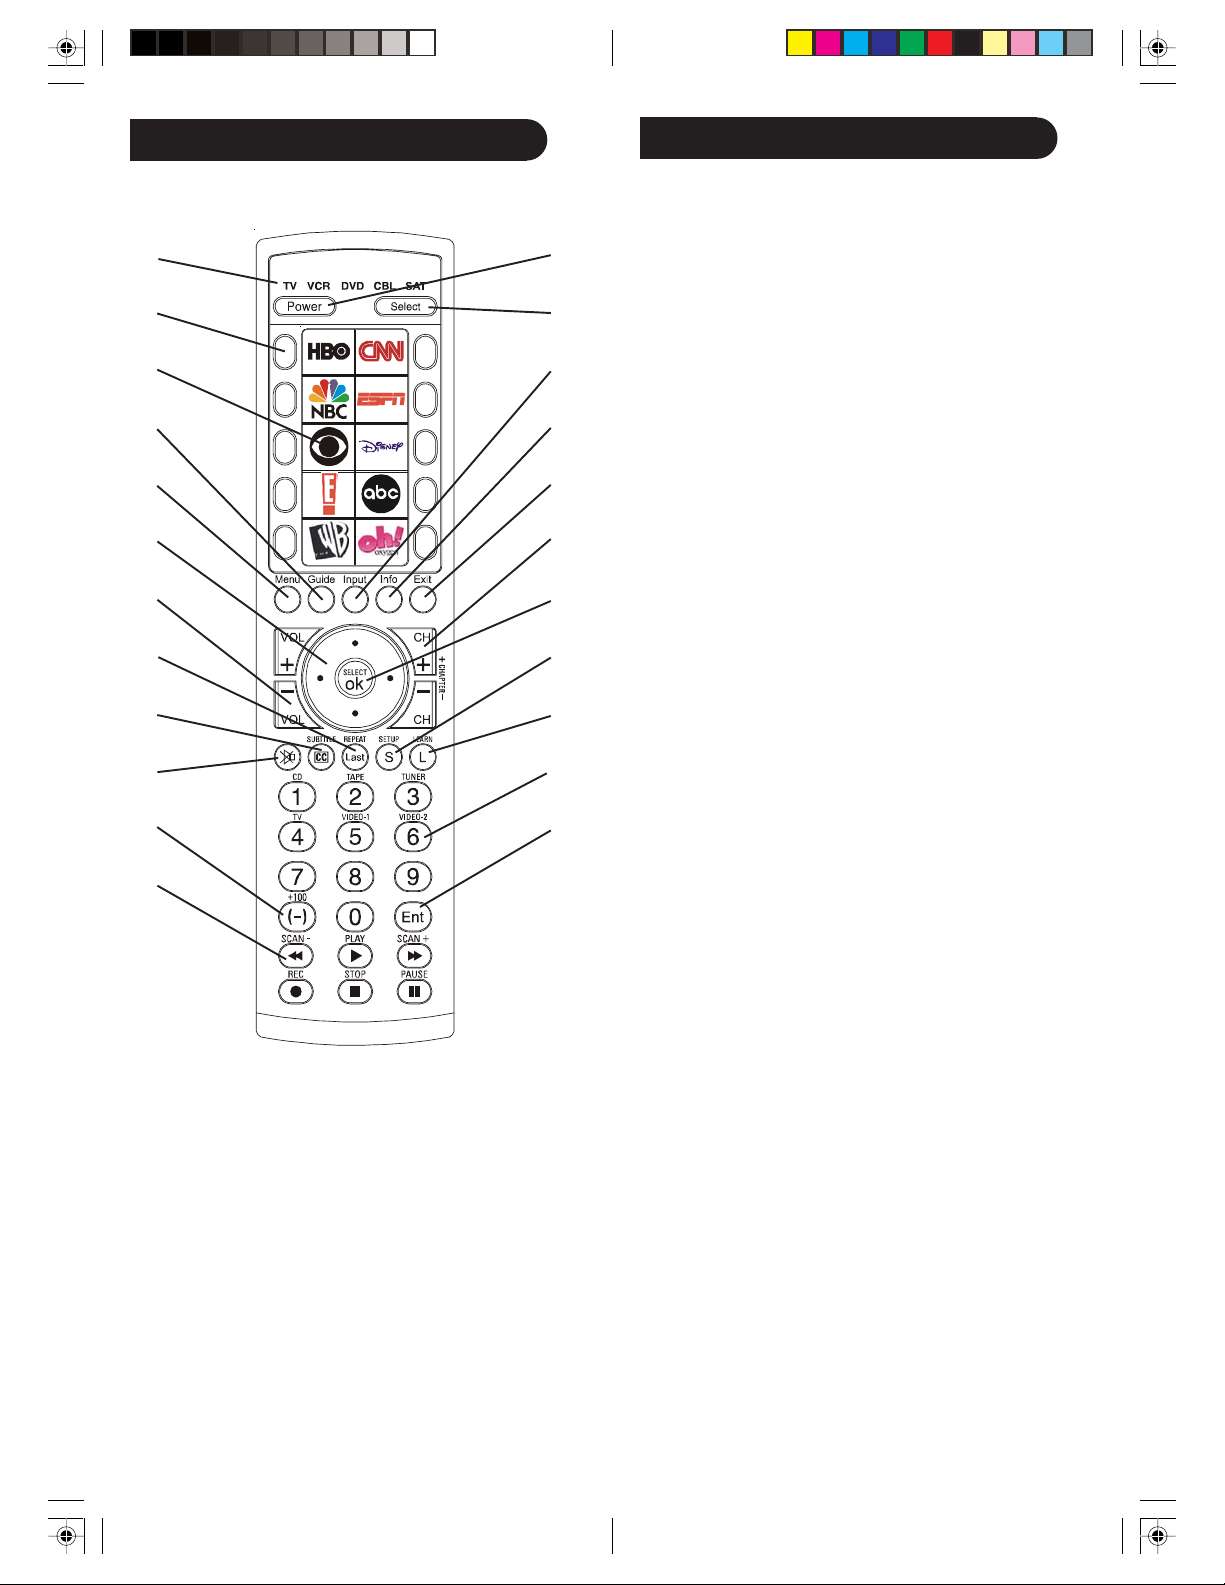
Button Functions
1.
2.
3.
4.
5.
6.
7.
8.
9.
10.
11.
23.
22.
21.
20.
19.
18.
17.
16.
15.
14.
13.
12.
Note: REC must be pressed twice to record from your
VCR. For some VCR brands, you might need to press
REC once, then press it again for 3 seconds.
Some buttons on the remote might have functions that
are referred to by different names on the device you are
controlling. These differences depend upon the brand
and model of your product. Also, this remote can only
operate features that exist on your product.
Button Functions (cont.)
1. TV, VCR, DVD, CBL, SAT: Indicates which
equipment is operating; press SELECT for mode
(from SAT to TV, TV to VCR, etc.).
2. FAVORITES BUTTONS: Allow you to choose your
favorite channels. (Key feature & benefit!)
3. FAVORITES ICONS: Display icons of your
favorite channels. (Key feature & benefit!)
4. GUIDE: Displays on-screen program or channel
guides. Displays DVD Title Menu screen.
5. MENU: Brings up the device Menu screen (if
available) - use with UP, DOWN, LEFT, and RIGHT
navigation buttons.
6. UP, DOWN, LEFT, RIGHT: Navigation buttons.
7. VOLUME UP/DOWN: Changes the volume level of
the product, normally the TV.
8. LAST (REPEAT): Returns to the previously
selected channel or DVD repeat toggle.
9. CC (SUBTITLE): TV Closed Caption (if your TV
has this feature) or DVD Subtitle toggle.
10. MUTE: Turns off the TV sound while the picture
remains.
11. +100: Used for channels greater than 100. (-) used
for digital channels like 2-3.
12. REC, STOP, PAUSE, PLAY: VCR controls.
SCAN+ (FAST FORWARD): Fast-forwards
through a chapter or title. SCAN- (REVERSE)
Reverses through a chapter or title.
13. ENT: Used after direct channel number entry to
change to the selected channel immediately.
14. NUMBERS: Enter numbers for direct channel
selection. Some products require ENT to be pressed
after channel selection.
15. LEARN: Used to setup learning functions.
16. SETUP: Initializes setup of remote and devices.
17. OK: Selects menu items for the device you are
controlling.
18. CHANNEL UP/DOWN: Changes the channels.
CHAPTER +/-: controls DVD/CD track selection.
Note: VCR buttons also control DVD when in DVD
mode.
19. EXIT: Exits on-screen menus/returns to previous
on-screen selection.
20. INFO: Displays/selects on-screen channel
information, etc.
21. INPUT: For some TVs, press repeatedly to select
from available viewing sources (antenna, cable box,
VCR, etc.).
22. SELECT: For TV, VCR, DVD, Cable (CBL), or
Auxiliary device.
23. POWER: Turns device on or off.
54
Page 4

Button Functions (cont.)
Setup
DVD Functions
SCAN+ and SCAN- control fast forward and reverse.
CHAPTER+ and CHAPTER- locate chapters or tracks
on a disc.
LAST (REPEAT) performs “A-B Repeat” (or RPT A.B)
for repeat play of current chapter or track.
INFO brings up DVD Display or Control Menu for
chapter/track/title number, time remaining/elapsed
indication, system information, etc.
MENU brings up the DVD disk menu screen; use with
UP, DOWN, LEFT, and RIGHT.
OK is used for on-screen Menu selection.
SUBTITLE (CC) Turns subtitles on or off.
EXIT Exit on-screen menus and/or return to previous on-
screen selection.
Note: Not all DVD Players support all functions described above. Your remote operates most (but not all)
models and brands of infrared (IR) controlled video
equipment. This remote might provide functions not
available on your equipment. Some functions (like
menus) might not be controlled by this remote. In such
cases, use the original remote control for your equipment.
SAT Functions
Battery Installation
1. On the back of the remote,
push down on the tab and lift
the cover off.
2. Match the batteries to the +
and - marks inside the battery
case, then insert 2 AAA
Alkaline batteries.
3. Press the battery cover back
into place.
+
A
A
A
-
Battery Saver
Your remote automatically turns off if the buttons are
depressed more than 30 seconds. This will save your
batteries should your remote get stuck in a place where
the buttons remain depressed (e.g., or for instance,
between the sofa cushions).
Code Saver
Codes are stored in permanent memory while you are
changing batteries so that you will not lose any codes
stored in the remote while you are changing batteries.
-
A
A
A
+
GUIDE displays on-screen Satellite Channel Guide.
CHAPTER+ and CHAPTER- perform the “Page+” and
“Page-” function for on-screen guide menus used by
some satellite systems.
INFO brings up Satellite Display screen for current
channel and system information.
MENU brings up the Satellite Menu screen; use with the
UP, DOWN, LEFT, and RIGHT navigation buttons.
OK is used for on-screen menu selection.
EXIT is used to exit or clear on-screen menu displays.
Power-On Default
The remote powers on in TV mode.
Code Setup
Please refer to “Code Search” on p. 8 for more information using the code search feature to learn how to search
through the library of codes for your products.
Note: You can store any kind of code under any mode
(except TV). You can store a VCR code under the CBL
button, or a DVD code under the VCR button, etc.
However, you can only store TV codes under the TV
button.
76
Page 5

Direct Code Entry
Code Search by Brand
1. Press and hold SETUP until the indicator remains on,
then release SETUP.
2. Repeatedly press SELECT to select the desired
mode (TV, VCR, etc.), unless the desired mode is
already selected.
3. Enter the 4-digit code from the code tables (on
separate sheet). Note: After a valid code entry, the
indicator turns off. For an invalid code, the indicator
flashes.
4. Press CHANNEL UP. If the device responds, no further
programming is required. Note: If some buttons do not
operate your equipment, try one of the other codes for
your brand.
Code Search
If your product does not respond after you have tried all
the codes for your brand or if your brand is not listed,
try searching for your code by following these steps.
1. Turn on the device (TV, VCR, etc.) to be controlled.
2. Press and hold SETUP until the indicator remains
on, then release SETUP.
3. Repeatedly press SELECT to select the desired
mode (TV, VCR, etc.), unless the desired mode is
already selected.
4. Press CHANNEL UP repeatedly (up to 300 times)
until the device to be controlled changes channels.
The indicator blinks off with each button press.
5. Press and release MUTE to install the code.
Most users store VCR codes under VCR. Cable codes
appear under CBL (Cable), etc.
If you want to store a VCR code under CBL, first follow
the procedure for Direct Code Entry and select CBL in
Step 2 of Direct Code Entry. Then enter any VCR code in
Step 3 of Direct Code Entry. Then follow the steps above
for Code Search.
Note: If the device does not have a CHANNEL UP
button, use PLAY (VCR only) or POWER instead.
Code search begins from the currently stored 4-digit
number under that mode.
Lets you search for a code for a specific Brand within
the Code Library for a particular manufacturer.
1. Turn on the device (TV, VCR, etc.) to be controlled.
2. Press and hold SETUP until the indicator remains on,
then release SETUP.
3. Repeatedly press SELECT to select the desired
mode (TV, VCR, etc.), unless the desired mode is
already selected.
4. Press and release the numeric button (0-9)
corresponding to desired Manufacturer (see table
on code list sheet). The green indicator blinks off
once. Note, pressing “0” performs a full library
search same as normal Code Search Method on
previous page.
5. Press the CHANNEL UP button ((or POWER or
PLAY (VCR only)) repeatedly until the device to be
controlled changes channel. The green indicator
blinks off with each button press. If you accidentally
overshoot the code required, press the CHANNEL
DOWN button to backtrack through the library until
the device changes channel. Pressing CHANNEL
UP changes direction to forward again.
6. Press and release MUTE to install the code.
Brand Search Method entry is now complete.
Note: When all codes under a Brand have been
searched the indicator flashes rapidly for 3 seconds.
Code Identification Feature
The Code Identification Feature lets you identify the 4digit library code stored under your device key.
If you want to find what 4-digit code is stored under any
device mode, follow these steps.
1. Press and hold SETUP until the indicator remains on,
then release SETUP.
2. Repeatedly press SELECT to select the desired
mode (TV, VCR, etc.), unless the desired mode is
already selected.
3. Press and release SETUP. The indicator blinks.
4. To find the first digit for the code stored under the
mode selected in Step 2, press each number button
(0-9). When the indicator blinks off, the number you
pressed is the first code digit you are searching for.
5. To find the second digit, repeat Step 4. When the
indicator blinks off, this is the second digit.
6. Repeat Step 4 to find the third and fourth digits.
98
Page 6
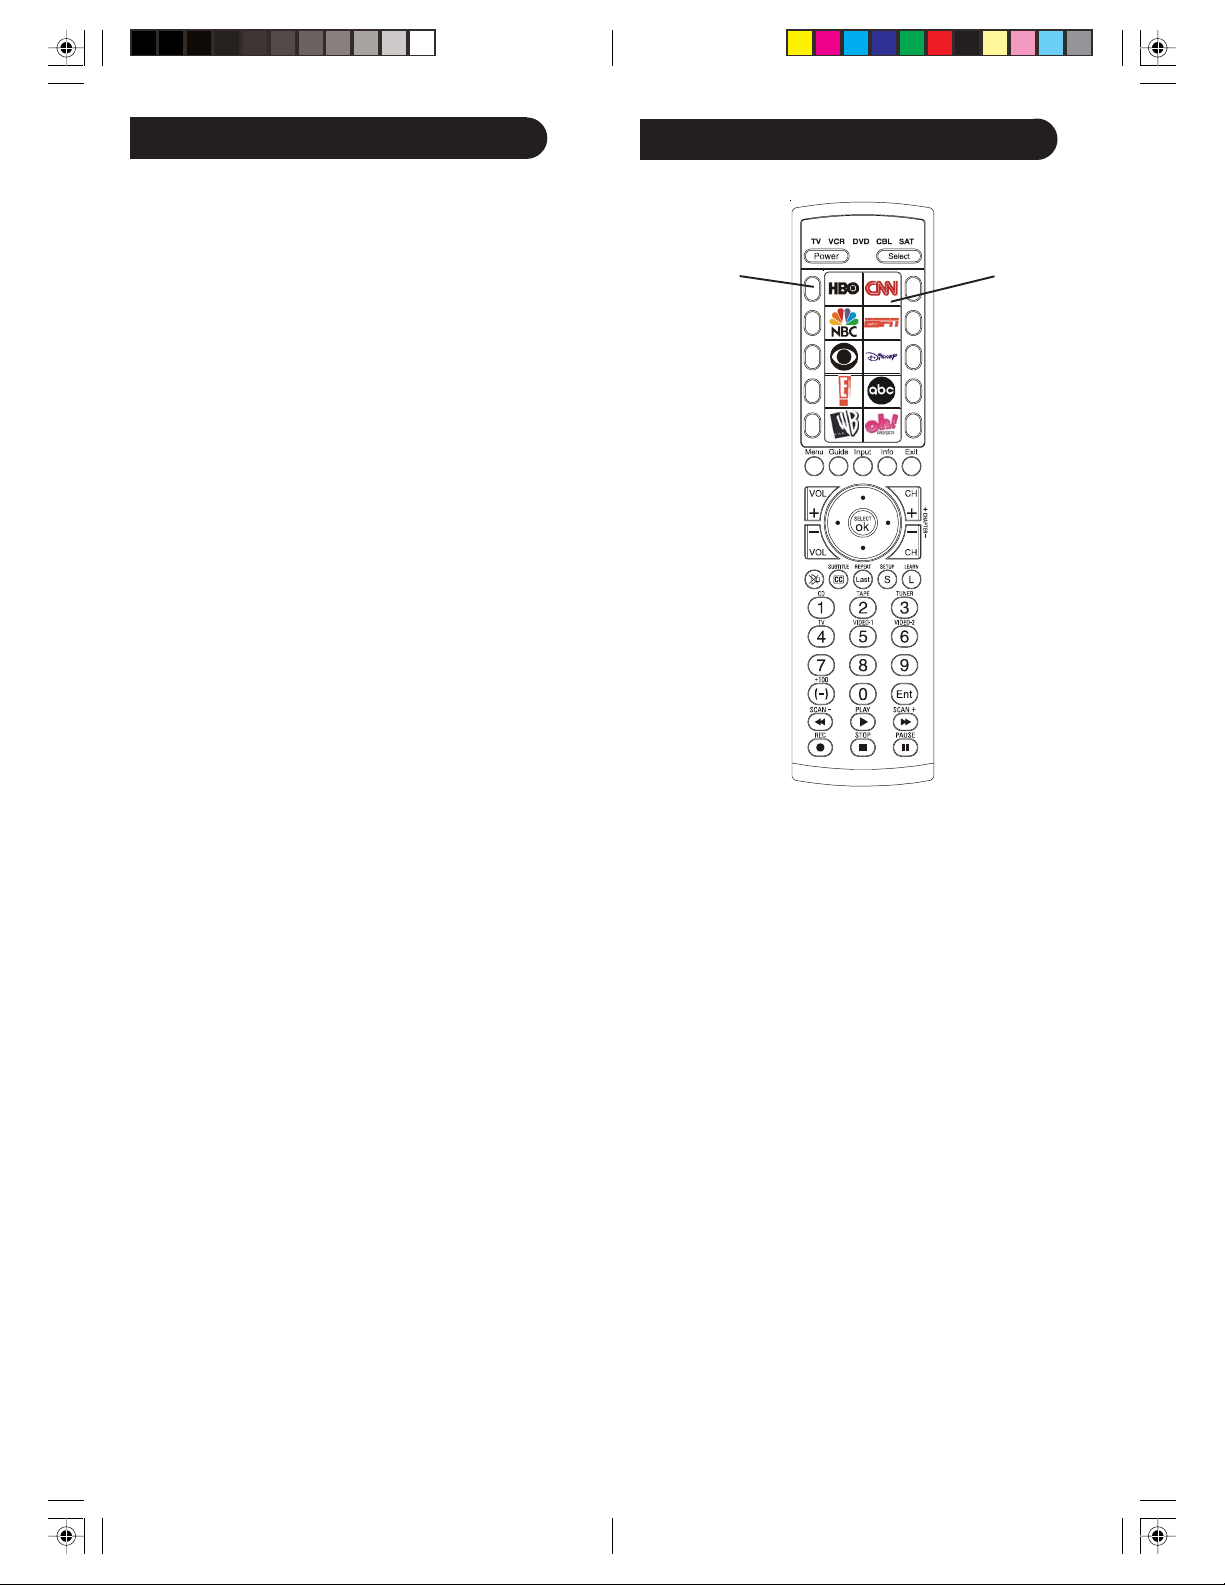
Setting Favorites
The Favorites feature is what really sets this remote
apart from other remotes. It lets you go to your favorite
channel(s) by simply pressing a button next to a sticker
(or label) that represents that favorite channel.
1. Press and hold SETUP until the indicator remains on,
then release SETUP.
2. Repeatedly press SELECT to select the desired
mode (TV, VCR, etc.), unless the desired device is
already selected. This sets the device that this
favorite button controls.
3. Press one of the 10 FAVORITE buttons to set up a
favorite channel. Let’s say we select the top righthand FAVORITE button.
4. Enter the channel number for this favorite channel.
Note: You can use up to 5 buttons, including 0 through
9, OK, and - to enter your favorite channel: 550,
472Enter, 162OK, 5-7, etc., are examples.
5. Press SETUP when you’ve finished entering the
channel.
Setting Favorites (cont.)
FAVORITE
buttons
FAVORITE
icons
After setting up your favorite, do the following.
6. Attach the sticker that represent the favorite
channel you set up above to the location next to
that FAVORITE button. (In the example on p. 11,
we’ve used a CNN sticker for the top right-hand
FAVORITE button.)
Follow Steps 1 through 6 to set up more favorites, each
time selecting a different FAVORITE button in Step 3,
and entering a different channel number in Step 4. Then
place the appropriate sticker next to the FAVORITE
button, as in Step 6.
To go to your favorite channel, simply press the
FAVORITE button next to the sticker that represents
the icon for that channel.
Note: If you can’t find a sticker for one of your
favorites, go to www.wikipedia.org to find labels for
your favorites. Do a search by using the key words
television logos. Find the logo you need. Right-click the
logo and save this logo somewhere on your computer.
Print the logo. If the logo needs adjustment, you can
use Microsoft Paint, etc. Cut out the logo and paste it
next to your FAVORITE button.
Adjusting the Delay Between Digits
You might need to adjust the time between digits sent
for a favorite channel. If the delay is too long you might
point the remote away from your device before all the
digits have been sent. If the delay is too short your
device might not respond.
1. Press and hold SETUP until the indicator remains
on, then release SETUP.
2. Press and release PLAY. The indicator blinks, then
stays on.
3. Press and release a number from 0 to 9. 0 is no delay
and 9 is the longest delay.
1110
Page 7

Setup
Setup (cont.)
Programming Combo Device Codes
Some combo (combination) devices (TV/VCR, TV/DVD,
DVD/VCR, etc.) require you to set up 2 different modes
to control both parts of the combo.
For example, if you have a TV/DVD combo, you might
need to set up one code under the TV mode to control
the TV and a separate code (under other modes) to
control the DVD.
VCR/DVD/DVR Punch-Through Feature
This remote allows the 6 VCR buttons (PLAY, PAUSE,
STOP, SCAN+, SCAN-, and REC) to “punch-through”
(transmit or hand-over) control from any mode programmed with TV or Cable codes to the last VCR, DVD,
or DVR mode used.
For example, if you have 2 DVD, VCR, or DVR devices
programmed into this remote, the last device you used
controls the 6 VCR buttons.
Note: This feature will not operate if the programmed
TV, SAT or Cable code has its own VCR transport
button control e.g. a TV Combo, SAT/PVR, etc.
Setting ALL Volume/Mute Controls to Any
Mode
You can set all modes to “punch-through” to any mode
for Volume/Mute control without needing to change to
that mode by doing the following.
1. Press and hold SETUP until the indicator remains on,
then release SETUP.
2. Press and hold MUTE until the indicator blinks off,
then release the button.
3. Press and release SELECT to select the desired
mode (TV, VCR, etc.) for Volume/Mute control; the
indicator blinks, then stays on.
4. Press and release MUTE; the indicator turns off.
Note: The indicator will blink rapidly for 3 seconds if
the mode you have selected does not have Volume/
Mute control.
5. All other modes will now “punch-through” to your
chosen mode for Volume/Mute control.
Setting Any Mode to Use its Own Volume/
Mute Control
You can set any mode to use only its own Volume/Mute
control.
Volume/Mute Control and Punch-Through
Feature
Your remote allows you to select which device mode
controls VOLUME and MUTE.
This remote is initially set for all device modes to use
their own Volume/Mute control if present.
If the programmed code does not have Volume/Mute
operation, then VOLUME and MUTE will “punchthrough” (hand-over) control to the TV-mode device
without you needing to change to TV mode. Note: Any
mode chosen for Volume/Mute control must have its
own Volume/Mute function or else VOLUME and MUTE
will not function.
Note: If your chosen mode does not have Volume/Mute
functions, then this remote’s VOLUME and MUTE will
not operate.
1. Press and hold SETUP until the indicator remains on,
then release SETUP.
2. Press and hold MUTE until the indicator blinks off,
then release the button.
3. Press and release SELECT to select the desired
mode (TV, VCR, etc.); the indicator blinks, then
stays on.
4. Press and release VOLUME- (down); the indicator
blinks, then stays on.
5. Press and release MUTE; the indicator turns off.
6. All modes will now “punch-through” to the
respective modes you have chosen for Volume/
Mute control.
1312
Page 8

Code Learning
Tips On Learning (cont.)
Your remote is equipped with an easy “learning” feature
that lets it “learn” features (such as RANDOM PLAY
from your original CD remote).
Tips On Learning
You can only learn one device type under any one mode
button e.g. only learn TV codes under the TV mode,
VCR codes under the VCR mode, etc. If you are trying
to learn from a “universal” type original remote, it might
have more than one code type stored under a mode. Try
learning from another remote to see if there’s a problem
with the type or band of remote you are trying to learn
from.
Keep the following in mind about learning codes.
• Some functions from some types of remotes might
not be able to be learned.
• No functions may be learned under the LEARN,
SETUP, and SELECT keys.
• Use fresh batteries for both your new remote and
your original remote.
• Keep at least 3 feet away from incandescent or lowenergy lights when learning.
• Place the original remote end-to-end with your new
remote so the IR transmitter (at the top) on your
original remote points at the IR learning device on
the bottom of your new remote.
• Keep the distance between the two remotes to
approximately 1 inch.
• Line up the remotes and then press the key you
want to learn. To get the correct range, press the key
on the remote you are learning. Do not change the
distance between the two remotes until you have
learned all the required keys.
• When Learning, do not release the button being
Learned until the indicator has blinked off for half a
second. However, some keys might be learned
multiple times if you do this. If this happens, just
“tap” the key you want to learn rather than press
and hold it. For example, keys that you normally
hold down for awhile (like volume up or down) will
likely require a long press when learning.
• Keys that you normally give a quick press (like the
numbers, and channel up/down) will likely require a
quick press when learning. If after learning, say, the
channel-up key, you find that it changes multiple
channels when pressed once, try relearning it with a
short key press.
• If learning the first or second keys results in
continuous errors, then try the following:
1. Check that the IR transmitters/sensors are correctly
aligned between the two remotes (see next page).
2. Adjust the distance between the two remotes to be
closer (1/2 an inch) or further away (2 inches) from
each other.
3. Try learning the original remote keys again.
4. If problems reoccur with the same button, check the
original remote key being learned – does it transmit?
Does it operate the target device?
5. Clear all learned settings and try learning again.
If problems reoccur with the same button, check the
original remote button being learned to see if there is
transmission.
Try learning that button under a different cleared mode,
if necessary.
If the remote learns, then this situation is likely a
different code type from others and cannot be learned
under the same mode.
1514
Page 9

IR Transmitter Finder
Learning Commands
This feature assists you in identifying where your
original remote’s infrared (IR) transmitter is located.
This feature is particularly useful if your original
remote’s IR transmitter is hidden behind a lens.
1. Point your remotes so that the top of your existing
remote faces the bottom of your new remote and the
remotes are about 1 inch apart (see picure on next
page).
2. Press and hold SETUP until the indicator remains on,
then release SETUP.
3. Repeatedly press and release SELECT to select the
desired mode (TV, VCR, etc.).
4. Press and release LEARN; the indicator blinks, then
stays on.
5. Press and hold any original remote button and move
the original remote to the left and right and/or up
and down in front of the IR transmitter.
Note1: The indicator will remain on if there is not any IR
from the original remote. The indicator will blink on and
off more rapidly when the IR transmitters are lining up.
The point where the indicator blinks most rapidly is
where the two IR transmitters are aligned.
Note2: Some original remotes only transmit IR on the
initial button press and then stop transmitting IR.
Quickly press and release the original remote button
repeatedly during this procedure in such cases.
The learning feature lets your remote “learn” functions
from your original remote control.
1. Press and hold SETUP until the indicator remains on,
then release SETUP.
2. Repeatedly press and release SELECT to select the
desired mode (TV, VCR, etc.).
3. Press and release LEARN; the indicator blinks, then
stays on.
4. Press and release the button that you want to learn
(for instance, POWER).
5. Point your original remote at the bottom of your new
remote until they are about 1 inch apart.
6. Press and hold the original remote button (for
instance, Power) until the indicator blinks once, then
stays on. If there is a learning problem, the indicator
blinks for 3 seconds and stays on. If this happens,
repeat Steps 4 to 6.
7. Repeat Steps 4-6 for other buttons you want your
remote to learn.
8. Press and release SETUP when all desired remote
commands are learned. Code learning is now
complete.
4.
2.
1.
3.
Line up your remotes (that you’re learning from) in front of
the learning remote on a hard surface approx. 1-inch apart.
6.
1716
Page 10

Clearing Commands
INPUT
To Clear All Learned Commands Under a
Mode
Clearing learned commands is helpful if you replace
your CD player with another brand or model, for
example. If your remote had learned a feature (such as
RANDOM PLAY) from your old CD player’s original
remote, that feature would no longer work for your new
CD player.
If you want to remove or clear one or more learned
commands, do the following.
1. Press and hold SETUP until the indicator remains
on, then release SETUP.
2. Press and release SELECT to select the mode you
want to clear (TV, VCR, etc.).
3. Press and release LEARN twice. The indicator blinks
off.
4. Press and release SETUP. The indicator turns off. All
learned commands under that mode are now cleared.
Master Clear
When in TV mode, INPUT performs the INPUT sourceswitch function.
When in a mode that has been programmed for VCR,
INPUT performs the TV/VCR antenna-switch function.
When in a mode that has been programmed for Cable,
INPUT performs the A.B-switch function.
When in a mode that has been programmed for DVD,
INPUT performs the DVD-setup function.
When in a mode that has been programmed for SAT,
INPUT performs theTV/SAT switch function.
Master Clear - To Clear All Learned
Commands Under All Modes
1. Press and hold SETUP until the indicator remains
on, then release SETUP.
2. Press and release LEARN twice. The indicator blinks
off.
3. Press and release SETUP. The indicator turns off. All
learned commands in the remote are now cleared.
1918
Page 11

Troubleshooting
Limited Lifetime Warranty
Remote does not operate your product
1. Select the mode for the product you want to control.
2. Program the remote with a new code.
3. Install new batteries in the remote. (You might have
to reprogram your remote after installing new
batteries.)
4. If these steps do not work, the remote might not be
compatible with your product.
Remote does not operate some features of
your product
1. Program remote with a new code.
2. If this does not work, your remote might not be able
to operate all features of your product or the button
names might be different than your product’s.
Indicator blinks after you program a product
code
1. This means the remote did not accept the code.
2. Try to program the code again or try a different
code.
The manufacturer warrants that this product shall be
free from defects in material, workmanship and
assembly, under normal use, in accordance with the
specifications and warnings, for as long as you own
this product. This warranty extends only to the original
purchaser of the product, and is nontransferable.
Defective products, together with the dated proof of
purchase, must be returned to the place of purchase for
repair or replacement. THERE ARE NO OTHER
EXPRESS WARRANTIES. Incidental and consequential
damages are disclaimed where permitted by law. This
warranty gives you specific legal rights, and you may
also have other rights which vary from state to state.
Made in China. Quality Assured in USA.
Ledgewood, NJ 07852
For help with setup, please call: (919) 573-7854.
2120
Page 12

Tabla de contenidos
Introducción
Introducción ...................................................23
Funciones de los botones ................................24
Funciones del DVD/SAT ............................26
Configuración .................................................27
Cómo colocar las pilas ...............................27
Ahorro de energía ......................................27
Almacenamiento de códigos .......................27
Encendido predeterminado .........................27
Configuración de códigos ...........................27
Introducción directa de códigos ......................28
Búsqueda de códigos ......................................28
Búsqueda de marcas .......................................29
Función de identificación de códigos ...............29
Configuración de favoritos ..............................30
Ajuste del retardo entre dígitos ........................31
Configuración .................................................32
Programación de códigos
de dispositivos combinados ........................32
Función de traspaso de
control de vídeo DVD/DVR .......................32
Función de control de volumen/
silenciamiento .............................................32
Configuración de traspaso de volumen/
silenciamiento .............................................33
Configuración de los modos para usar su
propio nivel de sonido/silenciamiento ..........33
Aprendizaje de códigos ..................................34
Consejos para el aprendizaje de códigos ....34
Buscador de transmisor de IR .........................36
Aprendizaje de comandos ...............................37
Eliminación de comandos ................................38
Eliminación de comandos aprendidos .........38
Master Clear ..................................................38
INPUT ...........................................................39
Solución de problemas ....................................40
Garantía limitada de un año ............................41
Enhorabuena por la adquisición de este mando a
distancia universal de Philips. Ahora puede estar
orgulloso de tener un revolucionario mando a
distancia que recuerda sus canales favoritos. Pulse
el botón del icono y sintonizará instantáneamente
su canal favorito.
Los mandos a distancia universales le permiten
sustituir cualquier mando a distancia averiado o
que haya perdido, o combinar varios mandos a
distancia en uno solo. Además, este mando está
equipado con una característica de aprendizaje de
comandos que le permite aprender los comandos
del mando a distancia de su equipo original.
Este mando a distancia cuenta con las
características habituales de la mayoría de los
modelos y marcas de dispositivos controlados por
infrarrojos (IR), aunque no de todos. El mando
puede ofrecer funciones que no estén disponibles
en su equipo. Es posible que algunas funciones de
su equipo concreto (por ejemplo, las funciones de
menús) no puedan controlarse con este mando.
En ese caso, utilice el mando a distancia original
para el equipo. Utilice este manual para
familiarizarse con el mando universal. Tras
haberse familiarizado con el mando, lo primero
que ha de hacer es colocar las pilas y configurar el
mando para la marca y el producto concretos.
Le agradecemos que haya comprado este mando
y esperamos que pueda beneficiarse del mismo
durante mucho tiempo.
2322
Page 13

Funciones de botones
Funciones de botones
1.
2.
3.
4.
5.
6.
7.
8.
9.
10.
11.
23.
22.
21.
20.
19.
18.
17.
16.
15.
14.
13.
12.
Nota: Debe pulsar REC dos veces para grabar desde el
vídeo. En el caso de algunas marcas de vídeo, es
posible que tenga que pulsar REC una vez y, después,
volver a pulsarlo durante 3 segundos.
Algunos botones del mando podrían tener funciones
que se denominen de manera diferente en el dispositivo
que vaya a controlar. Estas diferencias dependerán de la
marca y del modelo del producto. Además, este mando
sólo puede utilizar funciones que existan ya en el
producto.
1. TV, VCR, DVD, CBL, SAT,: indican qué equipo está
funcionando; pulse SELECT para seleccionar el modo.
2. FAVORITES BUTTONS: le permiten seleccionar los
canales favoritos. (Ventajas y características clave.)
3. FAVORITES ICONS: muestran los iconos de los
canales favoritos. (Ventajas y características clave.)
4. GUIDE: muestra guías de canales o de programación en
pantalla. Muestra la pantalla de menú del título del DVD.
5. MENU: muestra la pantalla de menú del dispositivo;
utilice los botones ARRIBA, ABAJO, IZQUIERDA y
DERECHA.
6. UP, DOWN, LEFT, RIGHT: ARRIBA, ABAJO,
IZQUIERDA y DERECHA: botones de navegación.
7. VOL +/-: modifica el nivel de sonido del producto,
normalmente el televisor.
8. LAST (REPEAT): vuelve al canal seleccionado
previamente o alterna la repetición del DVD.
9. CC (SUBTITLE): alterna entre subtítulos ocultos del
televisor (si el televisor dispone de esta característica) o
subtítulos del DVD.
10. MUTE: desactiva el sonido del televisor; la imagen sigue
viéndose.
11. +100: se utiliza para canales superiores a 100.
(-) se utiliza para canales digitales, por ejemplo, 2-3.
12. REC, STOP, PAUSE, PLAY: controles del vídeo.
SCAN+: realiza un avance rápido en un capítulo o
título. SCAN-: realiza una reproducción inversa en un
capítulo o título.
13. ENT: se utiliza después de haber introducido
directamente el número del canal para cambiar de forma
inmediata al canal seleccionado.
14. NUMBERS: : utilícelos para seleccionar directamente un
canal. En algunos dispositivos, habrá que pulsar ENTER
después de haber seleccionado el canal.
15. LEARN: se utiliza para configurar las funciones de
aprendizaje.
16. SETUP: inicia la configuración del mando a distancia y
de los dispositivos.
17. OK: selecciona elementos del menú del dispositivo que
se esté controlando.
18. CH +/-: cambia de canal.CHAPTER +/-: controla la
selección de pistas del DVD/CD. Nota: Los botones de
VCR también controlan el DVD en el modo DVD.
CHAPTER +/-: controls DVD/CD track selection. Note:
VCR buttons also control DVD when in DVD mode.
19. EXIT: con este botón puede salir de los menús en
pantalla o regresar a la selección anterior en pantalla.
20. INFO: muestra o selecciona la información de los
canales en pantalla, etc.
21. INPUT: hace aparecer el menú de configuración del
reproductor de DVD.
22. SELECT: para seleccionar el modo, TV, VCR, DVD, etc.
23. POWER: enciende o apaga el dispositivo.
2524
Page 14

Funciones de botones
Preparación
Funciones del DVD
SCAN+ y SCAN-: controlan el avance rápido y la
reproducción inversa.
CHAPTER+ y CHAPTER-: localizan los capítulos o
pistas de un disco.
LAST (REPEAT): activa la función de “A-B Repeat” (o
RPT A.B) para repetir la reproducción del capítulo o la
pista actual.
INFO: muestra el menú de control o la pantalla del DVD
para ver el número de capítulo, pista o título, una
indicación del tiempo restante o transcurrido,
información del sistema, etc.
MENU: muestra la pantalla de menú del disco DVD;
utilice los botones ARRIBA, ABAJO, IZQUIERDA y
DERECHA.
OK: se emplea para aceptar una selección en los menús
en pantalla.
SUBTITLE (CC): activa o desactiva los subtítulos.
EXIT: con este botón puede salir de los menús en
pantalla o regresar a la selección anterior en pantalla.
Nota: No todos los reproductores de DVD tienen todas
las funciones descritas anteriormente. El mando a
distancia funciona con la mayoría de los modelos y
marcas de equipos de vídeo controlados por infrarrojos
(IR), aunque no con todos. El mando puede ofrecer
funciones que no estén disponibles en su equipo. Es
posible que algunas funciones (como, por ejemplo, las
funciones de menús) no puedan controlarse con este
mando. En ese caso, utilice el mando a distancia original
para el equipo.
Cómo colocar las pilas
1. En la parte posterior del mando,
presione sobre la pestaña y quite la
cubierta.
2. Coloque las pilas de acuerdo con las
marcas + y - que hay dentro del
compartimento de las pilas. A
continuación, inserte 2 pilas alcalinas
AAA.
3. Presione la tapa del compartimento de
-
+
A
A
A
A
-
las pilas para colocarla de nuevo en su
sitio.
Ahorro de energía
El mando se apaga automáticamente si los botones se
mantienen pulsados durante más de 30 segundos. De
esta forma, se ahorrará energía de las pilas en el caso de
que el mando se quede encajado en un lugar en el que
se mantengan pulsados los botones (por ejemplo, entre
los cojines del sofá).
Almacenamiento de códigos
Los códigos se guardan en la memoria permanente
mientras se cambian las pilas, por lo que no perderá
ningún código almacenado en el mando mientras lo
hace.
Encendido predeterminado
A
A
+
Funciones de SAT
GUIDE: muestra la guía de canales por satélite en
pantalla.
CHAPTER+ y CHAPTER-: realizan la función de
“página siguiente” y “página anterior” con los menús
de la guía en pantalla utilizados por algunos sistemas
por satélite.
INFO: muestra la pantalla de visualización por satélite
con información del sistema y del canal actual.
MENU: muestra la pantalla de menú del satélite; utilice
los botones de navegación hacia ARRIBA, ABAJO,
IZQUIERDA y DERECHA.
OK: se emplea para aceptar una selección en los menús
en pantalla.
EXIT: se emplea para borrar las visualizaciones de
menús en pantalla o para salir de ellas.
El mando se enciende en el modo de televisor.
Configuración de códigos
Consulte “Búsqueda de códigos” en la página 28 para
obtener más información sobre el uso de la función de
búsqueda de códigos y para ver cómo funciona la
búsqueda de productos en la biblioteca de códigos.
Nota: Podrá guardar cualquier tipo de código en
cualquier modo (salvo en el modo de televisor). Podrá
guardar un código de vídeo en el botón CBL, o un
código de DVD en el botón VCR, etc. No obstante, sólo
podrá guardar códigos del televisor en el botón TV.
2726
Page 15

Introducción directa de códigos
Búsqueda de marcas
1. Mantenga pulsado SETUP hasta que el indicador se
encienda y, a continuación, suelte SETUP.
2. Pulse varias veces SELECT para seleccionar el
modo deseado (TV, VCR, etc.), a menos que el
modo deseado ya esté seleccionado.
3. Introduzca el código de 4 dígitos de las tablas de
códigos (en una hoja aparte). Nota: Tras introducir
una entrada de código válida, el indicador se apaga.
Si se introduce un código no válido, el indicador
parpadea.
4. Pulse CH +. Si el dispositivo responde, no será
necesaria ninguna programación adicional. Nota: Si
algunos botones no accionan el equipo, pruebe uno
de los otros códigos para la marca.
Búsqueda de códigos
Si el producto no responde después de haber probado
con todos los códigos correspondientes a la marca, o si
no aparece la marca en la lista, pruebe a buscar el
código siguiendo estos pasos.
1. Encienda el dispositivo (televisor, vídeo, etc.) que se
va a controlar.
2. Mantenga pulsado SETUP hasta que el indicador se
encienda y, a continuación, suelte SETUP.
3. Pulse varias veces SELECT para seleccionar el
modo deseado (TV, VCR, etc.), a menos que el
modo deseado ya esté seleccionado.
4. Pulse varias veces CH + (hasta 300 veces) hasta que
el dispositivo que se va a controlar cambie de canal.
El indicador deja de parpadear con cada pulsación
de botón.
5. Pulse brevemente MUTE para instalar el código.
Podrá buscar un código correspondiente a una marca
específica dentro de la biblioteca de códigos de un fabricante
concreto.
1. Encienda el dispositivo (televisor, vídeo, etc.) que se va a
controlar.
2. Mantenga pulsado SETUP hasta que el indicador se
encienda y, a continuación, suelte SETUP.
3. Pulse varias veces SELECT para seleccionar el modo
deseado (TV, VCR, etc.), a menos que el modo deseado
ya esté seleccionado.
4. Pulse brevemente el botón numérico (0-9)
correspondiente al fabricante que desee (consulte la lista
de códigos en la tabla de la hoja). El indicador verde
dejará de parpadear una vez. Tenga en cuenta que al
pulsar “0” se realiza una búsqueda completa en la
biblioteca, como el método de búsqueda de códigos
normal de la página anterior.
5. Pulse el botón CH + (o bien POWER o PLAY para
vídeos únicamente) varias veces hasta que el dispositivo
que se va a controlar cambie de canal. El indicador verde
deja de parpadear con cada pulsación de botón. Si por
accidente se pasa el código necesario, pulse el botón CH -
para retroceder dentro de la biblioteca hasta que el
dispositivo cambie de canal. Al pulsar CH + la dirección
se cambia de nuevo hacia delante.
6. Pulse brevemente MUTE para instalar el código.
La introducción del método de búsqueda de marcas se ha
completado. Nota: Cuando se han buscado todos los códigos
en una marca, el indicador parpadea rápidamente durante 3
segundos.
Función de identificación de códigos
La característica de identificación de códigos le permite
identificar el código de biblioteca de 4 dígitos almacenado en
el botón del dispositivo.
La mayoría de los usuarios almacenan los códigos de
vídeo en el modo VCR. Los códigos del receptor por
cable aparecen en CBL (cable), etc.
Si desea almacenar un código de vídeo en CBL, siga
primeroel procedimiento para la introducción directa de
códigos y seleccione CBL en el paso 2 de la introducción
directa de códigos. Luego introduzca cualquier código de
vídeo en el paso 3 de Introducción directa de códigos. A
continuación, siga los pasos anteriormente indicados en
Búsqueda de códigos.
Nota: Si el dispositivo no tiene un botón CH +,
utilice el botón PLAY (sólo vídeo) o POWER en su
lugar. La búsqueda de códigos se iniciará desde el
número de 4 dígitos guardado en ese momento dentro
de dicho modo.
Si desea saber qué código de 4 dígitos se ha almacenado en
cualquier modo de dispositivo, siga estos pasos.
1. Mantenga pulsado SETUP hasta que el indicador se
encienda y, a continuación, suelte SETUP.
2. Pulse varias veces SELECT para seleccionar el modo
deseado (TV, VCR, etc.), a menos que el modo deseado
ya esté seleccionado.
3. Pulse brevemente SETUP. El indicador parpadea.
4. Para buscar el primer dígito del código almacenado en el
modo seleccionado en el paso 2, pulse cada botón
numérico (0-9). Cuando el indicador deje de parpadear, el
número que haya pulsado será el primer dígito del código
que está buscando.
5. Para buscar el segundo dígito, repita el paso 4. Cuando el
indicador deje de parpadear, éste será el segundo dígito.
6. Repita el paso 4 para buscar el tercer dígito y el cuarto.
2928
Page 16

Configuración de favoritos
La característica de favoritos es la que diferencia a este
mando de los otros. Le permite ir al canal o a los canales
favoritos con tan solo pulsar el botón al lado de la
pegatina (o etiqueta) que representa ese canal favorito.
1. Mantenga pulsado SETUP hasta que el indicador se
encienda y, a continuación, suelte SETUP.
2. Pulse varias veces SELECT para seleccionar el
modo deseado (TV, VCR, etc.), a menos que el
dispositivo deseado ya esté seleccionado. Esto
ajusta el dispositivo que controla este botón de
favoritos.
3. Pulse uno de los 10 botones FAVORITE para
establecer un canal favorito. Supongamos que
seleccionamos el botón FAVORITE del extremo
superior derecho.
4. Introduzca el número de canal para este canal
favorito.
Nota: Puede utilizar hasta 5 botones, que incluyen del 0
al 9, OK y - para introducir el canal favorito: por
ejemplo, 550, 472Enter, 162OK, 5-7, etc.
Configuración de favoritos
FAVORITE
buttons
FAVORITE
icons
5. Pulse SETUP cuando termine de introducir el canal.
Después de configurar el canal favorito, realice lo
siguiente.
6. Pegue la pegatina que representa el canal favorito
que ha configurado sobre la ubicación situada al
lado del botón FAVORITE. (En el ejemplo de la
página 11, hemos utilizado una pegatina de CNN
para el botón FAVORITE del extremo superior
derecho.)
Siga los pasos del 1 al 6 para configurar más canales
favoritos; seleccione cada vez un botón FAVORITE
distinto en el paso 3 e introduzca un número de canal
diferente en el paso 4. A continuación, pegue la
pegatina correspondiente a lado del botón FAVORITE,
como en el paso 6.
Para ir al canal favorito, simplemente pulse el botón
FAVORITE que esté al lado de la pegatina que
represente el icono del canal deseado.
Nota: Si no encuentra una pegatina para uno de sus
canales favoritos, visite www.wikipedia.org para buscar
etiquetas para sus canales favoritos. Realice una
búsqueda mediante las palabras clave television logos.
Busque el logotipo que necesite. Haga clic con el botón
derecho y guarde el logotipo en su equipo. Imprímalo.
Si el logotipo necesita ajustes, puede utilizar Microsoft
Paint, etc. Recorte el logotipo y péguelo a lado del
botón FAVORITE.
Ajuste del retardo entre dígitos
Es posible que necesite ajustar el tiempo entre los
dígitos enviados de un canal favorito. Si el retardo es
demasiado largo, podría señalar con el mando hacia otra
dirección distinta de la del dispositivo antes de que se
envíen todos los dígitos. Si el retardo es demasiado
corto, puede que el dispositivo no responda.
1. Mantenga pulsado SETUP hasta que el indicador se
encienda y, a continuación, suelte SETUP.
2. Pulse brevemente PLAY . El indicador parpadea y, a
continuación, permanece encendido.
3 Pulse brevemente un número del 0 al 9. 0 significa
sin retardo y 9 significa el retardo más largo.
3130
Page 17

Preparación
Preparación (continuación)
Programación de códigos de dispositivos combinados
En algunos dispositivos combinados (televisor/vídeo,
televisor/DVD, DVD/vídeo, etc.) es necesario configurar
dos modos distintos para poder controlar ambas partes
del dispositivo combinado.
Por ejemplo, si tiene un televisor/DVD combinado, tal
vez tenga que configurar un código en el modo TV para
controlar el televisor y un código aparte (en cualquier
otro modo) para controlar el DVD.
Función de traspaso de control de vídeo/DVD/DVR
Este mando permite que los 6 botones de vídeo (PLAY,
PAUSE, STOP, SCAN+, SCAN- y REC) puedan
“traspasar” (transmitir o pasar) el control de cualquier
modo programado con códigos del televisor o del
receptor por cable al último modo de VCR, DVD o DVR
que haya utilizado.
Por ejemplo, si tiene 2 dispositivos de DVD, vídeo o
DVR programados en este mando, el último dispositivo
que haya utilizado controlará los 6 botones de vídeo.
Nota: Esta característica no funcionará si el código del
televisor, del receptor de satélite o del receptor por
cable posee su propio control de botón de transmisión
de vídeo, por ejemplo, un televisor combinado, SAT/
PVR, etc.
Configuración de TODOS los controles de volumen/
silenciamiento en cualquier modo
Puede configurar todos los modos para que “traspasen
el control” a cualquier modo para controlar el volumen/
silenciamiento sin necesidad de cambiar a dicho modo
mediante la siguiente acción.
1. Mantenga pulsado SETUP hasta que el indicador se
encienda y, a continuación, suelte SETUP.
2. Mantenga pulsado MUTE hasta que el indicador
deje de parpadear y, a continuación, suelte el botón.
3. Pulse brevemente SELECT para seleccionar el modo
deseado (TV, VCR, etc.) para controlar el volumen/
silenciamiento; el indicador parpadea y, a
continuación, permanece encendido.
4. Pulse brevemente MUTE; el indicador se apaga.
Nota: El indicador parpadeará rápidamente durante 3
segundos si el modo seleccionado no tiene control
de volumen/silenciamiento.
5. Todos los demás modos “traspasarán” ahora el
control al modo elegido para el control del volumen/
silenciamiento.
Configuración de los modos para usar su propio nivel
de sonido/silenciamiento
Puede configurar cualquier modo para que utilice
únicamente su propio control de volumen/
silenciamiento.
Función de control de volumen/silenciamiento y
traspaso de control
El mando le permite seleccionar el modo de dispositivo
que vaya a controlar los botones VOL y MUTE.
Este mando está configurado inicialmente para que
todos los modos de dispositivos utilicen su propio
control de volumen/silenciamiento, si lo hay.
Si el código programado no posee el accionamiento del
nivel de volumen/silenciamiento, los botones VOL y
MUTE “traspasarán” (pasarán) el control al dispositivo
en modo TV sin necesidad de cambiar al modo TV.
Nota: Cualquier modo elegido para controlar el
volumen/silenciamiento debe tener su propia función de
volumen/silenciamiento o los botones VOL y MUTE no
funcionarán.
Nota: Si el modo elegido no dispone de las funciones de
volumen/silenciamiento, los botones VOL y MUTE del
mando no funcionarán.
1. Mantenga pulsado SETUP hasta que el indicador se
encienda y, a continuación, suelte SETUP.
2. Mantenga pulsado MUTE hasta que el indicador
deje de parpadear y, a continuación, suelte el botón.
3. Pulse brevemente SELECT para seleccionar el modo
deseado (TV, VCR, etc.); el indicador parpadea y, a
continuación, permanece encendido.
4. Pulse brevemente VOL- (bajar volumen); el
indicador parpadea y, a continuación, permanece
encendido.
5. Pulse brevemente MUTE; el indicador se apaga.
6. Todos los modos se “traspasarán” ahora a los
respectivos modos elegidos para el control del
volumen/silenciamiento.
3332
Page 18

Aprendizaje de códigos
Consejos para el aprendizaje (continuación)
El mando está equipado con una función de
“aprendizaje” fácil que le permite “aprender” las
funciones (como, por ejemplo, la reproducción en orden
aleatorio del mando original del CD).
Consejos para el aprendizaje de códigos
Sólo podrá aprender un tipo de dispositivo en cualquier
botón de modo. Por ejemplo, en el modo TV, sólo
aprenderá códigos de televisor; en el modo VCR, sólo
aprenderá códigos de vídeo, etc. Si está tratando de
aprender códigos de un mando original “universal”,
podría haber más de un tipo de código guardado en un
modo. Pruebe a aprender códigos de otro mando para
ver si existe un problema con el tipo o marca de mando
del que está intentando aprender el código.
Tenga en cuenta lo siguiente sobre el aprendizaje de
códigos.
• Puede que no se puedan aprender algunas funciones
de algunos tipos de mandos.
• Es posible que no se pueda aprender ninguna función
para los botones LEARN, SETUP y SELECT.
• Utilice pilas nuevas para el mando nuevo y para el
mando original.
• Manténgalo al menos a un metro de distancia de luces
de bajo consumo o incandescentes durante el
aprendizaje.
• Coloque el mando original apuntando hacia el mando
nuevo, de forma que el transmisor de IR (situado en la
parte superior) del mando original apunte al
dispositivo de aprendizaje por IR situado en la parte
inferior del mando nuevo.
• Mantenga una distancia de unos 2,5 cm entre ambos
mandos.
• Alinee los mandos y, a continuación, pulse el botón
que desee aprender. Para obtener el rango correcto,
pulse el botón del mando del que vaya a aprender. No
cambie la distancia entre los dos mandos hasta que
haya aprendido todos los botones necesarios.
• Durante el proceso de aprendizaje, mantenga presiona
do el botón que está siendo adquirido hasta que el
indicador verde haya destellado durante medio
segundo. De lo contrario, puede que algunos botones
se aprendan varias veces. Si ocurre esto, pulse
brevemente el botón que desea aprender en lugar de
mantenerlo pulsado. Por ejemplo, los botones que
suelen mantenerse pulsados (como los botones de
volumen) requerirán una pulsación más prolongada
durante el aprendizaje.
• En cambio, los botones que se suelen pulsar
brevemente (como los botones numéricos o los
botones de canal anterior/siguiente) requerirán una
pulsación breve durante el aprendizaje. Si, por
ejemplo, tras aprender el botón de canal anterior,
observa que se pasan varios canales al pulsarlo una
sola vez, pruebe a aprenderlo de nuevo realizando
una pulsación breve.
• Si el aprendizaje del primer o del segundo botón
provoca errores continuos, pruebe lo siguiente:
1. Compruebe que los sensores/transmisores de IR
estén correctamente alineados entre ambos mandos
(consulte la página siguiente).
2. Ajuste la distancia entre ambos mandos para que sea
inferior (1,27 cm) o superior (5 cm) entre ellos.
3. Pruebe a aprender de nuevo los botones del mando
original.
4. Si tiene problemas con el mismo botón, compruebe si
el botón del mando original que está aprendiendo
transmite correctamente. ¿Funciona el dispositivo de
destino?
5. Borre todos los ajustes aprendidos e inicie de nuevo
el aprendizaje.
Si tiene problemas con el mismo botón, compruebe el
botón del mando original que esté aprendiendo para ver
si hay transmisión.
Pruebe a aprender ese botón dentro de un modo vacío
diferente, si fuera necesario.
Si el mando aprende, es posible que esta situación sea
un tipo de código diferente de los demás y no se pueda
aprender en el mismo modo.
3534
Page 19

Buscador de transmisor de IR
Aprendizaje de comandos
Esta función le ayuda a identificar dónde se ubica el
transmisor de infrarrojos (IR) del mando original.
Esta función es especialmente útil si el transmisor de
infrarrojos (IR) del mando original se encuentra tras una
lente.
1. Apunte los mandos de manera que la parte superior
del mando existente esté orientada hacia la parte
inferior del mando nuevo y ambos mandos estén a
una distancia de aproximadamente 2,54 cm (consulte
la imagen de la página siguiente).
2. Mantenga pulsado SETUP hasta que el indicador se
encienda y, a continuación, suelte SETUP.
3. Pulse brevemente varias veces el botón SELECT
para seleccionar el modo deseado (TV, VCR, etc.).
4. Pulse brevemente LEARN; el indicador parpadea y,
a continuación, permanece encendido.
5. Mantenga pulsado cualquier botón del mando
original y mueva el mando original de izquierda a
derecha o de arriba a abajo delante del transmisor de
IR.
Nota 1: El indicador permanecerá encendido si no se
recibe ninguna señal de IR del mando original. El
indicador parpadeará más rápido cuando los
transmisores de IR se estén ajustando. El punto en el
que el indicador parpadea más rápido es en el que los
dos transmisores de IR están ajustados.
La función de aprendizaje permite al mando “aprender”
las funciones del mando a distancia original.
1. Mantenga pulsado SETUP hasta que el indicador se
encienda y, a continuación, suelte SETUP.
2. Pulse brevemente varias veces el botón SELECT
para seleccionar el modo deseado (TV, VCR, etc.).
3. Pulse brevemente LEARN; el indicador parpadea y,
a continuación, permanece encendido.
4. Pulse brevemente el botón que desee aprender (por
ejemplo, POWER).
5. Apunte con el mando original a la parte inferior del
nuevo mando hasta que estén a una distancia de
aproximadamente 2,54 cm.
6. Mantenga pulsado el botón del mando original (por
ejemplo, Power) hasta que indicador parpadee una
vez y, a continuación, permanezca encendido. Si se
produce un problema de aprendizaje, el indicador
parpadeará durante 3 segundos y permanecerá
encendido. Si esto ocurre, repita los pasos del 4 al 6.
7. Repita los pasos del 4 al 6 para los demás botones
que desee que aprenda el mando.
8. Pulse brevemente SETUP cuando se hayan
aprendido todos los comandos deseados del mando.
El aprendizaje de códigos se ha completado.
4.
2.
Nota 2: Algunos mandos originales sólo transmiten
señales IR al pulsar el botón por primera vez y, a
continuación, dejan de transmitir señales IR. Pulse y
suelte rápidamente el botón del mando original varias
veces durante este proceso en tales casos.
1.
3.
Alinee los mandos (de los que se está aprendiendo) delante del
mando de aprendizaje, sobre una superficie rígida con una
separación de aproximadamente 2,5 cm.
6.
3736
Page 20

Eliminación de comandos
INPUT
Para eliminar todos los comandos aprendidos
dentro de un modo
La eliminación de los comandos aprendidos es útil si,
por ejemplo, sustituye su reproductor de CD por otro de
otra marca o modelo. Si el mando ha aprendido una
función (por ejemplo, la reproducción en orden
aleatorio) del mando original de su antiguo reproductor
de CD, dicha prestación ya no funcionará en su nuevo
reproductor de CD.
Si desea borrar o eliminar uno o más comandos
aprendidos, siga los pasos que se exponen a
continuación:
1. Mantenga pulsado SETUP hasta que el indicador se
encienda y, a continuación, suelte SETUP.
2. Pulse brevemente SELECT para seleccionar el modo
que desea borrar (TV, VCR, etc.).
3. Pulse brevemente LEARN dos veces. El indicador
dejará de parpadear.
4. Pulse brevemente SETUP. El indicador se apaga.
Todos los comandos aprendidos en ese modo se
han borrado.
INPUT
En el modo de televisor, el botón INPUT realiza la
función de conmutación de la fuente de entrada.
En un modo programado para vídeo, el botón INPUT
realiza la función de conmutación de la antena de TV/
vídeo.
En un modo programado para el receptor por cable, el
botón INPUT realiza la función de conmutación A-B.
En un modo programado para el DVD, el botón INPUT
realiza la función de configuración del DVD.
En un modo programado para el receptor de satélite, el
botón INPUT realiza la función de conmutación TV/
SAT.
Master Clear
Master Clear: para borrar todos los comandos
aprendidos en todos los modos
1. Mantenga pulsado SETUP hasta que el indicador se
encienda y, a continuación, suelte SETUP.
2. Pulse brevemente LEARN dos veces. El indicador
dejará de parpadear.
3. Pulse brevemente SETUP. El indicador se apaga.
Todos los comandos aprendidos en el mando se han
borrado.
3938
Page 21

Solución de problemas
Garantía limitada de un año
El mando no acciona el producto
1. Seleccione el modo del producto que desee
controlar.
2. Programe el mando con un nuevo código.
3. Instale baterías nuevas en el mando a distancia.
(Puede que tenga que volver a programar el mando
tras haber colocado pilas nuevas.)
4. Si estos pasos no funcionan, es posible que el
mando no sea compatible con el producto.
El mando no acciona algunas funciones del producto
1. Programe el mando con un nuevo código.
2. Si esto no funciona, es posible que el mando no
accione todas las funciones del producto o que los
nombres de los botones sean diferentes a los de su
producto.
El indicador parpadea después de programar un código
de producto
1. Esto significa que el mando no acepta el código.
2. Intente programar el código de nuevo o inténtelo
con un código distinto.
Philips le garantiza que este producto no tendrá ningún
tipo de defecto de material, fabricación o montaje, si se
utiliza de forma normal siguiendo las especificaciones y
advertencias, durante un año desde la fecha de compra.
Esta garantía sólo le corresponde al comprador original
del producto y no es transferible. Para poder ejercer los
derechos que le otorga esta garantía, debe facilitar una
prueba de compra en forma de recibo original de venta
en el que aparezcan el nombre del producto y la fecha
de compra. Si desea contactar con el servicio de
atención al cliente o utilizar la garantía, llame al 919-573-
7854. NO EXISTE NINGUNA OTRA GARANTÍA
EXPRESA O IMPLÍCITA. La responsabilidad de Philips
se limita a la reparación o a la sustitución del producto,
si lo cree conveniente. Siempre que la ley lo permita, se
eximirá de responsabilidad por daños accidentales,
especiales y emergentes. Esta garantía le otorga
derechos legales específicos. Los derechos pueden
variar dependiendo del país en el que se encuentre.
Fabricado en China. Control de calidad en EE.UU.
Ledgewood, NJ 07852
Para obtener ayuda con la configuración, llame al (919)
573-7854.
4140
Page 22

4342
Page 23

Made in China. Quality Assured in USA.
Ledgewood, NJ 07852
SRU4105WM/17
 Loading...