

Page 1
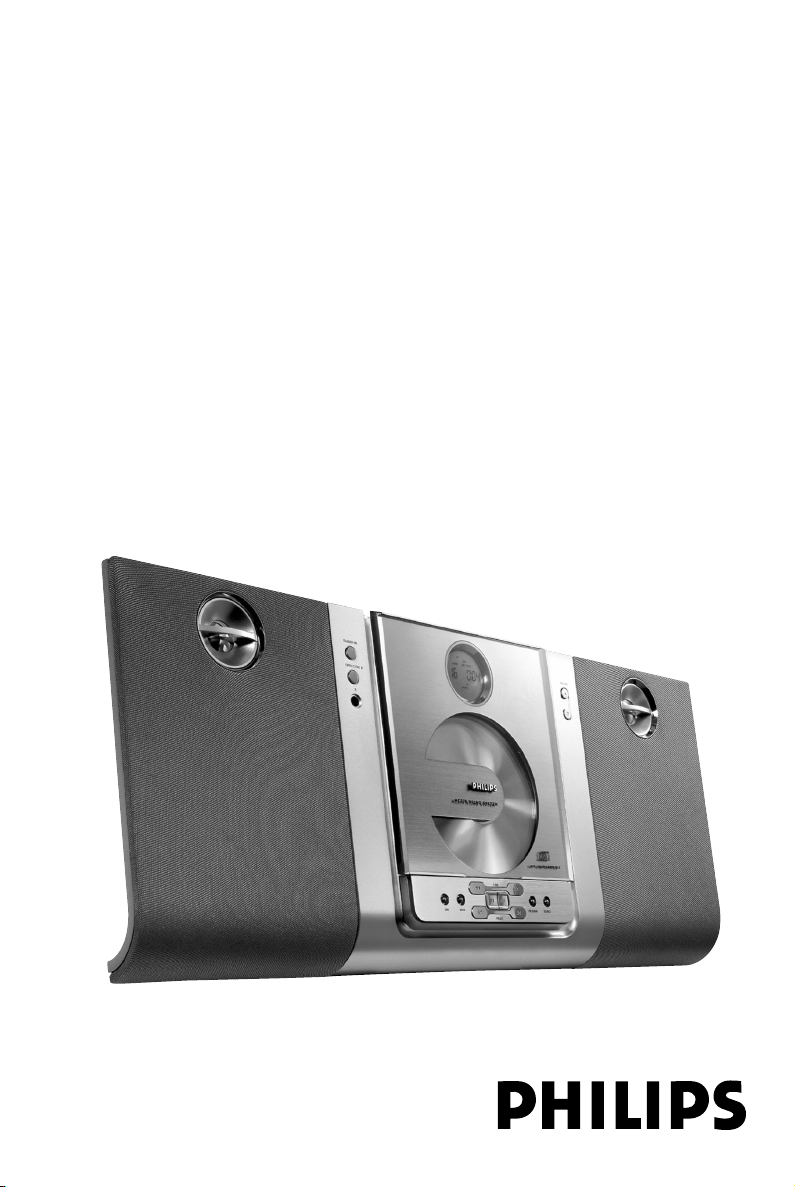
Micro Hi-Fi System
MC230
MC235
user manual
manuel d'utilisation
manual del usario
benutzerhandbuch
gebruikershandleiding
manuale per l'utente
användar-handbok
brugermanual
käyttöoppaita
manual do usuário
ÂÁ¯ÂÈÚ›‰ÈÔ ¯Ú‹Û˘
1
Page 2

Important notes for users in the
U.K.
Mains plug
This apparatus is fitted with an approved 13
Amp plug. To change a fuse in this type of plug
proceed as follows:
1 Remove fuse cover and fuse.
2 Fix new fuse which should be a BS1362 5 Amp,
A.S.T.A. or BSI approved type.
3 Refit the fuse cover.
If the fitted plug is not suitable for your socket
outlets, it should be cut off and an appropriate
plug fitted in its place.
If the mains plug contains a fuse, this should
have a value of 5 Amp. If a plug without a fuse
is used, the fuse at the distr ibution board
should not be greater than 5 Amp.
Note: The severed plug must be disposed of to
avoid a possible shock hazard should it be
inserted into a 13 Amp socket elsewhere.
How to connect a plug
The wires in the mains lead are coloured with
the following code: blue = neutral (N),
brown = live (L).
¶ As these colour s may not correspond with the
colour markings identifying the terminals in
your plug, proceed as follows:
– Connect the blue wire to the terminal
marked N or coloured black.
– Connect the brown wire to the terminal
marked L or coloured red.
– Do not connect either wire to the earth
terminal in the plug, marked E (or e) or
coloured green (or green and yellow).
Before replacing the plug cover, make certain
that the cord grip is clamped over the sheath
of the lead - not simply over the two wires.
Copyright in the U.K.
Recording and playback of material may
require consent. See Copyright Act 1956 and
The Performer’s Protection Acts 1958 to 1972.
Italia
DICHIARAZIONE DI CONFORMITA’
Si dichiara che l’apparecchio MC230, MC235
Philips risponde alle prescrizioni dell’ar t. 2
comma 1 del D.M. 28 Agosto 1995 n. 548.
Fatto a Eindhoven
Philips Consumer Electronics
Philips, Glaslaan 2
5616 JB Eindhoven, The Netherlands
Norge
Typeskilt finnes på apparatens underside.
Observer: Nettbryteren er sekundert
innkoplet. Den innebygde netdelen er
derfor ikke frakoplet nettet så lenge
apparatet er tilsluttet nettkontakten.
For å redusere faren for brann eller elektrisk
støt, skal apparatet ikke utsettes for regn eller
fuktighet.
CAUTION
Use of controls or adjustments or
performance of procedures other than
herein may result in hazardous
radiation exposure or other unsafe
operation.
VAROITUS
Muiden kuin tässä esitettyjen
toimintojen säädön tai asetusten
muutto saattaa altistaa vaaralliselle
säteilylle tai muille vaarallisille
toiminnoille.
2
Page 3
1
1
3
4
!
7
@
0
8
%
*
3
5
#
$
&
^
(
)
2
5
6
7
8
9
!
0
33
Page 4

DK
Advarsel: Usynlig laserstråling ved åbning
når sikkerhedsafbrydere er ude af funktion.
Undgå utsættelse for stråling.
Bemærk: Netafbryderen er sekundært
indkoblet og ofbryder ikke strømmen fra
nettet. Den indbyggede netdel er derfor
tilsluttet til lysnettet så længe netstikket
sidder i stikkontakten.
S
Klass 1 laseraparat
Varning! Om apparaten används på annat
sätt än i denna bruksanvisning specificerats,
kan användaren utsättas för osynlig
laserstrålning, som överskrider gränsen för
laserklass 1.
Observera! Stömbrytaren är sekundärt
kopplad och bryter inte strömmen från
nätet. Den inbyggda nätdelen är därför
ansluten till elnätet så länge stickproppen
sitter i vägguttaget.
SF
Luokan 1 laserlaite
Varoitus! Laitteen käyttäminen
muulla kuin tässä käyttöohjeessa mainitulla
tavalla saattaa altistaa käyttäjän
turvallisuusluokan 1 ylittävälle
näkymättömälle lasersäteilylle.
Oikeus muutoksiin varataan. Laite ei
saa olla alttiina tippu-ja roiskevedelle.
Huom. Toiminnanvalitsin on kytketty
toisiopuolelle, eikä se kytke laitetta irti
sähköverkosta. Sisäänrakennettu verkkoosa on kytkettynä sähköverkkoon aina
silloin, kun pistoke on pistorasiassa.
4
Page 5

Index
English ------------------------------------------------ 6
Français -------------------------------------------- 20
Español --------------------------------------------- 35
Deutsch --------------------------------------------- 49
Nederlands ---------------------------------------- 64
Italiano ---------------------------------------------- 79
Svenska --------------------------------------------- 94
English
Français
EspañolDeutschNederlandsItalianoSvenskaDanskSuomi
Dansk --------------------------------------------- 108
Suomi --------------------------------------------- 123
Por tuguês ---------------------------------------- 137
EППЛУИО¿ ----------------------------------------- 152
Por tuguês
EППЛУИО¿
5
Page 6

Indice
Informazioni Generali
Nota relative alla tutela ambientale ............... 80
Accessori in dotazione ...................................... 80
Note sulla sicurezza ........................................... 80
Preparazione
Collegamenti posteriori ............................. 81–82
Collegamenti opzionali ...................................... 82
Prima di usare il telecomando ......................... 82
Sostituzione della batteria
(litio CR2025) nel telecomando ..................... 82
Comandi
Comandi sull’apparecchio e sul
telecomando ........................................................ 83
Funzioni Base
Accensione dell’impianto .................................. 84
Mettere il sistema in modalità di
Standby Eco Power ............................................ 84
Standby automatico per il risparmio
energetico ............................................................ 84
Regolazione di volume e suono ...................... 84
Utilizzo dei CD
Riproduzione di un CD..................................... 85
Selezione di un brano diverso ......................... 85
Individuazione di un passaggio
all’interno di un brano ....................................... 85
I diversi modi di riproduzione:
SHUFFLE e REPEAT .......................................... 86
Programmazione dei numeri di brano ........... 86
Revisione del programma ................................. 86
Cancellazione di un programma ..................... 86
Orologio/Timer
Regolazione dell’orologio ................................. 90
Visione dell'orologio .......................................... 90
Regolazione del timer ....................................... 90
Attivazione e disattivazione del timer ........... 90
Attivazione e disattivazione del modo
SLEEP .................................................................... 91
Specifiche ..................................................... 91
Manutenzione .......................................... 92
Individuazione Guasti ............... 92–93
Italiano
Ricezione radio
Sintonizzazione sulle stazioni radio ................ 87
Programmazione delle stazioni radio ............ 87
Sintonizzazione sulle stazioni preimpostate . 87
RDS ....................................................................... 88
Regolazione dell’orologio RDS ....................... 88
Ricerca del tipo di programma (PTY)............ 88
Notiziario RDS ed Informazioni sul
traffico (TA) ......................................................... 89
79
Page 7

Informazioni Generali
Italiano
Questo prodotto è conforme ai requisiti
sulle interferenze radio della Comunità
Europea.
Nota relative alla tutela
ambientale
Per l’imballaggio sono stati utilizzati i seguenti
materiali, ridotti al minimo e facilmente eliminabili
secondo le procedure di raccolta differenziata:
cartone (scatola), polistirolo espanso
(protezione), polietilene (sacchetti, schiuma di
lattice di protezione).
L’apparecchio è stato realizzato con materiali
riciclabili, che possono essere riutilizzati se
l’impianto viene disassemblato da una società
specializzata. Per l’eliminazione dei materiali di
imballaggio, delle batterie scariche e degli
apparecchi usati, attenersi alle normative vigenti a
livello locale.
Accessori in dotazione
–2 casse per altoparlanti
–Telecomando (con batteria)
– Antenna a telaio AM
– Antenna filare FM
– supporto
–avvitamento e inserimento per l'assemblaggio
Note sulla sicurezza
● Prima di mettere in funzione l’apparecchio,
verificare che la tensione di esercizio indicata
sulla targhetta di identificazione (o l’indicazione di
tensione a fianco del selettore) dell’impianto sia
identica alla tensione dell’alimentazione locale. In
caso contrario, rivolgersi al rivenditore.
● Posizionare l’apparecchio su una superficie piana,
resistente e stabile.
● Posizionare l’apparecchio in un luogo
adeguatamente ventilato, onde impedire che si
surriscaldi internamente. Lasciare una distanza di
almeno 10 cm (4 pollici) dalla parte posteriore e
dalla parte superiore dell’unità e 5 cm (2 pollici)
da ogni lato.
● Non si dovrebbe impedire la ventilazione
coprendo con articoli, come giornali, tovaglie,
tende le aperture di ventilazione ecc.
● Non esporre l’apparecchio, le batterie o i dischi a
eccessiva umidità, pioggia, sabbia o fonti di calore
di impianti di riscaldamento o alla luce diretta del
sole.
● Non vanno messe sull'apparecchio fiamme
libere, come candele accese.
● Non vanno messi sull'apparecchio oggetti pieni
di liquido, come vasi.
● In caso di traspor to diretto dell’apparecchio da
un locale freddo a uno caldo, o di
posizionamento in un ambiente molto umido, è
possibile che sulla lente dell’unità disco interna
all’apparecchio si generi condensa dovuta
all’umidità. In tal caso, il lettore CD non funziona
normalmente. Lasciarlo acceso per circa un’ora
senza dischi inseriti, finché non è possibile
procedere a una normale riproduzione.
● Le parti meccaniche dell’apparecchio
contengono cuscinetti autolubrificanti e non
necessitano di lubrificazione.
● Se l’apparecchio si trova in modalità
Standby, consuma tuttavia una certa
quantità di energia. Per scollegare
completamente l’apparecchio
dall’alimentazione, rimuovere la spina di
rete in c.a. dalla presa a parete.
80
Page 8

Preparazione
Collegamenti posteriori
La targhetta di identificazione si trova sul
retro dell’apparecchio.
A Accensione
Prima di collegare il cavo di alimentazione in c.a.
alla presa a parete, assicurarsi di aver eseguito
tutti gli altri collegamenti.
AVVERTENZA!
– Per prestazioni ottimali, utilizzare
esclusivamente il cavo di alimentazione
originale.
– Non eseguire o modificare mai
collegamenti mentre l’apparecchio è acceso.
Per evitare il surriscaldamento
dell’apparecchio, è stato incorporato un
circuito di sicurezza. E’ quindi possibile che
in condizioni estreme venga selezionata
automaticamente la modalità Standby. Se
ciò accade, lasciare raffreddare
l’apparecchio prima di riutilizzarlo (non
disponibile per tutte le versioni).
B Collegamento delle antenne
Collegare l’antenna a telaio AM e l’antenna FM
fornite ai rispettivi connettori e regolarne la
posizione per una ricezione ottimale.
Antenna AM
● Posizionare l’antenna il più lontano possibile dal
televisore, dal videoregistratore o da altre
sorgenti di radiazioni.
Italiano
81
Page 9

Preparazione
Antenna FM
● Per migliorare la ricezione stereo FM, collegare
un’antenna FM esterna al connettore FM AERIAL
(FM ANTENNA).
C Collegamento degli altoparlanti
Altoparlanti anteriori
Collegare i fili degli altoparlanti ai connettori
SPEAKERS, l’altoparlante destro a "RIGHT" e
l’altoparlante sinistro a "LEFT", il filo colorato
(contrassegnato) a "+" e il filo nero (non
contrassegnato) a "-".
Italiano
● Tagliare la parte spellata del filo dell’altoparlante
come indicato in figura.
Nota:
–Per prestazioni ottimali del suono, utilizzare gli
altoparlanti forniti in dotazione.
– Non collegare più di un altoparlante a una
qualsiasi coppia di connettori+/-.
– Non collegare altoparlanti con un’impedenza
inferiore a quella degli altoparlanti forniti. Vedere la
sezione SPECIFICHE del presente manuale.
Prima di usare il telecomando
1 Estrarre il foglio di plastica protettivo.
2 Selezionare la sorgente che si desidera
comandare premendo uno dei tasti di selezione
di sorgente sul telecomando (ad esempio MP3CD, TUNER).
3 Quindi selezionare la funzione desiderata (Ad
esempio ÉÅ , í , ë).
fogli
protezione
di plastica
Sostituzione della batteria (litio
CR2025) nel telecomando
1 Tirare il pomolo A leggermente verso sinistra
2 Aprire il comparto della batteria B .
3 Sostituire una nuova batteria ed inserire i
comparto batteria tutto alla posizione originale.
Collegamenti opzionali
Le apparecchiature opzionali e i cavi di
collegamento non vengono forniti. Per
informazioni dettagliate, consultare le istruzioni
per il funzionamento delle unità collegate.
Collegamento di altre apparecchiature
all’impianto
Collegare i connettori audio OUT sinistro e
destro di un televisore, videoregistratore, lettore
Laser Disc, lettore DVD o registratore CD ai
connettori AUX-IN.
Nota:
– In caso di connessione di un dispositivo con
uscita mono (un connettore di uscita audio singolo),
eseguire il collegamento al connettore sinistro AUX ,
o in alternativa utilizzare un cavo Cinch “singolodoppio” (sempre mono).
82
ATTENZIONE!
Le batterie contengono sostanze
chimiche e devono quindi essere smaltite
correttamente.
Page 10

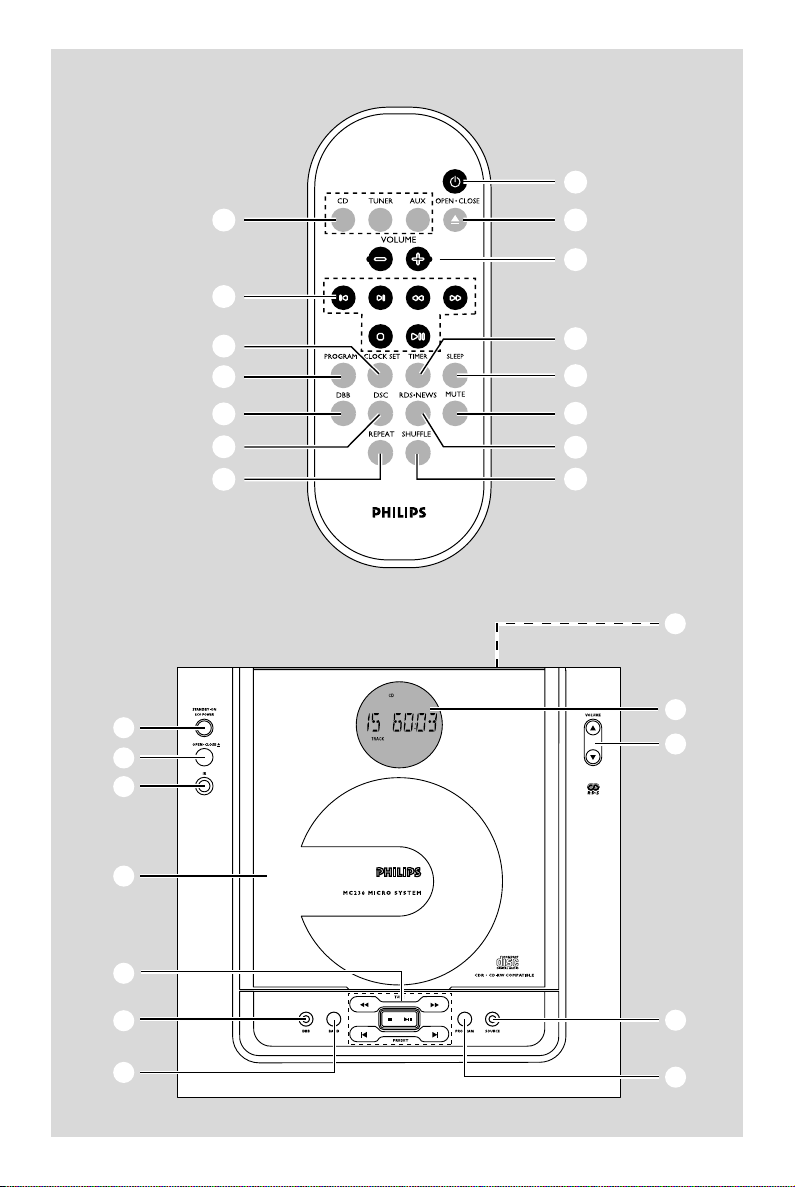
Comandi (illustrazioni a pagina 3)
Comandi sull’apparecchio e sul
telecomando
1 STANDBY-ON/ ECO POWER
–Passa alla modalità standby Eco Power o accende
l’apparecchio.
2 Display
– visualizza informazioni sull’apparecchio.
3 OPEN • CLOSEç
– apre/ chiude la piastra CD.
4 IR
– Puntare il telecomando verso questo sensore.
5 VOLUME (3 / 4 ) (+/-)
– regola il volume.
6 Scomparto del CD
7 Selezione del modo
SEARCH/ TUNE (à / á)
per TUNER ....... sintonizza sulle stazioni radio.
per CD ................ ricerca indietro o in avanti in un
brano/CD.
STOP 9............ arresta la lettura del CD e
cancella il programma del CD.
PLAYÉÅ ...... avvio e interruzione della
riproduzione.
PRESET (¡ / ™)
per TUNER ....... seleziona le stazioni radio
preimpostate.
per CD ................ salta all’inizio del brano corrente/
precedente/ successivo.
8 DBB (Dynamic Bass Boost)
– potenzia i suoni bassi.
9 BAND
– selezione gamma di lunghezze d’onda.
0 PROGRAM
per CD ................ programma i brani e rivede il
programma.
per TUNER ....... programma le stazioni radio
manualmente.
! SOURCE
– seleziona la sorgente sonora per CD/ TUNER/
AUX.
@ CLOCK SET
– regola l’orologio.
–Vedere l'ora dell'orologio.
# TIMER
– attiva/disattiva o regola il timer.
$ SLEEP
– attiva/disattiva o seleziona l’ora di spegnimento
automatico.
% DSC (Digital Sound Control)
– potenzia le caratteristiche sonore: ROCK/ JAZZ/
POP/ CLASSIC.
^ RDS.NEWS
– abilita la funzione di annuncio del notiziario RDS
e le informazioni sul traffico.
– per Tuner, visualizza le informazioni RDS.
& MUTE
– interrompe e riprende la riproduzione sonora.
* REPEAT
–ripete un brano/ un programma del CD/ tutto
un CD.
( SHUFFLE
– legge i brani del CD in ordine casuale.
)
– collegamento delle cuffie.
Italiano
Nota relative al telecomando:
– Selezionare innanzitutto la sorgente
premendo uno degli appositi pulsanti del
telecomando (ad esempio, CD, TUNER,
ecc.)
– Selezionare quindi la funzione desiderata
( ÉÅ, ¡ , ™ ecc.)
83
Page 11

Funzioni Base
IMPORTANTE:
Prima di mettere in funzione l’impianto,
eseguire le procedure preliminari.
Italiano
Accensione dell’impianto
● premere STANDBY-ON / 2.
➜ L’impianto si commuta nell’ultima sorgente
selezionata.
● In modalità SOURCE (o CD, TUNER o AUX
sul telecomando).
➜ L’impianto si commuta sulla sorgente
selezionata.
● premere OPEN • CLOSEç.
risparmio energetico
Come caratteristica di risparmio energetico, il
sistema si sposta automaticamente su Eco
Power/ Standby 15 minuti dopo che un CD ha
raggiunto la fine e non si tocca alcun comando.
Regolazione di volume e suono
1 Premere VOLUME 3 / 4 (+/-) per
diminuire o aumentare il volume.
➜ Il display visualizza il livello del volume VOL ed
un numero da MIN1, 2, ... 30, 31 MAX..
2 Premere una o più volte il comando sonoro
interattivo, DSC sull’apparecchio o sul
telecomando per selezionare l’effetto sonoro
desiderato: ROCK/ JAZZ/ POP/ CLASSIC.
3 Premere DBB per attivare o disattivare il
potenziamento dei bassi.
➜ Il display indica: se DBB è attivato.
4 Premere MUTE sul telecomando per
interrompere immediatamente la riproduzione
sonora.
➜ La riproduzione continua senza sonoro ed il
display indica MUTE.
● Per riattivare la riproduzione sonora:
– premere nuovamente MUTE;
– regolare i comandi del volume;
– cambiare fonte.
Mettere il sistema in modalità di
Standby ECO Power
● Premere STANDBY-ON / 2.
➜ “ECO PWR” verrà visualizzato poi il
visualizzatore si svuoterà.
➜ L’indicatore ECO POWER sarà illuminato.
Nota:
–Per devedere l’orologio in modalità standby,
premere e tenere premuto STANDBY-ON per più
di 3 secondi, l’ora verrà visualizzata con scarsa
intensità.
➜
L’indicatore ECO POWER si spegnerà.
● Il volume (fino a un volume massimo di 20), le
impostazioni sonore interattive, l’ultima sorgente
selezionata e le preimpostazioni della radio
resteranno nella memoria dell’apparecchio.
Standby automatico per il
84
Page 12

IMPORTANTE:
Non toccare mai la lente del lettore di CD!
Utilizzo dei CD
5 Per interrompere la lettura, premereÉÅ .
Premere nuovamenteÉÅper riprenderla.
6 Per interrompere la lettura del CD, premere
STOP 9.
Nota: la lettura del CD si interrompe anche se:
– si apre il comparto CD.
– il CD è finito.
– si seleziona un’altra sorgente: TUNER o
AUX.
Selezione di un brano diverso
● Premere una o più volte í o ë sino a
visualizzare sul display il numero di brano
desiderato.
● Se si è selezionato un numero di brano poco
dopo aver caricato un CD o se si è in posizione
PAUSE, è necessario premere ÉÅ per avviare
la riproduzione.
Riproduzione di un CD
● Non si possono usare, tuttavia, CD-ROM, CD-I,
CDV, VCD, MP3, DVD o CD per computer.
1 Premere SOURCE per selezionare CD.
2 Premere OPEN • CLOSEç sul pannello
frontale del sistema per aprire il piatto dei CD.
➜ Quando il coperchio del piatto si apre viene
visualizzato OPEN.
3 Inserire un disco con il lato stampato
rivolto verso l'alto. Premere di nuovo
OPEN • CLOSEç per chiudere il piatto.
➜ Mentre il lettore CD legge il contenuto del
disco viene visualizzato READING.
➜ Viene visualizzato il tempo di riproduzione
totale e il numero totale dei brani.
4 PremereÉÅ per avviare la lettura.
➜ Durante la lettura del CD, vengono
visualizzati il numero di brano corrente ed il
tempo di riproduzione trascorso.
Individuazione di un passaggio
all’interno di un brano
1 Premere e tenere premuto à o á.
➜ Il CD viene letto ad alta velocità e basso
volume.
2 Quando si individua il passaggio desiderato,
premere à o á.
➜ La lettura del CD continua in modo normale.
Italiano
85
Page 13

Utilizzo dei CD
I diversi modi di riproduzione:
SHUFFLE e REPEAT
Si possono selezionare o variare i modi differenti
di riproduzione prima o durante la lettura. I modi
di riproduzione possono essere combinati con la
funzione programma.
SHUFFLE ......... tutti i brani del CD/ del
programma vengono riprodotti
SHUFFLE e REPEAT ALL…per ripetere
REPEAT ALL ... ripete tutto il CD/ il programma
REPEAT ............riproduce ininterrottamente il
in ordine casuale
ininterrottamente il CD/ il
programma in ordine casuale
brano corrente
1 Per scegliere il modo di riproduzione, premere il
pulsante SHUFFLE o REPEAT prima o
durante la riproduzione, sino a visualizzare sul
display la funzione desiderata. (SHUFFLE, REPEAT,
REPEAT ALL)
Italiano
2 PremereÉÅ per avviare la riproduzione dalla
posizione di STOP.
➜ Se si è selezionato SHUFFLE, la riproduzione
si avvia automaticamente.
3 Per tornare al modo riproduzione normale,
premere il relativo pulsante SHUFFLE o
REPEAT sino a quando i modi SHUFFLE/
REPEAT scompaiono dal display.
● È anche possibile premere STOP 9 per
annullare il modo di riproduzione.
➜ Vengono visualizzati brevemente il numero di
brano programmato ed il tempo totale di
riproduzione del programma, quindi il brano
selezionato e PROG.
4 Ripetere i passi 2 e 3 per selezionare e
memorizzare tutti i brani desiderati.
➜ FULL appare se si cerca di programmare
oltre 40 brani.
5 Per iniziare la riproduzione del programma del
disco, premere STOP 9 seguito da ÉÅo
premereÉÅdirettamente.
Revisione del programma
In STOP modo, premere e tenere premuto per
poco tempo PROGRAM, sino a visualizzare in
sequenza sul display tutti i numeri di brano
memorizzati.
Cancellazione di un programma
Si può cancellare un programma:
● premendo una volta STOP 9 in posizione
STOP;
● premendo due volte STOP 9 durante la
riproduzione;
● premendo lo sportello del comparto CD
aperto;
➜ PROGRAM scompare.
➜ CLEAR passa e poi scompare dal display.
Programmazione dei numeri di
brano
Con il programma in posizione STOP, selezionare
e memorizzare i brani del CD nella sequenza
desiderata. Se si desidera, ogni brano può essere
memorizzato più volte. È possibile memorizzare
sino a 40 brani.
1 Premere PROGRAM per confermare il
numero del brano da memorizzare.
➜ Viene mostrato il numero dei brani
programmati.
2 Usare í o ë per selezionare il numero di
brano desiderato.
3 In modalità Stop, premere PROGRAM e tenere
premuto fino a che il visualizzatore mostra tutti i
numeri dei brani in memoria in sequenza.
86
Page 14

Sintonizzazione sulle stazioni
radio
1 Premere SOURCE per selezionare TUNER.
➜ TUNER viene visualizzato brevemente.
2 Premere una o più volte BAND (o TUNER sul
telecomando) per selezionare la banda delle
lunghezze d’onda (FM/ MW).
3 Premere e tenere premuto TUNE à o á.
➜ La radio si sintonizza automaticamente su una
stazione sufficientemente potente. Durante la
sintonizzazione automatica, il display indica
SEARCH.
4 Se necessario, ripetere il passo 3 sino ad
individuare la stazione desiderata.
¶ Per sintonizzarsi su una stazione debole, premere
brevemente e ripetutamente TUNE à o á
sino ad ottenere una ricezione ottimale.
Programmazione delle stazioni
radio
È possibile memorizzare sino a 40 stazioni radio.
Ricezione radio
1 Premere PRESET ¡ o ™ per selezionare il
numero preimpostato da cui si dovrà avviare la
programmazione.
Nota:
– Se non si è selezionato alcun numero
preimpostato, il valore di default è (1) e tutte le
preimpostazioni verranno sovrascritte.
2 Premere PROGRAM per oltre 2 secondi per
attivare la programmazione.
➜ Viene visualizzato AUTO e le stazioni
disponibili vengono programmate secondo
l’ordine di potenza di ricezione della banda delle
lunghezze d’onda: stazioni RDS, FM seguite da
MW. Viene quindi attivata l’ultima
preimpostazione memorizzata automaticamente.
Programmazione manuale
1 Sintonizzarsi sulla stazione desiderata (vedere
“Sintonizzazione sulle stazioni radio”).
2 Premere PROGRAM per attivare la
programmazione.
3 Premere PRESET ¡ o ™ per assegnare un
numero da 1 a 40 a questa stazione.
4 Premere nuovamente PROGRAM per
confermare l’impostazione.
➜ PROGRAM scompare e vengono indicati il
numero preimpostato e la frequenza della
stazione preimpostata.
5 Ripetere i suddetti quattro passi, per
memorizzare le altre stazioni.
● Si può sovrascrivere una stazione preimpostata,
memorizzando al posto di questa un’altra
frequenza.
Sintonizzazione sulle stazioni
preimpostate
● Premere PRESET ¡ o ™ sino a visualizzare il
numero prestabilito della stazione desiderata.
Italiano
Programmazione automatica
La programmazione automatica si avvia con un
numero preimpostato selezionato. Da tale
numero preimpostato in avanti, verranno
sovrascritte le stazioni radio programmate in
precedenza. L’unità programma soltanto stazioni
che non siano già memorizzate.
87
Page 15

Ricezione radio
RDS
Radio Data System è un servizio che
consente alle stazioni FM di inviare delle
informazioni aggiuntive. Se si riceve una stazione
RDS, vengono visualizzati ed il nome della
stazione. Se si usa la programmazione
automatica, vengono programmate innanzi tutto
le stazioni RDS.
Scorrimento fra le diverse informazioni
RDS
● Premere brevemente e ripetutamente
RDS • NEWS sull’unità per scorrere le
seguenti informazioni (se disponibili):
– Nome della stazione
– Tipo di programma: NEWS, SPORT, POP M ...
– Messaggi di testo della radio
– Frequenza
Nota:
– Se si preme RDS ed appare NO RDS, non viene
ricevuto alcun segnale RDS.
Italiano
Regolazione dell’orologio RDS
Alcune stazioni radio RDS potrebbero
trasmettere un orario reale d’orologio ad
intervalli di un minuto. È possibile regolare
l’orologio utilizzando un segnale orario
trasmesso assieme al segnale RDS.
1 Sintonizzarsi su di una stazione RDS sulla
lunghezza d’onda FM (consultare
“Sintonizzazione su stazioni radio”).
2 Premere e tenere premuto CLOCK SET fino
a che è visualizzato "SET CLOCK".
3 Premere RDS • NEWS.
➜ Si visualizza "SEARCH RDS TIME".
➜ Quando l’orario RDS è stato letto, il corrente
orario viene memorizzato.
➜ Se la stazione RDS non trasmette l’orario
RDS entro 90 secondi, si visualizza "NO RDS
TIME".
Ricerca del tipo di programma
(PTY)
PTY aiuta ad individuare un tipo di programma
desiderato. Per abilitare PTY, programmare
innanzi tutto le stazioni RDS nella memoria del
sintonizzatore (vedere “Programmazione delle
stazioni radio”).
1 Durante la ricezione di una stazione RDS,
premere brevemente RDS • NEWS sino a
visualizzare il tipo di programma.
2 Premere PRESET ¡ o ™ sino a visualizzare il
tipo di programma desiderato.
3 Premere e tenere premuto TUNE à o á per
avviare la ricerca.
➜ La radio si sintonizza su una stazione RDS che
stia trasmettendo questo tipo di programma. Se
il tipo di programma non è disponibile, appare
TYPE NOT FOUND (tipo non individuato).
Nota:
– Alcune stazioni radio RDS potrebbero
trasmettere un orario reale d’orologio ad intervalli
di un minuto. La precisione dell’orario trasmesso
dipende dalla trasmissione della stazione radio
RDS.
88
Page 16

Ricezione radio
Tipi di programmi RDS
NO TYPE .......... Nessun tipo di programma
RDS
NEWS .................... Servizi del notiziario
AFFAIRS .......... Politica ed attualità
INFO .................... Programmi di informazioni
straordinarie
SPORT ................ Sports
EDUCATE .......... Educazione ed addestramento
avanzato
DRAMA ................ Commedie radiofoniche e
letteratura
CULTURE .......... Cultura, religione e società
SCIENCE .......... Scienza
VARIED ............. Programmi di intrattenimento
POP M ................. Musica pop
ROCK M .............. Musica rock
MOR M ................. Musica leggera
LIGHT M .......... Musica classica leggera
CLASSICS ...... Musica classica
OTHER M .......... Programmi speciali di musica
WEATHER .......... Tempo
FINANCE .......... Finanza
CHILDREN ...... Programmi per bambini
SOCIAL ............. Socio culturali
RELIGION ...... Religione
PHONE IN .......Con telefonate
TRAVEL ............. Viaggio
LEISURE .......... Tempo libero
JAZZ .................... Musica Jazz
COUNTRY .......... Musica Country
NATION M .......Musica Nazionale
OLDIES ............. Vecchi successi
FOLK M .............. Musica Folk
DOCUMENT ...... Documentari
TEST .................... Test Sveglia
ALARM ................ Sveglia
Notiziario RDS ed Informazioni
sul traffico (TA)
Potete impostare il sintonizzatore in modo che
l'ascolto del CD/AUX venga interrotto dalle
NOTIZIE o dalle informazioni sul traffico di una
stazione RDS. Questa funzione è disponibile solo
se la stazione RDS trasmette un segnale NEWS
durante la trasmissione del notiziario.
1 Sintonizzarsi sulla stazione RDS desiderata.
2 In modalità CD, AUX Standby, premere
RDS.NEWS una o più volte sul telecomando per
scegliere l'opzione NEWS (NOTIZIE).
➜ Viene visualizzato brevemente NEWS ON,
TA ON o OFF.
➜ NEWS appare se è stata attivata l’opzione
relativa al notiziario o alle informazioni sul
traffico. Se si seleziona una sorgente di ascolto
diversa, non si disabilita la funzione.
Nota:
– Quando ricevete notizie RDS durante la
riproduzione di un CD, la riproduzione si
interromperà e riuscirete a sentire le notizie. La
riproduzione ricomincerà dopo che la trasmissione
è finita.
– Se usate l'annuncio RDS NEWS viene ricercata
tutta la rete per le notizie rispettive.
Disabilitazione della funzione Notiziario
RDS ed Informazioni sul traffico
La funzione notiziario può essere disabilitata in
diversi modi:
● Premere RDS • NEWS sul
telecomando durante la
ricezione del notiziario.
Italiano
89
Page 17

Orologio/Timer
Regolazione dell’orologio
1 In modalità standby, premere e tenere premuto
CLOCK SET sul sistema per più di 3 secondi.
➜ SET CLOCK scorre sul display.
Italiano
➜ Le cifre dell’orologio relative alle ore
lampeggiano.
2 Premere VOLUME +/- per regolare le ore.
3 Premere nuovamente CLOCK SET.
➜ Le cifre dell’orologio relative ai minuti
lampeggiano.
4 Premere VOLUME +/- per regolare i
minuti.
5 Premere CLOCK SET per confermare l’ora.
Nota:
–L’orologio sarà visualizzato senza
retroilluminazione in modalità standby.
TIMER sul sistema per più di 3 secondi.
➜ SET TIMER e SELECT SOURCE scorre sul
display.
2 Premere SOURCE o VOLUME +/- per
selezionare la fonte audio.
➜ CD, TUNER scorre sul display.
➜ lampeggia.
3 Premere TIMER per confermare.
4 Premere VOLUME +/- per impostare le
ore.
5 Premere nuovamente TIMER .
➜ Le cifre dell’orologio relative ai minuti
lampeggiano.
6 Premere VOLUME +/- per impostare i
minuti.
7 Premere TIMER per confermare l’ora.
➜ Il timer è ora regolato e attivato.
Attivazione e disattivazione del
TIMER
● Premere TIMER dal telecomando per
spegnere il timer o attivare di nuovo l’ultima
regolazione.
➜ Se attivato, l’informazione del timer verrà
visualizzata per pochi secondi, poi il sistema
riprende dall’ultima sorgente attiva o rimane
nella modalità standby.
➜ Se disattivato, si visualizza “OFF”.
Nota:
– Il sistema esce dalla modalità di regolazione del
timer se non si preme nessun pulsante entro 90
secondi.
Viewing the Clock
Premere CLOCK SET
➜ L’orologio si visualizza.
Regolazione del timer
● L’unità può essere utilizzata come una sveglia, in
qual caso il CD, il nastro o il sintonizzatore si
accende ad una predeterminata ora. Per usare la
sveglia, è necessario impostare l’ora dell’orologio.
● Se, durante l’impostazione, non si preme alcun
pulsante entro 90 secondi, l’unità abbandona il
modo regolazione timer.
1 In modalità standby, premere e tenere premuto
90
Page 18

Attivazione e disattivazione del
modo SLEEP
Il timer di spegnimento automatico consente
all’unità di spegnersi dopo un periodo di tempo
stabilito..
● Premere una o più volte
SLEEP sul telecomando.
➜ Il display indica SLEEP ed
una delle opzioni dell’ora di
spegnimento automatico in
sequenza: 90, 75, 60,...,
45,30,15, OFF, 90, se si è selezionata un’ora.
Dopo avere attivato SLEEP, SLEEP scorre sul
Orologio/Timer
display ad intervalli ripetuti.
● Per disattivare la funzione, premere una o più
volte SLEEP sul telecomando, sino a visualizzare
OFF, oppure premere STANDBY-ON
sull’apparecchio o sul telecomando.
➜ OFF scorre sul display.
Italiano
Specifiche
AMPLIFICATORE
Potenza di uscita ...................................... 2 x 5 W RMS
............................................................ 10 W + 10 W MPO
Rapporto segnale-rumore ............ ≥ 62 dBA (IEC)
Risposta in frequenza ....... 63 – 16000 Hz, ± 3 dB
Sensibilità di ingresso AUX........... 0,5 V (max. 2 V)
Impedenza, altoparlanti ............................................. 4 Ω
Impedenza, cuffia ................................ 32 Ω – 1000 Ω
......................................................................................... <0,5W
LETTORE DI CD
Gamma di frequenza ........................ 30 – 16000 Hz
Rapporto segnale-rumore ..............................75 dBA
SINTONIZZATORE
Gamma FM ........................................... 87,5 – 108 MHz
Gamma MW ....................................... 531 – 1602 kHz
Sensibilità a 75 Ω
– mono, 26 dB rapporto segnale-rumore 2,8 µV
– stereo, 46 dB rapporto
segnale-rumore ............................................... 61,4 µV
Selettività .................................................................. ≥ 28 dB
Distorsione armonica totale ............................... ≤ 5%
Risposta in frequenza ... 63 – 12500 Hz (± 3 dB)
Rapporto segnale-rumore ......................... ≥ 50 dBA
ALTOPARLANTI
Sistema di riflessione dei bassi
Dimensioni (l x a x p) ........166 x 245 x 90 (mm)
INFORMAZIONI GENERALI
Alimentazione in c.a. .............. 220 – 240 V / 50 Hz
Dimensioni (l x a x p) ........250 x 245 x 96 (mm)
Peso (con / senza altoparlanti) .. circa 9,4 / 4,8 kg
Consumo di potenza in modo standby .... < 7 W
Eco Power Standby ............................................... < 1 W
Tutte le caratteristiche sono soggette a
modifica senza preavviso.
91
Page 19

Manutenzione
Pulizia delle pareti esterne
● Utilizzare un panno morbido leggermente
inumidito con un detergente non corrosivo. Non
usare soluzioni contenenti alcool, acquaragia,
ammoniaca o sostanze corrosive.
Pulizia dei dischi
● I compact disc vanno puliti con
un panno, procedendo dal
centro verso l’esterno.
● Non utilizzare solventi tipo
benzina, diluenti, detergenti
disponibili in commercio o
spray antistatici per dischi
analogici.
Italiano
Individuazione Guasti
AVVERTENZA
Non tentare in nessun caso di riparare personalmente l’impianto, per non invalidare la
garanzia. Non aprire l’apparecchio, onde evitare il rischio di scossa elettrica.
In caso di guasti, verificare innanzitutto i punti elencati di seguito, prima di portare a far
riparare l’apparecchio. Se non si è in grado di risolvere il problema seguendo i suggerimenti
indicati sotto, rivolgersi al rivenditore o al Centro di assistenza.
Pulizia delle lenti del dischi
● Dopo un uso prolungato sulle lenti del dischi
possono depositarsi sporcizia o polvere. Per
garantire una buona qualità di riproduzione,
pulire le lenti del dischi con il detergente per
lenti di CD Philips o altro detergente disponibile
in commercio. Seguire le istruzioni riportate sulla
confezione.
Problema Soluzione
FUNZIONAMENTO DEL CD
Sul display compare l’indicazione – Inserire un disco.
“NO DISC” (manca disco). – Verificare se il disco è inserito capovolto.
– Attendere che la condensa sulla lente evapori.
– Sostituire o pulire il disco; vedere
“Manutenzione”.
– Utilizzare un disco CD-RW o CD-R finalizzato.
RICEZIONE RADIO
La qualità della ricezione radio è scarsa. – Se il segnale è troppo debole, regolare l’antenna
o collegare un’antenna esterna per migliorare la
ricezione.
– Aumentare la distanza tra l’impianto Micro HiFi e
il televisore o videoregistratore.
92
Page 20

Individuazione Guasti
GENERALE
L’a pparecchio non reagisce alla – Rimuovere e ricollegare la spina di alimentazione
pressione dei pulsanti. in c.a. e accendere nuovamente l’apparecchio.
Non proviene alcun audio o l’audio è – Regolare il volume.
di qualità scarsa. – Scollegare le cuffie.
–Verificare che gli altoparlanti siano collegati
correttamente.
–Verificare che il filo spellato dell’altoparlante sia
correttamente inserito.
Le uscite audio sinistra e destra –Verificare i collegamenti e l’ubicazione degli
sono invertite. altoparlanti.
Il telecomando non funziona – Selezionare la sorgente (ad esempio CD o
correttamente. TUNER) prima di premere il pulsante funzione
(ÉÅ,í, ë).
– Ridurre la distanza tra il telecomando e
l’apparecchio.
–Inserire le batterie con le relative polarità (segni
+/-) allineate come indicato.
– Sostituire le batterie.
– Puntare il telecomando verso il sensore a raggi
infrarossi dell’apparecchio.
Il timer non funziona. – Impostare correttamente l’orologio.
– Premere TIMER per accendere il timer.
L’impostazione dell’orologio/timer – Si è verificata un’interruzione di corrente o è
si è cancellata. stato scollegato il cavo di alimentazione. Risettare
l’orologio/timer.
Italiano
93
 Loading...