

Page 1
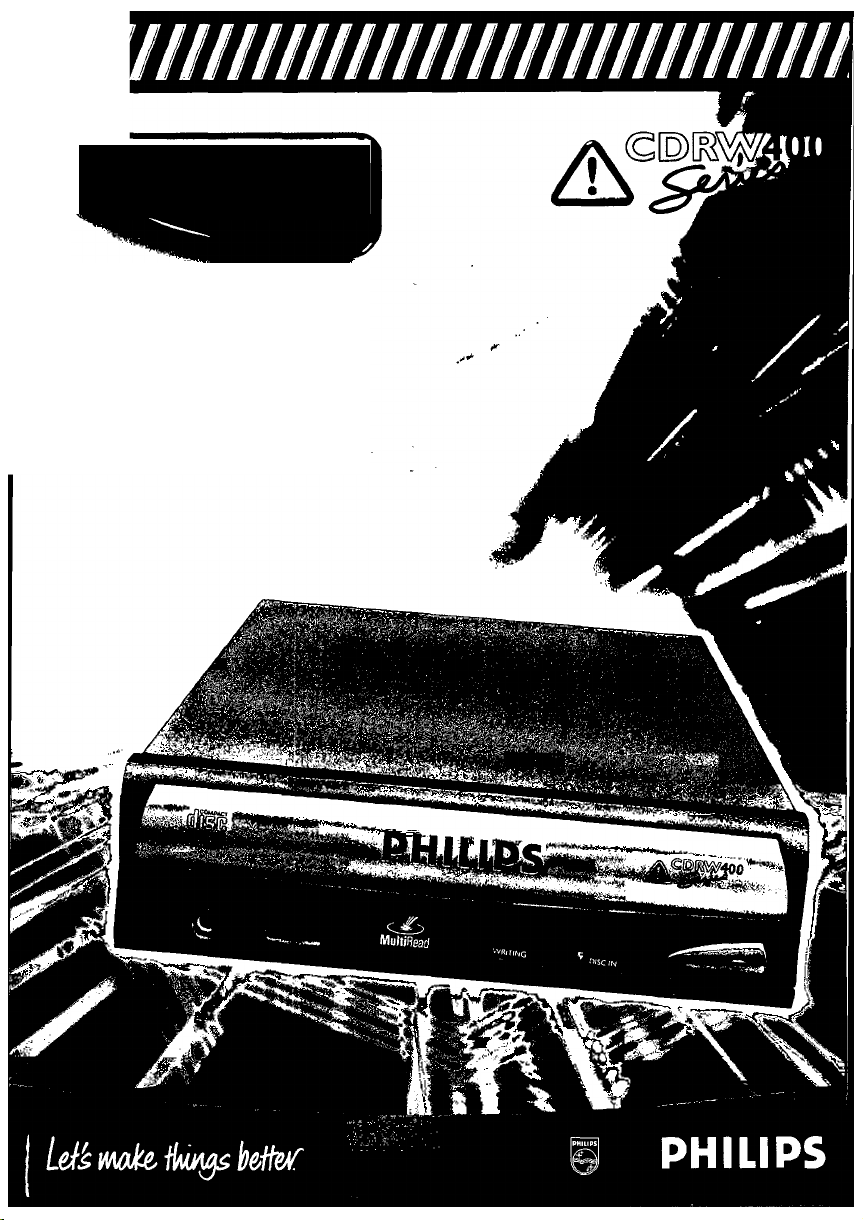
Internal CD-ReWritable kit
PCRW404K
Owner’s manual
Bedienungsanleitung
Mode d'emploi
Istruzioni per I'uso
Cebruiksaanwijzing
Instrucciones de manejo
Page 2
тшшшишшшшш1ш
Page 3

LASER SAFETY
This CD-RW drive employs a laser. Do not remove the cover or attempt to
service this device when connected due to the possibility of eye damage.
CLASS 1
LASER PRODUCT
;OMPLIAN(
3ECLARAT
.esponsible P
address:
ype of Equif
dodel Name
This device c
;onditions:
this devi(
0
this devi
1)
undesire
See user ma
CAUTION
USE OF CONTROLS OR ADJUSTMENTS OR PERFORMANCE OF
PROCEDURES OTHER THAN THOSE SPECIFIED HEREIN MAY RESULT IN
HAZARDOUS LASER RADIATION EXPOSURE.
CAUTION
LASER RADIATION WHEN OPEN AVOID EXPOSURE TO BEAM.
FOR EUROPE
C€
The CD-RW drive is in conformity with the EMC directive and low-voltage
directive.
1. IMPS
This
man
may,
2. IMI
duct
beU
le
If
Ic
This n
display
Page 4

C€:î-
I :
Page 5
: to
ltin
age
DMPLIANCE INFORMATION STATEMENT
DECLARATION OF CONFORMITY PROCEDURE)
.esponsible Party: Philips BU PC Add-Ons.
.ddress: Glaslaan 2, 5616 LW Eindhoven
ype of Equipment: CD Rewriter
dodel Name: Philips CD Rewriter
Phis device complies with Part 15 of the FCC Rules. Operation is subject to the following
onditions:
i) this device may not cause harmful interference, and
I) this device must accept any interference received including interference that may cause
undesired operation.
See user manual instructions if interference to radio reception is suspected.
FCC INFORMATION (U.S.A.)
1. IMPORTANT NOTICE: DO NOT MODIFY THIS UNIT!
This product, when installed as indicated in the instructions contained in this
manual, meets FCC requirements. Modifications not expressly approved by Philips
may void your authority, granted by the FCC, to use the product.
2. IMPORTANT: """■ ...
duct use I
be used.
your FCC authorization to use this product in the USA.
3. NOTE: This product has been tested and found to comply with the requirements
listed in FCC Regulations, Part 15 for Class “B” digital devices. Compliance with
these requirements provides a reasonable level of assurance that your use of this pro
duct in a residential environment will not result in harmful interference with other
electronic devices. This equipment generates/uses radio frequencies and, if not
installed and used according to the instructions found in the users manual, may
cause interference harmful to the operation of other electronic devices. Compliance
with FCC regulations does not guarantee that interference will not occur in all instal
lations. If this product is found to be the source of interference, which can be deter
mined by turning the product “OFF” and “ON”, please try to eliminate the problem
by using one of the following measures: Relocate either this product or the device
that is being affected by the interference.
Utilize power outlets that are on different branch (circuit breaker or fuse) circuits or
install AC line fUter/s.
In the case of radio or TV interference, relocate/reorient the antenna. If the antenna
lead-in is 300 ohm ribbon lead, change the lead-in to coaxial type cable.
If these corrective measures do not produce satisfactory results, please contact the
local retailer authorized to distribute this type of product. If you can not locate the
appropriate retailer, please contact Philips.
This manual applies to the Philips CD Rewriter. The Philips CD Rewriter front panel
displays the Philips brand
Page 6

¿штшм-
i
Page 7

WARNING
Warning
The temperature where your Philips CD Rewriter is located should be between 5°C and
40°C (4l°F - 104°F), when used in a fan-cooled system.
To reduce the risk of electric shock do not disassemble the Philips CD Rewriter cabinet.
Always remove the disc before transporting your Philips CD Rewriter.
IMPORTANT PRECAUTIONS
Important Precautions
Please read the following precautions before attempting to operate your Philips CD Rewriter.
• Always record in a dust-free environment. If the disc must be removed from the Philips
CD Rewriter before recording is finished, store the disc in a clean, dust-free environ
ment.
• Your Philips CD Rewriter contains no user serviceable parts. Please refer all servicing to
qualified personnel.
• If any of the following should occur, your Philips CD Rewriter should be serviced by
qualified personnel;
Metal objects or liquids get inside the Philips CD Rewriter.
Your Philips CD Rewriter does not operate normally or a marked change in perfor
mance is noticed.
• Do not place heavy objects on the CD-RW discs.
• Do not subject your Philips CD Rewriter and computer to impact or shock when in use,
as this may impair recording or playback.
• Philips is not responsible for any data or information losses resulting from the operation
of your Philips CD Rewriter.
•
Page 8

.....................
yî» !**• ■ * ••**!•* ♦
Page 9

Table of Contents
Introduction ..........................................................................................................................................4
Philips CD Rewriter Features................................................................................................4
Recording Modes................................................................................................................... 4
Read me first........................................................................................................................... 5
Chapter 1 - System Configuration ......................................................................................................6
Computer ................................................................................................................................6
Software................................................................................................................................... 6
Tools ........................................................................................................................................ 6
Discs .........................................................................................................................................7
Chapter 2 - Installing your Philips CD Rewriter Drive
MASTER/SLAVE settings.....................................................................................................8
Installing your Philips CD Rewriter drive .........................................................................10
Chapter 3 - Operation ........................................................................................................................15
Front Panel ...........................................................................................................................15
Loading a Disc.......................................................................................................................16
Ejecting the Disc....................................................................................................................17
Manual Eject (emergency use).............................................................................................17
Troubleshooting...................................................................................................................................18
Appendix .............................................................................................................................................19
Specifications.........................................................................................................................19
...................................................................
8
©1999 Philips Consumer Electronics B.V. All Rights Reserved.
This document may not, in whole or in part, be copied, photocopied, reproduced,
translated, transmitted or reduced to any electronic medium of machine readable form
without prior consent in writing from Philips.
MS-DOS and Windows are registered trademarks of Microsoft, Inc.
Unix is a registered trademark of UNIX System Laboratories.
All other trademarks are the property of their respective companies.
Page 10

i
Page 11

Introduction
Thank you and congratulations for purchasing this Philips Philips CD Rewriter drive. Please
read this manual before using the drive in order to make the best use of its superior functions.
After reading, we suggest you retain this manual for future reference.
Philips CD Rewriter Features
4 speed Recording (Rewritable) - 4 speed Recording (Recordable)
- 32 speed Reading
Your Philips CD Rewriter is able to write (overwrite) CD-RW discs at up to four speed, and
is able to write CD-R and CD-RW discs at up to four speed. For both types of media, this
drive is able to read at up to 32X speed.
Compatible with Seven Different Formats
Your Philips CD Rewriter can both record and read seven different formats; CD-ROM,
CD-ROM XA, CD-I, CD-DA, CD-Bridge (multisession), CD-Extra, and Video CD. Your
Philips CD Rewriter is also equipped with an analog audio output terminal (headphones)
for CD-DA.
ATARI for High-Volume, High-Speed Data Transfer
Your Philips CD Rewriter features an ATAPI/IDE interface for connecting computers and
peripheral devices. ATAPI provides high-speed transmission of large quantities of data, which
is especially important when working with image data
Recording Modes
Track at Once
In this mode, data can be recorded to disc one track at a time. Discs recorded in this mode
cannot be played in CD players or CDROM drives other than a CD-RW or a CD-R drive
until the session is closed.
Disc at Once
In this mode, data can be recorded to an entire disc in one pass. It is not possible to write
additional data later.
Session at Once
In this mode, data can be recorded to the disc one session at a time. To use this mode, your
software must support Session at Once recording. New sessions can be written later.
Packet Writing
This is useful for data back-up. Smaller units of data can be added to tracks. To use this
mode, your software must support Packet Writing. Your Philips CD Rewriter supports both
sequential and random packet writing.
Page 12

•-г-“;!
v.v.v j л::.-;;.- :\^л*
iVMk 'i.
..................t
:. .v,*.:.V; v:.w; . : у: * v* vV* %v
Page 13

READ ME FIRST!
Just as your primary applications Write2CD Audio, Write2CD Backup and Write2CD Data,
PacketCD™ has been designed to offer you the most advanced technology in CD recording,
with “UDF packet writing” you will be able to use your CDs in virtually the same way you
use your other storage devices such as floppy disks, hard drives, etc...
To facilitate using UDF packet writing, PacketCD™ will automate some of the tasks.
When you insert a blank CD-R or CD-RW disk, the Write2CD wizard will pop-up showing
your CD-Recording options. The first option is to format a disk using PacketCD™. After
selecting this option, PacketCD™ will guide you through the PacketCD™ application.
Please note that to be able to format a disk, the application needs to sense a blank disk. This
may require a few moments.
When you insert a previously recorded disk using PacketCD™, or a different UDF packet
writing solution, the Write2CD wizard will not start since this disk is already formatted and
you can address it directly from your Windows explorer, or all popular Windows applica
tions.
If this is the case, Write2CD needs to start the reader, which may require a few moments.
Please note the following recommendations:
y when you insert a blank CD:
wait for the wizard to pop-up, which will guide you further
in case the wizard doesn’t pop-up, simply start your Windows explorer. By clicking
on the right mouse button, you will be able to format your blank CD and proceed.
/ when you insert a pre-recorded or previously recorded PacketCD™ written disk,
proceed directly to your Windows explorer.
/ In ALL cases, give the system enough time to initialize the process. Your CD-RW drive’s
LED will blink during the initialization phase and will remain on when finished. Keep in
mind that a CD-R or a CD-RW disk stores up to 650mb of data. The more data written
on the CD, the longer it will take to load the disk.
Page 14

Chapter 1.
System Configuration
Before using your Philips CD Rewriter, make sure that you have all of the items on the list of
included items.
In order to use your Philips CD Rewriter, you will require the following.
Computer
The following operating environment is required:
• An IBM/AT compatible computer with a 100 MHz or faster Pentium Processor 16Mb
ofRAM
• A vacant IDE interface connector
• A vacant half-height bay
• Windows 95, Windows 98, Windows NT4.0 or Higher
• Sufficient free hard disk space (min 12Mb)
Note: You will need about twice as much space on your hard disk as that required by the data
you wish to write to CD
Software
The Philips CD-RW software packed with your Philips CD Rewriter has been carefully
designed to give you the best possible results with the maximum ease of use.
Tools
Cruciform screwdriver
This is used to remove the covet of your computer,
and to install your Philips CD Rewriter drive.
Long nose pliers
These are used to insert or remove the jumper pin
when setting the MASTER/SLAVE settings of your
Philips CD Rewriter drive.
Cruciform Screwdriver
Long nose pliers
Page 15

Discs
You may use conventional CD-RW and CD-R discs with your Philips CD Rewriter.
Philips recommends you use only Philips CD-RW and CD-R discs which are available at
your retailer.
CD-RW Discs
(ollOmm, 74 minutes)
CD-R Discs
(0120mm, 74 minutes)
Read-only Discs
You can use discs with the (lJD§(S logo which conform to the Compact Disc Read Only
nCOMPACT
niiTUAumo a r nraMH«cr •'
Memory standard. If you wish to use the audio functions, use discs with the logo,
which conform to the Compact Disc Digital Audio standard.
Page 16
Chapter 2.
Installing your Philips CD Rewriter Drive
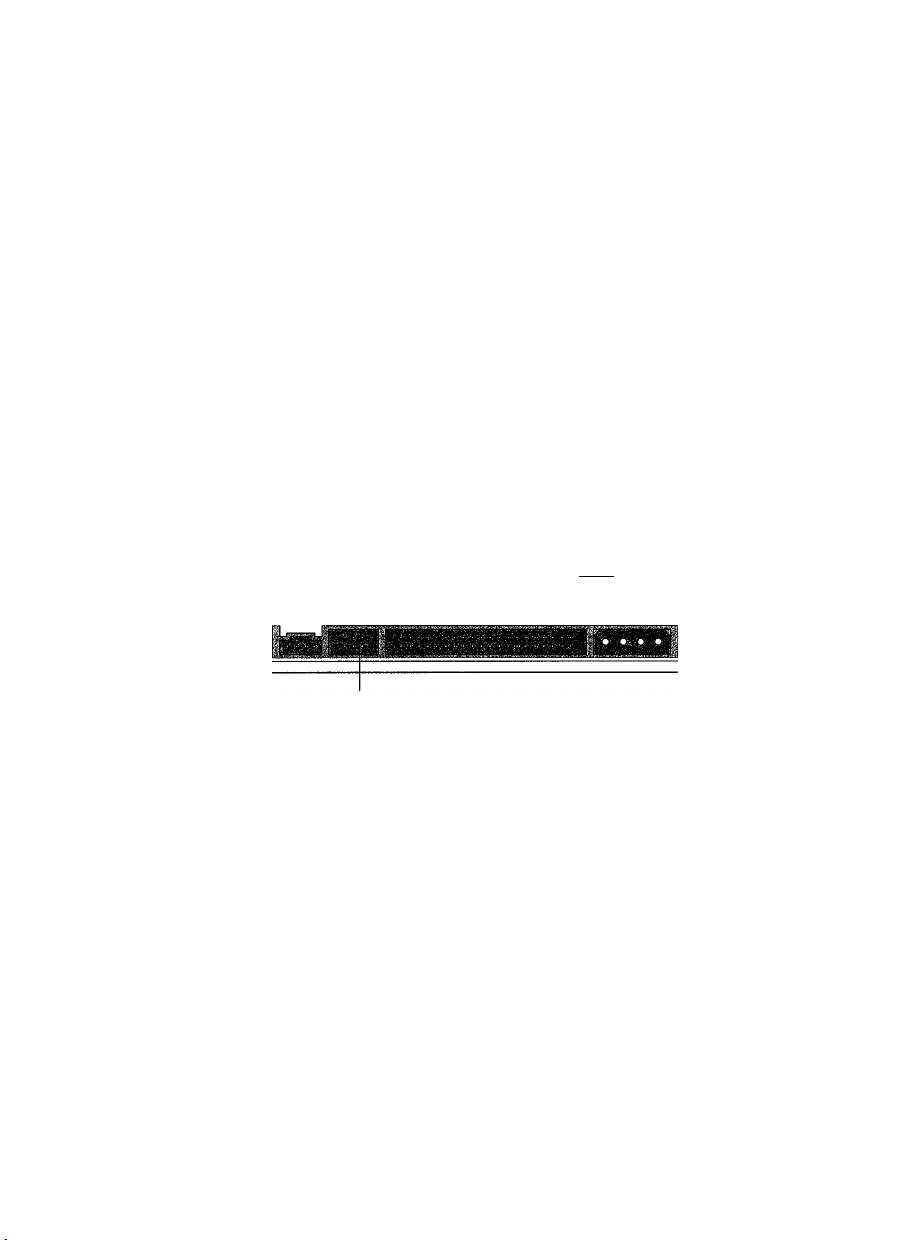
MASTER/SLAVE settings
Before you install your new Philips CD Rewriter in your computer, you must first make the
MASTER/SLAVE setting.
This setting is set by inserting a jumper pin in the jumper switch located on the rear panel of
the Philips CD Rewriter drive.
Important; When the unit is shipped from the factory, this setting is in the MASTER
position.
Note;
Use long-nose pliers to remove or insert the jumper pin.
Rear Panel
oooooooo
o o o o o o o
oooooooo
Jumper Switch
Enhanced IDE compatible computers normally have two IDE interface connectors; a
primary one and a secondary one.
Each IDE interface connector of the host computer allows up to two IDE devices to be
connected. This means that a total of up to four IDE devices can be connected.
Normally, a hard disk is connected to the primary connector, and a CDROM drive is
connected to the secondary connector.
Important: Avoid connecting your Philips CD Rewriter or a CD-ROM drive to the same
primary connector as the hard disk drive.
In order to take full advantage of the system’s performance, we recommend that
you connect your Philips CD Rewriter to the secondary connector by itself as the
MASTER.
Make sure that any other drives that are connected to the same cable have their
jumper settings set to SLAVE. Verify each respective drive’s owner’s manual for
instructions on jumper settings.
IDE PINT I
Page 17

Setting your Philips CD Rewriter as the MASTER
As shown in the diagram at the right, insert the jumper pin into
the right edge of the jumper switch.
Note: If only your Philips CD Rewriter will be connected to
the IDE interface connector, connect the Philips CD
Rewriter to the end of the connector.
Setting the Philips CD Rewriter as the SLAVE
As shown in the diagram at the right, insert the jumper pin into
the middle of the jumper switch.
) OUT
3 L
"1 1
> OUT
3 L
1 1
-----
CSEL
I—SLAVE
rMASTER
-----
CSEL
I—SLAVE
rMASTER
o □
2bB
°:
CSEL (Cable SELect)
If you choose the CSEL setting, the MASTER7SLAVE setting will be made automatically
depending on your hardware configuration. For details refer to the user manual of your
computer.
Page 18
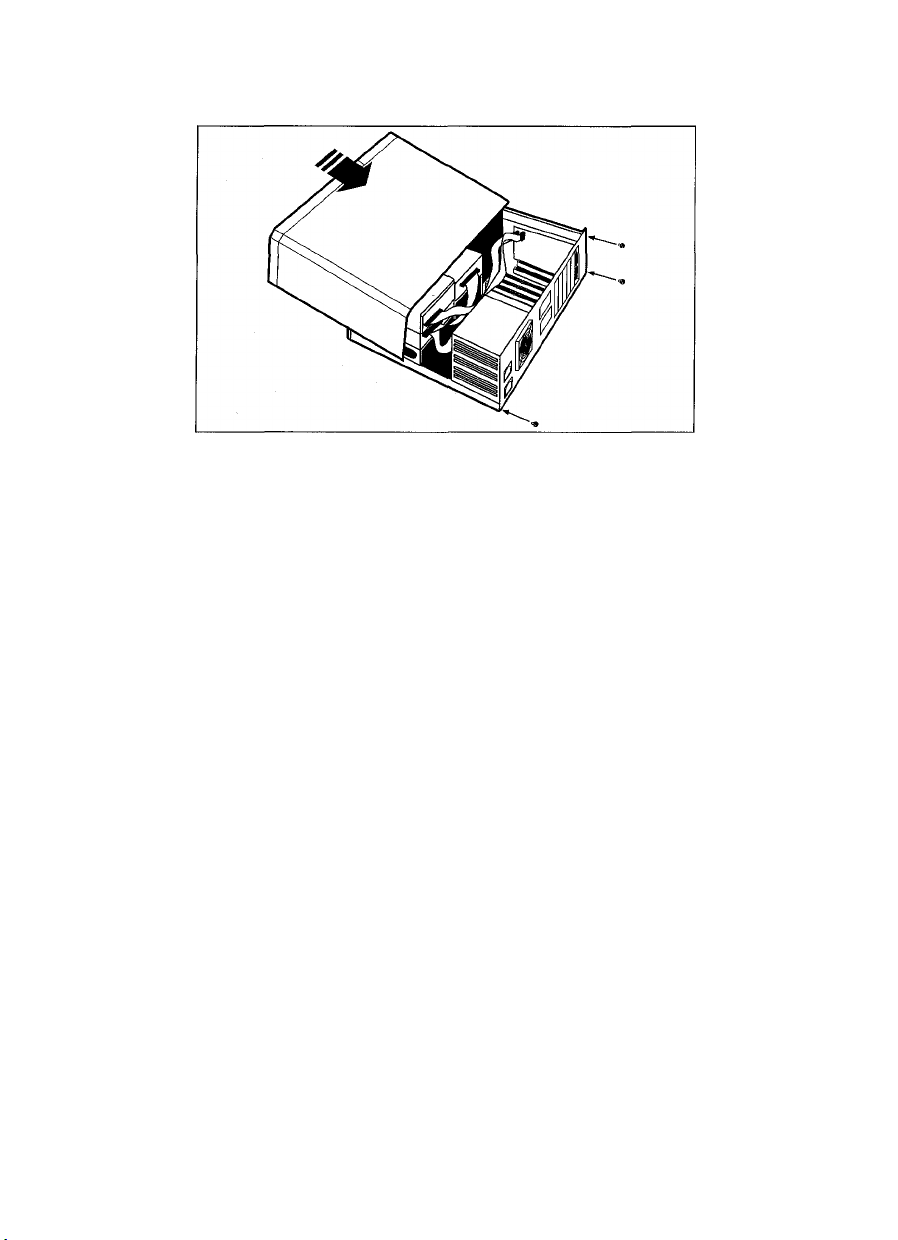
Installing your Philips CD Rewriter drive
The following steps may differ slightly, depending on the type of computer you are using.
For details on removing the cover from your computer, and installing or removing internal
devices, refer to the user manual for your computer.
1. Switch off your computer, and unplug it from the mains power
outlet.
If you fail to do this, there is a danger of electric shock and/or of causing short circuits,
which may damage the computer and/or your Philips CD Rewriter drive.
2. Remove the cover from your computer.
Be careful not to lose the screws that were removed.
Page 19
3. Your hands or body may be holding a charge of static
electricity.
Touch a metallic portion of the chassis or the power supply to discharge the build up.
4. Remove the front cover of a vacant half-height drive bay.
For details refer to the user manual of your computer.
5. Slide your Philips CD Rewriter into the drive bay from the
front.
At this time, be careful not to apply excessive force to the drive itself. Finger-tighten the
four fastening screws, and check that there is enough room to connect the power supply
cable, IDE interface connector, and the AUDIO cables.
Page 20
Connect the IDE interface connector.
Connect the 40-pin IDE interface connector to the IDE interface located on the rear
panel of your Philips CD Rewriter drive.
Position the connector so that the colored line is at pin 1 (your lower right).
7. Connect the AUDIO cable.
Connect the single 4-pin connector (Sound Blaster compatible) to the sound card.
Connect the 4-pin connector at the other end of the cable (the larger connector) to the
AUDIO OUT connector on your Philips CD Rewriter drive.
AUDIO cable
To the Philips CD
Rewriter 4-pin connector
(large)
To the Sound Card (Sound Blaster compatible)
One of the 2 connectors
Page 21
8. Connect the power supply cable.
Connect the +12V and +5V 4-pin power cable to the power supply interface located on
the rear panel of your Philips CD Rewriter drive.
The shape of the connector makes it impossible to reverse the connections.
If you have difficulty when inserting the connector, try gently wiggling the connector left
and right while inserting it.
9. Tighten the four fastening screws securely.
Page 22
10. Re-attach the cover to the computer.
11. Connect the power cable to an AC outlet, and switch on
your computer.
Make sure that the LED located on the panel of your Philips CD Rewriter drive is lit.
12. Start up your operating system.
For the procedure, refer to the manual for your operating system.
13. Install your Philips CD recording software
For the installation procedure, refer to the easy installation instructions on the CDROM sleeve or simply insert the software CD in your computers CD-ROM drive.
The software installation process will then begin automatically; just follow the on
screen prompts. In addition, a complete user manual for the software is located on
the CD-ROM in the root directory under “Manual”. Simply click on the language
you wish to use.
Page 23
Chapter 3.
Operation
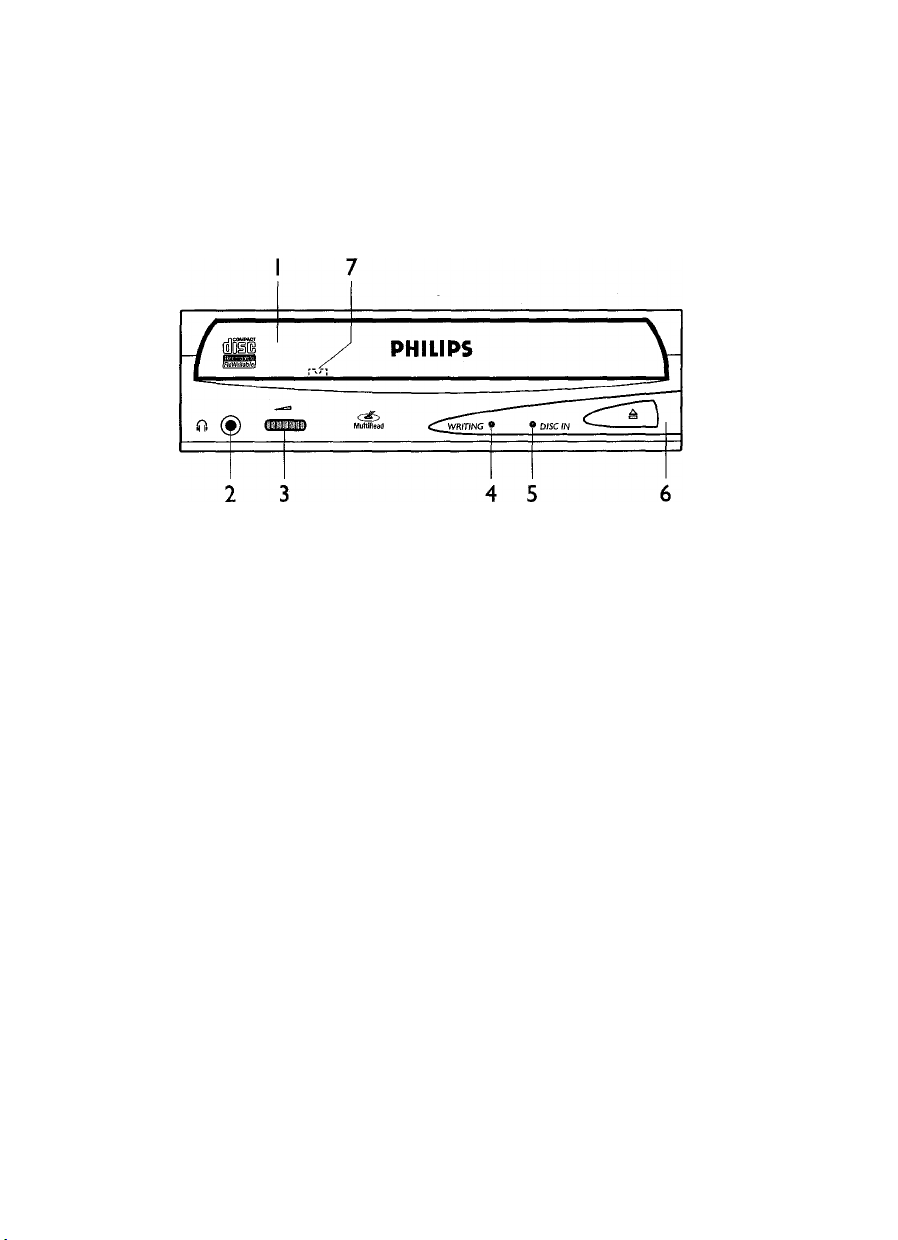
Front Panel
1 Disc tray
The disc is inserted and ejected here. Pressing the eject button will open the tray.
2 Headphone jack
This stereo mini jack allows you to connect headphones and listen to audio CD output.
3 Headphone volume control wheel
This control adjusts the volume level of the headphone output. Rotating the control
wheel clockwise (to the right) will increase the volume level.
4 WRITING LED
This indicator is illuminated when writing/overwriting the CD.
5 DISC IN LED
This indicator flashes when data is accessed and is illuminated green when there is a disc
in the drive.
Page 24
6 Eject button
This button is used to open or close the tray.
7 Manual Eject port
This is used to manually eject a disc that cannot be ejected in the normal way. It is for
emergency use only.
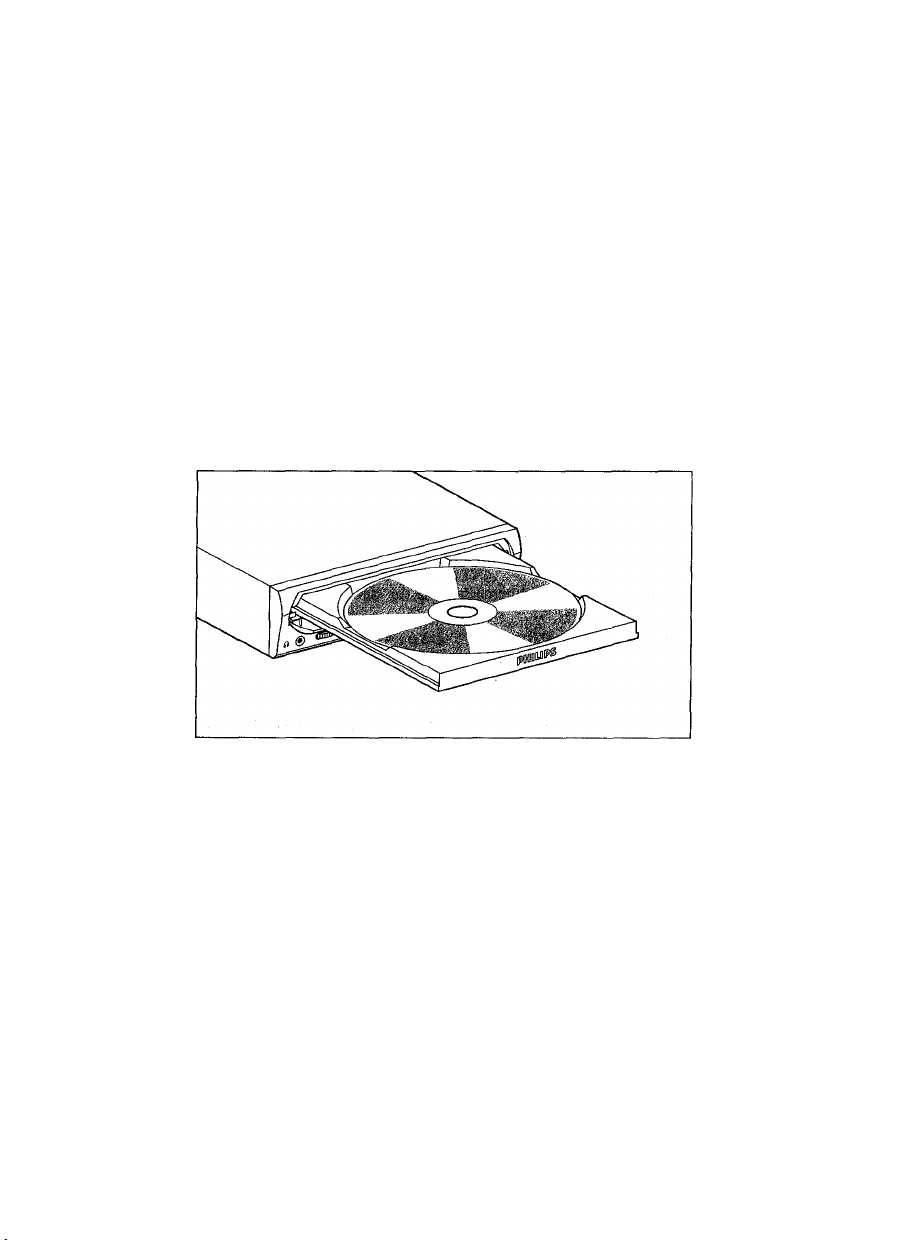
Loading a Disc
1. Press the eject button to open the tray.
2. Carefully place the disc, label-side up, on the disc tray.
3. Press the disc tray softly or press the eject button again to close the disc tray.
Page 25
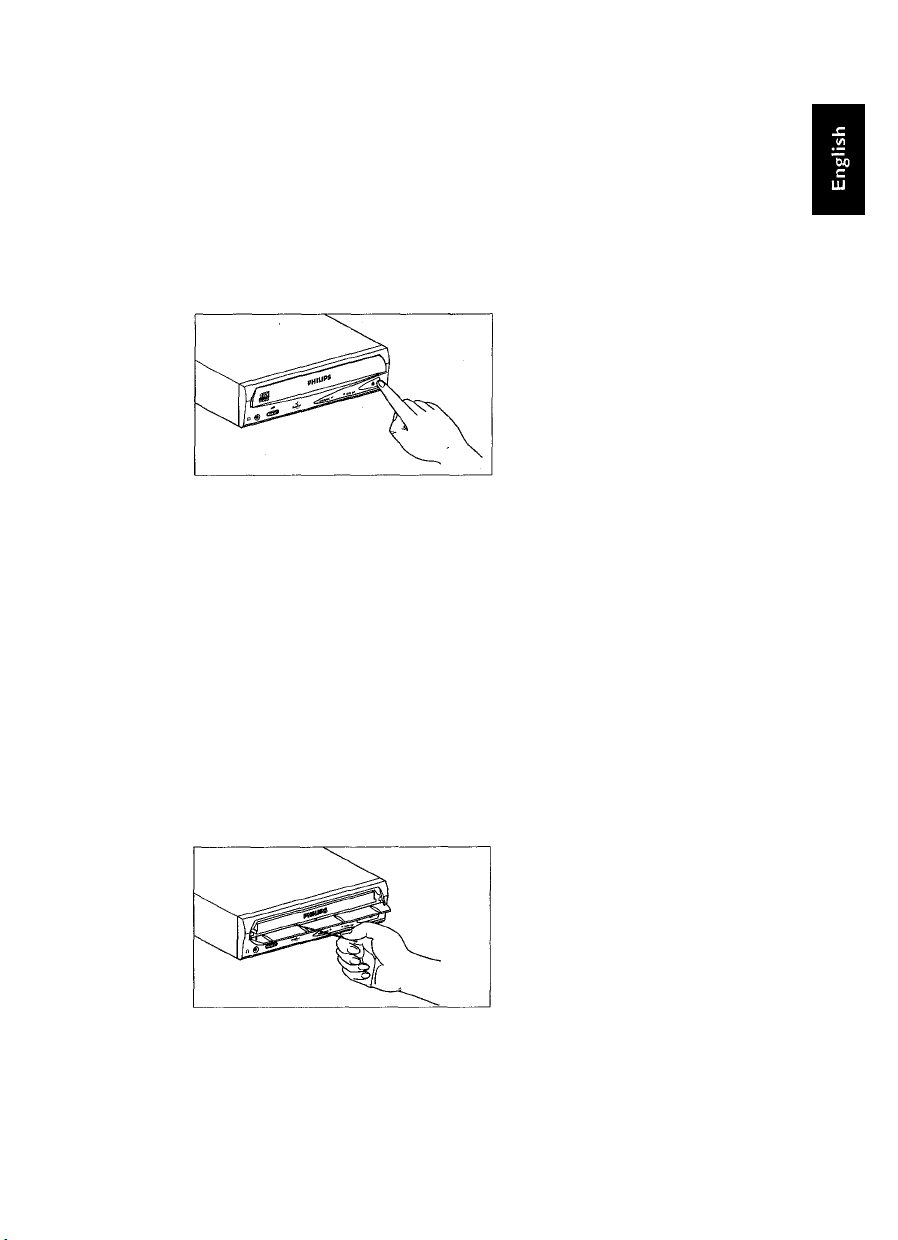
Ejecting the Disc
If your Philips CD Rewriter is powered-up:
Press the eject button to eject the disc.
Note: You cannot open the tray iftheATAPI command prohibits the eject operation while
your Philips CD Rewriter is reading data.
Caution: Be sure to remove the disc only after the tray is completely open. (Attempting to remove
the disc before it is completely ejected may cause the drive to malfunction.)
Press the eject button
If your Philips CD Rewriter is not powered up:
Pressing the eject button will not eject the disc.
Manual Eject (emergency use)
We will explain below how to eject the disc when the tray cannot be opened in the normal
manner, for example if the power is shut-off inadvertently or the loading mechanism fails.
This technique should be used only as a last resort. Frequent use may lead to malfunction.
You will need a rod-like object of 1 mm or less in diameter to do this. A straightened paper
clip works well.
1. Insert the pin-like tool into the manual eject port and push
gently.
The spring-loaded mechanism ejects the disc.
After manually ejecting a disc, you must turn off the power
2.
supply to your Philips CD Rewriter, then turn it back on
before continuing.
Page 26

Troubleshooting
If your Philips CD Rewriter is not performing as expected, we suggest you look up the symp
toms in the following table, and take the appropriate corrective action.
Symptoms
The DISC LED is off yet your computer is
powered up
Your Philips CD Rewriter is not recognized by
your computer
The disc tray will not open
The disc ejects by itself
Incorrect operation of the unit
Corrective action
- Check the DC power cable connection
to the drive.
- Check the IDE interface connection.
- Is the MASTER/SLAVE setting
correct?
- If there is only one device connected to
the IDE interface connector, is it
connected to the end of the connector?
- Make sure that the power to the
computer is turned on.
- Make sure that the disc is seated in the
tray correctly.
- Make sure that the disc is seated in the
tray correctly.
- Make sure that you are using the
correct disc.
- Make sure that there is no dust, dirt, or
condensation on the disc or tray.
Page 27

Appendix
Specifications
Interface
Data Capacity
Record/Read Speed
Data Transfer Rate
Burst Transfer Rate
Buffer Size
Access Speed
Installation
Disc Loading
Audio Out
(normal speed)
Power Consumption 12.7 W peak (read/write)
Power Supply 5V±5%, 12V±10%
Environment
Dimensions (WxHxD)
Weight
ATAPI (E-IDE)
650MB (74 minutes disc)
Writing (CD-RW); 4X speed
Writing (CD-R): Normal speed, 4X speed
Reading: Maximum 32X speed
(CD-DA: IX speed only)
150 - 2400KB/sec
Maximum 13.3 MB/sec
2MB (325 sectors)
115 ms (Random access at reading)
Horizontal
Tray
Frequency Response 20 - 20,000Hz (Line Out)
Output Level 1 Vrms (Line Out)
Temperature: +5°C - +45°C (read/write, when used in
a fan-cooled system)
Humidity: 8 - 80% (condensation must not occur)
146 X 41.3 X 193.1 mm (excluding front panel)
950g
Philips reserves the right to change product specifications at any time and without prior
notice.
Thank you for purchasing this fine Philips product. We have worked relentlessly to bring you
a product combining superb operating performance with the greatest possible ease of use.
If you have any questions or comments, please contact your retailer or Philips at the follow
ing Internet address: Http;//
www.pcstuff.philips.com.
Page 28

Page 29

WARNUNG!
Warnung
Die Umgebungstemperatur des Philips CD Rewriter sollte bei Systemen mit Gebläseküh
lung zwischen 5 °C und 40° C (41°F - 104“F) liegen.
Zum Schutz vor Stromschlägen sollten Sie das Philips CD Rewriter nicht zerlegen.
Entnehmen Sie immer die CD, bevor Sie Ihr.Philips CD Rewriter transportieren.
WICHTIGE HINWEISE
Wichtige Hinweise
Bevor Sie Ihr Philips CD Rewriter in Betrieb nehmen, lesen Sie bitte die folgenden
Hinweise.
• Zeichnen Sie immer in einer staubfreien Umgebung auf. Wenn die CD aus dem Philips
CD Rewriter entnoihmen werden muß, bevor das Aufzeichnen abgeschlossen ist, bewah
ren Sie die Platte in einer sauberen, staubfreien Umgebung auf.
• Ihr Philips CD Rewriter enthält keine Teile, die vom Benutzer instandgesetzt werden
können. Bei Servicearbeiten wenden Sie sich bitte immer an qualifiziertes Fachpersonal.
• Bei einem der folgenden Ereignisse sollte Ihr Philips CD Rewriter von qualifiziertem
Fachpersonal instandgesetzt werden:
Es sind Metallgegenstände oder Flüssigkeiten in das Innere des Philips CD Rewriter
eingedrungen.
Ihr Philips CD Rewriter arbeitet nicht wie gewohnt oder es ist ein deutlicher
Leistungsabfall zu verzeichnen.
• Legen Sie keine schweren Gegenstände auf die CD-RW.
• Setzen Sie den Philips CD Rewriter und den Computer beim Betrieb keinen Stößen oder
Erschütterungen aus, da hierdurch das Aufzeichnen oder Abspielen beeinträchtigt
werden kann.
• Philips ist nicht verantwortlich für einen etwaigen Daten- oder Informationsverlust, der
aus dem Betrieb des Philips CD Rewriter resultiert.
Page 30

Inhaltsverzeichnis
Einleitung ............................................................................................................................................23
Leistungsmerkmale des Philips CD Rewriter
Aufzeichnungsmodi...............................................................................................................24
Lies mich erst! .................................................................................................................... 25
....................................................................
23
Kapitel 1 - Systemkonfiguration
Computer ..............................................................................................................................26
Software................................................................................................................................. 26
Werkzeuge..............................................................................................................................26
CDs......................................................................................................................................... 27
Kapitel 2 - Installation Ihres Philips CD Rewriter-Laufwerkes
MASTER/SLAVE-Einstellungen
Installation Ihres Philips CD Rewriter-Laufwerkes..........................................................29
Kapitel 3 - Bedienung .........................................................................................................................34
Vorderes Bedienfeld..............................................................................................................34
Laden einet CD......................................................................................................................35
Auswerfen einer CD .............................................................................................................36
Manuelles Auswerfen (Benutzung im Notfall) .................................................................36
Fehlersuche .........................................................................................................................................37
Anhang ................................................................................................................................................ 38
Technische Daten ................................................................................................................. 38
................
......................................................................................
..................................
.......................................................................................
28
26
28
©1999 Philips Consumer Electronics B.V. Alle Rechte Vorbehalten.
Dieses Dokument darf weder ganz noch teilweise ohne vorherige schriftliche Genehmigung
der Firma Philips kopiert, fotokopiert, reproduziert, übersetzt, übermittelt oder in ein für ein
elektronisches Speichergerät lesbares Format gebracht werden.
MS-DOS und Windows sind eingetragene Warenzeichen der Firma Microsoft, Inc.
Unix ist ein eingetragenes Warenzeichen der Firma UNIX System Laboratories.
Alle anderen Warenzeichen sind Eigentum der jeweiligen Firmen.
Page 31

Einleitung
Vielen Dank und herzlichen Glückwunsch zum Erwerb des Philips CD Rewriter-Laufwerkes.
Vor dem Gebrauch des Laufwerkes lesen Sie bitte das Handbuch, die herausragenden Funk
tionen des Philips CD Rewriter optimal nutzen zu können.
Es empfiehlt sich, nach dem Lesen das Handbuch für ein späteres Nachschlagen aufzube
wahren.
Leistungsmerkmale des Philips CD Rewriter
Schreiben mit 4facher Geschwindigkeit (wiederbeschreibbare
CDs) - Schreiben mit 4facher Geschwindigkeit (beschreibbare
CDs) - Lesen mit 32facher Geschwindigkeit
Ihr Philips CD Rewriter kann eine CD-RW mit bis zu 4facher Geschwindigkeit beschreiben
(überschreiben) und eine CD-R bzw. CD-RW mit bis zu 4facher Geschwindigkeit beschrei
ben.
Das Laufwerk kann bei beiden Speichermedien mit bis zu 32facher Geschwindigkeit lesen.
Kompatibel mit sieben verschiedenen Formaten
Ihr Philips CD Rewriter kann sieben verschiedene Formate aufzeichnen und lesen: CDROM, CD-ROM XA, CD-I, CD-DA, CD-Bridge (Multisession), CD-Extra und VideoCD.
Ihr Philips CD Rewriter ist auch mit einem analogen Audio-Ausgang (Kopfhörer) für CDDA ausgerüstet.
ATAPI für eine umfangreiche und schnelle Datenübertragung
Ihr Philips CD Rewriter besitzt eine ATAPI/IDE Schnittstelle zur Verbindung mit
Computern und Peripheriegeräten.
ATAPI bietet bei großen Datenmengen eine schnelle Übertragung, was besonders beim
Arbeiten mit Bilddaten wichtig ist.
Page 32

Aufzeignungsmodi
“Track-at-Once”
In diesem Modus können auf der Platte einzelne „Tracks” [Spuren] aufgezeichnet werden.
CDs, die in diesem Modus beschrieben werden, können erst dann auf anderen CD-Spielern
oder CD-ROM-Laufwerken als einem CD-RW- oder CD-R-Laufwerk abgespielt werden,
wenn die „Session” [Dialogsitzung] abgeschlossen wurde.
“Disc-at-Once”
In diesem Modus können Daten in einem Durchgang auf die gesamte Platte geschrieben
werden.
Hierbei ist es später nicht möglich, die CD mit weiteren Daten zu beschreiben.
“Session-at-Once”
In diesem Modus können auf der CD Daten in einer “Session” auf einmal aufgezeichnet
werden.
Um diesen Modus benutzen zu können, muß Ihre Software die Aufzeichnungsmethode
“Session-at-Once” unterstützen. Hierbei können später neue “Sessions” geschrieben werden.
“Packet Writing"
Diese Methode ist für die Datensicherung nützlich. Kleinere Dateneinheiten können den
“Tracks” hinzugefügt werden.
Um diesen Modus benutzen zu können, muß Ihre Software die Methode “Packet Writing”
[Paketschreiben] unterstützen.
Ihr Philips CD Rewriter unterstützt sowohl das sequentielle Paketschreiben als auch das
Paketschreiben per Direktzugriff.
Page 33

LIES MICH ERST!
Genau wie Ihre ersten Anwendungen Write2CD Audio, Write2CD Backup und Write2CD
Data wurde PacketCD™ so konzipiert, daß es Ihnen die modernste Technologie bei CD-
Aufnahmen bietet. Mit “UDF Packet Writing” können Sie Ihre CDs ganz genau so verwen
den wie Ihre anderen Speichermedien, zum Beispiel Disketten, Festplatten etc. Um die
Verwendung von UDF Packet Writing zu erleichtern, automatisiert PacketCD™ einige der
Aufgaben.
Wenn Sie eine leere CD-R oder CD-RW einlegen, startet der
Write2CD-Assistent und zeigt Ihnen die Optionen für CD-Aufnahmen an. Die erste Option
ist das Formatieren einer CD mit PacketCD™. Wenn Sie diese Option ausgewählt haben,
führt PacketCD™ Sie durch die PacketCD™-Anwendung. Bitte beachten Sie, daß die
Anwendung erst eine leere CD erkennen muß, bevor sie eine CD formatieren kann. Das
kann einen Augenblick dauern.
Wenn Sie eine vorher aufgenommene CD einlegen und PacketCD™ oder eine andere UDF
Packet Writing-Lösung verwenden, startet der Write2CD-Assistent nicht, da diese CD schon
formatiert ist und Sie von Ihrem Windows Explorer bzw. allen beliebten Windows-Anwen
dungen direkt darauf zugreifen können. In dem Fall muß Write2CD den Leser starten, was
ebenfalls einen Augenblick dauern kann.
Bitte beachten Sie die folgenden Empfehlungen:
V wenn Sie eine leere CD einlegen:
- warten Sie, bis der Assistent startet, der Sie weiter durch das Programm führen wird;
- wenn der Assistent nicht erscheint, starten Sie einfach Ihren Windows Explorer. Indem
Sie auf die rechte Maustaste klicken, können Sie Ihre leere CD formatieren und den
Vorgang fortsetzen.
y wenn Sie eine aufgenommene oder vorher aufgenommene, mit PacketCD™
beschriebene CD einlegen, gehen Sie direkt zu Ihrem Windows Explorer.
Lassen Sie dem System in ALLEN Fällen genügend Zeit, den Vorgang zu initialisieren.
Die LED Ihres CD-RW-Laufwerks blinkt während der Initialisierungsphase und bleibt
an, wenn der Vorgang beendet ist. Beachten Sie, daß eine CD-R bzw. eine
CD-RW bis zu 650 MB an Daten speichert. Je mehr Daten schon auf der CD sind, umso
länger dauert es, bis die CD geladen ist.
Page 34

Kapitel 1.
System konfiguratiori
Vor Benutzung des Philips CD Rewriter sollten Sie prüfen, ob alle Positionen gemäß Inhalts
liste vorhanden sind.
Für die Benutzung Ihres Philips CD Rewriter benötigen Sie folgendes:
Computer
Systemvoraussetzungen
• Ein IBM/AT-kompatibler Computer mit einem 100 MHz-Prozessor oder einem schnel
leren Pentium-Prozessor oder einem 100 MHz oder schnelleren 486er Prozessor.
• Ein freier IDE-Port
• Ein freier, halbhoher Steckplatz
• Windows 98, Windows 95, Windows NT4.0 oder höher
• Genügend Festplattenkapazität (mindestens 12MB)
Bemerkung: Sie benötigen auf Ihrer Festplatte ungefähr doppelt soviel Platz wie für die Daten,
die Sie auf CD schreiben möchten.
Software
Die Ihrem Philips CD Rewriter beigefügte Software “Philips CD-RW” wurde sorgfältig
entwickelt, um Ihnen bei maximaler Anwenderfreundlichkeit den größtmöglichen Nutzen
zu bieten
Werkzeuge
Kreuzschraubenzieher
Dieses Werkzeug benötigen Sie, um die Abdeckung
am Computer zu entfernen und das Philips CD
Rewriter-Laufwerk zu installieren.
Spitzzange
Die Zange wird gebraucht, um die ’’Jumper” für
den MASTER/SLAVE-Modus Ihres Philips CD
Rewriter-Laufwerkes entsprechend einzustellen.
Kreuzschraubenzieher
Spitzzange
Page 35

CDs
Sie können herkömmliche CD-RW und CD-R verwenden.
Philips empfiehlt ausschließlich die Verwendung von Philips CD-RW und CD-R-Platten,
die im Einzelhandel erhältlich sind.
CD-RW
(0l2Omm, 74 Minuten)
CD-R
(0l2Omm, 74 Minuten)
CD-ROM
Sie können CDs mit dem DOSE -Logo verwenden, die dem Standard für CD-ROMs
entsprechen. Wenn Sie die Audiofunktionen benutzen möchten, verwenden Sie CDs mit
nCOMPACr
dem -Logo, die dem Standard für CD Digital Audio entsprechen.
nCOMRACT
Page 36

Kapitel 2.
Installation Ihres Philips CD Rewriter-
Lauf Werkes
MASTER/SLAVE-Einstellungen
Bevor Sie das neue Philips CD Rewriter in Ihrem Computer installieren, müssen Sie die
MASTER/SLAVE-Einstellungen vornehmen.
Diese Einstellung wird vorgenommen, indem Sie einen Jumperstift im Jumperblock auf der
hinteren Abdeckung Ihres Philips CD Rewriter-Laufwerkes einrasten.
Wichtig: Das Gerät wird werkseitig in der MASTER-Position ausgeliefert.
Hinweis.- Verwenden Sie zum Einstellen des Jumperstifts die Spitzzange.
Hintere Abdeckung
Jumperblock
EIDE-kompatible Computer verfügen normalerweise über zwei IDE-Ports; einen primären
und einen sekundären Port.
An jeden IDE-Port des Computers kann man bis zu zwei IDE-Geräte anschließen. Das
bedeutet, daß insgesamt bis zu vier Geräte angeschlossen werden können.
Normalerweise ist eine Festplatte mit dem primären IDE-Port verbunden, während das CDROM-Laufwerk mit dem sekundären IDE-Port verbunden ist.
Wichtig: Sie sollten es vermeiden, Ihren Philips CD Rewriter oder ein CD-ROM-Lauf
werk an denselben primären Port wie Ihre Festplatte anzuschließen. Um die
Leistung Ihres Systems voll auszuschöpfen empfehlen wir, Ihr Philips CD Rewri
ter als MASTER mit dem primären Port zu verbinden.
Stellen Sie sicher, daß sonstige Laufwerke, die an dasselbe Kabel angeschlossen
sind, über die jeweiligen Jumper als „Slave” eingestellt, sind. Hinweise zum
Einstellen der Jumper finden Sie im Benutzerhandhuch zu dem jeweiligen Lauf
werk.
Page 37

Einstellung Ihres Philips CD Rewriter als MASTER
Wie in der Abbildung rechts dargestellt, lassen Sie den Jumperstift
am rechten Rand des Jumperblocks einrasten.
Hinweis: Wenn nur Ihr Philips CD Rewriter mit dem IDE-
Portverhunden wird, schließen Sie den Philips CD
Rewriter am Ende des Ports an.
3 OUT
3 L
T 1
^ Hl
------r-SLAVE
rMASTER
CSEL
Einstellung des Philips CD Rewriter als SLAVE
-------
Wie in der Abbildung rechts dargestellt, lassen Sie den Jumperstift
in der Mitte des Jumperblocks einrasten.
) OUT
3 L
“1 1
CSEL
r- SLAVE
rMASTER
□ =
23B
Kabelselektion (Cable SELect)
Wenn Sie die Einstellung CSEL (Kabelselektion) wählen, erfolgt die MASTER/SLAVEEinstellung in Abhängigkeit Ihrer Hardwarekonfiguration automatisch. Weitere Einzelhei
ten können Sie dem Benutzerhandbuch des Computers entnehmen.
Installation ihres Philips CD Rewritei^Laufwerkes
Die folgenden Schritte können in Abhängigkeit des von Ihnen verwendeten Computers
leicht voneinander abweichen. Für Einzelheiten in Bezug auf das Entfernen der Computer
verkleidung und das Installieren oder den Ausbau interner Geräte schlagen Sie bitte im
Benutzerhandbuch des Computers nach.
1. Schalten Sie den Computer aus und ziehen Sie den
Netzstecker aus der Netzsteckdose.
Wenn Sie dies nicht tun, können elektrischer Stromschläge und/oder Kurzschlüsse
verursacht werden, wodurch Schäden an Ihrem Computer und/oder Ihrem Philips CD
Rewriter-Laufwerk entstehen können.
Page 38

2. Entfernen Sie die Verkleidung Ihres Computers.
Achten Sie sorgfältig darauf, daß Sie die entfernten Schrauben nicht verlieren.
3. Ihre Hände oder Ihr Körper können elektrostatisch aufgela
den sein.
Berühren Sie zum Abbau dieser Aufladung einen metallenen Teil des Gehäuses oder der
Stromversorgung.
4. Entfernen Sie die vordere Abdeckung eines freien, halbhohen
Laufwerk-Einbauplatzes.
Weitere Einzelheiten schlagen Sie bitte im Benutzerhandbuch Ihres Computers nach.
Page 39

5. Schieben Sie Ihr Philips CD Rewriter-Laufwerk von vorn in
den LaufWerk-Einbauplatz.
Achten Sie zu diesem Zeitpunkt darauf, bei dem Laufwerk selbst nicht zuviel Kraft anzu
wenden.
Ziehen Sie die vier Schrauben mit der Hand an und prüfen Sie, daß genügend Platz
vorhanden ist, um das Stromversorgungskabel, den IDE-Steckverbinder und das Audiokabel anschließen zu können.
Anschließen des IDE-Steckverbinders.
Schließen Sie den 40poligen IDE-Steckverbinder an den IDE-Port an, der sich an der
hinteren Abdeckung Ihres Philips CD Rewriter-Laufwerkes befindet.
Schließen Sie den Steckverbinder so an, daß er mit dem farbigen Strich an Pin 1 (von
Ihnen aus gesehen unten rechts) ausgerichtet ist.
Page 40

7. Anschließen des Audiokabels.
Schließen Sie den 4poligen Steckverbinder (SoundBlaster-kompatibel) an die Sound
karte an. Schließen Sie den 4poligen Steckverbinder auf der anderen Seite des Kabels
(größerer Steckverbinder) an den Audio-Line-Out-Steckverbinder Ihres Philips CD
Rewriter-Laufwerkes an. Die Polarisationsnase muß oben liegen.
Audiokabel
Zur Soundkarte (SoundBlaster-kompatibel)
Zum 4poligen
Steckverbinder des
Philips CD Rewriter
8. Anschließen des Stromversorgungskabels.
Schließen Sie das 4polige +12 Volt und +5 Volt-Kabel an die auf der hinteren Abdeckung
Ihres Philips CD Rewriter-Laufwerkes gelegene Stromversorgungs-Schnittstelle an.
Die Form des Steckverbinders sorgt dafür, daß die Anschlüsse nicht vertauscht werden
können. Wenn Sie beim Einsetzen des Steckverbinders Probleme haben, rütteln Sie beim
Einsetzen leicht an der linken und rechten Seite.
Page 41

9. Ziehen Sie die vier Befestigungsschrauben fest an.
10. Befestigen Sie die Abdeckung wieder am Computer.
11. Stecken Sie das Netzkabel wieder in die Steckdose und
schalten Sie Ihren Computer ein.
Achten Sie darauf, daß die LED-Anzeige im Bedienungsfeld des Laufwerkes leuchtet.
12. Starten Sie das Betriebssystem.
Für dieses Verfahren schlagen Sie bitte im Flandbuch für das Betriebssystem nach.
13. Installieren Sie die Philips CD Aufzeichnungs-Software.
Was das Installationsverfahren betrifft, beachten Sie bitte die Anweisungen für eine
einfache Installation auf der Schutzhülle der CD-ROM oder legen Sie einfach die
Sofiware-CD in das CD-ROM-Laufwerk Ihres Computers. Die Installation der Soft
ware beginnt dann automatisch; folgen Sie nur den Bedienerhinweisen auf dem Bild
schirm. Es befindet sich zusätzlich ein vollständiges Benutzerhandbuch der Software
im Hauptverzeichnis der CD-ROM unter “Manual”. Sie brauchen lediglich auf die
gewünschte Sprache Ihrer Aufzeichnungs-Software zu klicken.
Page 42

Kapitel 3.
Bedienung
Vorderes Bedienfeld
1 Schublade
Die CD wird hier eingelegt und entnommen. Wenn Sie auf die Taste “Eject [Auswerfen] ”
drücken, öffnet sich die Schublade.
2 Anschlußbuchse für Kopfhörer
Diese Stereo-Minianschlußbuchse gibt Ihnen die Möglichkeit, einen Kopfhörer anzu
schließen und CD-Tonaufnahmen zu hören.
3 Einstellrad für Kopfhörer-Lautstärke
Mit diesem Bedienelement kann die Lautstärke des Kopfhörers eingestellt werden.
Durch Drehen des Einstellrads im Uhrzeigersinn (nach rechts) erhöht sich die Laut
stärke.
4 WRITING-LED (LED SCHREIBEN)
Diese Kontrolleuchte leuchtet auf, während eine CD beschrieben bzw. überschrieben
wird.
5 DISC IN-LED (LED DISK EINGELEGT)
Diese Kontrolleuchte blinkt beim Zugriff auf die Daten und leuchtet grün auf, wenn sich
eine Disk im Laufwerk befindet.
Page 43

6 Taste Eject [Auswerfen]
Diese Taste dient zum Öffnen und Schließen der Schublade.
7 Port für manuelles Auswerfen
Wird dazu benutzt eine CD manuell auszuwerfen, die nicht auf normale Art und Weise
ausgeworfen werden kann. Nur im Notfall verwenden.
Laden einer CD
1. Zum Öffnen der Schublade die Taste Eject drücken.
2. Legen Sie die CD mit dem Etikett nach oben in die Schublade.
3. Zum Schießen der Schublade drücken Sie leicht dagegen oder drücken Sie erneut die
Taste Eject.
Page 44

Auswerfen einer CD
Wenn der Strom des Philips CD Rewriter eingeschaltet wurde:
Zum Auswerfen der CD drücken Sie die Taste Eject.
Hinweis:
Vorsicht:
Während Ihr Philips CD Rewriter Daten liest, können Sie die CD nicht entnehmen,
wenn der ATAPI-Befehl dies nicht gestattet.
Achten Sie darauf, die CD erst zu entnehmen, nachdem die Schublade vollständig
geöffnet ist (Wenn Sie versuchen, die CD zu entnehmen, bevor sie vollständig ausge
worfen wurde, kann dies eine Störung des Laufioerkes zur Folge haben).
Drücken Sie die Taste Eject
Wenn der Strom Ihres Philips CD Rewriter nicht eingeschaltet ist:
Durch Drücken der Taste Eject wird die CD nicht ausgeworfen.
Manuelles Auswerfen (Benutzung im Notfall)
Im folgenden wird erklärt, wie die CD ausgeworfen werden kann, wenn sich die Schublade
nicht in der normalen Art und Weise öffnen läßt, zum Beispiel wenn der Strom versehent
lich abgeschaltet wurde oder der Lademechanismus versagt. Diese Technik sollte allerdings
nur als letzter Ausweg angewendet werden. Ein häufiger Einsatz dieser Technik führt zu
Störungen. Zum manuellen Auswerfen der CD benötigen Sie einen Gegenstand mit einem
Durchmesser von 1 mm oder weniger, der einer Stecknadel ähnelt. Eine gerade gebogene
Büroklammer eignet sich auch gut dazu.
1. Stecken Sie den Gegenstand (ähnlich einer Stecknadel) in den Port zum manuellen Auswerfen der Platte und schieben ihn sanft nach vorne.
Die CD wird durch den gefederten Mechanismus ausgeworfen.
2. Nachdem eine CD manuell ausgeworfen wurde, müssen Sie
den Strom Ihres Philips CD Rewriter ausschalten und an
schließend wieder einschalten, bevor Sie die Arbeit fortsetzen.
Page 45

Fehlersuche
Wenn Ihr Philips CD Rewriter nicht die erwartet gute Leistung erbringt, empfehlen wir
Ihnen, die Symptome in folgender Tabelle zu suchen und die entsprechenden korrigierenden
Maßnahmen durchzuführen.
Symptom
Die CD-LED leuchtet nicht, obwohl der
Computer angeschaltet ist.
Ihr Philips CD Rewriter wird vom Computer
nicht erkannt
Die Schublade öffnet nicht
Die Platte wird selbsttätig ausgeworfen
Das Gerät arbeitet nicht korrekt
Abhilfemaßnahme
- Prüfen Sie den Anschluß des Gleich
Stromkabels
- Prüfen Sie den IDE-Steckverbinder.
- Ist die MASTER/SLAVE-Einstellung
korrekt?
- Wenn nur ein Gerät mit dem IDE-Port
verbunden ist, ist es mit dem Ende des
Steckverbinders verbunden?
- Stellen Sie sicher, daß der Computer
angeschaltet ist.
- Stellen Sie sicher, daß die CD korrekt
in der Schublade sitzt.
- Stellen Sie sicher, daß die CD korrekt
in der Schublade sitzt.
- Überzeugen Sie sich, daß Sie die rich
tige CD benutzen.
- Stellen Sie sicher, daß weder Staub,
Schmutz oder Kondensation auf der
CD oder der Schublade vorhanden
sind.
Page 46

Anhang
Technische Daten
Schnittstelle: ATAPI (E-IDE)
Speicherkapazität:
Schreib-ZLese-Geschwindigkeit: Schreiben (CD-RW): 4 fache Geschwindigkeit
Datenübertragungsrate:
Burst Datenrate
Puffergröße
Zugriffsgeschwindigkeit 115 ms (Direktzugriff beim Lesen)
Installation
Laden der Platte
Audio-Ausgang
(normale Geschwindigkeit) Ausgangspegel 1 Vrms (Ausgangsleitung)
Stromverbrauch
Stromversorgung
Umgebungstemperatur:
Luftfeuchtigkeit:
Abmessungen (BxHxT)
Gewicht 950 g
650MB (74 Minuten-CD)
Schreiben (CD-R): Normale Geschwindigkeit, 4 fache
Geschwindigkeit
Lesen: Maximal 32 fache Geschwindigkeit (CD-DA:
nur IX-Geschwindigkeit)
150 - 2400 KB/Sek.
Maximal 13,3 MB/Sek.
2 MB (325 Sektoren)
Horizontal
Schublade
Frequenzgang 20 - 20,000 Hz (Ausgangsleitung)
12,7 W (lesen/schreiben)
5V±5%, 12V ±10%
± 5°C - + 45°C (lesen/schreiben, Benutzung bei
Gebläsekühlung)
8-80 % (es darf keine Kondensation auftreten)
146 X 41.3 x 193.1 mm (ohne Frontplatte)
Philips behält sich das Recht vor, jederzeit ohne vorherige Mitteilung Änderungen der
Produktspezifikationen vorzunehinen.
Vielen Dank, daß Sie dieses Qualitätsprodukt von Philips gekauft haben. Wir haben hart
daran gearbeitet, Ihnen ein Produkt liefern zu können, das ein vorzügliches Betriebsverhal
ten mit größtmöglicher Anwenderfreundlichkeit kombiniert.
Bei Fragen oder Anmerkungen wenden Sie sich bitte an Ihren Fachhändler oder an das
Philips Produktmanagement unter der folgenden Internetadresse:
http://www.pcstuff.philips.com.
Page 47

AVERTISSEMENT
Avertissement
La température de l’endroit où votre Philips CD Rewriter se trouve devrait être comprise
entre 5°C et 40°C (4l°F - 104°F), lorsque celui-ci est utilisé dans un système refroidi par
ventilateur.
Pour réduire les risques de choc électrique, ne pas désassembler votre Philips CD Rewriter.
Retirez toujours le disque avant de transporter votre Philips CD Rewriter.
PRECAUTIONS IMPORTANTES
Précautions Importantes
Veuillez lire les précautions suivantes avant de tenter de faire fonctionner votre Philips CD
Rewriter.
• Toujours graver dans un environnement sans poussières. Si le disque doit être enlevé du
Philips CD Rewriter avant la fin de la gravure, conservez-le dans un environnement
propre et sans poussières.
• Votre Philips CD Rewriter ne contient aucun composant remplaçable par l’utilisateur.
L’entretien et les réparations doivent être confiés à un personnel qualifié.
• Apportez votre Philips CD Rewriter à un personnel qualifié si :
Des objets en métal ou des liquides se sont glissés à l’intérieur du Philips CD
Rewriter.
Votre Philips CD Rewriter ne fonctionne pas correctement, ou si vous remarquez une
nette dégradation de ses performances.
• Ne pas placer d’objets lourds sur les disques CD réinscriptibles.
• Ne faire subir d’impact ou de choc ni à votre Philips CD Rewriter ni à votre ordinateur
lors de leur utilisation ; ceci risquerait de fausser la gravure ou la lecture.
• Philips n’est pas responsable des pertes de données ou d’informations résultant de l’utili
sation de votre Philips CD Rewriter.
Page 48

Table des Matières
Introduction ........................................................................................................................................41
Caractéristiques de votre Philips CD Rewriter
Modes de Gravure................................................................................................................ 41
Lisez-moi d’abord ................................................................................................................42
..................................................................
4l
Chapter 1 - Configuration du Système
Ordinateur.............................................................................................................................43
Logiciel ..................................................................................................................................43
Outils .....................................................................................................................................43
Disques .................................................................................................................................. 44
Chapitre 2 - Installation de l’Unité Philips CD Rewriter ...............................................................43
Réglage MAITRE/ESCLAVE .............................................................................................45
Installation de l’unité Philips CD Rewriter
Chapitre 3 ■ Fonctionnement............................................................................................................ 52
Face Avant..............................................................................................................................52
Chargement du Disque ........................................................................................................53
Ejection du Disque ............................................................................................................. 54
Ejection Manuelle (en cas d'urgence)..................................................................................54
Guide de Détection des Pannes..........................................................................................................55
Annexe .................................................................................................................................................56
Spécifications.........................................................................................................................56
............................................................................................
.......................................................................
43
47
©1999 Philips Consumer Electronics B.V. Tous Droits Réservés.
La copie, la photocopie, la reproduction, la traduction, la transmission ou la réduction sur
tout support électronique de forme exploitable sur machine, de toute partie ou de l’ensemble
de ce document, sont interdites sans l’autorisation écrite préalable de Philips.
MS-DOS et Windows sont des marques déposées de Microsoft, Inc.
Unix est une marque déposée de UNIX System Laboratories.
Toutes les marques de fabrique sont la propriété de leurs compagnies respectives.
Jl.
Page 49

Introduction
Nous vous remercions et vous félicitons d’avoir fait l’achat de cette unité Philips CD
Rewriter. Afin de tirer le meilleur parti des fonctions supérieures de votre Philips CD
Rewriter, nous vous recommandons de lire ce manuel attentivement. Après l’avoir lu, nous
vous suggérons de le conserver en guise de référence afin de pouvoir le consulter ultérieure-
Caractéristiques de votre Philips CD Rewriter
Gravure quadruple vitesse Risques Réinscriptibles) - Gravure
quadruple vitesse (Disques Enregistrables) - Lecture 32x.
Votre Philips CD Rewriter est capable de graver (et regraver) les disques CD-RW jusqu’à une
vitesse de quatre fois, et est capable de graver les disques CD-R et CD-RW jusqu’à une vitesse
de quatre fois. Pour ces deux types de média, cette unité est capable de lire jusqu’à une vitesse
de seize fois.
Compatible avec Sept Formats Différents
Votre Philips CD Rewriter peut lire et graver sept formats différents : CD-ROM, CD-ROM
XA, CD-I, CD-DA, CD-Bridge (multisession), CD-Extra, et Video CD. Votre Philips CD
Rewriter est également équipé d’une sortie audio analogique (casque d’écoute) pour CD-DA.
ATARI, pour un Transfert Rapide de Grandes Quantités de
Données
Votre Philips CD Rewriter est doté d’une interface ATAPI/IDE permettant d’y relier ordina
teurs et périphériques. ATAPI autorise une transmission rapide de grandes quantités de
données, ce qui est surtout important lorsque l’on travaille avec des données image.
Modes de Gravure
Piste d’un coup (Track at once)
Dans ce mode, les données peuvent être gravées sur le disque une piste à la fois. Les disques
enregistrés dans ce mode-là ne peuvent pas être lus par des lecteurs CD ni par des unités de
disque CD-ROM autres que des unités de disque CD-RW ou CD-R jusqu’à ce que la session
soit terminée.
Disque d’un coup (Disc at Once)
Dans ce mode, des données peuvent être gravées sur l’ensemble du disque en un seul passage.
Il est impossible de graver des données supplémentaires ultérieurement.
Session d’un coup (Session at Once)
Dans ce mode, des données peuvent être gravées sur le disque une session à la fois. Pour
utiliser ce mode, votre logiciel doit supporter les gravures de type “ Session d’un coup “.
D’autres sessions peuvent être gravées ultérieurement.
Gravure par paquets (Packet writing)
Cette fonction est utile pour la sauvegarde de données. Des unités de données plus petites
peuvent être ajoutées aux pistes. Pour utiliser ce mode, votre logiciel doit supporter la
Gravure par Paquets. Votre Philips CD Rewriter supporte la gravure par paquets aléatoire et
séquentielle.
Page 50

USEZ-MOI D’ABORD!
Comme pour les principales applications Write2CD Audio, Write2CD Backup et Write2CD
Data, PacketCD™ a été conçu pour vous apporter la technologie la plus avancée en matière
de CD enregistrable. Grâce au “UDF packet writing” vous pourrez utiliser votre CD prati
quement de la même façon que vos autres supports d’enregistrement tels que les disquettes,
lecteurs de disque dur, etc. Pour vous faciliter l’utilisation du progiciel d’enregistrement
UDF, PacketCD™ va automatiser certaines tâches.
Lorsque vous insérez un CD enregistrable ou réinscriptible vierge, l’assistant Write2CD
apparaît et affiche les options d’enregistrement de CD. La première option est le formatage
du disque à l’aide de PacketCD™. Après avoir sélectionné cette option, PacketCD™ vous
guidera dans l’application PacketCD™.
Veuillez noter que cette opération de formatage de disque exige de l’application qu’elle
détecte un disque vierge, ce qui peut durer quelques instants.
Lorsque vous insérez un disque préalablement enregistré à l’aide de PacketCD™ ou d’un
progiciel d’enregistrement UDF différent, l’assistant 'Wfite2CD ne démarre pas puisque ce
disque est déjà formaté. Vous pouvez néanmoins le consulter directement à partir de l’ex
plorateur Windows ou d’autres applications courantes de Windows. Dans ce cas Write2CD
devra démarrer le lecteur, ce qui peut également durer quelques instants.
'Veuillez tenir compte des recommandations suivantes:
/ lorsque vous insérez un CD vierge;
- attendre l’affichage de l’assistant, qui va vous accompagner tout au long de la procédure
- si l’assistant ne s’affiche pas, démarrez votre explorateur Windows. En cliquant sur le
bouton droit de la souris, vous pouvez formater votre CD vierge et continuer la procé
dure.
y lorsque vous insérez un CD pré-enregistré ou un disque enregistré préalablement à l’aide
de PacketCD™, suivez directement la procédure de l’explorateur Windows.
y Dans TOUS les cas, laissez au système suffisamment de temps pour qu’il démarre la
procédure. Le témoin LED de votre graveur de CD va clignoter durant la phase d’ini
tialisation et restera allumé tant que la procédure ne sera pas terminée. Souvenez-vous
qu’un disque CD-R ou CD-RW peut stocker jusqu’à 650mo de données. Plus le disque
contient des données enregistrées, plus la durée de son chargement sera longue.
Page 51

Chapitre 1
Configuration du Système
Avant d’utiliser votre Philips CD Rewriter, assurez-vous de bien disposer de tous les articles
mentionnés sur la liste d’articles inclus.
Vous aurez besoin des éléments suivants pour utiliser votre Philips CD Rewriter.
Ordinateur
L’environnement d’exploitation suivant est nécessaire:
• Un ordinateur compatible IBM/PC avec processeur Pentium 100 Mhz ou plus rapide
16 Mo de RAM
• Un connecteur d’interface IDE libre
• Un logement demi-hauteur libre
• Windows 95, Windows 98, Windows NT4.0 ou plus récent
• Un espace disque dur suffisant (min. 12 Mo)
Remarqtie: Il vous faudra disposer sur votre disque dur d’environ deux fois plus d’espace que celui
requis par les données que vous souhaitez graver sur le CD.
Logiciel
Le logiciel CD-RW Philips livré avec votre Philips CD Rewriter a été soigneusement conçu
de manière à vous fournir les meilleurs résultats possibles tout en bénéficiant d’une facilité
d’utilisation optimale.
Outils
Tournevis cruciforme
Celui-ci sert à retirer le coffret de votre ordinateur, et
à installer votre unité Philips CD Rewriter.
Pince à becs longs
Elle sert à insérer ou à retirer le cavalier lors du
réglage de la position MAITRE/ESCLAVE de votre
unité Philips CD Rewriter.
Tournevis Cruciforme
Pince à becs longs
Page 52

Disques
Vous pouvez utiliser des disques CD-RW et CD-R qui sont conformes aux normes.
Philips vous recommande d’utiliser uniquement des disques CD-RW et CD-R Philips
disponibles chez votre détaillanr.
Disques CD-RW
(0120mm, 74 minutes)
Disques CD-R
(0120mm, 74 minutes)
Read-only Discs
Vous pouvez utiliser des disques portant le logo fflnSfg qui sont conformes au standard
Compact Disc Read Only Memory. Si vous désirez utiliser les fonctions audio, utilisez des
disques portant le logo qui sont conformes au standard Compact Disc Digital Audio.
nCOMPAC»
Page 53

Chapitre 2
Installation de l'unité Philips CD Rewriter
Réglage MAITRE/ESCLAVE
Avant d’installer votre nouveau Philips CD Rewriter dans votre ordinateur, vous devez tout
d’abord effectuer le réglage MAITRE/ESCLAVE.
Ce réglage est effectué par l’insertion d’un cavalier sur le connecteur mâle situé sur la face
arrière de l’unité Philips CD Rewriter.
Important: Lorsque l’unité quitte l’usine de fabrication, ce réglage est dans la position
MAITRE.
Remarque: Utilisez une pince à becs longs pour retirer ou insérer le cavalier.
Face Arrière
Cavalier
Les ordinateurs compatibles IDE améliorés possèdent normalement deux connecteurs d’in
terface IDE ; un connecteur primaire et un connecteur secondaire.
Chaque connecteur d’interface IDE de l’ordinateur hôte permet de brancher jusqu’à deux
périphériques IDE. Cela signifie qu’en tout, jusqu’à quatre périphériques IDE peuvent être
connectés.
En règle générale, un disque dur est relié au connecteur primaire, et un lecteur CD-ROM esr
relié au connecteur secondaire.
Important: Évitez de connecter votre Philips CD Rewriter ou un lecteur CD-ROM au même
connecteur primaire que le disque dur.
Afin de profiter au maximum des performances du système, nous vous recom
mandons de relier votre Philips CD Rewriter au connecteur secondaire en tant
que MAÎTRE.
Assurez-vous que toutes les autres unités raccordées au même câble sont mises en
mode «ESCLAVE». Pour plus d’informations sur le réglage des cavaliers de ces
unités, reportez-vous aux manuels d’installation respectifs de ces unités.
Page 54

Réglage du Philips CD Rewriter en position MAÎTRE.
Insérez le cavalier sur les broches du bord droit du connecteur,
comme indiqué sur le schéma de droite.
Remarque: Si seul votre Philips CD Rewriter sera relié au
connecteur d’interface IDE, reliez-le à l’extrémité du
connecteur.
Réglage du Philips CD Rewriter en position
ESCLAVE.
Insérez la broche du cavalier au milieu du commutateur du cava
lier, comme indiqué sur le schéma de droite.
) OUT
L
) OUT
3 L
T J
CSEL
SLAVE
MASTER
n
-----
CSEL
I—SLAVE
rMASTER
O □
CSEL (Câble SELect)
Si vous sélectionnez la position CSEL, le réglage MAITRE/ESCLAVE sera effectué automa
tiquement selon votre configuration matérielle. Pour plus de détails, veuillez consulter le
manuel de l’utilisateur de votre ordinateur.
Page 55

Installation de l’unité Philips CD Rewriter
Il se peut que les étapes suivantes diffèrent légèrement suivant le type d’ordinateur que vous
utilisez. Pour obtenir des instructions sur comment ouvrir votre ordinateur et comment
installer ou retirer les périphériques internes, veuillez consulter le manuel .de l’utilisateur de
votre ordinateur.
1. Éteignez votre ordinateur, et débranchez-le de la prise
d’alimentation secteur.
Ne pas débrancher la prise pourrait entraîner un risque de choc électrique et/ou provo
quer des courts-circuits, ce qui pourrait endommager votre ordinateur et/ou votre Philips
CD Rewriter.
2. Retirez le coffret de votre ordinateur.
Prenez garde à ne pas égarer les vis que vous aurez enlevées.
Page 56

3. Il se peut que vos mains ou votre corps soient porteurs d’une
charge d’électricité statique.
Touchez une partie métallique du châssis ou de l’alimentation afin de décharger cette
accumulation.
4. Retirez le couvercle d’un logement libre d’unité demi-hauteur.
Pour plus de détails, veuillez consulter le manuel de l’utilisateur de votre ordinateur.
5. Faites glisser votre Philips CD Rewriter dans son logement,
par l’avant.
Faites bien attention à ne pas appuyer trop fort sur votre Philips CD Rewriter. Serrez à la
main les quatre vis, et vérifiez qu’il y a suffisamment de place pour relier le câble d’ali
mentation, le connecteur d’interface IDE et les câbles AUDIO.
Page 57

6. Branchez le connecteur d’interface IDE.
Branchez le connecteur d’interface IDE 40-broches à l’interface IDE située sur la face
arrière de votre Philips CD Rewriter. Positionnez le connecteur de manière à ce que la
ligne colorée soit du côté de la broche n°l (à droite, en bas).
7. Branchez le câble AUDIO.
Reliez le connecteur simple 4-broches (compatible Sound Blaster) à la carte son. Reliez le
connecteur 4-broches de l’autre extrémité du câble (le connecteur le plus grand) au
connecteur de sortie AUDIO (AUDIO OUT) de votre Philips CD Rewriter.
câble AUDIO
■^03 Vers le connecteur
4-broches du Philips
CD Rewriter
Vers la Carte Son (compatible Sound Blaster).
Un des deux connecteurs
Page 58

8.
Branchez le câble d’alimentation secteur.
Branchez le câble d’alimentation 4-broches +12V et +5V à l’interface d’alimentation
située sur la face arrière de votre Philips CD Rewriter. La forme du connecteur rend
impossible une connexion à l’envers. Si vous éprouvez des difficultés à insérer le
connecteur, essayez de le faire jouer doucement, de droite à gauche, lors de l’insertion.
9. Vissez les quatre vis à fond.
Page 59

10. Replacez le coffret de votre ordinateur.
11. Reliez le câble d’alimentation à une prise d’alimentation
secteur, et allumez votre ordinateur.
Assurez-vous que la lumière située sur la face de votre unité Philips CD Rewriter est
bien allumée.
12. Démarrez votre système d’exploitation.
Pour la procédure à suivre, veuillez consulter le manuel de votre système d’exploitation.
13. Installez votre logiciel de gravure CD Philips.
Pour la procédure à suivre, veuillez consulter l’instruction d’installation rapide
imprimée sur la pochette du CD-ROM ou, insérez simplement le CD du logiciel
dans le lecteur CD-ROM de votre ordinateur. Le processus d’installation du logiciel
démarrera alors automatiquement; suivez les instructions affichées à l’écran. De plus,
un manuel de l’utilisateur complet pour le logiciel est inclus dans le répertoire racine
du CD-ROM sous “Manual”. Cliquez simplement sur la langue que vous désirez
utiliser avec votre logiciel de gravure.
Page 60

Chapitre 3
Fonctionnement
Face Avant
1 Tiroir de disque
Le disque est inséré et éjecté à cet endroit. Une pression sur le bouton d’éjection ouvre le
tiroir.
2 Prise pour écouteurs
Cette mini prise stéréo vous permet de brancher un casque et d’écouter la sortie CD
audio.
3 Commande de volume du casque
Cette commande permet d’ajuster le niveau du volume de la sortie casque. Tournez la
molette dans le sens des aiguilles d’une montre (vers la droite) afin d’augmenter le
volume.
4 LED D’ECRITURE
Ce voyant s'allume lorsque le lecteur grave/réinscrit un CD.
5 LED DE PRESENCE DE CD
Ce voyant clignote lorsque vous accédez à des données, et s'allume en vert lorsqu'un CD
est présent dans le lecteur.
Page 61

6 Bouton d’éjection
Ce bouton sert à ouvrir et à refermer le tiroir.
7 Port d’Éjection Manuelle
Celui-ci sert à éjecter manuellement un disque qui ne peut être éjecté normalement. Il ne
doit être utilisé qu’en cas d’urgence.
Chargement du Disque
\
1. Appuyez sur le bouton d’éjection pour ouvrir le tiroir.
2. Placez soigneusement le disque sur le plateau, face imprimée sur le dessus.
3. Pour refermer le tiroir, appuyez tout doucement sur le plateau ou appuyez de nouveau sur
le bouton d’éjection.
Page 62

Ejection du Disque
Si votre Philips CD Rewriter est sous tension :
Appuyez sur le bouton d’éjection pour éjecter le disque.
Remarque : Vous ne pouvez ouvrir le tiroir si la commande ATAPI interdit l’éjection lorsque
votre Philips CD Rewriter est en train de lire des données.
Attention : Assurez-vous de ne retirer le disque qu après l’ouverture complète du tiroir.
(Retirer le disque avant qu’il n’ait été entièrement éjecté pourrait entraîner une
défaillance de l’unité.)
Appuyez sur le bouton d'éjection.
Si votre Philips CD Rewriter n’est pas sous tension :
Une pression sur le bouton d’éjection n’ouvrira pas le tiroir.
Ejection Manuelle (en cas d’urgence)
Nous expliquons ci-dessous comment éjecter le disque lorsque le tiroir ne peut être ouvert dé
manière normale, par exemple lorsque l’alimentation a été coupée par inadvertance ou
lorsque le mécanisme de chargement est en panne. Cette méthode ne doit être employée
qu’en dernier ressort. Une utilisation fréquente de cette méthode pourrait entraîner une
défaillance de l’unité. Il faudra pour cette opération un objet fin tel qu’une tige métallique,
de 1 mm de diamètre ou moins. Un trombone déplié convient parfaitement.
1. Insérez l’épingle ou le trombone dans le port d’éjection
manuelle, et poussez doucement.
Le mécanisme à ressort éjectera alors le disque.
2. Après avoir éjecté manuellement un disque, vous devez cou
per l’alimentation secteur de votre Philips CD Rewriter puis
la rallumer avant de pouvoir continuer.
Page 63

Guide de Détection des Pannes
Si vous jugez ies performances de votre Philips CD Rewriter anormales, nous vous suggérons
de consulter les symptômes mentionnés dans le tableau suivant, et de procéder à l’action
corrective appropriée.
Symptômes
Votre Philips CD Rewriter n'est pas alimenté
en courant
Votre Philips CD Rewriter n'est pas reconnu
par votre ordinateur d’interface IDE
Le tiroir ne s’ouvre pas
Le disque s’éjecte tout seul
L’unité ne fonctionne pas correctement - Assurez-vous que le disque est placé
Action Corrective
- Vérifiez le raccordement du câble
d'alimentation CC.
- Vérifiez le raccordement du connecteur
d'interface IDE.
- Le réglage MAITRE/ESCLAVE est-il
correct ?
- Si un seul périphérique est relié au
connecteur d'interface IDE, est-il bien
relié à l'extrémité du connecteur ?
- Assurez-vous que l’unité est bien
alimentée.
- Assurez-vous que le disque est placé
correctement sur le plateau.
correctement sur le plateau.
- Vérifiez que vous utilisez le bon disque.
- Assurez-vous qu’il n’y a ni poussière, ni
salissure, ni condensation sur le disque
ou sur le plateau.
Page 64

Annexe
Spécifications
Interface
Capacités de Données 650MB (disque de 74 minutes)
Vitesse de Gravure/Lecture Gravure (CD-RW) ; quadruple vitesse
Vitesse de Transfert des Données 150 - 2400KB/sec
Vitesse de Transfert de Rafale Maximum 13.3 MB/sec
Tampon
Vitesse d'Accès 115 ms (accès aléatoire à la lecture)
Installation Horizontale
Chargement du Disque
Sortie Audio
(vitesse normale)
Puissance Absorbée 12,7 W en crête (lecture/gravure)
Alimentarion Secteur
Environnement Température : +5°C - +45°C (lecture/gravure, lors d'une
Dimensions (Larg x Haut x Prof)
Poids 950g
ATAPI (E-IDE)
Gravure (CD-R) : vitesse normale, quadruple vitesse
Lecture : vitesse maximale de 32 fois
(CD-DA : vitesse simple seulement)
2MB (325 secteurs)
Tiroir
Réponse en Fréquences 20 - 20,000Hz (Sortie Ligne)
Niveau de Sortie 1 Vrms (Sortie Ligne)
5V±5%, 12V±10%
utilisation dans un système refroidi par ventilateur)
Humidité : 8 - 80% (aucune condensation ne doit
survenir)
146 X 41,3 X 193,1 mm (face avant non comprise)
Philips se réserve le droit de modifier les spécifications du produit à tout moment et sans avis
préalable.
Nous vous remercions d’avoir fait l’achat de ce produit Philips. Nous avons travaillé sans
relâche afin de vous offrir un produit alliant une excellente performance à une facilité d’utili
sation optimale.
Si vous avez des questions, ou si vous souhaitez nous faire part de vos commentaires, n’hésitez
pas à entrer en contact avec votre détaillant ou à joindre le service de Gestion de Produit
Philips à l’adresse Internet suivante : Http://www.pcstuf£philips.com.
Page 65

AVVERTENZA
Avvertenza
La temperatura ambiente nel luogo di installazione di Philips CD Rewriter deve essere
compresa tra 5°C e 40°C quando l’unità viene utilizzata in un sistema dotato di ventilazione.
Per evitare il rischio di scosse elettriche, non smontare l’involucro esterno di Philips CD
Rewriter.
Rimuovere sempre il CD prima di trasportare Philips CD Rewriter.
RACCOMANDAZIONI IMPORTANTI
Raccomandazioni importanti
Leggere attentamente le seguenti raccomandazioni prima di utilizzare Philips CD Rewriter.
• Le registrazioni devono sempre essere eseguite in un ambiente privo di polvere. Se è
necessario rimuovere il CD dall’unità prima che la registrazione sia conclusa, conservare
il CD in un ambiente pulito e privo di polvere.
• Philips CD Rewriter non contiene parti che l’utente possa riparare o sostituire. Tutti gli
interventi di manutenzione devono essere effettuati esclusivamente da personale special
izzato.
Qualora si verifichi una delle situazioni di seguito descritte, l’unità Philips CD Rewriter
deve essere portata presso un centro di assistenza qualificato:
Infiltrazione di oggetti metallici o di liquidi all’interno dell’unità.
Anomalie di funzionamento di Philips CD Rewriter o cali significativi delle sue
prestazioni.
Non appoggiare oggetti pesanti sui dischi CD-RW.
Evitare che durante il funzionamento l’unità subisca urti che potrebbero compromettere
la registrazione o la riproduzione.
Philips non può essere ritenuta responsabile di eventuali perdite di dati o informazioni
derivanti dall’uso di Philips CD Rewriter.
Page 66

Indice
Introduzione
Capitolo 1 - Configurazione del sistema............................................................................................. 61
Capitolo 2 - Installazione dell’unità Philips CD Rewriter.................................................................63
Capitolo 3 - Funzionamento ................................................................................................................ 70
Risoluzione dei problemi...................................................................................................................... 73
Appendice...............................................................................................................................................74
.........................................................................................................................................59
Caratteristiche del Philips CD Rewriter ..............................................................................59
Modalitas Registrazione ........................................................................................................ 59
Informazioni preliminari ...................................................................................................... 60
Computer............................................................................................................................... 61
Software...................................................................................................................................61
Attrezzi.....................................................................................................................................61
Dischi .......................................................................................................................................62
Impostazioni MASTER/SLAVE............................................................................................63
Installazione dell’unità Philips CD Rewriter................................................................. ..65
Pannello Anteriore .................................................................................................................70
Caricamento di un CD............................................................................................................71
Espulsione del CD .................................................................................................................. 72
Espulsione Manuale (procedura d'emergenza) ...................................................................72
Specifiche................................................................................................................................. 74
©1999 Philips Consumer Electronics B.V. Tutti i diritti riservati.
Evietato copiare, fotocopiare, riprodurre, tradurre, trasmettere o trasferire su supporto elet
tronico in formato leggibile dalla macchina il presente documento o parte di esso senza la
previa autorizzazione in forma scritta di Philips.
MS-DOS e Windows sono marchi registrati di Microsoft Ine.
Unix è un marchio registrato di UNIX System Laboratories.
Tutti gli altri marchi di fabbrica sono di proprietà delle rispettive società.
Page 67

Introduzione
Vi ringraziamo e ci felicitiamo con voi per l'acquisto di un'unità Philips CD Rewriter. Per
sfruttare al meglio le eccezionali funzioni del Philips CD Rewriter, vi raccomandiamo di
leggere questo manuale prima di usare l'unità. Vi consigliamo di conservare questo manuale
dopo averlo letto per poterlo consultare anche in futuro.
Caratteristiche del Philips CD Rewriter
Registrazione 4 x (Riscrivibile) - Registrazione 4 x (Registrabile) -
Lettura 32 x
Il vostro Philips CD Rewriter è in grado di scrivere (riscrivere) dischi CD-RW a velocità fino
a 4 X e di scrivere dischi CD-R e CD-RW a velocità fino a 4 x. Per entrambi i tipi di supporto,
questa unità è in grado di leggere con velocità fino a 32 x.
Compatibilità con Sette Diversi Formati
Il vostro Philips CD Rewriter è in grado di registrare e leggere ben sette diversi formati: CD
ROM, CD-ROM XA, CD-I, CD-DA, CD-Bridge (multisession), CD-Extta e Video CD II
vostro Philips CD Rewriter è anche dotato di uscita audio analogica (cuffie) per CD-DA.
ATAPI per Trasferimento di Alto Volume di Dati ad Alta Velocità
Il vostro Philips CD Rewriter è dotato di interfaccia ATAPI/IDE per collegamento di
computer e dispositivi periferici. ATAPI permette la trasmissione ad alta velocità di elevate
quantità di dati, funzione di particolare importanza quando si opera con dati grafici.
Modalitàs Registrazione
Track at Once
In questa modalità, i dati possono essere registrati sul CD una pista per volta. I CD registrati
in questa modalità non possono essere riprodotti su CD o unità CD-ROM diversi da un
CD-RW o un'unità CD-R prima che sia chiusa la sessione
CD at Once
In questa modalità, i dati possono essere registrati su un intero CD in una sola volta. Non è
possibile aggiungere altri dati in seguito
Session at Once
In questa modalità, i dati possono essere registrati su CD una sessione per volta. Per utilizzare
questa modalità, il vostro software deve essere in grado di supportare la registrazione Session
at Once. Nuove sessioni possono essere scritte in seguito.
Packet Writing
Questa modalità è utile per archiviare dati. E possibile aggiungere alle piste unità di dati più
piccole. Per utilizzare questa modalità, il vostro software deve supportare Packet Writing.
Il vostro Philips CD Rewriter supporta la scrittura sia per pacchetti sequenziali che randomizzati.
Page 68

INFORMAZIONI PRELIMINARI
Come le applicazioni principali Write2CD Audio, Write2CD Backup e Write2CD Data,
PacketCD™ è stato appositamente progettato per offrire la tecnologia più avanzata nel
campo della registrazione su CD. Con la scrittura di pacchetti UDF è possibile utilizzare il
CD come qualsiasi altro supporto di memorizzazione (dischetto floppy, disco rigido, ecc...).
Per semplificare l’uso della scrittura di pacchetti UDF, PacketCD™ esegue automaticamente
alcune procedure.
Quando viene inserito un disco CD-R o CD-RW vergine, viene visualizzata la finestra a
comparsa dell’installazione guidata di Write2CD con le opzioni di registrazione su CD. La
prima opzione è la formattazione di un disco utilizzando PacketCD™. Dopo aver selezion
ato questa opzione, PacketCD™ accompagna l’utente alla scoperta dell’applicazione. Tenere
presente che per poter avviare la formattazione di un disco, l’applicazione deve rilevare un
disco vergine e questa operazione può richiedere alcuni secondi.
Quando viene inserito un disco precedentemente registrato utilizzando PacketCD™ o un’al
tra soluzione per la scrittura di pacchetti UDF, l’installazione guidata di Write2CD non
viene avviata poiché il disco è già formattato. È comunque possibile avviarla direttamente da
Esplora risorse o da tutte le altre comuni applicazioni di Windows; in questo caso Write2CD
deve avviare il lettore, operazione che può richiedere alcuni secondi.
Si prega di osservare le seguenti raccomandazioni:
/ Quando viene inserito un CD vergine:
- attendere che compaia la finestra dell’installazione guidata;
- se la finestra dell’installazione guidata non compare, è sufficiente avviare Esplora risorse
di Windows. Facendo clic con il pulsante destro del mouse è possibile formattare il CD
vergine e andare avanti con la procedura.
/ Quando viene inserito un disco preregistrato o registrato in precedenza con Pack
etCD™, procedere direttamente da Esplora risorse di Windows.
/ In TUTTI i casi attendere che il sistema inizializzi la procedura. Il LED dell’unità CD-
RW lampeggia durante la fase di inizializzazione e rimane acceso quando la procedura è
terminata. Tenere presente che i dischi CD-R o CD-RW possono contenere fino a 650
MB di dati: maggiore la quantità di dati memorizzati, maggiore il tempo richiesto per il
caricamento del CD.
Page 69

Capitolo 1
Configurazione del sistema
Prima di utilizzare Philips CD Rewriter, accertarsi che la confezione contenga tutti gli
elementi previsti nell’elenco.
Ecco i requisiti minimi necessari per utilizzare Philips CD Rewriter.
Computer
L’ambiente operativo deve soddisfare i seguenti requisiti:
• Un computer compatibile IBM/AT con processore Pentium da 100 MHz
16 MB di RAM
• Un connettore di interfaccia IDE libero
• Un alloggiamento a mezza altezza libero
• Windows 95, Windows 98, Windows NT4.0 o superiore
• Sufficiente spazio disponibile sul disco tigido (min. 12 MB)
Nota: Lo spazio disponibile sul disco rigido deve essere almeno il doppio di quello occupato dai
dati che si desidera scrivere sul CD.
Software
Il software Philips CD-RW fornito in dotazione con Philips CD Rewriter è stato progettato
con lo specifico obiettivo di garantire i migliori risultati possibili in combinazione con la
massima semplicità d’uso.
Attrezzi
Cacciavite a croce
Viene utilizzato per rimuovere il coperchio dal
computer e per installare l’unità Philips CD
Rewriter.
Pinza a punte lunghe
Vengono utilizzate per inserire o togliere il ponti
cello durante l’impostazione MASTER/SLAVE
dell’unità Philips CD Rewriter.
Cacciavite a croce
Pinza a punte lunghe
Page 70

Dischi
Philips CD Rewriter consente di utilizzare i normali dischi CD-RW e CD-R.
Philips raccomanda di utilizzare soltanto dischi CD-RW e CD-R di marca Philips disponi
bili presso il proprio rivenditore.
Dischi CD-RW (riscrivibili)
(0I2O mm, 74 minuti)
Dischi CD-R (registrabili)
(0I2O mm, 74 minuti)
Dischi Read-only (di soia lettura)
È possibile utilizzare i dischi con logo conformi allo standard per CD Read Only
Memory (CD-ROM). Se si desidera utilizzare le funzioni audio, utilizzare dischi con
nCOMPACT
logo MSE conformi allo standard CD Digital Audio (CD-DA).
Page 71

Capìtolo 2
Installazione dell’unità Philips CD Rewriter
Impostazione MASTER/SLAVE
Prima di installare Philips CD Rewriter nel computer è necessario effettuare l’impostazione
MASTER/SLAVE.
Questa impostazione viene effettuata inserendo un ponticello nell’apposito alloggiamento
situato sul pannello posteriore dell’unità.
Importante; L’impostazione di fabbrica è MASTER.
Nota; Utilizzare una pinza a punte lunghe per rimuovere o inserire il ponticello.
Pannello posteriore
oooooooo
o o o o o o o
oooooooo
Alloggiamento del ponticello
I computer compatibili con l’interfaccia IDE avanzata sono generalmente dotati di due
connettori di interfaccia IDE, uno primario ed uno secondario.
Ogni connettore di interfaccia IDE del computer host consente di collegare fino a due
dispositivi IDE; ciò significa che in questo caso è possibile collegare fino a quattro dispositivi
IDE complessivi.
Normalmente al connettore primario è collegato un’unità disco rigido e a quello secondario
un’unità CD-ROM.
Importante; Evitare di collegare Philips CD Rewriter o un’unità CD-ROM allo stesso
connettore primario dell’unità disco rigido.
Per ottimizzare le prestazioni del sistema, si consiglia di collegare Philips CD
Rewriter al connettore secondario da solo come MASTER
Accertarsi che eventuali altre unità collegate allo stesso cavo abbiano il ponticello
impostato su SLAVE. Per le istruzioni sulle impostazioni del ponticello,
consultare i rispettivi manuali utente delle diverse unità.
Page 72

Impostazione di Philips CD Rewriter come MASTER
Come illustrato qui a destra, inserire il ponticello nel lato destro
deiralloggiamento.
Nota; Se il connettore di interfaccia IDE viene utilizzato
esclusivamente per Philips CD Rewriter, collegare
l’unità all’estremità del connettore.
) OUT
3 L
1 1
-----
CSEL
1— SLAVE
rMASTER
O
0
Impostazione di Philips CD Rewriter come SLAVE
Come illustrato a destra, inserire il ponticello al centro dell’allog-
giamento.
) OUT
3 L
1 1
-----
CSEL
1— SLAVE
rMASTER
= °
CSEL (Cable SELect)
Scegliendo l’opzione CSEL, viene automaticamente effettuata l’impostazione
MASTER/SLAVE in base alla configurazione hardware del sistema. Per i particolari
consultare il manuale utente del computer.
Page 73

Installazione dell’unità Philips CD Rewriter
La procedura di seguito descritta può differire leggermente a seconda del tipo di computer
utilizzato. Per istruzioni dettagliate sulla rimozione del coperchio del computer e sull’instal
lazione o la rimozione di dispositivi interni, consultare il manuale utente del computer.
1. Spegnere il computer e disinserire la spina dalla presa di
corrente.
Quesra misura di sicurezza previene il rischio di scosse elettriche e/o di cortocircuiti che
possono danneggiare il computer e/o l’unità Philips CD Rewriter.
2. Rimuovere il coperchio del computer.
Fare attenzione a non perdere le viti rimosse.
Page 74

3. Le mani o altre parti del corpo possono caricarsi di elettricità
statica.
Toccare una parte metallica del telaio o dell’aUmentazione per scaricare l’accumulo.
4. Togliere il frontalino di un alloggiamento per unità a mezza
altezza.
Per i particolari consultare il manuale utente del computer.
5. Inserire l’unità Philips CD Rewriter neH’alloggiamento.
In questa fase fare attenzione a non esercitare una forza eccessiva sull’unità stessa. Strin
gere con le dita le quattro viti di fissaggio e verificare che ci sia spazio sufficiente
per colle gare il cavo di alimentazione, il connettore di interfaccia
IDE e i cavi AUDIO.
Page 75

6. Collegare il connettore di interfaccia IDE.
Collegare il connettore di interfaccia IDE a 40 pin all’interfaccia IDE situata sul pannello
posteriore dell’unità Philips CD Rewriter.
Posizionare il connettore in modo che la riga colorata si trovi al pin 1 (in basso a destra).
7. Collegare il cavo AUDIO.
Collegare il connettore singolo a 4 pin (compatibile Sound Blaster) alla scheda audio.
Collegare il connettore a 4 pin (quello più grande) all’altra estremità del cavo al connet
tore AUDIO OUT dell’unità Philips CD Rewriter.
Cavo AUDIO
Al connettore a 4 pin
di Philips CD Rewriter
Alla scheda audio (compatibile Sound Blaster)
Uno dei due connettori
Page 76

8. Collegare il cavo di alimentazione.
Collegare il cavo di alimentazione a 4 pin a +12 V e +5 V all’interfaccia di alimentazione
situata sul pannello posteriore dell’unità Philips CD Rewriter.
Il connettore ha una forma tale da rendere impossibile l’inversione delle connessioni.
Se l’inserimento del connettore risulta difficile, accompagnare il connettore muovendolo
delicatamente a destra e a sinistra.
9. Stringere a fondo le quattro viti di fissaggio.
Page 77

10. Riposizìonare il coperchio del computer.
11. Collegare il cavo di alimentazione a una presa di corrente e
accendere il computer.
Accertarsi che il LED situato sul pannello dell’unità Philips GD Rewriter sia acceso,
acceso.
12. Avviare il sistema operativo.
Per la procedura consultare il manuale del sistema operativo.
13. Installare il software di registrazione CD Philips.
Per la procedura di installazione, leggere le istruzioni riportate sulla copertina del
CD-ROM oppure inserire il CD del software nell’unità CD-ROM del computer:
l’installazione del software viene automaticamente avviata. È sufficiente seguire le
istruzioni visualizzate sullo schermo. Inoltre la directory principale del CD-ROM
contiene un manuale utente completo del software (“Manual”). Fare clic sulla lingua
che si desidera utilizzare.
Page 78

Capitolo 3
Funzionamento
Pannello Anteriore
1 Cassetto del disco
Il cassetto consente l’inserimento e l’espulsione del CD. Per aprire il cassetto, premere il
tasto di espulsione.
2 Presa per cuffie
Questo mini jack stereo consente di collegare le cuffie e di ascoltare l’audio CD in uscita.
3 Manopola di regolazione del volume delle cuffie
Questo controllo consente di regolare il volume dell’uscita delle cuffie. Per aumentare il
volume ruotare la manopola in senso orario (verso destra).
4 WRITINGLED
Questo indicatore si accende durante la scrittura/riscrittura di un CD.
5 DISC IN LEO
Questo indicatore lampeggia quando si accede ai dati e si accende (luce verde) in presenza
di un disco nell'unità.
Page 79

6 Pulsante di espulsione
Questo pulsante viene utilizzato per aprire e chiudere il cassetto.
7 Foro di espulsione manuale
Viene utilizzato per l’espulsione manuale di un CD quando non ci si riesce nel modo
consueto. Utilizzare questa procedura solo in casi di emergenza.
Caricamento del CD
1. Premere il pulsante di espulsione per aprire il cassetto.
2. Posizionare delicatamente il CD nel cassetto con l’etichetta verso l’alto.
3. Per richiudere il cassetto, spingerlo delicatamente oppure premere nuovamente il
pulsante di espulsione.
Page 80

Espulsione del CD
Se il Philips CD Rewriter è acceso:
Premete il pulsante di espulsione per espellere il CD.
Nota; Non è possibile aprire il cassetto se il comando ATAPI non lo consente durante la
lettura dei dati da parte di Philips CD Rewriter.
Attenzione; Aspettare che il cassetto sia completamente aperto prima di rimuovere il CD.
Rimuovendo il CD prima che sia stato completamente espulso si rischia di danneg
giare l’unità.
Premere il pulsante di espulsione
Se Philips CD Rewriter non è acceso:
Premendo il pulsante di espulsione il cassetto del CD non si apre.
Espulsione manuale (procedura d’emergenza)
La procedura di seguito illustrata spiega come estrarre il CD quando non si riesce ad aprire il
cassetto nel modo consueto, per esempio in caso di interruzioni nell’alimentazione o di guasti
del meccanismo di caricamento. Questa procedura deve essere utilizzata solo in casi di emer
genza: l’uso frequente potrebbe comportare guasti. Utilizzare un oggetto lungo e appuntito
del diametro massimo di 1 mm (come una graffetta raddrizzata).
1. Inserire l’oggetto appuntito nel foro per l’espulsione manuale
e premere delicatamente.
Il meccanismo a molla espelle il CD.
2. Dopo l’espulsione manuale di un CD, è necessario spegnere
Philips CD Rewriter e riaccenderlo prima di continuare.
Page 81

Risoluzione dei problemi
Qualora venissero riscontrate anomalie di funzionamento di Philips CD Rewriter, si
consiglia di consultare la tabella diagnostica di seguito riportata e di intervenire nel modo
indicato.
Problema
Il LED del CD è spento anche se il computer
è acceso.
Il computer non riconosce Philips CD Rewriter.
Il cassetto del CD non si apre. - Accertarsi che il computer sia acceso.
Il CD viene espulso da solo.
Soluzione
- Verificare il collegamento del
cavo di alimentazione all’unità.
- Verificare la connessione di interfaccia
IDE.
- L’impostazione MASTER/SLAVE è
corretta?
- Se al connettore di interfaccia IDE è
collegato un solo dispositivo: il disposi
tivo è collegato all’estremità del connet
tore?
- Accertarsi che il CD sia correttamente
posizionato nel cassetto.
- Accertarsi che il CD sia di tipo corretto.
- Accertarsi che non ci sia polvere, sporco
o condensa sul CD o sul cassetto.
Page 82

Appendice
Specifiche
Interfaccia
Capacità Dati
Velocità Registrazione/Lettura
Velocità di Trasferimento dati
Velocità di Trasferimento burst
Dimensioni buffer
Velocità di Accesso
Installazione
Caricamento CD
Uscita Audio
(velocità normale)
Consumo
Alimentazione
Temperatura ambiente
Dimensioni (latgh. x alt. x prof)
Peso
ATAPI (E-IDE)
650 MB (CD da 74 minuti)
Scrittura (CD-RW): velocità 4X
Scrittura (CD-R): velocità normale, velocità 4X
Lettura: velocità massima 32 x
(CD-DA: solo velocità 1 x)
150 - 2400KB/S
Max. 13,3 MB/sec
2MB ((325 settori)
115 ms (accesso casuale alla lettura)
Orizzontale
Cassetto
Risposta Frequenza 20 - 20.000Hz (Line Out)
Livello uscita 1 Vrms (Line Out)
12,7 W (lettura/scrittura)
5V±5%, 12V±10%
Da +5°C a +45°C (lettura/scrittura, quando utilizzato in
sistema ventilato)
Umidità: 8 - 80% (senza condensa)
146 X 41,3 X 193,1 mm (escluso frontalino)
950 g
Philips si riserva il diritto di apportare modifiche alle specifiche del prodotto in qualsiasi
momento senza preavviso.
Grazie per avere acquistato questo prodotto Philips di alta qualità. Abbiamo compiuto ogni
sforzo per offrirvi un prodotto che unisce prestazioni superiori alla massima facilità
d’impiego.
Se si desidera porre domande o esprimere commenti, rivolgersi al proprio rivenditore o diret
tamente a Philips al seguente indirizzo Internet: http://www.pcstuffphilips.com.
Page 83

WAARSCHUWING
Waarschuwing
In een ventilatorgekoeld systeem mag de omgevingstemperatuur van uw Philips CD Rewriter niet lager zijn dan 5°C en niet hoger dan 40°C.
Maak de behuizing van de Philips CD Rewriter niet open, ter voorkoming van een elektri
sche schok.
Verwijder altijd eerst de schijf alvorens uw Philips CD Rewriter te vervoeren.
BELANGRIJKE VOORZORGSMAATREGELEN
Belangrijke voorzorgsmaatregelen
Lees eerst de volgende voorzorgsmaatregelen alvorens uw Philips CD Rewriter in gebruik te
nemen.
• Neem altijd op in een stofvrije omgeving. Als de schijf uit de Philips CD Rewriter moet
worden genomen voordat de opname is voltooid, bewaar de schijf dan in een schone,
stofvrije omgeving.
• Repareer of vervang onderdelen van uw Philips CD Rewriter niet zelf, maar laat alle
onderhoudswerkzaamheden door gekwalificeerd personeel verrichten.
• Laat uw Philips CD Rewriter in de volgende gevallen nakijken door gekwalificeerd perso
neel:
Als er metalen voorwerpen of vloeistoffen in de Philips CD Rewriter terecht zijn
gekomen.
Als uw Philips CD Rewriter niet normaal werkt of het prestatievermogen duidelijk is
afgenomen.
• Plaats geen zware voorwerpen op de CD-RW schijven.
• Bescherm uw Philips CD Rewriter en computer tegen schokken als deze in bedrijf zijn,
ter voorkoming van kwaliteitsverlies bij het opnemen en afspelen.
• Philips is niet verantwoordelijk voor gegevensverlies als gevolg van het gebruik van uw
Philips CD Rewriter.
Page 84

Inhoudsopgave
Inleiding .............................................................................................................................................. 77
Kenmerken van uw Philips CD Rewriter...........................................................................77
Manieren om op te nemen....................................................................................................77
Lees dit eerst .........................................................................................................................78
Hoofdstuk 1 - Systeemconfiguratie....................................................................................................79
Computer ..............................................................................................................................79
Software................................................................................................................................. 79
Gereedschap ......................................................................................................................... 79
Discs........................................................................................................................................80
Hoofdstuk 2 - Het installeren van uw Philips CD Rewriter Drive ................................................81
MASTER/SLAVE-instellingen............................................................................................81
Het installeren van uw Philips CD Rewriter drive............................................................83
Hoofdstuk 3 - Bediening ....................................................................................................................88
Front paneel...........................................................................................................................88
Het laden van een schijf........................................................................................................89
Het uitnemen van de schijf................................................................................................ .90
Lade handmatig openen (in noodgevallen).........................................................................90
Probleemoplossing ........................................................................................................................... 91
Appendix .............................................................................................................................................92
Specificaties............................................................................................................................92
©1999 Philips Consumer Electronics B.V. Alle rechten voorbehouden.
Niets uit dit document mag worden gekopieerd, gefotokopieerd, verveelvoudigd, vertaald,
verzonden of opgeslagen op een elektronisch leesbaar medium zonder voorafgaande schrifre-
lijke toestemming van Philips.
MS-DOS en Windows zijn geregistreerde handelsmerken van Microsoft, Inc.
Unix is een geregistreerd handelsmerk van UNIX System Laboratories.
Alle andere handelsmerken zijn eigendom van de respectieve ondernemingen.
Page 85

Inleiding
Gefeliciteerd met de aanschaf van uw Philips CD Rewriter. Lees deze handleiding aandachtig
door alvorens de drive in gebruik te nemen om de supérieure functies van uw Philips CD
Rewriter optimaal te benutten. We raden u aan deze handleiding na lezing te bewaren voor
later.
Kenmerken van uw Philips CD Rewriter
Beschrijven met 4-voudiTC snelheid (Recordable) - Overschrijven
met 4-voudige snelheid (Rewritable) - Lezen met 32-voudige
snelheid
Uw Philips CD Rewriter kan CD-RW schijven met maar liefst viervoudige snelheid over
schrijven en CD-R en CD-RW schijven met dezelfde snelheid beschrijven. De drive kan
beide typen media lezen met maar liefst 32-voudige snelheid.
Compatibel met zeven verschillende CD formaten
Uw Philips CD Rewriter kan zeven verschillende CD formaten opnemen en lezen: CDROM, CD-ROM XA, CD-I, CD-DA, CD-Bridge (multisessie), CD-Extra en Video CD.
Uw Philips CD Rewriter is bovendien uitgerust met een analoge audio-uitgang (hoofdtelefoon) voor Audio CD’s.
ATAPI voor een razendsnelle gegevensoverdracht
Uw Philips CD Rewriter is voorzien van een ATAPI/IDE interface voor het aansluiten van
computers en randapparatuur. ATAPI zorgt voor een razendsnelle overdracht van grote
hoeveelheden gegevens, wat vooral van belang is bij het werken met afbeeldingen.
Manieren om op te nemen
Schrijven per spoor
In deze mode kunnen gegevens op één spoor tegelijk op de schijf worden opgenomen. Discs
die in deze mode zijn opgenomen, kunnen in geen andere CD-spelers of CDROM-drives
worden afgespeeld dan een CD-RW of een CD-R drive zolang de sessie niet is afgesloten.
Schrijven per schijf
In deze mode kunnen gegevens in een keer op de hele schijf worden opgenomen. Later
kunnen dan geen aanvullende gegevens meer worden geschreven.
Schrijven per sessie
In deze mode kunnen gegevens in één sessie tegelijk op de schijf worden opgenomen.
Om deze mode te kunnen gebruiken, moet uw software de functie Schrijven per sessie
onder-steunen. Later kunnen dän nieuwe sessies worden geschreven.
Schrijven van pakketten
Deze mode is nuttig voor gegevensback-up. Kleinere gegevenseenheden kunnen zo aan de
Sporen worden toegevoegd. Om deze mode te kunnen gebruiken, moet uw software de func
tie Schrijven van pakketten ondersteunen. Uw Philips CD Rewriter ondersteunt zowel het
schrijven van opeenvolgende pakketten als het schrijven in willekeurige volgorde.
Page 86

LEES DIT EERST!
Net als de meegeleverde toepassingsprogrammas Write2CD Audio, 'Write2CD Backup en
Write2CD Data, is de PacketCD™-software speciaal ontworpen om u de meest geavanceerde technologie op het gebied van
CD-opnamen te kunnen bieden. Met behulp van de schrijftechniek “UDF packet writing”
kunt u CD’s op vrijwel dezelfde manier gebruiken als uw andere opslagmedia zoals diskettes,
harde schijven, enz... De PacketCD™-software zorgt er automatisch voor dat u optimaal
gebruik maakt van de mogelijkheden van “UDF packet writing”.
Als u een bianco CD-R of CD-RW schijf in het station legt, zal kort daarna het Wizard-
venster van de Write2CD-software op uw scherm verschijnen en u laten zien welke opnameopties beschikbaar zijn. De eerste optie is het formatteren van een schijf met behulp van de
PacketCD™-software. Als u voor deze optie kiest, zal de PacketCD™-software u verder
door het programma leiden. Let erop dat het programma een bianco schijf in het station
moet detecteren om deze te kunnen formatteren. Fdet kan zijn dat u enkele momenten hierop
moet wachten.
Als u een schijf plaatst waarop eerder al opnamen zijn gemaakt met behulp van PacketCD™
of een ander programma voor het schrijven van
UDF-pakketten, dan zal de Write2CD-Wizard niet op het scherm verschijnen omdat de
schijf al geformatteerd is en u de gegevens erop direct kunt benaderen via de Verkennet van
Windows en elk ander Windows-programma. In dat geval moet de Write2CD-sofiware een
leesprogramma starten, wat ook enkele momenten kan duren.
Onze aanbevelingen zijn:
/ Als u een bianco CD plaatst:
- Wacht tot de Wizard op het scherm verschijnt, en volg diens aanwijzingen op
- Als er geen Wizard verschijnt, gebruik dan gewoon uw Windows Verkennet. Klik met
de rechtermuisknop op het CD-Recorder station zodat u de blanko CD kunt formatte
ren en gebruiken.
y Als u een kant-en-klare CD plaatst, of een CD waarop al eerder met PacketCD™ is
opgenomen, ga dan meteen naar de Windows Verkennet.
y Maar gun uw Computer ALTIJD genoeg tijd om het detectieproces te starten. Het LED-
indicatielampje op het CD-RW Station knippert tijdens de detectiefase en licht continu
op als de detectie is voltooid. Denk eraan dat een CD-R of een CD-RW schijf wel 650
Mb aan gegevens kan bevatten. Hoe meer gegevens op de CD staan, hoe langer het duurt
voordat u de schijf kunt gebruiken nadat deze in het Station is gelegd.
Page 87

Hoofdstuk 1.
Sy stee m configurati e
Controleer alvorens uw Philips CD Rewriter in gebruik te nemen of u alle onderdelen heeft
die op de lijst van bijgeleverde onderdelen staan.
Voor bet gebruik van uw Philips CD Rewriter is het volgende benodigd:
Computer
U heeft de volgende besturingsomgeving nodig:
• Een IBM/AT-compatibele computer met een Pentium-processor van 100 MHz of
Sneller
• Een vrije IDE interface connector
• Een vrije half-height bay
• Windows 95, Windows 98, Windows NT4.0 of hoger
• Voldoende ruimte op uw harddisk (min. 12Mb)
Opmerking; U heeft ongeveer tweemaal zoveel ruimte nodig op uw harddisk als de ruimte die
nodig is voor de gegevens die u naar CD wilt schrijven.
Software
De Philips CD-RW software bij uw Philips CD Rewriter is met zorg ontwikkeld voor de
beste resultaten en optimale gebruiksvriendelijkheid.
Gereedschap
Kruiskopschroevendraaier
Gebruik deze schroevendraaier om de behuizing
van uw computer te verwijderen en uw Philips CD
Rewriter drive te installeren.
Lange bektang
Gebruik deze tang voor het plaatsen of verwijderen
van de jumper-pen bij het instellen van de
MASTER/SLAVE- instellingen van uw Philips CD
Rewriter drive.
Kruiskopschroevendraaier
Lange bektang
Page 88

Discs
U kunt gebruik maken van conventionele CD-RW en CD-R schijven die geschikt zijn voor
de Recordable Compact Disc Systems.
Philips raadt u echter aan om alleen Philips CD-RW en CD-R schijven te gebruiken, die
verkrijgbaar zijn bij uw dealer.
CD-RW Discs
(0120mm, 74 minuten)
CD-R Discs
(0120mm, 74 minuten)
Read-only Discs
U kunt gebruik maken van schijven met het (o]D@E Wo, die aan de Compact Disc Read
Only Memory-norm voldoen (CD-ROM norm). Als u de audiofuncties wilt gebruiken,
neem dan schijven met het (UDSIS logo, die aan de Compact Disc Digital Audio-norm
' DtorrAiMiaio O' r D
voldoen.
nCDMPACT
Page 89

Hoofdstuk 2.
Het installeren van uw Philips CD
Rewriter Drive
MASTER/SLAVE-instellingen
Alvorens uw nieuwe Philips CD Rewriter in uw computer re installeren, moet u de drive op
MASTER/SLAVE instellen.
Deze instelling gebeurt door een jumper-pen in de jumper-schakelaar re plaatsen op het
achterpaneel van de Philips CD Rewriter drive.
Belangrijk: De fabrieksinstelling van de drive is de MASTER-positie.
Opmerking! Gebruik de lange bektang voor het plaatsen ofverwijderen van de jumper-pen.
Achterpaneel
Jumper-schakelaar
Enhanced IDE compatibele computers zijn doorgaans uitgerust met twee IDE interface
connectors: een primaire en een secondaire.
Op iedere IDE interface connector van de hostcomputer kunnen maximaal twee IDE-apparaten worden aangesloten. In totaal kunnen er dus maximaal vier IDE-apparaten worden
aangesloten.
Een harddisk wordt doorgaans op de primaire connector aangesloten en een CD-ROM drive
op de secondaire connecter.
Belangrijk: Sluit uw Philips CD Rewriter of CD-ROM drive niet op dezelfde primaire
connector aan als de harddiskdrive.
Om optimaalgebruik te kunnen maken van hetprestatievermogen van uw
systeem is het raadzaam uw Philips CD Rewriter als de MASTER aan te sluiten
op de secundaire connector.
Zorg ervoor dat aile andere apparaten die op dezelfde kabelzijn aangesloten, met
behulp van de jumpers wordt ingesteld op SLAVE. Hoe u dat moet doen, leest u
in de handleiding van de betreffende apparaten.
Page 90

Het instellen van uw Philips CD Rewriter als de MASTER
Plaats de jumper-pen in de rechterhoek van de jumper-schakelaar,
zoals rechts in de afbeelding is aangegeven.
Opmerking: Als alleen uw Philips CD Rewriter op de IDE
interface connector wordt aangesloten, sluit de
Philips CD Rewriter dan op het uiteinde van de
kahel aan.
D OUT
3 L
n 1
-----
CSEL
r— SLAVE
rMASTER
Het instellen van de Philips CD Rewriter als de SLAVE
Plaats de jumper-pen in het midden van de jumper-schakelaar,
zoals rechts in de afbeelding is aangegeven.
) OUT
3 L
n 1
-----
CSEL
I—SLAVE
[■MASTER
TViBf
CSEL (Cable SELect)
Als u de CSEL-instelling kiest, gebeurt de MASTER/SLAVE-instelling automatisch, afhankelijk van utv hardwareconfiguratie. Raadpleeg voor meet informatie de handleiding van uw
computer.
Page 91

Het installeren van uw Philips CD Rewriter drive
De volgende stappen kunnen enigszins afwijken, afhankelijk van het type computer dat u
gebruikt.
Raadpleeg de handleiding van uw computer voor informatie over het verwijderen van de
computerbehuizing en het installeren of verwijderen van interne apparaten.
1. Schäkel uw computer uit en trek de stekker uit het stopcontact.
Doe dit ter voorkoming van een elektrische schok en/of kortsluiting, waardoor de
computer en/of uw Philips CD Rewriter drive beschadigd kan raken.
2. Verwijder de behuizing van uw computer.
Zorg dat u de verwijderde schroeven niet kwijtraakt.
Page 92

3. Uw handen of uw lichaam kunnen statisch geladen zijn.
Raak de voeding of een metalen gedeelte van het chassis aan om de statische elektriciteit te entladen.
4. Verwijder het voordeksel van een vrije half-height drive bay.
Zie de handleiding van uw computer voor meet informatie.
5. Schuif UW Philips CD Rewriter drive van voren in de drive bay.
Zorg dat u niet te veel druk uitoefent op de drive zelf. Draai de bevestigingsschroeven
met de vingers vast en controleer of er voldoende ruimte is voor het aansluiten van de
stroomkabel, de IDE interface connector en de AUDIO-kabel.
Page 93

6. Sluit de IDE interface connector aan.
Sluit de 40-pins IDE interface connector op de IDE interface aan op het achterpaneel
van uw Philips CD Rewriter drive.
Plaats de connector zodanig dat de gekleurde lijn zich bij pin 1 bevindt (voor u rechtsonder).
7. Sluit de AUDIO-kabel aan.
Sluit de enkelvoudige 4-pins connector (compatibel met Sound Blaster) op de geluidskaart aan.
Sluit de 4-pins connector aan het andere eind van de kabel (de grootste connector) op de
AUDIO OUT connector van uw Philips CD Rewriter drive aan.
AUDIO-kabel
Naar de Philips CD
Rewriter Gebruik de
4-pins connector
Naar de geluidskaart (compatibel met Sound Blaster)
Gebruik een van de 2 connectoren
Page 94

8. Sluit de stroomkabel aan.
Sluit de +12V en de +5V 4-pins stroomkabel aan op de voedingsaansluiting op bet
achterpaneel van uw Philips CD Rewriter drive.
Door de vorm van de connector kunnen de aansluitingen niet worden verwisseld.
Heeft u Problemen met het installeren van de connectot, beweeg deze dan voorzichtig
been en weer bij het plaatsen.
9. Draai de vier bevestigingsschroeven goed vast.
Page 95

10. Bevestig de behuizing weer op de computer.
11. Steek de stekker in het stopcontact en zet uw computer
aan.
Controleer of de LED op het paneel van uw Philips CD Rewriter drive oplicht.
12. Start uw besturingssyteem op.
Raadpleeg voor de procedure de handleiding van uw besturingssyteem.
13. Het installeren van uw Philips CD-opnamesoftware
Raadpleeg voor de installatieprocedure de installatie-instructies op de CD-ROM
verpakking of plaats de software-CD gewoon in de Philips CD Rewriter. Het instal
leren van de software gebeurt dan automatisch; volg gewoon de aanwijzingen op het
scherm op. Bovendien bevindt zieh in de hoofddirectory op de CD-ROM, onder
“Manual”, een complete gebruikershandleiding van de software. Klik op de taal die u
wilt gebruiken.
Page 96

Hoofdstuk 3.
Bediening
Frontpaneel
PHILIPS y
__
o (<
---------------------
1 Disc-lade
Hier wordt de schijf ingelegd en uitgenomen. De lade gaat open door op de ejectknop
te drukken.
2 Hoofdtelefoonaansluiting
Op deze stereo mini-jack kunt u een hoofdtelefoon aansluiten om Audio CD’s te
beluisteren.
MuHiRead WRITING *
' DISC IN ^
3 Hoofdtelefoonvolumeregelaar
Met deze draaiknop kunt u het volume van de hoofdtelefoon regelen. U verhoogt het
volume door de knop naar rechts te draaien.
4 WRITING LED
Deze indicator licht op tijdens het CD schrijven/overschrijven.
5 DISC IN LED
Deze indicator knippert bij toegang tot de gegevens en licht groen op als er een disc in de
drive zk.
Page 97

6 Ejectknop
Met deze knop wordt de lade geopend en gesloten.
7 Opening voor handbediening
Deze opening is bedoeld voor het handmatig uitnemen van een schijf die niet op de
normale wijze kan worden verwijderd. Gebruik deze functie alleen in noodgevallen.
Het laden van een schijf
1. Druk op de ejectknop om de schijf-lade te openen.
2. Plaats de schijf met het label aan de bovenkant voorzichtig in de lade.
3. Duw zachtjes tegen de schijf-lade of druk nogmaals op de ejectknop om de lade te sluiten.
Page 98

Het uitnemen van de schijf
Ais uw Philips CD Rewriter is ingeschakeld:
Drukop de ejectknop om de schijf uit te nemen.
Opmerking: Als uw Philips CD Rewriter gegevens leest, kan de lade niet worden geopend
indien het ATAPI-commando actiefis.
Let Op: Verwijder de schijf alleen als de lade helemaal open is (Door de schijf uit te nemen
voordat deze volledig is uitgestoten, kan de drive beschadigd raken).
Druk Op de ejectknop
Ais uw Philips CD Rewriter niet is ingeschakeld:
De schijflade gaat niet open als u op de ejectknop drukt.
Lade handmatig openen (in noodgevallen)
Hieronder wordt uitgelegd hoe u de schijf kunt uitnemen als de lade niet op de normale wijze
kan worden geopend, bijvoorbeeld doordat de stroom per abuis is uitgeschakeld of het laadmechanisme niet werkt. Deze methode mag pas in laatste instantie worden toegepast. Bij
frequent gebruik kan de drive namelijk beschadigd raken.
U heeft een lang dun voorwerp nodig met een doorsnee van 1 mm of minder, bijvoorbeeld
een rechtgebogen paperclip.
1. Duw het penachtig voorwerp voorzichtig in de opening.
De schijf wordt nu door het veermechanisme uitgestoten.
2. Nadat u de schijf-lade handmatig heeft geopend, moet u uw Philips CD Rewriter eerst uitschakelen en vervolgens weer inschakelen alvorens verder te gaan.
Page 99

Probleemoplossing
Als uw Philips CD Rewriter niet naar behoren functioneert, raden we u aan de Symptomen
in de volgende tabel op te zocken om de fout te herstellen.
Symptoom
De AAN/DISC LED is uit, alhoewel uw
computer aan Staat
Uw Philips CD Rewriter wordt niet herkend
door uw computer
De schijf-lade gaat niet open
De schijf wordt automatisch uitgestoten
De eenheid werkt niet correct
Oplossing
- Controleer de verbinding van de DCstroom kabel met de drive.
- Controleer de verbinding van de IDE
interface connector.
- Is de MASTER/SLAVE-instelling juist?
- Als er slechts een apparaat op de IDE
interface connector is aangesloten, is
dar apparaat dan met het uiteinde van
de connector verbonden?
- Zorg dat de stroomtoevoer naar de
drive is ingeschakeld.
- Zorg dat de schijf correct in de lade is
geplaatst.
- Zorg dat de schijf correct in de lade is
geplaatst.
- Zorg dat u de juiste schijf gebruikt.
- Controleer of zieh geen stof, vuil of
condens op de schijf of lade bevindt.
Page 100

Appendix
Specificaties
Interface
Gegevenscapaciteit
Opname-Zleessnelheid
Gegevensoverdrachtsnelheid 150 - 2400KB/sec
Continue overdrachtsnelheid Maximaal 13,3 MB/sec
Buffergrootte 2MB (325 sectoren)
Toegangssnelheid
Installatie
Laden van schijf
Audio-uitgang
(normale snelheid)
Energieverbruik
Voeding
Omgeving
Afmetingen (BxHxD)
Gewicht 950g
ATAPI (E-IDE)
650MB (schijf van 74 minuten)
Schrijven (CD-RW): 4-voudige snelheid
Schrijven (CD-R): Normale snelheid, 4-voudige snelheid
Lezen: Maximaal 32-voudige snelheid (CD-DA:
uitsluitend IX-snelheid)
115 ms (Willekeurige toegang bij het lezen)
Horizontaal
Lade
Frequentieweergave 20 - 20,000Hz (Line out)
Uitgangsniveau 1 Vrms (Line out)
12,7 W piek (lezen/schrijven)
5V±5%, 12V±10%
Temperatuur: +5°C - +45°C (lezen/schrijven, bij
gebruik in een ventilatorgekoeld systeem)
Vochtigheid: 8 - 80% (vermijd condens)
146 X 41,3 X 193,1 mm (exclusief frontpaneel)
Philips behoudt zieh het recht voor om productspecificaties te alien tijde te wijzigen zonder
voorafgaande kennisgeving.
Hartelijk dank voor de aanschaf van dit hoogwaardige product van Philips. Wij hebben alles
in het werk gesteld om u een uiterst krachtig en gebruiksvriendelijk product te bieden.
Heeft u vragen of opmerkingen, neem dan contact op met uw dealer of met Philips op het
volgende Internetadres:
Http://www.pcstuffphilips.com.
 Loading...