

Philips Norelco SW9700 User Manual
© & ™ Lucaslm Ltd.
© Disney
BC
SW9700
Tripleheader shaver


English 4

IMPORTANT SAFETY
INSTRUCTIONS
When using an electrical product, basic
precautions should always be followed,
including the following:
Read all instructions before using this
product.
DANGER
To reduce the risk of electric shock:
- Do not reach for a corded product that has
fallen into water. Unplug immediately.
- The power plug and the accessories
connected to it are not for immersion or for
use in shower.
- Do not use an extension cord with this
product.
- Always unplug this product from the
electrical outlet immediately after use,
except when product is (re)charging.
- Unplug and remove power cord from the
product before cleaning.
- The batteries used in this product may
present a re or chemical burn hazard if
mistreated. Do not disassemble, heat above
100°C (212°F) or incinerate.
4
English

WARNING
To reduce the risk of burns, re, electric
shock, or injury to persons:
- Close supervision is required when this
product is used by, on, or near children,
or persons with limited physical, sensory,
or mental capabilities or invalids.
- Use this product for its intended household
use as described in this manual. Do not use
attachments not recommended by Philips
North America LLC.
- Never operate this product if it has a
damaged power cord or charging plug,
if it is not working properly, if it has been
dropped or damaged, or dropped into
water while plugged in. For assistance call
1-800-243-3050.
- Keep the product, cord and charging plug
and any attachments away from heated
surfaces.
- Never drop or insert any object into any
opening.
- Do not use the adapter in or near a power
outlet that contains an electric air freshener
to prevent damage to the adapter.
- Do not charge, clean or plug in product
outdoors or operate where aerosol (spray)
products are being used or where oxygen is
being administered.
5
English

- Always check cutters and combs before
using the product. Do not use the product
if cutters or combs are damaged, as injury
may occur.
- Always attach plug to product rst, then
to outlet. Be certain plug is inserted rmly
into shaver up to mark indicated on plug.
To disconnect, turn shaver o then remove
power cord from outlet.
- Keep the power cord dry at all times. Do not
handle with wet hands.
- Never put the product in direct sunlight or
store at a temperature above 140°F (60°C).
- To prevent possible damage to the power
cord, do not wrap power cord around the
product.
- Do not attempt to open the product to
remove or replace the built-in rechargeable
battery.
- Only use the power cord and other
accessories supplied with the product.
SAVE THESE
INSTRUCTIONS
IMPORTANT: The power plug contains a
transformer. Do not cut o the power plug to
replace it with another plug as this will cause a
hazardous condition.
6
English

Contents
Important safety instructions _________ 4
General description (Fig. 1)___________ 9
Introduction_______________________ 9
The display________________________ 9
Charging__________________________ 14
Using the shaver___________________ 15
Using the click-on attachment________ 18
Travel lock________________________ 19
Cleaning and maintenance___________ 20
Replacement______________________ 23
Storage___________________________ 25
Accessories_______________________ 26
Assistance________________________ 26
Disposal__________________________ 26
Full Two-Year Warranty_____________ 27
45-Day money-back guarantee ______ 28
7
English
8
English
1
2
1
4
3
6
5
7
8
9
10
11
12
13
14
15

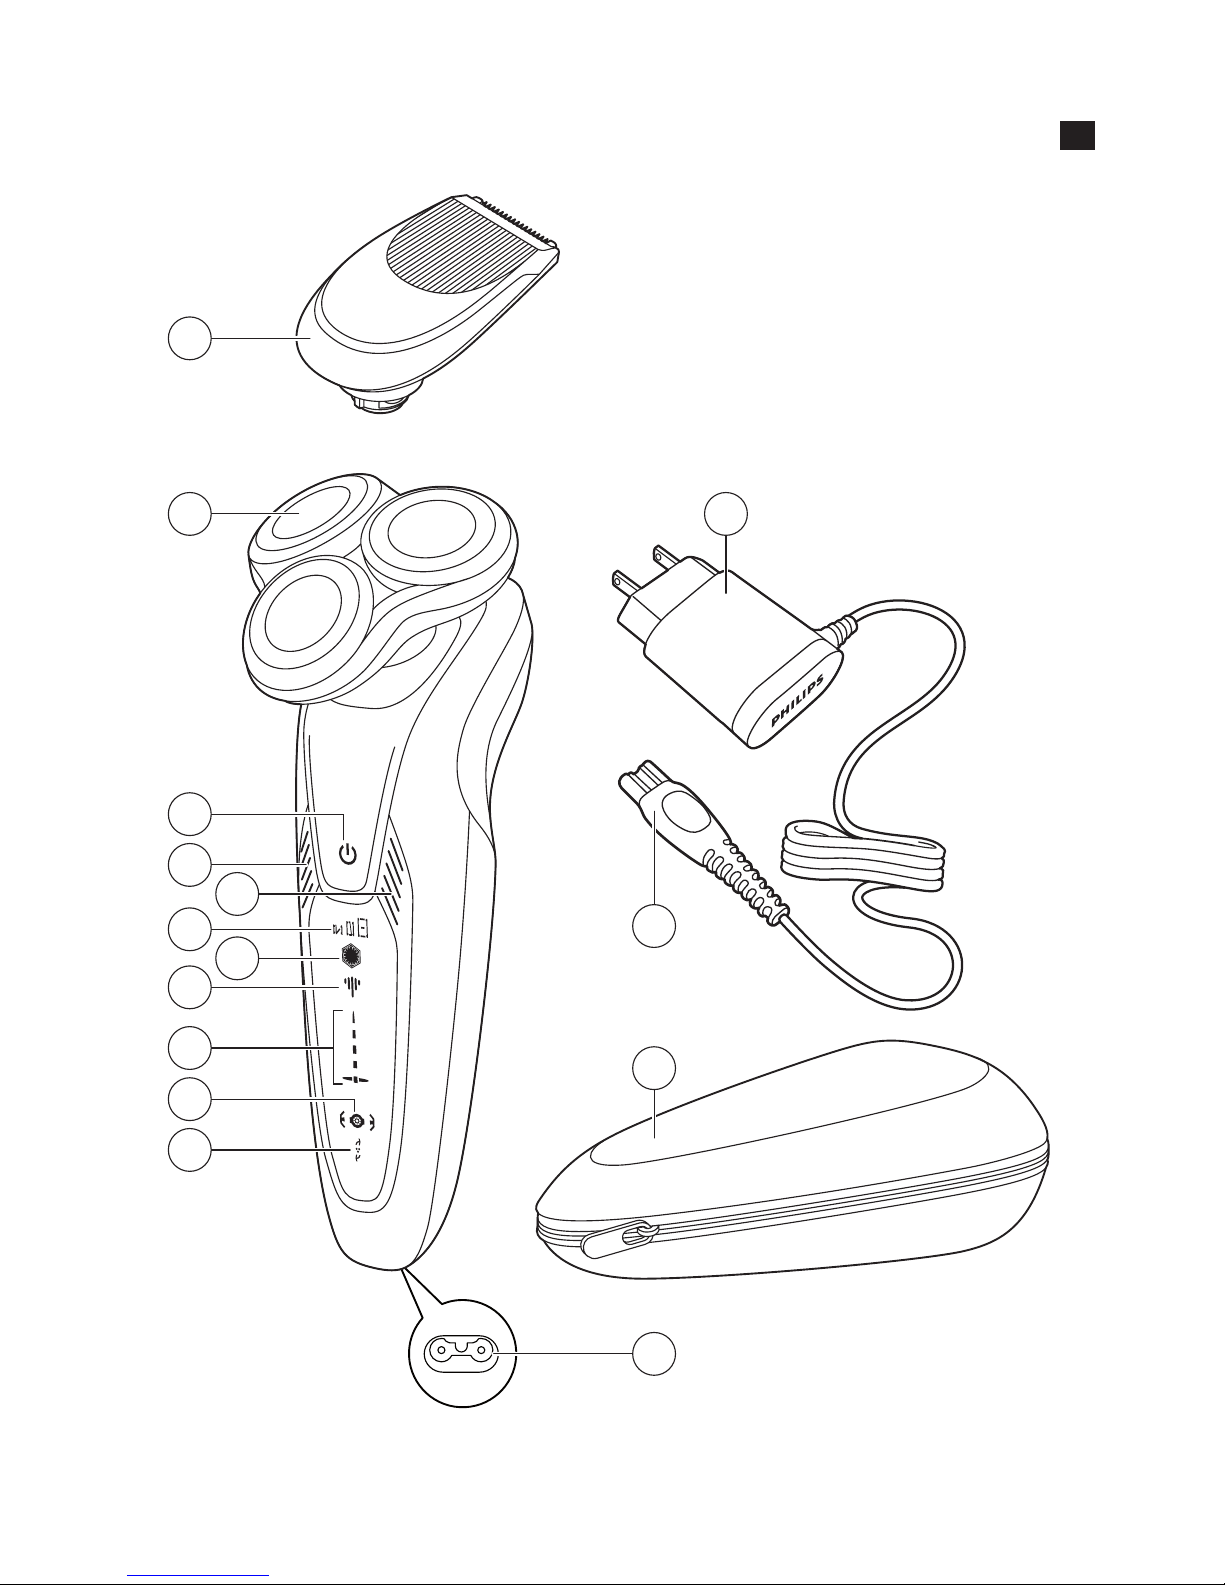
General description (Fig. 1)
1 SmartClick precision trimmer attachment
2 Shaving unit with hair chamber
3 On/o button
4 Personal comfort settings decrease button
5 Personal comfort settings increase button
6 Personal comfort settings bar
7 Notication symbol
8 Cleaning reminder
9 Battery charge indicator
10 Travel lock symbol
11 Replacement reminder
12 Socket for small plug
13 Travel case
14 Small plug
15 Power plug
Introduction
Congratulations on your purchase and
welcome to Philips Norelco!
To fully benet from the support that Philips
Norelco oers, register your product at
www.norelco.com/register.
The display
Note: Remove any sticker or protective foil
from the display before using the product.
9
English
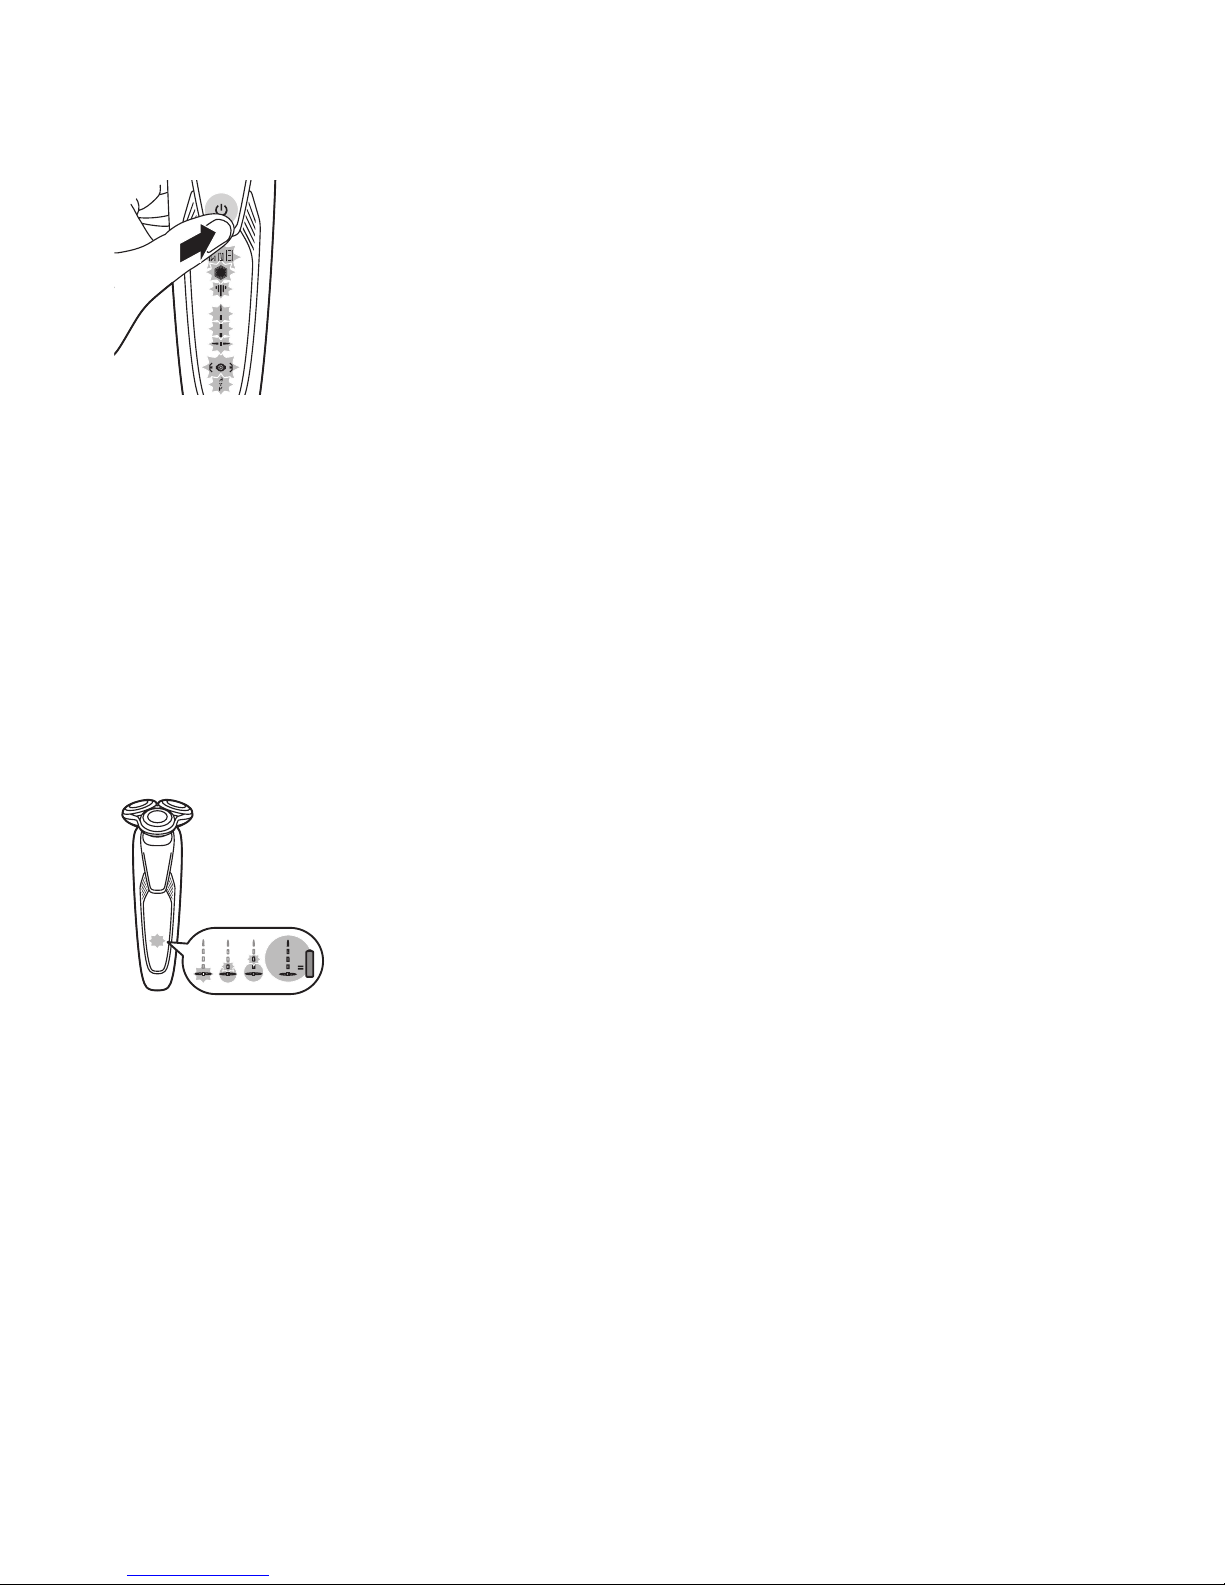
Start-up sequence
When you press the on/o button for the very
rst time, all display indications light up in
sequence.
The shaver now contains enough energy for
one shave.
Charging
Quick charge: When the battery is empty and
you connect the shaver to an electrical outlet,
the lights of the battery charge indicator light
up red one after the other repeatedly. When
the battery contains enough energy for one
shave, the bottom light of the battery charge
indicator starts ashing red slowly.
While the shaver continues to charge, rst
the bottom light of the battery charge
indicator ashes red and then lights up red
continuously. Then the second light ashes
and lights up continuously, and so on until the
shaver is fully charged.
10
English
 Loading...