

Philips HTM139/BK, HTM139/AK, HTM139/78, HTM139 Quick Start Manual
Quick Start Guide
HTM139
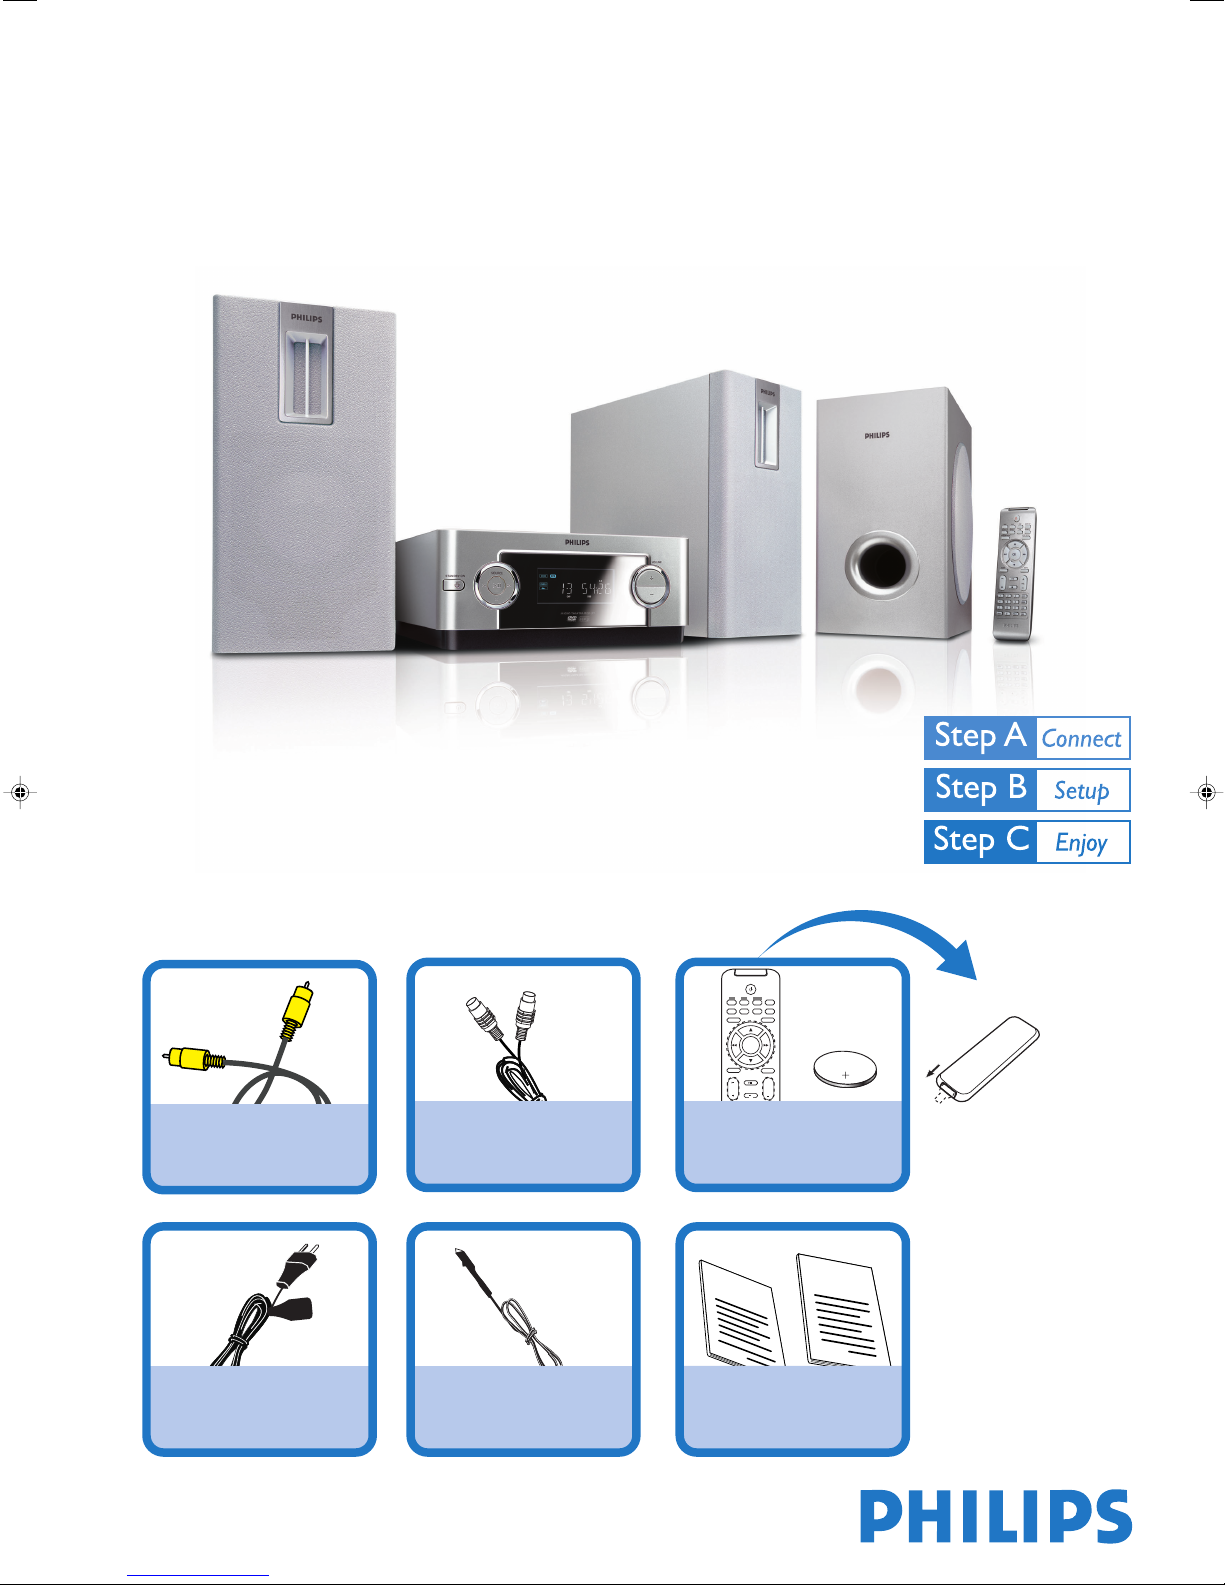
What’s in the Box?
You should find these items upon opening the box.
Composite video cable
AC power cord
DIN cable
FM wire antenna
TUNER
DISPLAY
DISC AUX
OSD
MODE
SLEEP/TIMER
CLOCKA-B
SYSTEM MENU
DISC MENU
OK
AUDIO MUTE
+
VOL
GOTO
1
2
3
ZOOM
4
5
6
DSC
7
8
9
PROG
SUBTITLE
DBB
0
Remote control with one
CR2025
CR2025 battery loaded
2
Quick Start Guide
1
User Manual
Quick start guide
User manual
Remove the insulation plastic tab
before use
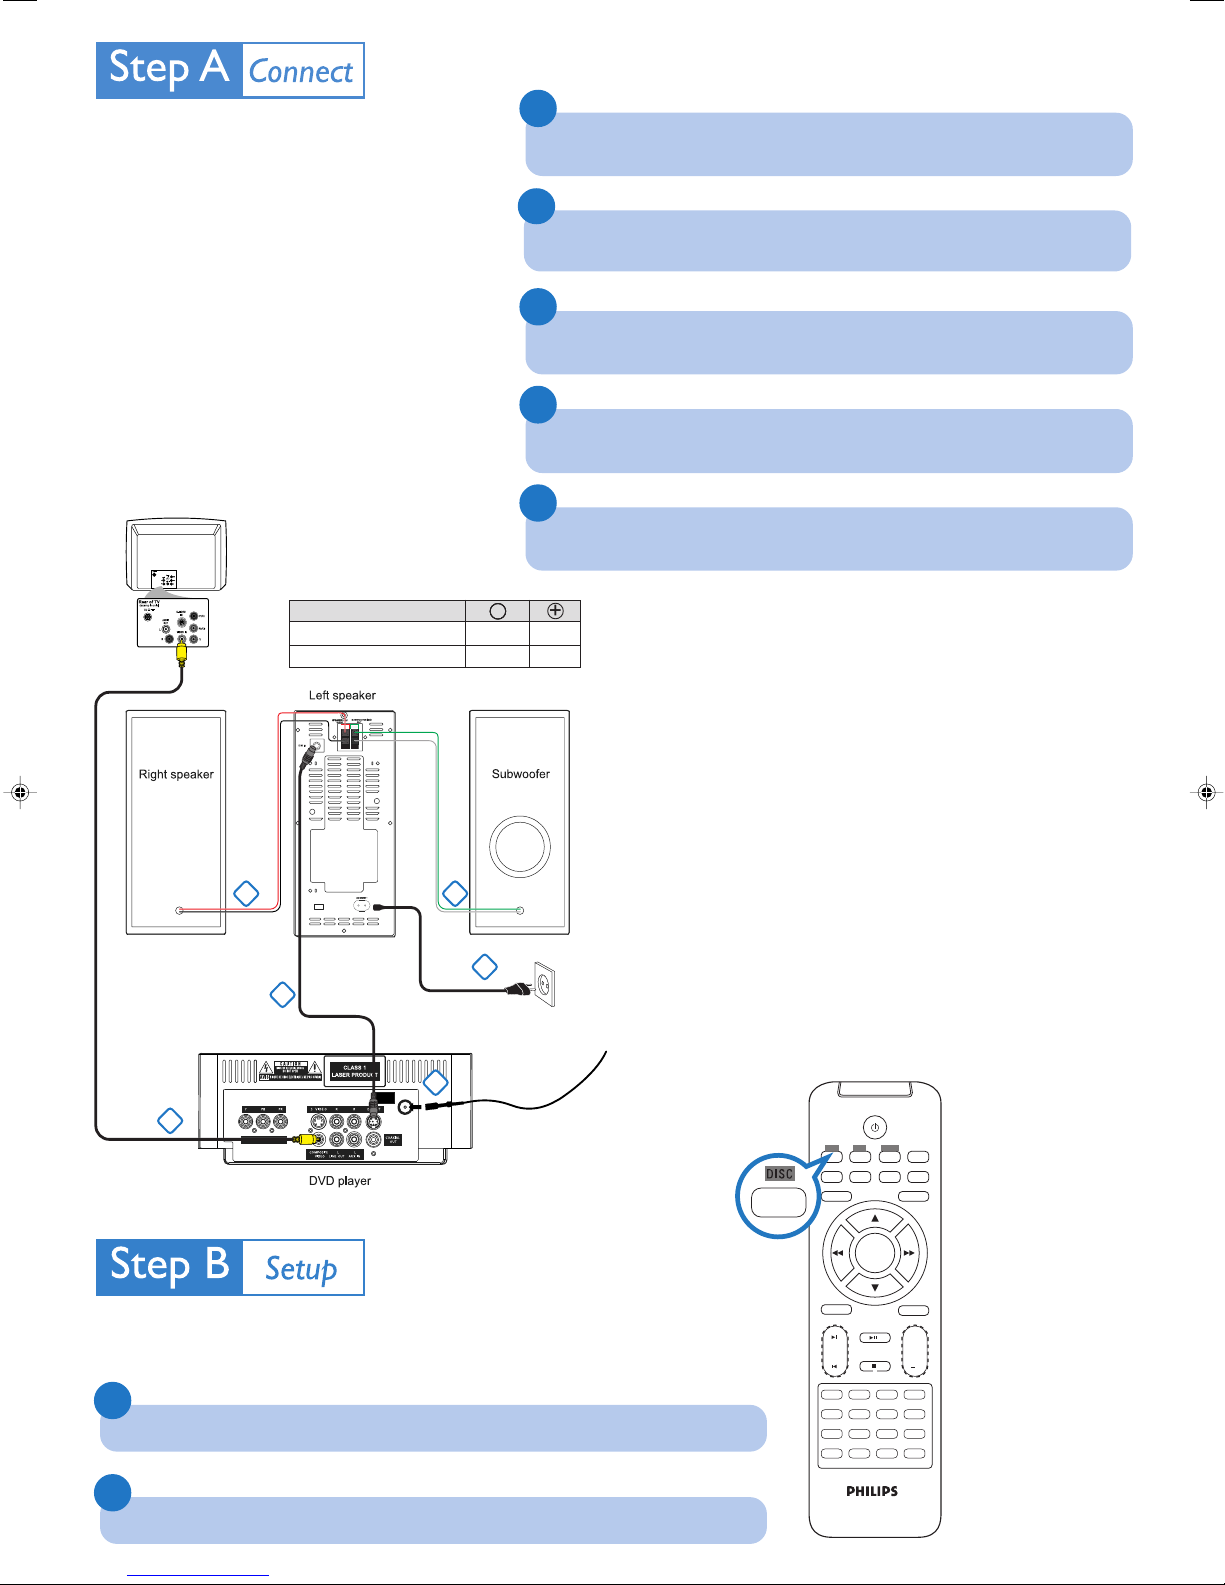
Important!
– This set can only be operated after the
supplied DIN cable has been connected.
Tips
– See the User Manual for other TV
connection options.
–For connecting to a Progressive Scan
TV, refer to the user manual for proper
connections and detailed setup.
1
Connect the speaker wires of the right speaker and subwoofer to the
left speaker.
2
Connect the supplied FM wire antenna.
3
Connect the left speaker and the DVD player by using the supplied
DIN cable.
4
Connect the DVD player to your TV using the supplied composite video
cable.
TV
5
Connect the AC power cord to the wall socket.
Speakers
Right Speaker
Subwoofer
––
Black
White
+
Red
Green
Notes for the remote control:
– First, select the source you wish to
control by pressing one of the source
select keys on the remote control
(DISC or AUX, for example).
– Then select the desired function
( 2;, í, ë for example).
1 1
5
3
ANTENNA
FM
(75Ω)
4
AC Power Cord
2
FM wire antenna
DISC AUX
SYSTEM MENU
TUNER
DISPLAY
OSD
SLEEP/TIMER
MODE
CLOCKA-B
DISC MENU
Setting up the TV
1
Press SOURCE (DISC on the remote) to select disc source.
2
Turn on the TV and set it to the correct Video In channel.
OK
AUDIO MUTE
1
2
3
4
5
6
7
8
PROG
9
SUBTITLE
0
+
VOL
GOTO
ZOOM
DSC
DBB
 Loading...