

Philips HQ-T388 Service Manual

Beard Trimmer
HQ-T 388
Philips Domestic Appliances and Personal Care
Service Manual
PRODUCT INFORMATION
Features :
- Adjustable attachment comb for even cutting result.
- Adjustable to 9 different beard lengths up to 18 mm.
- Stubble setting for 1.5 mm stubble beard.
- Easy length adjustment by zoom ring construction.
- Length indication window.
- Maintenance free cutting element - no oiling required.
- Precision pop-up trimmer.
- Green pilot light to indicate charging.
- Mains operating possible when batteries are empty.
TECHNICAL DATA
Power system : rechargeable
Batteries : 1 x AA NiCd
Charging period : 10 hours
Capacity : 40 minutes
Voltage : 100 - 240 Volt / 50 -60 Hz
Product meets the requirements regarding
interference suppression on radio and TV.
NOTES :
In order to guarantee the longest possible working life of
the battery :
- Do not charge for more than 24 hours.
- Do not keep the cord permanently plugged in.
- A weaker motor sound indicates that the rechargeable
battery will be empty soon.
- Only plug in the cord when you hear this weaker sound.
- Discharge the battery completely once a year by letting the
motor run until it stops.
- If you haven’t used the appliance for a long period,
charge it before use.
If the battery is completely empty the trimmer might not
start immediately. In this case switch off the product, charge
for one minute and switch again.
Published by Philips Domestic Appliances and Personal Care Printed in the Netherlands © Copyright reserved Subject to modification
4322 277 00040
99/12
PCS 101 335
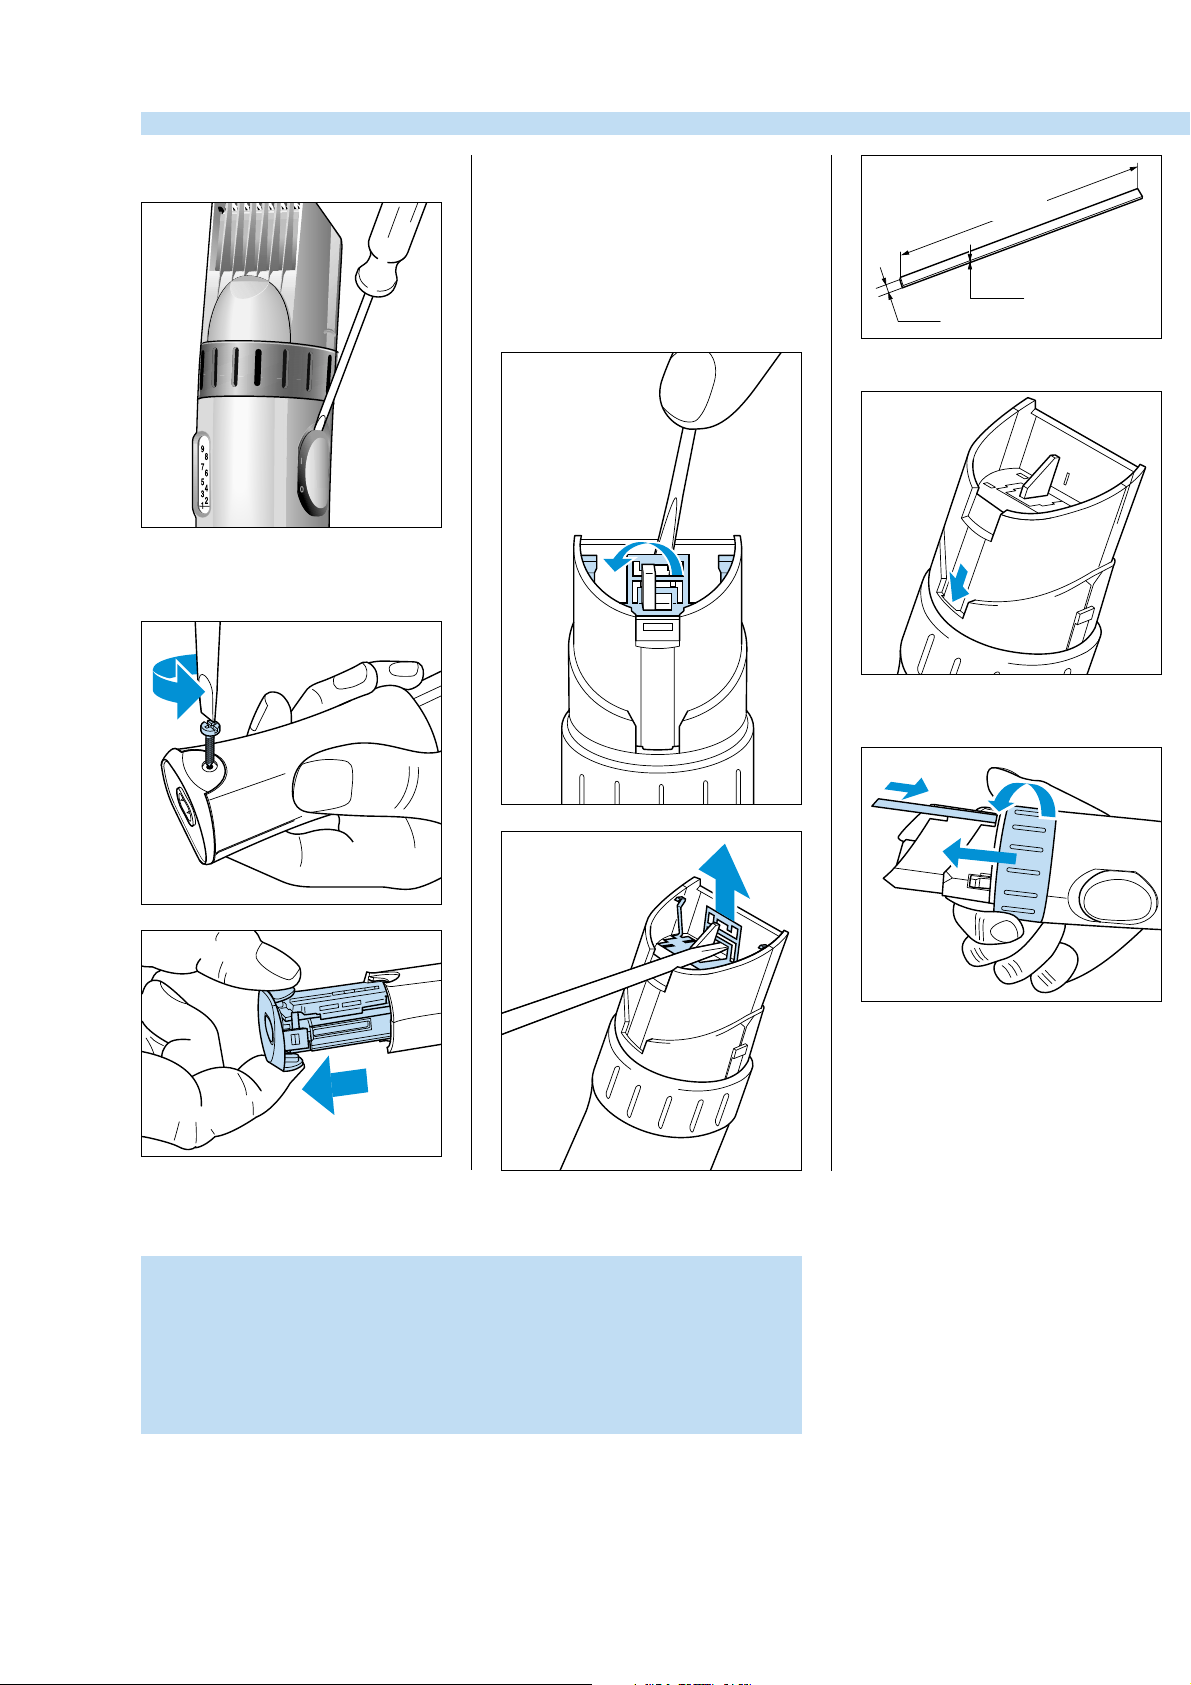
DISASSEMBLY ADVICE
to replace SPRING ON/OFF
SWITCH (4)
to replace BATTERY (6)
PCB (7)
remove SCREW A
to replace ZOOM RING +
GUIDE PART (8)
SPRING ZOOM RING (9)
SPRING POP-UP
TRIMMER (11)
POP-UP TRIMMER (12)
remove COMB (1)
remove CUTTER (2)
remove TRIMMER CLAMP (10)
± 80 mm
0.5 mm
5 mm
Prepare a disassembly tool of a metal strip.
Insert the disassembly tool into the small
gap on the rear side of the product.
N.B. Never use again a deformed trimmer clamp (10).
Before reassembling the battery holder, make sure that the
internal wiring is guided.
After the product has been repaired, it should function properly
and has to meet the safety requirements as laid down and offi cially
established at this moment.
1
2
Turn and push the zoom ring as shown in
the picture.
PCS 101 335
 Loading...