

HP6515

2

3
1

4

ENGLISH 6
DANSK 19
DEUTSCH 31
SUOMI 45
FRANÇAIS 58
ITALIANO 72
NEDERLANDS
NORSK
SVENSKA
99
111
85
HP6515

6
ENGLISH
Introduction
With your new Satinelle ICE PREMIUM you can remove unwanted hairs
quickly, easily and effectively. The combination of the ceramic epilating
system with the contour-following skin cooler and the new
sonic massaging system constitutes a revolution in epilation. Thanks to the
natural numbing effect of ice and massaging, the new Satinelle ICE
PREMIUM makes epilation more comfortable and less painful than ever.
The result is a silky-smooth skin and a hair growth reduction of up to
50%, assuming you use the appliance regularly (every 4 weeks).
The Satinelle ICE PREMIUM is suitable for all body parts and comes with
a sensitive area cap that has been specially developed for epilating
sensitive areas (underarms, bikini line).
The rapidly rotating epilating discs catch even the shortest hairs (down to
0.5 millimetre!) and pull them out by the roots. As a result, your skin stays
smooth for up to four weeks and regrowth is soft and downy.
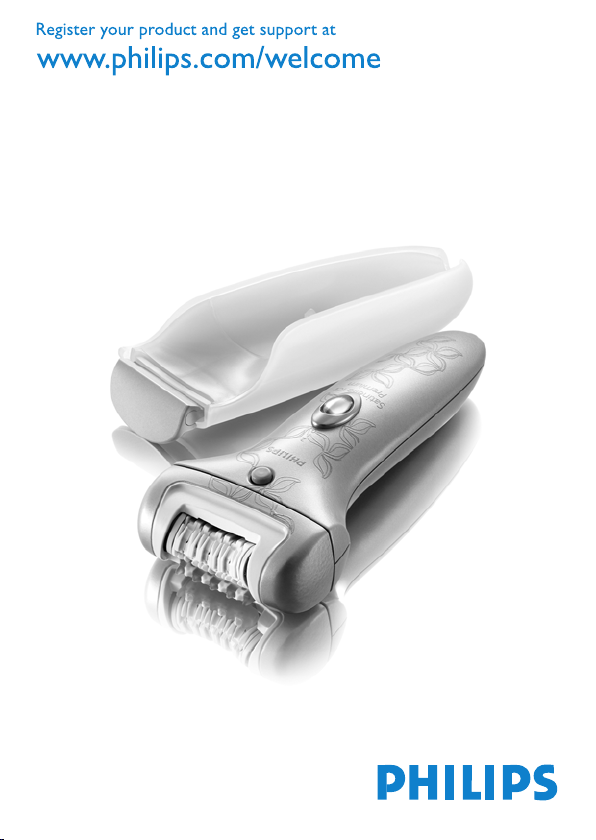
General description (Fig. 1)
A Sensitive area cap
B Massaging element
C Epilating head
D Release button
E Appliance
F On/off slide
G Protective cap of shaving head
H Shaving head
I Leg skin cooler with pivoting cooling head
J Insulating sleeve for leg skin cooler
K Adapter
L Peeling glove
M Cleaning brush
Important
Read this user manual carefully before you use the appliance and save it
for future reference.

ENGLISH 7
Danger
Keep the appliance and the adapter dry.
-
Do not use the appliance near or over a washbasin or bath lled with
water
Do not use the appliance in the bath or in the shower.
If you use the appliance in the bathroom, do not use an extension
cord.
Warning
Check if the mains voltage indicated on the appliance corresponds to
the local mains voltage before you connect the appliance.
Only use the appliance in combination with the adapter supplied.
Do not use the appliance if the adapter or the appliance itself is
damaged.
If the adapter is damaged, always have it replaced with one of the
original type in order to avoid a hazard.
The adapter contains a transformer. Do not cut off the adapter to
replace it with another plug, as this causes a hazardous situation.
This appliance is not intended for use by persons (including children)
with reduced physical, sensory or mental capabilities, or lack of
experience and knowledge, unless they have been given supervision
or instruction concerning use of the appliance by a person
responsible for their safety.
Children should be supervised to ensure that they do not play with
the appliance.
Caution
Only epilate the underarms and bikini line with the sensitive area cap
attached.
To prevent damage and injuries, keep the running appliance away
from scalp hair, eyebrows, eyelashes, clothes, threads, cords, brushes
etc.
Do not use the appliance on irritated skin or skin with varicose veins,
rashes, spots, moles (with hairs) or wounds without consulting your
doctor rst. People with a reduced immune response or people who
suffer from diabetes mellitus, haemophilia or immunodeciency
should also consult their doctor rst.

ENGLISH8
Your skin may become a little red and irritated the rst few times you
use the epilator. This phenomenon is absolutely normal and quickly
disappears. As you use the appliance more often, your skin gets used
to epilation, skin irritation decreases and regrowth becomes thinner
and softer. If the irritation has not disappeared within three days, we
advise you to consult a doctor.
Always check the shaving head before you use the appliance. Do not
use the shaving head if the foil is damaged, as this may cause injury.
Do not use the peeling glove immediately before or after epilation.
Do not expose the appliance to temperatures lower than 5°C or
higher than 35°C.
General
-
Regular massages with the peeling glove may help to prevent
ingrowing hairs.
Regular cleaning and proper maintenance ensure optimal results and
a long life for the appliance.
Electromagnetic elds (EMF)
This Philips appliance complies with all standards regarding
electromagnetic elds (EMF). If handled properly and according to the
instructions in this user manual, the appliance is safe to use based on
scientic evidence available today.
Preparing for use
Freezing the leg skin cooler
1 Put the skin cooler WITHOUT the insulating sleeve in the freezer
or freezing compartment (***) at least 4 hours before you start to
epilate. When the uid has turned completely blue, the skin cooler
is ready for use.
Make sure the outside of the skin cooler is completely dry before you
freeze it.
Tip: You can store the skin cooler in the freezer permanently.

ENGLISH 9
Using the appliance
General information about epilation
-
Epilation is easier just after a bath or shower. Make sure your skin is
completely dry when you start to epilate.
When you use the appliance for the rst time, we advise you to try it
out on an area with only light hair growth. This helps you get
accustomed to the epilation process.
For optimal epilating results, the hairs should not be longer than 10
-
millimetres (Fig. 2)
To epilate longer hairs, follow one of two procedures below: (Fig. 2)
-
1 shorten the hairs to a maximum length of 10mm with a trimmer. In
this case, you can start to epilate right away.
2 shave the hairs completely. In this case you can start to epilate after a
few days (the hairs must be at least 0.5mm long).
Your skin may become a little red and irritated the rst few times you
use the epilator. This phenomenon is absolutely normal and quickly
disappears. As you use the appliance more often, your skin gets used
to epilation, skin irritation decreases and regrowth becomes thinner
and softer. If the irritation has not disappeared within three days, we
advise you to consult a doctor.
We advise you to epilate before you go to bed at night, as this allows
any skin irritation that may develop to diminish overnight.
Epilating with the leg skin cooler
Only use the leg skin cooler to epilate your legs.
Make sure your skin is clean, entirely dry and free from grease. Do not
use any cream before you start to epilate.
1 Slide the insulating sleeve onto the skin cooler. (Fig. 3)
The insulating sleeve prevents an unpleasant sensation of coldness in your
hand while you use the appliance. It also keeps the skin cooler cold as
long as possible.
Sometimes the pivoting cooling head freezes onto the skin cooler and
does not move when you take the skin cooler from the freezer. The

ENGLISH10
pivoting cooling head starts to pivot again after you have passed it over
your leg a few times.
2 Snap the appliance onto the skin cooler (Fig. 4).
3 Insert the appliance plug into the bottom of the appliance and put
the adapter in the wall socket.
4 Select the desired speed to switch on the appliance (Fig. 5).
Select speed I for areas with little hair growth and for areas where bones
are located directly beneath the skin, such as knees and ankles.
Select speed II for larger areas with stronger hair growth.
5 Stretch your skin with your free hand to make the hairs stand
upright.
6 Place the appliance perpendicularly onto the skin with the epilating
head pointing forward. Move the appliance against the direction of
hair growth at a moderate speed. (Fig. 6)
Make sure both the epilating discs and the skin cooler are in proper
contact with the skin.
Press the appliance lightly onto the skin.
If you are not completely satised with the epilation result, try
,
moving the epilator more slowly over your skin.
7 Use the tab on the bottom end of the appliance to remove the
appliance from the skin cooler (Fig. 7).
Epilating without the leg skin cooler
If you do not want to use the skin cooler, for instance because you
,
have grown accustomed to the sensation of epilation, you can also
use the appliance without the skin cooler.
Make sure that you place the epilator perpendicularly onto your
,
skin and that you move it against the direction of hair growth.
Epilating the underarms and bikini line
Your epilator comes with a sensitive area cap that reduces the number of
active epilating discs. This makes the appliance ideal for epilating the more
delicate areas of the body, such as the underarms and bikini line.

ENGLISH 11
Note: You get the best results when the hairs are not too long (max.1cm).
Do not use the leg skin cooler to epilate your underarms and bikini
line.
1 Put the sensitive area cap on the epilating head (Fig. 8).
The sensitive area cap can only be tted onto the appliance in one way.
2 Insert the appliance plug into the bottom of the appliance and put
the adapter in the wall socket.
3 Switch on the appliance by selecting the desired speed. (Fig. 5)
We advise you to use speed II.
4 Stretch the skin with your free hand.
5 Place the appliance perpendicularly onto your skin, with the on/off
slide pointing in the direction in which you are going to move the
appliance.
6 Move the appliance slowly over the skin, against the direction of
the hair growth.
Epilate your bikini line as shown in the gure (Fig. 9).
-
Epilate your underarms as shown in the gure (Fig. 10).
-
7 For a cool sensation, you can dab the area you have just epilated
with a cloth soaked in cold water.
8 Remove the sensitive area cap from the epilator after use (Fig. 11).
Shaving
You can use the shaving head to shave sensitive body parts, such as your
underarms and bikini line. With the shaving head, you obtain a smooth
result in a comfortable and gentle way.
1 Make sure the appliance is switched off.
2 Remove the skin cooler (Fig. 7).
3 Press the release button (1) and pull the epilating head off the
appliance (2) (Fig. 12).

ENGLISH12
4 Place the shaving head on the appliance and press it onto the
appliance until it snaps home (‘click’) (Fig. 13).
5 Insert the appliance plug into the bottom of the appliance and put
the adapter in the wall socket.
6 Switch on the appliance by selecting speed II.
7 Place the shaving head onto your skin and move the appliance
slowly and smoothly against the direction of hair growth. Press the
appliance lightly (Fig. 14).
Using the peeling glove
Use the peeling glove in the shower.
Regular massages with the peeling glove may help to prevent ingrown
hairs. Do not use the peeling glove immediately before or after epilation.
Cleaning and maintenance
Never rinse the adapter or the appliance itself with water.
Never use scouring pads, abrasive cleaning agents or aggressive liquids
such as petrol or acetone to clean the appliance.
1 Make sure the appliance is switched off and disconnected from the
mains.
2 Remove the leg skin cooler from the appliance and slide the
insulating sleeve off the skin cooler.
3 Clean the pivoting cooling head of the leg skin cooler with the
brush supplied or with a moist cloth after each use.
Make sure the outside of the skin cooler is completely dry before
you freeze it again.
Cleaning the epilating head
Clean the epilating head after every use.
1 Make sure the appliance is switched off and disconnected from the
mains.

ENGLISH 13
2 Remove the epilating head (Fig. 12).
Press the release button (1) and pull the epilating head off the appliance
(2).
3 Remove the massaging element (Fig. 15).
4 Clean all accessible parts, including the bottom of the epilating head
and the epilating discs, with the brush (Fig. 16).
5 You can also rinse the epilating head (not the appliance!) under the
tap to clean it more thoroughly (Fig. 17).
Never try to detach the epilating discs from the epilating head.
6 Reattach the massaging element to the epilating head. Then place
the epilating head on the appliance and press it until it snaps home
(‘click’) (Fig. 18).
The epilating head only ts onto the appliance in one way.
Cleaning the shaving head
Clean the shaving head after every use.
1 Make sure the appliance is switched off and disconnected from the
mains.
2 Remove the shaving head.
3 Pull the cutter unit out of the shaving head. (Fig. 19)
4 Brush the hairs off the cutter unit and the shaving head. Make sure
that you also brush away any hairs that have collected under the
trimmers (Fig. 20).
5 You can also rinse the cutter unit and the rest of the shaving head
(not the appliance!) under the tap (Fig. 21).
6 Put the cutter unit back into the shaving head and snap the shaving
head back onto the appliance (‘click’) (Fig. 22).
Do not exert pressure on the shaving foil to avoid damage.
7 Rub a drop of sewing machine oil onto the trimmers and shaving
foil of the cutter unit twice a year.

ENGLISH14
Storage
Put the protective cap on the shaving head (‘click’). (Fig. 23)
1
2 Store the appliance and the accessories in the pouch.
Replacement
If you use the shaving head several times a week, replace the cutter unit
(type HP6193) after one or two years. If the cutter unit is damaged,
replace it right away.
Environment
Do not throw away the appliance with the normal household waste
-
at the end of its life, but hand it in at an ofcial collection point for
recycling. By doing this, you help to preserve the
environment (Fig. 24).
Guarantee & service
If you need information or if you have a problem, please visit the Philips
website at www.philips.com or contact the Philips Customer Care
Centre in your country (you nd its phone number in the worldwide
guarantee leaet). If there is no Customer Care Centre in your country,
go to your local Philips dealer or contact the Service Department of
Philips Domestic Appliances and Personal Care BV.

Troubleshooting
Problem Possible cause Solution
Reduced
epilating
performance.
You moved the
epilator in the
wrong direction.
You placed the
epilating
head on the
skin at the
wrong angle.
The epilating
head did not
touch the skin.
The sensitive
area cap was
on the
appliance when
you epilated
your legs.
You moistened
your skin with
water or a
cream or other
skincare
product prior
to epilation.
You moved the
appliance over
the skin too
fast.
Move the appliance against the
direction of hair growth.
Make sure you place the appliance
perpendicularly onto the skin.
Make sure the epilating head (and
the leg skin cooler, if present) are in
proper contact with your skin
during epilation.
Only use the sensitive area cap to
epilate your underarms and bikini
line.
Make sure your skin is entirely dry
and free from grease. Do not put
any cream, body milk or other
skincare product on your skin
before you start to epilate.
Move the appliance over the skin
at moderate speed.
ENGLISH 15

ENGLISH16
Problem Possible cause Solution
The appliance
does not work.
Skin irritation
occurs.
The leg skin
cooler is not
cold enough.
The socket to
which the
appliance is
connected is
not live.
The appliance is
not switched
on.
You did not
attach the
epilating
head correctly.
You used the
epilator for the
rst time or
after a long
period of
disuse.
You have
applied too
much pressure
to the appliance
You did not
freeze the leg
skin cooler long
enough.
Make sure the socket you use is
live. If you use a socket in a
bathroom cabinet, you may need
to switch on the light to activate
the socket.
Switch on the appliance.
Place the epilating head on the
appliance and press it onto the
appliance until it snaps home
(‘click’).
Some skin irritation may occur the
rst few times you use the
appliance. This is absolutely normal
and usually disappears quickly. For
tips to reduce skin irritation, see
the rst section of chapter ‘Using
the appliance’. Also make sure you
keep the epilating head clean.
Do not use any pressure when you
move the appliance over skin
Put the skin cooler without the
insulating sleeve in the freezer or
freezing compartment (***) for at
least 4 hours. When the colour of
the uid has changed from white
to completely blue, the skin cooler
is ready for use.

Problem Possible cause Solution
Put the skin cooler without the
insulating sleeve in the freezer or
freezing compartment (***) for at
least 4 hours. Do not store the skin
cooler in the refrigerator.
Make sure the skin cooler is always
in proper contact with your skin
during epilation. Only use the leg
skin cooler to epilate your legs.
Pass the skin cooler over your leg a
few times to make it pivot again.
Always make sure the outside of
the skin cooler is completely dry
before you freeze it.
Press the release button and pull
the epilating head off the appliance.
Press the release button and pull
the shaving head off the appliance.
Switch off the appliance, unplug it
and remove the shaving head. Then
clean the cutter unit and the
shaving head with the cleaning
brush supplied. Remove any hairs
that are stuck under the trimmers.
The pivoting
cooling head of
the leg skin
cooler does
not move.
It is not
possible to
remove the
epilating head.
It is not
possible to
remove the
shaving head.
Reduced
shaving
performance.
You did not put
the leg skin
cooler in the
freezer or
freezing
compartment.
The leg skin
cooler did not
touch the skin.
The pivoting
cooling head is
frozen.
You did not
press the
release button.
You did not
press the
release button.
The shaving
head is dirty.
ENGLISH 17

ENGLISH18
Problem Possible cause Solution
Stronger skin
irritation than
usual after
shaving.
The cutter unit
is damaged or
worn.
The cutter unit
is damaged or
worn.
Replace the cutter unit.
Replace the cutter unit.

DANSK
Introduktion
Med din nye Satinelle ICE PREMIUM kan du hurtigt og effektivt fjerne
uønsket hårvækst. Kombinationen af det nye keramiske epileringssystem
med kølende, konturfølgende iselement og massagesystem udgør en
revolution inden for epilering. Takket være isens naturligt bedøvende
effekt og massagen, bliver epilering med den nye Satinelle ICE PREMIUM
mere behagelig og mindre smertefuld end nogensinde. Resultatet er
silkeblød hud og op til 50% nedsat hårvækst, forudsat at du anvender
apparatet regelmæssigt (hver 4. uge).
Satinelle ICE PREMIUM er velegnet til alle kropszoner og leveres med en
præcisionskappe til sensitive områder, der er specielt udviklet til at fjerne
hår på følsomme områder (armhuler, bikinilinje)
De hurtigt roterende pincetskiver fanger selv de korteste hår (ned til 0,5
mm!) og trækker dem ud med rod. Huden forbliver glat og blød i op til 4
uger, og den nye hårvækst er blød og dunet.
Generel beskrivelse (g. 1)
A Præcisionskappe til sensitive områder
B Massageelement
C Epilatorhoved
D Udløserknap
E Apparat
F On/off-skydekontakt
G Beskyttelsesdæksel til shaverhoved
H Shaverhoved
I Iselement til ben med vipbart hoved
J Isolerende kappe til iselement til ben
K Adapter
L Eksfolieringshandske
M Rensebørste
19
Vigtigt
Læs denne brugsvejledning omhyggeligt igennem, inden apparatet tages i
brug, og gem den til eventuelt senere brug.

DANSK20
Fare
Både apparat og adapter skal holdes tørre.
Brug ikke apparatet nær eller over en håndvask eller et badekar med
vand
Brug ikke apparatet i badet eller under bruseren.
Hvis du bruger apparatet på badeværelset, må du ikke bruge en
forlængerledning.
Advarsel
Før apparatet tilsluttes, kontrolleres det, om den angivne netspænding
på apparatet svarer til den lokale netspænding.
Brug kun apparatet sammen med den medfølgende adapter.
Brug ikke apparatet, hvis adapteren eller selve apparatet er beskadiget.
Hvis adapteren beskadiges, skal den altid udskiftes med en original
adapter af samme type for at undgå enhver risiko.
Adapteren indeholder en transformer og må ikke klippes af og
udskiftes med et andet stik, da dette kan være meget risikabelt.
Dette apparat er ikke beregnet til at blive brugt af personer
(herunder børn) med nedsatte fysiske og mentale evner, nedsat
følesans eller manglende erfaring og viden, medmindre de er blevet
vejledt eller instrueret i apparatets anvendelse af en person, der er
ansvarlig for deres sikkerhed.
Apparatet bør holdes uden for børns rækkevidde for at sikre, at de
ikke kan komme til at lege med det.
Forsigtig
Armhuler og bikinilinje må kun epileres med påsat præcisionskappe.
-
For at undgå skader og uheld skal apparatet altid holdes i sikker
afstand fra hovedhår, øjenbryn, øjenvipper, tøj, snore, ledninger, børster
o.lign., når det er tændt.
Brug ikke apparatet på irriteret hud eller hud med åreknuder, udslæt,
knopper, modermærker (med hår) eller sår uden at konsultere din
læge. Personer med svækket immunforsvar eller personer, der lider af
diabetes, hæmoli eller nedsat immunforsvar, skal altid først konsultere
lægen.
Huden bliver måske lidt rød og irriteret de første par gange
epilatoren anvendes. Dette er helt normalt og vil hurtigt forsvinde.

DANSK 21
Efterhånden som huden vænner sig til behandlingen, bliver den
mindre irriteret og hårene, der gror ud igen, vil være blødere og
tyndere. Hvis en eventuel hudirritation ikke er forsvundet efter 3
dage, bør du kontakte lægen.
Kontrollér altid skærhovedet, før du bruger apparatet. Brug ikke
skærhovedet, hvis folien er beskadiget, da du kan risikere at komme til
skade.
Eksfolieringshandsken bør ikke anvendes umiddelbart før eller efter
epilering.
Udsæt ikke apparatet for temperaturer under 5°C eller over 35°C.
-
Generelt
-
Regelmæssig massage med eksfolieringshandsken er en god hjælp til
at undgå indgroede hår.
Regelmæssig rensning og korrekt vedligeholdelse af apparatet sikrer
optimale resultater og apparatet en lang levetid.
Elektromagnetiske felter (EMF)
Dette Philips-apparat overholder alle standarder for elektromagnetiske
felter (EMF). Ved korrekt anvendelse i overensstemmelse med
instruktionerne i denne brugsvejleding, er apparatet sikkert at anvende,
ifølge den videnskabelige viden, der er tilgængelig i dag.
Klargøring
Nedfrysning af iselement til ben
1 Læg iselementet i fryser eller fryseboks (***) UDEN
beskyttelseskappen i mindst 4 timer før epileringen. Når væsken er
blevet helt blå, er iselementet klar til brug.
Sørg for, at iselementets overade er helt tør, inden det nedfryses.
Tip: Iselementet kan opbevares permanent i fryseren.
Sådan bruges apparatet
Generel information om epilering
Det er lettest at bruge epilatoren lige efter et kar- eller brusebad,
men huden skal være helt tør, inden du starter.

DANSK22
Første gang apparatet bruges, anbefales det at begynde et sted med
let hårvækst. På denne måde vænner du dig gradvist til epileringen.
For at opnå det bedste epileringsresultat må hårene ikke være
-
længere end 10 mm (g. 2)
Længere hår kan epileres ved at bruge en af de to fremgangsmåder
-
nedenfor: (g. 2)
1 Afkort hårene til maks. 10 mm med en trimmer. Herefter kan du
påbegynde epileringen.
2 Barbér hårene helt af. Herefter kan du påbegynde epilering efter et
par dage (hårene skal mindst være 0,5 mm lange).
Huden bliver måske lidt rød og irriteret de første par gange
epilatoren anvendes. Dette er helt normalt og vil hurtigt forsvinde.
Efterhånden som huden vænner sig til behandlingen, bliver den
mindre irriteret og hårene, der gror ud igen, vil være blødere og
tyndere. Hvis en eventuel hudirritation ikke er forsvundet efter 3
dage, bør du kontakte lægen.
Vi anbefaler, at du bruger epilatoren, før du går i seng om aftenen, så
eventuel hudirritation har tid til at dæmpes i løbet af natten.
Epilering med iselement til ben
Brug kun det specielle iselement beregnet til ben, når du epilerer
benene.
Sørg for at huden er ren, helt tør og fri for fedtstoffer. Undlad at bruge
nogen former for creme umiddelbart før epilering.
1 Sæt beskyttelseskappen på iselementet. (g. 3)
Beskyttelseskappen modvirker ubehag ved kulde i hånden under brug af
apparatet. Den holder også iselementet koldt i længere tid.
Det vipbare hoved kan være frosset fast til iselementet, så det ikke kan
bevæge sig, når iselementet kommer direkte fra fryseren. Det vipbare
hoved bliver bevægeligt igen, når det har været ført hen over benet et par
gange.
2 Klik iselementet på epilatoren (g. 4).
3 Sæt apparatstikket i kontakten i bunden af apparatet, og slut
adapteren til lysnettet.

DANSK 23
4 Tænd apparatet ved at vælge den ønskede hastighed (g. 5).
Vælg hastighed I til områder med let hårvækst og områder, hvor der er
knogler lige under huden, f.eks. knæ og ankler.
Vælg hastighed II til større områder med kraftigere hårvækst.
5 Stræk huden ud med den frie hånd, så hårene rejser sig.
6 Placér apparatet vinkelret på huden med epilatorhovedet pegende
fremad. Bevæg apparatet mod hårenes vækstretning i et moderat
tempo. (g. 6)
Sørg for, at både pincetskiver og iselementet har fuld kontakt med huden.
Tryk apparatet let mod huden.
Hvis du ikke er helt tilfreds med resultatet, så prøv at bevæge
,
epilatoren lidt langsommere over huden.
7 Brug tappen i bunden af apparatet til at adskille apparat og
iselement (g. 7).
Epilering uden iselement til ben
,
Epilatoren kan også anvendes uden iselement, hvis du f.eks. har
vænnet dig til følelsen.
,
Sørg for, at du placerer epilatoren vinkelret på huden og fører den
imod hårenes vækstretning.
Epilering af armhuler og bikinilinje
Epilatoren leveres med en præcisionskappe til følsomme områder, som
reducerer antallet af aktive pincetskiver. Det gør apparatet velegnet til
epilering af de mere følsomme kropszoner, såsom armhuler og bikinilinjen.
Bemærk: Du opnår det bedste resultat, når hårene ikke er for lange (maks. 1
cm).
Undlad at benytte iselementet til epilering i armhulerne og bikinilinjen.
1 Sæt præcisionskappen til følsomme områder på
epileringshovedet (g. 8).
Præcisionskappen kan kun sættes på apparatet på én måde.

DANSK24
2 Sæt apparatstikket i kontakten i bunden af apparatet, og slut
adapteren til lysnettet.
3 Tænd apparatet ved at vælge den ønskede hastighed. (g. 5)
Det anbefales at vælge hastighed II.
4 Stræk huden med din frie hånd.
5 Placér apparatet vinkelret på huden, mens on/off-skydeknappen
peger i den retning, du vil bevæge apparatet.
6 Bevæg apparatet langsomt hen over huden, i modsat retning af
hårets vækstretning.
Epilér bikinilinjen som vist på illustrationen (g. 9).
-
Epilér armhulerne som vist på illustrationen (g. 10).
-
7 For at afkøle det epilerede område kan du duppe det med en kold,
våd klud.
8 Fjern præcisionskappen efter brug (g. 11).
Barbering
Shaverhovedet kan anvendes til barbering af følsomme kropszoner såsom
armhuler og bikinilinje. Med shaverhovedet opnår du et glat resultat på en
behagelig og blid måde.
1 Kontrollér, at apparatet er slukket.
2 Tag iselementet af (g. 7).
3 Tryk på udløserknappen (1), og træk epilatorhovedet af apparatet
(2) (g. 12).
4 Sæt shaverhovedet på apparatet og tryk, indtil det klikker på
plads (g. 13).
5 Sæt apparatstikket i kontakten i bunden af apparatet, og slut
adapteren til lysnettet.
6 Tænd apparatet ved at vælge hastighed II.
7 Placér shaverhovedet mod huden, og før langsomt og blidt
apparatet imod hårenes vækstretning med et let tryk (g. 14).

DANSK 25
Brug af eksfolieringshandsken
Brug af eksfolieringshandsken i badet.
Regelmæssig massage med eksfolieringshandsken er en god hjælp til at
undgå indgroede hår. Eksfolieringshandsken bør dog ikke anvendes
umiddelbart før eller efter epilering.
Rengøring og vedligeholdelse
Adapteren og selve apparatet må aldrig rengøres med vand.
Brug aldrig skuresvampe eller skrappe rengøringsmidler så som benzin,
acetone eller lignende til rengøring af apparatet.
1 Kontrollér, at apparatet er slukket, og at stikket er taget ud af
stikkontakten.
2 Tag iselementet til ben af apparatet og beskyttelseskappen af
iselementet.
3 Rengør det vipbare kølehoved på iselementet til ben med den
medfølgende børste eller en fugtig klud efter hver brug.
Sørg for, at iselementets overade er helt tør, inden det nedfryses.
Rengøring af epilatorhovedet
Rengør epileringshovedet, hver gang det har været brugt.
1 Kontrollér, at apparatet er slukket, og at stikket er taget ud af
stikkontakten.
2 Tag epilatorhovedet af (g. 12).
Tryk på udløserknappen (1), og træk epilatorhovedet af apparatet (2).
3 Fjern massageelementet (g. 15).
4 Rengør alle tilgængelige dele med børsten, inkl. bunden af
epileringshovedet og pincetskiverne (g. 16).
5 Du kan også skylle epilatorhovedet (ikke apparatet!) under
vandhanen for at rengøre det grundigt (g. 17).
Prøv aldrig at fjerne pincetskiverne fra epilatorhovedet.

DANSK26
6 Fastgør massageelementet på epilatorhovedet igen. Anbring
derefter epilatorhovedet på apparatet, og tryk på det, indtil det
klikker på plads (g. 18).
Epilatorhovedet kan kun påsættes på én måde.
Rengøring af shaverhovedet
Rengør shaverhovedet hver gang det har været brugt.
1 Kontrollér, at apparatet er slukket, og at stikket er taget ud af
stikkontakten.
2 Tag shaverhovedet af.
3 Træk skærenheden ud af shaverhovedet. (g. 19)
4 Børst skærenhed og shaverhoved fri for hår. Vær særlig omhyggelig
med at fjerne de hår, der har samlet sig under trimmerne (g. 20).
5 Du kan også skylle skærenheden og resten af shaverhovedet (ikke
apparatet!) under vandhanen (g. 21).
6 Sæt skærenheden tilbage på shaverhovedet og klik det tilbage på
apparatet (g. 22).
Tryk ikke på skærfolien, da den ellers kan blive beskadiget.
7 Smør trimmerne og skærfolien med en dråbe symaskineolie et par
gange om året.
Opbevaring
Sæt beskyttelseskappen på shaverhovedet (“klik”). (g. 23)
1
2 Opbevar epilator og tilbehør i posen.
Udskiftning
Hvis du bruger shaverhovedet ere gange om ugen, bør skærenheden
(type HP6193) udskiftes efter 1 eller 2 år. Hvis skærenheden er
beskadiget, skal den udskiftes med det samme.

DANSK 27
Miljøhensyn
Apparatet må ikke smides ud sammen med det almindelige
-
husholdningsaffald, når det til sin tid kasseres. Aevér det i stedet på
en kommunal genbrugsstation. På den måde er du med til at beskytte
miljøet (g. 24).
Reklamationsret og service
For alle yderligere oplysninger eller ved eventuelle problemer med
apparatet henvises til Philips’ hjemmeside på adressen www.philips.com
eller det lokale Philips Kundecenter (telefonnumre ndes i vedlagte
“World-Wide Guarantee”-folder). Hvis der ikke ndes et kundecenter i
dit land, bedes du venligst kontakte din lokale Philips-forhandler eller
Serviceafdelingen i Philips Domestic Appliances and Personal Care BV.
Fejlnding
Problem Mulig årsag Løsning
Nedsat
epileringsevne.
Du har bevæget
epilatoren i den
forkerte retning.
Du har placeret
epilatorhovedet
mod huden i en
forkert vinkel.
Epilatorhovedet
var ikke i berøring
med huden.
Præcisionskappen
til følsomme
områder sad på,
da du epilerede
benene.
Bevæg altid apparatet imod
hårenes vækstretning.
Sørg for at placere apparatet
vinkelret mod huden.
Sørg for, at epilatorhoved (og
evt. iselementet til ben) har
fuld kontakt med huden under
epilering.
Anvend kun præcisionkappen
til epilering af armhuler og
bikinilinje.

DANSK28
Problem Mulig årsag Løsning
Apparatet
fungerer ikke.
Der opstår
hudirritation.
Du havde fugtet
huden med vand,
creme eller et
andet
hudplejeprodukt
før epileringen.
Du har bevæget
apparatet for
hurtigt hen over
huden.
Der er ikke strøm
i kontakten.
Der er ikke tændt
for apparatet.
Epilatorhovedet
var ikke sat rigtigt
på.
Det er første gang
du benytter
epilatoren, eller du
har holdt en
længere pause.
Sørg for at huden er
fuldstændig tør og fedtfri. Du
må ikke smøre huden med
fugtighedscreme eller noget
andet hudplejeprodukt, før du
begynder epileringen.
Bevæg apparatet henover
huden ved moderat hastighed.
Sørg for, at der er strøm i
kontakten. Anvender du en
integreret stikkontakt i et
badeværelsesskab/kabinet, skal
lyset på badeværelset ofte
tændes for at aktivere denne.
Tænd for apparatet.
Sæt epilatorhovedet på
apparatet og tryk, indtil det
klikker på plads.
Der kan opstå hudirritation de
første par gange du bruger
apparatet. Dette er
fuldstændigt normalt og
ophører sædvanligvis hurtigt.
Læs første del af afsnittet “Brug
af apparatet” for at få et par
gode råd om nedsat
hudirritation. Sørg også for at
holde epilatorhovedet rent.

Problem Mulig årsag Løsning
Iselementet til
ben er ikke koldt
nok.
Det vipbare
hoved til
iselementet til
benene bevæger
sig ikke.
Epilatorhovedet
kan ikke tages af.
Shaverhovedet
kan ikke tages af.
Du har trykket
apparatet for
hårdt mod huden
Iselementet til ben
havde ikke ligget
længe nok i
fryseren.
Iselementet til ben
har ikke ligget i
fryser eller
fryseboks.
Iselementet til ben
var ikke i berøring
med huden.
Iselementets
vipbare hoved er
frosset fast.
Du glemte at
trykke på
udløserknappen.
Du glemte at
trykke på
udløserknappen.
Undlad at trykke for hårdt, når
du fører apparatet hen over
huden
Læg iselementet uden
beskyttelseskappe i fryser eller
isboks (***) i mindst 4 timer.
Når al væsken har skiftet farve
fra hvid til blå, er iselementet
klart til brug.
Læg iselementet uden
beskyttelseskappe i fryser eller
isboks (***) i mindst 4 timer.
Det er ikke nok at lægge
iselementet i køleskabet.
Sørg for, at iselementet altid er
i kontakt med huden under
epileringen. Brug kun
iselementet til ben, når du
epilerer benene.
Bevæg iselementet et par
gange hen over benet, indtil
det begynder at vippe igen.
Sørg altid for, at iselementets
overade er helt tør, før du
lægger det i fryseren.
Tryk på udløserknappen, og
træk epilatorhovedet af.
Tryk på udløserknappen, og
træk shaverhovedet af.
DANSK 29

DANSK30
Problem Mulig årsag Løsning
Nedsat
barberingsevne.
Kraftigere
hudirritation
efter barbering
end normalt.
Shaverhovedet er
ikke rent.
Skærenheden er
beskadiget eller
slidt.
Skærenheden er
beskadiget eller
slidt.
Sluk for apparatet, tag stikket
ud af stikkontakten og fjern
shaverhovedet. Rengør derefter
skærenhed og shaverhoved
med den medfølgende
rensebørste. Fjern alle de hår,
der sidder fast under
trimmerne.
Udskift skærenheden.
Udskift skærenheden.
 Loading...