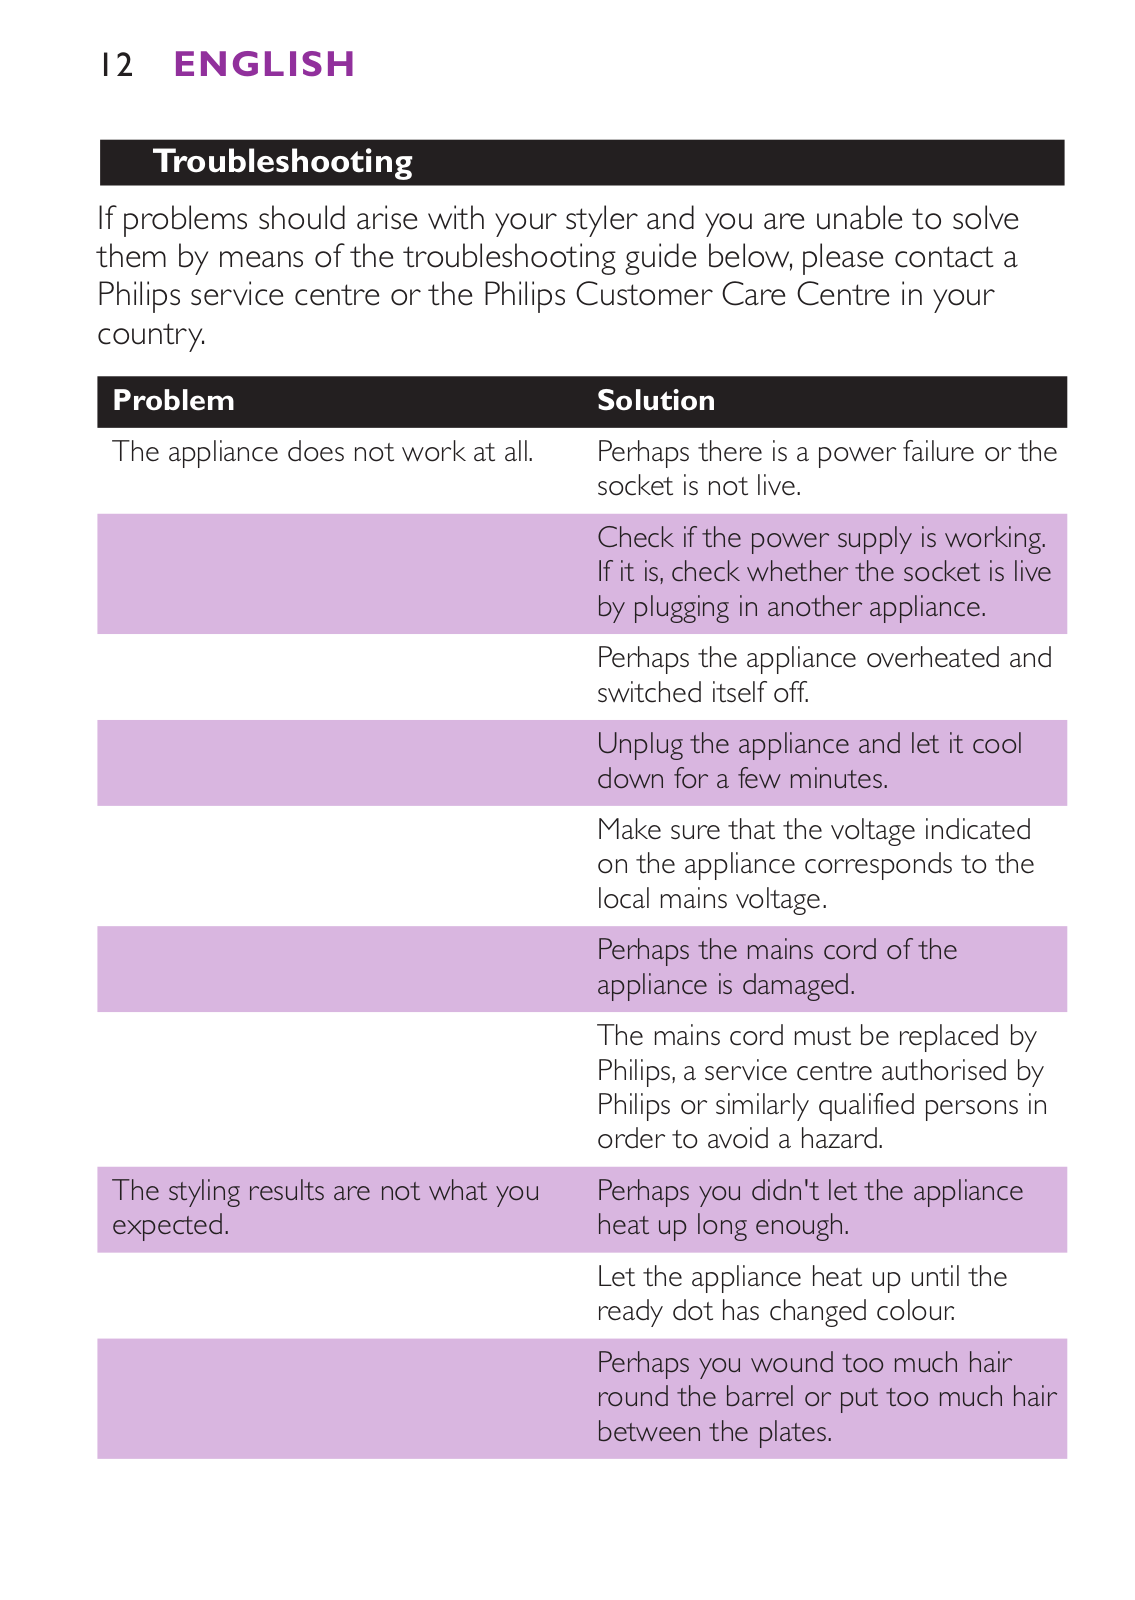
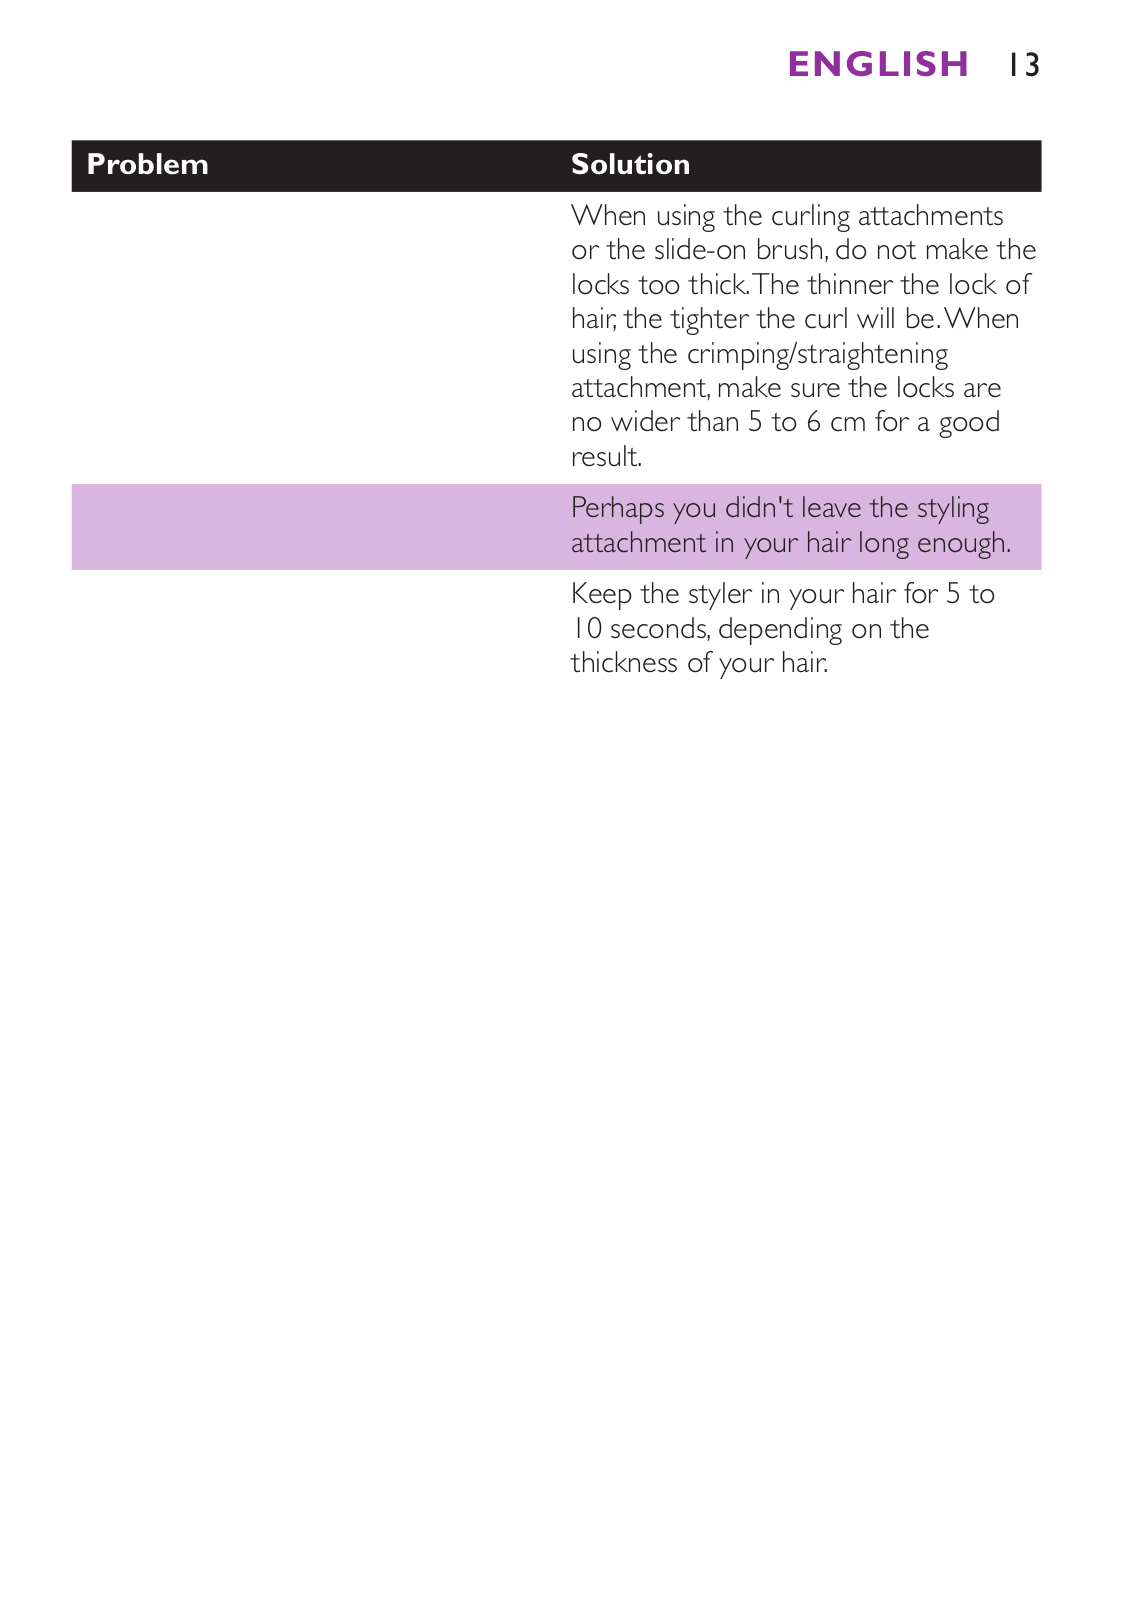
How it Works
Log In / Sign Up
Buy Points
How it Works
FAQ
Contact Us
Questions and Suggestions
Users
Philips
Loading...
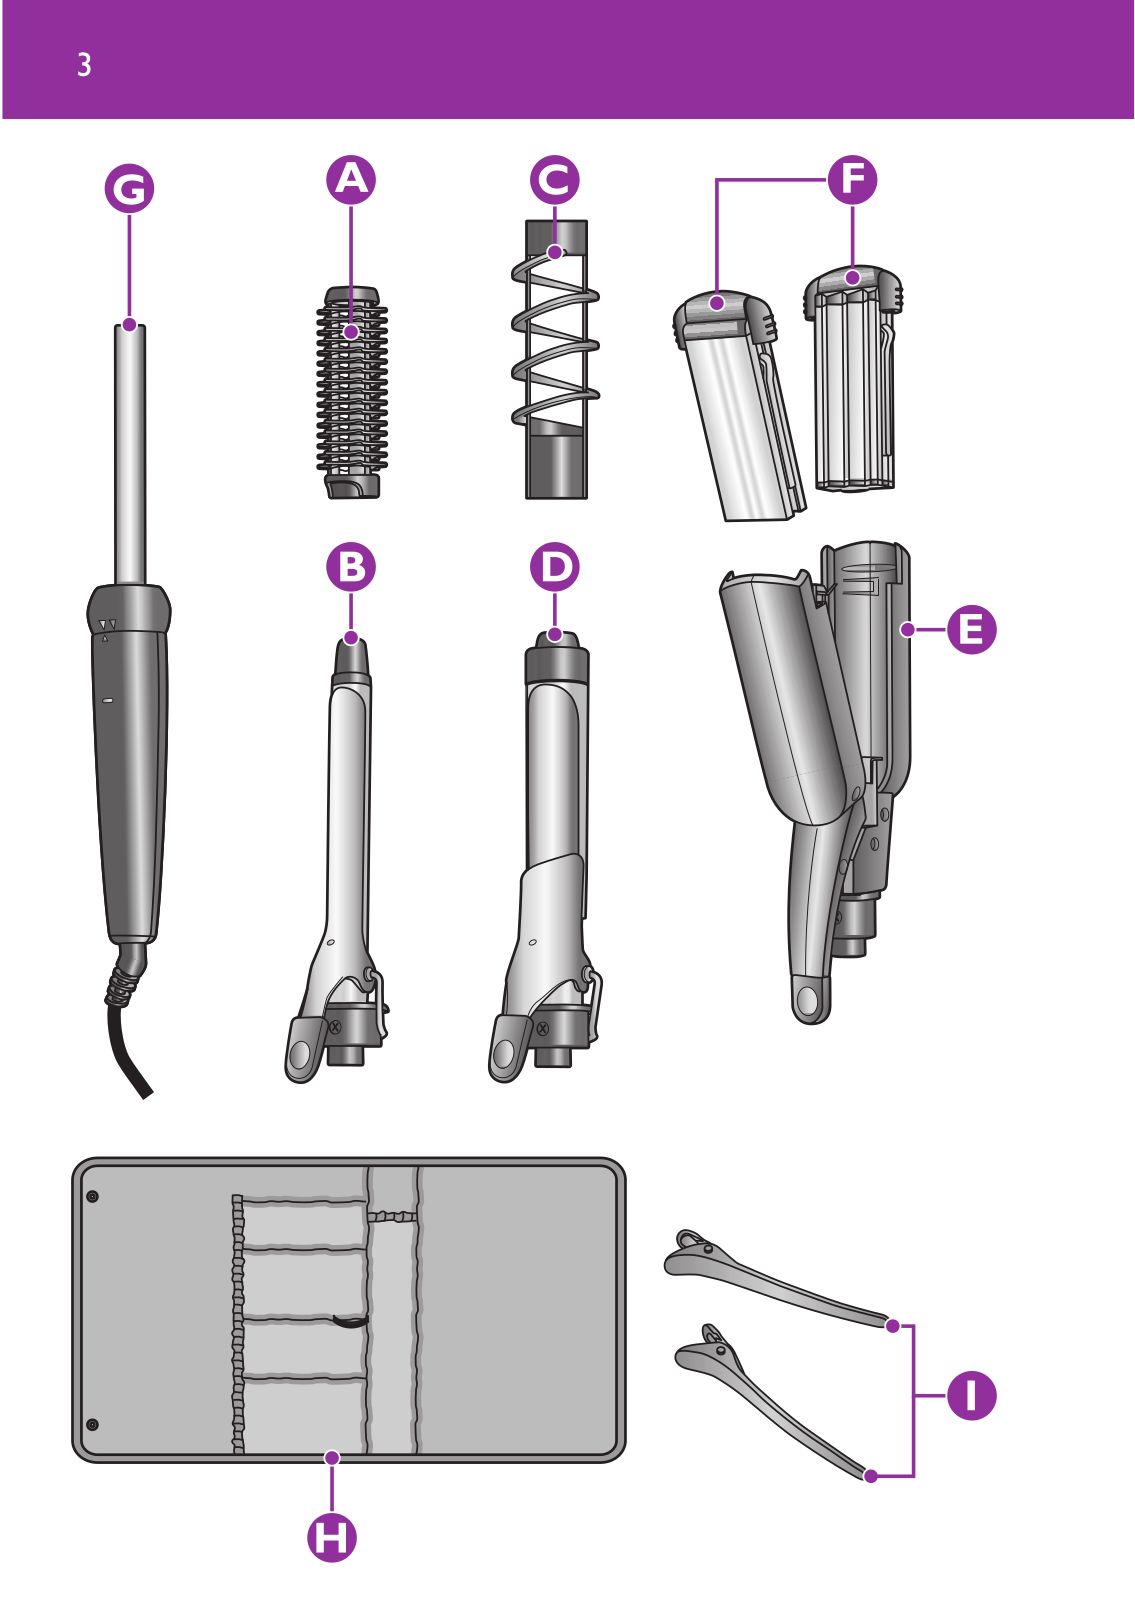
H
HP-1511
6
HP-3621
26
HP-3643
21
HP-4611
7
HP-4624
23
HP-4625
15
HP-4638
17
HP-4642
20
HP-4643
16
HP-4646
24
HP-4648
4
HP-4651
12
HP-4653
23
HP-4657
31
HP-4659
HP-4661
39
HP-4665
17
HP-4666
37
HP-4667
22
HP-4668
38
HP-4669
29
HP-4671
24
HP-4674
26
HP-4680
19
HP-4681
46
HP-4686
22
HP-4688
26
HP-4696
28
HP-4803
2
HP-4804
2
HP-4814
2
HP-4815
2
HP-4817
3
HP-4819
23
HP-4823
31
HP-4824
28
HP-4828
20
HP-4829
51
HP-4840
9
HP-4841
11
HP-4867
46
HP-4868
6
HP-4880
15
HP-4884
13
HP-4885
15
HP-4890
31
HP-4891
29
HP-4892
32
HP-4924
4
HP-4930
29
HP-4931
21
HP-4935
61
HP-4940
45
HP-4963
26
HP-4984
32
HP-4990
48
HP-4991
29
HP-4992
32
HP-4996
18
HP-4997
24
HP-6342
26
HP-6368
16
HP 6511
20
HP 6515
20
HP 6517
27
HP 6530
20
HP-6540
21
HP-6570
25
HP 6572
25
HP 6576
24
HP-6578
21
HP 6583/02
HP-8180/07
HP-8190
HP-8251
5
HP-8260
50
HP-8297
3
HP-8300
49
HP 8309
32
HP 8319
3
HP-8330
31
HP-8331
31
HP-8339
47
HP-8342
HP 8345
6
HP 8347
2
HP 8360
HP 8361
26
HP 8363
4
HP-8540
9
HP-8560
15
HP 8618
11
HP 8665
19
HP 8668
3
HP 8699
2
HP L1502
HP L1523
HP L1530R
HP L2035
HP P4795A
Loading...
Loading...
Nothing found
HP-4696
User Manual
56 pgs
4.31 Mb
0
User Manual
56 pgs
1.47 Mb
0
User Manual
3 pgs
1.16 Mb
0
BROCHURE
2 pgs
414.57 Kb
0
BROCHURE
2 pgs
330.66 Kb
0
BROCHURE
2 pgs
366.76 Kb
0
BROCHURE
60 pgs
2.52 Mb
0
BROCHURE
116 pgs
1.57 Mb
0
BROCHURE
3 pgs
1.18 Mb
0
BROCHURE
2 pgs
1.16 Mb
0
BROCHURE
2 pgs
201.06 Kb
0
BROCHURE
2 pgs
1.31 Mb
0
BROCHURE
2 pgs
208.57 Kb
0
BROCHURE
2 pgs
1.16 Mb
0
BROCHURE
2 pgs
304.05 Kb
0
BROCHURE
3 pgs
1.19 Mb
0
BROCHURE
2 pgs
248.59 Kb
0
Catalog
2 pgs
259.44 Kb
0
Service Manual
2 pgs
77.66 Kb
0
User Manual
3 pgs
1.18 Mb
0
User Manual
2 pgs
272.3 Kb
0
User Manual
2 pgs
321.46 Kb
0
User Manual
56 pgs
4.74 Mb
0
User Manual
56 pgs
4.4 Mb
0
User Manual
120 pgs
1.42 Mb
0
User Manual [fr]
8 pgs
3.61 Mb
0
BROCHURE [hu]
3 pgs
1.18 Mb
0
BROCHURE [zh]
2 pgs
1.16 Mb
0
Table of contents
Loading...
Philips HP-4696 BROCHURE
...
Philips BROCHURE
Download
Specifications and Main Features
Frequently Asked Questions
User Manual
Download
Loading...
+
86
hidden pages
Unhide
You need points to download manuals.
1 point = 1 manual.
You can buy points or you can get point for every manual you upload.
Buy points
Upload your manuals
 Loading...