

Page 1
Register your product and get support at
www.philips.com/welcome
EN User manual
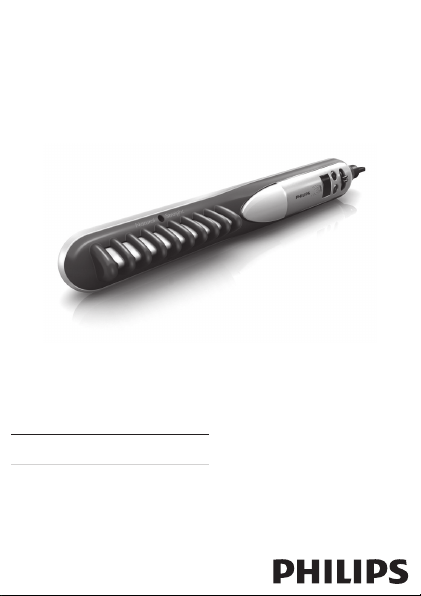
Straightener
HP8297
Page 2
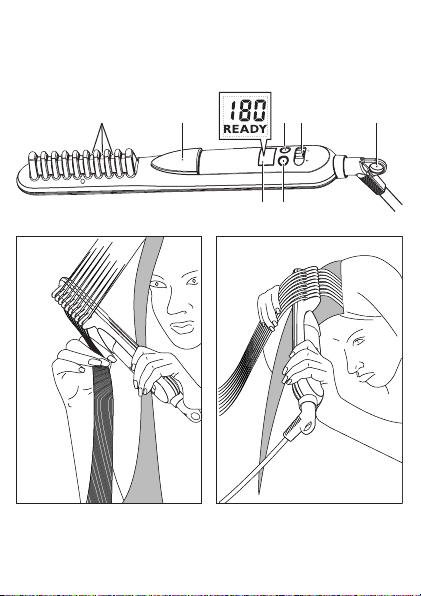
ab cfgd e
h
i
Page 3
English
Congratulations on your purchase, and welcome to Philips! To fully
benet from the support that Philips offers, register your product at
www.philips.com/welcome.
1 Important
Read this user manual carefully before you use the appliance and keep it
for future reference.
•
WARNING: As straighteners reach high temperatures, keep them
out of the reach of children during heat-up, use and cool-down to
avoid burnings.
•
WARNING: Do not use this appliance near water.
When the appliance is used in a bathroom, unplug it after •
use since the proximity of water presents a risk, even when
the appliance is switched off.
WARNING: Do not use this appliance near bathtubs, showers, basins
•
or other vessels containing water.
Before you connect the appliance, ensure that the voltage indicated
•
on the appliance corresponds to the local power voltage.
Do not use the appliance for any other purpose than described in
•
this manual.
Only use the appliance on dry hair. Do not use the appliance on
•
articial hair.
Keep the hot surfaces of the appliance away from your skin.
•
When the appliance is connected to the power, never leave it •
unattended.
Always unplug the appliance after use.
•
When the appliance is hot, keep it on a heat-resistant surface and •
never cover the appliance with anything, such as a towel or clothing.
Never use any accessories or parts from other manufacturers or that
•
Philips does not specically recommend. If you use such accessories
or parts, your guarantee becomes invalid.
Page 4
Do not wind the mains cord round the appliance.•
If you use the appliance on color-treated hair, the straightening plates •
may stain.
•
If the mains cord is damaged, you must have it replaced by Philips, a
service centre authorised by Philips or similarly qualied persons in
order to avoid a hazard.
•
This appliance is not intended for use by persons (including children)
with reduced physical, sensory or mental capabilities, or lack of
experience and knowledge, unless they have been given supervision
or instruction concerning use of the appliance by a person responsible
for their safety.
•
Children should be supervised to ensure that they do not play with
the appliance.
•
For additional protection, we advise you to install a residual current
device (RCD) in the electrical circuit that supplies the bathroom. This
RCD must have a rated residual operating current not higher than
30mA. Ask your installer for advice.
Electromagnetic elds (EMF)
This appliance complies with all standards regarding electromagnetic
elds (EMF). If handled properly and according to the instructions in this
user manual, the appliance is safe to use based on scientic evidence
available today.
Environment
Do not throw away the appliance with the normal household
waste at the end of its life, but hand it in at an ofcial collection
point for recycling. By doing this, you help to preserve the
environment.
Page 5

2 Straighten your hair
Ensure that you select a temperature setting that is suitable for your hair.
Always select a low setting when you use the straightener for the rst time.
Hair Type Temperature Setting
Thick or coarse Mid to High (170 ºC and above)
Fine or medium-textured Low to Mid (160 ºC and below)
Pale, blonde, bleached or color-treated Low (Below 160 ºC)
1 Connect the plug to a power supply socket.
2 Slide the On/Off switch (
The display screen ( »
setting 180 °C is displayed.
3 Press the + (
setting for your hair.
When the comb plates have heated up to the selected »
temperature, the stable indication “READY” is displayed.
4 The ion function activates when the appliance is switched on, which
provides additional shine and reduces frizz.
When the function is on, a special odor may be smelt and a »
sizzling noise may be heard, which is normal and caused by the
ions that are generated.
5 Comb your hair (with a brush or comb) and take a section that is
not wider than 5cm for straightening.
6 Press the button (
7 Insert your hair evenly between the comb teeth and release the
comb button that the hairs are clamped between the teeth.
8 Slide the comb straightener down the length of the hair in a single
motion (max. 10 seconds) from root to tip, without stopping to
prevent overheating.
) or - ( ) buttons to select a suitable temperature
) to to switch on the appliance.
) lights up and the default temperature
) to open the comb teeth ( ).
Page 6
Note: Hold the tips of your hair with your other hand during
the whole straightening process, so that the hair remains evenly
distributed between the teeth of the straightening comb. This avoids
that hairs fall out of the teeth before they are straightened.
9 After 20 seconds, repeat step 6 to 8 until you achieve the desired
look.
10 To straighten the rest of your hair, repeat steps 6 to 9.
Note: The appliance has auto-shut off function. It switches off
automatically after 60 minutes. You can reactivate the appliance by
setting the On/Off switch (
Straightening while reducing the volume
1 To reduce the volume, place the straightening comb on top of the
section of hair and slide them slowly along the section from roots to
tips like your do when brushing the hair with a normal brush.
Straightening while increasing the volume
Volume at hair-line: (
1 Place the straightening comb under your hair. It will straighten while
lifting the roots and giving your hair volume.
Volume at roots: (
1 To generate a volume effect at the roots, place the straightening
comb under your hair as close as possible to the roots. Make sure
that the comb goes through your hair completely.
2 Turn the straightening comb about 45° while gently sliding it towards
the tips. This rotating movement will give your roots a maximum of
volume.
To create icks:
1 Straighten a section of hair and turn the straightening comb half-circle
inwards (or outwards) when it reaches the end of the hair.
Note: Hold the tips of your hair with your other hand during the
whole straightening process.
2 Hold the straightening comb in the same position for 2 to 3 seconds,
and then release it.
)
) off and on again.
)
Page 7

After use:
1 Switch off the appliance and unplug it.
2 Place it on a heat-resistant surface until it cools down.
3 Clean the appliance and plates by damp cloth.
4 Keep it in a safe and dry place, free of dust. You can also hang it with
the hanging loop (
) or store it in the supplied pouch.
3 Guarantee and service
If you need information e.g. about replacement of an attachment or if
you have a problem, please visit the Philips website at www.philips.com
or contact the Philips Customer Care Centre in your country (you nd
its phone number in the worldwide guarantee leaet). If there is no
Consumer Care Centre in your country, go to your local Philips dealer.
4 Troubleshooting
Problem Cause Solution
The appliance
does not work
at all.
The power socket to
which the appliance
has been connected
may not live.
The mains cord of
the appliance may be
damaged.
Ensure the socket is live.
If the mains cord is damaged,
you must have it replaced
by Philips, a service centre
authorised by Philips or
similarly qualied persons in
order to avoid a hazard.
Page 8

© Royal Philips Electronics N.V. 2010
All rights reserved.
Specications are subject to change without notice.
Trademarks are the property of Koninklijke Philips
Electronics N.V. or their respective owners.
3140 035 22141
 Loading...