

Page 1

HF367X series
Philips SleepMapper app
Page 2

Page 3
1
12
1
2
11
3
10
4
13
14
5 39
6
7
8
Page 4

Page 5

English 6
Page 6

6
English
IMPORTANT SAFETY INSTRUCTIONS
Read and follow all instructions in this user manual and heed all warnings.
WARNING
To reduce the risk of burns, fire, electric shock, or injury to persons:
-
This appliance is for indoor use only.
-
If the adapter, cord or appliance has been damaged in any way, liquid has spilled or objects
have fallen into and/or onto the appliance, the appliance has been exposed to rain or
moisture, does not operate normally or has been dropped or damaged, it should not be
operated and needs servicing by qualified service personnel (see 'Service and assistance').
-
Water and electricity are a dangerous combination. Do not use this appliance in wet
surroundings (e.g. in the bathroom or near a shower or swimming pool).
-
Make sure the adapter does not get wet.
-
Do not let water run into the appliance or spill water onto the appliance.
-
Do not immerse the appliance in water or rinse under the tap.
-
The adapter contains a transformer, which converts an unsafe 100-240V AC to a safe 24V DC
low voltage. Do not cut off the adapter to replace it with another plug, as this causes a
hazardous situation.
-
Only use the original adapter. Do not use the adapter or any of the other accessories if they
are damaged. Call 1-866-832-4361 for assistance.
-
Do not use the adapter in or near a power outlet that contains an electric air freshener to
prevent damage to the adapter.
-
Protect the power cord from being walked on or pinched, particularly at plugs, outlet and
point where they exit from lamp.
-
The appliance has no on/off switch. To disconnect the appliance from the power source,
remove the plug from the wall outlet.
-
This appliance is not intended for use by persons (including children) with reduced physical,
sensory or mental capabilities, or lack of experience and knowledge, unless they have been
given supervision or instruction concerning use of the appliance by a person responsible for
their safety.
-
Do not install near any heat sources such as radiators, stoves, or other apparatus that
produce heat.
-
Do not impair the cooling of the appliance by covering the appliance with items such as
blankets, curtains, clothes, papers, etc.
CAUTION
-
Do not drop the appliance on the floor, hit it hard or expose it to other heavy shocks.
-
Place the appliance on a stable, level and non-slippery surface.
-
This appliance is only intended for household use, including similar use in hotels. Do not use
attachments not recommended by Philips North America LLC.
-
Check if the voltage indicated on the appliance corresponds to the local voltage before you
connect the appliance.
English
Page 7

English
-
Unplug this appliance during lightning storms or when unused for long periods of time.
GENERAL
-
Do not use this appliance as a means to reduce your hours of sleep. The purpose of this
appliance is to help you wake up more easily. It does not diminish your need for sleep.
-
Consult your doctor before you start using the appliance if you have suffered from or are
suffering from depression.
-
If you feel uncomfortable at any point while using RelaxBreathe in the breathing exercise,
just go back to breathing normally.
-
If you often wake up too early or with a headache reduce the set light intensity level and/or
the set Sunrise simulation time.
-
If you often wake up by the alarm sound, increase the set light intensity level or the set
Sunrise simulation time.
-
If you share a bedroom with someone else, this person may unintentionally wake up from
the light of the appliance, even though this person is further removed from the appliance.
This is the result of differences in light sensitivity between people.
-
The power consumption of the appliance is lowest if no device is connected to the USB port
and the lamp, radio, display and Wi-Fi are turned off.
SAVE THESE INSTRUCTIONS
7
Contents
IMPORTANT SAFETY INSTRUCTIONS________________________________________________________ 6
Introduction ___________________________________________________________________________________ 8
General description___________________________________________________________________________ 8
Intended use__________________________________________________________________________________ 9
The effects of the connected Sleep & Wake-Up Light_______________________________________ 9
Display icons__________________________________________________________________________________ 9
Connecting your appliance to Wi-Fi__________________________________________________________ 10
Navigating the menu__________________________________________________________________________ 11
Setting wake-up profiles______________________________________________________________________ 12
PowerBackUp+________________________________________________________________________________ 13
Snoozing_______________________________________________________________________________________ 13
Turning the alarm off__________________________________________________________________________ 13
Using the appliance as a bedside lamp______________________________________________________ 13
Midnight light__________________________________________________________________________________ 14
Settings________________________________________________________________________________________ 14
Listening to radio or your own music_________________________________________________________ 16
Wind-down programs_________________________________________________________________________ 17
Sunset simulation_____________________________________________________________________________ 17
RelaxBreathe__________________________________________________________________________________ 17
Bedtime function______________________________________________________________________________ 19
Page 8

8
English
Charging your mobile phone__________________________________________________________________ 19
Cleaning and storage__________________________________________________________________________ 19
Disposal________________________________________________________________________________________ 19
Service and assistance________________________________________________________________________ 19
90-Day Money-Back Guarantee _____________________________________________________________ 19
Full Two-Year Warranty_______________________________________________________________________ 20
Troubleshooting_______________________________________________________________________________ 21
Safety and compliance________________________________________________________________________ 24
Electromagnetic fields (EMF)_________________________________________________________________ 24
FCC Information_______________________________________________________________________________ 25
Specifications__________________________________________________________________________________ 25
Introduction
The Philips connected Sleep & Wake-Up Light helps you wake up
more pleasantly. If the Sunrise simulation is active (default is 30
minutes), the light intensity of the lamp gradually increases to the set
level and the light color changes from deep morning red to bright
daylight. The light gently prepares your body for waking up at the set
time. To make waking up an even more pleasant experience, you can
use natural wake-up sounds or the FM radio to wake up to.
The light-guided breathing function, personalized sun settings,
bedroom environment tracking and several other features make this
Wake-Up Light the perfect companion for your bedroom.
Tip: Using the Philips SleepMapper app will enable extra features. Any
information about these features is explained in the app.
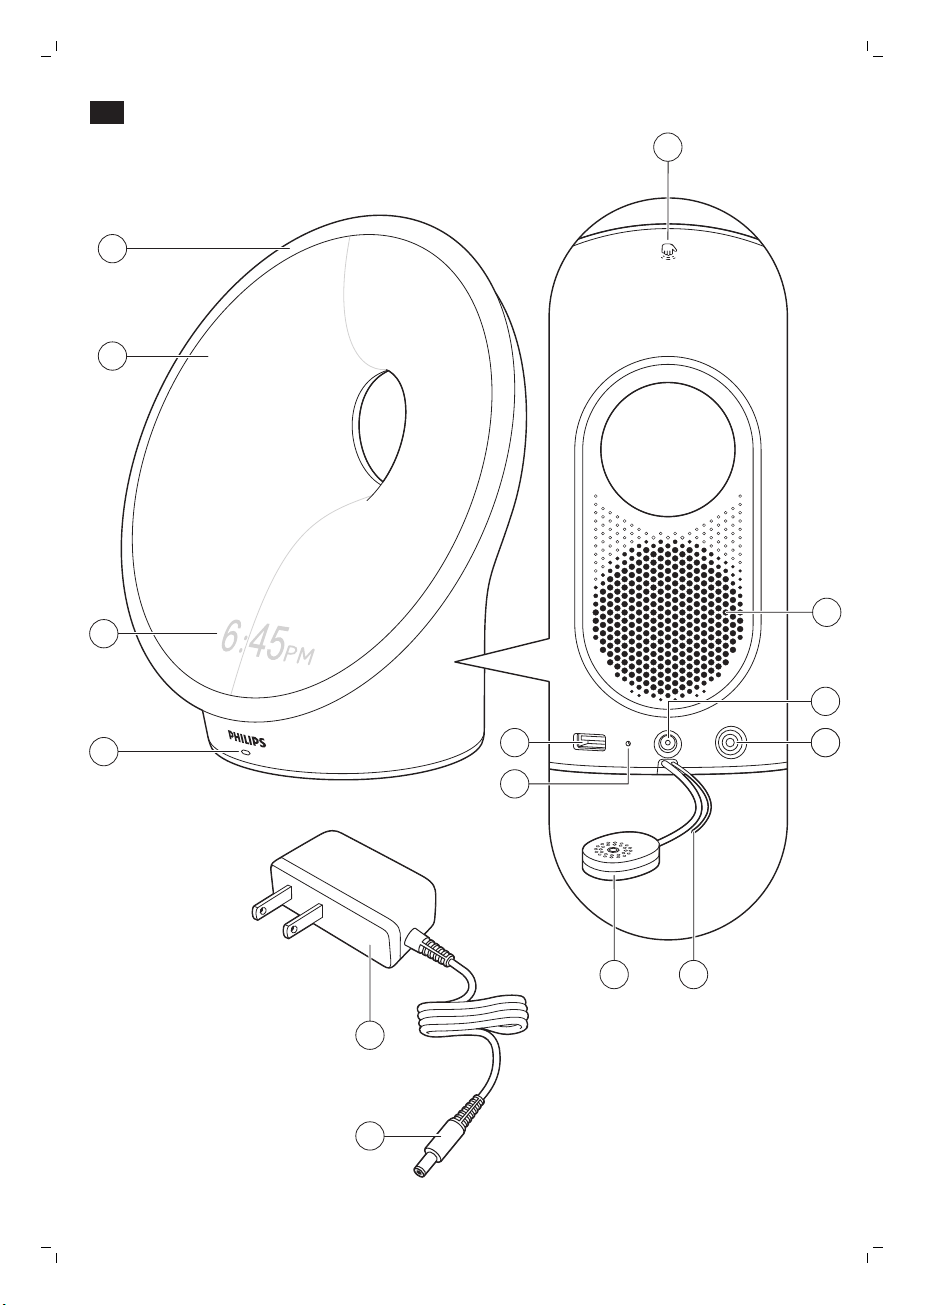
General description
1 Deco ring
2 Lamp housing
3 Display
4 Sound pressure sensor
5 USB charging port
6 Reset button
7 AmbiTrack sensor: Humidity and temperature sensor
8 Radio antenna
9 Auxiliary (AUX) inlet
10 Adapter DC-inlet
11 Speaker
12 Snooze/Midnight Light
13 Adapter
14 Small plug
Page 9
English
Intended use
The Philips connected Sleep & Wake-Up Light is intended to give you
a more natural and refreshed wake-up and a relaxed feeling before
falling asleep.
This is not a general illumination product.
The effects of the connected Sleep & Wake-Up Light
The Philips connected Sleep & Wake-Up Light gently prepares your
body for waking up during the last 5 to 60 minutes or last period of
sleep, depending on the Sunrise simulation time you set. In the early
morning hours, our eyes are more sensitive to light than when we are
awake. During this period, the relatively low light levels of a simulated
natural sunrise prepare our body for waking up and getting alert.
People who use the connected Sleep & Wake-Up Light report waking
up more easily, have a better overall mood in the morning and feel
more energetic. Because the sensitivity to light differs per person, you
can set the light intensity of your appliance to a level that matches
your light sensitivity for an optimal start of the day. For more
information about the connected Sleep & Wake-Up Light, see
www.philips.com.
9
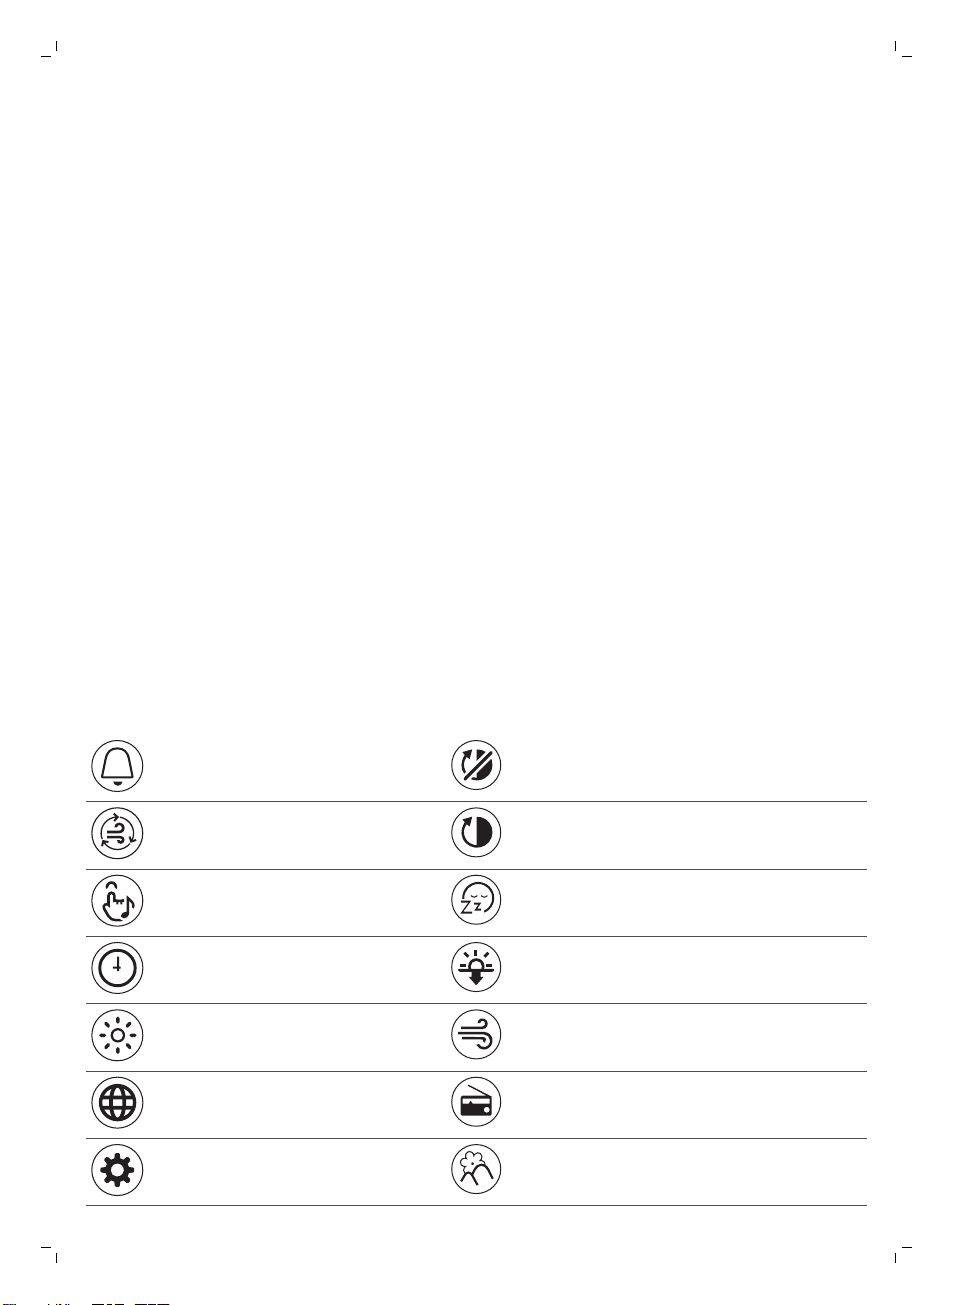
Display icons
Wake-up profile / Alarm Display off
Breathing rhythms Display
Audio feedback Wind-down program
Clock time Sunset simulation
Light intensity and light on/off RelaxBreathe
Select your language Radio
Settings Natural sounds
Page 10
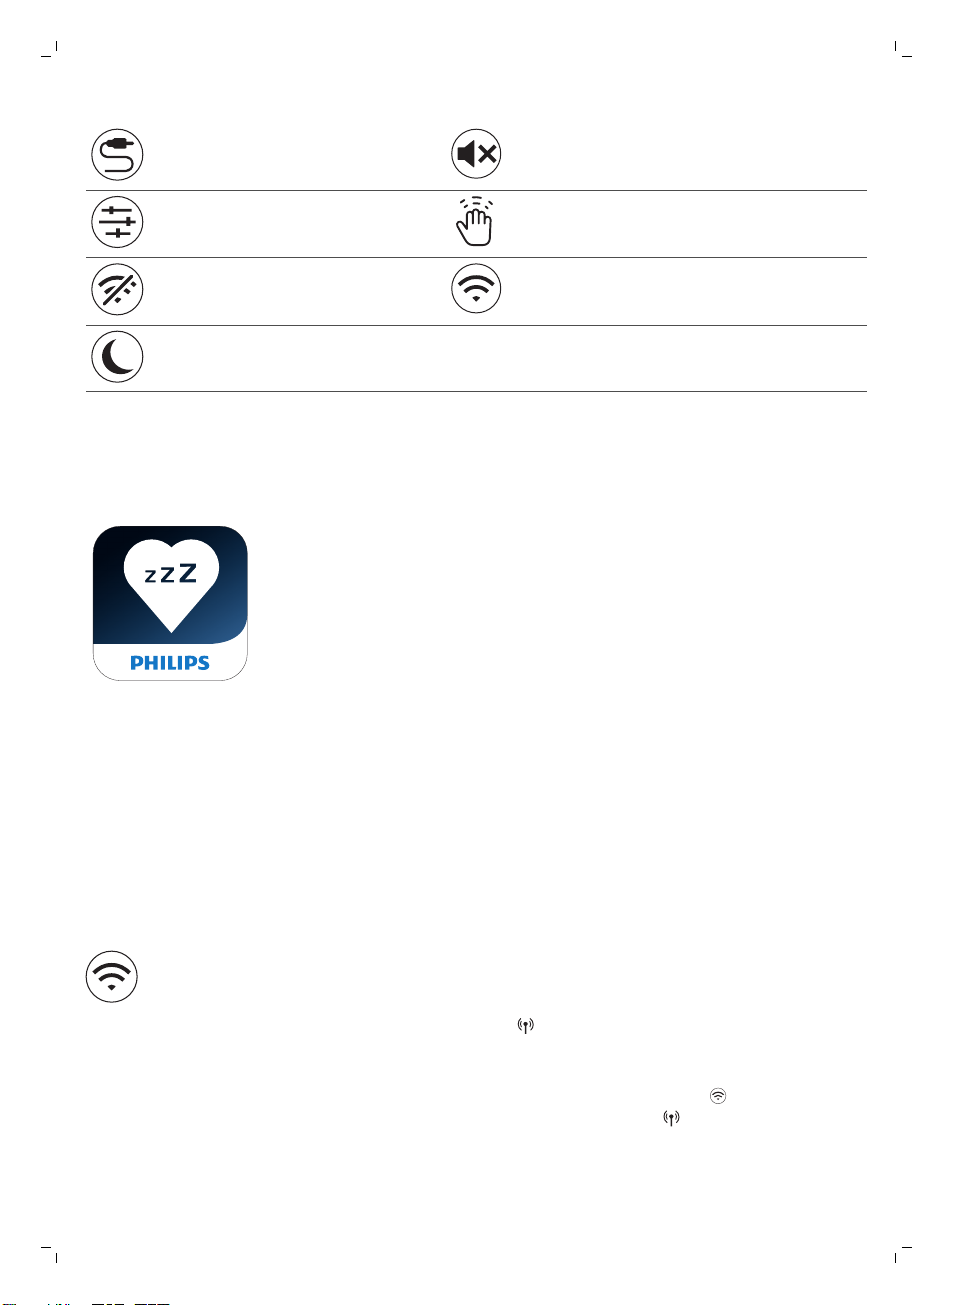
10
English
AUX inlet Sound off
Radio presets Snooze/Midnight Light
Wi-Fi disabled Wi-Fi
Bedtime
Connecting your appliance to Wi-Fi
Easy Wi-Fi setup
Download the Philips SleepMapper app from Google play or the App
store on your smartphone. See the information in Google play or the
App store to check if your smartphone is compatible with the app. You
can easily set up the Wi-Fi connection to your connected Sleep &
Wake-Up Light.
The setup to install your Sleep & Wake-Up Light and connect to your
home Wi-Fi network only needs to be done once. This setup will take
approximately 5-10 minutes.
Setup wizard of the connected Sleep & Wake-Up Light
1 When you use your connected Sleep & Wake-Up Light for the first
time, a setup wizard starts on the appliance.
2 After selecting your language on the display of the appliance,
continue in the app. Make sure that you have the app open on your
smartphone.
3 Follow the instructions in the app to connect your appliance to the
Wi-Fi network. If you have trouble connecting your appliance,
check the items mentioned in the troubleshooting section (see
'Troubleshooting').
-
If you previously chose to set up your appliance without the app,
but now want to connect your appliance to the app you press and
hold the Wi-Fi icon for 8 seconds. The access point mode icon will
be shown on the display
connect.
-
If you have changed your Wi-Fi home network or changed your
password, you also need to press the Wi-Fi icon
the access point mode icon on the display .Open the app on
your smartphone to connect.
. Open the app on your smartphone to
. You will see
Page 11
Note: Make sure your smartphone is connected to the Wi-Fi network
you use in your bedroom.
Note: The app on your smartphone and your connected Sleep &
Wake-Up Light can ONLY communicate with each other when both
appliances are connected to the same home Wi-Fi network.
Note: You cannot enable/disable alarms via the app if you are not
connected to your home Wi-Fi network, for example if your
smartphone is connected to 4G.
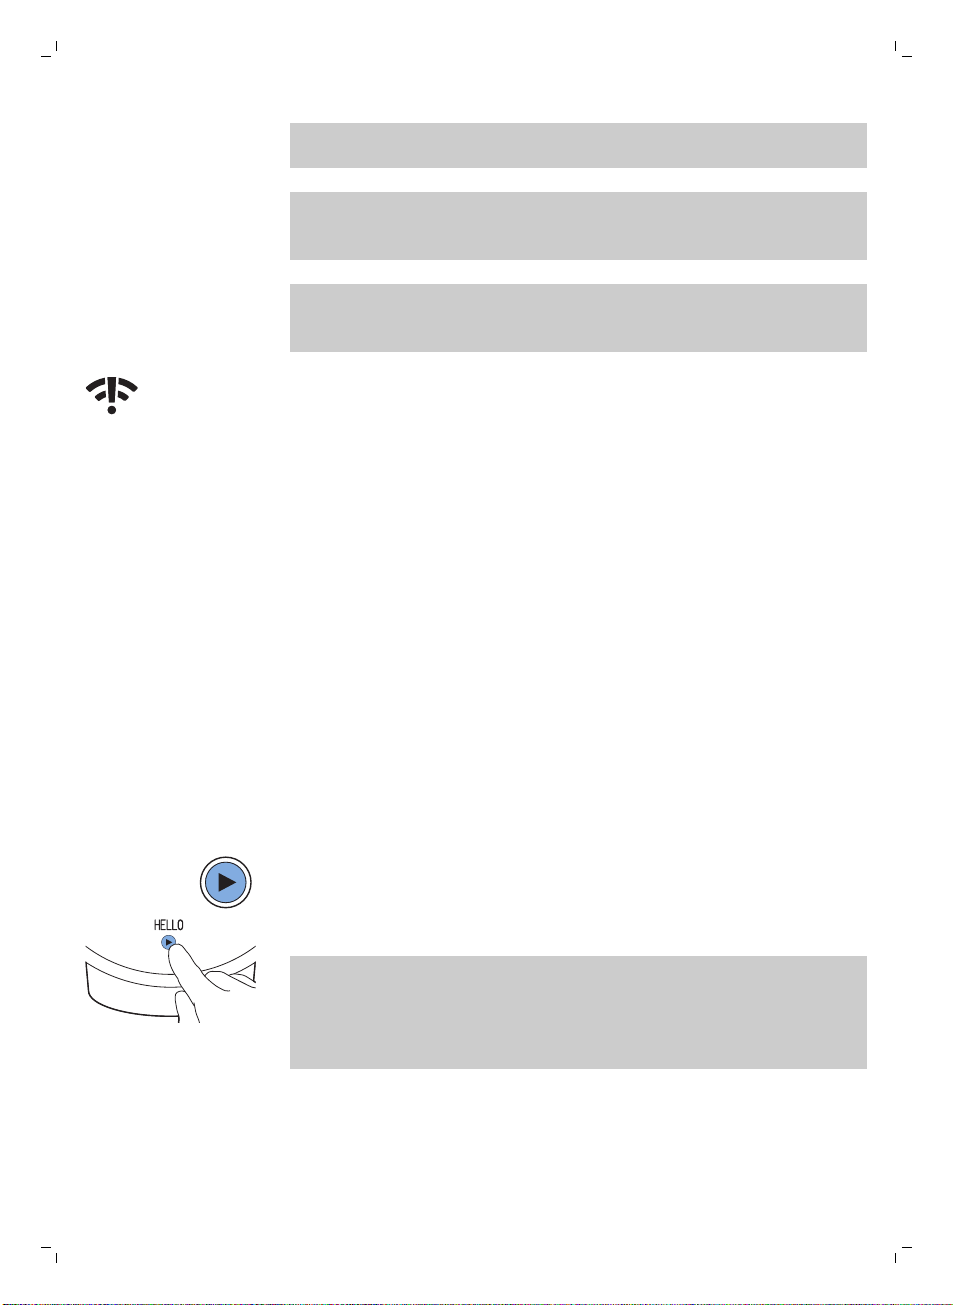
This Wi-Fi connection issue icon might appear on the display if a
connection cannot be established. Check the troubleshooting section
to solve the problem (see 'Connectivity troubleshooting').
AmbiTrack sensors
The connected Sleep & Wake-Up Light collects input from its
surroundings through the AmbiTrack sensors. AmbiTrack sensors
measure light, humidity, temperature and sound pressure. These
factors can influence your sleep. Only in the app you can see
information on the recommended values for ideal sleep conditions.
The measurements of the sensors can be influenced by the
surroundings of the connected Sleep & Wake-Up Light.
For example, if you place the appliance next to a window or near a
heating source such as a radiator, the temperature and humidity
sensors might not represent the temperature / humidity of the entire
room.
You can set up the Sleep & Wake-Up Light without the app. Before
you can use the appliance, a setup wizard on the appliance needs to
be completed first. You can connect the appliance to the app later
(see 'Easy Wi-Fi setup').
1 Start the setup wizard by tapping on the start icon on the display of
2 You will be guided through the setup wizard, where you set the
English
the appliance.
desired settings, a wake-up profile and a winddown program.
11
Note: The wake-up profile and the wind-down program can be set
later. Skip these settings by tapping the arrow repeatedly. However,
we advise you to set your wake-up profile and your wind-down
program during this setup. This can help you explore the different
functions of the appliance.
Navigating the menu
If you have set up your appliance with the help of the SleepMapper
app (see 'Easy Wi-Fi setup') or through the setup wizard (see ' ') on the
Page 12
12
English
appliance, you will see the menu as described in the following
sections.
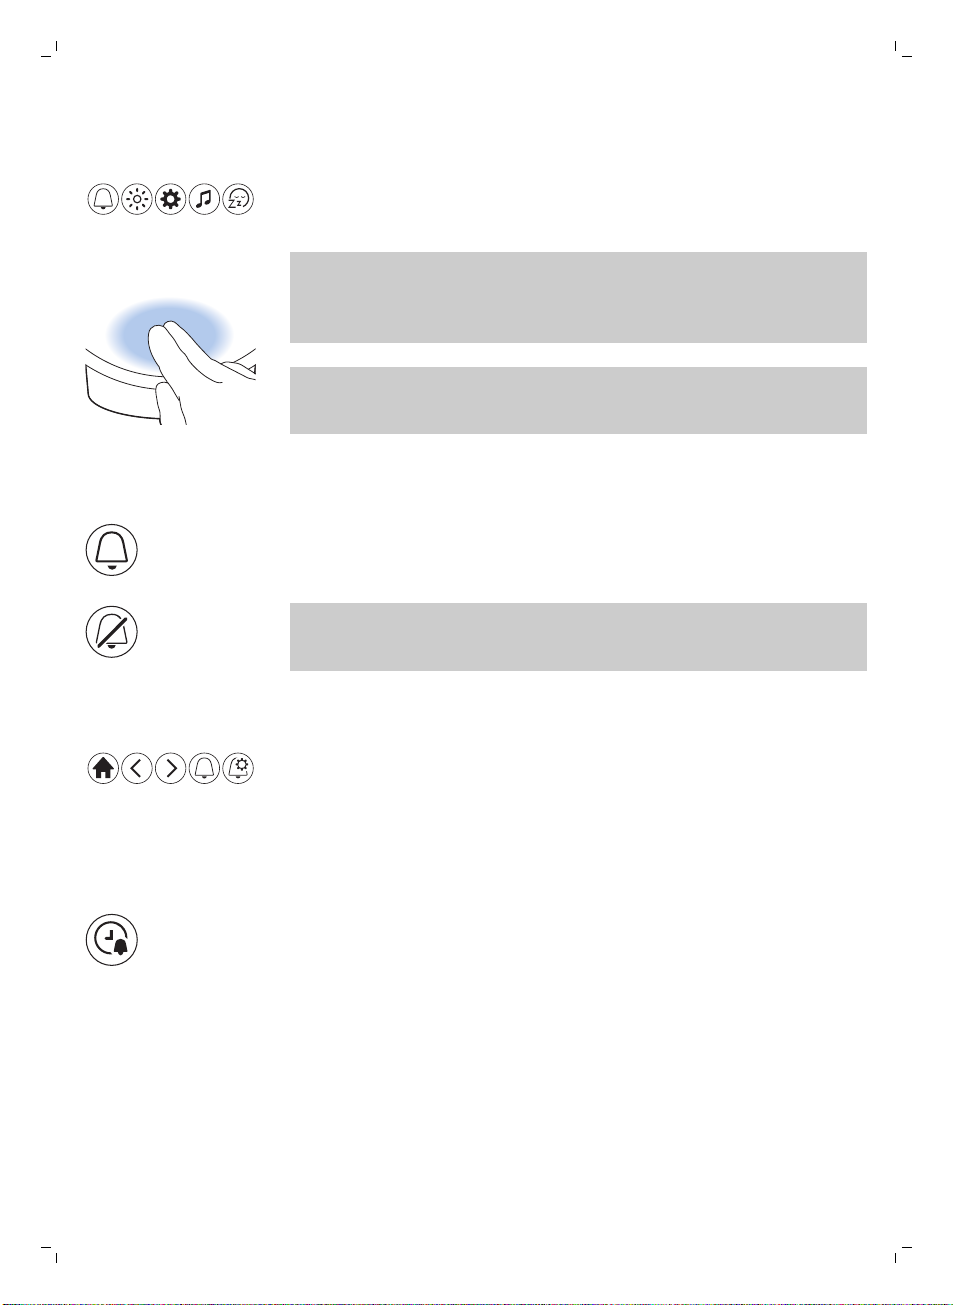
On the display of the appliance you can select and set the wake-up
profile, bedside light, settings, sound (source) or the unwind program.
Note: All your personalized settings and profiles will be permanently
stored in the memory, they will not be erased by removing the
adapter from the electrical outlet. You can change all settings at any
time, the last setting will be stored.
Note: If the display is blank, move your hand towards the lower part of
the Sleep & Wake-up Light to show the display menu. You will see the
menu icons.
Setting wake-up profiles
In your wake-up profile on the appliance you can set the alarm time,
the maximum light intensity and type of wake-up sound you prefer.
With the SleepMapper app, you can set more wake-up profiles.
Note: Press and hold the alarm icon for 4 seconds to deactivate all set
alarms at once. Press and hold the alarm icon 4 seconds to activate
the alarms again.
Set wake-up profile
You can set 2 different wake-up profiles on the appliance. For each
profile, you can set the time, light intensity, wake-up curve duration,
type of sound and volume. With the SleepMapper app you can set 16
alarms in total, giving you more options to choose the time and day
on which the alarm should go off.
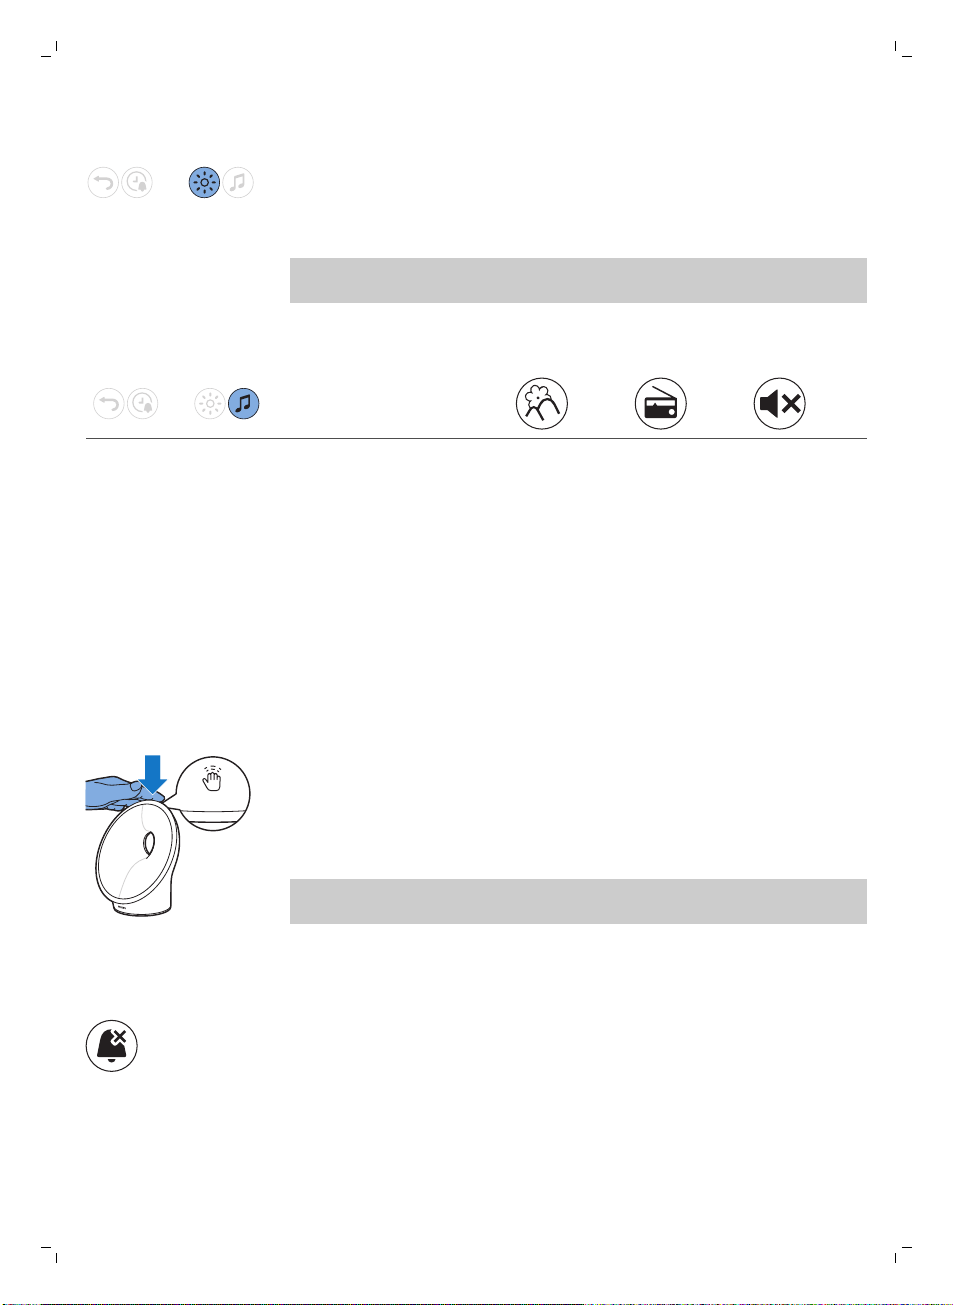
Duration of the wake-up profile
The default duration of the wake-up curve (brightness increase to the
set maximum light intensity) is 30 minutes. The duration can be
changed to your preference by pressing the icon on the appliance.
With the Sleepmapper app you can set different wake-up profiles.
Page 13
Light intensity of the wake-up profile
The lamp of the appliance simulates a sunrise. Like a sunrise, the
brightness of the lamp increases gradually. During this wake-up curve,
the color of the light changes from soft red to warm orange to bright
yellow. You can choose one of the 25 light intensity levels.
Note: The main display of the appliance shows if the alarm has been
set.
Type of sound
You can choose between three options. Select one of the natural
sounds, no sound or the FM radio.
PowerBackUp+
In the event of a power failure, all functions of the appliance, including
the display, do not work. However, the internal clock and a back-up
alarm remain active for at least 8 more hours.
If during the power failure the set alarm time is due, a back-up alarm
goes off generating a beeping sound for approximately 1 minute.
English
13
Snoozing
When the wake-up curve has ended (when the set maximum light
intensity has been reached) and the alarm sound is playing, you can
tap the top of the appliance to snooze.
The lamp stays on, but the sound is muted. After 9 minutes, the alarm
sound starts playing again.
Note: The light and sound automatically turn off 60 minutes after the
alarm has gone off or 60 minutes after the last snooze action.
Turning the alarm off
When the alarm goes off, you can turn it off by pressing this icon on
the appliance. If you turn it off, this alarm profile is deactivated for that
day.
Using the appliance as a bedside lamp
You can use the connected Sleep & Wake-Up Light as a bedside lamp.
Page 14
14
English
Midnight light
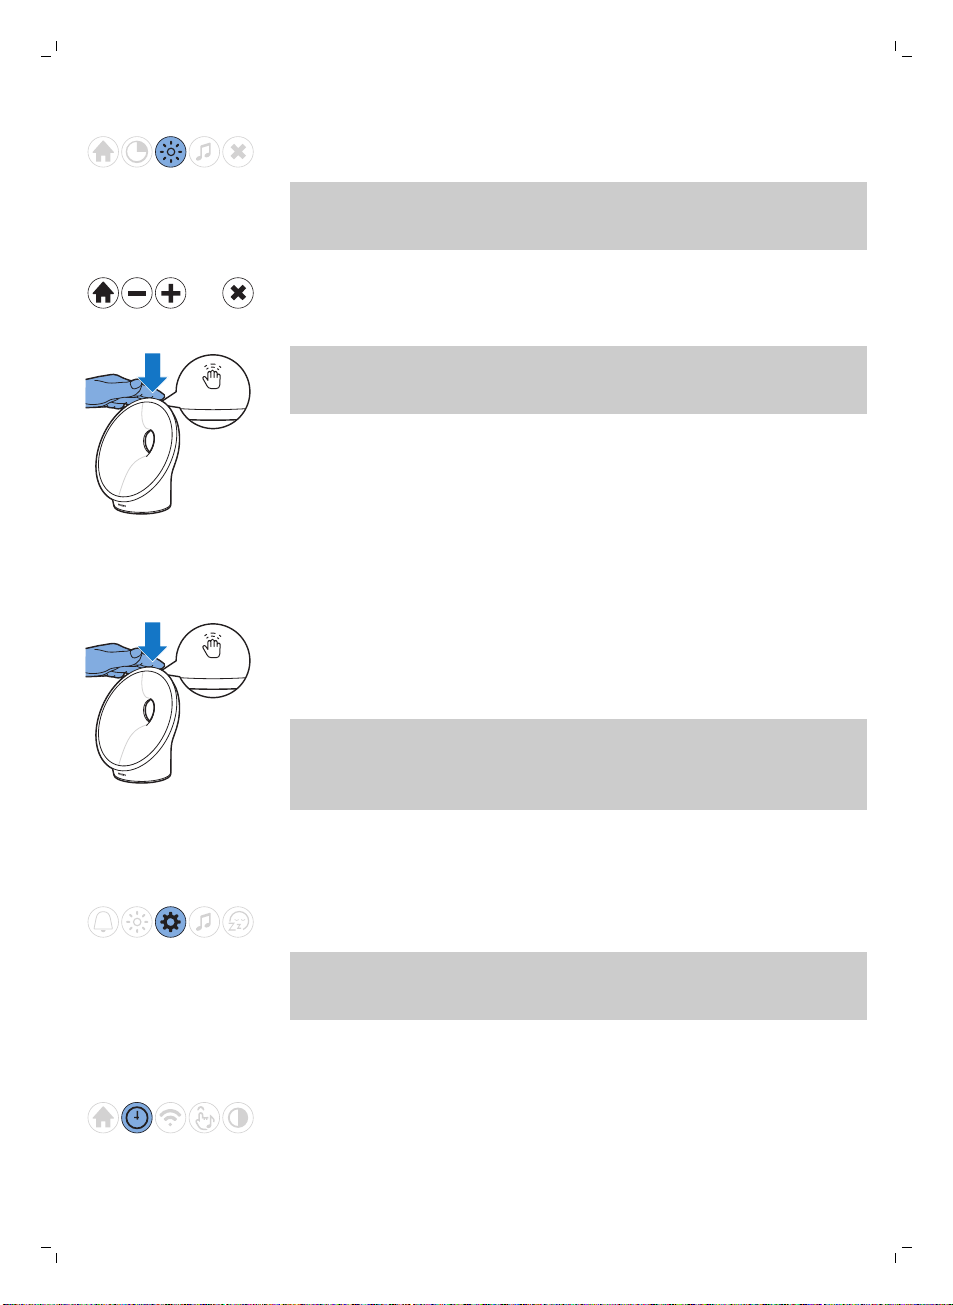
Press the bedside lamp icon on the display to switch on the bedside
lamp.
Note: You can increase and decrease the brightness intensity. You can
select a brightness between 1 (low) and 25 (high). The default
brightness setting is 18.
To switch off the lamp, press the cross icon in the menu.
Tip: When the light is on, you can also turn off the light with a single
tap on the top of the appliance. All active programs will stop. Set
alarms are still active.
If you wake up during the night, you can tap the top of the appliance
to activate a dim light. This dim, subtle orange light provides you with
just enough light to find your way in the dark. Switch off the Midnight
light by tapping the top of the appliance again.
Settings
Time
Note: The Midnight light cannot be activated directly when the main
light is already on. In that case, first tap the top of the appliance to
deactivate the main light. Then tap again to activate the Midnight
light.
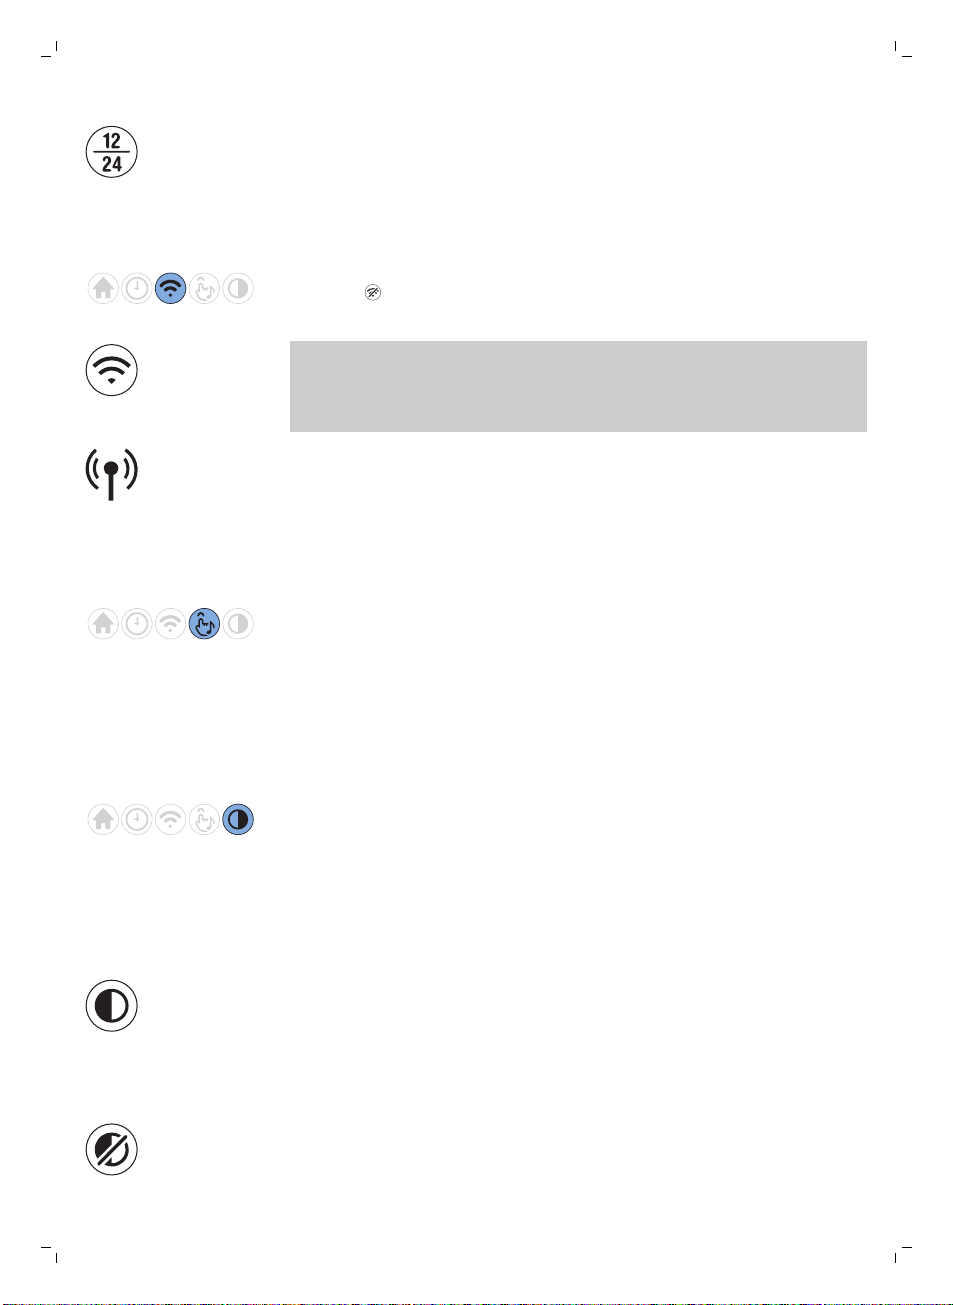
In this menu, you can adjust the clock time, the audio feedback and
the display brightness of the appliance.
Note: Press and hold the settings icon for 5 seconds to open a new
menu, in which you can select DEMO mode (accelerated wake-up
curve) or VERSION (firmware version of the appliance).
Page 15
Wi-Fi
Audio feedback
English
You can change the time and switch between a 12-hour clock
(AM/PM) and a 24-hour clock by pressing on the toggle icon (12/24).
Turn Wi-Fi on or off by pressing on the Wi-Fi icon. When Wi-Fi is
disabled
until the Wi-Fi connection is restored.
Note: Press and hold the Wi-Fi icon for 8 seconds to return to access
point mode. Open access point mode when you want to connect your
appliance to a different Wi-Fi network or if you have changed your
Wi-Fi password.
If you accidentally activated access point mode, remove the adapter
from the wall outlet. Wait for 30 seconds to connect the appliance to
the power outlet again. Your connected Sleep & Wake-Up Light
remembers the network you were connected to.
When you press any menu icon, you hear a click. If you do not want to
hear clicks when you press an icon, press the audio feedback icon to
turn off the audio feedback. You hear one click as a confirmation. To
reactivate the audio feedback, press this icon again. You hear two
clicks to confirm that audio feedback has been activated.
, any update made in the app will not be implemented
15
Display
Display brightness
You can adjust the display brightness from level 1 to level 6. We advise
you to set the display contrast in a dark bedroom. Choose a contrast
level that is optimal for you to see the display at night. The display
contrast will increase to a higher level when the Connected Sleep &
Wake-up Light measures a lot of light in the bedroom. This happens
automatically, so you will always be able to see the display, even
when the surroundings are lighter.
Display on/off
If you do not want the appliance to produce any light (including time
indication), you can turn off the display completely by pressing the
display icon.
Normally, if you do not touch the display for some time in any menu,
the display reverts to time and status indication only. When the
display is off, no time indication is shown.
Press the crossed-out icon to turn on the display again.
Page 16
16
English
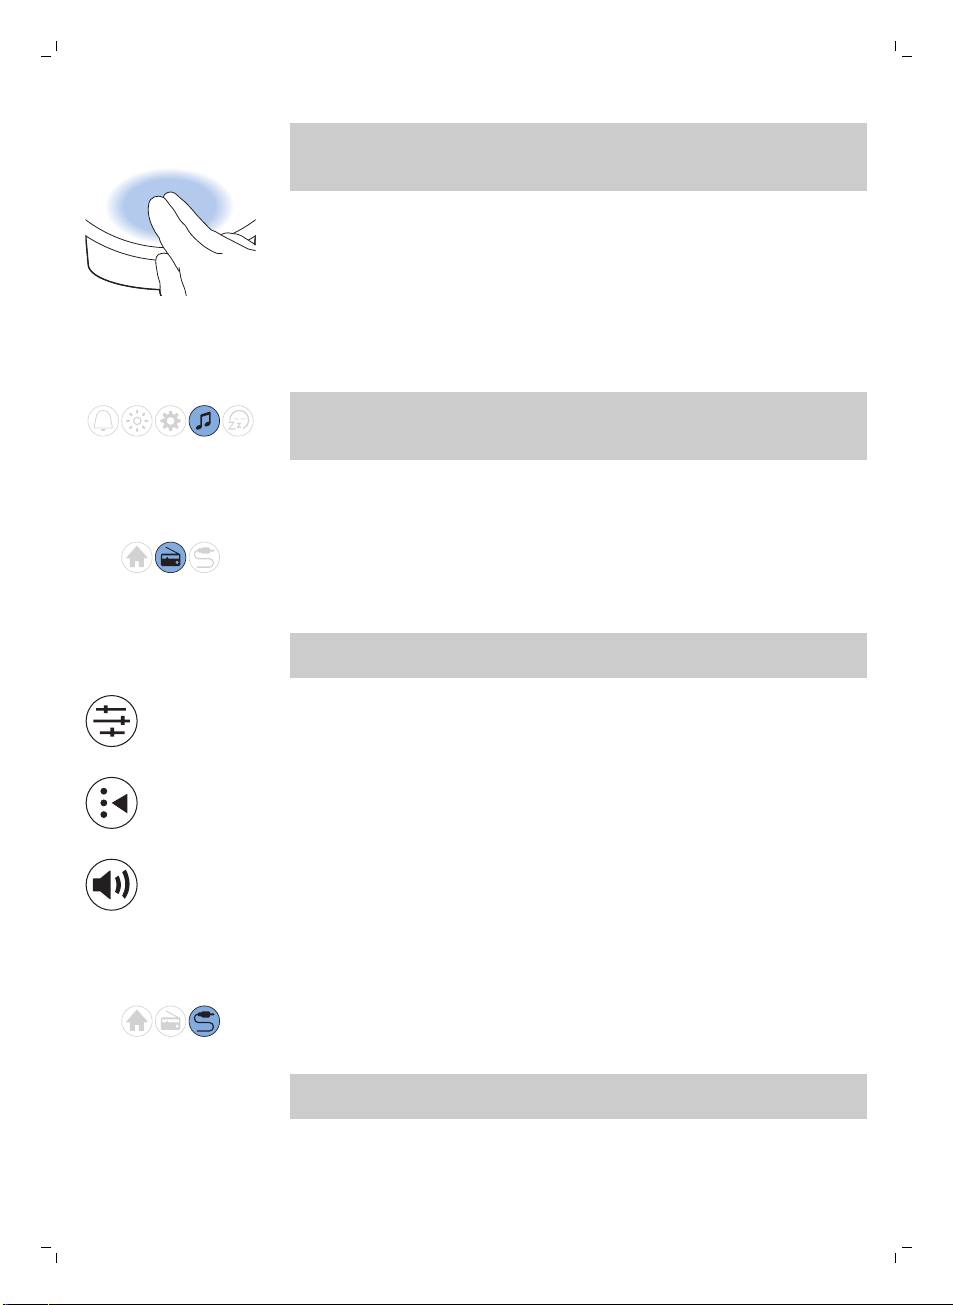
Tip: If you want to check the time or select a function while the display
is off, just place your hand near the display to turn it on for a few
seconds.
Listening to radio or your own music
Tip: When the radio or music is on, you can turn off the sound with a
single tap on top of the connected Sleep & Wake-Up Light. All active
programs will stop. Set alarms are still active.
Radio
You can listen to the FM radio with the connected Sleep & Wake-Up
Light. If you have set the radio function in the setup wizard, it shows
the selected radio station. You can manually change the radio station
by selecting the FM frequency of another radio station.
Tip: Make sure that you unwind the antenna fully and move it around
until the radio has the best reception.
You can preset 5 radio stations. First, select a radio station by setting
the FM frequency. Press and hold the double arrow icon to
automatically search for the next radio station.
After setting a radio station, you can easily add another preset radio
station by selecting the toggle icon. With this process, you can preset
5 radio stations.
Set the preferred volume. To save the radio frequency, press the
check mark icon.
Music via Auxiliary (AUX) inlet
You can use the connected Sleep & Wake-Up Light as a speaker for
music by connecting a music playing device (for instance your mobile
phone) to the AUX inlet.
Note: You cannot wake up to music from a device connected to the
AUX inlet.
If the sound is not loud enough when you have set the connected
Sleep & Wake-Up Light to maximum volume, increase the volume of
your music playing device.
Page 17
If the sound is too loud or distorted when you have set the connected
Sleep & Wake-Up Light to a low volume setting, decrease the volume
of your music playing device.
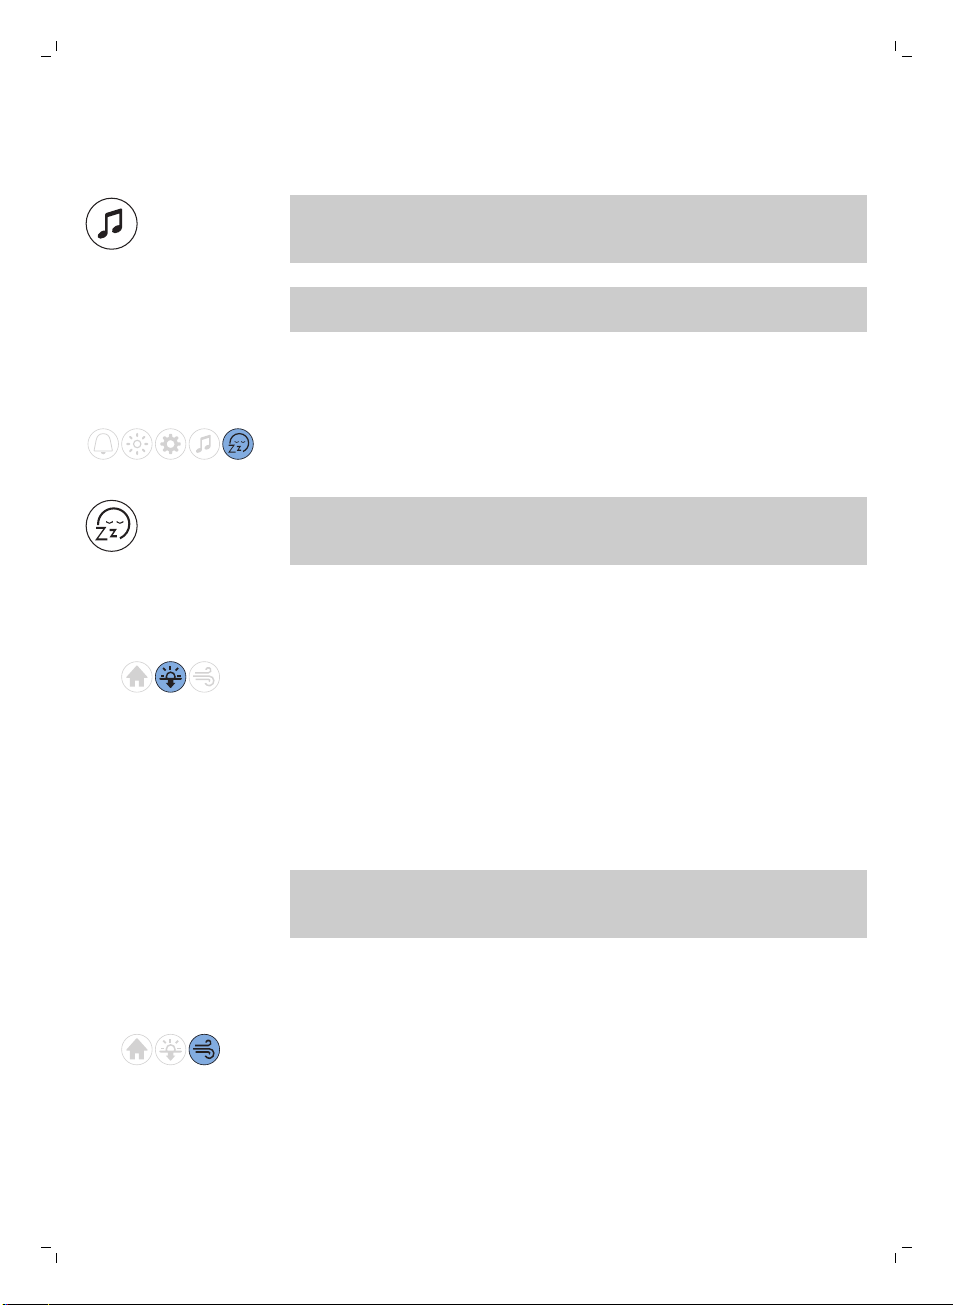
Note: Press and hold the music note icon for 5 second to
activate/deactivate the sound via the menu. You can also deactivate
the sound by tapping the top of the appliance.
Note: You need an AUX cable to connect the connected Sleep &
Wake-Up Light to a music playing device.
Wind-down programs
The appliance features two wind-down programs to help you relax
before you fall asleep.
Note: Press and hold the wind-down icon for 5 seconds to
activate/deactivate the wind-down program. You can also deactivate
the active wind-down program by tapping the top of the appliance.
Sunset simulation
During the sunset simulation, the brightness of the light decreases
gradually with colors changing from bright yellow to warm orange to
soft red. You can set the duration of the sunset simulation and the
initial light intensity of the sunset simulation.
You can also select a sound that fades away during the sunset
simulation. You can set the sound source and the initial volume. You
can either choose a natural sound, radio or no sound. You can also
play your own music by connecting a music playing device to the AUX
socket.
English
17
RelaxBreathe
Note: If you have set your sunset simulation in the setup wizard, it will
start immediately. If you have not set it, the appliance starts with a
default sunset simulation.
RelaxBreathe uses the belly breathing technique as a basis for the
breathing program. You can choose one of the breathing programs,
guided by light or sound. The combination of the belly breathing
exercise and the guidance of the connected Sleep & Wake-Up Light
helps you slow down and feel relaxed.
Page 18
18
English
Belly breathing for relaxation
Belly breathing is the most recognized breathing exercise technique
to help people relax. When you breathe from your belly, your
diaphragm pulls down automatically. This pulls down your lungs and
allows you to inhale fully and deeply.
Caution: If you feel uncomfortable at any point during this breathing
exercise, just go back to breathing normally.
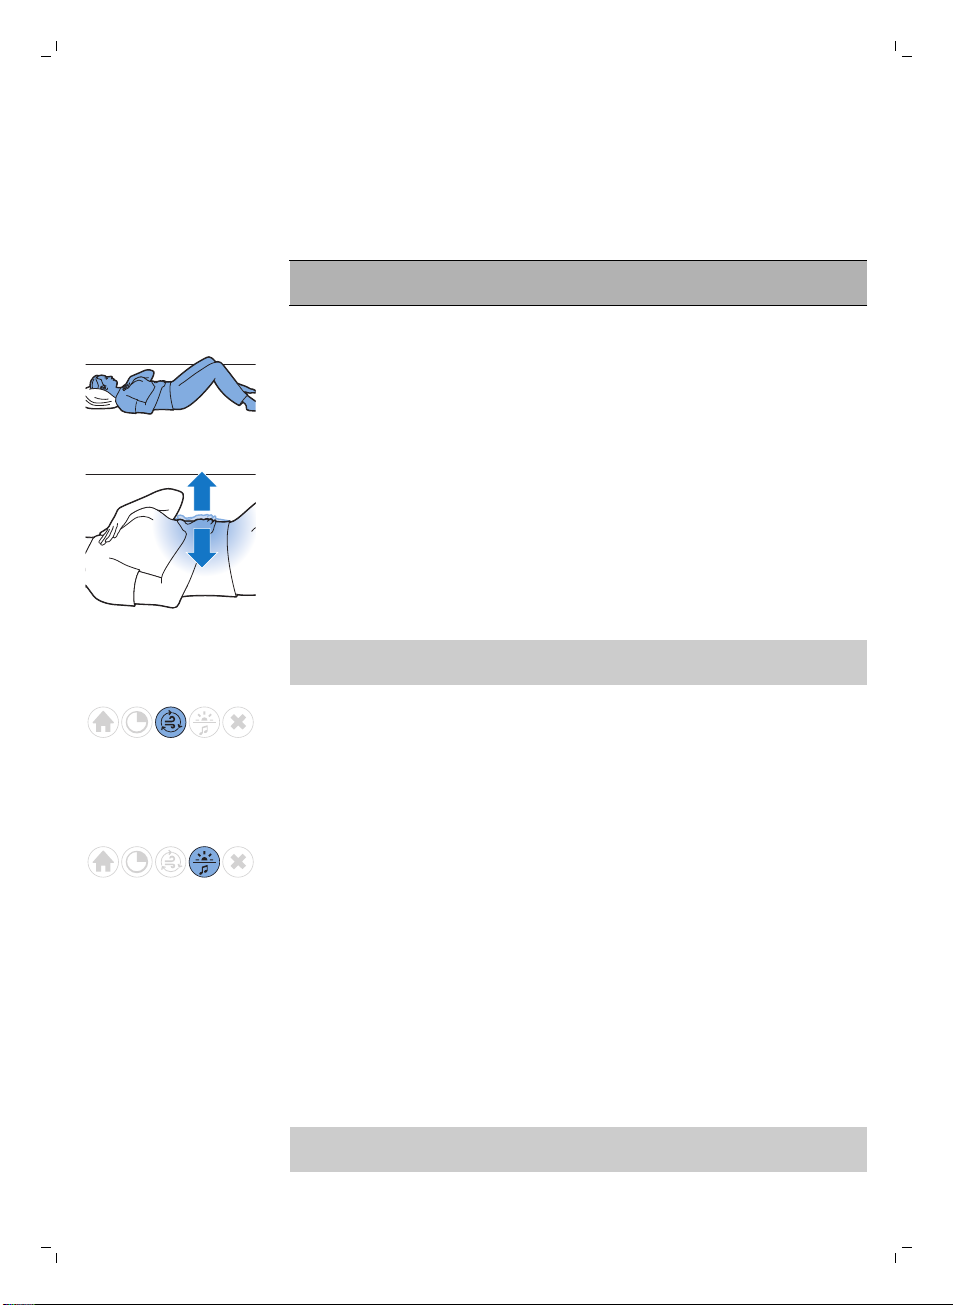
How to do belly breathing
1 Lie down comfortably on your back.
2 Inhale through your nose, exhale through your nose or mouth.
3 Place one hand on your stomach and your other hand on your
chest.
You should see your hand on your stomach move up with each
inhale and move down with each exhale. The hand on your chest
should only move slightly.
4 Your breath should only come from your belly. Try to make your
exhale longer than your inhale as this will quickly make you feel
more relaxed.
Note: The RelaxBreathe function of the appliance can guide you
during belly breathing.
You can select one of seven relaxation programs with preset
breathing rhythms. Each relaxation program has a different breathing
rhythm. The program '4 breaths' is preset to 4 breaths per minute.
Program '5 breaths' is preset to 5 breaths per minute. Each next
program has one additional breath per minute. The last program (10
breaths) is preset to 10 breaths per minute.
You can select light or sound to guide you during the selected
relaxation program. Follow the light or sound when you inhale and
exhale.
-
For guidance with light, inhale when the light intensity increases. In
between the two subtle light flashes, hold your breath. Exhale
slowly when the light intensity decreases.
-
For guidance with sound, inhale when the intensity of the sound of
the waves increases. When the intensity of the sound pauses, hold
your breath. Slowly exhale when the intensity of the sound of the
waves decreases.
Follow your preferred rhythm with the help of light or sound for a
more relaxed feeling. You can even do this with your eyes closed.
Note: You can find an instruction video of RelaxBreathe in the app
and on the Philips website.
Page 19

Bedtime function
You can track your time in bed by double tapping the top of the
appliance before going to sleep. You can also start the bedtime
function by pressing 'start tracking' in the SleepMapper app.
A moon icon will appear on the display of the appliance to let you
know bedtime tracking has started. You can find more information
about the bedtime function in the app.
Charging your mobile phone
You can use the USB port (see 'General description') to charge your
smartphone (max 1000 mA).
Cleaning and storage
-
Clean the appliance with a soft, dry cloth.
-
Do not use abrasive cleaning agents, pads or cleaning solvents like
alcohol, acetone, etc., as this may damage the surface of the
appliance.
-
If you are not going to use the appliance for an extended period of
time, remove the adapter from the wall outlet and store the
appliance in a safe, dry location where it will not be crushed,
banged, or subject to damage.
-
Do not wrap the cord around the appliance when storing it.
English
19
Disposal
Your product is designed and manufactured with high quality
materials and components, which can be recycled and reused. For
recycling information, please contact your local waste management
facilities or visit www.recycle.philips.com.
Service and assistance
This appliance has no other user-serviceable parts. For assistance visit
our website: www.philips.com/support or call toll free:
1-866-832-4361.
Online information is available 24 hours a day, 7 days a week.
90-Day Money-Back Guarantee
If you are not fully satisfied with your product send the product back
and we’ll refund you the full purchase price.
Page 20

20
English
The product must be shipped prepaid by insured mail, insurance
prepaid, have the original sales receipt, indicating purchase price and
date of purchase, and the money-back guarantee return authorization
form enclosed.
We cannot be responsible for lost mail.
The product must be postmarked no later than 90 days after the date
of purchase. Philips reserves the right to verify the purchase price of
the product and limit refunds not to exceed suggested retail price.
To obtain money-back guarantee return authorization form, call
1-866-832-4361 for assistance.
Delivery of refund check will occur 6–8 weeks after receipt of returned
product.
Full Two-Year Warranty
Philips North America LLC (USA) and Philips Electronics Ltd (Canada)
warrant this new product against defects in materials or workmanship
for a period of two years from the date of purchase, and agree to
repair or replace any defective product without charge.
IMPORTANT: This warranty does not cover damage resulting from
accident, misuse or abuse, lack of reasonable care, or the affixing of
any attachment not provided with the product or loss of parts or
subjecting the product to any but the specified voltage or batteries.*
NO RESPONSIBILITY IS ASSUMED FOR ANY SPECIAL, INCIDENTAL
OR CONSEQUENTIAL DAMAGES.
In order to obtain warranty service, go to www.philips.com/support
for assistance. It is suggested that for your protection you return
shipments of product by insured mail, insurance prepaid. Damage
occurring during shipment is not covered by this warranty.
NOTE: No other warranty, written or oral, is authorized by Philips
North America LLC.
This warranty gives you specific legal rights, and you may also have
other rights which vary from state to state, province to province or
country to country. Some states do not allow the exclusion or
limitation of incidental or consequential damages, so the above
exclusion and limitations may not apply to you.
* Read enclosed instructions carefully.
In US manufactured for: Philips Personal Health, a division of Philips
North America LLC, P.O. Box 10313, Stamford, CT 06904.
In Canada imported by: Philips Electronics LTD, 281 Hillmount Road,
Markham, Ontario L6C 2S3.
PHILIPS and Philips shield are registered trademarks of Koninklijke
Philips N.V.
Page 21

©2018 Philips North America LLC. All rights reserved.
Troubleshooting
This chapter summarizes the most common problems you could
encounter with the appliance.
If you are unable to solve the problem with the information below,
visit www.philips.com/support or call 1-866-832-4361 for assistance.
Connectivity troubleshooting
Problem
Solution
English
21
I cannot download
the app on my
smartphone.
I cannot connect my
Wake-Up Light to my
home-Wi-Fi network,
what should I do?
Connecting my
connected Sleep &
Wake-Up Light to a
Wi-Fi guest network
does not work.
The app is available for Android and IOS smartphones. The app is not
available for Windows phones.
If you cannot connect your Wake-Up Light to your home Wi-Fi
network and still see the flashing icon for access point mode
could be one of following issues:
1. Wrong password. Make sure that you entered the correct Wi-Fi
network password and try again.
2. Is your router suitable for connection with your Wake-up Light?
Your router must have a 2.4 GHz band to communicate with the
appliance. For the first time setup make sure your smartphone and
the appliance are both connected to the same 2,4 GHz Wi-Fi network,
otherwise you will not be able to connect the appliance and your
smartphone.
3. Check the signal strength of the Wi-Fi. If the signal is weak, the
appliance cannot connect properly. Move the appliance closer to the
router to make sure that a good Wi-Fi signal is available.
4. If the previous steps are not the issue, call 1-866-832-4361 for
assistance.
Within a Wi-Fi guest network, different devices (e.g. your smartphone
and connected Sleep & Wake-Up Light) are often not allowed to
communicate with each other. You will see the flashing icon for
access point mode
If you want to change this setting within your own Wi-Fi guest
network, enable universal Plug and Play (uPnP) on your router.
on the display of the appliance.
, it
Page 22

22
English
Problem Solution
I cannot use the app
to set alarms or
control the connected
Sleep & Wake-Up
Light.
How do I remove my
personal Wi-Fi
settings and alarms
from the connected
Sleep & Wake-Up
Light?
First, check if your Sleep & Wake-Up Light is connected to a Wi-Fi
network. If you completed the Wi-Fi Setup through the Philips
SleepMapper app and connected your appliance to a specific Wi-Fi
network, you should see a steady Wi-Fi symbol on the display of the
appliance
First check if Wi-Fi on your smartphone and router are enabled. If you
see the Wi-Fi disabled icon on the display of the appliance, enable
Wi-Fi first (see 'Wi-Fi').
-
Your smartphone could have reconnected to a different Wi-Fi
network. Make sure that your smartphone and appliance are
connected to the same home Wi-Fi network.
If you see the Wi-Fi connection issue icon
following issues.
1. Check the settings for your home Wi-Fi network on the router. It
could be that universal Plug and Play (uPnP) is not enabled on your
router. Enable this setting on the router.
2. Check the signal strength of the Wi-Fi. If the signal is weak, the
appliance cannot connect properly. Move the appliance closer to the
router to make sure that a good Wi-Fi signal is available.
3. You might have changed the home Wi-Fi password or installed a
new router (see 'Easy Wi-Fi setup').
Go back to factory settings by pressing the end of a paperclip into the
reset button on the back of the appliance (see 'General description').
.
, it could be one of the
I want to connect my
new smartphone to
my connected Sleep &
Wake-Up Light. What
do I need to do?
Please install the app again on your new smartphone. Indicate in the
app that you already installed the connected Sleep & Wake-Up Light
and follow the instructions in the app.
General troubleshooting
Problem
The icon on the
display or the light on
the appliance does
not respond when I try
to set different
functions.
Solution
Go back to factory settings by pressing the end of a paperclip into the
reset button on the back of the appliance (see 'General description').
Check if this solves the problem. If the appliance still does not work,
call 1-866-832-4361 for assistance. Please note that all personal
settings (set alarm etc.) will be removed by going back to factory
settings.
Page 23

Problem Solution
English
23
The lamp does not go
on when the alarm
goes off.
The lamp does not go
on right away when I
switch it on.
I do not hear the
alarm sound when the
alarm goes off.
The FM radio does
not work or makes a
crackling sound.
Perhaps you set a light intensity level that is too low. Increase the
light intensity level in your wake-up profile (see 'Light intensity of the
wake-up profile').
Perhaps you turned off the alarm function. The alarm icon is visible
on the display when the alarm is active (see 'Set wake-up profile').
It may take between 1 to 5 seconds for the lamp to go on, depending
on the set light intensity level.
Perhaps you set a sound level that is too low. To set a higher sound
level, increase the volume level of the wake-up sound in your wakeup profile.
When you have set an alarm, you will first see the light of the wakeup curve. The alarm sound only starts playing when the set alarm
time has been reached. You can change the duration of the wake-up
light curve.
If you selected the FM radio as the alarm sound, turn on the FM radio
after you turn off the alarm to check if the FM radio works.
Check if your FM radio is correctly tuned to a radio station. If
necessary, adjust the frequency. If the radio still does not work, call
1-866-832-4361 for assistance.
Check if the FM radio is correctly tuned to a radio station. If necessary,
adjust the frequency.
The alarm went off
yesterday, but it did
not go off today.
I wanted to snooze,
but the alarm did not
go off again after 9
minutes.
Change the position of the antenna by moving it around. Make sure
that you have unwound the antenna completely.
Perhaps the broadcast signal is weak. Adjust the frequency and/or
change the position of the antenna by moving it around. Make sure
you have unwound the antenna completely.
Perhaps you turned off the alarm function or only set the alarm for
one day. The alarm icon is visible on the display when the alarm is
due within 24 hours.
In the Philips SleepMapper app you have several options to set
alarms; perhaps the alarm was not set correctly. Check if you have set
the alarm in the app correctly. Make sure your appliance and the app
are connected to the same home Wi-Fi network when you set an
alarm.
You might have accidentally pressed the icon on the display to
dismiss the alarm . This deactivates the alarm for that day. Tap the
top of the appliance to snooze (see 'Snoozing').
Page 24

24
English
Problem Solution
The light wakes me
too early or too late.
I am unable to turn
the Midnight Light
function on/off.
I am unable to stream
music via USB.
The aux inlet doesn't
work properly.
Suddenly the
appliance makes a
beeping sound.
Perhaps the light intensity level you have set is not appropriate for
you. Try a lower light intensity level if you wake up too early or a
higher intensity level of you wake up too late. You can also change
the duration of the wake-up curve. If light intensity 1 is not low
enough, move the appliance further away from the bed. If the light
intensity is not high enough to wake you, make sure that the light of
the appliance is not blocked by any object and the appliance is
nearby.
Make sure you tap on the correct position (top/back) of the
appliance.
The USB connection is only for charging your mobile phone. You are
not able to stream music to the connected Sleep & Wake-Up Light.
Try to set the volume on your smartphone either higher or lower. If
necessary, adjust the volume level on the appliance as well.
The backup alarm went off. This can happen up to 8 hours after the
power was removed and a set alarm time is due. The alarm sound
stops automatically after approximately 1 minute. You also can stop
the alarm sound immediately if you power up the appliance for a
brief moment.
To prevent the back-up alarm from going off when the power is
removed (e.g. storage) disable the alarms prior to powering down.
Safety and compliance
This appliance meets the safety requirements in the USA and Canada for:
- UL 153, CSA C22.2 No. 250.4-14 (Portable Electric Luminaires)
- UL 8750 (Light Emitting Diode (LED) Equipment for Use in Lighting Products)
- UL 60065, CSA-C22.2 No. 60065-03 (Audio, Video and Similar Electronic Apparatus – Safety Requirements)
Electromagnetic fields (EMF)
This Philips appliance complies with all applicable standards and
regulations regarding exposure to electromagnetic fields.
Page 25

FCC Information
-
This equipment has been tested and found to comply with the limits for a Class B
digital device, pursuant to part 15 of the FCC rules. These limits are designed to
provide reasonable protection against harmful interference in a residential
installation. This equipment generates uses and can radiate radio frequency energy
and, if not installed and used in accordance with the instructions, may cause
harmful interference to radio communications. However, there is no guarantee that
interference will not occur in a particular installation. If this equipment does cause
harmful interference to radio or television reception, which can be determined by
turning the equipment off and on, the user is encouraged to try to correct the
interference by one or more of the following measures:
-
-
-
-
-
This device complies with Part 15 of the FCC Rules. Operation is subject to the
following two conditions: (1) This device may not cause harmful interference, and (2)
this device must accept any interference received, including interference that may
cause undesired operation.
-
This equipment complies with FCC radiation exposure limites set forth for an uncontrolled
environment. This equipment should be installed and operated with minimum distance 20 cm
between the radiator and your body. This transmitter must not be co-located or operating in
conjunction with any other antenna or transmitter.
-
This Class B digital apparatus complies with Canadian ICES-005.
-
This device complies with Industry Canada’s licence-exempt RSSs. Operation is subject to the
following two conditions:
-
-
operation of the device.
-
Le présent appareil est conforme aux CNR d'Industrie Canada applicables aux appareils radio
exempts de licence. L'exploitation est autorisée aux deux conditions suivantes :
-
-
brouillage est susceptible d'en compromettre le fonctionnement.
English
Reorient or relocate the receiving antenna.
Increase the separation between the equipment and the receiver.
Connect the equipment into an outlet on a circuit different from that to which
the receiver is connected.
Consult the dealer or an experienced radio/TV technician for help.
This device may not cause interference; and
This device must accept any interference, including interference that may cause undesired
l'appareil ne doit pas produire de brouillage, et
l'utilisateur de l'appareil doit accepter tout brouillage radioélectrique subi, même si le
25
Specifications
Model
Rated input voltage adapter 100-240V AC
Rated input frequency adapter 50/60Hz
No-load power adapter <0.1W
Rated output voltage adapter 24V DC
Rated output power adapter 18W
Average Standby Power appliance
(Conditions: all functions suspended, ambient
light scenario: day 12h 500 lux, night 12h 0lux)
- Wi-Fi on and display at maximum
brightness < 2W
- Wi-Fi off and display maximum brightness
< 1W
Page 26

26
English
USB charging port 5V, 1000mA
AUX sensitivity 280mV
Nominal light output (level 1 - 25) 1 - 350 lux at 45cm (1 -350* lux at 17.7 in.)
depending on model
Nominal light color (level 1 - 25) 1500-2800K
Physical characteristics
Dimensions (height x width x depth) 22.5 x 22.0 x 12.0cm (8.8 x 8.7 x 4.7in.)
Weight main unit / adapter Approx 0.77kg (27.2oz) / 0.14kg (4.9oz)
Cord length adapter 183cm (6ft)
Classification
Main unit Portable Electric Luminaires
Adapter Class 2 power supply
Mode of operation Continuous
Operating conditions
Temperature +5°C to +35°C (41°F to 95°F)
Relative humidity 15% to 90% (no condensation)
Storage conditions
Temperature -20°C to +50°C (-4°F to +122°F)
Relative humidity 15% to 90% (no condensation)
AmbiTrack sensors
Light sensor 0 lux to 10000 lux
Temperature sensor 0°C to +50°C (32°F to +122°F)
Humidity sensor 0% to 100% (relative humidity)
Sound pressure sensor 30dBA to 70dBA
FM
Operating Frequency 87.5 MHz - 108.0 MHz
WiFi
Operating Frequency Channel 1 to channel 11 (2412 MHz - 2462 MHz)
Modulation Type IEEE 802.11b, 802.11g, 802.11n (20 MHz)
RF output power Max. 30 dBm
Page 27

Page 28

Page 29

empty page before backcover
Page 30

Specifications are subject to change without notice.
© 2018 Koninklijke Philips N.V.
All rights reserved.
Les caractéristiques sont susceptibles d’être modifiées sans avis préalable.
© Koninklijke Philips N.V., 2018
Tous droits réservés.
Las especificaciones están sujetas a modificaciones sin previo aviso.
© 2018 Koninklijke Philips N.V.
Todos los derechos reservados.
4222.002.7347.1 (3/30/2018)
>75% recycled paper
>75% papier recyclé
 Loading...