

Philips HD9211, HD9210 User Manual
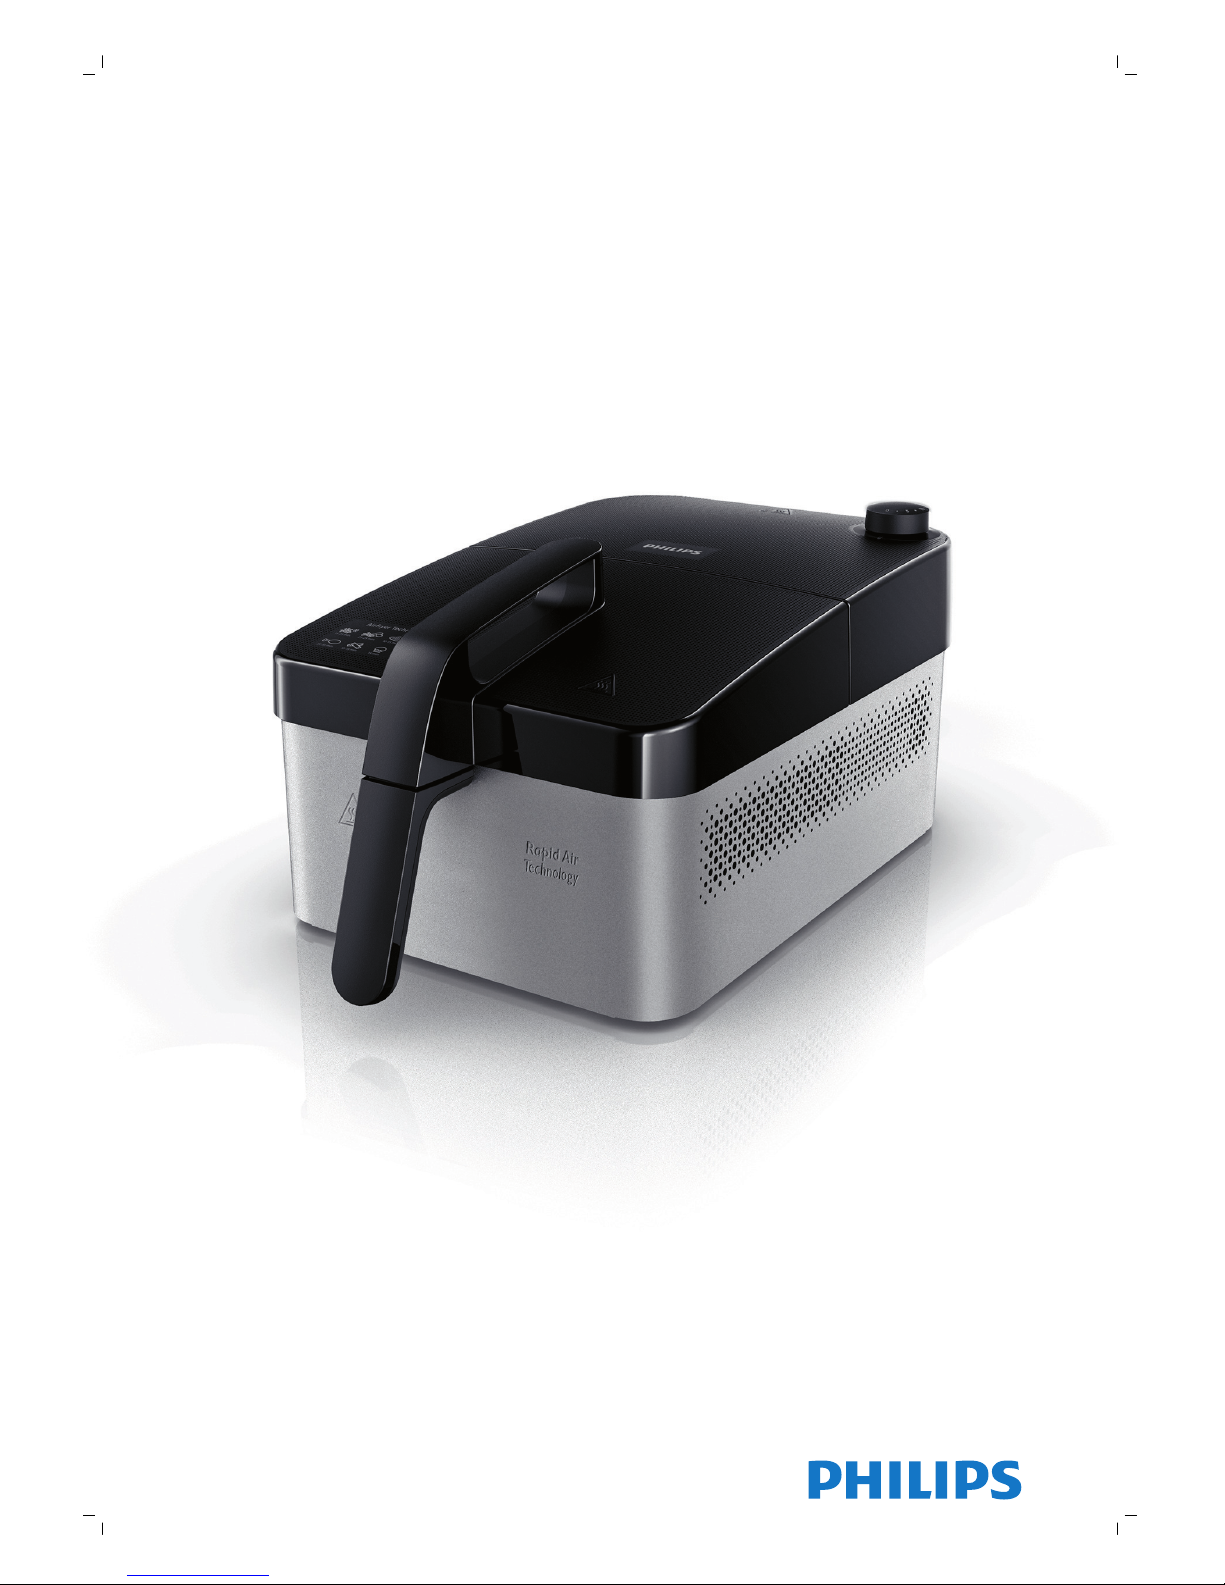
HD9211, HD9210

1 5 6
4
7
8
2
3
1


English 6
Español 17
Français 29

English
Introduction
Congratulations on your purchase and welcome to Philips! To fully benefit
from the support that Philips offers, register your product at
www.philips.com/welcome.
Important safety information
Read this important information carefully before you use the appliance and
save it for future reference.
Danger
-
Always put the ingredients to be fried in the basket, to prevent them from
coming into contact with the heating elements.
-
Do not cover the air inlet and the air outlet openings in the sides and
bottom of the appliance.
-
Do not fill the pan with oil as this may cause a fire hazard.
-
Never immerse the appliance in water or any other liquid and do not
rinse it under the tap.
Warning
-
Check if the voltage indicated on the appliance corresponds to the local
mains voltage before you connect the appliance.
-
Do not use the appliance if the plug, the mains cord or the appliance
itself is damaged.
-
If the mains cord is damaged, you must have it replaced by Philips, a
service centre authorised by Philips or similarly qualified persons in order
to avoid a hazard.
-
This appliance can be used by children aged from 8 years and above and
persons with reduced physical, sensory or mental capabilities or lack of
experience and knowledge if they have been given supervision or
instruction concerning use of the appliance in a safe way and understand
the hazards involved. Children shall not play with the appliance. Cleaning
and user maintenance shall not be made by children without supervision.
-
Keep the appliance and its cord out of reach of children less than 8
years.
-
Keep the mains cord away from hot surfaces.
-
Only connect the appliance to an earthed wall socket. Always make sure
that the plug is inserted into the wall socket properly.
-
Always place and use the appliance on a dry, stable, level and horizontal
surface.
-
This appliance is not intended to be operated by means of an external
timer or a separate remote-control system.
6
English

-
Do not place the appliance against a wall or against other appliances.
Leave at least 10cm free space on the back and sides and 10cm free
space above the appliance. Do not place anything on top of the
appliance.
- Do not use the appliance for any other purpose than described in the
user manual.
-
During hot air frying, hot steam is released through the air outlet
openings. Keep your hands and face at a safe distance from the steam
and from the air outlet openings. Also be careful of hot steam and air
when you remove the pan from the appliance.
-
The accessible surfaces may become hot during use.
-
The airfryer accessories become hot when you use them in the airfryer.
Be careful when you handle them.
Caution
-
This appliance is intended for normal household use only. It is not
intended for use in environments such as staff kitchens of shops, offices,
farms or other work environments. Nor is it intended to be used by clients
in hotels, motels, bed and breakfasts and other residential environments.
-
Do not place any food or other items on the heating element. If a piece
of food falls onto the heating element when the appliance is operating,
switch off the appliance and remove the piece of food with a fork or
similar utensil immediately. If the piece of food falls behind the heating
element, it is automatically guided back into the pan.
-
Do not use accessories and kitchen utensils other than those
recommended by the manufacturer with this appliance.
-
Always return the appliance to a service center authorised by Philips for
examination or repair. Do not attempt to repair the appliance yourself,
otherwise the guarantee becomes invalid.
-
This appliance is designed to be used at ambient temperatures between
5°C and 40°C.
-
Always unplug the appliance after use.
-
Let the appliance cool down for approx. 30 minutes before you handle
or clean it.
-
Empty the pan after each batch, especially when you fry fatty or
marinated foods. Be careful because the pan becomes hot during use.
-
Make sure the ingredients prepared in this appliance come out goldenyellow instead of dark or brown. Remove burnt remnants. Do not fry
fresh potatoes at a temperature above 180°C (to minimize the production
of acrylamide).
7
English
Electromagnetic fields (EMF)
-
This Philips appliance complies with all applicable standards and
regulations regarding exposure to electromagnetic fields.
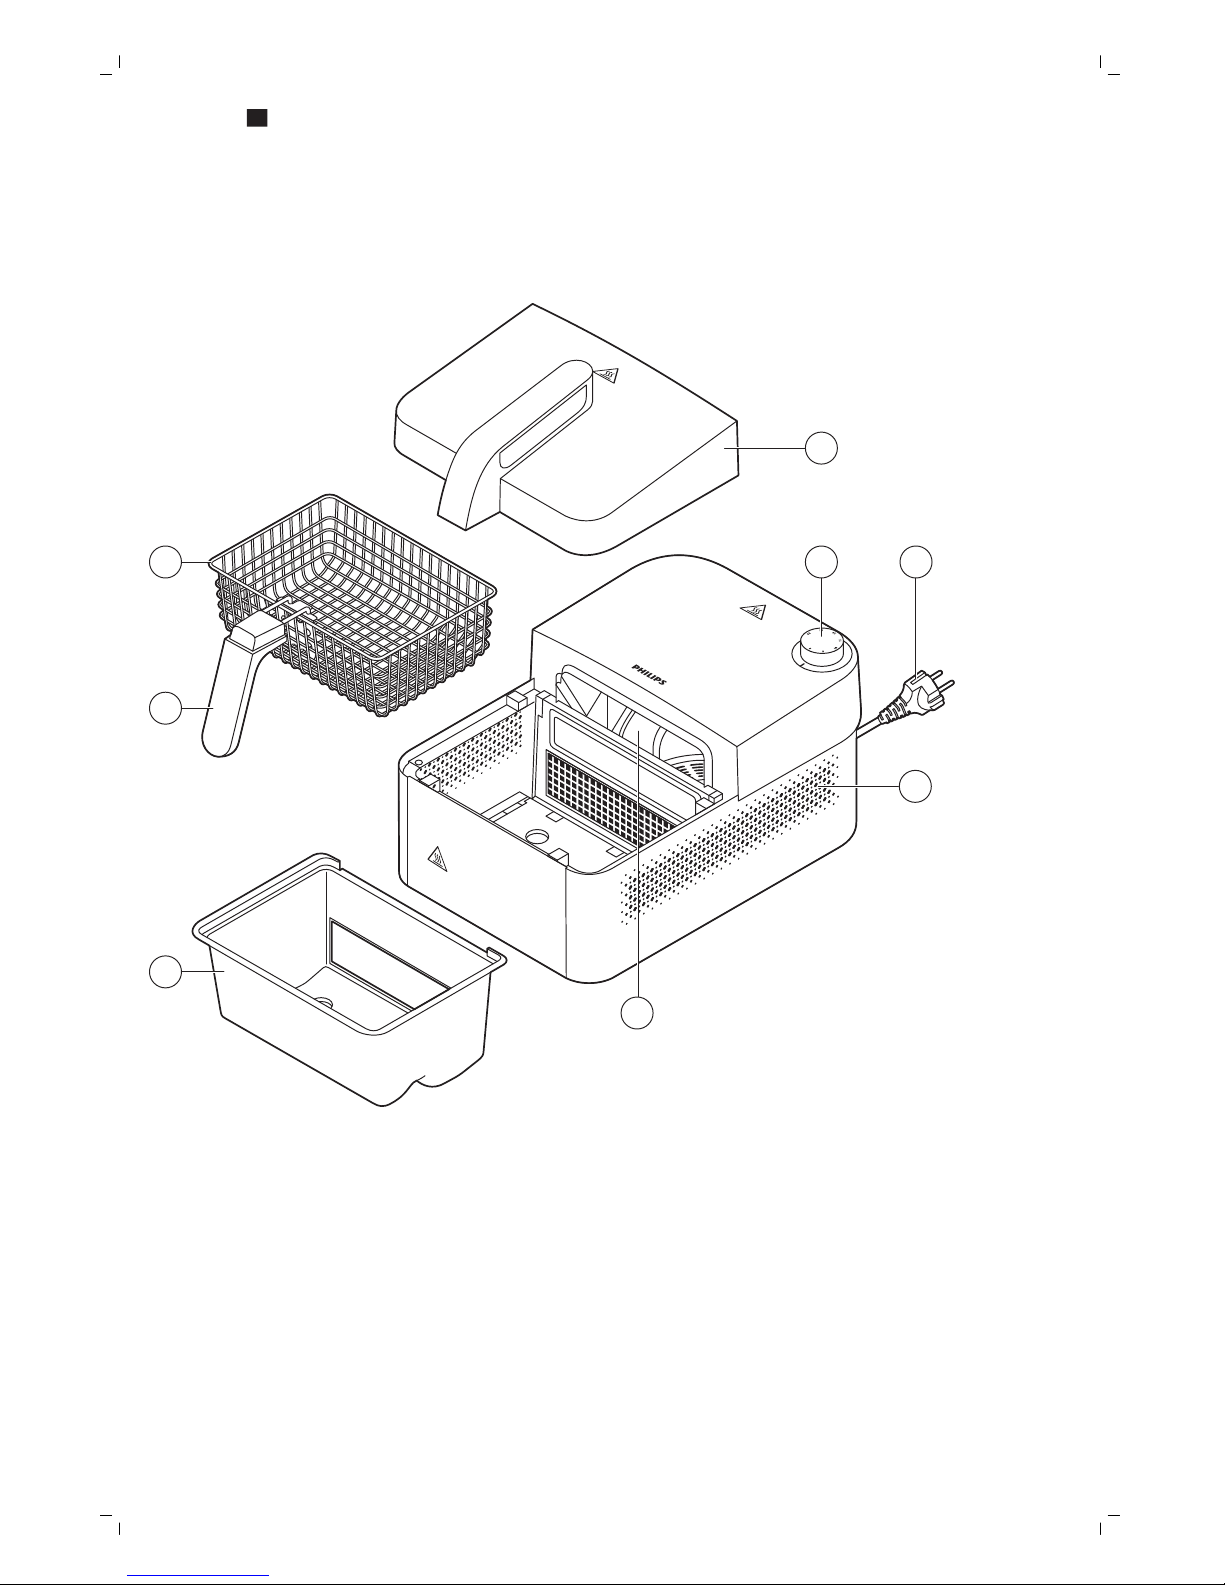
General description
1 Basket
2 Removable basket handle
3 Pan
4 Lid
5 Power-on knob with timer (0-30 min.)
6 Plug
7 Air inlet and outlet
8 Heating element
Before first use
1 Remove all packaging material.
2 Remove any stickers or labels from the appliance.
3 Thoroughly clean the appliance before first use. (see 'Cleaning ')
Preparing for use
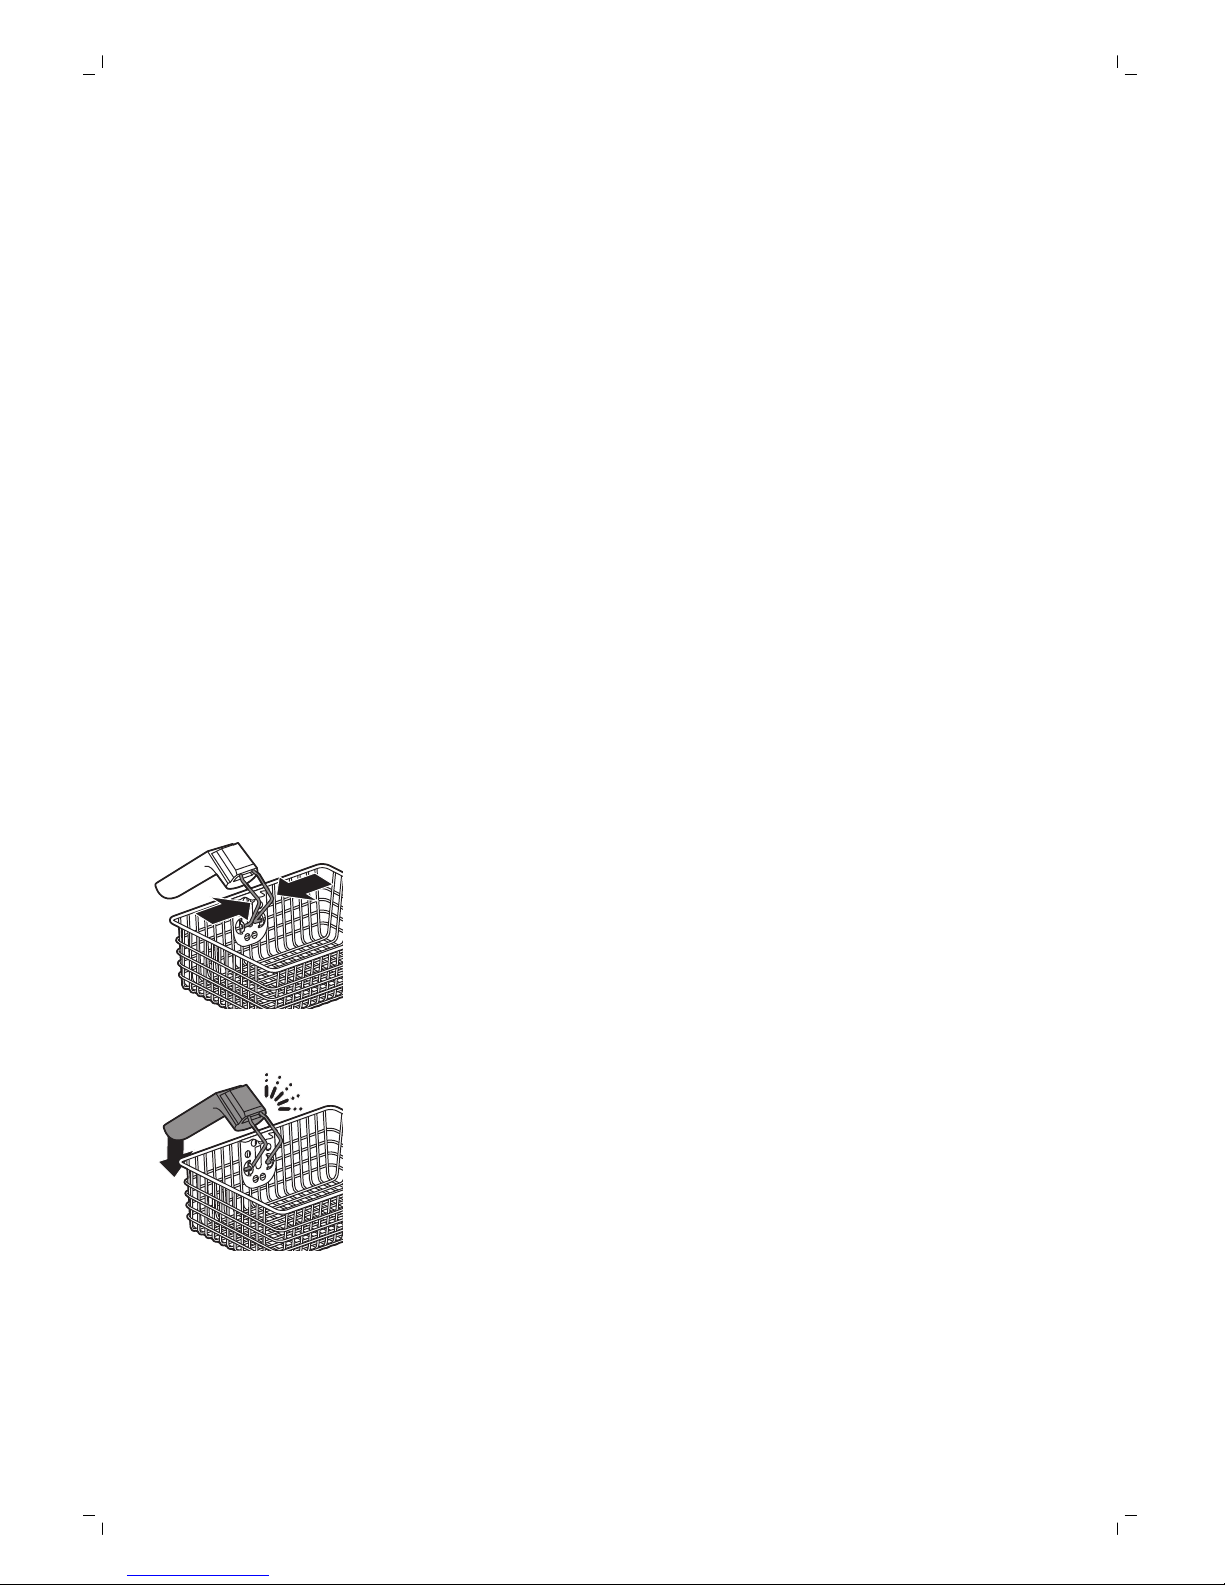
Attaching the removable handle to the basket
1 Press together the metal bars on the handle and position the ends in the
openings on the basket.
2 Release the metal bars and push down the handle until it locks into place
('click').
8
English

3 The basket is now ready for use.
Food table
The table below helps you to select the basic settings for the ingredients
you want to prepare.
Note: Keep in mind that these settings are indications. As ingredients differ
in origin, size, shape as well as brand, we cannot guarantee the best setting
for your ingredients.
Note: The airfryer technology instantly reheats the air inside the appliance.
Note: Add 3 minutes to the preparation time when you start frying while the
airfryer is still cold.
Ingredients
Max. amount
(grams)
Time
(minutes)
Shake/Turn Additional information
Frozen french
fries/frozen potato
wedges
800 15-25 Shake
halfway
Shaking the basket 2-3 times
improves the result.
Fresh french fries/fresh
potato wedges
700 20-30 Shake
halfway
Before frying, soak the cut
potatoes in water for 30 minutes,
dry them properly and add 1/2
tbsp of oil.
Kebbeh, chicken
nuggets, fish fingers
500 10-15 Shake or
turn
halfway
Oven-ready (pre-baked) or
freshly prepared.
Samosas, spring rolls 500 5-10 Turn
halfway
Cutlets, steaks 2-3 pieces 15-20 Turn
halfway
Chicken 4-6
drumsticks
2 legs
6-8 wings
25-35 Turn
halfway
Fish 1 whole fish,
2 fish fillets
10-20 Turn
halfway
9
English
Shrimps, prawns 10-12 pieces 5-15 Turn
halfway
Muffins 6 pieces 15
Using the appliance
This is an airfryer that works on hot air. Do not fill the pan with oil or
frying fat.
1 Place the appliance on a stable, horizontal, level and heat-resistant
surface.
Note: Do not put anything on top or on the sides of the appliance. This
could disrupt the airflow and influence the frying result.
Caution: Do not place the appliance on non-heat-resistant surfaces.
2 Put the plug in the wall socket.
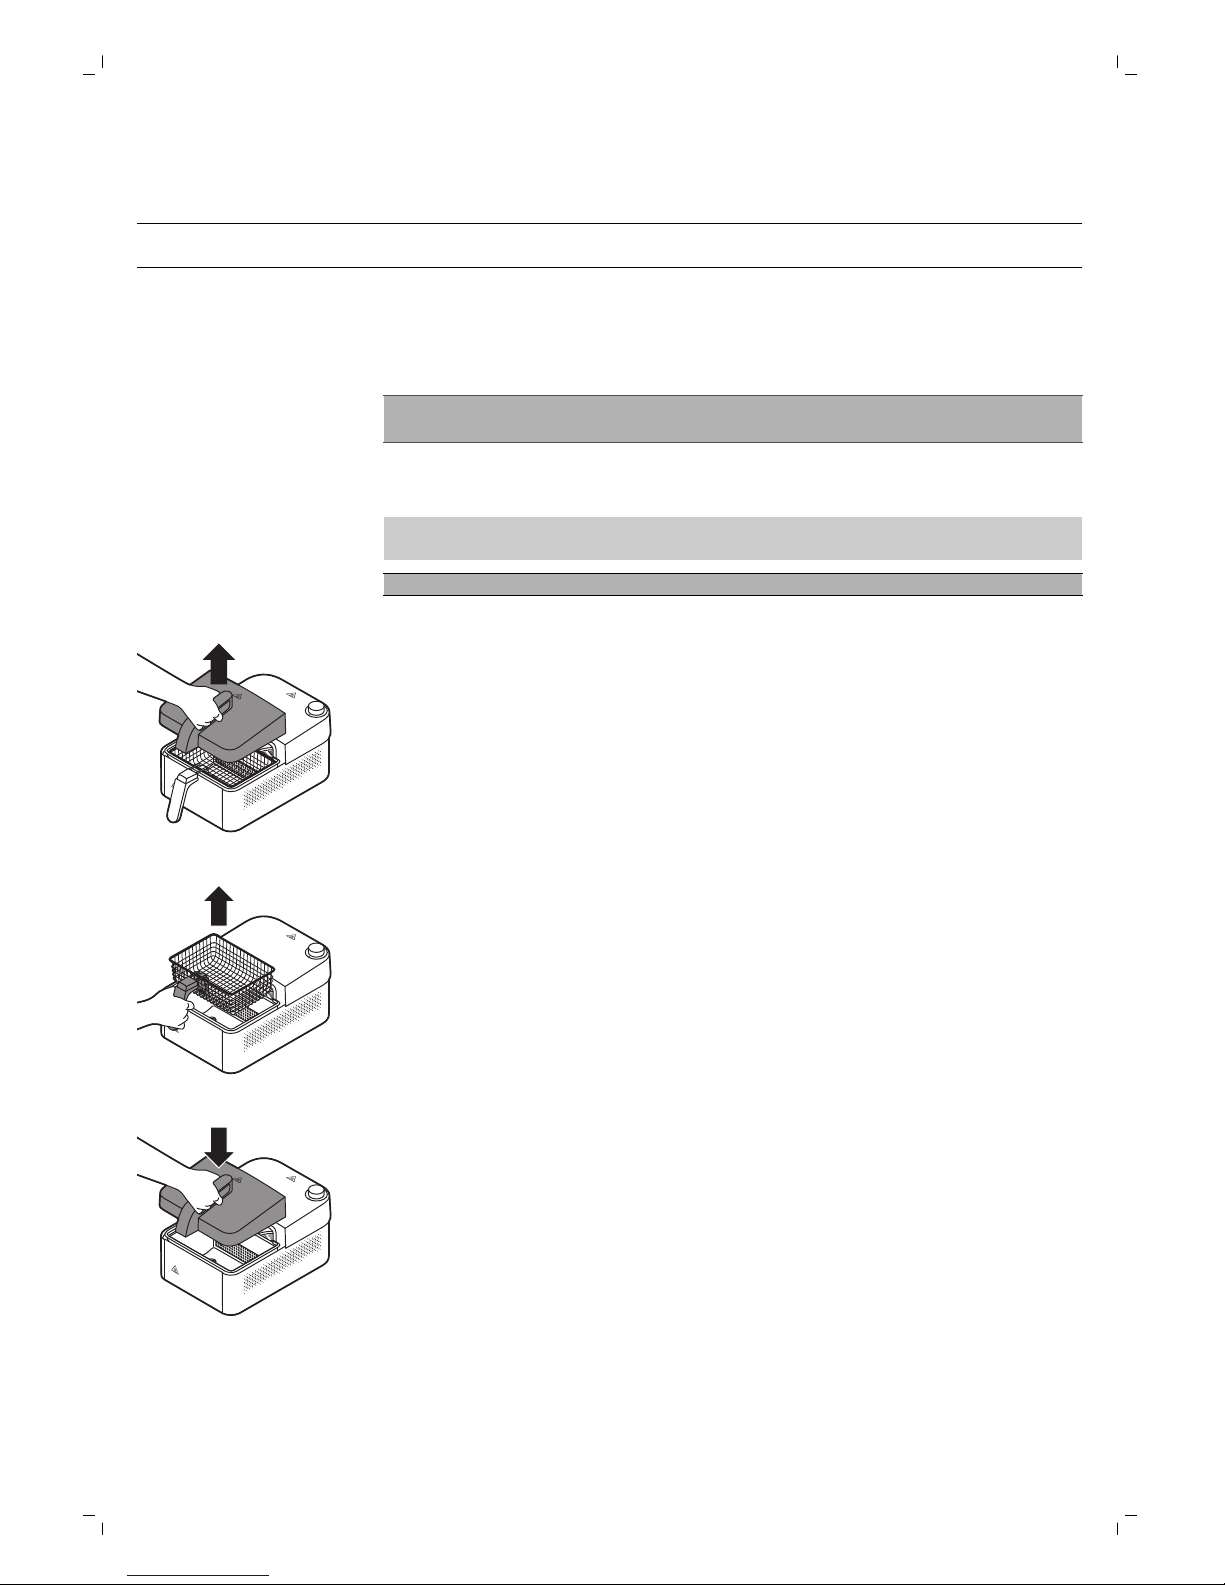
3 Remove the lid of the airfryer.
4 Remove the basket.
5 Place the lid onto the appliance.
10
English
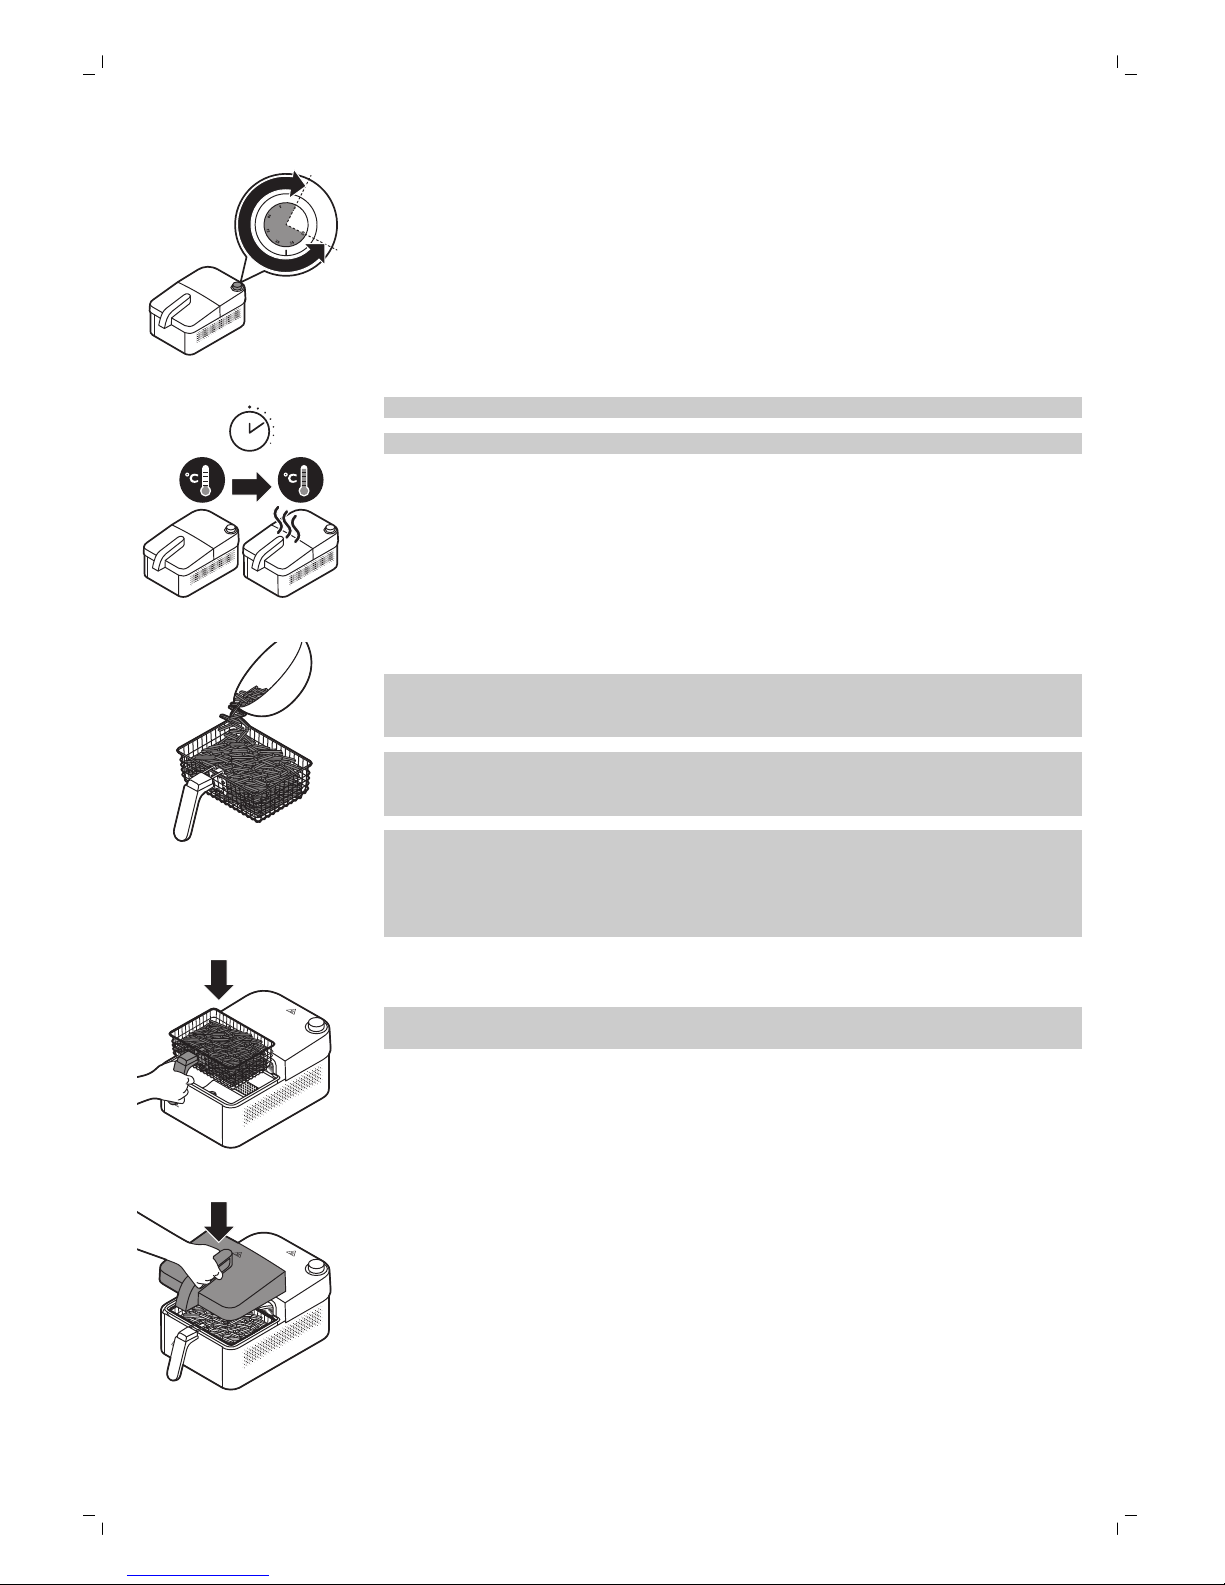
6 Turn the power-on knob to the required preparation time.
3 min.
Note: Add 3 minutes to the preparation time when the appliance is cold.
Note: The timer starts to count down to the set preparation time.
7 Put the ingredients in the basket.
Note: The airfryer can prepare a large range of ingredients. Refer to the
food table (see 'Food table') for the right quantities and preparation
times.
Note: Do not overfill the basket or exceed the amount indicated in the
food table (see 'Food table'), as this could affect the quality of the end
result.
Note: If you want to prepare different ingredients at the same time, make
sure you check the preparation time required for the different ingredients
before you start to prepare them simultaneously. Home-made fries and
drumsticks, for example, can be prepared simultaneously because they
require the same settings.
8 After preheating, remove the lid and place the basket with ingredients in
the pan.
Warning: Always make sure the pan is in the appliance before you insert
the basket.
9 Place the lid back onto the appliance.
10 The timer continues to count down the set preparation time.
11
English
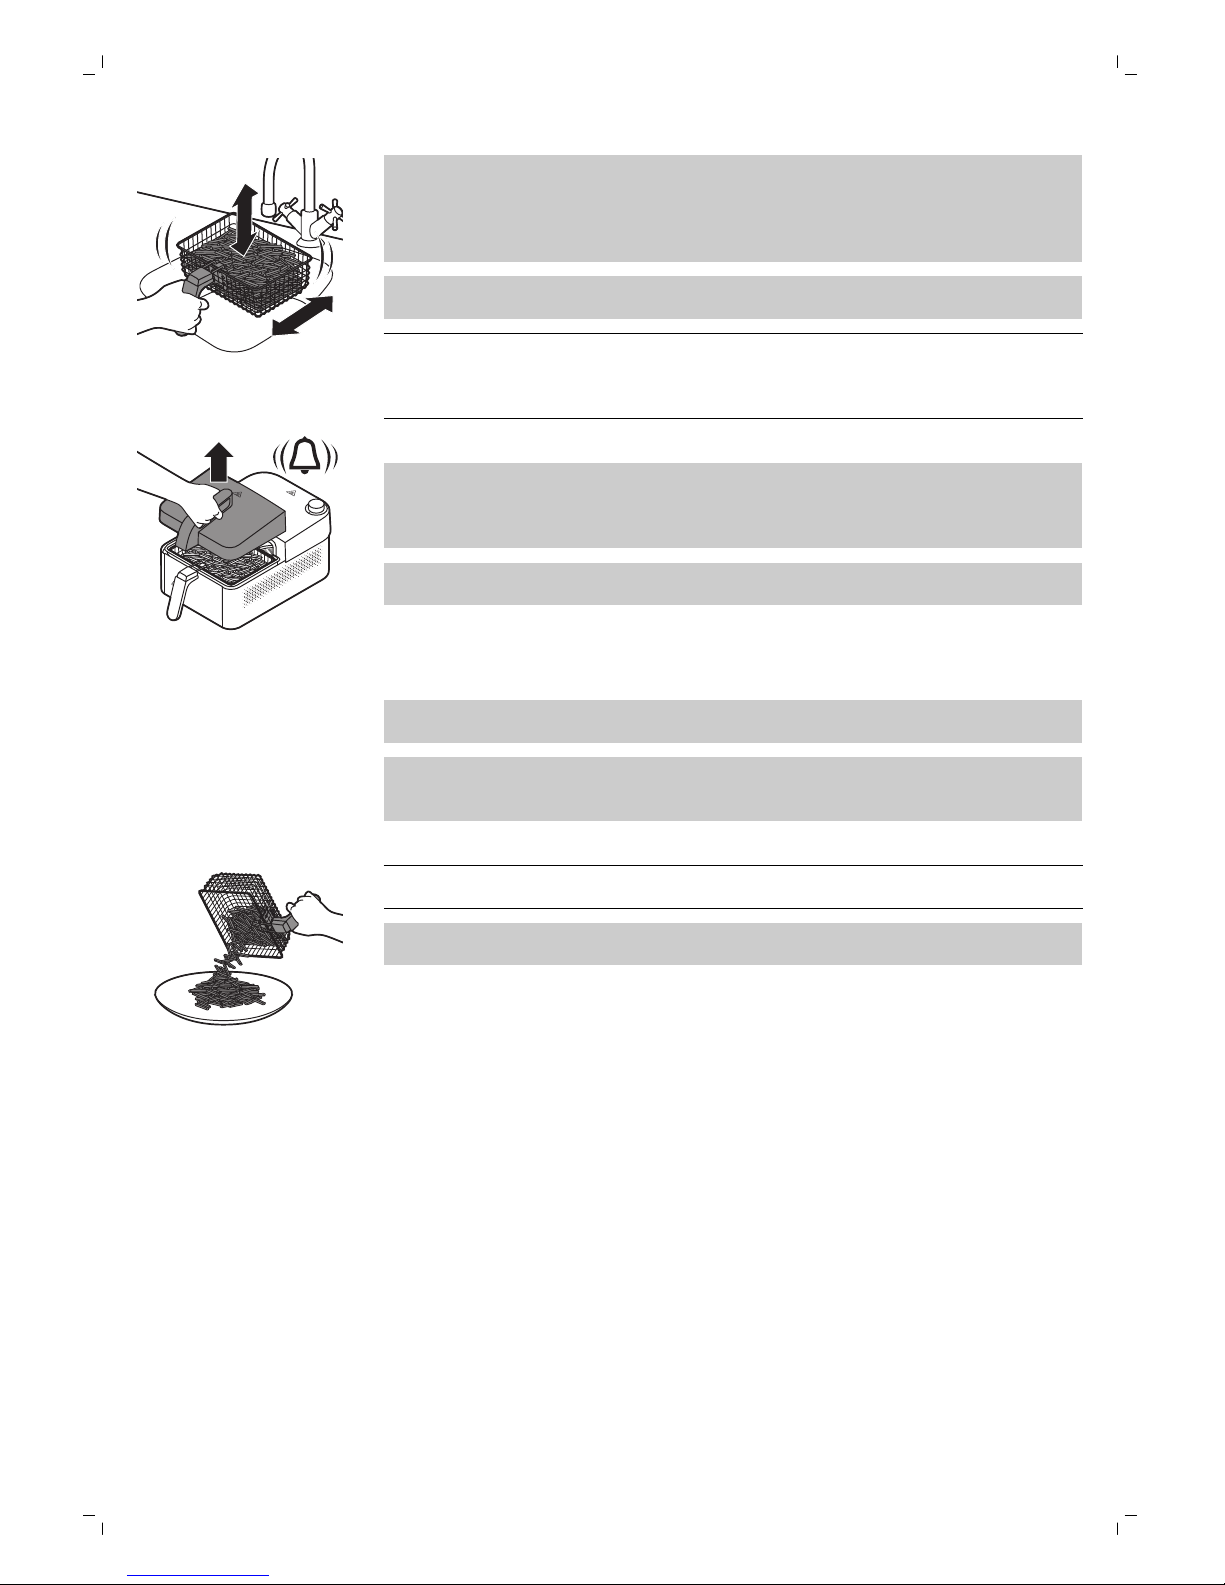
Note: Some ingredients require shaking or turning halfway through the
preparation time (see 'Food table'). To shake the ingredients, remove the
lid, take the basket out of the appliance by the handle and shake it over
the sink. Then put the basket back into the appliance and place the lid
back onto the appliance.
Note: Excess oil from the ingredients is collected on the bottom of the
pan.
Tip: If you set the timer to half the preparation time, you hear the timer
bell when you have to shake or turn the ingredients. However, this means
that you have to set the timer again to the remaining preparation time
after shaking or turning.
11 When you hear the timer bell, the set preparation time has elapsed.
Note: If you prepare several batches of fatty ingredients (e.g. drumsticks,
sausages or hamburgers) make sure you remove excess oil with a kitchen
paper towel from the pan after each batch. Be careful as the pan gets
very hot during use.
Note: You can also switch off the appliance manually. To do this, turn the
power-on knob to 0.
12 Open the lid and take the basket out of the appliance and place it on a
heat-resistant surface.
13 Check if the ingredients are ready.
If the ingredients are not ready yet, simply put the basket back into the
appliance and set the timer to a few extra minutes.
After hot air frying, the pan, the basket, the housing and the ingredients
are hot. Depending on the type of ingredients in the basket, steam may
escape from the pan.
14 Empty the basket into a bowl or onto a plate.
Tip: To remove large or fragile ingredients, use a pair of tongs to lift the
ingredients out of the basket.
When a batch of ingredients is ready, the airfryer is instantly ready for
preparing another batch.
Making home-made fries
If you want to make good home-made fries in the airfryer, pay attention to
the following:
-
Choose a potato variety suitable for making fries.
-
It is best to bake the fries in portions of up to 500 grams for an even
result. Larger fries tend to become less crispy than smaller fries.
-
Shake the basket 2-3 times during the air frying process.
1 Peel the potatoes and cut them into sticks.
2 Soak the potato sticks in a bowl for at least 30 minutes.
3 Empty the bowl and dry the potato sticks with kitchen paper.
4 Pour a half tablespoon of olive oil in the bowl, put the sticks in the bowl
and mix until the sticks are coated with oil.
12
English

5 Remove the sticks from the bowl with your fingers or a kitchen utensil so
that excess oil stays behind in the bowl.
Note: Do not tilt the bowl to put all the sticks in the basket in one go, to
prevent excess oil from ending up on the bottom of the pan.
6 Put the sticks in the basket.
7 Fry the potato sticks and shake the basket halfway through the air frying
process. Shake 2-3 times if you prepare more than 400g of fries.
Note: Add 3 minutes to the preparation time if you start frying while the
appliance is still cold.
Note: You can also use pre-baked frozen or chilled fries from the
supermarket.
Note: Consult the food table for the right quantities and preparation times
(see 'Food table').
Tips
-
A smaller amount of food requires a slightly shorter preparation time, a
larger amount of food needs a slightly longer preparation time.
-
Inspiration for recipes: An airfryer recipe app is available for IOS and
Android. You can download it for free in your download center.
-
It is recommended not to fill the basket of the airfryer beyond ¾ of its
capacity. The maximum amount of ingredients that can be prepared
depends on the kind of food you want to prepare (see 'Food table').
-
If you use oven-ready snacks, do not add oil because they are usually
pre-fried and become golden brown and crispy when prepared in the
airfryer.
-
If you use oven-ready snacks and they do not become crispy and stay
pale, please check the following:
-
The amount of ingredients: Put smaller batches of ingredients in the
basket. Cover the bottom of the basket with just one layer. Smaller
batches are fried more evenly.
-
The preparation time: If you have not preheated the appliance before
you put in the snacks, make sure you add 3 minutes extra to the
preparation time when you set the timer.
-
Most snacks need the preparation time indicated for the oven to become
fully cooked. Preparation times for the deep-fat fryer are shorter and will
not lead to well-cooked ingredients. Most snacks need between 10 and
15 minutes to cook.
-
If your croquettes or snacks burst when you prepare them in the airfryer,
choose a shorter preparation time.
13
English
Cleaning
10 min.
Warning: Let the basket, the pan and the inside of the appliance
cool down completely before you start cleaning. Do not use metal
kitchen utensils or abrasive cleaning materials to clean them.
Clean the appliance after every use. Remove oil and fat from the bottom of
the pan after every use to prevent smoke.
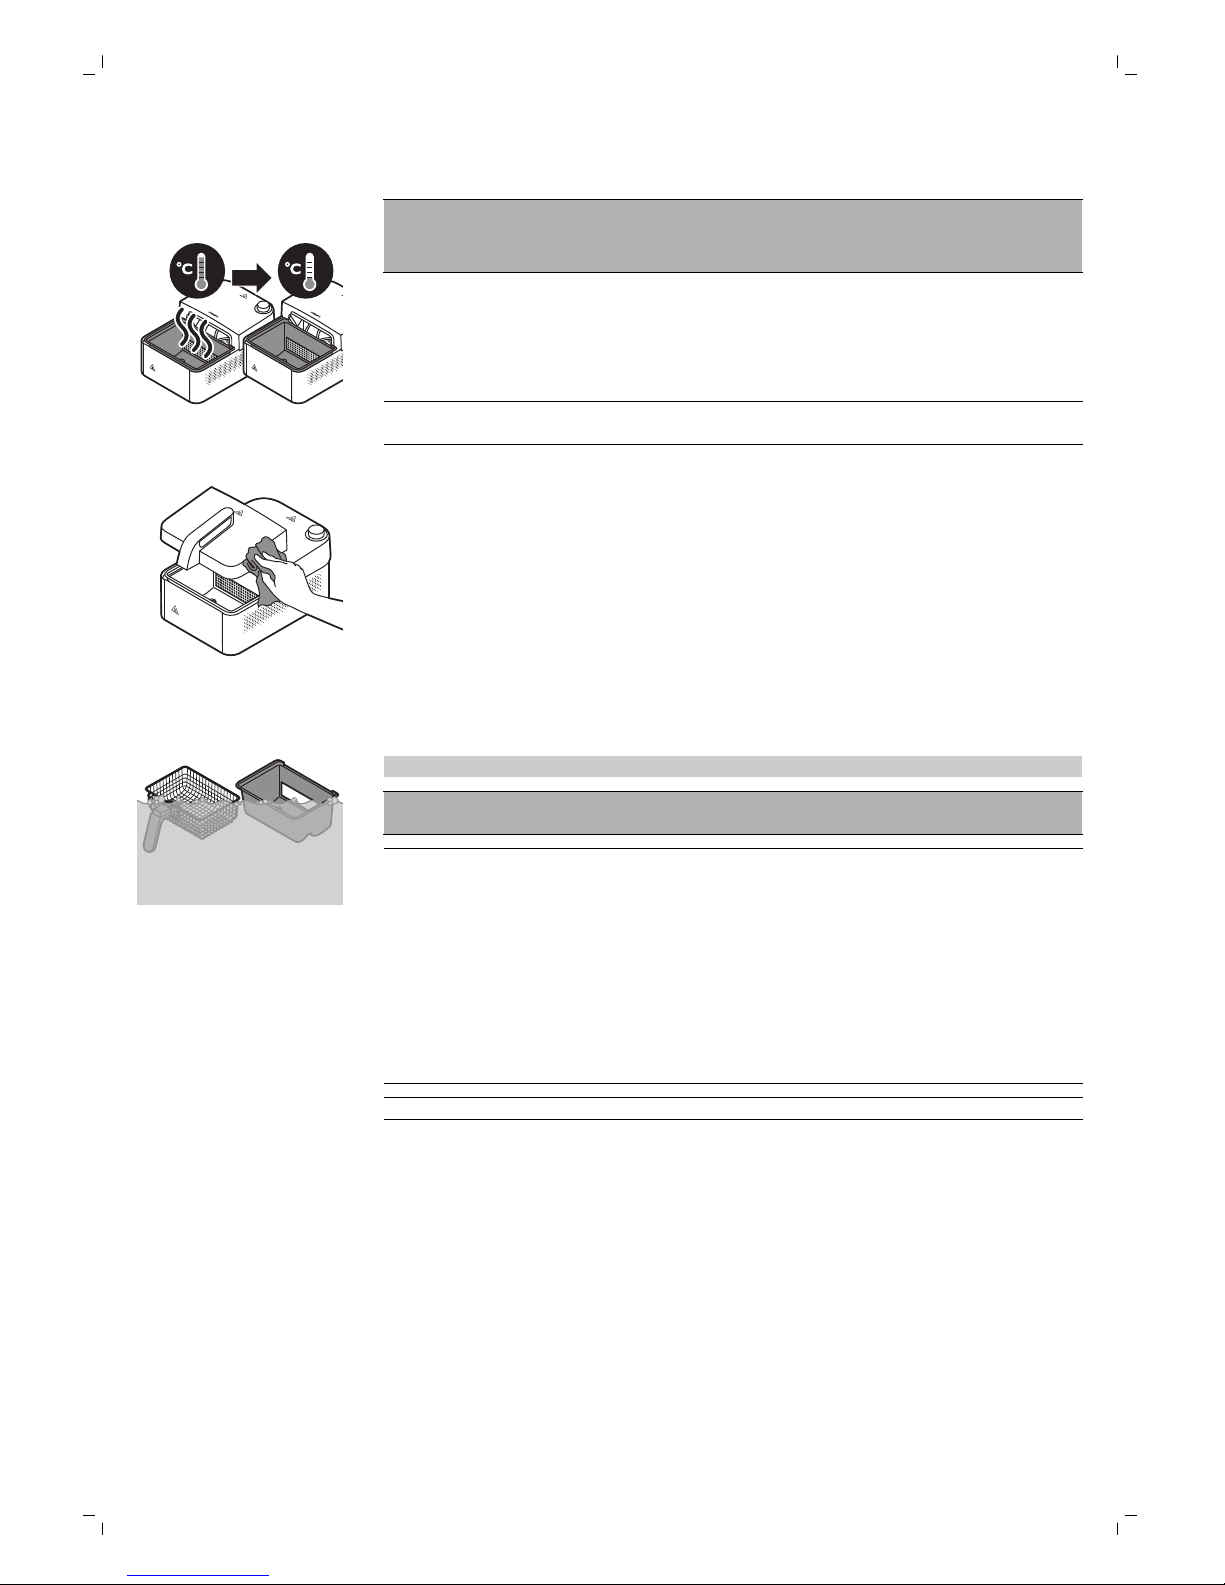
1 Turn power-on knob to 0, remove the plug from the wall socket and let
the appliance cool down for 10 minutes.
Tip: Remove the lid and the basket to let the airfryer cool down more
quickly.
2 Wipe the lid and the outside of the appliance with a moist cloth.
3 Clean the pan and basket with hot water, some washing-up liquid and a
non-abrasive sponge.
Note: The plastic pan and basket are dishwasher-proof.
Caution: Some types come with a metal pan, this metal pan is not
dishwasher proof.
Tip: If food residues are stuck to the pan or basket, you can soak them in
hot water with washing-up liquid for 10 to 15 minutes. Soaking will loosen
the food residues and will make it easier to remove them. The quality of
your washing-up liquid determines how easy it is to remove food
residues and grease. Make sure you use a washing-up liquid that can
dissolve oil and grease. If there are grease stains on the pan or the basket
and you have not been able to remove them with hot water and
washing-up liquid, use a liquid degreaser. If necessary, food residues
stuck to the heating element can be removed with a soft to medium
bristle brush. Do not use a steel wire brush or a hard bristle brush, as this
might damage the coating on the heating element.
Tip:You can use a degreasing liquid to remove any remaining dirt.
4 Clean the inside of the appliance with hot water and a non-abrasive
sponge.
5 Clean the heating element with a cleaning brush to remove any food
residues.
Storage
1 Unplug the appliance and let it cool down.
2 Make sure all parts are clean and dry before you store the appliance.
(see 'Cleaning ')
14
English
 Loading...