

Page 1
HD3198
Specifications are subject to change without notice
© 2018 Koninklijke Philips N.V.
All rights reserved
HD3198_UM_FR_v3.0
Always there to help you
Register your product and get support from
Question?
Contact
Philips
www.philips.com/welcome
1
2
a
k
j
3
1 2
3
EN User manual 1 FR Mode d’emploi 23
b
c
http://www.philips.com/welcome
User manual
a
d e f
http://www.philips.com/welcome
Recipe
http://www.philips.com/welcome
Warranty
l
m
n
o
b
c
d
e
f
i
h
g
v
u
t
s
4 5
7
9
10
6
8
ihg
p
q
r
Page 2
11 12
19 20
2827
35
36
43
44
3S
13 14
15 16
17
18
21
23
25
22
24
26
31
33
3029
32
34
3S
37
39
41
3S
38
40
42
45
Page 3

EN
English
Contents
1 Your multicooker 2
2 Important 2
Safety 2
Electromagnetic elds (EMF) 5
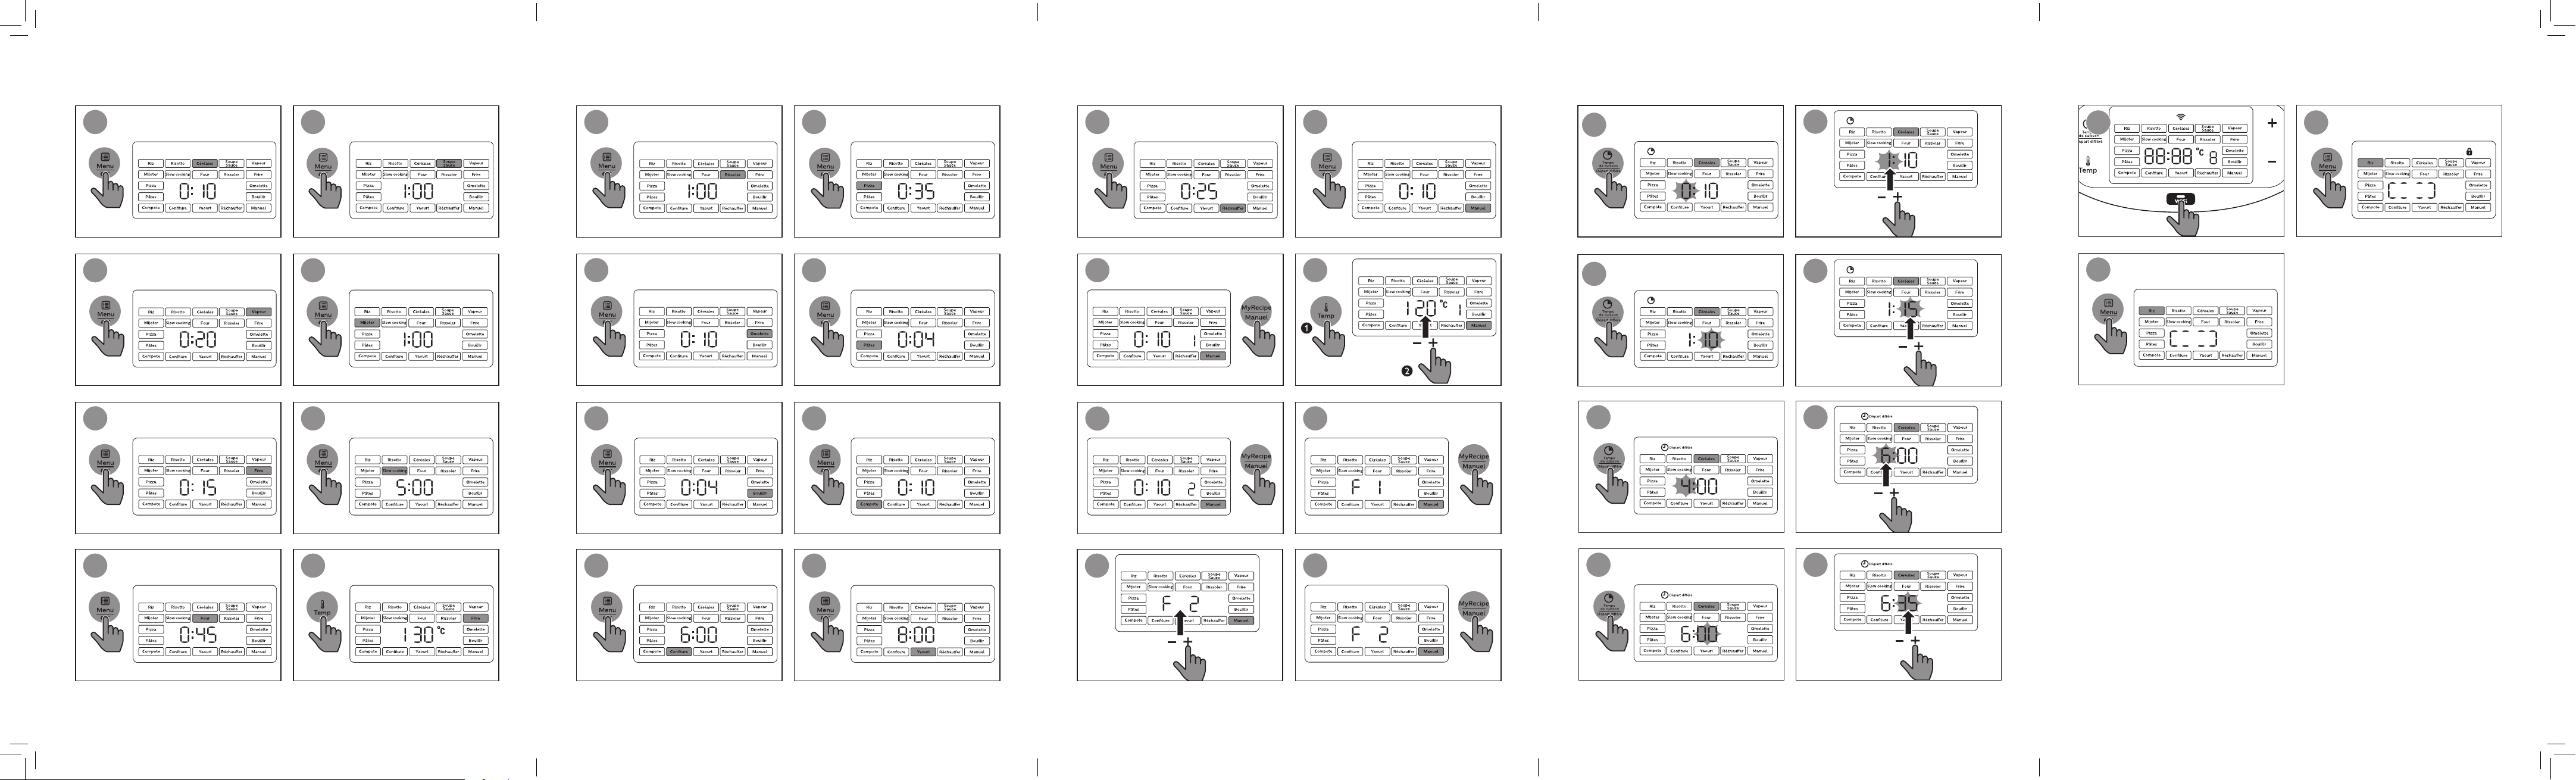
3 What’s in the box (g. 1) 6
4 Overview (g. 2) 6
Product overview 6
Controls overview 6
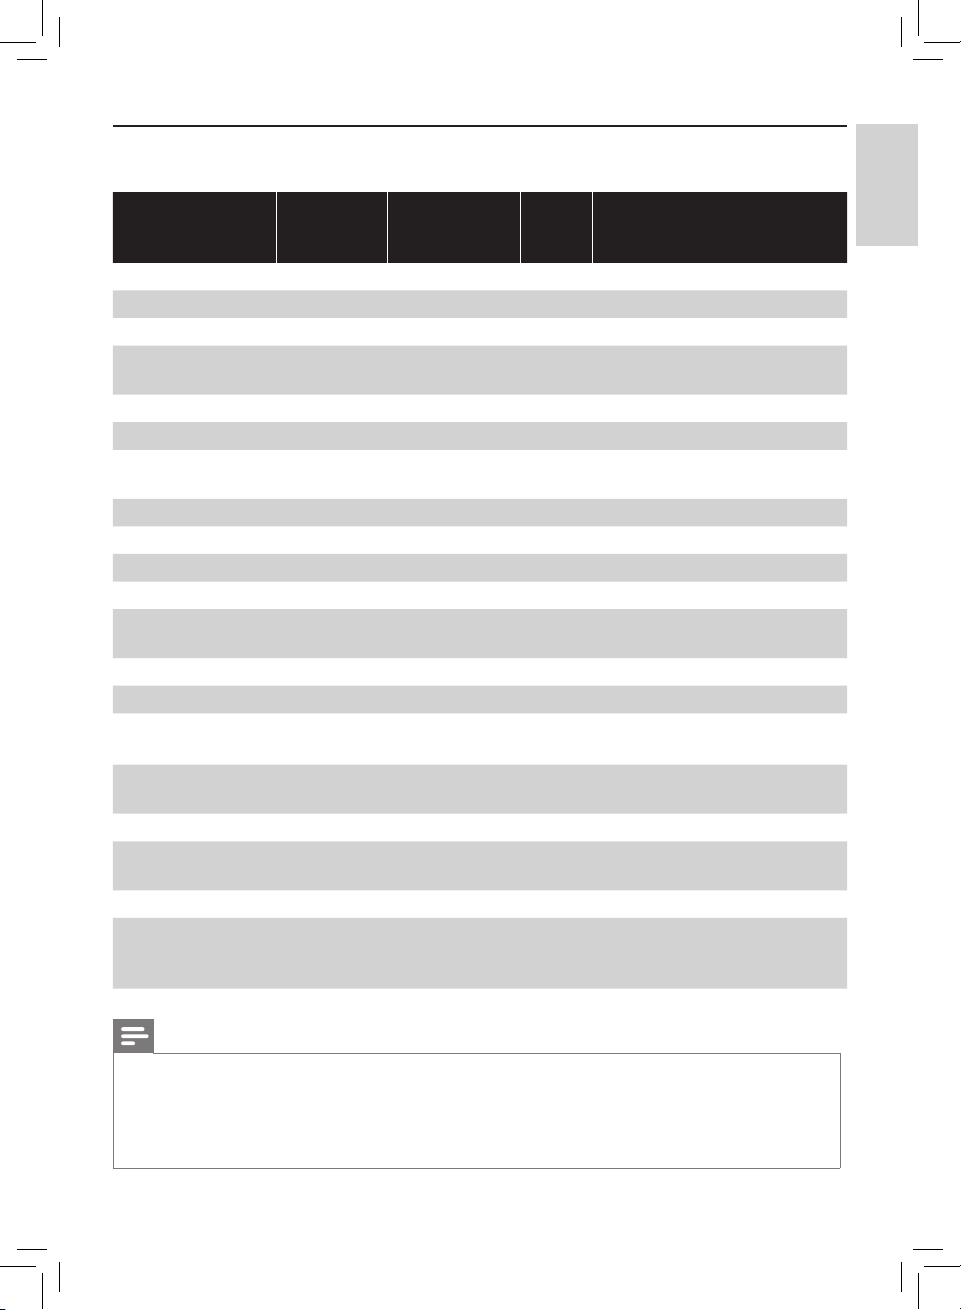
Menus overview 7
5 Using the multicooker (g. 3) 8
Before rst use 8
Cooking rice (Riz) 8
Making risotto (Risotto) 9
Cooking cereal (Céréales) 9
Making soup (Soupe/Sauce) 10
Steam (Vapeur) 10
Stew (Mijoter) 10
Slow cooking (Slow cooking) 11
Baking (Four) 11
Roasting (Rissoler) 12
Frying (Frire) 12
Making pizza (Pizza) 12
Making omelette (Omelette) 13
Boiling pasta (Pâtes) 13
Boiling (Bouillir) 14
Making beverage (Compote) 14
Making conture (Conture) 14
Making yogurt (Yaourt) 15
Reheating (Réchauer) 15
Manual (Manuel) 15
Multi-stage cooking 16
MyRecipe (MyRecipe) 16
Warm keeping 17
Setting up the cooking time 17
Preset time for delayed
cooking 18
Setting up the WiFi
connection 18
Setting up the child lock 18
6 Cleaning and Maintenance 19
Interior 19
Exterior 19
Accessories 19
7 Recycling 19
8 Guarantee and service 19
9 Specications 20
10 Troubleshooting 21
1
Page 4

EN
1 Your
multicooker
Congratulations on your purchase, and
welcome to Philips!
To fully benet from the support that
Philips oers, register your product at
www.philips.com/welcome.
2 Important
Safety
Read this user manual carefully before
you use the appliance, and save it for
future reference.
Danger
• Do not immerse the
multicooker in water, nor
rinse it under the tap.
•
The appliance must not be
immersed.
Warning
•
This appliance shall
not be used by children
from 0 year to 8 years.
This appliance can be
used by children aged
from 8 years and above
if they are continuously
supervised and they have
been given supervision or
instruction concerning use
of the appliance in a safe
way and understand the
hazards involved.
•
This appliance can be
used by people with
reduced physical, sensory
or mental capabilities or
lack of experience and
knowledge if they have
been given supervision or
instruction concerning use
of the appliance in a safe
way and understand the
hazards involved.
•
Keep the appliance and
its cord out of reach of
children ages less than 8
years.
•
Cleaning and maintenance
shall not be made by
children unless they
are older than 8 and
supervised.
•
Children shall not play with
the appliance.
•
Cooking appliances should
be positioned in a stable
situation with the handles
(if any) positioned to avoid
spillage of the hot liquids.
•
T
his appliance is intended
to be used in household
and similar applications
such as:
•
sta kitchen areas in
shops, oces and other
working environments;
•
farm houses;
•
by clients in hotels,
motels and other
2
Page 5

EN
English
residential type
environments;
•
bed and breakfast type
environments.
•
Make sure that the
damaged power cord
is replaced by Philips, a
service center authorized
by Philips or similarly
qualied persons in order
to avoid a hazard.
•
Make sure to avoid spillage
on the power connector to
avoid a potential hazard.
•
Always follow the
instructions and use the
appliance properly to avoid
potential injury.
•
CAUTION: Surface of the
heating element is subject
to residual heat after use.
•
The appliance is not
intended to be operated
by means of an external
timer or a separate
remote-control system.
•
To satisfy RF exposure
requirements, this device
should be operated with a
separation distance of at
least 20 centimeters from
all persons when the
Wi-Fi router is switched on.
The antenna used for the
transmitter must not be
co-located in conjunction
with any other antenna or
transmitter.
•
Check if the voltage
indicated on the
multicooker corresponds
to the local power voltage
before you connect it.
•
Check if the steam valve is
clear before every cooking
and becomes block during
the cooking.
•
If the steam valve is
blocked, the pressure will
increase in the appliance
and the jet of steam could
hurt and scald users.
•
During cooking, steam can
only come out from the
steam valve. If steam starts
to come out between the
top lid and main body,
immediately power o
the multicooker. Check
if the sealing ring is in
place, in good condition
and stacked with foreign
objects/food residues. If
there are foreign objects/
food residues, clean
them up. If there is no
foreign object, return it
to the service center for
checking and sealing ring
replacement if necessary.
Note that sealing ring
lifetime is limited and
depend on cooking and
maintenance frequency.
•
During cooking, water or
liquid food can’t come
out from the inner pot.
3
Page 6

EN
The only exception is
that water condenses
around the steam valve
and small amount of
water condensate leaks
on the back side of the
multicooker if top lid was
opened during cooking,
this can be easily wiped
o by clean cloth and
continuous cooking. If any
water/liquid food starts to
come out directly from the
steam valve or between
the top lid and main body,
immediately power o
the multicooker. Check
if the amount of water in
inner pot doesn’t exceed
allowed limit, amount of
food corresponds to the
recipe, cooking mode and
timing selection are correct
and the multicooker is
used according to the
user manual. Check if the
sealing ring is in place,
in good condition and
stacked with foreign
objects/food residues. If
there are foreign objects/
food residues, clean them
up. If there is no foreign
object and the multicooker
is used according to the
user manual, return it
to the service center for
checking and repair if
necessary.
•
Only connect the
multicooker to a grounded
power outlet. Always
make sure that the plug
is inserted rmly into the
power outlet.
•
Do not use the appliance
if the plug, the power cord,
the inner pot, the sealing
ring, or the main body is
damaged.
•
Do not let the power cord
hang over the edge of the
table or worktop on which
the multicooker stands.
•
Make sure the heating
element, the temperature
sensor, and the outside of
the inner pot are clean and
dry before you put the plug
in the power outlet.
•
Do not plug in the
multicooker or touch any of
the buttons on the control
panel with wet hands.
•
Do not put too much
cooking oil in the inner pot
to deep fry ingredients.
Caution
•
Never use any accessories
or parts from other
manufacturers or that
Philips does not specically
recommend. If you use
such accessories or parts,
your guarantee becomes
invalid.
•
Do not expose the
multicooker to high
4
Page 7

EN
English
temperatures, nor place
it on a working or still hot
stove or cooker.
•
Do not expose the
multicooker to direct
sunlight.
•
Place the multicooker on a
stable, horizontal, and level
surface.
•
Always put the inner pot in
the multicooker before you
put the plug in the power
outlet and switch it on.
•
Do not place the inner pot
directly over an open re to
cook dishes.
•
Do not use the inner pot if
it is deformed.
•
The accessible surfaces
may become hot when the
multicooker is operating.
Take extra caution when
touching the multicooker.
•
Beware of hot steam
coming out of the steam
vent during cooking or out
of the multicooker when
you open the lid. Keep
hands and face away from
the multicooker to avoid
the steam.
•
The inner pot and steamer
during and after cooking
process, may be hot and
heavy.
•
Do not lift and move the
multicooker while it is
operating.
•
Do not exceed the
maximum water level
indicated in the inner pot
to prevent overow.
•
Do not place the cooking
utensils inside the pot
during cooking, warm
keeping or reheating.
•
Only use the cooking
utensils provided. Avoid
using sharp utensils.
•
To avoid scratches, it is
not recommended to
cook ingredients with
crustaceans and shellsh.
Remove the hard shells
before cooking.
•
Do not insert metallic
objects or alien substances
into the steam vent.
•
Do not place a magnetic
substance on the lid. Do
not use the multicooker
near a magnetic substance.
•
Always let the multicooker
cool down before you
clean or move it.
•
Always clean the
multicooker after use. Do
not clean the multicooker
in dishwasher.
•
Always unplug the
multicooker if not used for
a longer period.
5
Page 8

EN
•
If the multicooker is
used improperly or
for professional or
semiprofessional purposes,
or if it is not used according
to the instructions in this
user manual, the guarantee
becomes invalid and
Philips refuses liability for
any damage caused.
Electromagnetic elds
(EMF)
This Philips appliance complies with all
applicable standards and regulations
regarding exposure to electromagnetic
elds.
3 What’s in the
4 Overview (fig. 2)
Product overview
Top lid
a
Inner pot
b
Lid release button
c
Control panel
d
Heating element
e
Main body
f
Power socket
g
Cooker handle
h
Water level indications
i
Detachable steam vent cap
j
Sealing ring
k
box (fig. 1)
Multicooker main unit
a
Power cord
b
Measuring cup
c
Detachable steam tray
d
Rice scoop
e
Soup ladle
f
User manual
g
Recipe booklet
h
Warranty card
i
6
Controls overview
Keep-warm button
l
Cooking time/preset button
m
Menu button
n
Temperature button
o
Cooking functions
p
WiFi indicator
q
Display screen
r
Decrease button
s
MyRecipe/Multi-stage cooking
t
button
Increase button
u
Start/O button
v
Page 9
EN
English
Menus overview
Menus
Default
cooking
time
Cooking time
regulating
range
Preset
time
Default
cooking
temperature
Temperature
regulating
range
Rice (Riz) 40 min / 1-24 hr 130-140°C /
Risotto (Risotto) 40 min / 1-24 hr 130-140°C /
Cereal (Céréales) 10 min 5 min - 2 hr 1-24 hr 90-100°C /
Soup (Soupe/
Sauce) 1 hr 20 min-4 hr 1-24 hr 90-100°C /
Steam (Vapeur) 20 min 5 min - 2 hr 1-24 hr 100°C /
Stew (Mijoter) 1 hr 20 min - 10 hr 1-24 hr 95°C /
Slow cooking
(Slow cooking) 5 hr 1-15 hr 1-24 hr 80°C /
Bake (Four) 45 min 20 min - 2 hr / 130°C 40-160°C
Roast (Rissoler) 1 hr / / 130°C /
Fry (Frire) 15 min 5-60 min / 145-160°C /
Pizza (Pizza) 35 min 10-60 min / 130°C /
Omelette
(Omelette) 10 min 5-20 min / 120°C /
Pasta (Pâtes) 4 min 1-15 min / 100°C /
Boil (Bouillir) 4 min 1-15 min / 100°C /
Beverages
(Compote) 10 min 5-40 min 1-24 hr 100°C /
Conture
(Conture) 6 hr 4-10 hr 1-24 hr 90-100°C /
Yogurt (Yaourt) 8 hr 6-12 hr 1-24 hr 40±3°C /
Reheat
(Réchauer) 25 min 5-60 min / 85°C /
Manual (Manuel) 2 hr 5 min - 10 hr 1-24 hr 100°C 30-160°C
Multi-stage
cooking
(MyRecipe) 10 min 5 min - 15 hr / 120°C 30-160°C
Note
•You can adjust the cooking temperature for the baking and manual functions. For baking,
the temperature is available from 40°C to 160°C; for the manual function, the temperature is
available from 30°C to 160°C.
•After the cooking has started, you can touch the Start/Cancel button (On/O) to deactivate
the current cooking process, and the multicooker will switch to the standby mode.
7
Page 10
EN
5 Using the
multicooker
(fig. 3)
Note
•For all menus, do not exceed the MAX
indication on the inside of the inner pot
when putting food, liquid or ingredients
in it, otherwise the food may overow
during cooking.
•The cooking time does not display
straight from the beginning for rice (Riz)
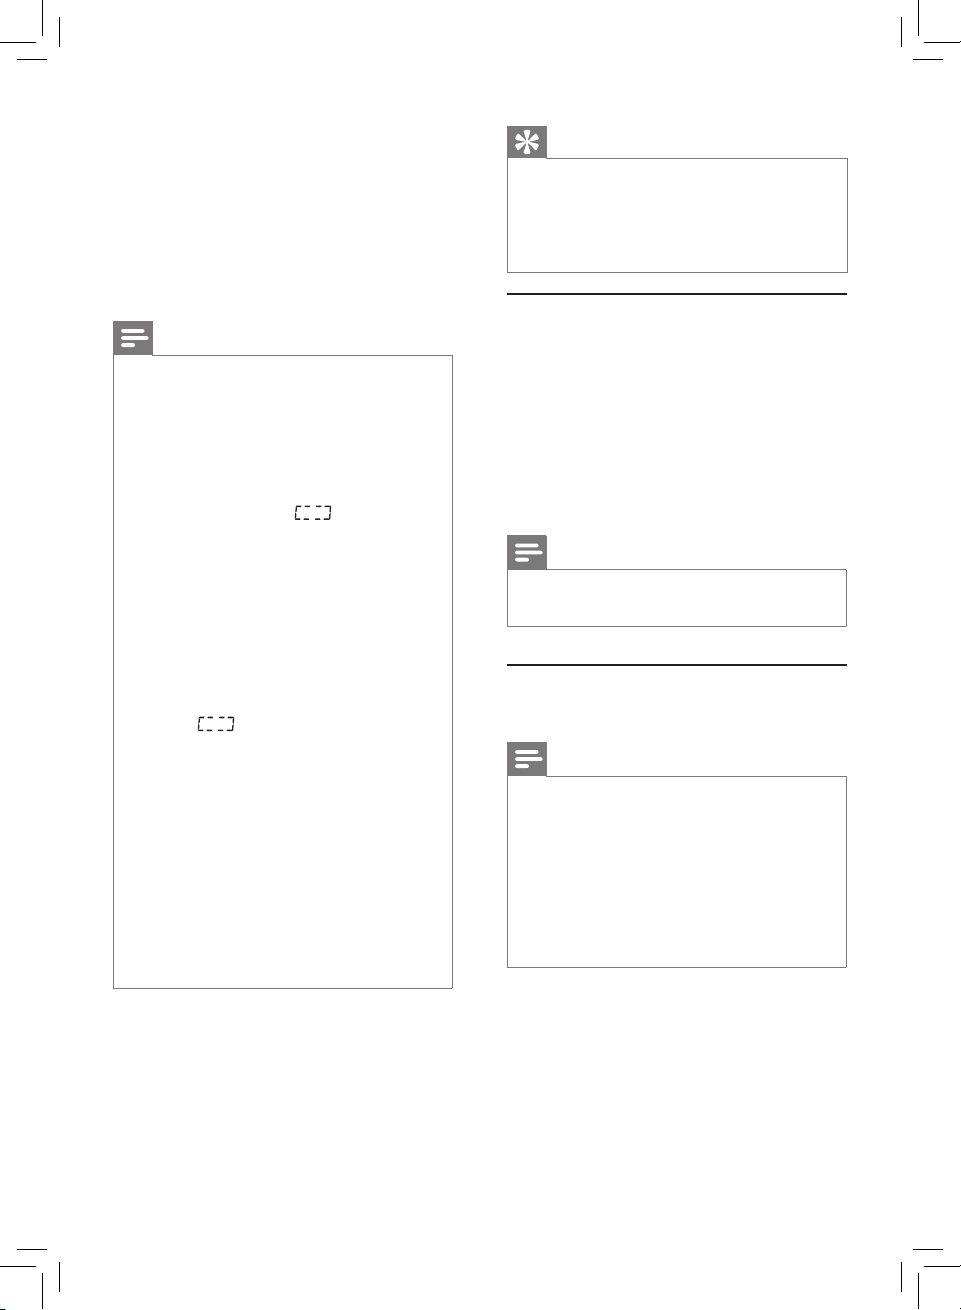
and risotto (Risotto). displays on
the screen during most of the cooking
time as the multicooker needs to detect
the water/liquid and ingredient volume
in the initial preparation stage. When the
multicooker detects the actual cooking
time needed, the remaining cooking
time displays on the screen. For cereal
(Céréales), steam (Vapeur), soup (Soupe/
Sauce), conture (Conture), beverage
(Compote), boil (Bouillir) and pasta
(Pâtes), displays on the screen
before the water/liquid is brought to boil.
When the water/liquid starts boiling, the
set cooking time displays on the screen.
•Refer to the recipe booklet for more
details on cooking with each menu.
•Within 30 seconds after the multicooker
is plugged in, you can reset the
multicooker including the WiFi module
to factory mode. To do so, touch
increase "+" for 5 to 10 seconds and
"--:--" displays on the screen. All the
saved recipes and the previous WiFi
connection will be removed after reset.
Tip
•To select a certain menu, touch the
menu button (Menu) repeatedly. You
can also touch the menu button (Menu)
once, and then touch the increase (+) or
decrease (-) button to do so.
Before rst use
Take out all the accessories from
1
the inner pot, and remove the
packaging material of the inner pot.
Clean all parts of the multicooker
2
thoroughly before using it for the
rst time (see chapter ‘Cleaning and
Maintenance’).
Note
•Make sure all parts are completely dry
before you start using the multicooker.
Cooking rice (Riz)
Note
•If the voltage is unstable at the area
you live, it is possible that food in the
multicooker overows.
•After the cooking is nished, stir the rice
and loosen it immediately to release
excessive moisture for uy rice.
•Depending on the cooking conditions,
the bottom portion of the rice may
become slightly browned.
Measure the rice using the
1
measuring cup provided (g. a).
Rinse rice, put the washed rice
2
in the inner pot, and ll in water
(g. b).
8
Page 11
EN
English
Note
•For details about the ratio of rice and
water, refer to the recipe booklet.
Touch the lid release button to
3
open the lid (g. c).
Wipe the outside of the inner pot
4
dry (g. d), and then put it in the
multicooker (g. e).
Note
•Make sure that the inner pot is in proper
contact with the heating element.
•Make sure that the outside of the inner
pot is clean and dry, and that there is no
foreign residue on the heating element.
Close the lid of the multicooker
5
(g. f), and put the plug in the
power socket (g. g).
Touch the menu button (Menu) to
6
select rice (Riz) (g. h).
Touch and hold the start button
7
(On/O) for 3 seconds to conrm
and start cooking (g. i).
When the cooking is nished, the
8
appliance beeps and turns into
warm keeping automatically.
Note
•The appliance remains at warm keeping
for 12 hours, after that it beeps and
cease warm keeping process.
Making risotto (Risotto)
Put the ingredients for the risotto
1
into the inner pot.
Wipe the outside of the inner pot
2
dry (g. d), and then put it in the
multicooker (g. e).
Close the lid of the multicooker
3
(g. f), and put the plug in the
power socket (g. g).
Touch the menu button (Menu) to
4
select risotto (Risotto) (g. j).
Touch and hold the start button
5
(On/O) for 3 seconds to conrm
and start cooking (g. i).
When the cooking is nished, the
6
appliance beeps and turns into
warm keeping automatically.
Cooking cereal (Céréales)
Put ingredients for the cereal into
1
the inner pot and stir a little bit.
Wipe the outside of the inner pot
2
dry (g. d), and then put it in the
multicooker (g. e).
Close the lid of the multicooker
3
(g. f), and put the plug in the
power socket (g. g).
Touch the menu button (Menu) to
4
select cereal (Céréales) (g. k).
To choose a dierent cooking
»
time, refer to chapter "Setting up
the cooking time".
Touch and hold the start button
5
(On/O) for 3 seconds to conrm
and start cooking (g. i).
When the cooking is nished, the
6
appliance beeps and turns into
warm keeping automatically.
9
Page 12
EN
Note
•For details about the ratio of food and
liquid, refer to the recipe booklet.
Making soup (Soupe/
Sauce)
Put food and ingredients for the
1
soup into the inner pot.
Wipe the outside of the inner pot
2
dry (g. d), and then put it in the
multicooker (g. e).
Close the lid of the multicooker
3
(g. f), and put the plug in the
power socket (g. g).
Touch the menu button (Menu) to
4
select soup (Soupe/Sauce) (g. l).
To choose a dierent cooking
»
time, refer to chapter "Setting up
the cooking time".
Touch and hold the start button
5
(On/O) for 3 seconds to conrm
and start cooking (g. i).
When the cooking is nished, the
6
appliance beeps and turns into
warm keeping automatically.
Steam (Vapeur)
Pour some water into the inner pot.
1
Put the steam tray in the inner pot,
2
put the food in a bowl, and then put
the bowl on the steam tray.
Wipe the outside of the inner pot
3
dry (g. d), and then put it in the
multicooker (g. e).
Close the lid of the multicooker
4
(g. f), and put the plug in the
power socket (g. g).
Touch the menu button (Menu) to
5
select Steam (Vapeur) (g. m).
To choose a dierent cooking
»
time, refer to chapter "Setting up
the cooking time".
Touch and hold the start button
6
(On/O) for 3 seconds to conrm
and start cooking (g. i).
When the water is brought to boil,
7
the appliance beeps, the remaining
steaming time displays on the
screen and starts counting down.
When the cooking is nished, the
8
appliance beeps and turns into
warm keeping automatically.
Note
•When steaming food, do not immerse
the steam tray in water.
•
displays on the screen before the
water/liquid is brought to boil. When the
water/liquid starts boiling, the remaining
steaming time displays on the screen.
•After the steaming is nished, use a
kitchen glove or a cloth to remove the
bowl and steam basket, as they could be
very hot.
Stew (Mijoter)
Put the food and ingredients for the
1
stew in the inner pot.
Wipe the outside of the inner pot
2
dry (g. d), and then put it in the
multicooker (g. e).
Close the lid of the multicooker
3
(g. f), and put the plug in the
power socket (g. g).
Touch the menu button (Menu) to
4
select stew (Mijoter) (g. n).
To choose a dierent cooking
»
time, refer to chapter "Setting up
the cooking time".
10
Page 13
EN
English
Touch and hold the start button
5
(On/O) for 3 seconds to conrm
and start cooking (g. i).
When the cooking is nished, the
6
appliance beeps and turns into
warm keeping automatically.
Slow cooking (Slow
cooking)
Put the food for slow cooking in the
1
inner pot.
Wipe the outside of the inner pot
2
dry (g. d), and then put it in the
multicooker (g. e).
Close the lid of the multicooker
3
(g. f), and put the plug in the
power socket (g. g).
Touch the menu button (Menu) to
4
select slow cooking (Slow cooking)
(g. o).
To choose a dierent cooking
»
time, refer to chapter "Setting up
the cooking time".
Touch and hold the start button
5
(On/O) for 3 seconds to conrm
and start cooking (g. i).
When the cooking is nished, the
6
appliance beeps and turns into
warm keeping automatically.
Baking (Four)
Note
•If you bake other food with a
temperature above 140°C, keep the lid
open.
Touch the menu button (Menu) to
4
select bake (Four) (g. p).
To choose a dierent baking
»
temperature, touch the
temperature button (Temp) rst,
and then touch the increase (+)
or decrease (-) button to select
the temperature you need.
(g. q)
To choose a dierent cooking
»
time, refer to chapter "Setting up
the cooking time".
Touch and hold the start button
5
(On/O) for 3 seconds to conrm
and start cooking (g. i).
When the cooking is nished, the
6
appliance beeps and turns into
warm keeping automatically.
Note
•If the baking temperature is set below
80°C, when the cooking is nished,
the appliance turns into standby
automatically.
•When removing the inner pot from the
multicooker after cooking, use a kitchen
glove or a cloth, as the inner pot could
be very hot.
Put the food and ingredients to
1
bake in the inner pot.
Wipe the outside of the inner pot
2
dry (g. d), and then put it in the
multicooker (g. e).
Close the lid of the multicooker
3
(g. f), and put the plug in the
power socket (g. g).
11
Page 14
EN
Roasting (Rissoler)
Frying (Frire)
Put food and ingredients into the
1
inner pot.
Wipe the outside of the inner pot
2
dry (g. d), and then put it in the
multicooker (g. e).
Close the lid of the multicooker
3
(g. f), and put the plug in the
power socket (g. g).
Touch the menu button (Menu) to
4
select roast (Rissoler) (g. r).
Touch and hold the start button
5
(On/O) for 3 seconds to conrm
and start cooking (g. i).
There are 2 stages of roasting. When
6
the rst stage (about 35 minutes)
is over, the multicooker beeps as
a reminder for you to open the lid,
and turn the food over in the inner
pot.
The remaining cooking time
»
displays on the screen.
Touch the menu button (Menu)
7
to start the second stage (about
25 minutes).
If the menu button (Menu) is not
»
touched after the rst stage is
over, the multicooker will turn into
warm keeping until the cooking
time is over.
When the cooking is nished, the
8
appliance beeps and turns into
standby automatically.
Put food and ingredients into the
1
inner pot.
Wipe the outside of the inner pot
2
dry (g. d), and then put it in the
multicooker (g. e).
Put the plug in the power socket (g.
3
).
g
Touch the menu button (Menu) to
4
select fry (Frire) (g. s).
Touch and hold the start button
5
(On/O) for 3 seconds to conrm
and start cooking (g. i).
Keep the lid open and stir the food
6
constantly with a spatula.
When the cooking is nished, the
7
appliance beeps and turns into
standby automatically.
Note
•Do not put too much cooking oil in the
inner pot to deep fry ingredients.
Making pizza (Pizza)
Put the ingredients for the pizza in
1
the inner pot.
Wipe the outside of the inner pot
2
dry (g. d), and then put it in the
multicooker (g. e).
Close the lid of the multicooker
3
(g. f), and put the plug in the
power socket (g. g).
Touch the menu button (Menu) to
4
select pizza (Pizza) (g. t).
To choose a dierent cooking
»
time, refer to chapter "Setting up
the cooking time".
12
Page 15
EN
English
Touch and hold the start button
5
(On/O) for 3 seconds to conrm
and start cooking (g. i).
When the cooking is nished, the
6
appliance beeps and turns into
warm keeping automatically.
Boiling pasta (Pâtes)
Fill the inner pot with some water.
1
Note
Note
•If you cook with frozen pizza, you can
adjust the cooking time according to your
own preference. The pizza gets browner
as the cooking time increases.
Making omelette
(Omelette)
Put the ingredients for the omelette
1
in the inner pot.
Wipe the outside of the inner pot
2
dry (g. d), and then put it in the
multicooker (g. e).
Close the lid of the multicooker
3
(g. f), and put the plug in the
power socket (g. g).
Touch the menu button (Menu) to
4
select omelette (Omelette) (g. u).
To choose a dierent cooking
»
time, refer to chapter "Setting up
the cooking time".
Touch and hold the start button
5
(On/O) for 3 seconds to conrm
and start cooking (g. i).
When the cooking is nished, the
6
appliance beeps and turns into
standby automatically.
•Do not exceed the MAX indication on
the inside of the inner pot.
Wipe the outside of the inner pot
2
dry (g. d), and then put it in the
multicooker (g. e).
Close the lid of the multicooker
3
(g. f), and put the plug in the
power socket (g. g).
Touch the menu button (Menu) to
4
select pasta (Pâtes) (g. v).
To choose a dierent cooking
»
time, refer to chapter "Setting up
the cooking time".
Touch and hold the start button
5
(On/O) for 3 seconds to conrm
and start cooking (g. i).
When the water is brought to boil,
6
the multicooker beeps as a reminder
for you to open the lid and put the
pasta in the inner pot.
After the pasta is put in the inner
7
pot, touch the menu button (Menu)
to resume the cooking process.
Keep the lid open and constantly
8
stir the pasta with a spatula.
When the cooking is nished, the
9
appliance beeps and turns into
standby automatically.
13
Page 16

EN
Boiling (Bouillir)
Fill the inner pot with some water.
1
Note
•Do not exceed the MAX indication on
the inside of the inner pot.
Wipe the outside of the inner pot
2
dry (g. d), and then put it in the
multicooker (g. e).
Close the lid of the multicooker
3
(g. f), and put the plug in the
power socket (g. g).
Touch the menu button (Menu) to
4
select boil (Bouillir) (g. w).
To choose a dierent cooking
»
time, refer to chapter "Setting up
the cooking time".
Touch and hold the start button
5
(On/O) for 3 seconds to conrm
and start cooking (g. i).
When the water is brought to boil,
6
the multicooker beeps as a reminder
for you to open the lid and put the
food in the inner pot.
After the food is put in the inner
7
pot, close the lid and touch the
menu button (Menu) to resume the
cooking process.
When the cooking is nished, the
8
appliance beeps and turns into
standby automatically.
Making beverage
(Compote)
Put the ingredients for the beverage
1
in the inner pot.
Wipe the outside of the inner pot
2
dry (g. d), and then put it in the
multicooker (g. e).
Close the lid of the multicooker
3
(g. f), and put the plug in the
power socket (g. g).
Touch the menu button (Menu) to
4
select beverage (Compote) (g. x).
To choose a dierent cooking
»
time, refer to chapter "Setting up
the cooking time".
Touch and hold the start button
5
(On/O) for 3 seconds to conrm
and start cooking (g. i).
When the cooking is nished, the
6
appliance beeps and turns into
warm keeping automatically.
Making conture
(Conture)
Put the ingredients for the conture
1
in the inner pot.
Wipe the outside of the inner pot
2
dry (g. d), and then put it in the
multicooker (g. e).
Close the lid of the multicooker
3
(g. f), and put the plug in the
power socket (g. g).
Touch the menu button (Menu) to
4
select conture (Conture) (g. y).
To choose a dierent cooking
»
time, refer to chapter "Setting up
the cooking time".
Touch and hold the start button
5
(On/O) for 3 seconds to conrm
and start cooking (g. i).
14
Page 17

EN
English
When the cooking is nished, the
6
appliance beeps and turns into
warm keeping automatically.
Making yogurt (Yaourt)
Whisk the ingredients for the yogurt
1
well and put them in the inner pot.
Wipe the outside of the inner pot
2
dry (g. d), and then put it in the
multicooker (g. e).
Close the lid of the multicooker
3
(g. f), and put the plug in the
power socket (g. g).
Touch the menu button (Menu) to
4
select yogurt (Yaourt) (g. z).
To choose a dierent cooking
»
time, refer to chapter "Setting up
the cooking time".
Touch and hold the start button
5
(On/O) for 3 seconds to conrm
and start cooking (g. i).
When the cooking is nished, the
6
appliance beeps and turns into
standby automatically.
Reheating (Réchauer)
Loosen the food and evenly
1
distribute it in the inner pot.
If needed, pour some water onto the
2
food to prevent it from becoming
too dry. The quantity of the water
depends on the amount of food.
Wipe the outside of the inner pot
3
dry (g. d), and then put it in the
multicooker (g. e).
Close the lid of the multicooker
4
(g. f), and put the plug in the
power socket (g. g).
Touch the menu button (Menu) to
5
select reheat (Réchauer) (g. {).
To choose a dierent cooking
»
time, refer to chapter "Setting up
the cooking time".
Touch and hold the start button
6
(On/O) for 3 seconds to conrm
and start cooking (g. i).
When the cooking is nished, the
7
appliance beeps and turns into
warm keeping automatically.
Manual (Manuel)
You can use the manual function to
cook food with more control over the
cooking time and temperature.
Put food and ingredients into the
1
inner pot.
Wipe the outside of the inner pot
2
dry (g. d), and then put it in the
multicooker (g. e).
Close the lid of the multicooker
3
(g. f), and put the plug in the
power socket (g. g).
Touch the menu button (Menu) to
4
select manual (Manuel) (g. |).
To choose a dierent cooking
»
temperature, touch the
temperature button (Temp) rst,
and then touch the increase (+)
or decrease (-) button to select
the temperature you need.
(g. q)
To choose a dierent cooking
»
time, refer to chapter "Setting up
the cooking time".
Touch and hold the start button
5
(On/O) for 3 seconds to conrm
and start cooking (g. i).
When the cooking is nished, the
6
appliance beeps and turns into
warm keeping automatically.
15
Page 18

EN
Note
•If you select a temperature below 80°C,
the multicooker automatically turns into
standby after the cooking process is
nished.
•If you select a temperature above 140°C,
the top lid must be open during cooking.
Multi-stage cooking
With the multi-stage cooking function,
you can set up to 9 stages of cooking
processes with dierent time and
temperature.
For example, you can set the rst stage
for 5 minutes at 160°C, the second stage
for 10 minutes at 100°C and the last
stage for 20 minutes at 80°C.
When the multicooker is at standby
1
mode, touch the multi-stage
cooking button (MyRecipe). (g. })
"1" displays on the screen.
»
Refer to chapter "Setting up the
2
cooking time" and select the
cooking time for stage 1.
To choose a dierent cooking
3
temperature, touch the temperature
button (Temp) rst, and then touch
the increase (+) or decrease (-)
button to select the temperature
you need for stage 1. (g. ~)
Touch the multi-stage cooking
4
button (MyRecipe) again and move
to stage 2. (g. )
"2" displays on the screen.
»
Set the cooking time and
5
temperature for stage 2.
Repeat the above steps until you
6
have set all the stages you need,
and then touch and hold the start
button (On/O) for 3 seconds to
conrm and start cooking (g. i).
MyRecipe (MyRecipe)
Saving MyRecipe settings
Within 10 minutes after the stage
cooking is nished, you can save the
cooking stages in "MyRecipe".
Touch and hold (MyRecipe) for
1
3 seconds. (g. €)
“F1” displays on the screen.
»
Touch the increase (+) or decrease
2
(-) button to select one of the slots:
F1, F2, F3, F4 or F5 (g. ).
Touch the multi-stage cooking
3
button (MyRecipe) to conrm and
save the cooking stages to the
designated slot (g. ‚).
Note
•You can save up to 5 multi-stage
cooking recipes in MyRecipe, and they
are saved as F1, F2, F3, F4 an F5.
•To replace one of the current multistage cooking recipes with a new setting,
follow the same steps above to do so.
When you are at step 2, make sure that
you select a slot with the multi-stage
cooking recipe you no longer need, and
then touch the multi-stage cooking
button (MyRecipe) to conrm and save
the new setting to the same slot.
•The total cooking time for all the cooking
stages has a maximum limitation of 24
hours.
16
Page 19

EN
English
Selecting already saved
MyRecipe (
At standby mode, touch and hold
1
the multi-stage cooking button
(MyRecipe) for 3 seconds. (g. €)
“F1” displays on the screen.
»
Touch the increase (+) or decrease
2
(-) button to select one of previously
saved MyRecipe settings: F1, F2, F3,
F4 or F5 (g. ).
Touch and hold the start button
3
(On/O) for 3 seconds to conrm
and start cooking (g. i).
MyRecipe
) settings
Warm keeping
The multicooker provides you with easy
control over the keep-warm mode.
•
After you have selected the cooking
function using the menu button
(Menu), if you start the cookign
process directly, the keep-warm
indicator will light up. After the
cooking is nished, the multicooker
will switch to keep-warm mode
directly.
•
After you have selected the cooking
function using the menu button
(Menu), if you touch the keep-warm
button (Chaud) rst, and then start
the cooking process, the keep-warm
indicator will be o. After the cooking
is nished, the multicooker will be in
standby mode.
Setting up the cooking
time
You can adjust the cooking time for
some menus. Refer to the chapter
"Menus Overview" and see the cooking
time regulating range of dierent menus.
Select the cooking menu you need.
1
Touch the cooking time button
2
(Temps de cuisson) (g. ƒ).
The hour unit ashes on the
»
screen.
Touch the increase (+) or decrease
3
(-) button to set the hour unit
(g. „).
After the hour unit is set, touch the
4
cooking time button (Temps de
cuisson) again (g. …).
The minute unit ashes on the
»
screen.
Touch the increase (+) or decrease
5
(-) button to set the minute unit
(g. †).
Touch and hold the start button
6
(On/O) for 3 seconds to conrm
the cooking time and start cooking
(g. i).
Note
•At standby mode, you can touch the
keep-warm button (Chaud) to switch to
warm keeping.
•In keep-warm mode, you can touch the
keep-warm button (Chaud) to switch to
standby.
17
Page 20
EN
Preset time for delayed
cooking
Setting up the WiFi
connection
You can set the preset cooking timefor
some menus. Refer to the chapter
"Menus Overview" and see the preset
time of dierent menus.
Select the cooking menu you need.
1
Touch and hold the preset
2
time button (Départ diéré) for
3 seconds. (g. ‡)
The hour unit ashes on the
»
screen.
Touch the increase (+) or decrease
3
(-) button to set the hour unit
(g. ˆ).
After the hour unit is set, touch
4
the preset time button (Temps de
cuisson) again (g. ‰).
Touch the increase (+) or decrease
5
(-) button to set the minute unit
(g. Š).
Touch and hold the start button
6
(On/O) for 3 seconds to conrm
the preset time and start cooking
(g. i).
Note
•The cooking process will be nished
when the preset time has elapsed. For
example, if you set a preset time of 8
hours, the dishes will be ready 8 hours
later.
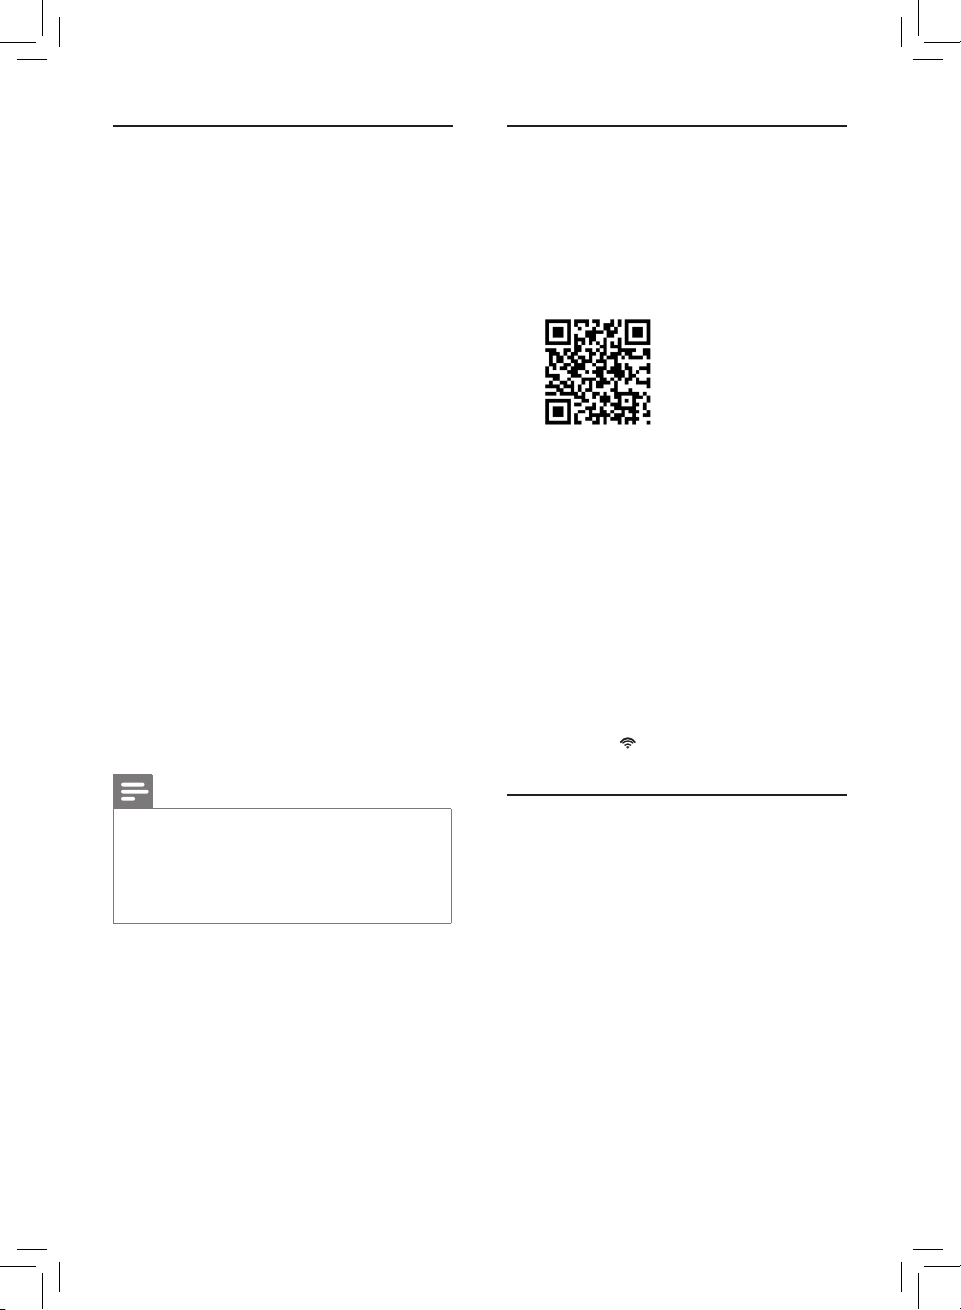
Download the Philips “Multicooker”
1
App to your smart phone from the
App Store, or by scanning the QR
code.
Launch the App on your smart
2
phone.
Plug in and switch on the
3
multicooker.
Touch and hold the WiFi button
4
until the WiFi indicator blinks
orange. (g. ‹)
Follow the onscreen instructions in
5
the App to connect the multicooker
to your smart phone.
When the multicooker is connected
6
to your smart phone, the WiFi
indicator will be continuously lit
with the color blue.
Setting up the child lock
To protect your child from using the
multicooker or avoid any misoperation,
you can activate the child lock during a
cooking process.
•
Touch and hold the menu button
(Menu) for 3 seconds to activate the
child lock (g. Œ).
The child lock icon lights up on
»
the display.
•
To unlock, touch and hold the menu
button (Menu) for 3 seconds again
(g. ).
The child lock icon lights o.
»
18
Page 21
EN
English
6 Cleaning and
Maintenance
Note
•Unplug the multicooker and wait until
it has cooled down suciently before
cleaning.
Interior
7 Recycling
- This symbol means that this
product shall not be disposed
of with normal household waste
(2012/19/EU).
- Follow your country’s rules
for the separate collection
of electrical and electronic
products. Correct disposal helps
prevent negative consequences for the
environment and human health.
Inside of the top lid and the main body;
the heating element::
•
Wipe with a wrung out cloth.
•
Make sure to remove all the food
residues stuck to the multicooker.
Exterior
Surface of the top lid and outside of the
main body:
•
Wipe with a cloth damped with
soap water.
•
Only use soft and dry cloth to wipe
the control panel.
•
Make sure to remove all the food
residues around the control panel.
Accessories
Inner pot, detachable steam tray, rice
scoop, soup ladle and detachable
steam vent cap:
•
Soak in hot water and clean with
sponge.
8 Guarantee and
service
If you need service or information, or
if you have a problem, visit the Philips
website at www.philips.com or contact
the Philips Customer Care Center in your
country. You can nd its phone number
in the worldwide guarantee leaet. If
there is no Customer Care Center in your
country, go to your local Philips dealer.
19
Page 22
EN
9 Specifications
Model Number HD3198
Rated power output 860W
Rated capacity 5.0L
WiFi router 802.11 b/g/n 2.4GHz
Compatible with iPhone 5 or higher.
Requires iOS 7 or higher.
The operating frequency bands of
WIFI module are from 2400 MHz to
2483.5MHz.
The maximum RF output power is
100mW / 20dBm.
20
Page 23

EN
English
10 Troubleshooting
If you encounter problems when using this multicooker, check the following points
before requesting service. If you cannot solve the problem, contact the Philips
Consumer Care Center in your country.
Problem Solution
The light on the button
does not go on.
The display does not
function.
The rice is not cooked. There is not enough water. Add water according to the
There is a connection problem. Check if the power cord is
connected to the multicooker properly and if the plug is
inserted rmly into the power outlet.
The light is defective. Take the appliance to your Philips
dealer or a service center authorized by Philips.
The multicooker is not connected to the power supply.
If there is no power supply, the power failure backup
function does not work and the display does not function.
The battery for the display runs out of power. Take the
appliance to your Philips dealer or a service center
authorized by Philips to have the battery replaced.
scale on the inside of the inner pot.
You did not touch and hold the start button (On/O) for 3
seconds.
Make sure that there is no foreign residue on the heating
element and the outside of the inner pot before switching
the multicooker on.
The heating element is damaged, or the inner pot is
deformed. Take the multicooker to your Philips dealer or a
service center authorized by Philips.
The rice is too dry and
not well cooked.
The multicooker does
not switch to the
keep-warm mode
automatically.
Add more water to the rice, and cook for a bit longer.
You touched the keep-warm button (Chaud) before
starting the cooking process. In this case the multicooker
will be in standby mode after the cooking is nished. Refer
to the chapter "Warm Keeping" and learn more about the
warm keeping function.
21
Page 24

EN
Problem Solution
The temperature control is defective. Take the appliance
to your Philips dealer or a service center authorized by
Philips.
The rice is scorched. You have not rinse the rice properly. Rinse the rice until
the water runs clear.
Water spills out of the
multicooker during
cooking.
I cannot get to the
desired cooking
function.
Rice smells bad after
cooking
The WiFi indicator
blinks blue and orange.
Error message (E1, E2,
E3, or E4) appears on
the display.
Make sure that you add water to the level indicated on
the scale inside the inner pot that corresponds to the
number of cups of rice used.
Touch the menu button (Menu) repeatedly to select the
desired function as shown by the indicator.
Clean the inner pot with some washing detergent and
warm water.
After cooking, make sure the steam vent cap, inner lid and
inner pot is cleaned thoroughly.
The WiFi connection has failed. Unplug the multicooker, and
plug it in after 15 seconds. Touch and hold the WiFi button
on the Multicooker until it blinks orange and repeat the WiFi
set up steps from the beginning.
There has been a power failure during cooking. Take
the appliance to your Philips dealer or a service center
authorized by Philips.
22
Page 25

FR
Français
Contenu
1 Votre cuiseur multifonction 24
2 Important 24
Sécurité 24
Champs électromagnétiques
(CEM) 29
3 Contenu de l'emballage
(g. 1) 29
4 Vue d'ensemble (g. 2) 30
Présentation du produit 30
Aperçu des commandes 30
Présentation des menus 31
5 Utilisation du cuiseur
multifonction (g. 3) 32
Avant la première utilisation 32
Faire cuire du riz 32
Faire cuire du risotto 33
Faire cuire des céréales 33
Préparer de la soupe ou de
la sauce 34
Vapeur 34
Mijoter 35
Slow cooking (Cuisson lente) 35
Faire cuire au four 35
Faire rissoler 36
Faire frire 37
Faire des pizzas 37
Faire une omelette 37
Faire cuire des pâtes 38
Faire cuire à l'eau bouillante 38
Faire de la purée de fruits 39
Faire des contures 39
Faire des yaourts 39
Faire réchauer 40
Manuel 40
Cuisson en plusieurs étapes 41
MyRecipe 41
Mode de maintien au chaud 42
Le réglage du temps de
cuisson 42
Programmation pour une
cuisson ultérieure 43
Après avoir conguré la
connexion WiFi 43
Conguration de la fonction
verrouillage enfant 44
6 Nettoyage et entretien 44
Intérieur 44
Extérieur 44
Accessoires 44
7 Recyclage 45
8 Garantie et service 45
9 Caractéristiques techniques 45
10 Dépannage 46
23
Page 26

FR
1 Votre cuiseur
multifonction
Félicitations pour votre achat et
bienvenue dans le monde de Philips !
Pour proter pleinement de l'assistance
oerte par Philips, enregistrez votre
appareil à l'adresse suivante :
www.philips.com/welcome.
2 Important
Sécurité
Lisez attentivement ce mode d'emploi
avant d'utiliser l'appareil et conservezle pour un usage ultérieur.
Danger
• Ne plongez pas le cuiseur
multifonction dans l'eau
et ne le rincez pas sous le
robinet.
• L'appareil ne doit pas être
plongé dans l'eau.
Avertissement
• Cet appareil ne doit
pas être utilisé par des
enfants âgés de 0 à 8 ans.
Cet appareil peut être
utilisé par des enfants
âgés de 8 ans ou plus à
condition qu'ils soient sous
surveillance permanente
ou qu'ils aient reçu des
instructions quant à
l'utilisation sécurisée de
l'appareil et qu'ils aient pris
connaissance des dangers
encourus.
• Cet appareil peut être
utilisé par des personnes
dont les capacités
physiques, sensorielles
ou intellectuelles sont
réduites ou des personnes
manquant d'expérience
et de connaissances,
à condition que ces
personnes soient sous
surveillance ou qu'elles
aient reçu des instructions
quant à l'utilisation
sécurisée de l'appareil
et qu'elles aient pris
connaissance des dangers
encourus.
• Tenez l'appareil et son
cordon hors de portée des
enfants de moins de 8 ans.
• Le nettoyage et l'entretien
ne doivent pas être
réalisés par des enfants
sauf s'ils sont âgés de
plus de 8 ans et sous
surveillance.
• Les enfants ne doivent pas
jouer avec l'appareil.
• Les appareils de cuisson
doivent être positionnés
de manière stable avec
les poignées (le cas
échéant) positionnées de
façon à éviter tout risque
24
Page 27

FR
Français
d'éclaboussure de liquides
chauds.
• Cet appareil est destiné
à un usage domestique
ou pour une utilisation
similaire comme :
• cuisine destinée aux
employés dans les
entreprises, magasins et
autres environnements
de travail ;
• fermes ;
• utilisation par les
clients dans les hôtels,
motels et autres
environnements
résidentiels ;
• chambres d'hôte.
• Si le cordon d'alimentation
est endommagé, veillez à
ce qu'il soit remplacé par
Philips, un Centre Service
Agréé ou un technicien
qualié an d'éviter tout
accident.
• Veillez à éviter toute
projection sur le câble
d'alimentation an de
prévenir tout risque.
• Suivez toujours les
instructions et utilisez
l'appareil à bon escient
pour éviter tout risque de
blessure.
• Attention: Après
utilisation, la surface de la
résistance chauante reste
chaude pendant un certain
temps.
• L'appareil n'est pas
destiné à être utilisé avec
un minuteur externe ou
un système de contrôle
séparé.
• Pour respecter les
exigences relatives
à l'exposition au
rayonnement RF, cet
appareil doit être utilisé
à une distance minimale
de 20 centimètres de
toute personne lorsque le
routeur Wi-Fi est allumé.
L'antenne utilisée pour
l'émetteur ne doit pas être
installée en parallèle avec
une autre antenne ou un
autre émetteur.
• Avant de brancher le
cuiseur multifonction,
vériez si la tension
indiquée sur l'appareil
correspond à la tension
secteur locale.
• Vériez si la soupape de
vapeur est libre avant
chaque cuisson et si elle
se bloque pendant la
cuisson.
• Si la soupape de vapeur
est bloquée, la pression
augmente dans l'appareil
et le jet de vapeur peut
blesser et brûler les
utilisateurs.
• Lors de la cuisson,
de la vapeur ne peut
s'échapper que de la
soupape de vapeur. Si
25
Page 28

FR
de la vapeur commence
à s'échapper entre le
couvercle supérieur et le
corps principal, éteignez
immédiatement le cuiseur
multifonction. Vériez si
la bague d'étanchéité est
en place, en bon état et
exempte d'objet étranger/
de résidus d'aliments. S'il
y a des objets étrangers/
résidus d'aliments,
nettoyez-les. S'il n'y a
aucun objet étranger,
renvoyez-le au centre de
service pour vérication et
remplacement de la bague
d'étanchéité si nécessaire.
Notez que la durée de vie
de la bague d'étanchéité
est limitée et dépend de
la fréquence de cuisson et
d'entretien.
• Pendant la cuisson, de
l'eau ou des aliments
liquides ne peuvent pas
s'échapper de la cuve.
La seule exception est
lorsque de l'eau se
condense autour de la
soupape de vapeur et
qu'une petite quantité
de condensats d'eau
fuit à l'arrière du cuiseur
multifonction si le
couvercle supérieur était
ouvert pendant la cuisson.
Elle peut facilement être
essuyée à l'aide d'un
chion propre et une
cuisson en continu. Si
de l'eau/des aliments
liquides s'écoulent
directement de la soupape
de vapeur ou entre le
couvercle supérieur et le
corps principal, éteignez
immédiatement le cuiseur
multifonction. Vériez si
la quantité d'eau dans
la cuve ne dépasse pas
la limite autorisée, si
la quantité d'aliments
correspond à la recette,
si le mode de cuisson
et la sélection de temps
sont corrects et si le
cuiseur multifonction est
utilisé conformément aux
instructions fournies dans
le mode d'emploi. Vériez
si la bague d'étanchéité
est en place, en bon
état et exempte d'objet
étranger/de résidus
d'aliments. S'il y a des
objets étrangers/résidus
d'aliments, nettoyezles. S'il n'y a aucun objet
étranger et si le cuiseur
multifonction est utilisé
conformément aux
instructions du mode
d'emploi, retournez-le
au centre de service pour
vérication et réparation si
nécessaire.
26
Page 29

FR
Français
• Ne branchez le cuiseur
multifonction que sur
une prise secteur reliée
à la terre. Assurezvous toujours que la
che d'alimentation est
correctement insérée dans
la prise secteur.
• N'utilisez pas l'appareil
si la prise, le cordon
d'alimentation, la cuve, la
bague d'étanchéité ou le
corps est endommagé.
• Ne laissez pas le cordon
d'alimentation pendre
de la table ou du plan de
travail sur lequel le cuiseur
multifonction est posé.
• Assurez-vous que
l'élément chauant, le
capteur de température et
l'extérieur de la cuve sont
bien propres et secs avant
de brancher l'appareil sur
la prise secteur.
• Ne branchez pas le
cuiseur multifonction
et ne touchez pas les
boutons du panneau de
commande si vos mains
sont mouillées.
• Ne versez pas une trop
grande quantité d'huile de
cuisson dans la cuve pour
frire des ingrédients.
Attention
• N'utilisez jamais
d'accessoires ou de
pièces d'un autre
fabricant ou n'ayant
pas été spéciquement
recommandés par Philips.
L'utilisation de ce type
d'accessoires ou de pièces
entraîne l'annulation de la
garantie.
• N'exposez pas le cuiseur
multifonction à des
températures élevées,
ne le placez pas sur une
plaque chauante ou une
cuisinière en cours de
fonctionnement ou encore
chaude.
• N'exposez pas le cuiseur
multifonction directement
aux rayons du soleil.
• Posez le cuiseur
multifonction sur une
surface horizontale, plane
et stable.
• Placez toujours la
cuve dans le cuiseur
multifonction avant de
brancher l'appareil sur
la prise secteur et de
l'allumer.
• Ne placez jamais la cuve
directement sur une
amme pour préparer des
plats.
• N'utilisez pas la cuve si elle
est déformée.
27
Page 30

FR
• En cours de
fonctionnement, les
surfaces accessibles
peuvent être très chaudes.
Soyez particulièrement
prudent(e) lorsque
vous touchez le cuiseur
multifonction.
• Faites attention à la vapeur
brûlante s'échappant des
évents à vapeur pendant
la cuisson et à la vapeur
s'échappant du cuiseur
multifonction lorsque
vous ouvrez le couvercle.
Éloignez vos mains et
votre visage du cuiseur
multifonction pour éviter
tout contact avec la
vapeur.
• Pendant et après la
cuisson, la cuve et le
cuiseur vapeur peuvent
être chauds et lourds.
• Ne soulevez pas et ne
déplacez pas le cuiseur
multifonction en cours
d'utilisation.
• Pour éviter tout
débordement, ne
dépassez pas le niveau
d'eau maximal indiqué
dans la cuve.
• Ne placez pas les
ustensiles à l'intérieur de
la cuve durant la cuisson,
le maintien au chaud ou le
réchauage.
• Utilisez uniquement les
ustensiles de cuisine
fournis. Évitez d'utiliser des
ustensiles coupants.
• Il est déconseillé de
cuisiner des crustacés
et des coquillages an
d'éviter les rayures. Ôtez
les coquilles et carapaces
avant la cuisson.
• N'insérez pas d'objet
métallique ou de corps
étranger par les évents à
vapeur.
• Ne placez pas d'objet
magnétique sur le
couvercle. N'utilisez pas
le cuiseur multifonction
à proximité d'un objet
magnétique.
• Laissez toujours refroidir le
cuiseur multifonction avant
de le nettoyer ou de le
déplacer.
• Nettoyez le cuiseur
multifonction après
chaque utilisation. Ne
nettoyez pas le cuiseur
multifonction au lavevaisselle.
• Débranchez toujours le
cuiseur multifonction en
cas de longue période
sans utilisation.
28
Page 31

FR
Français
• Si le cuiseur multifonction
est employé de manière
inappropriée, à des ns
professionnelles ou semiprofessionnelles, ou en
non-conformité avec les
instructions de ce mode
d'emploi, la garantie est
caduque et Philips décline
toute responsabilité
concernant les dégâts
occasionnés.
3 Contenu de
l'emballage
(fig. 1)
Unité principale du cuiseur
a
multifonction
b Cordon d'alimentation
c Bol gradué
d Plateau de cuisson vapeur
Champs
électromagnétiques
(CEM)
Cet appareil Philips est conforme
à toutes les normes et à tous les
règlements applicables relatifs
à l'exposition aux champs
électromagnétiques.
e Mesure à riz
f Louche
g Mode d'emploi
h Livret de recettes
i Carte de garantie
29
Page 32

FR
4 Vue d'ensemble
(fig. 2)
Présentation du produit
a
Couvercle supérieur
b
Cuve
Bouton de déverrouillage du
c
couvercle
d
Panneau de commande
e
Résistance chauante
f
Corps de l'appareil
g
Prise secteur
h
Poignée du cuiseur
i
Indications du niveau d'eau
Capuchon amovible des évents
j
à vapeur
k
Anneau d'étanchéité
Aperçu des commandes
Bouton de maintien au chaud
l
Bouton de programmation du
m
temps de cuisson
Bouton Menu
n
Thermostat
o
Fonctions de préparation
p
Voyant WiFi
q
Écran
r
Bouton de diminution
s
Bouton de cuisson en plusieurs
t
étapes et MyRecipe
Bouton d'augmentation
u
Bouton marche / arrêt
v
30
Page 33
FR
Français
Présentation des menus
Plage de
Temps de
cuisson par
Menus
défaut
Riz 40 min / 1-24 h 130-140 °C /
Risotto 40 min / 1-24 h 130-140 °C /
Céréales 10 min 5 min - 2 h 1-24 h 90-100 °C /
Soupe/Sauce 1 h 20 min-4 h 1-24 h 90-100 °C /
Vapeur 20 min 5 min - 2 h 1-24 h 100 °C /
Mijoter 1 h 20 min - 10 h 1-24 h 95°C /
Cuisson lente
5 heures 1-15 h 1-24 h 80 °C /
Four 45 min 20 min - 2 h / 130 °C 40-160°C
Rissoler 1 h / / 130 °C /
Frire 15 min 5-60 min / 145-160°C /
Pizza 35 min 10-60 min / 130 °C /
Omelette 10 min 5-20 min / 120°C /
Pâtes 4 min 1-15 min / 100 °C /
Bouillir 4 min 1-15 min / 100 °C /
Compote 10 min 5-40 min 1-24 h 100 °C /
Conture 6 h 4-10 h 1-24 h 90-100 °C /
Yaourt 8 h 6-12 h 1-24 h 40 ±3 °C /
Réchauer 25 min 5-60 min / 85 °C /
Manuel 2 h 5 min - 10 h 1-24 h 100 °C 30-160°C
Cuisson en
plusieurs
étapes
(MyRecipe) 10 min 5 min -15 h / 120°C 30-160°C
réglage du
temps de
cuisson
Durée
prédénie
Température
de cuisson
par défaut
Plage de
réglage du
thermostat
Note
• Vous pouvez régler la température de cuisson en mode four ou en mode manuel. La
température peut être réglée de 40°C à 160°C en mode four et de 30°C à 60°C en mode
manuel.
• Après que la cuisson a démarré, vous pouvez toucher le bouton Marche/Arrêt (On/O) pour
désactiver le processus de cuisson en cours. Le cuiseur multifonction passe alors en mode
veille.
31
Page 34
FR
5 Utilisation
du cuiseur
multifonction
(fig. 3)
Conseil
• Pour sélectionner un menu particulier,
touchez le bouton Menu à plusieurs
reprises. Vous pouvez également
toucher le bouton Menu une seule
fois, et ensuite toucher le bouton
d'augmentation (+) ou de diminution (-)
pour obtenir le même résultat.
Note
• Pour l'ensemble des menus, ne
dépassez pas l'indication MAX à
l'intérieur de la cuve lorsque vous la
remplissez d'aliments, de liquides
ou d'ingrédients, car ceci pourrait
provoquer un débordement lors de la
cuisson.
• Le temps de cuisson ne s'ache pas
directement depuis le début pour le riz
et le risotto. s'ache sur l'écran
pendant pratiquement toute la durée de
la cuisson, car le cuiseur multifonction
doit détecter la quantité de liquide ou le
volume des ingrédients utilisés lors de la
phase de préparation initiale. Lorsque le
cuiseur multifonction détecte le temps
précis nécessaire à la cuisson, le temps
de cuisson restant s'ache sur l'écran.
Pour les réglages Céréales, Vapeur,
Soupe/Sauce, Conture, Compote,
Bouillir et Pâtes, apparaît sur
l'acheur avant que l'eau/le liquide soit
porté(e) à ébullition. Lorsque l'eau/le
liquide commence à bouillir, le temps de
cuisson déni apparaît sur l'acheur.
• Veuillez vous reporter au livret de
recettes pour obtenir plus de précisions
sur la cuisson de chaque menu.
• Dans un délai de 30 secondes après le
branchement du cuiseur multifonction,
vous pouvez restaurer les paramètres
par défaut du cuiseur multifonction, y
compris le module Wi-Fi. Pour ce faire,
touchez « + » pendant 5 à 10 secondes
et « --:-- » apparaît sur l'acheur.
Toutes les recettes enregistrées et la
connexion Wi-Fi précédente seront
perdues après la réinitialisation.
Avant la première
utilisation
1 Retirez tous les accessoires de la
cuve et ôtez l'emballage de cette
dernière.
2 Nettoyez soigneusement tous les
éléments du cuiseur multifonction
avant la première utilisation (voir le
chapitre « Nettoyage et entretien »).
Note
• Séchez bien tous les éléments avant
d'utiliser le cuiseur multifonction.
Faire cuire du riz
Note
• Si la tension de la zone dans laquelle
vous vivez est instable, il est possible
que les aliments débordent du cuiseur
multifonction.
• Une fois que la cuisson est terminée,
mélangez le riz et décollez-le
immédiatement an d'enlever toute
humidité excessive pour un riz moelleux.
• En fonction des conditions de cuisson,
la portion inférieure du riz peut brunir
légèrement.
32
Page 35
FR
Français
1 Mesurez le riz à l'aide de la mesure
graduée fournie (g. a).
2 Rincez le riz, mettez-le dans la cuve
et remplissez cette dernière avec de
l'eau (g. b).
Note
Note
• Cet appareil maintient au chaud
pendant 12 heures ; ensuite, il émet un
signal sonore et entame un processus
de refroidissement.
• Pour obtenir plus de précisions sur la
quantité de riz et d'eau nécessaire,
reportez-vous au livret de recettes.
3 Touchez le bouton de
déverrouillage pour ouvrir le
couvercle (g. c).
4 Essuyez la partie externe de la cuve
(g. d), et placez-la dans le cuiseur
multifonction (g. e).
Note
• Assurez-vous que la cuve soit
directement en contact avec la
résistance chauante.
• Assurez-vous que l'extérieur de la cuve
soit bien propre et sec, et qu'il n'y ait
aucun corps étranger sur la résistance
chauante.
5 Fermez le couvercle du cuiseur
multifonction (g. f), et branchez
le cordon d'alimentation sur la prise
secteur (g. g).
6 Touchez le bouton Menu et
sélectionnez le programme Riz
(g. h).
7 Maintenez le bouton Marche/
Arrêt (On/O) enfoncé pendant
3 secondes pour conrmer et
démarrer la cuisson (g. i).
8 Lorsque la cuisson est terminée,
l'appareil émet un signal
sonore et maintient au chaud
automatiquement.
Faire cuire du risotto
1 Dans la cuve, mettez les ingrédients
nécessaires à la préparation du
risotto.
2 Essuyez la partie externe de la cuve
(g. d), et placez-la dans le cuiseur
multifonction (g. e).
3 Fermez le couvercle du cuiseur
multifonction (g. f), et branchez
le cordon d'alimentation sur la prise
secteur (g. g).
4 Touchez le bouton Menu et
sélectionnez le programme Risotto
(g. j).
5 Maintenez le bouton Marche/
Arrêt (On/O) enfoncé pendant
3 secondes pour conrmer et
démarrer la cuisson (g. i).
6 Lorsque la cuisson est terminée,
l'appareil émet un signal
sonore et maintient au chaud
automatiquement.
Faire cuire des céréales
1 Mettez les ingrédients nécessaires à
la préparation des céréales dans la
cuve et mélangez un peu.
2 Essuyez la partie externe de la cuve
(g. d), et placez-la dans le cuiseur
multifonction (g. e).
3 Fermez le couvercle du cuiseur
multifonction (g. f), et branchez
le cordon d'alimentation sur la prise
secteur (g. g).
33
Page 36
FR
4 Touchez le bouton Menu et
sélectionnez le programme
Céréales (g. k).
» Pour sélectionner un temps de
cuisson diérent, reportez-vous
au chapitre « Réglage du temps
de cuisson ».
5 Maintenez le bouton Marche/
Arrêt (On/O) enfoncé pendant
3 secondes pour conrmer et
démarrer la cuisson (g. i).
6 Lorsque la cuisson est terminée,
l'appareil émet un signal
sonore et maintient au chaud
automatiquement.
Note
• Pour obtenir plus de précisions sur la
quantité de nourriture ou de liquide
nécessaire, reportez-vous au livret de
recettes.
Préparer de la soupe ou
de la sauce
1 Dans la cuve, mettez les aliments
et les ingrédients nécessaires à la
préparation de la soupe ou de la
sauce.
2 Essuyez la partie externe de la cuve
(g. d), et placez-la dans le cuiseur
multifonction (g. e).
3 Fermez le couvercle du cuiseur
multifonction (g. f), et branchez
le cordon d'alimentation sur la prise
secteur (g. g).
4 Touchez le bouton Menu et
sélectionnez le programmeSoupe/
Sauce (g. l).
» Pour sélectionner un temps de
cuisson diérent, reportez-vous
au chapitre « Réglage du temps
de cuisson ».
5 Maintenez le bouton Marche/
Arrêt (On/O) enfoncé pendant
3 secondes pour conrmer et
démarrer la cuisson (g. i).
6 Lorsque la cuisson est terminée,
l'appareil émet un signal
sonore et maintient au chaud
automatiquement.
Vapeur
1 Versez un peu d'eau dans la cuve.
2 Placez le plateau de cuisson vapeur
dans la cuve, mettez les aliments
dans un bol et placez le bol dans le
plateau de cuisson vapeur.
3 Essuyez la partie externe de la cuve
(g. d), et placez-la dans le cuiseur
multifonction (g. e).
4 Fermez le couvercle du cuiseur
multifonction (g. f), et branchez
le cordon d'alimentation sur la prise
secteur (g. g).
5 Appuyez sur le bouton Menu et
sélectionnez Vapeur (g. m).
» Pour sélectionner un temps de
cuisson diérent, reportez-vous
au chapitre « Réglage du temps
de cuisson ».
6 Maintenez le bouton Marche/
Arrêt (On/O) enfoncé pendant
3 secondes pour conrmer et
démarrer la cuisson (g. i).
7 Lorsque l'eau est portée à
ébullition, l'appareil émet un
signal sonore, le temps de cuisson
restant apparaît sur l'acheur et le
décompte commence.
8 Lorsque la cuisson est terminée,
l'appareil émet un signal
sonore et maintient au chaud
automatiquement.
34
Page 37

FR
Français
Note
• Lorsque vous cuisez à la vapeur, ne
plongez pas le plateau de cuisson
vapeur dans l'eau.
• apparaît sur l'acheur avant que
l'eau/le liquide soit porté(e) à ébullition.
Lorsque l'eau/le liquide commence
à bouillir, le temps de cuisson restant
apparaît sur l'acheur.
• Lorsque la cuisson à la vapeur est
terminée, utilisez un gant de cuisine ou
un torchon pour retirer le bol et le panier
vapeur car ces derniers peuvent être
brûlants.
Mijoter
1 Dans la cuve, placez les aliments
et les ingrédients prévus pour ce
programme.
2 Essuyez la partie externe de la cuve
(g. d), et placez-la dans le cuiseur
multifonction (g. e).
3 Fermez le couvercle du cuiseur
multifonction (g. f), et branchez
le cordon d'alimentation sur la prise
secteur (g. g).
4 Touchez le bouton Menu et
sélectionnez la fonction Mijoter
(g. n).
» Pour sélectionner un temps de
cuisson diérent, reportez-vous
au chapitre « Réglage du temps
de cuisson ».
5 Maintenez le bouton Marche/
Arrêt (On/O) enfoncé pendant
3 secondes pour conrmer et
démarrer la cuisson (g. i).
6 Lorsque la cuisson est terminée,
l'appareil émet un signal
sonore et maintient au chaud
automatiquement.
Slow cooking (Cuisson
lente)
1 Mettez les ingrédients pour cuisson
lente dans la cuve.
2 Essuyez la partie externe de la cuve
(g. d), et placez-la dans le cuiseur
multifonction (g. e).
3 Fermez le couvercle du cuiseur
multifonction (g. f), et branchez
le cordon d'alimentation sur la prise
secteur (g. g).
4 Touchez le bouton Menu et
sélectionnez la fonction Cuisson
lente (g. o).
» Pour sélectionner un temps de
cuisson diérent, reportez-vous
au chapitre « Réglage du temps
de cuisson ».
5 Maintenez le bouton Marche/
Arrêt (On/O) enfoncé pendant
3 secondes pour conrmer et
démarrer la cuisson (g. i).
6 Lorsque la cuisson est terminée,
l'appareil émet un signal
sonore et maintient au chaud
automatiquement.
Faire cuire au four
1 Dans la cuve, mettez les aliments et
les ingrédients destinés à être cuits
au four.
2 Essuyez la partie externe de la cuve
(g. d), et placez-la dans le cuiseur
multifonction (g. e).
3 Fermez le couvercle du cuiseur
multifonction (g. f), et branchez
le cordon d'alimentation sur la prise
secteur (g. g).
35
Page 38
FR
Note
• Si vous cuisez d'autres aliments à une
température supérieure à 140 °C, laissez
le couvercle ouvert.
4 Touchez le bouton Menu et
sélectionnez la fonction Four
(g. p).
» Pour sélectionner une
température de cuisson au four
diérente, touchez tout d'abord
le bouton de température
(Temp), puis touchez le bouton
d'augmentation (+) ou de
diminution (-) pour sélectionner
la température souhaitée.
(g. q)
» Pour sélectionner un temps de
cuisson diérent, reportez-vous
au chapitre « Réglage du temps
de cuisson ».
5 Maintenez le bouton Marche/
Arrêt (On/O) enfoncé pendant
3 secondes pour conrmer et
démarrer la cuisson (g. i).
6 Lorsque la cuisson est terminée,
l'appareil émet un signal
sonore et maintient au chaud
automatiquement.
Note
• Si la température de cuisson est
inférieure à 80 °C, lorsque la cuisson
est terminée, l'appareil se met
automatiquement en veille.
• Après la cuisson, lorsque vous sortez la
cuve du cuiseur multifonction, utilisez
un gant de cuisine ou un torchon car la
cuve risque d'être brûlante.
Faire rissoler
1 Mettez les ingrédients dans la cuve.
2 Essuyez la partie externe de la cuve
(g. d), et placez-la dans le cuiseur
multifonction (g. e).
3 Fermez le couvercle du cuiseur
multifonction (g. f), et branchez
le cordon d'alimentation sur la prise
secteur (g. g).
4 Appuyez sur le bouton Menu et
sélectionnez la fonction Rissoler
(g. r).
5 Maintenez le bouton Marche/
Arrêt (On/O) enfoncé pendant
3 secondes pour conrmer et
démarrer la cuisson (g. i).
6 Rissoler comporte 2 étapes.
Lorsque la première étape (environ
35 minutes) est terminée, le cuiseur
multifonction émet un signal sonore
pour vous rappeler que vous devez
ouvrir le couvercle et mélanger les
aliments qui se trouvent dans la
cuve.
» Le temps de cuisson restant
apparaît sur l'acheur.
7 Touchez le bouton Menu pour
lancer la deuxième étape (environ
25 minutes).
» Si le bouton Menu n'est pas
touché à la n de la première
étape, le cuiseur multifonction
maintiendra les aliments au
chaud jusqu'à la n du temps de
cuisson.
8 Lorsque la cuisson est terminée,
l'appareil émet un signal sonore et
se met automatiquement en veille.
36
Page 39
FR
Français
Faire frire
1 Mettez les ingrédients dans la cuve.
2 Essuyez la partie externe de la cuve
(g. d), et placez-la dans le cuiseur
multifonction (g. e).
3 Branchez le cordon d'alimentation
sur la prise secteur (g. g).
4 Touchez le bouton Menu et
sélectionnez la fonction Frire
(g. s).
5 Maintenez le bouton Marche/
Arrêt (On/O) enfoncé pendant
3 secondes pour conrmer et
démarrer la cuisson (g. i).
6 Laissez le couvercle ouvert et
mélangez les aliments sans arrêt
avec une spatule.
7 Lorsque la cuisson est terminée,
l'appareil émet un signal sonore et
se met automatiquement en veille.
» Pour sélectionner un temps de
cuisson diérent, reportez-vous
au chapitre « Réglage du temps
de cuisson ».
5 Maintenez le bouton Marche/
Arrêt (On/O) enfoncé pendant
3 secondes pour conrmer et
démarrer la cuisson (g. i).
6 Lorsque la cuisson est terminée,
l'appareil émet un signal
sonore et maintient au chaud
automatiquement.
Note
• Si vous faites cuire des pizzas surgelées,
vous pouvez adapter le temps cuisson
en fonction de vos goûts. Plus le temps
de cuisson augmente, plus la pizza
devient dorée.
Faire une omelette
Note
• Ne versez pas une trop grande quantité
d'huile de cuisson dans la cuve pour
frire des ingrédients.
Faire des pizzas
1 Dans la cuve, mettez les ingrédients
nécessaires à la préparation de la
pizza.
2 Essuyez la partie externe de la cuve
(g. d), et placez-la dans le cuiseur
multifonction (g. e).
3 Fermez le couvercle du cuiseur
multifonction (g. f), et branchez
le cordon d'alimentation sur la prise
secteur (g. g).
4 Touchez le bouton Menu et
sélectionnez la fonction Pizza
(g. t).
1 Dans la cuve, mettez les ingrédients
nécessaires à la fabrication de
l'omelette.
2 Essuyez la partie externe de la cuve
(g. d), et placez-la dans le cuiseur
multifonction (g. e).
3 Fermez le couvercle du cuiseur
multifonction (g. f), et branchez
le cordon d'alimentation sur la prise
secteur (g. g).
4 Touchez le bouton Menu et
sélectionnez la fonction Omelette
(g. u).
» Pour sélectionner un temps de
cuisson diérent, reportez-vous
au chapitre « Réglage du temps
de cuisson ».
5 Maintenez le bouton Marche/
Arrêt (On/O) enfoncé pendant
3 secondes pour conrmer et
démarrer la cuisson (g. i).
37
Page 40
FR
6 Lorsque la cuisson est terminée,
l'appareil émet un signal sonore et
se met automatiquement en veille.
9 Lorsque la cuisson est terminée,
l'appareil émet un signal sonore et
se met automatiquement en veille.
Faire cuire des pâtes
1 Remplissez la cuve avec de l'eau.
Note
• Ne dépassez pas l'indication MAX à
l'intérieur de la cuve.
2 Essuyez la partie externe de la cuve
(g. d), et placez-la dans le cuiseur
multifonction (g. e).
3 Fermez le couvercle du cuiseur
multifonction (g. f), et branchez
le cordon d'alimentation sur la prise
secteur (g. g).
4 Touchez le bouton Menu et
sélectionnez la fonction Pâtes
(g. v).
» Pour sélectionner un temps de
cuisson diérent, reportez-vous
au chapitre « Réglage du temps
de cuisson ».
5 Maintenez le bouton Marche/
Arrêt (On/O) enfoncé pendant
3 secondes pour conrmer et
démarrer la cuisson (g. i).
6 Lorsque l'eau est portée à
ébullition, le cuiseur multifonction
émet un signal sonore pour vous
rappeler que vous devez ouvrir le
couvercle et mettre les pâtes dans
la cuve.
7 Une fois les pâtes versées dans la
cuve, touchez le bouton Menu pour
remettre en route le processus de
cuisson.
8 Laissez le couvercle ouvert et
remuez en permanence les pâtes
avec une spatule.
38
Faire cuire à l'eau
bouillante
1 Remplissez la cuve avec de l'eau.
Note
• Ne dépassez pas l'indication MAX à
l'intérieur de la cuve.
2 Essuyez la partie externe de la cuve
(g. d), et placez-la dans le cuiseur
multifonction (g. e).
3 Fermez le couvercle du cuiseur
multifonction (g. f), et branchez
le cordon d'alimentation sur la prise
secteur (g. g).
4 Touchez le bouton Menu et
sélectionnez la fonction Bouillir
(g. w).
» Pour sélectionner un temps de
cuisson diérent, reportez-vous
au chapitre « Réglage du temps
de cuisson ».
5 Maintenez le bouton Marche/
Arrêt (On/O) enfoncé pendant
3 secondes pour conrmer et
démarrer la cuisson (g. i).
6 Lorsque l'eau est portée à
ébullition, le cuiseur multifonction
émet un signal sonore pour vous
rappeler que vous devez ouvrir le
couvercle et verser les aliments
dans la cuve.
7 Une fois les aliments placés dans la
cuve, fermez le couvercle et touchez
le bouton Menu pour remettre en
route le processus de cuisson.
8 Lorsque la cuisson est terminée,
l'appareil émet un signal sonore et
se met automatiquement en veille.
Page 41

FR
Français
Faire de la purée de
fruits
1 Dans la cuve, mettez les ingrédients
nécessaires à la préparation de la
purée de fruits.
2 Essuyez la partie externe de la cuve
(g. d), et placez-la dans le cuiseur
multifonction (g. e).
3 Fermez le couvercle du cuiseur
multifonction (g. f), et branchez
le cordon d'alimentation sur la prise
secteur (g. g).
4 Touchez le bouton Menu et
sélectionnez la fonction Compote
(g. x).
» Pour sélectionner un temps de
cuisson diérent, reportez-vous
au chapitre « Réglage du temps
de cuisson ».
5 Maintenez le bouton Marche/
Arrêt (On/O) enfoncé pendant
3 secondes pour conrmer et
démarrer la cuisson (g. i).
6 Lorsque la cuisson est terminée,
l'appareil émet un signal
sonore et maintient au chaud
automatiquement.
Faire des contures
1 Dans la cuve, mettez les ingrédients
nécessaires à la confection des
contures.
2 Essuyez la partie externe de la cuve
(g. d), et placez-la dans le cuiseur
multifonction (g. e).
3 Fermez le couvercle du cuiseur
multifonction (g. f), et branchez
le cordon d'alimentation sur la prise
secteur (g. g).
4 Touchez le bouton Menu et
sélectionnez la fonction Conture
(g. y).
» Pour sélectionner un temps de
cuisson diérent, reportez-vous
au chapitre « Réglage du temps
de cuisson ».
5 Maintenez le bouton Marche/
Arrêt (On/O) enfoncé pendant
3 secondes pour conrmer et
démarrer la cuisson (g. i).
6 Lorsque la cuisson est terminée,
l'appareil émet un signal
sonore et maintient au chaud
automatiquement.
Faire des yaourts
1 À l'aide d'un fouet, mélangez bien
les ingrédients nécessaires à la
confection des yaourts et versez
cette préparation dans la cuve.
2 Essuyez la partie externe de la cuve
(g. d), et placez-la dans le cuiseur
multifonction (g. e).
3 Fermez le couvercle du cuiseur
multifonction (g. f), et branchez
le cordon d'alimentation sur la prise
secteur (g. g).
4 Touchez le bouton Menu et
sélectionnez la fonction Yaourt
(g. z).
» Pour sélectionner un temps de
cuisson diérent, reportez-vous
au chapitre « Réglage du temps
de cuisson ».
5 Maintenez le bouton Marche/
Arrêt (On/Off) enfoncé pendant
3 secondes pour conrmer et
démarrer la cuisson (g. i).
6 Lorsque la cuisson est terminée,
l'appareil émet un signal sonore et
se met automatiquement en veille.
39
Page 42
FR
Faire réchauer
1 Décollez les aliments et répartissez-
les uniformément dans la cuve.
2 Si nécessaire, versez de l'eau sur
les aliments pour éviter qu'ils ne
deviennent trop secs. La quantité
d'eau dépend de la quantité
d'aliments.
3 Essuyez la partie externe de la cuve
(g. d), et placez-la dans le cuiseur
multifonction (g. e).
4 Fermez le couvercle du cuiseur
multifonction (g. f), et branchez
le cordon d'alimentation sur la prise
secteur (g. g).
5 Touchez le bouton Menu et
sélectionnez la fonction Réchauer
(g. {).
» Pour sélectionner un temps de
cuisson diérent, reportez-vous
au chapitre « Réglage du temps
de cuisson ».
6 Maintenez le bouton Marche/
Arrêt (On/O) enfoncé pendant
3 secondes pour conrmer et
démarrer la cuisson (g. i).
7 Lorsque la cuisson est terminée,
l'appareil émet un signal
sonore et maintient au chaud
automatiquement.
Manuel
Vous pouvez utiliser le mode manuel
pour cuire des aliments en ayant une
plus grande maîtrise du temps de
cuisson et du thermostat.
1 Mettez les ingrédients dans la cuve.
2 Essuyez la partie externe de la cuve
(g. d), et placez-la dans le cuiseur
multifonction (g. e).
3 Fermez le couvercle du cuiseur
multifonction (g. f), et branchez
le cordon d'alimentation sur la prise
secteur (g. g).
4 Touchez le bouton Menu et
sélectionnez le mode Manuel
(g. |).
» Pour sélectionner une
température de cuisson
diérente, touchez tout d'abord
le bouton de température
(Temp), puis touchez le bouton
d'augmentation (+) ou de
diminution (-) pour sélectionner
la température souhaitée.
(g. q)
» Pour sélectionner un temps de
cuisson diérent, reportez-vous
au chapitre « Réglage du temps
de cuisson ».
5 Maintenez le bouton Marche/
Arrêt (On/O) enfoncé pendant
3 secondes pour conrmer et
démarrer la cuisson (g. i).
6 Lorsque la cuisson est terminée,
l'appareil émet un signal
sonore et maintient au chaud
automatiquement.
Note
• Si vous sélectionnez une température
inférieure à 80 °C, le cuiseur
multifonction se met automatiquement
en veille une fois la cuisson terminée.
• Si vous sélectionnez une température
supérieure à140 °C, le couvercle
supérieur doit rester ouvert pendant la
cuisson.
40
Page 43

FR
Français
Cuisson en plusieurs
étapes
Grâce à la fonction permettant de
cuire en plusieurs étapes, vous pouvez
régler jusqu'à 9 étapes de processus de
cuisson avec des thermostats et des
temps de cuisson variés.
Par exemple, vous pouvez régler une
première étape de 5 minutes à 160 °C,
une deuxième étape de 10 minutes
à 100 °C et une dernière étape de
20 minutes à 80 °C.
1 Lorsque le cuiseur multifonction est
en mode veille, touchez le bouton
de cuisson en plusieurs étapes
(MyRecipe). (g. })
» « 1 » s'ache sur l'écran.
2 Reportez-vous au chapitre
« Réglage du temps de cuisson » et
sélectionnez le temps de cuisson
pour l'étape 1.
3 Pour sélectionner une température
de cuisson diérente, touchez tout
d'abord le bouton de température
(Temp), puis touchez le bouton
d'augmentation (+) ou de
diminution (-) pour sélectionner la
température requise pour l'étape 1.
(g. ~)
4 Touchez à nouveau le bouton
de cuisson en plusieurs étapes
(MyRecipe) et passez à l'étape 2.
(g. )
» « 2 » s'ache sur l'écran.
5 Réglez le temps de cuisson et le
thermostat pour l'étape 2.
6 Recommencez les étapes indiquées
ci-dessus jusqu'à ce que vous ayez
réglé toutes les phases nécessaires,
puis maintenez le bouton Marche/
Arrêt (On/O) enfoncé pendant
3 secondes pour conrmer et
démarrer la cuisson (g. i).
MyRecipe
Enregistrement des réglages
MyRecipe
Dans un délai de 10 minutes après la n
de la cuisson par étapes, vous pouvez
enregistrer les étapes de cuisson dans
« MyRecipe ».
1 Maintenez enfoncé (MyRecipe)
pendant 3 secondes. (g. €)
» « F1 » apparaît sur l'acheur.
2 Touchez le bouton d'augmentation
(+) ou de diminution (-)
pour sélectionner l'un des
emplacements : F1, F2, F3, F4 ou F5
(g. ).
3 Touchez le bouton de cuisson
en plusieurs étapes (MyRecipe)
pour conrmer et enregistrer les
étapes de cuisson à l'emplacement
souhaité (g. ‚).
Note
• Vous pouvez enregistrer jusqu'à
5 recettes de cuisson en plusieurs
étapes dans MyRecipe ; elles seront
enregistrées comme suit : F1, F2, F3, F4
et F5.
• Pour remplacer l'une des recettes de
cuisson en plusieurs étapes par un
nouveau réglage, suivez les mêmes
étapes que ci-dessus. Lorsque vous
êtes à l'étape 2, veillez à sélectionner la
recette de cuisson en plusieurs étapes
dont vous ne voulez plus, puis touchez
le bouton de cuisson en plusieurs
étapes (MyRecipe) pour conrmer et
enregistrer le nouveau réglage au même
emplacement.
• Le temps total de cuisson pour toutes
les étapes de cuisson a une limite
maximale de 24 heures.
41
Page 44

FR
Sélection des réglages
MyRecipe déjà enregistrés
1 En mode veille, maintenez enfoncé
le bouton de cuisson en plusieurs
étapes (MyRecipe) pendant
3 secondes. (g. €)
» « F1 » apparaît sur l'acheur.
2 Touchez le bouton d'augmentation
(+) ou de diminution (-) pour
sélectionner l'un des réglages
MyRecipe précédemment
enregistrés : F1, F2, F3, F4 ou F5
(g. ).
3 Maintenez le bouton Marche/
Arrêt (On/O) enfoncé pendant
3 secondes pour conrmer et
démarrer la cuisson (g. i).
Mode de maintien au
chaud
Le cuiseur multifonction vous permet un
contrôle aisé du maintien au chaud.
• Après avoir sélectionné la fonction
de cuisson au moyen du bouton
Menu, si vous démarrez directement
le processus de cuisson, le voyant
de maintien au chaud s'allume. Une
fois que la cuisson est terminée,
le cuiseur multifonction bascule
directement en mode de maintien
au chaud.
• Après avoir sélectionné la fonction
de cuisson au moyen du bouton
Menu, si vous touchez tout d'abord
le bouton de maintien au chaud
(Chaud), puis démarrez le processus
de cuisson, le voyant de maintien
au chaud s'éteint. Une fois que la
cuisson est terminée, le cuiseur
multifonction passe en mode veille.
Note
• Lorsque l'appareil est en mode veille,
vous pouvez toucher le bouton de
maintien au chaud (Chaud) pour
accéder au mode maintien au chaud.
• En mode de maintien au chaud, vous
pouvez toucher le bouton de maintien
au chaud (Chaud) pour accéder au
mode veille.
Le réglage du temps de
cuisson
Vous pouvez régler le temps de cuisson
pour certains menus. Reportez-vous au
chapitre « Présentation des menus »
pour consulter la plage de réglage du
temps de cuisson de diérents menus.
1 Sélectionnez le menu que vous
voulez préparer.
2 Touchez le bouton Temps de
cuisson (g. ƒ).
» L'unité de l'heure clignote sur
l'acheur.
3 Touchez le bouton d'augmentation
(+) ou de diminution (-) pour régler
l'unité de l'heure (g. „).
4 Une fois que l'unité de l'heure
est dénie, touchez à nouveau le
boutonTemps de cuisson (g. …).
» L'unité des minutes clignote sur
l'acheur.
5 Touchez le bouton d'augmentation
(+) ou de diminution (-) pour régler
l'unité des minutes (g. †).
6 Maintenez le bouton Marche/
Arrêt (On/O) enfoncé pendant
3 secondes pour conrmer le temps
et démarrer la cuisson (g. i).
42
Page 45
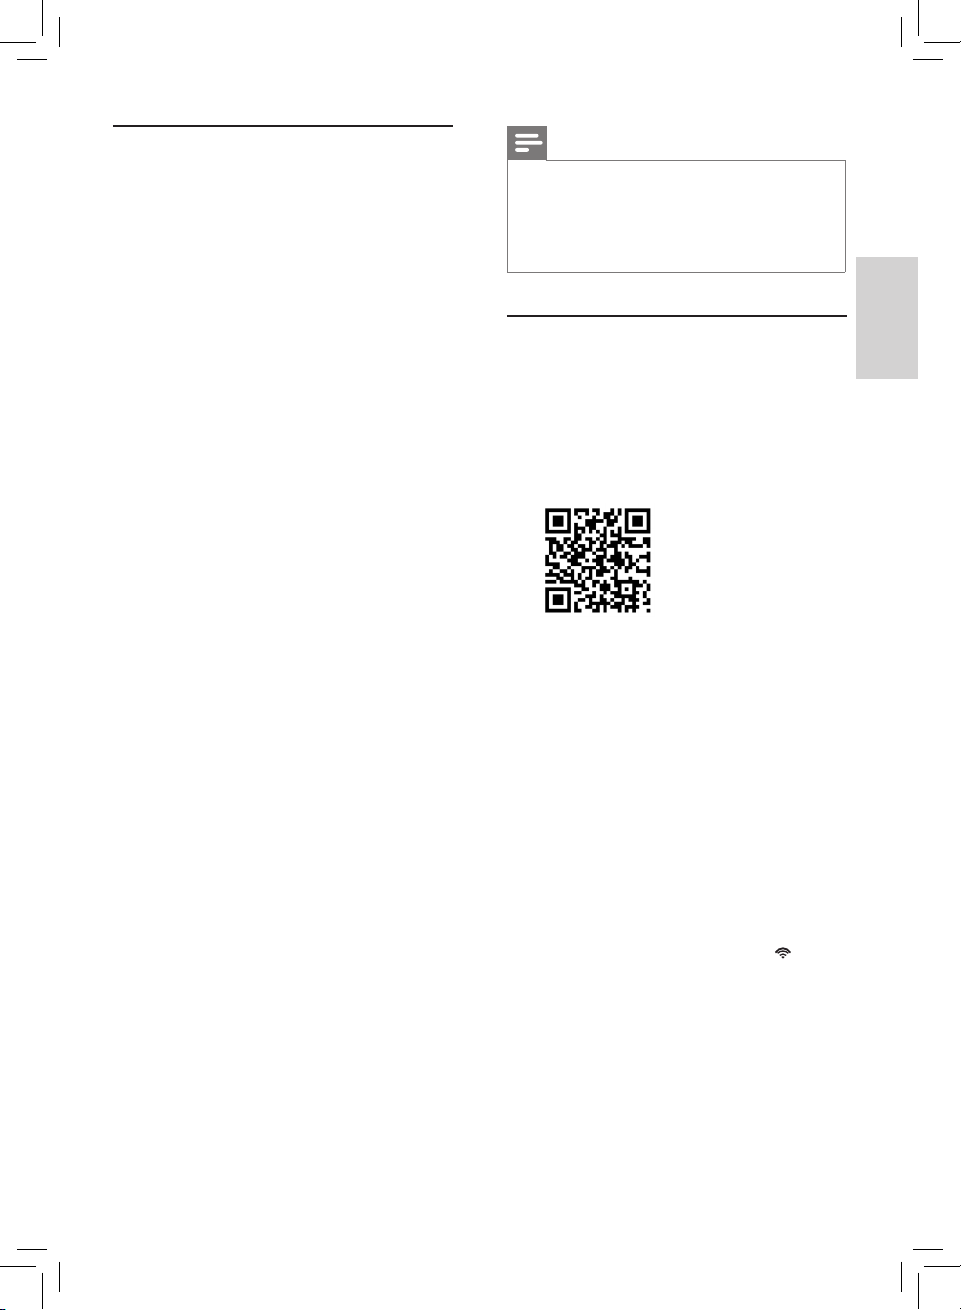
FR
Français
Programmation pour une
cuisson ultérieure
Vous pouvez dénir le temps de
cuisson programmé pour certains
menus. Reportez-vous au chapitre
« Présentation des menus » pour
consulter le temps de cuisson
programmé de diérents menus.
1 Sélectionnez le menu que vous
voulez préparer.
2 Maintenez enfoncé le bouton
Départ diéré pendant 3 secondes.
(g. ‡)
» L'unité de l'heure clignote sur
l'acheur.
3 Touchez le bouton d'augmentation
(+) ou de diminution (-) pour régler
l'unité de l'heure (g. ˆ).
4 Une fois que l'unité de l'heure
est dénie, touchez à nouveau le
boutonTemps de cuisson (g. ‰).
5 Touchez le bouton d'augmentation
(+) ou de diminution (-) pour régler
l'unité des minutes (g. Š).
6 Maintenez le bouton Marche/
Arrêt (On/O) enfoncé pendant
3 secondes pour conrmer le temps
programmé et démarrer la cuisson
(g. i).
Note
• Le processus de cuisson est terminé
lorsque le temps de programmation est
écoulé. Par exemple, si vous dénissez
un temps programmé de 8 heures, le
plat sera prêt 8 heures plus tard.
Après avoir conguré la
connexion WiFi
1 Téléchargez l'application
Philips « Multicooker » sur votre
smartphone depuis l'AppStore ou
en scannant le code QR.
2 Lancez l'application sur votre smart
phone.
3 Branchez le cuiseur multifonction et
mettez-le en marche.
4 Maintenez enfoncé le bouton
WiFi jusqu'à ce que le voyant WiFi
clignote en orange. (g. ‹)
5 Suivez les instructions à l'écran
dans l'application pour connecter
le cuiseur multifonction à votre
smartphone.
6 Une fois que le cuiseur
multifonction est connecté à votre
smartphone, le voyant WiFi reste
allumé en bleu.
43
Page 46
FR
Conguration de la
fonction verrouillage
enfant
6 Nettoyage et
entretien
Pour empêcher votre enfant d'utiliser
le cuiseur multifonction ou pour éviter
tout dysfonctionnement, vous pouvez
activer la fonction verrouillage enfant
pendant le processus de cuisson.
• Maintenez le bouton Menu enfoncé
pendant 3 secondes pour activer la
fonction verrouillage enfant (g. Œ).
» Le symbole du verrouillage
enfant s'allume sur l'acheur.
• Pour déverrouiller, maintenez le
bouton Menu enfoncé à nouveau
pendant 3 secondes (g. ).
» Le symbole du verrouillage
enfant s'éteint.
Note
• Avant de nettoyer le cuiseur
multifonction, débranchez-le
et attendez qu'il se soit refroidi
susamment.
Intérieur
Intérieur du couvercle supérieur et
du corps de l'appareil : la résistance
chauante :
• Essuyez à l'aide d'un chion essoré.
• Veillez à enlever tous les résidus
d'aliments collés au cuiseur
multifonction.
Extérieur
Surface du couvercle supérieur et
extérieur du corps de l'appareil :
• Essuyez à l'aide d'un chion
humidié avec de l'eau savonneuse.
• Utilisez uniquement un chion doux
et sec pour essuyer le panneau de
commande.
• Veillez à enlever tous les résidus
d'aliments autour du panneau de
commande.
Accessoires
Cuve, plateau de cuisson vapeur
amovible, mesure à riz, louche et
capuchon amovible des évents à
vapeur :
• Trempez dans de l'eau chaude et
nettoyez à l'aide d'une éponge.
44
Page 47
FR
Français
7 Recyclage
- Ce symbole signie que ce
produit ne doit pas être mis au
rebut avec les ordures ménagères
(2012/19/UE).
- Respectez les règles en vigueur
dans votre pays pour la mise au
rebut des produits électriques
et électroniques. Une mise au
rebut correcte contribue à préserver
l'environnement et la santé.
8 Garantie et
service
Si vous rencontrez un problème ou si
vous souhaitez obtenir des informations
ou faire réparer votre appareil, rendezvous sur le site Web de Philips à
l'adresse www.philips.com ou contactez
le Service Consommateurs Philips de
votre pays. Vous trouverez son numéro
de téléphone dans le dépliant de
garantie internationale. S'il n'existe pas
de Service Consommateurs Philips dans
votre pays, renseignez-vous auprès de
votre revendeur Philips.
9 Caractéristiques
techniques
Référence du
modèle
Puissance de sortie
nominale
Capacité nominale 5,0 l
Routeur Wi-Fi 802.11 b/g/n 2,4 GHz
Compatible avec l'iPhone 5 ou
supérieur. Nécessite iOS 7 ou supérieur.
Les bandes de fréquence de
fonctionnement du module WIFI vont
de 2 400 MHz à 2 483,5 MHz.
La puissance de sortie RF maximale est
de 100 mW / 20 dBm.
HD3198
860 W
45
Page 48

FR
10 Dépannage
En cas de problème lors de l'utilisation de ce cuiseur multifonction, vériez les points
suivants avant de faire appel au service d'assistance. Si vous ne parvenez pas à
résoudre le problème, contactez le Service Consommateurs Philips de votre pays.
Problème Solution
Le voyant sur le bouton
ne s'allume pas.
L'écran ne fonctionne
pas.
Le riz n'est pas cuit. Il n'y a pas assez d'eau. Ajoutez de l'eau jusqu'au niveau
Il s'agit d'un problème de branchement. Vériez si le
cordon d'alimentation est correctement raccordé au
cuiseur multifonction et si la che est fermement insérée
dans la prise secteur.
Le voyant est défectueux. Conez l'appareil à votre
revendeur Philips ou à un Centre Service Agréé Philips.
Le cuiseur multifonction n'est pas branché. S'il n'y a pas
de courant, la fonction de sauvegarde en cas de coupure
de courant et l'acheur ne fonctionnent pas.
La batterie de l'acheur est déchargée. Conez
l'appareil à votre revendeur Philips ou à un
Centre Service Agréé Philips pour remplacer la batterie.
correspondant à l'intérieur de la cuve.
Vous n'avez pas maintenu enfoncé le bouton Marche/
Arrêt (On/O) pendant 3 secondes.
Assurez-vous qu'aucun résidu ne se trouve sur l'élément
chauant et l'extérieur de la cuve avant d'allumer le
cuiseur multifonction.
L'élément chauant est endommagé ou la cuve est
déformée. Conez le cuiseur multifonction à votre
revendeur Philips ou à un Centre Service Agréé Philips.
Le riz est trop sec et
pas bien cuit.
Le cuiseur
multifonction ne passe
pas automatiquement
en mode de maintien
au chaud.
46
Ajoutez plus d'eau au riz et poursuivez un peu la cuisson.
Vous avez touché le bouton de maintien au chaud
(Chaud) avant de démarrer le processus de cuisson.
Dans ce cas, le cuiseur multifonction passe en mode
veille lorsque la cuisson est terminée. Reportez-vous au
chapitre « Maintien au chaud » pour en savoir plus sur la
fonction de maintien au chaud.
Le thermostat est défectueux. Conez l'appareil à votre
revendeur Philips ou à un Centre Service Agréé Philips.
Page 49

FR
Français
Problème Solution
Le riz est sec. Vous n'avez pas rincé le riz correctement. Rincez le riz
jusqu'à ce que l'eau devienne claire.
De l'eau déborde du
cuiseur multifonction
pendant la cuisson.
Je ne parviens pas à
sélectionner la fonction
de cuisson souhaitée.
Le riz ne sent pas bon
après la cuisson.
Le voyant WiFi clignote
en bleu et en orange.
Un message d'erreur
(E1, E2, E3 ou E4)
apparaît sur l'acheur.
Veillez à ajouter de l'eau jusqu'au niveau correspondant
au nombre de tasses de riz utilisées.
Touchez le bouton Menu à plusieurs reprises pour
sélectionner la fonction souhaitée comme indiqué par le
voyant.
Nettoyez la cuve à l'eau chaude savonneuse.
Après la cuisson, veillez à nettoyer soigneusement le
capuchon des évents à vapeur, le couvercle intérieur et la
cuve.
La connexion WiFi a été perdue. Débranchez le
cuiseur multifonction, puis rebranchez-le au bout de
15 secondes. Maintenez enfoncé le bouton WiFi du
cuiseur multifonction jusqu'à ce qu'il clignote en orange
et recommencez la conguration WiFi depuis le début.
Une panne de courant s'est peut-être produite durant la
cuisson. Conez l'appareil à votre revendeur Philips ou à
un Centre Service Agréé Philips.
47
Page 50

 Loading...