


GC9642
GC9644
© 2021 Philips Domestic Appliances Holding B.V.
All rights reserved
4239.000.9597.4 (21/10/2021)
User Manual
Gebrauchsanleitung

18
17
16
15
14
13
1
2
12
3
11
4
5
8
9
6 7
10

ENGLISH 6
DEUTSCH 23
GC9642, GC9644

6
ENGLISH
Table of contents
Important 7
Introduction 8
Product overview (Fig. 4) 9
Before rst use 10
Using your appliance 10
Filling the water tank 10
Heating up 11
Carry lock 12
Temperature setting 12
Ironing 12
ECO mode 14
TURBO steam mode 14
Ironing tips 15
Safety auto-o mode 15
Cleaning and maintenance 15
IMPORTANT - DESCALING 16
IMPORTANT – Descaling the soleplate 17
Storage 19
Guarantee and support 20
Troubleshooting 20
Technical information 22

ENGLISH
7
Important
Read this user manual carefully before you use the appliance and
save it for future reference.
Danger
- Never immerse the appliance in water.
Warning
- Check if the voltage indicated on the type plate corresponds
to the local mains voltage before you connect the appliance.
- Do not use the appliance if the plug, the mains cord, the
supply hose or the appliance itself shows visible damage, or if
the appliance has been dropped or leaks.
- If the mains cord or the supply hose is damaged, you must
have it replaced by Philips, a service centre authorised by
Philips or similarly qualied persons in order to avoid a hazard.
- Never leave the appliance unattended when it is connected to
the mains.
- This appliance can be used by children aged from 8 years and
above and persons with reduced physical, sensory or mental
capabilities or lack of experience and knowledge if they
have been given supervision or instruction concerning use
of the appliance in a safe way and understand the hazards
involved. Children shall not play with the appliance. Cleaning
and user maintenance shall not be made by children without
supervision.
- Keep the appliance and its cord out of reach of children less
than 8 years of age when it is connected to the mains or
cooling down.
- Do not leave the appliance unattended when it is connected to
the mains.
- Older children are only allowed to clean the appliance and
perform the Calc-Clean procedure under supervision.
- Do not let the mains cord and supply hose come into contact
with the hot soleplate of the appliance.
- If steam or hot water droplets escape from under the EASY
DE-CALC knob when the appliance heats up, switch o the
appliance and let it cool down for 2 hours. Then reinsert the
EASY DE-CALC knob. If steam continues to escape when the
appliance heats up, switch o the appliance and contact a
service centre authorised by Philips.
- Do not remove the EASY DE-CALC knob when the appliance is
still hot or under pressure.
- Do not use any other cap on the appliance than the EASY DECALC knob that has been supplied with the appliance.

8
ENGLISH
Caution
- Only connect the appliance to an earthed wall socket.
- Always place and use the appliance on a stable, level,
horizontal and heat-resistant surface.
- Check the mains cord and the supply hose regularly for
possible damage.
- Fully unwind the mains cord before you plug it in the wall
socket.
- The iron platform and the soleplate of the iron can become
extremely hot and may cause burns if touched. If you want to
move the appliance, do not touch the iron platform.
- Put the iron back onto the iron platform, switch o the
appliance and remove the mains plug from the wall socket:
- when you have nished ironing
- when you clean the Pappliance
- when you ll or empty the water tank
- when you leave the appliance, even if it is only for a short
while
- Descale the appliance regularly according to the instructions
in chapter ‘IMPORTANT - DESCALING’.
- This appliance is intended for indoor household use only.
Electromagnetic elds (EMF)
This Philips appliance complies with all applicable standards and
regulations regarding exposure to electromagnetic elds.
Recycling
- This symbol means that this product shall not be disposed of
with normal household waste (2012/19/EU).
- Follow your country’s rules for the separate collection of
electrical and electronic products. Correct disposal helps
prevent negative consequences for the environment and
human health.
Introduction
Thank you for buying this Philips PerfectCare Elite.
- The Philips PerfectCare oers you an innovative way to iron
your garments. We all know the fuss with traditional irons:
choosing the right temperature for your tough and delicate
fabrics, waiting for the iron to warm up and cool down to
avoid the risk of damaging clothes with an iron that is too
hot. Those hassles are things of the past with the new Philips
PerfectCare.

ENGLISH
9
- In principle, wrinkle removal is done by transferring heat to
fabric. Historically, this was done with a very hot soleplate.
Then steam was added to enhance heat transfer, thus making
ironing much faster. Our research conrmed that the best
way to remove wrinkles eectively is a perfect combination
of intense steam and optimal soleplate temperature. The key
to eective wrinkle removal is the steam, not the soleplate
temperature. The soleplate temperature needs to be just
above the steam temperature to remove any moisture. This is
the optimal temperature.
- In the past, a large amount of steam at this optimal
temperature would have led to water leakage. We developed
a unique patented cyclonic chamber to maintain highpressure steam that penetrates deep into the fabric for fast
ironing with no risk of water leakage.
- Ironing is now truly simple - no temperature adjustment, no
scorching, no waiting for the appliance to heat up or cool
down. It is faster, no matter who does the ironing. With this
OptimalTemp technology, every single garment can be ironed
eectively and safely.
Product overview (Fig. 4)
1 Steam supply hose
2 Iron platform
3 First supply hose storage compartment
4 Mains cord with plug
5 ECO button with light
6 On/o button with safety auto o light and TURBO steam
mode
7 ’Water tank empty’ light
8 EASY DE-CALC light
9 EASY DE-CALC knob
10 Cord storage compartment
11 Second supply hose storage compartment
12 Detachable water tank
13 Carry lock
14 Carry lock release button
15 Soleplate
16 Steam trigger
17 ‘Iron ready’ light
18 Filling hole

10
ENGLISH
Before rst use
This appliance is intended for ironing and refreshing fabrics only.
Remove all packaging material and stickers.
Remove the protective cover from the soleplate before you use
the appliance.
Always place the appliance on a stable and horizontal surface.
Fill the water tank before every use (see chapter ‘Using your
appliance’, section ‘Filling the water tank’).
Using your appliance
Filling the water tank
Fill the water tank before every use and when the ‘water tank
empty’ light ashes.
1 Remove the water tank from the appliance.
2 Fill the water tank with tap water up to the MAX
indication.
Note: Do not ll the water tank beyond the MAX indication to
avoid spillage. If you have overlled the water tank, empty it
until the water level drops below the MAX indication again.
3 Put the water tank back into the appliance by sliding in
the bottom part rst. Then push the top part until it locks
into place.
Tip: Your appliance has been designed to be used with tap
water. In case you live in an area with hard water, fast scale
build-up may occur. Therefore, it is recommended to use
distilled or demineralised water to prolong the lifetime of your
appliance.
Do not use perfumed water, water from the tumble dryer,
vinegar, starch, descaling agents, ironing aids, chemically
ENGLISH
11
descaled water or other chemicals, as they may cause water
spitting, brown staining or damage to your appliance.
Note: Do not tilt or shake the appliance when the water tank is
full, otherwise water may spill out of the lling hole.
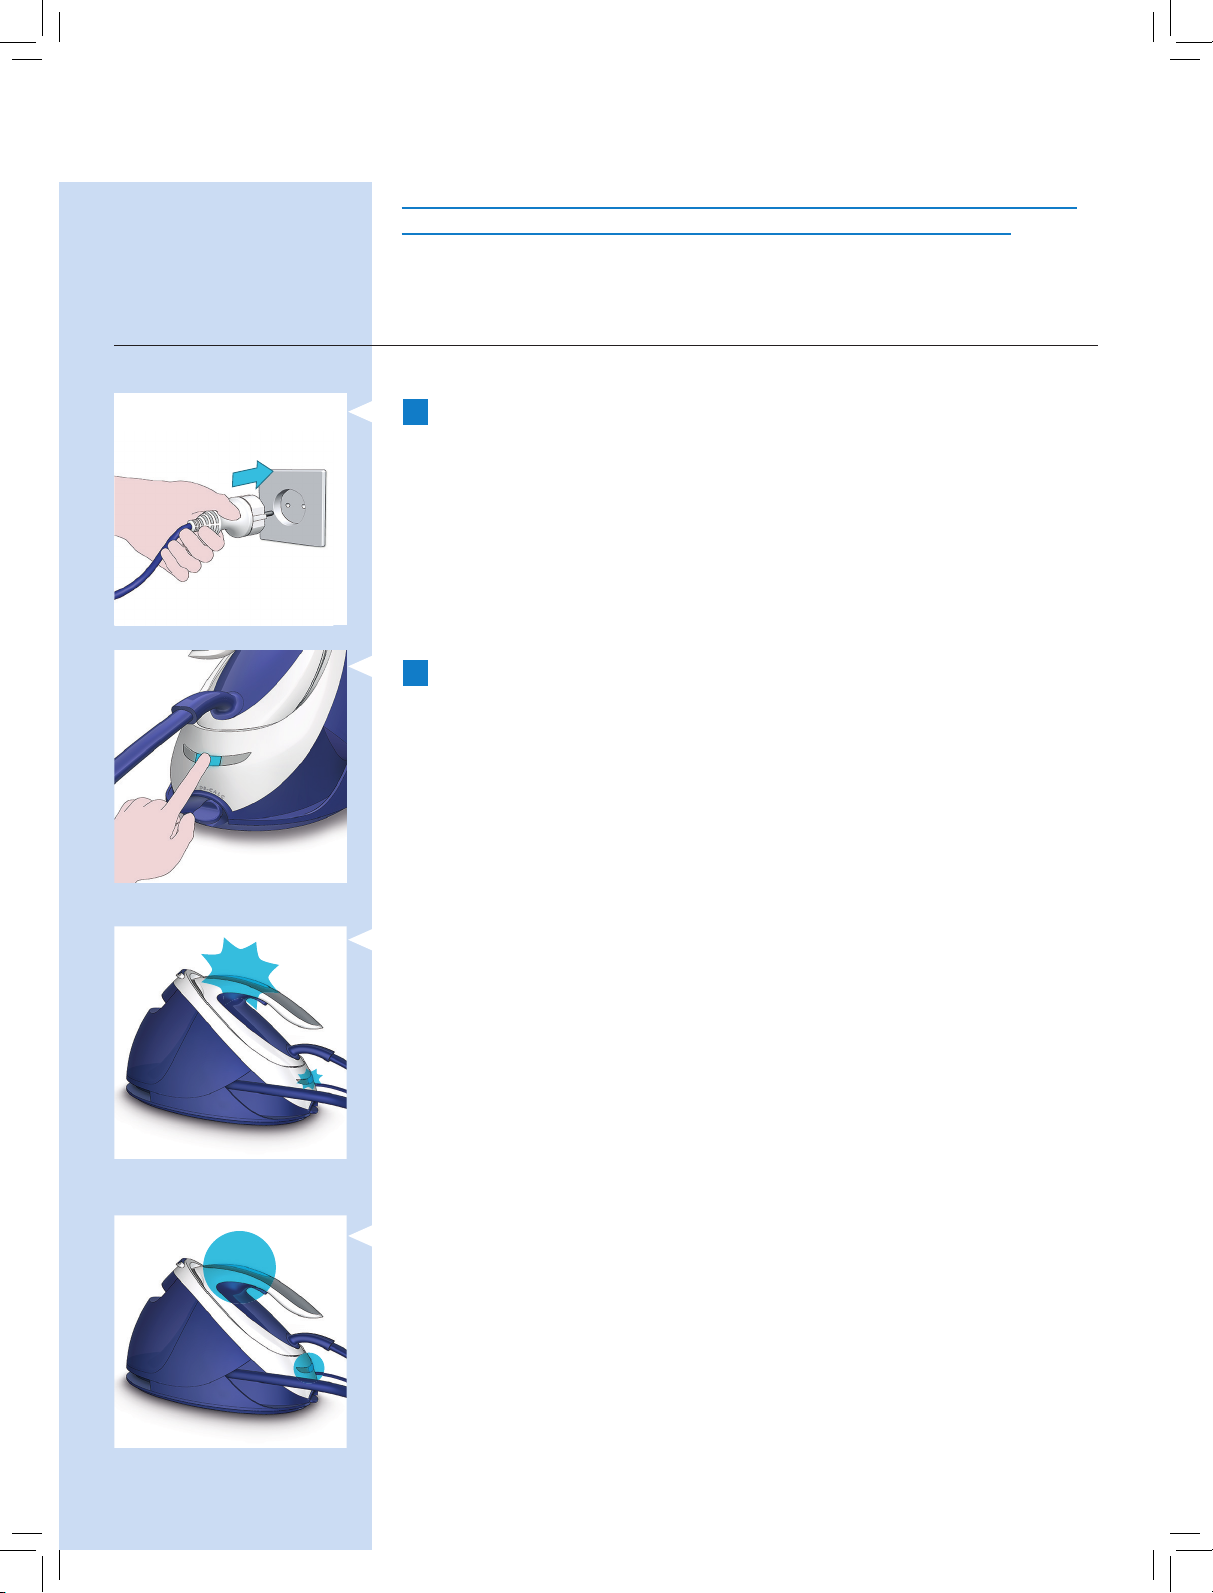
Heating up
1 Put the plug in an earthed wall socket.
2 Press the on/o button to switch on the appliance.
, The blue power-on light on the appliance and the ‘iron
ready’ light start to ash to indicate that the appliance
is heating up.
, When the appliance is ready for use, the ‘iron ready
light’ and the power-on light stop ashing and light up
continuously. Additionally you hear a short beep.
Note: Water is pumped into the boiler inside the appliance,
which causes the appliance to produce a pumping sound for
up to 2 minutes. This is normal.
12
ENGLISH
Carry lock
1 Press the carry lock release button to unlock the iron from
the iron platform.
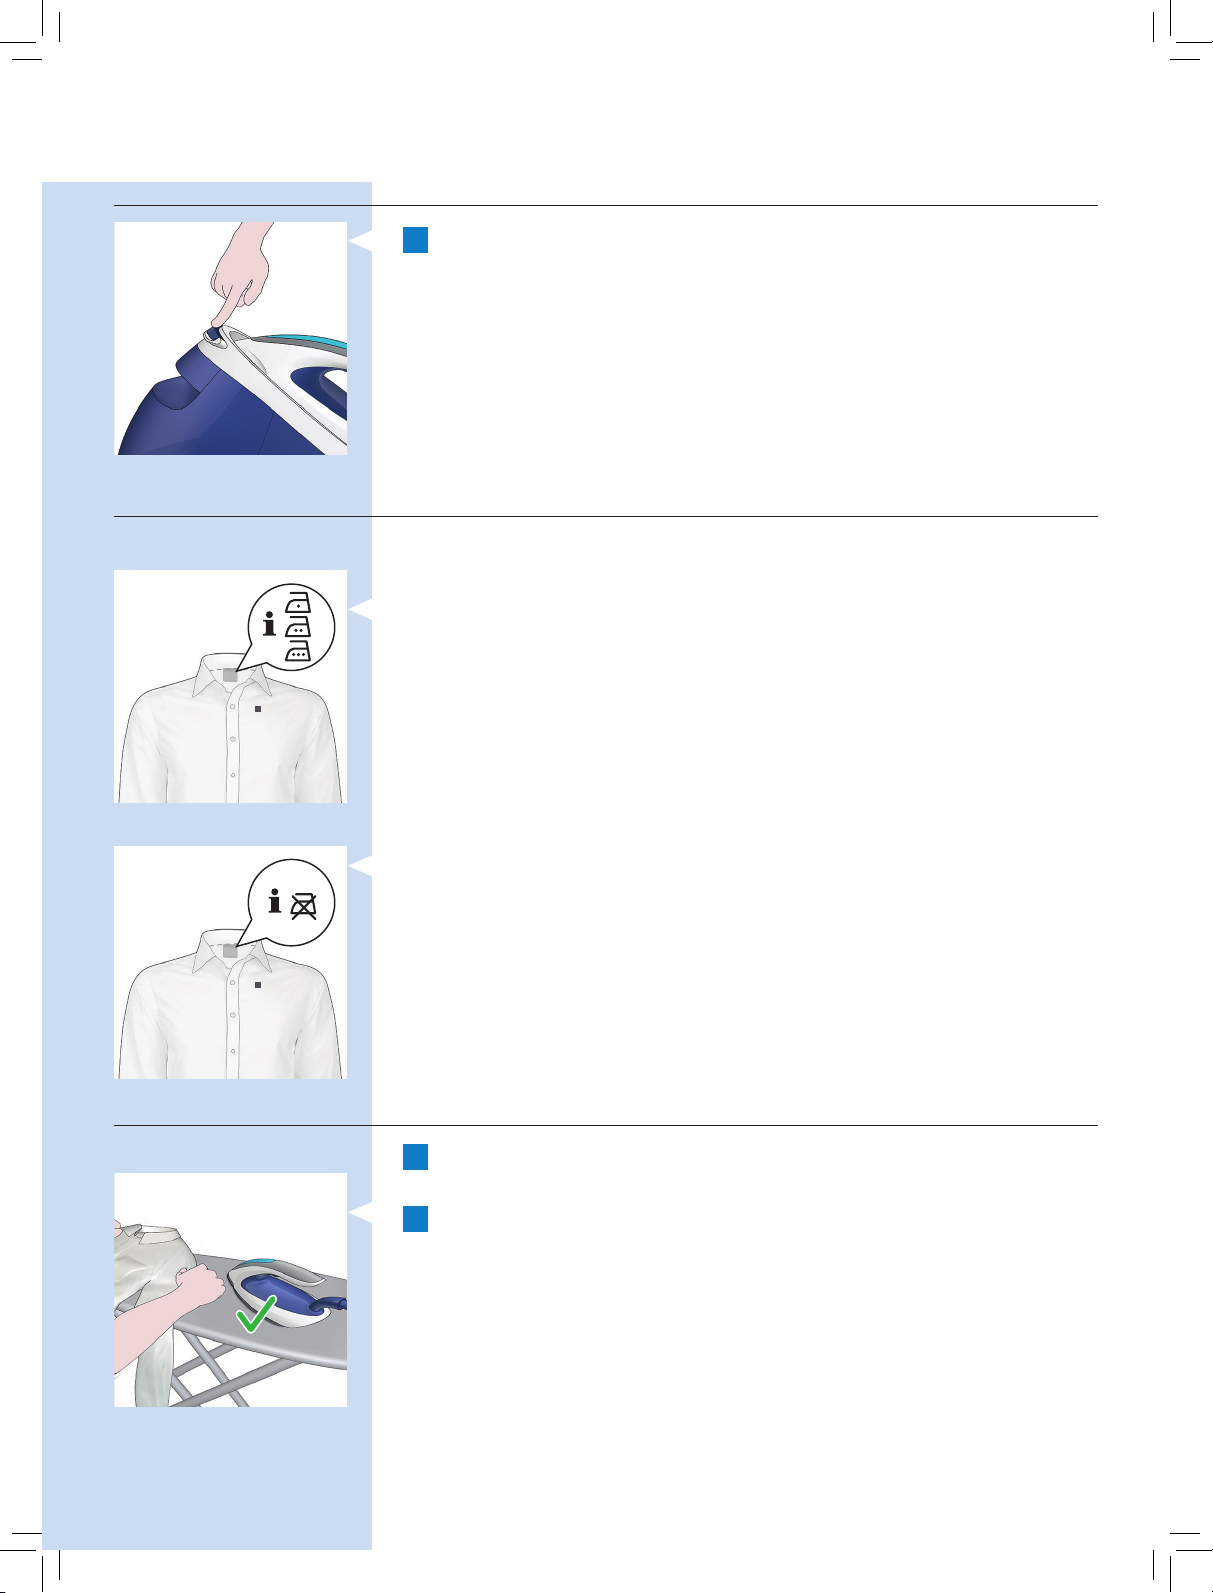
Temperature setting
The Optimal Temp technology enables you to iron all types
of ironable fabrics, in any order, without adjusting the iron
temperature.
Fabrics with these symbols are ironable, for example linen,
cotton, polyester, silk, wool, viscose and rayon.
Fabrics with this symbol are not ironable. These fabrics include
synthetic fabrics such as Spandex or elastane, Spandex-mixed
fabrics and polyolens (e.g. polypropylene), but also prints on
garments.
Ironing
1 Unfold your ironing board and set it to the appropriate
height.
2 Place the garment you want to iron on the ironing board.

ENGLISH
13
3 You can start ironing when the ‘iron ready’ light stops
ashing and lights up continuously.
Note: The default steam setting is the normal steam mode. It is
recommended to use this mode for all ironable fabrics.
Steam trigger
- Press the steam trigger to start ironing.
Tip: If you have thick garments keep the steam trigger pressed
continuously when you move the iron over the fabric. Then
move the iron over the same area a few more times without
steam to dry the fabric. The steam will stop when you release
the steam trigger.
Note: For the best results on silk and shiny synthetic fabrics it is
recommended to keep the steam trigger pressed continuously
while ironing.
2x
Steam boost function
The steam boost function is designed to help tackle dicult
creases.
- Double press the steam trigger for a continuous shot of
steam. It is not necessary to press and hold the steam trigger
continuously when the steam boost function is activated. To
stop the steam boost function, press the steam trigger once.
Vertical ironing
For vertical steaming, we advise you to switch to the TURBO steam
mode.
- Put the garment that you want to steam on a clothes hanger
and hang it from e.g. a hanging rack. Hold the iron in vertical
position. Pull the garment with one hand and stretch it slightly
for more eective wrinkle removal. While pulling the garment,
press the steam trigger and move the iron up and down.

14
ENGLISH
4 When you put down the iron during ironing, put it on the
iron platform or place it on the ironing board in horizontal
position, on its soleplate.
Hot steam is emitted from the iron. Never attempt to remove
wrinkles from a garment while someone is wearing it. Do
not apply steam near your or someone else’s body to prevent
burns.
Note: Regularly water is pumped into the boiler inside the
appliance again, which causes the appliance to produce a
pumping sound. This is normal.
ECO mode
During ironing, you can use the ECO mode to save energy but
still have sucient steam to iron all your garments.
Note: For the best results, we advise you to use the normal
steam mode.
1 Press the ECO button.
, The ECO button lights up green.
2 To switch back to the normal steam mode, press the ECO
button again.
, The green light in the ECO button goes out.
2 sec.
TURBO steam mode
The TURBO steam mode has a higher amount of steam. You can
use it for thick garments to have better steam penetration.
Note: As the TURBO steam mode produces a high amount of
steam, the supply hose may become hotter than at the normal
steam and ECO modes. This is normal.
1 Press and hold the on/o button for 2 seconds until the
light turns white.
, The ‘iron ready’ light on the iron and the white TURBO
light in the on/o button start to ash to indicate that the
iron is heating up to the TURBO steam mode. This takes up
to 2 minutes.
2 To switch back to the normal steam mode, press and hold
the on/o button for 2 seconds until the light turns blue
again.
 Loading...