

Philips GC8700 series User Manual
GC8700 series

21 3
6 75
9 8
11 1012
4
13


English 6
Čeština 18
Magyar 30
Slovensky 42
Українська 54

English
Introduction
Congratulations on your purchase and welcome to Philips! To fully benefit
from the support that Philips offers, register your product at
www.philips.com/welcome.
Read this user manual, the important information leaflet, and the quick start
guide carefully before you use the appliance. Save them for future
reference.
Exclusive technology from Philips
OptimalTemp technology
The OptimalTemp technology enables you to iron all types of ironable
fabrics, in any order, without adjusting the iron temperature and without
sorting your garments.
It is safe to just rest the hot soleplate directly on the ironing board without
putting back to the iron platform. This will help reduce the stress on your
wrist.
This iron has been approved by The Woolmark Company Pty Ltd for the
ironing of wool-only products, provided that the garments are ironed
according to the instructions on the garment label and those issued by the
manufacturer of this iron. R1602. In the United Kingdom, Eire, Hong Kong
and India, the Woolmark trademark is a certification trademark.
Compact ProVelocity Technology
This technology delivers continuous steam that penetrates deeply to
remove creases easily. At the same time, it keeps the appliance more
compact and lighter than traditional steam generators, for easier storage.
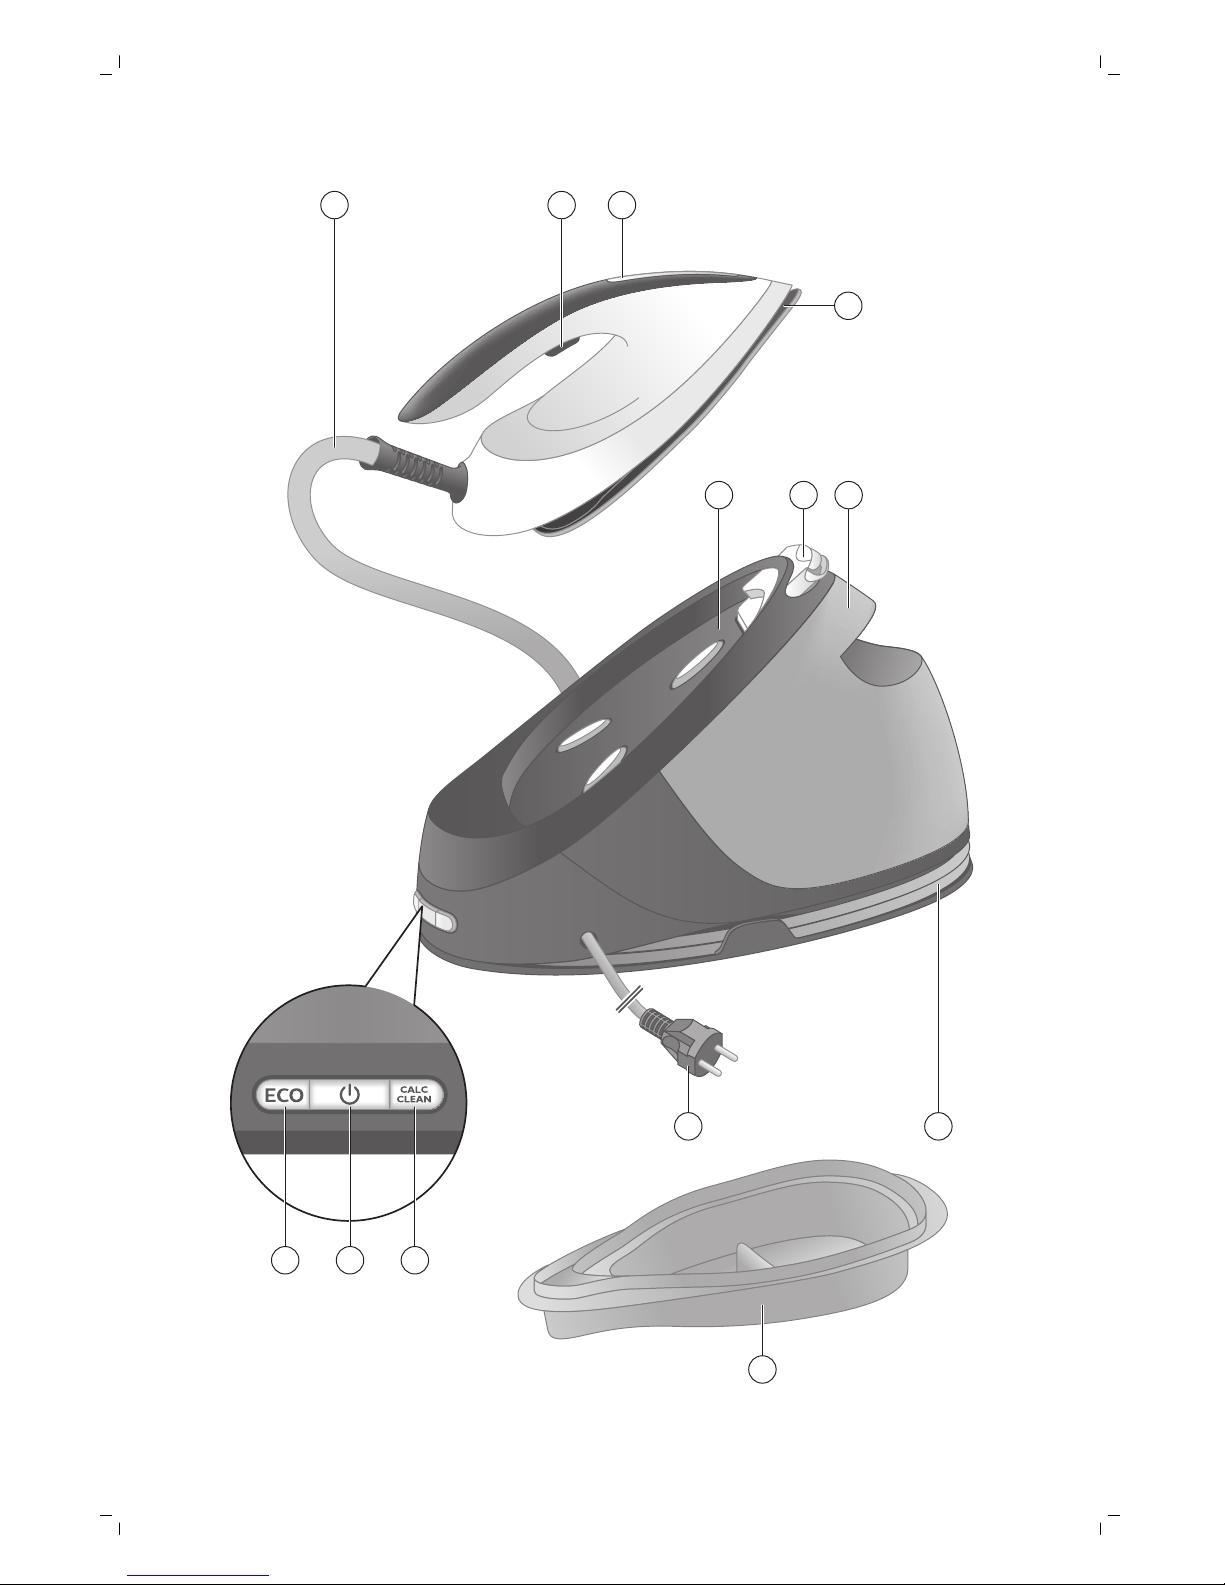
Product overview (Fig. 1)
1 Water supply hose
2 Steam trigger/Steam boost
3 'Iron ready' light
4 Soleplate
5 Iron platform
6 Carry lock release button
7 Detachable water tank
8 Water supply hose storage compartment
9 Mains cord with plug
10 CALC-CLEAN button with light
6
English

11 On/off button with power-on light and auto-off light
12 ECO button with light
13 Smart Calc-Clean container
Preparing for use
Type of water to use
This appliance has been designed to be used with tap water. However, if
you live in an area with hard water, fast scale build-up may occur.
Therefore, it is recommended to use distilled or demineralized water to
prolong the lifetime of the appliance.
Warning: Do not use perfumed water, water from the tumble
dryer, vinegar, starch, descaling agents, ironing aids, chemically
descaled water or other chemicals, as they may cause water
spitting, brown staining or damage to your appliance.
Filling the water tank
1 Fill the water tank before every use or when the water level in the water
tank drops below the minimum level. You can refill the water tank at any
time during use.
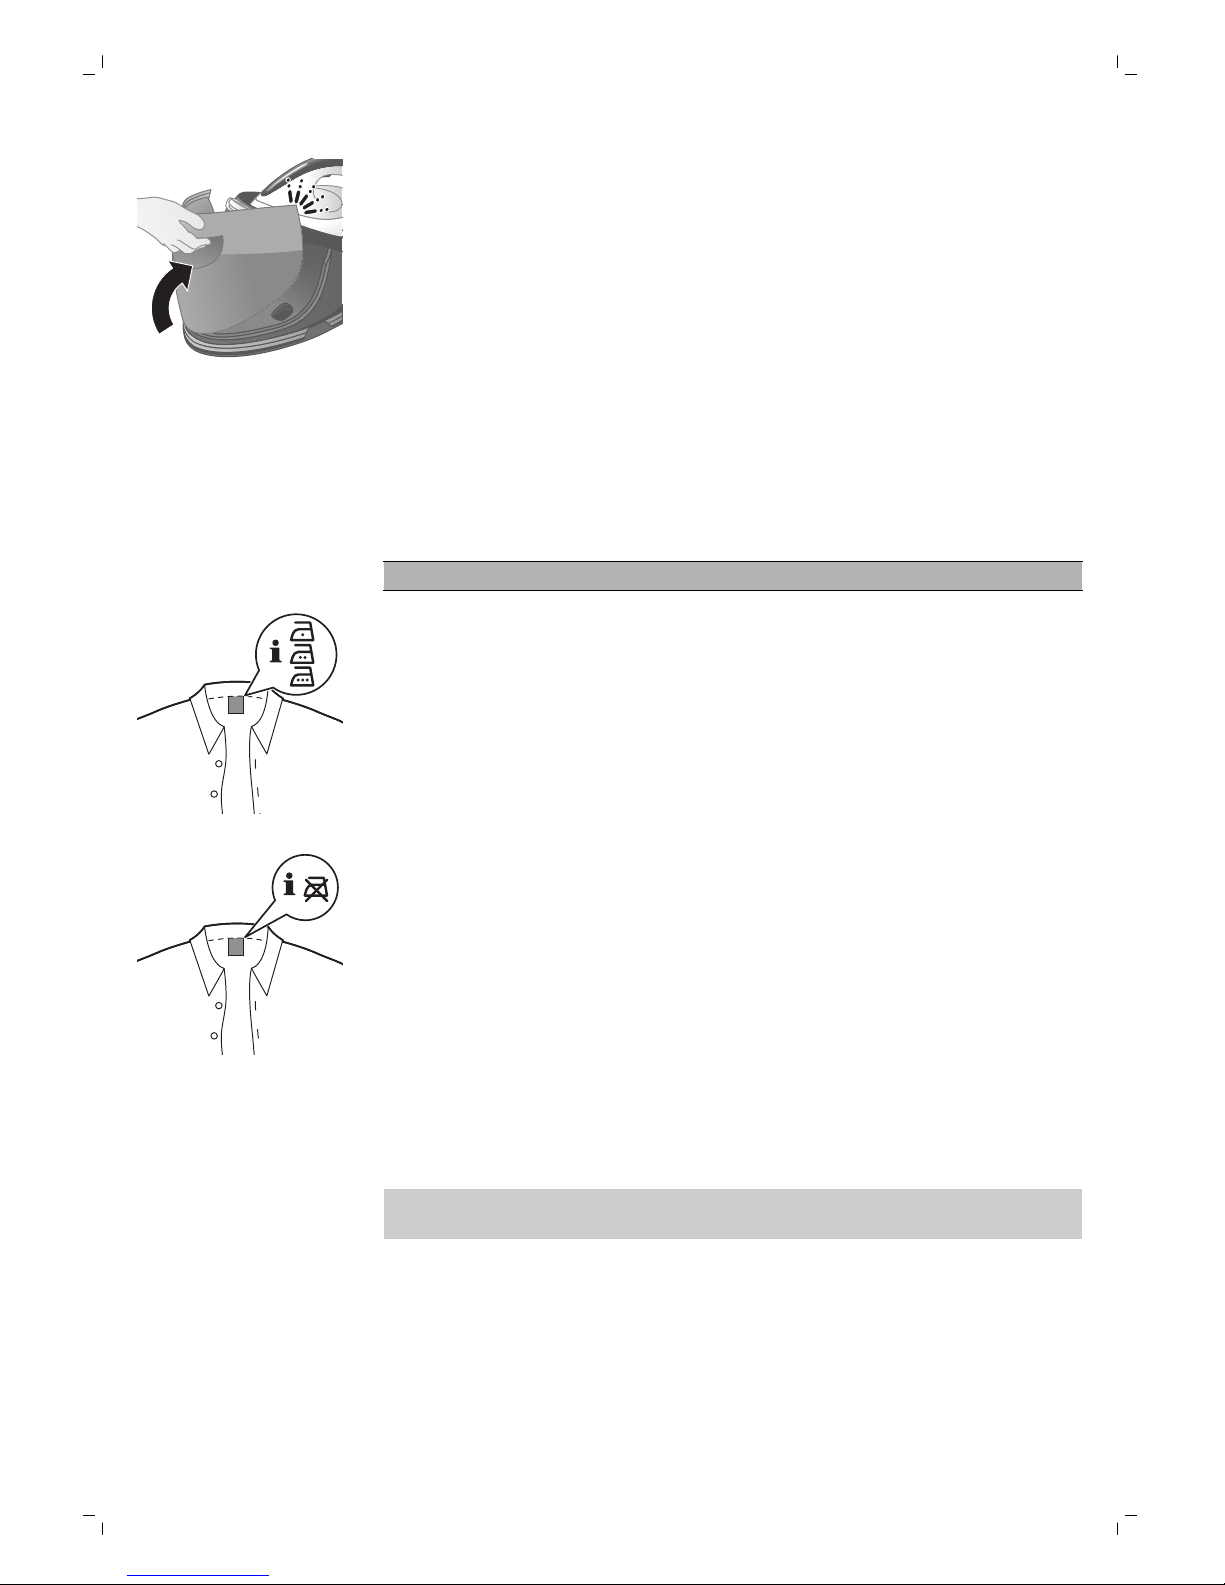
2 Remove the water tank from the base.
3 Fill the water tank up to the MAX indication.
7
English
4 Put the water tank back into the appliance by fitting the bottom part into
the appliance first.
5 Push in the top part of the water tank until it locks into place ('click').
Using the appliance
Ironable fabrics
Do not iron non-ironable fabrics.
Fabrics with these symbols are ironable, for example linen, cotton,
polyester, silk, wool, viscose and rayon.
Fabrics with this symbol are not ironable. These fabrics include synthetic
fabrics such as Spandex or elastane, Spandex-mixed fabrics and polyolefins
(e.g. polypropylene). Prints on garments are not ironable either.
Ironing
1 Place the steam generator on a stable and even surface.
Note: In order to ensure safe ironing we recommend to always place the
base on a stable ironing board.
2 Make sure that there is enough water in the water tank.
8
English

3 Put the mains plug in an earthed wall socket and press the on/off button
to switch on the steam generator. Wait until the 'iron ready' light lights up
continuously. This takes approx. 2 minutes.
4 Remove the water supply hose from the water supply hose storage
compartment.
5 Press the carry lock release button to unlock the iron from the iron
platform.
6 Press and hold the steam trigger to start ironing.
Warning: Never direct steam at people.
7 For best ironing results, after ironing with steam, perform the last strokes
without steam.
Note: When you use the appliance for the first time, it may take 30 seconds
for steam to come out of the appliance.
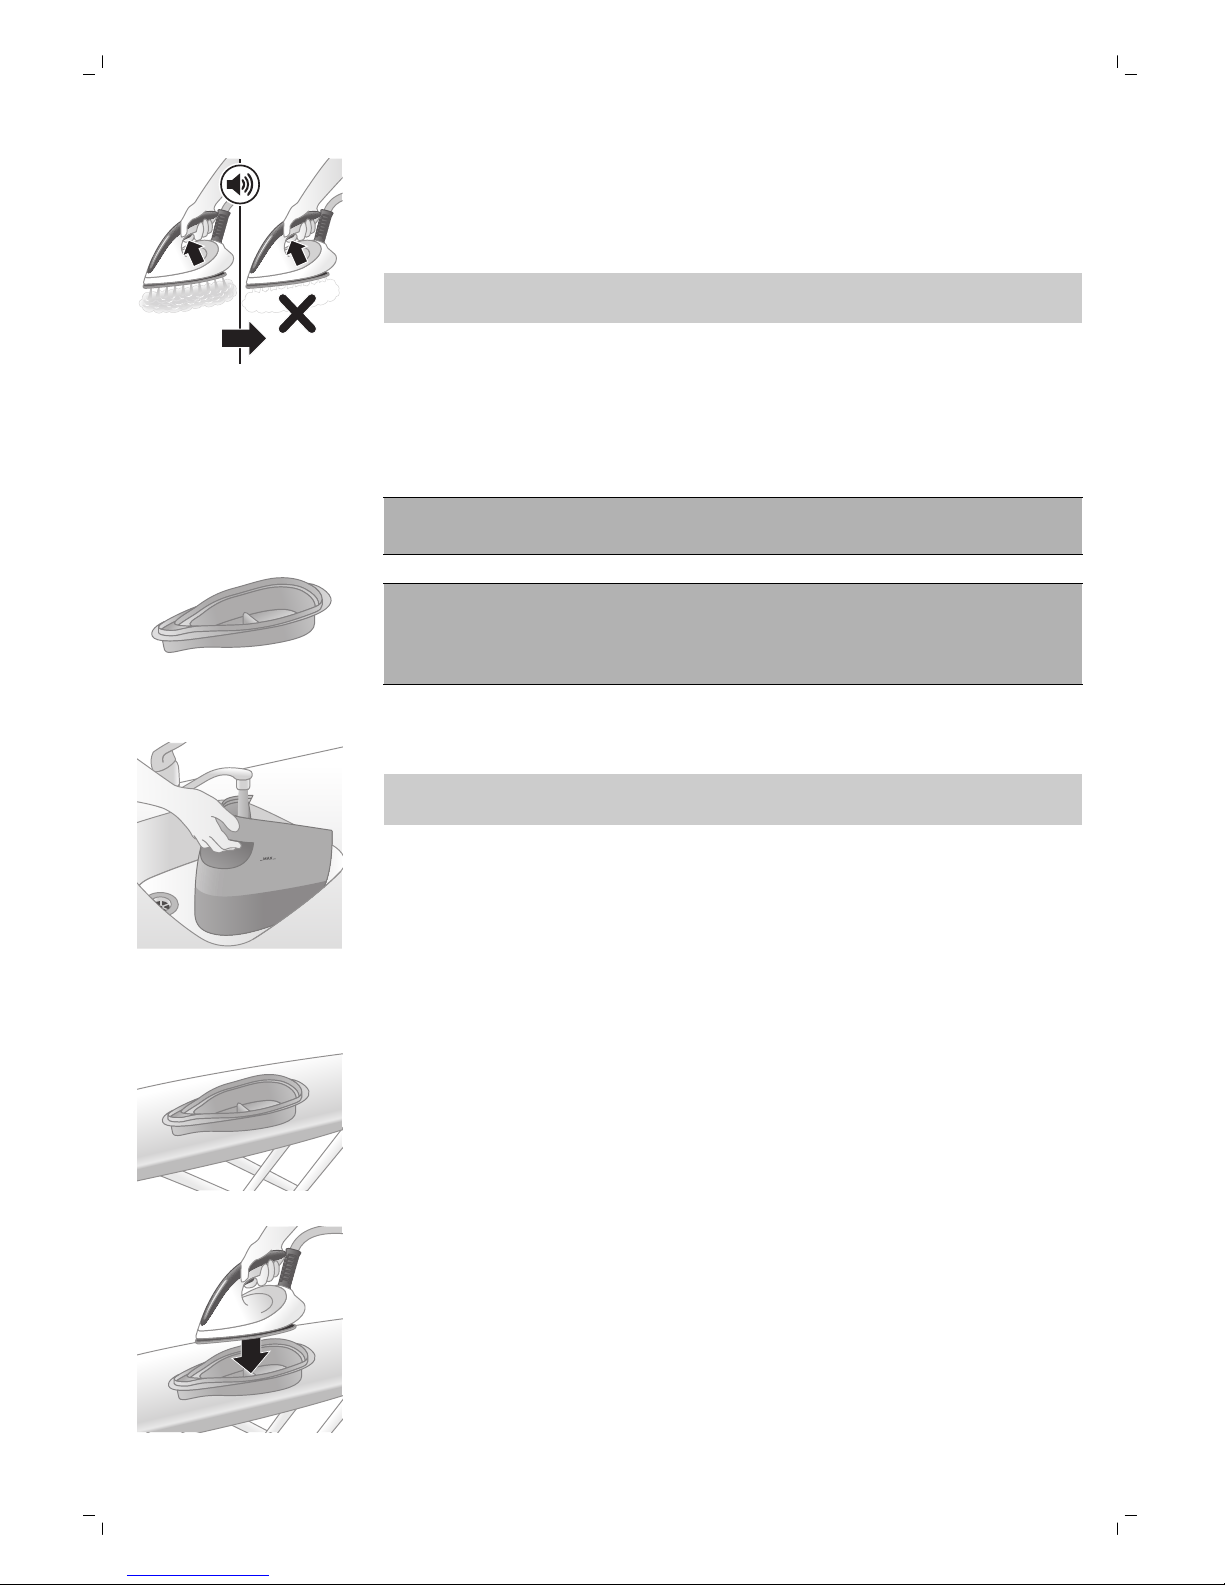
Note: The pump is activated each time you press the steam trigger. It
produces subtle rattling sound, which is normal. When there is no water in
the water tank, the pump sound is louder. Fill up the water tank with water
when the water level drops below the minimum level.
For more powerful steam, you can use the TURBO steam mode, which is
safe on all ironable fabrics.
For fabrics such as cotton, jeans and linen, you are recommended to use the
TURBO steam mode.
1 Press and hold the on/off button for 2 seconds until the light turns white.
2 To deactivate the TURBO mode, press and hold the on/off button for 2
seconds again until the light turns blue.
Steam boost function
Use the steam boost function to remove stubborn creases.
9
English
2x
1 Press the steam trigger twice quickly.
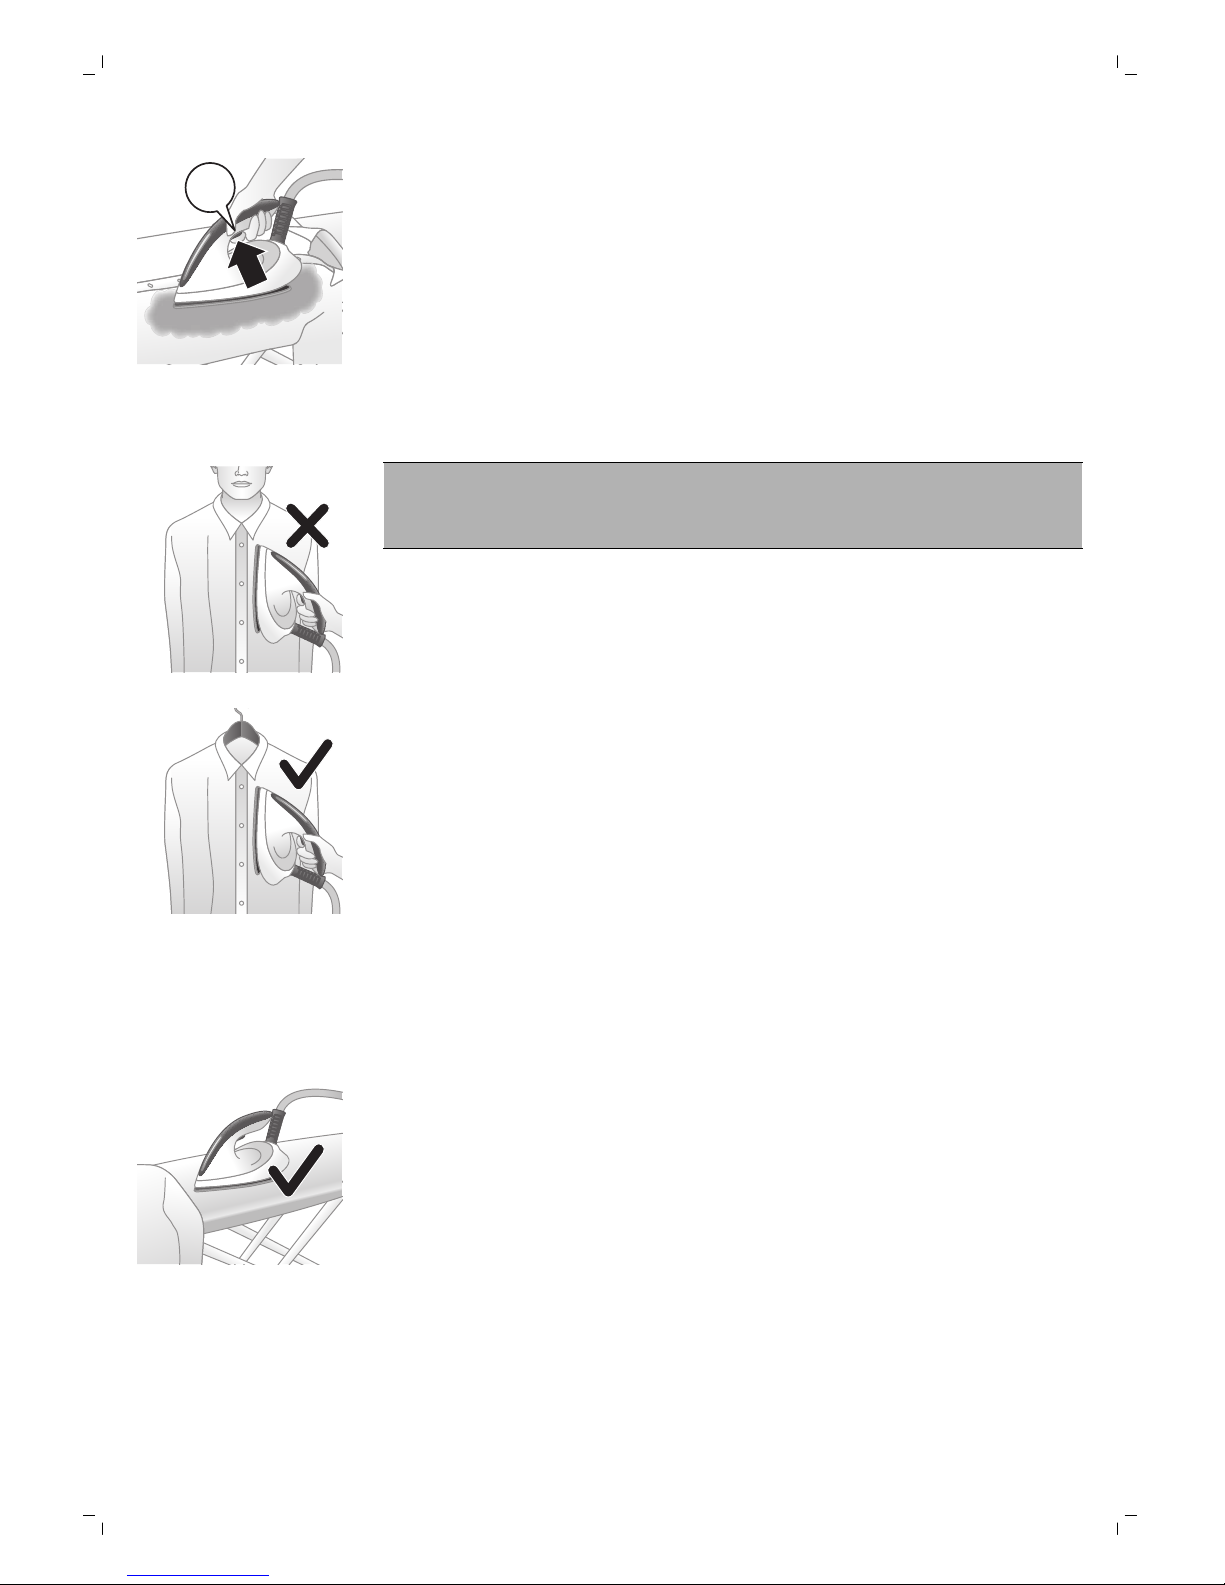
Vertical ironing
Warning: Hot steam is emitted from the iron. Never attempt to
remove wrinkles from a garment while someone is wearing it. Do
not apply steam near your or someone else's hand.
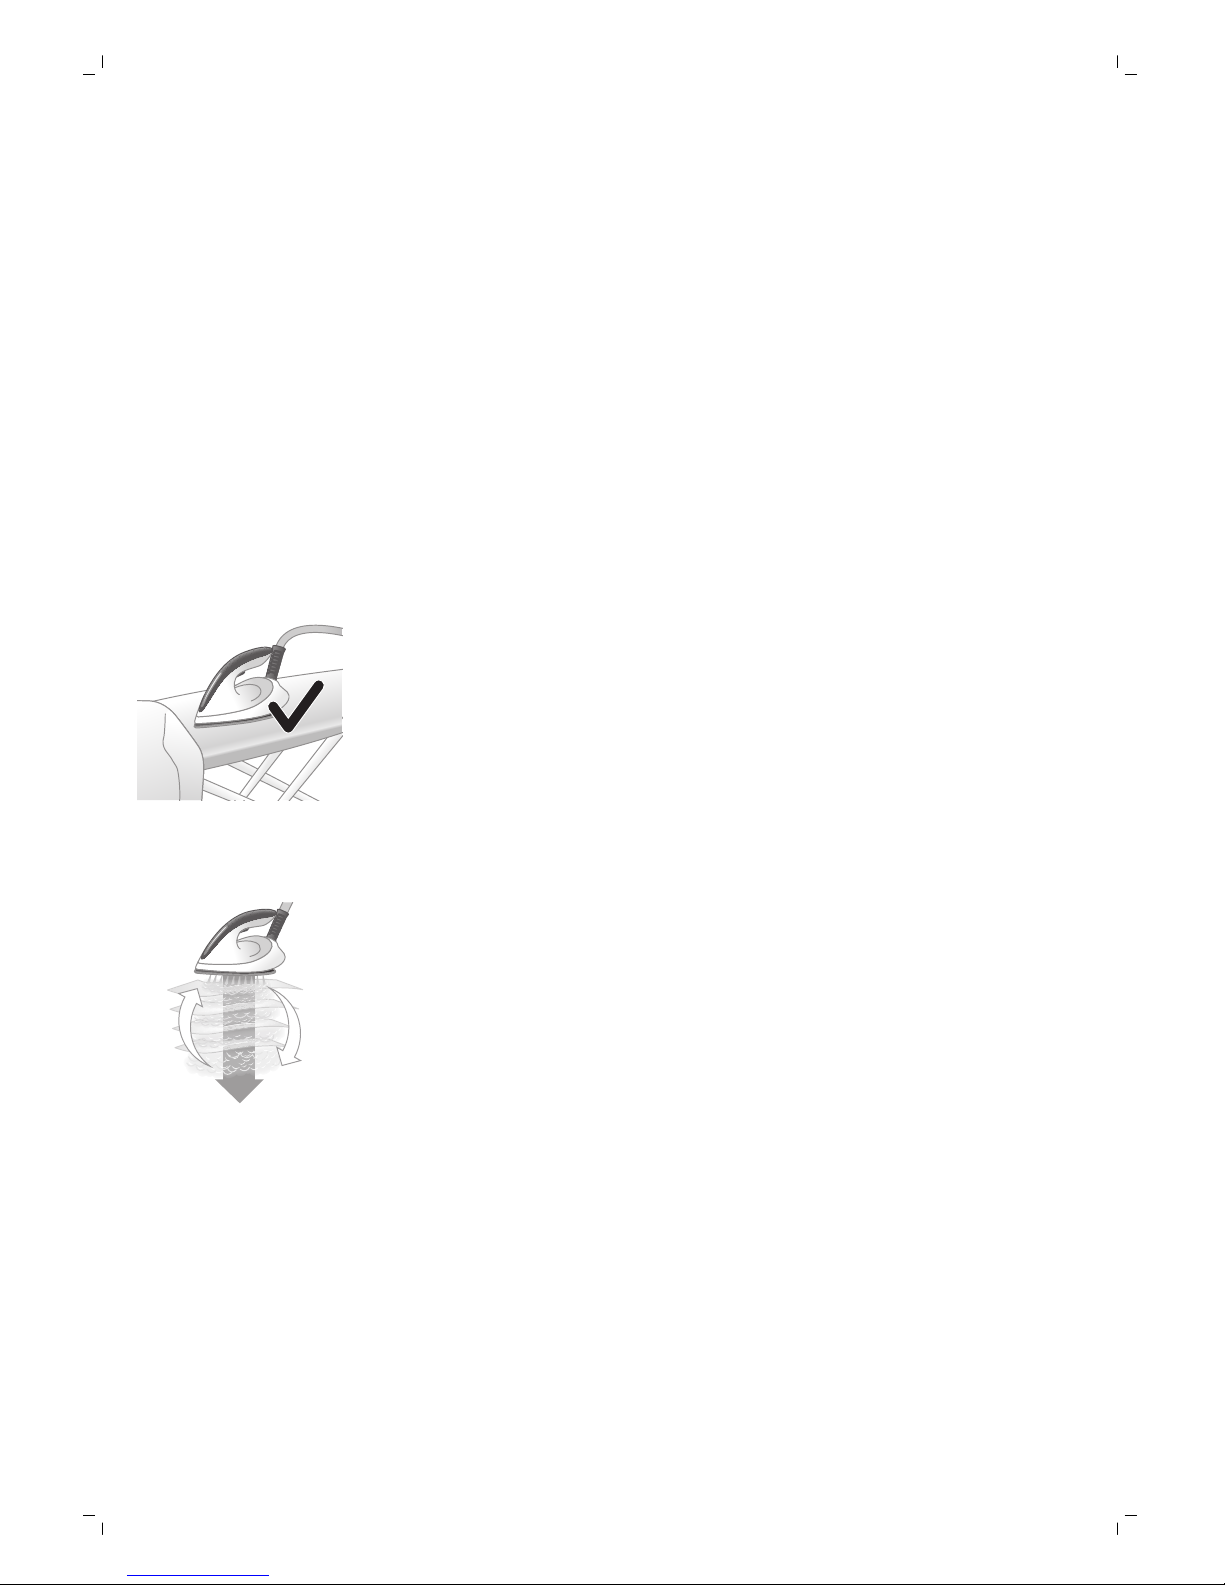
You can use the steam iron in vertical position to remove wrinkles from
hanging fabrics.
1 Hold the iron in vertical position, press the steam trigger and touch the
garment lightly with the soleplate and move the iron up and down.
Safe rest
Resting the iron while rearranging your garment
While rearranging your garment, you can rest the iron either on the iron
platform or horizontally on the ironing board. The OptimalTemp technology
ensures the soleplate will not damage the ironing board cover.
10
English

Energy saving
Eco mode
By using the ECO mode (reduced amount of steam), you can save energy
without compromising on the ironing result.
1 To activate the ECO mode, press the ECO button. The green ECO light
goes on.
2 To deactivate the ECO mode, press the ECO button again. The green
ECO light goes out.
Safety auto-off mode (specific types only)
-
To save energy, the appliance switches off automatically when it has not
been used for 5 minutes. The auto-off light in the on/off button starts to
flash.
-
To activate the appliance again, press the on/off button. The appliance
then starts to heat up again.
Warning: Never leave the appliance unattended when it is
connected to the mains. Always unplug the appliance after use.
Cleaning and maintenance
Smart Calc-Clean System
Your appliance has been designed with a Smart Calc-Clean system to
ensure that descaling and cleaning is done regularly. This helps to maintain
a strong steam performance and prevents dirt and stains coming out of the
soleplate over time. To ensure that the cleaning process is performed, the
steam generator gives regular reminders.
Sound and light Calc-Clean reminder
After 1 to 3 months of use, the Calc-Clean light starts flashing and the
appliance starts beeping to indicate that you have to perform the CalcClean process.
11
English
Besides that, a second defense step to protect the steam generator from
scale is integrated: the steam function gets disabled if descaling is not done.
After descaling is done, the steam function will be restored. This takes place
regardless of the type of water used.
Note: The Calc-Clean process can be performed at any time, even when the
sound and light reminder is not activated yet.
Performing the Calc-Clean process with the Calc-Clean
container
Warning: Do not leave the appliance unattended during the CalcClean process.
Caution: Always perform the Calc-Clean process with the Calc-Clean
container. Do not interrupt the process by lifting the iron up from the
Calc-Clean container, as hot water and steam will come out of the
soleplate.
1 Fill up the water tank halfway.
Note: Make sure that the appliance is plugged in and switched ON during
the Calc-Clean process.
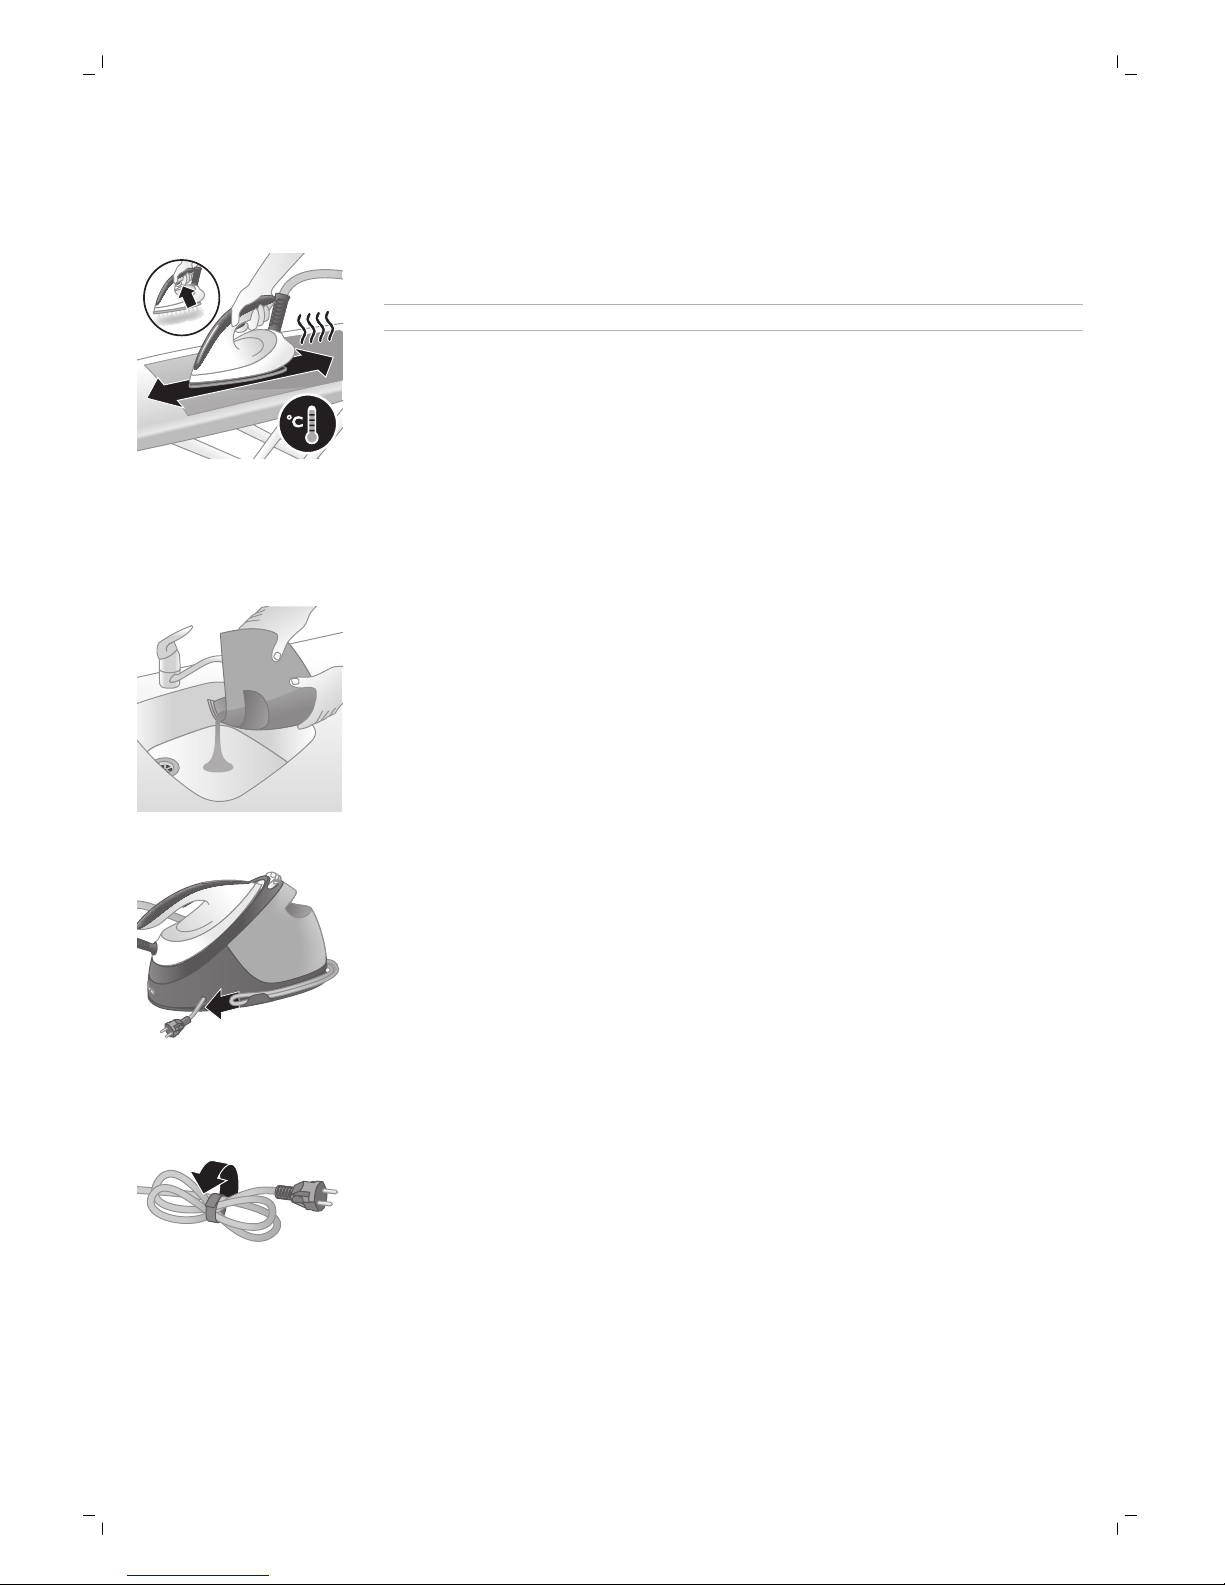
2 Place the Calc-Clean container on the ironing board or any other even,
stable surface.
3 Place the iron stably on the Calc-Clean container.
12
English

2 sec.
4 Press and hold the CALC-CLEAN button for 2 seconds until you hear
short beeps.
Note: The Calc-Clean container has been designed to collect scale
particles and hot water during the Calc-Clean process. It is perfectly safe
to rest the iron on this container during the entire process.
2 min.
5 During the Calc-Clean process, you hear short beeps and a pumping
sound.
6 Wait approximately 2 minutes for the appliance to complete the process.
When the Calc-Clean process is completed, the iron stops beeping and
the CALC-CLEAN light stops flashing.
7 Wipe the iron with a piece of cloth and put it back on the base station.
Caution: The iron is hot.
8 As the Calc-Clean container becomes hot during the Calc-Clean process,
wait approx. 5 minutes before you touch it. Then carry the Calc-Clean
container to the sink, empty it and store it for future use.
9 If necessary, you can repeat steps 1 to 8. Make sure that you empty the
Calc-Clean container before you start the Calc-Clean process.
Note: During the Calc-Clean process, clean water may come out of the
soleplate if no scale has accumulated inside the iron. This is normal.
For more information on how to carry out the Calc-Clean process, refer to
the videos in this link: http://www.philips.com/descaling-iron.
13
English
Cleaning the soleplate
To properly maintain your appliance, clean it regularly.
1 Clean the appliance with a moist cloth.
2 To easily and effectively remove stains, let the soleplate heat up and
move the iron over a moist cloth.
Tip: Clean the soleplate regularly to ensure smooth gliding.
Storage
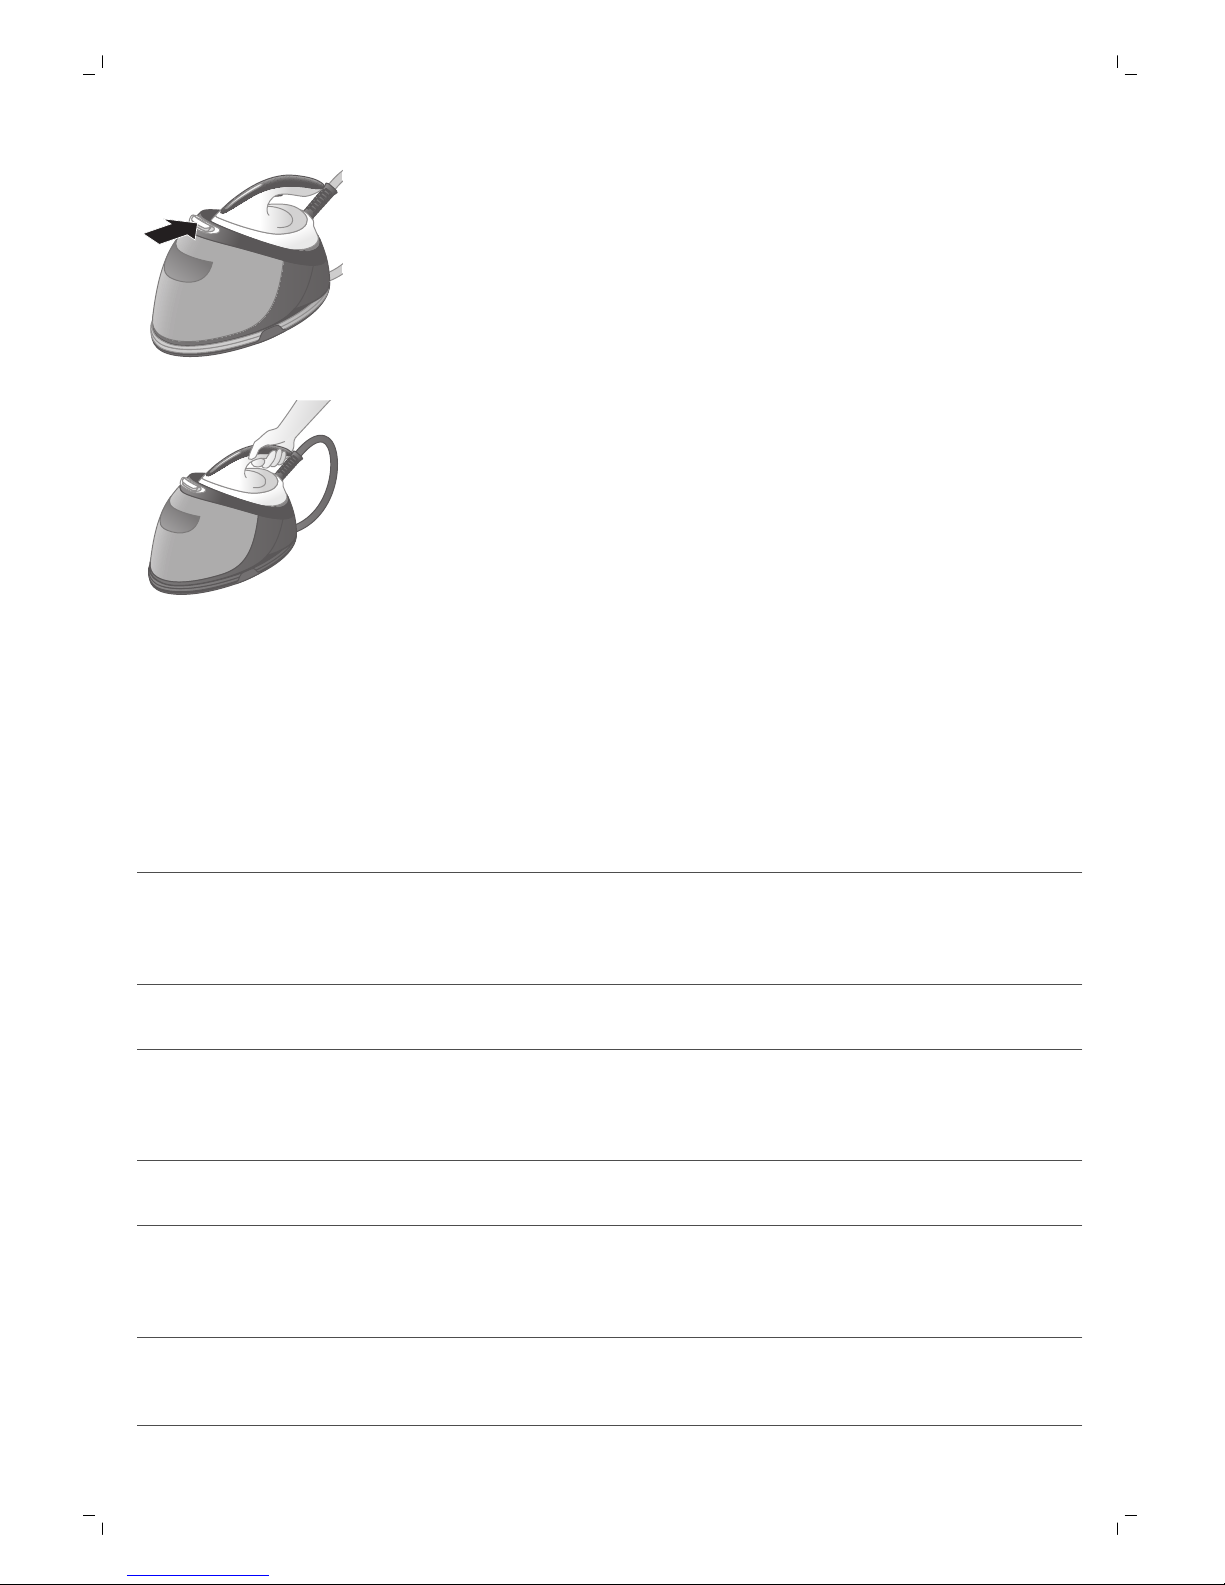
1 Switch off the steam generator and unplug it.
2 Pour the water out of the water tank into the sink.
3 Fold the water supply hose. Wind the water supply hose inside the water
supply hose storage compartment and secure it inside the storage hook.
4 Fold the mains cord and fasten it with the Velcro strip.
14
English
5 Push the carry lock release button to lock the iron onto the iron platform.
6 You can carry the appliance with one hand by the handle of the iron
when the iron is locked on the iron platform.
Troubleshooting
This chapter summarizes the most common problems you could encounter
with the appliance. If you are unable to solve the problem with the
information below, visit www.philips.com/support for a list of frequently
asked questions or contact the Consumer Care Center in your country.
Problem
Possible cause Solution
The iron does not
produce any steam.
There is not enough water in
the water tank.
Fill the water tank beyond the MIN
indication. Press and hold the steam trigger
until steam comes out. It may take up to 30
seconds until steam comes out.
You did not press the steam
trigger.
Press and hold the steam trigger until steam
comes out.
The steam function has
been disabled until you
have performed the CalcClean process.
Perform the Calc-Clean process to restore
the steam function. (see chapter ' Cleaning
and maintenance')
The water tank is not placed
in the appliance properly.
Fit the water tank back into the appliance
firmly ('click').
At the start of your ironing
session, the steam trigger
has not been pressed long
enough.
Press and hold the steam trigger until steam
comes out. It may take up to 30 seconds
until steam comes out.
The light of the CALCCLEAN button flashes
and the appliance beeps.
This is the Calc-Clean
reminder.
Perform the Calc-Clean after the CalcClean reminder is given (see chapter
'Cleaning and maintenance').
15
English

Problem Possible cause Solution
No steam comes out of
the soleplate, the light of
the CALC-CLEAN button
flashes and the appliance
beeps.
You have not done or have
not completed the CalcClean process.
Perform the Calc-Clean process to enable
the steam function again (see chapter
'Cleaning and maintenance').
The appliance has
switched off.
The safety auto-off function
is activated automatically
when the appliance has not
been used for more than 5
minutes.
To activate the appliance again, press the
on/off button. The appliance then starts to
heat up again.
The appliance produces
a loud pumping sound.
The water tank is empty. Fill the water tank with water and press the
steam trigger until the pumping sound
becomes softer and steam comes out of the
soleplate.
Water droplets come out
of the soleplate.
After the Calc-Clean process
remaining water may drip
out of the soleplate.
Wipe the soleplate dry with a piece of cloth.
If the Calc-Clean light still flashes and the
appliance still beeps, perform the CalcClean process (see chapter 'Cleaning and
maintenance').
The Calc-Clean process has
not been completed.
You have to perform the Calc-Clean
process again (see chapter 'Cleaning and
maintenance').
Steam condenses into water
in the hose when you use
steam for the first time or
have not used it for a long
time.
This is normal. Hold the iron away from the
garment and press the steam trigger.Wait
until steam instead of water comes out of
the soleplate.
Dirty water and impurities
come out of the
soleplate.
Impurities or chemicals
present in the water have
deposited in the steam vents
and/or soleplate.
Perform the Calc-Clean process regularly
(see chapter 'Cleaning and maintenance').
Water flushes out of the
soleplate.
You have accidentally
started the Calc-Clean
process (see chapter
'Cleaning and
maintenance').
Switch off the appliance. Then switch it
back on again. Let the iron heat up until the
'iron ready' light lights up steadily.
The Calc-Clean process
does not start.
You have not pressed the
CALC-CLEAN button for 2
seconds until the appliance
started beeping.
See chapter 'Cleaning and maintenance'.
The iron leaves a shine or
an imprint on the
garment.
The surface to be ironed was
uneven, for instance
because you were ironing
over a seam or a fold in the
garment.
PerfectCare is safe on all garments. The
shine or imprint is not permanent and will
come off if you wash the garment.Avoid
ironing over seams or folds or you can place
a cotton cloth over the area to be ironed to
avoid imprints.
16
English

Problem Possible cause Solution
There was not enough felt in
the ironing board cover.
Put an extra layer of felt material under the
ironing board cover.
The ironing board cover
becomes wet, or there
are water droplets on the
floor/garment.
Steam has condensed on
the ironing board cover after
a long ironing session.
Replace the ironing board cover if the foam
or felt material has worn out. You can also
add an extra layer of felt material under the
ironing board cover to prevent
condensation on the ironing board.
You have an ironing board
that is not designed to cope
with the high steam rate of
the appliance.
Put an extra layer of felt material under the
ironing board cover to prevent
condensation on the ironing board.
17
English
Čeština
Úvod
Společnost Philips Vám gratuluje ke koupi a vítá Vás! Chcete-li využívat
všech výhod podpory nabízené společností Philips, zaregistrujte svůj
výrobek na stránkách www.philips.com/welcome.
Před použitím přístroje si důkladně přečtěte tuto uživatelskou příručku,
samostatný letáček s důležitými informacemi a stručnou příručku.
Uschovejte je pro budoucí použití.
Exkluzivní technologie společnosti Philips
Technologie OptimalTemp
Technologie OptimalTemp umožňuje žehlit všechny typy látek vhodných
k žehlení, a to v jakémkoli pořadí a bez nutnosti nastavovat teplotu nebo
třídit oděvy.
Horkou žehlicí plochu lze bezpečně položit přímo na žehlicí prkno namísto
pokládání na stojánek na žehličku. Můžete tak snížit napětí působící na vaše
zápěstí.
Tato žehlička byla schválena společností Woolmark Company Pty Ltd
k žehlení výrobků z čisté vlny v souladu s pokyny uvedenými na cedulce
žehleného prádla a pokyny výrobce žehličky. R1602. Ve Velké Británii, Irsku,
Hongkongu a Indii je ochranná známka Woolmark certifikační známkou.
Technologie Compact ProVelocity
Tato technologie vytváří souvislý proud páry, který proniká hluboko a
snadno odstraňuje záhyby. Zároveň zajišťuje, že je přístroj kompaktnější a
lehčí než klasické generátory páry a snadněji se skladuje.
Přehled výrobku (obr. 1)
1 Přívodní hadice na vodu
2 Spoušť páry / parního rázu
3 Kontrolka „Žehlička připravena“
4 Žehlicí plocha
5 Žehlicí plocha
6 Tlačítko pro zajištění při přenášení
7 Odnímatelná nádržka na vodu
8 Přihrádka pro uložení přívodní hadice na vodu
9 Napájecí kabel se zástrčkou
10 Tlačítko CALC-CLEAN s kontrolkou
18
Čeština

11 Tlačítko zapnutí/vypnutí s kontrolkou zapnutí a kontrolkou
automatického vypnutí
12 Tlačítko ECO s kontrolkou
Příprava k použití
Typ použitelné vody
Tento přístroj je určen pro používání vody z vodovodního kohoutku. Pokud
však žijete v oblasti s tvrdou vodou, může se vodní kámen usazovat rychleji.
V zájmu prodloužení životnosti přístroje proto doporučujeme používat
destilovanou nebo demineralizovanou vodu.
Varování: Nepoužívejte parfémovanou vodu, vodu ze sušičky,
ocet, škrob, odvápňovací prostředky, přípravky pro usnadnění
žehlení, vodu s chemicky odstraněným vodním kamenem nebo
jiné chemikálie, protože by mohlo dojít k vystřikování vody,
vzniku hnědých skvrn nebo poškození zařízení.
Naplnění nádržky na vodu
1 Nádržku na vodu naplňte před každým použitím, nebo když hladina vody
v nádržce klesne pod minimální úroveň. Nádržku lze doplnit kdykoli
během žehlení.
2 Vyjměte nádržku na vodu ze základny.
3 Zásobník naplňte vodou až po označení MAX.
19
Čeština

4 Vložte nádržku na vodu zpět do generátoru tak, že ji nejprve zasunete do
jeho spodní části.
5 Zasunujte horní část nádržky na vodu, dokud nezapadne na místo (ozve
se cvaknutí).
Použití zastřihovače
Látky, které lze žehlit
Varování:Nežehlete látky, které se nemají žehlit.
-
Žehlit lze látky označené těmito symboly; jedná se například o lněnou
tkaninu, bavlnu, polyester, hedvábí, vlnu, viskózu a umělé hedvábí.
-
Látky označené tímto symbolem nelze žehlit. Patří sem syntetické
látky jako spandex nebo elastan, látky s podílem spandexu nebo
polyolefiny (například polypropylen). Žehlit nelze ani oděvy s potiskem.
Žehlení
1 Generátor páry umístěte na stabilní a vodorovný povrch.
Poznámka: Chcete-li zajistit bezpečné žehlení, umístěte základnu vždy
na stabilní žehlicí prkno.
2 Zkontrolujte, zda je v nádržce na vodu dostatek vody.
20
Čeština

3 Zasuňte síťovou zástrčku do uzemněné síťové zásuvky a stisknutím
vypínače generátor páry zapněte. Počkejte, dokud nebude nepřetržitě
svítit kontrolka „žehlička připravena”. Tato fáze trvá přibližně 2 minuty.
4 Vyjměte přívodní hadici na vodu z přihrádky pro uložení přívodní hadice
na vodu.
5 Stiskněte tlačítko uvolnění zámku pro přenášení žehličky a odemkněte
žehličku ze stojánku.
6 Chcete-li začít žehlit, stiskněte a podržte spoušť páry.
Varování: Párou nikdy nemiřte na osoby.
7 Nejlepších výsledků dosáhnete, pokud po žehlení s párou provedete
několik posledních tahů bez páry.
Poznámka: Při prvním použití přístroje může trvat až 30 sekund, než z něj
začne vycházet pára.
Poznámka: Čerpadlo se aktivuje při každém stisknutí spouště páry. Čerpadlo
lehce drnčí, což je normální. Pokud v nádržce není voda, je zvuk čerpadla
hlasitější. Když úroveň vody klesne pod minimální hladinu, naplňte nádržku
vodou.
Chcete-li dosáhnout silnějšího výstupu páry, můžete rovněž použít režim
páry TURBO, a to u všech materiálů, které lze žehlit.
U látky typu bavlny, džínoviny a lnu se použití režimu páry TURBO
doporučuje.
1 Stiskněte vypínač a podržte jej 2 sekundy, dokud kontrolka nezačne svítit
bíle.
2 Chcete-li režim TURBO deaktivovat, stiskněte a po dobu 2 sekund
podržte tlačítko vypínače, dokud nebude kontrolka svítit modře.
Funkce parního rázu
K odstranění nepoddajných záhybů slouží funkce parního rázu.
21
Čeština
 Loading...