Philips GC8030, GC7030, GC7010 User Manual [id]

Intellicare

GC8030, GC7030, GC7010

2

Philips GC8030, GC7030, GC7010 User Manual

3

C

E

D

B

A

G

F

H

I

N J

M

L

K

O

Q

H

P

R

S

4

ENGLISH 6

DEUTSCH 15

FRANÇAIS 25

NEDERLANDS 34

ESPAÑOL 44

ITALIANO 54

PORTUGUÊS 64

74

84

GC8030, GC7030, GC7010

6 ENGLISH

Introduction

Thank you for buying the Intellicare, the new intelligent steam-ironing system from Philips.

The iron offers non-stop ironing and also has a detachable water tank that can be refilled at any moment.

The iron has a constant high steam output, which is a unique feature for steam-ironing systems with unlimited autonomy.This gives you a constant and fast ironing result.

General description

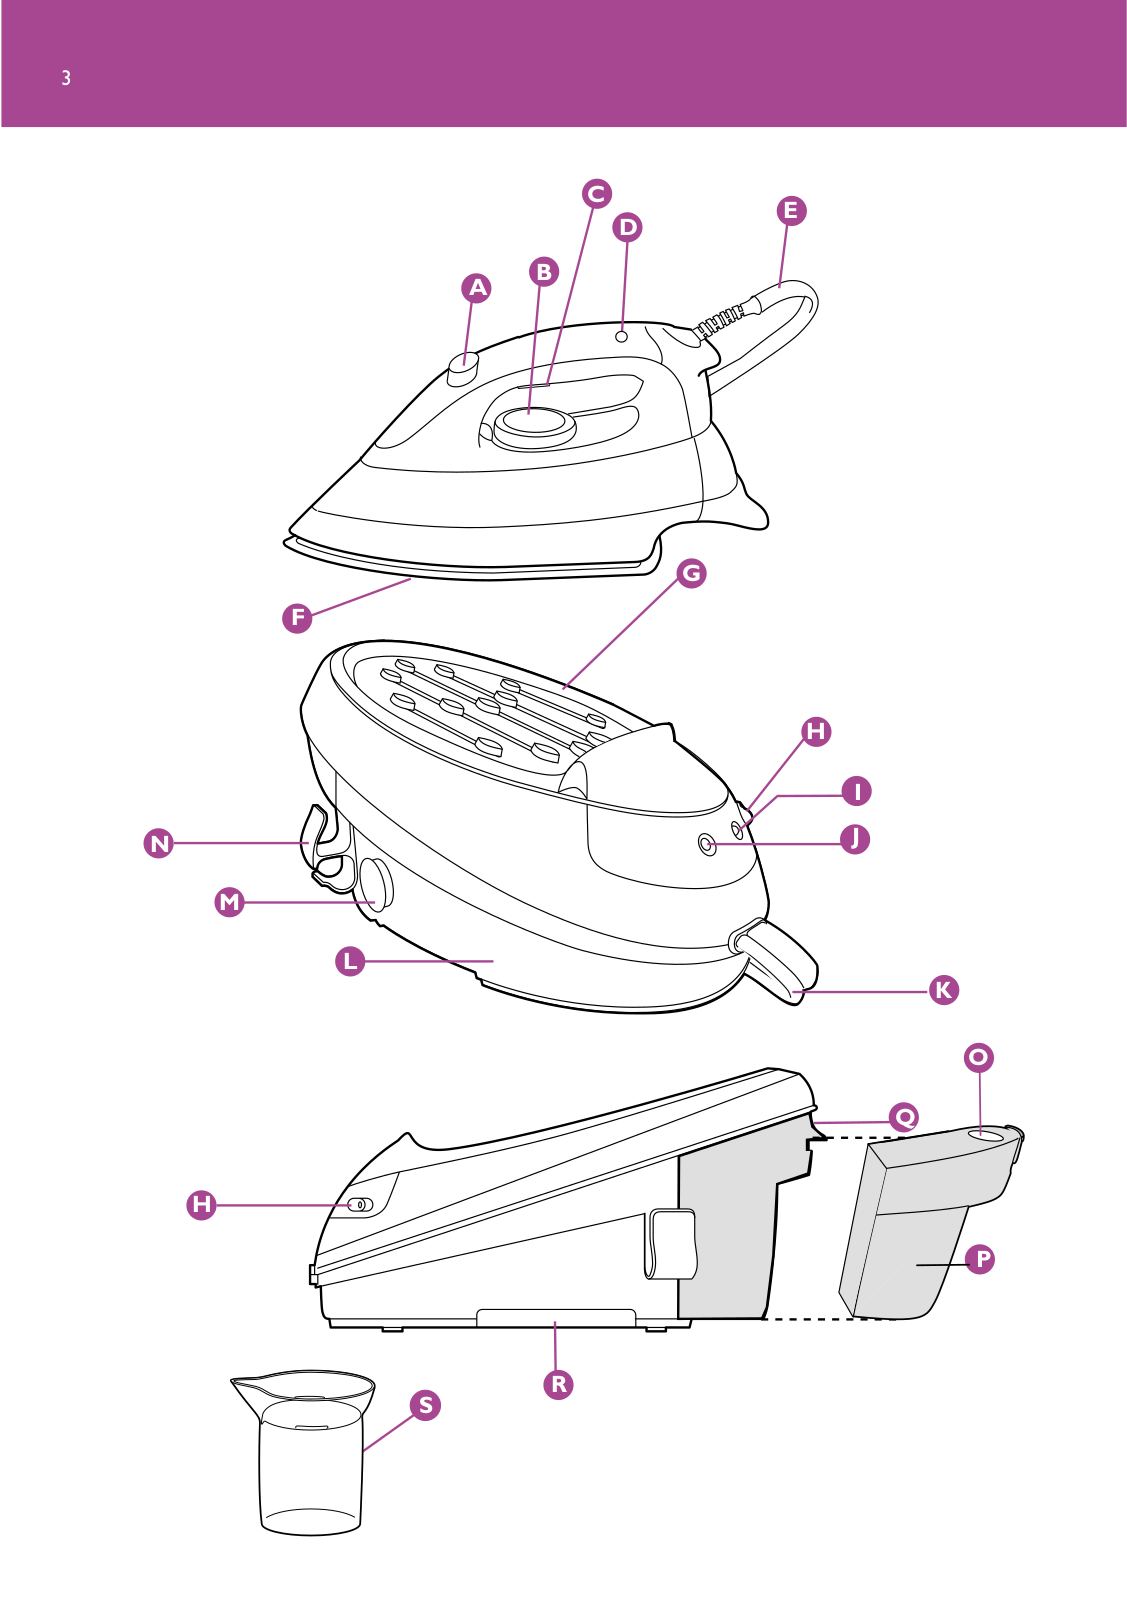
A Shot-of-Steam button (GC8030 only)

BTemperature dial

C Steam activator

DTemperature pilot light

E Supply hose

F Soleplate

G Iron stand

H Power on/off switch with pilot light

I 'Water tank refill' indicator light (GC8030/GC7030 only)

J Steam tank pilot light (GC8030/GC7030 only)

K Mains cord

L Steam tank

M Calc-Clean rinsing cap & plug

NCord storage facility for mains cord & supply hose (GC8030/GC7030 only)

O Filling opening

P Detachable water tank

QWater tank release lever

RTransport handgrip

S Cup

Important

Read these instructions for use carefully before using the appliance and save them for future reference.

Check if the voltage indicated on the bottom of the steam tank corresponds to the local mains voltage before you connect the appliance.

Only connect the appliance to an earthed wall socket.

Do not use the appliance if the plug, the cord, the hose or the appliance itself is damaged.

Regularly check if the mains cord and the supply hose are still undamaged and safe.

If the mains cord is damaged, it must be replaced by Philips, a service centre authorised by Philips or similarly qualified persons in order to avoid a hazard.

ENGLISH 7

Never leave the iron unattended when it is connected to the mains.

Never immerse the iron or the steam tank in water.

Infirm persons should not be allowed to use the appliance without supervision. Keep the appliance out of the reach of children.

The iron stand and the soleplate of the iron can become extremely hot and may cause burns if touched. If you want to move the steam tank, do not touch the stand.

Always place the iron on the stand or on its heel. Do not put the hot iron on the supply hose or the mains cord. Make sure that mains cord and the supply hose do not come into contact with the hot soleplate.

Do not put perfume, vinegar, starch, descaling agents, ironing aids or other chemicals in the water tank.

Always place the appliance on a stable, level and horizontal surface.

When you have finished ironing and even when you leave the iron for a short while, unplug the iron and put it on the iron stand.

If steam escapes from the steam tank when the appliance is heating up, switch the appliance off and tighten the Calc-Clean rinsing plug. If steam continues to escape when the appliance is heating up, switch the appliance off and contact a service centre authorised by Philips.

Rinse the steam tank once a month or after every 10 times of use to prevent damage to your iron.

Never remove the Calc-Clean rinsing cap and unscrew the Calc-Clean rinsing plug when the steam tank is hot.

Before first use

B

The iron may give off some smoke when you use it for the first time.This


is normal and will stop after a short while.

B

White particles may come out of the soleplate when you use the iron for


the first time.This is normal; the particles are harmless and will stop


coming out of the iron after a short while.

BWhen you switch the appliance on, the steam tank may produce a pumping sound.This is normal; the sound tells you that water is being pumped into the steam tank.

1Remove any sticker or protective foil from the soleplate and clean the soleplate with a soft cloth.

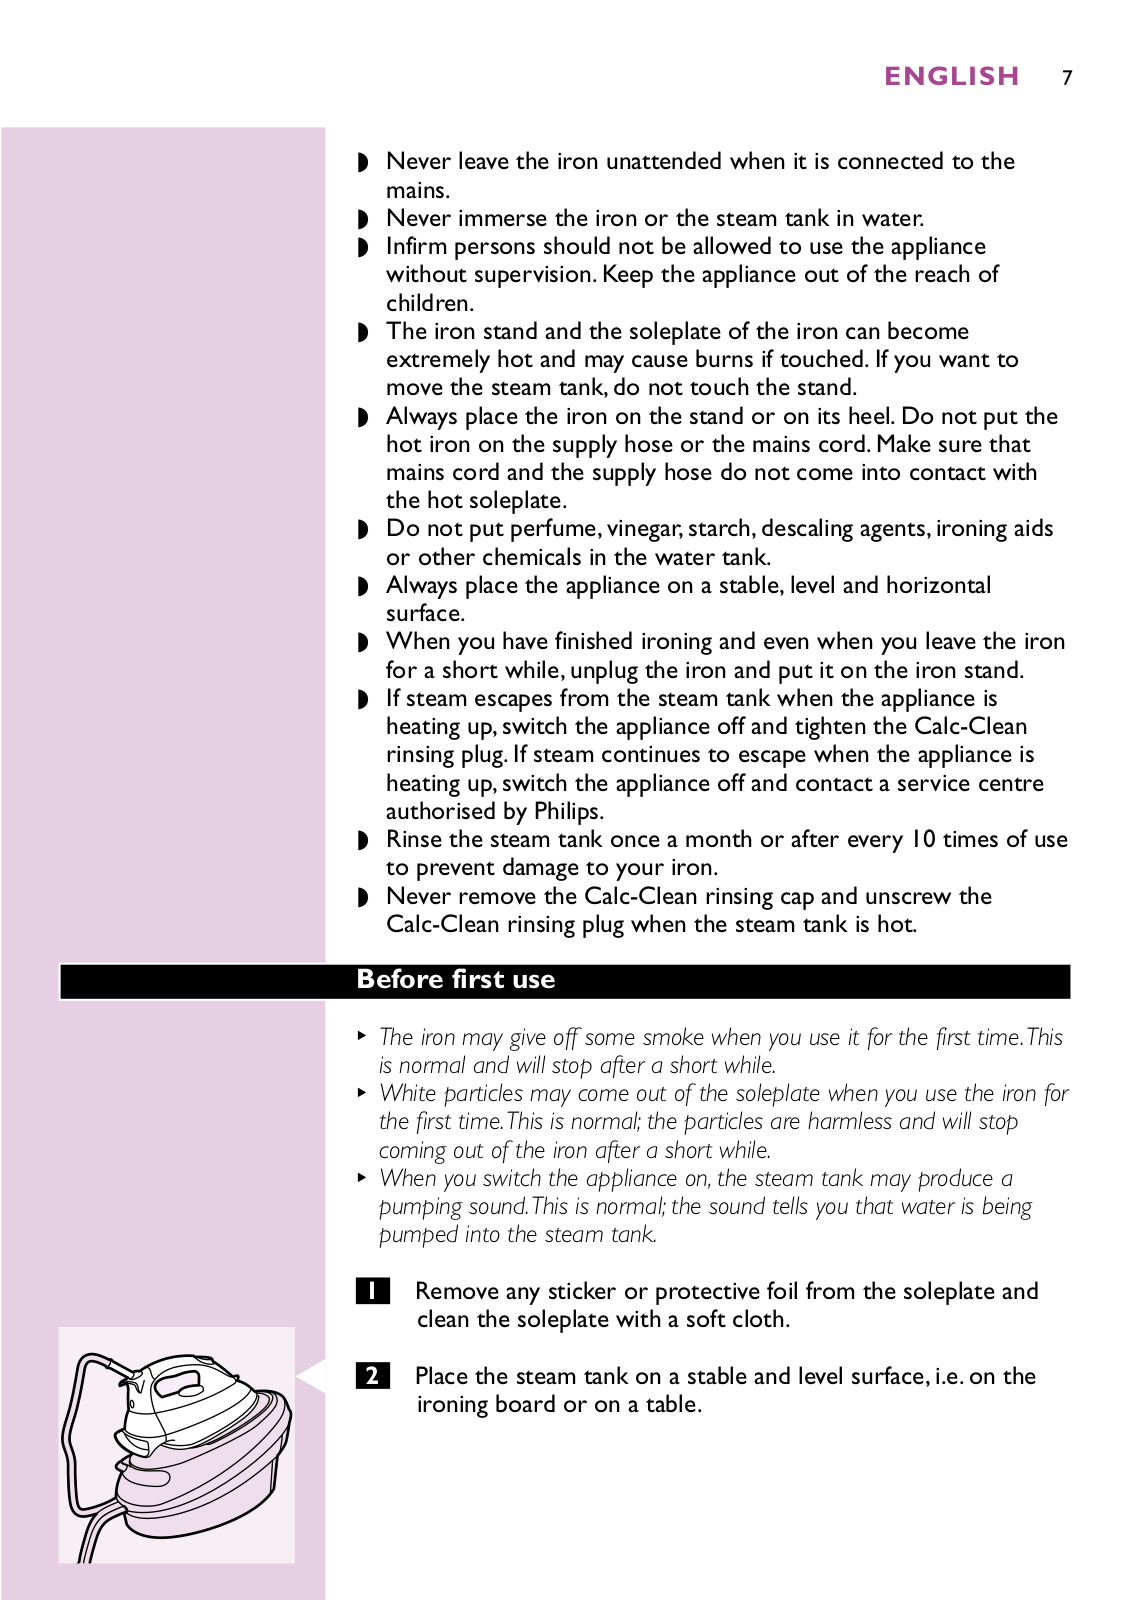
C 2 Place the steam tank on a stable and level surface, i.e. on the ironing board or on a table.

8 ENGLISH

Preparing for use

Filling the detachable water tank

If the tap water in your area is very hard, we advise you to mix the tap

water with an equal amount of demineralised water.

Do not put perfume, vinegar, starch, descaling agents, ironing aids, other

chemicals or 100 percent distilled water in the water tank.

C 1

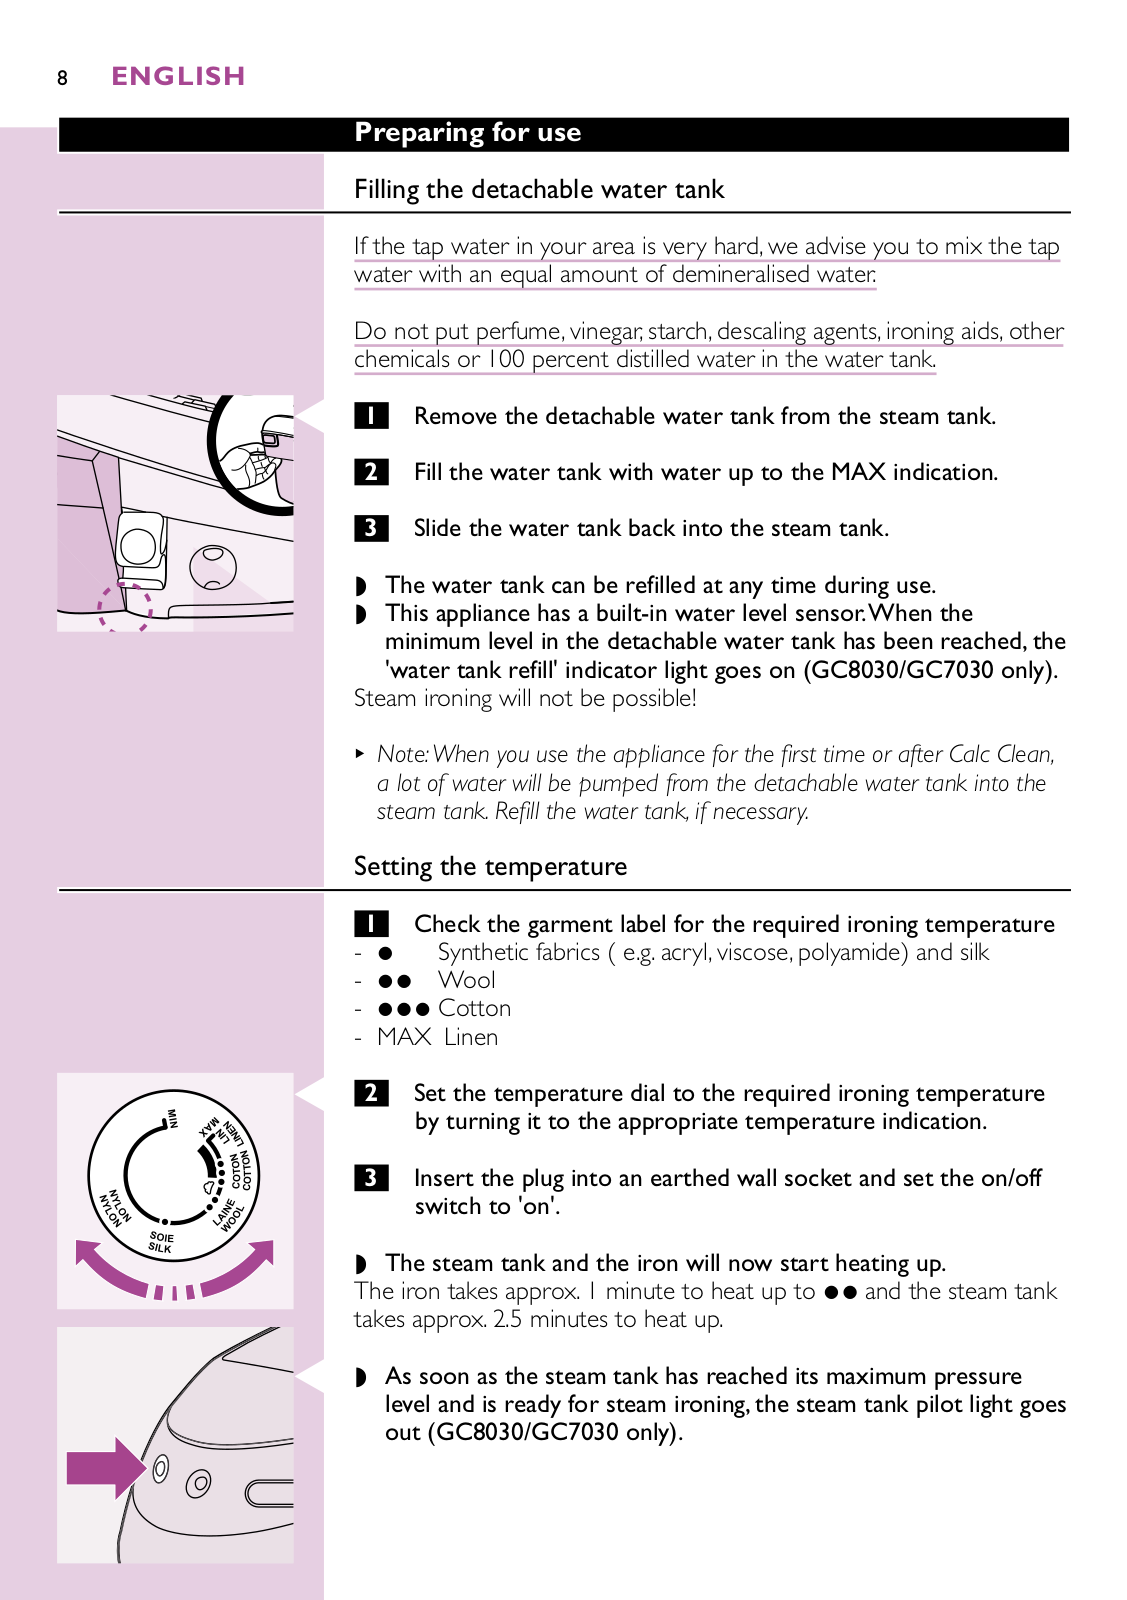
Remove the detachable water tank from the steam tank.

2

Fill the water tank with water up to the MAX indication.

3Slide the water tank back into the steam tank.

The water tank can be refilled at any time during use.

This appliance has a built-in water level sensor.When the minimum level in the detachable water tank has been reached, the 'water tank refill' indicator light goes on (GC8030/GC7030 only).

Steam ironing will not be possible!

BNote:When you use the appliance for the first time or after Calc Clean, a lot of water will be pumped from the detachable water tank into the steam tank. Refill the water tank, if necessary.

Setting the temperature

1Check the garment label for the required ironing temperature

-1 Synthetic fabrics ( e.g. acryl, viscose, polyamide) and silk

-2 Wool

-3 Cotton

-MAX Linen

C 2 Set the temperature dial to the required ironing temperature by turning it to the appropriate temperature indication.

3 Insert the plug into an earthed wall socket and set the on/off switch to 'on'.

The steam tank and the iron will now start heating up.

The iron takes approx. 1 minute to heat up to 2 and the steam tank takes approx. 2.5 minutes to heat up.

C As soon as the steam tank has reached its maximum pressure

level and is ready for steam ironing, the steam tank pilot light goes out (GC8030/GC7030 only).

ENGLISH 9

Tips

-If the article consists of various kind of fibres, always select the temperature required by the most delicate fibre, i.e. the lowest temperature. If, for example, the fabric consists of 60% polyester and 40% cotton, it should be ironed at the temperature indicated for polyester (2).

-If you do not know what kind of fabric(s) the article is made of, determine the right ironing temperature by ironing a part that will not be visible when you wear or use the article.

-Silk, woolen and synthetic materials: iron the reverse side of the fabric to prevent shiny patches.

-Fabrics that tend to acquire shiny patches should be ironed in one direction only (along with the nap) while applying very little pressure.

-Start ironing the articles that require the lowest ironing temperature, i.e. those made of synthetic materials.

To make the iron cool down faster, simply apply steam or iron a piece of cloth.

Using the appliance

Steam ironing

The supply hose may become hot during a long ironing session.

B The system may occasionally produce a pumping sound during steam ironing.This is normal and tells you that water is being pumped into the steam tank.

1 Make sure there is enough water in the water tank.

Steam ironing is only possible at higher ironing temperatures (higher than 2).

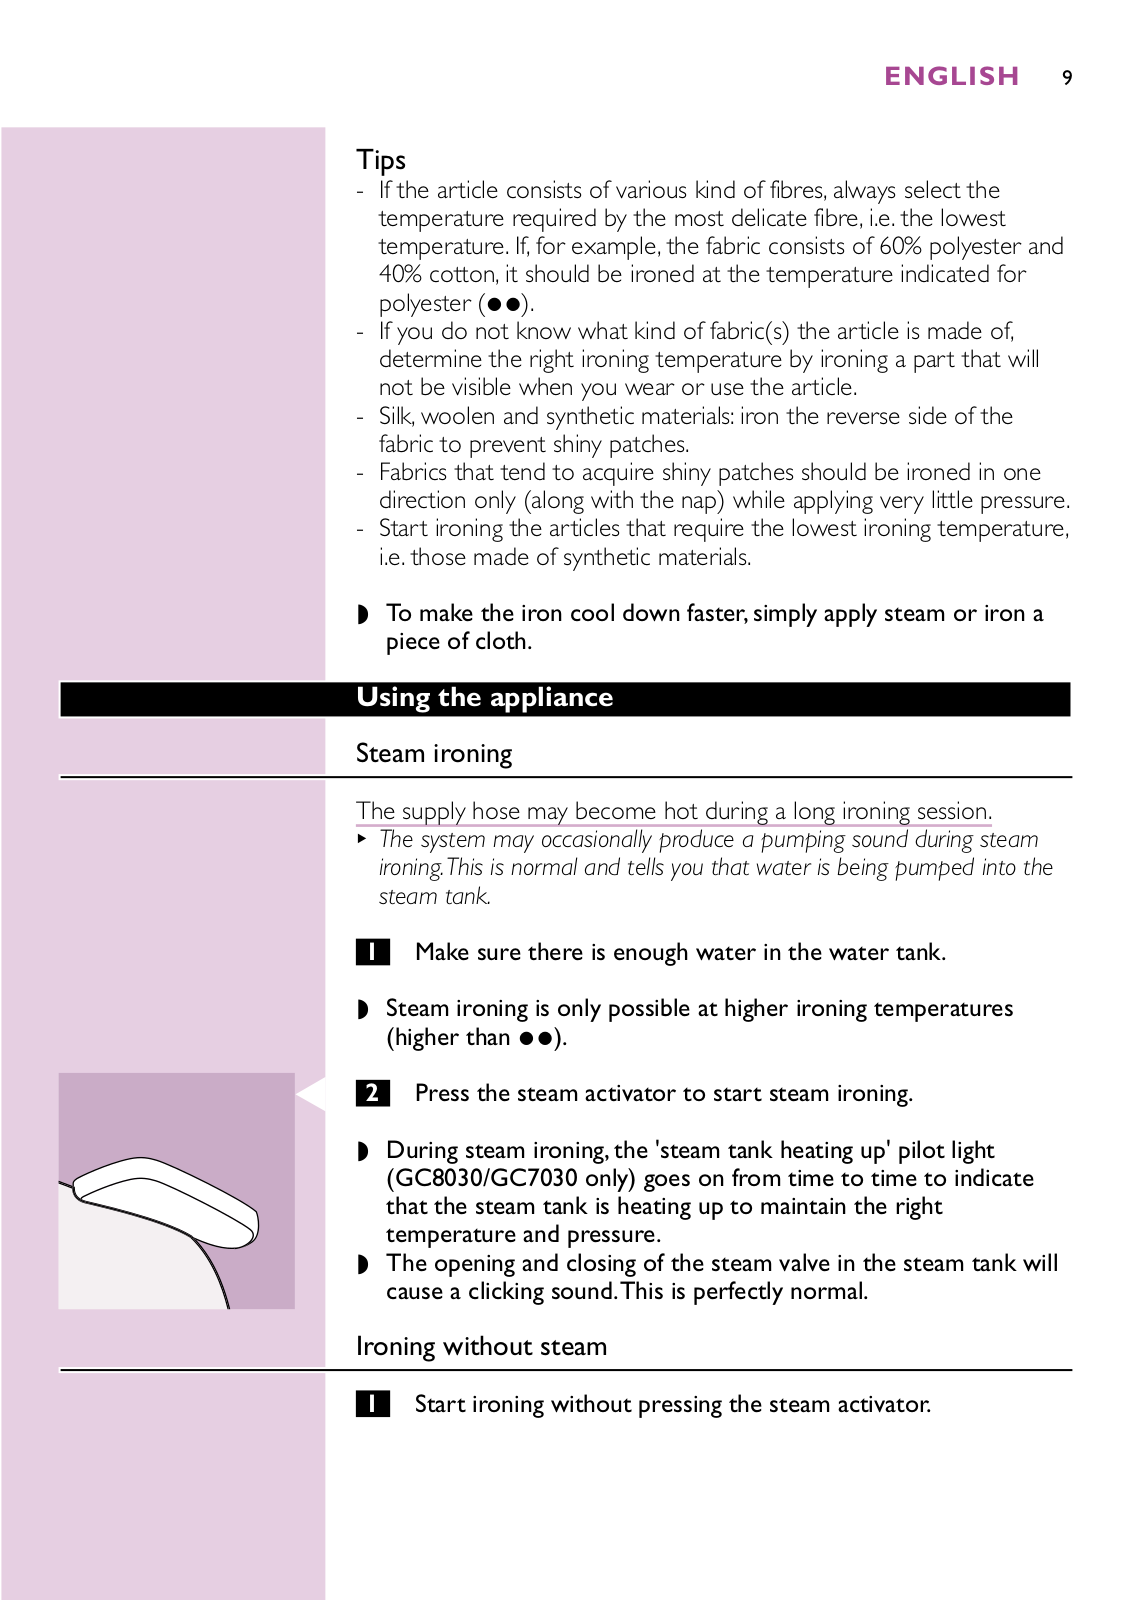
C 2 Press the steam activator to start steam ironing.

During steam ironing, the 'steam tank heating up' pilot light (GC8030/GC7030 only) goes on from time to time to indicate that the steam tank is heating up to maintain the right temperature and pressure.

The opening and closing of the steam valve in the steam tank will cause a clicking sound.This is perfectly normal.

Ironing without steam

1 Start ironing without pressing the steam activator.

10 ENGLISH

After ironing

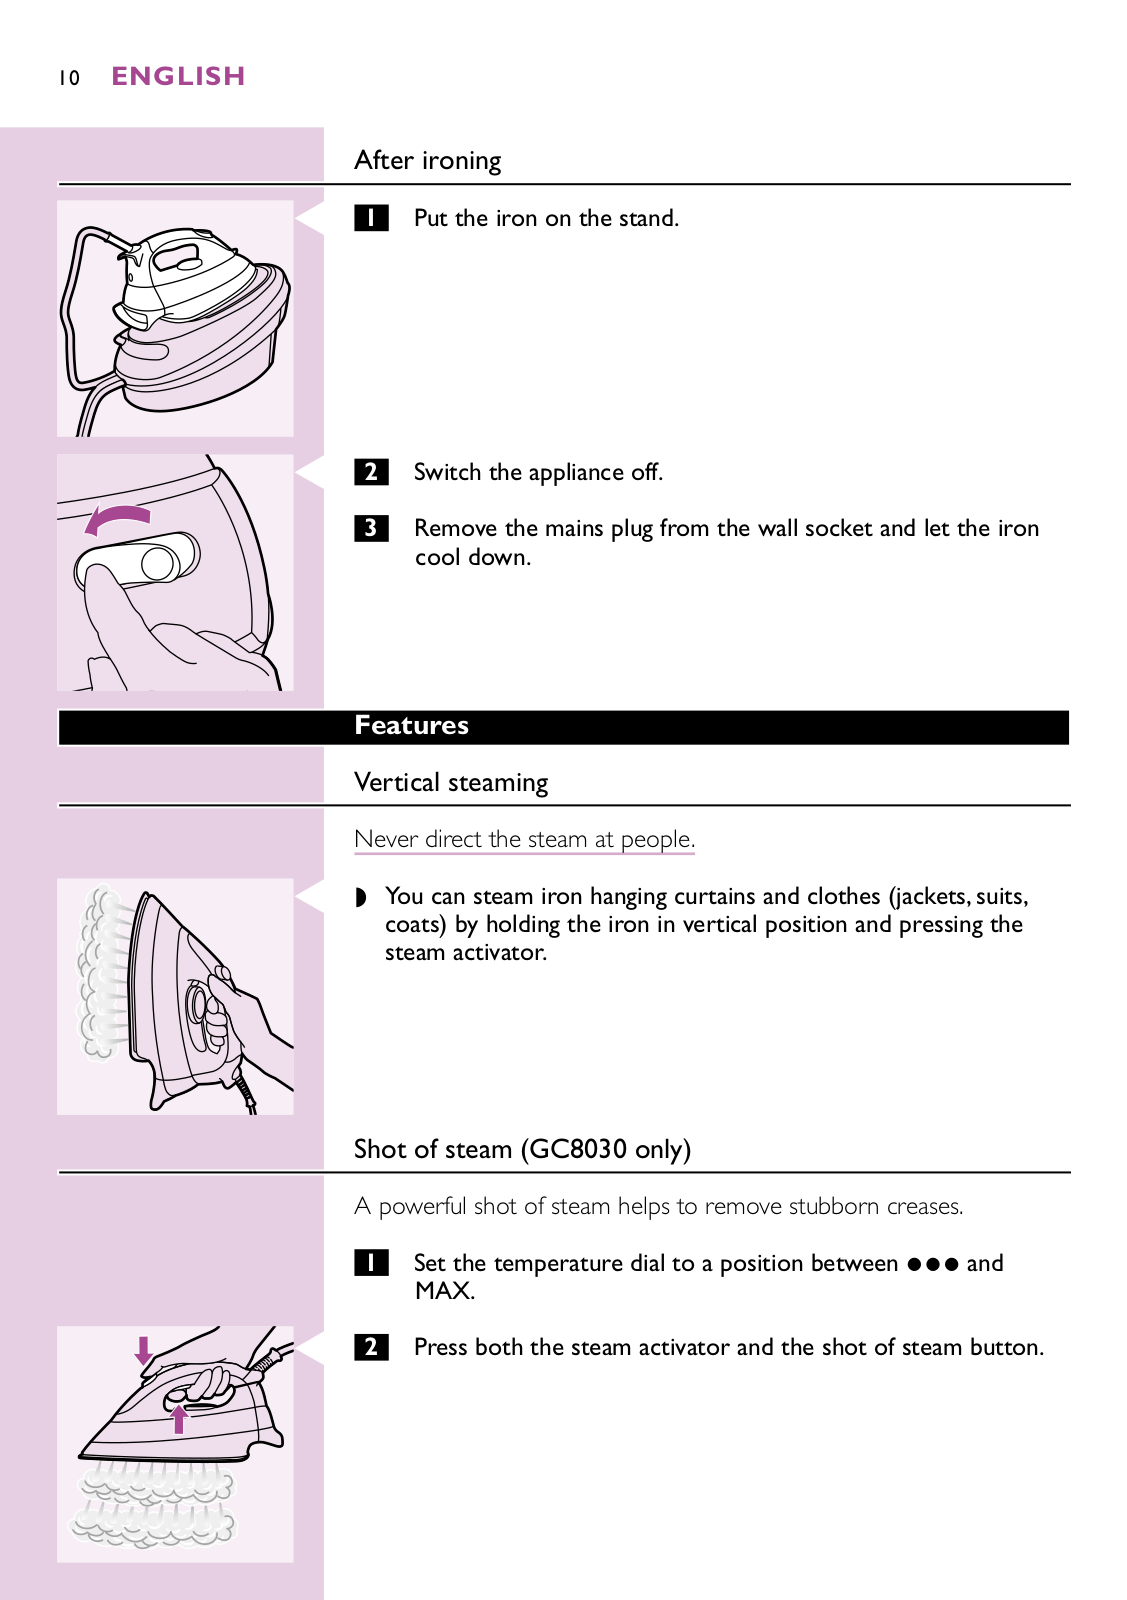
C 1 Put the iron on the stand.

C 2

Switch the appliance off.

3

Remove the mains plug from the wall socket and let the iron


cool down.

Features

Vertical steaming

Never direct the steam at people.

C You can steam iron hanging curtains and clothes (jackets, suits, coats) by holding the iron in vertical position and pressing the steam activator.

Shot of steam (GC8030 only)

A powerful shot of steam helps to remove stubborn creases.

1Set the temperature dial to a position between 3 and MAX.

C 2 Press both the steam activator and the shot of steam button.

ENGLISH 11

Cleaning and maintenance

After each use

Never immerse the iron in water nor rinse it under the tap.

1Clean the iron with a damp cloth.

2Wipe scale and any other deposits off the soleplate with a damp cloth and a non-abrasive cleaning agent.

Calc Clean

Never remove the Calc-Clean rinsing cap and unscrew the Calc-Clean rinsing plug when the steam tank is hot.

VERY IMPORTANT: Rinse the steam tank once a month or after every

10 times of use to prevent damage to your iron.

BThe scale that develops inside the steam tank will not deposit onto the walls. Just calc-clean the steam tank once or twice a month to keep your Intellicare in good condition.

1Make sure that the steam tank has been unplugged for more than 2 hours and is not hot.

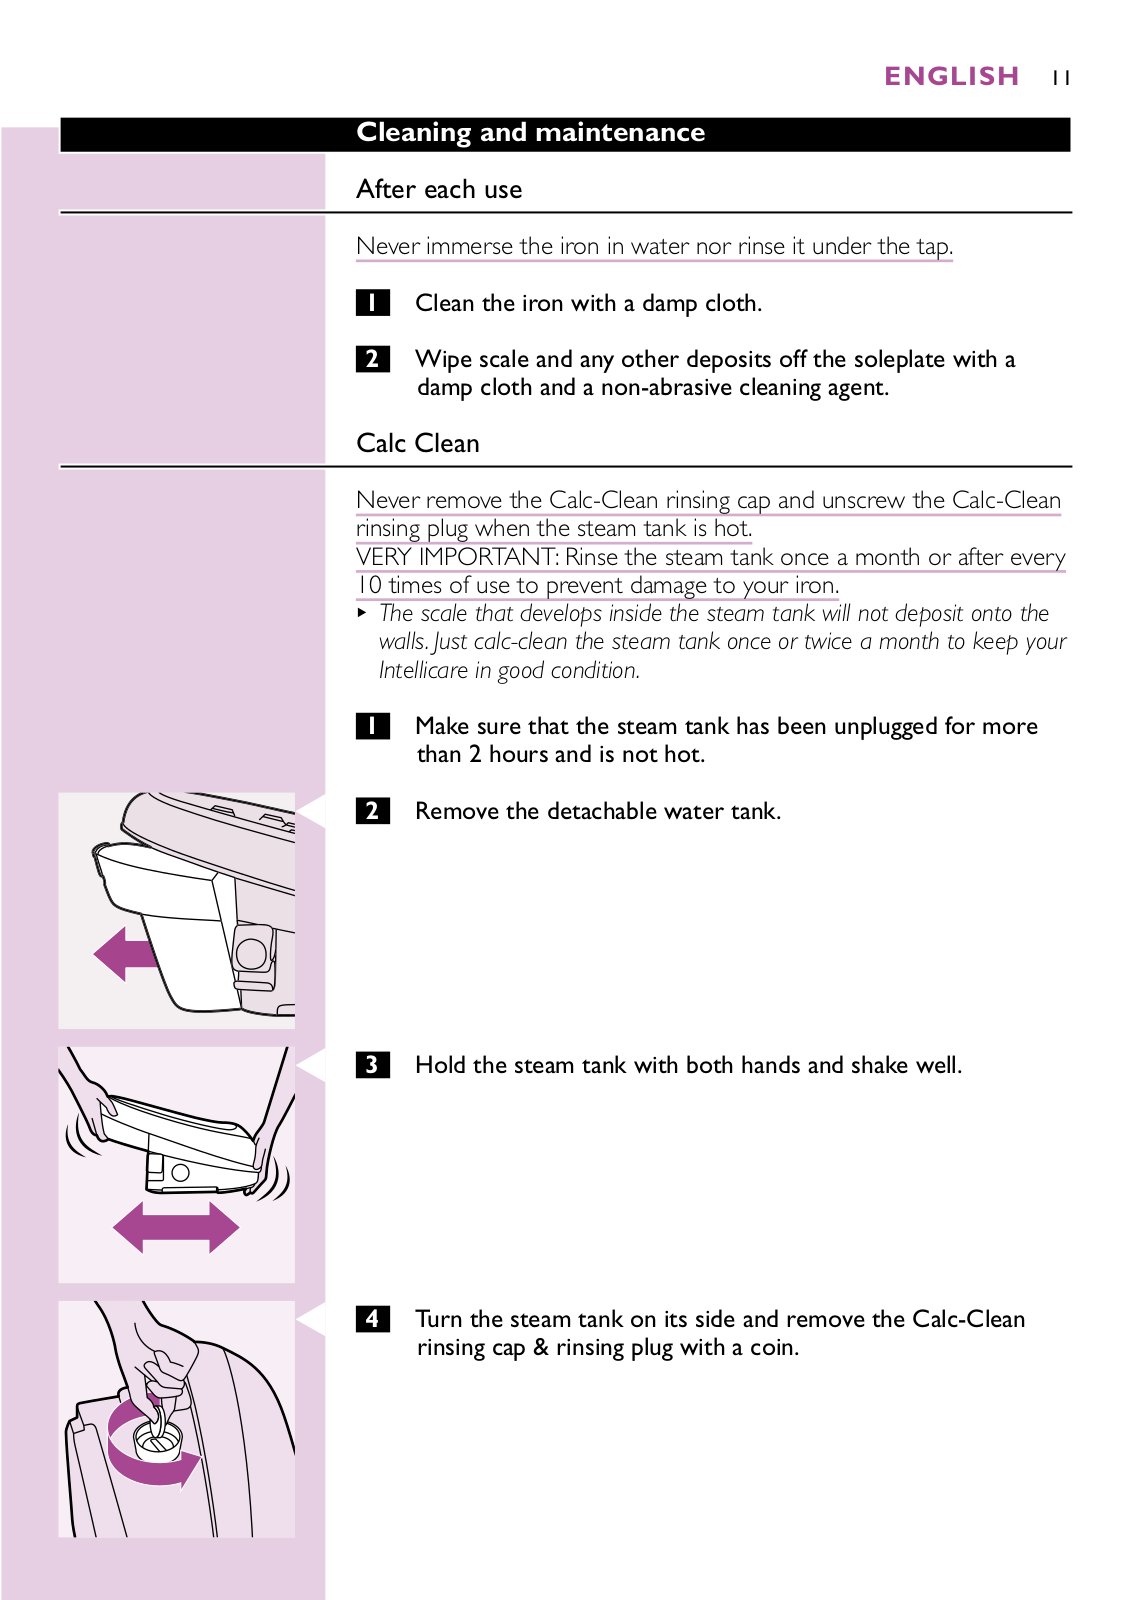
C 2 Remove the detachable water tank.

C 3 Hold the steam tank with both hands and shake well.

C 4 Turn the steam tank on its side and remove the Calc-Clean rinsing cap & rinsing plug with a coin.

12 ENGLISH

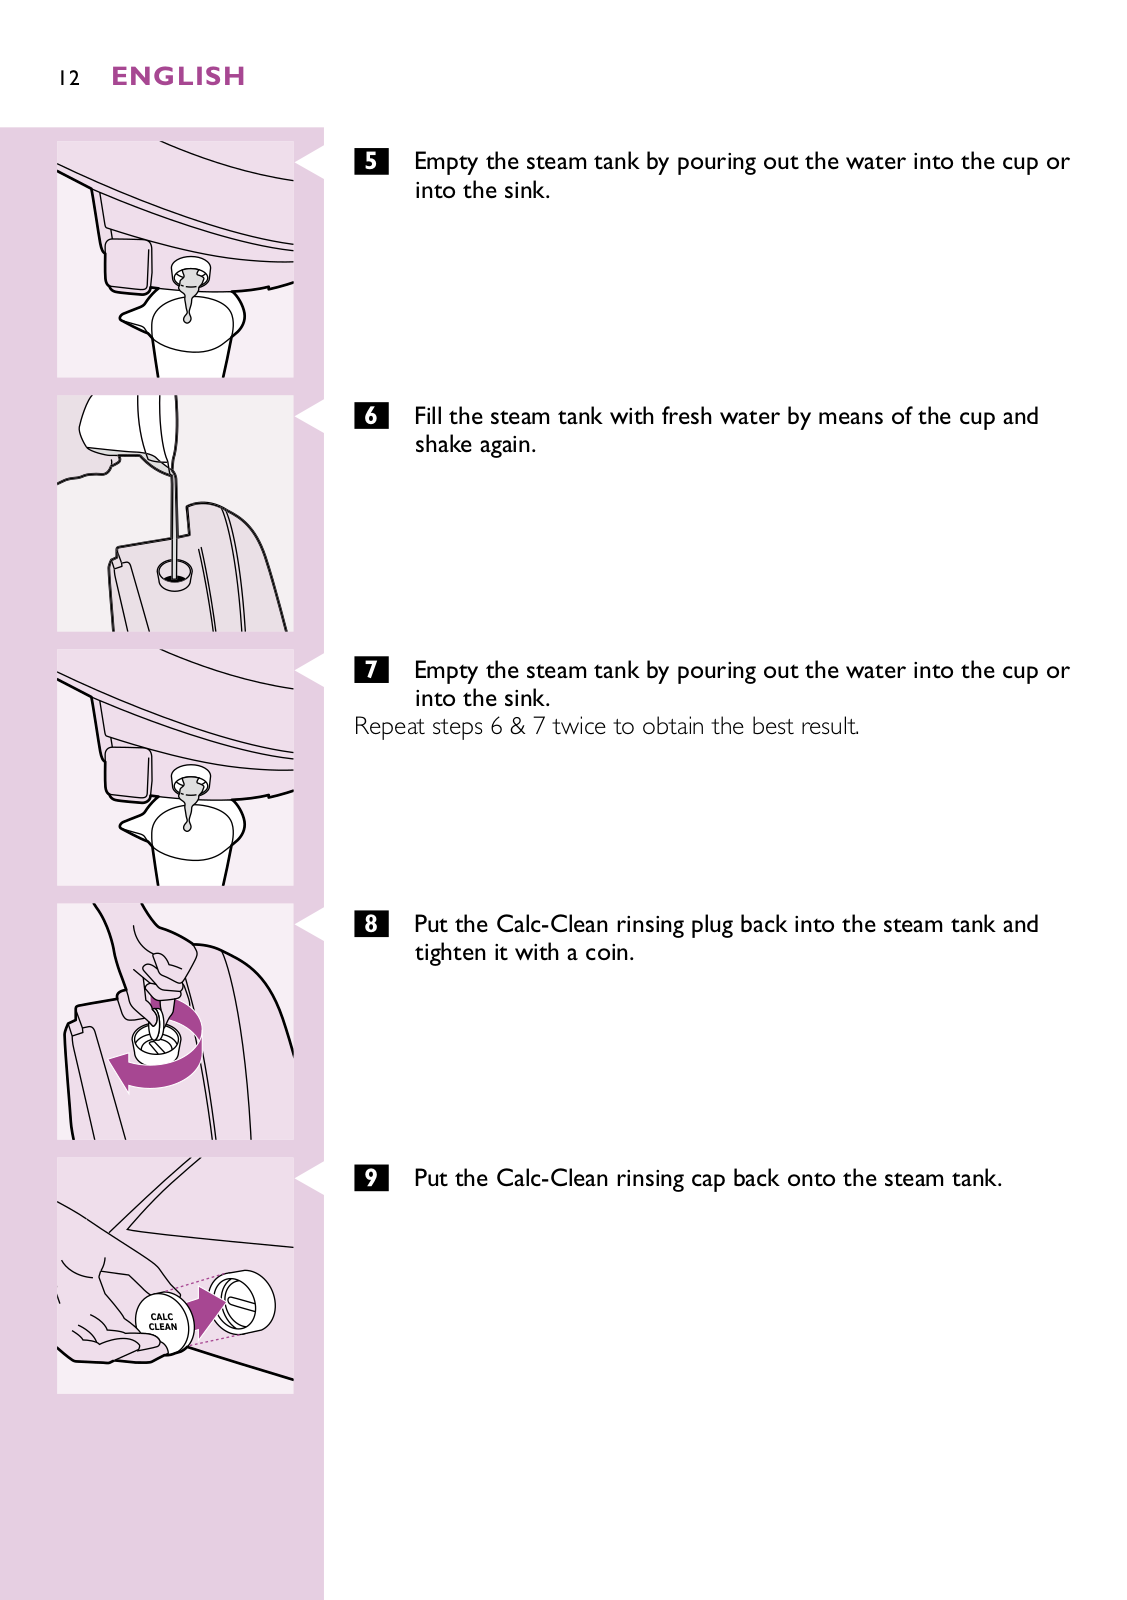
C 5 Empty the steam tank by pouring out the water into the cup or into the sink.

C 6 Fill the steam tank with fresh water by means of the cup and shake again.

C 7 Empty the steam tank by pouring out the water into the cup or into the sink.

Repeat steps 6 & 7 twice to obtain the best result.

C 8 Put the Calc-Clean rinsing plug back into the steam tank and tighten it with a coin.

C 9 Put the Calc-Clean rinsing cap back onto the steam tank.

ENGLISH 13

Storage

Always let the iron cool down before storing it.

C 1 Empty the water tank and store the supply hose and the mains cord.

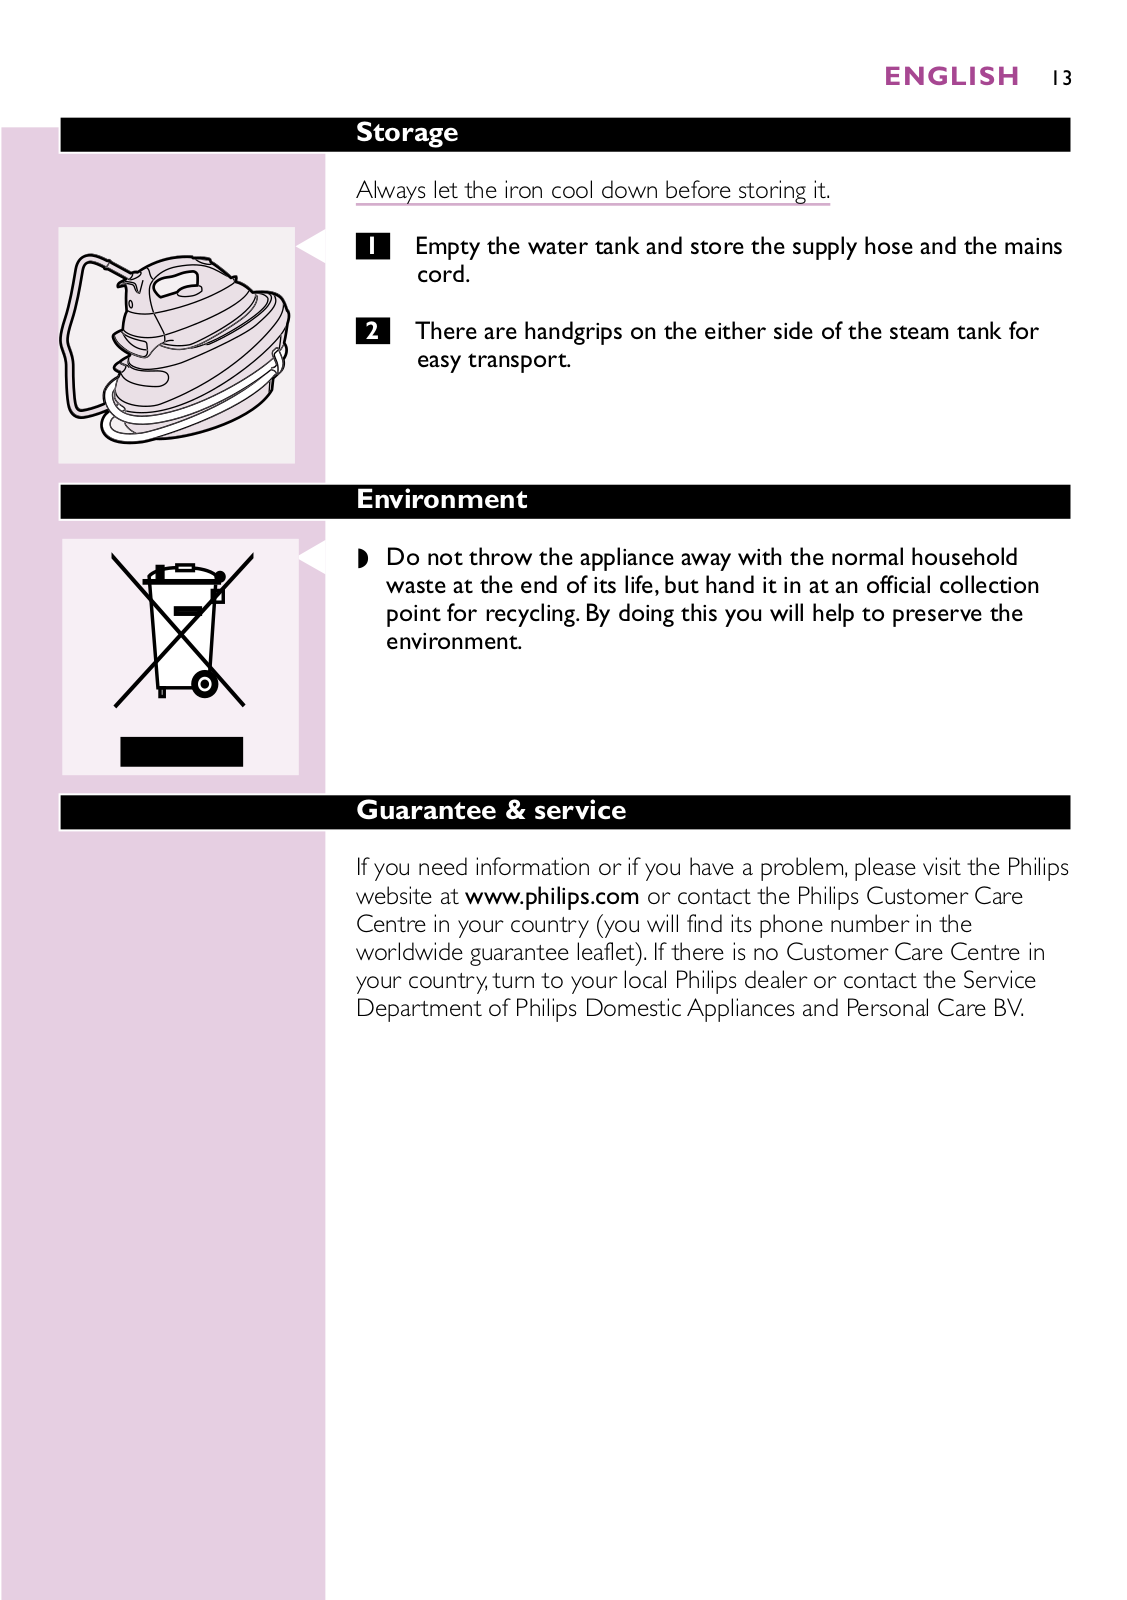
2 There are handgrips on the either side of the steam tank for easy transport.

Environment

C Do not throw the appliance away with the normal household waste at the end of its life, but hand it in at an official collection point for recycling. By doing this you will help to preserve the environment.

Guarantee & service

If you need information or if you have a problem, please visit the Philips website at www.philips.com or contact the Philips Customer Care Centre in your country (you will find its phone number in the worldwide guarantee leaflet). If there is no Customer Care Centre in your country, turn to your local Philips dealer or contact the Service Department of Philips Domestic Appliances and Personal Care BV.

14 ENGLISH

Troubleshooting

This chapter summarises the most common problems you could encounter with your iron. Please read the different sections for more details. If you are unable to solve the problem, please contact the Philips Customer Care Centre in your country.

Problem

Possible cause(s)

Solution

The appliance does not become

There is a connection problem.

Check the mains cord, the plug and the

hot.


wall socket.


The steam tank has not been switched

Set the on/off switch to 'on'.


on.


The temperature dial has been set to MIN.

Set the temperature dial to the required ironing temperature.

Smoke comes out of my new iron

Some parts of the appliance have been

This phenomenon is perfectly normal

when I switch it on.

lightly greased in the factory and may

and will cease after a short while.


initially give off some smoke when heated.


The iron does not produce any steam.

There is not enough water in the water tank.

Fill the water tank (see 'Preparing for use', section 'Filling the detachable water tank').

The steam tank pilot light is still on

Wait until the pilot light goes out

(GC8030/GC7030 only).

(GC8030/GC7030 only).

The selected ironing temperature is too

Set the temperature to 2 or higher.

low for steam ironing.


The water tank has not been properly attached to the steam tank.

When the iron has been set to a very high temperature, the steam produced is dry and hardly visible. It will be even less visible when the ambient temperature is relatively high and it will be entirely invisible when the temperature has been set to MAX.

Attach the water tank to the steam tank properly (you will hear a click).

Set the iron to a lower temperature, e.g. 2, to check if the iron is actually producing steam.

Water droplets come out of the

The selected temperature is too low for Set the temperature higher than 2.

soleplate.

steam ironing.


When you start steam ironing and when you have stopped steam ironing for a while, the steam that was still present in the supply hose will have cooled down and condensed into water, which causes water droplets to come out of the soleplate.

This is perfectly normal. Hold the iron over an old cloth and press the steam activator when you start ironing (again). Wait until steam instead of water comes out of the soleplate.

Flakes and impurities come out of

Impurities or chemicals present in the

Clean the soleplate with a damp cloth.

the soleplate or the soleplate is

water have deposited in the steam vents


dirty.

and/or on the soleplate.


The appliance produces a

Water is being pumped into the steam

This is normal.

pumping sound.

tank.


The pumping sound does not stop.

Unplug the iron immediately and contact an authorised Philips service centre.

Dirty water comes out of the soleplate.

Too much scale and minerals have accumulated inside the steam tank.

Rinse the steam tank. See chapter 'Cleaning and maintenance'.

DEUTSCH 15

Einleitung

Wir gratulieren Ihnen zu Intellicare, der neuen intelligenten Bügelstation von Philips.

Mit diesem Gerät können Sie ohne Unterbrechung bügeln: Der abnehmbare Wassertank lässt sich jederzeit nachfüllen.

Das Bügeleisen hat eine gleichbleibend hohe Dampfleistung - ein ganz besonderes Merkmal bei jederzeit nachfüllbaren Bügelstationen mit abnehmbarem Wassertank. So erhalten Sie ohne Unterbrechung ein gleichmäßiges und schnelles Bügelergebnis.

Allgemeine Beschreibung

A Dampfstoß-Taste (nur GC8030) BTemperaturregler

C Dampftaste

DTemperatur-Kontrolllampe EVerbindungsschlauch

F Bügelsohle

GAbstellfläche für Bügeleisen

H Ein-/Ausschalter mit Kontrolllampe

I Lampe "Wassertank Nachfüllen" (nur GC8030/GC7030) J Kontrolllampe: Boiler (nur GC8030/GC7030)

K Netzkabel L Boiler

M Calc-Clean-Verschlusskappe und Stöpsel

NHalterung für Netzkabel und Verbindungsschlauch (nur GC8030/GC7030)

O Einfüllöffnung

PAbnehmbarer Wassertank

QWassertank-Entriegelung

RTragegriff

S Becher

Wichtig

Lesen Sie diese Bedienungsanleitung vor dem ersten Gebrauch des Geräts sorgfältig durch und bewahren Sie sie zur späteren Einsichtnahme auf.

Prüfen Sie, bevor Sie das Gerät anschließen, ob die Spannungsangabe unter dem Boiler mit der örtlichen Netzspannung übereinstimmt.

Verwenden Sie das Gerät ausschließlich an einer Schukosteckdose.

Benutzen Sie das Gerät nicht, wenn der Netzstecker, das Netzkabel, der Schlauch oder das Gerät selbst beschädigt ist.

Prüfen Sie Verbindungsschlauch und Netzkabel regelmäßig auf Unversehrtheit und Sicherheit.

16 DEUTSCH

Wenn das Netzkabel defekt oder beschädigt ist, darf es nur von einem Philips Service-Center oder einer von Philips autorisierten Werkstatt durch ein Original-Ersatzkabel ausgetauscht werden, um Gefährdungen zu vermeiden.

Lassen Sie das eingeschaltete Gerät niemals unbeaufsichtigt.

Tauchen Sie das Bügeleisen oder den Boiler niemals in Wasser.

Behinderte Personen sollten das Gerät nicht unbeaufsichtigt benutzen. Halten Sie das Gerät außer Reichweite von Kindern.

Die Abstellfläche und die Bügelsohle können sehr heiß werden und bei Berührung Brandwunden verursachen. Berühren Sie keinesfalls die Abstellfläche, wenn Sie den Boiler bewegen.

Stellen Sie das Bügeleisen immer auf die Abstellfläche oder aufrecht. Geben Sie Acht, das heiße Bügeleisen nicht auf den Verbindungsschlauch oder das Netzkabel zu stellen. Netzkabel und Verbindungsschlauch dürfen nicht in Kontakt mit der heißen Bügelsohle kommen.

Geben Sie niemals Parfüm, Essig, Stärke, Entkalker, Bügelhilfen oder andere Chemikalien in den Wassertank.

Stellen Sie das Gerät stets auf eine stabile, ebene und waagerechte Unterlage.

Ziehen Sie stets den Netzstecker, und stellen Sie das Bügeleisen auf die Abstellfläche, wenn Sie das Bügeln beendet haben oder den Raum - sei es auch nur für kurze Zeit - verlassen.

Sollte Dampf aus dem Boiler austreten, während das Gerät aufheizt, schalten Sie es aus und drehen Sie den Calc-Clean- Stöpsel fest. Sollte weiterhin während des Aufheizens Dampf aus dem Boiler austreten, schalten Sie das Gerät aus und setzen Sie sich mit einem Philips Service-Center in Verbindung.

Spülen Sie den Boiler einmal monatlich bzw. nach 10-maligem Gebrauch aus, um Beschädigungen des Geräts zu vermeiden.

Nehmen Sie den Calc-Clean-Verschluss nicht ab und lösen Sie den Calc Clean-Stöpsel nicht, solange der Boiler heiß ist.

Vor dem ersten Gebrauch

B Beim ersten Gebrauch gibt das Bügeleisen möglicherweise etwas Rauch ab. Das ist ganz normal und lässt nach kurzer Zeit nach.

BEs können beim ersten Gebrauch weiße Partikel aus der Bügelsohle treten. Das ist ganz normal. Diese Partikel sind harmlos und erscheinen

nach kurzer Zeit nicht mehr.

BMöglicherweise macht der Boiler beim Einschalten des Geräts ein Pumpgeräusch. Das ist normal und signalisiert, dass Wasser in den Boiler gepumpt wird.

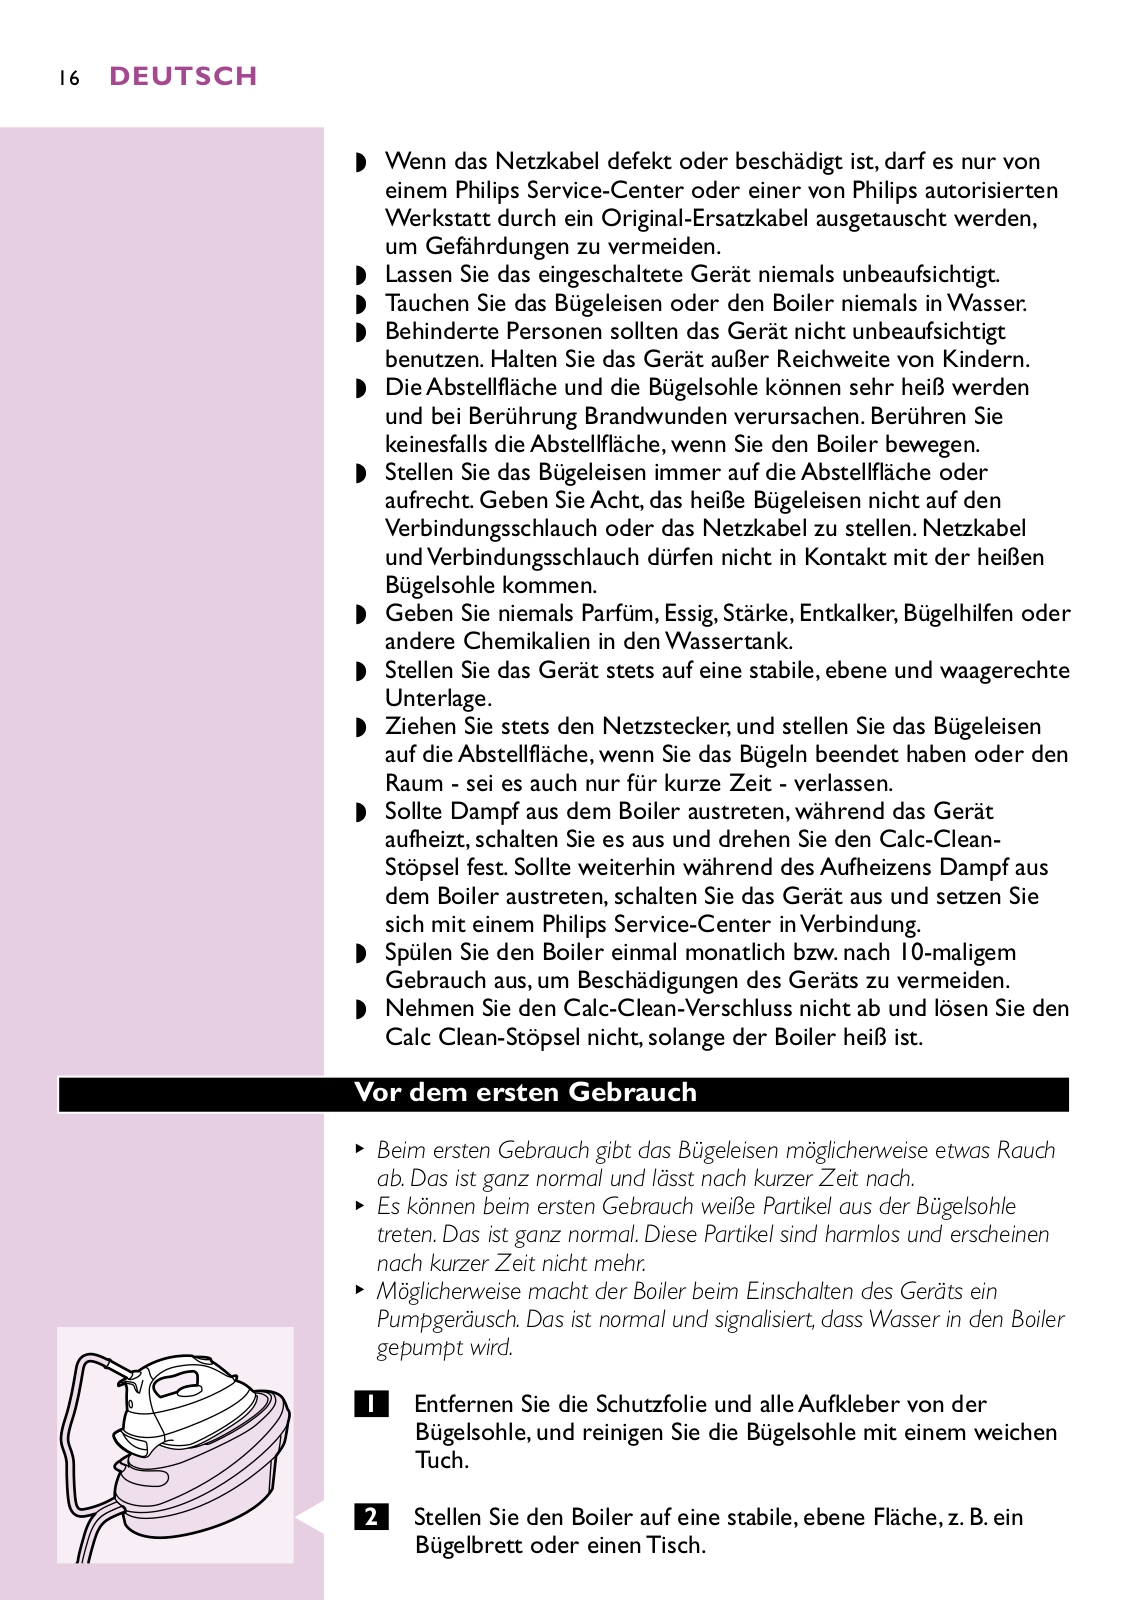
1Entfernen Sie die Schutzfolie und alle Aufkleber von der Bügelsohle, und reinigen Sie die Bügelsohle mit einem weichen Tuch.

C 2 Stellen Sie den Boiler auf eine stabile, ebene Fläche, z. B. ein

Bügelbrett oder einen Tisch.

DEUTSCH 17

Vorbereitung zum Gebrauch

Den abnehmbaren Wassertank füllen

Sollte das Leitungswasser in Ihrer Gegend sehr hart sein, empfiehlt es

sich, es zu gleichen Teilen mit destilliertem Wasser zu mischen.

Füllen Sie niemals Parfüm, Essig, Stärke, Entkalker, Bügelhilfen, andere

Chemikalien oder ausschließlich destilliertes Wasser in den Tank.

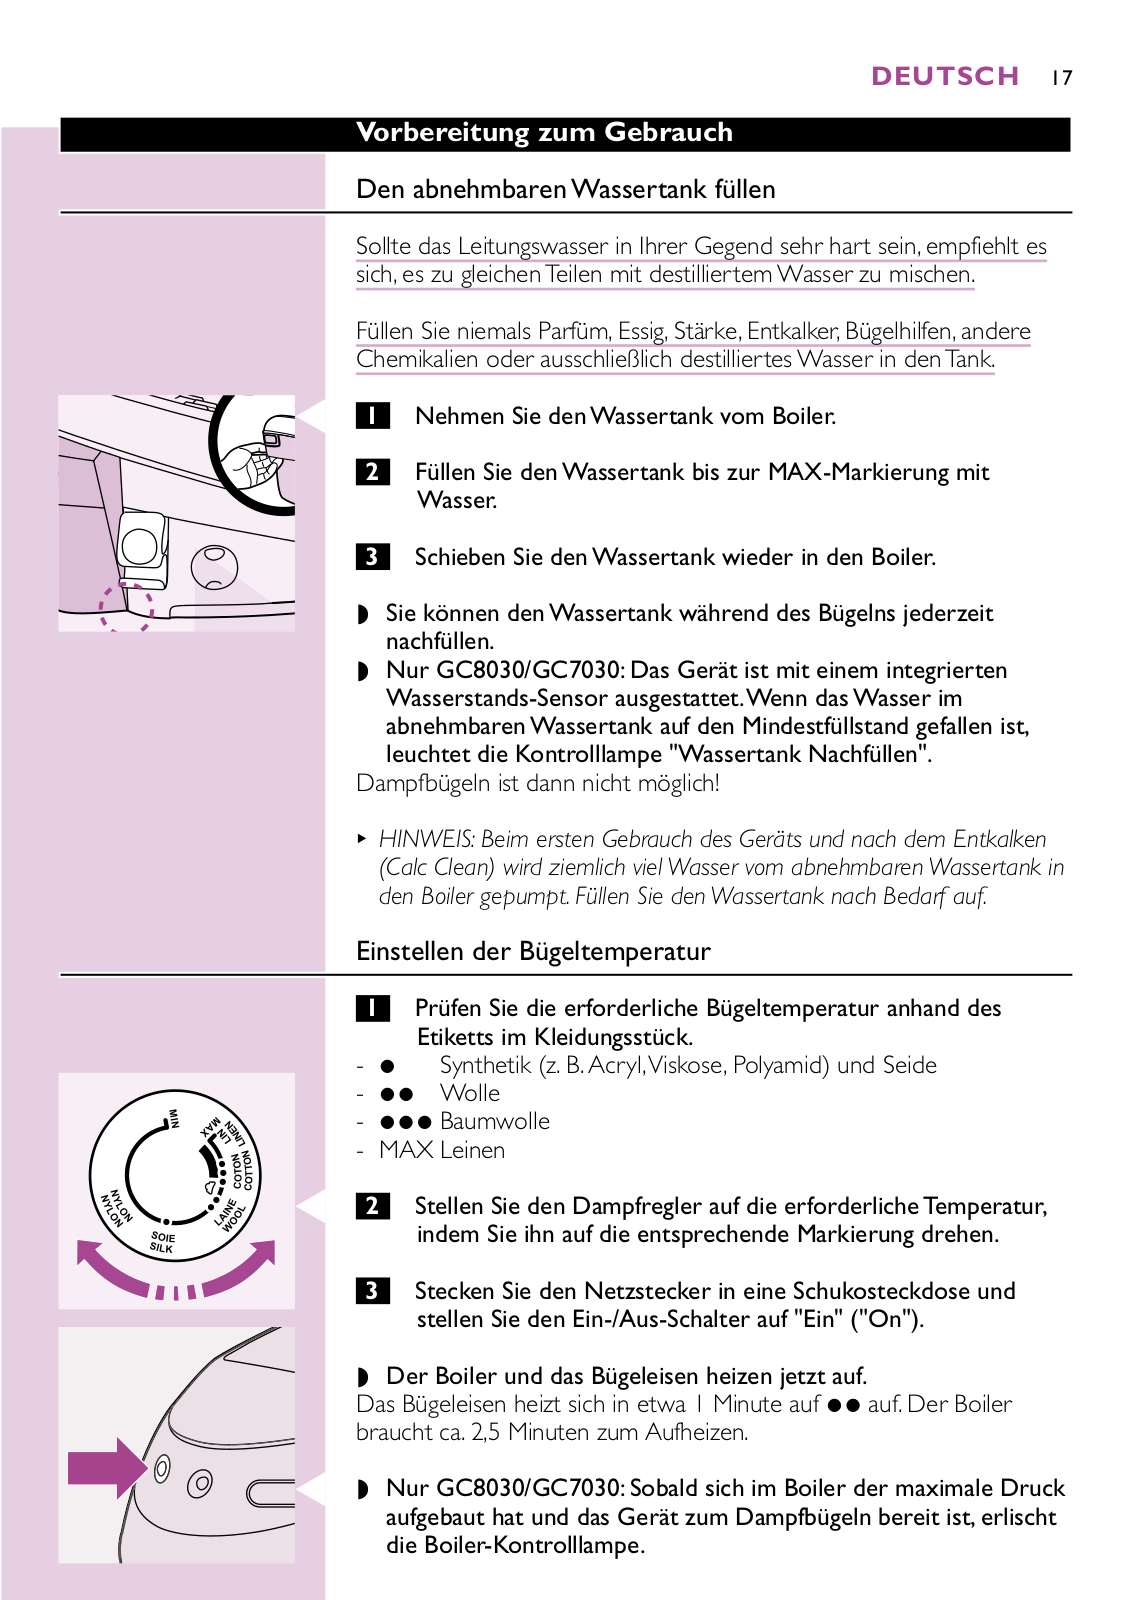
C 1 Nehmen Sie den Wassertank vom Boiler.

2 Füllen Sie den Wassertank bis zur MAX-Markierung mit Wasser.

3 Schieben Sie den Wassertank wieder in den Boiler.

Sie können den Wassertank während des Bügelns jederzeit nachfüllen.

Nur GC8030/GC7030: Das Gerät ist mit einem integrierten Wasserstands-Sensor ausgestattet.Wenn das Wasser im

abnehmbaren Wassertank auf den Mindestfüllstand gefallen ist, leuchtet die Kontrolllampe "Wassertank Nachfüllen".

Dampfbügeln ist dann nicht möglich!

BHINWEIS: Beim ersten Gebrauch des Geräts und nach dem Entkalken (Calc Clean) wird ziemlich viel Wasser vom abnehmbaren Wassertank in den Boiler gepumpt. Füllen Sie den Wassertank nach Bedarf auf.

Einstellen der Bügeltemperatur

1Prüfen Sie die erforderliche Bügeltemperatur anhand des Etiketts im Kleidungsstück.

-1 Synthetik (z. B. Acryl,Viskose, Polyamid) und Seide

-2 Wolle

- 3 Baumwolle

- MAX Leinen

C 2 Stellen Sie den Dampfregler auf die erforderliche Temperatur, indem Sie ihn auf die entsprechende Markierung drehen.

3 Stecken Sie den Netzstecker in eine Schukosteckdose und stellen Sie den Ein-/Aus-Schalter auf "Ein" ("On").

Der Boiler und das Bügeleisen heizen jetzt auf.

Das Bügeleisen heizt sich in etwa 1 Minute auf 2 auf. Der Boiler braucht ca. 2,5 Minuten zum Aufheizen.

C Nur GC8030/GC7030: Sobald sich im Boiler der maximale Druck aufgebaut hat und das Gerät zum Dampfbügeln bereit ist, erlischt die Boiler-Kontrolllampe.

18 DEUTSCH

Hinweise

-Wenn sich das Gewebe aus verschiedenen Fasern zusammensetzt, sollten Sie stets die Temperatureinstellung für das empfindlichste Gewebe wählen, also die niedrigste Temperatur. Besteht das Gewebe z. B. aus 60% Polyester und 40% Baumwolle, sollten Sie es bei der Temperatur für Polyester (2) bügeln.

-Wenn Sie nicht wissen, um welche Art von Gewebe es sich handelt,

ermitteln Sie die richtige Temperatur durch Bügeln einer Stelle, die beim Tragen des Kleidungsstücks normalerweise nicht sichtbar ist.

-Seide,Wolle und Synthetik: Bügeln Sie den Stoff von links, um glänzende Stellen zu vermeiden.

-Textilien, die leicht glänzende Flecken bekommen, sollten Sie nur in eine Richtung bügeln (mit dem Fadenlauf) und bei nur leichtem Druck.

-Beginnen Sie mit dem Bügeln von Textilien, die eine sehr niedrige Temperatur erfordern, z. B. Synthetik.

Um das Bügeleisen schneller abzukühlen, wenden Sie Dampf an oder bügeln Sie ein Stück Stoff.

Der Gebrauch des Geräts

Dampfbügeln

Der Verbindungsschlauch kann bei längerem Bügeln heiß werden.

BDas Gerät kann beim Dampfbügeln gelegentlich ein Pumpgeräusch machen. Das ist ganz normal und signalisiert, dass Wasser in den Boiler gepumpt wird.

1Sorgen Sie dafür, dass sich genügend Wasser im Wassertank befindet.

Dampfbügeln ist nur bei höheren Temperaturen möglich (über 2).

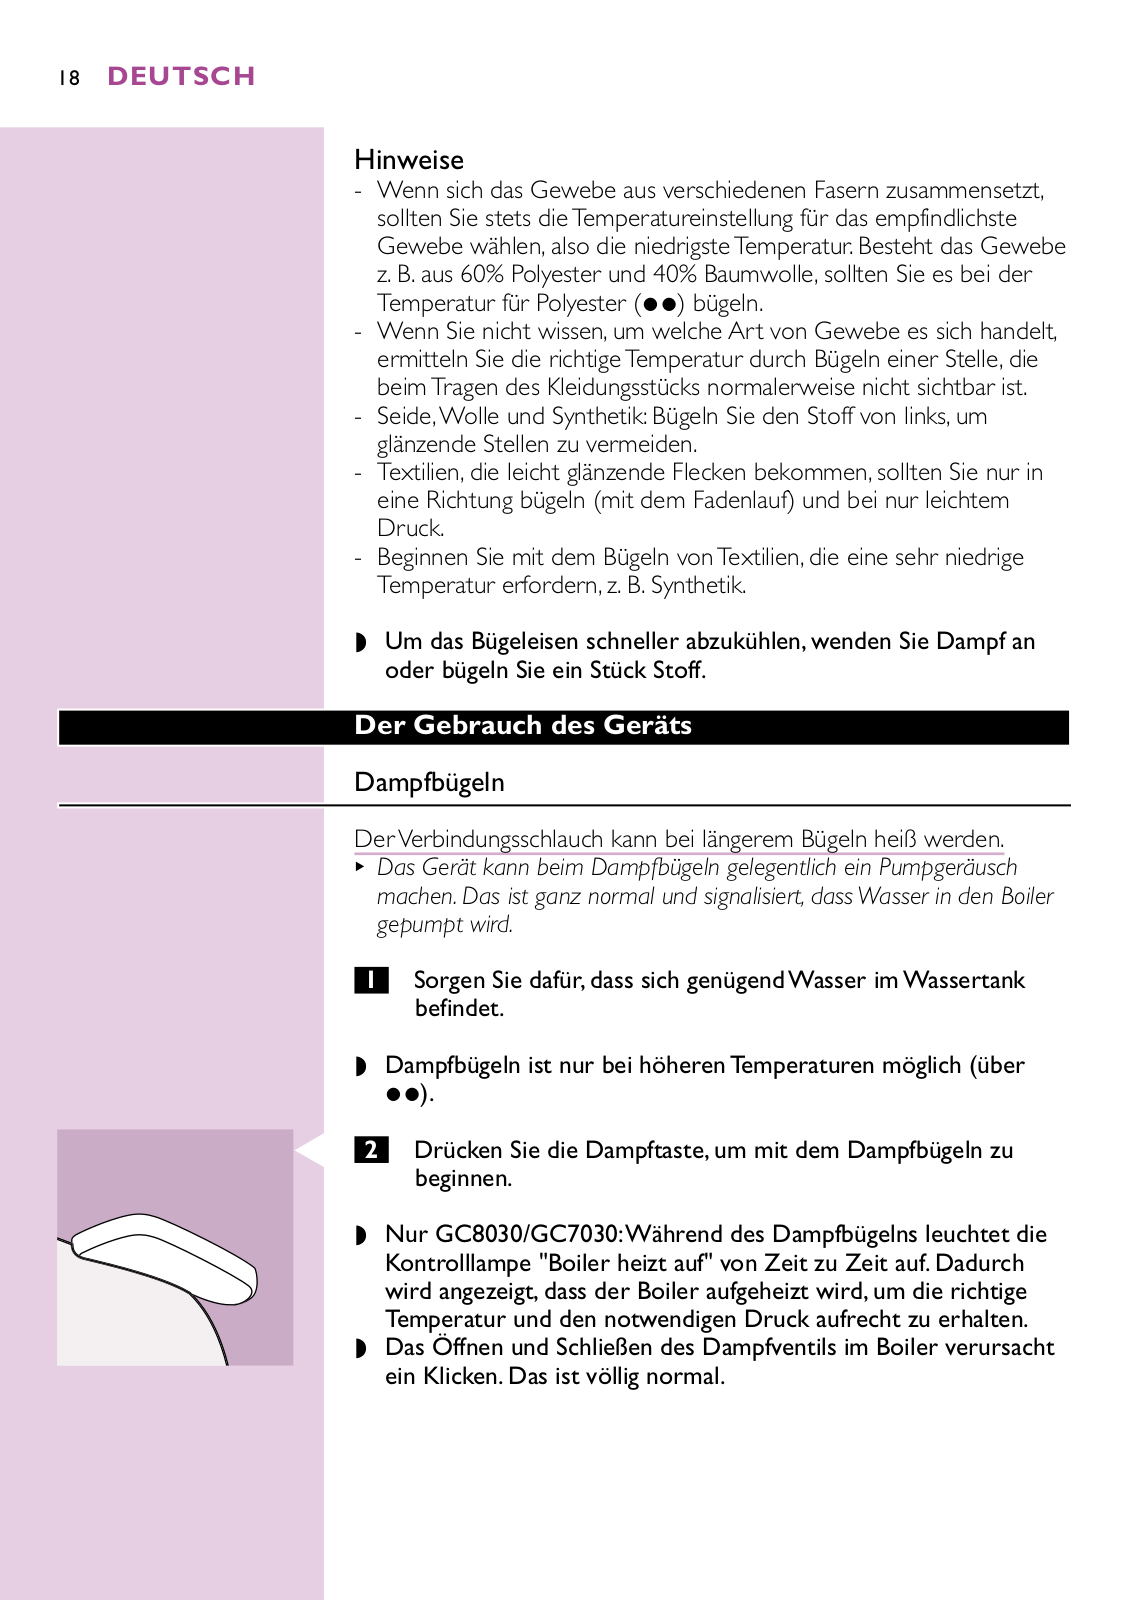
C 2 Drücken Sie die Dampftaste, um mit dem Dampfbügeln zu beginnen.

Nur GC8030/GC7030:Während des Dampfbügelns leuchtet die Kontrolllampe "Boiler heizt auf" von Zeit zu Zeit auf. Dadurch wird angezeigt, dass der Boiler aufgeheizt wird, um die richtige Temperatur und den notwendigen Druck aufrecht zu erhalten.

Das Öffnen und Schließen des Dampfventils im Boiler verursacht ein Klicken. Das ist völlig normal.

DEUTSCH 19

Trockenbügeln

1 Beginnen Sie mit dem Bügeln, ohne die Dampftaste zu drücken.

Nach dem Bügeln

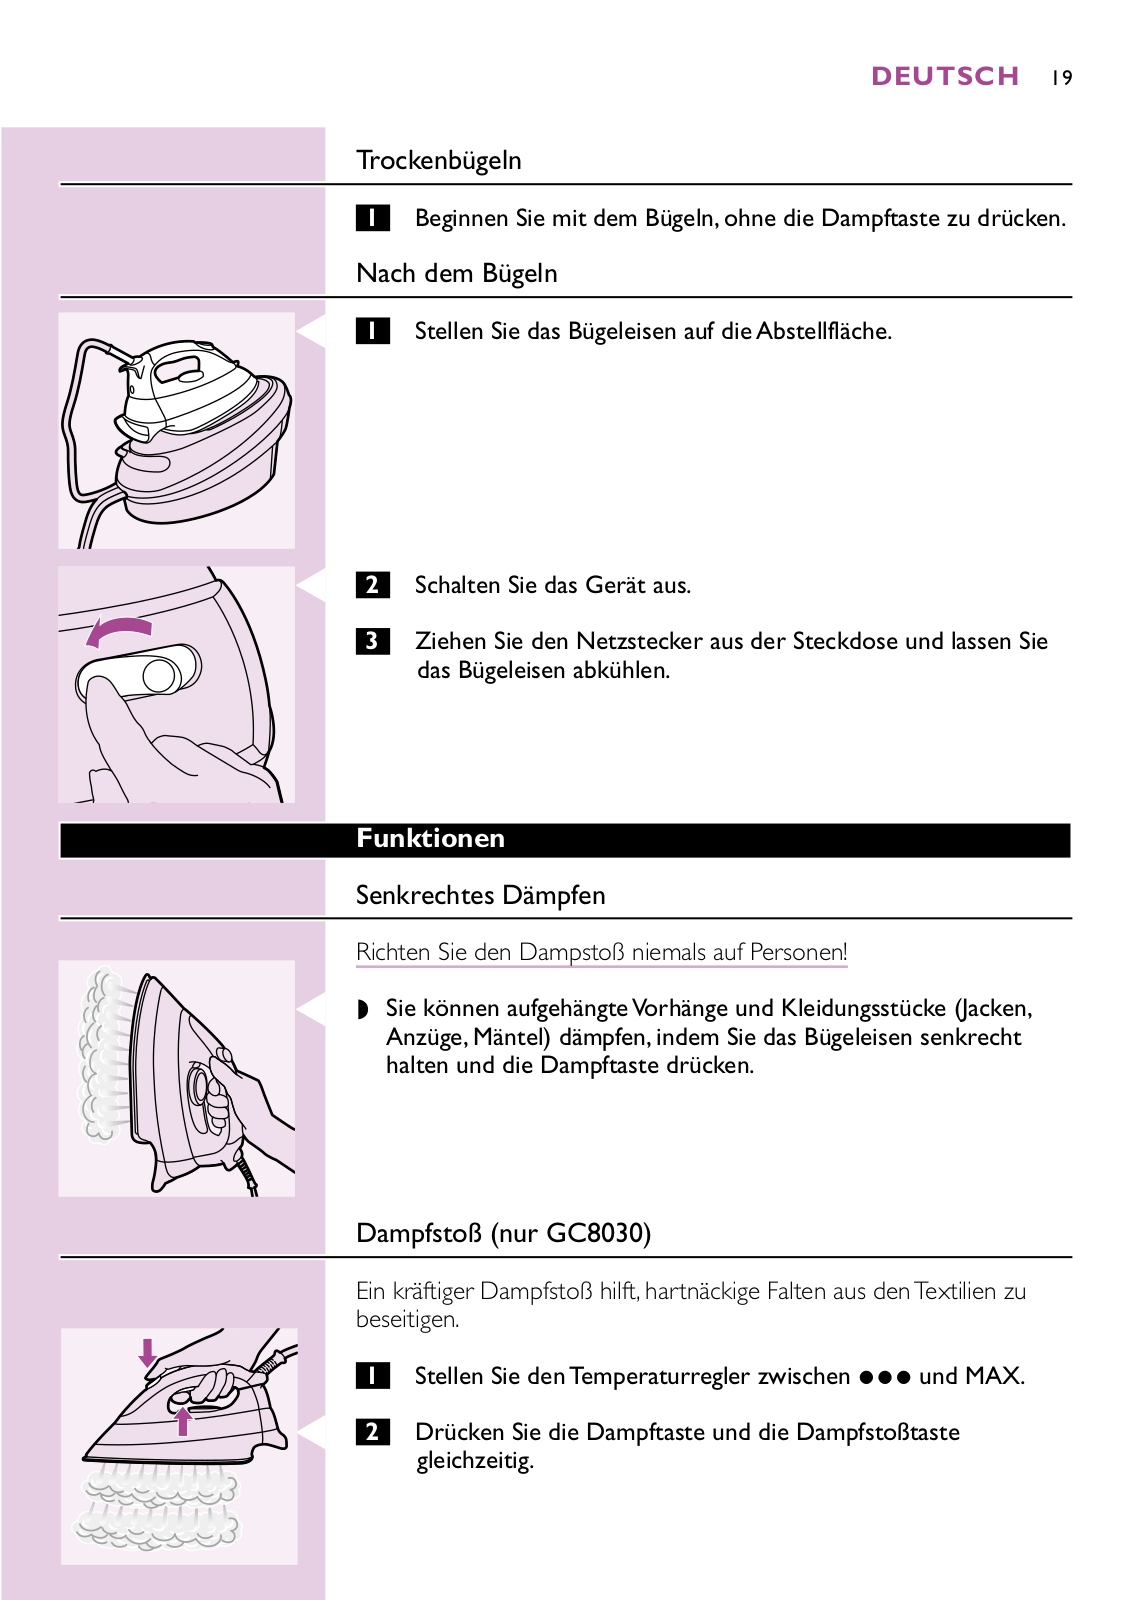
C 1 Stellen Sie das Bügeleisen auf die Abstellfläche.

C 2 Schalten Sie das Gerät aus.

3 Ziehen Sie den Netzstecker aus der Steckdose und lassen Sie das Bügeleisen abkühlen.

Funktionen

Senkrechtes Dämpfen

Richten Sie den Dampstoß niemals auf Personen!

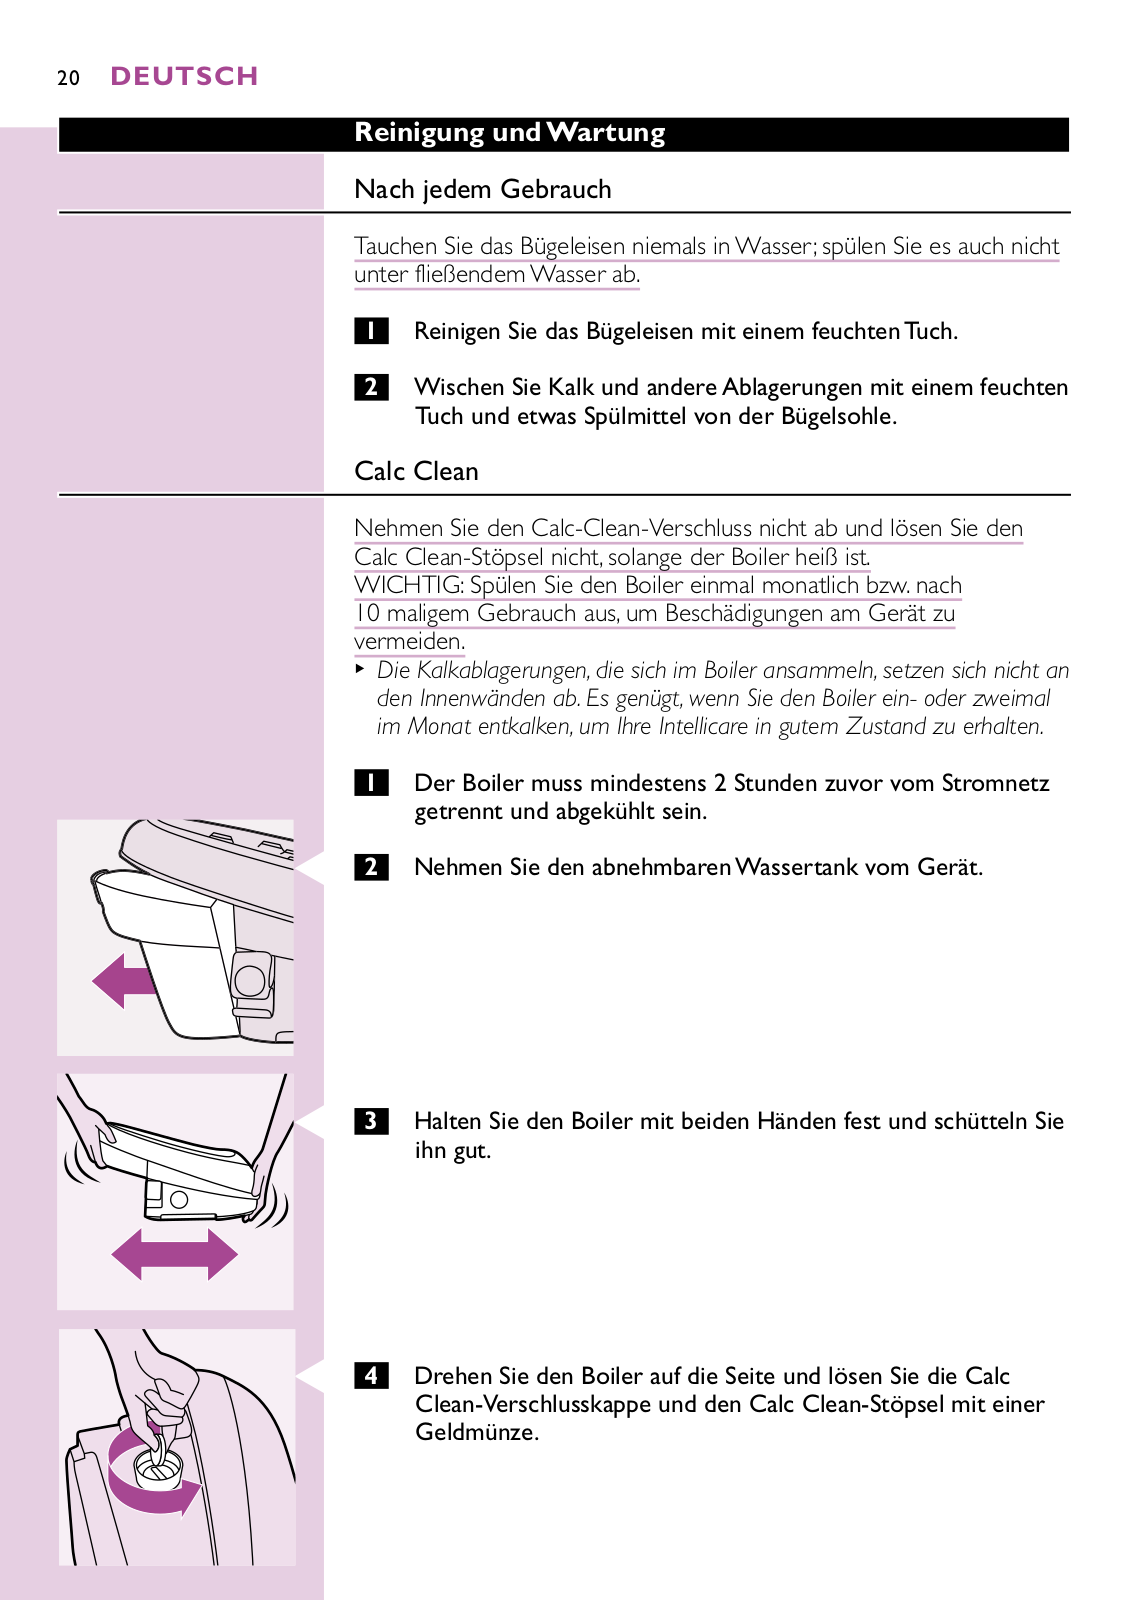
C Sie können aufgehängte Vorhänge und Kleidungsstücke (Jacken, Anzüge, Mäntel) dämpfen, indem Sie das Bügeleisen senkrecht halten und die Dampftaste drücken.

Dampfstoß (nur GC8030)

Ein kräftiger Dampfstoß hilft, hartnäckige Falten aus den Textilien zu beseitigen.

1 Stellen Sie den Temperaturregler zwischen 3 und MAX.

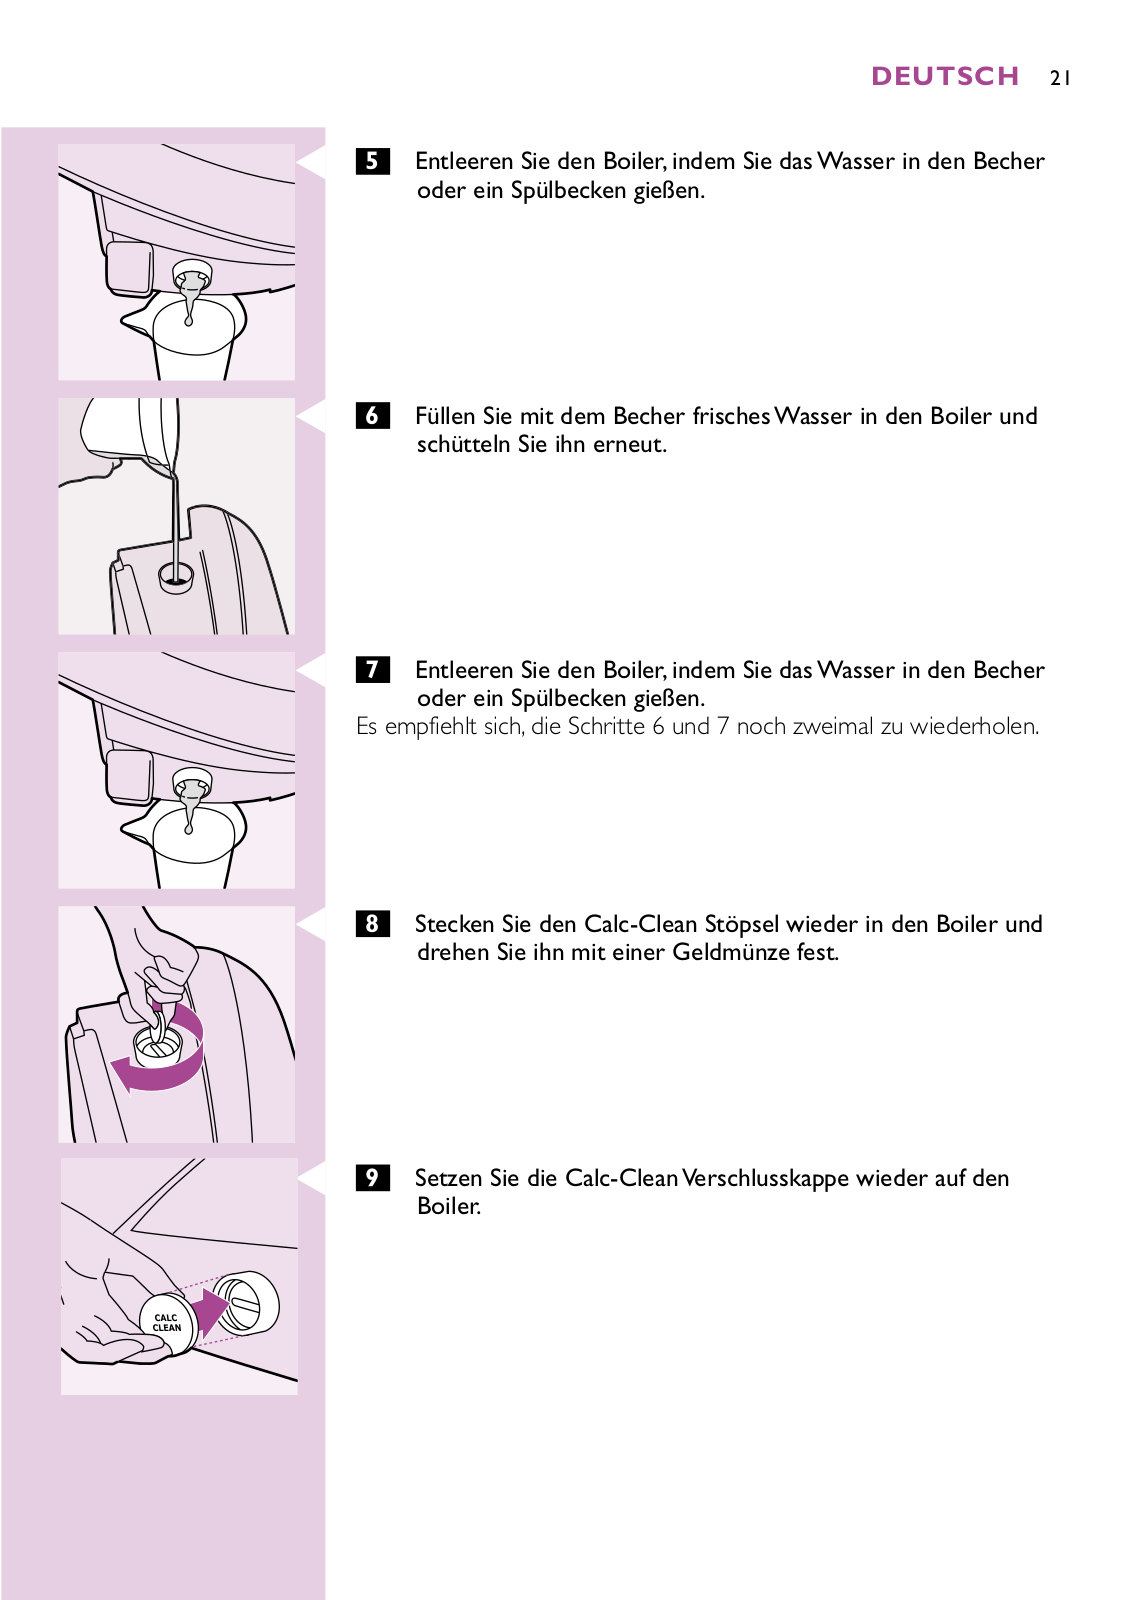
C 2 Drücken Sie die Dampftaste und die Dampfstoßtaste gleichzeitig.

20 DEUTSCH

Reinigung und Wartung

Nach jedem Gebrauch

Tauchen Sie das Bügeleisen niemals in Wasser; spülen Sie es auch nicht unter fließendem Wasser ab.

1Reinigen Sie das Bügeleisen mit einem feuchten Tuch.

2Wischen Sie Kalk und andere Ablagerungen mit einem feuchten Tuch und etwas Spülmittel von der Bügelsohle.

Calc Clean

Nehmen Sie den Calc-Clean-Verschluss nicht ab und lösen Sie den

Calc Clean-Stöpsel nicht, solange der Boiler heiß ist.

WICHTIG: Spülen Sie den Boiler einmal monatlich bzw. nach 10 maligem Gebrauch aus, um Beschädigungen am Gerät zu vermeiden.

BDie Kalkablagerungen, die sich im Boiler ansammeln, setzen sich nicht an den Innenwänden ab. Es genügt, wenn Sie den Boiler einoder zweimal im Monat entkalken, um Ihre Intellicare in gutem Zustand zu erhalten.

1Der Boiler muss mindestens 2 Stunden zuvor vom Stromnetz getrennt und abgekühlt sein.

C 2 Nehmen Sie den abnehmbaren Wassertank vom Gerät.

C 3 Halten Sie den Boiler mit beiden Händen fest und schütteln Sie ihn gut.

C 4 Drehen Sie den Boiler auf die Seite und lösen Sie die Calc

Clean-Verschlusskappe und den Calc Clean-Stöpsel mit einer

Geldmünze.

C

C

DEUTSCH 21

5Entleeren Sie den Boiler, indem Sie das Wasser in den Becher oder ein Spülbecken gießen.

6Füllen Sie mit dem Becher frisches Wasser in den Boiler und schütteln Sie ihn erneut.

C 7 Entleeren Sie den Boiler, indem Sie das Wasser in den Becher oder ein Spülbecken gießen.

Es empfiehlt sich, die Schritte 6 und 7 noch zweimal zu wiederholen.

C 8 Stecken Sie den Calc-Clean Stöpsel wieder in den Boiler und drehen Sie ihn mit einer Geldmünze fest.

C 9 Setzen Sie die Calc-Clean Verschlusskappe wieder auf den Boiler.

22 DEUTSCH

Aufbewahrung

Lassen Sie das Bügeleisen stets abkühlen, bevor Sie es wegstellen.

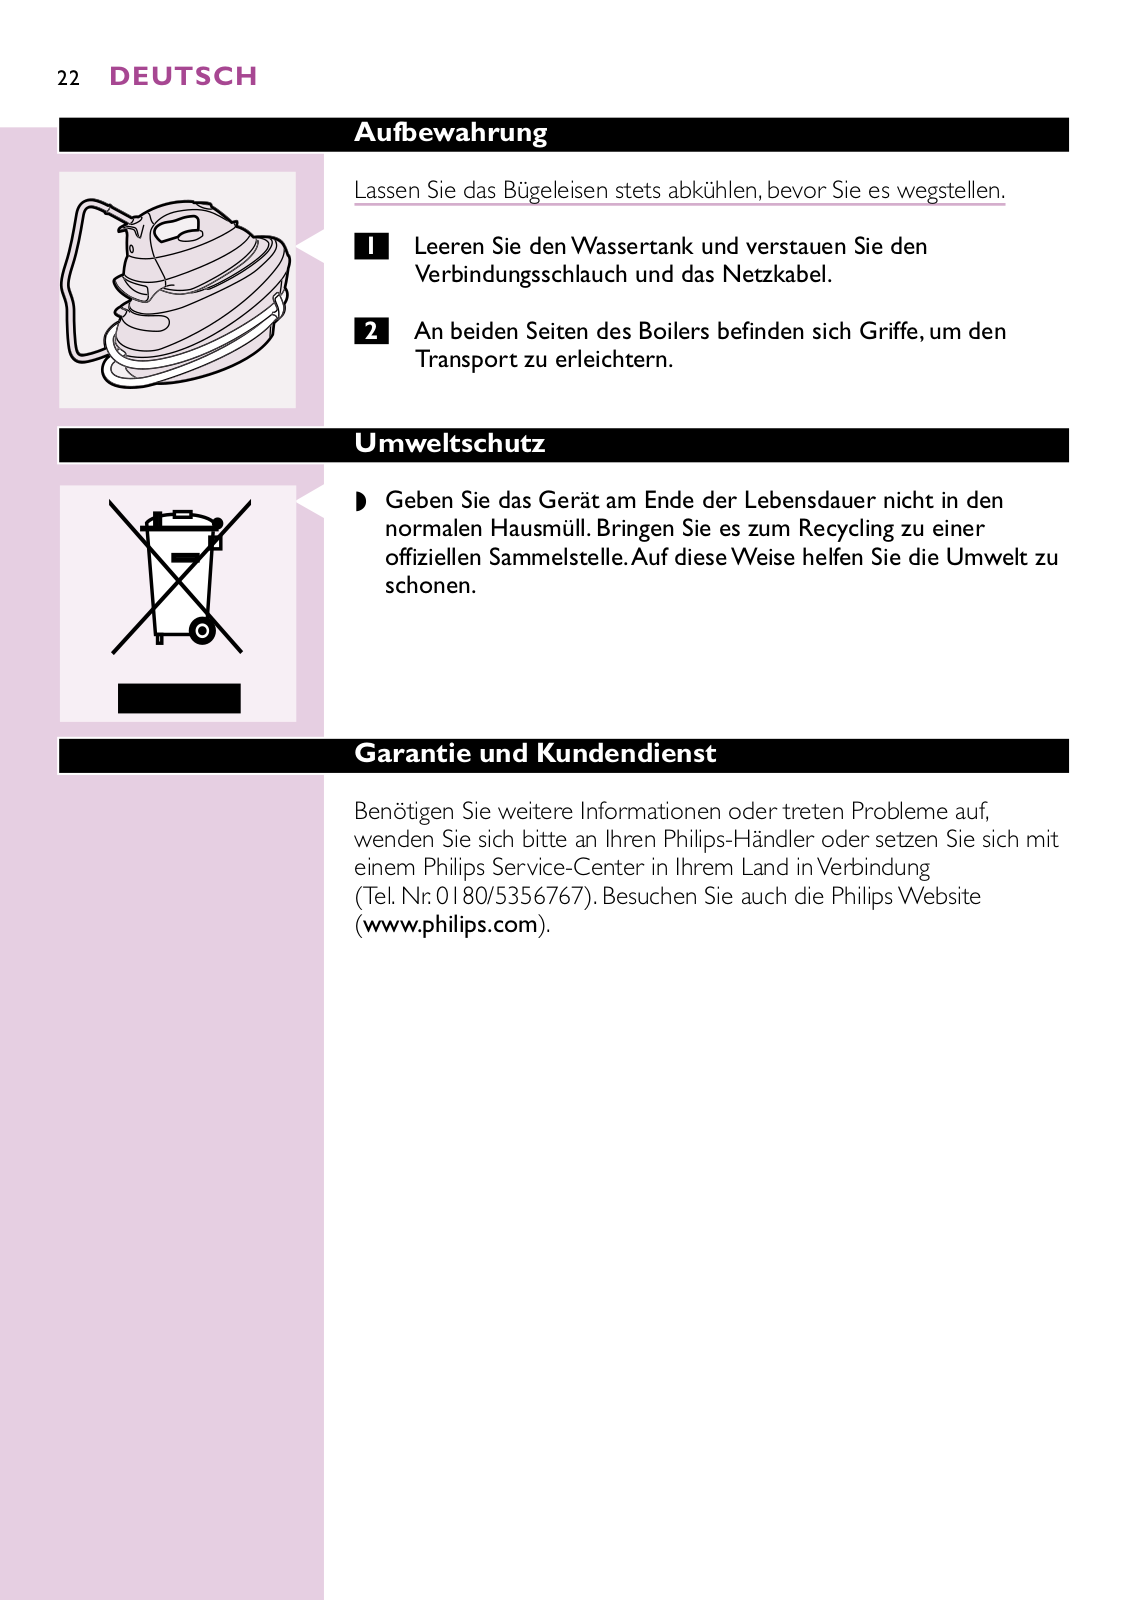
C 1 Leeren Sie den Wassertank und verstauen Sie den Verbindungsschlauch und das Netzkabel.

2 An beiden Seiten des Boilers befinden sich Griffe, um den Transport zu erleichtern.

Umweltschutz

C Geben Sie das Gerät am Ende der Lebensdauer nicht in den normalen Hausmüll. Bringen Sie es zum Recycling zu einer offiziellen Sammelstelle.Auf diese Weise helfen Sie die Umwelt zu schonen.

Garantie und Kundendienst

Benötigen Sie weitere Informationen oder treten Probleme auf, wenden Sie sich bitte an Ihren Philips-Händler oder setzen Sie sich mit einem Philips Service-Center in Ihrem Land in Verbindung

(Tel. Nr. 0180/5356767). Besuchen Sie auch die Philips Website (www.philips.com).

DEUTSCH 23

Fehlerbehebung

Der folgende Abschnitt führt eine Reihe von Problemen auf, die beim Gebrauch des Geräts auftreten können. Lesen Sie bitte die verschiedenen Abschnitte durch. Finden Sie dort keine Lösung für Ihr Problem, so wenden Sie sich bitte an das nächstgelegene Philips Service Center.

Problem

Vermutliche Ursache(n)

Lösung

Das Gerät heizt nicht auf.

Es gibt ein Problem mit der

Prüfen Sie das Netzkabel, den


Stromversorgung.

Netzstecker und die Steckdose.


Der Dampftank ist nicht eingeschaltet.

Stellen Sie den Ein-/Ausschalter auf


"On" ("Ein").


Der Temperaturregler wurde auf MIN

Stellen Sie den Temperaturregler auf


gestellt.

die erforderliche Bügeltemperatur.


Wenn ich mein neues Bügeleisen

Einige Teile des Geräts sind bei der

Dies ist ganz normal und lässt nach

einschalte, tritt Rauch aus dem Gerät.

Herstellung leicht eingefettet worden

kurzer Zeit nach.


und können beim Aufheizen etwas


rauchen.


Das Bügeleisen erzeugt keinen Dampf.

Der Wasserbehälter ist leer.

Füllen Sie den Wassertank (siehe


"Vorbereitung zum Gebrauch",


Abschnitt "Den abnehmbaren


Wassertank füllen").


Nur GC8030/GC7030: Die

Nur GC8030/GC7030:Warten Sie, bis


Kontrolllampe am Boiler leuchtet noch.

die Kontrolllampe erlischt.


Die gewählte Temperatur ist zu niedrig

Stellen Sie die Temperatur auf


zum Dampfbügeln.

mindestens 2 ein.


Der Wassertank wurde nicht

Bringen Sie den Wasertank


ordnungsgemäß am Boiler befestigt.

ordnungsgemäß am Boiler an. Er muss


hörbar einrasten.


Wenn Sie eine sehr hohe Temperatur eingestellt haben, ist der erzeugte Dampf sehr trocken und fast unsichtbar. Er wird noch weniger sichtbar, wenn die Umgebungstemperatur relativ hoch ist. Der Dampf ist völlig unsichtbar, wenn Sie die Temperatur auf MAX eingestellt haben.

Stellen Sie eine niedrigere Temperatur ein, z. B. 2, um zu prüfen, ob das Gerät tatsächlich Dampf produziert.

Wasser tropft aus der Bügelsohle.

Die gewählte Temperatur ist zum

Stellen Sie die Temperatur auf


Dampfbügeln zu niedrig.

mindestens 2 ein.


Wenn Sie mit dem Dampfbügeln beginnen oder das Dampfbügeln eine

Weile unterbrochen haben, hat sich der noch im Verbindungsschlauch verbliebene Dampf abgekühlt und kondensiert. Dieses Wasser tropft dann aus der Bügelsohle.

Das ist ganz normal. Halten Sie das

Bügeleisen über ein Stück Stoff und drücken Sie die Dampftaste, wenn Sie das Bügeln (wieder) aufnehmen. Warten Sie, bis Dampf (statt Wasser) aus der Bügelsohle tritt.

Flocken und Verunreinigungen treten

Verunreinigungen und Chemikalien aus

Reinigen Sie die Bügelsohle mit einem

aus der Bügelsohle aus, oder die

dem Wasser haben sich in den

feuchten Tuch.

Bügelsohle ist verschmutzt.

Dampföffnungen bzw. an der


Bügelsohle abgesetzt.


Das Gerät macht ein Pumpgeräusch.

Wasser wird in den Boiler gepumpt.

Das ist normal.

24 DEUTSCH

Problem

Vermutliche Ursache(n)

Lösung


Das Pumpgeräusch hört nicht auf.

Ziehen Sie sofort den Stecker aus der


Steckdose und setzen Sie sich mit


einem Philips Service-Center in


Verbindung.


Schmutziges Wasser tritt aus der

Es haben sich zu viele

Spülen Sie den Boiler aus (siehe

Bügelsohle aus.

Kalkablagerungen und Mineralien im

"Reinigung und Wartung").


Boiler angesammelt.


FRANÇAIS 25

Introduction

Nous vous remercions d'avoir acheté Intellicare, le nouveau système de repassage à vapeur intelligent de Philips.

Le fer assure un repassage continu et il est doté d'un réservoir d'eau détachable qui peut être rempli à tout moment.

Le fer a un débit vapeur puissant et constant ce qui représente une caractéristique unique parmi les systèmes de repassage à la vapeur en assurant des résultats optimaux.

Description générale

A Bouton jet de vapeur (GC8030 uniquement) BThermostat

C Bouton vapeur

DTémoin de température E Cordon secteur

F Semelle G Support fer

H Bouton marche/arrêt avec témoin lumineux

ITémoin lumineux "manque d'eau" (GC8030/GC7030 uniquement) JTémoin chaudière (GC8030/GC7030 uniquement)

K Cordon d'alimentation L Chaudière

M Capot et bouchon d'auto-nettoyage

N Rangement des cordons (GC8030/GC7030 uniquement) O Ouverture de remplissage

P Réservoir d'eau détachable

Q Levier de déclenchement du réservoir d'eau R Poignées de transport

SVerre

Important

Avant d'utiliser l'appareil, lisez soigneusement ces instructions et conservez-les pour un usage ultérieur.

Vérifiez que la tension indiquée sur le fond de la chaudière correspond bien à la tension de votre secteur avant de brancher l'appareil.

Branchez la fiche dans la prise de courant.

N'utilisez pas le fer à repasser si la fiche, le cordon d'alimentation, le cordon secteur ou l'appareil lui-même est endommagé.

Vérifiez régulièrement que le cordon d'alimentation et le cordon secteur ne sont pas endommagés.

Si le cordon d'alimentation est endommagé, il ne doit être remplacé que par un Centre Service Agréé Philips ou par une personne autorisée pour éviter tout accident.

26 FRANÇAIS

Ne laissez jamais le fer à repasser sans surveillance pendant qu'il est branché.

Ne plongez jamais le fer ou la chaudière dans l'eau.

Cet appareil ne doit pas être manipulé par des personnes handicapées sans surveillance.Tenez l'appareil hors de portée des enfants.

Le support du fer et la semelle peuvent devenir très chauds et peuvent causer des brûlures graves si vous les touchez. Si vous voulez déplacer la chaudière, ne touchez pas le support du fer.

Placez toujours le fer sur son support ou sur son talon. Ne placez jamais le fer chaud sur le cordon d'alimentation ou sur le cordon secteur. Evitez le contact du cordon d'alimentation ou cordon secteur avec la semelle lorsqu'elle est chaude.

Ne mettez pas de parfum, de vinaigre, d'amidon, de détartrants ou d'autres agents chimiques dans le réservoir d'eau.

Placez toujours l'appareil sur une surface stable et horizontale.

Lorsque vous avez fini de repasser ou même si vous laissez le fer pour un bref instant, débranchez-le et placez-le sur son support.

Si de la vapeur s'échappe par la chaudière lorsque l'appareil est en chauffe, arrêtez l'appareil et resserrez le bouchon d'autonettoyage. Si la vapeur continue de s'échapper, arrêtez l'appareil et contactez un Centre Service Agréé Philips.

Rincez la chaudière une fois par mois ou toutes les 10 utilisations pour éviter d'endommager le fer.

Ne retirez jamais le capot et le bouchon d'auto-nettoyage lorsque la chaudière est chaude.

Avant la première utilisation

B Le fer peut fumer légèrement quand on le branche pour la première fois.

Ceci est normal et cessera après un bref instant.

BDes particules blanches peuvent sortir de la semelle lorsque le fer est neuf. Ceci est normal. Prenez l'habitude de faire sortir la vapeur sur un

chiffon avant de repasser pour la première fois.

BLorsque vous mettez l'appareil en marche il est possible que le fer produise un bruit de pompe. Ceci est normal; le bruit vous indique que l'eau est pompée dans la chaudière.

1Retirez toute étiquette ou feuille de protection de la semelle et nettoyez-la avec un chiffon doux.

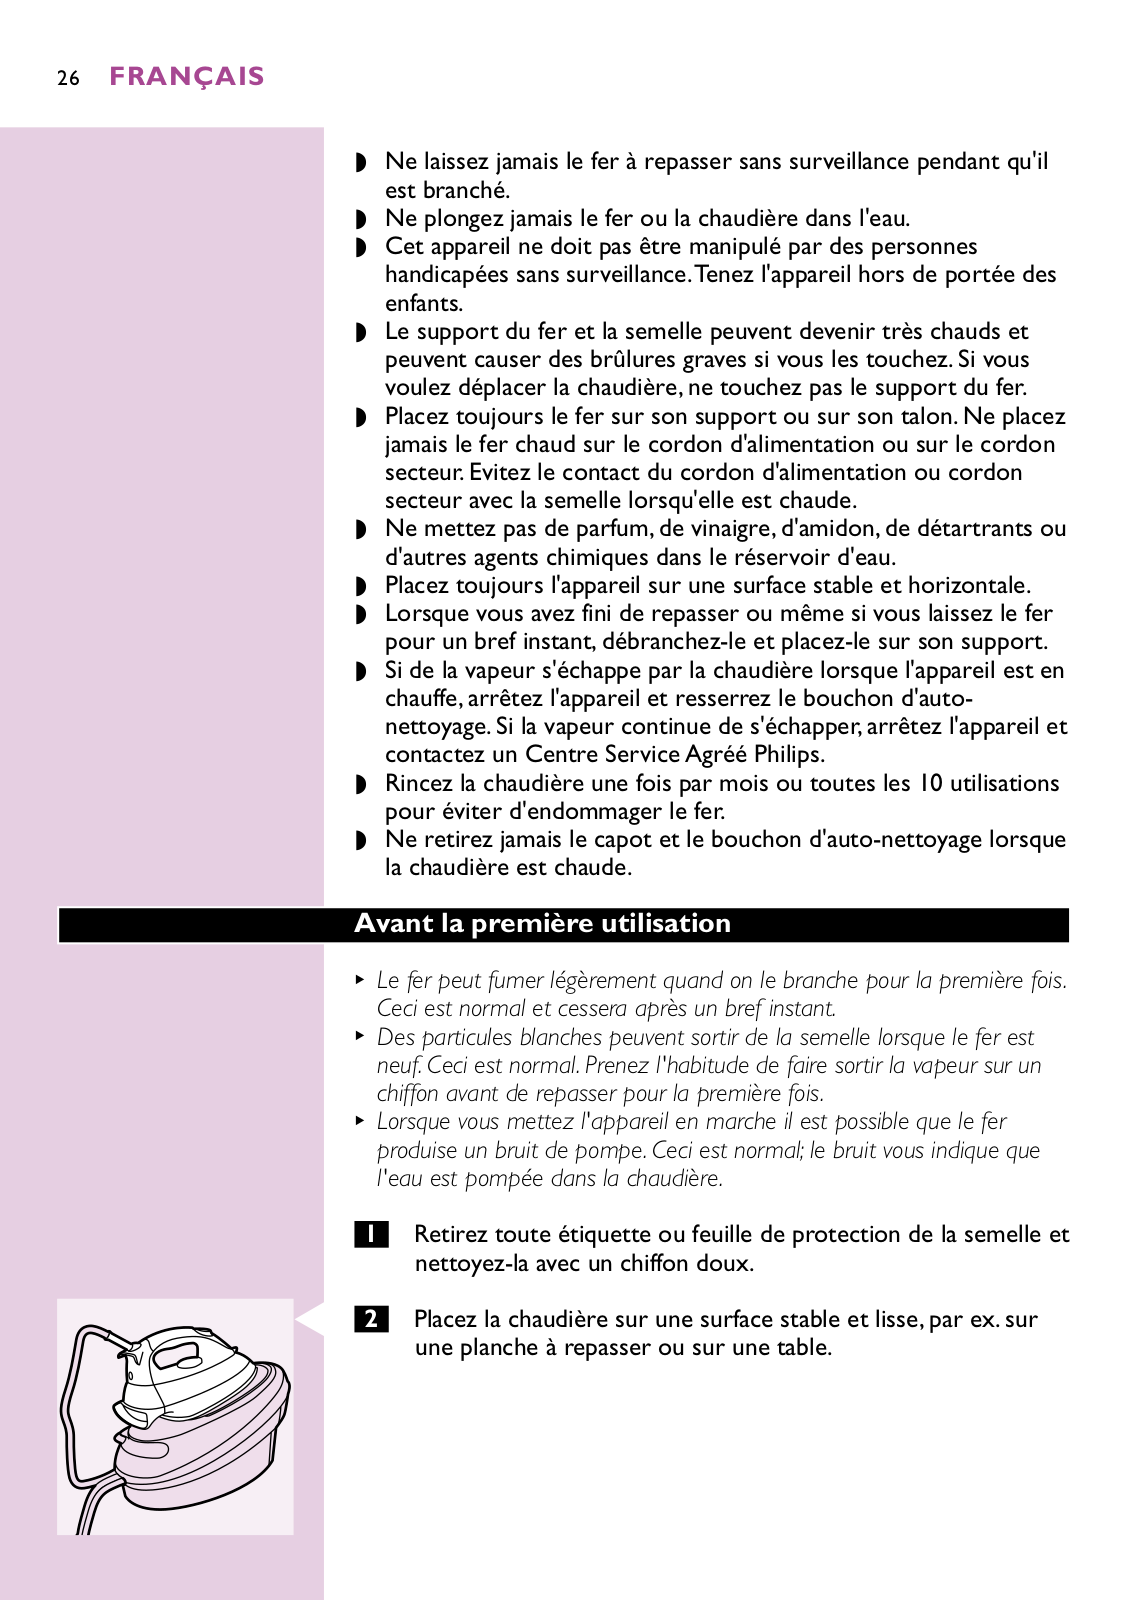
C 2 Placez la chaudière sur une surface stable et lisse, par ex. sur une planche à repasser ou sur une table.

FRANÇAIS 27

Préparation à l'emploi

Remplissage du réservoir d'eau détachable

Si l'eau du robinet de votre région est très calcaire, il est conseillé de la mélanger avec de l'eau déminéralisée.

N'utilisez pas de parfum, de vinaigre, d'amidon, d'additifs, d'autres produits chimiques ou 100% de l'eau distillée dans le réservoir d'eau.

C 1

Retirez le réservoir d'eau détachable de la chaudière.

2

Remplissez le réservoir avec de l'eau jusqu'au niveau MAX.

3Remettez le réservoir d'eau sur la chaudière.

Le réservoir d'eau peut être rempli à tout moment pendant le

repassage.

L'appareil est doté d'un détecteur incorporé du niveau d'eau. Lorsque l'eau du réservoir détachable est au niveau minimum, le

témoin "manque d'eau" s'allume (GC8030/GC7030 uniquement).

Le repassage à la vapeur ne sera pas possible!

BNote: Lors de la première utilisation ou après l'auto-nettoyage, beaucoup de l'eau sera pompée du réservoir détachable dans la chaudière. Remplissez le réservoir d'eau à nouveau, si nécessaire.

Réglage de la température

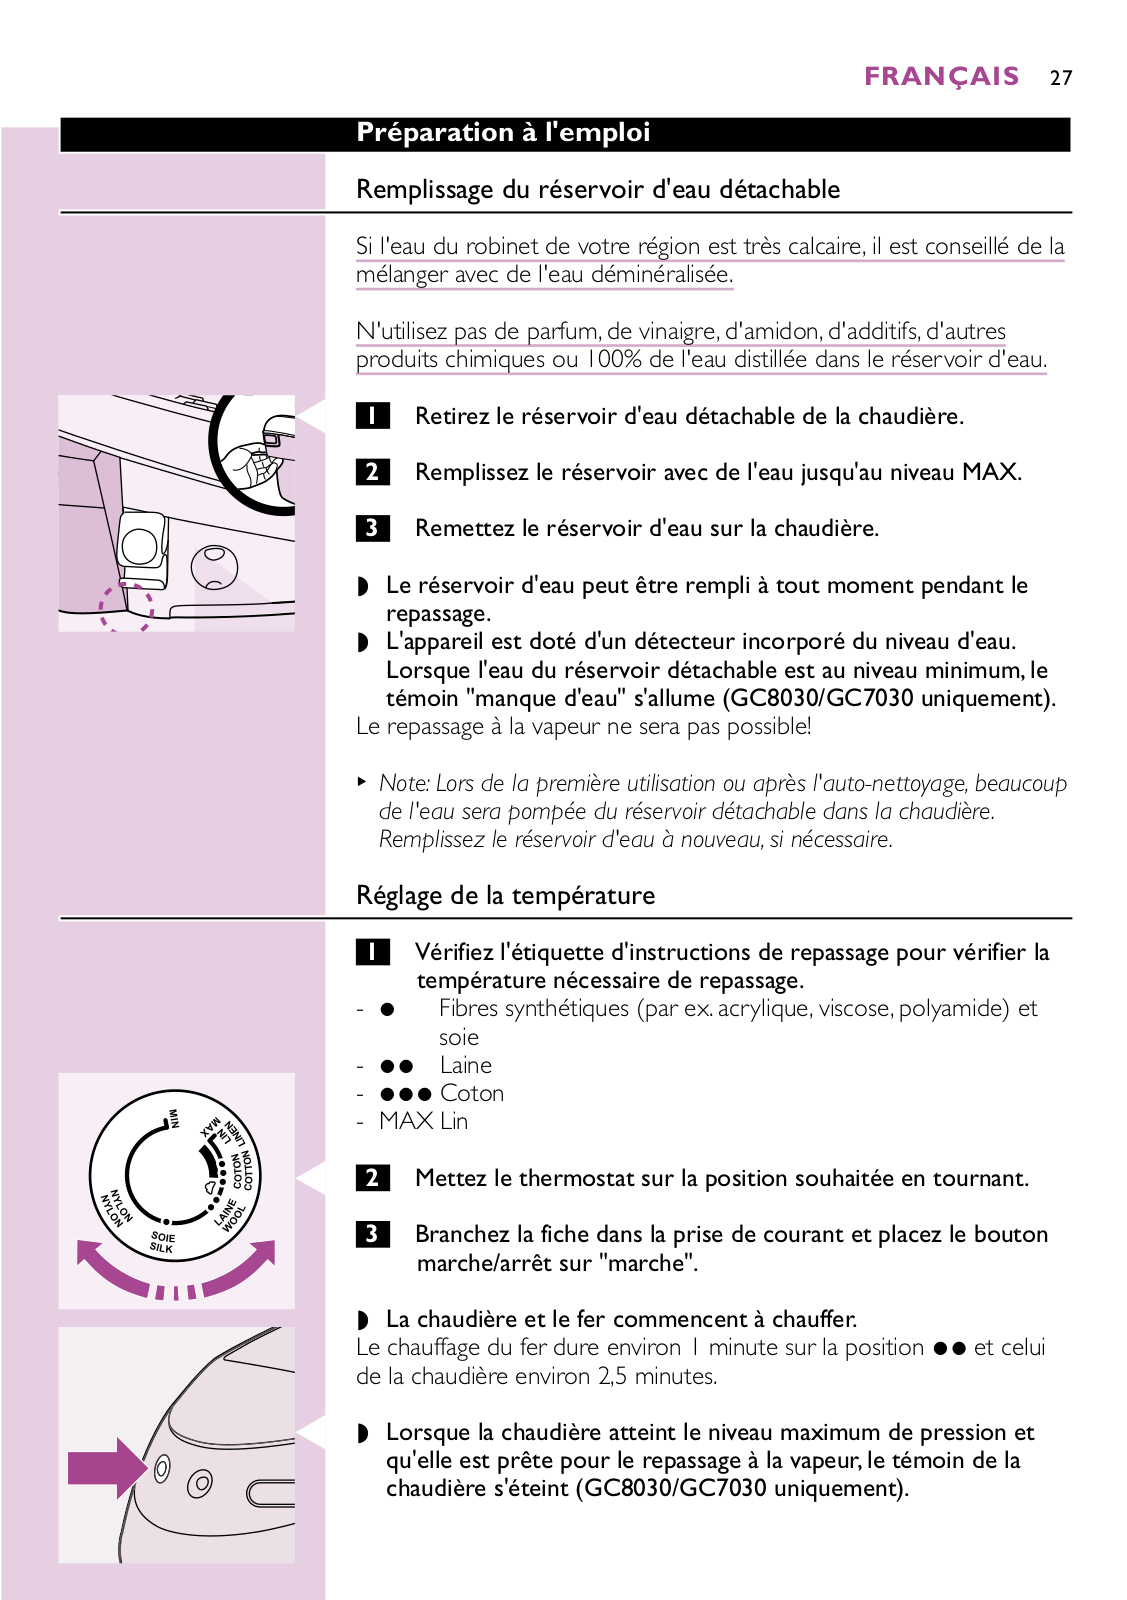
1Vérifiez l'étiquette d'instructions de repassage pour vérifier la température nécessaire de repassage.

-1 Fibres synthétiques (par ex. acrylique, viscose, polyamide) et soie

-

2 Laine

-

3 Coton

-

MAX Lin

C


Mettez le thermostat sur la position souhaitée en tournant.

2


Branchez la fiche dans la prise de courant et placez le bouton

3


marche/arrêt sur "marche".

La chaudière et le fer commencent à chauffer.

Le chauffage du fer dure environ 1 minute sur la position 2 et celui de la chaudière environ 2,5 minutes.

C Lorsque la chaudière atteint le niveau maximum de pression et qu'elle est prête pour le repassage à la vapeur, le témoin de la chaudière s'éteint (GC8030/GC7030 uniquement).

28 FRANÇAIS

Suggestions

-Si le tissu est fait de plusieurs types de fibres, sélectionnez toujours la température nécessaire pour la fibre la plus délicate, c.-à-d. la température la plus basse. Par ex. si un article contient 60% polyester et 40% coton, il doit être repassé à la température indiquée pour le polyester (2).

-Si vous ne connaissez pas la composition des tissus, repassez en commençant par la température la plus basse sur une partie interne du vêtement et invisible de l'extérieur.

-La soie, la laine et autres fibres synthétiques: Repassez sur l'envers pour éviter les taches.

-Les tissus qui ont tendance lustrer, doivent être repassés dans une seule direction en exerçant une faible pression.

-Commencez toujours le repassage des articles de fibres synthétiques nécessitant la température la plus basse.

Pour refroidir le fer plus rapidement, faites-le dégager de la vapeur ou repassez un chiffon.

Utilisation de l'appareil

Repassage à la vapeur

Le cordon secteur peur devenir très chaud après une longue période

de repassage.

B Ce système peut produire parfois un bruit de pompe pendant le repassage à la vapeur. Ceci est normal et vous indique que l'eau est pompée dans la chaudière.

1 Assurez-vous qu'il y a suffisamment d'eau dans le réservoir.

Vous pouvez repasser à la vapeur en utilisant les températures les plus élevées (supérieures à 2).

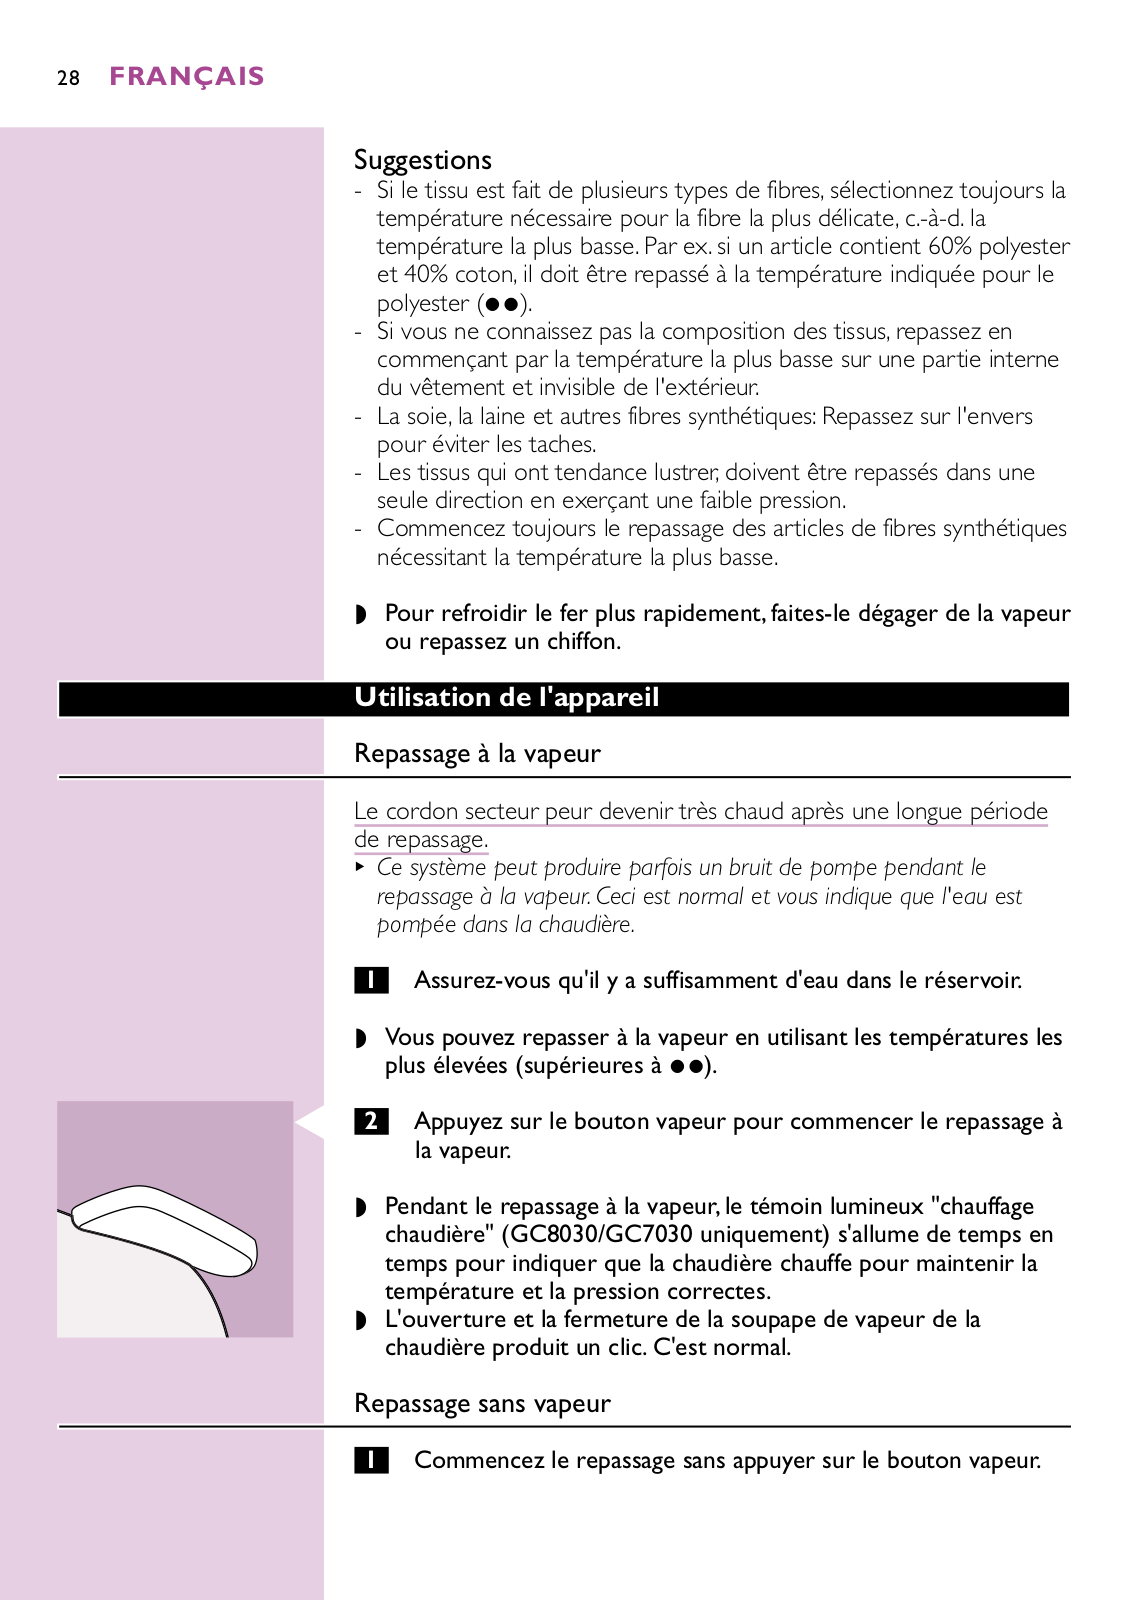
C 2 Appuyez sur le bouton vapeur pour commencer le repassage à la vapeur.

Pendant le repassage à la vapeur, le témoin lumineux "chauffage chaudière" (GC8030/GC7030 uniquement) s'allume de temps en temps pour indiquer que la chaudière chauffe pour maintenir la température et la pression correctes.

L'ouverture et la fermeture de la soupape de vapeur de la chaudière produit un clic. C'est normal.

Repassage sans vapeur

1 Commencez le repassage sans appuyer sur le bouton vapeur.

FRANÇAIS 29

Après le repassage

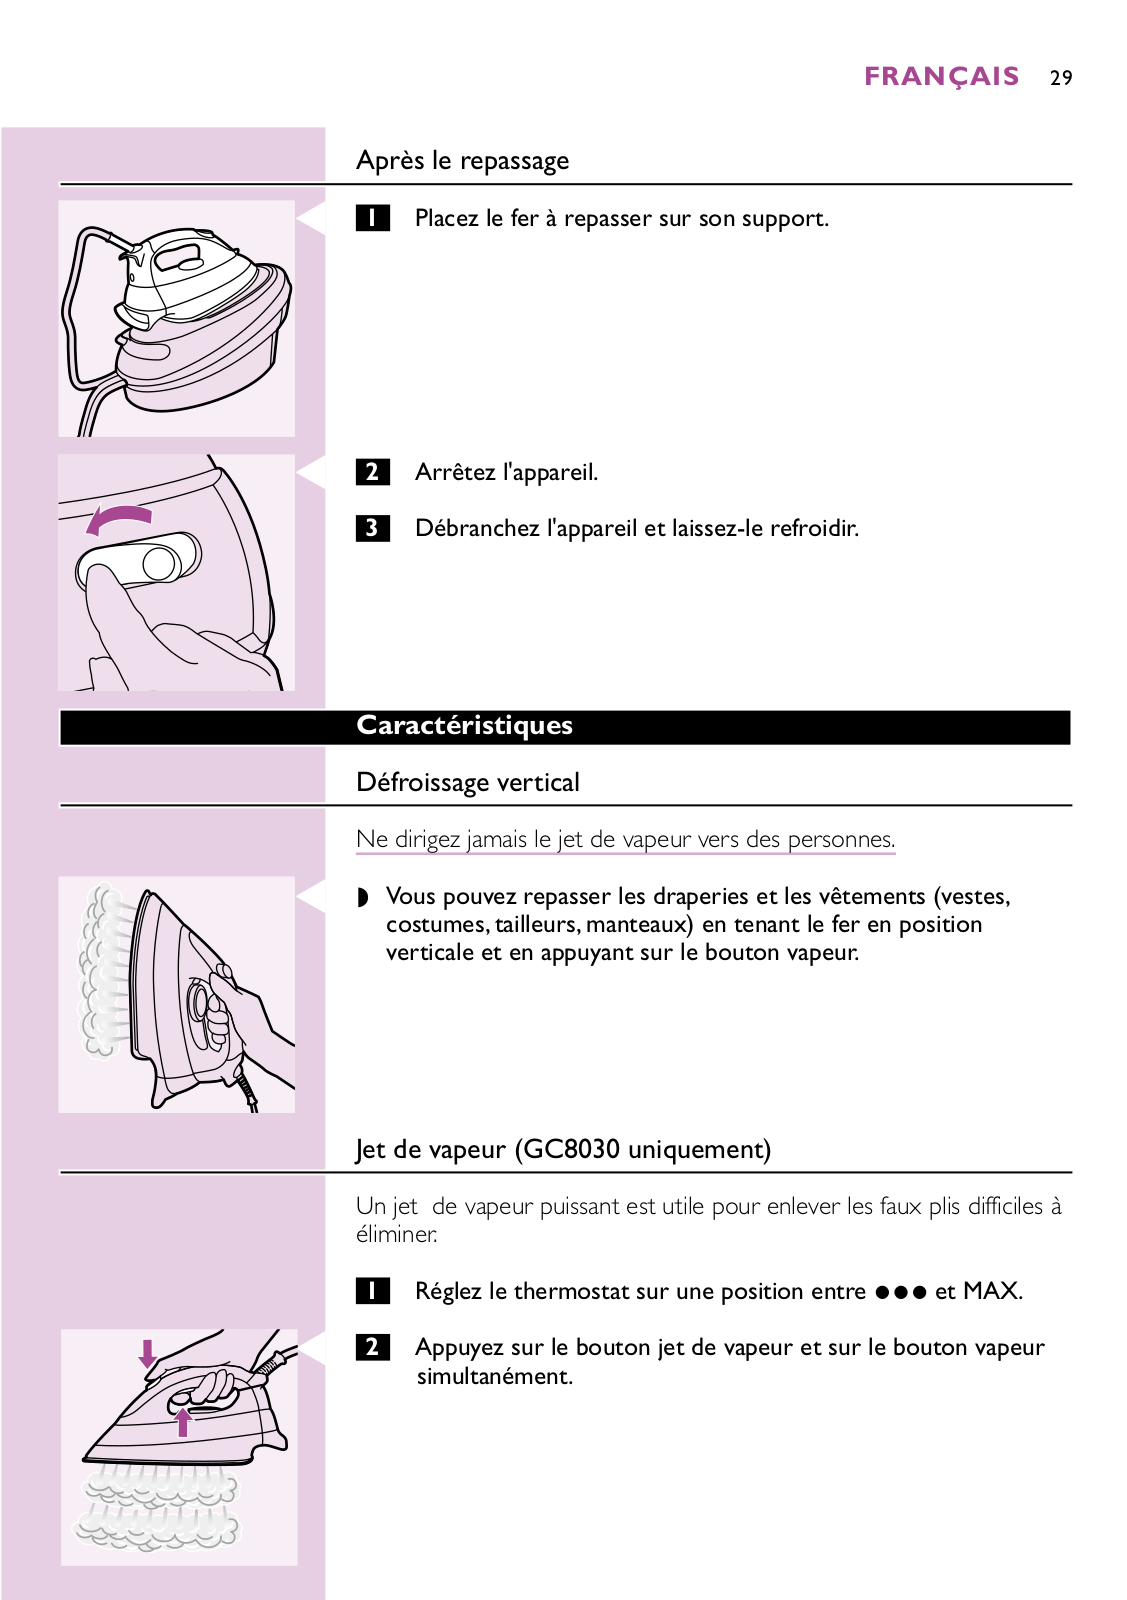
C 1 Placez le fer à repasser sur son support.

C 2 Arrêtez l'appareil.

3 Débranchez l'appareil et laissez-le refroidir.

Caractéristiques

Défroissage vertical

Ne dirigez jamais le jet de vapeur vers des personnes.

C Vous pouvez repasser les draperies et les vêtements (vestes, costumes, tailleurs, manteaux) en tenant le fer en position verticale et en appuyant sur le bouton vapeur.

Jet de vapeur (GC8030 uniquement)

Un jet de vapeur puissant est utile pour enlever les faux plis difficiles à éliminer.

1 Réglez le thermostat sur une position entre 3 et MAX.

C 2 Appuyez sur le bouton jet de vapeur et sur le bouton vapeur simultanément.

Loading...
+ 65 hidden pages