How it Works
Log In / Sign Up
Buy Points
How it Works
FAQ
Contact Us
Questions and Suggestions
Users
Philips
Loading...
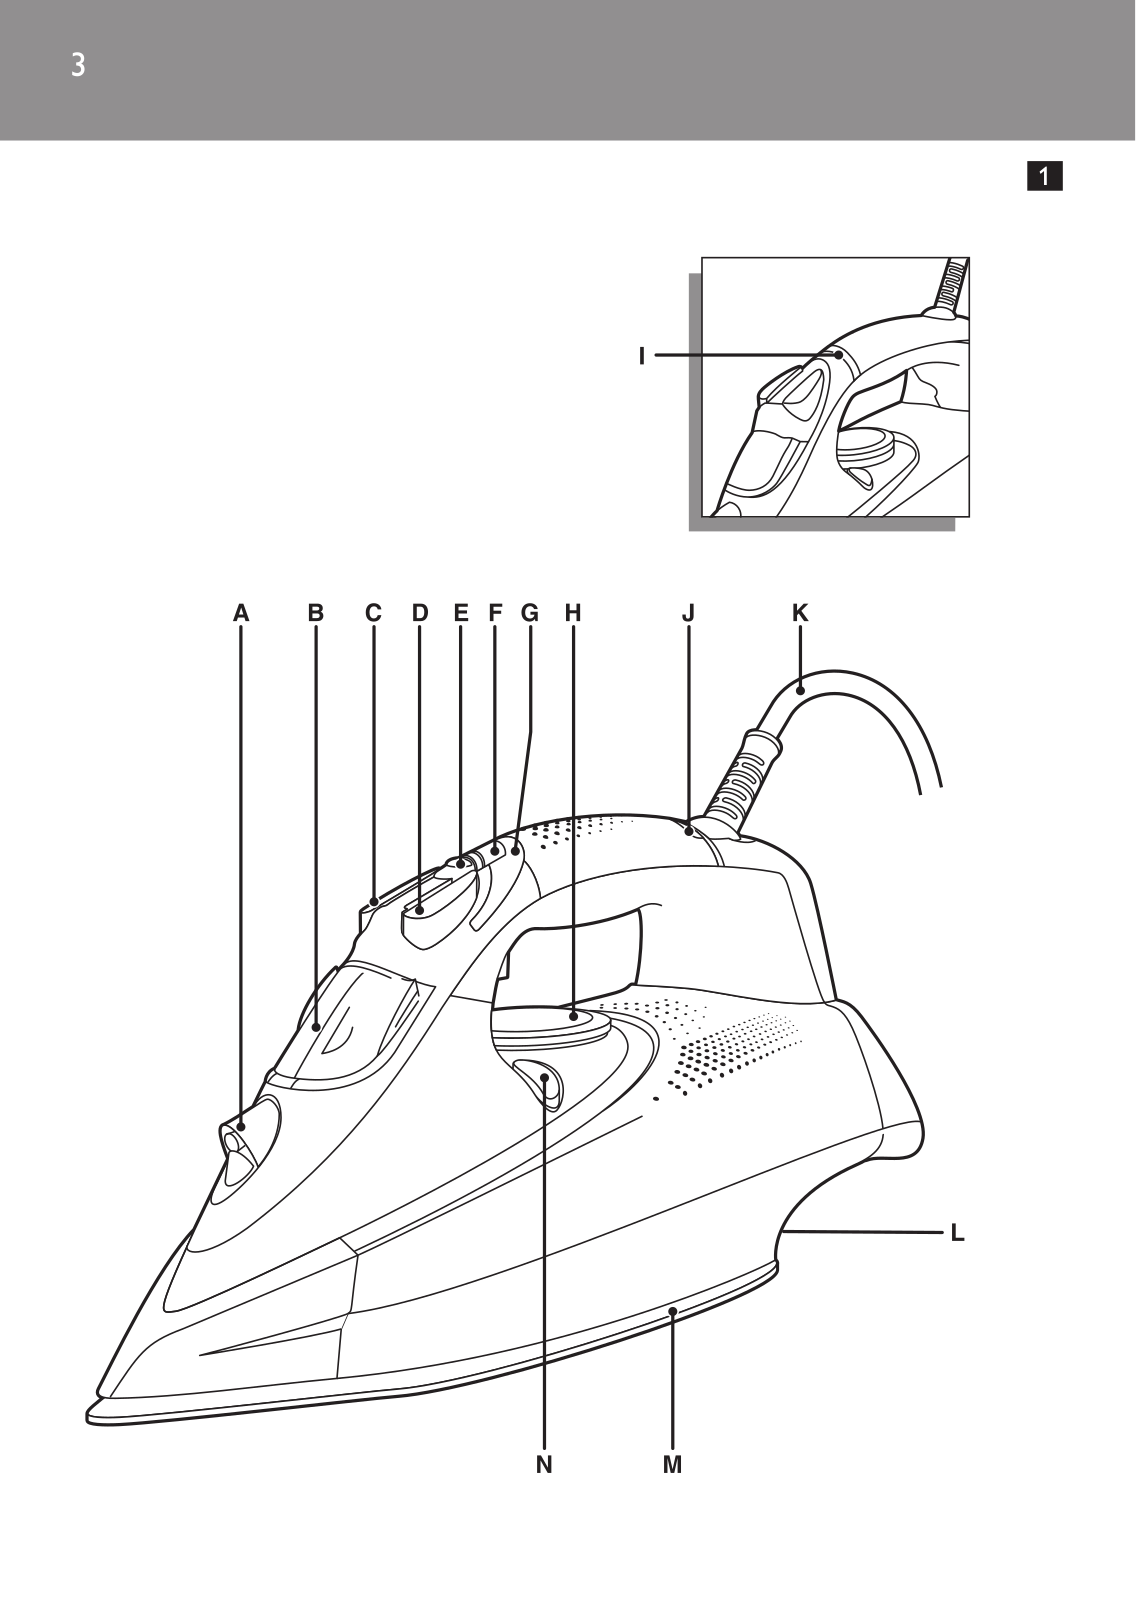
G
GC4330/12
4
GC4340/02
7
GC4340/07
GC440
6
GC4400
3
GC4400 serie
2
GC4400 series
8
GC440/20
2
GC440/27
GC440/28
GC440/47
GC440/81
GC440/87
GC440/88
2
GC4410/02
3
GC4410/07
2
GC4410/12
2
GC4410/22
GC4410/27
2
GC4410/38
GC4411/02
2
GC4411/32
GC4412
13
GC4412/02
GC4412/32
GC4413/02
2
GC4415
8
GC4415/02
2
GC4415/32
GC442
4
GC4420/02
2
GC4420/07
2
GC4420/38
2
GC4422
13
GC4422/02
2
GC442/40
2
GC442/47
GC4425
10
GC4425/02
2
GC442/60
2
GC442-67
3
GC442/67R1
GC442/68
GC442/87
GC4430/02
2
GC4430/07
2
GC4430/12
GC4430/38
2
GC4440/02
GC4440/27
GC4444
11
GC4444/02
2
GC4490
GC4490/02
2
GC4491/02
2
GC4491/27
GC4500 series
12
GC4501
2
GC4501-20
4
GC4501/28
GC4506-20
3
GC4506/21
GC4506/28
GC4510
3
GC4510/30
2
GC4510/36
GC4510/37
GC4510/97
GC4511
6
GC4511/20
3
GC4511/40
4
GC4511/46
GC4511/97
GC4512
2
GC4512/20
2
GC4512/97
GC4513/30
GC4514/30
GC4515/30
GC4515/36
GC4515/37
GC4516
2
GC4516-20
5
GC4516/20R1
GC4516-40
GC4516/40R1
GC4516/41
GC4516/46
GC4517
3
GC4517/20
GC4517/26
GC4518
GC4518/30
2
GC4519
2
GC4519/30
GC4520
2
GC4520/10
3
GC4520/15
GC4520/30
6
GC4520/31
Loading...
Loading...
Nothing found
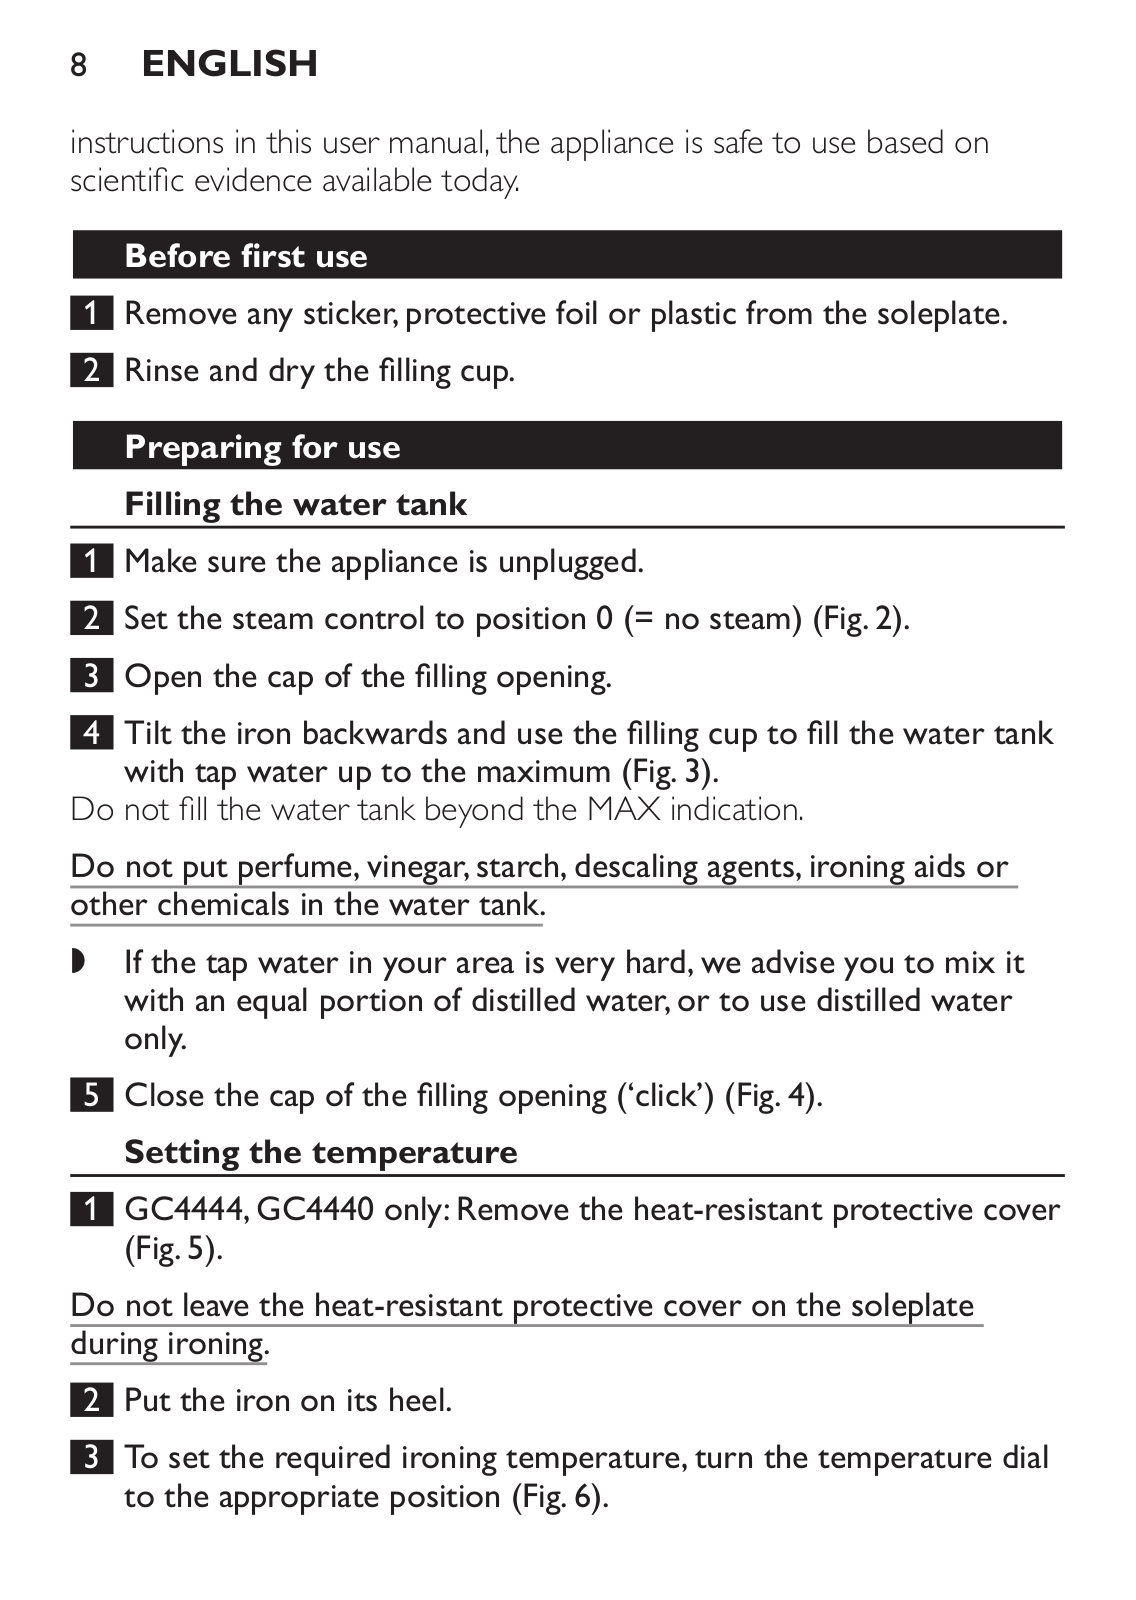
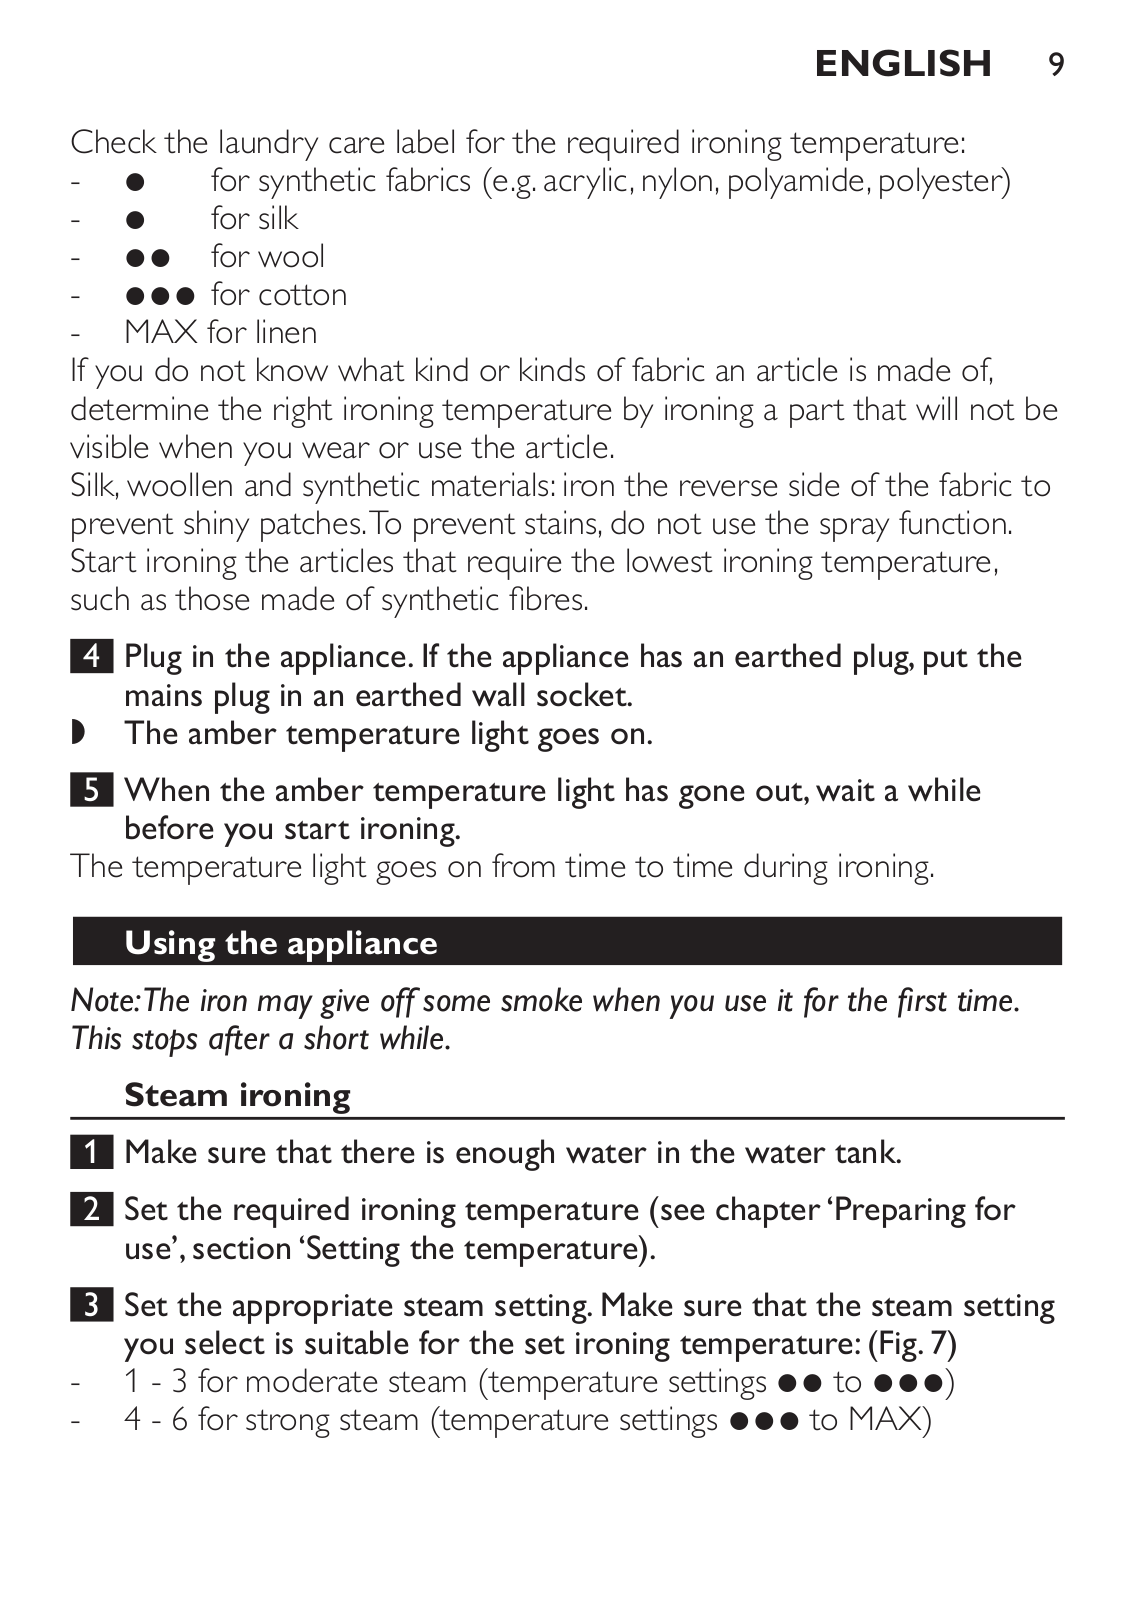
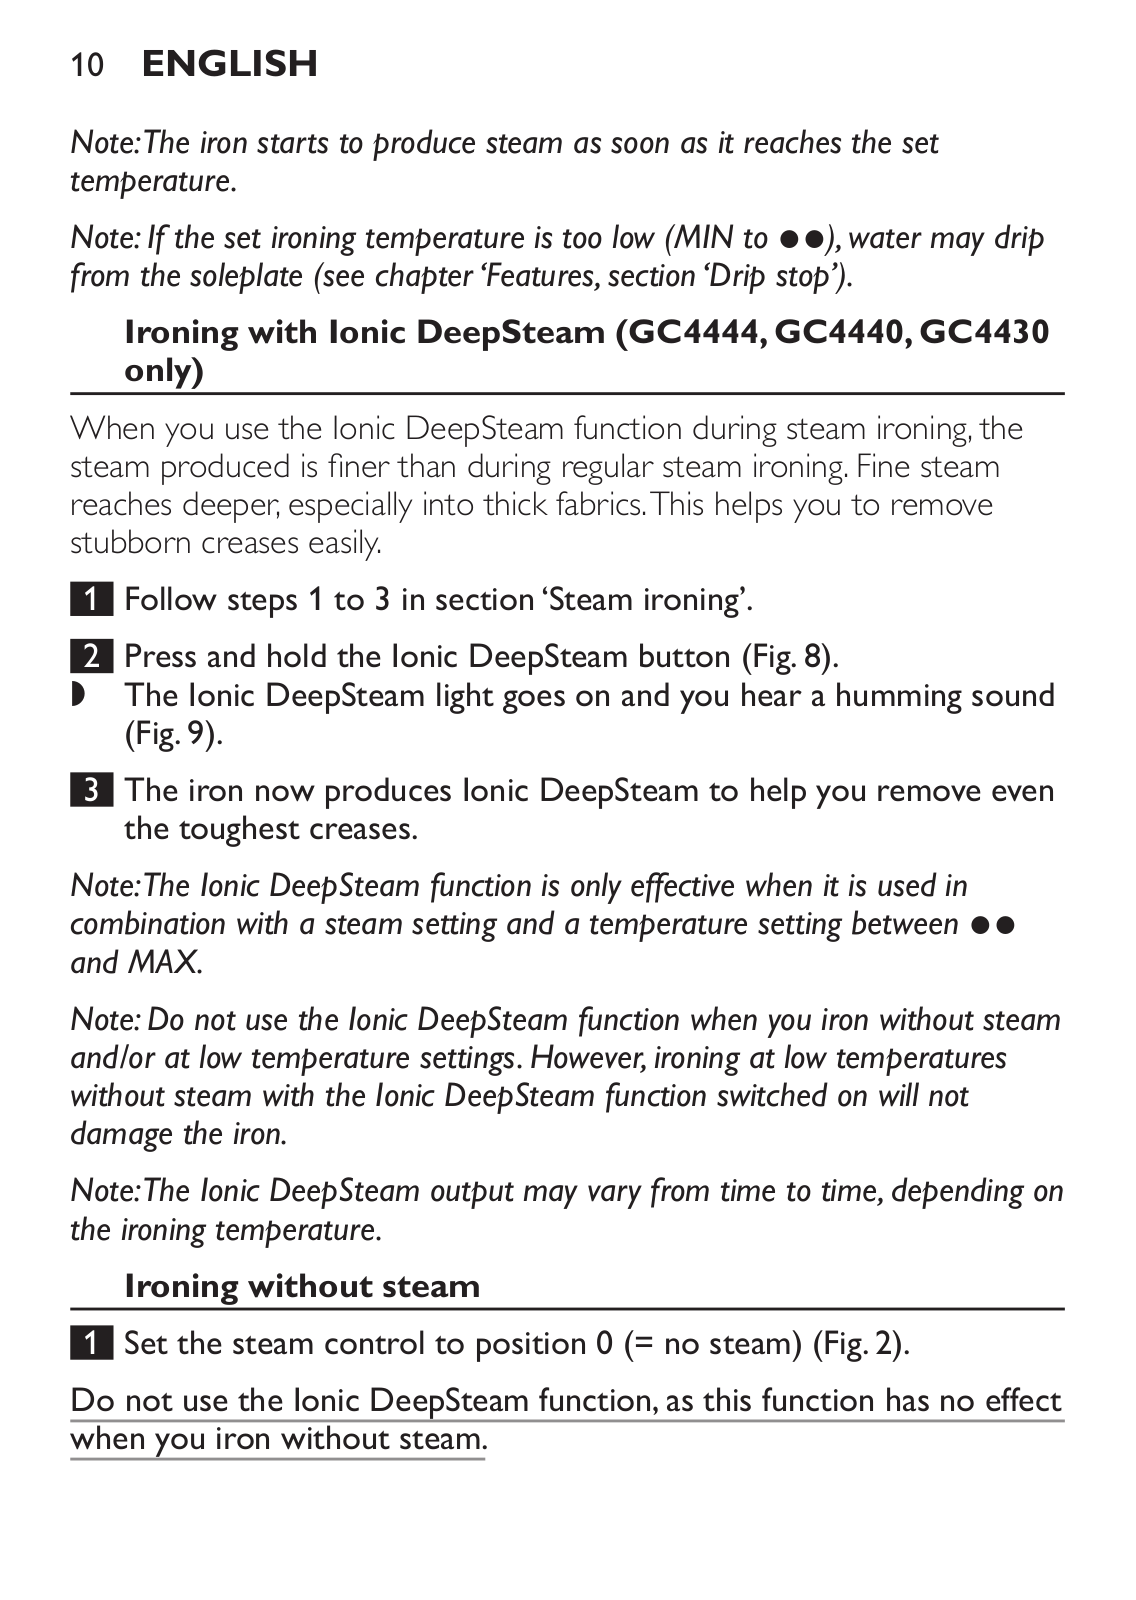
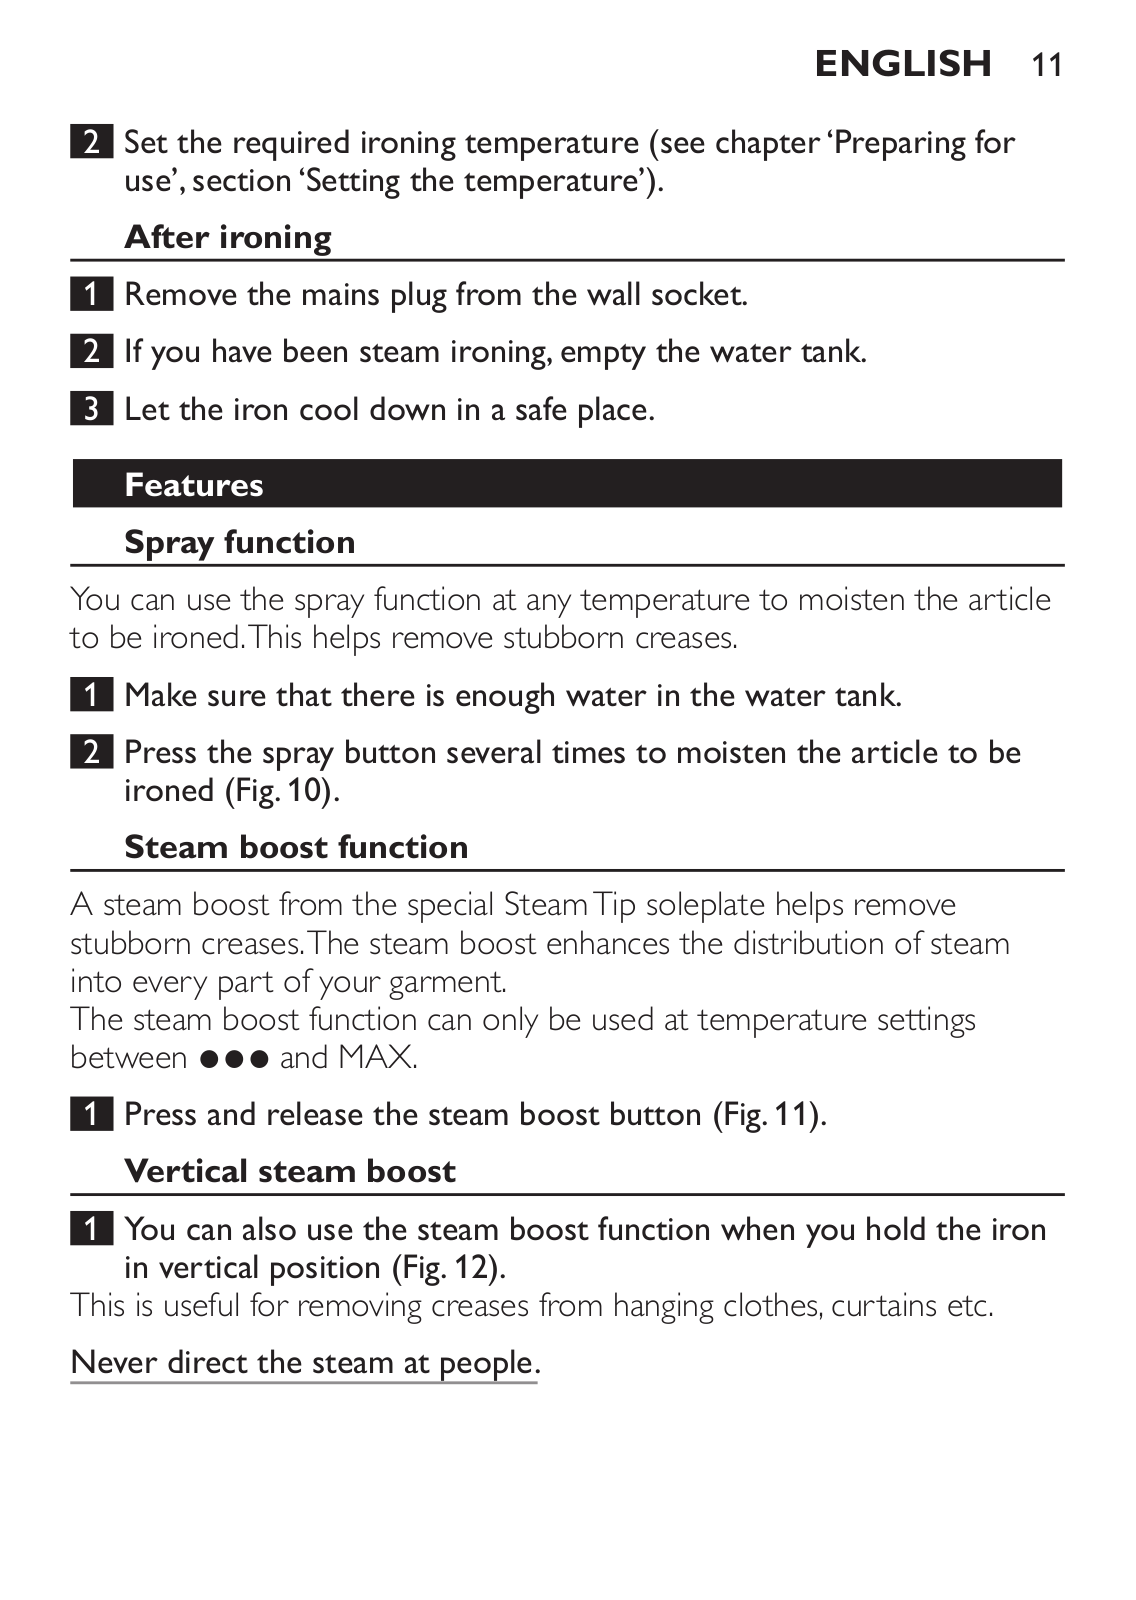
GC4444
Instruction Manual
72 pgs
1.16 Mb
0
User Manual
2 pgs
329.82 Kb
0
User Manual
72 pgs
2.42 Mb
0
User Manual
76 pgs
1.27 Mb
0
User Manual
80 pgs
980.06 Kb
0
User manual
92 pgs
1.06 Mb
0
User Manual
1 pgs
58.67 Kb
0
User Manual
88 pgs
1.02 Mb
0
User Manual [ar]
60 pgs
6.41 Mb
0
User Manual [id]
96 pgs
2.5 Mb
0
User Manual [ru, en, cs, pl]
132 pgs
1.48 Mb
0
Table of contents
Loading...
Philips GC4444, GC4440, GC4430, GC4425, GC4422 User Manual [id]
...
Philips GC4444, GC4440, GC4430, GC4425, GC4422, GC4420, GC4415, GC4412, GC4411, GC4410 User Manual [id]
Download
Specifications and Main Features
Frequently Asked Questions
User Manual
Download
Loading...
+
67
hidden pages
Unhide
You need points to download manuals.
1 point = 1 manual.
You can buy points or you can get point for every manual you upload.
Buy points
Upload your manuals