

Page 1

Azur
GC4340, GC4330, GC4325, GC4320, GC4310
Page 2

2
Page 3

ENGLISH 4
DEUTSCH 13
FRANÇAIS 23
NEDERLANDS 32
ITALIANO 42
GC4340, GC4330, GC4325, GC4320, GC4310
Page 4
Important
Read these instructions for use carefully before using the appliance and
save them for future reference.
◗ Check if the voltage indicated on the type plate corresponds to
the local mains voltage before you connect the appliance.
◗ Only connect the appliance to an earthed wall socket.
◗ Do not use the appliance if the plug, the cord or the appliance
itself shows visible damage, or if the appliance has been dropped
or is leaking.
◗ Check the cord regularly for possible damage.
◗ If the mains cord is damaged, it must be replaced by Philips, a
service centre authorised by Philips or similarly qualified persons
in order to avoid a hazard.
◗ Never leave the appliance unattended when it is connected to the
mains.
◗ Never immerse the iron and the stand,if provided, in water.
◗ Keep the appliance out of the reach of children.
◗ The soleplate of the iron can become extremely hot and may
cause burns if touched.
◗ Do not allow the cord to come into contact with the soleplate
when it is hot.
◗ When you have finished ironing, when you clean the appliance,
when you fill or empty the water tank and also when you leave
the iron even for a short while:set the steam control to position
0, put the iron on its heel and remove the mains plug from the
wall socket.
◗ Always place and use the iron and the stand, if provided, on a
stable, level and horizontal surface.
◗ Do not put perfume, vinegar, starch, descaling agents,ironing aids
or other chemicals in the water tank.
◗ This appliance is intended for household use only.
Before first use
C
1 Remove the heat-resistant protective cover from the soleplate
(GC4340 only). Remove any sticker or protective foil from the
soleplate.
B
The iron may give off some smoke when you use it for the first time.This
will cease after a short while.
ENGLISH4
Page 5
Preparing for use
Filling the water tank
Never immerse the iron in water.
1 Make sure the appliance is unplugged.
C
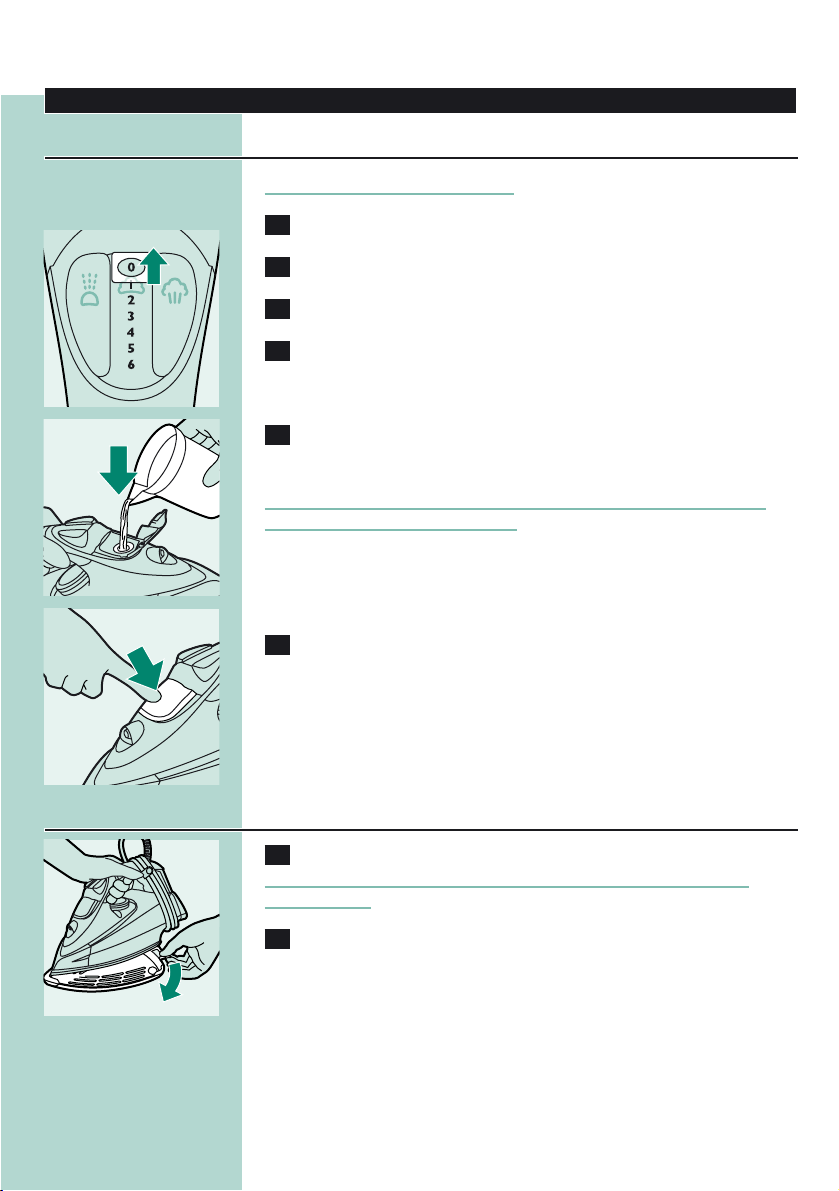
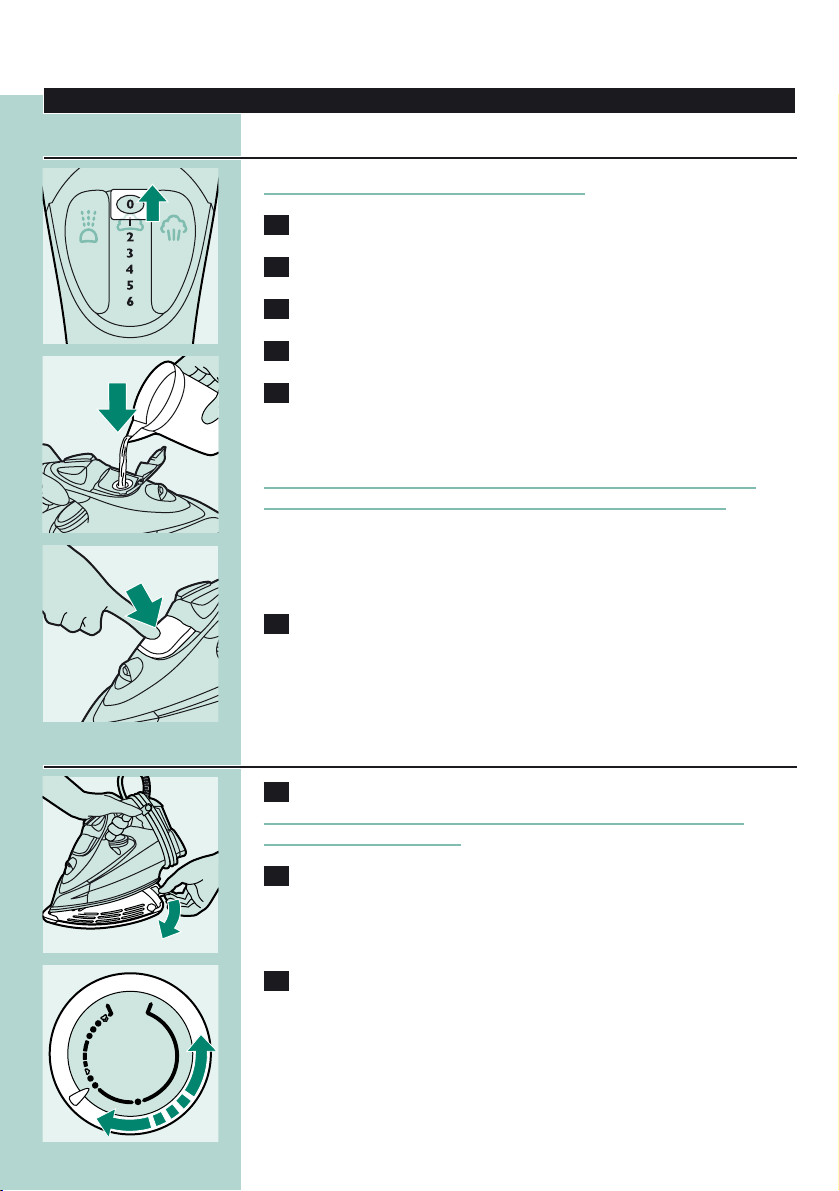
2 Set the steam control to position 0 (= no steam).
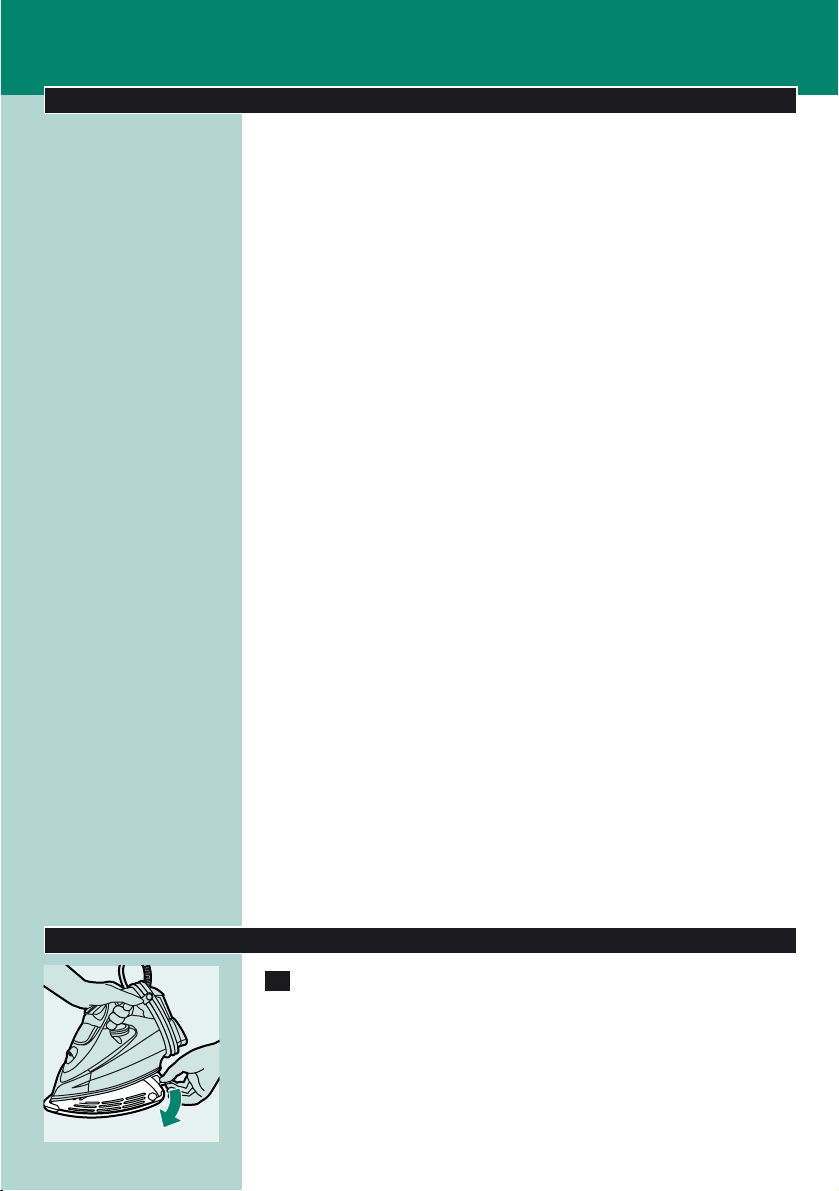
3 Open the cap of the filling opening.
4 Tilt the iron backwards.
C
5 Fill the water tank with tap water up to the maximum level by
means of the filling cup.
Do not fill the tank beyond the MAX indication.
Do not put perfume, vinegar, starch, descaling agents, ironing aids or
other chemicals in the water tank.
◗ If the tap water in your area is very hard,we advise you to mix it
with an equal portion of distilled water, or to use distilled water
only.
C
6 Close the cap of the filling opening ('click').
Setting the temperature
C
1 Type GC4340 only: remove the heat-resistant protective cover.
Do not leave the heat-resistant protective cover on the soleplate
during ironing.
2 Put the iron on its heel.
ENGLISH 5
Page 6
C
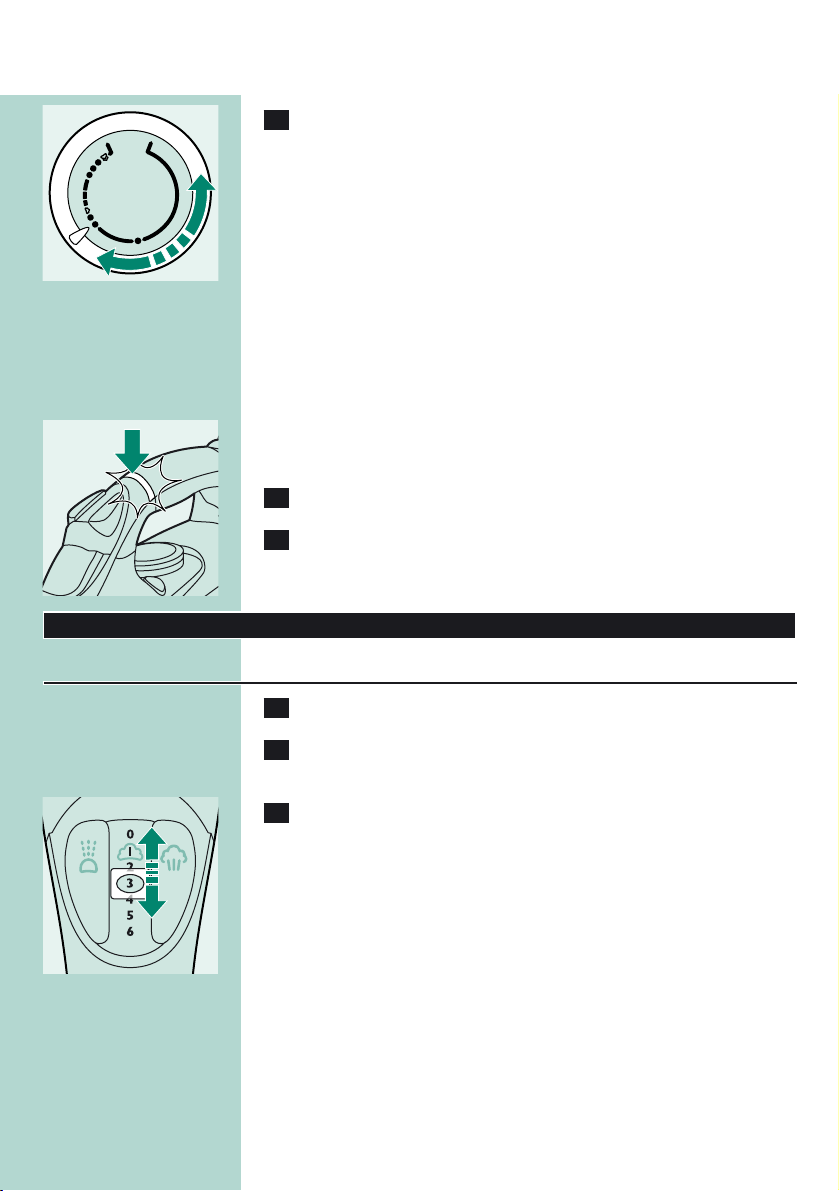
3 Set the required ironing temperature by turning the
temperature dial to the appropriate position.
Check the laundry care label for the required ironing temperature:
- 1 Synthetic fabrics (e.g. acrylic, nylon, polyamide, polyester)
- 1 Silk
- 2 Wool
- 3 Cotton, linen
If you do not know what kind or kinds of fabric an article is made of,
determine the right ironing temperature by ironing a part that will not
be visible when you wear or use the article.
Silk, woollen and synthetic materials: iron the reverse side of the fabric
to prevent shiny patches.Avoid using the spray function to prevent
stains.
Start ironing the articles that require the lowest ironing temperature,
such as those made of synthetic fibres.
4 Put the mains plug in an earthed wall socket.
C
5 When the amber temperature light has gone out, wait a while
before you start ironing.
The temperature light will go on from time to time during ironing.
Using the appliance
Steam ironing
1 Make sure that there is enough water in the water tank.
2 Select the recommended ironing temperature (see chapter
'Preparing for use', section 'Setting the temperature').
C
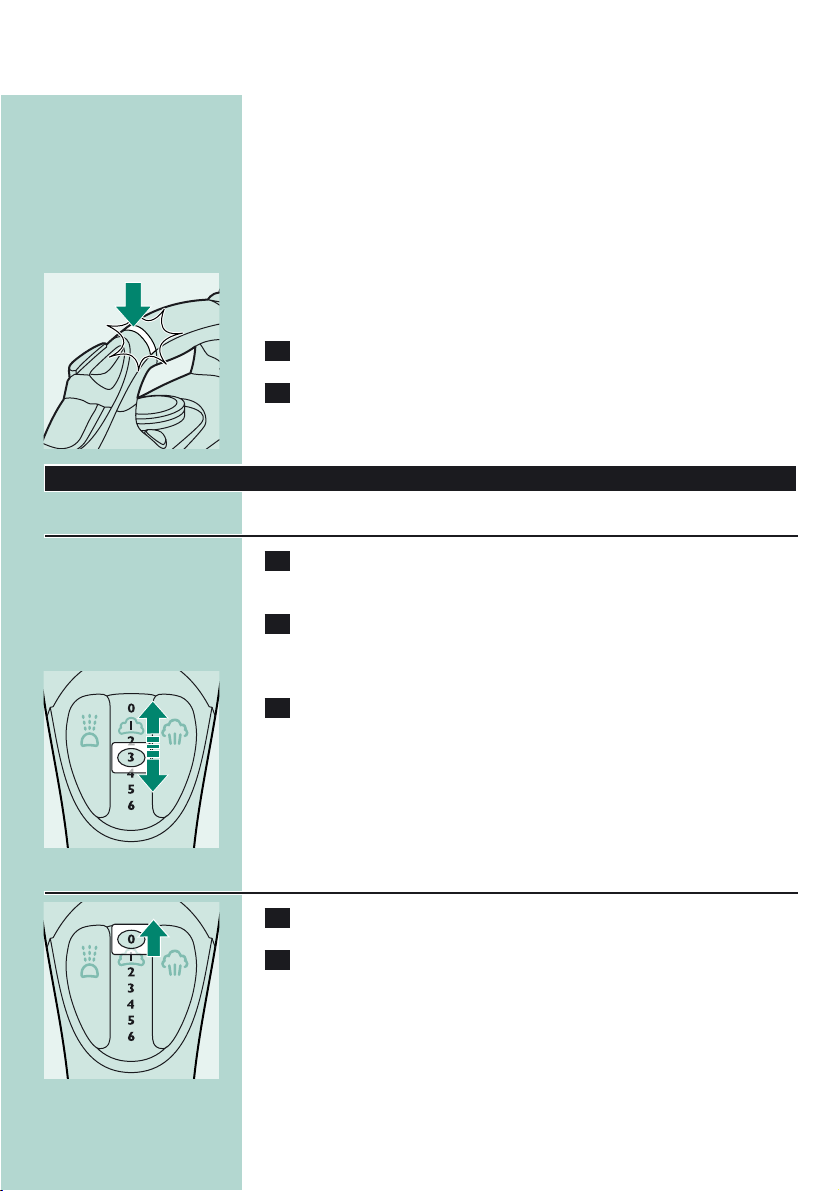
3 Select the appropriate steam setting. Make sure that the steam
setting you select is suitable for the ironing temperature
selected:
- 1 - 3 for moderate steam (temperature settings 2 to 3)
- 4 - 6 for strong steam (temperature settings 3 to MAX)
B
The iron will start steaming as soon as the set temperature has been
reached.
ENGLISH6
COTTON
WOOL
MAX
LINEN
MIN
NYLON
SILK
Page 7
Ironing without steam
C
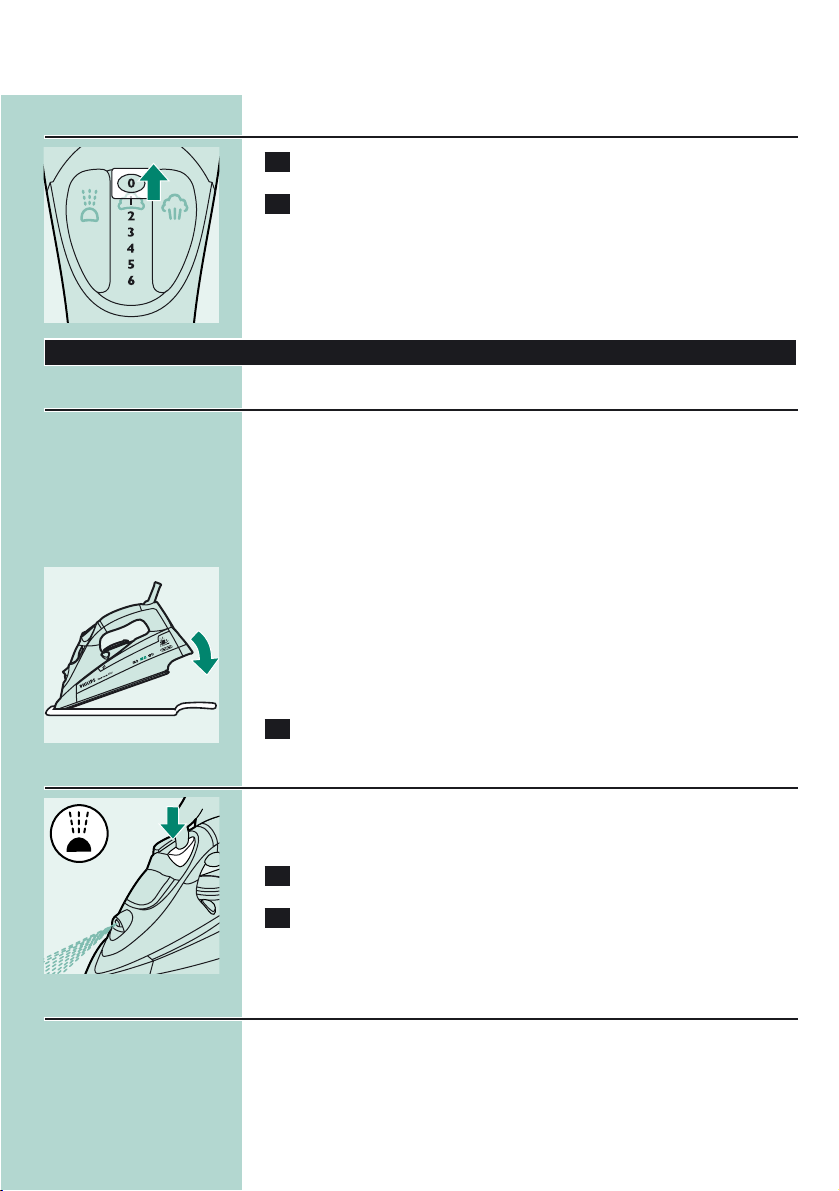
1 Set the steam control to position 0 (= no steam).
2 Select the recommended ironing temperature (see chapter
'Preparing for use', section 'Setting the temperature').
Features
Delicate fabric protector (GC4325 only)
The delicate fabric protector protects delicate fabrics from heat
damage and shiny patches.
With the delicate fabric protector you can iron delicate fabrics (silk,
wool and nylon) at temperature settings 3 to MAX in combination
with all steam functions available on the iron.
The delicate fabric protector reduces the soleplate temperature
instantly, thus allowing you to iron delicate fabrics safely.
If you do not know what kind or kinds of fabric an article is made of,
determine the right ironing temperature by ironing a part that will not
be visible when you wear or use the article.
C
1 Put the iron on the delicate fabric protector ('click').
Spray function
You can use the spray function to remove stubborn creases at any
temperature.
1 Make sure that there is enough water in the water tank.
C
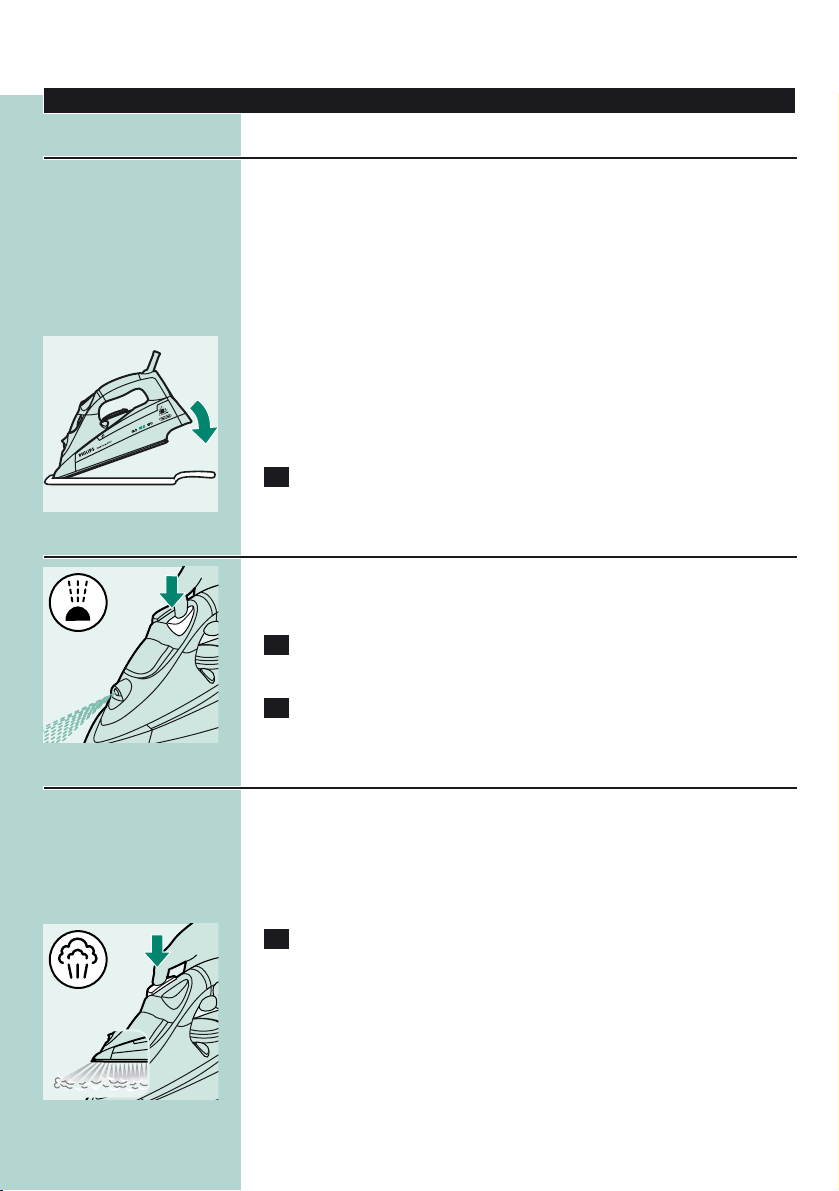
2 Press the spray button several times to moisten the article to
be ironed.
Concentrated shot of steam from the special Steam Tip
A powerful shot of concentrated steam helps remove stubborn
creases.The forward-directed concentrated shot of steam enhances
the distribution of steam into every part of your garment.
The shot-of-steam function can only be used at temperature settings
between 2 and MAX.
ENGLISH 7
Page 8
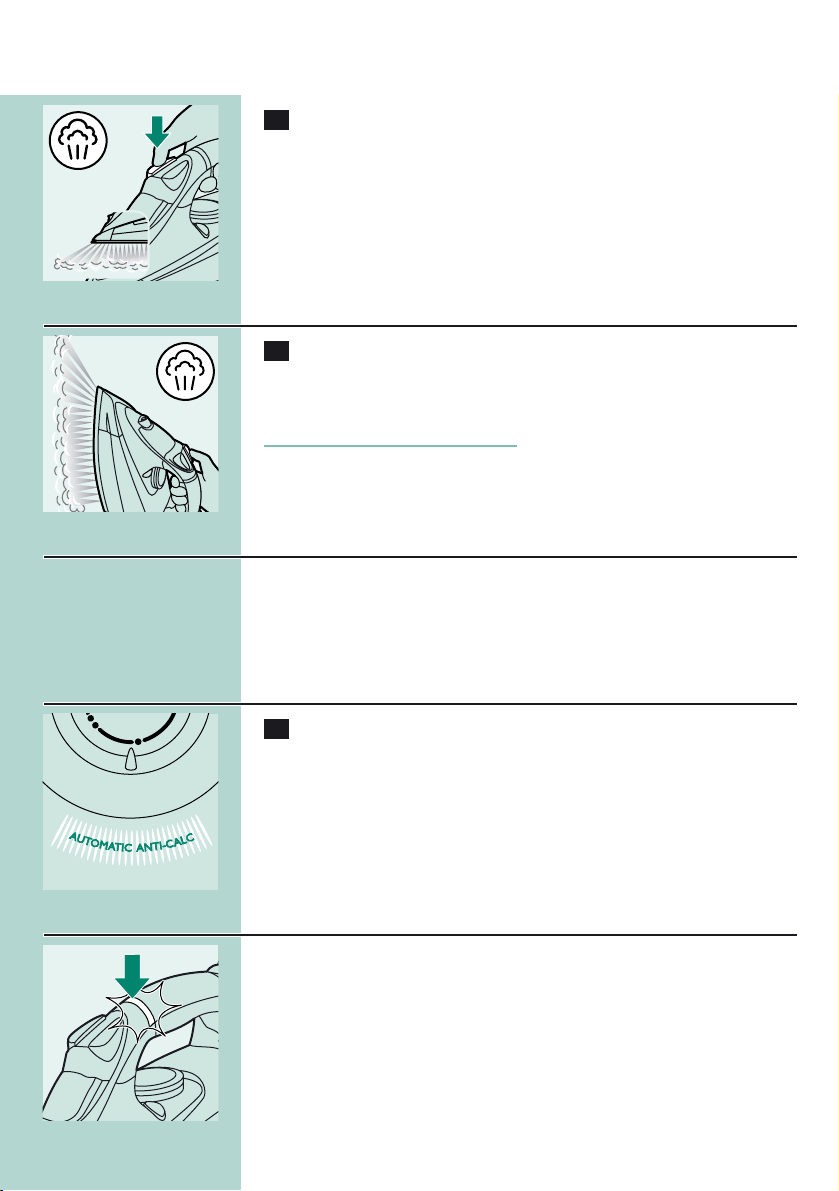
C
1 Press and release the shot-of-steam button.
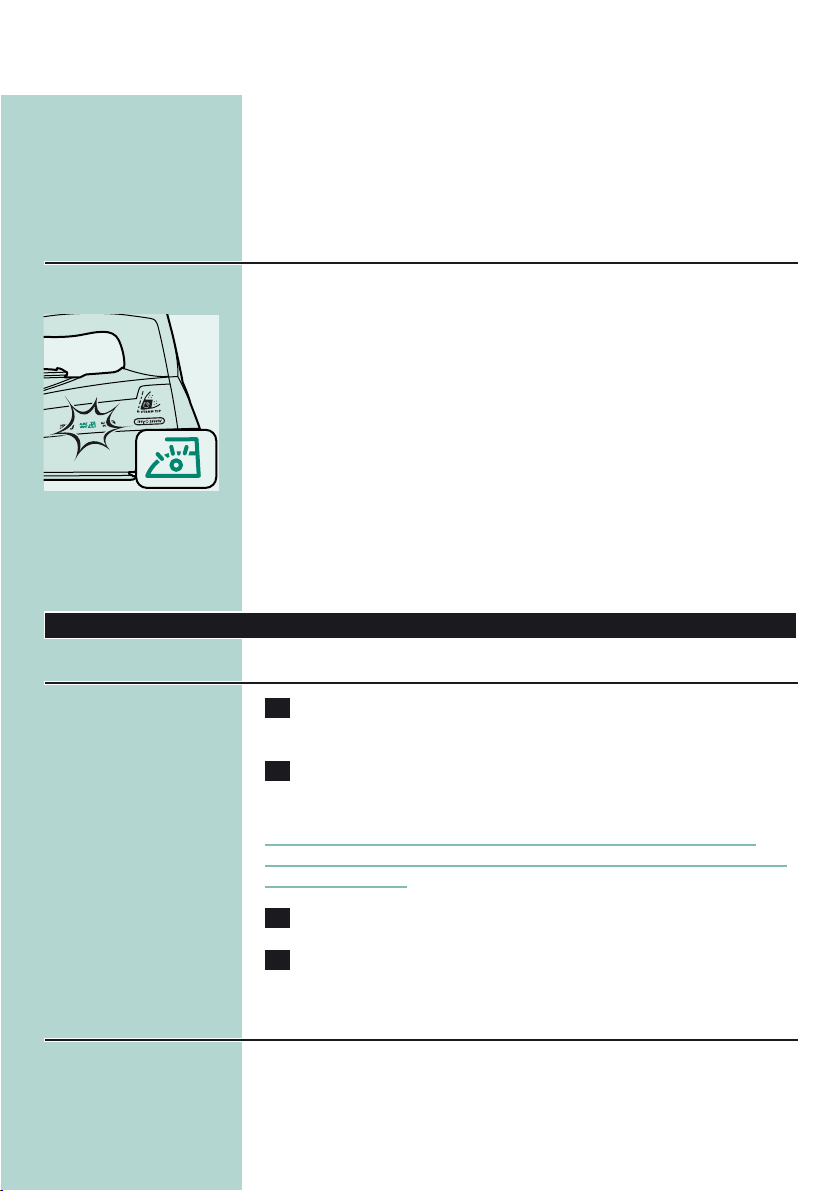
Vertical shot of steam
C
1 The shot-of-steam function can also be used when you hold
the iron in vertical position.
This is useful for removing creases from hanging clothes, curtains etc.
Never direct the steam at people.
Drip stop
This iron is equipped with a drip-stop function: the iron automatically
stops producing steam when the temperature is too low, to prevent
water from dripping out of the soleplate. When this happens you may
hear a sound.
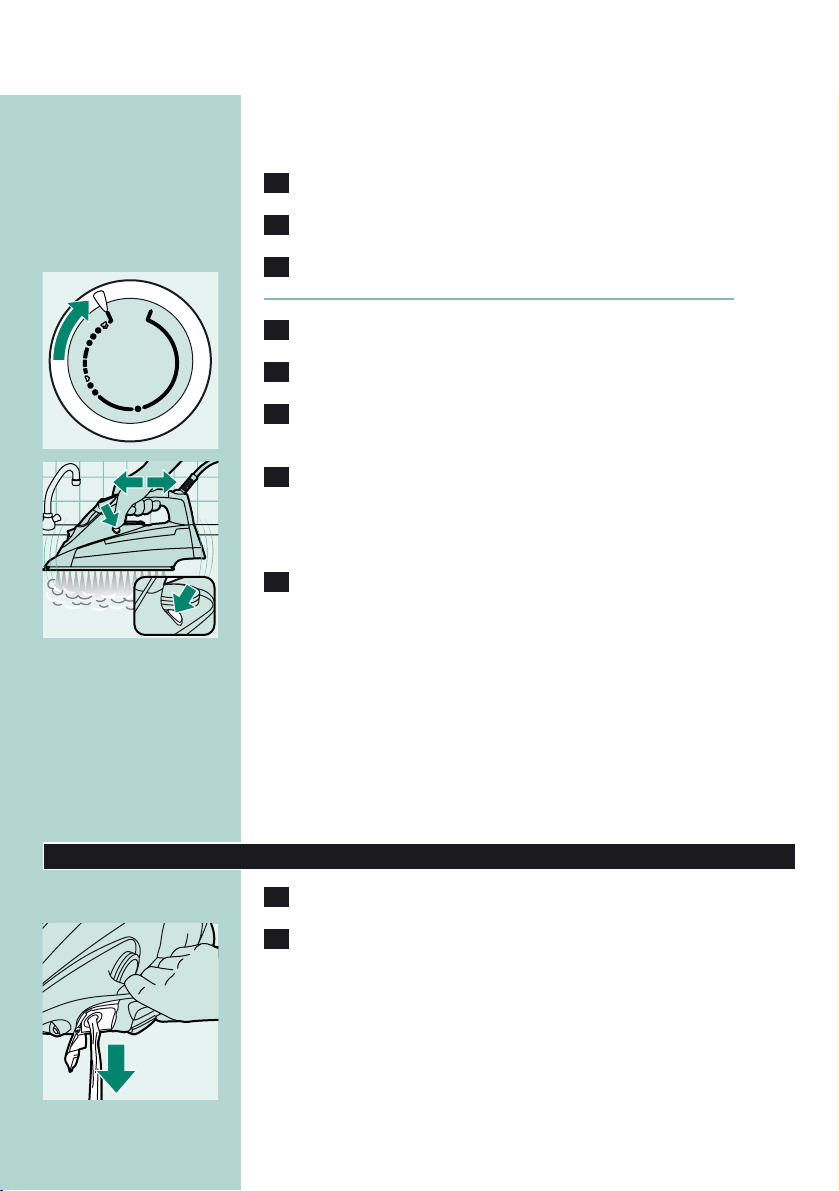
Automatic anti-calc system
C
1 The built-in anti-calc system reduces the build-up of scale and
guarantees a longer life for the iron.
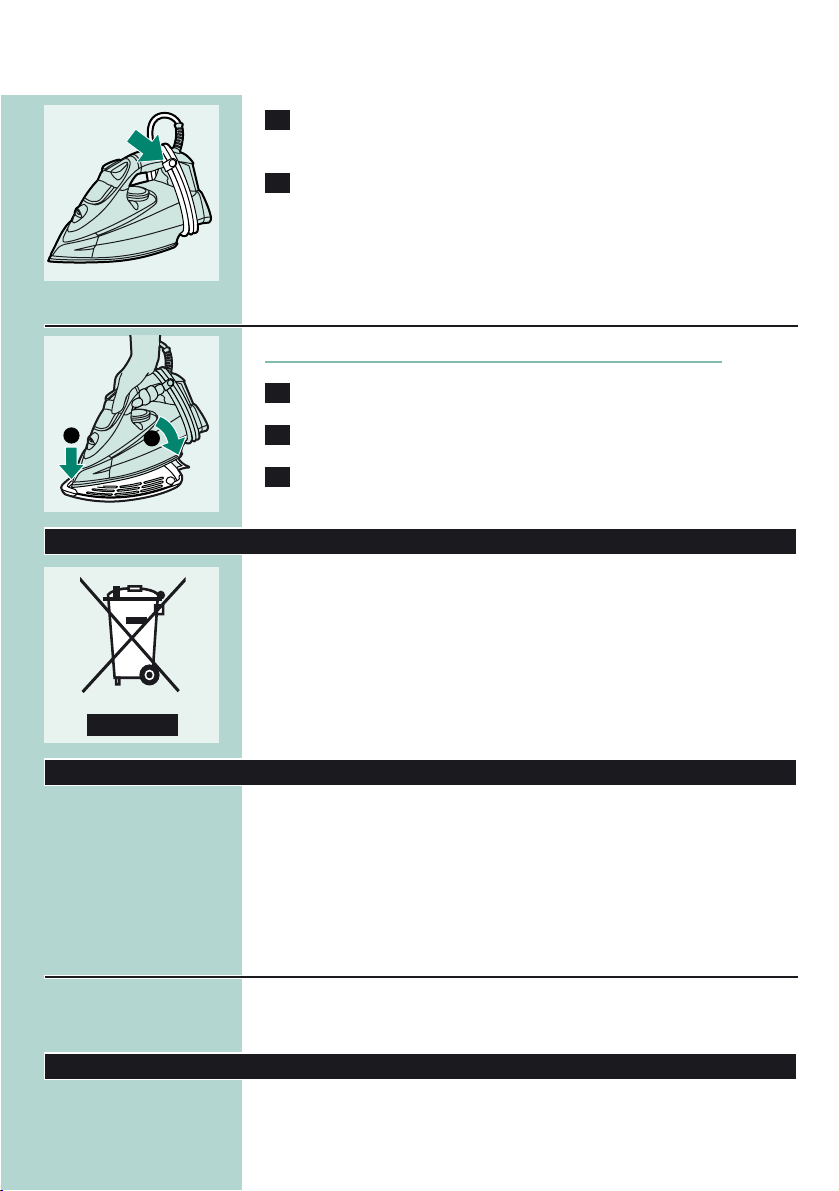
Electronic safety shut-off function (GC4325/4320 only)
C
◗ The electronic safety shut-off function automatically switches off
the iron if it has not been moved for a while.
◗ The red auto-off light starts blinking to indicate that the iron has
been switched off by the safety shut-off function.
To let the iron heat up again:
- Pick up the iron or move it slightly.
- The red auto-off light goes out. If the temperature of the soleplate
has dropped below the set ironing temperature, the amber
temperature light goes on.
ENGLISH8
Page 9
- If the temperature light goes on after you have moved the iron,wait
for it to go out before you start ironing.
- If the temperature light does not go on after you move the iron, the
soleplate still has the right temperature and the iron is ready for use.
Alert light and electronic safety shut-off function
(GC4340 and GC4330)
The iron is equipped with a blue alert light.
C
◗ The blue alert light burns as long as the iron is plugged in.
◗ The blue alert light starts blinking to indicate that the iron has
been switched off by the safety shut-off function.
To let the iron heat up again:
- Pick up the iron or move it slightly.
- The blue alert light stops blinking. If the temperature of the soleplate
has dropped below the set ironing temperature, the amber
temperature light goes on.
- If the temperature light goes on after you have moved the iron,wait
for it to go out before you start ironing.
- If the temperature light does not go on after you move the iron, the
soleplate still has the right temperature and the iron is ready for use.
Cleaning and maintenance
After ironing
1 Remove the mains plug from the wall socket and let the iron
cool down.
2 Wipe flakes and any other deposits off the soleplate with a
damp cloth and a non-abrasive (liquid) cleaning agent.
To keep the soleplate smooth, you should avoid hard contact with
metal objects. Never use a scouring pad, vinegar or other chemicals to
clean the soleplate.
3 Clean the upper part of the iron with a damp cloth.
4 Regularly rinse the water tank with water. Empty the water
tank after cleaning.
Calc-clean function
You can use the calc-clean function to remove scale and impurities.
◗ Use the calc-clean function once every two weeks.If the water in
your area is very hard (i.e. when flakes come out of the soleplate
ENGLISH 9
Page 10
during ironing), the calc-clean function should be used more
frequently.
1 Make sure the appliance is unplugged.
2 Set the steam control to position 0.
3 Fill the water tank to the maximum level.
Do not put vinegar or other descaling agents in the water tank.
C
4 Select the maximum ironing temperature.
5 Put the plug in an earthed wall socket.
6 Unplug the iron when the amber temperature light has gone
out.
C
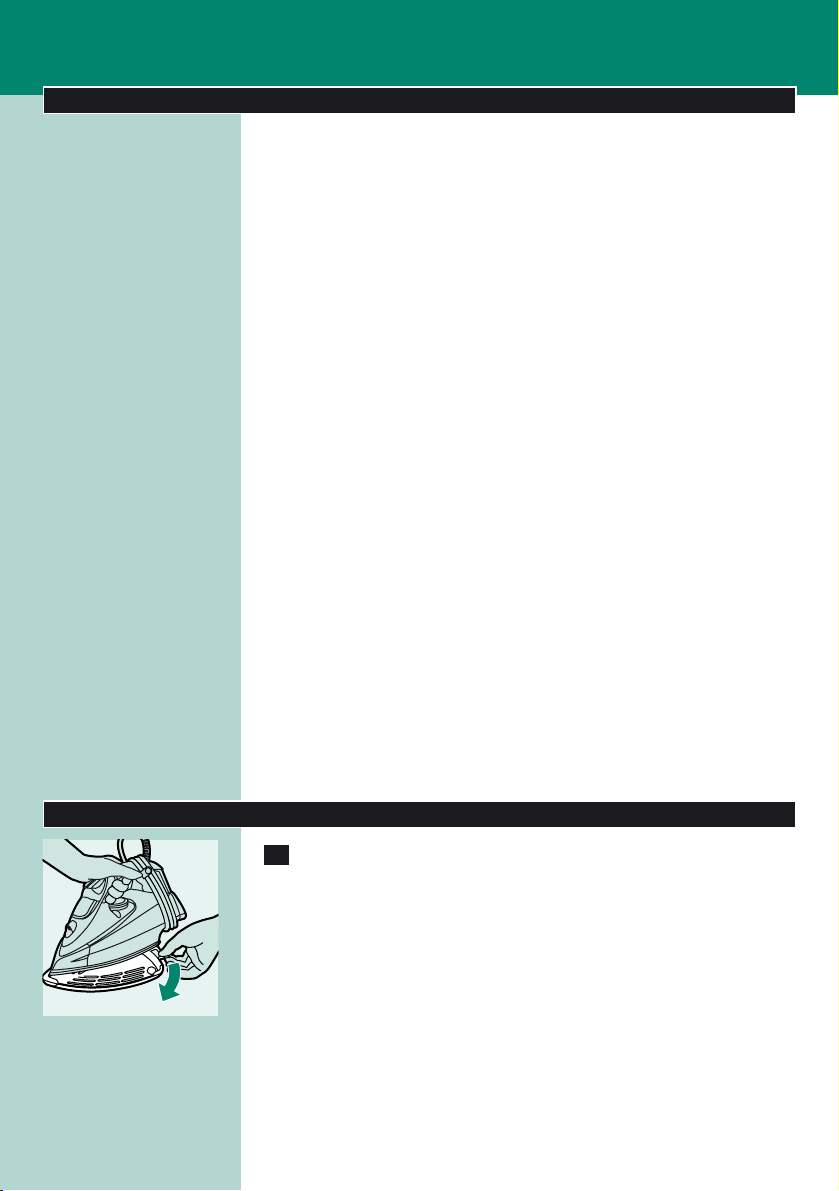
7 Hold the iron over the sink,press and hold the calc-clean
button and gently shake the iron to and fro.
Steam and boiling water will come out of the soleplate. Impurities and
flakes (if any) will be flushed out.
8 Release the calc-clean button as soon as all the water in the
tank has been used up.
Repeat the calc-clean process if the iron still contains a lot of impurities.
After the calc-clean process
- Put the plug in the wall socket and let the iron heat up to allow the
soleplate to dry.
- Unplug the iron when it has reached the set ironing temperature.
- Move the hot iron gently over a piece of used cloth to remove any
water stains that may have formed on the soleplate.
- Let the iron cool down before you store it.
Storage
1 Unplug the iron and set the steam control to position 0.
C
2 Empty the water tank.
ENGLISH10
COTTON
WOOL
MAX
LINEN
MIN
NYLON
SILK
Page 11
C
3 Let the iron cool down.Wind the mains cord round the cord
storage facility and fix it with the cord clip.
4 Always store the emptied iron horizontally on a stable surface
and use a cloth to protect the soleplate.
Heat-resistant protective cover (GC4340 only)
Do not use the heat-resistant protective cover during ironing.
1 Wind the mains cord round the cord storage facility.
C
2 Put the iron on the heat-resistant protective cover.
3 Store the iron with the heat-resistant protective cover
horizontally on a stable surface.
Environment
C
◗ Do not throw the appliance away with the normal household
waste at the end of its life, but hand it in at an official collection
point for recycling. By doing this you will help to preserve the
environment.
Guarantee & service
If you need information or if you have a problem, please visit the Philips
website at www.philips.com or contact the Philips Customer Care
Centre in your country (you will find its phone number in the
worldwide guarantee leaflet). If there is no Customer Care Centre in
your country, turn to your local Philips dealer or contact the Service
Department of Philips Domestic Appliances and Personal Care BV.
Guarantee restrictions
The delicate fabric protector is not covered by the terms of the
international guarantee.
Troubleshooting
This chapter summarises the most common problems you could
encounter with your iron. If you are unable to solve the problem,
contact the Customer Care Centre in your country.
ENGLISH 11
1
2
Page 12

Solution
Check the mains cord, the plug and
the wall socket.
Set the temperature dial to the
required position.
Fill the water tank (see chapter
'Preparing for use').
Set the steam control to a position
between 1 and 6 (see chapter 'Using
the appliance').
Select an ironing temperature that is
suitable for steam ironing (2 to
MAX). Put the iron on its heel and
wait until the amber temperature light
has gone out before you start ironing.
Continue ironing in horizontal position
and wait a while before using the
shot-of-steam function again.
Select an ironing temperature that is
suitable for steam ironing (2 to
MAX). Put the iron on its heel and
wait until the amber temperature light
has gone out before you start ironing.
Press the cap until you hear a click.
Rinse the water tank and do not put
any additive in the water tank.
Use the calc-clean function a few
times (see chapter 'Cleaning and
maintenance').
Move the iron slightly to deactivate
the safety shut-off function.The autooff light goes out.
Move the iron slightly to deactivate
the safety shut-off function.The blue
alert light stops blinking.
Check the mains cord, the plug and
the wall socket.
Possible cause
There is a connection problem.
The temperature dial has been set to
MIN.
There is not enough water in the
water tank.
The steam control has been set to
position 0.
The iron is not hot enough and/or the
drip-stop function has been activated.
The shot-of-steam function has been
used too often within a very short
period.
The iron is not hot enough.
The cap of the filling opening has not
been closed properly.
An additive has been poured into the
water tank.
Hard water forms flakes inside the
soleplate.
The safety shut-off function has
switched the iron off (see chapter
'Features').
The safety shut-off function has
switched the iron off (see chapter
'Features').
There is a connection problem.
Problem
The iron is plugged in but the soleplate
is cold.
No steam.
No shot of steam or no vertical shot of
steam.
Water droplets drip onto the fabric.
Flakes and impurities come out of the
soleplate during ironing.
The red auto-off light blinks
(GC4325/4320 only).
The blue alert light blinks (GC4340 and
GC4330).
The iron is plugged in but the blue alert
light is out (GC4340 and GC4330).
ENGLISH12
Page 13
Wichtig
Lesen Sie diese Bedienungsanleitung vor dem ersten Gebrauch des
Geräts sorgfältig durch, und bewahren Sie sie für eine spätere
Verwendung auf.
◗ Prüfen Sie vor Inbetriebnahme des Geräts, ob die auf dem
Typenschild angegebene Betriebsspannung mit der örtlichen
Netzspannung übereinstimmt.
◗ Schließen Sie das Gerät nur an eine geerdete Steckdose an.
◗ Verwenden Sie das Gerät nicht, wenn der Netzstecker, das
Netzkabel oder das Gerät selbst beschädigt ist oder das Gerät
heruntergefallen ist bzw.leckt.
◗ Überprüfen Sie das Netzkabel regelmäßig auf mögliche
Beschädigungen.
◗ Wenn das Netzkabel defekt oder beschädigt ist, darf es nur von
einem Philips Service-Center oder einer von Philips autorisierten
Werkstatt durch ein Original-Ersatzkabel ausgetauscht werden,
um Gefährdungen zu vermeiden.
◗ Lassen Sie das eingeschaltete Gerät niemals unbeaufsichtigt.
◗ Tauchen Sie das Bügeleisen und die Abstellfläche (sofern
mitgeliefert) nicht in Wasser.
◗ Halten Sie das Gerät außerhalb der Reichweite von Kindern.
◗ Achten Sie beim Bügeln darauf, dass Sie die heiße Bügelsohle nicht
berühren.
◗ Achten Sie darauf, dass das Netzkabel nicht mit der heißen
Bügelsohle in Kontakt kommt.
◗ Stellen Sie den Dampfregler auf "0", stellen Sie das Bügeleisen
aufrecht und ziehen Sie den Netzstecker aus der Steckdose, wenn
Sie das Bügeln beenden, das Gerät reinigen, den Wasserbehälter
füllen bzw.leeren oder den Raum - auch nur für kurze Zeit verlassen.
◗ Benutzen Sie das Bügeleisen und die Abstellfläche (sofern
mitgeliefert) auf einer stabilen, ebenen und waagerechten
Unterlage.
◗ Geben Sie weder Duftstoffe, Essig,Wäschesteife,
Entkalkungsmittel, Bügelzusätze noch andere Chemikalien in den
Wasserbehälter.
◗ Dieses Gerät ist nur für den Gebrauch im Haushalt bestimmt.
Vor dem ersten Gebrauch
C
1 Entfernen Sie die hitzebeständige Unterlage von der Bügelsohle
(nur GC4340). Entfernen Sie den Aufkleber bzw. die Schutzfolie
von der Bügelsohle.
B
Beim ersten Gebrauch gibt das Gerät möglicherweise etwas Rauch ab.
Dies geht nach kurzer Zeit vorüber.
DEUTSCH 13
Page 14
Für den Gebrauch vorbereiten
Den Wasserbehälter füllen
Tauchen Sie das Bügeleisen nicht in Wasser.
1 Ziehen Sie den Netzstecker aus der Steckdose.
C
2 Stellen Sie den Dampfregler auf "0" (kein Dampf).
3 Öffnen Sie die Kappe der Einfüllöffnung.
4 Halten Sie das Bügeleisen schräg.
C
5 Füllen Sie mit dem Becher Leitungswasser in den
Wasserbehälter, bis die Markierung MAX erreicht ist.
Überschreiten Sie beim Füllen des Wasserbehälters nicht die
Markierung MAX.
Geben Sie weder Duftstoffe, Essig,Wäschesteife, Entkalkungsmittel
Bügelzusätze noch andere Chemikalien in den Wasserbehälter.
◗ Wenn das Leitungswasser in Ihrer Gegend sehr hart ist, sollte zu
gleichen Teilen Leitungswasser und destilliertes Wasser oder
ausschließlich destilliertes Wasser verwendet werden.
C
6 Schließen Sie die Kappe der Einfüllöffnung, bis sie hörbar
einrastet.
Die Temperatur einstellen
C
1 Nur GC4340: Entfernen Sie die hitzebeständige Unterlage.
Lassen Sie die hitzebeständige Unterlage keinesfalls während des
Bügelns an der Bügelsohle.
2 Stellen Sie das Bügeleisen aufrecht ab.
C
3 Stellen Sie den Temperaturregler auf die gewünschte
Bügeltemperatur ein.
Prüfen Sie das Etikett im Wäsche-/Kleidungsstück auf die erforderliche
Bügeltemperatur:
- 1 Kunstfasern (z. B. Polyacryl, Nylon, Polyamid, Polyester)
- 1 Seide
- 2 Wolle
- 3 Baumwolle, Leinen
DEUTSCH14
COTTON
WOOL
MAX
LINEN
MIN
NYLON
SILK
Page 15
Wenn Sie nicht wissen,um welche Art von Gewebe es sich handelt,
ermitteln Sie die richtige Temperatur durch Bügeln einer Stelle, die
normalerweise nicht sichtbar ist.
Seide,Wolle und Kunstfasern: Bügeln Sie das Gewebe von links, um
glänzende Stellen zu vermeiden. Die Sprühfunktion sollte nicht
verwendet werden, um mögliche Wasserflecken zu vermeiden.
Beginnen Sie stets mit den Textilien, die eine niedrige
Temperatureinstellung erfordern, etwa mit synthetischen Stoffen.
4 Stecken Sie den Netzstecker in eine geerdete Steckdose.
C
5 Wenn die gelbe Temperaturanzeige erloschen ist, sollten Sie
noch einen Moment warten, bis Sie mit dem Bügeln beginnen.
Die Temperaturanzeige leuchtet während des Bügels gelegentlich auf.
Das Gerät verwenden
Dampfbügeln
1 Überprüfen Sie, ob sich genügend Wasser im Wasserbehälter
befindet.
2 Stellen Sie die empfohlene Bügeltemperatur ein (siehe Kapitel
"Für den Gebrauch vorbereiten",Abschnitt "Die Temperatur
einstellen").
C
3 Wählen Sie die gewünschte Dampfeinstellung.Vergewissern Sie
sich, dass diese Einstellung zur gewählten Temperatur passt:
- 1 bis 3: mäßiger Dampf - bei Temperatureinstellung 2 bis 3.
- 4 bis 6: starker Dampf - Temperatur 3 bis MAX.
B
Das Gerät gibt Dampf aus, sobald die eingestellte Temperatur erreicht
ist.
Trockenbügeln
C
1 Stellen Sie den Dampfregler auf "0" (kein Dampf).
2 Stellen Sie die empfohlene Bügeltemperatur ein (siehe Kapitel
"Für den Gebrauch vorbereiten",Abschnitt "Die Temperatur
einstellen").
DEUTSCH 15
Page 16
Merkmale
Hitzeschutz für empfindliche Textilien (nur GC4325)
Der Hitzeschutz verhindert bei empfindlichen Textilien Beschädigungen
durch überhöhte Temperaturen und glänzende Flecken.
Dank des Hitzeschutzes können Sie empfindliche Textilien (Seide,Wolle
und Nylon) bei Temperaturen von 3 bis MAX zusammen mit allen
bei diesem Bügeleisen verfügbaren Dampfeinstellungen bügeln.
Außerdem verringert der Hitzeschutz sofort die Temperatur der
Bügelsohle, damit Sie empfindliche Textilien sicher bügeln können.
Wenn Sie nicht wissen,um welche Art von Gewebe es sich handelt,
ermitteln Sie die richtige Temperatur durch Bügeln einer Stelle, die
normalerweise nicht sichtbar ist.
C
1 Stellen Sie das Bügeleisen auf den Hitzeschutz für empfindliche
Textilien (hörbares Einrasten).
Die Sprühfunktion
Die Sprühfunktion steht bei jeder Temperatur zur Verfügung und eignet
sich zur Beseitigung hartnäckiger Falten.
1 Überprüfen Sie, ob sich genügend Wasser im Wasserbehälter
befindet.
C
2 Betätigen Sie die Sprühtaste mehrmals, um das Wäsche-
/Kleidungsstück anzufeuchten.
Gezielter Dampfstoß durch die innovative Dampfspitze
Ein kräftiger Dampfstoß hilft, hartnäckige Falten zu beseitigen. Der
gezielt nach vorn gerichtete Dampfstoß verbessert die Verteilung des
Dampfes auf das gesamte Gewebe.
Die Dampfstoßfunktion kann nur bei Temperaturen zwischen 2 und
MAX aktiviert werden.
C
1 Drücken Sie die Dampfstoßtaste und lassen Sie sie wieder los.
DEUTSCH16
Page 17

Vertikaler Dampfstoß
C
1 Die Dampfstoßfunktion kann auch bei senkrecht gehaltenem
Bügeleisen genutzt werden.
Diese Funktion eignet sich besonders zum Glätten hängender
Kleidungsstücke und Textilien wie Gardinen,Vorhänge usw.
Richten Sie den Dampfstoß niemals auf Personen!
Tropf-Stopp
Dieses Bügeleisen ist mit einer Tropfschutzfunktion versehen: Bei zu
niedrigen Temperaturen wird die Dampfproduktion automatisch
gestoppt, damit kein Wasser aus der Bügelsohle tropft. Eventuell ist
dabei ein Geräusch zu hören.
Automatisches Antikalk-System
C
1 Das integrierte Antikalk-System verringert Kalkablagerungen
und sorgt dadurch für eine längere Lebensdauer des
Bügeleisens.
Automatische Sicherheitsabschaltung (nur GC4325/4320)
C
◗ Das Bügeleisen wird automatisch ausgeschaltet, wenn es eine Zeit
lang nicht bewegt wurde.
◗ Wenn sich das Bügeleisen automatisch ausgeschaltet hat, blinkt die
rote Kontrollanzeige.
So heizt sich das Bügeleisen wieder auf:
- Heben Sie das Bügeleisen an, und bewegen Sie es leicht.
- Die rote Kontrollanzeige erlischt.Wenn die Temperatur der
Bügelsohle unter die eingestellte Bügeltemperatur abgesunken ist,
leuchtet die gelbe Temperaturanzeige auf.
- Wenn die gelbe Kontrollanzeige nach dem Bewegen des Bügeleisens
aufleuchtet, warten Sie, bis sie wieder erlischt, bevor Sie mit dem
Bügeln beginnen.
- Wenn die Temperaturanzeige nach dem Bewegen des Bügeleisens
nicht aufleuchtet, hat die Bügelsohle noch die erforderliche
Temperatur,und das Bügeleisen ist einsatzbereit.
DEUTSCH 17
Page 18

Kontrollanzeige und automatische Sicherheitsabschaltung
(GC4340 und GC4330)
Das Bügeleisen ist mit einer blauen Kontrollanzeige ausgestattet.
C
◗ Die blaue Kontrollanzeige leuchtet, solange das Bügeleisen mit
dem Stromnetz verbunden ist.
◗ Wenn das Bügeleisen von der automatischen
Sicherheitsabschaltung ausgeschaltet wurde, blinkt die blaue
Kontrollanzeige.
So heizt sich das Bügeleisen wieder auf:
- Heben Sie das Bügeleisen an, und bewegen Sie es leicht.
- Die blaue Kontrollanzeige erlischt.Wenn die Temperatur der
Bügelsohle unter die eingestellte Bügeltemperatur abgesunken ist,
leuchtet die gelbe Temperaturanzeige auf.
- Wenn die gelbe Temperaturanzeige nach dem Bewegen des
Bügeleisens aufleuchtet, warten Sie, bis sie wieder erlischt, bevor Sie
mit dem Bügeln beginnen.
- Wenn die Temperaturanzeige nach dem Bewegen des Bügeleisens
nicht aufleuchtet, hat die Bügelsohle noch die erforderliche
Temperatur,und das Bügeleisen ist einsatzbereit.
Reinigung und Wartung
Nach dem Bügeln
1 Ziehen Sie den Netzstecker aus der Steckdose, und lassen Sie
das Bügeleisen abkühlen.
2 Wischen Sie Kalkpartikel und andere Ablagerungen mit einem
feuchten Tuch und etwas Spülmittel von der Bügelsohle.
Damit die Bügelsohle glatt bleibt, sollte sie nicht in Berührung mit
Metallgegenständen kommen.Verwenden Sie zum Reinigen der
Bügelsohle weder Scheuerschwämme noch Essig oder andere
Chemikalien.
3 Reinigen Sie den oberen Teil des Bügeleisens mit einem
feuchten Tuch.
4 Spülen Sie den Wasserbehälter regelmäßig mit klarem Wasser
aus, und leeren Sie ihn anschließend.
Calc-Clean-Funktion
Mit der Entkalkungsfunktion Calc-Clean lassen sich Kalkablagerungen
und Verunreinigungen beseitigen.
DEUTSCH18
Page 19

◗ Entkalken Sie das Bügeleisen mithilfe dieser Funktion alle zwei
Wochen.Wenn das Wasser in Ihrer Gegend sehr hart ist (d.h. es
treten beim Bügeln Kalkpartikel aus der Bügelsohle), sollten Sie
die Calc-Clean-Funktion häufiger verwenden.
1 Ziehen Sie den Netzstecker aus der Steckdose.
2 Stellen Sie den Dampfregler auf Position "0".
3 Füllen Sie den Wasserbehälter bis zur Markierung MAX.
Geben Sie keinen Essig oder andere Entkalkungsmittel in den
Wasserbehälter.
C
4 Stellen Sie die maximale Bügeltemperatur ein.
5 Stecken Sie den Netzstecker in eine geerdete Steckdose.
6 Ziehen Sie den Netzstecker aus der Steckdose, sobald die
gelbe Temperaturanzeige erloschen ist.
C
7 Halten Sie das Bügeleisen über ein Spülbecken. Halten Sie die
Calc-Clean-Taste gedrückt. Schwenken Sie das Bügeleisen leicht
hin und her.
Es treten Dampf und kochendes Wasser aus der Bügelsohle aus.
Verunreinigungen und Kalkpartikel werden, sofern vorhanden,
herausgespült.
8 Lassen Sie die Calc-Clean-Taste los, sobald der Wasserbehälter
leer ist.
Wiederholen Sie den Vorgang, wenn sich noch Kalkablagerungen im
Bügeleisen befinden.
Nach dem Entkalken
- Stecken Sie den Netzstecker in die Steckdose.Warten Sie, bis sich
das Bügeleisen aufgeheizt hat und die Bügelsohle getrocknet ist.
- Ziehen Sie den Netzstecker aus der Steckdose, sobald die
eingestellte Temperatur erreicht ist.
- Führen Sie die Bügelsohle einige Male leicht über ein altes Tuch, um
Wasserflecken von der Bügelsohle zu entfernen.
- Lassen Sie das Bügeleisen abkühlen, bevor Sie es wegstellen.
Aufbewahrung
1 Ziehen Sie den Netzstecker aus der Steckdose, und stellen Sie
den Dampfregler auf Position "0".
DEUTSCH 19
COTTON
WOOL
MAX
LINEN
MIN
NYLON
SILK
Page 20

C
2 Leeren Sie den Wasserbehälter.
C
3 Lassen Sie die Bügelsohle abkühlen.Wickeln Sie das Netzkabel
um die Kabelaufwicklung und fixieren Sie es mit der
Kabelklammer.
4 Stellen Sie das entleerte Bügeleisen zur Aufbewahrung
waagerecht auf eine feste Unterlage, und legen Sie ein Tuch
zum Schutz unter die Bügelsohle.
Hitzebeständige Unterlage (nur GC4340)
Benutzen Sie die hitzebeständige Unterlage nicht während des Bügelns.
1 Wickeln Sie das Netzkabel um die Kabelaufwicklung.
C
2 Stellen Sie das Bügeleisen auf die hitzebeständige Unterlage.
3 Bewahren Sie das Bügeleisen mit der hitzebeständigen
Unterlage waagerecht auf einer stabilen Oberfläche auf.
Umweltschutz
C
◗ Werfen Sie das Gerät am Ende der Lebensdauer nicht in den
normalen Hausmüll. Bringen Sie es zum Recycling zu einer
offiziellen Sammelstelle.Auf diese Weise helfen Sie, die Umwelt zu
schonen.
Garantie und Kundendienst
Benötigen Sie weitere Informationen oder treten Probleme auf,
wenden Sie sich bitte an Ihren Philips-Händler oder setzen Sie sich
mit einem Philips Service-Center in Ihrem Land in Verbindung
(Tel. Nr. 0180/5356767).Besuchen Sie auch die Philips Website
(www.philips.com).
DEUTSCH20
1
2
Page 21

Garantieeinschränkungen
Die Bedingungen der internationalen Garantie erstrecken sich nicht auf
den Hitzeschutz für empfindliche Textilien.
Fehlerbehebung
In diesem Abschnitt sind die am häufigsten auftretenden Probleme
zusammengestellt. Sollte sich ein Problem nicht lösen lassen, wenden
Sie sich bitte an das Philips Service Center in Ihrem Land.
DEUTSCH 21
Lösung
Überprüfen Sie das Netzkabel, den
Netzstecker und die Steckdose.
Stellen Sie den Temperaturregler auf
die erforderliche Position.
Füllen Sie den Wasserbehälter (siehe
"Für den Gebrauch vorbereiten").
Stellen Sie den Dampfregler auf eine
Position von 1 bis 6 (siehe "Das Gerät
verwenden").
Wählen Sie eine Bügeltemperatur,die
für das Dampfbügeln geeignet ist (2
bis MAX). Stellen Sie das Bügeleisen
aufrecht und warten Sie, bis die gelbe
Temperaturanzeige erlischt, bevor Sie
mit dem Bügeln beginnen.
Bügeln Sie eine Zeit lang mit
waagerecht gehaltenem Bügeleisen
weiter, bevor Sie die (vertikale)
Dampfstoßfunktion erneut betätigen.
Wählen Sie eine Bügeltemperatur,die
für das Dampfbügeln geeignet ist (2
bis MAX). Stellen Sie das Bügeleisen
aufrecht und warten Sie, bis die gelbe
Temperaturanzeige erlischt, bevor Sie
mit dem Bügeln beginnen.
Drücken Sie auf die Verschlusskappe,
bis sie hörbar einrastet.
Spülen Sie den Wasserbehälter aus.
Verwenden Sie keine Zusatzmittel.
Aktivieren Sie mehrere Male die CalcClean-Funktion (siehe "Reinigung und
Wartung").
Bewegen Sie das Bügeleisen hin und
her, um die Abschaltfunktion zu
deaktivieren. Die rote Kontrollanzeige
erlischt.
Mögliche Ursache
Es gibt ein Problem mit der
Stromversorgung.
Der Temperaturregler wurde auf MIN
gestellt.
Der Wasserbehälter ist leer.
Der Dampfregler steht auf Position
"0".
Das Bügeleisen ist nicht heiß genug
bzw. die Tropf-Stopp-Funktion wurde
aktiviert.
Die Dampfstoßfunktion ist innerhalb
kürzester Zeit zu häufig aktiviert
worden.
Das Bügeleisen ist nicht heiß genug.
Die Kappe der Einfüllöffnung wurde
nicht richtig verschlossen.
Dem Wassertank wurde ein
Zusatzmittel zugegeben.
Durch hartes Wasser bilden sich
Kalkpartikel in der Bügelsohle.
Das Bügeleisen wurde aufgrund der
automatischen Sicherheitsabschaltung
ausgeschaltet (siehe "Merkmale").
Problem
Der Netzstecker ist mit der
Steckdose verbunden, aber die
Bügelsohle bleibt kalt.
Das Bügeleisen erzeugt keinen
Dampf.
Das Bügeleisen erzeugt keinen
Dampfstoß bzw. keinen vertikalen
Dampfstoß.
Wasser tropft auf das Gewebe.
Kalkpartikel und Verunreinigungen
treten beim Bügeln aus der
Bügelsohle aus.
Die rote Kontrollanzeige blinkt (nur
GC4325/4320).
Page 22

Lösung
Bewegen Sie das Bügeleisen etwas, um
die Abschaltfunktion zu deaktivieren.
Die blaue Kontrollanzeige hört auf zu
blinken.
Überprüfen Sie das Netzkabel, den
Netzstecker und die Steckdose.
Mögliche Ursache
Das Bügeleisen wurde aufgrund der
automatischen Sicherheitsabschaltung
ausgeschaltet (siehe "Merkmale").
Es gibt ein Problem mit der
Stromversorgung.
Problem
Die blaue Kontrollanzeige blinkt
(GC4340 und GC4330).
Das Bügeleisen ist am Stromnetz
angeschlossen, aber die blaue
Kontrollanzeige leuchtet nicht (GC4340
und GC4330).
DEUTSCH22
Page 23

Important
Avant d'utiliser l'appareil, lisez les instructions ci-dessous et conservez
ce mode d'emploi pour un usage ultérieur.
◗ Vérifiez que la tension indiquée sur la plaque signalétique
correspond bien à la tension de secteur locale avant de brancher
l'appareil.
◗ Branchez l'appareil uniquement sur une prise murale mise à la
terre.
◗ N'utilisez pas le fer à repasser si la fiche, le câble, le cordon
d'alimentation ou l'appareil lui-même est endommagé, ou si le fer
est tombé et/ou si de l'eau s'écoule de l'appareil.
◗ Vérifiez régulièrement l'état du cordon d'alimentation.
◗ Si le cordon d'alimentation est endommagé, il doit être remplacé
par Philips ou un Centre Service Agréé afin d'éviter tout
accident.
◗ Ne laissez jamais le fer à repasser sans surveillance pendant qu'il
est branché.
◗ Ne plongez jamais dans l'eau le fer à repasser ni son socle, s'il est
fourni.
◗ Tenez l'appareil hors de portée des enfants.
◗ La semelle du fer à repasser peut devenir très chaude et peut par
conséquent provoquer des brûlures si vous la touchez.
◗ Évitez le contact du cordon d'alimentation avec la semelle
lorsqu'elle est chaude.
◗ Lorsque vous avez fini de repasser,pendant que vous nettoyez,
remplissez ou videz le réservoir d'eau, et même si vous laissez le
fer pour un bref instant, réglez la commande de vapeur sur la
position 0, placez le fer à repasser sur le talon et débranchez
l'appareil.
◗ Placez et utilisez toujours le fer à repasser sur son socle, s'il est
fourni, sur une surface stable, plane et nivelée.
◗ Ne mettez pas de parfum, de vinaigre, d'amidon,de détartrants ou
d'autres agents chimiques dans le réservoir d'eau.
◗ Cet appareil est destiné à un usage domestique uniquement.
Avant la première utilisation
C
1 Retirez le revêtement de protection résistant à la chaleur
(GC4340 uniquement). Ôtez tout autocollant ou film de
protection de la semelle.
B
Le fer peut fumer légèrement lors de la première utilisation. Ce
phénomène est normal et cesse après un bref instant.
FRANÇAIS 23
Page 24

Avant utilisation
Remplissage du réservoir
Ne plongez jamais le fer dans l'eau.
1 Assurez-vous que l'appareil est débranché.
C
2 Réglez la commande de vapeur sur la position 0 (pas de
vapeur).
3 Ouvrez le bouchon du réservoir.
4 Inclinez le fer en arrière.
C
5 Remplissez le réservoir avec de l'eau du robinet,jusqu'au
niveau maximal, à l'aide du godet de remplissage.
Ne remplissez pas le réservoir au-delà de l'indication de niveau
maximal (MAX).
Ne mettez pas de parfum, de vinaigre, d'amidon,de détartrants ou
d'autres agents chimiques dans le réservoir d'eau.
◗ Si l'eau du robinet dans votre région est très calcaire, il est
conseillé de la mélanger avec de l'eau déminéralisée.
C
6 Fermez le bouchon de l'orifice de remplissage (clic).
Réglage de la température
C
1 Type GC4340 uniquement : retirez le revêtement de
protection résistant à la chaleur.
Ne laissez pas celui-ci sur la semelle pendant le repassage.
2 Posez le fer à repasser sur son talon.
C
3 Réglez la température de repassage recommandée en tournant
le thermostat sur la position adéquate.
Consultez l'étiquette de lavage pour vérifier la température de
repassage recommandée :
- 1 Fibres synthétiques (par ex. acrylique, nylon,polyamide, polyester)
- 1 Soie
- 2 Laine
- 3 Coton, lin
FRANÇAIS24
COTTON
WOOL
MAX
LINEN
MIN
NYLON
SILK
Page 25

Si vous ne connaissez pas la composition du tissu, repassez en
commençant par la température la plus basse sur une partie interne de
l'article et invisible de l'extérieur.
Soie, laine et autres fibres synthétiques : repassez sur l'envers pour
éviter de les lustrer. Évitez d'utiliser la fonction Spray au risque de faire
des taches.
Commencez toujours le repassage par les articles de fibres
synthétiques nécessitant la température la plus basse.
4 Branchez le cordon d'alimentation sur une prise secteur.
C
5 Une fois le voyant de température orange éteint,patientez un
court instant avant de commencer à repasser.
Le voyant de température s'allume de temps en temps pendant le
repassage.
Utilisation de l'appareil
Repassage à la vapeur
1 Assurez-vous qu'il y a suffisamment d'eau dans le réservoir.
2 Réglez la température de repassage recommandée (voir le
chapitre « Avant l'utilisation », section « Réglage de la
température »).
C
3 Sélectionnez le réglage vapeur de votre choix.Assurez-vous
que ce réglage est approprié à la température de repassage
choisie.
- 1 - 3 pour une vapeur modérée (réglage de température : 2 à
3)
- 4 - 6 pour une vapeur maximale (réglage de température : 3 à
MAX)
B
Le fer commence à dégager de la vapeur dès que la température réglée
est atteinte.
Repassage sans vapeur
C
1 Réglez la commande de vapeur sur la position 0 (pas de
vapeur).
2 Réglez la température de repassage recommandée (voir le
chapitre « Avant l'utilisation », section « Réglage de la
température »).
FRANÇAIS 25
Page 26

Caractéristiques
Dispositif de protection des tissus délicats (GC4325
uniquement)
Ce dispositif protège les tissus délicats du lustrage et des dommages
dus à une chaleur excessive.
Grâce à ce dispositif de protection, vous pouvez repasser des tissus
délicats (soie, laine et nylon) à des températures comprises entre 3
et MAX en utilisant les fonctions de vapeur du fer à repasser.
Le dispositif de protection des tissus délicats réduit instantanément la
température de la semelle pour éviter tout dommage.
Si vous ne connaissez pas la composition du tissu, repassez en
commençant par la température la plus basse sur une partie interne de
l'article et invisible de l'extérieur.
C
1 Placez le fer sur le dispositif de protection des tissus délicats
(clic).
Fonction Spray
Vous pouvez utiliser la fonction Spray pour enlever les faux plis difficiles
à éliminer.
1 Assurez-vous qu'il y a suffisamment d'eau dans le réservoir.
C
2 Appuyez à plusieurs reprises sur le bouton Spray afin
d'humidifier l'article à repasser.
Jet de vapeur puissant dégagé par la pointe vapeur.
Le jet de vapeur concentrée enlève les faux plis difficiles à éliminer.
L'orientation du jet améliore la distribution de la vapeur : vous pouvez
ainsi atteindre les moindres recoins.
La fonction Jet de vapeur peut être utilisée uniquement à des
températures situées entre 2 et MAX.
C
1 Appuyez et relâchez le bouton Jet de vapeur.
FRANÇAIS26
Page 27

Jet de vapeur vertical
C
1 Vous pouvez également utiliser le jet de vapeur lorsque vous
tenez le fer en position verticale.
Cette opération peut s'avérer utile pour enlever les faux plis des
vêtements rangés sur un cintre, des rideaux, etc.
Ne dirigez en aucun cas le jet de vapeur sur des personnes.
Système anti-goutte
Ce fer à repasser est doté d'un système anti-goutte : en cas de
température trop basse, la production de vapeur est interrompue afin
d'éviter tout écoulement d'eau de la semelle. Le cas échéant, vous
entendez un clic.
Système anti-calcaire automatique
C
1 Le système anti-calcaire intégré réduit les dépôts de calcaire et
augmente la longévité de l'appareil.
Fonction d'arrêt automatique électronique
(GC4325/4320 uniquement)
C
◗ Cette fonction éteint automatiquement le fer s'il reste immobile
pendant quelques temps.
◗ Le voyant rouge commence à clignoter :il indique que le fer a été
éteint par la fonction de sécurité.
Pour que le fer se réchauffe, procédez comme suit :
- Prenez le fer en main et bougez-le légèrement.
- Le voyant rouge s'éteint. Lorsque la température de la semelle est
inférieure à la température de repassage réglée, le voyant orange
s'allume.
- Si le voyant de température s'allume lorsque vous reprenez le fer,
attendez que celui-ci s'éteigne avant de commencer à repasser.
- S'il reste éteint, la semelle est à bonne température.Vous pouvez
commencer le repassage.
FRANÇAIS 27
Page 28

Voyant d'alerte et fonction d'arrêt automatique électronique
(GC4340 et GC4330)
Le fer est équipé d'un voyant d'alerte bleu.
C
◗ Le voyant d'alerte bleu s'allume lorsque le fer est branché.
◗ Le voyant d'alerte bleu commence à clignoter dès que le fer a été
éteint automatiquement.
Pour que le fer se réchauffe, procédez comme suit :
- Prenez le fer en main et bougez-le légèrement.
- Le voyant bleu s'arrête de clignoter. Lorsque la température de la
semelle est inférieure à la température de repassage réglée, le voyant
orange s'allume.
- Si le voyant de température s'allume lorsque vous reprenez le fer,
attendez que celui-ci s'éteigne avant de commencer à repasser.
- S'il reste éteint, la semelle est à bonne température.Vous pouvez
commencer le repassage.
Nettoyage et entretien
Après le repassage
1 Assurez-vous que l'appareil a été débranché et que le fer a
refroidi.
2 Ôtez les particules de calcaire et autres impuretés de la
semelle au moyen d'un chiffon humide et d'un détergent
(liquide) non-abrasif.
Évitez le contact de la semelle avec tout objet métallique afin de ne pas
l'endommager. N'utilisez jamais de tampons à récurer, vinaigre ou
autres produits chimiques pour nettoyer la semelle.
3 Nettoyez la partie supérieure du fer à repasser avec un chiffon
humide.
4 Rincez régulièrement le réservoir avec de l'eau.Videz le
réservoir après le nettoyage.
Fonction Calc-Clean (anti-calcaire)
La fonction Calc-Clean (anti-calcaire) permet de supprimer toutes les
particules de calcaire ou autres impuretés.
◗ Utilisez la fonction anticalcaire toutes les deux semaines. Si l'eau
de votre région est très calcaire (par exemple si des particules de
calcaire s'écoulent de la semelle pendant le repassage), n'hésitez
pas à utiliser cette fonction plus souvent.
FRANÇAIS28
Page 29

1 Assurez-vous que l'appareil est débranché.
2 Réglez la commande de vapeur sur la position 0.
3 Remplissez le réservoir d'eau jusqu'au niveau maximal.
Ne versez pas de vinaigre ni d'autres agents détartrants dans le
réservoir d'eau.
C
4 Sélectionnez la température de repassage maximale.
5 Branchez la fiche sur une prise murale mise à la terre.
6 Quand le voyant lumineux orange s'éteint, débranchez
l'appareil.
C
7 Tenez le fer au-dessus de l'évier,maintenez appuyé le bouton
anti-calcaire et secouez légèrement le fer.
De la vapeur et de l'eau bouillante sortent de la semelle. Les impuretés
et particules sont évacuées en même temps.
8 Relâchez le bouton anti-calcaire lorsque le réservoir est vide.
Répétez cette opération aussi souvent que nécessaire.
Après le traitement anti-calcaire
- Branchez le cordon d'alimentation sur la prise secteur et réchauffez
le fer afin de sécher la semelle.
- Débranchez le fer lorsque la température de repassage est atteinte.
- Repassez un morceau de tissu afin d'éliminer les dernières gouttes
d'eau qui se sont formées sur la semelle le cas échéant.
- Laissez toujours refroidir le fer avant de le ranger.
Rangement
1 Débranchez le fer et réglez la commande de vapeur sur la
position 0.
C
2 Videz le réservoir d'eau.
FRANÇAIS 29
COTTON
WOOL
MAX
LINEN
MIN
NYLON
SILK
Page 30

C
3 Laissez le fer refroidir complètement.Enroulez le cordon sur le
talon et fixez l'extrémité à l'aide de la bride.
4 Rangez toujours le fer vide sur son talon, à l'horizontale sur
une surface stable, et protégez la semelle avec un chiffon.
Revêtement de protection résistant à la chaleur (GC4340
uniquement)
N'utilisez pas le revêtement de protection résistant à la chaleur
pendant le repassage.
1 Enroulez le cordon d'alimentation sur le talon.
C
2 Placez le fer sur le revêtement de protection résistant à la
chaleur.
3 Rangez le fer avec le revêtement de protection résistant à la
chaleur sur son talon, à l'horizontale sur une surface stable.
Environnement
C
◗ Lorsqu'il ne fonctionnera plus, ne jetez pas l'appareil avec les
ordures ménagères mais déposez-le à un endroit assigné à cet
effet, où il pourra être recyclé.Vous contribuerez ainsi à la
protection de l'environnement.
Garantie et service
Si vous souhaitez obtenir des informations supplémentaires ou si vous
rencontrez un problème, visitez le site Web de Philips à l'adresse
www.philips.com ou contactez le Service Consommateurs Philips de
votre pays (vous trouverez le numéro de téléphone correspondant sur
le dépliant de garantie internationale). S'il n'existe pas de Service
Consommateurs Philips dans votre pays, renseignez-vous auprès de
votre revendeur local ou contactez le « Service Department of Philips
Domestic Appliances and Personal Care BV ».
Limitation de garantie
Le dispositif de protection des tissus délicats n'est pas couvert par la
garantie internationale.
FRANÇAIS30
1
2
Page 31

Dépannage
Cette rubrique présente les problèmes les plus courants que vous
pouvez rencontrer avec votre fer à repasser. Si vous n'arrivez pas à
résoudre le problème, veuillez contacter le Service Consommateurs
de votre pays.
FRANÇAIS 31
Solution
Vérifiez le cordon d'alimentation, la
fiche et la prise secteur.
Réglez le thermostat sur la
température requise.
Remplissez le réservoir d'eau (voir le
chapitre Avant l'utilisation).
Réglez la commande de vapeur sur
une position entre 1 et 6 (voir le
chapitre Utilisation de l'appareil).
Sélectionnez une température de
repassage appropriée au repassage à
la vapeur (2 à MAX). Placez le fer
sur son talon et attendez que le
voyant de température orange
s'éteigne avant de commencer le
repassage.
Continuez à utiliser le fer en position
horizontale et attendez quelque
temps avant d'utiliser de nouveau la
fonction Jet de vapeur.
Sélectionnez une température de
repassage appropriée au repassage à
la vapeur (2 à MAX). Placez le fer
sur son talon et attendez que le
voyant de température orange
s'éteigne avant de commencer le
repassage.
Appuyez sur le bouchon jusqu'à ce
que vous entendiez un clic.
Rincez le réservoir. À l'avenir, ne
mettez plus d'additifs dans le réservoir.
Utilisez quelques fois la fonction CalcClean (anti-calcaire) (voir le chapitre
Nettoyage et entretien).
Remuez le fer doucement pour
désactiver la fonction d'arrêt
automatique. Le voyant s'éteint.
Remuez le fer doucement pour
désactiver la fonction d'arrêt
automatique. Le voyant d'alerte bleu
ne clignote plus.
Vérifiez le cordon d'alimentation, la
fiche et la prise secteur.
Cause possible
Il s'agit d'un problème de
branchement.
Le thermostat a été réglé sur MIN.
Il n'y a pas assez d'eau dans le
réservoir d'eau.
La commande de vapeur a été réglée
sur la position 0.
La semelle n'est pas suffisamment
chaude et/ou la fonction anti-goutte a
été activée.
La fonction Jet de vapeur a été utilisée
trop souvent.
Le fer n'est pas suffisamment chaud.
Le bouchon de l'orifice de remplissage
n'a pas été correctement fermé.
Vous avez ajouté un additif dans le
réservoir d'eau.
L'eau trop calcaire favorise la
formation de dépôts calcaires à
l'intérieur de la semelle.
La fonction automatique de sécurité a
éteint l'appareil (voir le chapitre «
Caractéristiques »).
La fonction automatique de sécurité a
éteint l'appareil (voir le chapitre «
Caractéristiques »).
Il s'agit d'un problème de
branchement.
Problème
Le fer à repasser est branché mais la
semelle est froide.
Pas de vapeur.
Pas de jet de vapeur ou pas de jet de
vapeur vertical.
Des gouttes d'eau tombent sur le
tissu.
Des particules de calcaire et des
impuretés s'écoulent de la semelle
pendant le repassage.
Le voyant d'arrêt automatique rouge
clignote (GC4325/4320 uniquement).
Le voyant d'alerte bleu clignote
(GC4340 et GC4330).
Le fer est branché mais le voyant
d'alerte bleu est éteint (GC4340 et
GC4330).
Page 32

NEDERLANDS32
Belangrijk
Lees deze gebruiksaanwijzing zorgvuldig door voordat u het apparaat
gaat gebruiken. Bewaar de gebruiksaanwijzing om deze indien nodig te
kunnen raadplegen.
◗ Controleer of het voltage aangegeven op het typeplaatje
overeenkomt met de plaatselijke netspanning voordat u het
apparaat aansluit.
◗ Sluit het apparaat alleen aan op een geaard stopcontact.
◗ Gebruik het apparaat niet indien de stekker, het snoer of het
apparaat zelf zichtbaar beschadigd is. Gebruik het apparaat ook
niet meer als het is gevallen of als het lekt.
◗ Controleer regelmatig of het snoer niet beschadigd is.
◗ Indien het netsnoer beschadigd is, moet het worden vervangen
door Philips, een door Philips geautoriseerd servicecentrum of
personen met vergelijkbare kwalificaties om gevaar te voorkomen.
◗ Laat het apparaat nooit onbeheerd achter terwijl het op
netspanning is aangesloten.
◗ Dompel het strijkijzer en de houder (indien bijgeleverd) nooit in
water.
◗ Houd het apparaat buiten het bereik van kinderen.
◗ De zoolplaat van het strijkijzer kan zeer heet worden en bij
aanraking brandwonden veroorzaken.
◗ Voorkom dat het snoer in aanraking komt met de hete zoolplaat.
◗ Als u klaar bent met strijken, als u het strijkijzer schoonmaakt, als
u bij het strijkijzer wegloopt (al is het maar even) en tijdens het
vullen of legen van het waterreservoir, zet dan altijd de
stoomregelaar op 0, plaats het strijkijzer op zijn achterkant en
haal de stekker uit het stopcontact.
◗ Plaats en gebruik het strijkijzer en de houder (indien bijgeleverd)
altijd op een stabiele, vlakke en horizontale ondergrond.
◗ Doe geen reukstof, azijn, stijfsel,ontkalkers, strijkconcentraat of
andere chemicaliën in het waterreservoir.
◗ Dit apparaat is uitsluitend bedoeld voor huishoudelijk gebruik.
Voor het eerste gebruik
C
1 Verwijder de hittebestendige beschermhoes van de zoolplaat
(alleen GC4340).Verwijder stickers of beschermfolie, indien
aanwezig, van de zoolplaat.
B
Er kan wat rook uit het strijkijzer komen wanneer u het voor de eerste
keer gebruikt. Dit houdt na enige tijd op.
Page 33

NEDERLANDS 33
Klaarmaken voor gebruik
Het waterreservoir vullen
Dompel het strijkijzer nooit in water.
1 Haal altijd de stekker uit het stopcontact.
C
2 Zet de stoomregelaar op stand 0 (= geen stoom).
3 Open het klepje van de vulopening.
4 Houd het strijkijzer achterover gekanteld.
C
5 Gebruik het vulkannetje om het waterreservoir tot aan het
maximumniveau met kraanwater te vullen.
Vul het waterreservoir nooit tot boven het MAX-teken.
Doe geen reukstof, azijn, stijfsel, ontkalkers, strijkconcentraat of andere
chemicaliën in het waterreservoir.
◗ Als het kraanwater in uw woongebied erg hard is, raden wij u aan
het water te mengen met een gelijke hoeveelheid gedistilleerd
water, of alleen gedistilleerd water te gebruiken.
C
6 Sluit het klepje van de vulopening ('klik').
De temperatuur instellen
C
1 Alleen type GC4340: verwijder de hittebestendige
beschermhoes.
Laat de hittebestendige beschermhoes niet op de zoolplaat zitten
tijdens het strijken.
2 Zet het strijkijzer op zijn achterkant.
C
3 Stel de vereiste strijktemperatuur in door de
temperatuurregelaar naar de juiste stand te draaien.
Raadpleeg het wasetiket van het te strijken artikel voor de juiste
strijktemperatuur:
- 1 Synthetische stoffen (bijv. acryl, nylon, polyamide, polyester)
- 1 Zijde
- 2 Wol
- 3 Katoen, linnen
COTTON
WOOL
MAX
LINEN
MIN
NYLON
SILK
Page 34

NEDERLANDS34
Als u niet zeker weet van welk materiaal het artikel gemaakt is, probeer
de gekozen strijktemperatuur dan eerst uit op een plek die niet
zichtbaar is wanneer u het artikel draagt of gebruikt.
Zijde, wol en synthetische materialen: strijk de binnenkant van de
stoffen om glimmende plekken te voorkomen. Gebruik de
sproeifunctie niet, omdat hierdoor vlekken zouden kunnen ontstaan.
Strijk eerst de ar tikelen die op de laagste temperatuur gestreken
moeten worden, zoals artikelen gemaakt van synthetische stoffen.
4 Steek de stekker in een geaard stopcontact.
C
5 Wanneer het oranje temperatuurlampje uit is gegaan,wacht
dan even voordat u begint te strijken.
Het temperatuurlampje gaat tijdens het strijken af en toe aan en uit.
Het apparaat gebruiken
Stoomstrijken
1 Zorg ervoor dat er voldoende water in het waterreservoir zit.
2 Stel de aanbevolen strijktemperatuur in (zie 'Temperatuur
instellen' in het hoofdstuk 'Klaarmaken voor gebruik').
C
3 Zet de stoomregelaar op de gewenste stand.Zorg ervoor dat
de stand die u instelt geschikt is voor de ingestelde
strijktemperatuur.
- 1 - 3 voor weinig stoom (temperatuurstand 2 tot 3)
- 4 - 6 voor veel stoom (temperatuurstand 3 tot MAX)
B
Het strijkijzer begint te stomen zodra de ingestelde temperatuur is
bereikt.
Strijken zonder stoom
C
1 Zet de stoomregelaar op stand 0 (= geen stoom).
2 Stel de aanbevolen strijktemperatuur in (zie 'Temperatuur
instellen' in het hoofdstuk 'Klaarmaken voor gebruik').
Page 35

NEDERLANDS 35
Functies
Zoolplaathuls ter bescherming van tere stoffen
(alleen GC4325)
De zoolplaathuls ter bescherming van tere stoffen voorkomt
glimmende plekken en schade door een te hete zoolplaat.
Dankzij de zoolplaathuls kunt u tere stoffen (zijde, wol en nylon)
strijken op temperatuurstanden tussen 3 en MAX in combinatie
met alle stoomfuncties van het apparaat.
De zoolplaathuls ter bescherming van tere stoffen zorgt voor een
onmiddellijke verlaging van de temperatuur van de zoolplaat, zodat u
ook veilig tere stoffen kunt strijken.
Als u niet zeker weet van welk materiaal het artikel gemaakt is, probeer
de gekozen strijktemperatuur dan eerst uit op een plek die niet
zichtbaar is wanneer u het artikel draagt of gebruikt.
C
1 Plaats het strijkijzer op de zoolplaathuls ter bescherming van
tere stoffen ('klik').
Sproeifunctie
U kunt de sproeifunctie gebruiken voor het verwijderen van
hardnekkige kreuken op elke temperatuur.
1 Zorg ervoor dat er voldoende water in het waterreservoir zit.
C
2 Druk een paar keer op de sproeiknop om de stof vochtig te
maken.
Geconcentreerde stoomstoot uit de speciale Steam Tip
Een krachtige stoot geconcentreerde stoom helpt om hardnekkige
kreuken te verwijderen. De naar voren gerichte geconcentreerde
stoom verbetert de verdeling van de stoom over ieder deel van het
kledingstuk.
De stoomstootfunctie kan alleen worden gebruikt bij
strijktemperaturen tussen 2 en MAX.
C
1 Druk op de stoomstootknop even in laat deze daarna weer los.
Page 36

NEDERLANDS36
Verticale stoomstoot
C
1 U kunt de stoomstootfunctie ook gebruiken als u het strijkijzer
verticaal houdt.
Zo kunt u kreuken verwijderen uit hangende kleren, gordijnen enz.
Richt de stoom nooit op mensen.
Druppelstop
Dit strijkijzer is uitgerust met een druppelstopsysteem: het strijkijzer
stopt automatisch met stomen wanneer de temperatuur te laag is,
zodat er geen water uit de zoolplaat druppelt. Als dit systeem wordt
ingeschakeld, hoor t u mogelijk een geluidje.
Automatisch antikalksysteem
C
1 Het ingebouwde automatische antikalksysteem vermindert de
afzetting van kalk en garandeert een langere levensduur voor
uw strijkijzer.
Automatische uitschakelfunctie (alleen GC4325/4320)
C
◗ De automatische uitschakelfunctie zorgt ervoor dat het strijkijzer
automatisch wordt uitgeschakeld als het een tijdje heeft
stilgestaan.
◗ Het rode waarschuwingslampje gaat knipperen om aan te geven
dat de automatische uitschakelfunctie het apparaat heeft
uitgeschakeld.
Om het strijkijzer weer te laten opwarmen:
- Til het strijkijzer op of beweeg het even heen en weer.
- Het rode waarschuwingslampje gaat uit. Als de temperatuur van de
zoolplaat inmiddels lager is dan de ingestelde strijktemperatuur, gaat
het oranje temperatuurlampje aan.
- Gaat het temperatuurlampje branden nadat u het strijkijzer heen en
weer hebt bewogen, wacht dan totdat het is uitgegaan voordat u
begint te strijken.
- Gaat het temperatuurlampje niet branden nadat u het strijkijzer heen
en weer hebt bewogen, dan heeft de zoolplaat nog de juiste
temperatuur en is het strijkijzer klaar voor gebruik.
Page 37

NEDERLANDS 37
Waarschuwingslampje en automatische uitschakelfunctie
(GC4340 en GC4330)
Het strijkijzer is voorzien van een blauw waarschuwingslampje.
C
◗ Dit blauwe lampje brandt zolang het apparaat op netspanning
aangesloten is.
◗ Het blauwe waarschuwingslampje knippert om aan te geven dat
het strijkijzer is uitgeschakeld door de automatische
uitschakelfunctie.
Om het strijkijzer weer te laten opwarmen:
- Til het strijkijzer op of beweeg het even heen en weer.
- Het blauwe waarschuwingslampje stopt met knipperen. Als de
temperatuur van de zoolplaat inmiddels lager is dan de ingestelde
strijktemperatuur, gaat het oranje temperatuurlampje branden.
- Gaat het temperatuurlampje branden nadat u het strijkijzer heen en
weer hebt bewogen, wacht dan totdat het is uitgegaan voordat u
begint te strijken.
- Gaat het temperatuurlampje niet branden nadat u het strijkijzer heen
en weer hebt bewogen, dan heeft de zoolplaat nog de juiste
temperatuur en is het strijkijzer klaar voor gebruik.
Schoonmaken en onderhoud
Na het strijken
1 Haal de stekker uit het stopcontact en laat het strijkijzer
afkoelen.
2 Veeg schilfertjes en andere verontreinigingen van de zoolplaat
met een vochtige doek en een niet-schurend (vloeibaar)
schoonmaakmiddel.
Houd de zoolplaat glad door te voorkomen dat deze hard in aanraking
komt met metalen voorwerpen. Gebruik nooit een schuurspons, azijn
of andere chemicaliën om de zoolplaat te reinigen.
3 Maak de bovenkant van het strijkijzer schoon met een vochtige
doek.
4 Spoel het waterreservoir regelmatig schoon met water. Leeg
het waterreservoir na het schoonmaken.
Calc-Clean-functie
U kunt de Calc-Clean-functie gebruiken om kalkaanslag en andere
verontreinigingen te verwijderen.
Page 38

NEDERLANDS38
◗ Gebruik de Calc-Clean-functie om de twee weken.Als het water
in uw woongebied erg hard is (d.w.z. wanneer er tijdens het
strijken schilfertjes uit de zoolplaat komen),moet u de CalcClean-functie vaker gebruiken.
1 Haal altijd de stekker uit het stopcontact.
2 Zet de stoomregelaar op stand 0.
3 Vul het waterreservoir tot aan het maximumniveau.
Doe geen azijn of andere ontkalkingsmiddelen in het waterreservoir.
C
4 Stel de hoogste strijktemperatuur in.
5 Steek de stekker in een geaard stopcontact.
6 Haal, nadat het oranje temperatuurlampje is uitgegaan, de
stekker uit het stopcontact.
C
7 Houd het strijkijzer boven de gootsteen, houd de Calc-Clean-
knop ingedrukt en schud het strijkijzer voorzichtig heen en
weer.
Er komt stoom en kokend water uit de zoolplaat. Schilfertjes en
verontreinigingen, voor zover aanwezig, worden uit het strijkijzer
weggespoeld.
8 Laat de Calc-Clean-knop los zodra al het water in het
reservoir is opgebruikt.
Gebruik de Calc-Clean-functie nogmaals als het strijkijzer nog steeds
veel verontreinigingen bevat.
Na het gebruik van de Calc-Clean-functie
- Steek de stekker in het stopcontact en laat het strijkijzer opwarmen
om de zoolplaat te laten drogen.
- Haal de stekker uit het stopcontact zodra het strijkijzer de ingestelde
temperatuur bereikt heeft.
- Beweeg het hete strijkijzer voorzichtig over een schone oude lap om
eventuele watervlekken van de zoolplaat te verwijderen.
- Laat het strijkijzer afkoelen voordat u het opbergt.
Opbergen
1 Haal de stekker uit het stopcontact en zet de stoomregelaar
op stand 0.
COTTON
WOOL
MAX
LINEN
MIN
NYLON
SILK
Page 39

NEDERLANDS 39
C
2 Leeg het waterreservoir.
C
3 Laat het strijkijzer afkoelen.Wikkel het snoer om de
snoeropwindhaspel en maak het vast met de clip.
4 Berg het strijkijzer, nadat u het reservoir heeft geleegd, altijd op
door het horizontaal op een stevig oppervlak te plaatsen.
Bescherm de zoolplaat door het strijkijzer op een doek te
plaatsen.
Hittebestendige beschermhoes (alleen GC4340)
Gebruik de hittebestendige beschermhoes niet tijdens het strijken.
1 Wind het snoer rond de snoerhaspel.
C
2 Plaats het strijkijzer op de hittebestendige beschermhoes.
3 Plaats het strijkijzer met de hittebestendige beschermhoes
horizontaal op een stabiel oppervlak.
Milieu
C
◗ Gooi het apparaat aan het einde van zijn levensduur niet weg met
het normale huisvuil, maar lever het in op een door de overheid
aangewezen inzamelpunt. Op die manier levert u een bijdrage aan
een schonere leefomgeving.
Garantie & service
Als u informatie nodig hebt of als u een probleem hebt, bezoek dan de
Philips website (www.philips.com) of neem contact op met het Philips
Customer Care Centre in uw land (u vindt het telefoonnummer in het
'worldwide guarantee' vouwblad). Als er geen Customer Care Centre
in uw land is, ga dan naar uw Philips-dealer of neem contact op met de
afdeling Service van Philips Domestic Appliances and Personal Care BV.
1
2
Page 40

NEDERLANDS40
Garantiebeperkingen
De zoolplaathuls ter bescherming van tere stoffen valt niet onder de
internationale garantie.
Problemen oplossen
Dit hoofdstuk behandelt in het kort de problemen die u tegen kunt
komen tijdens het gebruik van uw strijkijzer.Als u er niet in slaagt het
probleem op te lossen, neem dan contact op met het Philips Customer
Care Centre in uw land.
Oplossing
Controleer het netsnoer, de stekker
en het stopcontact.
Stel de temperatuurregelaar in op de
vereiste strijktemperatuur.
Vul het waterreservoir (zie hoofdstuk
'Klaarmaken voor gebruik').
Zet de stoomregelaar op een stand
tussen 1 en 6 (zie hoofdstuk 'Gebruik
van het apparaat').
Stel het strijkijzer in op een
temperatuur in het stoomgebied
(tussen 2 en MAX). Plaats het
strijkijzer op zijn achterkant en wacht
tot het oranje temperatuurlampje is
uitgegaan voordat u gaat strijken.
Ga verder met strijken, met het
apparaat in horizontale stand, en
wacht een tijdje voordat u de
stoomstootfunctie opnieuw gebruikt.
Stel het strijkijzer in op een
temperatuur in het stoomgebied
(tussen 2 en MAX). Plaats het
strijkijzer op zijn achterkant en wacht
tot het oranje temperatuurlampje is
uitgegaan voordat u gaat strijken.
Druk op het klepje tot u een klik
hoort.
Spoel het waterreservoir schoon en
doe geen additief meer in het
waterreservoir.
Gebruik de Calc-Clean-functie enkele
keren (zie hoofdstuk 'Schoonmaken
en onderhoud').
Mogelijke oorzaak
Er is een aansluitprobleem.
De temperatuurregelaar staat op
MIN.
Er zit niet voldoende water in het
waterreservoir.
De stoomregelaar staat op stand 0.
De zoolplaat is niet warm genoeg
en/of de druppelstopfunctie is
geactiveerd.
De stoomstootfunctie is te vaak
achter elkaar gebruikt.
Het strijkijzer is niet heet genoeg.
Het klepje van de vulopening is niet
goed gesloten.
Er is een additief in het waterreservoir
gedaan.
Hard water vormt schilfertjes binnenin
de zoolplaat.
Probleem
De stekker zit in het stopcontact,
maar de zoolplaat is koud.
Geen stoom.
Geen stoomstoot of verticale
stoomstoot.
Er vallen druppeltjes water op de
stof.
Er komen schilfertjes en
verontreinigingen uit de zoolplaat
tijdens het strijken.
Page 41

NEDERLANDS 41
Oplossing
Beweeg het strijkijzer even heen en
weer om de automatische
uitschakelfunctie te deactiveren. Het
controlelampje gaat dan uit.
Beweeg het strijkijzer even om de
automatische uitschakelfunctie te
deactiveren. Het blauwe
waarschuwingslampje stopt met
knipperen.
Controleer het netsnoer, de stekker
en het stopcontact.
Mogelijke oorzaak
De automatische uitschakelfunctie
heeft het strijkijzer uitgeschakeld (zie
hoofdstuk 'Functies').
De automatische uitschakelfunctie
heeft het strijkijzer uitgeschakeld (zie
hoofdstuk 'Functies').
Er is een aansluitprobleem.
Probleem
Het rode controlelampje van de
automatische uitschakelfunctie knippert
(alleen GC4325/4320).
Het blauwe waarschuwingslampje
knippert (GC4340 en GC4330).
De stekker zit in het stopcontact, maar
het blauwe waarschuwingslampje is uit
(GC4340 en GC4330).
Page 42

ITALIANO42
Importante
Prima di utilizzare l'apparecchio, leggete attentamente le istruzioni e
conservatele per eventuali riferimenti futuri.
◗ Prima di collegare l'apparecchio, controllate che la tensione
indicata sulla placchetta corrisponda a quella della rete locale.
◗ Collegate l'apparecchio esclusivamente a una presa di messa a
terra.
◗ Non utilizzate l'apparecchio nel caso in cui la spina, il cavo di
alimentazione o l'apparecchio stesso siano danneggiati o in
presenza di rotture o perdite dall'apparecchio.
◗ Verificate periodicamente le condizioni del cavo di alimentazione.
◗ Nel caso in cui il cavo di alimentazione fosse danneggiato, dovrà
essere sostituito presso i centri autorizzati Philips, i rivenditori
specializzati oppure da personale opportunamente qualificato, per
evitare situazioni pericolose.
◗ Non lasciate mai l'apparecchio incustodito quando è collegato alla
presa di corrente.
◗ Non immergete mai il ferro e l'eventuale supporto nell'acqua.
◗ Tenete l'apparecchio fuori dalla portata dei bambini.
◗ La piastra del ferro può surriscaldarsi eccessivamente e provocare
scottature se a contatto con la pelle.
◗ Evitate che il cavo venga a contatto con la piastra surriscaldata.
◗ Dopo aver utilizzato l'apparecchio, durante le operazioni di pulizia,
riempimento o svuotamento del serbatoio dell'acqua o nel caso in
cui l'apparecchio venga lasciato incustodito anche per un breve
periodo, impostate il regolatore di vapore in posizione 0 e il ferro
in posizione verticale, quindi scollegate la spina dalla presa.
◗ Appoggiate sempre il ferro e l'apposito supporto, se fornito, su
una superficie piana, stabile e orizzontale.
◗ Non aggiungete mai profumo,aceto, amido, agenti disincrostanti,
prodotti per la stiratura o altre sostanze chimiche nel serbatoio
dell'acqua.
◗ Questo apparecchio è destinato esclusivamente a uso domestico.
Prima di utilizzare l'apparecchio per la prima volta
C
1 Rimuovete il coperchio di protezione termoresistente dalla
piastra (solo per GC4340).Togliete eventuali adesivi o fogli di
protezione dalla piastra.
B
Il ferro potrebbe emettere un po' di fumo quando viene acceso per la
prima volta. Il fenomeno è del tutto normale e scomparirà nel giro di
poco tempo.
Page 43

ITALIANO 43
Come preparare l'apparecchio per l'uso
Come riempire il serbatoio
Non immergete mai il ferro nell'acqua.
1 Verificate che l'apparecchio sia scollegato dalla presa di
corrente.
C
2 Impostate il regolatore di vapore in posizione 0 (= assenza di
vapore).
3 Aprite il tappo del foro di riempimento.
4 Inclinate il ferro all'indietro.
C
5 Riempite il serbatoio con acqua del rubinetto fino al livello
massimo utilizzando l'apposito misurino.
Non superate l'indicazione MAX.
Non aggiungete mai profumo, aceto, amido,agenti disincrostanti
prodotti per la stiratura o altre sostanze chimiche nel serbatoio
dell'acqua.
◗ In caso di acqua particolarmente dura, si consiglia di miscelarla
con la stessa quantità di acqua distillata o di utilizzare
esclusivamente acqua distillata.
C
6 Chiudete il tappo del foro di riempimento facendolo scattare in
posizione.
Come impostare la temperatura
C
1 Solo mod. GC4340: togliete il coperchio di protezione
termoresistente.
Non lasciate il coperchio di protezione termoresistente sulla piastra
durante la stiratura.
2 Ponete il ferro in posizione verticale.
C
3 Impostate la temperatura di stiratura desiderata ruotando il
termostato sulla posizione corretta.
Verificate sull'etichetta del capo la temperatura di stiratura richiesta:
- 1 Tessuti sintetici (es. acrilico,nylon, poliammide, poliestere)
- 1 Seta
- 2 Lana
- 3 Cotone, lino
COTTON
WOOL
MAX
LINEN
MIN
NYLON
SILK
Page 44

ITALIANO44
Se non conoscete la composizione di un tessuto e volete stabilire la
temperatura giusta, fate una prova su un angolo del capo non visibile
quando viene indossato o usato.
Seta, lana e materiali sintetici: stirate il capo al rovescio per evitare
tracce di lucido. Evitate anche l'uso dello spray per non macchiare i
tessuti.
Iniziate a stirare i capi che richiedono una temperatura di stiratura più
bassa, ad esempio i tessuti sintetici.
4 Inserite la spina in una presa dotata di messa a terra.
C
5 Dopo che la spia arancione si spegne, aspettate qualche minuto
prima di iniziare a stirare.
Durante la stiratura, la spia della temperatura si accenderà
regolarmente.
Modalità d'uso dell'apparecchio
Stiratura a vapore
1 Controllate che ci sia una quantità d'acqua sufficiente nel
serbatoio.
2 Selezionate la temperatura di stiratura consigliata (vedere il
capitolo: "Come preparare l'apparecchio per l'uso" sezione
"Come impostare la temperatura".
C
3 Selezionate l'impostazione di vapore desiderata. Controllate
che l'impostazione prescelta sia compatibile con la temperatura
selezionata:
- 1-3: vapore moderato (temperatura compresa tra 2 e 3)
- 4-6: vapore intenso (temperatura compresa tra 3 e MAX)
B
Non appena viene raggiunta la temperatura impostata, il ferro inizierà a
emettere vapore.
Stiratura senza vapore
C
1 Impostate il regolatore di vapore in posizione 0 (= assenza di
vapore).
2 Selezionate la temperatura di stiratura consigliata (vedere il
capitolo: "Come preparare l'apparecchio per l'uso" sezione
"Come impostare la temperatura".
Page 45

ITALIANO 45
Caratteristiche
Protezione per tessuti delicati (solo per GC4325)
Questo sistema consente di proteggere i tessuti delicati dal calore e
dalle tracce di lucido.
La protezione per tessuti delicati consente di stirare tessuti (seta, lana,
nylon) a una temperatura compresa tra 3 e MAX in combinazione
con tutte le opzioni di vapore disponibili.
La protezione per tessuti delicati riduce istantaneamente la
temperatura della piastra garantendo una stiratura sicura.
Se non conoscete la composizione di un tessuto e volete stabilire la
temperatura giusta, fate una prova su un angolo del capo non visibile
quando viene indossato o usato.
C
1 Posizionate il ferro sulla protezione per tessuti delicati
facendolo scattare in posizione.
Funzione spray
Potete usare la funzione spray per eliminare le pieghe più ostinate a
qualsiasi temperatura.
1 Controllate che ci sia una quantità d'acqua sufficiente nel
serbatoio.
C
2 Premete più volte il pulsante spray per inumidire il capo da
stirare.
Getto di vapore concentrato grazie alla speciale funzione
"Steam Tip"
Un potente getto di vapore concentrato per eliminare le pieghe più
ostinate. Il getto di vapore concentrato rivolto in avanti permette una
miglior distribuzione del vapore sul capo da stirare.
Il getto di vapore può essere utilizzato solo a temperature comprese
tra 2 e MAX.
C
1 Premete e rilasciate il pulsante del getto di vapore.
Page 46

ITALIANO46
Getto di vapore verticale
C
1 La funzione getto di vapore può essere utilizzata anche
tenendo il ferro in posizione verticale
Questo getto di vapore è utile per eliminare le pieghe da vestiti appesi,
tende, ecc.
Non puntate mai il getto di vapore verso le persone.
Dispositivo antigoccia
Il ferro è provvisto di un dispositivo antigoccia che blocca
automaticamente l'erogazione del vapore nel caso la temperatura sia
troppo bassa, per evitare che l'acqua sgoccioli dalla piastra. Quando
questo accade, sentirete un bip.
Sistema automatico anticalcare
C
1 Il sistema anticalcare integrato riduce la formazione di calcare e
garantisce una maggiore durata del ferro.
Funzione di spegnimento elettronico di sicurezza
(solo per GC4325/4320)
C
◗ Il dispositivo elettronico di spegnimento spegne automaticamente
il ferro se non viene mosso per alcuni minuti.
◗ La spia rossa auto-off inizia a lampeggiare per indicare che il ferro
è stato spento dal dispositivo elettronico di sicurezza
Per riaccendere il ferro:
- Sollevate il ferro o muovetelo leggermente.
- La spia rossa auto-off si spegne. Se la temperatura della piastra è
scesa al di sotto di quella impostata, si accenderà la spia arancione.
- Se la spia arancione si accende dopo aver mosso il ferro, attendete
che si spenga prima di iniziare a stirare.
- Se la spia arancione non si accende dopo aver mosso il ferro, significa
che la piastra ha mantenuto la temperatura e che quindi il ferro è
pronto per l'uso.
Page 47

ITALIANO 47
Spia allarme e funzione elettronica di spegnimento di sicurezza
(solo per GC4340 e GC4330)
Il ferro è provvisto di una spia allarme di colore blu
C
◗ La spia blu rimane accesa mentre il ferro viene collegato alla presa
di corrente.
◗ La spia blu inizia a lampeggiare per indicare che il ferro è
stato?spento dalla funzione di spegnimento di sicurezza.
Per riaccendere il ferro:
- Sollevate il ferro o muovetelo leggermente.
- La spia blu si spegne. Se la temperatura della piastra è scesa al di
sotto di quella impostata, si accenderà la spia arancione.
- Se la spia arancione si accende dopo aver mosso il ferro, attendete
che si spenga prima di iniziare a stirare.
- Se la spia arancione non si accende dopo aver mosso il ferro, significa
che la piastra ha mantenuto la temperatura e che quindi il ferro è
pronto per l'uso.
Pulizia e manutenzione
Al termine della stiratura
1 Togliete la spina dalla presa e lasciate raffreddare il ferro.
2 Pulite la piastra con un panno umido e un detergente (liquido)
non abrasivo,per eliminare eventuali impurità e depositi.
Per mantenere sempre liscia la piastra, evitate il contatto con oggetti
metallici. Non usate mai pagliette, aceto o altre sostanze chimiche per
pulire la piastra.
3 Potete pulire la parte superiore del ferro con un panno umido.
4 Risciacquate regolarmente il serbatoio con acqua pulita. Dopo
la pulizia, svuotate sempre il serbatoio dell'acqua.
Funzione anticalcare
Potete usare la funzione anticalcare per eliminare il calcare e altre
impurità.
◗ Usate la funzione anticalcare ogni due settimane. Se l'acqua nella
vostra zona è particolarmente dura (ad esempio se quando stirate
dalla piastra fuoriescono tracce di calcare), potete usare la
funzione anticalcare con maggior frequenza.
1 Verificate che l'apparecchio sia scollegato dalla presa di
corrente.
Page 48
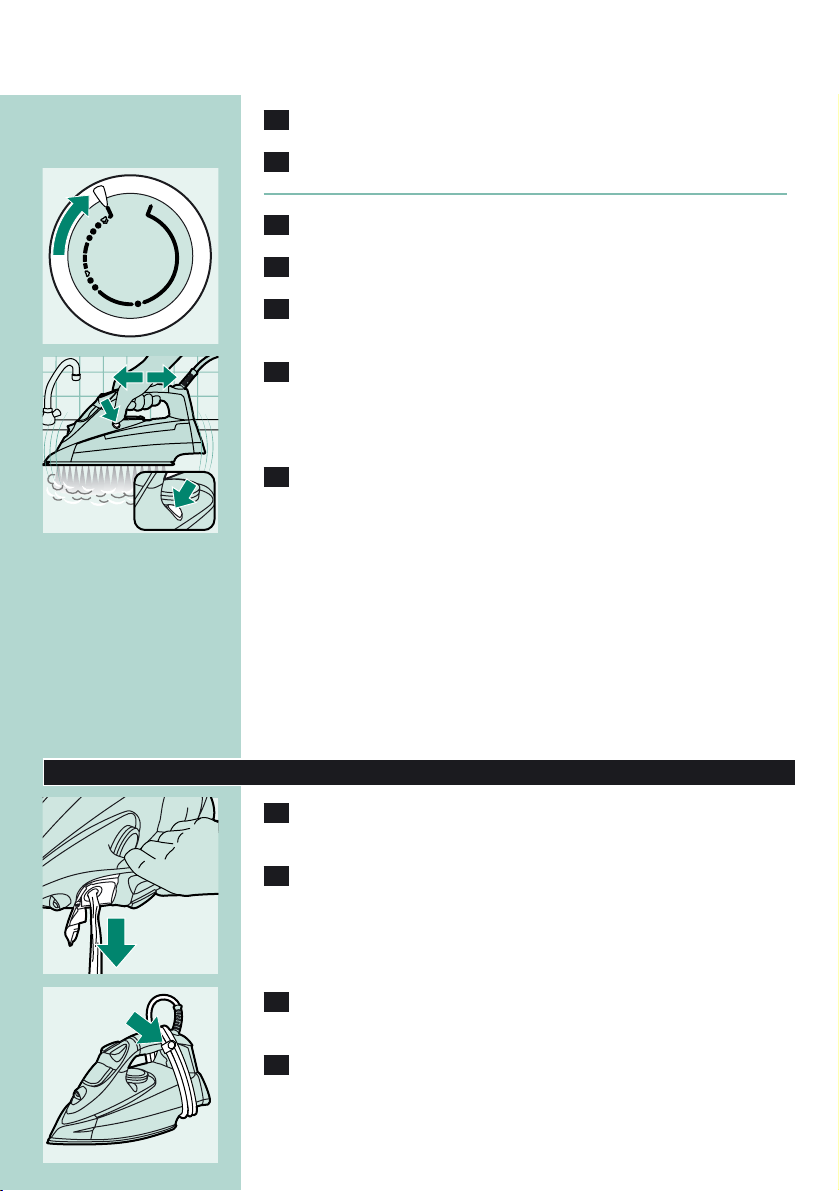
ITALIANO48
2 Mettete il regolatore di vapore in posizione O.
3 Riempite il serbatoio fino al livello MAX.
Non versate aceto o altri agenti disincrostanti nel serbatoio dell'acqua.
C
4 Selezionate la temperatura massima di stiratura.
5 Inserite la spina nella presa di corrente.
6 Scollegate l'apparecchio dalla presa di corrente non appena la
spia arancione si spegne.
C
7 Tenendo il ferro sul lavandino,tenete premuto il pulsante
anticalcare e scuotete delicatamente il ferro avanti e indietro.
Dalla piastra usciranno acqua bollente e vapore, che trascineranno con
sé le (eventuali) impurità e il calcare.
8 Rilasciate il pulsante anticalcare non appena il serbatoio
dell'acqua è vuoto.
Ripetete l'operazione nel caso il ferro contenga ancora molte impurità.
Al termine del processo anticalcare
- Inserite la spina nella presa e fate riscaldare il ferro in modo che la
piastra si asciughi completamente.
- Scollegate l'apparecchio dalla presa di corrente non appena il ferro
raggiunge la temperatura di stiratura impostata.
- Fate scorrere delicatamente il ferro su un panno per eliminare
eventuali macchie formatesi sulla piastra.
- Lasciate raffreddare il ferro prima di riporlo.
Come riporre il ferro
1 Controllate di aver tolto la spina dalla presa e che il dispositivo
di controllo vapore sia in posizione O.
C
2 Svuotate il serbatoio dell'acqua.
C
3 Lasciate raffreddare il ferro.Avvolgete il cavo attorno
all'apposito supporto e fissatelo con il gancio.
4 Riponete il ferro con il serbatoio vuoto in posizione
orizzontale, su una superficie stabile, utilizzando un panno per
proteggere la piastra.
COTTON
WOOL
MAX
LINEN
MIN
NYLON
SILK
Page 49

ITALIANO 49
Coperchio di protezione termoresistente (solo per GC4340)
Non utilizzate il coperchio di protezione termoresistente durante la
stiratura.
1 Avvolgete il cavo attorno all'apposito supporto.
C
2 Mettete il ferro sul coperchio di protezione termoresistente.
3 Riponete il ferro con il coperchio di protezione
termoresistente in posizione orizzontale su una superficie
stabile.
Tutela dell'ambiente
C
◗ Per contribuire alla tutela dell'ambiente, non smaltite l'apparecchio
tra i rifiuti domestici ma consegnatelo a un centro di raccolta
ufficiale.
Garanzia e assistenza
Per ulteriori informazioni o eventuali problemi visitate il sito Philips
all'indirizzo www.philips.com oppure contattate il Centro Assistenza
Clienti Philips locale (il numero di telefono è riportato nell'opuscolo
della garanzia). Qualora non fosse disponibile un Centro Assistenza
Clienti locale, rivolgetevi al rivenditore autorizzato Philips oppure
contattate il Reparto assistenza Philips Domestic Appliances & Personal
Care BV.
Limitazioni della garanzia
La protezione per tessuti delicati non è coperta dalla garanzia
internazionale.
Localizzazione guasti
In questo capitolo vengono riportati i problemi più ricorrenti
riscontrati durante l'uso del ferro. Nel caso non riusciste a risolvere i
problemi, vi preghiamo di contattare il Centro Assistenza Philips del
vostro paese.
1
2
Page 50

ITALIANO50
Soluzione
Controllate il cavo,la presa e la spina
a?muro.
Impostate il termostato sulla posizione
richiesta.
Riempite il serbatoio dell'acqua
(vedere il capitolo "Come preparare il
ferro per l'uso")
Impostate il regolatore di vapore in
una posizione compresa fra 1 e
6(vedere il capitolo "Come
usare?l'apparecchio").
Selezionate una temperatura indicata
per la stiratura a vapore (da 2 a
MAX). Mettete il ferro in posizione
verticale e aspettate che si spenga la
spia?arancione prima di iniziare a
stirare.
Continuate a stirare in posizione
orizzontale e aspettate un po' prima
di usare nuovamente la funzione di
getto (verticale).
Selezionate una temperatura indicata
per la stiratura a vapore (da 2 a
MAX). Mettete il ferro in posizione
verticale e aspettate che si spenga la
spia?arancione prima di iniziare a
stirare.
Premete il tappo fino a sentire un clic.
Risciacquate il serbatoio dell'acqua e
non versate altro additivo.
Usate alcune volte la funzione
anticalcare (vedere il capitolo "Pulizia e
manutenzione").
Muovete leggermente il ferro per
disattivare la funzione di spegnimento
automatico. La spia si spegnerà.
Muovete delicatamente il ferro per
disattivare la funzione di spegnimento
automatico. La spia smetterà di
lampeggiare.
Controllate il cavo,la presa e la spina
a?muro.
Possibile causa
È presente un problema di
alimentazione.
Il termostato è impostato su MIN.
Non c'è abbastanza acqua nel
serbatoio.
Il regolatore di vapore è in
posizione?O.
Il ferro non è sufficientemente caldo
e/o è stata attivata la funzione
antigoccia.
Il getto di vapore è stato utilizzato
troppo spesso in un lasso di tempo
troppo breve.
Il ferro non è abbastanza caldo.
Il tappo del foro di riempimento non
è chiuso correttamente.
Nel serbatoio dell'acqua è stato
versato un additivo.
L'acqua troppo dura ha formato del
calcare all'interno della piastra.
La funzione di spegnimento di
sicurezza ha spento il ferro (vedere il
capitolo "Caratteristiche").
La funzione di spegnimento di
sicurezza ha spento il ferro (vedere il
capitolo "Caratteristiche").
È presente un problema di
alimentazione.
Problema
Il ferro è collegato alla presa di
corrente ma la piastra è fredda.
Il vapore non viene erogato.
Il getto di vapore, standard o verticale,
non viene erogato.
Alcune gocce d'acqua sono cadute
sul?tessuto.
Dalla piastra fuoriescono impurità e
residui di calcare durante la stiratura.
La spia rossa di autospegnimento
lampeggia (solo mod.?GC4325/4320)
La spia blu di avvertimento lampeggia
(solo per GC4340 e GC4330).
Il ferro è collegato alla presa di
corrente ma la spia blu è spenta (solo
per GC4340 e GC4330).
Page 51

51
Page 52

www.philips.com
4239 000 54815
u
 Loading...