

Page 1
Azur
GC4243, GC4238, GC4233, GC4223, GC4218
Page 2

2
Page 3

ENGLISH 4
DEUTSCH 12
NORSK 21
SVENSKA 29
SUOMI 37
DANSK 45
GC4243, GC4238, GC4233, GC4223, GC4218
Page 4

Important
Read these instructions for use carefully before using the appliance and
save them for future reference.
◗ Check if the voltage indicated on the type plate corresponds to
the local mains voltage before you connect the appliance.
◗ Only connect the appliance to an earthed wall socket.
◗ Do not use the appliance if the plug, the cord or the appliance
itself shows visible damage, or if the appliance has been dropped
or is leaking.
◗ Check the cord regularly for possible damage.
◗ If the mains cord is damaged, it must be replaced by Philips, a
service centre authorised by Philips or similarly qualified persons
in order to avoid a hazard.
◗ Never leave the appliance unattended when it is connected to the
mains.
◗ Never immerse the iron and the stand,if provided, in water.
◗ Keep the appliance out of the reach of children.
◗ The soleplate of the iron can become extremely hot and may
cause burns if touched.
◗ Do not allow the cord to come into contact with the soleplate
when it is hot.
◗ When you have finished ironing, when you clean the appliance,
when you fill or empty the water tank and also when you leave
the iron even for a short while:set the steam control to position
O,put the iron on its heel and remove the mains plug from the
wall socket.
◗ Always place and use the iron and the stand, if provided, on a
stable, level and horizontal surface.
◗ Do not put perfume, vinegar,starch, descaling agents, ironing aids
or other chemicals in the water tank.
◗ This appliance is intended for household use only.
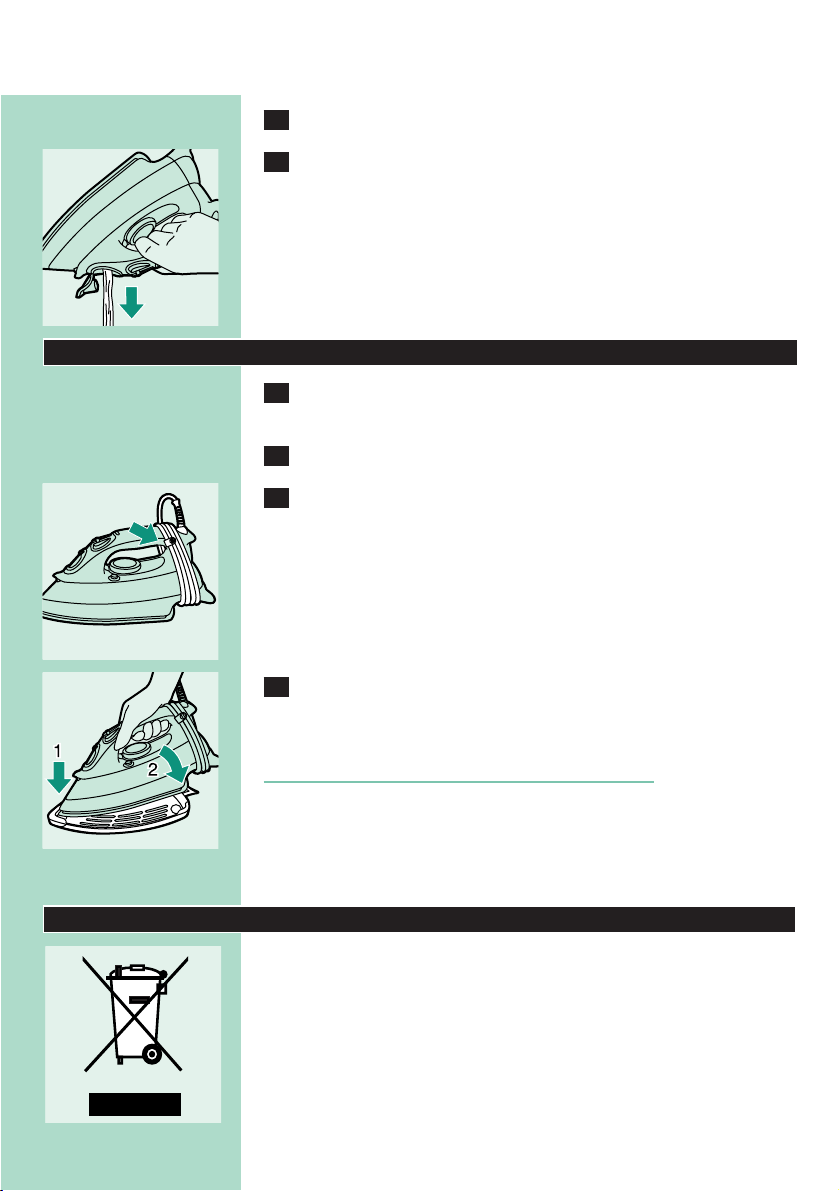
Before first use
1 Check if the voltage indicated on the appliance corresponds to
the local mains voltage before you connect the appliance.
C
2 Remove the protective heat cover from the soleplate (type
GC4243 only). Remove any sticker or protective foil from the
soleplate.
3 Let the iron heat up to maximum temperature and pass the
iron over a piece of damp cloth for several minutes to remove
any residues from the soleplate.
B
The iron may give off some smoke when you use it for the first time.This
will cease after a short while.
ENGLISH4
Page 5

Preparing for use
Filling the water tank
Never immerse the iron in water.
1 Remove the mains plug from the wall socket.
C
2 Set the steam control to position O (= no steam).
3 Open the cap of the filling opening.
4 Tilt the iron backwards.
C
5 Fill the water tank with tap water up to the maximum level by
means of the filling cup.
Do not fill the tank beyond the MAX indication.
◗ If the tap water in your area is very hard,we advise you to mix it
with an equal amount of distilled water or to use distilled water
only.
Do not put additives, vinegar, starch or chemically descaled water in the
water tank.
C
6 Close the cap of the filling opening.You will hear a click.
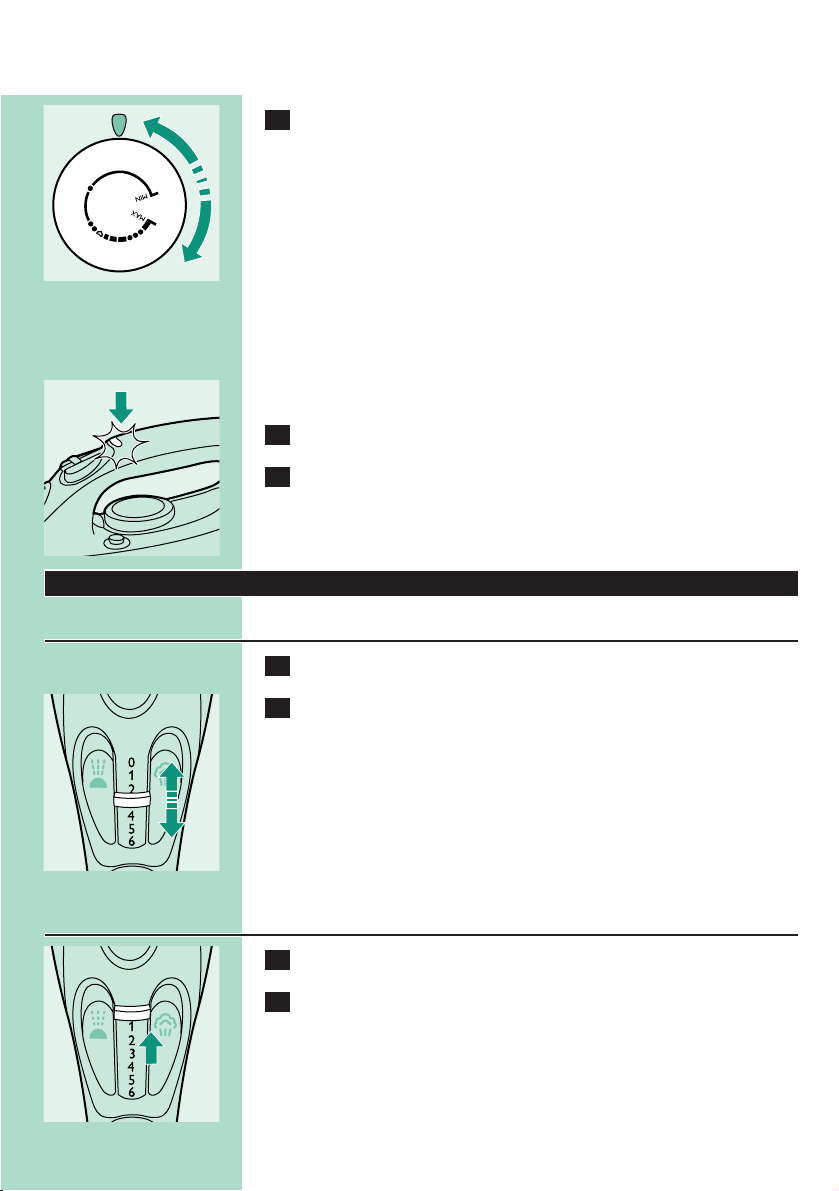
Setting the temperature
C
1 Type GC4243 only:remove the protective heat cover.
Do not leave the protective heat cover on the soleplate during ironing.
2 Put the iron on its heel.
C
3 Set the temperature dial to the required ironing temperature
by turning it to the appropriate position.
- Check the garment label for the required ironing temperature.
- 1 Synthetic fabrics (e.g. acrylic, nylon, polyamide, polyester)
- 1 Silk
- 2 Wool
- 3 Cotton, linen
ENGLISH 5
N
Y
L
O
N
N
Y
L
O
N
S
S
I
O
L
K
I
E
L
A
W
I
N
O
E
O
L
N
N
I
E
L
N
I
L
N
O
T
O
N
C
O
T
T
O
C
Page 6
6
- If you do not know what kind(s) of fabric(s) an article is made of,
determine the right ironing temperature by ironing a part that will
not be visible when you wear or use the article.- Silk, woollen
and synthetic materials: iron the reverse side of the fabric to prevent
shiny patches.Avoid using the spray function to prevent stains.
- Start ironing the articles that require the lowest ironing temperature,
such as those made of synthetic fibres.
4 Put the mains plug in an earthed wall socket.
C
5 When the amber temperature pilot light has gone out, wait a
while before you start ironing.
The amber pilot light will go on from time to time during ironing.
Using the appliance
Steam ironing
1 Make sure that there is enough water in the water tank.
C
1 Select the appropriate steam setting. Make sure that the steam
setting you select is suitable for the ironing temperature
selected:
- 1 - 3 for moderate steam (temperature settings 2 to 3)
- 4 - 6 for maximum steam (temperature settings 3 to MAX)
See 'Setting the temperature'.
B
The iron will start producing steam as soon as the set temperature has
been reached.
Ironing without steam
C
1 Set the steam control to position O (= no steam).
2 Select the recommended ironing temperature.
See 'Setting the temperature'.
ENGLISH
Page 7

7
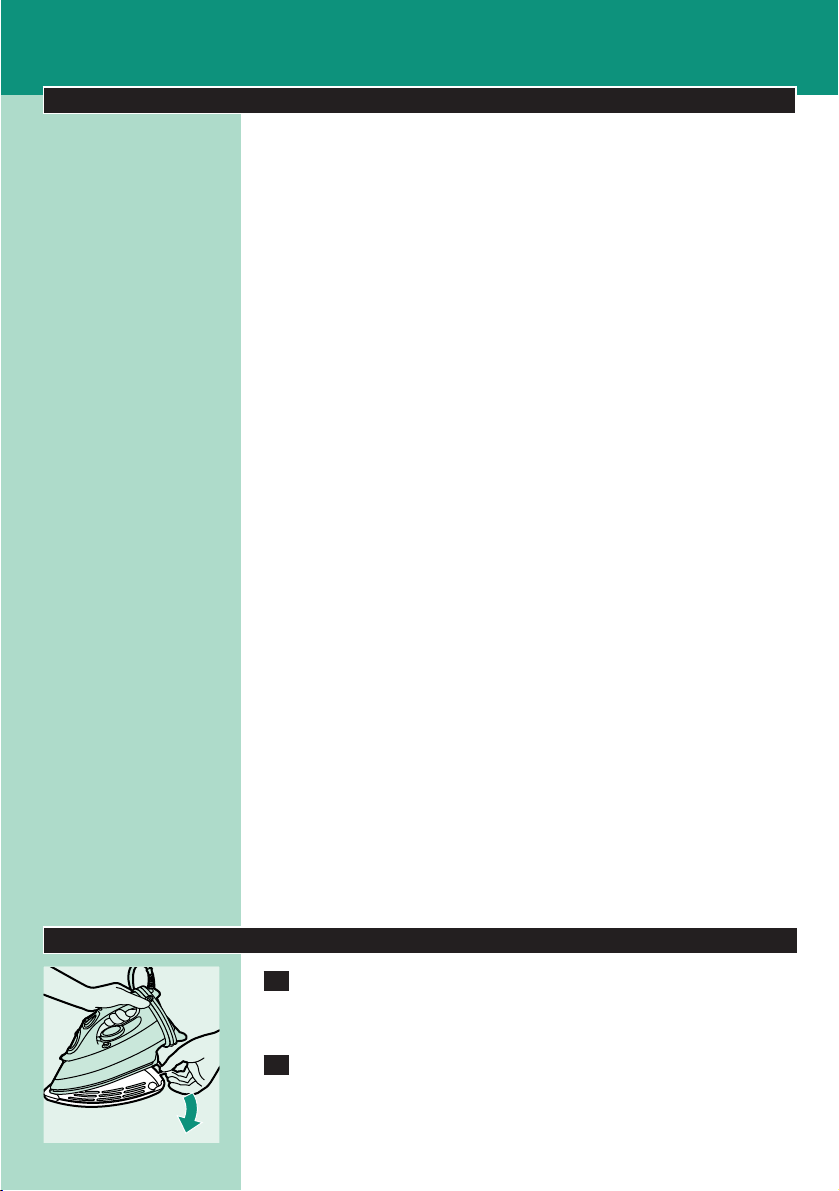
Features
Spraying
You can use the spray function to remove stubborn creases at any
temperature.
Make sure that there is enough water in the water tank.
C
1 Press the spray button several times to moisten the article to
be ironed.
Shot of steam
A powerful 'shot' of steam helps remove stubborn creases.
The shot-of-steam function can only be used at temperature settings
between 2 and MAX.
C
1 Press and release the shot-of-steam button.
Drip stop
This iron is equipped with a drip-stop function: the iron automatically
stops producing steam when the temperature is too low to prevent
water from dripping out of the soleplate. When this happens you may
hear a sound.
Vertical shot of steam
C
1 The shot-of-steam function can also be used when you hold
the iron in vertical position.
Never direct the steam at people.
ENGLISH
Page 8
8
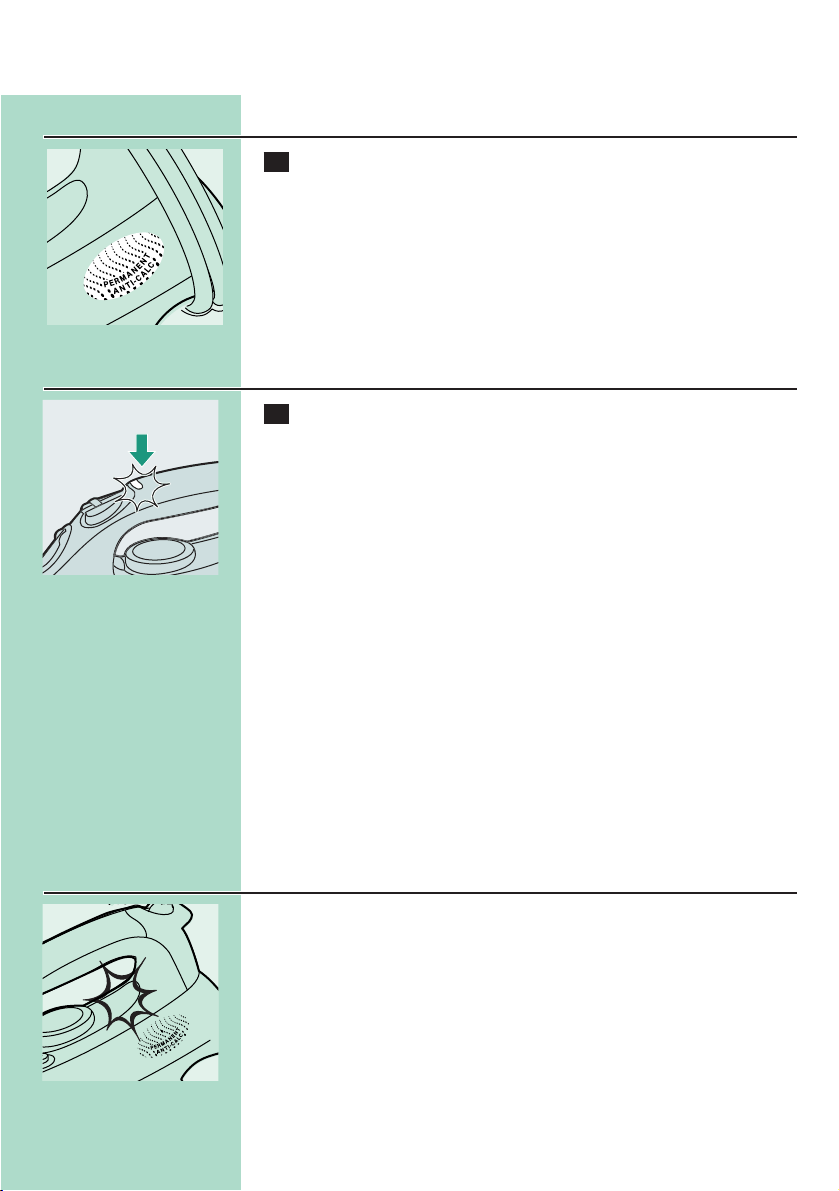
Automatic anti-calc function
C
1 The built-in anti-calc system reduces the build-up of scale and
guarantees a longer life for the iron.
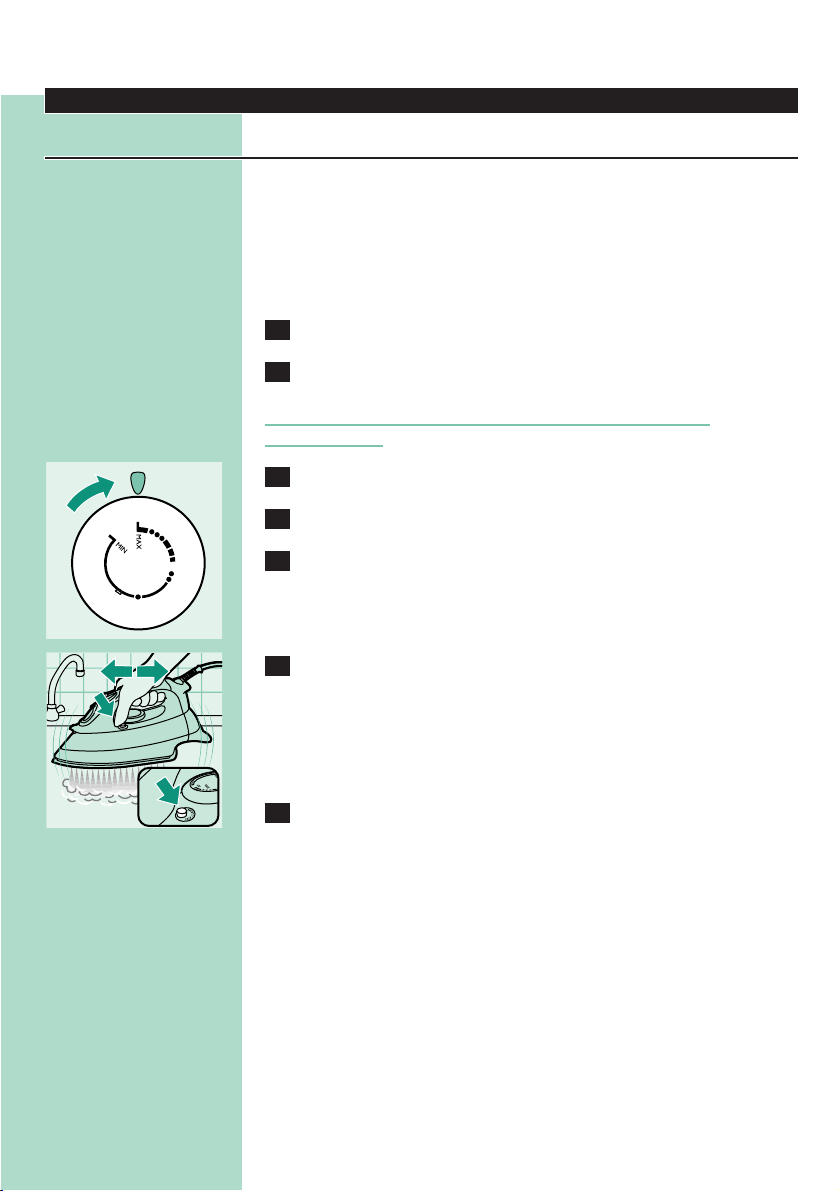
Electronic safety shut-off function (Types GC4243, GC4238,
GC4233 only)
C
1 The electronic safety shut-off function automatically switches
off the iron if it has not been moved for a while.
◗ The red auto-off pilot light starts blinking to indicate that the iron
has been switched off by the safety shut-off function.
To let the iron heat up again:
- Pick up the iron or move it slightly.
- The red auto-off pilot light goes out. If the temperature of the
soleplate has dropped below the set ironing temperature, the amber
temperature pilot light goes on.
- If the amber pilot light goes on after you have moved the iron, wait
for it to go out before you start ironing.
- If the amber pilot light does not go on after you move the iron, the
soleplate still has the right temperature and the iron is ready for use.
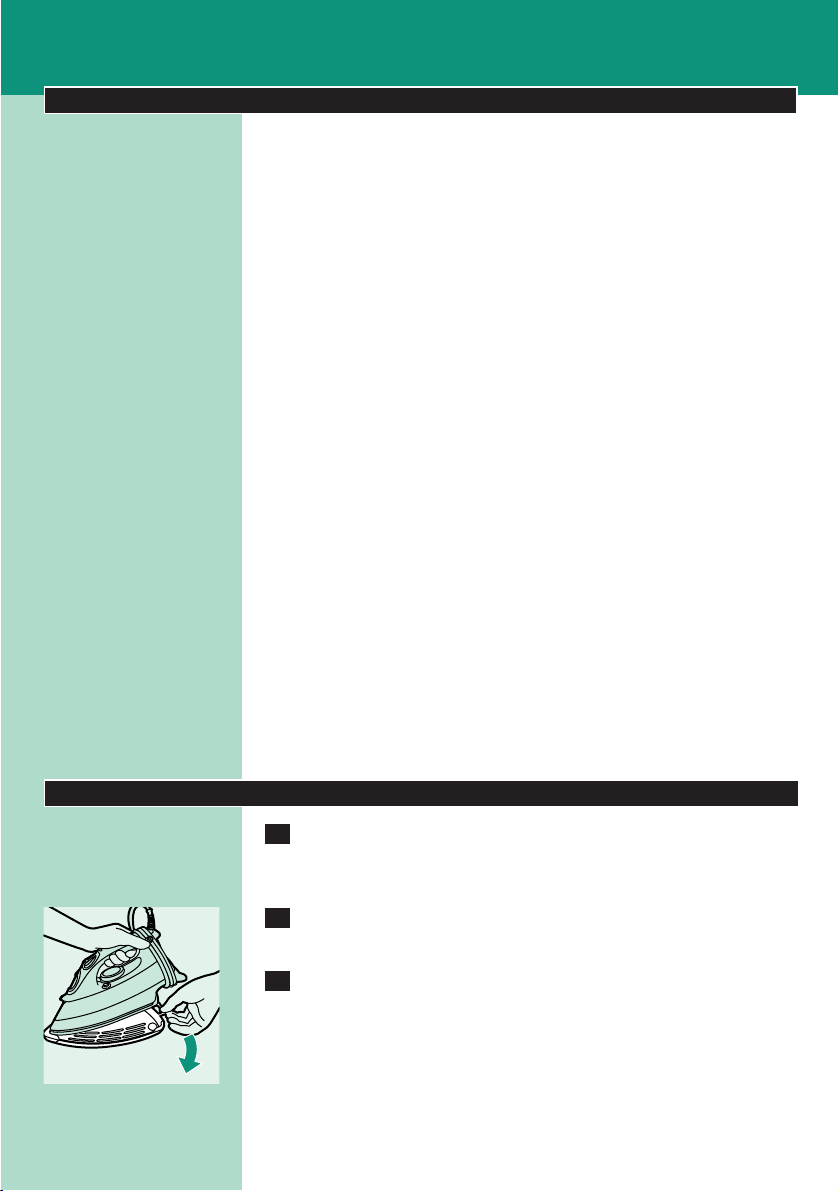
Alert light
C
◗ Types GC4243 and GC4238 only:
- The iron is equipped with a blue alert pilot light.
- The blue alert light burns as long as the iron is plugged in, even if the
iron has been switched off by the safety shut-off function.
ENGLISH
Page 9
9
Cleaning and maintenance
Using the calc-clean function
You can use the calc-clean function to remove scale and impurities.
◗ Use the calc-clean function once every two weeks.If the water in
your area is very hard (i.e. when flakes come out from the
soleplate during ironing), the calc-clean function should be used
more frequently.
1 Set the steam control to position O.
2 Fill the water tank to the maximum level.
Do not put vinegar or other descaling agents in the water tank.
C
3 Select the maximum ironing temperature.
4 Put the plug in the wall socket.
5 Unplug the iron when the amber temperature pilot light has
gone out.
C
6 Hold the iron over the sink,press and hold the calc-clean
button and gently shake the iron to and fro.
B
Steam and boiling water will come out of the soleplate. Impurities and
flakes (if any) will be flushed out.
7 Release the calc-clean button as soon as all the water in the
tank has been used up.
Repeat the calc-clean process if the iron still contains a lot of impurities.
After the calc-clean process
- Put the plug in the wall socket and let the iron heat up to allow the
soleplate to dry.
- Unplug the iron when it has reached the set ironing temperature.
- Move the hot iron gently over a piece of used cloth to remove any
water stains that may have formed on the soleplate.
- Let the iron cool down before you store it.
After ironing
1 Remove the mains plug from the wall socket and let the iron
cool down.
2 Wipe flakes and any other deposits off the soleplate with a
damp cloth and a non-abrasive (liquid) cleaning agent.
ENGLISH
E
N
N
I
L
N
I
L
N
O
T
N
T
O
T
O
O
C
C
L
E
O
N
I
O
N
N
Y
L
Y
O
L
O
N
N
A
L
W
E
I
O
S
K
L
I
S
Page 10
10
3 Clean the upper part of the iron with a damp cloth.
C
4 Regularly rinse the water tank with water. Empty the water
tank after cleaning.
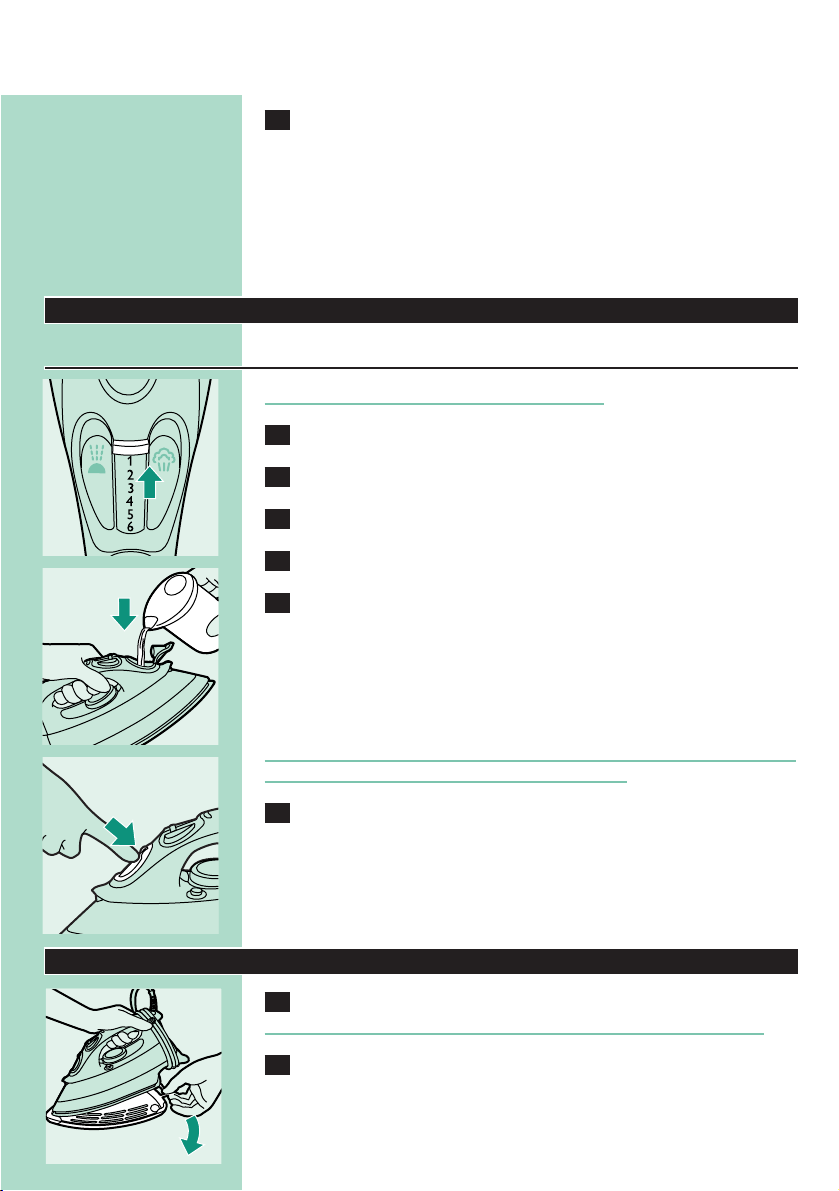
Storage
1 Remove the mains plug from the wall socket and set the steam
control to position O.
2 Empty the water tank.
C
3 a) Let the iron cool down.Wind the mains cord around the
cord storage facility and fix it with the cord clip.
b) Always store the emptied iron horizontally on a stable surface and
use a cloth to protect the soleplate.
C
4 Protective heat cover (type GC4243 only)
a) Put the iron on the protective heat cover.
Do not use the protective heat cover during ironing.
b) Wind the mains cord around the cord storage facility.
c) Store the iron with the protective heat cover horizontally on a stable
surface.
Environment
C
◗ Do not throw the appliance away with the normal household
waste at the end of its life, but hand it in at an official collection
point for recycling. By doing this you will help to preserve the
environment.
ENGLISH
Page 11

Guarantee & service
If you need information or if you have a problem, please visit the Philips
Web site at www.philips.com or contact the Philips Customer Care
Centre in your country (you will find its phone number in the
worldwide guarantee leaflet). If there is no Customer Care Centre in
your country, turn to your local Philips dealer or contact the Service
Department of Philips Domestic Appliances and Personal Care BV.
Troubleshooting
This chapter summarises the most common problems you could
encounter with your iron. Please read the different sections for more
details. If you are unable to solve the problem, please contact the
Customer Care Centre in your country.
11ENGLISH
Solution
Check the mains cord, the plug and
the wall socket.
Fill the water tank (see 'Filling the
water tank').
Set the steam control to a position
between 1 and 6 (see 'Steam ironing').
Select an ironing temperature that is
suitable for steam ironing (2 to
MAX). Put the iron on its heel and
wait until the amber pilot light has
gone out before you start ironing.
Continue ironing in horizontal position
and wait for a while before using the
(vertical) shot-of-steam function again.
Select an ironing temperature that is
suitable for steam ironing (2 to
MAX). Put the iron on its heel and
wait until the amber pilot light has
gone out before you start ironing.
Close the cap properly.You will hear a
click.
Rinse the water tank and do not put
any additive in the water tank.
Use the calc-clean function a few times
(see 'Using the calc-clean function').
Move the iron slightly to deactivate the
safety shut-off function.The pilot light
stops blinking.
Check the mains cord, the plug and
the wall socket.
Possible cause(s)
There is a connection problem.
There is not enough water in the
water tank.
The steam control has been set to
position O.
The iron is not hot enough.
The (vertical) shot-of-steam
function has been used too often
within a very short period.
The iron is not hot enough and/or
the drip-stop function has been
activated.
The cap of the filling opening has
not been closed properly.
An additive has been poured into
the water tank.
You have been using hard water,
which has caused scale flakes to
develop inside the soleplate.
The safety shut-off function has
switched the iron off (see 'Safety
shut-off function')
There is a connection problem.
Problem
The iron is plugged in but the soleplate
is cold.
The iron does not produce any steam.
The (vertical) shot-of-steam function
does not work.
Water droplets drip onto the fabric.
Flakes and impurities come out of the
soleplate during ironing.
The red pilot light blinks (types
GC4243, GC4238 and GC4233 only).
The iron is plugged in but the blue
alert light is out (types C4243 and
GC4238 only).
Page 12
Wichtig
Lesen Sie diese Bedienungsanleitung vor dem ersten Gebrauch des
Geräts sorgfältig durch und bewahren Sie sie zur späteren
Einsichtnahme auf.
◗ Überprüfen Sie, ob die auf dem Typenschild angegebene
Betriebsspannung mit der örtlichen Netzspannung übereinstimmt,
bevor Sie das Gerät anschließen.
◗ Verwenden Sie das Gerät ausschließlich an einer
Schukosteckdose.
◗ Benutzen Sie das Gerät nicht, wenn Schäden am Stecker, am Kabel
oder am Gerät selbst erkennbar sind, oder wenn das Gerät
herunter gefallen oder undicht ist.
◗ Überprüfen Sie das Netzkabel regelmäßig auf Unversehrtheit.
◗ Wenn das Netzkabel defekt oder beschädigt ist, darf es nur von
einem Philips Service-Center oder einer von Philips autorisierten
Werkstatt durch ein Original-Ersatzkabel ausgetauscht werden,
um Gefährdungen zu vermeiden.
◗ Lassen Sie das Gerät nicht unbeaufsichtigt, solange es am
Stromnetz angeschlossen ist.
◗ Tauchen Sie das Bügeleisen und die Ladestation (sofern
vorhanden) nicht in Wasser.
◗ Halten Sie das Gerät außer Reichweite von Kindern.
◗ Die Bügelsohle wird sehr heiß. Berühren Sie sie nicht, um
Verbrennungen zu vermeiden.
◗ Achten Sie darauf, dass das Netzkabel nicht mit der heißen
Bügelsohle in Kontakt kommt.
◗ Wenn Sie das Bügeln beenden, das Gerät reinigen, den
Wasserbehälter füllen oder leeren oder den Raum nur kurz
verlassen, stellen Sie stets den Dampfregler auf Position 0, stellen
Sie das Bügeleisen aufrecht und ziehen Sie den Netzstecker aus
der Steckdose.
◗ Platzieren und benutzen Sie das Bügeleisen und die Ladestation
(sofern vorhanden) stets auf einer stabilen, ebenen und
waagerechten Unterlage.
◗ Geben Sie niemals Parfüm, Essig, Stärke, Entkalker, Bügelhilfen oder
andere Chemikalien in den Wasserbehälter.
◗ Dieses Gerät ist nur für den Gebrauch im Haushalt bestimmt.
Vor dem ersten Gebrauch
1 Prüfen Sie, bevor Sie das Gerät in Betrieb nehmen, ob die auf
dem Typenschild des Geräts angegebene Betriebsspannung mit
der örtlichen Netzspannung übereinstimmt.
C
2 Nehmen Sie den Hitzeschutz von der Bügelsohle (nur
GC4243). Entfernen Sie alle Aufkleber von der Bügelsohle und
ziehen Sie die Schutzfolie ab.
12 DEUTSCH12
Page 13
3 Heizen Sie das Bügeleisen auf Maximaltemperatur auf und
führen Sie es einige Minuten lang auf einem feuchten Tuch hin
und her, um eventuell verbliebene Ablagerungen von der
Bügelsohle zu entfernen.
B
Einige Teile des Bügeleisens sind leicht eingefettet und können beim
ersten Gebrauch etwas Rauch abgeben. Das geht nach kurzer Zeit
vorüber.
Vorbereitung für den Gebrauch
Den Wasserbehälter füllen
Tauchen Sie das Bügeleisen niemals in Wasser
1 Ziehen Sie den Netzstecker aus der Steckdose.
C
2 Stellen Sie den Dampfregler auf Position 0 (= kein Dampf).
3 Nehmen Sie die Kappe der Einfüllöffnung ab.
4 Neigen Sie das Bügeleisen nach hinten.
C
5 Füllen Sie mithilfe des Füllbechers Leitungswasser in den
Wasserbehälter, bis die Markierung MAX erreicht ist.
Füllen Sie niemals mehr Wasser ein als bis zur Markierung MAX.
◗ Sollte Ihr Leitungswasser sehr hart sein, empfiehlt sich die
Mischung mit destilliertem Wasser zu gleichen Teilen oder die
ausschließliche Verwendung von destilliertem Wasser.
Befüllen Sie den Behälter nicht mit chemisch aufbereitetem Wasser und
nicht mit Zusätzen wie Essig oder Wäschestärke.
C
6 Schließen Sie Einfüllöffnung mit der Kappe. Es muss ein Klicken
zu hören sein.
Die Temperatur einstellen
C
1 Nur GC4243: Nehmen Sie den Hitzeschutz ab.
Nehmen Sie zum Bügeln stets den Hitzeschutz von der Bügelsohle.
2 Stellen Sie das Bügeleisen auf den Rücken.
DEUTSCH 13
Page 14
14
C
3 Drehen Sie den Temperaturregler auf die gewünschte
Bügeltemperatur.
- Prüfen Sie die Bügelvorschrift auf dem Etikett des Wäschestücks.
- 1 Kunstfasern (z. B. Polyacryl, Nylon, Polyamid, Polyester)
- 1 Seide
- 2 Wolle
- 3 Baumwolle, Leinen
- Wenn Ihnen die Art des Gewebes nicht bekannt ist, ermitteln Sie die
geeignete Bügeltemperatur an einer Stelle, die bei normalem
Gebrauch nicht sichtbar ist.
- Seide,Wolle und Kunstfasern: Bügeln Sie das Gewebe von links, um
glänzende Stellen zu vermeiden.Verwenden Sie die Sprühfunktion
nicht, es könnten Wasserflecken zurückbleiben.
- Beginnen Sie stets mit den Textilien, die eine niedrige
Temperatureinstellung erfordern, also gfs. mit Synthetics.
4 Stecken Sie den Netzstecker in eine Schuko-Steckdose.
C
5 Warten Sie noch eine Weile, wenn die gelbe Kontroll-Lampe
erloschen ist, bevor Sie zu bügeln beginnen.
Während des Bügelns leuchtet die gelbe Kontrolllampe in
regelmäßigen Abständen auf.
Verwendung des Geräts
Dampfbügeln
1 Achten Sie darauf, daß genügend Wasser im Wasserbehälter ist.
C
1 Wählen Sie die gewünschte Dampfeinstellung.Vergewissern Sie
sich, dass diese Einstellung zur gewählten Temperatur passt:
- 1 bis 3: mäßiger Dampf - Temperatur-Einstellung 2 bis 3.
- 4 bis 6: starker Dampf - Temperatur-Einstellung 3 bis MAX.
Vgl. den Abschnitt "Die Temperatur einstellen".
B
Sobald die eingestellte Temperatur erreicht ist, wird Dampf produziert.
Trockenbügeln
C
1 Stellen Sie den Dampfregler auf Position 0 (= kein Dampf).
2 Wählen Sie die empfohlene Bügeltemperatur.
Vgl. den Abschnitt "Die Temperatur einstellen".
DEUTSCH
N
S
S
I
O
L
K
I
E
L
A
W
I
N
O
E
O
L
N
Y
L
O
N
Y
L
O
N
N
N
I
E
L
N
I
L
N
O
T
O
N
C
O
T
T
O
C
Page 15

15
Funktionen
Bügelgut einsprühen
Die Sprühfunktion steht bei jeder Temperatur zur Verfügung und eignet
sich zur Beseitigung von starken Falten.
Achten Sie darauf, daß genügend Wasser im Wasserbehälter ist.
C
1 Feuchten Sie das Bügelgut an, indem Sie mehrmals die
Sprühtaste drücken.
Dampfstoß
Ein kräftiger Dampfstoß hilft, hartnäckige Falten zu beseitigen.
Die Dampfstoßfunktion kann nur bei Temperaturen zwischen 2 und
MAX verwendet werden.
C
1 Drücken Sie kurz die Dampfstoßtaste.
Tropfschutz
Dieses Bügeleisen ist mit einer Tropfschutzfunktion versehen: Bei zu
niedrigen Temperaturen wird die Dampfproduktion gestoppt, damit
kein Wasser aus der Bügelsohle tropft. Eventuell ist dabei ein Geräusch
zu hören.
Vertikaler Dampfstoß
C
1 Die Dampfstoßfunktion kann auch bei senkrecht gehaltenem
Bügeleisen benutzt werden.
Richten Sie den Dampstoß niemals auf Personen!
DEUTSCH
Page 16
16
Automatische Antikalk-Funktion
C
1 Das integrierte Antikalk-System verringert Kalkablagerungen
und sorgt dadurch für eine längere Lebensdauer des
Bügeleisens.
Sichere automatische Abschaltung (nur GC4243, GC4238 und
GC4233)
C
1 Das Bügeleisen wird automatisch ausgeschaltet, wenn es eine
Zeit lang nicht bewegt wurde.
◗ Wenn das Bügeleisen automatisch ausgeschaltet wurde, blinkt die
rote Kontrolllampe.
Erneutes Aufheizen des Bügeleisens:
- Nehmen Sie das Bügeleisen auf, und bewegen Sie es etwas.
- Die rote Kontrolllampe erlischt.Wenn die Temperatur der Bügelsohle
unter die eingestellte Bügeltemperatur abgesunken ist, leuchtet die
gelbe Temper atur-Kontrolllampe auf.
- Wenn die gelbe Kontrolllampe nach dem Bewegen des Bügeleisens
aufleuchtet, warten Sie, bis diese wieder erlischt, bevor Sie zu bügeln
beginnen.
- Wenn die gelbe Kontrolllampe nach dem Bewegen des Bügeleisens
nicht aufleuchtet, hat die Bügelsohle noch die erforderliche Temperatur,
und das Bügeleisen ist einsatzbereit.
Netzkontrolllampe
C
◗ Nur GC4243 und GC4238:
- Das Bügeleisen ist mit einer blauen Netzkontrolllampe ausgerüstet.
- Die blaue Lampe leuchtet, solange das Bügeleisen an das Stromnetz
angeschlossen ist, also auch dann, wenn das Bügeleisen automatisch
ausgeschaltet wurde.
DEUTSCH
Page 17
17
Reinigung und Wartung
Calc-Clean Funktion
Mit der Entkalkungsfunktion Calc-Clean lassen sich Kalkablagerungen
und Verunreinigungen beseitigen.
◗ Aktivieren Sie die Calc-Clean Funktion alle zwei Wochen.Wenn Ihr
Leitungswasser so hart ist, dass an der Bügelsohle Kalkpartikel
austreten, aktivieren Sie die Funktion häufiger.
1 Stellen Sie den Dampfregler auf Position O (= kein Dampf).
2 Füllen Sie den Wasserbehälter bis zur Markierung MAX.
Füllen Sie keinen Essig oder andere Entkalkungsmittel in den
Wasserbehälter.
C
3 Stellen Sie die maximale Bügeltemperatur ein.
4 Stecken Sie den Netzstecker in die Steckdose.
5 Sobald die gelbe Temperatur-Kontrolllampe erloschen ist,
ziehen Sie den Netzstecker aus der Steckdose.
C
6 Halten Sie das Bügeleisen über ein Waschbecken.Drücken und
halten Sie die Calc-Clean-Taste.Schwenken Sie das Bügeleisen
leicht hin und her.
B
Dabei tritt Dampf und kochendes Wasser aus der Bügelsohle aus.
Verunreinigungen und Kalkpartikel werden, sofern vorhanden, dabei
herausgepült.
7 Sobald der Wasserbehälter leer ist, lassen Sie die Calc-Clean-
Taste los.
Wiederholen Sie den Vorgang bei Bedarf.
Nach der Entkalkung
- Stecken Sie den Netzstecker in die Steckdose.Warten Sie, bis sich
das Bügeleisen aufgeheizt hat und die Bügelsohle getrocknet ist.
- Sobald die eingestellte Bügeltemperatur erreicht ist, ziehen Sie den
Netzstecker aus der Steckdose.
- Führen Sie die Bügelsohle einige Male über ein altes, aber sauberes
Tuch hin und her, um etwaige Rückstände von der Bügelsohle zu
entfernen.
- Lassen Sie das Bügeleisen abkühlen, bevor Sie es zur Seite stellen.
DEUTSCH
E
N
N
I
L
N
I
L
N
O
T
N
T
O
T
O
O
C
C
L
E
O
N
I
O
N
N
Y
L
Y
O
L
O
N
N
A
L
W
E
I
O
S
K
L
I
S
Page 18

18
Nach dem Bügeln
1 Ziehen Sie den Netzstecker aus der Steckdose, und lassen Sie
das Bügeleisen abkühlen.
2 Wischen Sie Kalkpartikel und andere Ablagerungen mit einem
feuchten Tuch und etwas Spülmittel von der Bügelsohle.
3 Der obere Teil des Bügeleisens lässt sich mit einem feuchten
Tuch abwischen, auf das Sie bei Bedarf ein wenig Spülmittel
auftragen können.
C
4 Füllen Sie den Wasserbehälter von Zeit zu Zeit mit klarem
Wasser. Gießen Sie das Wasser anschließend aus.
Aufbewahrung
1 Ziehen Sie den Netzstecker aus der Steckdosse, und stellen Sie
den Dampfregler auf Position 0.
2 Leeren Sie den Wasserbehälter.
C
3 a) Lassen Sie das Bügeleisen abkühlen.Wickeln Sie das
Netzkabel um die Kabelaufwicklung und fixieren Sie es mit
dem Kabelclip.
b) Bewahren Sie das Bügeleisen stets waagerecht auf einer festen
Oberfläche stehend auf. Schützen Sie die Bügelsohle mit einem
weichen Tuch.
C
4 Hitzeschutz (nur GC4243)
a) Stellen Sie das Bügeleisen auf dem Hitzeschutz ab.
Verwenden Sie den Hitzeschutz nicht beim Bügeln.
b) Wickeln Sie das Netzkabel um die Kabelaufwicklung.
c) Bewahren Sie das Bügeleisen mit dem Hitzeschutz waagerecht auf
einer festen Oberfläche stehend auf.
DEUTSCH
Page 19

19
Umweltschutz
C
◗ Geben Sie das Gerät am Ende der Lebensdauer nicht in den
normalen Hausmüll. Bringen Sie es zum Recycling zu einer
offiziellen Sammelstelle.Auf diese Weise helfen Sie die Umwelt zu
Garantie und Kundendienst
Weitere Informationen erhalten Sie im Internet unter
www.philips.com.Wenden Sie sich mit Problemen, Fragen und
Wünschen gegebenenfalls an das Philips Service Center in Ihrem Land
(die Telefonnummer finden Sie in der beiliegenden internationalen
Garantieschrift). Gibt es in Ihrem Land kein Philips Service Center,
setzen Sie sich mit der Kundendienstabteilung (Service Department)
von Philips Domestic Appliances and Personal Care B.V. in Verbindung.
DEUTSCH
Page 20

Abhilfe
Prüfen Sie das Netzkabel, den
Netzstecker und die Steckdose.
Füllen Sie den Wasserbehälter (siehe
"Den Wasserbehälter füllen").
Stellen Sie den Dampfregler auf eine
Position von 1 bis 6 (siehe
"Dampfbügeln").
Wählen Sie eine Bügeltemperatur,die
für das Dampfbügeln geeignet ist (2
bis MAX). Stellen Sie das Bügeleisen
aufrecht und warten Sie, bis die gelbe
Kontrolllampe erlischt, bevor Sie zu
bügeln beginnen.
Halten Sie das Bügeleisen eine Zeit
lang waagerecht, bevor Sie die
Dampfstoßfunktion erneut nutzen.
Wählen Sie eine Bügeltemperatur,die
für das Dampfbügeln geeignet ist (2
bis MAX). Stellen Sie das Bügeleisen
aufrecht und warten Sie, bis die gelbe
Kontrolllampe erlischt, bevor Sie zu
bügeln beginnen.
Schließen Sie die Kappe vollständig. Es
muss ein Klicken zu hören sein.
Leeren und spülen Sie den
Wasserbehälter aus.Verwenden Sie
keine Zusatzmittel.
Aktivieren Sie einige Male die CalcClean Funktion (siehe "Calc-Clean
Funktion").
Bewegen Sie das Bügeleisen etwas.
Die Kontrolllampe hört auf zu blinken.
Prüfen Sie das Netzkabel, den
Netzstecker und die Steckdose.
Vermutliche Ursache(n)
Die Stromversorgung ist
unterbrochen.
Der Wasserbehälter ist leer.
Der Dampfregler steht auf Position 0
(= kein Dampf).
Das Bügeleisen ist nicht heiß genug.
Die Funktion für den (vertikalen)
Dampfstoß wurde innerhalb kurzer
Zeit zu oft genutzt.
Das Bügeleisen ist nicht heiß genug
und/oder die Tropfschutzfunktion
wurde aktiviert.
Die Kappe der Einfüllöffnung wurde
nicht richtig verschlossen.
Der Wasserbehälter wurde mit einem
Zusatzmittel befüllt.
Es wurde sehr hartes Wasser
eingefüllt, sodass sich in der Bügelsohle
Kalkpartikel bilden konnten.
Das Bügeleisen wurde automatisch
ausgeschaltet (siehe "Sichere
automatische Abschaltung").
Die Stromversorgung ist
unterbrochen.
Problem
Der Netzstecker steckt in der
Steckdose, aber die Bügelsohle bleibt
kalt.
Das Bügeleisen erzeugt keinen Dampf.
Das Bügeleisen erzeugt keinen
(vertikalen) Dampfstoß.
Wasser tropft auf das Gewebe.
Kalkpartikel und Verunreinigungen
treten beim Bügeln aus der Bügelsohle
aus.
Die rote Kontrolllampe blinkt (nur
GC4243, GC4238 und GC4233).
Das Bügeleisen ist an die Steckdose
angeschlossen, aber die blaue
Netzkontrolllampe leuchtet nicht (nur
GC4243 und GC4238).
DEUTSCH20
Fehlerbehebung
In diesem Abschnitt sind die Ursachen der häufigsten Probleme
zusammengestellt. Lesen Sie bei Bedarf die ausführlichen Hinweise in
den Abschnitten,auf die hier verwiesen wird. Sollte sich ein Problem
nicht lösen lassen, wenden Sie sich an das Philips Service Center in Ihrer
Nähe.
Page 21
Viktig
Av sikkerhetshensyn bør du lese denne bruksanvisningen nøye og se på
illustrasjonene før du begynner å bruke apparatet.
◗ Kontroller at spenningen som er angitt på merkeplaten, er den
samme som nettspenningen før du kobler apparatet til strøm.
◗ Apparatet skal bare kobles til jordet stikkontakt.
◗ Ikke bruk apparatet hvis støpselet,ledningen eller selve apparatet
har synlig skade, eller hvis apparatet har blitt mistet i gulvet eller
det lekker.
◗ Kontroller ledningen regelmessig for skade.
◗ Hvis nettledningen blir skadet, må den bare skiftes ut av Philips, et
serviceverksted autorisert av Philips eller liknende kvalifisert
personell. Dette for å unngå fare.
◗ La aldri apparatet være uten tilsyn når det er koblet til strøm.
◗ Strykejernet og sokkelen må aldri senkes ned i vann.
◗ Hold apparatet utenfor barns rekkevidde.
◗ Strykesålen på strykejernet kan bli ekstremt varm, og berøring av
denne kan forårsake forbrenning.
◗ Nettledningen må ikke komme i berøring med den varme
strykesålen.
◗ Når du er ferdig med å stryke, når du rengjør apparatet, når du
fyller eller tømmer vannbeholderen, og også når du forlater
strykejernet et kort øyeblikk: Still dampkontrollen på O, sett
strykejernet i oppreist stilling, og dra ut støpselet fra
stikkontakten.
◗ Strykejernet og sokkelen skal settes og brukes på et stabilt,jevnt
og vannrett underlag.
◗ Ikke tilsett parfyme, eddik, stivelse, avkalkingsmiddel,strykespray
eller andre kjemikalier i vannbeholderen.
◗ Dette apparatet er bare beregnet på husholdningsbruk.
Før første gangs bruk
1 Kontroller at spenningen som er angitt på apparatet, er den
samme som den lokale nettspenningen, før De kobler til
apparatet.
C
2 Ta av varmedekselet fra sålen (gjelder kun GC4243).Ta av
eventuelle klistremerker eller beskyttelsesfolie fra sålen.
3 La strykejernet varmes opp til maksimaltemperatur og før
strykejernet over et fuktig tøystykke i flere minutter for å
fjerne eventuelle rester fra sålen.
B
Strykejernet kan ryke litt ved første gangs bruk. Dette vil avta etter en
kort stund.
21NORSK 21
Page 22

Klargjøring før bruk
Fylle på vann
Dypp aldri strykejernet i vann.
1 Fjern nettledningen fra stikkontakten.
C
2 Sett dampkontrollen til posisjon 0 (= ingen damp).
3 Åpne hetten på påfyllingsåpningen.
4 Vipp strykejernet bakover.
C
5 Fyll vanntanken med vann fra springen til maksimalnivået ved
hjelp av påfyllingskoppen.
Fyll ikke vann over maksimumsnivået.
◗ Hvis vannet i springen er veldig hardt, anbefaler vi å blande med
like mye destillert vann, eller å bruke bare destillert vann.
Ikke ha tilsetningsstoffer, eddik, stivelse eller kjemisk demineralisert vann
i vanntanken.
C
6 Lukk hetten på påfyllingsåpningen. De vil høre et klikk.
Stille inn temperaturen
C
1 Gjelder kun GC4243:Ta av varmedekselet
Ikke la varmedekselet sitte på sålen under stryking.
2 Sett strykejernet på hælen.
C
3 Sett temperaturbryteren på ønsket stryketemperatur ved å
dreie den til riktig stilling.
- Se på merket på plagget for å finne den riktige stryketemperatur.
- 1 Syntetiske stoffer (f.eks. akryl, nylon, polyamid, polyester)
- 1 Silke
- 2 Ull
- 3 Bomull, lin
NORSK22
N
Y
L
O
N
N
Y
L
O
N
S
S
I
O
L
K
I
E
L
A
W
I
N
O
E
O
L
N
N
I
E
L
N
I
L
N
O
T
O
N
C
O
T
T
O
C
Page 23

23
- Hvis De ikke vet hva slags stoff(er) et plagg består av, kan De finne
riktig stryketemperatur ved å stryke et sted som er ikke er synlig når
plagget er i bruk.
- Silke, ull og syntetiske stoffer: stryk på vrangen for å unngå blanke
områder. Unngå å bruke sprayfunksjonen, slik at det ikke blir flekker.
- Begynn å stryke de plaggene som krever lavest stryketemperatur, for
eksempel plagg som er laget av syntetiske materialer.
4 Sett nettledning inn i en jordet stikkontakt.
C
5 Når den gule temperaturlampen slukkes, venter De en stund
før De begynner å stryke.
Den gule temperaturlampen vil tennes enkelte ganger under stryking.
Bruke apparatet
Damp-stryking
1 Sørg for at det er tilstrekkelig med vann i vanntanken.
C
1 Velg ønsket dampinnstilling.Pass på at dampinnstillingen er
egnet for valgt stryketemperatur:
- 1 - 3 for litt damp (temperaturinnstilling 2 til 3)
- 4 - 6 for mye damp (temperaturinnstilling 3 til MAX)
Se seksjonen 'Stille inn temperatur'
B
Strykejernet begynner å produsere damp så snart innstilt temperatur er
nådd.
Stryking uten damp
C
1 Sett dampkontrollen til posisjon 0 (= ingen damp).
2 Velg anbefalt stryketemperatur.
Se seksjonen 'Stille inn temperatur'
NORSK
Page 24

24
Funksjoner
Spraying
Sprayfunksjonen kan brukes til å fjerne vanskelige krøller ved alle
temperaturer.
Sørg for at det er tilstrekkelig med vann i vanntanken.
C
1 Trykk på sprayknappen flere ganger for å fukte plagget som skal
strykes.
Dampstøt
Et kraftig dampstøt gjør det lettere å få vekk vanskelige krøller.
Dampstøtfunksjonen kan bare brukes ved temperaturinnstillinger
mellom 2 og MAX.
C
1 Trykk på og slipp dampstøtknappen.
Dryppstopp
Dette strykejernet er utstyrt med en dryppstoppfunksjon. Strykejernet
slutter automatisk å produsere damp når temperaturen er for lav,for
dermed å hindre at vann drypper fra sålen. Når dette skjer, kan det
høres en lyd.
Vertikalt dampstøt
C
1 Dampstøtfunksjonen kan også brukes når strykejernet holdes
loddrett (vertikalt).
Rett aldri dampen mot mennesker.
NORSK
Page 25

25
Automatisk antikalkfunksjon
C
1 Det innebygde antikalksystemet reduserer kalkavleiringer og gir
strykejernet lengre levetid.
Elektronisk sikkerhetsbryter (gjelder kun GC4243, GC4238
og GC4233)
C
1 Den elektroniske sikkerhetsbryteren slår automatisk av
strykejernet hvis det ikke har vært flyttet på en stund.
◗ Den røde varsellampen begynner å blinke for å vise at strykejernet
er slått av med den automatiske sikkerhetsbryteren.
Slik varmes strykejernet opp igjen:
- Løft opp strykejernet eller beveg det litt.
- Den røde varsellampen slukkes. Dersom temperaturen i sålen har falt
under innstilt stryketemperatur, tennes den gule lampen.
- Dersom den gule lampen tennes etter at strykejernet er flyttet,
venter De til den slukkes før De begynner å stryke.
- Dersom den gule lampen ikke tennes etter at strykejernet er flyttet,
har sålen fortsatt riktig temperatur, og strykejernet er klart til bruk.
Kontrollampe
C
◗ Gjelder kun GC4243 og GC4238:
- Strykejernet er utstyrt med en blå lampe.
- Den blå lampen er tent så lenge strykejernet er koblet til strøm, selv
når strykejernet er slått av med den automatiske sikkerhetsbryteren.
NORSK
Page 26

26
Rengjøring og vedlikehold
Bruke avkalkingsfunksjonen
Avkalkingsfunksjonen kan brukes til å fjerne kalk og urenheter.
◗ Bruk avkalkingsfunksjonen annenhver uke. Dersom vannet er hardt
(dvs. hvis det kommer flak ut av sålen under stryking), bør
avkalkingsfunksjonen brukes oftere.
1 Sett dampkontrollen til posisjon 0.
2 Fyll vanntanken til maksimumsnivået.
Ikke ha eddik eller andre avkalkingsmidler i vanntanken.
C
3 Velg maksimal stryketemperatur.
4 Sett nettledningen i stikkontakten.
5 Trekk støpselet ut av stikkontakten når den gule
temperaturlampen er sluknet.
C
6 Hold strykejernet over vasken,trykk på og hold nede
avkalkingsknappen,og rist forsiktig på strykejernet.
B
Damp og kokende vann vill komme ut av strykesålen. Urenheter og
eventuelle flak blir skylt ut.
7 Slipp avkalkingsknappen når alt vannet i tanken er brukt opp.
Gjenta avkalkingsprosessen dersom det fortsatt er mye urenheter i
strykejernet.
Etter avkalkingsprosessen
- Sett støpselet i stikkontakten og la strykejernet varmes opp slik at
sålen tørker.
- Ta ut støpselet når strykejernet har nådd innstilt stryketemperatur.
- Beveg det varme strykejernet over et brukt tøystykke for å fjerne
vannflekker som kan ha blitt dannet på strykesålen.
- La strykejernet avkjøles før De setter det bort.
Etter stryking
1 Trekk ut nettledningen fra stikkontakten og la strykejernet
avkjøles.
2 Tørk flak og andre avleiringer av sålen med en fuktig klut og et
(flytende) vaskemiddel uten skureeffekt.
3 Rengjør overdelen av strykejernet med en fuktig klut.
NORSK
E
N
N
I
L
N
I
L
N
N
Y
L
Y
O
L
O
N
N
N
O
T
N
T
O
T
O
O
C
C
L
E
O
N
I
O
A
L
W
E
I
O
S
K
L
I
S
Page 27
27
C
4 Fra tid til annen bør innsiden av vannbeholderen renses med
vann.Tøm så vannet ut etter rengjøringen.
Oppbevaring
1 Dra støpselet ut av stikkontakten og sett dampkontrollen i
posisjon O.
2 Tøm vannbeholderen.
C
3 a) La strykejernet kjøles av. Rull opp nettledningen rundt
lagringsenheten for ledningen og fest den med
ledningsklemmen.
b) Oppbevar alltid det tomme strykejernet liggende på en stabil
overflate. Bruk et klede til å beskytte strykesålen.
C
4 Varmedeksel (gjelder kun GC4243)
a) Sett strykejernet oppå varmedekselet.
Ikke bruk varmedekselet under stryking.
b) Rull opp ledningen rundt lagringsenheten for ledningen.
c) Oppbevar strykejernet med varmedekselet vannrett på et stabilt
underlag.
Miljø
C
◗ Ikke kast apparatet sammen med vanlig husholdningaavfall når
produktets levetid er over, men lever det på et anvist
oppsamlingssted for resirkulering.Ved å gjøre dette, vil du hjelpe
til å verne miljøet.
NORSK
Page 28

28
Løsning
Undersøk nettledningen, støpslet og
stikkontakten.
Fyll vanntanken (se 'Fylle vanntanken').
Sett dampkontrollen til en posisjon
mellom 1 og 6 (se 'Dampstryking').
Velg stryketemperatur som er egnet
for dampstryking (2 til MAX). Sett
strykejernet på hælen og vent til den
gule lampen er sluknet før De
begynner å stryke.
Fortsett å str yke i vannrett stilling og
vent litt før De bruker (den vertikale)
dampstøtfunksjonen igjen.
Velg stryketemperatur som er egnet
for dampstryking (2 til MAX). Sett
strykejernet på hælen og vent til den
gule lampen er sluknet før De
begynner å stryke.
Lukk hetten ordentlig. Det skal høres et
klikk.
Skyll vanntanken og ha ikke i
tilsetningsstoffer.
Bruk avkalkingsfunksjonen noen ganger
(se 'Bruke avkalkingsfunksjonen').
Beveg strykejernet litt for å dekativere
sikkerhetsbryteren. Lampen slutter å
blinke.
Undersøk nettledningen, støpslet og
stikkontakten.
Mulig årsak
Det er oppstått et tilkoblingsproblem.
Det er ikke nok vann på vanntanken.
Dampkontrollen har blitt satt til
posisjon O.
Strykejernet er ikke varmt nok.
(Den vertikale) dampstøtfunksjonen
er blitt brukt for mange ganger i et
kort tidsrom.
Strykejernet er ikke tilstrekkelig varmt,
og/eller dryppstoppfunksjonen er
aktivert.
Hetten på påfyllingsåpningen er ikke
ordentlig lukket.
Det er helt et tilsetningsstoff i
vanntanken.
Vannet er hardt, slik at det har dannet
seg kalkflak inne i sålen.
Strykejernet er slått av med den
automatiske sikkerhetsbryteren (se
'Automatisk sikkehetsbryter').
Det er oppstått et tilkoblingsproblem.
Problem
Strykejernet er tilkoblet men
strykesålen er kald.
Strykejernet produserer ikke damp.
(Den vertikale) dampstøtfunksjonen
virker ikke.
Det drypper vann på tøyet.
Flak og urenheter kommer ut av
sålen under stryking.
Den røde lampen blinker (gjelder
kun GC4243, GC4238 og GC4233)
Strykejernet er koblet til strøm,men
den blå kontrollampen er ikke tent
(gjelder kun GC4243 og GC4238).
Garanti og service
Hvis De trenger service eller informasjon, kan De se Philips'
webområde på www.philips.com eller kontakte Philips Kundetjeneste
(se telefonnummer i garantiheftet). Hvis det ikke er noe Philips
Kundetjenestesenter i landet hvor De befinner Dem, kan De kontakte
den lokale Philips-forhandleren eller serviceavdelingen ved Philips
Domestic Appliances and Personal Care BV.
Problemløsing
Dette kapitlet inneholder en oversikt over de vanligste problemene
som kan oppstå med strykejernet. Se de enkelte avsnittene for
nærmere opplysninger. Hvis De ikke kan løse problemet, kan De
kontakte kundetjenestesenteret i Deres land.
NORSK
Page 29

Viktigt
Läs instruktionerna noggrant innan du börjar använda strykjärnet och
spara dem som referens.
◗ Innan du ansluter apparaten kontrollerar du att den spänning som
anges på apparaten överensstämmer med nätspänningen i ditt
hem.
◗ Använd endast ett jordat vägguttag.
◗ Använd inte apparaten om nätkontakten,nätsladden eller
apparaten själv har synliga skador eller om apparaten har tappats
eller läcker.
◗ Kontrollera nätsladden regelbundet för att se om den är skadad.
◗ Om nätsladden är skadad, måste den för att undvika skaderisk
alltid bytas av Philips eller ett av Philips auktoriserat
serviceombud.
◗ Lämna aldrig apparaten obevakad när den är ansluten till elnätet.
◗ Sänk aldrig ner strykjärnet och stället, om sådant finns,i vatten.
◗ Förvara apparaten utom räckhåll för barn.
◗ Järnets stryksula kan bli mycket het och vid beröring orsaka
brännskada.
◗ Låt inte nätsladden komma i beröring med stryksulan när den är
varm.
◗ När du är färdig med strykningen, när du gör ren strykjärnet, när
du fyller på vatten och också när du lämnar strykjärnet för en
kort stund ska du vrida ångvredet till läge 0, ställa järnet på sin häl
och ta ut stickkontakten ur väggkontakten.
◗ Ställ alltid och använd strykjärnet och stället, om sådant finns, på
en stabil, jämn och horisontell yta.
◗ Häll inte parfym, vinäger,stärkelse, avkalkningsmedel,
strykningshjälpmedel eller andra kemikalier i vattentanken.
◗ Den här apparaten är endast avsedd för hushållsbruk.
Före första användning
1 Innan du ansluter apparaten kontrollerar du att den spänning
som anges på apparaten överensstämmer med den aktuella
nätspänningen i ditt hem.
C
2 Avlägsna värmeskyddet från stryksulan (endast modellerna
GC4243).Avlägsna eventuella klistermärken eller skyddsfilmer
från stryksulan.
3 Hetta upp strykjärnet till maximal temperatur under några
minuter och dra sedan strykjärnet över ett fuktigt tygstycke
för att avlägsna eventuella beläggningar från stryksulan.
B
Strykjärnet kan avge lite rök när du använder det för första gången. Det
upphör efter en kort stund.
29SVENSKA 29
Page 30

Förberedelser
Påfyllnad av vattenbehållaren
Sänk aldrig ner strykjärnet i vatten.
1 Ta ut stickkontakten ur vägguttaget.
C
2 Ställ ångreglaget i läge 0 (= ingen ånga).
3 Öppna locket till påfyllningsöppningen.
4 Luta strykjärnet bakåt.
C
5 Fyll vattentanken med kranvatten till MAX-markeringen med
hjälp av påfyllningskoppen.
Fyll inte på vatten till över MAX-markeringen.
◗ Om kranvattnet i ditt område är väldigt hårt, rekommenderar vi
att du blandar med lika delar destillerat vatten, eller använder
enbart destillerat vatten.
Häll inte i parfym, ättika, stärkelse eller kemiskt avkalkat vatten.
C
6 Stäng locket till påfyllningsöppningen. Ett klick hörs.
Inställning av temperatur
C
1 Endast GC4243: avlägsna värmeskyddet.
Låt aldrig värmeskyddet sitta kvar under strykningen.
2 Ställ strykjärnet på parkeringshälen.
C
3 Ställ in önskad temperatur genom att vrida temperaturvredet
till önskat läge.
- Titta på etiketten på materialet för uppgift om vilken temperatur du
ska använda.
- 1 Syntetmaterial (t ex akryl, viskos, polyamid, polyester)
- 1 Silke
- 2 Ylle
- 3 Bomull, linne
SVENSKA30
N
Y
L
O
N
N
Y
L
O
N
S
S
I
O
L
K
I
E
L
A
W
I
N
O
E
O
L
N
N
I
E
L
N
I
L
N
O
T
O
N
C
O
T
T
O
C
Page 31

31
- Om du inte vet vilket material en artikel är tillverkad i kan du ta reda
på den rätta stryktemperaturen genom att provstryka en del av
plagget som inte syns när du använder eller bär artikeln.
- För silke, ylle och syntetmaterial: stryk på materialets insida för att
undvika glänsande fläckar.Använd inte sprayfunktionen, den kan
orsaka fläckar.
- Börja med att stryka de material som kräver lägst temperatur såsom
syntetfibrer.
4 Sätt in stickkontakten i ett jordat vägguttag.
C
5 Vänta med att börja stryka tills den gula
temperaturindikatorlampan har varit släckt en stund.
Signallampan lyser då och då under strykningen.
Användning
Ångstrykning
1 Se till att det finns tillräckligt vatten i vattentanken.
C
1 Välj önskad ånginställning. Se till att ånginställningen passar den
valda temperaturen.
- 1-3 för måttlig ånga (temperaturinställning 2 till 3)
- 4-6 för maximal ånga (temperaturinställning 3 till MAX)
Studera avsnitt 'Inställning av temperatur'.
B
Strykjärnet avger ånga så snart den valda temperaturen har uppnåtts.
Strykning utan ånga
C
1 Ställ ångreglaget i läge 0 (= ingen ånga).
2 Välj rekommenderad strykningstemperatur.
Studera avsnitt 'Inställning av temperatur'.
SVENSKA
Page 32

32
Funktioner
Spray
Du kan använda sprayfunktionen för att avlägsna skarpa skrynklor och
veck vid alla temperaturer.
Se till att det finns tillräckligt vatten i vattentanken.
C
1 Tryck flera gånger på sprayknappen för att fukta den artikel
som ska strykas.
Ångpuff
En kraftig ångpuff hjälper till att släta ut skarpa skrynklor och veck.
Ångpuffen kan bara användas vid temperaturer mellan 2 och MAX.
C
1 Tryck in och släpp ångpuffknappen.
Drip Stop
Det här strykjärnet är utrustat med Drip Stop. Strykjärnet slutar
automatiskt att producera ånga när temperaturen är för låg för att
hindra vatten från att droppa från stryksulan. När detta sker kan du
höra ett ljud.
Vertikal ångpuff
C
1 Ångpuffen kan också användas när du håller strykjärnet i
vertikal position.
Rikta aldrig ångpuffen mot människor eller djur.
SVENSKA
Page 33

33
Automatisk avkalkningsfunktion
C
1 Den inbyggda avkalkningsfunktionen avlägsnar avlagringar och
ger strykjärnet en längre livslängd.
Automatisk avstängningsfunktion (endast GC4243, GC4238
och GC4233)
C
1 Den automatiska avstängningsfunktionen stänger automatiskt
av strykjärnet om det har stått stilla ett slag.
◗ Den röda signallampan börjar blinka för att visa att strykjärnet har
stängts av automatiskt.
Så här hettar du upp strykjärnet igen:
Lyft upp strykjärnet eller flytta det en aning.
Den röda signallampan släcks. Om stryksulans temperatur har sjunkit
under den inställda temperaturen tänds den gula signallampan.
Om den gula signallampan tänds efter att du har rört strykjärnet väntar
du tills den släcks innan du börjar stryka.
Om den gula signallampan inte tänds efter att du rört strykjärnet, håller
stryksulan fortfarande den inställda temperaturen och strykjärnet är
klart för användning.
Varningslampa
C
◗ Endast GC4243 och GC4238.
- Det här strykjärnet är utrustat med en blå varningslampa.
- Den blå varningslampan lyser så länge strykjärnet är inkopplat, även
om strykjärnet har stängts av automatiskt.
SVENSKA
Page 34

34
Rengöring och underhåll
Använda avkalkningsfunktionen
Avkalkningsfunktionen använder du för att avlägsna kalkavlagringar och
smuts.
◗ Använd avkalkningsfunktionen varannan vecka.Om vattnet där du
bor är väldigt hårt (om det kommer kalkflagor ur stryksulan) bör
du använda avkalkningsfunktionen oftare.
1 Ställ ångreglaget i läge 0.
2 Fyll vatten i vattentanken till MAX-markeringen.
Häll inte vinäger eller andra avkalkningsmedel i vattentanken.
C
3 Ställ in maximal strykningstemperatur.
4 Stick in stickkontakten i vägguttaget.
5 Koppla ur strykjärnet när den gula signallampan släcks.
C
6 Håll strykjärnet över vasken, tryck och håll ned
kalkavlagringsknappen och skaka sedan försiktigt strykjärnet
fram och tillbaka.
B
Ånga och kokande vatten kommer ut ur stryksulan. Avlagringar och
(eventuella) flagor sköljs ut.
7 Släpp kalkavlagringsknappen så snart allt vatten har runnit ut.
Upprepa processen om det fortfarande finns smuts kvar i strykjärnet.
Efter avkalkningen
- Sätt i kontakten i vägguttaget och hetta upp strykjärnet så stryksulan
torkar.
- Koppla ur strykjärnet när det nått önskad temperatur.
- För försiktigt det heta strykjärnet över en tygbit för att få bort
eventuella vattenfläckar som kan ha bildats på stryksulan.
- Låt strykjärnet svalna innan du sätter undan det.
Efter strykningen
1 Dra ut stickkontakten ur vägguttaget och låt strykjärnet svalna.
2 Torka av flagor och andra avlagringar från stryksulan med en
fuktad trasa och ett (ej nötande) rengöringsmedel.
SVENSKA
N
N
Y
L
Y
O
L
O
N
N
E
N
N
I
L
N
I
L
N
O
T
N
T
O
T
O
O
C
C
L
E
O
N
I
O
A
L
W
E
I
O
S
K
L
I
S
Page 35

35
3 Gör ren strykjärnets övre del med en fuktad trasa.
C
4 Skölj regelbundet vattenbehållaren med vatten.Töm behållaren
efter rengöringen.
Förvaring
1 Ta ut stickkontakten ur vägguttaget och ställ ångvredet i läge 0.
2 Töm vattenbehållaren.
C
3 a) Låt strykjärnet svalna. Linda nätsladden runt sladdvindan och
fäst den i klämman.
Förvara alltid det tömda strykjärnet i horisontellt läge på en stadig yta
och skydda stryksulan med en duk.
C
4 Värmeskydd (endast GC4243)
Ställ strykjärnet på värmeskyddet.
a) Använd inte värmeskyddet under strykning.
b) Linda nätsladden runt sladdförvaringsanordningen.
c) Förvara strykjärnet med värmeskyddet under sig på en jämn yta.
Miljö
C
◗ När apparatens livslängd är slut ska du inte slänga den med de
vanliga hushållssoporna utan lämna in den på en offentlig
återvinningsstation. Om du gör det hjälper du till att skydda
miljön.
SVENSKA
Page 36

Garanti och service
Om du behöver information eller stöter på problem kan du besöka
Philips webbplats på www.philips.com eller kontakta Philips kundtjänst i
ditt eget land (du finner telefonnumret i världsgarantibroschyren). Om
det inte finns någon kundtjänst i ditt eget land, vänder du dig till din
lokala Philips-återförsäljare eller kontaktar serviceavdelningen på Philips
Domestic Applicances and Personal Care BV.
Felsökning
I det här kapitlet sammanfattas de vanligaste problemen som kan
uppstå med ditt strykjärn. Läs de olika avsnitten om du vill ha mer
information. Om du inte kan lösa problemet kontaktar du kundtjänst i
ditt land.
36
Åtgärd
Kontrollera nätsladden, stickkontakten
och vägguttaget.
Fyll på vattenbehållaren (se avsnittet
Fylla på vattenbehållaren).
Ställ ångvredet i läge mellan 1 och 6
(se avsnittet Ångstrykning).
Välj en stryktemperatur som är
lämplig för ångstrykning (2 till
MAX). Ställ strykjärnet på
parkeringshälen och vänta tills den
gula signallampan slocknat innan du
börjar stryka.
Fortsätt str yka i vågrät position ett
slag innan du använder den vertikala
ångpuffen igen.
Välj en stryktemperatur som är
lämplig för ångstrykning (2 till
MAX). Ställ strykjärnet på
parkeringshälen och vänta tills den
gula signallampan slocknat innan du
börjar stryka.
Stäng locket ordentligt. Ett klick hörs.
Skölj ur vattentanken och häll inga
mer tillsatser i vattentanken.
Använd avkalkningsfunktionen ett par
gånger (se avsnittet Använda
avkalkningsfunktionen).
Rör på strykjärnet en aning för att
inaktivera avstängningsfunktionen.
Signallampan slutar att blinka.
Kontrollera nätsladden, stickkontakten
och vägguttaget.
Möjlig orsak
Ett kontaktproblem har uppstått.
Det finns inte tillräckligt med vatten i
tanken.
Ångvredet står i läge 0.
Strykjärnet är inte tillräckligt varmt.
Du har använt den vertikala ångpuffen
för många gånger på kort tid.
Strykjärnet är inte varmt nog och/eller
droppskyddsfunktionen har aktiverats.
Påfyllningsöppningen är inte stängd.
En tillsats har hällts i vattentanken.
Du har använt hårt vatten, vilket har
gjort att kalkflagor skapas i str yksulan.
Den automatiska
avstängningsfunktionen har stängt av
strykjärnet (se avsnittet Automatisk
avstängningsfunktion).
Ett kontaktproblem har uppstått.
Problem
Strykjärnet är anslutet men
stryksulan är kall.
Strykjärnet avger inte någon ånga.
Den vertikala ångpuffen fungerar inte
Det droppar vatten på tyget.
Det kommer flagor och föroreningar
från stryksulan vid strykning.
Den röda signallampan blinkar
(endast GC4243, GC4238 och
GC4233)
Strykjärnet är ikopplat men den blå
signallampan lyser inte (endast
GC4243 och GC4238)
SVENSKA
Page 37

Tärkeää
Lue nämä ohjeet huolellisesti, ennen kuin alat käyttää laitetta. Säästä
käyttöohje vastaisen varalle.
◗ Tarkasta, että laitteen arvokilven jännitemerkintä vastaa paikallista
verkkojännitettä, ennen kuin liität laitteen pistorasiaan.
◗ Liitä laite mielellään maadoitettuun pistorasiaan.
◗ Älä käytä laitetta, jos sen pistotulpassa, liitosjohdossa tai itse
laitteessa on näkyviä vikoja tai jos laite on pudonnut tai se vuotaa.
◗ Tarkasta liitosjohdon kunto säännöllisesti.
◗ Jos liitosjohto on vahingoittunut,vaihdata se oman turvallisuutesi
vuoksi Philips Kodinkoneiden valtuuttamassa huoltoliikkeessä tai
muulla ammattitaitoisella korjaajalla.
◗ Laitetta ei saa koskaan jättää ilman valvontaa silloin kun se on
liitetty sähköverkkoon.
◗ Älä upota höyryrautaa tai sen mukana mahdollisesti toimitettua
laskualustaa veteen.
◗ Pidä laite poissa lasten ulottuvilta.
◗ Höyryraudan pohja tulee hyvin kuumaksi, ja koskettaessa se voi
aiheuttaa palovamman.
◗ Pidä huoli, ettei höyryraudan kuuma pohja kosketa liitosjohtoa.
◗ Aseta höyrynvalitsin asentoon O,aseta höyryrauta pystyasentoon
ja irrota pistotulppa pistorasiasta aina, kun lopetat silittämisen, kun
puhdistat laitetta, kun täytät tai tyhjennät vesisäiliötä tai kun
hetkeksikin poistut höyryraudan luota.
◗ Aseta höyryrauta ja sen mukana mahdollisesti toimitettu
laskualusta aina tukevalle, tasaiselle ja vaakasuoralle pinnalle ja
käytä tukevaa,tasaista ja vaakasuoraa alustaa silittäessäsi.
◗ Älä laita vesisäiliöön hajusteita, etikkaa, kalkinpoistoaineita tai
muitakaan kemikaaleja.
◗ Tämä laite on tarkoitettu vain kotikäyttöön.
Käyttöönotto
1 Tarkasta, että laitteen jännitemerkintä vastaa paikallista
verkkojännitettä, ennen kuin liität laitteen pistorasiaan.
C
2 Poista lämpösuojus pohjasta (vain mallit GC4243). Poista
pohjassa mahdollisesti oleva tarra tai suojakalvo.
3 Anna höyryraudan lämmetä korkeimpaan lämpötilaan ja liikuta
sitä sitten kostean kankaan päällä useita minuutteja,jotta
mahdolliset jäämät lähtevät irti.
B
Höyryraudasta voi ensimmäisellä käyttökerralla tulla hieman käryä.
Tämä loppuu kuitenkin nopeasti.
37SUOMI 37
Page 38

Käyttöönotto
Vesisäiliön täyttö
Älä upota höyryrautaa veteen.
1 Irrota pistotulppa pistorasiasta.
C
2 Aseta höyrynvalitsin asentoon O (= ei höyryä).
3 Avaa täyttöaukon korkki.
4 Kallista höyryrautaa taaksepäin.
C
5 Täytä vesisäiliö täyttöaukon kautta vesijohtovedellä.
Täytä vesisäiliö enintään MAX-merkkiin asti.
◗ Jos paikallinen vesijohtovesi on hyvin kovaa,suosittelemme veteen
sekoitettavaksi puolet tislattua vettä tai käyttämään pelkästään
tislattua vettä.
Älä laita vesisäiliöön lisäaineita, etikkaa, tärkkiä tai kemiallisesti
puhdistettua vettä.
C
6 Sulje täyttöaukon korkki.Kuulet napsahduksen.
Lämpötilan valinta
C
1 Vain mallit GC4243:poista lämpösuojus.
Älä pidä lämpösuojusta pohjan päällä silityksen aikana.
2 Aseta höyryrauta pystyasentoon.
SUOMI38
Page 39
39
C
3 Aseta haluttu silityslämpötila kääntämällä lämpötilanvalitsin
oikeaan asentoon.
- Varmista sopiva silityslämpötila vaatteen silitysohjeesta.
- 1 Tekokuidut (esim. akryyli, nailon, polyamidi, polyesteri)
- 1 Silkki
- 2 Villa
- 3 Puuvilla, pellava
- Jos et tiedä mistä materiaal(e)ista vaate on tehty,kokeile varovasti
silittää jostain sellaisesta kohdasta, joka ei vaatetta käytettäessä näy
päällepäin.
- Silkki, villa ja tekokuidut: silitä nurjalta puolelta kiiltämisen välttämiseksi.
Vältä suihkaustoiminnon käyttämistä, ettei vaatteeseen tule läikkiä.
- Aloita silittäminen matalinta lämpötilaa vaativista tekstiileistä, kuten
tekokuidut.
4 Ty önnä pistotulppa pistorasiaan.
C
5 Kun keltainen merkkivalo on sammunut, odota hetki ennen
kuin alat silittää.
Keltainen merkkivalo syttyy aina välillä silittämisen aikana.
Käyttö
Höyrysilitys
1 Varmista että vesisäiliössä on riittävästi vettä.
C
1 Valitse sopiva höyryasetus.Varmista,että valitsemasi
höyryasetus sopii valitulle silityslämpötilalle:
- 1 - 3 kohtalaisesti höyryä (lämpötila-asetukset 2 - 3)
- 4 - 6 runsaasti höyryä (lämpötila-asetukset 2 - MAX)
Katso kohtaa 'Lämpötilan valinta'.
B
Höyryrauta alkaa tuottaa höyryä, heti kun asetettu lämpötila on
saavutettu.
Silittäminen ilman höyryä
C
1 Aseta höyrynvalitsin asentoon O (= ei höyryä).
2 Valitse suositeltu silityslämpötila.
Katso kohtaa 'Lämpötilan valinta'.
SUOMI
N
Y
L
O
N
N
Y
L
O
N
S
S
I
O
L
K
I
E
L
A
W
I
N
O
E
O
L
N
N
I
E
L
N
I
L
N
O
T
O
N
C
O
T
T
O
C
Page 40

40
Toiminnot
Suihkutus
Voit käyttää suihkutusta itsepäisten laskosten poistamiseen kaikissa
lämpötiloissa.
Varmista että vesisäiliössä on riittävästi vettä.
C
1 Kostuta silitettävä vaate painamalla suihkutuspainiketta useita
kertoja.
Höyrysuihkaus
Voimakas höyrysuihkaus auttaa poistamaan itsepäiset laskokset.
Höyrysuihkausta voidaan käyttää vain lämpötila-asetuksilla 2-MAX.
C
1 Paina ja vapauta höyrysuihkauspainike.
Tippalukko
Tässä höyryraudassa on tippalukko: höyryrauta lakkaa automaattisesti
tuottamasta höyryä, kun lämpötila on liian matala, ettei pohjasta ala
tippua vettä. Kun tämä tapahtuu, saatat kuulla äänen.
Höyrysuihkaus pystyasennossa
C
1 Höyrysuihkausta voidaan käyttää myös pidettäessä höyryrautaa
pystyasennossa.
Älä koskaan suuntaa höyryä ihmisiä päin.
Automaattinen anti-calc-toiminto
C
1 Sisäänrakennettu anti-calc-järjestelmä vähentää kalkin
muodostusta ja takaa höyryraudalle pidemmän käyttöiän.
SUOMI
Page 41

41
Elektroninen turvakatkaisin (vain mallit GC4243, GC4238 ja
GC4233)
C
1 Elektroninen turvakatkaisin katkaisee höyryraudan toiminnan
automaattisesti, jos sitä ei ole vähään aikaan liikuteltu.
◗ Punainen automaattikatkaisun merkkivalo alkaa vilkkua osoituksena
siitä,että turvakatkaisin on katkaissut höyryraudan toiminnan.
Höyryraudan uudelleen lämmittäminen:
- Ota höyryrauta käteen tai liikuta sitä hieman.
- Punainen automaattikatkaisun merkkivalo sammuu. Jos pohjan
lämpötila on laskenut asetetun silityslämpötilan alle, keltainen
merkkivalo syttyy.
- Jos keltainen merkkivalo syttyy,kun liikutat höyryrautaa, odota, että se
sammuu, ennen kuin jatkat silittämistä.
- Jos keltainen merkkivalo ei syty,kun liikutat höyryrautaa, pohjan
lämpötila on edelleen oikea ja höyryrauta on valmis käyttöön.
Varoitusvalo
C
◗ Vain mallit GC4243 ja GC4238:
- Höyryraudassa on sininen varoitusvalo.
- Sininen varoitusvalo palaa niin kauan kuin höyryrauta on liitettynä
pistorasiaan, vaikka turvakatkaisin olisi katkaissut höyryraudan
toiminnan.
Puhdistus ja hoito
Calc-clean-toiminnon käyttö
Calc-clean-toimintoa voidaan käyttää kalkin ja epäpuhtauksien
poistamiseen.
◗ Käytä calc-clean-toimintoa kerran kahdessa viikossa.Jos paikallinen
vesijohtovesi on hyvin kovaa (eli kalkkihiutaleita tulee pohjasta
silityksen aikana), calc-clean-toimintoa tulisi käyttää useammin.
1 Aseta höyrynvalitsin asentoon O.
2 Kaada vesisäiliöön vettä MAX-merkkiin asti.
Älä laita vesisäiliöön etikkaa tai muita kalkinpoistoaineita.
SUOMI
Page 42

42
C
3 Valitse korkein silityslämpötila.
4 Ty önnä pistotulppa pistorasiaan.
5 Irrota pistotulppa pistorasiasta, kun keltainen merkkivalo on
sammunut.
C
6 Pidä höyryrautaa pesualtaan päällä, paina jatkuvasti calc-clean-
painiketta ja heiluta höyryrautaa edestakaisin.
B
Pohjasta alkaa tulla höyryä ja kiehuvaa vettä. Epäpuhtaudet ja
kalkkihiutaleet (jos niitä on) huuhtoutuvat pois.
7 Vapauta calc-clean-painike, kun kaikki vesi on käytetty
vesisäiliöstä.
Toista sama, jos höyryraudassa on vielä paljon epäpuhtauksia.
Calc-clean-toimenpiteen jälkeen
- Liitä pistotulppa pistorasiaan ja anna höyryraudan lämmetä, niin että
pohja kuivuu.
- Irrota pistotulppa pistorasiasta, kun asetettu silityslämpötila on
saavutettu.
- Liikuta kuumaa höyryrautaa hitaasti käytetyn kankaan päällä, niin että
vesitahrat häviävät pohjasta.
- Anna höyryraudan jäähtyä ennen säilytystä.
Silittämisen jälkeen
1 Irrota pistotulppa pistorasiasta ja anna höyryraudan jäähtyä.
2 Pyyhi kalkkihiutaleet ja muut tahrat pois pohjasta kostealla
liinalla ja nestemäisellä puhdistusaineella.
3 Puhdista höyryraudan yläosa kostealla liinalla.
C
4 Huuhtele vesisäiliö säännöllisesti vedellä.Tyhjennä vesisäiliö
puhdistuksen jälkeen.
SUOMI
E
N
N
I
L
N
I
L
N
N
Y
L
Y
O
L
O
N
N
N
O
T
N
T
O
T
O
O
C
C
L
E
O
N
I
O
A
L
W
E
I
O
S
K
L
I
S
Page 43

Säilytys
1 Irrota pistotulppa pistorasiasta ja aseta höyrynvalitsin asentoon
O.
2 Tyhjennä vesisäiliö.
C
3 a) Anna höyryraudan jäähtyä.Kierrä liitosjohto laitteen
ympärille ja kiinnitä johdonpää pidikkeellä.
b) Säilytä tyhjennetty höyryrauta aina vaaka-asennossa suojuksen päällä
tukevalla alustalla.
C
4 Lämpösuojus (vain mallit GC4243)
a) Aseta höyryrauta lämpösuojuksen päälle.
Älä käytä lämpösuojusta silityksen aikana.
b) Kierrä liitosjohto johtokelan ympärille.
c) Säilytä höyryrauta lämpösuojuksen kanssa vaaka-asennossa vakaalla
alustalla.
Ympäristöasiaa
C
◗ Älä hävitä loppuun käytettyä laitetta tavallisen kotitalousjätteen
mukana, vaan toimita se asianmukaiseen keräyspisteeseen. Näin
autat suojelemaan ympäristöä.
Takuu & huolto
Jos haluat lisätietoa tai jos laitteen kanssa tulee ongelmia, katso Philipsin
www-sivuja osoitteesta www.philips.com tai ota yhteys Philipsin
asiakaspalveluun (puhelinnumero löytyy takuulehtisestä).Voit myös
kääntyä lähimmän Philips-kauppiaan puoleen tai ottaa suoraan yhteyden
Hollantiin Philips Domestic Appliances and Personal Care BV:n Serviceosastoon.
43SUOMI
Page 44

Ratkaisu
Tarkasta liitosjohto, pistotulppa ja
pistorasia.
Täytä vesisäiliö (katso Vesisäiliön
täyttö).
Aseta höyrynvalitsin asentoon 1-6
(katso Höyrysilitys).
Valitse höyrysilitykseen sopiva
silityslämpötila (2 - MAX). Aseta
höyryrauta pystyyn ja odota,kunnes
keltainen merkkivalo on sammunut,
ennen kuin aloitat silittämisen.
Jatka silittämistä vaaka-asennossa ja
odota hetki, ennen kuin taas käytät
höyrysuihkausta (pystyasennossa).
Valitse höyrysilitykseen sopiva
silityslämpötila (2 - MAX). Aseta
höyryrauta pystyyn ja odota,kunnes
keltainen merkkivalo on sammunut,
ennen kuin aloitat silittämisen.
Sulje korkki kunnolla. Kuulet
napsahduksen.
Huuhtele vesisäiliö äläkä laita
vesisäiliöön mitään lisäaineita.
Käytä calc-clean-toimintoa muutama
kerta (katso Calc-clean-toiminnon
käyttö).
Liikuta höyryrautaa hieman, niin
turvakatkaisimen toiminta lakkaa.
Merkkivalo lakkaa vilkkumasta.
Tarkasta liitosjohto, pistotulppa ja
pistorasia.
Mahdollinen syy(t)
Virtaa ei tule.
Vesisäiliössä ei ole tarpeeksi vettä.
Höyrynvalitsin on asennossa O.
Höyryrauta ei ole tarpeeksi kuuma.
Höyrysuihkausta (pystyasennossa) on
käytetty liian usein hyvin lyhyen ajan
kuluessa.
Höyryrauta ei ole tarpeeksi kuuma
ja/tai tippalukko on katkaissut
höyryntulon.
Täyttöaukon korkkia ei ole suljettu
kunnolla.
Vesisäiliöön on kaadettu lisäainetta.
Olet käyttänyt kovaa vettä,mikä on
aiheuttanut kalkkihiutaleiden
muodostumisen pohjan sisälle.
Turvakatkaisin on katkaissut
höyryraudan toiminnan (katso
Turvakatkaisin).
Virtaa ei tule.
Ongelma
Höyryrauta on liitetty pistorasiaan,
mutta pohja on kylmä.
Höyryraudasta ei tule lainkaan höyryä.
Höyrysuihkaus (pystyasennossa) ei
toimi.
Vesipisaroita tekstiilillä.
Pohjasta tulee silityksen aikana
kalkkihiutaleita ja muita epäpuhtauksia.
Punainen merkkivalo vilkkuu (vain mallit
GC4243, GC4238 ja GC4233).
Höyryrauta on liitetty pistorasiaan,
mutta sininen varoitusvalo ei pala (vain
mallit GC4243 ja GC4238).
SUOMI44
Tarkistusluettelo
Tähän kohtaan on koottu tavallisimmat ongelmat, joita höyryrautaa
käytettäessä saattaa tulla esiin. Katso tarkemmat ohjeet vastaavista
tekstikohdista. Ellei ongelma ratkea, ota yhteys Philipsin asiakaspalveluun.
Page 45

Vigtigt
Af hensyn til sikkerheden anbefales det at læse denne
betjeningsvejledning grundigt igennem og se på illustrationerne, før
apparatet tages i brug første gang.
◗ Inden apparatet tages i brug første gang, kontrolleres det, at
spændingsangivelsen på typeskiltet svarer til den lokale
netspænding.
◗ Apparatet må kun sluttes til en stikkontakt med jordforbindelse.
◗ Brug ikke apparatet,hvis stik, netledning eller selve apparatet viser
synlige tegn på beskadigelse, hvis apparatet har været tabt på
gulvet, eller hvis det er utæt.
◗ Efterse jævnligt netledningen for tegn på skader.
◗ Hvis netledningen beskadiges, må den kun udskiftes af Philips, et
autoriseret Philips-serviceværksted eller af en tilsvarende
kvalificeret fagmand for at undgå enhver risiko.
◗ Apparatet skal altid være under opsyn, når det er tilsluttet strøm.
◗ Strygejern og en eventuel holder må aldrig kommes ned i vand.
◗ Hold apparatet uden for børns rækkevidde.
◗ Strygesålen kan blive utroligt varm og forårsage brandsår ved
berøring.
◗ Undgå, at netledningen kommer i kontakt med den varme
strygesål.
◗ Når du er færdig med at stryge, rengør apparatet, fylder vand i
eller tømmer vandtanken, og når du forlader strygejernet - selv
for et kort øjeblik - skal dampvælgeren altid sættes i stilling O,
strygejernet stilles på højkant, og stikket tages ud af stikkontakten.
◗ Strygejern og en eventuel holder skal altid placeres og anvendes
på et stabilt, plant og vandret underlag.
◗ Kom aldrig parfume,eddike, stivelse, afkalkningsmiddel eller andre
former for kemikalier i vandtanken.
◗ Dette apparat er udelukkende beregnet til husholdningsbrug.
Inden strygejernet tages i brug første gang
1 Før apparatet tages i brug kontrolleres det, at den indikerede
spændingsangivelse på apparatet svarer til den lokale
netspænding.
C
2 Tag den varmebestandige beskyttelsessål af (kun type GC4243)
og fjern eventuelle klæbemærker/beskyttelsesfolie fra
strygesålen.
3 Varm først strygejernet op til maximum temperatur og stryg
derefter et fugtigt stykke klæde i et par minutter for at fjerne
eventuelle urenheder fra strygesålen.
B
Første gang strygejernet tages i brug, kan der komme lidt røgudvikling.
Dette varer dog kun et øjeblik.
45DANSK 45
Page 46

Klargøring
Vandpåfyldning
Nedsænk aldrig strygejernet i vand.
1 Tag stikket ud af stikkontakten.
C
2 Sæt dampvælgeren i stilling 0 (= ingen damp).
3 Luk det lille dæksel til vandtanken op.
4 Vip strygejernet lidt bagover.
C
5 Fyld vandtanken til max. niveau med vand fra vandhanen ved
hjælp af det medfølgende bæger.
Fyld aldrig mere vand i end til MAX-markeringen.
◗ Hvis postevandet i dit område er meget hårdt, anbefales det at
bruge lige dele postevand og destilleret vand eller udelukkende
destilleret vand.
Kom aldrig tilsætningsstoffer, eddike, stivelse eller kemisk afkalket vand i
vandtanken.
C
6 Luk det lille dæksel til vandtanken. Du hører et "klik".
Temperaturindstilling
C
1 Kun type GC4243:fjern beskyttelsessålen.
Beskyttelsessålen må ikke sidde på strygesålen under strygningen.
2 Stil strygejernet på højkant.
DANSK46
Page 47

47
C
3 Temperaturskiven drejes til den ønskede temperaturindstilling.
- Følg strygeanvisningen i tøjets mærkning.
- 1 Syntetiske materialer (f.eks. acryl, nylon, polyamid, polyester)
- 1 Silke
- 2 Uld
- 3 Bomuld, linned
- Ved du ikke, hvilken type materiale, der er tale om, må du prøve dig
forsigtigt frem et sted på tøjet, der ikke ses under brug.
- Silke, uld og syntetiske materialer: Stryges på vrangen for at undgå
blanke skjolder. Undlad brug af spray-funktionen for at undgå
pletter/stænk.
- Start med at stryge det tøj, der kræver den laveste temperatur, f.eks.
syntetiske tekstiler.
4 Sæt netstikket i en stikkontakt,som tændes.
C
5 Strygningen kan påbegyndes, et øjeblik efter, at den gule
kontrollampe er slukket.
Den gule kontrollampe vil lyse fra tid til anden under strygningen.
Sådan bruges strygejernet
Dampstrygning
1 Sørg for, at der er tilstrækkeligt med vand i vandtanken.
C
1 Vælg den ønskede dampindstilling og sørg for, at den passer til
den valgte strygetemperatur.
- 1 - 3 for moderat dampmængde (temperaturindstillinger fra 2 til
3)
- 4 - 6 for maximal dampmængde (temperaturindstillinger fra 3 til
MAX)
Se afsnittet "Temperaturindstilling"
B
Strygejernet begynder at producere damp, så snart den indstillede
temperatur er nået.
Tørstrygning (uden damp)
C
1 Sæt dampvælgeren i stilling 0 (= ingen damp).
2 Vælg den anbefalede strygetemperatur.
Se afsnittet "Temperaturindstilling"
DANSK
N
Y
L
O
N
N
Y
L
O
N
S
S
I
O
L
K
I
E
L
A
W
I
N
O
E
O
L
N
N
I
E
L
N
I
L
N
O
T
O
N
C
O
T
T
O
C
Page 48

Ekstra funktioner
Spray
Spray-funktionen bruges til at fjerne vanskelige folder ved alle
temperaturer.
Sørg for, at der er tilstrækkeligt med vand i vandtanken.
C
1 Tryk et par gange på spray-knappen for at fugte strygetøjet.
Dampskud
Et kraftigt damskud gør det nemmere at glatte ekstra besværlige folder
ud.
Dampskuds-funktionen kan kun anvendes ved temperaturindstillinger
mellem 2 og MAX.
C
1 Tryk og slip dampskuds-knappen.
Drypstop
Strygejernet er udstyret med drypstop-funktion: Strygejernet afbryder
automatisk dampproduktionen ved for lave temperaturer for at undgå,
at der drypper vand fra strygesålen.
Vertikalt dampskud
C
1 Dampskuds-funktionen kan også anvendes, mens strygejernet
holdes lodret.
Ret aldrig dampstrålen direkte mod mennesker.
Automatisk anti-kalk funktion .
C
1 Det indbyggede anti-kalk system reducerer kalkaflejringerne og
sikrer dermed strygejernet en længere levetid.
48 DANSK
Page 49

49
Elektronisk sikkerhedsafbryder (kun type GC4243, GC4238
og GC4233)
C
1 Den elektroniske sikkerhedsafbryder slukker automatisk for
strygejernet, hvis det ikke har været i bevægelse et stykke tid.
◗ Den røde kontrollampe begynder at blinke for at indikere, at den
automatiske sikkerhedsafbryder har slukket for strygejernet.
Genopvarmning af strygejernet:
- Løft strygejernet og bevæg det lidt.
- Den røde kontrollampe slukker. Hvis strygesålens temperatur er
lavere end den indstillede strygetemperatur, vil den gule kontrollampe
lyse.
- Hvis den gule kontrollampe lyser, efter strygejernet har været i
bevægelse, skal du vente med at fortsætte strygningen, til den slukker
igen.
- Lyser den gule kontrollampe ikke, efter strygejernet har været i
bevægelse, betyder det, at strygesålen har den rette temperatur, og at
strygejernet er klar til brug.
Advarselslys
C
◗ Kun type GC4243 og GC4238:
- Strygejernet er udstyret med et blåt advarselslys.
- Det blå advarselslys lyser konstant, når der er sluttet strøm til
strygejernet, også selvom det er slukket af sikkerhedsafbryderen.
Rengøring og vedligeholdelse
Calc-Clean funktion
Brug Calc-Clean funktionen til fjernelse af kalkpar tikler og urenheder.
◗ Det anbefales at bruge Calc-Clean funktionen et par gange om
måneden. Er vandet i dit område meget hårdt (der kommer
kalkpartikler ud fra strygesålen under strygningen),skal den bruges
oftere.
1 Sæt dampvælgeren i stilling 0.
DANSK
Page 50

50
2 Fyld vandtanken op til MAX-markeringen.
Kom aldrig eddike eller andre former for afkalkningsmidler i
vandtanken.
C
3 Vælg maximum strygetemperatur.
4 Sæt netstikket i en stikkontakt,som tændes.
5 Tag stikket ud af stikkontakten, når den gule kontrollampe
slukker.
C
6 Hold strygejernet ind over vasken, tryk på og hold Calc-Clean
knappen nede samtidig med, at strygejernet rystes lidt frem og
tilbage.
B
Der kommer nu damp og kogende vand ud fra strygesålen. Eventuelle
urenheder og kalkpartikler sprøjtes med ud.
7 Når der ikke er mere vand i vandtanken, slippes Calc-Clean
knappen.
Gentag - om nødvendigt - Calc-Clean processen.
Efter Calc-Clean processen
- Sæt stikket i stikkontakten og varm strygejernet op for at tørre
strygesålen.
- Tag stikket ud af stikkontakten, når strygejernet har nået den
indstillede strygetemperatur.
- Bevæg det varme strygejern henover et gammelt stykke stof, så
eventuelle vandstænk fjernes fra strygesålen.
- Lad strygejernet afkøle helt, inden det stilles væk.
Efter brug
1 Tag stikket ud af stikkontakten og lad strygejernet afkøle.
2 Tør eventuelle kalkpartikler og urenheder af strygesålen med
en fugtig klud og lidt ikke-ridsende (flydende)
rengøringsmiddel.
3 Den øverste del af strygejernet rengøres med en fugtig klud.
C
4 Rens den indvendige del af vandtanken med jævne mellemrum
ved at fylde tanken med vand,ryste strygejernet og hælde
vandet ud igen.
DANSK
E
N
N
I
L
N
I
L
N
N
Y
L
Y
O
L
O
N
N
S
N
O
T
N
T
O
T
O
O
C
C
L
E
O
N
I
O
A
L
W
E
I
O
K
L
I
S
Page 51
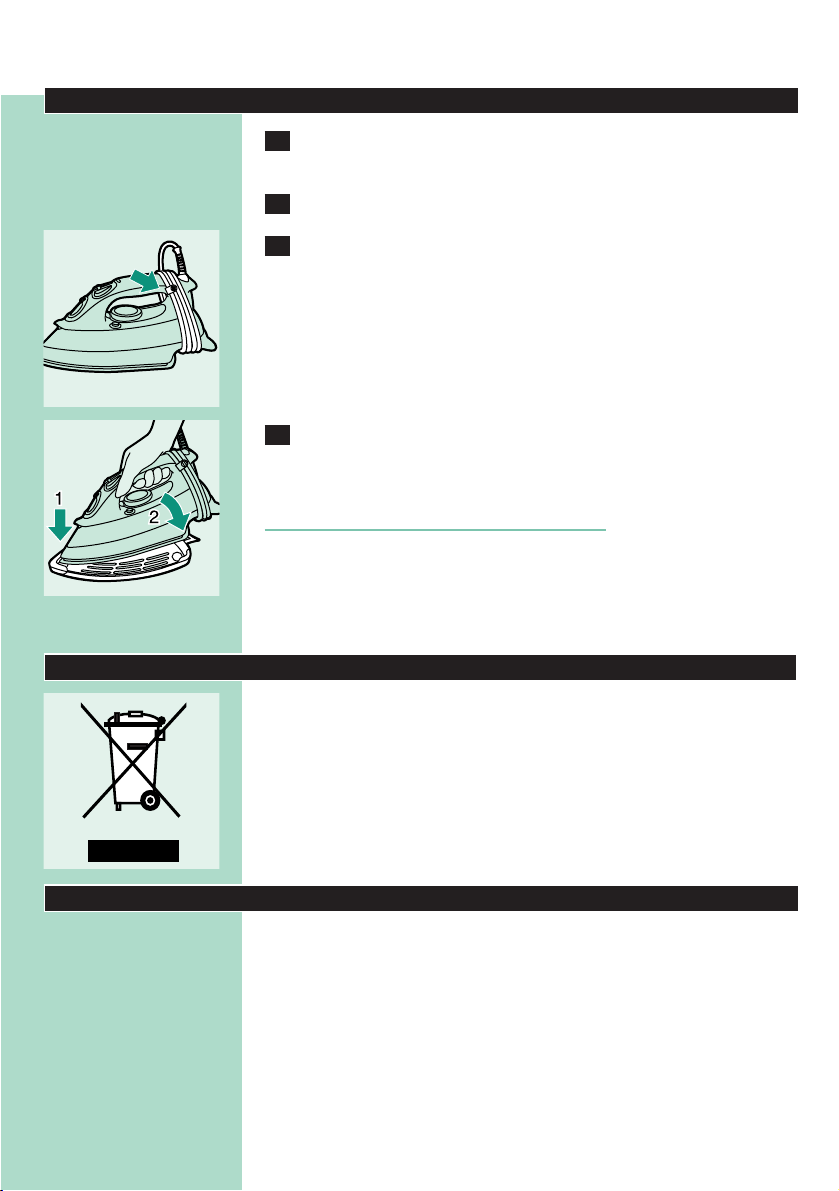
51
Opbevaring
1 Tag stikket ud af stikkontakten og sæt dampvælgeren i stilling
O.
2 Tøm vandtanken for eventuelt resterende vand.
C
3 a) Lad strygejernet køle af. Rul netledningen op omkring den
bageste del og sæt den fast med ledningsclipsen.
b) Opbevar altid strygejernet uden vand i, i opretstående stilling på et
fast underlag og beskyt eventuelt strygesålen med et klæde.
C
4 Beskyttelsessål (kun type GC4243)
a) Stil strygejernet på beskyttelsessålen.
Brug ikke beskyttelsessålen under strygningen.
b) Rul netledningen op omkring ledningsopbevaringen.
c) Opbevar strygejernet med beskyttelsessål i lodretstående stilling på
et stabilt underlag.
Miljøbeskyttelse
C
◗ Smid ikke apparatet ud sammen med det almindelige
husholdningsaffald, når det til sin tid kasseres. Indlevér det istedet
på det kommunale indsamlingssted for genbrugsmaterialer.
Derved er du med til at beskytte miljøet.
Reklamationsret & service
For alle yderligere oplysninger eller ved eventuelle problemer med
apparatet henvises venligst til Philips hjemmeside på adressen
www.philips.com eller det lokale Philips Kundecenter (telefonnumre
findes i vedlagte "World-Wide Guarantee" folder). Hvis der ikke findes
et kundecenter i dit land, bedes du venligst kontakte din lokale Philips
forhandler eller Serviceafdelingen i Philips Domestic Appliances and
Personal Care BV. Dette apparat overholder de gældende EU-direktiver
vedrørende sikkerhed og radiostøj.
DANSK
Page 52

52
Løsning
Kontrollér netledning, stik og
stikkontakt.
Fyld vandtanken (se afsnittet
"Vandpåfyldning").
Sæt dampvælgeren i en stilling mellem
1 og 6 (se afsnittet "Dampstrygning").
Vælg en strygetemperatur, der passer
til dampstrygning (2 til MAX). Stil
strygejernet på højkant og vent med at
påbegynde strygningen, til den gule
kontrollampe slukker
Fortsæt str ygningen i vandret position
og vent lidt, inden en af dampskudsfunktionerne bruges igen.
Vælg en strygetemperatur, der passer
til dampstrygning (2 til MAX). Stil
strygejernet på højkant og vent med at
påbegynde strygningen, til den gule
kontrollampe slukker
Luk låget ordentligt. Du hører et "klik".
Rens vandtanken og lad være med at
komme noget i vandtanken.
Brug Calc-Clean funktionen et par
gange (se afsnittet "Calc-Clean
funktion").
Bevæg strygejernet lidt for at deaktivere sikkerhedsafbryderen.
Kontrollampen holder op med at
blinke.
Kontrollér netledning, stik og
stikkontakt.
Mulig(e) årsåg(er)
Der er et problem med tilslutningen.
Der er ikke nok vand i vandtanken.
Dampvælgeren står i stilling O.
Strygejernet er ikke varmt nok.
Den vertikale og/eller vandrette
dampskuds-funktion er brugt for tit
indenfor en meget kort periode.
Strygejernet er ikke varmt nok og/eller
drypstop-funktionen er aktiveret.
Det lille dæksel til vandtanken er ikke
ordentligt lukket.
Der er kommet et tilsætningsstof i
vandtanken.
Der er brugt hårdt vand, som har
dannet kalkaflejringer på strygesålens
inderside.
Sikkerhedsafbryderen har slukket
strygejernet (se afsnittet
"Sikkerhedsafbryder").
Der er et problem med tilslutningen.
Problem
Stikket sidder i stikkontakten, men
strygesålen er kold.
Strygejernet producerer ingen damp.
Dampskuds-funktionerne virker ikke.
Der drypper vand på tøjet.
Der drysser små kalkflager og
urenheder ud fra strygesålen.
Den røde kontrollampe blinker (kun
type GC4243, GC4238 og
GC4233).
Stikket sidder i stikkontakten, men
det blå advarselslys er slukket (kun
type GC4243 og GC4238).
Fejlsøgning
Dette afsnit opsummerer de mest almindelige problemer, der kan
forekomme ved brug af strygejernet. Læs venligst de enkelte afsnit for
yderligere oplysninger.Har du brug for yderligere hjælp og vejledning,
henvises venligst til nærmeste Philips Kundecenter.
DANSK
Page 53

535455
Page 54

Page 55

Page 56

u
4239 000 52404
www.philips.com
 Loading...