Steam Iron
GC2652, GC2650, GC2640, GC2620
GC2560, GC2530, GC2528, GC2522, GC2520, GC2510
1
A |
B |
C |
D |
E |
F |
G |
H |
I
L K J
English 6
Dansk 12
Suomi 18
Indonesia 24
Norsk 30
Svenska 36
GC2652, GC2650, GC2640, GC2620, |
GC2560, GC2530, GC2528, GC2522, GC2520, GC2510 |
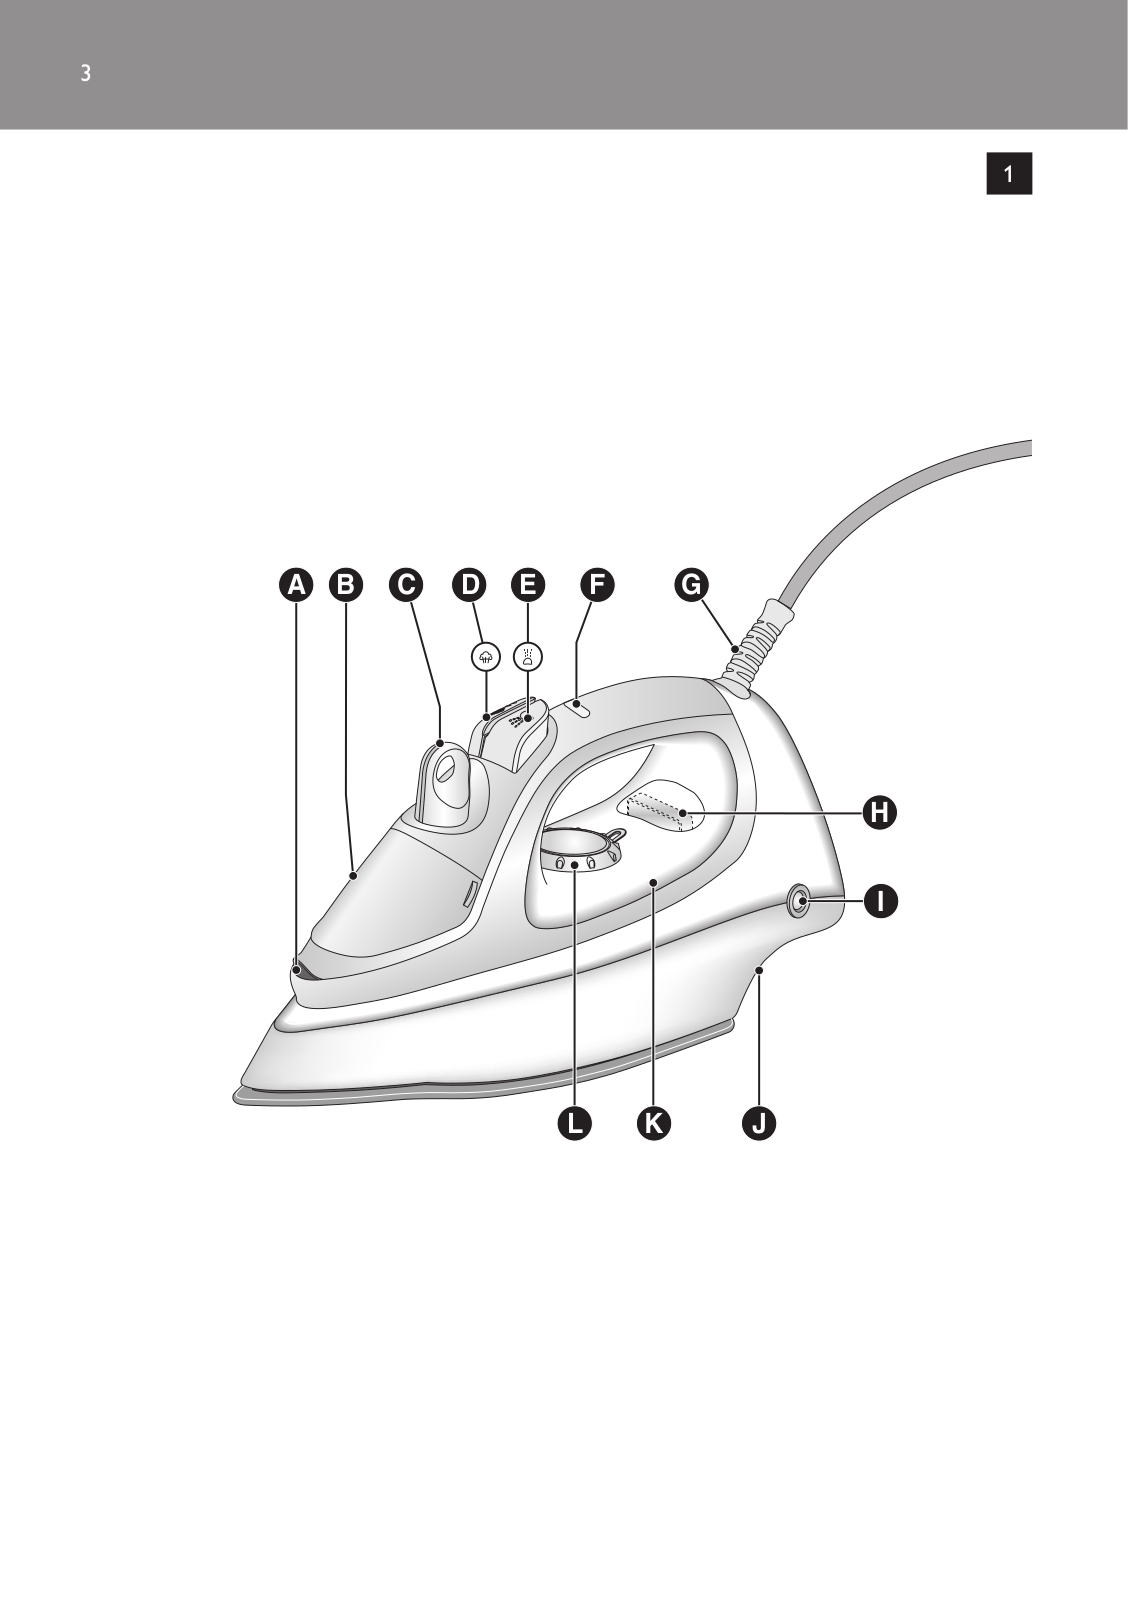
ASpray nozzle
BCap of filling opening
CSteam control
-O = no steam
-l = minimum steam
-; = maximum steam
-1 = Calc-Clean function D Shot-of-steam button 9 E Spray button T
F Automatic shut-off light (GC2560 only) G Mains cord
H Anti-Calc tablet (all types except GC2522 en GC2510) I Temperature light
J Type plate K Water tank
L Temperature dial
Read these instructions for use carefully before using the appliance and save them for future reference.
,Check if the voltage indicated on the type plate corresponds to the local mains voltage before you connect the appliance.
,Only connect the appliance to an earthed wall socket.
, |
Do not use the appliance if the plug, the cord or the appliance itself shows visible damage, or |
if the appliance has been dropped or is leaking. |
,Check the cord regularly for possible damage.
,If the mains cord is damaged, it must be replaced by Philips, a service centre authorised by
Philips or similarly qualified persons in order to avoid a hazard.
,Never leave the appliance unattended when it is connected to the mains.
,Never immerse the iron and the stand, if provided, in water.
,This appliance is not intended for use by persons (including children) with reduced physical, sensory or mental capabilities, or lack of experience and knowledge, unless they have been given supervision or instruction concerning use of the appliance by a person responsible for their safety.
,Children should be supervised to ensure that they do not play with the appliance.
,The soleplate of the iron can become extremely hot and may cause burns if touched.
,Do not allow the cord to come into contact with the soleplate when it is hot.
,When you have finished ironing, when you clean the appliance, when you fill or empty the water tank and also when you leave the iron even for a short while: set the steam control to
position O, put the iron on its heel and remove the mains plug from the wall socket.
,Always place and use the iron and the stand,if provided, on a stable, level and horizontal surface.
,This appliance is intended for household use only.
This Philips appliance complies with all standards regarding electromagnetic fields (EMF). If handled properly and in accordance with the instructions in this instruction manual, the appliance is safe to use according to scientific evidence available today.
English
1Remove the mains plug from the wall socket.
2Set the steam control to position O (= no steam) (Fig. 2).
3Open the cap of the filling opening.
4Tilt the iron and fill the water tank up to maximum level (Fig. 3).
If the tap water in your area is very hard, we advise you to use distilled water. Do not use chemically descaled water.
Do not fill the water tank beyond the MAX indication.
Do not put perfume, vinegar, starch, descaling agents, ironing aids or other chemicals in the water tank.
5Close the cap of the filling opening (‘click’).
,The iron may give off some smoke when you use it for the first time.This will cease after a short while.
1Put the iron on its heel and set the temperature dial to the required ironing temperature by turning it to the appropriate position (Fig. 4).
-Check the laundry care label for the required ironing temperature.
-1 Synthetic fabrics (e.g. acrylic, viscose, polyamide, polyester)
-1 Silk
-2 Wool
-3 Cotton, linen
-If you do not know what kind or kinds of fabric an article is made of, determine the right ironing temperature by ironing a part that will not be visible when you wear or use the article.
-Silk, woollen and synthetic materials: iron the reverse side of the fabric to prevent shiny patches. Avoid using the spray function to prevent stains.
2Put the mains plug in an earthed wall socket.
3When the temperature light has gone out, wait a while before you start ironing.
Note:The temperature light will go on from time to time during ironing.
Make sure that there is enough water in the water tank.
1Set the temperature dial to the recommended position (see section ‘Setting the temperature’).
2 Set the steam control to the appropriate steam position (Fig. 2).
-ç for minimum steam (temperature settings 2 and 3).
-é for maximum steam (temperature settings 3 to MAX).
Note:The iron will start steaming as soon as the set temperature has been reached.
Water may leak from the soleplate if the set temperature is too low (MIN to 2).
English
1Set the steam control to position O (= no steam).
2Set the temperature dial to the recommended position (see section ‘Setting the temperature’).
You can use the spray function to remove stubborn creases at any temperature
1Make sure that there is enough water in the water tank.
2Press the spray button several times to moisten the article to be ironed (Fig. 5).
A powerful shot of steam helps to remove very stubborn creases.
The shot-of-steam function only works at temperature settings between 2 and MAX.
1Press and release the shot-of-steam button (Fig. 6).
1The shot-of-steam function can also be used when you are holding the iron in vertical position.This is useful for removing creases from hanging clothes, curtains, etc (Fig. 7).
Never direct the steam at people.
This iron is equipped with a drip stop function: the iron automatically stops producing steam when the temperature is too low to prevent water from dripping out of the soleplate.When this happens you will hear a click.
The electronic shut-off function automatically switches the heating element off if the iron has not been moved for a while.
,The automatic shut-off light starts blinking to indicate that the heating element has been
switched off (Fig. 8).
To let the iron heat up again, pick the iron up or move it slightly.The automatic shut-off light goes out.
1 If the temperature light goes on, wait for it to go out before you start ironing.
2If the temperature light does not go on, the iron is ready for use.
,All types except GC2510:The Anti-Calc tablet prevents scale from clogging the steam vents. The tablet is constantly active and does not need to be replaced (Fig. 9).
,The Calc-Clean function removes the scale particles.
Use the Calc-Clean function once every two weeks. If the water in your area is very hard (i.e. when flakes come out of the soleplate during ironing), the Calc-Clean function should be used more frequently.
1 Set the steam control to position O.
English
2 Fill the water tank to the maximum level.
Do not pour vinegar or other descaling agents into the water tank..
3Set the temperature dial to MAX (Fig. 10).
4Put the plug in the wall socket.
5Unplug the iron when the temperature light has gone out.
6Hold the iron over the sink and set the steam control to the Calc-Clean position (1). The steam control will spring up slightly.
7Pull the steam control upwards and remove it (Fig. 11).
8Hold the iron over the sink and move it to and fro (Fig. 12).
Note:Steam and boiling water will come out of the soleplate.Impurities and scale (if any) will be flushed out.
9 Use vinegar to remove scale, if any, from the steam control needle (Fig. 13). Do not bend or damage the steam control needle.
10Put the steam control back into the iron by inserting the point of the needle exactly in the centre of the hole and by fitting the small projection on the side of the needle into the slot.
Press down the steam control while turning it to position O (Fig. 14).
11Repeat the Calc-Clean process if the iron still contains a lot of impurities.
1Put the plug in the wall socket and let the iron heat up to allow the soleplate to dry.
2Unplug the iron when the temperature light has gone out.
3Move the iron gently over a piece of used cloth to remove any water stains that may have formed on the soleplate.
1Set the steam control to position O, remove the plug from the wall socket and let the iron cool down.
2Clean the appliance and wipe scale and any other deposits off the soleplate with a damp cloth and a non-abrasive (liquid) cleaner.
Keep the soleplate smooth: avoid hard contact with metal objects.
Never use a scouring pad, vinegar or other chemicals.
3Regularly rinse the water tank with water and empty it after cleaning (Fig. 15).
4Wind the mains cord round the cord storage facility (Fig. 16).
5Always store the iron standing on its heel in a safe and dry place.
,Do not throw the appliance away with the normal household waste at the end of its life, but hand it in at an official collection point for recycling. By doing this you will help to preserve the environment (Fig. 17).
10 English
If you need information or if you have a problem, please visit the Philips website at www.philips.com or contact the Philips Customer Care Centre in your country (you will find its phone number in the worldwide guarantee leaflet). If there is no Customer Care Centre in your country, turn to your local Philips dealer or contact the Service Department of Philips Domestic Appliances and Personal
Care BV.
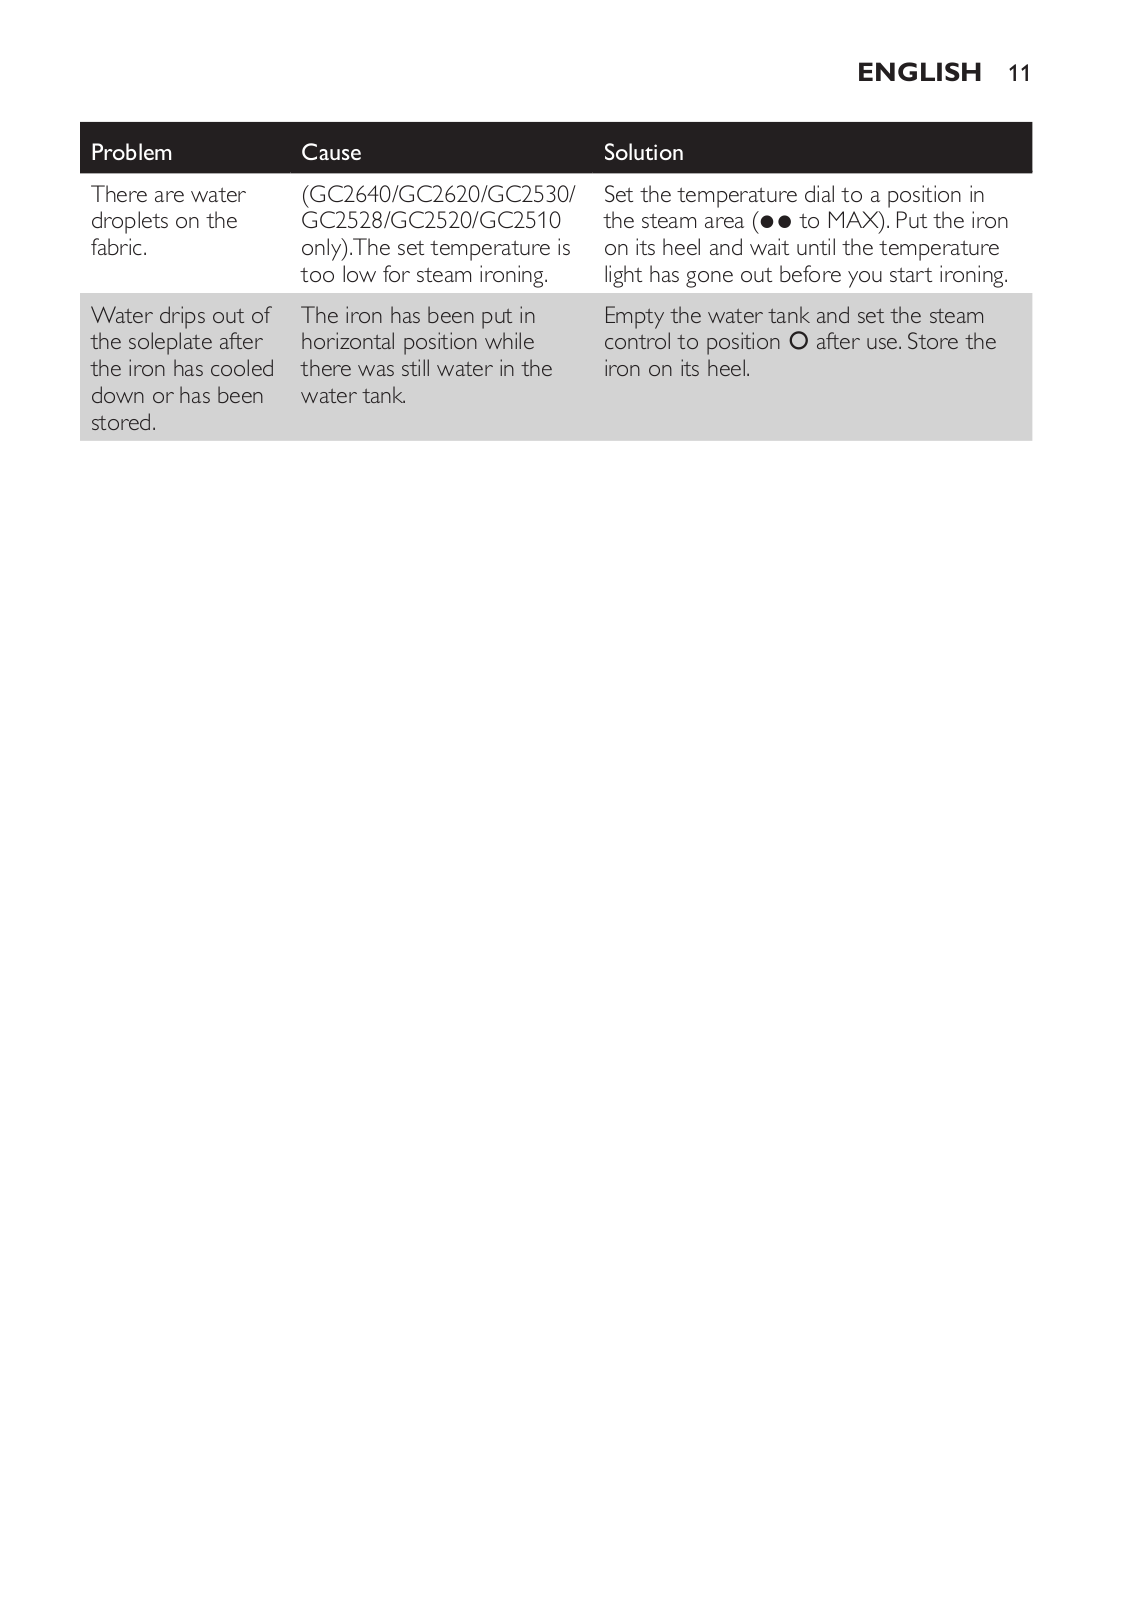
Problem |
Cause |
Solution |
The iron is plugged |
There is a connection |
Check the mains cord, the plug and the wall |
in but the soleplate |
problem. |
socket. |
is cold. |
|
|
No steam.
No shot of steam or no vertical shot of steam (specific types only).
Flakes and impurities come out of the soleplate during ironing.
The red light blinks (GC2560 only).
There are water droplets on the fabric.
The temperature dial has been set to MIN.
There is not enough water in the water tank.
The steam control has been set to position O.
The soleplate is not hot enough and/or the drip stop function (specific types only) has been activated.
The shot-of-steam function has been used too often within a very short period.
The soleplate is not hot enough.
Hard water forms flakes inside the soleplate.
The automatic shut-off function has been activated (see chapter ‘Features’, section ‘Automatic shut-off’).
The cap of the filling opening has not been closed properly.
Set the temperature dial to the required position.
Fill the water tank (see chapter ‘Preparing for use’, section ‘Filling the water tank’).
Set the steam position to ç or é (see chapter ‘Using the appliance’, section ‘Steam ironing’).
Set the temperature dial to a position in the steam area (2 to MAX). Put the iron on its heel and wait until the temperature light has gone out before you start ironing.
Continue ironing in horizontal position and wait a while before using the shot-of-steam function again.
Set the temperature dial to a position in the steam area (2 to MAX). Put the iron on its heel and wait until the temperature light has gone out before you start ironing.
Use the Calc-Clean function a few times (see chapter ‘Cleaning and maintenance’, section ‘Calc-Clean function’).
Pick the iron up or move it slightly to deactivate the automatic shut-off function. The red light stops blinking.
Press onto the cap until you hear a click.
|
|
English 11 |
Problem |
Cause |
Solution |
There are water |
(GC2640/GC2620/GC2530/ |
Set the temperature dial to a position in |
droplets on the |
GC2528/GC2520/GC2510 |
the steam area (2 to MAX). Put the iron |
fabric. |
only).The set temperature is |
on its heel and wait until the temperature |
|
too low for steam ironing. |
light has gone out before you start ironing. |
Water drips out of |
The iron has been put in |
Empty the water tank and set the steam |
the soleplate after |
horizontal position while |
control to position O after use. Store the |
the iron has cooled |
there was still water in the |
iron on its heel. |
down or has been |
water tank. |
|
stored. |
|
|
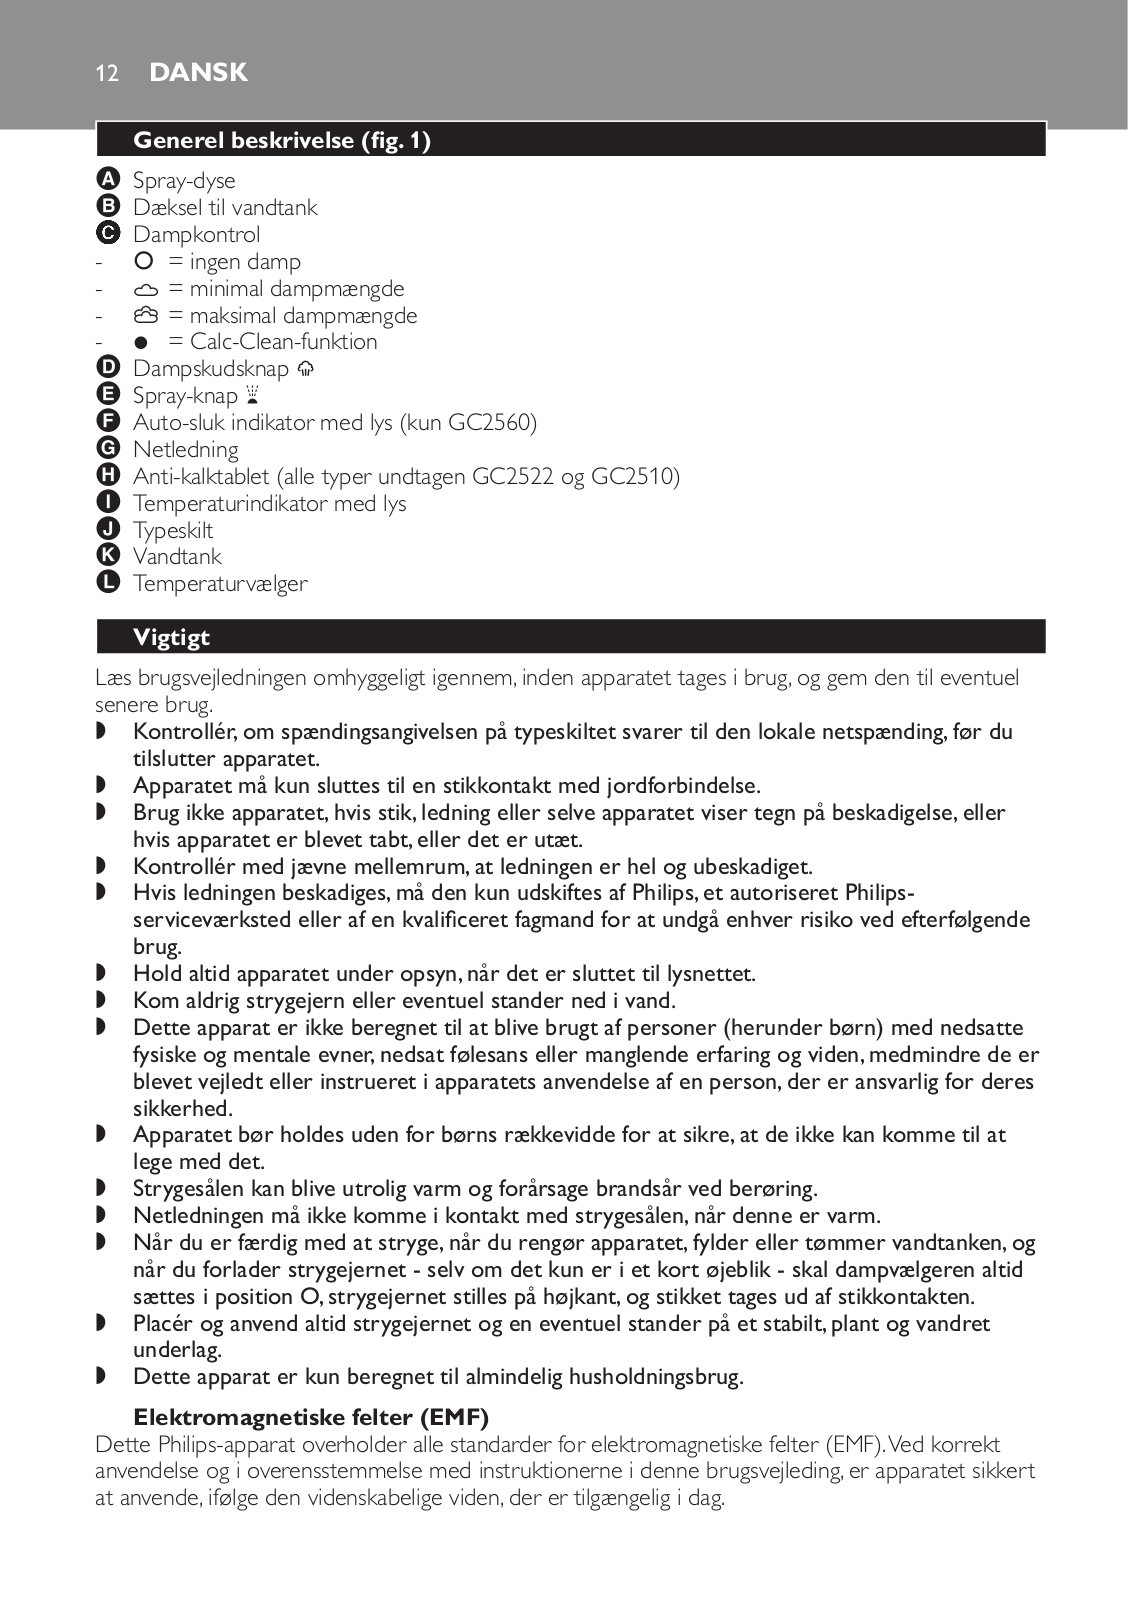
Generel beskrivelse (fig.1)
ASpray-dyse
BDæksel til vandtank
CDampkontrol
-O = ingen damp
-l = minimal dampmængde
-; = maksimal dampmængde
-1 = Calc-Clean-funktion D Dampskudsknap 9
E Spray-knap T
F Auto-sluk indikator med lys (kun GC2560) G Netledning
H Anti-kalktablet (alle typer undtagen GC2522 og GC2510) I Temperaturindikator med lys
J Typeskilt K Vandtank
L Temperaturvælger
Læs brugsvejledningen omhyggeligt igennem, inden apparatet tages i brug, og gem den til eventuel senere brug.
,Kontrollér, om spændingsangivelsen på typeskiltet svarer til den lokale netspænding, før du tilslutter apparatet.
,Apparatet må kun sluttes til en stikkontakt med jordforbindelse.
,Brug ikke apparatet, hvis stik, ledning eller selve apparatet viser tegn på beskadigelse, eller hvis apparatet er blevet tabt, eller det er utæt.
,Kontrollér med jævne mellemrum, at ledningen er hel og ubeskadiget.
,Hvis ledningen beskadiges, må den kun udskiftes af Philips, et autoriseret Philipsserviceværksted eller af en kvalificeret fagmand for at undgå enhver risiko ved efterfølgende brug.
,Hold altid apparatet under opsyn, når det er sluttet til lysnettet.
,Kom aldrig strygejern eller eventuel stander ned i vand.
,Dette apparat er ikke beregnet til at blive brugt af personer (herunder børn) med nedsatte fysiske og mentale evner, nedsat følesans eller manglende erfaring og viden, medmindre de er blevet vejledt eller instrueret i apparatets anvendelse af en person, der er ansvarlig for deres sikkerhed.
,Apparatet bør holdes uden for børns rækkevidde for at sikre, at de ikke kan komme til at lege med det.
,Strygesålen kan blive utrolig varm og forårsage brandsår ved berøring.
,Netledningen må ikke komme i kontakt med strygesålen, når denne er varm.
,Når du er færdig med at stryge, når du rengør apparatet, fylder eller tømmer vandtanken, og når du forlader strygejernet - selv om det kun er i et kort øjeblik - skal dampvælgeren altid
sættes i position O, strygejernet stilles på højkant, og stikket tages ud af stikkontakten.
,Placér og anvend altid strygejernet og en eventuel stander på et stabilt, plant og vandret underlag.
,Dette apparat er kun beregnet til almindelig husholdningsbrug.
Dette Philips-apparat overholder alle standarder for elektromagnetiske felter (EMF).Ved korrekt anvendelse og i overensstemmelse med instruktionerne i denne brugsvejleding, er apparatet sikkert at anvende, ifølge den videnskabelige viden, der er tilgængelig i dag.
Dansk 13
1Tag stikket ud af stikkontakten.
2Sæt dampvælgeren i position O (= ingen damp) (fig. 2)
3Luk dækslet til vandtanken op.
4Hold strygejernet lidt på skrå og fyld vandtanken op til MAX-markeringen (fig. 3).
Hvis vandet i dit område er meget hårdt, anbefales det at bruge destilleret vand. Brug aldrig kemisk afkalket vand.
Fyld aldrig vandtanken til op over MAX-mærket.
Kom aldrig parfume, eddike, stivelse, afkalkningsmiddel, strygemiddel eller andre kemikalier i vandtanken.
5Luk dækslet til vandtanken (“klik”).
,Første gang strygejernet tages i brug, kan der komme lidt røgudvikling. Dette varer dog kun et øjeblik.
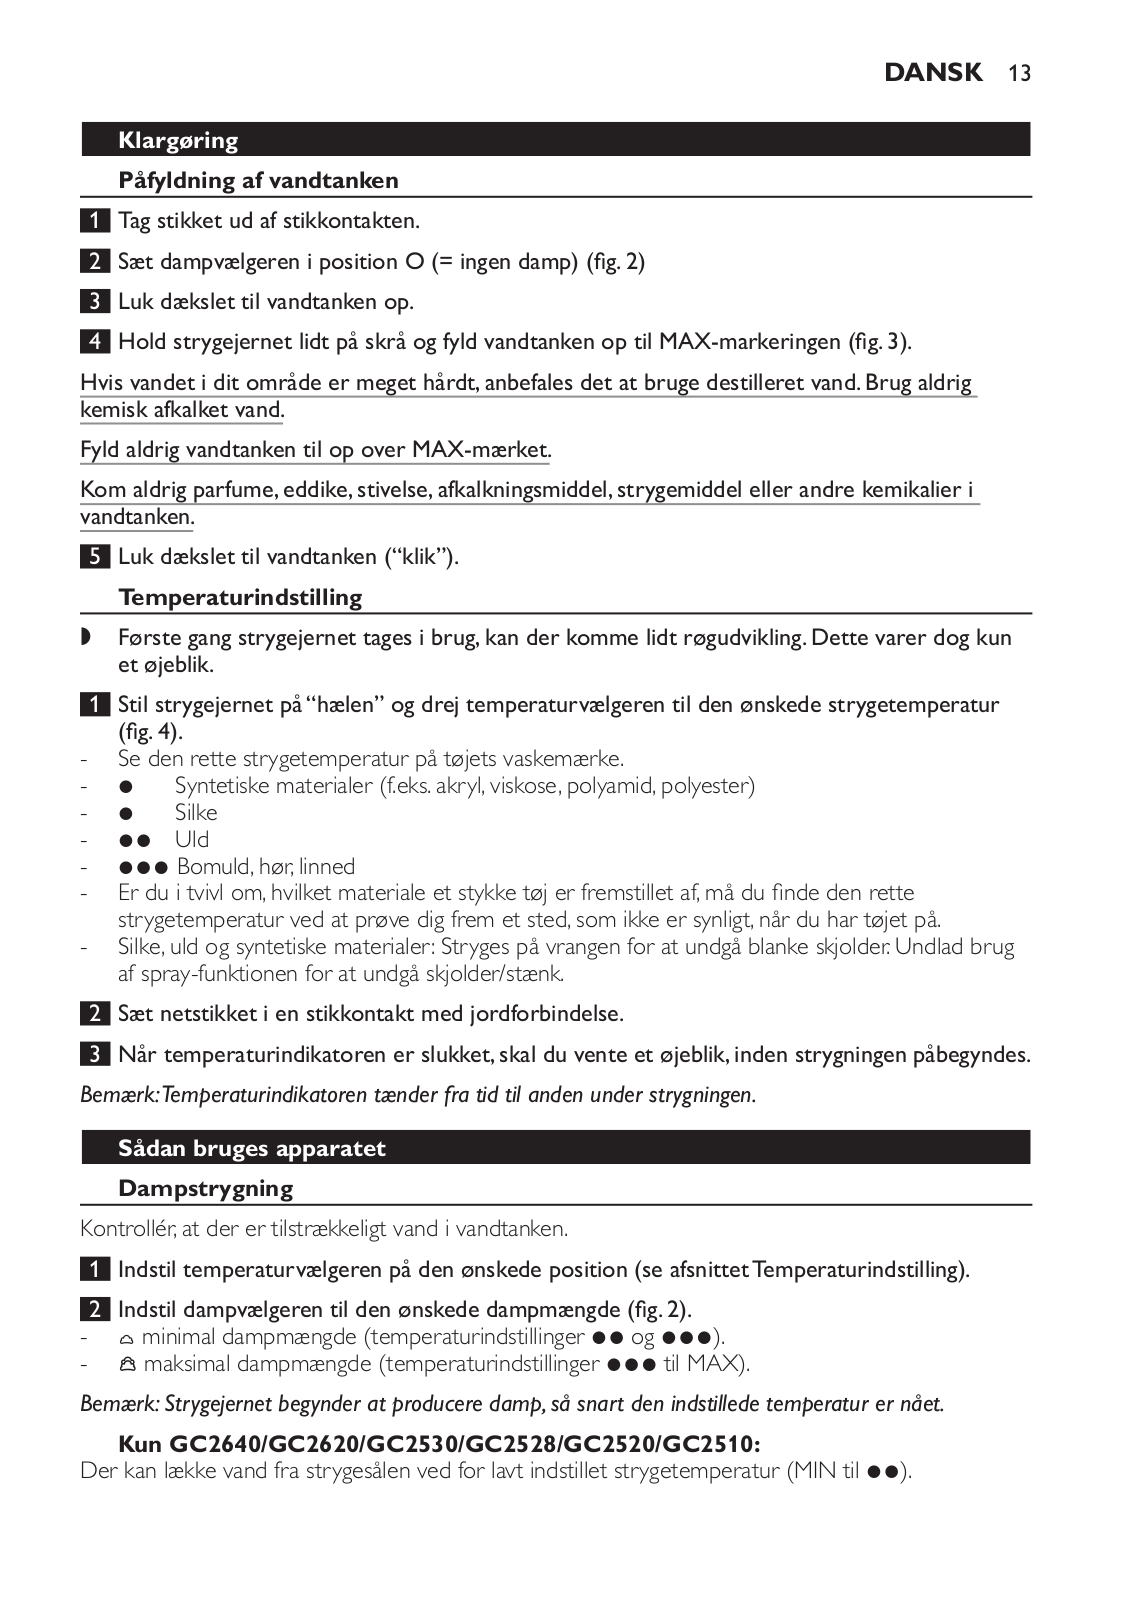
1Stil strygejernet på “hælen” og drej temperaturvælgeren til den ønskede strygetemperatur (fig. 4).
- Se den rette strygetemperatur på tøjets vaskemærke.
- |
1 |
Syntetiske materialer (f.eks. akryl, viskose, polyamid, polyester) |
- |
1 |
Silke |
- |
2 |
Uld |
- |
3 Bomuld, hør, linned |
- Er du i tvivl om, hvilket materiale et stykke tøj er fremstillet af, må du finde den rette strygetemperatur ved at prøve dig frem et sted, som ikke er synligt, når du har tøjet på.
-Silke, uld og syntetiske materialer: Stryges på vrangen for at undgå blanke skjolder. Undlad brug af spray-funktionen for at undgå skjolder/stænk.
2Sæt netstikket i en stikkontakt med jordforbindelse.
3Når temperaturindikatoren er slukket, skal du vente et øjeblik, inden strygningen påbegyndes.
Bemærk:Temperaturindikatoren tænder fra tid til anden under strygningen.
Kontrollér, at der er tilstrækkeligt vand i vandtanken.
1Indstil temperaturvælgeren på den ønskede position (se afsnittet Temperaturindstilling).
2Indstil dampvælgeren til den ønskede dampmængde (fig. 2).
-ç minimal dampmængde (temperaturindstillinger 2 og 3).
-é maksimal dampmængde (temperaturindstillinger 3 til MAX).
Bemærk: Strygejernet begynder at producere damp, så snart den indstillede temperatur er nået.
Kun GC2640/GC2620/GC2530/GC2528/GC2520/GC2510:
Der kan lække vand fra strygesålen ved for lavt indstillet strygetemperatur (MIN til 2).
14 Dansk
1Sæt dampvælgeren i position O (= ingen damp).
2Indstil temperaturvælgeren på den ønskede position (se afsnittet Temperaturindstilling).
Du kan anvende spray-funktionen til at fjerne vanskelige folder ved alle temperaturer
1Kontrollér, at der er tilstrækkeligt vand i vandtanken.
2Tryk et par gange på spray-knappen for at fugte strygetøjet (fig. 5).
Et kraftigt dampskud kan fjerne ekstra besværlige folder.
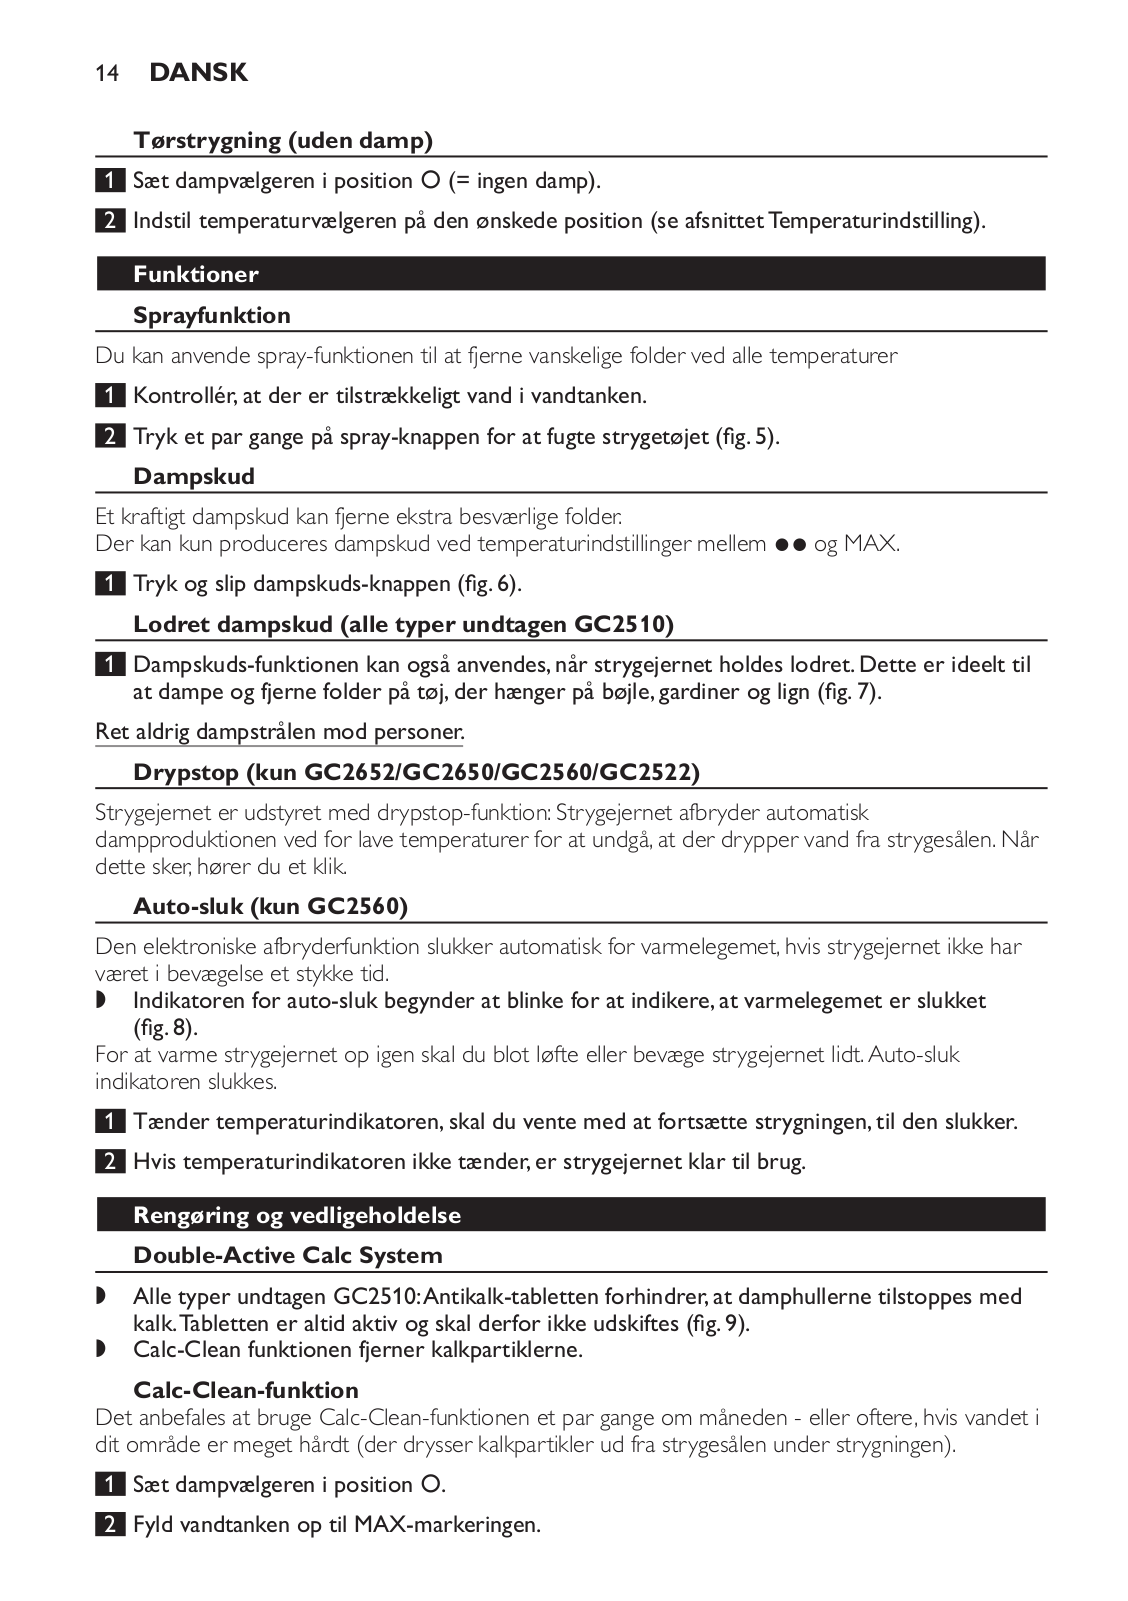
Der kan kun produceres dampskud ved temperaturindstillinger mellem 2 og MAX.
1Tryk og slip dampskuds-knappen (fig. 6).
1Dampskuds-funktionen kan også anvendes, når strygejernet holdes lodret. Dette er ideelt til at dampe og fjerne folder på tøj, der hænger på bøjle, gardiner og lign (fig. 7).
Ret aldrig dampstrålen mod personer.
Strygejernet er udstyret med drypstop-funktion: Strygejernet afbryder automatisk dampproduktionen ved for lave temperaturer for at undgå, at der drypper vand fra strygesålen. Når dette sker, hører du et klik.
Den elektroniske afbryderfunktion slukker automatisk for varmelegemet, hvis strygejernet ikke har været i bevægelse et stykke tid.
,Indikatoren for auto-sluk begynder at blinke for at indikere, at varmelegemet er slukket
(fig. 8).
For at varme strygejernet op igen skal du blot løfte eller bevæge strygejernet lidt.Auto-sluk indikatoren slukkes.
1Tænder temperaturindikatoren, skal du vente med at fortsætte strygningen, til den slukker.
2Hvis temperaturindikatoren ikke tænder, er strygejernet klar til brug.
,Alle typer undtagen GC2510:Antikalk-tabletten forhindrer, at damphullerne tilstoppes med kalk.Tabletten er altid aktiv og skal derfor ikke udskiftes (fig. 9).
,Calc-Clean funktionen fjerner kalkpartiklerne.
Det anbefales at bruge Calc-Clean-funktionen et par gange om måneden - eller oftere, hvis vandet i dit område er meget hårdt (der drysser kalkpartikler ud fra strygesålen under strygningen).
1Sæt dampvælgeren i position O.
2Fyld vandtanken op til MAX-markeringen.