

Page 1

GC2078GC2089 series
User manual
© 2016 Koninklijke Philips N.V.
All rights reserved.
4239 001 02671
Page 2

ENGLISH
a
b
c
2 3 4
5
i
h
d
e
f
g
m j
k
l
7 86
10 11 12 13
14
18
15 16 17
9
Page 3

ENGLISH 6
SVENSKA 14
DANSK 22
NORSK 30
SUOMI 38
EasySpeed Plus Cordless GC2078-GC2089 series
Page 4

6 ENGLISH
Important
Read the separate important information leaet and the user
manual carefully before you use the appliance. Save both
documents for future reference.
General description (Fig. 1)
1 Spray nozzle
2 Cap of lling opening
3 Steam control
- CALC CLEAN = Calc-Clean function
- = dry ironing
- = optimal steam
- = maximum steam
- = turbo steam
4 Steam boost button
5 Spray button
6 Temperature dial
7 Type plate
8 Water tank with MAX water level indication
9 Soleplate
10 Light ring
11 Base
12 Iron storage lock
13 Mains cord
Using the appliance
Filling the water tank
Note: Your appliance has been designed to be used with
tap water. In case you live in an area with hard water, fast
scale build-up may occur. Therefore, it is recommended to
use distilled or de-mineralized water to prolong the lifetime
of your appliance.
Note: Do not add perfume, water from tumble dryer,
vinegar, magnetically treated water (e.g., Aqua+), starch,
descaling agents, ironing aids, chemically descaled water
Page 5

7
ENGLISH
or other chemicals as they may cause water spitting, brown
staining, or damage to your appliance.
1 Set the steam control to position . (Fig. 2)
2 Fill the water tank up to the MAX indication (Fig. 3).
3 Close the cap of the lling opening.
Selecting temperature and steam setting
Table 1
Fabric type Temperature
setting
Linen MAX
Cotton
Wool
Silk
3
2
1
Steam
setting
,
,
Steam
boost
Spray
Yes Yes
Yes Yes
No Yes
No No
Synthetic fabrics
(e.g. acrylic,
nylon, polyamide,
1
No No
polyester).
Note: As indicated in the table above, do not use steam
or steam boost at a low temperature, otherwise hot water
may leak from the iron.
1 Consult table 1 to set the temperature dial to the
appropriate setting for your garment (Fig 4)
2 Consult table 1 to select a steam setting that
corresponds to the temperature you have set. (Fig. 5)
Page 6

8
ENGLISH
3 Place the iron on its base and connect the base to a
power socket. (Fig 6.)
Note: Make sure that the base sits on a stable and level
surface. It is recommended to place the base on the soft
part of the ironing board.
4 The light ring starts to ash blue light, indicating the iron
is heating up. (Fig 7.)
5 When the blue light turns steady, you can start ironing.
(Fig.8 )
Operation of Smart Charging base
The iron is equipped with Smart Charging base. The light
will indicate the status of the iron, and remind you to
charge the iron after 20 to 25 seconds to ensure a good
wrinkle removal performance. Please refer to table 2 for
the operation of the base.
Note: to ensure good wrinkle removal performance, always
put the iron on its base during the resting period. Do not
place the iron on its heel. (Fig.9)
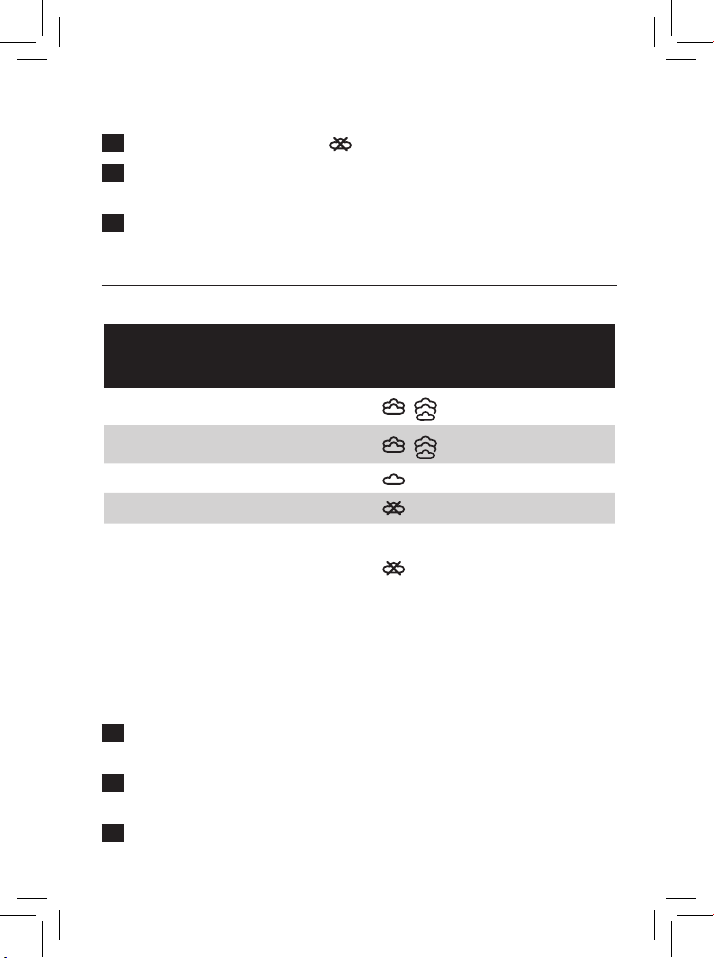
Table 2
Light status Iron status Instructions
Flashing blue Heating up Wait for iron to be
ready.
Steady blue Ready for use You can start ironing.
Flashing
orange
Slow
breathing blue
(specic types
The iron needs to
be charged now
Safety autoo has been
activated
Put the iron back to
the base to charge it.
Refer to Chapter
“Features”, section
“safety auto-o”.
only)
Page 7

9
ENGLISH
Features
Spray function
- Press the spray button to moisten the garment to be
ironed. This helps remove stubborn creases (Fig. 10).
Steam boost function
- Press and release the steam boost button for a powerful
boost of steam to remove stubborn creases (Fig. 11).
- For optimal steam boost performance, it is recommended
to press the steam boost trigger at a 5 seconds interval.
Vertical steam
- You can use the steam boost function when you hold
the iron in vertical position for removing creases from
hanging clothes, curtains etc. (Fig. 12)
Dry ironing
- Set the steam control to to iron without steam. (Fig. 2)
Safety auto-o function (specic types only)
- The iron switches o automatically if the iron is not in use
for 8 minutes. The light ring starts to slowly breath in blue
to indicate the safety auto-o mode is activated.
- To let the iron heat up again, remove the iron (if the iron
is on the base) and put it back to the base.
Cleaning and maintenance
Cleaning
1 Set the steam control to , unplug the base and let the
iron cool down. (Fig. 2)
2 Pour any remaining water out of the water tank.
3 Wipe akes and any other deposits o the soleplate with
a damp cloth and a non-abrasive (liquid) cleaning agent.
Page 8

10
ENGLISH
Caution: To keep the soleplate smooth, avoid hard contact
with metal objects. Never use a scouring pad, vinegar or
other chemicals to clean the soleplate.
Note: Regularly rinse the water tank with tap water. Empty
the water tank after rinsing it.
Calc-Clean function
IMPORTANT: To prolong the lifetime of your appliance and
to maintain good steaming performance, use the Calc-Clean
function once every two weeks. If the water in your area is
very hard (i.e. when akes come out of the soleplate during
ironing), use the Calc-Clean function more frequently.
1 Make sure the steam control is set to . (Fig. 2)
2 Fill the water tank to the MAX indication. (Fig. 3)
Do not pour vinegar or other descaling agents into the
water tank.
3 Set the temperature dial to MAX. (Fig. 13)
4 Plug in the base, put the iron on the base and let the
iron heat up. (Fig. 6)
5 Remove the iron when the light ring turns steady blue.
(Fig. 8)
6 Hold the iron over the sink. Push the steam control to
the Calc-Clean position and hold it. (Fig. 14)
7 Gently shake the iron while holding the steam control
until all water in the water tank has been used
up. (Fig. 15)
Caution: While scale is ushed out, steam and boiling water
also come out of the soleplate.
Page 9

11
ENGLISH
8 Set the steam control back to . (Fig. 2)
Note: Repeat the Calc-Clean process if the water that
comes out of the iron still contains scale particles.
After the Calc-Clean process
1 Put the iron on the base. Let the iron heat up to dry the
soleplate.
2 Take the iron from the base when the light ring turns
steady blue.
3 Move the iron gently over a piece of cloth to remove any
water stains on the soleplate.
Storage
1 Set the steam control back to . (Fig. 2)
2 Pour out any remaining water from the water tank.
3 Unplug the mains cord and wind the mains cord around
the base. (Fig. 16)
Remove iron from the base when you wind the cord, as the
soleplate could still be hot.
4 Put the iron on the base. Lock the iron to its base. (Fig.
17)
5 Let the iron cool down before you store it.
You can carry the iron and base by the iron handle. (Fig. 18)
Troubleshooting
This chapter summarises the most common problems you
could encounter with the appliance. If you are unable to
solve the problem with the information below, visit www.
philips.com/support for a list of frequently asked questions
or contact the Consumer Care Centre in your country
(see the worldwide guarantee leaet for contact details).
Page 10

12
ENGLISH
Problem Possible cause Solution
The iron does
not produce
steam.
The iron leaks. Cordless iron cools
Cordless iron cools
down after a while.
It needs to be
recharged.
The steam control is
set to .
The water tank is
empty.
You are using a
temperature of below
2 dots.
down after a while.
It needs to be
recharged.
You are using steam
or steam boost at a
low temperature.
Put the iron back to the
base until the light ring
turns steady blue light,
indicating that the iron
is ready for use again.
Set the steam control
to a steam setting
(consult Table 1 in
Chapter “using the
appliance”).
Fill the water tank.
Consult Table 1
in Chapter “using
the appliance” for
temperature and steam
setting.
Put the iron back to its
base to heat up and
dry the soleplate.
Put the iron back to its
base to heat up and
dry the soleplate.
Consult Table 1 for use
of steam and steam
boost.
Page 11

13
ENGLISH
Problem Possible cause Solution
You have used the
steam boost function
too often within a
very short period.
The water tank is
overlled.
The door of lling
opening is not closed
properly.
Flakes and
impurities
come out of
the soleplate
during ironing.
When I push
the steam
control to the
turbo steam
position, the
steam control
jumps back.
Only part of
the light ring is
lighted in safety
auto-o mode.
The base is
not lighted up
when I place
the iron on it.
You have not
performed CalcClean function for
some time. The iron
need to be cleaned.
This is normal.
The turbo steam is
designed as this.
This is normal. This
is intended to save
energy in safety
auto-o mode.
The iron is not
connected to the
base properly.
Put the iron back to
its base to heat up
and dry the soleplate.
Use the steam
boost function less
frequently.
Do not ll the water
tank beyond the MAX
indication.
Make sure that the
door of lling opening
is closed properly.
Use the Calc-Clean
function (see chapter
‘Cleaning and
maintenance’, section
‘Calc-Clean function’).
Keep holding the
steam control in the
turbo steam position
while using turbo
steam. For other steam
settings, this is not
necessary.
Take out the iron and
put it back to the base
again.
N/A
Page 12
14 SVENSKA
Viktigt
Läs den separata broschyren med viktig information och
användarhandboken innan du använder apparaten. Behåll
båda dokumenten för framtida bruk.
Allmän beskrivning (bild 1)
1 Spraymunstycke
2 Lock till påfyllningsöppning
3 Ångvred
- CALC CLEAN = avkalkningsfunktion
- = torrstrykning
- = optimal ånga
- = maximal ånga
- = turboånga
4 Ångpusknapp
5 Sprayknapp
6 Temperaturvred
7 Typplatta
8 Vattentank med indikering för MAX-vattennivå
9 Stryksula
10 Ljusring
11 Base
12 Lås till strykjärnsförvaring
13 Nätsladd
Använda apparaten
Fylla vattenbehållaren
Obs! Apparaten är utformad för att användas med kranvatten.
Om du bor i ett område med hårt vatten kan det snabbt
bildas kalkavlagringar. Du bör därför använda destillerat eller
avsaltat vatten för att förlänga apparatens livslängd.
Obs! Använd inte parfym, vatten från torktumlare, ättika,
magnetiskt behandlat vatten (t.ex. Aqua+), stärkelse,
avkalkningsmedel, strykhjälpmedel, kemiskt avkalkat
vatten eller andra kemikalier eftersom det kan orsaka
vattenstänk, bruna fläckar eller skada på apparaten.
Page 13
15
SVENSKA
1 Vrid ångvredet till läge . (bild 2)
2 Fyll vattenbehållaren med vatten upp till MAX-
markeringen (bild 3).
3 Stäng locket till påfyllningsöppningen.
Välja inställning för temperatur och ånga
Tabell 1
Typ av material Tempera-
turinställning
Linne MAX
Bomull 3
Ånginställning
,
,
Ångpu Spray
Ja Ja
Ja Ja
Ylle 2 Nej Ja
Siden 1 Nej Nej
Syntetmaterial
(t.ex. akryl,
nylon, polyamid,
1 Nej Nej
polyester).
Obs! Enligt tabellen ovan ska du inte använda ånga eller
ångpu vid låga temperaturer, annars kan varmvatten
läcka från strykjärnet.
1 I tabell 1 nns temperaturinställningar för olika slags
plagg. (bild 4)
2 I tabell 1 nns ånginställningar som motsvarar den
temperatur som du har ställt in. (bild 5)
3 Ställ strykjärnet på basenheten och anslut basenheten
till ett nätuttag. (bild 6)
Page 14

16
SVENSKA
Obs! Se till att basenheten står på en stabil och plan yta. Vi
rekommenderar att du ställer basenheten på strykbrädans
mjuka del.
4 Ljusringen börjar att blinka blått, vilket indikerar att
strykjärnet värms upp. (bild 7)
5 Du kan börja att stryka när ljusringen lyser blått. (bild 8)
Användning av basenhet med smart laddning
Strykjärnet är utrustat med en basenhet som har smart
laddning. Lampan kommer att indikera strykjärnets status
och påminna dig om att ladda strykjärnet efter 20 till 25
sekunder för att säkerställa god strykförmåga. Se tabell 2
för användning av basenheten.
Obs! Du säkerställer god strykförmåga genom att alltid
ställa strykjärnet i basenheten när du inte stryker. Ställ inte
strykjärnet på hälen. (Bild 9)
Tabell 2
Lampstatus Strykjärnsstatus instruktioner
Blinkar blått Uppvärmning Vänta på att strykjärnet
ska bli redo.
Lyser blått Redo för
Du kan börja att stryka.
användning
Blinkar orange Strykjärnet
måste laddas nu
Ställ tillbaka strykjärnet
i basenheten för att
ladda det.
Blinkar blått
långsamt
(endast
specika typer)
Den automatiska säkerhetsavstängningen
har aktiverats
Se kapitlet ”Funktioner”,
avsnitt ”Automatisk
säkerhetsavstängning”.
Page 15

17
SVENSKA
Funktioner
Sprayfunktion
- Tryck på sprayknappen för att fukta plagget som ska
strykas. Det här bidrar till att avlägsna envisa veck (bild 10).
Ångpusfunktion
- Tryck på ångpusknappen och släpp den sedan för att få
en kraftig ångpu som tar bort envisa veck (bild 11).
- Vi rekommenderar att du trycker på ångpusknappen i
intervall om 5 sekunder för att få optimal ångpu.
Vertikal ånga
- Du kan använda ångpusfunktionen när du håller
strykjärnet i vertikalt läge. Det är praktiskt när du tar bort
veck från upphängda kläder, gardiner osv. (bild 12)
Torr strykning
- För ångvredet till om du vill styrka utan ånga. (bild 2)
Automatisk säkerhetsavstängning (endast på vissa
modeller)
- Strykjärnet stängs av automatiskt om det inte används
på 8 minuter. Ljusringen börjar att blinka långsamt i blått
för att indikera att automatisk säkerhetsavstängning är
aktiverat.
- Du värmer upp strykjärnet igen genom att ta bort det (om
strykjärnet står på basenheten) och ställa tillbaka det på
basenheten.
Rengöring och underhåll
Rengöring
1 Vrid ångvredet till , koppla ur basenheten och låt
strykjärnet svalna. (bild 2)
Page 16

18
SVENSKA
2 Häll ut överödigt vatten från vattenbehållaren.
3 Torka av agor och andra avlagringar från stryksulan
med en fuktad trasa och (ytande) rengöringsmedel
utan slipmedel.
Varning! Håll stryksulan slät genom att inte låta den komma
i kontakt med metallföremål. Använd aldrig skursvamp,
ättika eller andra kemikalier när du rengör stryksulan.
Obs! Skölj vattenbehållaren regelbundet med kranvatten.
Töm vattenbehållaren efter att du har sköljt den.
Avkalkningsfunktion
VIKTIGT! Du förlänger livslängden på apparaten och
bibehåller dess fortsatt goda ångprestanda genom
att använda snabbavkalkningsfunktionen två gånger i
månaden. Om du bor i ett område med väldigt hårt vatten
(det kan till exempel komma agor från stryksulan när du
stryker) ska du använda avkalkningsfunktionen oftare.
1 Se till att ångvredet är vridet till . (bild 2)
2 Fyll vattenbehållaren med vatten upp till MAX-
markeringen. (bild 3)
Häll inte ättika eller andra avkalkningsmedel i
vattenbehållaren.
3 Ställ in temperaturvredet till MAX-läget. (bild 13)
4 Koppla in basenheten, ställ strykjärnet på basenheten
och låt strykjärnet värmas upp. (bild 6).
5 Avlägsna strykjärnet när ljusringen lyser blått. (bild 8)
6 Håll strykjärnet ovanför diskhon. Sätt ångvredet i
avkalkningsfunktionsläget och håll in det. (Bild 14)
Page 17

19
SVENSKA
7 Skaka försiktigt strykjärnet och håll samtidigt in
ångvredet tills allt vatten i vattentanken har använts
upp. (Bild 15)
Varning! Medan kalkavlagringar spolas ut kan det också
komma ånga och kokande vatten från stryksulan.
8 Vrid tillbaka ångvredet till . (bild 2)
Obs! Upprepa avkalkningsprocessen om vattnet
som kommer ut ur strykjärnet fortfarande innehåller
kalkpartiklar.
Efter avkalkningen
1 Ställ strykjärnet på basenheten. Låt strykjärnet värmas
upp för att torka stryksulan.
2 Ta strykjärnet från basenheten när ljusringen lyser blått.
3 För försiktigt strykjärnet över en tygbit för att få bort
eventuella vattenäckar från stryksulan.
Förvaring
1 Vrid tillbaka ångvredet till . (bild 2)
2 Häll ut överödigt vatten från vattenbehållaren.
3 Koppla ur nätsladden och linda ihop den kring
basenheten. (bild 16)
Avlägsna strykjärnet från basenheten när du lindar ihop
sladden eftersom stryksulan fortfarande kan vara varm.
4 Ställ strykjärnet på basenheten. Lås strykjärnet i
basenheten. (bild 17)
5 Låt strykjärnet svalna innan du ställer undan det.
Du kan bära strykjärnet och basenheten i strykjärnets
handtag. (bild 18)
Page 18

20
SVENSKA
Felsökning
I det här kapitlet sammanfattas de vanligaste problemen
som kan uppstå med apparaten. Om du inte kan lösa
problemet med hjälp av informationen nedan kan du gå
till www.philips.com/support och läsa svaren på vanliga
frågor. Du kan även kontakta kundtjänst i ditt land (se
garantibroschyren för kontaktinformation).
Problem Möjlig orsak Lösning
Strykjärnet
avger inte
någon ånga.
Strykjärnet
läcker.
Sladdlöst strykjärn
svalnar efter ett tag.
Det måste laddas upp.
Ångvredet är vridet
till .
Vattenbehållaren är tom. Fyll vattenbehållaren.
Du använder nu en
temperatur på under 2
punkter.
Sladdlöst strykjärn
svalnar efter ett tag.
Det måste laddas upp.
Du använder nu ånga
eller ångpu i en låg
temperatur.
Ställ tillbaka strykjärnet i
basenheten och låt det
sitta i den tills ljusringen
lyser blått, vilket indikerar
att strykjärnet är redo att
användas igen.
Vrid ångvredet till
en ånginställning
(se tabell 1 i kapitlet
”Använda apparaten”).
Se tabell 1 i kapitlet
”Använda apparaten”
gällande inställning för
temperatur och ånga.
Ställ tillbaka strykjärnet i
basenheten för att värma
upp och torka stryksulan.
Ställ tillbaka strykjärnet i
basenheten för att värma
upp och torka stryksulan.
Se tabell 1 för information
om hur du använder ånga
och ångpu.
Page 19

21
SVENSKA
Problem Möjlig orsak Lösning
Du har använt ångpusfunktionen för
ofta under en mycket
kort period.
Vattenbehållaren är
överfull.
Påfyllningsöppningen
är inte ordentligt
stängd.
Det kommer
agor och
smuts ur
stryksulan
vid strykning.
När jag för
ångvredet
till läget för
turboånga
hoppar
ångvredet
tillbaka.
Endast en
del av ljusringen lyser
i läget för
automatisk
säkerhetsavstängning.
Basenheten
tänds inte
när jag ställer strykjärnet på den.
Det var ett tag
sedan du utförde
avkalkningsfunktionen. Strykjärnet måste
rengöras.
Det är normalt. Tuboångan är utformad
som den är.
Det är normalt. Anledningen till detta är att
spara energi i läget för
automatisk säkerhetsavstängning.
Strykjärnet är inte
korrekt anslutet till
basenheten.
Ställ tillbaka strykjärnet i
basenheten för att värma
upp och torka stryksulan.
Använd ångpusfunktionen
mindre ofta.
Fyll inte vattenbehållaren
över MAX-markeringen.
Se till att påfyllningsöppningen är ordentligt
stängd.
Använd avkalkningsfunktionen (se kapitlet
"Rengöring och underhåll", avsnittet "Avkalkningsfunktion").
Håll ångvredet i läget
turboånga när du använder turboånga. För andra
ånginställningar är det
här inte nödvändigt.
Avlägsna strykjärnet och
ställ tillbaka det på basenheten igen.
Saknas
Page 20

22 DANSK
Vigtigt!
Læs den separate folder med vigtige oplysninger og brugervejledningen
omhyggeligt igennem, før du tager apparatet i brug. Gem begge
dokumenter til eventuel senere brug.
Generel beskrivelse (Fig. 1)
1 Spray-dyse
2 Dæksel til vandtank
3 Dampkontrol
- CALC CLEAN = Calc-Clean-funktion
- = tørstrygning
- = optimal damp
- = maksimal dampmængde
- = turbo-dampfunktion
4 Knap til dampskud
5 Spray-knap
6 Temperaturvælger
7 Typeskilt
8 Vandtank med MAX-vandstandsindikation
9 Strygesål
10 Lysring
11 Opladeenhed
12 Opbevaringslås til strygejern
13 Netledning
Sådan bruges apparatet
Påfyldning af vandtanken
Bemærk: Apparatet er udviklet til brug med vand fra hanen. Hvis du
bor i et område med hårdt vand, kan der hurtigt komme kalkaflejringer.
Derfor anbefales det at bruge destilleret eller demineraliseret vand for
at forlænge apparatets levetid.
Bemærk: Tilsæt ikke parfume, vand fra tørretumbler,
eddike, magnetisk behandlet vand (f.eks. Aqua+), stivelse,
afkalkningsmiddel, strygemiddel, kemisk afkalket vand eller andre
kemikalier, da de kan medføre medført vandstænk, brune pletter
eller skader på apparatet.
Page 21

23
DANSK
1 Sæt dampkontrollen i positionen . (Fig. 2)
2 Fyld vand i vandtanken op til MAX-markeringen (Fig. 3).
3 Luk dækslet til vandtanken.
Valg af temperatur og dampindstilling
Tabel 1
Materialetype Tempera-
Hør MAX
Bomuld 3
Uld 2 Nej Ja
Silke 1 Nej Nej
Syntetiske
materialer
(f.eks. akryl,
nylon, polyamid, polyester).
Bemærk: Som angivet i ovenstående tabel må du ikke bruge damp
eller dampskud ved lav temperatur, da det varme vand ellers kan
lække fra strygejernet.
1 Se tabel 1 for at sætte temperaturvælgeren til den passende
indstilling for dit tøj (Fig. 4)
2 Se tabel 1 for at vælge en dampindstilling, der svarer til den
temperatur, du har valgt. (Fig. 5)
3 Placer strygejernet på opladeenheden, og tilslut
opladeenheden til en stikkontakt. (Fig. 6)
turindstilling
1 Nej Nej
Dampindstilling
,
,
Dampskud Spray
Ja Ja
Ja Ja
Page 22

24
DANSK
Bemærk: Sørg for, at opladeenheden står på et stabilt og jævnt
underlag. Det anbefales at placere opladeenheden på den bløde
del af strygebrættet.
4 Den lysende ring begynder at blinke blåt for at angive, at
strygejernet er ved at varme op. (Fig. 7)
5 Når det blå lys lyser konstant, kan du begynde at stryge. (Fig. 8)
Betjening af SmartCharging-enhed
Strygejernet er udstyret med SmartCharging-enhed. Lampen
angiver status for strygejernet og minder dig om at oplade
strygejernet efter 20 til 25 sekunder for at sikre god udglatning af
folder. Se tabel 2 for betjening af opladeenheden.
Bemærk: For at sikre god udglatning af folder skal du altid stille
strygejernet i opladeenheden, når du holder pause i strygningen.
Stil ikke strygejernet på højkant uden for opladeenheden. (Fig. 9)
Tabel 2
Status for lys Status for
Blinker blåt Opvarming Vent, indtil strygejernet
Lyser blåt Klar til brug Du kan begynde at
Blinker orange Strygejernet skal
Blinker
langsomt blåt
(kun bestemte
typer)
strygejern
oplades nu
Automatisk
sikkerhedsafbrydelse
er aktiveret
Vejledning
er klar.
stryge.
Placer strygejernet i
opladeenheden for at
oplade det.
Se kapitlet "Funktioner",
afsnittet "Automatisk
sikkerhedsafbrydelse".
Page 23

25
DANSK
Funktioner
Sprayfunktion
- Tryk på spray-knappen for at fugte strygetøjet. Det gør det
nemmere at fjerne vanskelige folder (Fig. 10).
Dampskudsfunktion
- Tryk på og slip dampskudsknappen for at få et eektivt
dampskud, der fjerner vanskelige folder (Fig. 11).
- For at opnå det bedste dampskud anbefales det at trykke på
dampskududløseren med 5 sekunders mellemrum.
Lodret damp
- Dampskudsfunktionen kan også anvendes, når strygejernet
holdes lodret, for at fjerne folder fra tøj, der hænger på bøjle,
gardiner o.l. (Fig. 12)
Tørstrygning
- Sæt dampvælgeren på for at stryge uden damp. (Fig. 2)
Funktion til automatisk sikkerhedsafbryder (gælder kun nogle
modeller)
- Strygejernet slukkes automatisk, hvis det ikke har været i brug
i 8 minutter. Lysringen begynder at blinke blåt langsomt for
at indikere, at funktionen Automatisk sikkerhedsafbrydelse er
aktiveret.
- Du varmer strygejernet op igen ved at fjerne det (hvis
strygejernet står på opladeenheden) og sætte det tilbage på
opladeenheden.
Rengøring og vedligeholdelse
Rengøring
1 Sæt dampkontrollen til , tag stikket ud af stikkontakten,
og lad strygejernet køle ned. (Fig. 2)
2 Hæld overskydende vand ud af vandtanken.
Page 24

26
DANSK
3 Tør eventuelle kalkpartikler og urenheder af strygesålen med en
fugtig klud og lidt ikke-ridsende (ydende) rengøringsmiddel.
Forsigtig: Undgå kontakt med metalgenstande, så strygesålen
bevares glat. Anvend aldrig skuremidler, eddike eller andre
kemikalier for at rengøre strygesålen.
Bemærk: Skyl vandtanken regelmæssigt med vand fra hanen. Tøm
vandbeholderen efter skylning.
Calc-Clean-funktion
VIGTIGT: For at forlænge din maskines levetid og bibeholde god
dampfunktion bør du anvende Calc-Clean-funktionen en gang
hver anden uge. Hvis vandet i dit område er meget hårdt (hvis der
f.eks. drysser kalkpartikler ud fra strygesålen under strygningen),
skal Calc-Clean-funktionen benyttes oftere.
1 Sørg for, at dampkontrollen står på . (Fig. 2)
2 Fyld vand i vandtanken til MAX-markeringen. (Fig. 3)
Kom aldrig eddike eller andre afkalkningsmidler i vandtanken.
3 Indstil temperaturvælgeren på MAX. (Fig. 13)
4 Tilslut opladeenheden til stikkontakten, placer strygejernet på
opladeenheden, og lad strygejernet varme op. (Fig. 6)
5 Fjern strygejernet, når lysringen lyser konstant blåt. (Fig. 8)
6 Hold strygejernet hen over vasken. Sæt dampvælgeren i
positionen Calc-Clean, og hold den nede. (Fig. 14)
7 Ryst strygejernet forsigtigt, mens du holder dampvælgeren
nede, indtil alt vandet i vandtanken er brugt op. (Fig. 15)
Forsigtig: Mens kalkpartiklerne skylles ud, kommer der også damp
og kogende vand ud af strygesålen.
8 Sæt dampkontrollen tilbage på . (Fig. 2)
Bemærk: Gentag Calc-Clean-proceduren, hvis det vand, som
kommer ud af strygejernet, stadig indeholder kalkpartikler.
Page 25

27
DANSK
Efter Calc-Clean-processen
1 Placer strygejernet i opladeenheden. Lad strygejernet varme
op for at tørre strygesålen.
2 Fjern strygejernet fra opladeenheden, når lysringen lyser
konstant blåt.
3 Før strygejernet let hen over en klud for at fjerne vandstænk fra
strygesålen.
Opbevaring
1 Sæt dampkontrollen tilbage på . (Fig. 2)
2 Tøm vandtanken for overskydende vand.
3 Træk stikket ud af stikkontakten, og rul ledningen rundt om
opladeenheden. (Fig. 16)
Fjern strygejernet fra opladeenheden, når du ruller ledningen op,
idet strygesålen stadig kan være varm.
4 Placer strygejernet i opladeenheden. Lås strygejernet fast til
opladeenheden. (Fig. 17)
5 Lad strygejernet køle af, før du stiller det væk.
Du kan bære strygejernet og opladeenheden i strygejernets
håndtag. (Fig. 18)
Fejlfinding
Dette kapitel opsummerer de mest almindelige problemer, der kan
forekomme ved brug af apparatet. Har du brug for yderligere hjælp
og vejledning, så besøg www.philips.com/support for en liste af
ofte stillede spørgsmål, eller kontakt dit lokale Philips Kundecenter
(kontaktoplysninger ndes i "Worldwide Guarantee"-folderen).
Page 26

28
DANSK
Problem Mulig årsag Løsning
Strygejernet
producerer ikke
damp.
Strygejernet
lækker.
Ledningsfri strygejern
køles ned efter et
stykke tid. Det skal
genoplades.
Dampkontrollen er sat
på .
Vandtanken er tom. Fyld vand i
Du anvender en
temperatur på under
2 prikker.
Ledningsfri strygejern
køles ned efter et
stykke tid. Det skal
genoplades.
Du bruger damp eller
dampskud ved lav
temperatur.
Du har anvendt
dampskudsfunktionen for ofte inden
for en meget kort
periode.
Placer strygejernet
i opladeenheden,
indtil lysringen lyser
konstant blåt, hvilket
indikerer, at det er klar
til brug igen.
Indstil dampkontrollen
til en dampindstilling
(se tabel 1 i afsnittet
"Sådan bruges
apparatet").
vandtanken.
Se tabel 1 i kapitlet
"Sådan bruges
apparatet" for at
se temperatur- og
dampindstilling.
Placer strygejernet i
opladeenheden for
at opvarme og tørre
strygesålen.
Placer strygejernet i
opladeenheden for
at opvarme og tørre
strygesålen.
Se Tabel 1 for brug af
damp og dampskud.
Placer strygejernet
i opladeenheden
for at opvarme og
tørre strygesålen. Brug
dampskudsfunktionen
mindre hyppigt.
Page 27

29
DANSK
Problem Mulig årsag Løsning
Vandtanken er
overfyldt.
Dækslet til
vandtanken er ikke
lukket korrekt.
Der drysser små
kalkpartikler og
urenheder ud fra
strygesålen.
Når jeg sætter
dampvælgeren
i positionen
turbodampfunktion,
springer
dampvælgeren
tilbage.
Kun en del af
den lysende ring
lyser i funktionen Automatisk
sikkerhedsafbrydelse.
Opladeenheden
lyser ikke, når
jeg placerer
strygejernet i
den.
Du har ikke udført
Calc-Cleanfunktionen i et stykke
tid. Strygejernet skal
rengøres.
Dette er normalt.
Turbodampfunktionen er
designet sådan.
Dette er normalt.
Det er for at spare
energi i funktionen
Automatisk
sikkerhedsafbrydelse.
Strygejernet er ikke
ordentligt forbundet
med opladeenheden.
Fyld aldrig
vandtanken til op over
MAX-mærket.
Sørg for, at dækslet
til vandtanken bliver
lukket korrekt.
Brug Calc-Cleanfunktionen (se
kapitlet "Rengøring
og vedligeholdelse"’,
afsnittet "Calc-Cleanfunktion").
Bliv ved med at
holde dampvælgeren
i turbodamppositionen,
mens du bruger
turbo-damp.
Dette er ikke
nødvendigt for andre
dampindstillinger.
Fjern strygejernet,
og placer det igen i
opladeenheden.
I/T
Page 28

30 NORSK
Viktig
Les det separate heftet med viktig informasjon og brukerhåndboken
nøye før du begynner å bruke apparatet. Ta vare på begge
dokumentene for fremtidig bruk.
Generell beskrivelse (fig. 1)
1 Spraymunnstykke
2 Hette på påfyllingsåpning
3 Dampskyvebryter
- CALC CLEAN = kalkrensfunksjon
- = tørr stryking
- = optimal damp
- = maksimal damp
- = turbodamp
4 Dampstøtknapp
5 Sprayknapp
6 Temperaturdreieskive
7 Typeplate
8 Vannbeholder med MAX-indikator for vannivå
9 Strykesåle
10 Lysring
11 Sokkel
12 Oppbevaringslås i jern
13 Nettledning
Bruke apparatet
Fylle vannbeholderen
Merk: Apparatet er utformet for bruk med springvann. Hvis du bor
i et område med hardt vann, kan det raskt danne seg mye kalk.
Derfor anbefaler vi at du bruker destillert eller avsaltet vann for å
forlenge levetiden til apparatet.
Merk: Ikke tilsett parfyme, vann fra en tørketrommel,
eddik, magnetisk behandlet vann (f.eks. Aqua+), stivelse,
avkalkingsmidler, strykemidler, kjemisk avkalket vann eller andre
kjemikalier, ettersom dette kan føre til vannsprut, brune flekker
eller skade på apparatet.
Page 29

31
NORSK
1 Sett dampbryteren til . (Fig. 2)
2 Fyll vannbeholderen opp til MAX-nivået (g. 3).
3 Lukk hetten på påfyllingsåpningen.
Velge temperatur og dampinnstilling
Tabell 1
Stotype Temperatur-
Lin MAX
Bomull 3
Ull 2 Nei Ja
Silke 1 Nei Nei
Syntetiske
stoer (f.eks.
akryl, nylon,
polyamid,
polyester).
Merk: Som vist i tabellen ovenfor, må du ikke bruke damp eller
dampstøt ved lave temperaturer da varmt vann kan lekke fra
strykejernet.
1 Se tabell 1 for å sette temperaturvelgeren på riktig innstilling for
plagget (g. 4).
2 Se tabell 1 for å velge en dampinnstilling som stemmer med den
temperaturen du har angitt. (Fig. 5)
3 Plasser strykejernet på sokkelen og koble sokkelen til en
stikkontakt. (g. 6)
innstilling
1 Nei Nei
Dampinnstilling
,
,
Dampstøt Dusj
Ja Ja
Ja Ja
Page 30

32
NORSK
Merk: Sørg for at sokkelen er plassert på en stabil og jevn
overflate. Vi anbefaler at du plasserer sokkelen på den myke delen
av strykebrettet.
4 Lysringen blinker blått når strykejernet varmes opp. (g. 7)
5 Du kan begynne å stryke når lyset lyser kontinuerlig blått. (g. 8)
Hvordan den smarte ladesokkelen fungerer
En smart ladesokkel følger med strykejernet. Etter 20 til 25
sekunder minner lysindikatoren deg på å lade strykejernet slik at
ytelsen opprettholdes, og du enkelt kan stryke skrukker. Se i tabell
2 for hvordan sokkelen fungerer.
Merk: For å sørge for at strykejernet fjerner skrukker med høy
ytelse må du sette strykejernet i sokkelen i løpet av hvileperioden.
Ikke sett strykejernet i oppreist stilling. (Fig.9)
Tabell 2
Status på lyset Status på
Blinker blått Oppvarming Vent til strykejernet er klart.
Kontinuerlig
blått
Blinkende
oransje
Langsomt
blinkende blått
(bare utvalgte
modeller)
strykejernet
Klart til bruk Du kan begynne å stryke.
Strykejernet må
lades nå
Funksjonen
for automatisk
avslåing er
aktivert
Instruksjoner
Plasser strykejernet i
sokkelen for å lade det.
Se i avsnittet Funksjon for
automatisk avslåing under
Funksjoner.
Page 31

33
NORSK
Funksjoner
Sprayfunksjon
- Trykk på sprayknappen for å fukte plagget som skal strykes.
Dette hjelper på vanskelige skrukker (g. 10).
Dampstøtfunksjon
- Trykk på og slipp dampstøtknappen for et kraftig dampstøt for å
fjerne vanskelige skrukker (g. 11).
- Hvis du vil ha optimal dampstøtytelse, er det anbefalt at du
trykker på dampstøtutløseren i intervaller på 5 sekunder.
Vertikal damp
- Du kan bruke dampstøt -funksjonen når du holder strykejernet
loddrett. Dette er nyttig for å fjerne skrukker fra klær på
kleshengere, gardiner osv. (g. 12)
Tørr stryking
- Sett dampbryteren til for å stryke uten damp. (Fig. 2)
Funksjon for sikker automatisk avslåing (kun bestemte
modeller)
- Strykejernet slår seg automatisk av hvis du ikke bruker det i
løpet av 8 minutter. Lysringen blinker langsomt blått for å vise at
funksjonen for automatisk avslåing er aktivert.
- For at strykejernet skal varmes opp igjen, må du fjerne
strykejernet (hvis det står i sokkelen) og sette det tilbake i
sokkelen.
Rengjøring og vedlikehold
Rengjøring
1 Sett dampbryteren til , koble fra sokkelen, og la strykejernet
avkjøles. (Fig. 2)
2 Hell overødig vann ut av vannbeholderen.
Page 32

34
NORSK
3 Tørk kalk og andre avleiringer av strykesålen med en fuktig klut
og et (ytende) vaskemiddel uten skureeekt.
Forsiktig: For å holde strykesålen glatt må du unngå hard kontakt
med metallgjenstander. Bruk aldri skuresvamper, eddik eller andre
kjemikalier for å rengjøre strykesålen.
Merk: Skyll vannbeholderen med vann fra springen med jevne
mellomrom. Tøm vannbeholderen etter at du har skyllet den.
Kalkrensfunksjon
VIKTIG: Hvis du vil forlenge levetiden til apparatet
og opprettholde god dampytelse, kan du bruke
avkalkningsfunksjonen én gang annenhver uke. Hvis vannet i
området er hardt (f.eks. når det kommer kalk ut av strykesålen
under strykingen), bør du bruke avkalkningsfunksjonen oftere.
1 Kontroller at dampbryteren er satt til . (Fig. 2)
2 Fyll vannbeholderen opp til MAX-nivået. (Fig. 3)
Ikke hell eddik eller andre avkalkingsmidler i vannbeholderen.
3 Sett temperaturvelgeren til MAX-nivået. (Fig. 13)
4 Koble til sokkelen, plassere strykejernet i sokkelen, og la
strykejernet varmes opp. (Fig. 6).
5 Fjern strykejernet når lysringen lyser kontinuerlig blått. (Fig. 8)
6 Hold strykejernet over vasken. Trykk på og hold inne
dampskyvebryteren i avkalkingsposisjonen. (Fig. 14)
7 Rist strykejernet forsiktig mens du holder inne
dampskyvebryteren til alt vannet i beholderen er brukt opp.
(Fig. 15)
Forsiktig: Mens kalkrester skylles ut, kommer også damp og
kokende vann ut av strykesålen.
Page 33

35
NORSK
8 Sett dampbryteren tilbake til . (Fig. 2)
Merk: Gjenta kalkprosessen hvis vannet som kommer ut av
strykejernet, fremdeles har spor av kalk.
Etter kalkrensprosessen
1 Sett strykejernet i sokkelen. La strykejernet varmes opp for å
tørke strykesålen.
2 Løft strykejernet fra sokkelen når lysringen lyser kontinuerlig
blått.
3 Beveg strykejernet forsiktig over et tøystykke for å fjerne
vannekker på strykesålen.
Lagring
1 Sett dampbryteren tilbake til . (Fig. 2)
2 Hell ut resterende vann fra vannbeholderen.
3 Trekk ut nettledningen og vikle den rundt sokkelen. (Fig. 16)
Fjern strykejernet fra sokkelen når du vikler nettledningen rundt
sokkelen, fordi strykesålen fortsatt kan være varm.
4 Sett strykejernet i sokkelen. Lås strykejernet til sokkelen. (Fig. 17)
5 La strykejernet avkjøles før du setter det bort.
Du kan bære strykejernet og sokkelen ved å holde i håndtaket
på strykejernet. (Fig. 18)
Feilsøking
Dette avsnittet gir en oppsummering av de vanligste problemene
som kan oppstå med apparatet. Hvis du ikke kan løse problemet
ved hjelp av informasjonen nedenfor, kan du gå til www.philips.
com/support for å se en liste over vanlige spørsmål, eller du kan
kontakte forbrukerstøtten i landet der du bor (se i garantiheftet for
kontaktinformasjon).
Page 34

36
NORSK
Problem Mulig årsak Løsning
Strykejernet
avgir ikke damp.
Strykejernet
lekker.
Strykejernet uten
ledning avkjøles etter
en stund. Det må
lades opp.
Dampbryteren er satt
til .
Vannbeholderen er
tom.
Du bruker en
temperatur på under
to prikker.
Strykejernet uten
ledning avkjøles etter
en stund. Det må
lades opp.
Du bruker damp eller
dampstøt ved lav
temperatur.
Du har brukt
dampstøtfunksjonen
for ofte i løpet av kort
tid.
Plasser strykejernet i
sokkelen til lysringen
lyser kontinuerlig
blått. Dette viser at
strykejernet er klart til
bruk igjen.
Sett dampbryteren til
en dampinnstilling (se
tabell 1 i avsnittet Bruke
apparatet).
Fyll vannbeholderen.
Se tabell 1 i avsnittet
Bruke apparatet
for temperatur- og
dampinnstillinger.
Sett strykejernet
tilbake i sokkelen for
å varme opp og tørke
såleplaten.
Sett strykejernet
tilbake i sokkelen for
å varme opp og tørke
såleplaten.
Se tabell 1 for bruk av
damp og dampstøt.
Sett strykejernet
tilbake i sokkelen for
å varme opp og tørke
såleplaten. Ikke bruk
dampstøtfunksjonen
så ofte.
Page 35

37
NORSK
Problem Mulig årsak Løsning
Vannbeholderen er
overfylt.
Luken der du fyller på
vann, er ikke ordentlig
lukket.
Kalk og
urenheter
kommer ut av
strykesålen
under stryking.
Når jeg skyver
dampbryteren
til turbodampstillingen, hopper dampbryteren tilbake.
Bare deler av
lysringen lyser
i modus for
automatisk
avslåing.
Sokkelen
lyser ikke opp
når jeg setter
strykejernet i
den.
Du har ikke utført
avkalkningsfunksjonen
på en stund.
Strykejernet må
rengjøres.
Dette er normalt.
Dampskyvebryteren
skal gjøre dette i
turbodampstillingen.
Dette er normalt.
Dette er for å spare
energi i modus for
automatisk avslåing.
Strykejernet er ikke
ordentlig koblet til
sokkelen.
Ikke fyll vann over
MAX-nivået.
Kontroller at luken der
du fyller på vann, er
ordentlig lukket.
Bruk
avkalkningsfunksjonen
(se avsnittet Rengjøring
og vedlikehold, delen
Avkalkningsfunksjon).
Hold inne
dampskyvebryteren i
turbodampstillingen
mens du bruker
turbodamp. Du
trenger ikke å holde
dampskyvebryteren
inne for andre
dampinnstillinger.
Ta ut strykejernet
og sett det tilbake i
sokkelen igjen.
i/t
Page 36

38 SUOMI
Tärkeää!
Lue tämä laitteen käyttöopas ja erillinen tärkeitä tietoja sisältävä
lehtinen ennen laitteen käyttöä. Säilytä molemmat asiakirjat
myöhempää käyttöä varten.
Laitteen osat (kuva 1)
1 Suihkutussuutin
2 Täyttöaukon korkki
3 Höyrynvalitsin
- CALC CLEAN = kalkinpoistotoiminto
- = kuivasilitys
- = optimaalinen höyry
- = paljon höyryä
- = turbohöyry
4 Höyrysuihkauspainike
5 Suihkutuspainike
6 Lämpötilanvalitsin
7 Tyyppikilpi
8 Vesisäiliö, jossa on veden enimmäismäärän merkki
9 Pohja
10 Merkkivalo
11 Teline
12 Silitysraudan turvalukitus
13 Virtajohto
Käyttö
Vesisäiliön täyttäminen
Huomautus: Laite on suunniteltu käyttämään vesijohtovettä. Jos
asut alueella, jossa on kova vesi, kalkkia voi muodostua nopeasti.
Tästä syytä suosittelemme, että laitteessa käytetään tislattua tai
demineralisoitua vettä. Tämä pidentää laitteen käyttöikää.
Huomautus: älä käytä hajustettua vettä, kuivausrummun vettä,
magnetisoitua vettä (esim. Aqua+) tai vettä, johon on lisätty
etikkaa, tärkkiä, kalkinpoistoaineita, silitysaineita, kemiallisesti
puhdistettua vettä tai muita kemikaaleja, koska se voi vahingoittaa
laitetta tai aiheuttaa veden pirskahtelua ja ruskeita tahroja
silitettävään kankaaseen.
Page 37

39
SUOMI
1 Aseta höyrynvalitsin asentoon . (kuva 2)
2 Täytä vesisäiliö vedellä MAX-merkkiin asti. (kuva 3).
3 Sulje täyttöaukon korkki.
Lämpötila- ja höyryasetuksen valitseminen
Taulukko 1
Kangastyyppi Lämpöti-
Pellava MAX
Puuvilla 3
Villa 2 ei kyllä
Silkki 1 ei ei
Tekokuidut
(esimerkiksi
akryyli, nailon,
polyamidi,
polyesteri).
Huomautus: älä käytä höyryä tai höyrysuihkausta matalassa
lämpötilassa (kuten kerrottu edellä olevassa taulukossa), sillä
muuten silitysraudasta voi vuotaa kuumaa vettä.
1 Käytä vaatteillesi sopivan lämpötila-asetuksen valinnassa
apuna taulukkoa 1 (kuva 4).
2 Käytä valittuun lämpötilaan parhaiten sopivan höyryasetuksen
valinnassa apuna taulukkoa 1. (Kuva 5)
3 Aseta silitysrauta telineeseen ja kytke telineen virtajohto
verkkovirtaan. (Kuva 6)
la-asetus
1 ei ei
Höyryasetus
,
,
Höyrysuihkaus
kyllä kyllä
kyllä kyllä
Suihkaus
Page 38

40
SUOMI
Huomautus: varmista, että teline on asetettu tukevalle ja tasaiselle
alustalle. On suositeltavaa asettaa teline silityslaudan pehmeälle
osalle.
4 Merkkivalo alkaa vilkkua sinisenä, kun silitysrauta alkaa
kuumentua. (Kuva 7)
5 Kun sininen valo palaa tasaisesti, voit aloittaa silittämisen.
(Kuva 8)
Älykäs latausteline
Silitysraudassa on älykäs latausteline. Merkkivalo kertoo
silitysraudan tilan. Se muistuttaa, että silitysrauta on ladattava
20–25 sekunnin välein, jotta se poistaa rypyt mahdollisimman
tehokkaasti. Lue telineen toimintaa koskevat tiedot taulukosta 2.
Huomautus: jotta silitysrauta poistaa ryppyjä mahdollisimman
tehokkaasti, aseta silitysrauta aina telineeseen, kun silitysrautaa ei
käytetä. Älä aseta silitysrautaa pystyasentoon. (kuva 9)
Taulukko 2
Merkkivalon tila Silitysraudan tila Ohjeet
Vilkkuu sinisenä Lämmitys Odota, että silitysrauta on
valmis.
Palaa tasaisesti
sinisenä
Vilkkuu
oranssina
Vilkkuu hitaasti
sinisenä (vain
tietyissä
malleissa)
Käyttövalmis Voit aloittaa silittämisen.
Silitysrauta on
ladattava
Automaattinen
virrankatkaisu on
käynnistynyt
Lataa silitysrauta
asettamalla se telineeseen.
Katso lisätietoja
Ominaisuudet-luvun
kohdasta Automaattinen
virrankatkaisu.
Page 39

41
SUOMI
Ominaisuudet
Spray-toiminto
- Kostuta silitettävä vaate painamalla suihkutuspainiketta. Näin
voit poistaa sitkeät rypyt (kuva 10).
Höyrysuihkaustoiminto
- Poista sitkeät rypyt painamalla höyrysuihkauspainiketta (kuva 11).
- Höyrysuihkaus toimii parhaiten, kun höyrysuihkauspainiketta
painetaan viiden sekunnin välein.
Pystyhöyrytys
- Höyrysuihkausta voidaan käyttää myös pidettäessä
höyrysilitysrautaa pystyasennossa. Tämä on hyödyllinen
ominaisuus poistettaessa ryppyjä ja laskoksia esimerkiksi
ripustustangossa riippuvista vaatteista tai verhoista. (kuva 12)
Kuivasilitys
- Aseta höyrynvalitsin -asentoon, kun haluat silittää ilman
höyryä. (kuva 2)
Automaattinen virrankatkaisu (vain tietyissä malleissa)
- Silitysraudan virta katkeaa automaattisesti, kun silitysrautaa
ei ole käytetty 8 minuuttiin. Silitysraudan merkkivalo alkaa
vilkkua hitaasti sinisenä, mikä tarkoittaa, että automaattinen
virrankatkaisu on käynnistynyt.
- Silitysrauta alkaa kuumeta uudelleen, kun poistat silitysraudan
telineestä (jos se on asetettuna telineeseen) ja asetat sen siihen
takaisin.
Puhdistus ja huolto
Puhdistaminen
1 Aseta höyrynvalitsin asentoon , irrota telineen pistoke
pistorasiasta ja anna silitysraudan jäähtyä. (kuva 2)
2 Kaada jäljelle jäänyt vesi pois vesisäiliöstä.
Page 40

42
SUOMI
3 Pyyhi kalkkihiutaleet ja muut tahrat pois pohjasta
kostealla liinalla ja naarmuttamattomalla (nestemäisellä)
puhdistusaineella.
Varoitus: Varo, ettei pohja kosketa metallia. Näin pohja pysyy
sileänä. Älä käytä hankaustyynyjä, etikkaa tai muita kemikaaleja
pohjan puhdistamiseen.
Huomautus: huuhtele vesisäiliö säännöllisesti vesijohtovedellä.
Tyhjennä vesisäiliö huuhtelun jälkeen.
Calc-Clean-toiminto
TÄRKEÄÄ: voit pidentää laitteen käyttöikää ja varmistaa sen
parhaan mahdollisen suorituskyvyn tekemällä Calc-Cleankalkinpoiston kahden viikon välein. Jos paikallinen vesi on
erittäin kovaa (esimerkiksi jos silityksen aikana pohjasta tulee
kalkkihiutaleita), käytä Calc-Clean-toimintoa useammin.
1 Varmista, että höyrynvalitsin on asetettu asentoon . (kuva 2)
2 Täytä vesisäiliö vedellä MAX-merkkiin asti. (kuva 3)
Älä kaada vesisäiliöön etikkaa tai muita kalkinpoistoaineita.
3 Aseta lämpötilan valitsin asentoon MAX. (kuva 13)
4 Kytke telineen pistoke, aseta silitysrauta telineeseen ja anna
silitysraudan kuumeta. (Kuva 6)
5 Poista silitysrauta telineestä, kun merkkivalo palaa tasaisesti
sinisenä. (Kuva 8)
6 Pidä silitysrautaa pesualtaan päällä. Pidä höyrynvalitsinta
Calc-Clean-asennossa (kuva 14).
7 Pidä höyrynvalitsinta paikallaan ja ravista höyrysilitysrautaa
varovasti, kunnes säiliössä ollut vesi on kulunut
loppuun (kuva 15).
Varoitus: kalkin huuhtoutuessa pois laitteen pohjasta tulee myös
höyryä ja kiehuvaa vettä.
Page 41

SUOMI
8 Aseta höyrynvalitsin takaisin asentoon . (kuva 2)
Huomautus: jos höyrysilitysraudasta tulevassa vedessä on
edelleen kalkkihiukkasia, suorita Calc-Clean-toiminto uudelleen.
Calc-Clean-toimenpiteen jälkeen
1 Aseta silitysrauta telineeseen. Anna silitysraudan kuumeta,
jotta silitysraudan pohjaa kuivuu.
2 Poista silitysrauta telineestä, kun merkkivalo palaa tasaisesti
sinisenä.
3 Liikuta silitysrautaa kankaan päällä hitaasti, jotta vesitahrat
häviävät pohjasta.
Säilytys
1 Aseta höyrynvalitsin takaisin asentoon . (kuva 2)
2 Kaada vesisäiliöstä pois jäljelle jäänyt vesi.
3 Irrota virtajohto pistorasiasta ja kierrä virtajohto telineen
ympärille. (Kuva 16)
Älä pidä silitysrautaa telineessä virtajohdon kiertämisen aikana,
sillä silitysraudan pohja voi edelleen olla kuuma.
4 Aseta silitysrauta telineeseen. Lukitse silitysrauta telineeseen.
(Kuva 17)
5 Anna silitysraudan jäähtyä ennen säilytystä.
Voit kantaa silitysrautaa ja telinettä silitysraudan kahvasta. (Kuva 18)
Vianmääritys
Tähän osaan on koottu tavallisimmat laitteen käytössä ilmenevät
ongelmat. Ellet löydä ongelmaasi ratkaisua seuraavista tiedoista,
lue osoitteesta www.philips.com/support vastauksia usein
kysyttyihin kysymyksiin tai ota yhteys maasi asiakaspalveluun
(katso yhteystiedot kansainvälisestä takuulehtisestä).
43
Page 42

44
SUOMI
Ongelma Mahdollinen syy Ratkaisu
Höyrysilitysraudasta ei
tule höyryä.
Silitysraudasta
vuotaa vettä.
Johdoton silitysrauta
jäähtyy hieman
käytön aikana. Se on
ladattava.
Höyrynvalitsin on
asetettu asentoon .
Vesisäiliö on tyhjä. Täytä vesisäiliö.
Käyttämäsi lämpötila
on alle kahden
pisteen.
Johdoton silitysrauta
jäähtyy hieman
käytön aikana. Se on
ladattava.
Käytät höyryä tai höyrysuihkaustoimintoa
matalassa lämpötilassa.
Olet käyttänyt höyrysuihkaustoimintoa
liian usein lyhyen ajan
kuluessa.
Aseta silitysrauta
takaisin telineeseen,
kunnes merkkivalo palaa
tasaisesti sinisenä. Tämä
tarkoittaa, että silitysrauta
on jälleen käyttövalmis.
Aseta höyrynvalitsin
höyryasetukselle (katso
Käyttö-luvun taulukko 1).
Katso lisätietoja
lämpötila- ja
höyryasetuksesta Käyttöluvun taulukosta 1.
Aseta silitysrauta takaisin
telineeseen, jotta
silitysrauta kuumenee ja
sen pohja kuivuu.
Aseta silitysrauta takaisin
telineeseen, jotta
silitysrauta kuumenee ja
sen pohja kuivuu.
Katso lisätietoja höyryn ja
höyrysuihkaustoiminnon
käytöstä taulukosta 1.
Aseta silitysrauta
takaisin telineeseen,
jotta silitysrauta
kuumenee ja sen
pohja kuivuu. Käytä
höyrysuihkaustoimintoa
harvemmin.
Page 43

45
SUOMI
Ongelma Mahdollinen syy Ratkaisu
Vesisäiliö on liian
täynnä.
Täyttöaukon luukkua
ei ole suljettu
kunnolla.
Pohjasta tulee
silityksen
aikana kalkkihiutaleita ja
muita epäpuhtauksia.
Höyrynvalitsin
palautuu
turbohöyryasennosta
alkuperäiseen
asentoon.
Vain osa
merkkivalon
valosta syttyy
automaattisen
virrankatkaisun aikana.
Telineen
merkkivalo ei
syty, vaikka
asetan
silitysraudan
telineeseen.
Calc-Cleankalkinpoistoa ei
ole tehty vähään
aikaan. Silitysrauta on
puhdistettava.
Tämä on normaalia.
Turbohöyrytoiminto
on suunniteltu
toimimaan näin.
Tämä on normaalia.
Näin energiaa säästyy
automaattisen
virrankatkaisun
aikana.
Silitysrautaa ei ole
asetettu kunnolla
telineeseen.
Täytä vesisäiliö enintään
MAX-merkkiin asti.
Varmista, että
täyttöaukon luukku on
suljettu kunnolla.
Käytä CalcCleantoimintoa (katso
Puhdistus ja hoito, kohta
CalcClean-toiminto).
Pidä höyrynvalitsin
turbohöyryasennossa
niin kauan kuin
haluat käyttää
turbohöyryä. Tämä ei
ole tarpeen muissa
höyryasetuksissa.
Poista silitysrauta
telineestä ja aseta se
takaisin telineeseen.
n/a
Page 44

 Loading...