

Philips FWR33 User Manual [en, es, fr]

CDR Mini Hi-Fi System
FW-R33
FW-R33
Toll Free Help Line
Ligne d’assistance en service libre
Linea de ayuda telefónica sin cargo
800-531-0039
Know these
ssaaffeettyysymbols
t
This “bolt of lightning” indicates
uninsulated material within your unit
may cause an electrical shock.For
the safety of everyone in your household,
please do not remove product covering.
s
The “exclamation point” calls attention
to features for which you should read
the enclosed literature closely to
prevent operating and maintenance problems.
WARNING: TO PREVENT FIRE OR
SHOCK HAZARD, DO NOT EXPOSE THIS
EQUIPMENT TO RAIN OR MOISTURE.
CAUTION: To prevent electric shock,
match wide blade of plug to wide slot, and
fully insert.
For Customer Use
Enter below the Serial No.which is located
on the rear of the cabinet.Retain this
information for future reference.
Model No. ___________________________
Serial No. ____________________________
CAUTION
RISK OF ELECTRIC SHOCK
DO NOT OPEN
CAUTION: TO REDUCE THE RISK OF ELECTRIC SHOCK, DO NOT
REMOVE COVER (OR BACK). NO USER-SERVICEABLE PARTS
INSIDE. REFER SERVICING TO QUALIFIED SERVICE PERSONNEL.
• Once your Philips purchase is registered,you’re eligible to
receive all the privileges of owning a Philips product.
• So complete and return the Warranty Registration Card
enclosed with your purchase at once , and take advantage
of these important benefits.
Return your Warranty Registration card today to
ensure you receive all the benefits you’re entitled to.
Warranty
Verification
Registering your product within 10days
confirms your right to maximum
protection under the terms and
conditions of your Philips warranty.
Owner
Confirmation
Your completed Warranty Registration
Card serves as verification of ownership
in the event of product theft or loss.
Model
Registration
Returning your Warranty Registration
Card right away guarantees you’ll
receive all the information and special
offers which you qualify for as the
owner of your model.
Congratulations on your purchase,
and welcome to the “family!”
Dear Philips product owner:
Thank you for your confidence in Philips.You’ve selected one of the best-built,
best-backed products available today.And we’ll do everything in our power to
keep you happy with your purchase for many years to come.
As a member of the Philips “family,” you’re entitled to protection by one of the
most comprehensive warranties and outstanding service networks in the industry.
What’s more,your purchase guarantees you’ll receive all the information and
special offers for which you qualify,plus easy access to accessories from our
convenient home shopping network.
And most importantly you can count on our uncompromising commitment to
your total satisfaction.
All of this is our way of saying welcome – and thanks for investing in a Philips product.
Sincerely,
Lawrence J.Blanford
President and Chief Executive Officer
P.S. Remember, to get the most from your Philips product, you must
return your Warranty Registration Card within 10 days.So please
mail it to us right now!
MAC5097
Visit our World Wide Web Site at http://www.philips.com
I
T
O
A
N
R
T
S
I
G
E
R
S
Y
Hurry!
A
D
0
N
E
E
D
E
D
W
I
T
H
I
1
N

3
EnglishFrançaisEspañol
English
_________________________________________________________
4
Français
_______________________________________________________
30
Español
________________________________________________________
57
Canada
English:
This digital apparatus does not exceed the Class B limits
for radio noise emissions from digital apparatus as set
out in the Radio Interference Regulations of the
Canadian Department of Communications.
Français:
Cet appareil numérique n'émet pas de bruits
radioélectriques dépassant les limites applicables aux
appareils numériques de Classe B prescrites dans le
Règlement sur le Brouillage Radioélectrique édicté par
le Ministère des Communications du Canada.
This warning label is located on the rearside and inside this laser product.
CAUTION
:
INVISIBLE
LASER RADIATION
WHEN OPEN.DO NOT STARE INTO BEAM.
DANGER
:
INVISIBLE LASER RADIATION WHEN OPEN.
AVOID DIRECT EXPOSURE TO BEAM.
VARO!
AVATTAESSA JA SUOJALUKITUS OHITETTAESSA OLET
ALTTIINANAKYMATTOMAALLE LASERSATEILYLLE.ALA
KATSO SATEESEEN.
VARNING!
OSYNLIG LASERSTRÅLNING NÄR DENNA DEL ÄR ÖPPNAD.
OCH SPARREN AR URKOPPLAD.BETRAKTA EJ STRÅLEN.
DANGER
- Invisible laser radiation when open.
AVOID DIRECT EXPOSURE TO BEAM.

The following text contains updated information in addition to the
supplied instruction manual.
Basic functions,page 14
Loading the CDC and CDR When loading an MP3-CD,the volume name will not be scrolled.
When displaying album or track names,CD and the disc tray number
or CDR is not displayed.
Basic functions,page 15
Selecting and searching When loading an MP3-CD,there will be no upcounting of tracks.
When displaying album or track names,CD and the disc tray number
or CDR is not displayed.
Basic functions,page 16
SHUFFLE and REPEAT Repeating a track is not possible during SHUFFLE.
Program,page 17
Programming track numbers A program with MP3 tracks can only be created from one MP3-CD.
About recording,page 18
Adjusting the record level You can adjust the record level from the CD changer only during recording.
Cd text editing (on CD recorder only),page 24
Storing text during recording It is not possible to store and edit text while recording.
Deleting and substituting a character You do not have to press YES to confirm substituting a character.
Addendum FW-R33
English

Français
Le texte suivant contient des informations mises à jour qui viennent
s'ajouter au mode d'emploi.
Fonctions de base,page 42
Mise en place de disques dans le CDC Lors du chargement d’un CD-MP3, le nom du volume ne défile pas.
et le CDR
Lors de l’affichage des noms d’albums ou de pistes, CD et le numéro du
porte-disque ou CDR n’est pas affiché.
Fonctions de base,page 43
Sélection et recherche Lors du chargement d’un CD-MP3, il n’y a pas de décompte des pistes.
Lors de l’affichage des noms d’albums ou de pistes, CD et le numéro du
porte-disque ou CDR n’est pas affiché.
Fonctions de base,page 44
SHUFFLE et REPEAT La répétition d'une piste n'est pas possible pendant la lecture aléatoire
SHUFFLE.
Programme,page 45
Programmation des numéros de piste Un programme contenant des pistes MP3 ne peut être créé qu'à partir d'un
seul CD-MP3.
A propos de l'enregistrement,page 46
Réglage du niveau d'enregistrement Vous ne pouvez régler le niveau d'enregistrement du changeur de CD que
pendant l'enregistrement.
Edition du texte du CD (sur l'enregistreur de CD uniquement),page 52
Mise en mémoire du texte pendant Il n'est pas possible de mémoriser ou d'éditer du texte pendant
l'enregistrement l'enregistrement.
Effacement et remplacement d'un Il n'est pas nécessaire d'appuyer sur YES pour confirmer le remplacement
caractère d'un caractère.
Addenda FW-R33
3103 306 1845.1 Printed in China EL6498B001 / VieUrs0135

Español
El siguiente texto contiene información actualizada como complemento
del manual de instrucciones suministrado.
Funciones básicas,página 68
Carga del cambiador de CD Cuando cargue un CD MP3, el nombre del índice no se desplazará.
y grabadora de CD
Cuando aparezca en pantalla el nombre del álbum o de una de sus pistas,no
aparecerá CD y el número de bandeja del disco o CDR.
Funciones básicas,página 69
Selección y búsqueda Cuando cargue un CD MP3, no se contarán las pistas.
Cuando aparezca en pantalla el nombre del álbum o de una de sus pistas,no
aparecerá CD y el número de bandeja del disco o CDR.
Funciones básicas,página 70
SHUFFLE y REPEAT Repetir una pista no es posible durante SHUFFLE.
Programa,página 71
Programación de números de pistas Un programa con pistas MP3 sólo puede ser creado desde un CD MP3.
Sobre la grabación,página 72
Ajuste del nivel de grabación Puede ajustar el nivel de grabación desde el cambiador de CD solamente
durante la grabación.
Edición de texto de CD (sólo en la grabadora de CD),página 78
Almacenamiento de texto durante No es posible almacenar ni editar texto durante la grabación.
Borrado y sustitución de un carácter No tiene que pulsar YES para confirmar la sustitución de un carácter.
la grabación
Addendum FW-R33
3103 306 1845.1 Printed in China EL6498S001 / VieUrs0135
IMPORTANT SAFETY INSTRUCTIONS
4
1. Read these instructions.
2. Keep these instructions.
3. Heed all warnings.
4. Follow all instructions.
5. Do not use this apparatus near water.
6. Clean only with dry cloth.
7. Do not block any ventilation openings.Install in
accordance with the manufacturer´s instructions.
8. Do not install near any heat sources such as
radiators, heat registers, stoves,or other apparatus
(including amplifiers) that produce heat.
9. Do not defeat the safety
purpose of the polarized or
grounding-type plug.A polarized plug
has two blades with one wider than
the other.A grounding type plug has two blades and a third
grounding prong.The wide blade or the third prong are
provided for your safety.If the provided plug does not fit
into your outlet,consult an electrician for replacement of
the obsolete outlet.
10.Protect the power cord from being walked on or
pinched,particularly at plugs, convenience receptacles,and
the point where they exit from the apparatus.
11.Only use attachments/accessories specified by the
manufacturer.
12. Use only with the cart, stand, tripod,
bracket, or table specified by the manufacturer
or sold with the apparatus.When a cart is used,
use caution when moving the cart/apparatus
combination to avoid injury from tip-over.
13.Unplug this apparatus during lightning storms or when
unused for long periods of time.
14.Refer all servicing to qualified service personnel.
Servicing is required when the apparatus has been
damaged in any way, such as power-supply cord or plug is
damaged,liquid has been spilled or objects have fallen into
the apparatus, the apparatus has been exposed to rain or
moisture, does not operate normally,or has been dropped.
15. Battery usage CAUTION – To prevent battery leakage
which may result in bodily injury or damage to the unit:
● Install all batteries correctly, + and - as marked on the unit.
● Do not mix batteries (old and new or carbon and
alkaline,etc.).
● Remove batteries when the unit is not used for a long time.
EL 6475-E003:01/6
AC Polarized
Plug

General information
Supplied accessories
__________________________
6
Setup information
___________________________
6
Maintenance
________________________________
6
Disc handling
_______________________________
6
Environmental information
_____________________
6
Discs for recording
___________________________
7
Discs for playback
____________________________
7
MP3
Some words about MP3
______________________
7
Installation
Speaker connections
_________________________
8
Antenna connections
_________________________
8
Power
_____________________________________
8
Plug and Play
_______________________________
8
Analog audio connections
_____________________
9
Connecting a subwoofer
______________________
9
Controls and connections
On the back
_______________________________
10
On the front
_______________________________
11
Remote control
Remote control keys
________________________
12
Remote control usage
_______________________
13
Sound control
______________________________
13
Basic functions
Switching to standby
________________________
14
Demonstration mode
_______________________
14
Loading the CDC and CDR
___________________
14
Playback
__________________________________
15
Selecting and searching
_______________________
15
SHUFFLE and REPEAT
_______________________
16
CD text display
____________________________
16
ID3-tag
___________________________________
16
Program
Programming track numbers
__________________
17
Erasing a track from the program
_______________
17
Clearing the program
________________________
17
Making a program for recording
________________
17
About recording
Basic information
___________________________
18
Direct Line Recording (DLR)
__________________
18
Auto Level Control (ALC)
____________________
18
Adjusting the record level
____________________
18
Internal recording
Recording a single track
______________________
19
Recording an entire CD
______________________
19
Recording a program
________________________
20
Recording from the tuner
_____________________
20
Further recording possibilities
_________________
21
External recording
Automatic track increment
____________________
22
Recording with automatic start
________________
22
Manual recording
___________________________
22
(Un)finalizing,erasing
Finalizing CDR(W) discs
______________________
23
Unfinalizing CDRW discs
_____________________
23
Erasing from a CDRW disc
____________________
23
Features
CD text editing (on CD recorder only)
__________
24
Tuner
Tuning to radio stations
______________________
25
Storing radio stations
________________________
25
Tuning to preset stations
_____________________
25
Clock and timer
Clock setting
______________________________
26
Timer functions
____________________________
26
Technical data
______________________________
27
Troubleshooting
____________________________
28
Limited warranty
___________________________
29
Contents
5
English
Supplied accessories
– 2 loudspeakers including 2 speaker cables
– Remote control
– 2 batteries for the remote control, size AA
– AM (MW) loop antenna
– FM wire antenna
– Power cable
Setup information
Place the unit on a flat,hard and stable surface. Make sure
to leave at least 3.5 cm (1.5 inches) free around the unit to
prevent overheating.Active mobile phones near the unit
may cause malfunctions.
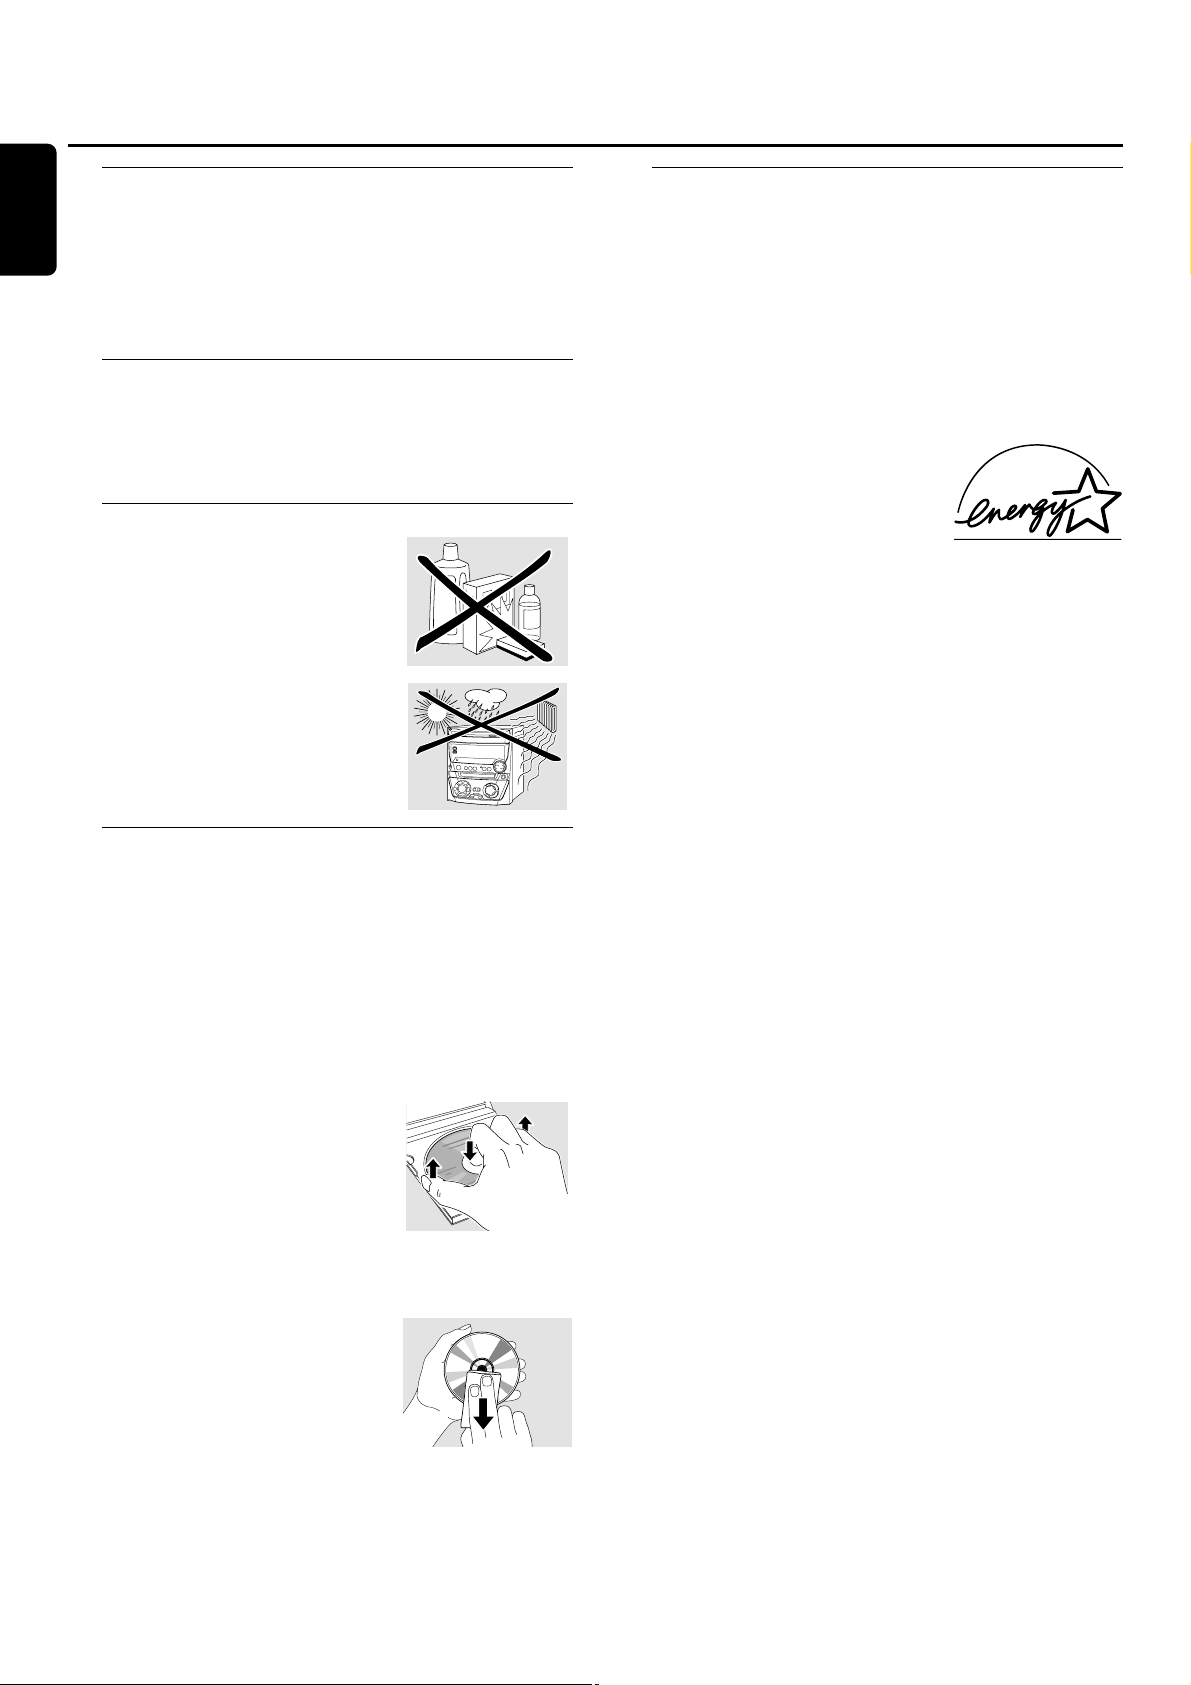
Maintenance
Clean the unit with a soft,
slightly dampened,lint-free cloth. Do
not use any cleaning agents as they
may have a corrosive effect.
Do not expose the unit,batteries or
discs to humidity,rain, sand or
excessive heat (caused by heating
equipment or direct sunlight).
Disc handling
If the CDR Mini Hi-Fi system fails to read discs correctly,use
a commonly available cleaning-CD to clean the lenses
before submitting the unit to repair. Other cleaning
methods may destroy the lenses.Always keep the trays
closed to avoid dust on the lenses.
The lenses may cloud over when the unit is suddenly
moved from cold to warm surroundings. Playing a disc is
not possible then.Leave the unit in a warm environment
until the moisture evaporates.
To take a disc out of its box easily,
press the center spindle while lifting
the CD(RW).Always pick up a
CD(RW) by the edge and put it
back in its box after use.
Never write on a CD or attach a
sticker to it.Write only on the printed side of a CDR or
CDRW, and only with a soft felt-tipped pen.
To clean a disc, wipe it in a straight
line from the center toward the
edge using a soft,lint-free cloth.A
cleaning agent may damage the disc!
Environmental information
All redundant packing material has been omitted.We have
tried to make the packaging easy to separate into three
mono materials: cardboard (box), polystyrene foam (buffer)
and polyethylene (bags,protective foam sheet).
Your unit consists of materials which can be recycled if
disassembled by a specialized company.Please observe the
local regulations regarding the disposal of packing materials,
exhausted batteries and old equipment.
As an ENERGY STAR®partner,
Philips has determined that this
product meets the ENERGY STAR
®
guidelines for energy efficiency.
The set complies with the FCC-Rules, Part 15 and
with 21 CFR 1040.10.Operation is subject to the
following two conditions:
1.This device may not cause harmful interference,
and
2.This device must accept any interference
received,including interference that may cause
undesired operation.
CAUTION
Use of controls or adjustments or performance of
procedures other than herein may result in
hazardous radiation exposure or other unsafe
operation.
General information
6
English
Discs for recording
For recording,make sure to use special audio discs only.
These discs are marked with “Digital Audio”and the logos
shown below.
There are two different types of audio discs for the use on
this CD recorder:
– CD-Audio Recordable (CDR)
discs can be recorded on once and
played on all standard CD players and
CD recorders when finalized.
– CD-Audio ReWritable (CDRW)
discs can be recorded on, erased and
re-recorded many times and played on
CDRW compatible CD players and
CD recorders when finalized.
All Philips CD players and CD recorders with
this sticker are CDRW compatible.
To ensure proper working of the unit, we
recommend the use of Philips audio CDR and audio
CDRW discs only.
Note: Do not use a computer CDR or CDRW as recording will
not work properly!
Recording is permissible insofar as copyright or
other rights of third parties are not infringed upon.
In some countries the use of the Philips CDR Mini
Hi-Fi system as shown or suggested in this user
manual may require the authorization of copyright
holders.
Discs for playback
For playback on this CD changer and CD recorder you can
use following discs:
– All pre-recorded audio CDs
– All audio CDR and audio CDRW discs
– MP3-CDs (CD-ROMs with MP3 tracks) – Make
sure the file name ends with .mp3
Note:Not finalized CDR(W) discs can only be played on the
CD recorder.
Some words about MP3
The revolutionary new music compression technology MP3
(MPEG Audio Layer-3) enables shrinking of original digital
audio sound data with a factor of up to 10 without losing
significant sound quality.This allows you to record up to
10 hours of CD-like quality music on a single CD-ROM.
Making your own MP3-CD
Basically there are two sources for MP3 music on CD.You can
either transfer music from your own digital audio CDs via
CD-ROM drive onto your PC and encode it into MP3 format
(“rip”),or download legal MP3 music from the Internet.
Record (“burn”) the music from your hard disc onto a
CD-ROM with your home PC (make sure the file name
ends with .mp3).Once finished,you can play your
MP3-CD on this CDR Mini Hi-Fi system and enjoy the music.
Data rate
The data rate is of great importance with MP3. It indicates
how fast bits are transferred.
Stereo music on a CD shows a data rate of about
1,400 kilobits per second (kbps). To achieve a good MP3
quality,a bit rate of 128 kbps is recommended. As
the encoding rate is user-selectab le,make sure to reach this
data rate for MP3 as recordings less than 128 kbps will suffer
from a degradation in sound quality.
Recording
Downloading MP3 files from the Internet or ripping songs
from your own digital audio CDs is a delicate process,also
influenced by the quality of the encoder program and speed
of your PC.This may sometimes result in “drop-outs”, that
you may experience while listening to your MP3-CD.
In any case make sure to use a recording speed not faster
than indicated on the CD-ROM and avoid running other
programs simultaneously on your PC during the recording
process.
In compliance with the SDMI (Secure Digital
Music Initiative),this CDR Mini Hi-Fi system has no
digital output.
It is not possible to “burn” an MP3-CD on this
CDR Mini Hi-Fi system.
It is not possible to record from an MP3-CD.
Supported formats
The following formats are supported on this
CDR Mini Hi-Fi system:
– Disc format:ISO 9660 or Joliet
– File name: .mp3 (tracks), .m3u or .pls (playlists)
– Bit rate: 32–320 kbps (128 kbps advised) or variable
bit rate
Use ISO 9660 disc format when burning the CD-ROM.
UDF disc format (e.g.“DirectCD” or
“WinOnCD”) is not supported.
General information/MP3
7
English
Speaker connections
The speaker connections are click-fit connectors. Use them
as shown below.
1 Connect the colored (or marked) wire to the red terminal
and the black (or unmarked) wire to the black terminal.
2 Connect:
– Left speaker to L (red and black)
– Right speaker to R (red and black)
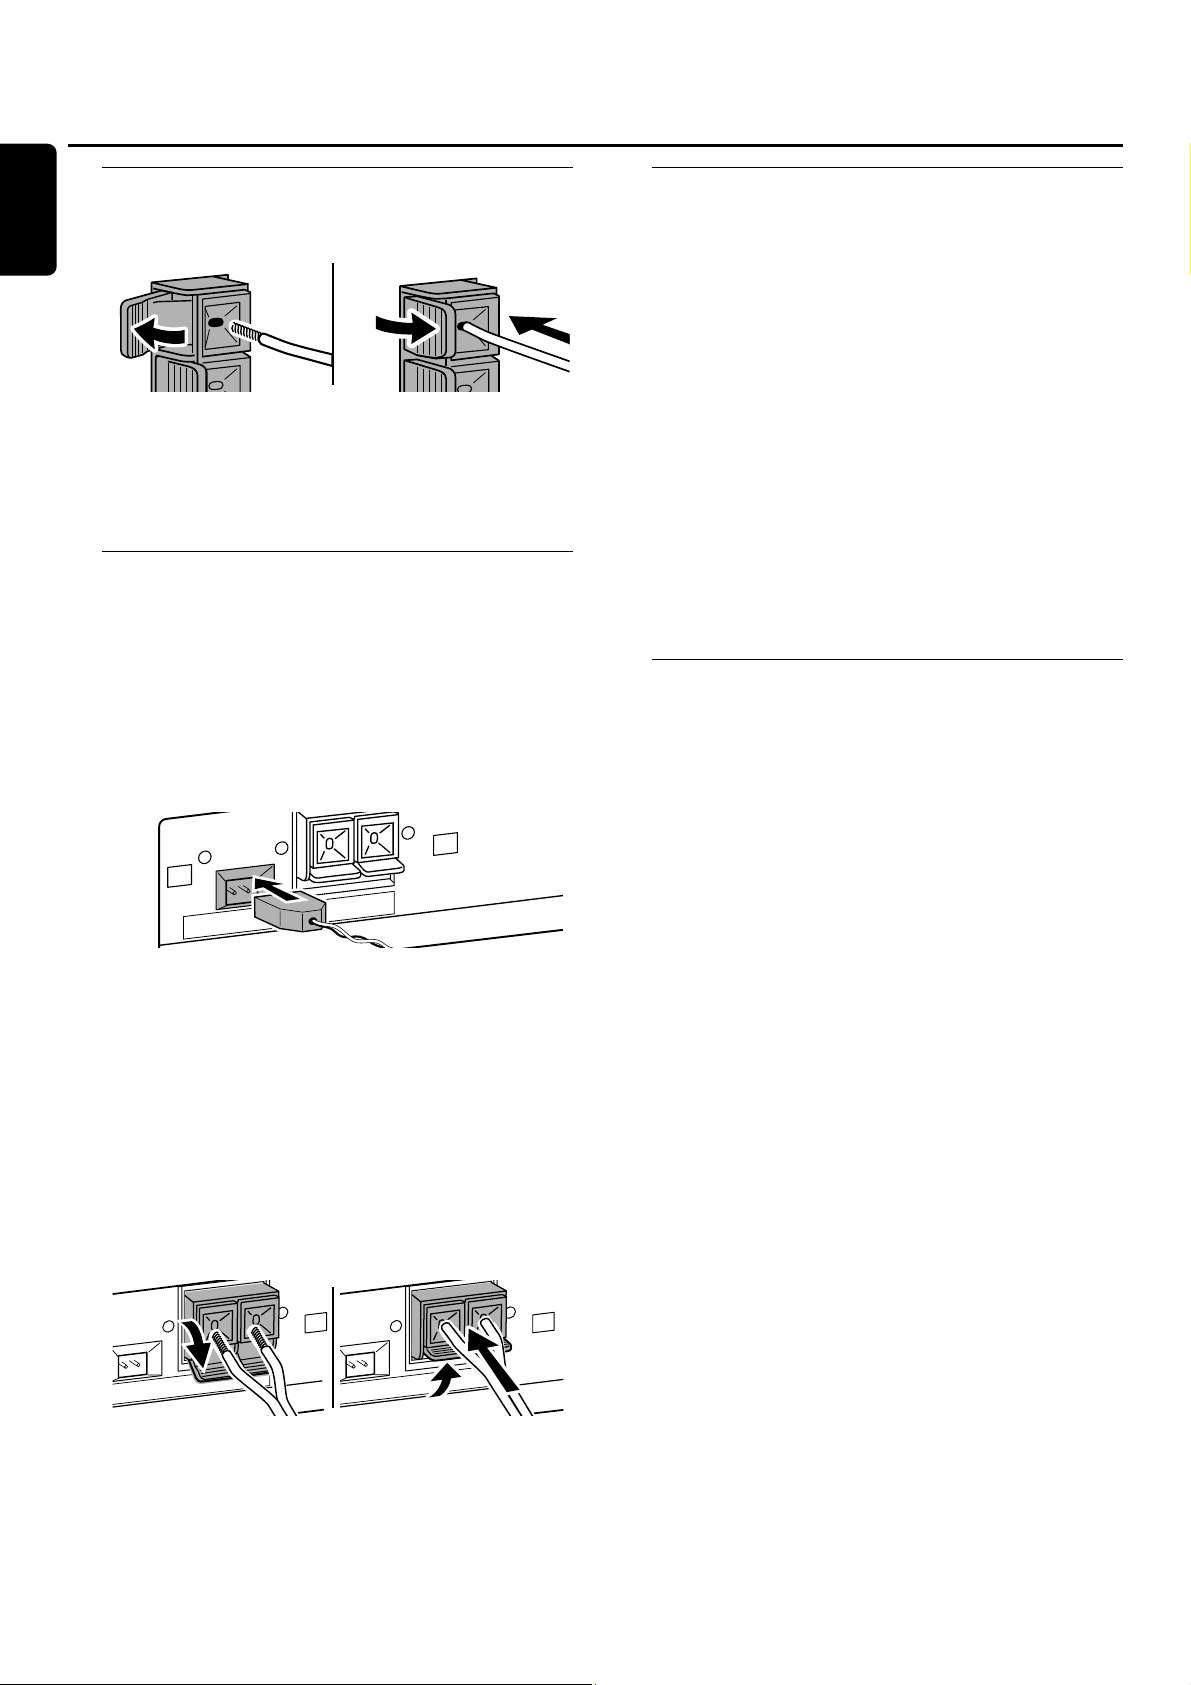
Antenna connections
AM antenna
The supplied loop antenna is for indoor use only.
1 Fit the plug of the loop antenna to AMANTENNA as
shown below.
2 Position the antenna as far as possible from the TV, a VCR
and other radiation sources.
3 Turn the antenna for optimum reception.
FM antenna
The supplied wire antenna can only be used to receive
nearby stations.For better reception we recommend using
a cable antenna system or an outdoor antenna.
1 Open the FM ANTENNA click-fits by pushing the lever
down as shown below.
2 Insert each wire of the antenna into one hole.
3 Close the click-fits using the lever.
4 Move the antenna in different positions for optimum
reception.
Power
The type plate is located on the rear of the unit.
1 Check whether the power voltage as shown on the type
plate corresponds to your local power voltage.If it does
not,consult your dealer or service organization.
2 Make sure all connections have been made before
switching on the power supply.
3 Connect the supplied power cable to AC MAINS ~ and to
the power outlet.This switches on the power supply.
When the unit is switched to standby, it is still consuming
some power. To disconnect the unit from the power
completely,remove the power cable from the power
outlet.
To avoid overheating of the unit,a safety circuit has
been built in.Therefore, your unit may disconnect
under extreme conditions.If this happens, switch the
unit off and let it cool down before reusing it.
Plug and Play
This function allows you to store all available radio stations
automatically.
First setup
1 When you switch on the power AUTO INSTALL -
PRESS PLAY will be scrolled.
2 Press ÉÅ to start storing.
➜ INSTALL is displayed,followed by TUNER and AUTO.
➜ PROG starts flashing.
➜ All FM stations,followed by all other stations of other
wavebands with sufficient signal strength,will be stored.
Note:If no stereo signal is detected, CHECK ANTENNA will
be displayed.Check the antenna connection or turn the
antenna for optimum reception.
3 When all available radio stations are stored or the memory
for 40 presets is full,storing will stop and the last stored
radio station will play.
00
To exit automatic storing, press Ç.
Note:If you exit automatic storing before completion, the
function will restart when you switch on the power supply again.
Restarting Plug and Play
1 Press ÉÅ for minimum 5 seconds in standby or
demonstration mode.
➜ AUTO INSTALL - PRESS PLAY will be scrolled.
2 Press ÉÅ to restart storing.
➜ INSTALL is displayed,followed by TUNER and AUTO.
➜ PROG starts flashing.
➜ All previously stored stations will be replaced.
Installation
8
English
AM ANTENNA FM ANTENNA
NTENNA FM ANTENNA
AM ANTENNA FM ANTENNA
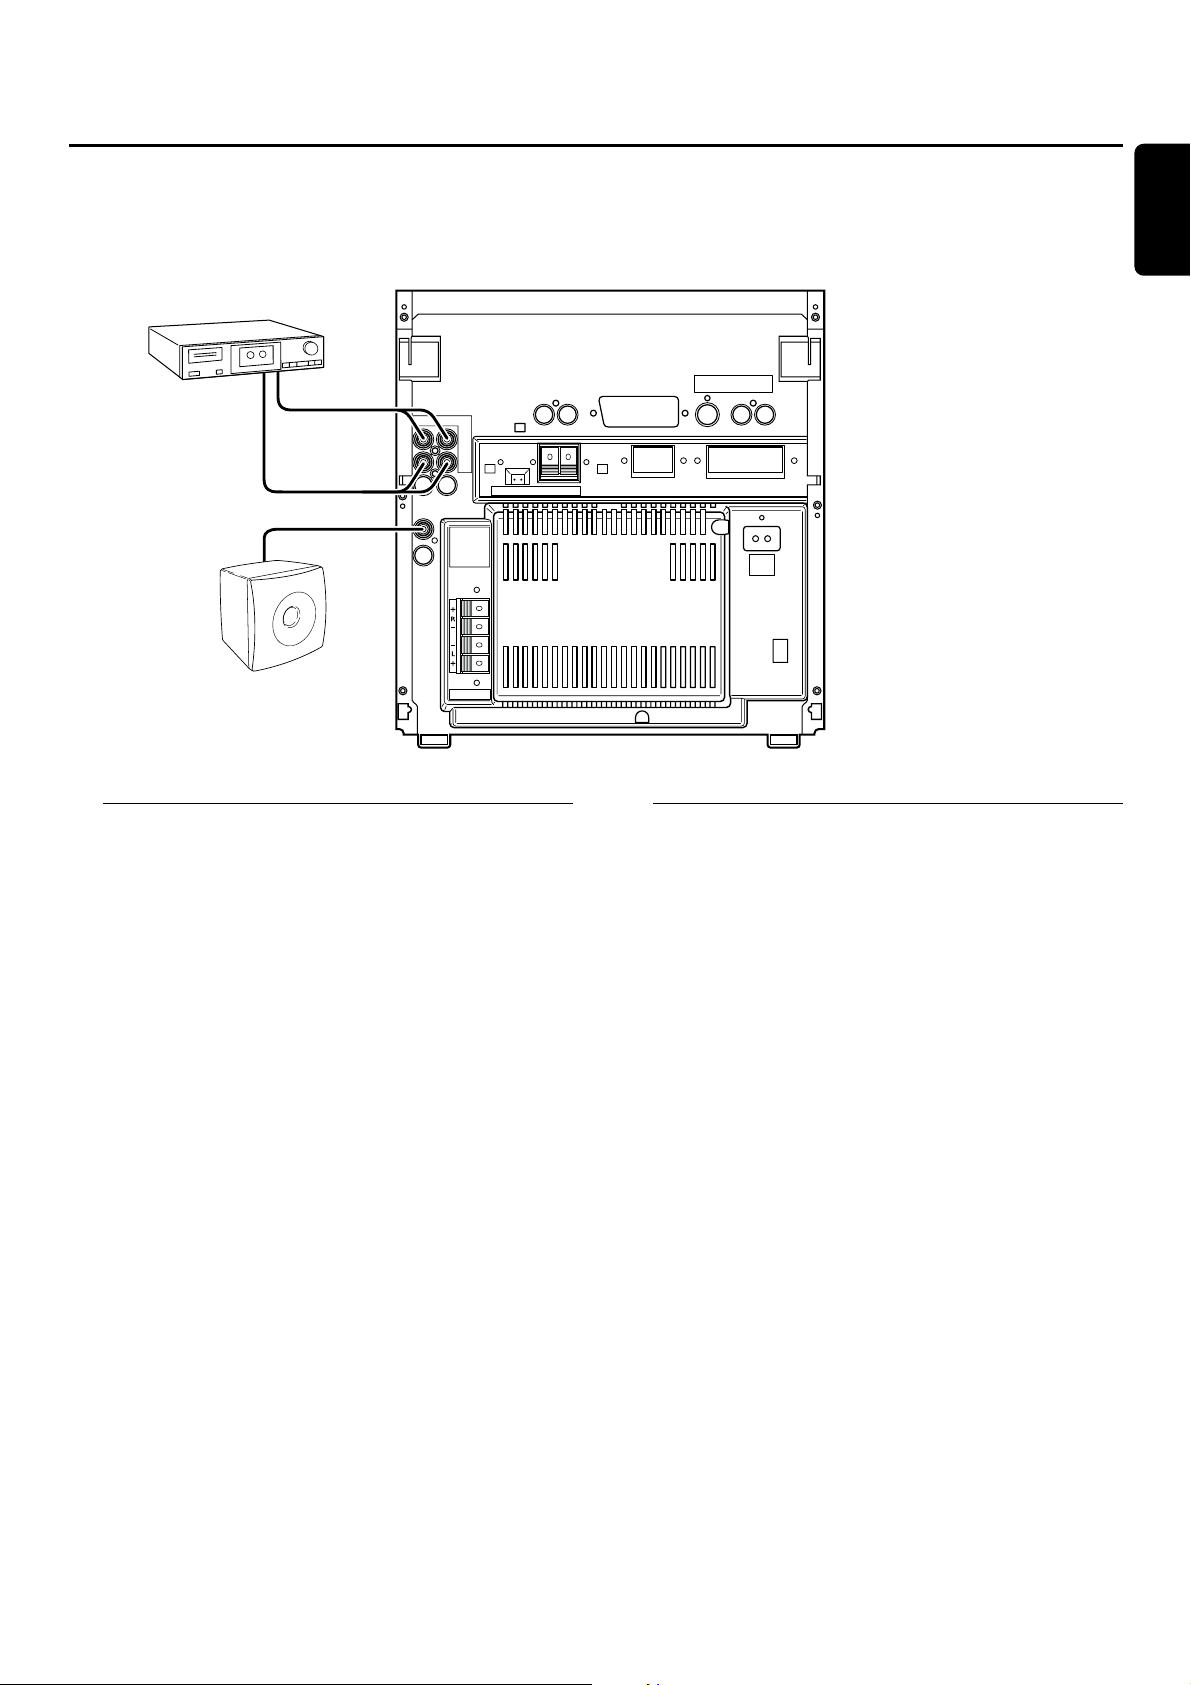
Analog audio connections
AUX/CDR IN L/R
It is possible to use an additional appliance, e.g.tape
recorder,TV or VCR,with the unit.
1 Connect the red plug of an RCA-style audio cable to the
red jack AUX/CDR IN R and the white plug to the white
jack AUX/CDR IN L.
2 Connect the other end of the RCA-style audio cable to the
audio outputs of the additional appliance.
3 Press AUX repeatedly to select the analog input for the
appliance.
➜ AUX ANALOG H:for standard level input sources
➜ AUX ANALOG L:for low level input sources (when
sound of external source is too low compared to the
internal tuner or CD changer)
4 Operate your appliance as usual and adjust volume and
sound with the unit.
It is not possible to connect a turntable directly to
AUX/CDR IN L/R. If you wish to use a turntable
with the unit,you have to connect an amplifier to
AUX/CDR IN L/R on the unit.Then connect the
turntable to the amplifier.
LINE OUT L/R
You can use these outputs for playback or recording on any
analog audio equipment,e.g. amplifier or tape recorder.
● Use an RCA-style audio cable to connect the analog audio
inputs of the additional appliance with LINE OUTL/R on
the unit and operate your appliance as usual.
Connecting a subwoofer
A subwoofer can be used to enhance the bass
performance of your unit dramatically.
1 Use an RCA-style audio cable to connect the input of the
subwoofer with SUBWOOFER OUT on the unit.
2 Follow the instructions supplied with the subwoofer.
Installation
9
English
TAPE RECORDER
RL
SUBWOOFER
OUT
LINE
OUT
AUX/
CDR
IN
AM ANTENNA FM ANTENNA
MAINS
AC
~
SUBWOOFER
SPEAKERS 6
Ω
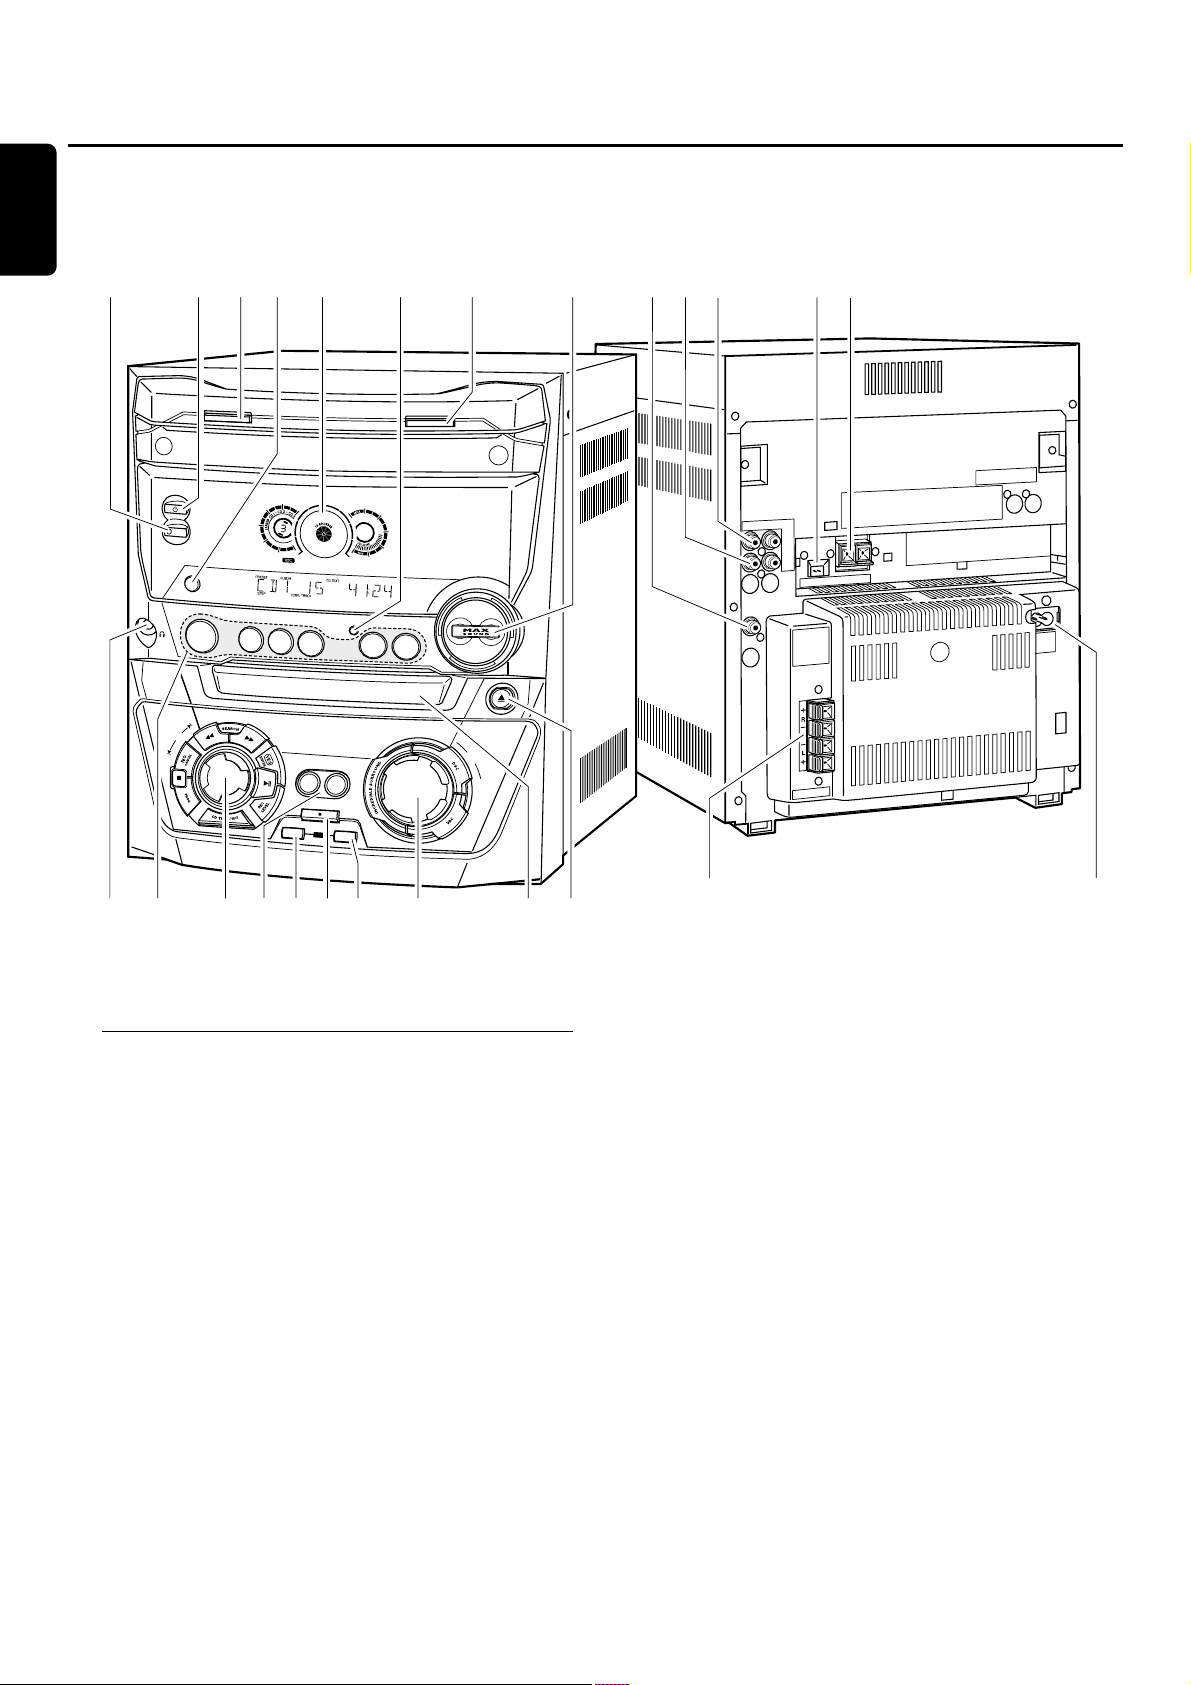
On the back
1 SPEAKERS 6 Ω L/R
connect to the supplied speakers
2 AC MAINS ~
After all other connections have been made,connect
the power cord to the power outlet.
3 FM ANTENNA
connect the supplied wire antenna here
4 AM ANTENNA
connect the supplied loop antenna here
5 LINE OUT R/L
connect to the analog audio input of an additional appliance
6 AUX/CDR IN R/L
connect to the analog audio output of an additional
appliance
7 SUBWOOFER OUT
connect to the input of a subwoofer
Controls and connections
10
English
%$ 8 65
C
D
C
H
A
N
G
E
S
T
A
N
D
B
Y
•
O
N
ECO PO
W
ER
D
IS
P
L
A
Y
C
D
2
CD RECORDER
F
I
N
A
L
CLOCK•TIMER
C
D
3
C
O
P
Y
C
D
R
E
C
O
R
I
Z
E
C
D
CONTROL
CDR
C
D
1
JOG
0!@#
S
O
U
R
C
E
T
U
N
E
R
C
O
M
P
IL
E
C
D
D
E
R
A
S
E
9
OPEN•CLOSE
AUX
C
O
D
P
R
E
N
•C
L
O
S
E
M
A
S
T
E
R
V
O
L
U
M
E
7
L
R
34
E
LIN
OUT
AUX/
CDR
IN
B
U
S
T
U
O
E
P
S
NA
ANTEN
NA FM
ANTEN
AM
R
E
F
O
O
W
Ω
6
S
R
E
K
A
C
A
S
IN
A
M
~
&*()™£ ≤∞
¡^
1
2

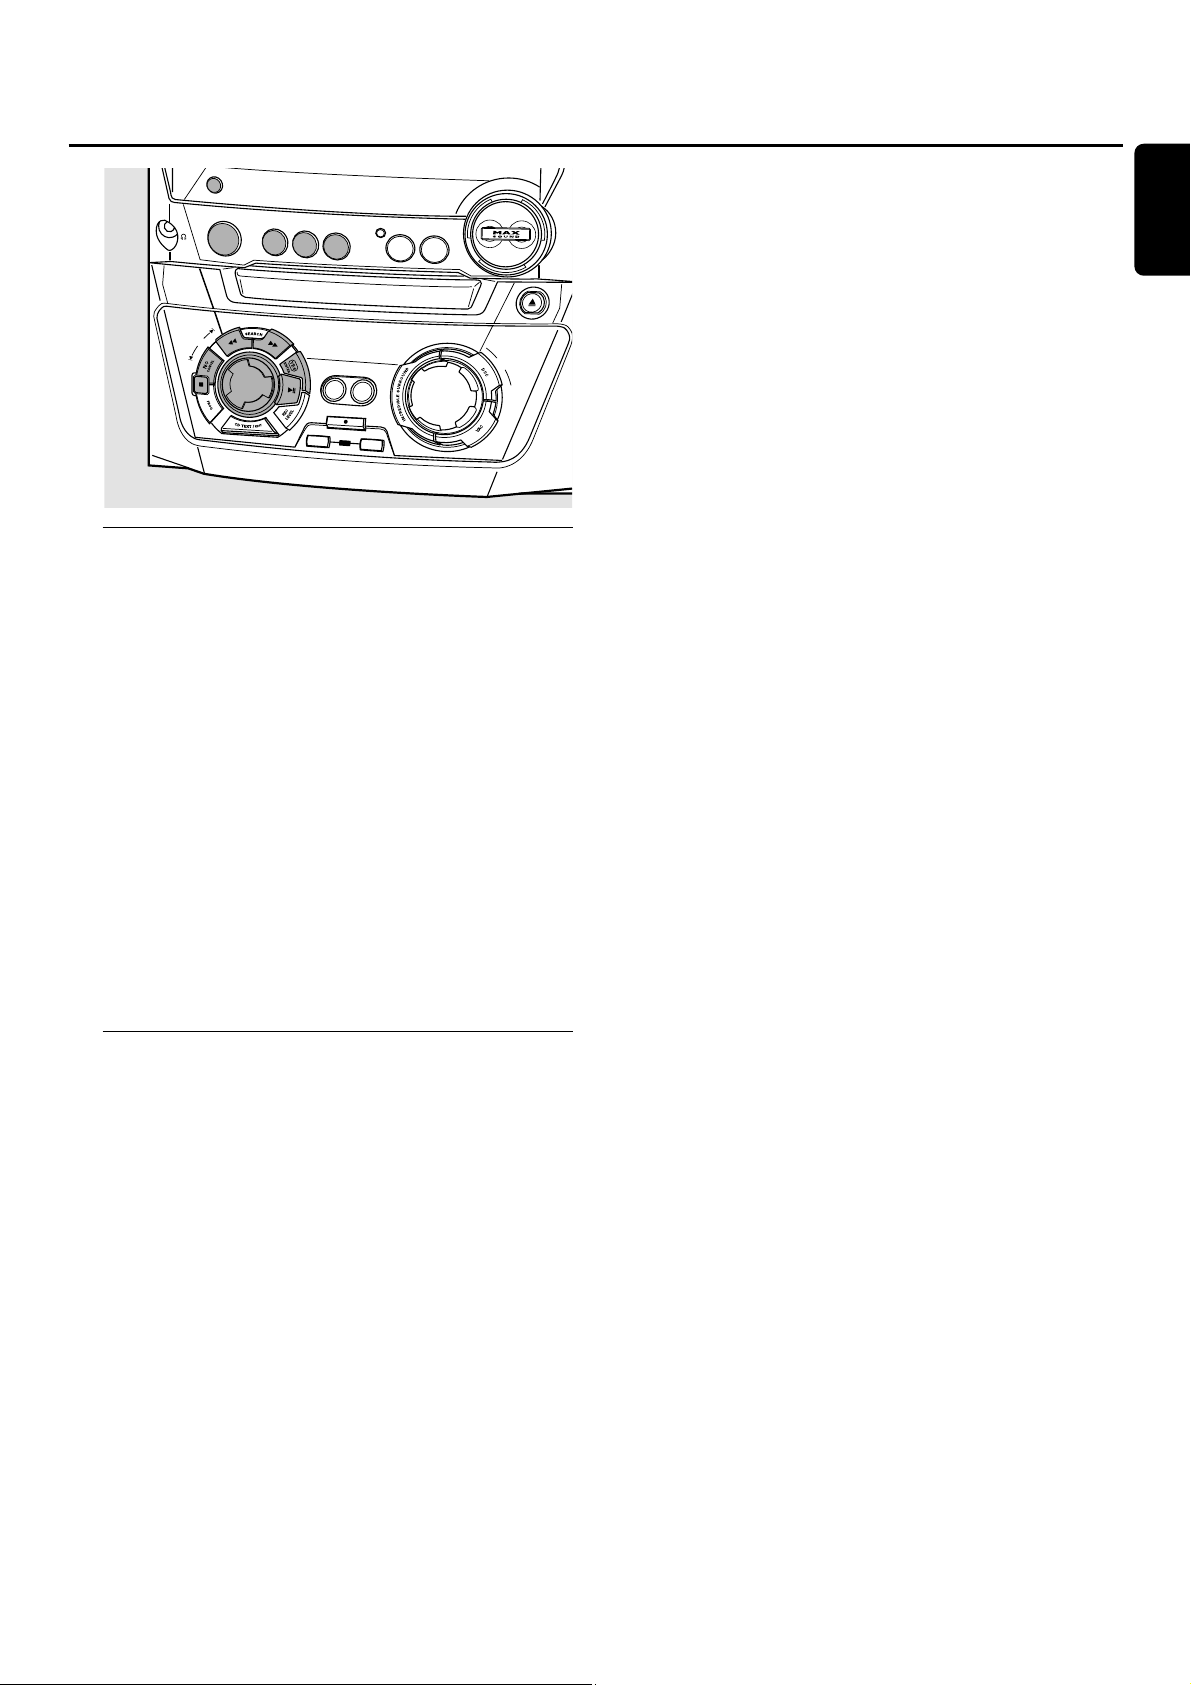
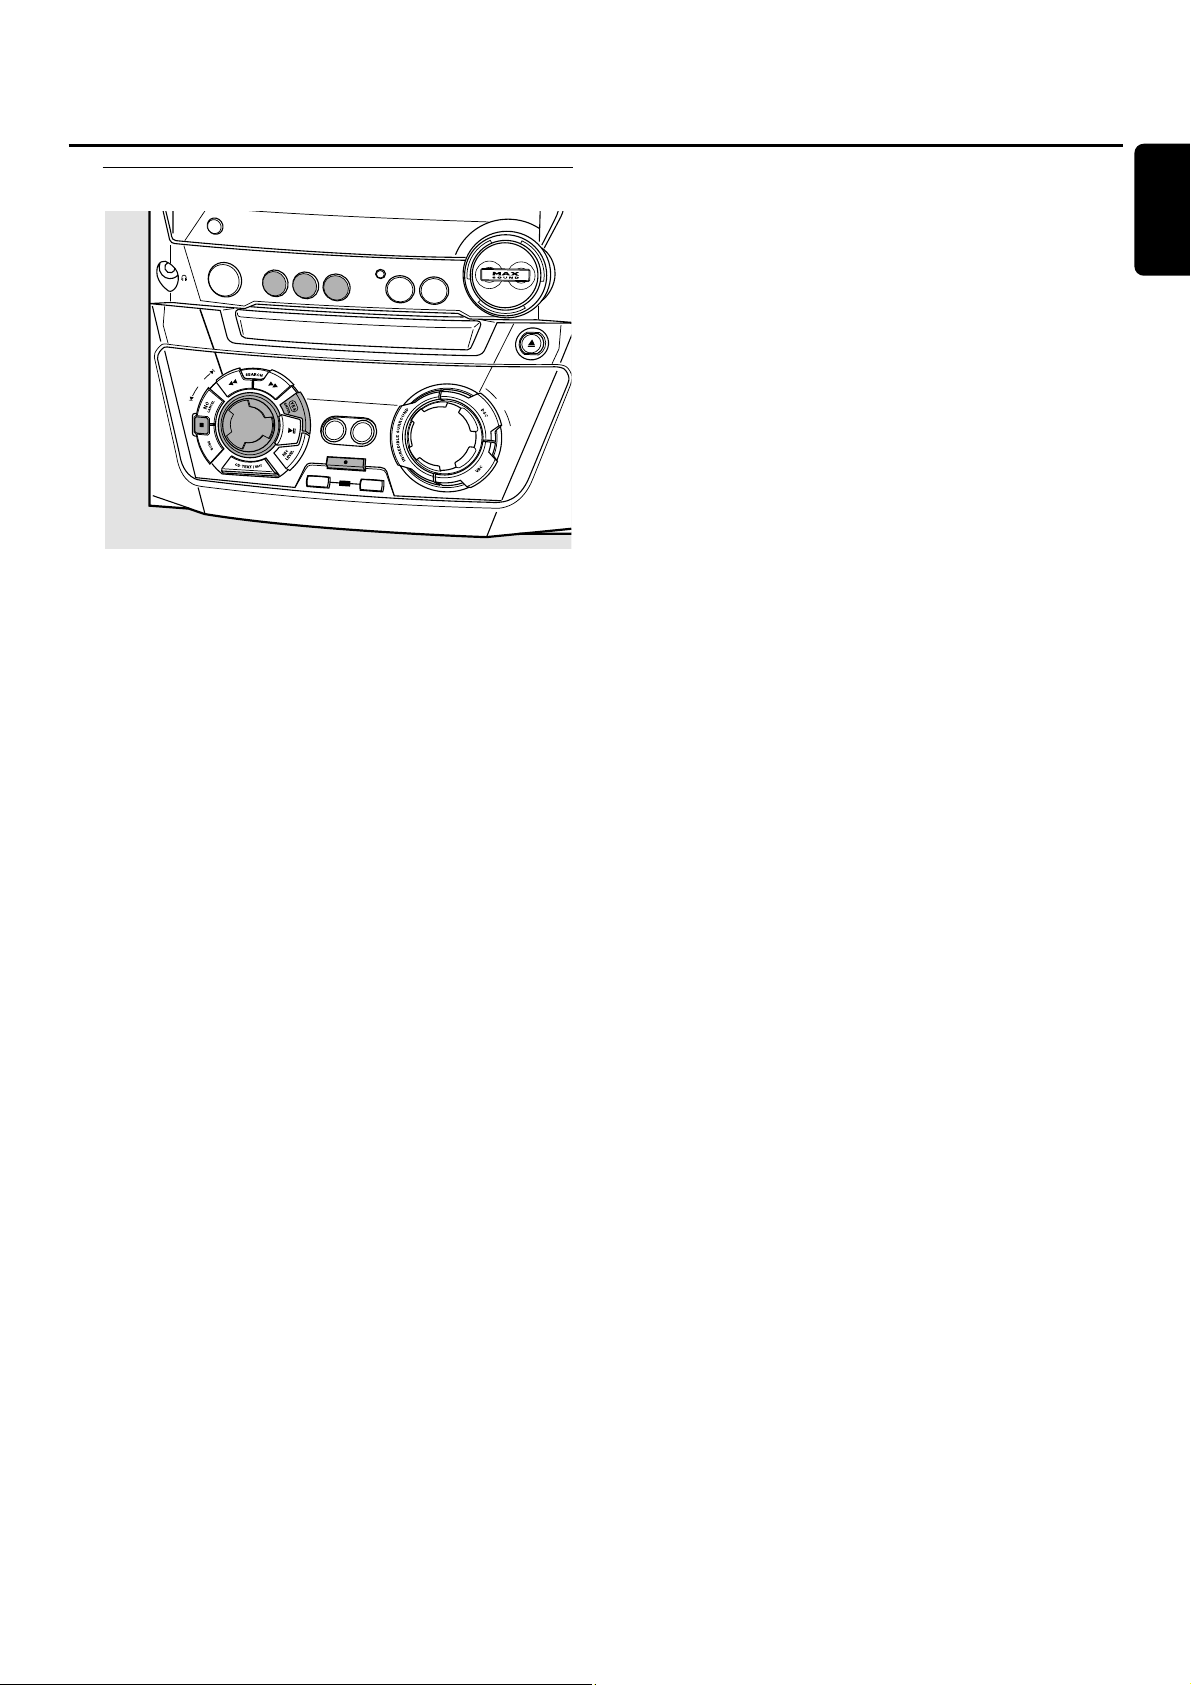
On the front
8 MAX SOUND
switches the MAX effect on/off
9 OPEN·CLOSE
opens/closes the CD changer drawer
0 CLOCK·TIMER
selects the clock or timer functions
! display
@ DISPLAY
CDC, CDR:selects display information/text
# CD CHANGE
opens the CD changer drawer, rotates the tray once
$ 2 STANDBY·ON
switches the unit to standby
% ECO POWER
switches the unit to eco-standby
^ p
3.5 mm headphone jack
Note:Connecting the headphones will switch off the speakers.
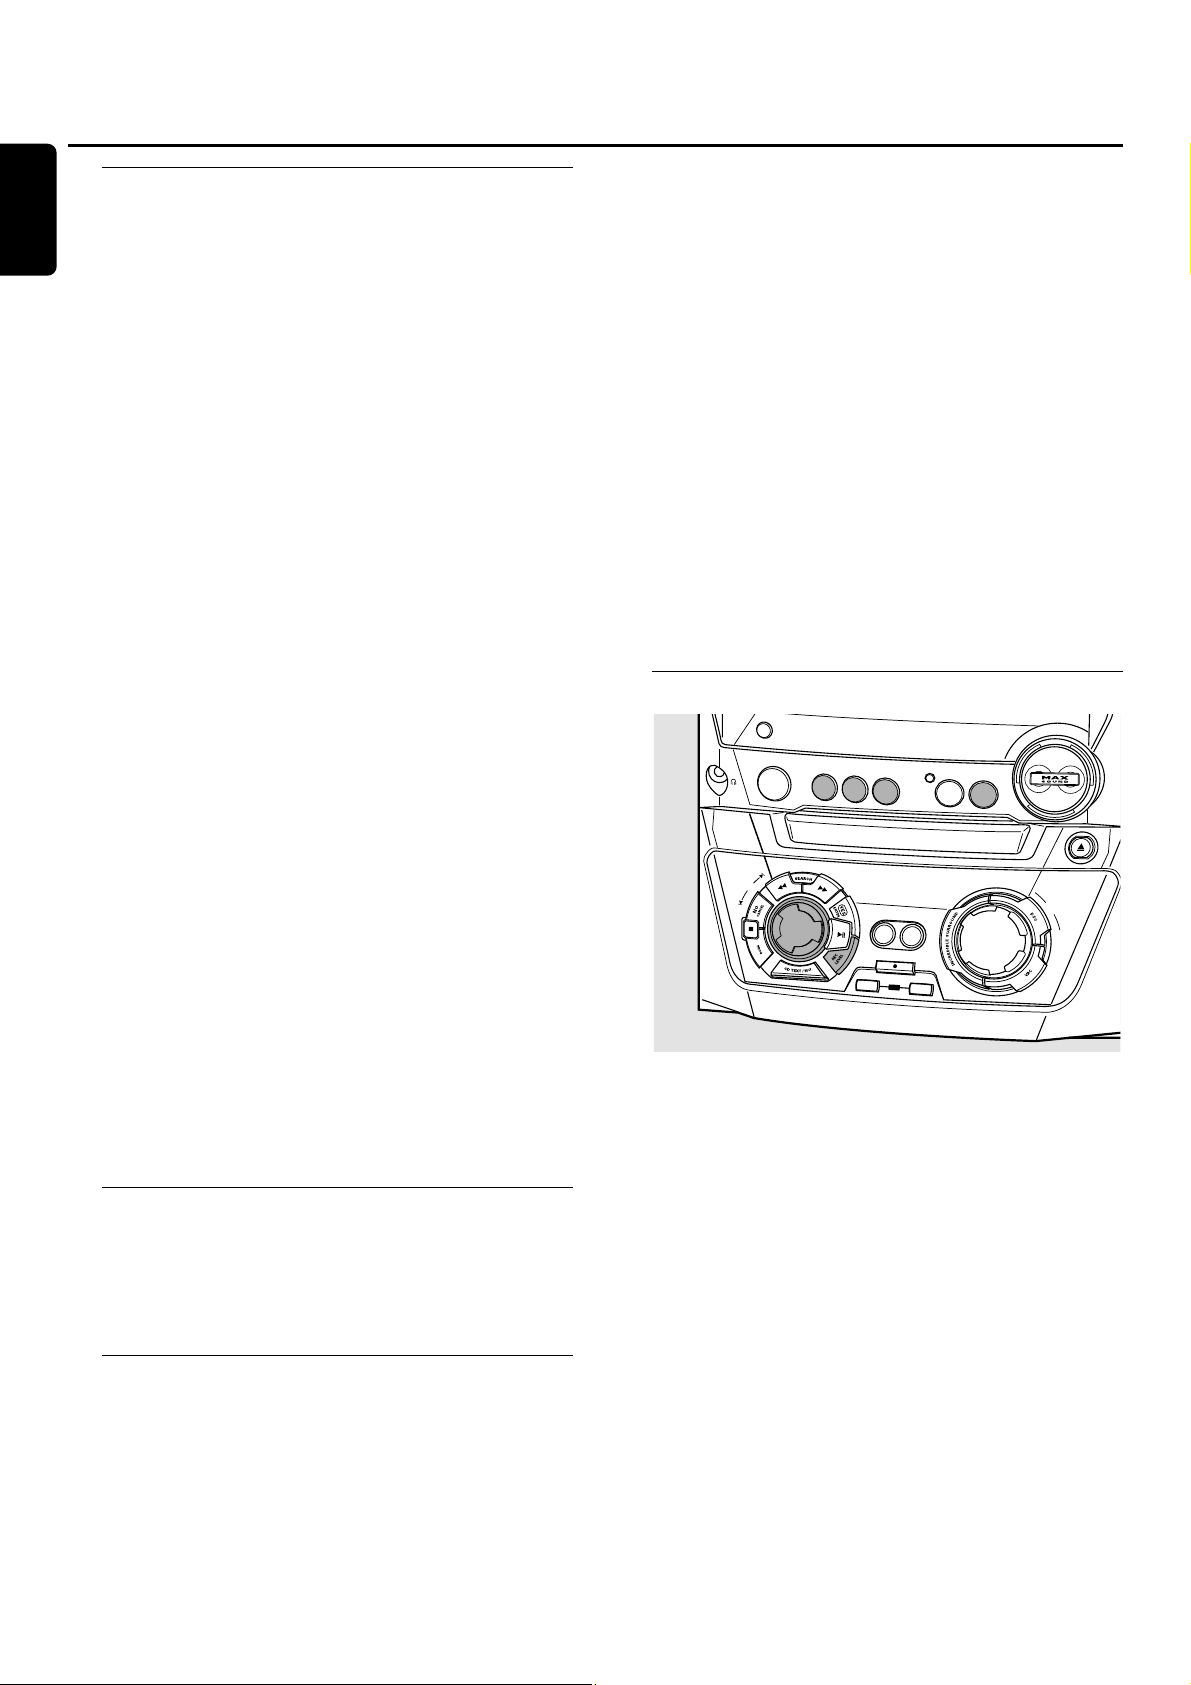
& Source selection – SOURCE
CDR
selects the CD recorder
CD1,CD2, CD3
selects the CD changer,switches to CD 1, CD 2 or CD 3
TUNER
selects the tuner
AUX
selects the input for an additional appliance
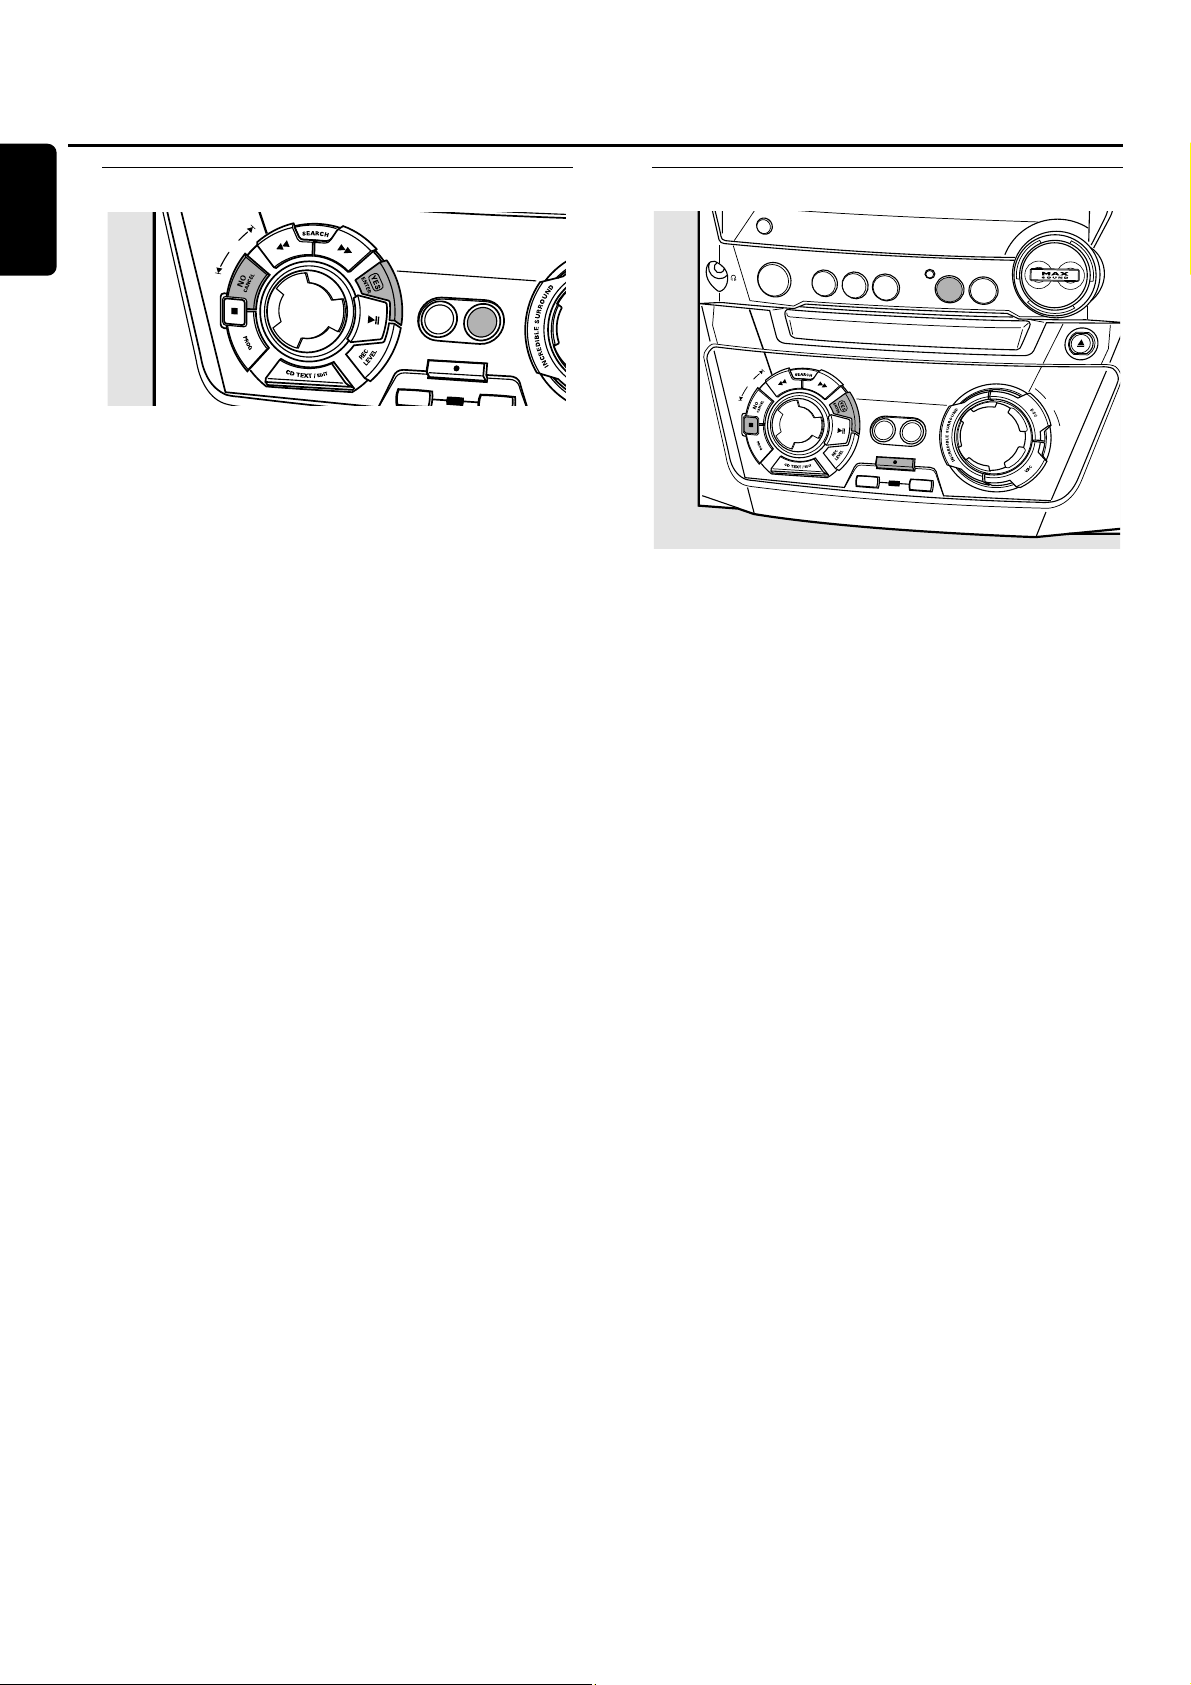
* Multiple function control – rotary control:
í JOG CONTROL ë
selects the previous/next menu item
CDC, CDR:selects the previous/next track
TUNER: selects the previous/next preset tuner station
Multiple function control – keys to press:
à SEARCH
CDC, CDR:searches backward, reviews the tracks in a
program
TUNER:tunes to a lower radio frequency
á SEARCH
CDC, CDR:searches forward,reviews the tracks in a
program
TUNER:tunes to a higher radio frequency
YES/ENTER
confirms a selection
ÉÅ
starts/interrupts playback
REC LEVEL
activates the rotary control for record level adjustment
CD TEXT/EDIT
switches through CD text information, enters/exits the text
edit menu
PROG
enters/exits the program menu
Ç
stops playback/recording
NO/CANCEL
cancels a selection
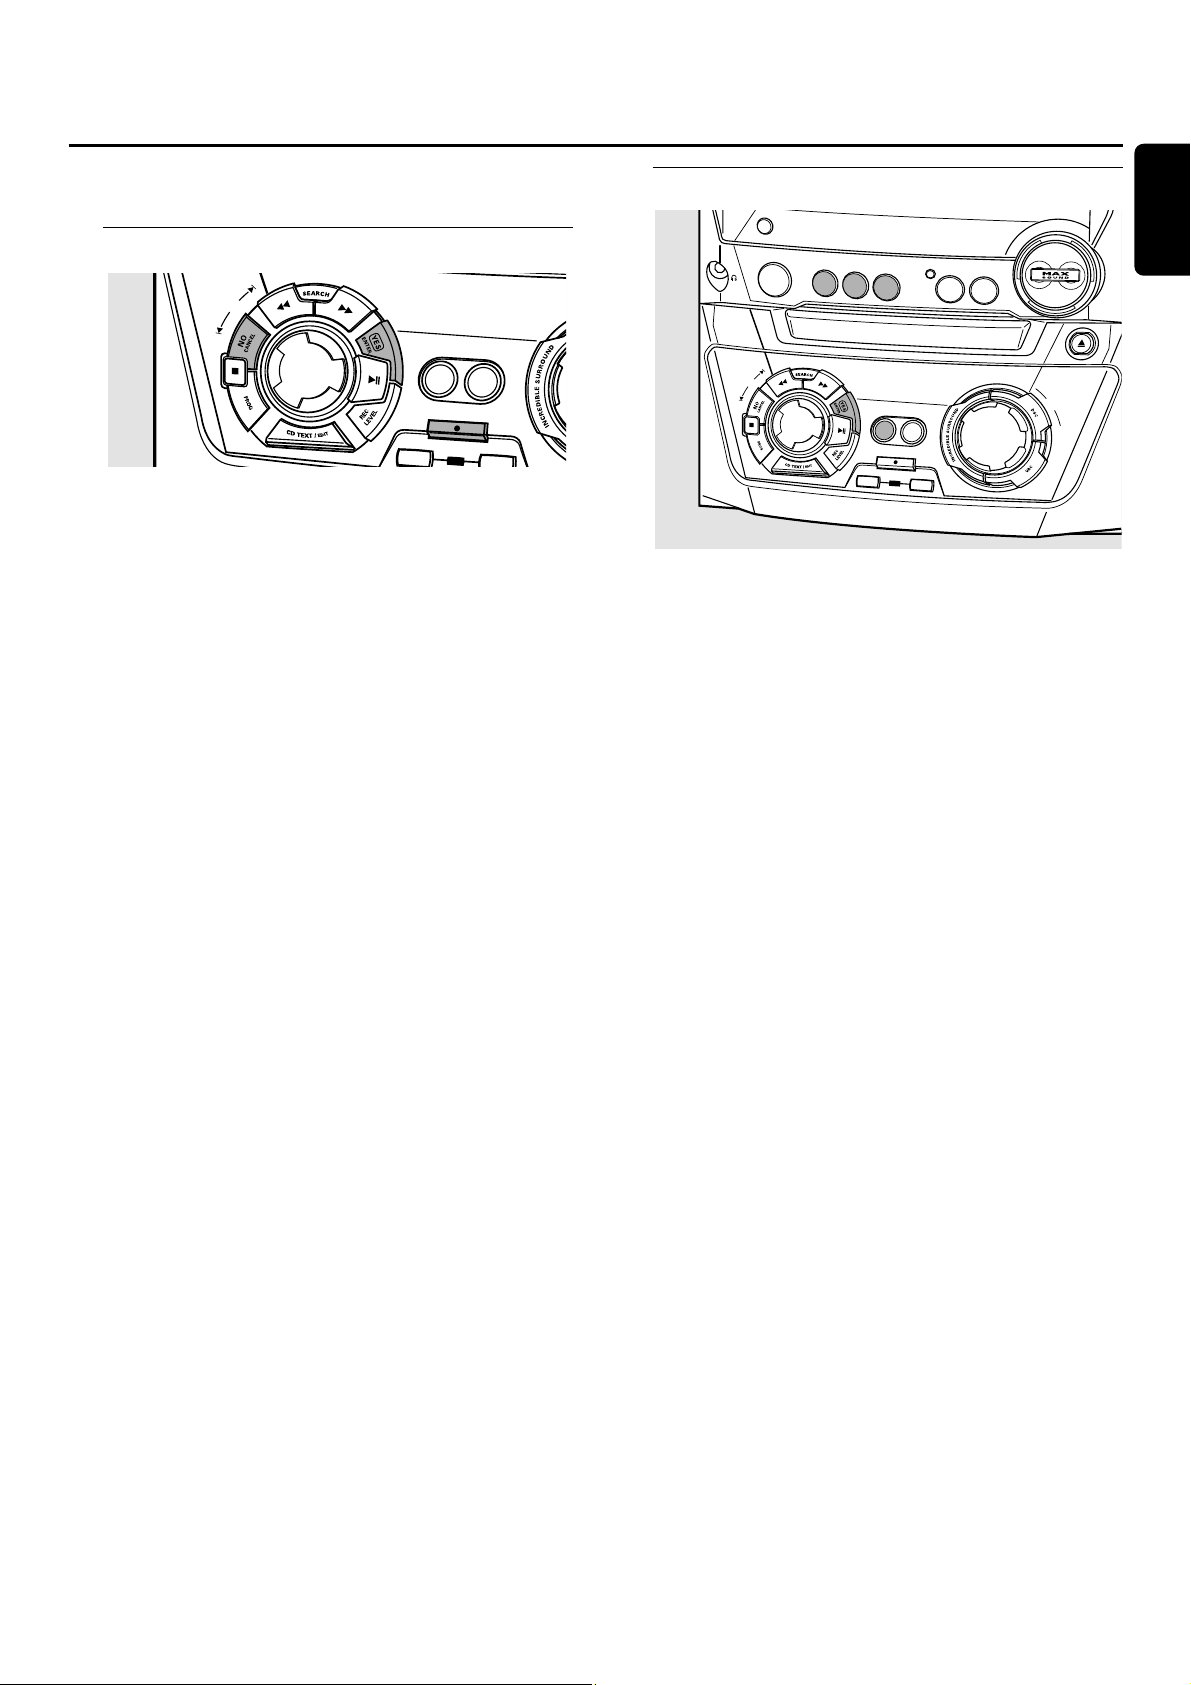
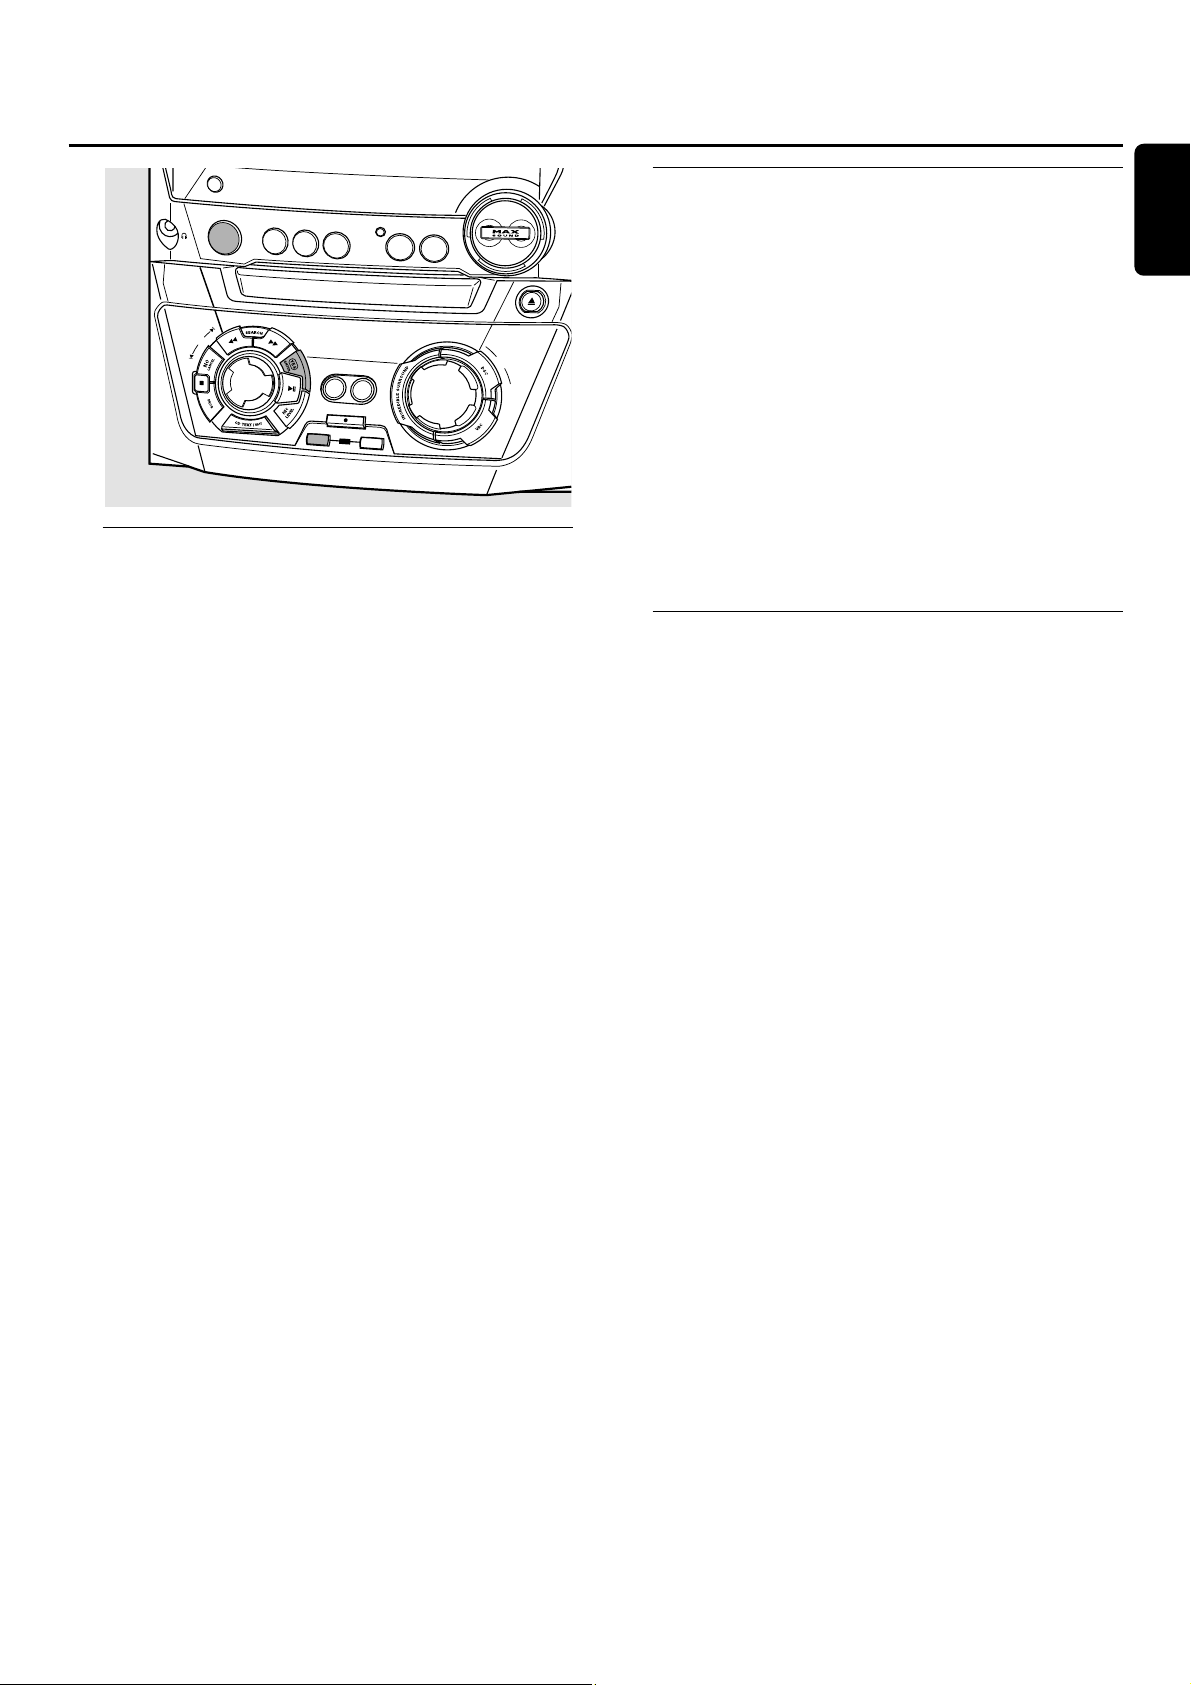
( COPY CD
selects high speed recording and automatic finalizing of
current CD
COMPILE CD
selects high speed recording and automatic finalizing of
current program
) FINALIZE CD
finalizes/unfinalizes recordings
¡ RECORD
enters the recording menu
™ ERASE CD
enters the erasing menu
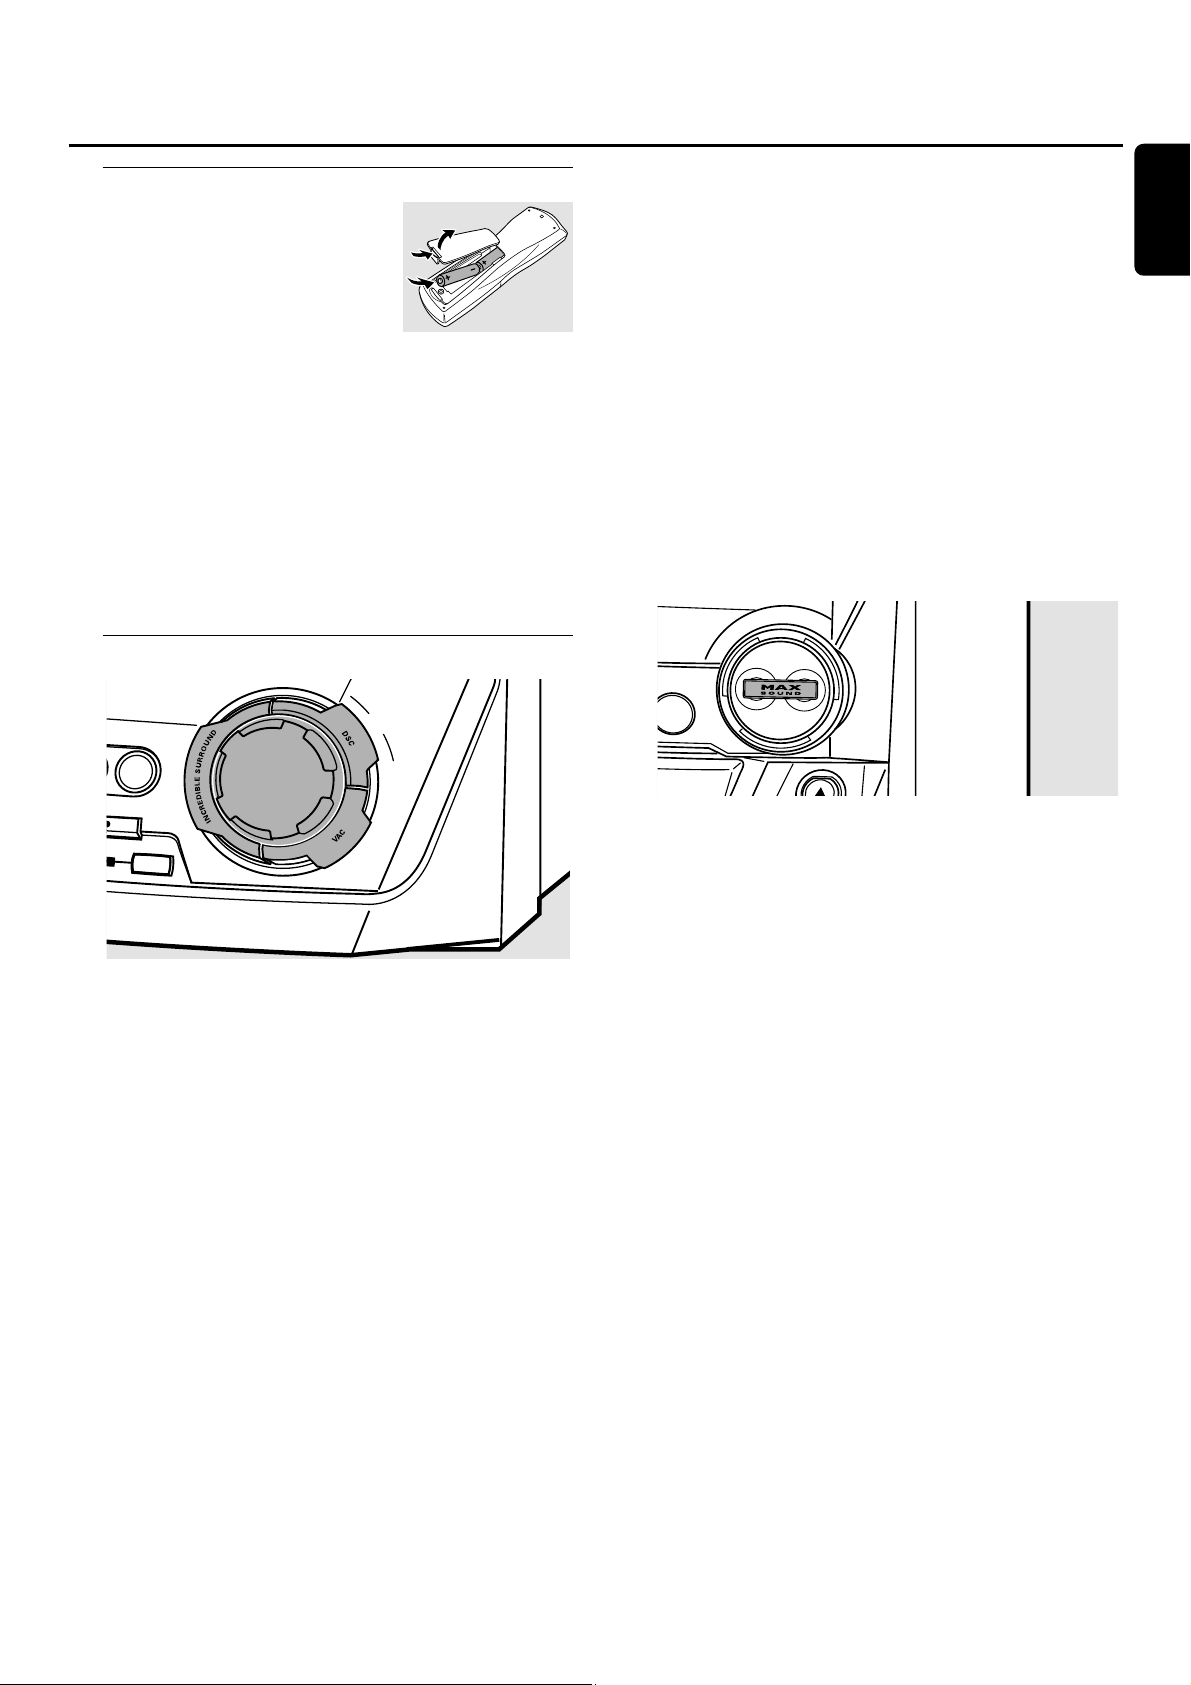
£ Sound control – rotary control:
MASTER VOLUME
adjusts the volume
Sound control – keys to press:
DSC
selects predefined sound settings
VAC
selects predefined surround sound settings
INCREDIBLE SURROUND
creates an incredibly wide stereo effect
≤ CD RECORDER
CD recorder drawer
∞ / CDR OPEN·CLOSE
opens/closes the CD recorder drawer
Controls and connections
11
English
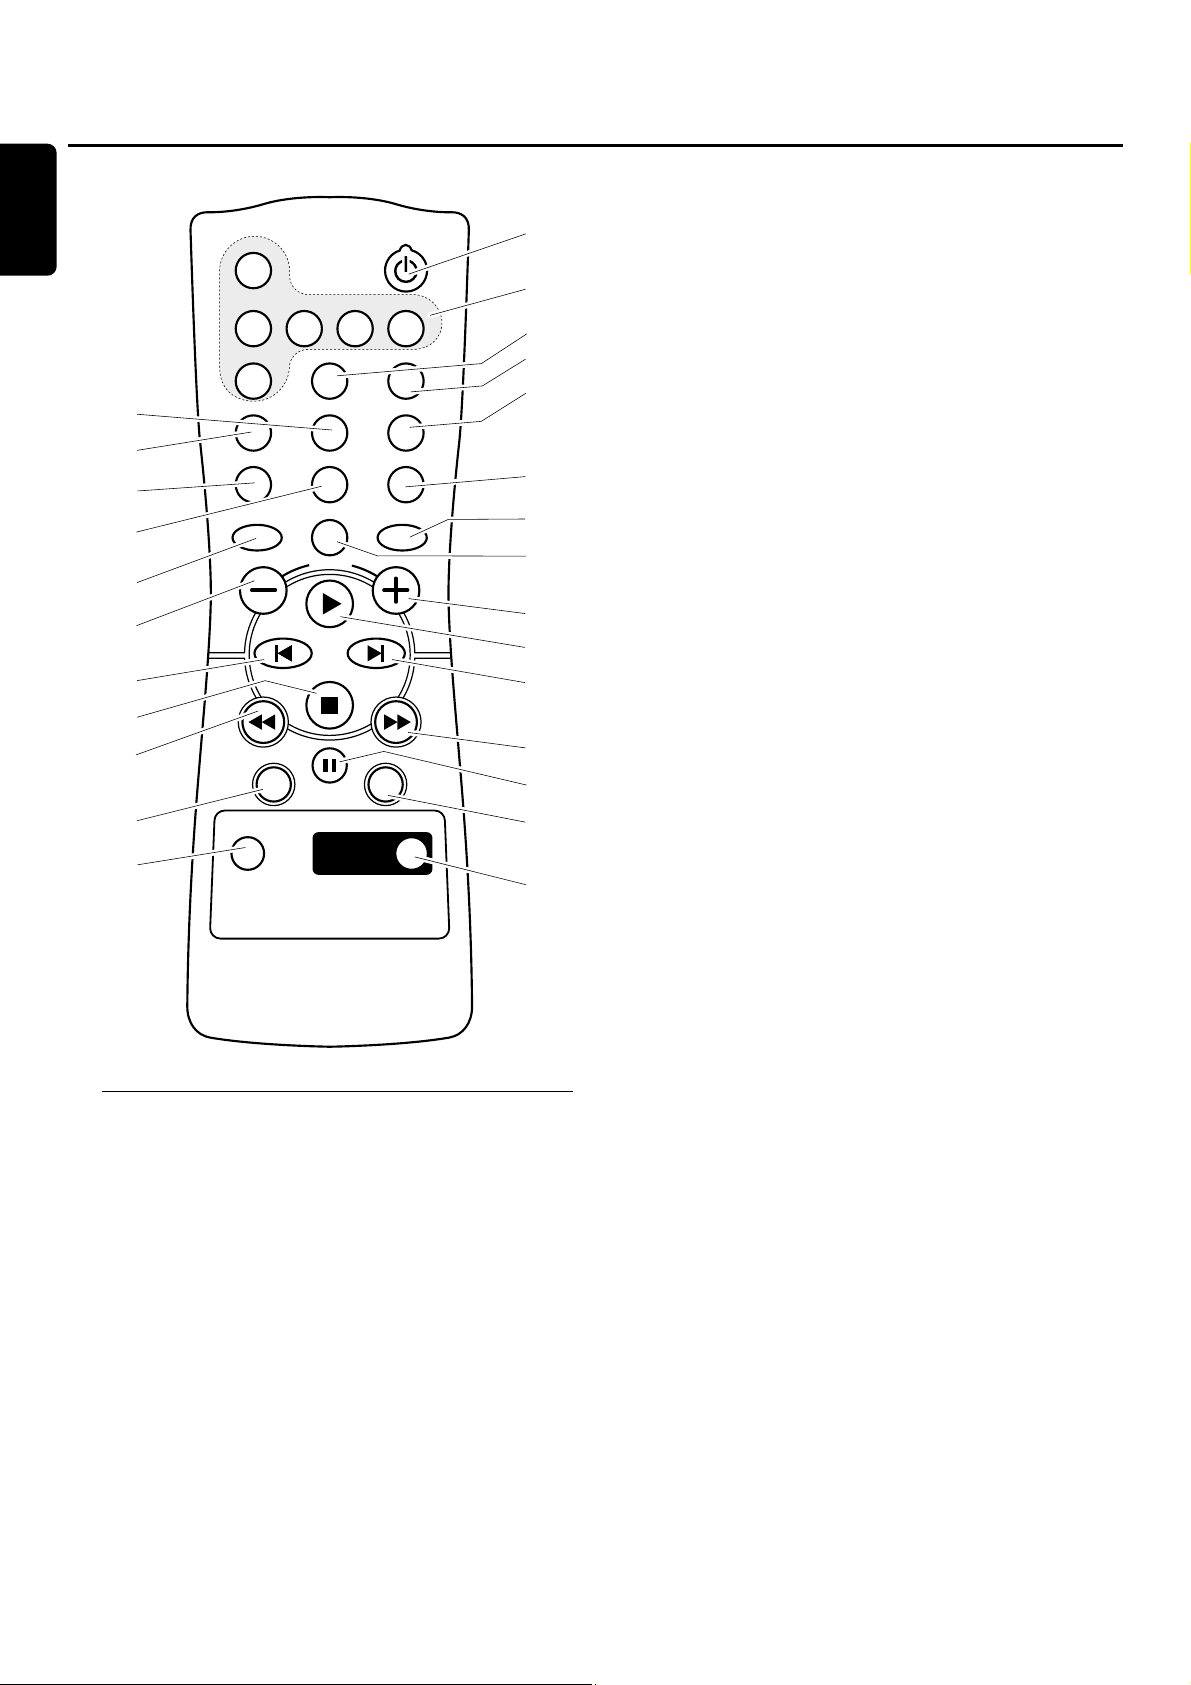
Remote control keys
1 2
switches the unit to standby
2 CDR,CD1, CD2, CD3,TUNER,AUX
select the sources
3 SLEEP
activates the sleep timer
4 TIMER ON/OFF
activates/deactivates the timer
5 DIM
controls brightness of display
6 CD TEXT/edit
switches through CD text information, enters/exits the text
edit menu
7 TRACK INCR.
selects automatic or manual increment of a track
8 PROGRAM
enters/exits the program menu
9 REPEAT
repeats a track, an entire CD(RW) or a program
0 SHUFFLE
plays tracks in random order
! VAC
selects predefined surround sound settings
@ MUTE
switches the sound off/on
# DSC
selects predefined sound settings
$ -VOLUME
decreases the volume
% +VOLUME
increases the volume
^ É
starts playback
& ë
selects the next menu item
CDC, CDR:selects the next track
TUNER:selects the next preset tuner station
* í
selects the previous menu item
CDC, CDR:selects the previous track
TUNER:selects the previous preset tuner station
( Ç
stops playback
) à
CDC, CDR:searches backward
TUNER:tunes to a lower radio frequency
¡ á
CDC, CDR:searches forward
TUNER:tunes to a higher radio frequency
™ Å PAUSE
interrupts playback/recording
£ YES
confirms a selection
≤ NO
cancels a selection
∞ INCR.SURR.
switches incredibly wide stereo effect on/off
§ MAX ON/OFF
switches the MAX effect on/off
Remote control
12
English
6
7
8
9
#
$
*
(
)
≤
∞
CDR
CD1 CD2 CD3 TUNER
AUX SLEEP
TRACK INCR. CD TEXT/edit
PROGRAM REPEAT
DSC
INCR.SURR.
MUTE
VOLUME
NO
PAUSE
MAX
TIMER ON/OFF
DIM
SHUFFLE
VAC
YES
MAX
ON/OFF
1
2
3
4
5
0
!
@
%
^
&
¡
™
£
§
Remote control usage
Open the battery compartment
of the remote control and insert
2 alkaline batteries, type AA (R06,
UM-3).
Do not use old and new or different
types of batteries in combination.
Remove batteries if they are empty or if the remote
control will not be used for a long time.
Batteries contain chemical substances, so they should
be disposed of properly.
The buttons on the remote control work the same way as
the corresponding ones on the unit.
Note:Always press the source key of the source you wish to
control (e.g.CD1) before selecting the desired function key
(e.g.ÉÅ).
Sound control
Volume adjustment
● Adjust the volume by using MASTER VOLUME.
➜ The current volume level is displayed.
Incredible Surround
Stereo sound is determined by the distance between the
front speakers. Incredible Surround enables you to enjoy an
incredibly wide stereo effect,regardless of the speakers’
distance.
● Press INCREDIBLESURROUND to switch the surround
sound effect either on or off.
➜ INCREDIBLE SURROUND is displayed if the surround
sound effect is on.
Note:The effect of Incredible Surround may vary with different
types of music.
Optimal Sound
For optimal sound listening,you can adjust only one of the
following sound controls at a time:DSC or VAC.
DSC
Digital Sound Control enables you to select predefined
sound settings.
● Press DSC repeatedly to select the desired sound setting.
➜ Either DIGITAL,ROCK, POP,NEW AGE, CLASSIC or
ELECTRIC is displayed.
Note:For a neutral sound select CLASSIC.
VAC
Virtual Ambience Control enables you to select
predefined surround sound settings.
● Press VAC repeatedly to select the desired surround sound
setting.
➜ Either HALL,CINEMA, ARCADE,CONCERT, DISCO or
CYBER is displayed.
MAX SOUND
This feature enables you to select a predefined optimal mix
of sound and surround sound settings.
● Press MAX SOUND repeatedly to switch the MAX effect
either on or off:
➜ MAX OFF:the MAX effect is switched off.
➜ MAX ON:the MAX effect is switched on.
MUTE
This feature allows you to temporarily switch off the sound
without switching off the unit.
1 Press MUTE on the remote control to switch off the sound.
➜ MUTE is displayed and playback/recording will continue
without sound.
2 Press MUTE on the remote control again to switch on the
sound again.
Remote control/Sound control
13
English
M
ASTER
VOLUM
E
COMPILE
CD
AUX
ORD
E
R
A
S
E

Switching to standby
● To switch the unit on press 2 STANDBY·ON on the
unit.
● To switch the unit to standby press 2 STANDBY·ON
again.
➜ The unit is switched to standby and the time is displayed.
● To switch the unit to eco-standby press ECO POWER
on the unit (or 2 on the remote control for 3 seconds).
Demonstration mode
The demonstration mode displays various features of the
unit and will start automatically.
● To cancel the demonstration mode keep Ç on the
unit pressed for at least 5 seconds.
➜ The demo mode is cancelled permanently.The unit
switches to standby.
Loading the CDC and CDR
Important!
1) This system is designed for regular CD(RW)s.
Therefore,do not use any accessories such as disc
stabilizer rings or CD treatment sheets,etc. as offered
on the market,because they may cause jamming of
the changer mechanism.
2) Do not load more than one disc into one disc
tray.
1 CD changer: Press OPEN·CLOSE to open the
CD changer drawer.
➜ OPEN CHANGER is displayed,the drawer is opened and
the tray rotates once.
CD recorder: Press / CDR OPEN·CLOSE to open the
CD recorder drawer.
➜ OPEN CDR is displayed and the drawer is opened.
Note:Opening the CD changer or CD recorder clears any
program.
2 CD changer:You can load up to 3 discs. Insert a disc
(printed side up) in the right tray.
00
You can load another disc in the left tray.
00
To insert a third disc press CD CHANGE on the unit.
➜The CD carousel will rotate once.
CD recorder: Insert a disc (printed side up) in the tray.
3 CD changer: Press OPEN·CLOSE again to close the drawer .
➜ The drawer is closed and READING is displayed.
➜ CD,the disc tray number,the total number of tracks and
the total playing time of the disc in the last selected tray
are displayed.
CD recorder: Press / CDR OPEN·CLOSE to close the
drawer.
➜ The drawer is closed and READING is displayed.
➜ If an unfinalized disc is loaded,INITIALIZING will be
displayed.
➜ CDR,the total number of tracks and the total playing
time of the disc are displayed.
MP3-CD only:
➜ READING is displayed.MP3 is shown.Then the volume
name is scrolled once (if available).
➜ CD and the disc tray number (or CDR) and the first
album name are displayed.
Basic functions
14
English
ST
E
C
CONTROL
C
D
C
H
A
N
G
E
OPEN•CLOSE
ANDBY
•ON
O
P
O
W
E
R
DISPLA
Y
C
L
O
C
K
•
T
IM
E
C
D
R
CD1
C
D2
R
CD
3
SO
U
R
C
E
TUNER
AUX
C
D
R
E
C
O
R
D
E
R
CDR
M
VOLUME
OPEN•CLOSE
ASTER
JO
G
C
O
PY
C
O
M
P
IL
E
C
D
C
D
R
E
C
O
R
D
F
IN
A
L
IZ
E
C
D
E
R
A
S
E
Playback
1 Press either CD1,CD2,CD3 or CDR to select a particular
disc.
2 Press ÉÅ to start playback.
➜ CD1 (or 2,3) or CDR, the current track number and
elapsed playing time are displayed.
00
To switch through the following information,repeatedly
press DISPLAY on the unit:
➜ track number,remaining playing time of current track
➜ track number,remaining playing time of disc
➜ track number,actual playing time of current track
3 Press Ç to stop playback.
➜ CD1 (or 2,3) or CDR, the total number of tracks and the
total playing time of the disc are displayed.
00
You can interrupt playback by pressing ÉÅ.
➜ The time where playback was interrupted blinks.
00
To resume playback press ÉÅ again.
Selecting and searching
Selecting a track when playback is stopped (on all
discs except MP3-CDs)
1 Rotate í JOG CONTROL ë to skip to the desired track
number.
2 Press ÉÅ to start playback.
➜ Playback starts with the selected track.
Selecting an album and/or a track when playback
is stopped (on MP3-CDs only)
1 Insert an MP3-CD (printed side up) in the CD changer or
recorder.
➜ READING is displayed,followed by a continuous
up-counting of the total number of tracks. MP3 is shown.
Then the volume name is scrolled once (if available).
➜ The first album name, CD and the disc tray number or
CDR are displayed.
2 Rotate í JOG CONTROL ë to skip to the album
number you wish to select.
➜ ALBUM is shown and the album number is displayed.
3 As soon as the desired album number is displayed,stop
rotating í JOG CONTROL ë.
➜ The album name is scrolled.
4 If you want to start playback of the entire album:
Press ÉÅ.
➜ Playback of the entire album starts.
If you want to enter the album:
Press YES.
Rotate í JOG CONTROL ë to skip to the track
number you wish to select.
➜ TRACK is shown and the track number is displayed.
As soon as the desired track number is displayed,stop
rotating í JOG CONTROL ë.
➜ The track name is scrolled.
Press ÉÅ to start playback.
➜ Playback starts with the selected track.
To exit the album and to return to the album selection
press NO.
Notes:
At the end of your album selection you will recognize an
album called VARIOUS.This album contains all tracks which
were not saved in an album when making the MP3-CD.
If you want to play a playlist that you created on your
MP3-CD when making it,you have to select it directly by
rotating í JOG CONTROL ë, then pressing ÉÅ.
Selecting a track during playback
● Rotate í JOG CONTROL ë to skip to the beginning of
the previous or next track on the selected disc.
➜ Playback continues with the selected track.
Searching for a passage during playback
1 Keep à SEARCH or á SEARCH pressed to find a
particular passage in a backward or forward direction.
➜ Searching is started and playback continues at a low
volume.After 3 seconds the search speeds up with
volume muted.
2 Release the key at the desired passage.
➜ Normal playback continues.
Basic functions
15
English
DISPLA
Y
C
L
O
C
K
•
T
I
M
E
CDR
C
D
1
C
D
2
J
O
G
C
O
N
T
R
O
L
F
C
D
3
CD RECORDER
C
OPY
CD
RECORD
IN
A
L
IZ
E
C
R
SOURCE
T
U
N
E
R
AU
X
C
O
D
P
R
E
N
•C
LO
S
E
M
A
S
T
E
R
V
O
LU
M
E
C
O
M
P
I
L
E
C
D
D
E
R
A
S
E

SHUFFLE and REPEAT
Repeating a track,a disc or a program
1 Press REPEAT repeatedly on the remote control during
playback to select either:
➜ REP TRACK:The current track is played repeatedly.
➜ REP DISC:The entire selected disc is played repeatedly.
➜ REP ALL:All discs in the unit (or the program) are (is)
played repeatedly.
Note:REP DISC is not possible during SHUFFLE or while
playing a program.
2 Playback starts in the chosen mode.
00
To return to normal playback press REPEAT on the remote
control until the display indication disappears.
Playing tracks in random order
● Press SHUFFLE on the remote control during playback.
➜ SHUFFLE is shown and either all tracks of the program or
of all loaded disc(s) in the CD changer and CD recorder
are played in random order.
00
To return to normal playback press SHUFFLE on the
remote control again.
CD text display
This feature allows you to display information such as an
album title or track title contained on a specially encoded
CD.
● Make sure to insert a CD that contains CD text.
➜ CD TEXT is shown and the album title and album artist’s
name is scrolled once.
CD text when playback is stopped
● Press CD TEXT/EDIT to see the following information,
which will be scrolled once (if available):
– Album title
– Album artist’s name
CD text during playback
● Press CD TEXT/EDIT to see the following information,
which will be scrolled once (if available):
– Track title
– Track artist’s name
ID3-tag
This feature allows you to display information such as an
album title or track title contained on an MP3-track.
● If you created an ID3-tag on your MP3-CD, press
CDTEXT/EDIT during playback to show the following
ID3-tag information:
➜ Album title
➜ Track artist’s name
➜ Track title
Basic functions
16
English
ASE
J
O
G
C
O
N
T
R
O
L
C
O
P
Y
C
O
M
P
IL
E
C
D
C
D
R
EC
O
R
D
FINALIZE
CD
ER

Programming track numbers
You can select up to 99 tracks and store them in the
memory. It is possible to store any track more than once.
1 Load the desired disc(s) in the disc tray(s).
2 Press either CD1,CD2,CD3 or CDR to select a disc.
3 Press PROG to enter the program menu.
➜ PROG starts blinking and PROGRAM is displayed.
4 Rotate í JOG CONTROL ë to select either:
➜ CD1 (or 2, 3) and track number or CDR and track
number:The track number of CD1 (or 2,3) or the track
number of the disc in the CD recorder will be
programmed.
or (for audio CD(RW)´s only):
➜ CD1 (or 2, 3) ALL or CDR ALL:All tracks of CD1 (or
2,3) or all tracks of the disc in the CD recorder will be
programmed.
5 Press YES to store your selection in the memory.
➜ The number of programmed tracks (STEP), PROG and
the total program time are displayed.
6 Select and store all desired tracks in this way.
7 Press PROG to end programming.
➜ PROG stays shown and the program is currently available.
Note:If you try to store more than 99 tracks,
PROGRAM FULL will be displayed.
Erasing a track from the program
1 If necessary press Ç to stop playback.
2 Press either CD1,CD2,CD3 or CDR to select a disc.
3 Press PROG,followed by à SEARCH or á SEARCH to
move through the program steps.
➜ The track number at the selected step and the total
program time are displayed.
4 Press NO to remove the track from the program.
➜ CLEARED is displayed briefly.
➜ The next programmed track number will move up to
this position and is displayed together with the step
number and the remaining total program time.
Clearing the program
1 If necessary press Ç to stop playback.
2 Press NO.
➜ CLEAR PROG? is displayed.
3 Press YES to clear the program.
➜ PROG CLEARED is displayed and PROG goes off.
Making a program for recording
1 Select and store all desired tracks from the CD changer
(see “Programming track numbers”).
2 Enter the recording menu (see “Internal recording”).
00
If the total time of the program is greater than the
remaining recording time of the CDR(W):
➜ DOES NOT FIT will be displayed briefly,followed by
the remaining recording time and RECORD PROG?.
If you start recording anyway,only those tracks of the
program that fit onto the CDR(W) will be recorded
entirely.
00
To change the program, press NO.
➜ PROGRAM will be displayed briefly,PROG and the total
playing time of the program will start blinking.Now you
can change the program (see “Programming track
numbers”,“Erasing a track from the program” and
“Clearing the program”).
Note:If you try to use a program for recording which contains
tracks from the CD changer and CD recorder,4 DISC PROG
and CLEAR PROG? will be displayed. Press either NO to exit
or YES to clear the current program and prepare a new one.
Program
17
English
D
I
S
P
L
A
Y
C
L
O
C
K
•
T
IM
E
C
D
R
CD
1
C
D
2
JOG
CONTROL
F
R
CD3
SOURCE
TUN
ER
AUX
C
D
R
E
C
O
R
D
ER
M
A
S
T
V
O
L
U
C
O
P
Y
C
O
M
P
IL
E
C
D
C
D
RECORD
I
N
A
L
I
Z
E
C
D
E
R
A
S
E
C
O
D
PE
R
N
•C
LO
S
E
E
R
M
E
Basic information
The CD recorder deck offers you 3 main functions:
– Recording from the internal CD changer and tuner or
from a selected external source
– Finalizing your CDR(W) discs and unfinalizing your
CDRW discs
– Erasing a CDRW disc
The recording procedure is the same for CDR and CDRW
discs.Make sure the CDR(W) is absolutely free of
scratches and dust particles.
For recordings,the minimum track length is 4 seconds.You
can record up to a maximum of 99 tracks on a disc.The
minimum of recording time left on the disc is 7 seconds.
Otherwise DISC FULL is displayed and you cannot enter
the record mode.
Do not forget to finalize! Finalizing a CDR(W) disc is
a simple procedure,necessary to:
– play a recorded CDR on a standard CD player, or
– play a recorded CDRW on a CDRW compatible
CD player and CD recorder.
Copyright protection
The Serial Copy Management System (SCMS) prevents
the making of a digital copy from a digital copy.The system
allows making a digital recording from the original however,
in some countries this may require the authorization of
copyright holders.
When you try to record copy protected material from an
external source, COPY PROTECT will be displayed.No
further digital recording is possible then.
When you try to record copy protected material from the
internal CD changer,no digital recording is possible however,
the CD recorder will automatically switch to analog recording.
It is not possible to copy an MP3-CD.
Recording CD text
If the original CD has CD text, this text will be recorded
automatically, provided that the CD text is not copy
protected.In that case, recording of CD text will not be
possible and TEXT PROTECT will be displayed.
Direct Line Recording (DLR)
The CD recorder is equipped with the high-performance
Direct Line Recording technique.It ensures a perfect
recording of the source material, meaning a true “bit for bit”
recording.DLR will not become active when ALC is being
used or the record level is adjusted.
Auto Level Control (ALC)
Auto Level Control ensures that the tracks on the
recorded disc have a similar volume lev el.At all times the
already recorded tracks of the CDR(W) disc will be taken as
reference for the volume level of the following recordings.
Auto level control becomes active when:
– COMPILE CD is being used,
– a disc, a track or a track edit is being high speed
recorded and the CDR(W) has recordings on it,or
– a program (consisting of more than one disc) from the
CD changer is being high speed recorded.
Auto level control will not become active when:
– using COPYCD,
– making recordings from the FM tuner,
– making recordings from an external source, or
– making normal recordings in listen mode.
Switching ALC permanently off
1 If necessary,press Ç to stop playback.
2 Press CDR to select the CD recorder.
3 Press REC LEVEL to select:
➜ ALC OFF:ALC is permanently switched off.
00
To enable ALC,press REC LEVEL again to select:
➜ ALC ON:ALC is enabled.
Adjusting the record level
You can adjust the reference record level for recordings
from the internal CD changer or from an additional
appliance.This is also possible when ALC is active.This
feature can be used for fading your recordings in or out.
1 Press CD1,CD2 or CD3 to select the CD changer,
or
press AUX repeatedly to select the input of the additional
appliance:
➜ AUX ANALOG H:the analog input for a standard level
source is selected.
➜ AUX ANALOG L:the analog input for a low level source
is selected.
2 Press REC LEVEL on the unit to enable the rotary control
to adjust the desired record level.
3 Turn the rotary control to the left to adjust the desired
record level.The loudest sounds in the material to be
recorded should not reach the red levels of the level bar.
➜ The actual record level (in dB) will be displayed.
About recording
18
English
D
I
S
P
L
A
Y
C
L
O
C
K
•
T
IM
E
R
CD
3
SOURCE
TUNER
AU
X
C
D
R
EC
O
R
D
E
R
C
O
P
Y
C
O
M
P
IL
E
C
D
C
D
RECORD
I
N
A
L
I
Z
E
C
D
E
R
A
S
E
CONTROL
C
D
R
C
D1
C
D
2
JOG
F
C
O
D
P
R
E
N
•C
L
O
S
E
M
A
S
T
E
R
V
O
L
U
M
E
For internal recordings you can record from the internal
CD changer or tuner.
Recording a single track
Recording a single track during playback
1 Insert a CDR(W) that is absolutely free of scratches and
dust particles into the CD recorder tray.
2 Play your desired track on the CD changer.
3 Press RECORD on the unit to enter the recording menu.
➜ REC TR and the tracknumber are displayed.
4 Press either:
YES to start recording,
➜ The arrow lights,RECORDING IN SESSION is shown,
playback and recording start from the beginning of the
selected track and the actual recording time left starts to
count down.
or
NO to continue playback.
Recording an entire CD
High speed recording and automatic finalizing of
the current disc
1 Insert a CDR(W) that is absolutely free of scratches and
dust particles into the CD recorder tray.
2 Press either CD1,CD2 or CD3 to select the disc you wish
to copy.
3 Press COPYCD on the unit to enter the recording menu.
➜ The arrow starts blinking.The remaining recording time
of the CDR(W),the total playing time of the source CD
and RECORD CD1 (or 2, 3)? are displayed.
4 Press YES to start recording and finalizing.
➜ The arrow lights,RECORDING IN SESSION is shown, high
speed recording at a low volume and finalizing start and
the actual recording time left starts to count down.
Note:If a program was already available before pressing
COPY CD,this will be ignored. PROG goes off and the current
disc will be recorded.After finishing the recording, PROG is
shown and the program is available again.
Internal recording
19
English
E
J
O
G
C
O
N
T
R
O
L
C
O
P
Y
C
O
M
P
IL
E
C
D
C
D
RE
C
O
RD
FINALIZE
CD
ERAS
D
IS
P
L
A
Y
C
L
O
C
K
•
T
IM
E
C
D
R
CD
1
C
D
2
JOG
CONTROL
F
R
C
D3
SOURCE
TUN
ER
AUX
C
D
R
EC
O
R
D
ER
C
O
D
PE
R
N
•C
L
O
S
E
M
A
S
T
E
R
V
O
L
U
M
E
C
O
P
Y
C
O
M
P
IL
E
C
D
C
D
RECORD
I
N
A
L
I
Z
E
C
D
E
R
A
S
E
Recording a program
High speed recording and automatic finalizing
(optional) of the current program
1 Insert a CDR(W) that is absolutely free of scratches and
dust particles into the CD recorder tray.
2 Press COMPILECD on the unit to enter the recording menu.
➜ The arrow starts blinking.The remaining recording time
of the CDR(W),the total playing time of the source CD
and RECORD PROG? are displayed.
Note:If no program is available and you press COMPILE CD,
you will enter immediately the program menu.Start your
programming and return to the recording menu by pressing
PROGor COMPILE CD.
3 Press either:
YES to confirm,
or
NO to change the program.
➜ PROG starts blinking.Now you can change the program
(see “Program”) and return to the recording menu by
pressing COMPILECD.
4 AUTO FINAL? is displayed.
Press either:
YES,if the CDR(W) is to be finalized after recording,
or
NO,if the CDR(W) is not to be finalized after recording.
➜ The arrow lights,RECORDING IN SESSION is shown, high
speed recording and finalizing (if selected) start and the
actual recording time left starts to count down.
Recording from the tuner
1 Insert a CDR(W) that is absolutely free of scratches and
dust particles into the CD recorder tray.
2 Press TUNER repeatedly to select the FM tuner.Then select
the desired radio station (see “Tuning to radio stations”).
3 Press RECORD on the unit to enter the recording menu.
➜ REC FM TUNER is displayed.
4 Press YES to confirm.
➜ PREPARING and RECORD? are displayed.
5 Press YES to start recording.
➜
The arrow lights,
RECORDING IN SESSION
is shown,recording
starts and the actual recording time left starts to count down.
6 Press Ç to stop recording.
Do not forget to finalize! Finalizing a CDR(W) disc is
a simple procedure,necessary to:
– play a recorded CDR on a standard CD player, or
– play a recorded CDRW on a CDRW compatible
CD player and CD recorder.
Internal recording
20
English
ASE
J
O
G
C
O
N
T
R
O
L
C
O
P
Y
C
D
RE
CO
FINALIZE
CD
D
I
S
P
L
A
Y
C
L
O
C
K
•
T
IM
E
C
D
R
CD
1
C
D2
C
O
M
P
IL
E
C
D
RD
JOG
CONTROL
ER
F
R
CD3
SOURCE
TUNER
AUX
C
D
R
EC
O
R
D
ER
C
O
D
PE
R
N
•C
LO
S
E
M
A
S
T
E
R
V
O
L
U
M
E
C
O
P
Y
C
O
M
P
IL
E
C
D
C
D
RECORD
I
N
A
L
I
Z
E
C
D
E
R
A
S
E
Further recording possibilities
High speed recording of an entire disc,a track or a
program
1 Insert a CDR(W) that is absolutely free of scratches and
dust particles into the CD recorder tray.
2 Press either CD1,CD2 or CD3 to select the disc you wish
to record from.
3 Press RECORD on the unit to enter the recording menu.
4 Rotate í JOG CONTROL ë to select one of the
following high speed recording modes:
If a disc from the CD changer is selected:
➜ REC CD1 (or 2,3) FAST?: for high speed recording of
CD1 (or 2,3)
Continue with step 5.
➜ REC TR FAST?:for high speed recording of a track
Press YES to confirm.
Rotate í JOG CONTROL ë to select the desired track.
➜REC TR and the track number is displayed.
Continue with step 6.
If a program is available:
➜ PROG FAST?:for high speed recording of the program
5 Press YES to confirm your selection.
➜ The arrow starts blinking.The remaining recording time
of the CDR(W),the total recording time of the
CDR(W) and RECORD? are displayed.
Note:If the CDR(W) already contains a recording,ALC will also
become active.
6 Press YES to start high speed recording.
➜ The arrow lights,RECORDING IN SESSION is shown, high
speed recording starts and the actual recording time left
starts to count down.
00
To stop recording press Ç on the unit.
Normal recording while listening to an entire disc,
a track or a program
1 Insert a CDR(W) that is absolutely free of scratches and
dust particles into the CD recorder tray.
2 Press either CD1,CD2 or CD3 to select the disc you wish
to record from.
3 Press RECORD on the unit to enter the recording menu.
4 Rotate í JOG CONTROL ë to select one of the
following normal recording modes:
If CD changer is selected:
➜ RECORD CD1 (or 2,3)?: for listening to CD1 (or 2,3)
during normal recording
➜
REC TRACK?:for listening to the track during normal recording
Press YES to confirm.
Rotate í JOG CONTROL ë to select the desired track.
➜REC TR and the track number are displayed.
Press YES to start normal recording.
If a program is available:
➜ REC PROG?:for listening to the program during normal
recording
5 Press YES to confirm your selection.
➜ The arrow starts blinking.The remaining recording time
of the CDR(W),the total recording time of the
CDR(W) and RECORD? are displayed.
6 Press YES to start normal recording.
➜ The arrow lights,RECORDING IN SESSION is shown,
normal recording starts and the actual recording time left
starts to count down.
00
To stop recording press Ç on the unit.
Do not forget to finalize! Finalizing a CDR(W) disc is
a simple procedure,necessary to:
– play a recorded CDR on a standard CD player, or
– play a recorded CDRW on a CDRW compatible
CD player and CD recorder.
Internal recording
21
English
D
IS
P
L
A
Y
C
L
O
C
K
•
T
IM
E
C
D
R
CD
1
C
D
2
JOG
CONTROL
F
R
CD3
SOURCE
TUN
ER
AUX
C
D
R
E
C
O
R
D
ER
C
O
D
PE
R
N
•C
L
O
S
E
M
A
S
T
E
R
V
O
L
U
M
E
C
O
P
Y
C
O
M
P
IL
E
C
D
C
D
RECORD
I
N
A
L
I
Z
E
C
D
E
R
A
S
E

Automatic track increment
Select one of the following settings and tracks will be
incremented automatically such that the track numbers are
positioned on the same position as on the original.Track
increments may not always be positioned correctly,
depending on the quality of the source material.
● Press TRACK INCR.as often as necessary on the remote
control during stop to switch through the following
automatic track increment functions:
➜ MANUAL:for switching the function off
➜ TURNTABLE:for optimal recording from noisy sources
like turntables (It is not possible to connect a
turntable directly to AUX/CDR IN L/R - see “Analog
audio connections”.)
➜ TAPE/TUNER:for optimal recording from a tape
➜ CD/DVD:for optimal recording from high quality sources
like DAT, DCC or DVD
Notes:
Track numbers can be incremented manually by pressing
TRACK INCR. on the remote control during recording.The
minimum track length is 4 seconds.
Track numbers cannot be changed after recording.
Recording with automatic start
Recording of an entire disc or a track
1 Insert a CDR(W) that is absolutely free of scratches and
dust particles into the CD recorder tray.
2 Press AUX repeatedly to select the input for the external
source you want to record from.
➜ AUX ANALOG H:the analog input for a standard level
source is selected.
➜ AUX ANALOG L:the analog input for a low level source
is selected.
3 Press RECORD on the unit to enter the recording menu.
4 Rotate í JOG CONTROL ë to select either:
➜ AUX CD?:for recording with synchronised start of an
entire disc
➜ AUX TRACK?:for recording with synchronised start of a
single track
5 Press YES to confirm your selection.
➜ PRESS PLAY ON EXTERNAL SOURCE is scrolled.
6 Start playback on the external source you want to record
from.
➜ The CD recorder starts to record simultaneously and
RECORDING IN SESSION is shown.The remaining
recording time on the CDR(W) is displayed.
Note:If you start playback on the selected source within a
track,recording will start at the beginning of the next track.
7 At the end of the recording process,the CD recorder
stops after a silence of 20 seconds on the source material.
● To stop recording manually press Ç on the unit.
➜ RECORDING IN SESSION goes off.
Manual recording
Recording from an external source
1 Insert a CDR(W) that is absolutely free of scratches and
dust particles into the CD recorder tray.
2 Press repeatedly AUX to select the input for the external
source you want to record from.
➜ AUX ANALOG H:the analog input for a standard level
source is selected.
➜ AUX ANALOG L:the analog input for a low level source
is selected.
3 Press RECORD on the unit to enter the recording menu.
4 Rotate í JOG CONTROL ë to select the type of
recording:
➜ AUX MANUAL?:for manual start of recording
5 Press YES to confirm your selection.
➜ PREPARING is displayed.
➜ RECORD?,AUX and the remaining recording time of the
CDR(W) are displayed.
6 Start playback on the external source in order to set the
optimal recording level on the CD recorder (see “Adjusting
the record level”).
7 Stop playback on the external source.
8 Go to the beginning of the desired track.
9 Press YES on the unit and start playback on the external
source at the same time.
➜ The CD recorder starts to record and RECORDING IN
SESSION is shown.The remaining recording time of the
CDR(W) is displayed.
10 Press Ç on the unit to stop recording.
➜ UPDATE is displayed and RECORDING IN SESSION goes off.
External recording
22
English
Finalizing CDR(W) discs
Finalizing a CDR(W) disc is a simple procedure, necessary to:
– play a recorded CDR on a standard CD player,
– play a recorded CDRW on a CDRW compatible
CD player and CD recorder,
– avoid further unwanted recordings on a disc, or
– avoid accidental erasure of tracks on a CDRW.
Notes:
Finalizing will take about 2 minutes.
During finalization, no other operating commands can be
executed.
After finalization of the CDR(W),CDRW changes to CD on
the display.
Auto finalizing
When using either COPYCD or COMPILE CD,your
recordings will be finalized automatically (see “High speed
recording and automatic finalizing”).
Manual finalizing when recording is in progress
1 Press FINALIZECD on the unit during recording.
➜ AUTO FINAL? is displayed.
2 Press YES to confirm.
➜ FINALIZE is shown.The finalization will start after
recording and the actual finalizing time remaining will
start to count down.
Manual finalizing when recording is stopped
1 Insert the CDR(W) you want to finalize in the
CD recorder tray.
2 Press CDR to select the CD recorder.
3 Press FINALIZE CD on the unit.
➜ FINALIZE? is displayed.
4 Press YES to start finalizing.
➜ FINALIZE is shown. FINAL is displayed and the actual
finalizing time remaining starts to count down.
Unfinalizing CDRW discs
If you want to record on or erase from a finalized CDRW,
you have to unfinalize it first.
Notes:
Unfinalizing will take approximately 2 minutes.
After unfinalizing of the CDRW, CD changes to CDRW on
the display.
1 Insert the CDRW you want to unfinalize in the
CD recorder tray.
2 Press CDR to select the CD recorder.
3 Press FINALIZECD on the unit.
➜ UNFINALIZE? is displayed.
4 Press YES to start unfinalizing.
➜ UNFINAL is displayed and the operation time remaining
starts to count down.
Erasing from a CDRW disc
It is possible to erase one or more tracks (starting from the
end of the last track) or the entire CDRW.
Erasing an entire CDRW
1 Insert the CDRW you want to erase in the CD recorder tray.
2 Press CDR to select the CD recorder.
3 Press ERASECD to enter the erasing menu.
4 Rotate í JOG CONTROL ë to select:
➜ ERASE DISC?:for erasing the entire disc
5 Press YES to confirm your selection.
➜ ERASE? is displayed.
6 Press YES to start erasing.
➜ ERASE is displayed and the operation time left starts to
count down.
Erasing one or more tracks
1 Follow steps 1–3 of “Erasing an entire CDRW”.
2 Rotate í JOG CONTROL ë to select the track
number(s) you wish to erase.
➜ ERASE and the track number (e.g.10+)? are displayed.
00
To select more tracks, to be erased repeat step 2.
Note:When erasing several tracks, the tracks to be erased
must be selected in sequence,starting from the last recorded
track.Example:The CDRW has 5 tracks recorded on it.Now,
you can erase tracks 5 and 4.You can also erase tracks 5,4
and 3,but you cannot erase tracks 5 and 3!
3 Press YES to confirm your selection.
➜ ERASE? is displayed.
4 Press YES to start erasing.
➜ ERASE is displayed and the operation time left starts to
count down.
(Un)finalizing,erasing
23
English
CONTROL
D
IS
P
L
A
Y
C
L
O
C
K
•
T
IM
E
C
D
R
CD
1
CD
2
JOG
F
R
CD
3
SOURCE
TUN
ER
AUX
C
D
R
E
C
O
R
D
ER
C
O
D
PE
R
N
•C
L
O
S
E
M
A
S
T
E
R
V
O
L
U
M
E
C
O
P
Y
C
O
M
P
ILE
C
D
C
D
RECORD
I
N
A
L
I
Z
E
C
D
E
R
A
S
E

CD text editing (on CD recorder
only)
Storing text during stop mode
After you have recorded your CDR(W) you can enter text,
e.g. names to discs and tracks.This text will be displayed
during playback on this unit,but also on other sets
equipped with the CD text feature.You can enter up to
60 characters per text field.Only use an unfinalized CDR
or CDRW (finalized CDRW must be unfinalized first).
1 If necessary press Ç to stop playback.
2 Press CDR to select the CD recorder.
3 Press CD TEXT/EDIT to enter the text edit menu.
➜ CD TEXT EDIT is blinking. TEXT EDIT is displayed.
4 Rotate í JOG CONTROL ë to select either:
➜ ALBUM ARTIST:for editing the CD artist
➜ ALBUM TITLE:for editing the CD title
➜ ARTIST TR 1 (or 2, 3,…):for editing the artist of track
1 (or 2,3,…)
➜ TITLE TR 1 (or 2, 3,…):for editing the title of track 1
(or 2,3,…)
5 Press YES to confirm the selection.
6 Rotate í JOG CONTROL ë to select a character.
➜ After selecting a character,the cursor moves
automatically to the next character space.
7 Repeat step 6 for adding further characters.
8 Press YES to save the characters that have been selected
and to exit to the last position in the text editing menu.
➜ UPDATE is displayed.
Storing text during recording
You can store and edit text even while recording.Editing
text during finalizing is not possible.When using high speed
recording and automatic finalizing,make sure to enter the
text before finalizing starts,otherwise, automatic finalizing
will be cancelled.
● Follow steps 3–8 of “Storing text during stop mode”.
Auto copied text
When an artist’s name has been stored for a track,it will be
copied automatically into the next track.
● Press either:
YES to confirm the copied text,
or
NO to delete the copied text and to enter a new one.
Inserting a space
1 Press à SEARCH or á SEARCH to move to the
position where the space is to be inserted.
➜ The position starts blinking.
2 Press YES to confirm the position of the insert character.
➜ A space will be inserted after the cursor.
Deleting and substituting a character
1 Press à SEARCH or á SEARCH to move to the
character’s position to be deleted or substituted.
➜ The character starts blinking.
2 If you want to delete the character:
Press NO.
➜ The character is deleted and the text is shifted one
position to the left.
If you want to substitute the character:
Rotate í JOG CONTROL ë to select a new character.
Press YES to confirm the selection.
00
To change another character press à SEARCH or
á SEARCH.
Erasing text
1 Press CD TEXT/EDIT to enter the text edit menu.
➜ CD TEXT EDIT is blinking. TEXT EDIT is displayed.
2
Rotate í JOG CONTROL ë to select the text erase menu:
➜ ERASE TEXT is displayed.
3 Press YES to confirm.
4
Rotate í JOG CONTROL ë to select one of the following:
➜ ALL TEXT CD:All text of the selected disc is chosen to
be erased in one step.
➜
ALL TEXT TR1 (or 2, 3,…):All text of track 1 (or 2, 3,…)
is chosen to be erased.
➜ CD TITLE:CD artist’s name and CD title are chosen to
be erased.
5 Press YES to start erasing.
➜ The chosen text will be erased.
Erasing from the memory
When the text memory of your CD recorder is almost full,
the messages MEMORY FULL and FINALIZE DISC will
be displayed.If you still want to add a new disc to the text
memory, you have to finalize another disc.
Features
24
English
CONTROL
D
IS
P
L
A
Y
C
D
R
CD
1
CD
JOG
C
L
O
C
K
•
T
IM
E
2
F
I
N
R
CD
3
SOURCE
TUNER
AU
X
C
D
R
E
C
O
R
D
ER
C
O
D
P
R
E
N
•C
LO
S
E
M
A
S
T
E
R
V
O
L
U
M
E
C
O
P
Y
C
O
M
P
IL
E
C
D
C
D
RECORD
A
L
I
Z
E
C
D
E
R
A
S
E
 Loading...