

Page 1
3139 116 19701
Mini Hi-Fi System
FW-
C90
with 3 CD changer
pg 01-29/C90/22-Eng 3/6/00, 1:52 PM1
Page 2
3139 116 19701
2
Deutsch ∂ППЛУИО¿PortuguêsSuomiDanskSvenskaItalianoNederlands
Español
FrançaisEnglish
Norge
Typeskilt finnes på apparatens underside.
Observer:
Nettbryteren er sekundert innkoplet.
Den innebygde netdelen er derfor ikke frakoplet
nettet så lenge apparatet er tilsluttet
nettkontakten.
For å redusere faren for brann eller elektrisk
støt, skal apparatet ikke utsettes for regn eller
fuktighet.
Italia
DICHIARAZIONE DI CONFORMITA’
Si dichiara che l’apparecchio FW-C90 Philips
risponde alle prescrizioni dell’art. 2 comma 1 del
D.M. 28 Agosto 1995
n. 548.
Fatto a Eindhoven
Philips Consumer Electronics
Philips, Glaslaan 2
5616 JB Eindhoven, The Netherlands
Important notes for users in the U.K.
Mains plug
This apparatus is fitted with an approved 13 Amp plug. To change a fuse in this
type of plug proceed as follows:
1 Remove fuse cover and fuse.
2 Fix new fuse which should be a BS1362 5 Amp, A.S.T.A. or BSI approved type.
3 Refit the fuse cover.
If the fitted plug is not suitable for your socket outlets, it should be cut off and an
appropriate plug fitted in its place.
If the mains plug contains a fuse, this should have a value of 5 Amp. If a plug
without a fuse is used, the fuse at the distribution board should not be greater
than 5 Amp.
Note: The severed plug must be disposed of to avoid a possible shock hazard
should it be inserted into a 13 Amp socket elsewhere.
How to connect a plug
The wires in the mains lead are coloured with the following code: blue = neutral
(N), brown = live (L).
As these colours may not correspond with the colour markings identifying the
terminals in your plug, proceed as follows:
• Connect the blue wire to the terminal marked N or coloured black.
• Connect the brown wire to the terminal marked L or coloured red.
• Do not connect either wire to the earth terminal in the plug, marked E (or e) or
coloured green (or green and yellow).
Before replacing the plug cover, make certain that the cord grip is clamped over
the sheath of the lead - not simply over the two wires.
Copyright in the U.K.
Recording and playback of material may require consent. See Copyright Act 1956
and The Performer’s Protection Acts 1958 to 1972.
pg 01-29/C90/22-Eng 3/6/00, 1:52 PM2
Page 3
3139 116 19701
3
∂ППЛУИО¿ EnglishFrançais
Español
NederlandsItalianoSvenskaDanskSuomi Deutsch
Português
INDEX
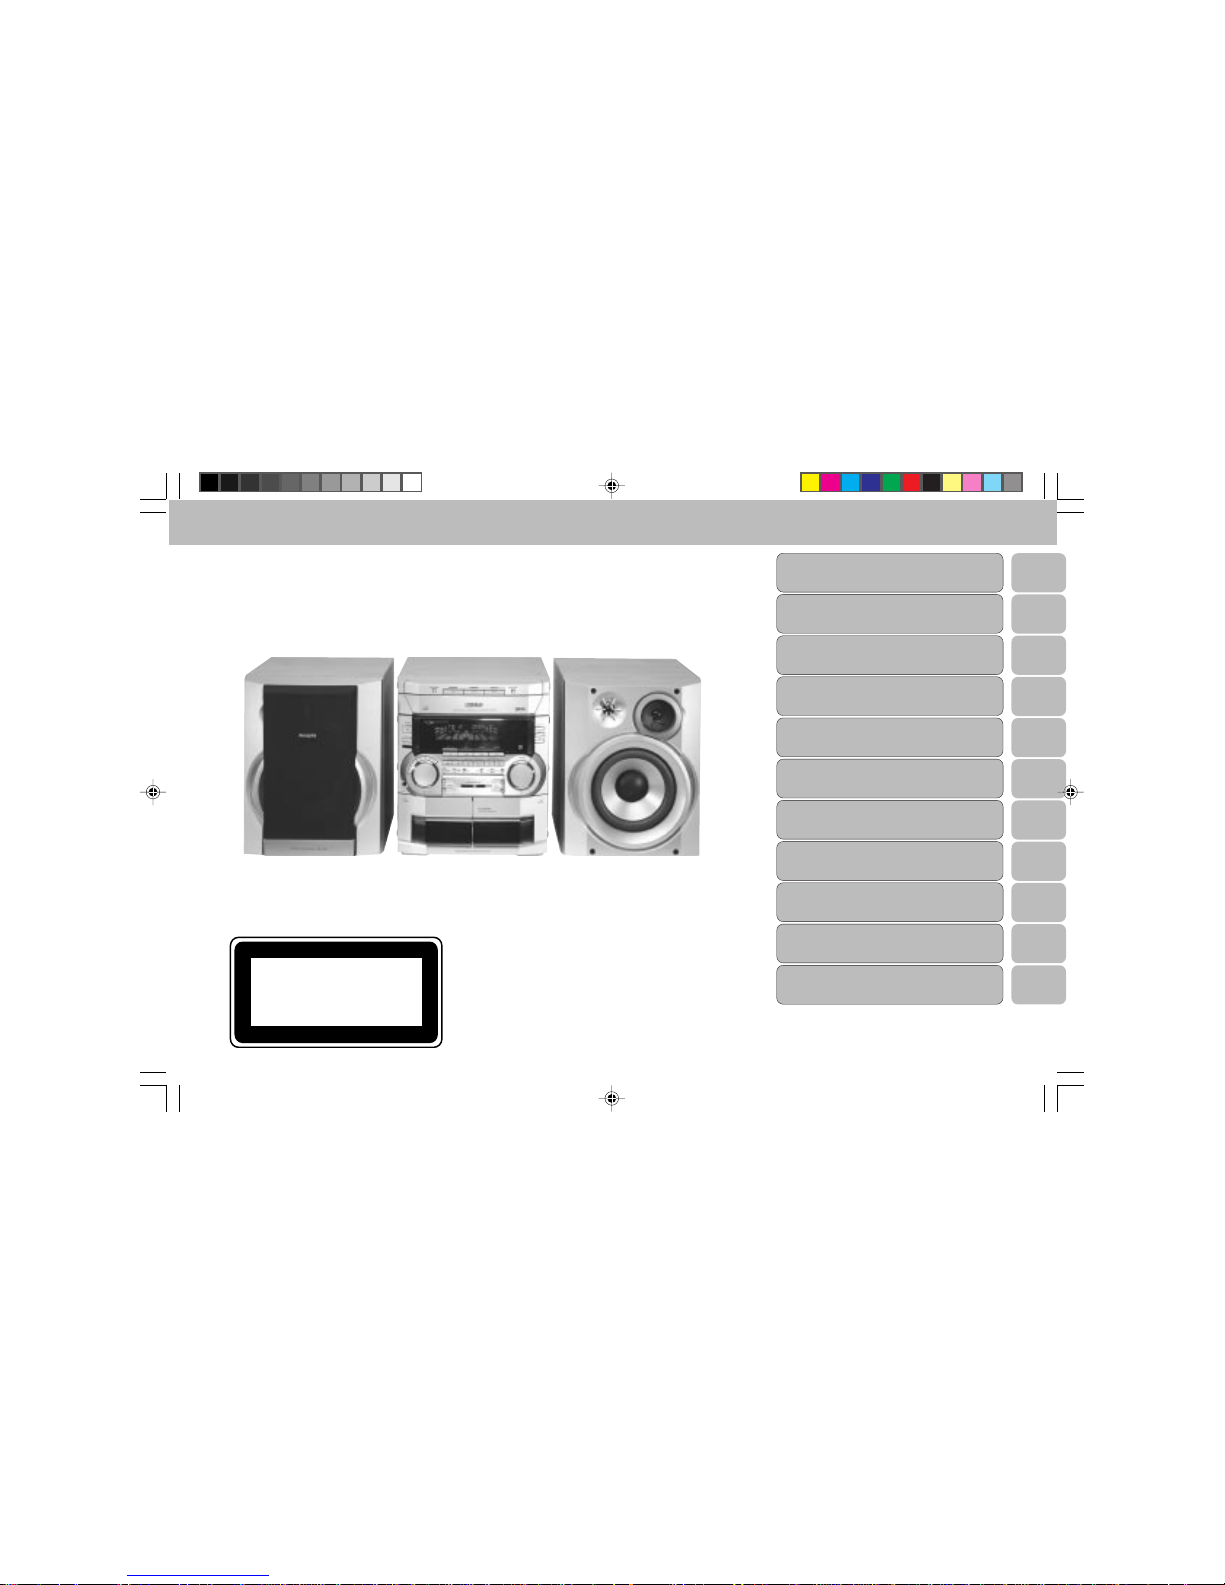
CLASS 1
LASER PRODUCT
English .....................................4
Français .................................30
Español ..................................56
Deutsch ..................................82
Nederlands.......................... 110
Italiano .................................136
Svenska ...............................162
Dansk ...................................188
Suomi ...................................214
Português ............................238
∂ППЛУИО¿
............................ 264
pg 01-29/C90/22-Eng 3/6/00, 1:52 PM3
Page 4
4
English
3139 116 19701
General Information ..................................................................................... 5
Safety Information ........................................................................................ 5
Preparation .............................................................................................. 6 - 7
Controls ................................................................................................... 8 - 10
Operating The System ........................................................................ 11 - 14
CD ........................................................................................................... 15 - 17
Tuner...................................................................................................... 18 - 20
AUX/CDR .......................................................................................................20
Tape ....................................................................................................... 21 - 22
Recording ............................................................................................. 23 - 24
Clock ............................................................................................................. 25
Timer..................................................................................................... 25 - 26
Sleep Timer ..................................................................................................26
Specifications ............................................................................................. 27
Maintenance ................................................................................................28
Troubleshooting .................................................................................. 28 - 29
CONTENTS
pg 01-29/C90/22-Eng 3/6/00, 1:52 PM4
Page 5
5
English
3139 116 19701
General Information
• The type plate (which contains the
serial number) is located at the rear
of the system.
• Recording is permissible if
copyright or other rights of third
parties are not infringed.
• This product complies with the
radio interference requirements of
the European Community.
Environmental Information
All unnecessary packaging has been
omitted. We have tried to make the
packaging easy to separate into three
materials: cardboard (box), polystyrene
foam (buffer) and polyethylene (bags,
protective foam sheet).
Your system consists of materials which
can be recycled and reused if disassembled
by a specialized company. Please observe
the local regulations regarding the disposal
of packaging materials, exhausted
batteries and old equipment.
Safety Information
• Before operating the system, check that
the operating voltage indicated on the
typeplate (or the voltage indication
beside the voltage selector) of your
system is identical with the voltage of
your local power supply. If not, please
consult your dealer. The typeplate is
located at the rear of your system.
• When the system is switched on, do not
move it around.
• Place the system on a solid base (e.g. a
cabinet).
• Place the system in a location with
adequate ventilation to prevent internal
heat build-up in your system. Allow at
least 10 cm clearance from the rear and
the top of the unit and 5 cm from the
each side.
• The system incorporates a built-in
safety feature that prevents
overheating.
• Do not expose the system to excessive
moisture, rain, sand or heat sources.
• Under no circumstances should you
repair the system yourself, as this will
invalidate the warranty!
GENERAL INFORMATION SAFETY INFORMATION
• If the system is brought directly from a
cold to a warm location, or is placed in a
very damp room, moisture may
condense on the lens of the CD unit
inside the system. Should this occur, the
CD player will not operate normally.
Leave the power on for about one hour
with no disc in the system until normal
playback is possible.
• Electrostatic discharge may cause
unexpected problems. See whether
these problems disappear if you unplug
the AC power cord and plug it in again
after a few seconds.
• To disconnect the system from the
power supply completely, remove
the AC power plug from the wall
socket.
Energy Star
As an ENERGY STARR Partner; Philips has
determined that this product meets the
ENERGY STARR guidelines for energy
efficiency.
Acknowledgement
Dolby B NR and the double-D symbol d
are trademarks of Dolby Laboratories
Licensing Corporation.
Manufactured under license from Dolby
Laboratories Licensing Corporation.
Accessories
(Supplied)
– Remote control
– Batteries (two AA size) for remote
control
– AM loop antenna
– FM wire antenna
– AC power cord
pg 01-29/C90/22-Eng 3/6/00, 1:52 PM5
Page 6
6
English
3139 116 19701
PREPARATION
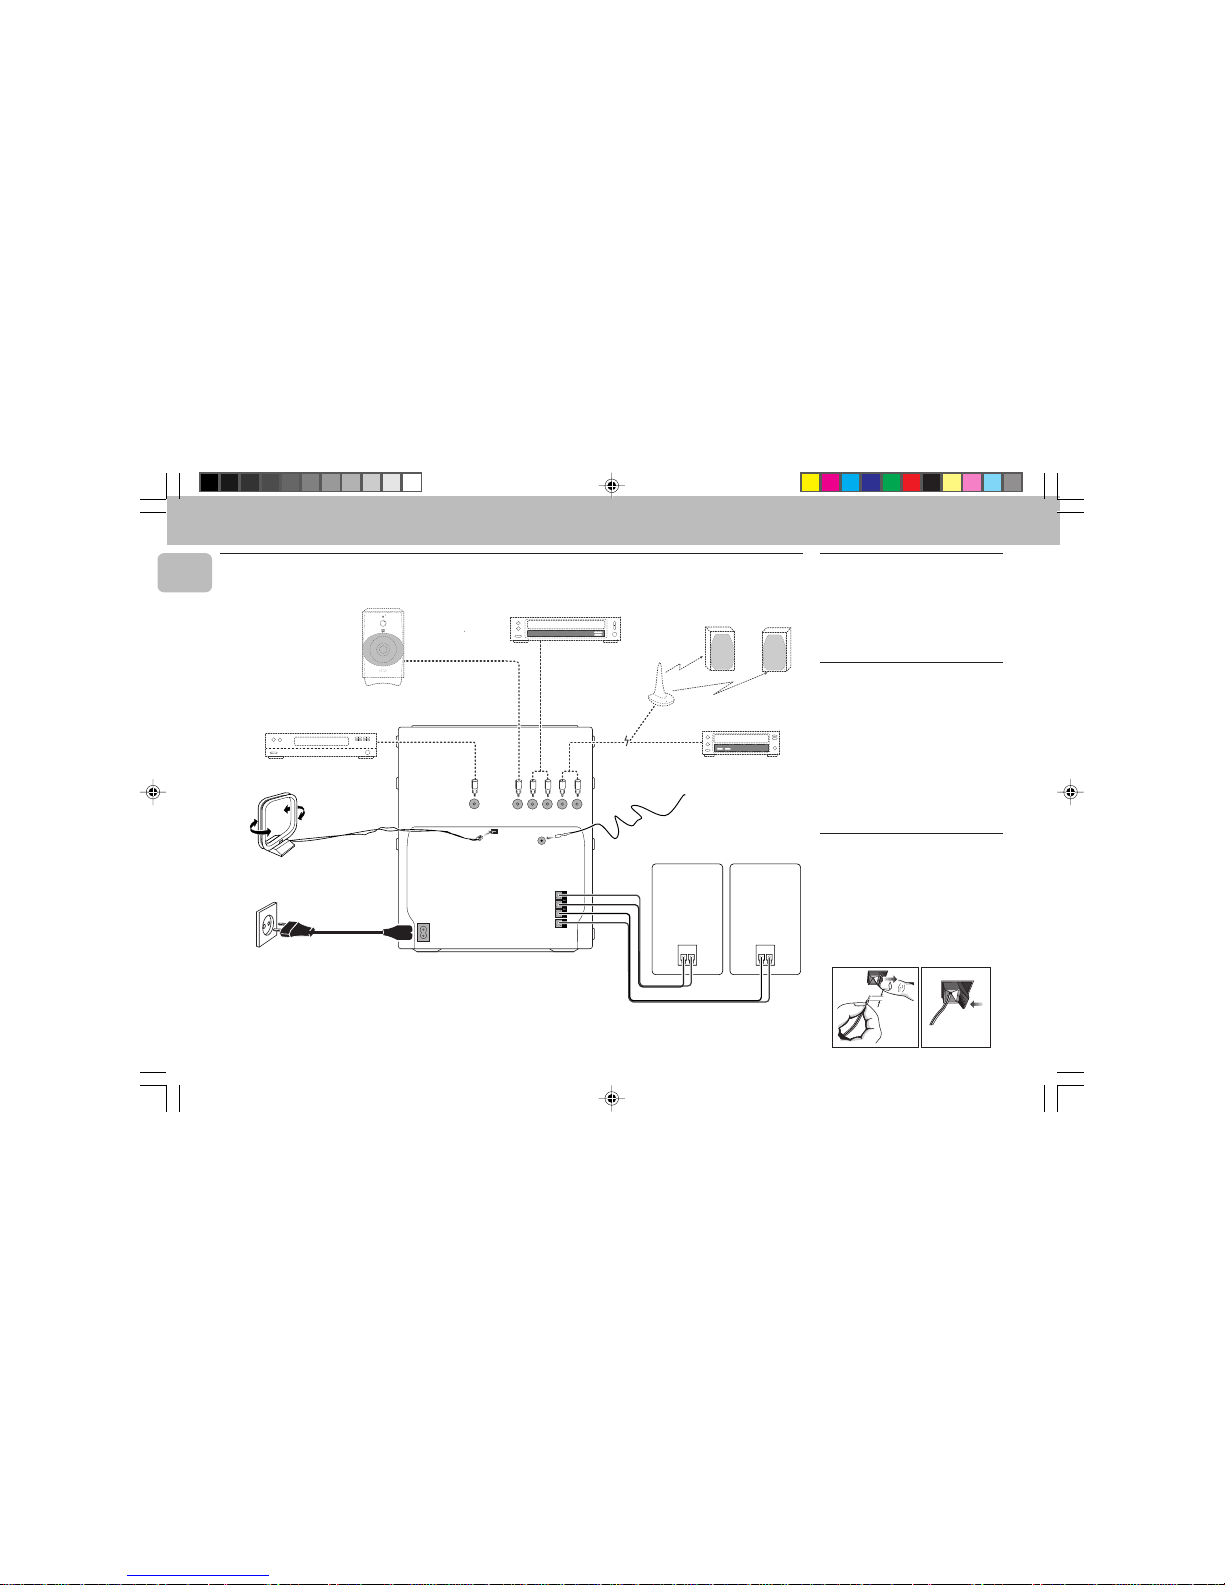
Rear Connections
AM ANTENNA
D
C
FRONT
AUX/CDR IN
F
SUB-
WOOFER
OUT
DIGITAL
OUT
LINE OUT
AUDIO OUT
L
+
–
R
–
+
LRLR
HIGH POWER SUBWOOFER
S
U
B
W
O
O
F
E
R
L
E
V
E
L
C
O
N
T
R
O
L
STANDBY ON
CUT OFF FREQUENCY
60Hz 150Hz
MIN MAX
AUDIO IN
E
B
–
+
–
+
LR
A
G
AC
MAINS
~
H
FM ANTENNA 75Ω
A AM Loop Antenna
Connection
Connect the supplied loop antenna to the
AM ANTENNA terminal. Place the AM loop
antenna far away from the system and
adjust its position for the best reception.
B FM Wire Antenna
Connection
Connect the supplied FM wire antenna to
the FM ANTENNA 75 Ω terminal. Adjust
the position of the FM antenna for the best
reception.
Outdoor Antenna
For better FM stereo reception connect an
outdoor FM antenna to the FM ANTENNA
75 Ω terminal using a 75 Ω coaxial wire.
C Speakers Connection
• Connect the right speaker to Front
terminal R, with the colored wire to +
and the black wire to -.
• Connect the left speaker to Front
terminal L, with the colored wire to +
and the black wire to -.
• Clip the stripped portion of the speaker
wire as shown.
unlock lock
12 mm
pg 01-29/C90/22-Eng 3/6/00, 1:52 PM6
Page 7
7
English
3139 116 19701
CAUTION:
– For optimal sound performance, it is
recommended to use the supplied
speakers.
– Do not connect more than one speaker
to any one pair of +/- speaker
terminal.
– Do not connect speakers with
impedance lower than the speakers
supplied. Please refer to
SPECIFICATION section of this manual.
D Line Out Connection
(wireless
ready)
You can connect the audio left and right
LINE OUT terminals to a optional CD
Recorder ANALOG IN terminals. This
allows you to record in an analogue format.
You can also install additional optional
front active speakers away from the
system (e.g. in another room) to reduce the
inconvenience of running long speaker
wires across rooms. You can place as many
remote speakers as you like provided they
operate at the same radio frequency.
Connect the wireless radio frequency
transmitter to the LINE OUT terminals.
Place the active speakers at your preferred
location. Be sure to follow the instructions
supplied with the active speakers.
PREPARATION
Note:
– Availability of wireless transmitter and
its peripherals are subjected to the
approval of local authorities. Please
check with respective local safety or
approving authority.
E Connecting other
equipment to your system
You can connect the audio left and right
OUT terminals of a TV, VCR, Laser Disc
player, DVD player or CD Recorder to the
AUX/CDR IN terminals at the rear of the
system.
F Subwoofer Out Connection
Connect the optional active subwoofer to
the SUBWOOFER OUT terminal. The
subwoofer reproduces just the low bass
sound effect (e.g. explosions, the rumble of
spaceships, etc.). Be sure to follow the
instructions supplied with the subwoofer.
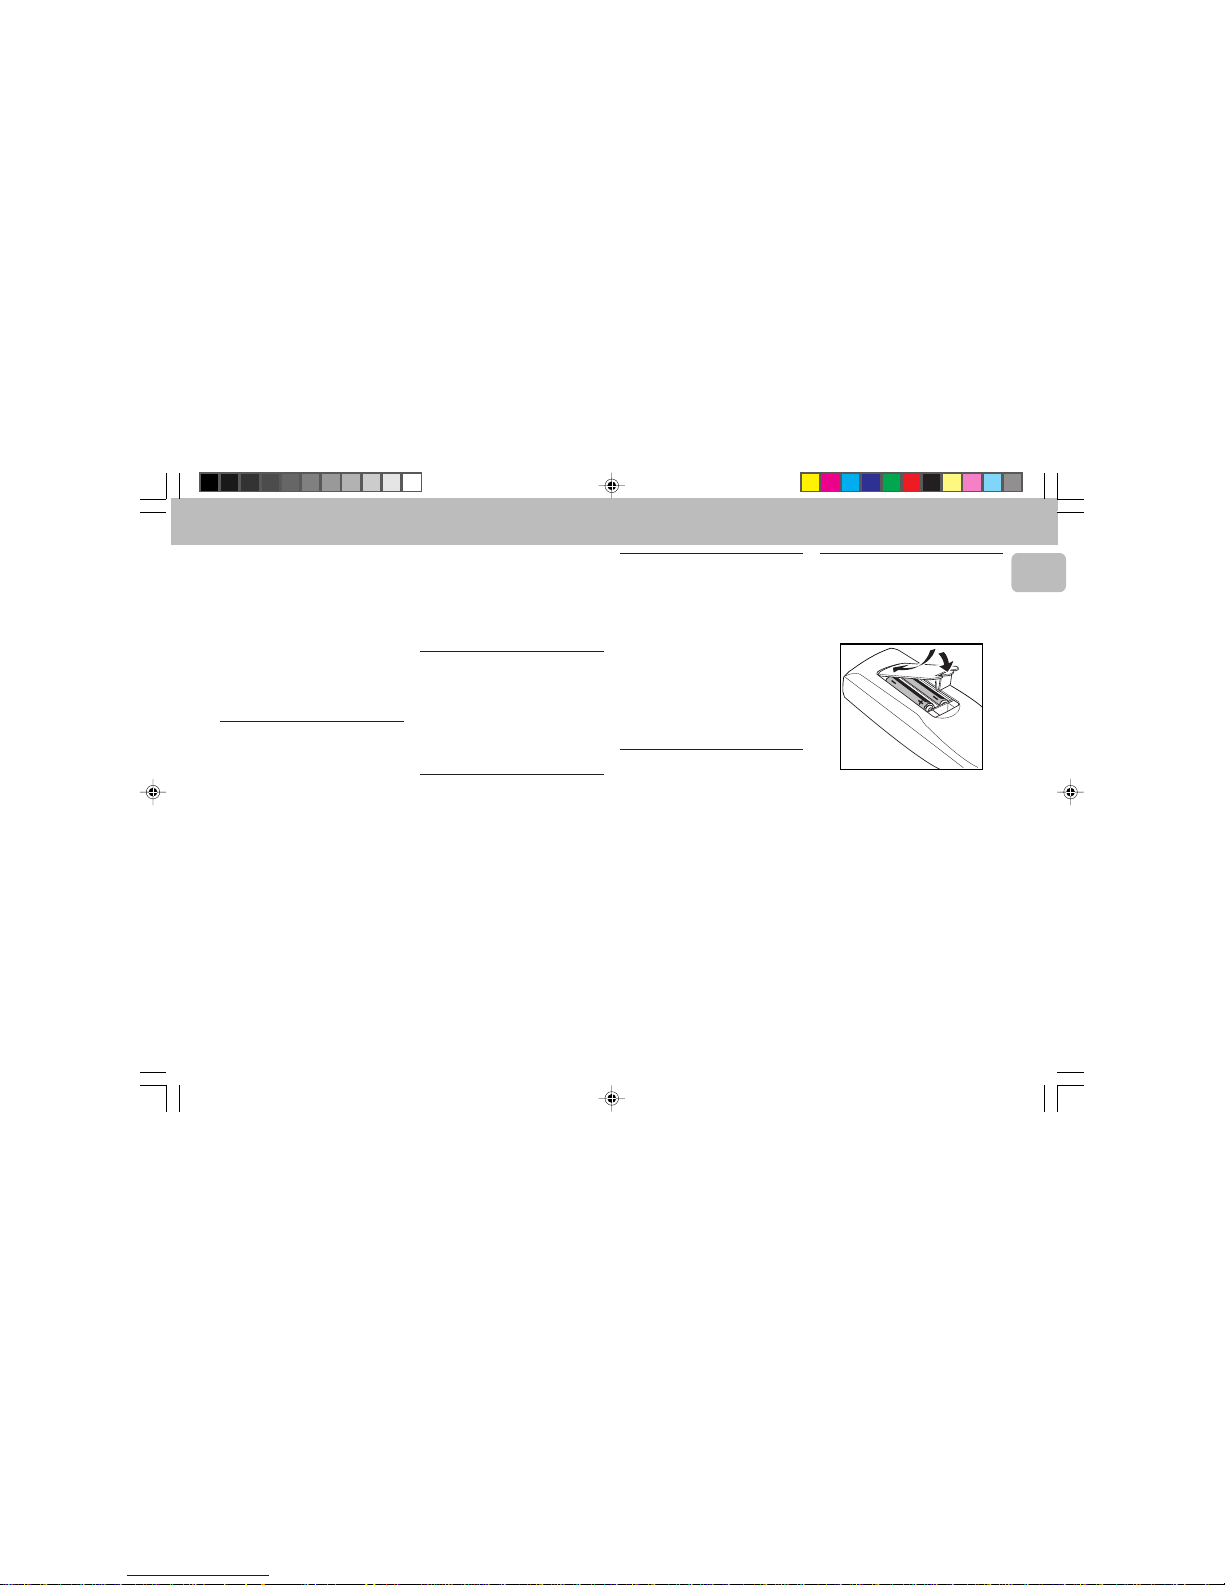
Inserting batteries into the
Remote Control
• Insert the batteries (Type R06 or AA)
into the remote control as shown in the
battery compartment.
• To avoid damage from possible battery
leakage, remove dead batteries or
batteries that will not be used for a long
time. For replacement, use type R06 or
AA batteries.
G Digital Out Connection
You can record the digital sound from the
CD, through this output, on any audio
equipment with digital input (e.g. CD
Recorder, Digital Audio Tape (DAT) deck,
Digital to Analog Converter and Digital
Signal Processor).
Connect one end of the cinch cable (not
supplied) to the DIGITAL OUT socket and
the other end to the audio equipment with
digital input.When connecting the cinch
cable, make sure it is fully inserted.
H AC Power Supply
After all other connections have been
made, connect the AC power cord to the
system and to the wall outlet.
pg 01-29/C90/22-Eng 3/6/00, 1:52 PM7
Page 8
8
English
3139 116 19701
CONTROLS
DISC CHANGE
DISC 1 DISC 2 DISC 3
OPEN•CLOSE
STANDBY
ON
DC
3
CHANGER
MINI HIFI SYSTEM
BANDC1 • 2 • 3
CDR
STOP•CLEAR
SEARCH•TUNING PLAY PAUSE PREV
NEXT
DUB
(HSD)
RECORD
A. REVDIM
CLOCK/
TIMER
PROG
BASS
TREBLE
POWER SAVE
IR SENSOR
SIDE
V
O
L
U
M
E
RDS
DOLBY B NR
NEWS/TA
CD TEXT
DYNAMIC BASS BOOST
B
A
S
S
/
T
R
E
B
L
E
TAPE
CD
TUNER
AUX
P
E
R
S
O
N
A
L
D
S
C
V
E
C
1
2
0
5
4
6
7
8
£
≥
!
@
%
#
$
(
9
§
)
¡
™
£
≤
¢Ω∞
1
3
DSC
BASS
ÅÉ
1
3
2
4
6
5
7
9
8
VOLUME
á
à
2
ë
í
Ç
0
2
AUX/CDR
MUTE
CD 123
TUNER
TAPE 1/2
AUTO REV.CLOCK
CD TEXT
PERSONAL
BASS/TREBLE
PROGRAMREPEAT
SHUFFLE
TREBLE
+
-
0
ª
¡
(
(
(
¡
≤
›
fi
CD
DIRECT
VEC
TIMER ON/OFFSLEEP
DIM
DBB
+
-
•
TAPE 1•2
CD 1•2•3
BAND
CDR/DVD
3
^
&
*
PRESET
▲
▲
+
5
£
º
⁄
4
¤
‹
*
9
∞
%
pg 01-29/C90/22-Eng 3/6/00, 1:52 PM8
Page 9
9
English
3139 116 19701
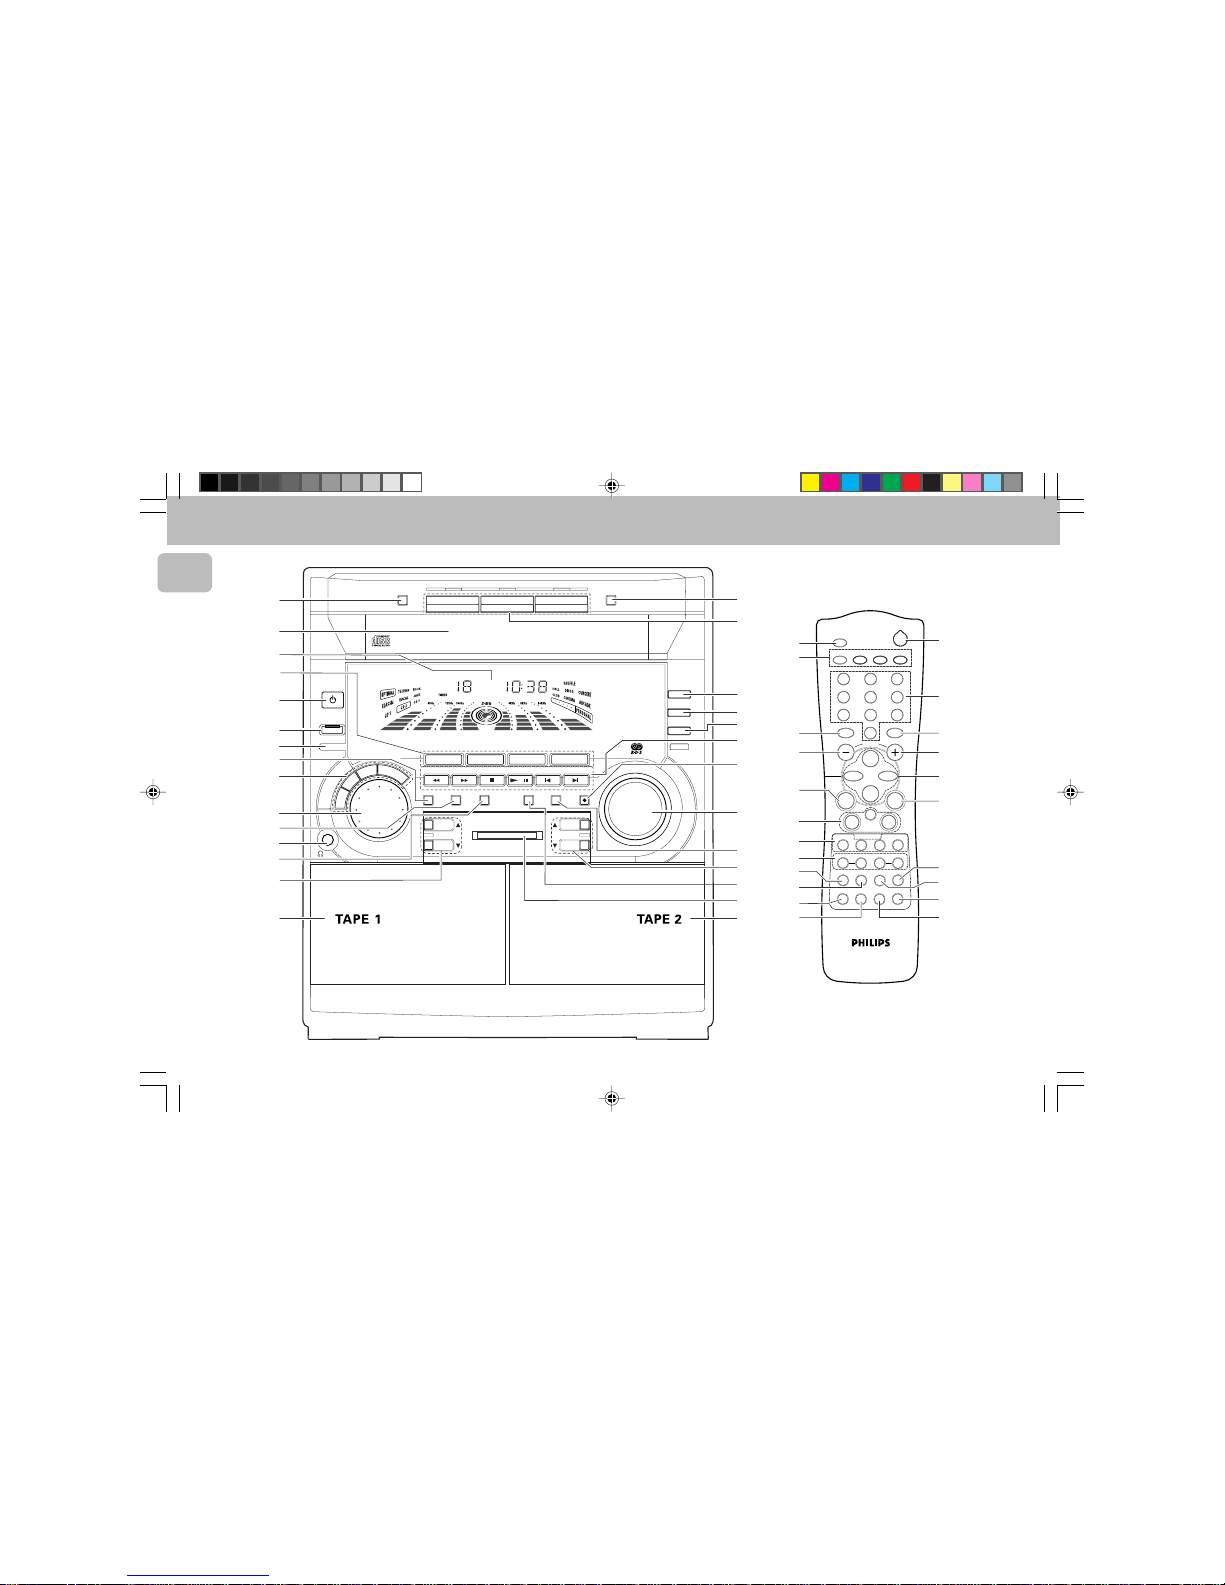
Controls on the system and
remote control
1 STANDBY ON
– to switch the system on or to standby
mode.
– to use for EASY SET.
2 POWER SAVE
– to switch the system to energy saving
mode.
3 IR SENSOR
– sensor for the infrared remote control.
4 PROG (PROGRAM)
for CD ............ to program CD tracks.
for TUNER ..... to program preset radio
stations.
for CLOCK ..... to select 12 or 24 hour
in clock setting mode
(on the system only)
.
5 SOUND CONTROL – to select the
desired sound feature : PERSONAL,
DSC, VEC or BASS/TREBLE.
6 JOG
– to select the desired sound effect of
PERSONAL/DSC/VEC setting. You
must select the respective sound
feature first.
PERSONAL
– to select up to 6 personal preferred
Spectrum Analyzer settings :
PERSONAL 1-6.
DSC
– to select the desired Digital Sound
Control effect : OPTIMAL, CLASSIC,
TECHNO, VOCAL, ROCK or JAZZ.
VEC
– to select the desired Virtual
Environment Control effect : HALL,
CLUB, DISCO, CINEMA, CONCERT or
ARCADE.
7 CLOCK/TIMER
– to view the clock, set the clock or set
the timer.
8 n
– to connect headphones.
9 DIM
– to select brightness for the display
screen : DIM 1, DIM 2, DIM 3 or DIM
OFF.
0 SOURCE – to select the following:
CD / (CD 1•2•3)
– to select CD mode. When CD playback
is stopped, press to select disc tray 1,
2 or 3.
TUNER / (BAND)
– to select Tuner mode. When in tuner
mode; press to select the waveband:
FM, MW or LW.
TAPE / (TAPE 1• 2)
– to select Tape mode. When tape
playback is stopped, press to select
either tape deck 1 or 2.
AUX / (CDR/DVD)
– to select sound from an external
source (e.g. TV, VCR, Laser Disc player,
DVD player or CD Recorder). When in
AUX mode, press to select either AUX
or CDR/DVD.
! DISPLAY SCREEN
– to view the current setting of the
system.
@ CD CAROUSEL TRAY
# DISC CHANGE
– to change CD(s).
$ OPEN•CLOSE
– to open or close the CD carousel tray.
% DISC 1 / DISC 2 / DISC 3 (CD
DIRECT PLAY)
– to select a CD tray for playback.
^ DOLBY B NR
– to switch on or off Dolby B NR.
& NEWS/TA
– to hear News or Traffic Announcement
data automatically.
* RDS (CD TEXT)
for TUNER ..... to select RDS data in
the following order:
station name, program
type and radio text.
for CD ............ to view the CD encoded
information.
( MODE SELECTION
SEARCH à á (TUNING à á )
for CD ............ to search backward/
forward.
for TUNER ..... to tune to a lower or
higher radio frequency.
for TAPE ........ to rewind or fast
forward a tape.
for CLOCK ..... to set the hour
(on the
system only)
.
STOP•CLEAR Ç
for CD ............ to stop CD playback or
to clear a program.
for TUNER ..... to stop programming.
for TAPE ........ to stop playback or
recording.
for DEMO ......
(on the system only)
to
start or stop
demonstration mode.
PLAY PAUSE ÉÅ
for CD ............ to start or interrupt
playback.
for TAPE ........ to start playback.
í PREV / SIDE / NEXT ë
(PRESET 4 3 )
for CD ............ to skip to the beginning
of the current, previous,
or next track.
for TUNER ..... to select a preset radio
station in memory.
for TAPE ........ to select tape side
(back or front) in tape
deck 2 only.
for CLOCK ..... to set the minute
(on
the system only)
.
CONTROLS
pg 01-29/C90/22-Eng 3/6/00, 1:52 PM9
Page 10
10
English
3139 116 19701
) RECORD
– to start recording on tape deck 2.
¡ VOLUME
– to increase or decrease the volume.
™ DUB (HSD) (HIGH SPEED
DUBBING)
– to dub a tape in normal or fast speed.
£ BASS/TREBLE CONTROL – to
adjust BASS/TREBLE level :
BASS 3 4 (BASS +/-)
– to increase or decrease the low tone.
TREBLE 3 4 (TREBLE +/-)
– to increase or decrease the high tone.
≤ A. REV (AUTO REVERSE)
– available in tape deck 2 only.
– to select the desired play modes
( å / ∂ / ∫ ).
∞ DYNAMIC BASS BOOST (DBB)
– to select a bass boost level or to
switch off bass boost.
§ TAPE DECK 2
≥ TAPE DECK 1
• MUTE
– to switch off the sound temporarily.
ª CLOCK
– to view clock display.
º TIMER ON/OFF
– to switch on or off timer.
⁄ SLEEP
– to switch the system to standby mode
at a selected time.
CONTROLS
¤ REPEAT
– to repeat a CD track, a disc, or all
available discs.
‹ SHUFFLE
– to play all the available discs and their
tracks in random order.
› DIGIT 0 – 9
(numbers consisting of two figures
must be keyed in within 2 seconds)
for CD ............ to key in a CD track for
playback or
programming.
for TUNER ..... to key in a preset radio
station.
fi B
– to switch the system to standby mode.
Notes for remote control:
– First select the source you wish to
control by pressing one of the
source select keys on the remote
control (e.g. CD, TUNER, etc.).
– Then select the desired function
(É, í, ë, etc.).
pg 01-29/C90/22-Eng 3/6/00, 1:52 PM10
Page 11
11
English
3139 116 19701
Important:
Before you operate the system,
complete the preparation procedures.
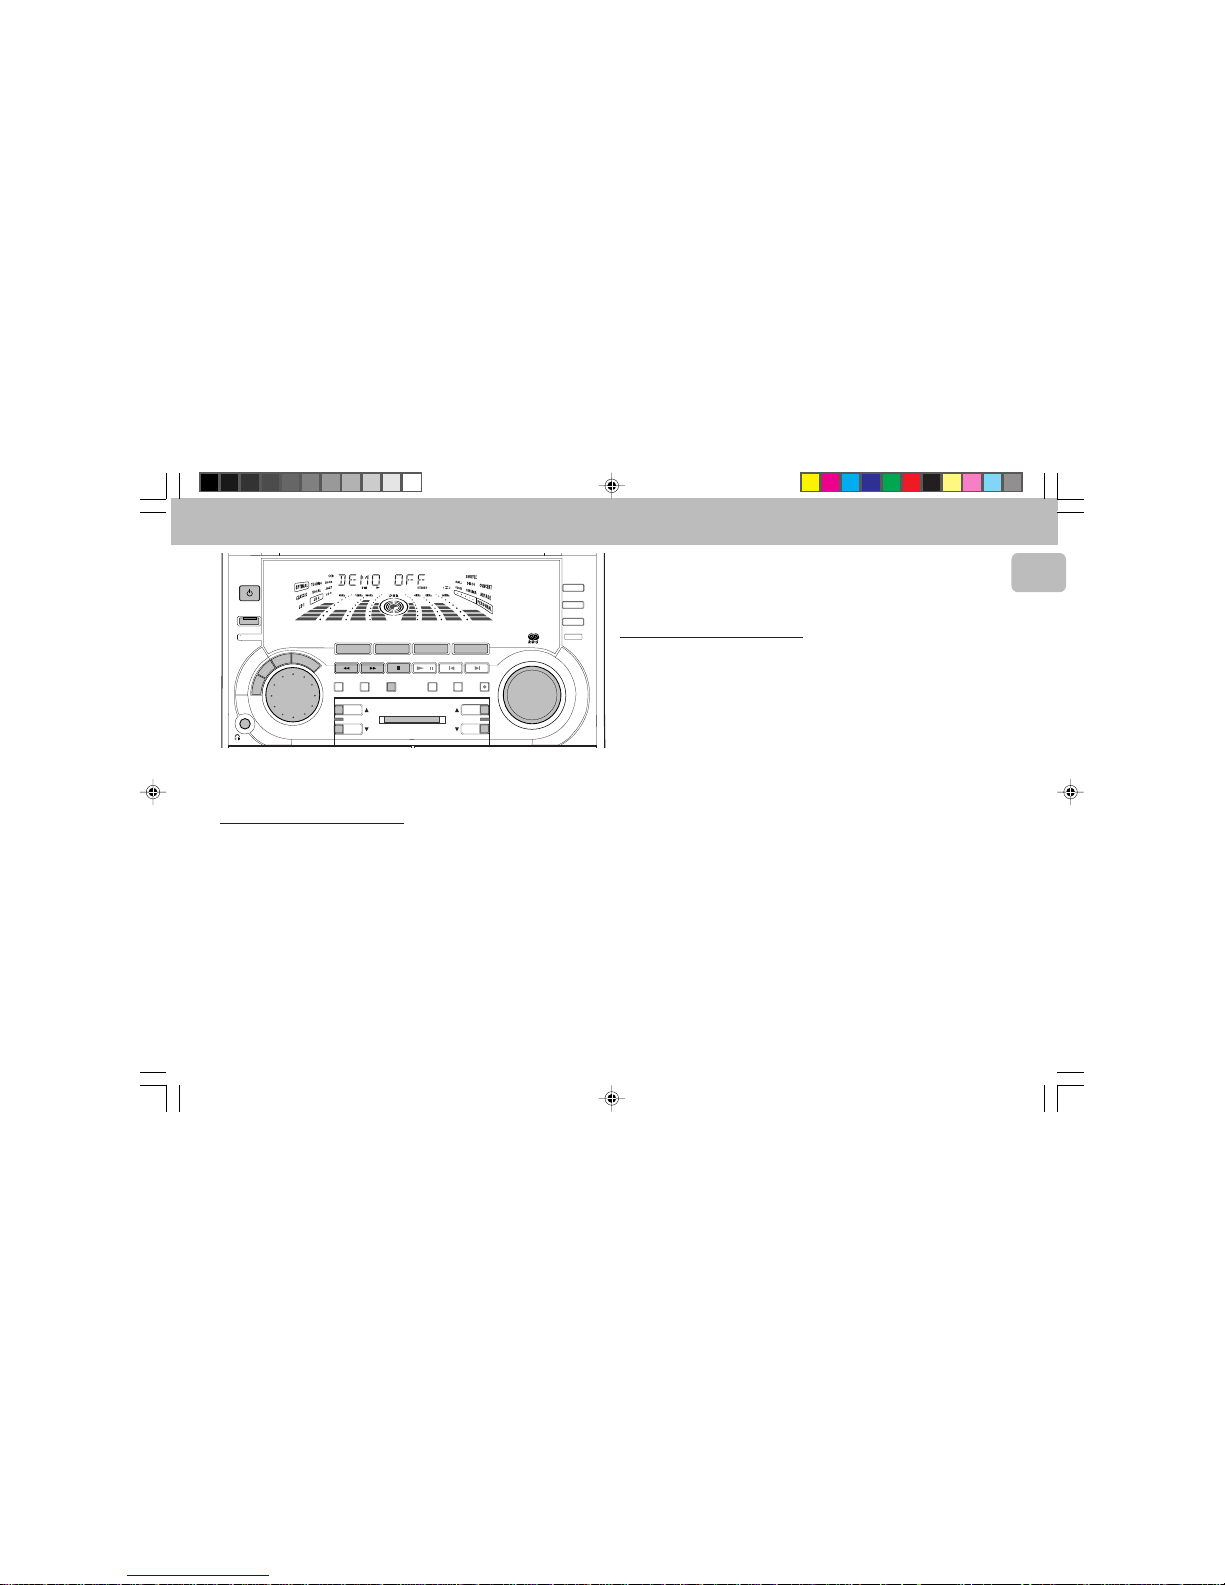
Demonstration mode
The system has a demonstration mode that
shows the various features offered by the
system.
When the system is switched
on for the first time, the demonstration
mode will start automatically.
Notes:
– During the demonstration, if you press
any source (or standby-on) button, the
system will switch to the respective
mode (or standby).
– When the system is switched to standby
or power save mode, the demonstration
will resume 5 seconds later.
To stop the demonstration mode
• Press and hold Ç
(on the system only)
for
5 seconds
when the system is in
demonstration mode.
™ The demonstration will stop.
™ "DEMO OFF" is displayed.
™ The system will switch to standby
mode.
Notes:
– When the system is switched on from
the main power outlet, the CD carousel
tray may open and close again to
initialize the set.
– Even though the AC power cord is
removed from and reconnected to the
wall socket, the demonstration will
remain off until it is switched on again.
STANDBY
ON
MINI HIFI SYSTEM
BANDC1 • 2 • 3
CDR
STOP•CLEAR
SEARCH•TUNING PLAY PAUSE PREV
NEXT
DUB
(HSD)
RECORD
A. REVDIM
CLOCK/
TIMER
PROG
POWER SAVE
IR SENSOR
SIDE
V
O
L
U
M
E
PRESET
▲
▲
BASS
TREBLE
DYNAMIC BASS BOOST
B
A
S
S
/
T
R
E
B
L
E
TAPE
CD
TUNER
AUX
P
E
R
S
O
N
A
L
D
S
C
V
E
C
TAPE 1•2
CD 1•2•3
CDR/DVD
RDS
DOLBY B NR
NEWS/TA
CD TEXT
BAND
OPERATING THE SYSTEM
To start the demonstration mode
• Press and hold Ç
(on the system only)
for
5 seconds
when the system is in
standby mode.
™ The demonstration will begin.
Easy Set
EASY SET allows you to store all available
radio stations and RDS stations
automatically.
1 Press and hold STANDBY ON
(on the
system only)
for
5 seconds
; when the
system is in standby or demonstration
mode.
™ "EASY SET" will be displayed, and
followed by "TUNER" and then
"AUTO".
™ EASY SET will start searching for all
RDS radio stations with sufficient
signal strength and then followed by
radio stations on FM, MW and LW
band respectively. Weak RDS radio
stations may be stored in later
presets.
™ All available RDS and radio stations
with sufficient signal strength will be
stored. Up to 40 presets may be
stored.
2 The system will proceed to set the RDS
time automatically with the stored RDS
preset station.
• If no RDS station is available in the first
preset station, the program will exit
automatically.
™ After a radio station is found, "EASY
SET" will be displayed and followed
by "TIME".
• When searching RDS time;
™ "SEARCH RDS TIME" will be
displayed.
™ When RDS time is read, "RDS
TIME" will be displayed. The current
time will be displayed for 2 seconds
and stored automatically.
Notes:
– EASY SET will start with the RDS
station, if there are still presets
available, it will continue to store the
FM, MW and LW bands respectively.
– When EASY SET is used, all previously
stored radio stations will be replaced.
– The last preset radio station or the first
available RDS station will appear on the
display when EASY SET is completed.
– If RDS station does not transmit RDS
time within 90 seconds, the program
will exit automatically and the display
will show “
NO RDS TIME
”.
pg 01-29/C90/22-Eng 3/6/00, 1:52 PM11
Page 12
12
English
3139 116 19701
OPERATING THE SYSTEM
Switching the system ON
• Press CD, TUNER, TAPE or AUX.
You can also switch on the system by
pressing any one of the CD DIRECT PLAY
buttons.
Switching the system to
standby mode
• Press STANDBY ON or B on the
remote control.
™ The system will switch to standby
mode.
Switching the system to power
save mode
(when Demonstration mode
is stopped)
• Press POWER SAVE to switch to
energy saving mode ( < 2 watts ).
™ "LOW POWER STANDBY ON" will
be displayed, after which the display
screen goes blank.
™ The low power STANDBY ON LED
will be lit.
Note:
– if the demonstration mode has not been
disabled, it will resume 5 seconds later.
Selecting the Source
• Press the respective source selection
button: CD, TUNER, TAPE or AUX.
™ The display indicates the selected
source.
Note:
– For an external source, make sure you
have connected the audio left and right
OUT terminals of the external
equipment (TV, VCR, Laser Disc player,
DVD player or CD Recorder) to the AUX/
CDR IN terminals.
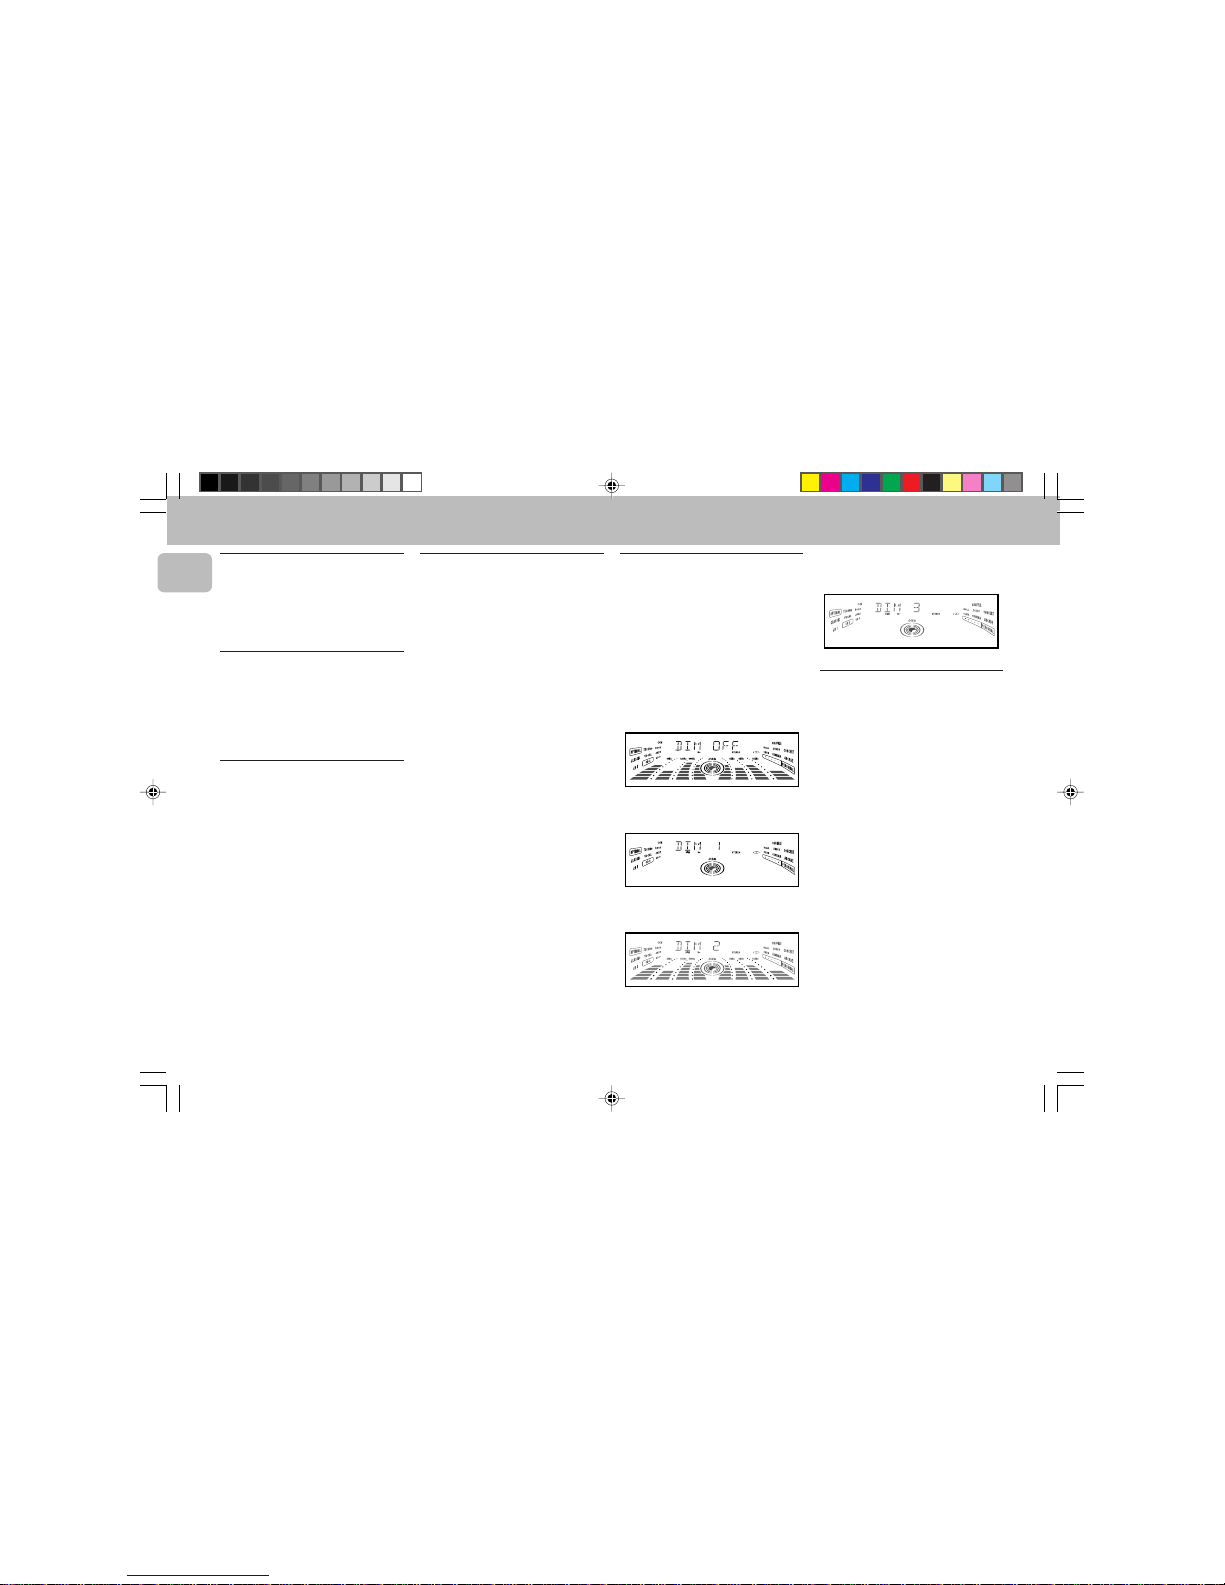
Dim mode
You can select the desired brightness for
the display.
• Press DIM to select DIM 1, DIM 2, DIM
3 or DIM OFF display mode.
™ The DIM appears on the display.
™ "DIM 1", "DIM 2", "DIM 3" or
"DIM OFF" will be displayed
depending on the mode selected.
DIM OFF - normal brightness with
Spectrum Analyzer On
DIM 1 - normal brightness with
Spectrum Analyzer Off
DIM 2 - half brightness with Spectrum
Analyzer On
DIM 3 - half brightness with Spectrum
Analyzer Off and all LEDs on the
system will be switched off.
Volume Control
Adjust VOLUME to increase or decrease
the sound level.
For Personal Listening
Connect the headphones plug to the n
socket at the front of the system. The
speakers will be muted.
MUTE (only on remote control)
This feature allows you to temporarily
switch off the sound without switching off
the system when you require a moment of
silence.
1 Press MUTE on the remote control to
switch off the sound.
™ "MUTE" will be displayed.
2 Press MUTE again on the remote
control or increase the VOLUME level
to switch on the sound.
pg 01-29/C90/22-Eng 3/6/00, 1:53 PM12
Page 13
13
English
3139 116 19701
Sound Control
For Optimal sound listening, you can
only select one of the following sound
control at a time : PERSONAL, DSC,
VEC or BASS/TREBLE.
PERSONAL SOUND
You can store upto 6 personal settings.
1 Press to select the PERSONAL feature.
2 Adjust the JOG to select the desired
Personal setting.
™ The selected personal setting number
will be encircled.
™ If no name has been stored
previously, "PERSONAL X" will be
displayed. "X" is the setting number.
Personal Setting
You can adjust the personal setting to your
desired level with the JOG control.
1 Press and hold PERSONAL for about
5
seconds
to switch on the personal
setting mode.
™ "SELECT PRESET NUMBER"
will be displayed.
2 Adjust the JOG to select the desired
preset number for personal setting and
press á to confirm the selection.
™ "ADAPT LOW FREQ LEVEL" will
be displayed.
OPERATING THE SYSTEM
3 Adjust the JOG to select the desired
Spectrum Analyzer band level for low
frequency.
™ The level will increase or decrease
between+3 and -3.
4 Press á to confirm the selection.
™ "ADAPT MID FREQ LEVEL" will
be displayed and the next followed
by "ADAPT HIGH FREQ
LEVEL".
• Repeat
step 3 - 4
to select the desired
mid and high frequencies Spectrum
Analyzer band levels.
5 You can choose to edit the name for the
personal setting.
™ The first character of setting name
will be flashing.
6 Adjust the JOG to select the desired
alphabet, number or symbol.
™ "A to Z", "0 to 9" or "*, -, +, \, /, _".
7 Press á to confirm the selection.
™ The next character for editing will be
flashing.
• Repeat
step 6 - 7
to store up to 10
characters.
8 To store the setting, press PERSONAL
again.
• Before storing the setting, you can
press à to retrace the steps in the
reverse order.
• To exit without storing the setting,
press Ç.
Notes:
– During personal setting, if no button is
pressed within 90 seconds, the system
will exit personal setting mode
automatically.
– It is not possible to adjust Bass/Treble
level during personal setting, "
USE
JOG
" will be displayed.
DIGITAL SOUND CONTROL (DSC)
The DSC feature enables you to adjust the
system to suit your type of music.
1 Press to select the DSC feature.
2 Adjust the JOG to select the desired
Digital Sound Control setting :
OPTIMAL, CLASSIC, TECHNO, VOCAL,
ROCK or JAZZ.
™ The selected digital sound is
encircled.
™ "OPTIMAL, CLASSIC, TECHNO,
VOCAL, ROCK or JAZZ" will be
displayed.
Note:
– For neutral setting, select CLASSIC.
VIRTUAL ENVIRONMENT CONTROL
(VEC)
The VEC feature enables you to adjust the
system to select a type of environment.
1 Press to select the VEC feature.
2 Adjust the JOG to select the desired
Virtual Environment Control setting :
HALL, CLUB, DISCO, CINEMA,
CONCERT or ARCADE.
™ The selected environment is
encircled.
™ "HALL, CLUB, DISCO,
CINEMA, CONCERT or
ARCADE" will be displayed.
BASS/TREBLE
The BASS/TREBLE features enable you to
define the sound processor settings for
Bass and Treble.
1 Press to select the BASS/TREBLE
feature.
™ The BASS and TREBLE LED will be lit.
™ "ADAPT BASS AND TREBLE
LEVELS" will be displayed.
2 Use BASS/TREBLE CONTROL to select
the desired BASS or TREBLE level
respectively.
™ The BASS/TREBLE level will increase
or decrease between level +3 and
-3.
pg 01-29/C90/22-Eng 3/6/00, 1:53 PM13
Page 14
14
English
3139 116 19701
• Press BASS 3 or 4 to select the low
tone level.
™ "BASS -X or BASS +X" will be
displayed.
• Press TREBLE 3 or 4 to select the
high tone level.
™ "TREBLE -X or TREBLE +X"
will be displayed.
Note:
–"X" denotes the sound level.
DYNAMIC BASS BOOST (DBB)
There are three DBB settings to enhance
the bass response.
• Press DYNAMIC BASS BOOST briefly
to select a bass boost level.
™ The DBB display lights up.
™ "BEAT", "PUNCH" or "BLAST" will
be displayed.
To switch off DBB
• Press DYNAMIC BASS BOOST briefly
until "DBB OFF" is displayed.
Notes:
– When Personal or Bass/Treble sound
control is selected, DBB will be
switched off automatically.
– Some CDs or tapes might be recorded in
high modulation, which causes a
distortion at high volume. If this occurs,
switch off DBB or reduce the volume.
Automatic DSC-DBB / VEC-DBB
selection
The best DBB setting is generated
automatically for each DSC or VEC
selection. You can manually select the DBB
setting that best suits your listening
environment.
OPERATING THE SYSTEM
pg 01-29/C90/22-Eng 3/6/00, 1:53 PM14
Page 15
15
English
3139 116 19701
CD
Warning!
1) This system is designed for conventional CDs. Do not use any accessories
such as disc stabilizer rings or CD treatment sheets, etc., which may damage
the CD mechanism.
2) Do not load more than one disc into each tray.
3) When the CD changer is loaded with CDs, do not turn over or shake the
system. This may jam the changer.
You may load three discs in the CD changer for continuous playback without
interruption.
DISC CHANGE
DISC 1 DISC 2 DISC 3
OPEN•CLOSE
STANDBY
ON
DC
3
CHANGER
MINI HIFI SYSTEM
BANDC1 • 2 • 3
CDR
STOP•CLEAR
SEARCH•TUNING PLAY PAUSE PREV
NEXT
DUB
(HSD)
RECORD
A. REVDIM
CLOCK/
TIMER
PROG
POWER SAVE
IR SENSOR
SIDE
V
O
L
U
M
E
RDS
DOLBY B NR
NEWS/TA
CD TEXT
BAND
B
A
S
S
/
T
R
E
B
L
E
TAPE
CD
TUNER
AUX
P
E
R
S
O
N
A
L
D
S
C
V
E
C
TAPE 1•2
CD 1•2•3
CDR/DVD
PRESET
▲
▲
BASS
TREBLE
DYNAMIC BASS BOOST
CD Text
It will enable you to know which album and
its track you are selecting or playing on
specially encoded CD.
• Press RDS
(or CD TEXT on the remote
control)
.
At stop mode
™ The title of album or total playing
time will be displayed.
During Playback
™ The title of album, track title or
elapsed time will be displayed.
• If the album and track title are not
known.
™ "NO TEXT ON DISC" will be
displayed.
Discs for playback
This system can play all digital audio CD,
finalized digital audio CD-Recordable and
finalized digital audio CD-Rewritable
format discs.
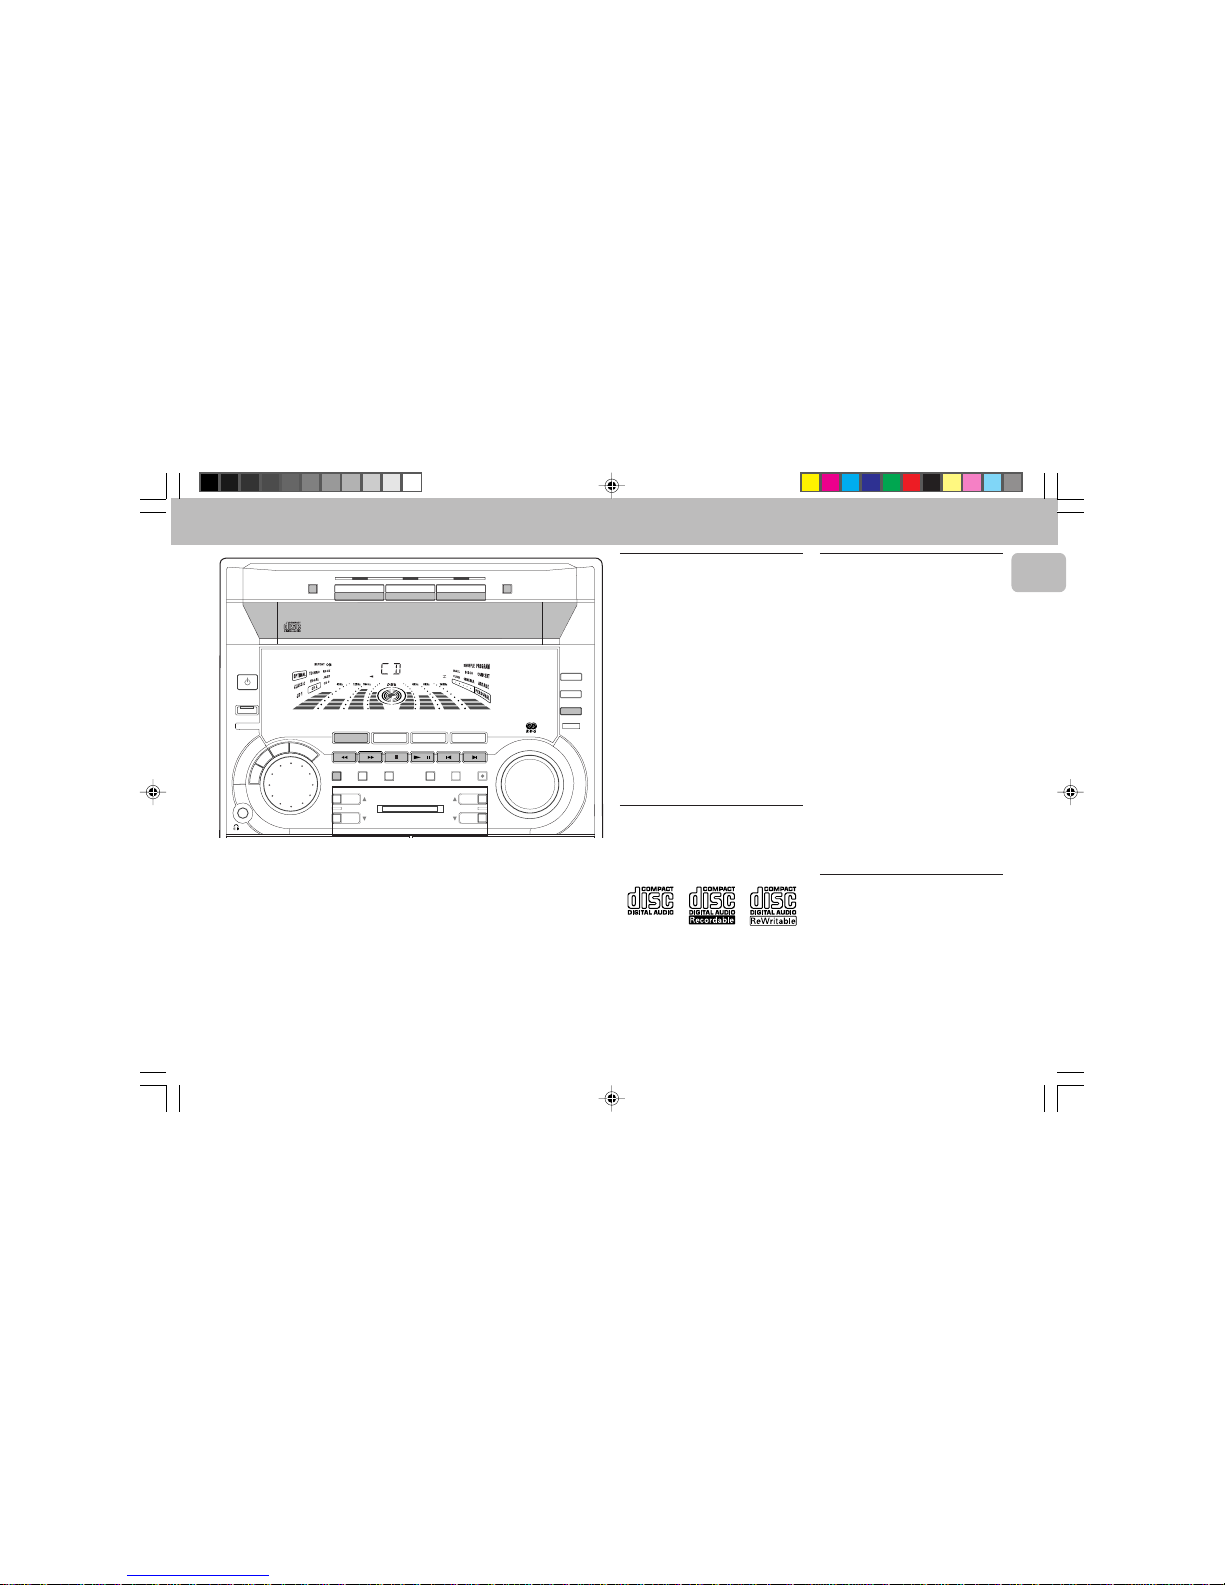
Loading the CD Changer
1 Press CD to select CD mode.
2 Press OPEN•CLOSE.
™ The CD carousel tray slides out.
3 Load a CD with the printed side up in
the right tray.
• You can load another disc in the left
tray.
• To load the third disc, press the DISC
CHANGE button.
™ The CD carousel will rotate until the
empty tray is ready for loading.
4 Press OPEN•CLOSE to close the CD
carousel tray.
™ The total number of tracks and the
playing time of the selected disc
appear on the display.
Note:
– To ensure good system performance,
wait until the CD changer completely
reads the disc(s) before proceeding.
CD Direct Play
• You can play a CD directly by pressing
the DISC 1, DISC 2 or DISC 3 button.
The CD player will stop at the end of
playback of the selected disc.
™ A lit button indicates that a disc is
loaded in the disc tray.
™ The selected disc is encircled.
pg 01-29/C90/22-Eng 3/6/00, 1:53 PM15
Page 16
16
English
3139 116 19701
Playing a CD
1 Press PLAYÉÅ to start playback.
™ The disc tray, track number and
elapsed playing time of the current
track appear on the display.
• To interrupt playback, press
PAUSEÉÅ.
™ The playing time flashes.
• To resume playback, press PLAYÉÅ
again.
2 To stop playback, press Ç.
Notes:
– All the available discs will play once,
then stop.
– When the CD has stopped playing, the
system will switch to standby mode
after 30 minutes if no button is pressed.
Disc Change
You can change the outer two discs while
the third inner disc is stopped or is playing.
1 Press DISC CHANGE.
™ The CD carousel tray slides out.
2 Replace the discs in the left and right
disc trays.
• If you wish to change the inner disc
during playback, press DISC CHANGE
again.
™ "DISC CHANGE" will be displayed.
™ The CD will stop playing.
™ The CD carousel tray will close to
retrieve the inner CD and then open
again with the inner CD accessible.
3 Press OPEN•CLOSE to close the CD
carousel tray.
Selecting a desired track
Selecting a desired track when
playback is stopped
1 Press í or ë
(or Digit 0-9 on the
remote control)
until the desired track
appears on the display.
2 Press PLAYÉÅ to start playback.
™ The selected track number and
elapsed playing time appear on the
display.
Selecting a desired track during
playback
• Press í or ë
(or Digit 0-9 on the
remote control)
until the desired track
appears on the display.
™ The selected track number and
elapsed playing time appear on the
display.
• If you press í once it will skip to the
beginning of the current track and play
the track again.
Note:
– Pressingí during shuffling can only skip
to the beginning of the current track.
CD
Searching for a particular
passage during playback
• Press and hold à or á until the
desired passage is located.
™ The volume will be reduced.
• Play returns to normal when à or á
is released.
Programming Tracks
Programming tracks of a loaded CD is
possible when playback is stopped. The
display will indicate the total tracks stored
in the program. Up to 40 tracks can be
stored in the memory in any order. When
40 tracks are stored and you attempt to
store another track, the display will show
“PROGRAM FULL”.
1 Load the desired discs in the disc trays.
2 Press PROG to start programming.
™ The PROGRAM starts flashing.
™ It will cancel any previously selected
repeat mode.
3 Press the CD (CD 1•2•3) or DISC 1/2/3
button to select the disc.
4 Press í or ë
(or Digit 0-9 on the
remote control)
to select the desired
track.
5 Press PROG to store the track.
• Repeat steps 3 to 5 to store other discs
and tracks.
6 Press Ç once to end programming.
™ The total number of tracks
programmed and total playing time
appear on the display.
Notes:
– If the total playing time is more than
“
99:59“
or if one of the programmed
tracks has a number greater than 30,
then “
--:--
” appears on the display
instead of the total playing time.
– If the system is reading the disc,
programming is not possible,
“
READING
” will be displayed and
followed by "
DISC X
" . "X" is the
current read disc number.
– During programming, if no button is
pressed within 20 seconds, the system
will exit program mode automatically.
Reviewing the program
Reviewing of the program is possible only
when playback is stopped.
1 Press í or ë repeatedly to review
the programmed tracks.
2 Press Ç once to exit review mode.
pg 01-29/C90/22-Eng 3/6/00, 1:53 PM16
Page 17
17
English
3139 116 19701
Erasing the program
(when
playback is stopped)
• Press Ç.
™ "PROGRAM CLEARED" will be
displayed.
Note:
– The program will be erased when the
system is disconnected from the power
supply or when the CD carousel tray is
opened.
Shuffle
(only on remote control)
In shuffle mode, the system plays all the
available discs and their tracks in random
order. Shuffle may be used also when
tracks are programmed.
To shuffle all the discs and tracks
1 Press SHUFFLE.
™ "SHUFFLE" will be displayed.
™ The SHUFFLE, the disc and the track
selected at random appear on the
display.
• The discs and the tracks will be played
in random order until you press Ç.
• If you press REPEAT during shuffling,
the current track or all available discs
will be played repeatedly.
™ "TRACK" or "ALL DISC" will be
displayed.
™ The REPEAT and SHUFFLE appear on the
display.
CD
Playing the program
1 Press PLAYÉÅ to start program
playback.
™ "PLAY PROGRAM" will be
displayed.
™ The track number and elapsed
playing time of the current track will
appear on the display.
• If you press REPEAT during program
playback, the current track or all
programmed tracks will be played
repeatedly.
™ "TRACK" or "PROGRAM" will be
displayed.
™ The REPEAT and PROGRAM appear on
the display.
2 Press Ç to stop program playback.
Notes:
– If you press any of the CD DIRECT PLAY
buttons, the system will play the
selected disc or track and the stored
program will be ignored temporarily. The
PROGRAM display also will disappear
temporarily from the display. It will
reappear when playback of the selected
disc ends.
– REPEAT DISC mode is not available
when program playback begins.
2 Press SHUFFLE again to resume normal
playback.
™ The SHUFFLE disappears from the
display.
Note:
– REPEAT DISC mode is not available
when shuffle is selected.
Repeat
(only on remote control)
You can play the current track, a disc or all
available discs repeatedly.
1 Press REPEAT on the remote control to
select the various repeat modes.
™ "TRACK", "DISC", "ALL DISC" or
"OFF" will be displayed.
™ The REPEAT appears on the display.
• The selected track, selected disc or all
available discs will now be played
repeatedly until you press Ç.
2 Press REPEAT until the "OFF" mode is
displayed to resume normal playback.
™ The REPEAT disappears from the
display.
Notes:
– REPEAT DISC mode is not available
during program play or shuffle mode.
– You can also repeat shuffling a program.
™ “TRACK“
or
“PROGRAM"
will be
displayed.
™
The REPEAT, PROGRAM and SHUFFLE
appear on the display.
pg 01-29/C90/22-Eng 3/6/00, 1:53 PM17
Page 18
18
English
3139 116 19701
STANDBY
ON
MINI HIFI SYSTEM
BANDC1 • 2 • 3
CDR
STOP•CLEAR
SEARCH•TUNING PLAY PAUSE PREV
NEXT
DUB
(HSD)
RECORD
A. REVDIM
CLOCK/
TIMER
PROG
POWER SAVE
IR SENSOR
SIDE
V
O
L
U
M
E
RDS
DOLBY B NR
NEWS/TA
CD TEXT
BAND
PRESET
▲
▲
B
A
S
S
/
T
R
E
B
L
E
TAPE
CD
TUNER
AUX
P
E
R
S
O
N
A
L
D
S
C
V
E
C
TAPE 1•2
CD 1•2•3
CDR/DVD
BASS
TREBLE
DYNAMIC BASS BOOST
Note:
– For 'EASY SET' feature, please refer to
page 11.
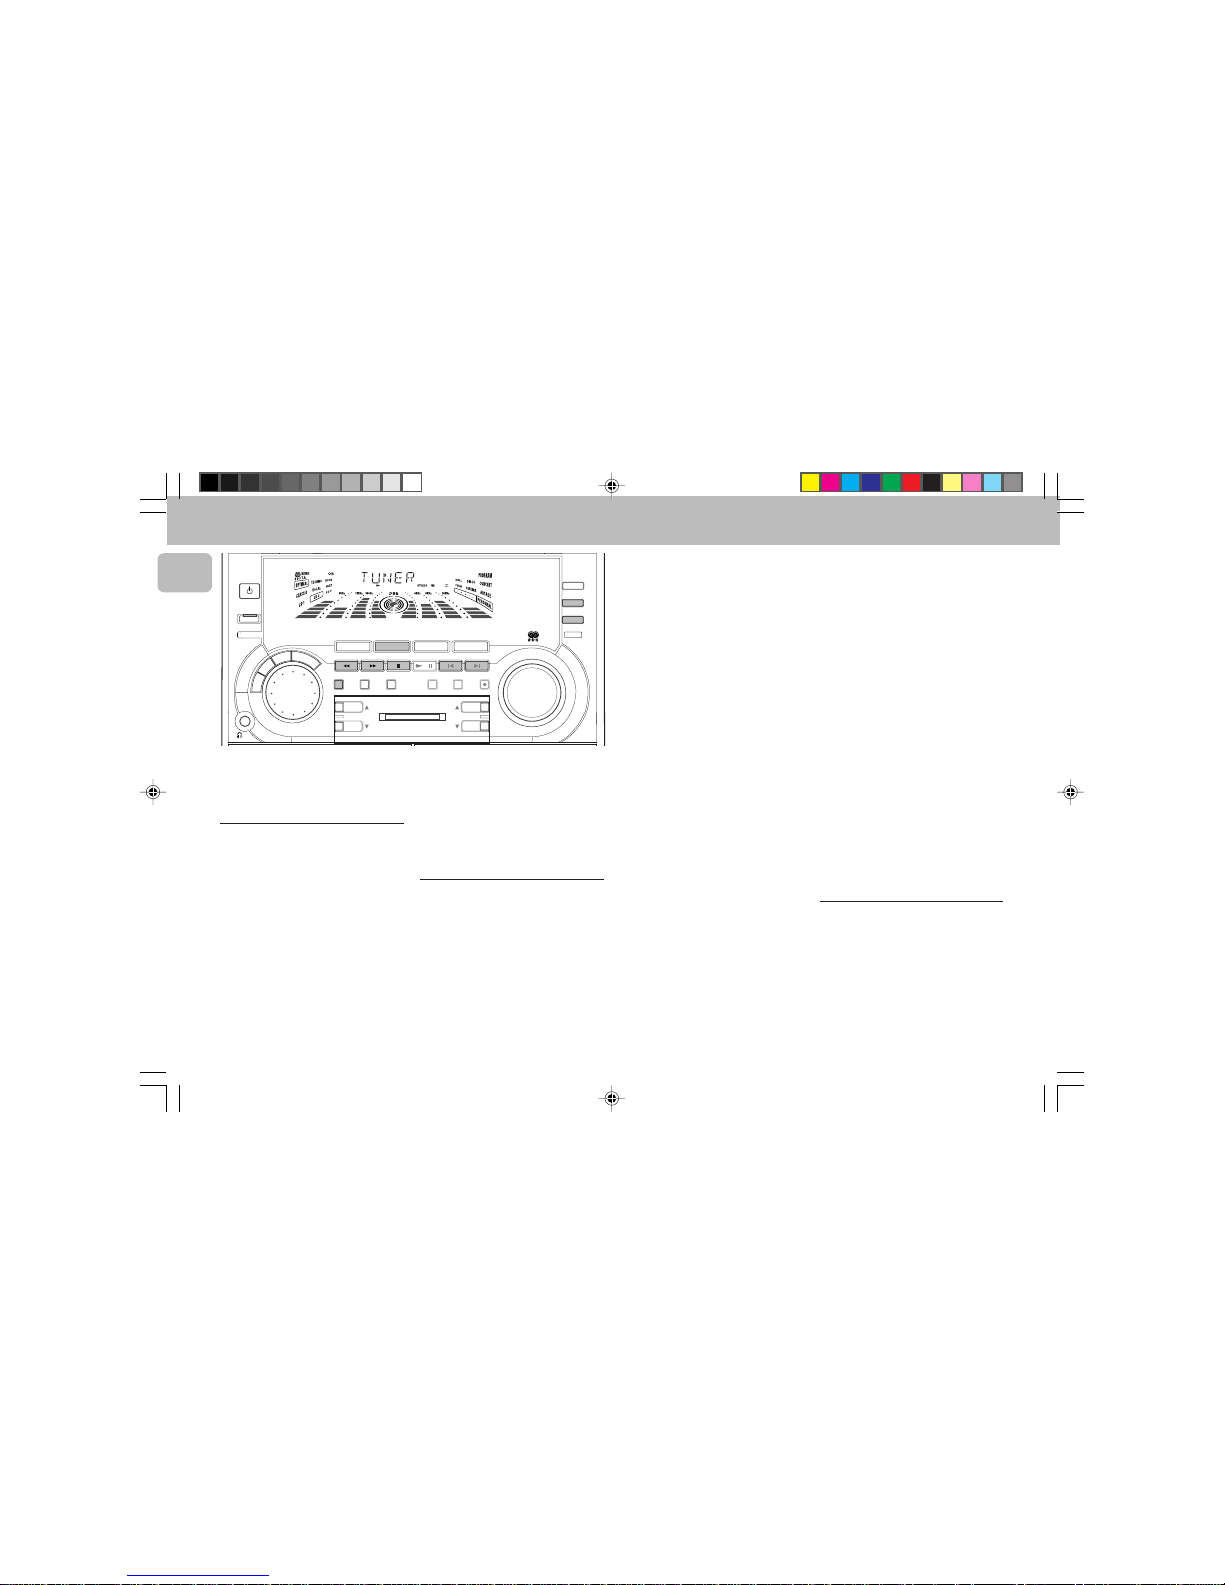
Tuning to radio stations
1 Press TUNER (BAND) to select TUNER
mode.
™ "TUNER" will be displayed.
A few seconds later, the current radio
frequency will be displayed.
2 Press TUNER (BAND) again to select
the desired waveband : FM, MW or LW.
3 Press à or á for more than one
second, then release.
™ The display will show "SEARCH"
until a radio station with sufficient
signal strength is found.
• Repeat this procedure until the desired
station is reached.
• To tune to a weak station, briefly press
à or á repeatedly until the display
shows the desired frequency and/or
when the best reception has been
obtained.
Storing Preset Stations
You can store up to 40 radio stations in the
memory. When a preset radio station is
selected, the preset number appears next
to the frequency on the display.
Automatic programming
1 Press TUNER (BAND).
2 Press PROG for more than one second.
™ The PROGRAM starts flashing and
"AUTO" will be displayed.
TUNER
™ The system will start searching for all
radio stations with RDS and then
followed by radio stations on FM,
MW and LW band respectively.
™ All available stations will be stored
automatically. The frequency and
preset number will be displayed
briefly.
™ The system will stop searching when
all the available radio stations are
stored or when the memory for 40
preset radio stations is used.
™ The system will remain tuned to the
last stored preset radio station.
Notes:
– You can cancel the automatic
programming by pressing PROG or
Ç
(on the system only).
– If you want to reserve a section of
preset numbers, for example preset
numbers 1 to 9, select preset 10 before
starting automatic programming, only
the preset numbers 10 to 40 will be
programmed.
Manual programming
1 Press TUNER (BAND).
2 Press TUNER (BAND) again to select
the desired waveband : FM, MW or LW.
3 Press PROG for less than one second.
™ The PROGRAM starts flashing.
™ The next available preset number will
be displayed for selection.
4 Press à or á to tune to the desired
frequency.
• If you wish to store the radio station to
another preset number, press 4 or 3
(or Digit 0-9 on the remote control)
to
select the desired preset number.
5 Press PROG again.
™ The PROGRAM disappears and the
radio station will be stored.
• Repeat
steps 3 – 5
to store other preset
radio stations.
Notes:
– When 40 radio stations are stored and
you attempt to store another radio
station, the display will show
"
PROGRAM FULL
”. If you want to
change an existing preset number,
repeat steps 3 – 5.
– You can cancel manual programming by
pressing Ç (on the system only).
– During programming, if no button is
pressed within 20 seconds, the system
will exit program mode automatically.
Tuning to Preset Radio
Stations
• Press 4 or 3
(or Digit 0-9 on the
remote control)
to select the desired
preset number.
™ The preset number, radio frequency,
and waveband appear on the display.
pg 01-29/C90/22-Eng 3/6/00, 1:53 PM18
Page 19
19
English
3139 116 19701
TUNER
Receiving RDS Radio Station
Ç
RDS (Radio Data System) is a broadcasting
service that allows FM stations to send
additional information along with the
regular FM radio signal. This additional
information can contain:
• STATION NAME: The radio station
name is displayed.
• PROGRAM TYPE: The following
program types exist and can be received
by your tuner: News, Affairs, Info, Sport,
Educate, Drama, Culture, Science,
Varied, Pop M, Rock M, M.O.R. (middle
of the road music), Light M, Classics,
Other M, No type.
• RADIO TEXT (RT): text messages
appear in the display.
When you have tuned to a RDS station, the
RDS logo (Ç) and the radio station name
will appear on the display:
• The display normally shows the radio
station name if available.
By repeatedly pressing RDS button you
can change the type of display
information:
™ The display shows in turn:
STATION NAME ™ PROGRAM
TYPE ™ RADIO TEXT ™
TUNED FREQUENCY ™
STATION NAME ...
Note:
– When you press the RDS button and the
display shows "
NO RDS
", it indicates
that either the tuned station is not
transmitting RDS signal or it is a non
RDS station.
RDS Clock
Some RDS station may be transmitting a
real clock time at an interval of every
minute.
Setting the time with RDS clock
1 Press CLOCK/TIMER.
™ "--:--" or current time appears on
the display.
2 Press CLOCK/TIMER once more to
enter clock setting mode.
™ "00:00" or current time starts
flashing.
3 Press RDS.
™ The message "SEARCH RDS
TIME" will be displayed.
™ If the station does not transmit RDS
clock, "NO RDS TIME" will be
displayed.
™ When the RDS clock is read, "RDS
TIME" will be displayed. The
current clock time is displayed for 2
seconds and will be stored
automatically.
™ If within 90 seconds, the RDS time is
not detected, "NO RDS TIME" will
be displayed.
Note:
– Some RDS station may be transmitting a
real time clock at a minute interval. The
accuracy of the transmitted time
depends on the transmitting RDS
station.
NEWS/TA (Traffic
Announcement)
(only available in Radio Station with
RDS)
You can activate NEWS or TA function in
Standby, Demonstration or any source
mode except Tuner mode. Once the News
Program Type (for NEWS function) or Traffic
Announcement data (for TA function) is
detected in any of the selected RDS
stations, it will switch to TUNER mode
automatically.
NEWS/TA key toggles in the following
sequence :
NEWS ™ TA ™ OFF ™ NEWS
To start NEWS or TA function
1 Press NEWS/TA to select NEWS
function.
™ The NEWS and "NEWS" will be
displayed.
• If you want to select TA function, press
NEWS/TA again.
™ The TA and "TA" will be displayed.
2 When NEWS or TA is selected;
• It will scan stations stored in the first 5
preset and wait for the News Program
Type / Traffic Announcement data to be
available in any of these RDS stations.
During the search :
™ The current source activity will
remain uninterrupted.
™ If no RDS station is found in the first
5 presets, the NEWS/TA function will
be switched off. The display will
show "NO RDS NEWS" or "NO
RDS TA" and NEWS or TA will
disappear from the display.
• When NEWS/TA transmission is
detected, the system will switch to
Tuner mode.
™ The NEWS or TA starts flashing.
To cancel NEWS or TA function
• Press NEWS/TA until the NEWS or TA
disappears and "TA OFF" is displayed.
Notes:
– If you are listening to a non RDS TUNER
radio station and should you decide to
hear NEWS or TA, first select other
source (e.g. CD, TAPE or AUX), then
press NEWS/TA.
– Before using the NEWS or TA feature,
ensure that the first 5 presets are RDS
stations.
– The NEWS/TA works only once for each
activation.
pg 01-29/C90/22-Eng 3/6/00, 1:53 PM19
Page 20
20
English
3139 116 19701
– During News bulletin or Traffic
Announcement, you can press any
available source or Tuner function keys
to cancel NEWS/TA function and
execute the relevant source mode.
– If set is switched to Tuner source, the
NEWS/TA function will be cancelled,
"
NEWS OFF
" or "
TA OFF
" will be
displayed immediately after the
"
TUNER
" message.
TUNER AUX/CDR
Selecting External Equipment
If you have connected the audio out
terminals of the external equipment (TV,
VCR, Laser Disc player, DVD player, or CD
Recorder) to the AUX/CDR IN terminals,
you can hear the enhanced sound from the
system.
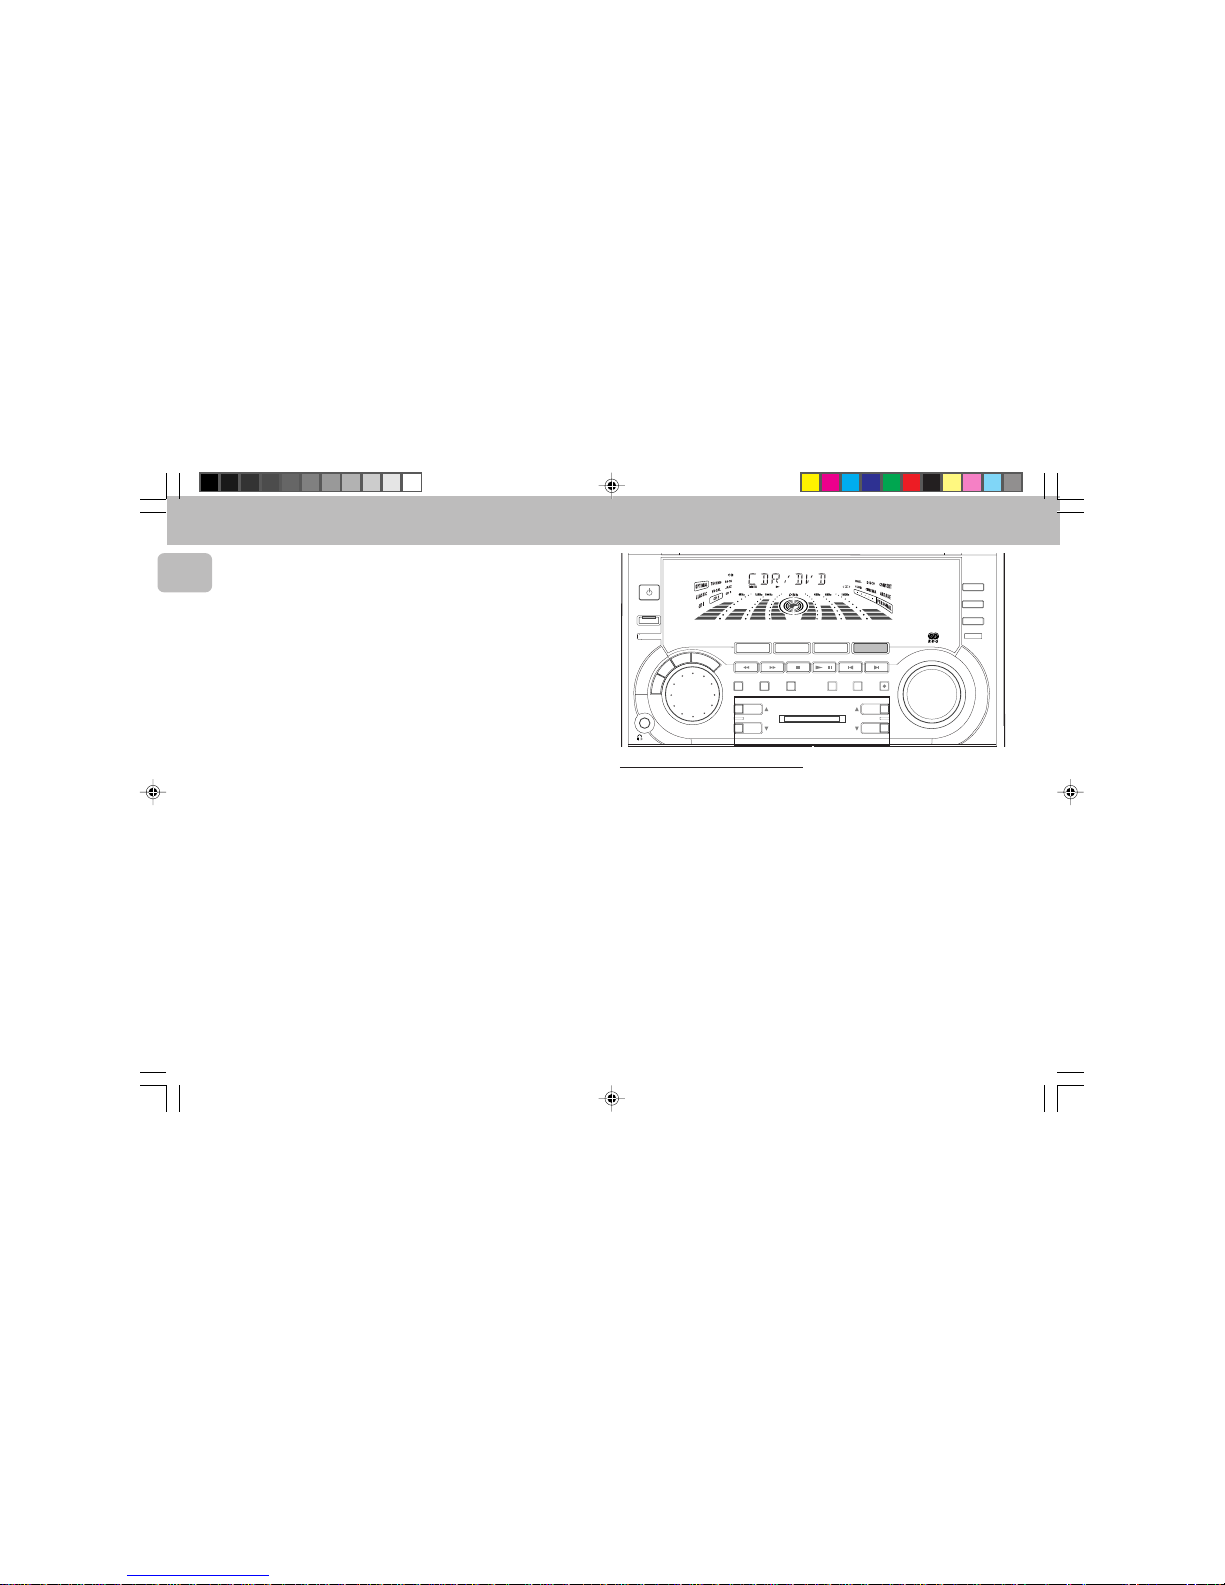
1 Press AUX (CDR/DVD) to select the
CDR/DVD mode.
™ "CDR/DVD" will be displayed.
2 Press AUX (CDR/DVD) again to select
external (normal AUX) mode.
™ "AUX" will be displayed.
STANDBY
ON
MINI HIFI SYSTEM
BANDC1 • 2 • 3
CDR
STOP•CLEAR
SEARCH•TUNING PLAY PAUSE PREV
NEXT
DUB
(HSD)
RECORD
A. REVDIM
CLOCK/
TIMER
PROG
POWER SAVE
IR SENSOR
SIDE
V
O
L
U
M
E
RDS
DOLBY B NR
NEWS/TA
CD TEXT
BAND
PRESET
▲
▲
B
A
S
S
/
T
R
E
B
L
E
TAPE
CD
TUNER
AUX
P
E
R
S
O
N
A
L
D
S
C
V
E
C
TAPE 1•2
CD 1•2•3
CDR/DVD
BASS
TREBLE
DYNAMIC BASS BOOST
Notes:
– There are two Auxiliary modes:
i. the normal AUX mode.
ii. the CDR mode, where the LINE OUT
of this mini system is muted. You will
not be able to record or listen to the
sound from the LINE OUT.
– You are advised not to listen to and
record from the same source
simultaneously.
– All the sound control features (e.g. DSC,
DBB, etc.) are available for selection.
pg 01-29/C90/22-Eng 3/6/00, 1:53 PM20
Page 21
21
English
3139 116 19701
TAPE
STANDBY
ON
MINI HIFI SYSTEM
BANDC1 • 2 • 3
CDR
STOP•CLEAR
SEARCH•TUNING PLAY PAUSE PREV
NEXT
DUB
(HSD)
RECORD
A. REVDIM
CLOCK/
TIMER
PROG
POWER SAVE
IR SENSOR
SIDE
V
O
L
U
M
E
RDS
DOLBY B NR
NEWS/TA
CD TEXT
BAND
PRESET
▲
▲
B
A
S
S
/
T
R
E
B
L
E
TAPE
CD
TUNER
AUX
P
E
R
S
O
N
A
L
D
S
C
V
E
C
TAPE 1•2
CD 1•2•3
CDR/DVD
BASS
TREBLE
DYNAMIC BASS BOOST
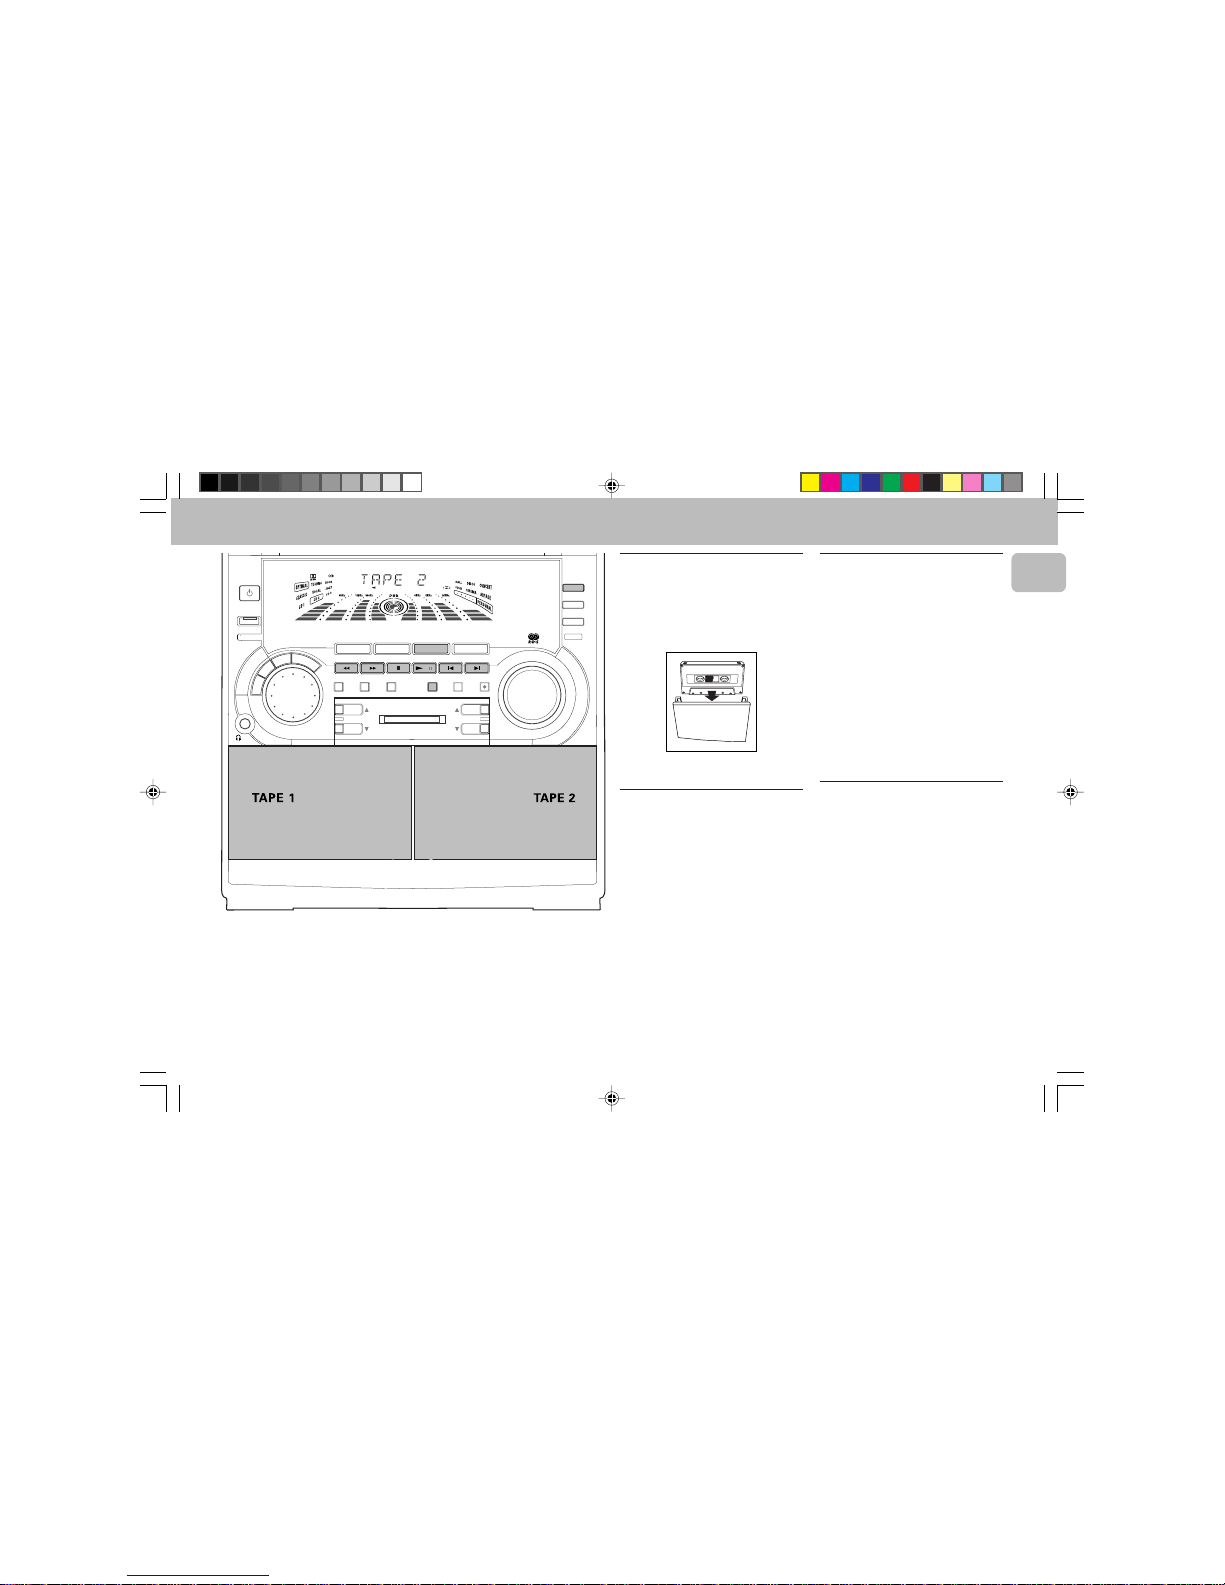
Loading a tape
1 Press on the tape deck to open the tape
deck door.
2 The tape deck door opens.
3 Load the tape with the open side
downward and the full spool to the left.
4 Close the tape deck door.
Tape Side
(only on tape deck 2)
• Press í or ë to select the tape side
for playback or recording.
™ The A (BACK) or B (FRONT) appear
on the display, depending on the tape
side selected.
™ "T2 ! ! !" or "T2 @ @ @" will be
displayed.
™ When recording, the A or B display
will be flashing.
Auto Reverse Playback
(only on
tape deck 2)
• Press A. REV to select the different
playback modes.
åå
åå
å ...... to record or playback on one side
of the tape. The tape stops at the
end of one side.
∂∂
∂∂
∂ ..... to record or playback on both
sides of the tape. The tape then
stops.
∫∫
∫∫
∫ ... to playback continuously on both
sides of the tape up to a
maximum of 10 times per side
unless you press Ç.
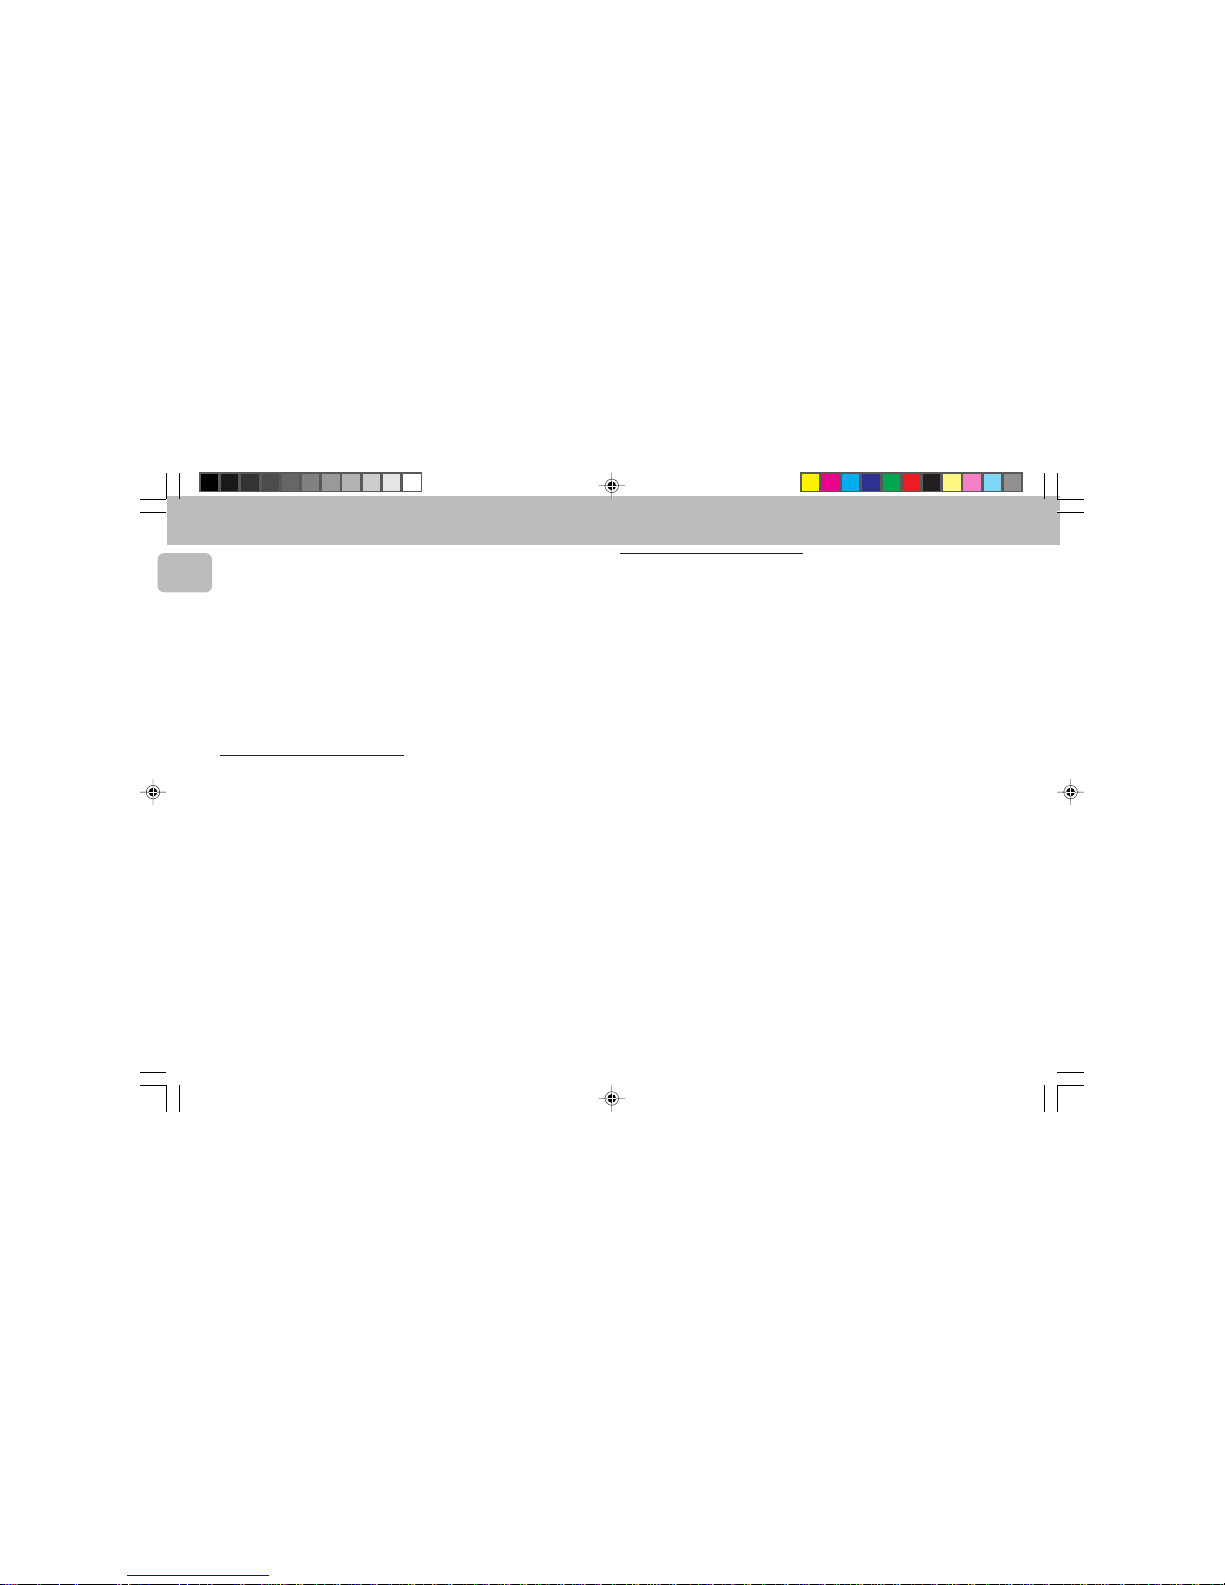
Tape Playback
1 Press TAPE ( TAPE 1•2 ) to select TAPE
mode.
™ "TAPE 1" or "TAPE 2" will be
displayed, and followed by "T1 or
T2" with "! ! ! or @ @ @".
• Press TAPE ( TAPE 1•2 ) again to select
either tape deck 1 or tape deck 2.
2 Load the tape into the desired tape
deck.
3 Press PLAYÉÅ to start playback.
• If tape 1 is selected for playback;
™ "T1 " with "@" scrolling right will be
displayed.
• If tape 2 is selected for playback;
™ "T2 " with "! or @" scrolling left or
right will be displayed depending on
the tape side selected.
pg 01-29/C90/22-Eng 3/6/00, 1:53 PM21
Page 22
22
English
3139 116 19701
TAPE
3a(for playback on tape deck 2 only)
• Press í or ë to select tape side
(see
Tape Side)
.
• Press A. REV to select the different type
of playback mode
(see Auto Reverse
Playback)
.
4 Press Ç to end playback.
™ "T1 or T2" with "! ! ! or @ @ @"
will be displayed.
Note:
– When the tape has stopped playing, the
system will switch to standby mode
after 30 minutes if no button is pressed.
Rewind/Fast Forward
When playback is stopped
1 You can rewind or fast forward the tape
by pressing à or á respectively.
™ If rewinding, "T1 ! or T2 !" with
"!" scrolling left will be displayed.
™ If fast forwarding, "T1 @ or
T2 @" with "@" scrolling right will be
displayed
™ The tape will stop automatically at
the end of the rewinding or fast
forwarding.
2 Press Ç to stop rewinding or fast
forwarding.
During playback
• Press and hold à or á until the
desired passage is located.
™ "T1 or T2" with "! ! or @ @"
scrolling left or right will be
displayed depending on which button
is pressed.
™ During searching, the sound is
reduced to a low volume.
™ When you release à or á, the
tape continues playing.
Notes:
– During rewinding or fast forwarding of a
tape, it is also possible to select another
source (e.g. CD, TUNER, or AUX).
– Before playing a tape, check and tighten
slack tape with a pencil. Slack tape may
get jammed or may burst in the
mechanism.
– C-120 tape is extremely thin and is
easily deformed or damaged. It is not
recommended for use in this system.
– Store the tapes at room temperature
and do not put them too close to a
magnetic field (for example, a
transformer, TV, or speaker).
Dolby B Noise Reduction
System
1 Press DOLBY B NR to switch on Dolby
B NR.
™ The d B NR appears in the display.
2 Press DOLBY B NR again to switch off
Dolby B NR.
™ The d B NR disappears from the
display.
Note:
– A tape recorded with the Dolby B NR
system should also be played in the
Dolby B NR mode. If you forget to
operate the DOLBY B NR button, the
treble may be reproduced too strongly.
.
pg 01-29/C90/22-Eng 3/6/00, 1:53 PM22
Page 23
23
English
3139 116 19701
STANDBY
ON
MINI HIFI SYSTEM
BANDC1 • 2 • 3
CDR
STOP•CLEAR
SEARCH•TUNING PLAY PAUSE PREV
NEXT
DUB
(HSD)
RECORD
A. REVDIM
CLOCK/
TIMER
PROG
POWER SAVE
IR SENSOR
SIDE
V
O
L
U
M
E
PRESET
▲
▲
BASS
TREBLE
DYNAMIC BASS BOOST
B
A
S
S
/
T
R
E
B
L
E
TAPE
CD
TUNER
AUX
P
E
R
S
O
N
A
L
D
S
C
V
E
C
TAPE 1•2
CD 1•2•3
CDR/DVD
RDS
DOLBY B NR
NEWS/TA
CD TEXT
BAND
RECORDING
Notes:
– It is not possible to change tape side
during recording.
– For recording, use only tape of IEC type I
(normal tape) or IEC type II (Cr02).
– The tape is secured at both ends with
leader tape. At the beginning and end of
tape, nothing will be recorded for six to
seven seconds.
– The recording level is set automatically,
regardless of the position of Volume,
DBB, DSC, etc.
Dolby B NR can be selected for Tuner or
CD recording.
– To prevent accidental recording, break
out the tab on the left shoulder of the
tape side you want to protect.
– If “
CHECK TAPE
” is displayed, the
protection tab has been broken. Put a
piece of clear adhesive tape over the
opening. Do not cover the Cr02 tape
detection hole when covering the tab
opening.
Digital Recording via Digital
Out
For CD digital recording, please refer to the
Instructions Manual of the CD Recorder,
digital audio equipment, etc.
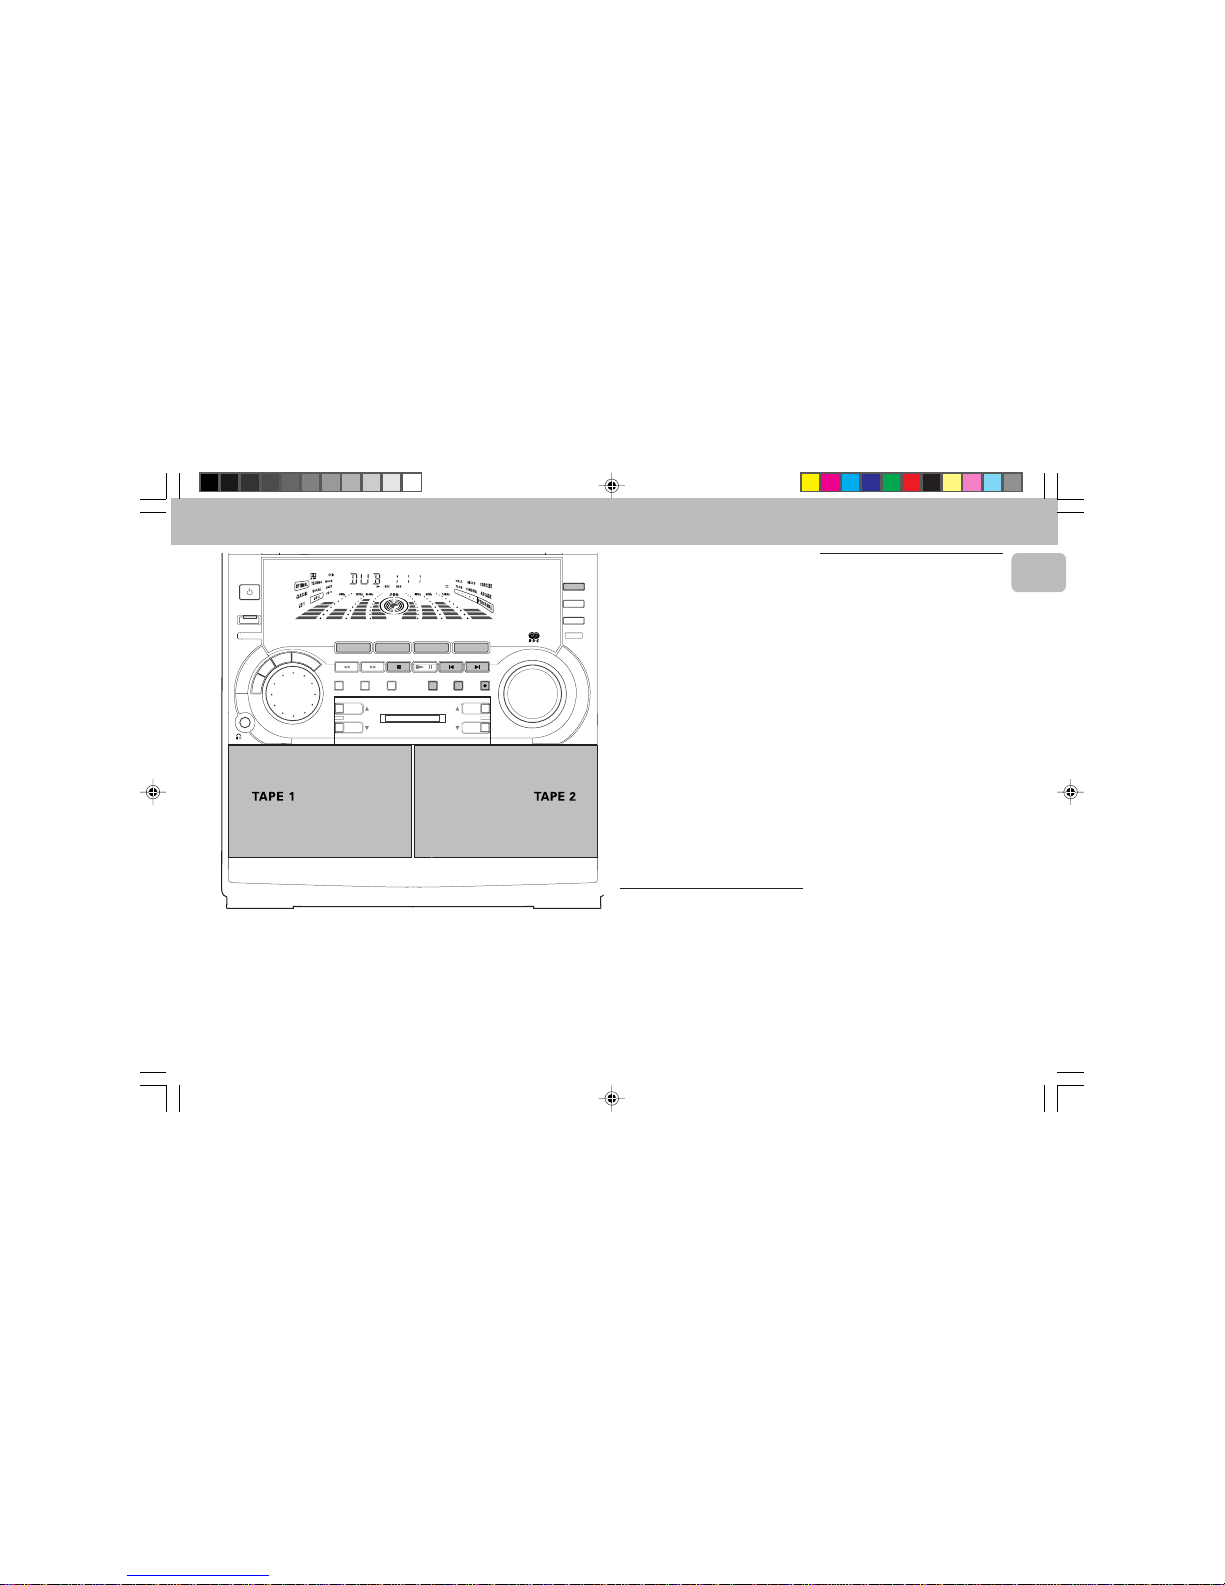
Recording from other sources
(only on tape deck 2)
1 Press TAPE ( TAPE 1•2 ) to select tape
deck 2.
2 Load a blank tape into tape deck 2 with
the open side downward.
3 Press í or ë to select the recording
tape side
(see Tape Side under TAPE
section)
.
4 Press DOLBY B NR to record with
Dolby B NR.
5 Press CD, TUNER or AUX.
• Start playback of the selected source.
6 Press RECORD to start recording.
™ The REC starts flashing.
7 Press Ç to stop recording.
Notes:
– Only
åå
åå
å
or
∂∂
∂∂
∂
mode is available
during recording .
– During recording, it is not possible to
listen to another source.
pg 01-29/C90/22-Eng 3/6/00, 1:53 PM23
Page 24
24
English
3139 116 19701
RECORDING
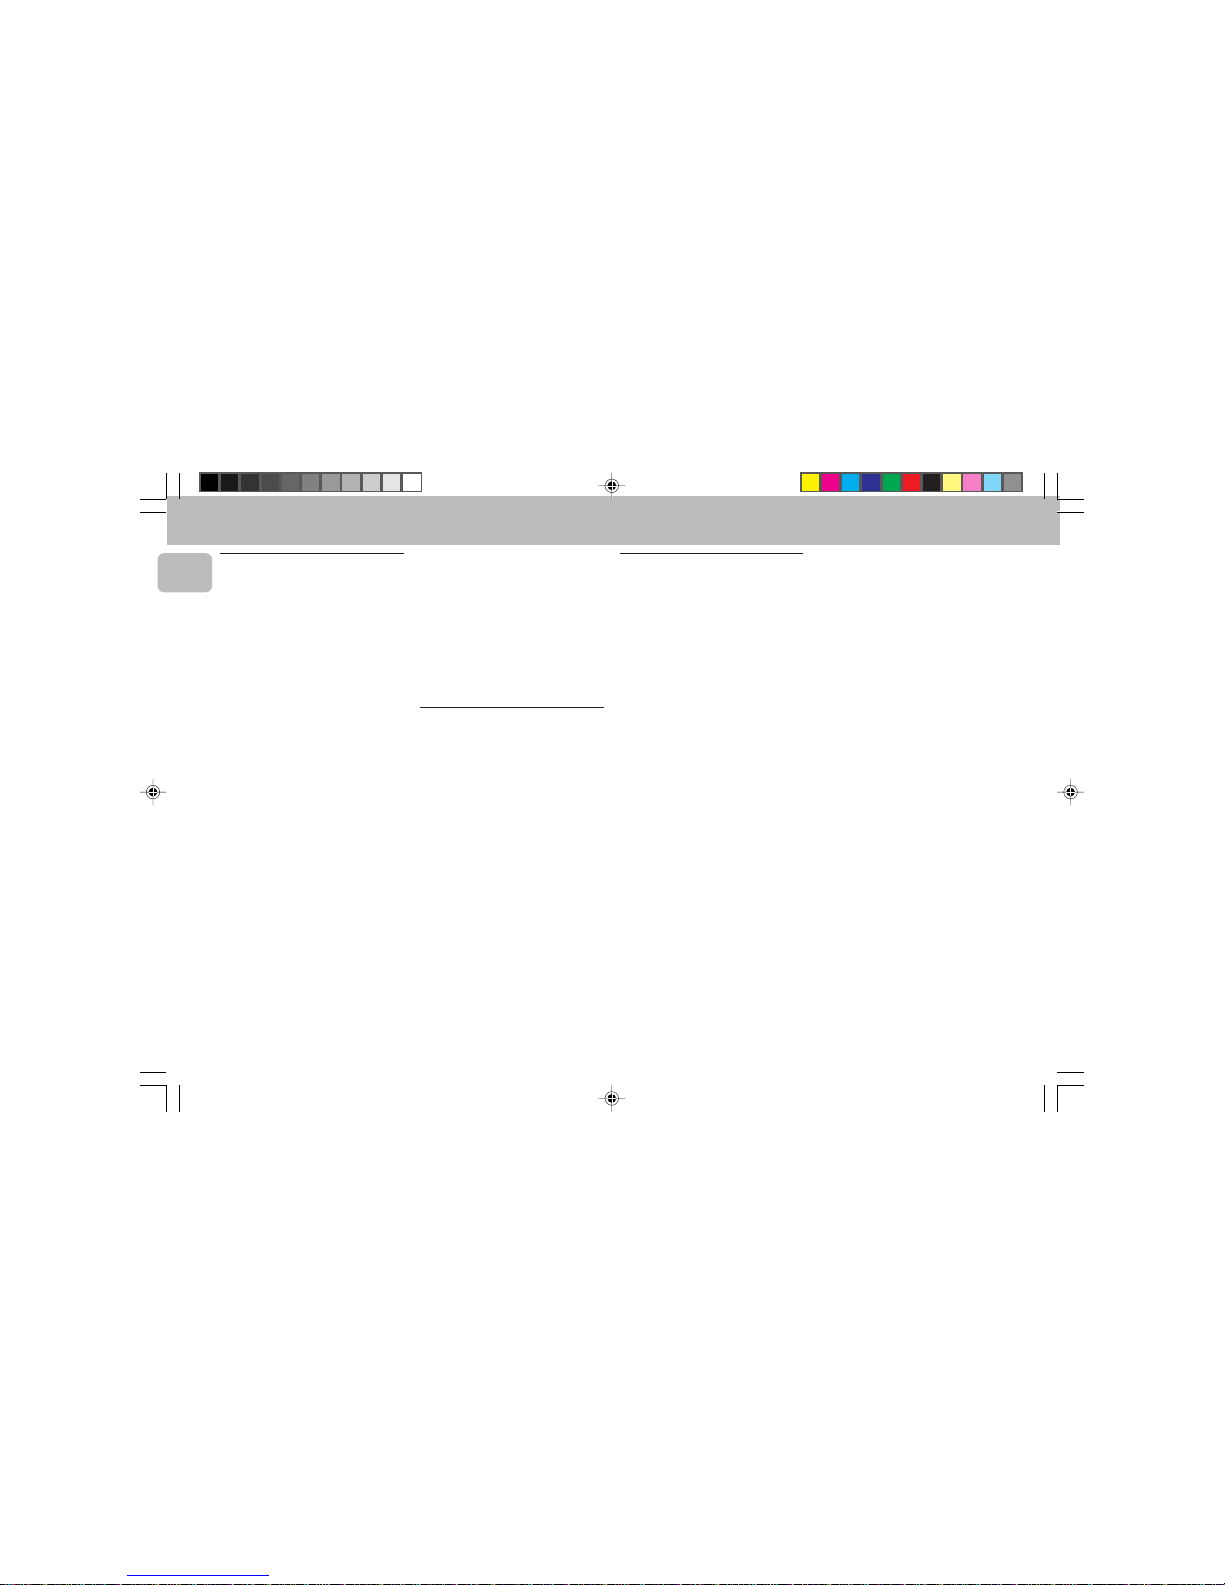
Dubbing tapes
(from tape deck 1 to
tape deck 2)
1 Press TAPE ( TAPE 1•2 ) to select tape
deck 2.
2 Load the prerecorded tape into tape
deck 1 with full spool to the left and a
blank tape into tape deck 2 with full
spool aside.
3 Press í or ë to select the recording
tape side
(see Tape Side under TAPE
section)
.
4 Press DUB (HSD)
once
for normal
speed dubbing or
twice (within 2
seconds)
for high speed dubbing.
™ "NORMAL" (normal speed) or
"FAST" (high speed) will be
displayed, followed by "DUB" with "!
or @" scrolling left or right depending
on the tape side selected.
™ The HSD appears on the display
during high speed dubbing.
• Dubbing will start immediately.
™ The REC starts flashing.
5 Press Ç to stop dubbing.
Notes:
– Only
å å
å å
å
mode is available during
dubbing.
– At the end of side A, flip the tapes to
side B and repeat the procedure.
– Dubbing of tapes is only possible from
tape deck 1 to tape deck 2.
– To ensure good dubbing, use tapes of
the same length.
– During high speed dubbing in Tape
mode, the sound is reduced to a low
volume.
– You can listen to another source while
dubbing.
– Dolby B NR button has no influence
during dubbing (dubbing from tape deck
1 to tape deck 2). An original tape
recorded with Dolby B NR automatically
produces a copy with Dolby B NR.
CD Synchro Start Recording
1 Load a blank tape into tape deck 2 and a
disc into a disc tray.
2 Press CD to select CD mode.
• You can program the tracks in the order
you want them to be recorded (see
Programming Tracks). If not, select the
disc by pressing CD (CD 1•2•3) and the
tracks are recorded according to the
order on the selected disc.
3 Press RECORD to start recording.
™ The REC starts flashing.
• CD will start playback automatically.
4 Press Ç to stop recording.
One Touch Recording
• For One Touch Recording, as soon as you
press RECORD, the current source (CD,
TUNER or AUX) will be recorded on tape
deck 2.
1 Load a blank tape in tape deck 2.
2 Press RECORD to start recording.
™ The REC starts flashing.
3 Press Ç to stop recording.
Note:
– When you press RECORD while in TAPE
mode, "
SELECT SOURCE
" will be
displayed. One Touch Recording is not
possible in TAPE mode.
pg 01-29/C90/22-Eng 3/6/00, 1:54 PM24
Page 25
25
English
3139 116 19701
CLOCK TIMER
View Clock
You can view the clock (if it is set) if the
system is in Standby mode or when any
sound source is selected (CD, TUNER, etc.).
The clock will be displayed for about 7
seconds.
• Press CLOCK/TIMER briefly
(or CLOCK
on the remote control)
.
™ "PM 10:38 or 22:38" (the
current time) will be displayed
depending on whether you have
selected 12- or 24-hour mode.
™ "--
::
::
:--" will be displayed if the
clock is not set.
Note:
– When the system goes into low power
standby mode, the clock setting will not
be displayed.
Clock Setting
The clock can be set in either 12- or 24hour mode, e.g. "AM 12:00" or
"00:00". Before setting the clock, you
must be in the View Clock mode.
1 Press CLOCK/TIMER to select clock
mode.
2 Press PROG
(on the system only)
to
select 12- and 24- hour mode.
™ If 12-hour mode is selected,
"AM 12:00" starts flashing.
™ If 24-hour mode is selected, "00:00"
starts flashing.
3 Set the hour with␣ à or á on the
system.
4 Set the minute with␣ í or ë on the
system.
STANDBY
ON
MINI HIFI SYSTEM
BANDC1 • 2 • 3
CDR
STOP•CLEAR
SEARCH•TUNING PLAY PAUSE PREV
NEXT
DUB
(HSD)
RECORD
A. REVDIM
CLOCK/
TIMER
PROG
POWER SAVE
IR SENSOR
SIDE
V
O
L
U
M
E
PRESET
▲
▲
BASS
TREBLE
DYNAMIC BASS BOOST
B
A
S
S
/
T
R
E
B
L
E
TAPE
CD
TUNER
AUX
P
E
R
S
O
N
A
L
D
S
C
V
E
C
TAPE 1•2
CD 1•2•3
CDR/DVD
RDS
DOLBY B NR
NEWS/TA
CD TEXT
BAND
5 Press CLOCK/TIMER again to store the
setting.
™ The clock starts.
• To exit without storing the setting, press
Ç on the system.
Notes:
– During clock setting, if no button is
pressed within 90 seconds, the system
will exit clock setting mode
automatically.
– When a power interruption occurs, the
clock setting is erased.
– To set the time with RDS clock, see
"Receiving RDS Radio Station" under
TUNER section.
Timer Setting
• The system can switch on to CD,
TUNER, or TAPE 2 mode automatically
at a preset time. It can serve as an
alarm to wake you up.
• Before setting the timer, make sure the
clock is set correctly.
• The timer will always be switched on
once it is set.
• The volume of the timer will
increase from the minimum level
until the volume level before the set
is switched to standby mode.
1 Press and hold CLOCK/TIMER for more
than
2 seconds
to select timer mode.
™ “AM 12:00” or “00:00" or the
last timer setting starts flashing
depending on whether you have
selected 12- or 24-hour mode.
™ The TIMER starts flashing.
™ The selected source is lit while other
available sources are flashing.
2 Press CD, TUNER or TAPE to select the
desired source.
• Before selecting CD or TAPE, make sure
a CD or tape is loaded in the CD tray or
tape deck 2.
3 Press␣ à or á on the system to set
the hour for the timer to start.
4 Press␣ í or ë on the system to set
the minute for the timer to start.
pg 01-29/C90/22-Eng 3/6/00, 1:54 PM25
Page 26
26
English
3139 116 19701
TIMER SLEEP TIMER
5 Press CLOCK/TIMER to store the start
time.
™ The timer is now set.
™ The TIMER remains on the display.
• At the preset time, the timer will be
activated.
™ The selected source will be played.
Notes:
– During timer setting, if no button is
pressed within 90 seconds, the system
will exit timer setting mode
automatically.
– If the source selected is TUNER, the last
tuned frequency will be switched on.
– If the source selected is CD, playback
will begin with the first track of the
selected disc or program. If the CD trays
are empty, TUNER will be selected
instead.
– If the source selected is TAPE, and if the
preset time is reached during high
speed dubbing, the TUNER will be
selected instead.
– The timer will not activate if a recording
is in progress.
Sleep
(only on remote control)
This feature allows you to select a length
of time after which the system will switch
to the standby mode automatically.
1 Press SLEEP on the remote control
repeatedly to select a period of time.
™ The selections are as follows (time in
minutes):
60 ™ 45 ™ 30 ™ 15 ™ OFF
™ 60 …
™ "SLEEP XX" or "OFF" will be
displayed. "XX" is the time in
minutes.
2 When you reach the desired length of
time, stop pressing the SLEEP button.
™ After this amount of time passes, the
system will switch to the standby
mode.
To switch off the Sleep Timer
• Press SLEEP repeatedly until "OFF" is
displayed, or press the STANDBY ON
button.
To switch off the TIMER
• Press TIMER ON/OFF on the remote
control.
™ The timer is now switched off.
™ The display will show "CANCEL"
and the TIMER disappears.
To start the TIMER again
(for the same
preset time and source)
• Press TIMER ON/OFF on the remote
control.
™ The timer is now on.
™ The TIMER appears on the display.
pg 01-29/C90/22-Eng 3/6/00, 1:54 PM26
Page 27
27
English
3139 116 19701
Specifications
AMPLIFIER
Output power ............ 2 x 200 W MPO / 2 x 100 W RMS
(1)
Signal-to-noise ratio ....................................≥ 75 dBA (IEC)
Frequency response .........................40 – 20000 Hz, ± 3 dB
Input sensitivity
AUX In / CDR/DVD In .................................. 500 mV / 1V
Output
Speakers ................................................................ ≥ 6 Ω
Headphones ............................................ 32 Ω – 1000 Ω
Subwoofer Out ........................... 1.5 V ±2dB, > 22000 Ω
Line Out .................................. 500 mV ±2dB, > 22000 Ω
Digital Out ........................................... IEC 958, 44.1 kHz
(1) (6 Ω, 1 kHz, 10% THD)
CD PLAYER
Number of programmable tracks ................................... 40
Frequency response ..................................... 40 – 20000 Hz
Signal-to-noise ratio ............................................ ≥ 76 dBA
Channel separation .................................... ≥ 79 dB (1 kHz)
Total harmonic distortion .......................... < 0.02% (1 kHz)
TUNER
FM wave range ......................................... 87.5 – 108 MHz
MW wave range ........................................ 531 – 1602 kHz
LW wave range............................................ 153 – 279 kHz
Number of presets .......................................................... 40
Antenna
FM .................................................................. 75 Ω wire
AM ............................................................ Loop antenna
TAPE DECK
Frequency response
CrO2 tape (type II) ........................... 60 – 15000 Hz (5 dB)
Normal tape (type I) ....................... 60 – 15000 Hz (5 dB)
Signal-to-noise ratio
(without Dolby B NR)
CrO2 tape (type II) ............................................. ≥ 50 dBA
Normal tape (type I) ......................................... ≥ 47 dBA
Signal-to-noise ratio
(with Dolby B NR)
CrO2 tape (type II) ............................................. ≥ 62 dBA
Normal tape (type I) ......................................... ≥ 58 dBA
Wow and flutter .............................................. ≤ 0.4% DIN
SPEAKERS
System ..................................... 3-way; 1 x rear bass ports
Impedance .................................................................... 6 Ω
Woofer .................................................................... 1 x 6.5"
Tweeter................................................... 1 x 2.5" Ferrofluid
Polydome Tweeter ..................................................... 1 x 1"
Dimensions (w x h x d) ..................... 240 x 310 x 315 (mm)
Weight .............................................................. 4.1 kg each
GENERAL INFORMATION
Material/finish ..................................... Polystyrene/Metal
AC Power ............................................ 220 – 230 V / 50 Hz
Power Consumption
Active ................................................................... 170 W
Standby ............................................................... < 20 W
Standby (energy saving mode) .............................. < 2 W
Dimensions (w x h x d) ..................... 265 x 310 x 390 (mm)
Weight (without speakers) ....................................... 8.8 kg
Subject to modification
SPECIFICATIONS
pg 01-29/C90/22-Eng 3/6/00, 1:54 PM27
Page 28
28
English
3139 116 19701
MAINTENANCE TROUBLESHOOTING
Maintenance
Cleaning the Cabinet
• Use a soft cloth slightly moistened with
a mild detergent solution. Do not use a
solution containing alcohol, spirits,
ammonia or abrasives.
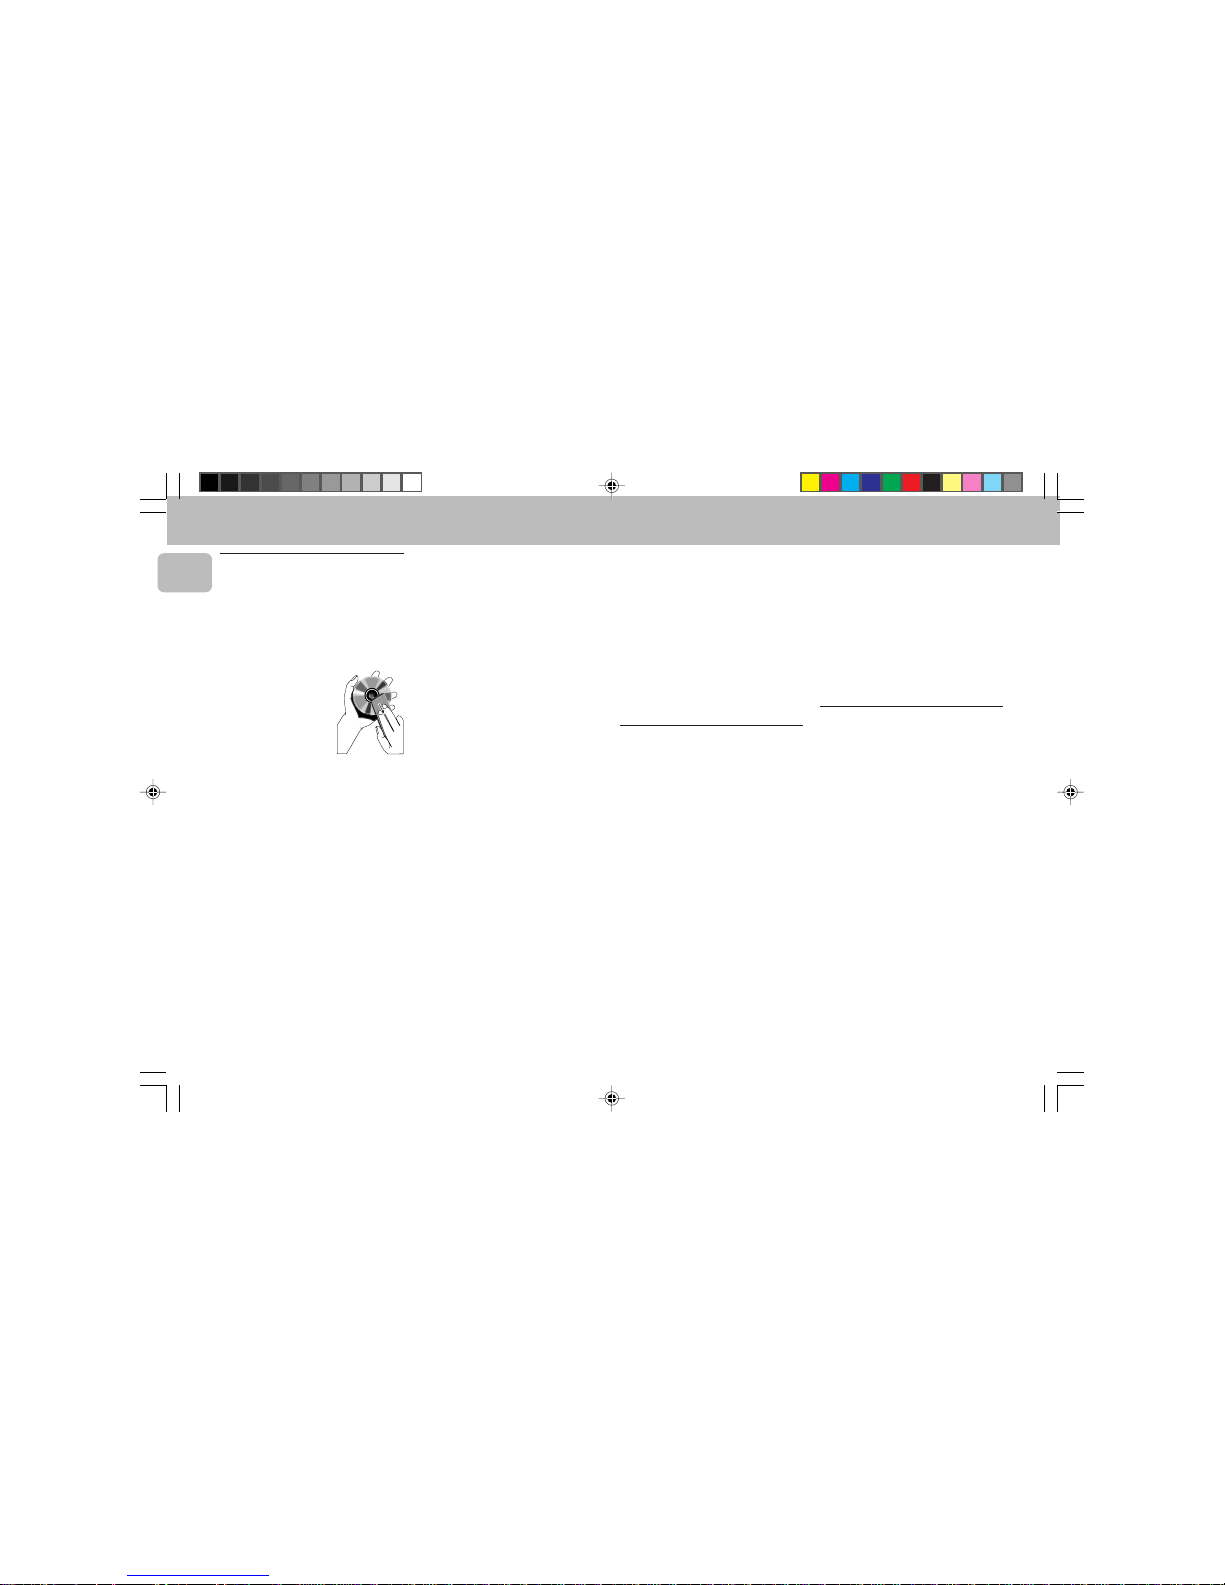
Cleaning Discs
• When a disc becomes
dirty, clean it with a
cleaning cloth. Wipe
the disc from the
center out.
• Do not use solvents
such as benzine,
thinner, commercially available cleaners,
or antistatic spray intended for analog
records.
Cleaning the CD lens
• After prolonged use, dirt or dust may
accumulate at the CD lens. To ensure
good playback quality, clean the CD lens
with Philips CD Lens Cleaner or any
commercially available cleaner. Follow
the instructions supplied with cleaner.
Cleaning the Heads and the Tape Paths
• To ensure good recording and playback
quality, clean the heads, the capstan(s),
and pressure roller(s) after every 50
hours of tape operation.
• Use a cotton swab slightly moistened
with cleaning fluid or alcohol.
• You can also clean the heads by playing
a cleaning tape once.
Demagnetizing the heads
• Use a demagnetizing tape available at
your dealer.
Warning! Under no circumstances
should you try to repair the set
yourself as this will invalidate the
guarantee. Do not open the set as
there is a risk of electric shock.
• If a fault occurs, check the points listed
below before taking the system for
repair.
• Should any problems persist after you
have made these checks, consult your
nearest dealer or service center.
CD Player Operation
“NO DISC” is displayed.
• The disc is inserted upside down.
™
Place CD with printed side up.
• Moisture condensation at the lens.
™
Wait until lens has adjusted to normal
room temperature.
• There is no disc in the CD tray.
™
Insert a CD.
• The CD is dirty, badly scratched or
warped.
™
Clean or replace the CD.
• The CD lens is dirty or dusty.
™
See section under Maintenance (page
28).
“DISC NOT FINALIZED” is
displayed.
• The CD-RW or CD-R disc is not properly
recorded for use with a standard CD
player.
™
Read the instruction booklet of your CDRewritable or CD-Recorder on how to
finalize a recording.
• The CD is badly scratched or dirty.
™
Replace or clean CD.
Radio Reception
Poor radio reception.
• The signal is too weak.
™
Adjust the antenna.
™
Connect an external antenna for better
reception.
• The TV or VCR is too close to the stereo
system.
™
Separate the stereo system from the TV
or VCR.
“NO RDS TEXT” is displayed.
• RDS text message is not available.
™
Select another RDS station.
pg 01-29/C90/22-Eng 3/6/00, 1:54 PM28
Page 29
29
English
3139 116 19701
TROUBLESHOOTING
Tape Deck Operation
Recording or playback cannot be
made or there is a decrease in audio
level.
• Dirty tape heads, capstans or pressure
rollers.
™
See section on tape deck maintenance
(page 28).
• Magnetic build-up in the record/
playback head.
™
Use demagnetizing tape.
Tape deck door cannot open.
• Power failure or AC power plug
disconnect from the wall outlet during
tape playback.
™
Reconnect the AC power plug and
switch on the system again.
General
System does not react when any
button is pressed.
• Electrostatic discharge.
™
Press STANDBY ON to switch the
system off. Remove the AC power plug
from the wall outlet, then reconnect the
power plug and switch on the system
again.
No or poor sound.
• Volume is not turned up.
™
Adjust VOLUME.
• The headphones are connected.
™
Disconnect the headphones.
• Speakers are not connected or are
connected wrongly.
™
Check that the speakers are connected
correctly.
™
Make sure the stripped speaker wire is
clamped.
Reversed left and right sound.
• Speakers are connected wrongly.
™
Check the speaker connections and
location.
Lack of bass sound or apparently
imprecise physical location of musical
instruments.
• Speakers are connected wrongly.
™
Check the speaker connection for
proper phasing, colored/black wires to
colored/black terminals.
Remote control has no effect on the
system.
• Wrong source is selected.
™
Select the source (CD, TUNER, etc.)
before pressing the function button
(É, í, ë, etc.).
• The distance to the system is too large.
™
Reduce the distance.
• Batteries are inserted incorrectly.
™
Insert the batteries with their polarities
(+/– signs) as indicated.
• Batteries are exhausted.
™
Replace the batteries.
Timer is not working.
• Clock is not set.
™
Set the clock.
• Timer is not switched on.
™
Press TIMER ON/OFF to switch on the
timer.
• Recording is in progress.
™
Stop recording.
Clock setting is erased.
• There was a power failure.
™
Reset the clock.
System displays features
automatically; buttons flash
continuously.
• Demonstration mode is switched on.
™
Press and hold Ç (on the system) for 5
seconds to switch off the
demonstration.
There is a howling sound at the
external source.
• You hear feedback when you are
listening in AUX mode.
™
Press AUX to select CDR/DVD mode.
All lighted buttons are not lit.
• Display is switch on in DIM 3 mode.
™
Press DIM until DIM OFF display mode
is shown.
pg 01-29/C90/22-Eng 3/6/00, 1:54 PM29
 Loading...