How it Works
Log In / Sign Up
Buy Points
How it Works
FAQ
Contact Us
Questions and Suggestions
Users
Philips
Loading...
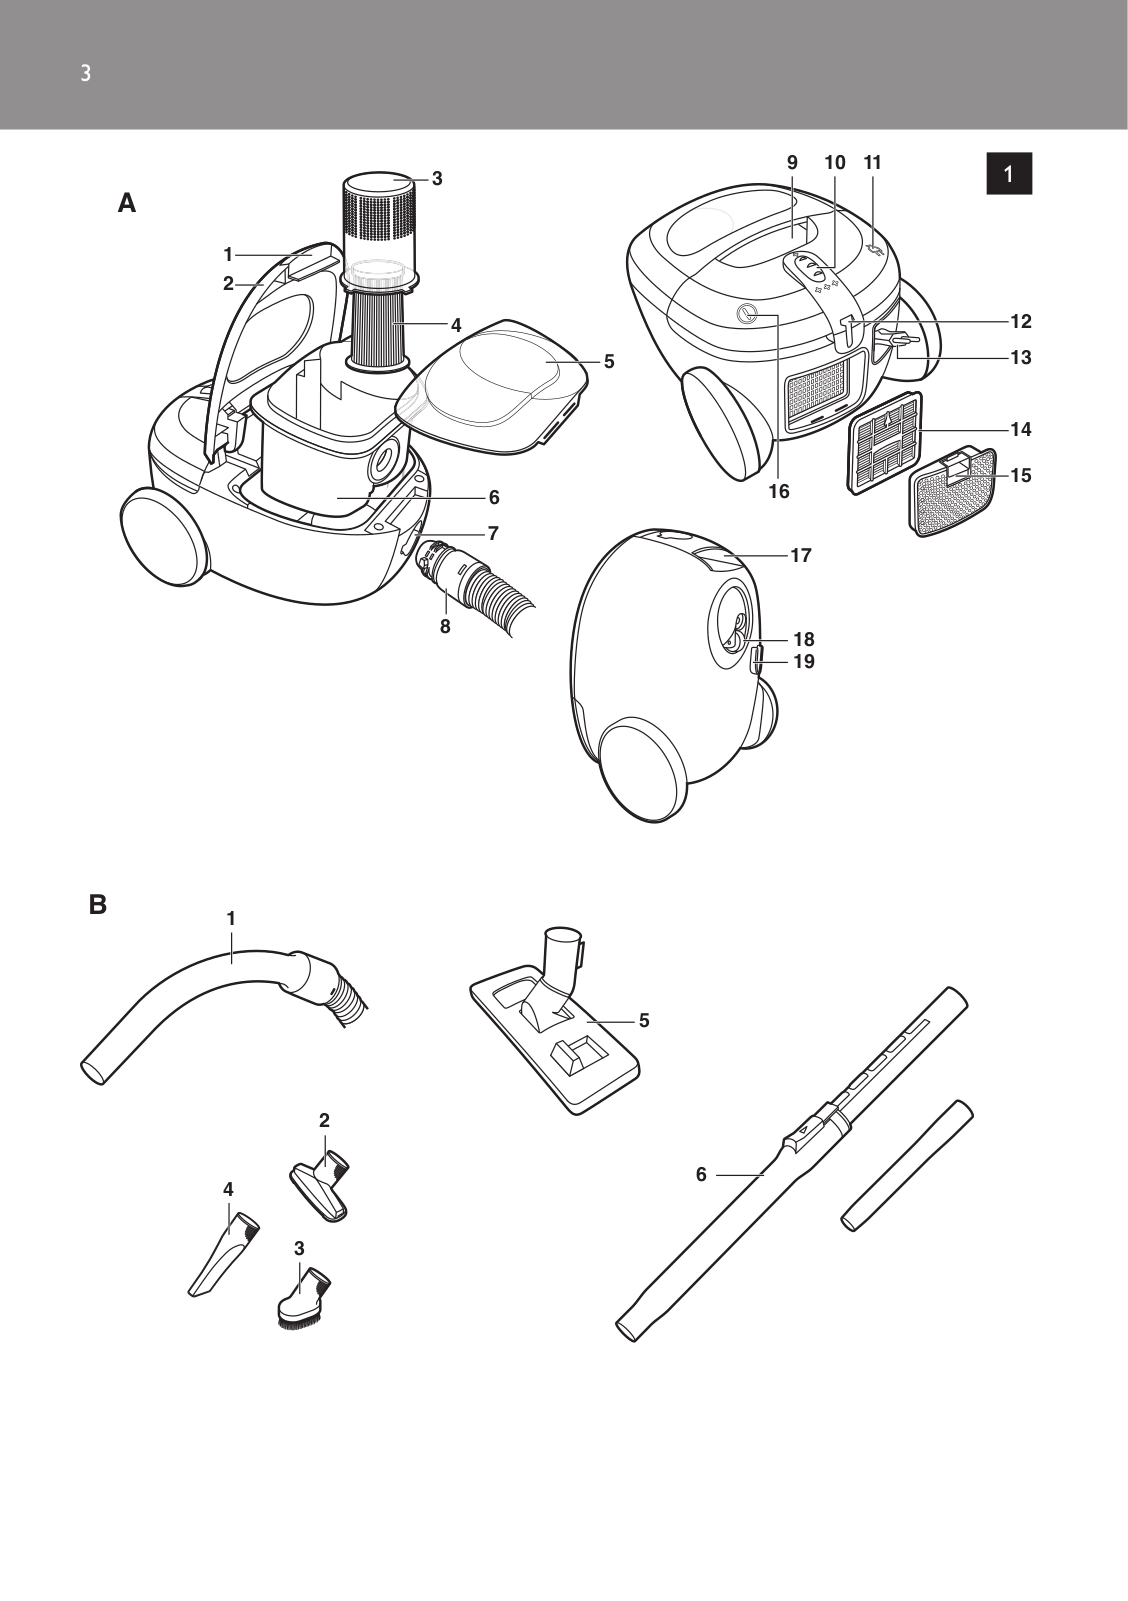
F
FC8245
2
FC8245-09
2
FC8245/09R1
FC8246
2
FC8246/09
2
FC8246/09R1
FC8250
8
FC8250/09
FC8250/09R1
FC8253
2
FC8253-09
3
FC8253/09R1
FC8254/01
3
FC8254/02
FC8256
18
FC8256/01
2
FC8257
2
FC8258/01
2
FC8260/01
2
FC8260/02
2
FC8261/01
3
FC8261/02
2
FC8262
19
FC8262/01
2
FC8262/02
2
FC8264/01
2
FC8264/02
FC8269
4
FC8270
FC8270/01
2
FC8272
FC8272/01
2
FC8274
FC8274/01
2
FC8276
FC8276/01
2
FC8276/31
2
FC8278
FC8278/01
2
FC8279
FC8279/61
FC8280
3
FC8280/01
2
FC8280/60
2
FC8282
3
FC8282/01
3
FC8282/51
FC8284
3
FC8284/01
4
FC8284/60
2
FC8286
2
FC8286/01
4
FC8289
2
FC8289/09
FC8290
FC8291
2
FC8291/01
4
FC8291/02
10
FC8293
4
FC8293/01
3
FC8293/62
FC8294
3
FC8294/01
5
FC8294/61
2
FC8295
2
FC8295/01
2
FC8295/61
FC8296
5
FC8296/01
3
FC8296/61
FC8297
2
FC8297/01
FC8320/09
FC8321
FC8321/09
FC8322
FC8322/08
2
FC8322/09
FC8322/19
2
FC8323/09
FC8324/09
FC8325/09
FC8326/09
FC8334
3
FC8334/01
5
FC8336/01
6
FC8338
FC8338/01
5
FC8344/01
5
FC8344/02
2
FC8344/03
2
FC8348/01
9
FC8366/09
FC8366/19
FC8367/09
3
FC8370
FC8370/09
2
FC8370/09R1
FC8370/69
2
FC8371
4
Loading...
Loading...
Nothing found
FC8286
User manual
100 pgs
4.1 Mb
0
User Manual
56 pgs
7.22 Mb
0
Table of contents
Loading...
Philips FC8286, FC8284, FC8282, FC8280 User Manual
...
Philips User Manual
Download
Specifications and Main Features
Frequently Asked Questions
User Manual
Download
Loading...
+
hidden pages
Unhide
You need points to download manuals.
1 point = 1 manual.
You can buy points or you can get point for every manual you upload.
Buy points
Upload your manuals
 Loading...