

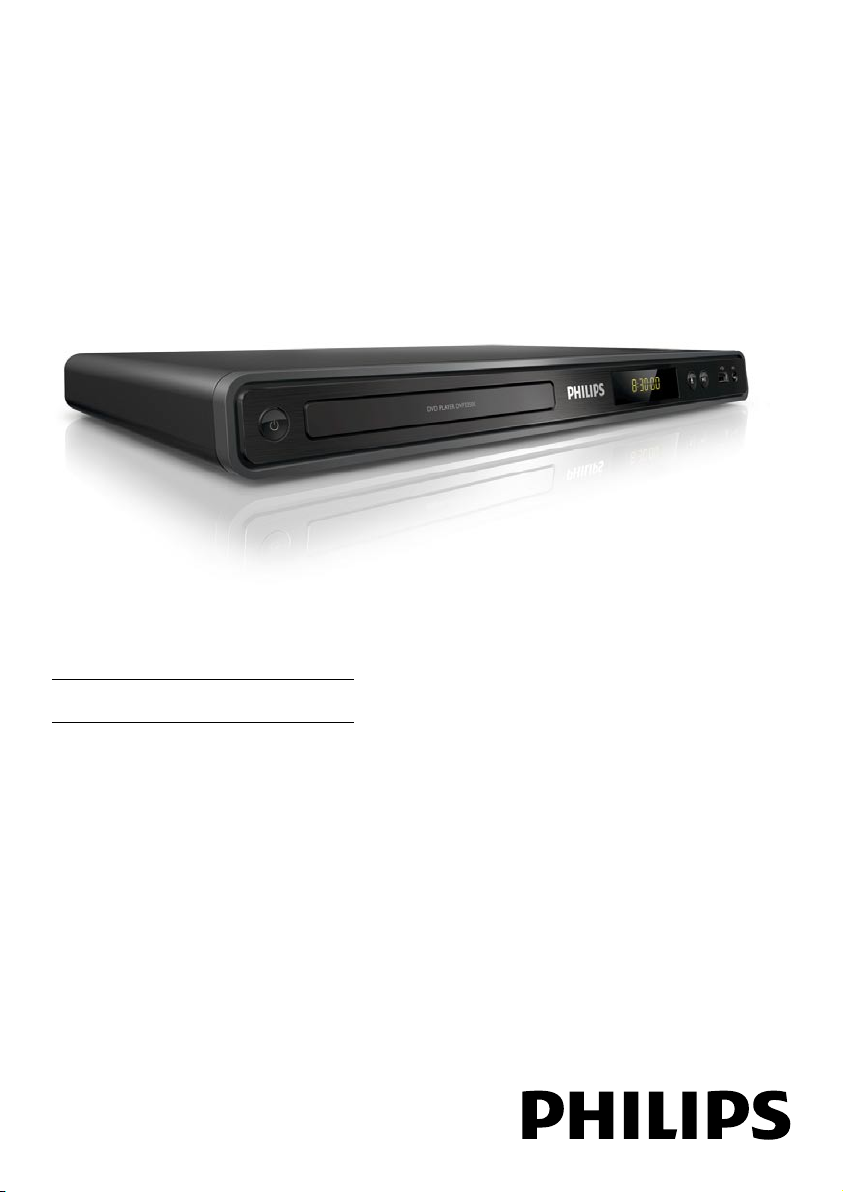
Philips DVP3350K-55 User Manual
Register your product and get support at
www.philips.com/welcome
DVP3350K
EN User Manual

2

English
EN 3
Contents
1 Important 4
Safety and important notice 4
Trademark Notice 5
6 Advanced features 24
Media copy 24
Create MP3 les 24
7 Adjust sound 26
Karaoke settings 26
Turn off vocal (cancel voice) 26
Contents
2 Your DVD player 6
Features highlight 6
Product overview 7
3 Connect 9
Connect video cables 9
Connect audio cables 10
Route audio to other devices 10
Connect USB device 11
Connect to power outlet 11
4 Get started 12
Prepare the remote control 12
Find the correct viewing channel 13
Select menu display language 13
Turn on Progressive Scan 14
5 Play 15
Play from disc 15
Play video 16
Play music 20
Play photo 21
Play from USB device 23
8 Adjust settings 27
General setup 27
Audio setup 28
Video setup 30
Preferences 32
9 Additional information 34
Update software 34
Care 34
10 Specication 35
11 Troubleshooting 36
12 Glossary 38

4 EN
1 Important
Recycle notice
Safety and important notice
Warning
Risk of overheating! Never install t he DVD player
•
in a conned space. Always leave a space of at least
four inches ar ound the DVD player for ventilation.
Ensur e the curt ains or other objec ts never cover the
ventilation slots on the DVD player.
Never place the DVD player, remote control or
•
batteries near naked ames or other heat sources,
including direct sunlight.
Only use this DVD player indoors. Keep this DVD
•
player away from water, moisture and liquid-lled
objects.
Never place this DVD player on other electr ical
•
equipment.
•
Keep away from this DVD player during lightning
storms.
•
Use of controls or adjustments or per formance
of procedures other than herein may result in
hazardous radiation exposure or other unsafe
operation.
Wher e the mains plug or an appliance coupler is
•
used as the disconnect device, the disconnec t device
shall r emain readily operable.
Visible and invisible laser radiation whe n open . Avoid
•
exposure to beam.
This electronic equipment contains a large
number of materials that can be recycled or
reused if disassembled by a specialized
company. If you are disposing of an old
machine, please take it to a recycling center.
Please observe the local regulations regarding
disposal of packaging materials, exhausted
batteries and old equipment.
Copyright notice
This product incorporates copyright protection
technology that is protected by method claims
of certain U.S. patents and other intellectual
property rights owned by Macrovision
Corporation and other rights owners. Use of
this copyright protection technology must be
authorised by Macrovision Corporation, and is
intended for home and other limited viewing
uses only unless otherwise authorised by
Macrovision Corporation. Reverse engineering
or disassembly is prohibited.
About Progressive Scan
Consumers should note that not all high
denition television sets are fully compatible
with this product and may cause artifacts to be
displayed in the picture. In case of 525 or 625
progressive scan picture problems, it is
recommended that the user switch the
connection to the ‘standard denition’ output. If
there are questions regarding our TV set
compatibility with this model 525p and 625p
DVD player, please contact our customer
service center.

English
EN 5
Important
Trademark Notice
Manufactured under license from Dolby
Laboratories. Dolby and the double-D symbol
are trademarks of Dolby Laboratories.
Windows Media and the Windows logo are
trademarks, or registered trademarks of
Microsoft Corporation in the United States and/
or other countries.
DivX, DivX Certied, and associated logos are
trademarks of DivX, Inc. and are used under
license.
Plays DivX® video with menus, subtitles and
audio tracks.
The USB-IF Logos are trademarks of Universal
Serial Bus Implementers Forum, Inc.

6 EN
2 Your DVD
player
Create MP3 les
Convert your favourite audio tracks from an
audio CD into MP3 format. The created MP3
les are saved in your USB ash drive.
Congratulations on your purchase, and
welcome to Philips! To fully benet from the
support that Philips offers, register your product
at www.philips.com/welcome.
This DVD player brings audio and video to life.
Just plays practically any disc format, including
the digital photos with absolutely no
compromise to picture quality.
Features highlight
Screen t
View the movie in full screen on any TV with
this DVD player.
Progressive scan component video
Pushes the limits of standard resolution and
provides a more lm-like image display that is
more pleasing for viewing DVDs on a TV
display.
Karaoke scoring function
Karaoke scoring gives a score for each
performance. Have your singing performance
scored for even more karaoke fun at home!
Region codes
Your DVD player plays discs with the following
region codes.
DVD region code Countries
Latin America
Hi speed USB 2.0 link
Simply plug your USB ash drive into the USB
jack to play your MP3/WMA/JPEG/DivX les to
enjoy the music play in superb sound quality.
Media copy
You can transfer data les such as MP3, WMA
and JPEG from disc to USB ash drive.
English
EN 7
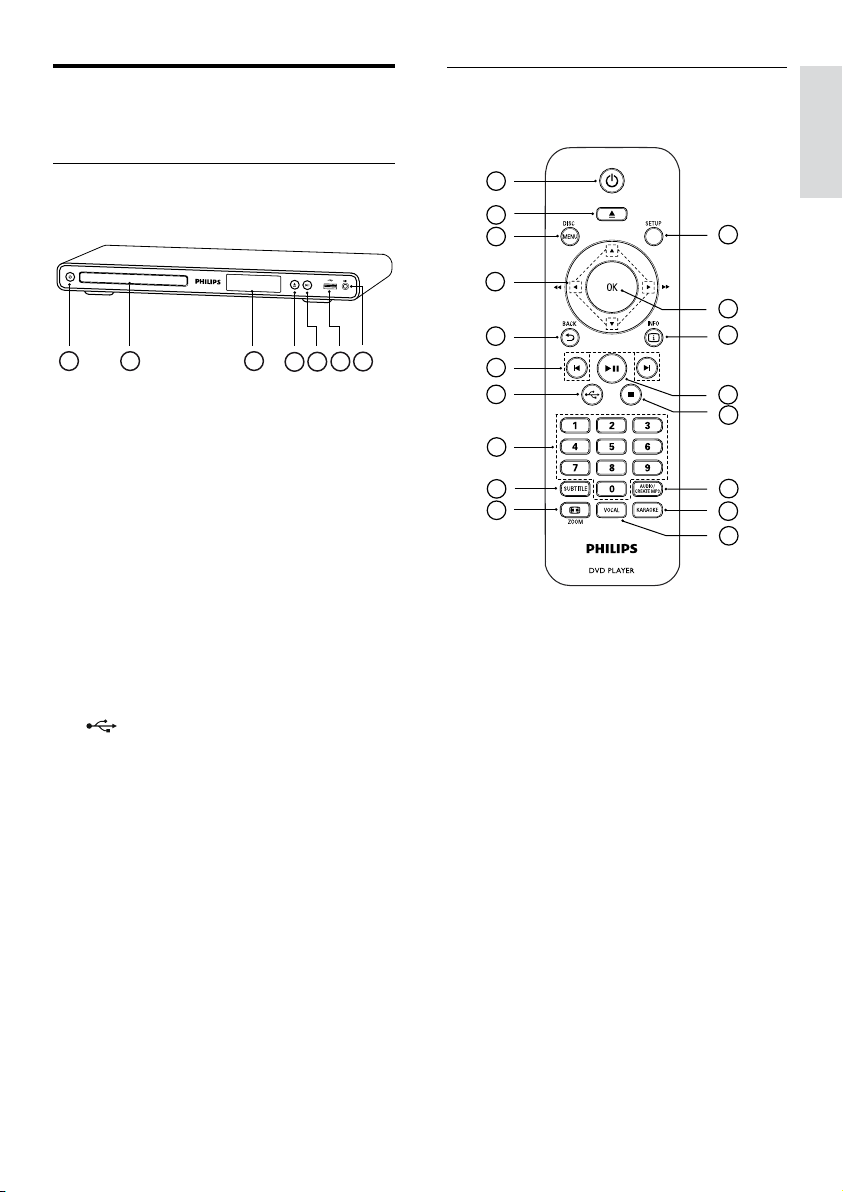
Your DVD player
Product overview
4
31 2
6
5
7
4
3
6
7
9
8
1
5
2
16
17
12
15
13
14
10
11
18
Main unit
a 2 (Standby-on)
Turn on the DVD player or switch to •
standby mode.
b Disc compartment
c Display panel
d Z (Open/Close)
Open or close the disc compartment.•
Remote control
e u (Play/Pause)
Start, pause or resume disc play.•
f (USB) jack
Connect a USB ash drive.•
g MIC
Audio input from a microphone.•
a 2 (Standby-On)
Turn on the DVD player or switch to •
standby mode.
b Z (Open/Close)
Open or close the disc compartment.•
c DISC MENU
Access or exit the disc menu.•
Switch to disc mode.•
For VCD/SVCD, turn PBC (Playback •
Control) on or off in PBC mode.

8 EN
d v V b B (Navigation buttons)
Navigate through the menus.•
Search fast-forward (• B) or fast-
backward (b). Press repeatedly to
change the search speed.
Search slow-forward (• v) or slow-
backward (V). Press repeatedly to
change the search speed.
e BACK
Return to the previous display menu.•
For DVD, navigate to the title menu.•
For VCD version 2.0 or SVCD with •
PBC turned on, return to the menu.
f í/ë (Previous/Next)
Skip to the previous or next title, •
chapter, or track.
Press and hold for fast-backward or •
fast-forward search.
g (USB)
Switch to USB mode and display the •
content.
h Numeric buttons
Select an item to play.•
m AUDIO/CREATE MP3
Select an audio language/channel.•
Access the menu to create MP3.•
n x (Stop)
Stop disc play.•
o u (Play/Pause)
Start, pause or resume disc play.•
p INFO
For disc, display the current status or •
disc information.
For slideshows, display a thumbnail view •
of photo les.
q OK
Conrm an entry or selection.•
r SETUP
Access or exit the setup menu.•
i SUBTITLE
Select DVD or DivX subtitle language.•
Access the menu to USB copy or USB •
delete.
j , ZOOM
Fit the picture format to the TV screen.•
Zoom in or out of the picture.•
k VOCAL
Change the audio channel of a karaoke •
disc.
l KARAOKE
Access or exit the karaoke menu.•

English
EN 9
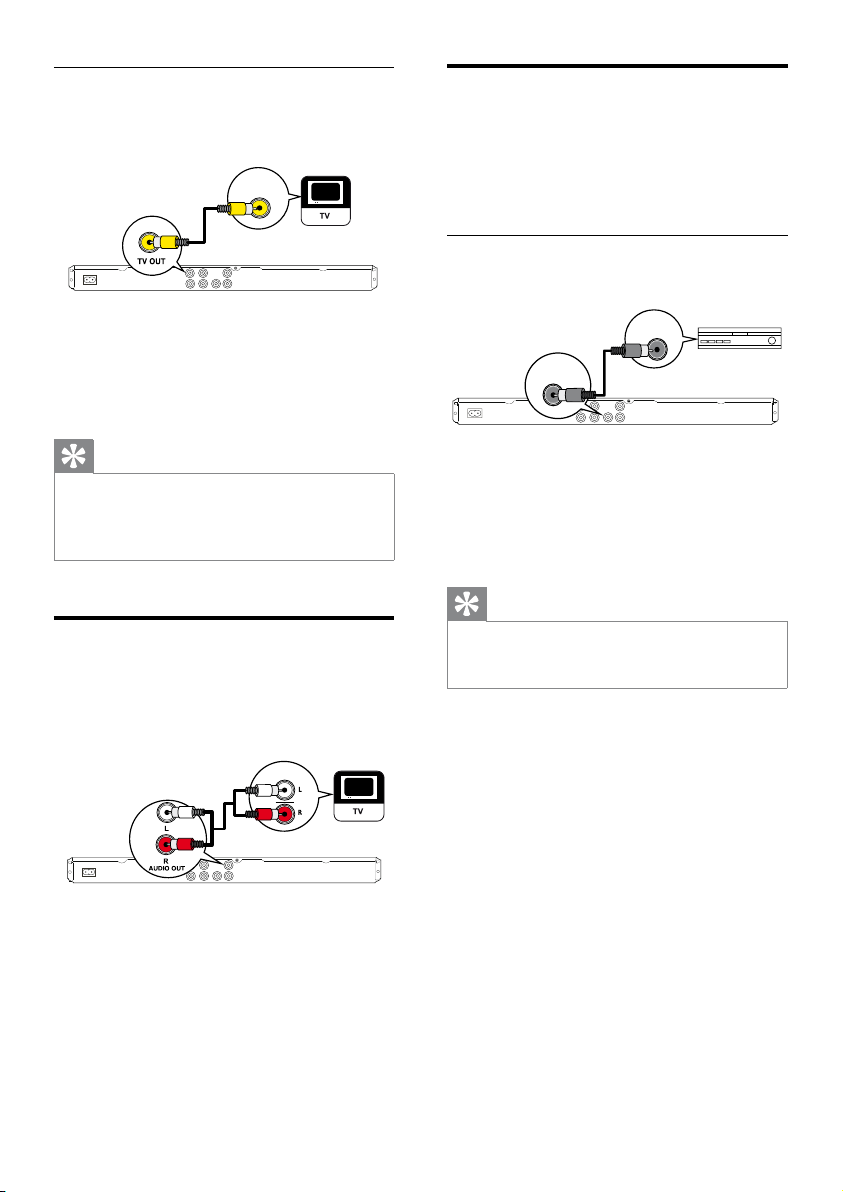
3 Connect
Pb
COMPONENT
VIDEO IN
Y
Pr
Pb
COMPONENT VIDEO OUT
Y
Pr
Select the best video connection that the TV can
support.
Make the following basic connections to use the
DVD player.
Basic connections:
Video cables•
Audio cables•
Optional connections:
Audio to other devices:•
Digital amplier/receiver•
Analog stereo system•
Note
Refer to the type plate at the r ear or bottom of the •
product for identication and supply ratings .
•
Befor e you make or change any connections, ensure
that all the devices are disconnec ted from the power
outlet.
Tip
Different types of connectors may be used to •
connect this product to your TV, depending on
availability and your needs. A compre hensive
interactive guide to help you connect your produc t is
available at w ww.connectivityguide.philips .com.
Connect video cables
Connect this DVD player to the TV to view
disc play.
Option 1:• Connect to component video
jacks (for a standard TV or Progressive Scan
TV).
Option 2:• Connect to video (CVBS) jack
(for a standard TV).
Note
You must connect this • DVD player directly to a
TV.
Option 1: Connect to component
video jacks
1 Connect the component video cables (not
supplied) to the Y Pb Pr jacks on this DVD
player and the component video input
jacks on the TV.
If a progressive scan TV is used, you •
may turn on the progressive scan mode
(see chapter ‘Turn on Progressive Scan’
for details).
Tip
The component video inpu t jack s on the T V may be •
labeled as Y Pb/Cb Pr/Cr or YUV.
•
This type of connec tion provides good picture
qua lity.
Connect
10 EN
Option 2: Connect to video (CVBS)
VIDEO IN
AUDIO IN
DIGITAL IN
COAXIAL
DIGITAL
OUT
jack
1 Connect a composite video cable
(supplied) to the TV OUT jack on this
DVD player and the video input jack on
the TV.
Tip
The video input jack on the T V may be labeled as •
A/ V IN, VIDEO IN, COMPOSITE or BASEBAND.
•
This type of connec tion provides standard pic ture
qua lity.
Connect audio cables
Connect the audio from this DVD player to the
TV to allow sound output through the TV.
Route audio to other devices
Route the sound from this DVD player to other
devices to enhance audio play.
Connect to digital amplier/receiver
1 Connect a coaxial cable (not supplied) to
the COAXIAL/DIGITAL OUT jack on this
DVD player and the COAXIAL/DIGITAL
input jack on the device.
Tip
You can optimize the audio output (see chapter •
‘Adjust settings’ - [ Audio Setup ] > [ Digital Audio
]) for details.
1 Connect the audio cables (supplied) to the
AUDIO OUT L/R jacks on this DVD
player and the audio input jacks on the TV.

English
EN 11
Connect
Connect to analog stereo system
AUDIO IN
Connect USB device
1 Connect the audio cables (supplied) to the
AUDIO OUT L/R jacks on this DVD
player and the audio input jacks on the
device.
Tip
You can optimize the audio output (see chapter •
‘Adjust settings’ - [ Audio Setup ] > [ Analog Output
]) for details.
1 Connect the USB ash drive to the
(USB) jack on this DVD player.
Note
This DVD player can only play/view MP3 , WMA , •
DivX or JPEG les that are stored on such devices.
• to access the content and play the les.
Press
Connect to power outlet
Warning
Risk of product damage! Ensur e that the power •
supply voltage cor responds to the voltage printed on
the back or the under side of the DVD player.
1 Connect the power cord to the power
outlet.
9
The DVD player is ready to be set up
for use.
12 EN
4 Get started
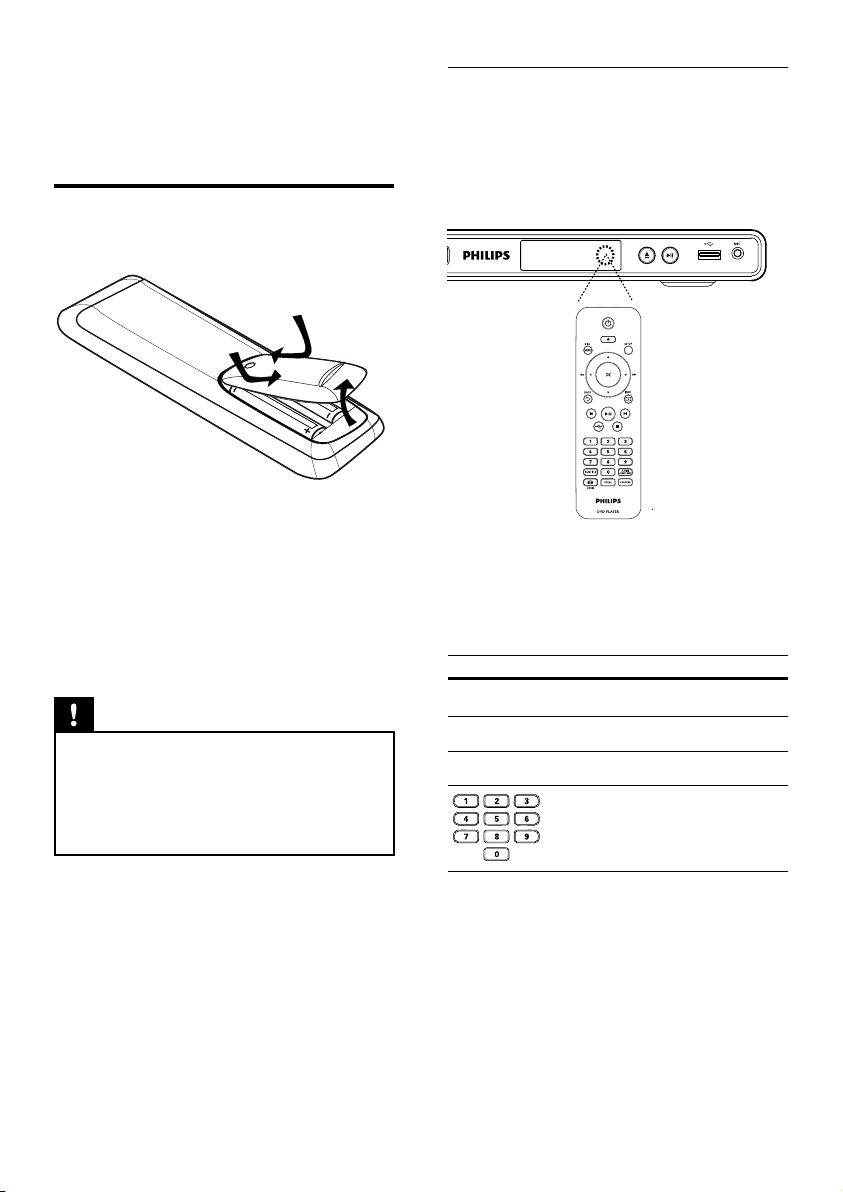
Prepare the remote control
1 Push to open the battery compartment
cover.
2 Insert two R03 or AAA batteries type with
correct polarity (+/-) as indicated.
3 Close the battery compartment.
Caution
Remove batteries if they are exhausted or if the •
remote control is not to be used for a long time.
•
Do not mix batteries (old and new or carbon and
alkaline, etc.).
•
Batteries cont ain chemical subs tances, they should
be disposed of f properly.
Navigate through the menu
1 Point the remote control directly at the
remote sensor on this DVD player and
select the desired function.
2 Use the following buttons on the remote
control to navigate through the on-screen
menus.
Button Action
v V
b B
OK
Move up or down.
Move left or right.
Conrm a selection.
Enter numbers.
 Loading...