

Philips DVD-612 User Manual
DVD-622
DVD-612
DVD
DVD
Video Player
Video Player
1

Important Note
DK
Advarsel:
Laserrudstråling ved åbning når sikkerhesafbrydere er ude af
funktion. Undgå u tsættelse for stråling.
Bemærk:
Netafbryderen POWER er sekundært indkoblet og afbryder ikke
strømmen fra nette. Den indbyggede netdel er derfor tilsluttet til
lysnettet så længe netstikket sidder i stikkontakten.
N
Observer:
Nettbryteren POWER er sekundert innkoplet. Den
innebygdenetdelen er derfor ikke frakoplet nettet så lenge apparatet
er tilsluttet nettkontakten.
This product incorporates copyright protection
technology that is protected by method claims of certain
U.S. patents and other intellectual property rights owned
by Macrovision Corporation and other rights owners. Use
of this copyright protection technology must be
authorized by Macrovision Corporation, and is intended
for home and other limited viewing uses only unless
otherwise authorized by Macrovision Corporation.
Reverse engineering or disassembly is prohibited.
S
Klass 1 laserapparat
Varning!
Om apparaten används på annat sätt än i denna bruksanvisning
specificerats, kann användaren utsättas för laserstrålning, som
översjruder gränsen för läserklass 1.
Observera!
Strömbrytaren POWER är sekundärt kopplad och inte bryter
strömmen fråan nätet Den inbyggda nätdelen är därför ansluten till
elnätet så länge stickproppen sitter i v ägguttaget.
SF
Luokan 1 laserlaite + Klass 1 laserapparat
Varoitus!
Laitteen käyttäminen muulla kuin tässä käyttöohjeessa mainitulla
tavalla saattaa altistaa käyttäjän turvallisuusluokan 1 ylittävälle
lasersäleilille.
Huom.
Toiminnanvalitsin POWER on kytketty toisiopuolelle, eikä se kytke
laitetta irti sähköverkosta. Sisäänrakennettu verkko-osa on
kytkettynä sähköverkkoon aina silloin, kun pistoke on pistorasiassa.
Manufactured under license from Dolby Laboratories.
“Dolby” and the double-D symbol are trademarks of
Dolby Laboratories. Confidential Unpublished Works.
© 1992 - 1997 Dolby Laboratories, Inc.All rights
reserved.
Important Note for Users in the UK
Mains plug
This apparatus is fitted with an approved 13 Amp plug.To
change a fuse in this type of plug proceed as follows:
1 Remove fuse cover and fuse.
2 Fix new fuse which should be a BS1362 5 Amp,
A.S.T.A. or BSI approved type.
3 Refit the fuse cover.
If the fitted plug is not suitable for your socket outlets, it should
be cut off and an appropriate plug fitted in its place.
If the mains plug contains a fuse, this should have a value of 5
Amp. If a plug without a fuse is used, the fuse at the
distribution board should not be greater than 5 Amp.
Note:The severed plug must be disposed of to avoid a possible
shock hazard should it be inserted into a 13 Amp socket
elsewhere.
How to connect a plug
The wires in the mains lead are coloured with the following
code: blue = neutral (N), brown = live (L).
As these colours may not correspond with the colour
markings identifying the terminals in your plug, proceed as
follows:
• Connect the blue wire to the terminal marked N or
coloured black.
• Connect the brown wire to the terminal marked L
or coloured red.
• Do not connect either wire to the earth terminal in
the plug, marked E (or e) or coloured green
(or green and yellow).
Before replacing the plug cover, make certain that the cord grip
is clamped over the sheath of the lead - not simply over the
two wires.
Copyright in the U.K.
Recording and playback of material may require
consent. See Copyright Act 1956 and The Performer’s
Protection Acts 1958 to 1972.
2
IMPORTANT NOTE

Index
English -------------------------------------------------------- 5
English
Français ------------------------------------------------------ 23
Français
Deutsch -----------------------------------------------------41
Deutsch
Nederlands ------------------------------------------------- 59
Svenska ------------------------------------------------------77
Dansk -------------------------------------------------------- 95
Suomi ------------------------------------------------------ 113
Norge------------------------------------------------------ 131
Nederlands
Svenska
Dansk
Suomi
Norge
INDEX
3
General Information
The region code for this set is 2.
2
Since it is usual for DVD movies to be released at
different times in different regions of the world,
all players have region codes and discs can have an optional
region code. If you load a disc of a different region code to
your player, you will see the region code notice on the
screen. The disc will not playback, and should be unloaded.
NOTE:
PICTURES SHOWN MAYBE DIFFERENT
BETWEEN COUNTRIES.
NEVER MAKE OR CHANGE CONNECTIONS
WITH THE POWER SWITCHED ON.
CAUTION
(WARNING LOCATION: ON THE BACKPLATE
OF SET)
Laser safety
This unit employs a laser. Due to possible eye injury, only a
qualified service person should remove the cover or
attempt to service this device.
USE OF CONTROLS OR ADJUSTMENTS OR
PERFORMANCE OF PROCEDURES OTHER
THAN THOSE SPECIFIED HEREIN MAY
RESULT IN HAZARDOUS RADIATION
EXPOSURE.
LASER
Type Semiconductor laser GaAlAs
Wave length 650 nm (DVD)
780 nm (VCD/CD)
Output Power 7 mW (DVD)
10 mW (VCD/CD)
Beam divergence 60 degree
Manufactured under license from Digital Theater Systems,
Inc. US Pat. No. 5,451,942 and other world-wide patents
issued and pending. “DTS” and “DTS DIGITAL SURROUND”
are trademarks of Digital Theater Systems, Inc. © 1996
Digital Theater Systems, Inc. All rights reserved.
The DVD-VIDEO player is in conformity
with the EMC directive and low-voltage
directive.
TruSurround and the SRS symbol are trademarks of SRS
Labs., Inc. TruSurround technology is manufactured under
license from SRS Labs., Inc.
CAUTION
VISIBLE AND INVISIBLE LASER RADIATION WHEN
OPEN AVOID EXPOSURE TO BEAM
ADVARSEL
SYNLIG OG USYNLIG LASERSTRÅLING VED ÅBNING
UNDGÅ UDSÆTTELSE FOR STRÅLING
VARNING
SYNLIG OCH OSYNLIG LASERSTRÅLNING NÄR
DENNA DEL ÄR ÖPPNAD BETRAKTA EJ STRÅLEN
VARO!
AVATTAESSA OLET ALTTIINA NÄKYVÄLLE JA
NÄKYMÄTTÖMÄLLE LASER SÄTEILYLLE. ÄLÄ KATSO
SÄTEESEEN
VORSICHT
SICHTBARE UND UNSICHTBARE LASERSTRAHLUNG
WENN ABDECKUNG GEÖFFNET NICHT DEM
STRAHL AUSSETSEN
ATTENTION
RAYONNEMENT LASER VISIBLE ET INVISIBLE EN CAS
D’OUVERTURE EXPOSITION DANGEREUSE AU
FAISCEAU
For Customer Use:
Read carefully the information located at the bottom of
your DVD-VIDEO player and enter below the Serial
No.Retain this information for future reference.
Model No. DVD-VIDEO
Serial No. __________________________
4
GENERAL INFORMATION

Contents
Introduction
Philips DVD-Video Introduction ------------------------- 6
Unpacking ---------------------------------------------------- 6
Remote Control Battery Installation ------------------- 6
Environmental Information ------------------------------- 6
Safety Information ------------------------------------------ 6
Cleaning Discs ---------------------------------------------- 6
Functional Overview
Front and Rear Panels ------------------------------------- 7
Remote Control -------------------------------------------- 8
Preparation
General Notes ---------------------------------------------- 9
Connecting to a TV ---------------------------------------- 9
Connecting to Optional Equipment ----------------- 9-10
NTSC/PAL Settings ---------------------------------------- 10
NTSC/PAL Conversion ----------------------------------- 10
General Explanation -------------------------------------- 10
Initial Setup ------------------------------------------------- 11
Menu Bar/Status Window -------------------------------- 11
Temporary Feedback Field Icons ----------------------- 12
Personal Preferences ---------------------------------- 12-13
English
Operation
Loading Discs-----------------------------------------------14
Playing a DVD-Video and Video CD Disc ------------- 14
General Features --------------------------------------14-16
Special DVD Features ------------------------------------- 16
Special VCD & SVCD Features -------------------------- 17
Playing an Audio CD -------------------------------------- 17
FTS Programme----------------------------------------17-18
MP3 Disc Features ---------------------------------------- 18
Access Control
Access Control: Child Lock ----------------------------- 19
Access Control: Parental Control ------------------19-20
Before Requesting Service
Before Requesting Service ------------------------------- 21
Specifications
Specifications -----------------------------------------------22
CONTENTS
5
Introduction
English
Philips DVD-Video
Introduction
Your Philips DVD-Video player will playback digital video
discs conforming to the universal DVD-Video standard. The
unique features of DVD-Video, such as selection of sound
track, subtitle languages and different camera angles (disc
dependent), are all supported.
In addition to DVD-Video discs, you will be able to playback
all Video CDs, SVCDs and Audio CDs.
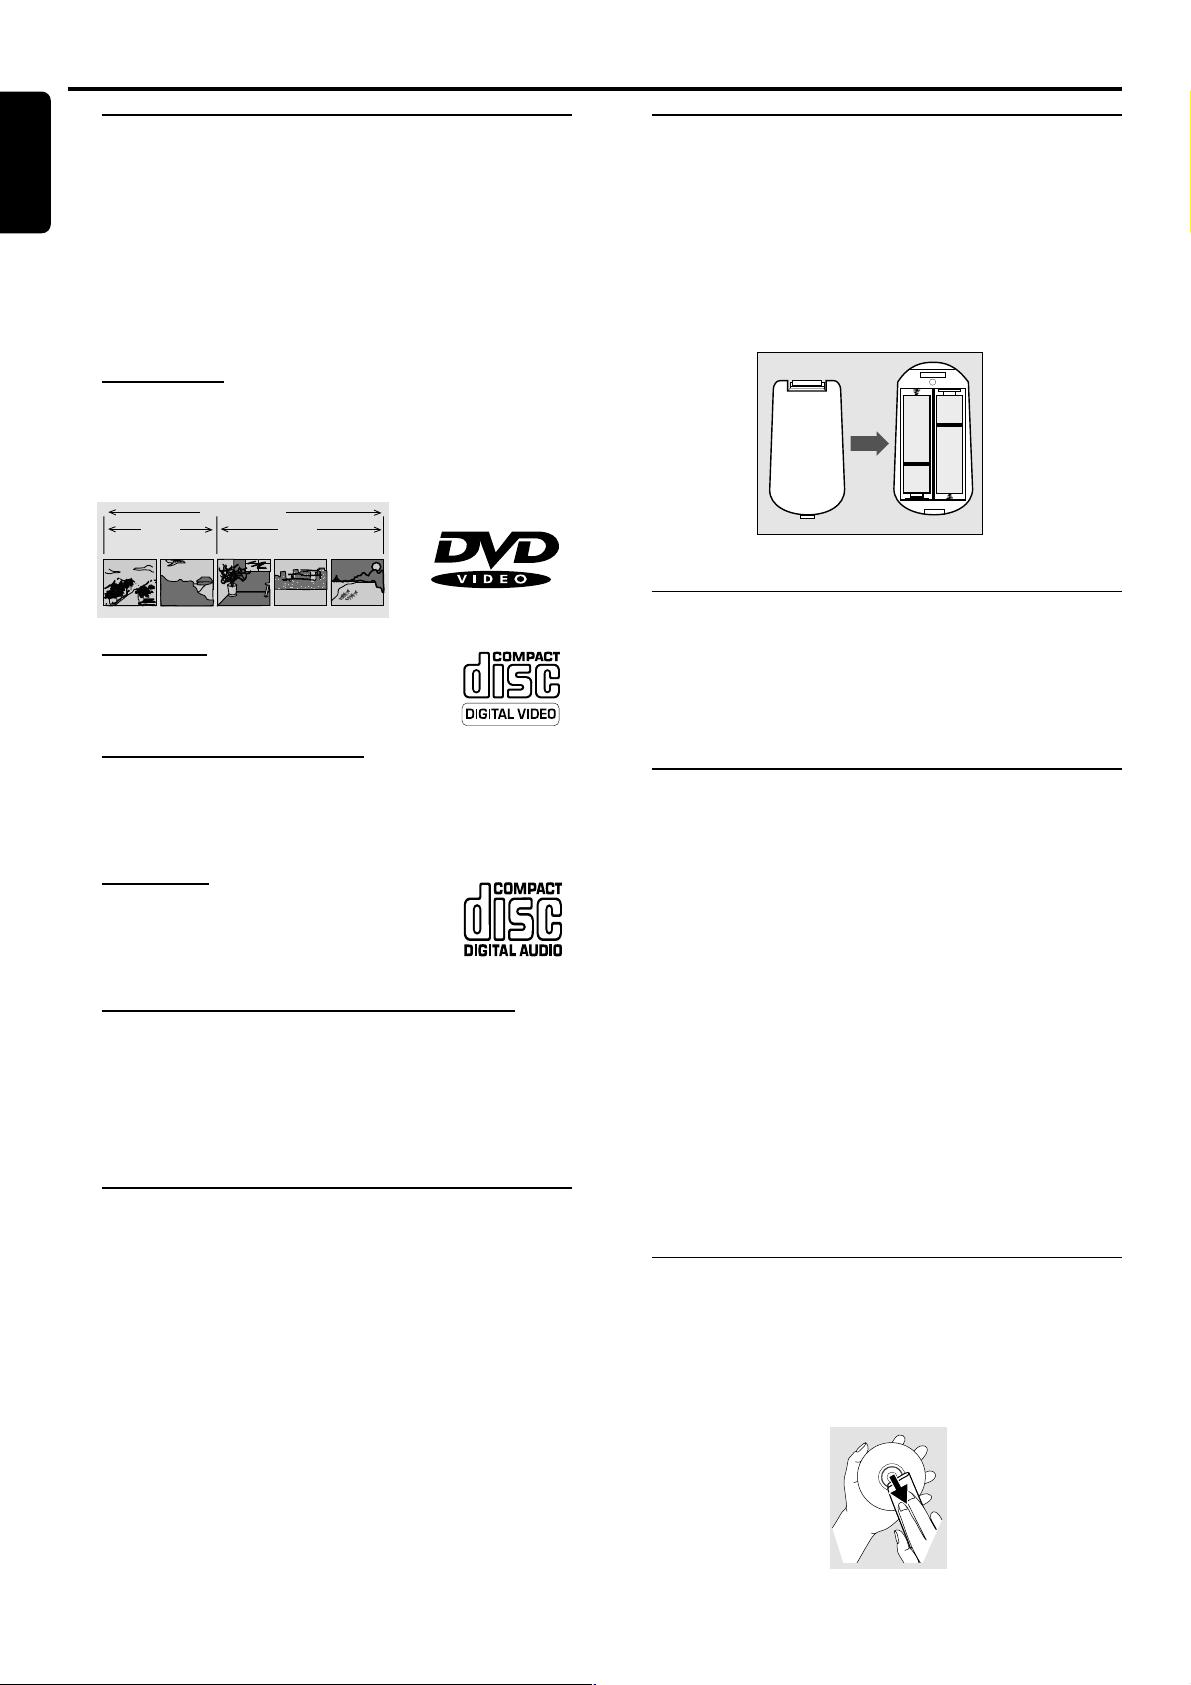
DVD-Video
You will recognise DVD-Video discs by the logo shown.
Depending on the material on the disc (a movie, video clips,
a drama series, etc.) the disc may have one or more Titles.
DVD-VIDEO DISC
TITLE 1 TITLE 2
CHAPTER 1 CHAPTER 2 CHAPTER 1 CHAPTER 2 CHAPTER 3
Video CD
You will recognise Video CDs by the logo
shown.
Remote Control Battery
Installation
¶ Insert batteries as indicated inside the battery
compartment.
Caution: Do not mix old and new batteries. Never
mix different types of batteries (standard, alkaline,
etc.)
+
+
-
Environmental Information
¶ Your system consists of materials which can be recycled
and reused if disassembled by a specialized company. Please
observe the local regulations regarding the disposal of
packaging materials, exhausted batteries and old equipment.
Super Video CD (SVCD)
SVCD discs based on the Super VCD IO Standard refering
to Standard of Electronics Industry of the People’s Republic
of China.
Audio CD
Audio CDs contain music tracks only.
You will recognise Audio CDs by their logo
shown.
MP3 (MPEG Audio Layer-3) (DVD622 only)
This player supports MP3 which contains compressed
music tracks.
Note:
– Only the first session of multisession discs is supported
Unpacking
First check and identify the contents of your DVD-Video
player package.
You should have the following items.
– DVD-Video player
– Remote Control with batteries
– Audio cable
– SCART cable
– Instructions for use
If any item is damaged or missing, contact your retailer or
Philips.
Keep the packaging materials for future transportation.
Safety Information
¶ Do not expose the system to excessive moisture, rain, sand
or heat sources.
¶ Place the player on a firm, flat surface.
¶ Keep the player away from domestic heating equipment
and direct sunlight.
¶ In a cabinet, allow about 2.5 cm (1 inch) of free space all
around the player for adequate ventilation.
¶ If the DVD-Video player cannot read CDs/DVDs correctly,
use a commonly available cleaning CD/DVD to clean the
lens before taking the DVD-Video player to be repaired.
Other cleaning methods may destroy the lens. Always keep
the tray closed to avoid dust on the lens.
¶ The lens may cloud over when the DVD-Video player is
suddenly moved from cold to warm surroundings. Playing a
CD/DVD is not possible then. Leave the power on for
about one hour with no disc in the unit until normal
playback is possible.
Cleaning Discs
¶ When a disc becomes dirty, clean it with a cleaning cloth.
Wipe the disc from the centre out, in a straight line.
¶ Do not use solvents such as benzine, thinner, commercially
available cleaners, or anti-static spray intended for analog
discs.
6
INTRODUCTION
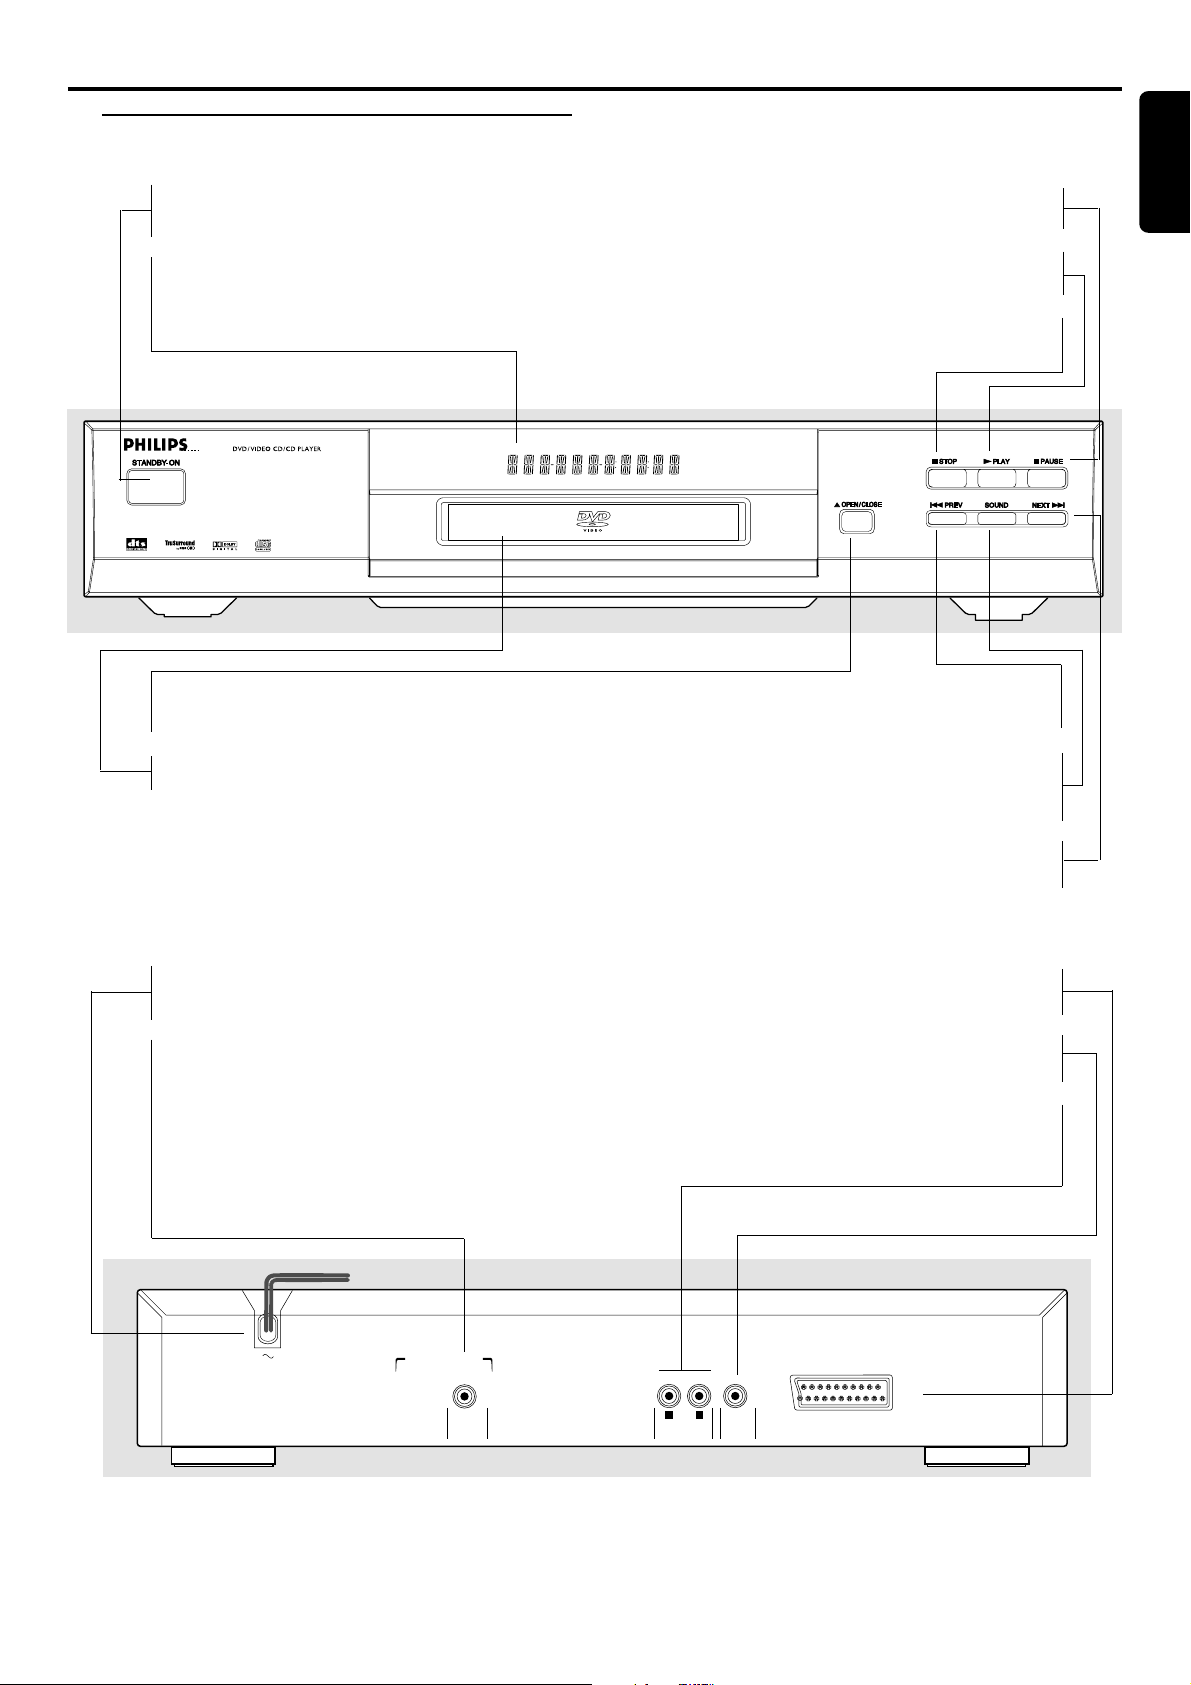
Functional Overview
Front and Rear Panels
STANDBY-ON
– switches the player to Standby mode or ON
DISPLAY
– shows the current status of the player
DVD622
/ OPEN/CLOSE
– opens/closes the disc tray
Disc Tray
; PAUSE
– to interrupt playback
B PLAY
– to start playback
9 STOP
– to stop playback
S PREV
– go to previous chapter or track
SOUND
– selects Stereo, Dolby Surround or
3D Sound (TruSurround)
English
MAINS (AC Power)
– connect to power source
COAXIAL (Digital audio out jack)
– connect to digital (coaxial) equipment
DIGITAL AUDIO OUT
PCM-MPEG2-Dolby Digital-DTS
COAXIAL
T NEXT
– go to next chapter or track
TV OUT (TV)
– connect to TV with SCART
VIDEO OUT (CVBS)
– connect to TV with CVBS video inputs
AUDIO OUT (Left/Right)
– connect to amplifier, receiver or stereo
TV OUT
L
(CVBS)
R
AUDIO OUT
VIDEO OUT
system
Caution: Do not touch the inner pins of the jacks on the rear panel connectors. Electrostatic discharge may
cause permanent damage to the unit.
FUNCTIONAL OVERVIEW
7
 Loading...